Tag Archives: regular cleaning regular cleaning

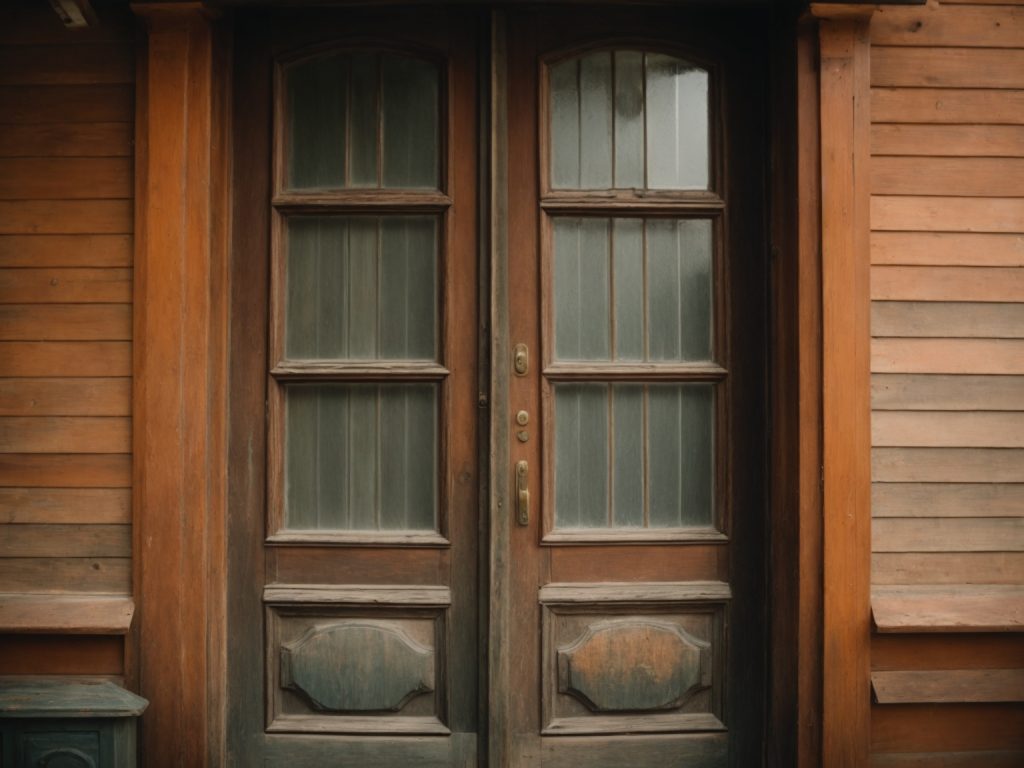
how-to-restore-a-weathered-wooden-front-door

How to Restore a Weathered Wooden Front Door: Easy Tips and Tricks

Is your wooden front door looking weathered and worn? If so, you’re not alone. Over time, exposure to the elements can cause wood doors to fade, crack, and peel. However, there’s good news! Restoring a weathered wooden front door is a simple and affordable process that can breathe new life into your entryway.

One easy step to restore your weathered wood door is to use a product called Sun Shield. This product can help to restore the finish of your door, making it look like new again. Additionally, you can refinish your door by sanding it down with a random-orbit sander and applying a fresh coat of varnish. By following these simple steps, you can restore your weathered wooden front door and make a great first impression on your guests.

Understanding the Damage
how-to-restore-a-weathered-wooden-front-door

If your wooden front door is looking weathered and worn, it’s important to understand the type of damage it has sustained before attempting to restore it. Here are some common types of damage that can occur:

Sun Damage

The sun’s UV rays can cause wood to dry out, fade, and crack over time. If your front door is exposed to direct sunlight for long periods of time, it’s likely that it has sustained sun damage.

Weather Damage

Rain, snow, and other types of weather can also take a toll on your front door. Moisture can cause wood to swell, warp, and rot, which can lead to structural damage over time.

Wear and Tear

Daily use can cause your front door to become scratched, dented, or chipped. This type of damage is usually cosmetic, but it can still detract from the overall appearance of your door.

Insect Damage

Termites and other wood-boring insects can cause serious damage to your front door over time. If you notice small holes or sawdust around your door, it’s possible that insects are present.

By understanding the type of damage your front door has sustained, you can choose the right restoration method and materials to bring it back to life.

Materials and Tools Needed

Restoring a weathered wooden front door is a simple DIY task that can be accomplished with a few basic tools and materials. Here’s what you’ll need:

Materials

  • Sandpaper (80-grit, 100-grit, and 120-grit)
  • Wood stain or paint
  • Clear coat or sealant
  • Rag or cloth
  • Mineral spirits (if using oil-based products)
  • Painter’s tape

Tools

  • Random-orbit sander
  • Paintbrush or foam roller
  • Screwdriver
  • Sawhorses or a sturdy work surface
  • Drop cloth or tarp

Before you begin, make sure you have all the necessary materials and tools. You may already have some of them on hand, but if not, they can be easily found at your local hardware or home improvement store.

When choosing your materials, consider the type of wood your door is made of and the look you want to achieve. If you prefer a natural wood look, choose a stain that complements the wood’s natural color. If you prefer a painted finish, choose a high-quality paint that is designed for exterior use.

Using a clear coat or sealant will help protect your door from future weather damage and ensure that your hard work lasts for years to come.

Preparation of the Door

Before you start restoring your weathered wooden front door, you need to prepare it properly. Here are the steps you should follow:

  1. Remove the Door: The first thing you need to do is remove the door from its hinges. This will make it easier to work on the door and ensure that you don’t accidentally damage the surrounding area.
  2. Clean the Door: Use a soft-bristled brush or a cloth to remove any dirt, dust, or debris from the door. You can also use a vacuum cleaner with a soft brush attachment to remove the dirt from the nooks and crannies.
  3. Sand the Door: Use sandpaper to remove any loose or flaking paint, varnish, or stain from the door. Start with a coarse-grit sandpaper and then move to a finer-grit sandpaper to achieve a smooth surface. Be sure to sand with the grain of the wood.
  4. Repair Any Damage: If your door has any cracks, holes, or other damage, you need to repair it before you start restoring it. Use wood filler to fill any holes or cracks and then sand the area smooth.
  5. Apply a Stripper: If your door has a lot of old paint or varnish, you may need to use a paint stripper to remove it. Be sure to follow the manufacturer’s instructions and wear protective gloves and eyewear.
  6. Clean Again: Once you have stripped the door, you need to clean it again to remove any residue from the stripper. Use a cloth and a mild detergent to clean the door thoroughly.

By following these steps, you can prepare your weathered wooden front door for restoration.

Stripping the Old Paint

If your wooden front door is covered in old paint, it’s important to strip it off before refinishing the wood. Here are the steps you need to follow to strip the old paint off your front door.

Safety Measures

Before you start stripping the paint off your front door, it’s important to take some safety measures to protect yourself from the chemicals involved in the process. Here are some things you should do:

  • Wear gloves and protective eyewear to protect your skin and eyes from the chemicals.
  • Work in a well-ventilated area to avoid inhaling fumes.
  • Cover the surrounding area with drop cloths to avoid getting paint stripper on anything else.

Process of Stripping

Here’s how to strip the old paint off your front door:

  1. Apply paint stripper to the door using a brush or roller. Be sure to follow the manufacturer’s instructions for the specific product you’re using.
  2. Wait for the paint stripper to work. This can take anywhere from a few minutes to several hours depending on the product and the thickness of the paint.
  3. Use a scraper to remove the paint. Be sure to scrape in the direction of the wood grain to avoid damaging the wood.
  4. Repeat steps 1-3 until all the paint is removed.
  5. Once all the paint is removed, use a fine-grit sandpaper to smooth out any rough spots.

Remember to dispose of the paint stripper and any paint chips in accordance with your local regulations. With the old paint stripped off, your front door is now ready for refinishing.

Sanding the Door

When restoring a weathered wooden front door, sanding is a crucial step to prepare the surface for refinishing. Here are some tips to help you sand your door effectively and efficiently.

Choosing the Right Sandpaper

Before starting, it’s important to choose the right sandpaper grit for your door. A lower grit sandpaper, such as 60 or 80, is best for removing old paint or finish. Once the old finish is removed, switch to a higher grit sandpaper, such as 120 or 150, to smooth out the surface and prepare it for refinishing.

Sanding Technique

When sanding your door, it’s important to use a consistent and even pressure. Sand with the grain of the wood to avoid creating scratches or marks on the surface. Use a sanding block or tool to ensure an even finish. Be sure to sand all areas of the door, including the edges and corners.

After sanding, use a tack cloth or a damp cloth to remove any dust or debris from the surface. This will ensure a smooth and even finish when refinishing your door.

Remember, sanding is a crucial step in restoring a weathered wooden front door. With the right sandpaper and technique, you can achieve a beautiful and long-lasting finish.

Addressing Weather Damage

If your wooden front door has been exposed to the elements for a long time, it can develop cracks, splits, and rot. These issues can make your door look unsightly and can even compromise its structural integrity. Fortunately, there are steps you can take to address these problems and restore your door to its former glory.

Fixing Cracks and Splits

If your door has developed cracks or splits, you can fix them using wood filler. Here’s how:

  1. Clean the damaged area with a stiff-bristled brush to remove any loose or splintered wood.
  2. Apply wood filler to the damaged area using a putty knife. Make sure to fill the crack or split completely.
  3. Smooth the surface of the wood filler with the putty knife.
  4. Allow the wood filler to dry completely, following the manufacturer’s instructions.
  5. Sand the surface of the wood filler with fine-grit sandpaper until it is smooth and flush with the surrounding wood.
  6. Apply a coat of primer to the repaired area to seal the wood filler and prepare it for paint or stain.

Treating Rotten Wood

If your door has developed rot, you will need to remove the affected wood and replace it with new wood. Here’s how:

  1. Use a screwdriver or chisel to remove any loose or rotten wood.
  2. Cut a piece of new wood to fit the area you removed.
  3. Apply wood glue to the edges of the new wood and the surrounding wood.
  4. Insert the new wood into the hole and press it firmly in place.
  5. Clamp the new wood in place and allow the glue to dry completely, following the manufacturer’s instructions.
  6. Sand the surface of the new wood until it is smooth and flush with the surrounding wood.
  7. Apply a coat of primer to the repaired area to seal the new wood and prepare it for paint or stain.

By following these steps, you can address weather damage to your wooden front door and restore its appearance and function.

Priming the Door

Now that you have cleaned and sanded your weathered wooden front door, it’s time to prime it. Priming the door is an essential step that will help the new paint or stain adhere better and last longer. Here are a few steps to follow when priming your door:

  1. Choose the right primer: There are many types of primers available, so make sure you choose the right one for your door. If you plan to stain your door, choose a wood conditioner or a clear primer. If you plan to paint your door, choose a primer that is compatible with the type of paint you will be using.
  2. Apply the primer: Using a brush or a roller, apply a thin and even coat of primer to the door. Make sure to apply the primer in the direction of the wood grain and avoid leaving any drips or brush marks. If you are using a spray primer, make sure to follow the manufacturer’s instructions and wear a mask to protect yourself from fumes.
  3. Let the primer dry: Allow the primer to dry completely before applying the paint or stain. The drying time will depend on the type of primer and the weather conditions, so make sure to check the label for instructions.
  4. Sand the primer: Once the primer is dry, use a fine-grit sandpaper to sand the surface of the door lightly. This will help smooth out any rough spots and create a better surface for the paint or stain to adhere to.
  5. Clean the door: Use a tack cloth or a damp cloth to remove any dust or debris from the surface of the door. Make sure the surface is clean and dry before applying the paint or stain.

By following these steps, you can ensure that your weathered wooden front door is properly primed and ready for the final coat of paint or stain.

Painting the Door

If you want to restore your weathered wooden front door, painting it is a great option. Here are some tips to help you get started.

Choosing the Right Paint

When choosing a paint for your front door, it’s important to select an exterior-grade paint that can withstand the elements. Look for a paint that is specifically designed for use on wood and offers UV protection to prevent fading from the sun.

Consider the color of your door and the style of your home when selecting a paint color. A bright color can add a pop of personality to your home, while a more neutral color can create a classic look.

Painting Technique

Before you start painting, make sure your door is clean and dry. Sand any rough spots or peeling paint to create a smooth surface.

Apply a primer to the door to help the paint adhere and create a more even finish. Once the primer is dry, apply the paint in thin, even coats. It’s better to apply multiple thin coats than one thick coat, which can lead to drips and an uneven finish.

Use a high-quality brush or roller to apply the paint, and work in the direction of the wood grain. Be sure to paint the edges of the door as well.

Allow each coat of paint to dry completely before applying the next coat. Once you’re happy with the coverage, allow the final coat to dry for at least 24 hours before reattaching any hardware or closing the door.

By following these tips, you can restore your weathered wooden front door with a fresh coat of paint.

Maintaining Your Restored Door

Once you’ve restored your weathered wooden front door, it’s important to maintain it properly to keep it looking beautiful and protect it from the elements. Here are some tips for maintaining your restored door:

Regular Cleaning

Regular cleaning is essential to keep your door looking great. Here’s what you need to do:

  • Use a soft cloth or sponge to wipe down the door with warm, soapy water. Avoid using harsh chemicals or abrasive materials, as these can damage the finish.
  • Rinse the door thoroughly with clean water and dry it with a soft towel.
  • If your door has glass panels, clean them with a glass cleaner and a soft cloth.

Annual Check-up

It’s a good idea to give your door an annual check-up to make sure it’s still in good condition. Here’s what you need to do:

  • Inspect the door for any signs of wear or damage, such as cracks, chips, or peeling paint. If you notice any problems, address them as soon as possible to prevent further damage.
  • Check the weatherstripping around the door to make sure it’s still in good condition. Replace any worn or damaged weatherstripping to keep your home energy-efficient.
  • Lubricate the hinges and locks with a silicone-based lubricant to keep them working smoothly.

By following these simple maintenance tips, you can keep your restored wooden front door looking beautiful for years to come.
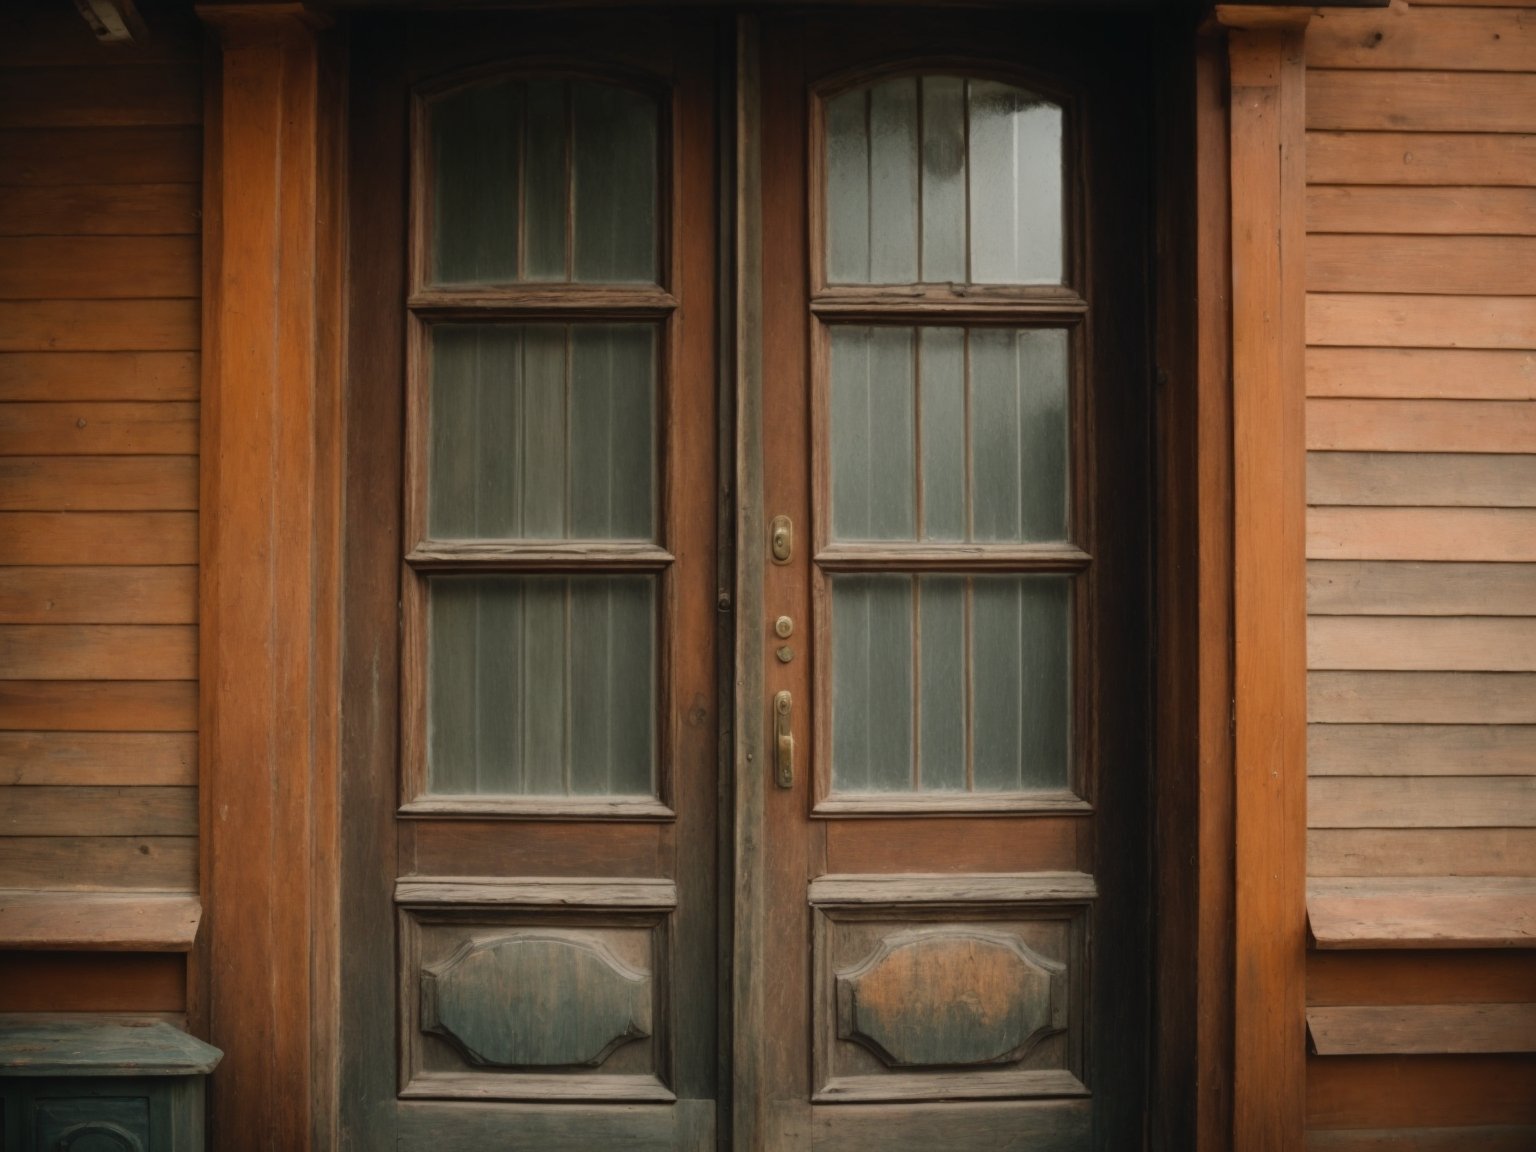

how-to-build-outdoor-wooden-steps-a-beginners-guide-2

How to Build Outdoor Wooden Steps: A Beginner's Guide

If you’re looking to spruce up your entryway, building outdoor wooden steps is a great way to do it. Not only do they add visual appeal, but they also provide a safe and sturdy way to access your home. However, building outdoor wooden steps can seem like a daunting task, especially if you’re not a seasoned DIYer. But fear not, with the right tools and a little know-how, you can build beautiful and functional outdoor wooden steps in no time.

Before you get started, it’s important to prepare the area where the steps will be located. This involves removing any shrubs or plants from the spot and leveling the ground. You’ll also need to build up low spots with fill dirt so that the area slopes away from the house. Once the area is prepped, it’s time to start building the steps. There are a few different methods you can use, depending on your skill level and the design you’re going for. In this article, we’ll cover the basics of building outdoor wooden steps, so you can tackle this project with confidence.

Understanding the Basics

how-to-build-outdoor-wooden-steps-a-beginners-guide-2

If you’re looking to add some charm to your outdoor space, building wooden steps is a great way to do so. Not only do they provide functionality, but they can also enhance the look of your home. In this section, we’ll cover the basics of building outdoor wooden steps.

Materials Needed

Before you start building, make sure you have all the necessary materials. Here’s a list of what you’ll need:

Materials
Pressure-treated lumber
Gravel
Concrete
Wood screws
Wood glue
Stain or paint

Pressure-treated lumber is the best type of wood to use for outdoor steps because it’s resistant to rot and decay. Gravel and concrete will be used to create a stable foundation for the steps. Wood screws and glue will be used to secure the steps together. Finally, you’ll need stain or paint to protect the wood from the elements.

Tools Required

In addition to the materials, you’ll need a few tools to complete the project. Here’s a list of what you’ll need:

  • Circular saw
  • Jigsaw
  • Hammer
  • Drill
  • Level
  • Tape measure
  • Square
  • Shovel
  • Wheelbarrow
  • Safety glasses
  • Work gloves

The circular saw and jigsaw will be used to cut the lumber to the appropriate size and shape. The hammer and drill will be used to attach the steps together. The level, tape measure, and square will be used to ensure the steps are level and square. The shovel and wheelbarrow will be used to move the gravel and concrete. Finally, safety glasses and work gloves are essential for protecting your eyes and hands during the construction process.

Now that you have an idea of what materials and tools you’ll need, let’s move on to the next section to learn how to prepare the area for building the steps.

Site Preparation

Before starting to build outdoor wooden steps, you need to prepare the site properly. Here are the steps you should follow:

Step 1: Choose the Location

The first thing you need to do is choose the location where you want to build your outdoor wooden steps. It could be alongside the house, a porch, or a deck. Make sure to choose a location that is safe and easy to access.

Step 2: Clear the Area

Once you have chosen the location, you need to clear the area of any shrubs, plants, or debris. This will ensure that you have a clear and level area to work with. Use a shovel or a rake to remove any debris and level the ground.

Step 3: Build up Low Spots

If the area where you want to build your outdoor wooden steps is not level, you need to build up the low spots with fill dirt. This will ensure that the area slopes away from the house and prevent water from accumulating around the steps.

Step 4: Mark the Location

Use a measuring tape and stakes to mark the location where you want to build your outdoor wooden steps. This will help you to ensure that the steps are level and evenly spaced.

Step 5: Check for Utility Lines

Before you start digging, make sure to check for any utility lines such as gas, water, or electricity. You can call your local utility company to request a free utility locate service.

By following these steps, you can prepare the site properly for building your outdoor wooden steps.

Designing Your Steps

designing-your-steps

Before you start building your outdoor wooden steps, it’s important to consider the design of your steps. Here are a few things to keep in mind when designing your steps:

Step Size and Height

The size and height of your steps are essential for both safety and comfort. The general rule of thumb is that each step should be no higher than 7.5 inches and no deeper than 11 inches. If your steps are too steep or too shallow, it can make it difficult to climb up or down the stairs.

Number of Steps

The number of steps you need will depend on the height of your deck or porch. To determine the number of steps you need, divide the height of your deck or porch by the height of each step. For example, if your deck is 30 inches high and each step is 7.5 inches high, you will need four steps.

Materials

When it comes to building your outdoor wooden steps, you have several options for materials. Pressure-treated lumber is a popular choice because it is durable and weather-resistant. Cedar and redwood are also good choices because they are naturally resistant to decay and insects. If you want a more modern look, you can use metal or concrete for your steps.

Style

The style of your outdoor wooden steps should match the style of your home and landscape. You can choose from a variety of styles, including straight, curved, or spiral. You can also add decorative elements, such as railings, to enhance the look of your steps.

By considering these factors, you can design outdoor wooden steps that are safe, comfortable, and aesthetically pleasing.

Cutting the Wood

Once you have measured and marked the wooden pieces for your outdoor steps, it’s time to cut them. Here are some tips to make the cutting process easier and more efficient:

Use the Right Tools

To cut wooden pieces for your steps, you will need a circular saw, a handsaw, or a jigsaw. A circular saw is the most efficient tool for cutting long pieces of wood, while a handsaw or a jigsaw is better for cutting shorter pieces or making angled cuts.

Make sure the saw blade is sharp and in good condition before you start cutting. A dull blade can cause the wood to splinter or burn, which will ruin the cut and may damage the saw.

Measure Twice, Cut Once

Before you start cutting, double-check your measurements to make sure they are accurate. Measure twice, cut once is a good rule of thumb to follow to avoid wasting wood and time.

Cut Straight

To make straight cuts, use a straightedge or a guide to keep the saw blade on track. You can use a piece of scrap wood as a guide or purchase a commercial saw guide.

Cut at the Right Angle

If your steps require angled cuts, use a protractor or a bevel gauge to measure the angle accurately. Set the saw blade to the correct angle and make a test cut on a scrap piece of wood before cutting the actual piece.

Sand the Cut Edges

After you have cut the wooden pieces, sand the cut edges to remove any rough spots or splinters. This will make the steps safer to use and give them a more finished look.

By following these tips, you can cut the wooden pieces for your outdoor steps accurately and efficiently.

Assembling the Steps

Once you have completed the previous steps of preparing the area and cutting the stringers and treads, it’s time to assemble the steps. This is where you will put all the pieces together to create a sturdy and safe set of outdoor wooden steps. Here’s how to do it:

Joining the Stringers

The first step in assembling your wooden steps is to join the stringers. Stringers are the diagonal pieces that support the treads and risers. To join the stringers, you will need to use a metal angle bracket. Here’s how to do it:

  1. Position the stringers so that they are parallel and even with each other.
  2. Place the metal angle bracket over the stringers where they meet at the bottom.
  3. Use a drill to screw the bracket into place, using wood screws that are at least 2 inches long.
  4. Repeat this process for each step.

Attaching the Treads

Once the stringers are joined, it’s time to attach the treads. Treads are the horizontal pieces that you step on when walking up or down the stairs. Here’s how to attach them:

  1. Place a tread on top of the stringers, making sure that it is even and centered.
  2. Use a drill to screw the tread into place, using wood screws that are at least 2 inches long.
  3. Repeat this process for each step.

It’s important to note that you should leave a gap of about 1/4 inch between each tread to allow for water drainage. You can use a piece of scrap wood as a spacer to ensure that the gap is consistent.

Once you have attached all of the treads, your outdoor wooden steps are complete! You can add a coat of sealant or paint to protect the wood and enhance its appearance. With proper maintenance, your wooden steps will provide safe and reliable access to your home for years to come.

Installing the Steps

Now that you have built your outdoor wooden steps, it is time to install them. Here are the steps to follow:

  1. Start by measuring the distance between the top of the stairs and the bottom of the landing. This will give you the length of the stringers needed to support the steps.
  2. Cut the stringers to the appropriate length and attach them to the landing using metal brackets. Make sure the stringers are level and secure.
  3. Next, attach the treads to the stringers using screws or nails. Be sure to space them evenly and make sure they are level.
  4. Finally, attach the risers to the back of each tread using screws or nails. This will give your steps a finished look and prevent debris from getting trapped between the treads.
  5. If desired, you can add a railing to your steps for safety. This can be done using metal brackets or by attaching the railing directly to the stringers.

Congratulations! You have successfully built and installed your outdoor wooden steps. Enjoy your new entryway and the added curb appeal it brings to your home.

Safety Measures

When building outdoor wooden steps, it’s important to prioritize safety to avoid accidents and injuries. Here are some safety measures you should keep in mind:

Use Protective Gear

Before you start building, it’s important to wear the right protective gear. This includes safety glasses, gloves, and a dust mask. Safety glasses will protect your eyes from flying debris, while gloves will protect your hands from splinters and cuts. A dust mask will prevent you from inhaling sawdust and other particles that can cause respiratory problems.

Check the Weather

Make sure to check the weather forecast before you start building. Avoid working on rainy or windy days, as this can make it difficult to handle tools and materials. Wet surfaces can also be slippery and hazardous, so make sure the ground is dry and stable before you start building.

Use the Right Tools

Using the right tools is essential for safety and efficiency. Make sure to use sharp blades and bits, and keep your tools in good condition. Dull or damaged tools can cause accidents and injuries. Also, make sure to use the right tool for the job. Using the wrong tool can cause damage to your materials and increase the risk of accidents.

Follow Building Codes

Make sure to follow building codes and regulations in your area. This will ensure that your steps are safe and up to code. Building codes may vary depending on your location, so make sure to check with your local authorities before you start building.

Take Breaks

Building outdoor wooden steps can be a physically demanding task. Make sure to take breaks and stay hydrated to avoid exhaustion and fatigue. Stretching before and after working can also help prevent muscle strains and injuries.

By following these safety measures, you can ensure that your outdoor wooden steps are built safely and efficiently.

Maintaining Your Wooden Steps

Once you’ve built your outdoor wooden steps, it’s important to maintain them to ensure they last as long as possible. Here are some tips for maintaining your wooden steps:

Regular Cleaning

Regular cleaning is essential to keep your wooden steps looking good and to prevent the buildup of dirt and debris. You can use a broom to sweep away loose dirt and debris, and a stiff-bristled brush to scrub away any stubborn dirt or stains. You can also use a pressure washer on a low setting to clean your steps, but be careful not to use too much pressure as this can damage the wood.

Staining and Sealing

Staining and sealing your wooden steps can help to protect them from the elements and prevent them from rotting. You should stain and seal your steps every 2-3 years, or as needed. Before applying stain or sealer, make sure your steps are clean and dry. You can use a brush or sprayer to apply the stain or sealer, and make sure to follow the manufacturer’s instructions.

Repairing Damage

If your wooden steps become damaged, it’s important to repair them as soon as possible. Small cracks or splits can be filled with wood filler, while larger damage may require replacing the affected boards. You should also check your steps regularly for signs of rot, and replace any rotting boards as needed.

Preventative Measures

There are also some preventative measures you can take to help maintain your wooden steps. For example, you can place mats or rugs on your steps to prevent dirt and debris from accumulating. You can also install a roof or awning over your steps to protect them from the elements.

By following these tips, you can help to ensure that your outdoor wooden steps remain safe, sturdy, and attractive for years to come.

how-to-build-wooden-steps-a-beginners-guide-2

How to Build Wooden Steps: A Beginner's Guide

Are you looking to add some charm and functionality to your outdoor space? Building wooden steps can be a great way to enhance the look of your yard and provide easy access to different levels of your property. Whether you’re looking to build steps for a deck, patio, or garden, this article will provide you with the basics of how to build wooden steps.

Before you start building, it’s important to prepare the area where the steps will be located. This means removing any shrubs or plants and ensuring the ground is level. You may need to build up low spots with fill dirt so the area slopes away from your house. Once you’ve prepared the area, you’ll need to determine the height and width of the steps. This will depend on the location and purpose of the steps, as well as the materials you’ll be using.

Understanding the Basics of Wooden Steps

how-to-build-wooden-steps-a-beginners-guide-2

When it comes to building wooden steps, there are a few things you need to keep in mind. In this section, we’ll cover the basics of wooden steps, including the types of wood you can use and the safety measures you need to take.

Types of Wood

When it comes to choosing the right type of wood for your steps, there are a few things you need to consider. First, you want to choose a wood that is strong and durable, as your steps will need to support a lot of weight over time. Some of the most popular types of wood for steps include:

  • Cedar: A popular choice for outdoor steps, cedar is a durable and weather-resistant wood that is also resistant to insects and rot.
  • Redwood: Another popular choice for outdoor steps, redwood is a durable and weather-resistant wood that is also resistant to insects and rot.
  • Pressure-treated pine: A popular choice for indoor and outdoor steps, pressure-treated pine is a durable and affordable wood that is treated to resist insects and rot.

When choosing your wood, make sure to choose a type that is appropriate for your climate and the location of your steps.

Safety Measures

When building wooden steps, safety should always be your top priority. Here are a few safety measures you should take:

  • Use a level: Make sure your steps are level and evenly spaced to prevent tripping hazards.
  • Use non-slip treads: Consider using non-slip treads on your steps to prevent slipping, especially if your steps will be used in wet or icy conditions.
  • Install handrails: Handrails can provide additional support and stability when using your steps, especially for children and elderly individuals.
  • Use appropriate tools and equipment: Make sure you have the right tools and equipment for the job, and use them safely and appropriately.

By following these basic guidelines, you can ensure that your wooden steps are safe and durable for years to come.

Tools and Materials Needed

Building wooden steps can be a fun and rewarding DIY project. Before you get started, it’s important to gather all the necessary tools and materials. Here’s what you’ll need:

Tools

  • Circular saw
  • Jigsaw
  • Power drill
  • Hammer
  • Measuring tape
  • Carpenter’s square
  • Level
  • Safety glasses
  • Work gloves

Materials

  • Pressure-treated lumber (2x12s for stringers, 2x6s for treads, and 4x4s for posts)
  • Gravel or crushed stone
  • Concrete mix
  • Galvanized screws or nails
  • Post spikes or concrete anchors

Make sure to choose high-quality materials that are suitable for outdoor use. Pressure-treated lumber is a popular choice because it is durable and resistant to rot and insect damage. You’ll also need gravel or crushed stone to create a stable base for your steps, as well as concrete mix to anchor the posts.

In terms of tools, a circular saw and jigsaw are essential for cutting the lumber to size. A power drill is necessary for drilling pilot holes and attaching the pieces together with screws or nails. A measuring tape and carpenter’s square will help ensure accurate cuts and angles. Don’t forget to wear safety glasses and work gloves to protect yourself while working with power tools.

By gathering all the necessary tools and materials before you start, you’ll be well-prepared to tackle your wooden step project with confidence.

Designing Your Wooden Steps

When building wooden steps, it’s important to consider both functionality and aesthetics. In this section, we’ll cover the key factors to consider when designing your wooden steps.

Step Measurements

Before you start building your wooden steps, you need to measure the area where they will be installed. Here are the key measurements you’ll need to take:

  • Total Rise: Measure the height from the ground to the top of where the steps will end. This will determine the number of steps you need to build.
  • Total Run: Measure the horizontal distance from the bottom of the steps to the top.
  • Tread Depth: This is the horizontal depth of each step. It should be at least 10 inches for comfort and safety.
  • Riser Height: This is the vertical height of each step. It should be between 6 and 8 inches for safety and ease of use.

Once you have these measurements, you can start designing your steps.

Choosing the Design

choosing-the-design

When it comes to designing your wooden steps, there are a few different options to consider. Here are some popular designs:

  • Straight Steps: These are the most basic design, with steps that go straight up and down. They’re easy to build and work well in most situations.
  • L-Shaped Steps: These steps have a landing or platform halfway up, which makes them easier to climb and can add visual interest to your design.
  • U-Shaped Steps: These steps have two landings or platforms, making them ideal for longer staircases. They can be more difficult to build, but they offer a unique and impressive look.

When choosing your design, consider the overall style of your home and the surrounding landscape. You want your wooden steps to complement your property and enhance its curb appeal.

By taking accurate measurements and choosing a design that fits your needs and style, you can create beautiful and functional wooden steps that will last for years to come.

Building the Steps

When it comes to building wooden steps, there are three main steps you need to follow: cutting the wood, assembling the steps, and securing the steps. Here’s a breakdown of each step:

Cutting the Wood

Before you can start assembling your wooden steps, you’ll need to cut the wood to the right size. To do this, you’ll need a saw, a measuring tape, and a pencil. Here’s what you need to do:

  1. Measure the height and width of the area where you want to install the steps.
  2. Cut two pieces of wood to the width of the area where you want to install the steps.
  3. Cut two more pieces of wood to the height of the area where you want to install the steps.
  4. Cut several smaller pieces of wood to the same width as the two larger pieces. These will be used as the steps themselves.

Assembling the Steps

Once you’ve cut all of the wood to the right size, it’s time to start assembling the steps. Here’s what you need to do:

  1. Lay the two larger pieces of wood on the ground where you want to install the steps. These will be the sides of the steps.
  2. Place the smaller pieces of wood on top of the larger pieces, evenly spaced apart. These will be the steps themselves.
  3. Use a level to make sure each step is level before moving on to the next step.
  4. Once you’ve placed all of the steps, use a drill to attach them to the larger pieces of wood on either side.

Securing the Steps

After you’ve assembled the steps, it’s important to make sure they’re secure. Here’s what you need to do:

  1. Use wood glue to attach each step to the larger pieces of wood on either side.
  2. Once the glue has dried, use screws to attach each step to the larger pieces of wood on either side.
  3. Use a level to make sure the steps are still level after you’ve secured them.

By following these three steps, you’ll be able to build wooden steps that are sturdy, secure, and safe to use.

Finishing Touches

Once you have completed building your wooden steps, it’s time to give them a finishing touch. This will not only make them look more attractive but also protect them from the elements. Here are some steps you can take to finish your wooden steps.

Sanding the Steps

Before applying any finish, it’s important to sand your wooden steps. This will help smooth out any rough spots and ensure that the finish adheres properly. Start by using a coarse grit sandpaper, such as 60-grit, to remove any rough spots or splinters. Then, move on to a finer grit sandpaper, such as 120-grit, to smooth out the surface of the wood.

Make sure to sand in the direction of the grain to avoid damaging the wood. You can use a sanding block or an orbital sander to make the job easier. Once you’re done sanding, wipe down the steps with a damp cloth to remove any dust.

Applying the Finish

There are several types of finishes you can use on your wooden steps, including paint, stain, or varnish. Each has its own advantages and disadvantages, so choose the one that best suits your needs.

If you want to paint your steps, make sure to use a high-quality exterior paint that is designed for wood surfaces. Apply the paint in thin, even coats, and allow each coat to dry completely before applying the next.

If you prefer a natural look, you can use a stain to enhance the natural beauty of the wood. Choose a stain that is designed for exterior use and apply it in thin coats with a brush or rag. Make sure to wipe off any excess stain with a clean cloth.

Finally, if you want to protect your steps from the elements, you can use a varnish or sealer. These products will help prevent water damage and protect the wood from UV rays. Apply the varnish or sealer in thin coats, and allow each coat to dry completely before applying the next.

With these finishing touches, your wooden steps will look great and last for years to come.

Maintenance Tips

Taking care of your wooden steps is essential to ensure their longevity and safety. Here are some maintenance tips to keep them in good condition for years to come.

Regular Cleaning

Regular cleaning of your wooden steps is crucial to maintain their appearance and prevent the buildup of dirt and debris. Here are some steps to follow:

  • Sweep the steps regularly to remove dirt, leaves, and other debris.
  • Use a stiff-bristled brush to scrub the steps with a solution of mild soap and water.
  • Rinse the steps thoroughly with water and allow them to dry completely before use.
  • Avoid using a pressure washer as it can damage the wood.

Wood Treatment

Wooden steps are prone to damage from moisture, sunlight, and insects. To prevent this, it is essential to treat them regularly. Here are some tips to follow:

  • Apply a wood preservative to protect the wood from moisture and insects. Follow the manufacturer’s instructions for application and frequency of treatment.
  • Apply a coat of exterior wood sealer or stain to protect the wood from sunlight and weather damage. Choose a product that is suitable for your climate and follow the manufacturer’s instructions for application and frequency of treatment.
  • Inspect the steps regularly for signs of damage such as cracks, splinters, and rot. Repair any damage promptly to prevent further deterioration.

By following these maintenance tips, you can keep your wooden steps in good condition and ensure their safety for you and your family.

preparing-your-wooden-floors

How to Paint Wooden Floors: A Beginner's Guide

Are you tired of your old, worn-out wooden floors? Painting them can be a great way to give them a fresh new look without the expense of replacing them. Painting wooden floors is a relatively easy DIY project that can be done in a weekend. In this article, we will provide you with some tips on how to paint your wooden floors and achieve a professional-looking finish.

Before you start painting, it is important to prepare your floors properly. This involves cleaning, sanding, and priming the surface to ensure that the paint adheres properly and lasts for a long time. We will walk you through the steps of preparing your floors and choosing the right paint color and finish. We will also provide you with some ideas on how to create interesting patterns and designs on your floors using stencils or painter’s tape. With the right tools and techniques, you can transform your wooden floors into a beautiful and stylish feature of your home.

Understanding the Basics of Painting Wooden Floors

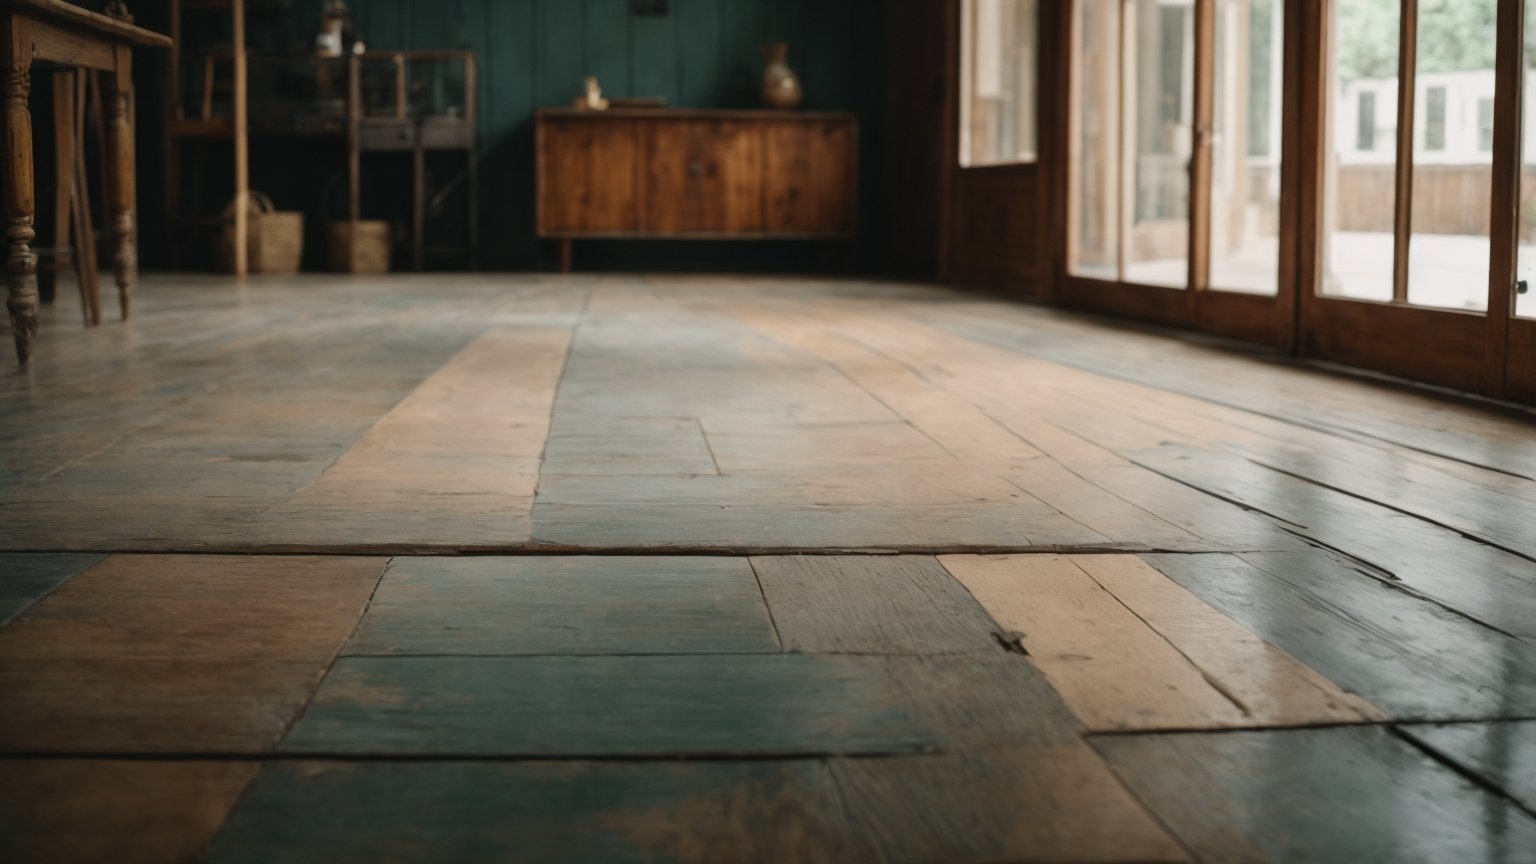
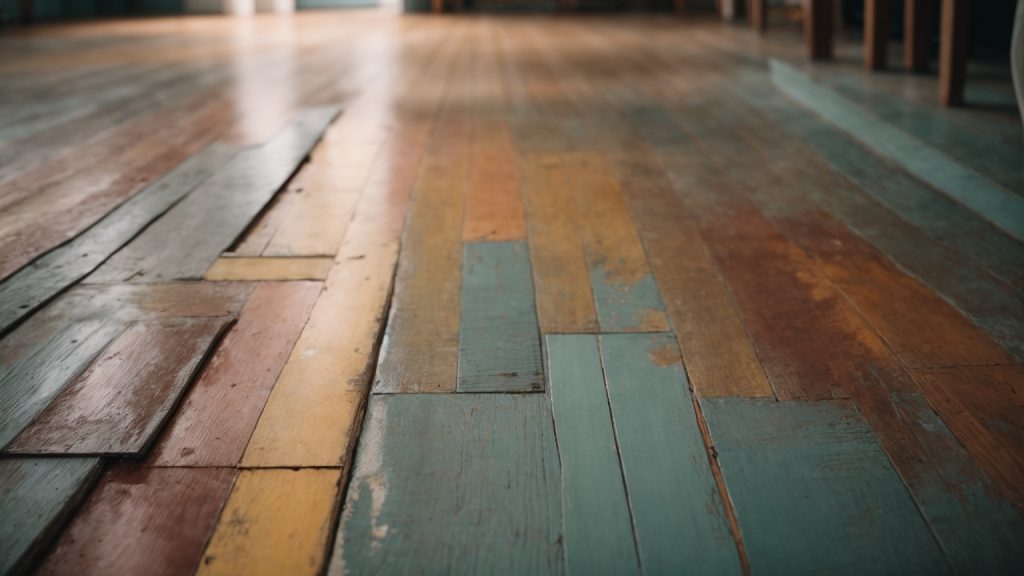
paint-wooden-floors

If you’re thinking of painting your wooden floors, it’s important to understand the basics before you start. Painting your floors can give your home a fresh new look, but it’s not a project to take lightly. Here are some things to keep in mind:

Choose the Right Paint

Not all paints are created equal, and this is especially true when it comes to painting floors. You’ll want to choose a paint that’s specifically designed for floors, as these paints are formulated to be more durable and resistant to wear and tear. Look for paints labeled as “porch and floor” or “deck and floor” paints. These paints are usually oil-based or water-based enamels and are available in a range of colors.

Prepare the Surface

Proper surface preparation is key to a successful floor painting project. Start by thoroughly cleaning the floors to remove any dirt, dust, or debris. Sand the floors lightly to create a rough surface that will help the paint adhere. Fill any cracks or holes with wood filler, and sand again once the filler is dry. Finally, vacuum and wipe down the floors to remove any remaining dust.

Use the Right Tools

To get the best results, it’s important to use the right tools. You’ll need a high-quality brush or roller designed for use with floor paints. A brush will give you a smoother finish, but a roller is faster. You may also want to use a paint sprayer if you have a large area to cover. Be sure to choose the right size brush or roller for your project, and use a high-quality paint tray to hold your paint.

Apply the Paint

When you’re ready to paint, start by cutting in around the edges of the room with a brush. Then, use a roller or sprayer to apply the paint in even, thin coats. Be sure to follow the manufacturer’s instructions for drying time and recoat time. It’s better to apply several thin coats of paint than one thick coat, as this will help prevent drips and ensure a smooth finish.

Allow for Drying Time

Once you’ve finished painting, it’s important to allow plenty of time for the paint to dry before you start using the floors again. This can take anywhere from a few hours to a few days, depending on the type of paint you used and the humidity in your area. Be sure to follow the manufacturer’s instructions for drying time, and avoid walking on the floors or placing furniture on them until the paint is fully cured.

By following these basic tips, you can achieve beautiful, long-lasting results when painting your wooden floors.

Choosing the Right Paint and Tools

When it comes to painting wooden floors, choosing the right paint and tools is crucial to achieving a beautiful and long-lasting finish. In this section, we will go over the key factors to consider when selecting your paint and tools.

Selecting the Paint

When it comes to selecting the paint for your wooden floors, there are a few things to keep in mind. First, you’ll want to choose a paint that is specifically designed for floors. These paints are formulated to be durable and resistant to wear and tear, which is essential for high-traffic areas like floors.

Second, consider the color and finish of the paint. While white is a popular choice for painted wooden floors, you can choose any color you like. Just be sure to test a small area first to make sure you like the color and that it complements the rest of your decor. As for the finish, a glossy or semi-glossy finish is recommended for floors as it is easier to clean and more durable than a matte finish.

Lastly, make sure the paint is compatible with the type of wood you are painting. Some paints may not adhere well to certain types of wood, so be sure to check the label or consult with a professional if you are unsure.

Picking the Right Brushes and Rollers

The tools you use to apply the paint are just as important as the paint itself. When it comes to brushes and rollers, there are a few things to consider.

For brushes, choose a high-quality brush with synthetic bristles. These brushes will provide a smooth and even finish and are easier to clean than natural bristle brushes. Look for a brush with a comfortable grip and a size that is appropriate for the size of your floor.

For rollers, choose a high-quality roller with a medium nap. This will allow the paint to be applied evenly and will prevent drips and streaks. Look for a roller with a sturdy frame and a comfortable grip.

In addition to brushes and rollers, you may also need other tools such as sandpaper, painter’s tape, and a paint tray. Be sure to have all the necessary tools on hand before you begin painting.

By selecting the right paint and tools, you can ensure a successful and long-lasting paint job on your wooden floors.

Preparing Your Wooden Floors

preparing-your-wooden-floors

Before you start painting your wooden floors, you need to prepare them properly. This step is crucial to ensure that the paint adheres well and lasts for a long time. Follow these sub-sections to prepare your floors:

Cleaning the Floor

The first step is to clean your wooden floors thoroughly. You should remove any dirt, dust, or debris that may be present on the surface. Here are some tips to clean your floors:

  • Sweep the floor with a broom to remove loose dirt and debris.
  • Use a vacuum cleaner to remove dust and small particles from the floor.
  • Clean the floor with a damp mop and a mild detergent. Avoid using harsh chemicals that can damage the wood.

Make sure the floor is completely dry before you move on to the next step.

Sanding the Surface

The next step is to sand the surface of your wooden floors. Sanding helps to remove any rough spots, scratches, or stains on the surface. It also helps to create a smooth surface for the paint to adhere to. Here are some tips to sand your floors:

  • Use a floor sander to sand the surface of the floor. Make sure you follow the manufacturer’s instructions carefully.
  • Sand the floor in the direction of the grain to avoid damaging the wood.
  • Start with a coarse sandpaper and gradually move to a finer grit to create a smooth surface.
  • After sanding, use a vacuum cleaner to remove any dust or debris from the floor.

By following these steps, you can prepare your wooden floors for painting. Remember to take your time and be patient during this process. Proper preparation will ensure that your paint job looks great and lasts for a long time.

Applying Primer to the Floor

Before you start painting your wooden floors, you need to prepare the surface by applying a primer. Priming the floor will help the paint adhere better and last longer. Here are the steps to follow when applying primer to your wooden floors:

  1. Choose the Right Primer: Make sure to choose a primer that is suitable for your paint type. If you are using oil-based paint, use an oil-based primer. If you are using water-based paint, use a water-based primer.
  2. Prepare the Surface: Sand the floorboards with 150-grit sandpaper to remove any rough spots or imperfections. Then, clean the floor thoroughly with a powdered detergent cleaner to remove all dust and deposits. Rinse the floor with clean water and allow it to dry completely. This may take a couple of days.
  3. Apply the Primer: Apply the primer to the floor using a paint roller or brush. Start at the farthest corner of the room and work your way towards the door. Make sure to apply the primer in thin, even coats. Allow the primer to dry completely before applying the paint. It is recommended to let the primer dry overnight.
  4. Sand the Floor: Once the primer is dry, lightly sand the floor with 220-grit sandpaper to remove any rough spots or imperfections. Wipe the floor with a cloth or rag dampened with mineral spirits to remove any dust or debris.
  5. Apply a Second Coat of Primer (Optional): If you notice any areas where the primer did not cover well, you can apply a second coat of primer. Allow the primer to dry completely before applying the paint.

By following these steps, you will ensure that your wooden floors are properly primed and ready for painting.

Painting Your Wooden Floors

If you’re looking to give your wooden floors a fresh new look, painting them can be a great option. Here are some tips on how to paint your wooden floors.

Applying the First Coat

Before you begin painting, make sure your floors are clean and free of any debris. You can sweep or vacuum them to remove any dust or dirt. Once they’re clean, you can apply the first coat of paint.

When it comes to choosing paint, make sure you choose a paint that is specifically designed for floors. This type of paint is more durable and will hold up better over time. You can choose any color you like, but be sure to test a small area first to make sure you like the color and finish.

When applying the first coat of paint, use a roller or brush and work in small sections. Start at one end of the room and work your way across, making sure to overlap each section slightly to avoid leaving any gaps. Allow the first coat to dry completely before adding additional coats.

Adding Additional Coats

Once the first coat is dry, you can add additional coats of paint. Depending on the color and finish you’ve chosen, you may need to apply two or three coats to achieve the desired look.

When applying additional coats, be sure to use a light touch and work in small sections. You don’t want to apply too much paint at once, as this can lead to drips and uneven coverage. Allow each coat to dry completely before adding the next one.

When you’re finished painting, allow the floors to dry completely before walking on them or placing any furniture back in the room. This will ensure that the paint has had time to fully cure and will help prevent any damage or scuffs.

Maintaining Your Painted Floors

Once you’ve painted your wooden floors, it’s important to maintain them properly to ensure they look great for years to come. Here are some tips to help you keep your painted floors in top condition.

Regular Cleaning

Regular cleaning is essential to maintain the appearance of your painted floors. Here are some tips for cleaning your painted floors:

  • Sweep or vacuum your floors regularly to remove dust and dirt.
  • Damp mop your floors with a mild detergent to remove any dirt or grime that has accumulated.
  • Avoid using harsh chemicals or abrasive cleaners, as they can damage the paint on your floors.
  • Wipe up spills immediately to avoid staining or damaging the paint on your floors.

Dealing with Scratches and Scuffs

Even with regular cleaning, your painted floors may still get scratched or scuffed over time. Here are some tips for dealing with scratches and scuffs:

  • Use a touch-up kit to repair small scratches and scuffs. These kits usually contain paint and a small brush, and can be used to touch up small areas of damage.
  • For larger scratches or scuffs, you may need to repaint the affected area. Sand the damaged area lightly to remove any loose paint, and then apply a new coat of paint.
  • To prevent scratches and scuffs, place felt pads on the bottom of furniture legs and avoid wearing shoes with hard soles on your floors.

By following these tips, you can keep your painted floors looking great for years to come.

build-a-wooden-cabinet

How to Build a Wooden Cabinet: A Beginner's Guide

Are you looking to build a wooden cabinet but don’t know where to start? Building a cabinet can seem like a daunting task, but with the right tools and guidance, it can be a rewarding and satisfying project. In this article, we will guide you through the process of building a wooden cabinet, step by step.

Before you begin building your cabinet, you will need to gather the necessary materials and tools. This will include wood boards, screws, nails, wood glue, a saw, a drill, and sandpaper. You will also need to measure the space where you plan to install the cabinet to ensure that it fits properly. Once you have everything you need, you can begin building your cabinet.

The first step in building a wooden cabinet is to create a plan or blueprint. This will help you visualize the design of your cabinet and ensure that you have all the necessary materials. Next, you will need to cut the wood boards to the appropriate size and shape. You can then assemble the cabinet using screws, nails, and wood glue. Once the cabinet is assembled, you can sand and finish it to give it a polished look.

Understanding the Basics

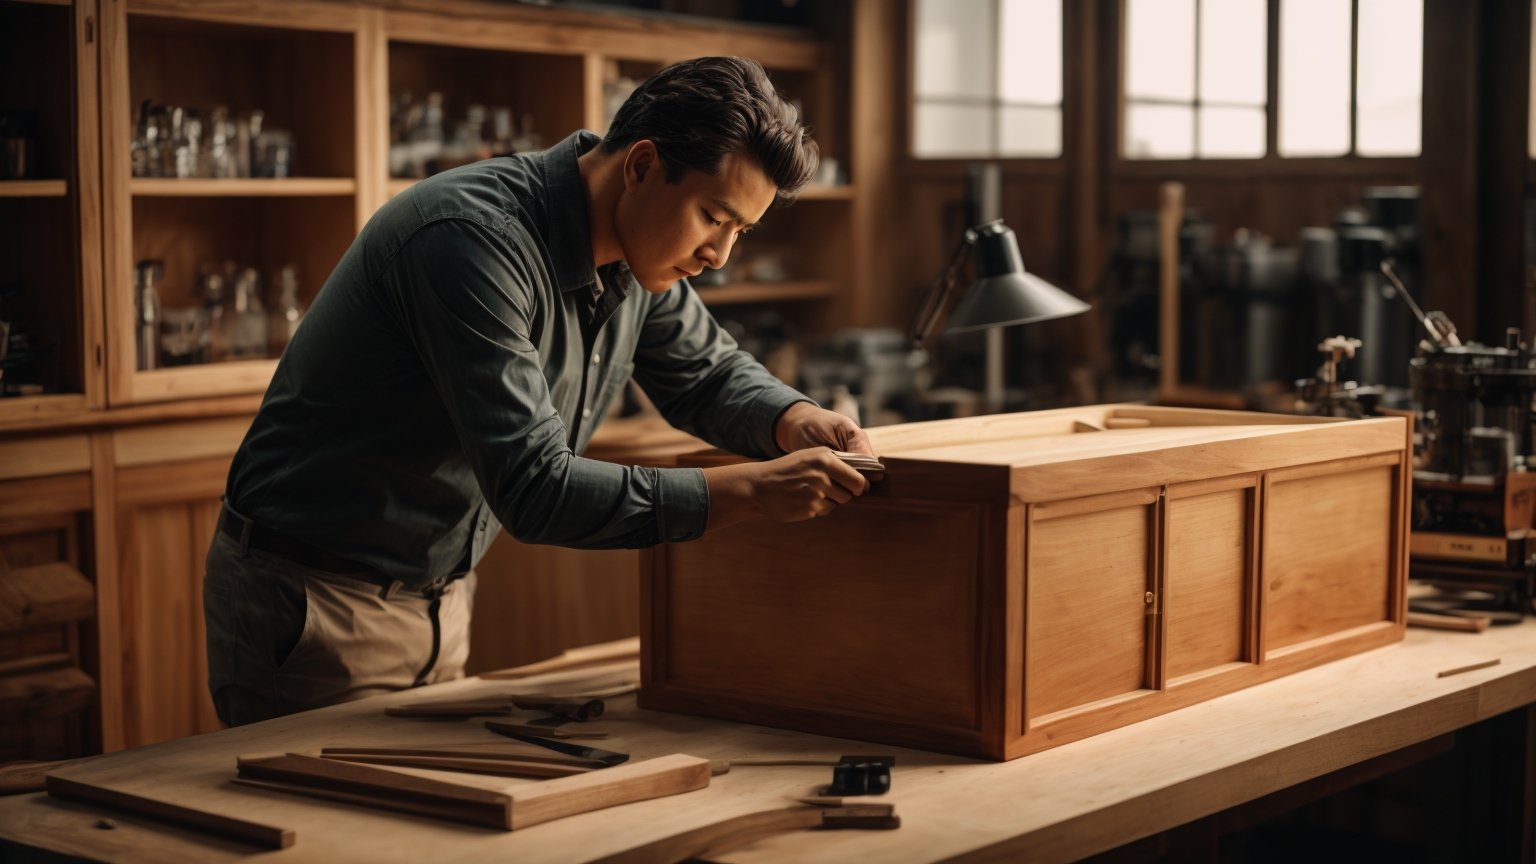
build-a-wooden-cabinet

If you’re new to woodworking, building a cabinet can seem like a daunting task. However, with the right tools and materials, it can be a rewarding project that adds both functionality and aesthetic appeal to your living space. In this section, we’ll cover the basics of building a wooden cabinet.

Types of Wood

When it comes to choosing the right wood for your cabinet, there are several options available. Here are some of the most common types of wood used in cabinet-making:

  • Plywood: A popular choice for its affordability and durability, plywood is made by layering thin sheets of wood together. It comes in various grades and thicknesses, so be sure to choose the right one for your project.
  • Solid Wood: This type of wood is more expensive than plywood but is known for its natural beauty and durability. Popular types of solid wood for cabinets include oak, maple, and cherry.
  • MDF: Medium-density fiberboard is a man-made material that is made by breaking down wood fibers and combining them with resin. It’s a popular choice for painted cabinets due to its smooth surface.

Required Tools

Before you start building your cabinet, you’ll need to gather the necessary tools. Here are some of the most important tools you’ll need:

  • Table Saw: This tool is essential for cutting large sheets of plywood or solid wood into the right size and shape.
  • Circular Saw: A circular saw is useful for making straight cuts on smaller pieces of wood.
  • Jigsaw: A jigsaw is a handheld saw that can be used for cutting curves and intricate shapes.
  • Drill: You’ll need a drill to make holes for screws and other fasteners.
  • Sander: A sander is used to smooth out rough edges and surfaces before applying finish.
  • Clamps: Clamps are used to hold pieces of wood together while glue dries or while you’re making cuts.

By understanding the basics of wood selection and required tools, you’ll be well on your way to building a wooden cabinet that you can be proud of.

Planning Your Cabinet

Before you start building your wooden cabinet, it’s essential to plan it out properly. This will ensure that you have all the necessary materials and tools, and that your cabinet will fit perfectly in the space you have designated for it. Here are some steps to follow when planning your cabinet.

Determining the Size

The first step in planning your cabinet is to determine its size. Measure the space where you want to install the cabinet, and write down the height, width, and depth of the area. Consider what you will be storing in the cabinet and how much space you will need. Keep in mind that it’s better to have a cabinet that’s slightly too big than one that’s too small.

Once you have the measurements, you can decide on the size of your cabinet. You can use a table saw to cut the wood to the exact size you need. Alternatively, you can purchase pre-cut wood pieces from a hardware store.

Choosing the Design

The next step is to choose the design of your cabinet. There are many different styles and designs to choose from, so take some time to research and find one that suits your needs and preferences. Some popular options include:

  • Wall-mounted cabinets
  • Base cabinets
  • Corner cabinets
  • Pantry cabinets
  • Open shelving cabinets

Consider the style of your room and the overall aesthetic you want to achieve. You can also choose to add decorative elements such as trim or molding to your cabinet to give it a more finished look.

Once you have determined the size and design of your cabinet, you can start gathering the necessary materials and tools. With proper planning, you can build a beautiful and functional wooden cabinet that will last for years to come.

Preparing the Materials

Before you start building your wooden cabinet, it’s important to prepare all of the necessary materials. This includes measuring and cutting the wood, as well as sanding it down to a smooth finish.

Cutting the Wood

The first step in preparing your materials is to measure and cut the wood. This will ensure that all of your pieces fit together properly and that your cabinet is the correct size. You will need a tape measure, a saw, and the wood that you will be using for your cabinet.

To begin, measure the height, width, and depth of the space where you will be placing your cabinet. Then, use these measurements to determine the size of each piece of wood that you will need. Mark the measurements on the wood and use the saw to cut each piece to the correct size.

Make sure to double-check your measurements before cutting to avoid any mistakes. It’s also a good idea to label each piece of wood as you cut it to keep track of which piece goes where.

Sanding the Wood

Once you have cut all of your pieces of wood, it’s time to sand them down to a smooth finish. Sanding will help to remove any rough edges or splinters and will ensure that your cabinet looks clean and professional.

You will need sandpaper and a sanding block or an electric sander. Start with a coarse grit sandpaper and work your way up to a finer grit for a smoother finish.

Hold the sandpaper or sander firmly and move it in a back-and-forth motion along the surface of the wood. Be sure to sand evenly and not to apply too much pressure, as this can damage the wood.

Once you have sanded all of your pieces, wipe them down with a damp cloth to remove any dust or debris. Your wood is now ready to be assembled into your cabinet.

By taking the time to properly prepare your materials, you will ensure that your cabinet is sturdy, well-fitted, and looks great.

Assembling the Cabinet

assembling-the-cabinet

Now that you have all the necessary components ready, it’s time to assemble your wooden cabinet. This section will guide you through the process of building the frame, adding shelves, and attaching the doors.

Building the Frame

Start by laying out the cabinet’s sides, top, bottom, and back on a flat surface. Use clamps to hold the pieces together while you drill pilot holes and then use screws to attach them. Make sure the corners are square by using a carpenter’s square.

Next, attach the face frame to the cabinet’s front. The face frame is the part of the cabinet that the doors will attach to. Use glue and clamps to hold the face frame in place while you drill pilot holes and then use screws to attach it to the cabinet.

Adding the Shelves

Measure and cut the shelves to fit inside the cabinet. Use a table saw or circular saw to make straight cuts. Drill pilot holes into the sides of the cabinet and then attach the shelves using screws. Make sure the shelves are level by using a level.

Attaching the Doors

Measure and cut the doors to fit the face frame. Use a router to create a groove on the inside of the door where the hinges will be attached. Install the hinges on the door and then attach the door to the face frame. Adjust the hinges so that the door hangs straight and opens and closes smoothly.

Finally, install any knobs or pulls on the doors. Make sure they are level and centered.

Congratulations! You have successfully assembled your wooden cabinet.

Finishing Touches

Once you have built your wooden cabinet, it’s time to add the finishing touches to make it look great. Here are some tips on how to finish your cabinet:

Painting or Staining

Painting or staining your cabinet is an important step in the finishing process. You can choose to paint or stain your cabinet depending on the look you want to achieve. If you want a more natural look, staining is the way to go. If you want a more colorful look, painting is the way to go.

Before you start painting or staining, you need to prepare the wood. Sand the wood with a fine-grit sandpaper to remove any rough spots. Then, wipe the wood with a damp cloth to remove any dust. Apply a wood conditioner to the wood to help the stain or paint adhere better.

When painting, apply a primer first to help the paint adhere better. Then, apply the paint in thin, even coats. Let each coat dry before applying the next coat. When staining, apply the stain with a brush or cloth, following the grain of the wood. Let the stain dry for at least 24 hours before applying a clear coat.

Adding Hardware

Adding hardware to your cabinet is another important step in the finishing process. Hardware includes knobs, handles, hinges, and locks. Choose hardware that complements the style of your cabinet.

When installing hardware, mark the location of the hardware on the cabinet with a pencil. Then, drill pilot holes for the screws. Install the hardware with screws, making sure they are tight.

Adding hardware can be a simple way to update the look of your cabinet. You can choose from a variety of styles and finishes to find the perfect hardware for your cabinet.

By following these tips, you can give your wooden cabinet a professional-looking finish that will make it stand out in your home.

Safety Precautions

When building a wooden cabinet, safety should be your top priority. Woodworking can be dangerous, and it is important to take the necessary precautions to prevent accidents. Here are some safety tips to keep in mind:

Wear Protective Gear

Always wear protective gear when working with power tools or sharp objects. This includes safety glasses, earplugs, gloves, and a dust mask. Safety glasses will protect your eyes from flying debris, earplugs will protect your hearing from loud noises, gloves will protect your hands from cuts and scrapes, and a dust mask will protect your lungs from sawdust and other airborne particles.

Keep Your Workspace Clean and Organized

A cluttered workspace can lead to accidents. Keep your workspace clean and organized to prevent tripping hazards and to ensure that you have enough space to work safely. Make sure that all tools are stored in their proper place when not in use.

Use Tools Safely

Always use tools according to their intended purpose and manufacturer’s instructions. Make sure that blades are sharp and in good condition, and that all guards and safety features are in place and working properly. Never remove guards or safety features from tools.

Take Breaks

Working for long periods of time without a break can lead to fatigue and increased risk of accidents. Take frequent breaks to rest and stretch your muscles. This will help you stay alert and focused while working.

Have a First Aid Kit on Hand

Accidents can happen even when you take all the necessary precautions. Keep a first aid kit on hand in case of minor injuries. The kit should include items such as bandages, antiseptic, and tweezers.

By following these safety precautions, you can help ensure that your woodworking project is completed safely and without incident.

Maintaining Your Wooden Cabinet

Now that you have built your wooden cabinet, it is important to maintain it properly to ensure its longevity and keep it looking its best. Here are some tips to help you maintain your wooden cabinet:

Regular Cleaning

Regular cleaning is essential to keep your wooden cabinet looking its best. Use a soft, damp cloth to wipe down the cabinet and remove any dust or dirt. Avoid using harsh chemicals or abrasive cleaners, as these can damage the wood.

Avoid Excessive Moisture

Excessive moisture can cause the wood to warp or crack, so it is important to avoid getting your wooden cabinet too wet. If you need to clean a spill or stain, use a damp cloth and dry the area immediately afterward.

Polish the Wood

Polishing your wooden cabinet can help protect the wood and keep it looking shiny and new. Choose a high-quality polish that does not contain silicone or wax, and follow the manufacturer’s directions for application.

Check for Damage

Regularly inspect your wooden cabinet for any signs of damage, such as cracks or scratches. If you notice any damage, address it promptly to prevent it from getting worse.

Avoid Direct Sunlight

Direct sunlight can cause the wood to fade or discolor, so it is important to avoid placing your wooden cabinet in direct sunlight. If you cannot avoid placing it in a sunny location, consider using curtains or blinds to block the sunlight.

By following these tips, you can keep your wooden cabinet looking beautiful for years to come.

stripping-the-old-finish

How to Refinish a Wooden Desk: A Step-by-Step Guide

Refinishing a wooden desk can be a daunting task, but with the right tools and techniques, it can be a rewarding DIY project. Whether you’re looking to give your old desk a new lease of life or simply want to update its look, refinishing can be a cost-effective solution. In this article, we’ll guide you through the steps to refinish a wooden desk and give it a brand new look.

Before you begin, it’s important to determine the original finish of your desk. This will help you choose the right refinishing method and ensure that the wood is suitable for refinishing. Some finishes and types of wood may not be able to be refinished, so it’s important to verify this before taking any action. Once you’ve determined that your desk can be refinished, you can begin the process of stripping the old finish.

Understanding the Importance of Refinishing

refinish-a-wooden-desk

If you have a wooden desk that has seen better days, refinishing it may be just what it needs to restore its beauty and functionality. Refinishing a wooden desk involves removing the old finish, repairing any damage, and applying a new finish to protect the wood and give it a fresh look.

Refinishing your wooden desk is important for several reasons. First, it helps to protect the wood from damage caused by moisture, heat, and other environmental factors. Over time, wooden desks can become discolored, warped, or cracked if they are not properly maintained. Refinishing your desk can help to prevent these issues and keep it looking great for years to come.

Second, refinishing your wooden desk can help to restore its beauty and value. A well-maintained wooden desk can be a valuable piece of furniture that adds character and style to any room. By refinishing your desk, you can bring out its natural beauty and give it a fresh, updated look that will enhance its appeal and value.

Finally, refinishing your wooden desk can be a fun and rewarding DIY project that you can tackle on your own. With the right tools and materials, you can strip and refinish your desk in a weekend or two, depending on the size and complexity of the project. Plus, by doing it yourself, you can save money and have the satisfaction of knowing that you restored your desk to its former glory with your own hands.

In summary, refinishing your wooden desk is an important step in maintaining its beauty, functionality, and value. By taking the time to strip, repair, and refinish your desk, you can protect it from damage, restore its natural beauty, and enjoy the satisfaction of a job well done.

Identifying the Type of Wood

When it comes to refinishing a wooden desk, one of the first things you need to do is identify the type of wood you are working with. Knowing the type of wood will help you choose the right refinishing technique and products to use. Here are some tips for identifying the type of wood:

Hardwood vs Softwood

The first thing you need to determine is whether the wood is a hardwood or a softwood. Hardwoods come from deciduous trees, such as oak, maple, and cherry, while softwoods come from coniferous trees, such as pine and cedar. Hardwoods are generally more durable and harder to work with, while softwoods are easier to work with but less durable.

To determine whether your wood is a hardwood or a softwood, look at the grain pattern. Hardwoods have a tighter and more complex grain pattern, while softwoods have a simpler and more open grain pattern. You can also try to dent the wood with your fingernail. If it dents easily, it is likely a softwood.

Exotic Wood Types

If you are working with an exotic wood, such as teak or mahogany, you may need to do some additional research to identify the type of wood. Exotic woods can come from all over the world and can have unique characteristics and properties.

One way to identify exotic woods is to look at the color and grain pattern. For example, teak is a golden brown color with a straight grain, while mahogany is a reddish-brown color with a ribbon-like grain. You can also try to identify the wood by its smell. Some exotic woods have a distinct smell, such as cedar and rosewood.

Overall, identifying the type of wood is an important step in refinishing a wooden desk. By knowing the type of wood, you can choose the right refinishing technique and products to use, and ensure that your finished product looks beautiful and lasts for years to come.

Materials and Tools Needed

Refinishing a wooden desk can be a rewarding DIY project that can transform an old, worn-out piece of furniture into a beautiful and functional addition to your home or office. To get started, you’ll need a few basic materials and tools. Here are the essentials:

Safety Equipment

Before you begin refinishing your desk, it’s important to ensure that you have the necessary safety equipment to protect yourself from harmful chemicals and dust. Here are some items you should have on hand:

  • Safety glasses or goggles
  • Dust mask or respirator
  • Gloves
  • Protective clothing

Sanding Tools

Sanding is a crucial step in the refinishing process, as it helps to remove the old finish and prepare the surface for a new one. Here are some tools you’ll need for sanding your desk:

  • Sandpaper (150, 220, and 300 grit)
  • Sanding block or palm sander
  • Low-grit sandpaper for removing varnish or paint
  • High-grit sandpaper for removing thin layers of varnish or paint and for use after applying wood putty or filler
  • Steel wool (medium grade)

Finishing Products

The finishing products you choose will depend on the look you want to achieve and the level of protection you need. Here are some options to consider:

  • Stain: Stain can enhance the natural beauty of the wood and add color. Choose a stain that is appropriate for the type of wood you are refinishing.
  • Polyurethane: Polyurethane is a durable, protective finish that can be applied in a variety of sheens. Choose a finish that is appropriate for the level of use your desk will receive.
  • Lacquer: Lacquer is a fast-drying, durable finish that can be applied in a variety of sheens. It is a good choice for high-use areas.
  • Wood filler: Wood filler can be used to fill in gaps or holes in the wood before refinishing.

With these materials and tools, you’ll be well on your way to refinishing your wooden desk. Remember to take your time and follow the instructions carefully to achieve the best results.

Preparing the Workspace

Before you begin refinishing your wooden desk, it is important to prepare your workspace properly. This will ensure that the process is smoother and safer. Here are some steps to follow:

Clear the Area

First, clear the area where you will be working. Remove any items that could get in the way or get damaged during the refinishing process. This includes any other furniture, decorations, or accessories.

Cover the Floor

Next, cover the floor with a drop cloth or plastic sheeting to protect it from any spills or drips. You can also use old newspapers or cardboard boxes if you don’t have a drop cloth. Make sure the covering extends beyond the area where you will be working to catch any stray drips or spills.

Ventilation

Refinishing a wooden desk can produce fumes that can be harmful if inhaled. It is important to work in a well-ventilated area to avoid any health issues. Open windows and doors, or use a fan to help circulate the air. If you have a respirator mask, wear it to protect yourself from the fumes.

Lighting

Make sure your workspace is well-lit. This will help you see any imperfections or missed spots during the refinishing process. Natural light is best, but if that’s not possible, use bright artificial light.

Tools and Materials

Gather all the tools and materials you will need before starting the refinishing process. This includes sandpaper, paint stripper, wood filler, stain, and a sealer. Make sure you have enough of each item to complete the job. Keep them within easy reach so you don’t have to stop and search for them during the process.

By following these steps, you can prepare your workspace for refinishing your wooden desk efficiently and safely.

Stripping the Old Finish

stripping-the-old-finish

Before you can refinish your wooden desk, you need to remove the old finish first. The process of stripping the old finish can be messy and time-consuming, but it’s essential to achieve a smooth and even surface for the new finish.

Step 1: Choose a Stripping Method

There are two main methods for stripping the old finish off your wooden desk: sanding and chemical stripping. Sanding involves using sandpaper to remove the old finish manually, while chemical stripping uses a chemical solvent to dissolve the old finish.

Sanding is a good option for flat surfaces, but it can be challenging to remove the finish from curved or detailed areas. Chemical stripping is a better option for those areas, but it requires more caution and care.

Step 2: Gather Your Supplies

To strip the old finish off your wooden desk, you’ll need the following supplies:

  • Chemical stripper or sandpaper
  • Rubber gloves
  • Protective eyewear
  • Respirator mask
  • Paintbrush or scraper
  • Steel wool or sandpaper
  • Clean rags

Step 3: Apply the Chemical Stripper

If you choose to use a chemical stripper, follow the manufacturer’s instructions carefully. Apply the stripper to the desk surface with a paintbrush or scraper, and let it sit for the recommended time. Then, use steel wool or sandpaper to remove the old finish.

Be sure to work in a well-ventilated area and wear protective gear, as the fumes from the chemical stripper can be harmful.

Step 4: Sand the Surface

If you choose to sand the old finish off your wooden desk, start with a coarse-grit sandpaper and work your way up to a finer grit. Sand in the direction of the wood grain to avoid scratches and uneven spots.

Once you’ve removed the old finish, wipe down the surface with a clean rag to remove any dust or debris.

By following these steps, you can strip the old finish off your wooden desk and prepare it for a new finish.

Sanding the Desk

Sanding the desk is a crucial step in the process of refinishing a wooden desk. It helps to remove the old finish and create a smooth surface for the new finish to adhere to. Here are some tips to help you sand your desk effectively:

  • Choose the right sandpaper: Depending on the condition of your desk, you may need to start with a coarse sandpaper and work your way up to a finer grit. A good rule of thumb is to start with 100-grit sandpaper and move up to 150-grit, 220-grit, and finally 320-grit.
  • Use an orbital sander: An orbital sander is a great tool for sanding large surfaces like a desk. It is easy to use and creates a smooth finish. If you don’t have an orbital sander, you can use a sanding block with sandpaper.
  • Sand with the grain: Always sand with the grain of the wood to avoid creating scratches or marks on the surface.
  • Clean as you go: As you sand, dust and debris will accumulate on the surface of the desk. Use a vacuum or a tack cloth to clean the surface and remove any debris.
  • Check your progress: As you sand, check your progress by running your hand over the surface of the desk. You should feel a smooth, even surface.
  • Be patient: Sanding can be a time-consuming process, but it is essential for achieving a beautiful finish. Take your time and don’t rush the process.

By following these tips, you can effectively sand your desk and prepare it for the next step in the refinishing process.

Applying the New Finish

After removing the old finish, it’s time to apply the new finish to your wooden desk. This is the step that will give your desk a fresh new look and protect it from damage. There are many different types of finishes to choose from, so it’s important to choose the right one for your desk.

Choosing the Right Finish

When choosing a new finish for your desk, consider the following factors:

  • Durability: How much wear and tear will your desk be subjected to? If your desk will be used frequently, you’ll want a more durable finish.
  • Appearance: What look are you going for? Do you want a glossy or matte finish? Do you want the natural wood grain to show through?
  • Ease of application: Some finishes are easier to apply than others. Consider your skill level and the tools you have available.

Here are some common types of finishes and their characteristics:

Finish Characteristics
Polyurethane Durable, water-resistant, glossy finish
Varnish Durable, glossy finish
Lacquer Durable, glossy finish, dries quickly
Oil-based stain Penetrates the wood, enhances natural grain, requires a topcoat
Water-based stain Low odor, dries quickly, requires a topcoat

Techniques for Application

Once you’ve chosen your finish, it’s time to apply it to your desk. Here are some tips for a successful application:

  • Work in a well-ventilated area.
  • Stir the finish thoroughly before use.
  • Apply the finish in thin, even coats, using a brush, roller, or spray gun.
  • Sand lightly between coats with fine-grit sandpaper.
  • Apply at least two coats for best results.
  • Allow the finish to dry completely between coats and before using the desk.

Remember, applying a new finish can be a time-consuming process, but the end result is worth it. With the right finish and application techniques, your wooden desk will look beautiful and be protected for years to come.

Final Touches

After you have stripped, sanded, stained, and sealed your wooden desk, it’s time to add the final touches to bring out the best in your hard work. This section will cover two essential final touches: buffing and polishing and adding a protective coating.

Buffing and Polishing

Buffing and polishing are the final steps to give your desk a smooth and shiny finish. To do this, you will need:

  • Soft cloth
  • Polishing compound
  • Electric buffer (optional)

First, apply a small amount of polishing compound to the soft cloth. Then, rub the cloth onto the surface of the desk in circular motions. If you have an electric buffer, you can use it to buff the desk more quickly and efficiently.

Be careful not to overdo it, as too much buffing can remove the protective coating you applied earlier. Once you are satisfied with the shine, wipe off any excess polishing compound with a clean cloth.

Adding Protective Coating

Adding a protective coating is crucial to ensure that your desk stays in good condition for years to come. There are several options for protective coatings, including:

Polyurethane is a popular choice for its durability and resistance to scratches and stains. Lacquer is also durable but requires more maintenance and can yellow over time. Wax is a natural option that provides a soft, matte finish but needs to be reapplied regularly.

To apply the protective coating, follow the instructions on the product label carefully. Generally, you will need to apply several thin coats, allowing each coat to dry completely before applying the next.

Congratulations, you have successfully refinished your wooden desk! With proper care, your desk will continue to look beautiful and serve you well for years to come.

Maintenance Tips

Taking care of your refinished wooden desk is important to ensure it stays looking great for years to come. Here are some maintenance tips to keep your desk in top condition.

Regular Cleaning

Regular cleaning is essential to maintaining the beauty of your refinished wooden desk. Dust and dirt can accumulate quickly and cause scratches and damage to the surface. Use a soft, lint-free cloth to wipe down your desk regularly. Avoid using abrasive cleaners or harsh chemicals that can damage the finish. Instead, use a mild soap and water solution to clean your desk. Be sure to dry the surface thoroughly to prevent water damage.

Preventing Scratches and Stains

Preventing scratches and stains is key to keeping your refinished wooden desk looking its best. Here are some tips to help prevent damage:

  • Use coasters and placemats to protect the surface from spills and stains.
  • Avoid placing hot items directly on the surface to prevent heat damage.
  • Use desk pads or mouse pads to protect the surface from scratches and wear.
  • Avoid dragging heavy items across the surface, as this can cause scratches and damage.

By following these maintenance tips, you can keep your refinished wooden desk looking beautiful and in top condition for years to come.

build-a-wooden-arch

How to Build a Wooden Arch: A Step-by-Step Guide

If you’re looking to add a touch of elegance to your garden or backyard, building a wooden arch is a great way to do it. Not only does it add a beautiful focal point to your outdoor space, but it can also serve as a support for climbing plants like roses, ivy, and wisteria. In this article, we’ll go over the steps involved in building a wooden arch so that you can create a stunning addition to your garden.

The first step in building a wooden arch is to gather the necessary tools and materials. You’ll need plywood sheets, a circular saw, a cordless drill, a posthole digger, safety glasses, and other tools depending on the design you choose. Once you have everything you need, you can start building the arch.

The process of building a wooden arch involves cutting and shaping the plywood sheets into the desired shape, assembling the arch, and securing it in place. Depending on the design you choose, you may also need to add additional support structures like posts or braces. With a little patience and some basic woodworking skills, you can create a beautiful wooden arch that will enhance the look of your garden or backyard.

Understanding the Basics of a Wooden Arch

build-a-wooden-arch

If you’re looking to add a touch of elegance to your garden or outdoor space, a wooden arch is a great way to do it. Wooden arches are easy to build and can be customized to fit any style or design. In this section, we’ll cover the basics of building a wooden arch, including the importance of wood type and arch design principles.

Importance of Wood Type

When it comes to building a wooden arch, the type of wood you use is crucial. You want to choose a wood that is strong and durable enough to withstand the elements and support the weight of the arch. Some of the best types of wood for building a wooden arch include:

  • Cedar: Cedar is a popular choice for building outdoor structures because it is naturally resistant to rot and insect damage. It is also lightweight and easy to work with.
  • Redwood: Redwood is another popular choice for outdoor structures because it is naturally resistant to decay and insect damage. It is also strong and durable, making it a great choice for building a wooden arch.
  • Pressure-treated pine: Pressure-treated pine is a cost-effective option for building a wooden arch. It is treated with chemicals to make it resistant to rot and insect damage, but it is important to note that these chemicals can be harmful to the environment.

Arch Design Principles

When it comes to designing your wooden arch, there are a few key principles to keep in mind:

  • Height: The height of your arch will depend on its intended use. If you’re building an arch to frame a garden path, a height of 7 feet is usually sufficient. If you’re building an arch for a wedding or other special event, you may want to go taller.
  • Width: The width of your arch will depend on the size of the space you’re working with. A width of 4-5 feet is usually sufficient for a garden path. If you’re building an arch for a wedding or other special event, you may want to go wider.
  • Shape: The shape of your arch will depend on your personal preference. Some popular shapes include a classic gothic arch, a rounded arch, and a flat arch.
  • Bracing: It’s important to include bracing in your design to ensure that your arch is stable and secure. Bracing can be added to the sides or the back of the arch, depending on the design.

By keeping these design principles in mind and choosing the right type of wood, you can build a beautiful and functional wooden arch that will add a touch of elegance to your outdoor space.

Materials and Tools Required

When it comes to building a wooden arch, having the right materials and tools is essential. Here are the things you’ll need to get started:

Choosing the Right Wood

The first step in building a wooden arch is to choose the right type of wood. You’ll want to select wood that is strong, durable, and able to withstand the elements. Some good options include:

  • Cedar: This is a popular choice for outdoor projects because it is naturally resistant to rot and decay.
  • Redwood: This is another durable option that is resistant to insects and decay.
  • Pressure-treated lumber: This type of wood is treated with chemicals to resist rot, insects, and decay.

Before you start building, make sure to inspect your wood for any defects or damage. You’ll want to avoid using any wood that is warped, cracked, or has knots that could weaken the structure.

Essential Tools

To build a wooden arch, you’ll need a few essential tools:

  • Circular saw: This will be used to cut your wood to size.
  • Drill: You’ll need a drill to make holes for screws and bolts.
  • Jigsaw: This tool is useful for cutting curved shapes in your wood.
  • Screwdriver: You’ll need a screwdriver to tighten screws and bolts.
  • Clamps: These will help hold your wood in place while you work.
  • Measuring tape: You’ll need to measure your wood to ensure it is cut to the correct size.
  • Pencil: This will be used to mark your wood before cutting.
  • Safety gear: Make sure to wear safety glasses and gloves to protect yourself while working with power tools.

Having the right materials and tools is crucial to building a wooden arch that is strong and durable. With the right materials and a little bit of know-how, you’ll be able to create a beautiful arch that will last for years to come.

Creating Your Arch Design

creating-your-arch-design

Designing your wooden arch is an important step that will determine the final look and functionality of your arch. In this section, we will go over the steps to create your arch design.

Drawing the Arch Blueprint

Before you start building your arch, you need to create a blueprint. This will help you visualize the final product and make any necessary adjustments before you start building.

To create your blueprint, you can use a pencil and paper or a computer-aided design (CAD) program. Draw the arch shape you want and make sure to include the height, width, and depth of the arch. You can also add any decorative elements you want to include, such as carvings or cutouts.

Determining the Arch Dimensions

Once you have your blueprint, you need to determine the dimensions of your arch. This will depend on the size of the space where you want to install the arch and the purpose of the arch.

To determine the dimensions, measure the height and width of the space where you want to install the arch. Make sure to add a few extra inches to the measurements to ensure a proper fit. You also need to consider the purpose of the arch. If it is for decoration, you may want to make it smaller. If it is for a garden or walkway, you may want to make it larger to accommodate people walking underneath.

After you have determined the dimensions, you can start selecting the materials you will need to build your arch. Make sure to choose high-quality wood that is sturdy and durable. You can also choose to add a finish to your arch, such as paint or stain, to protect it from the elements and enhance its appearance.

By following these steps, you can create a beautiful and functional wooden arch that will enhance the look of your garden or walkway.

Preparing the Wood

Before building a wooden arch, it is important to properly prepare the wood to ensure a sturdy and long-lasting structure. This section will cover two key steps in preparing the wood: cutting and sanding.

Cutting the Wood

To begin, you will need to cut the wood to the appropriate length and shape. This will depend on the specific design of your arch. It is important to use a circular saw or jigsaw to make precise cuts. A framing square or combination square can be used to ensure that the cuts are straight and accurate.

To make curved cuts, a router can be used to create a smooth and consistent shape. Alternatively, a template can be used to guide the saw or jigsaw along the desired curve.

Sanding the Wood

Once the wood is cut to the appropriate size and shape, it is important to sand it to remove any rough edges or splinters. This will also help to create a smooth and even surface for painting or staining.

Start with a coarse sandpaper, such as 80-grit, and gradually work your way up to a finer grit, such as 220-grit. Sand in the direction of the grain to avoid damaging the wood.

After sanding, wipe the wood down with a damp cloth to remove any dust or debris. This will ensure that the surface is clean and ready for finishing.

By properly preparing the wood through cutting and sanding, you can ensure that your wooden arch will be strong, durable, and visually appealing.

Assembling the Arch

After cutting the arch pieces, it’s time to assemble them. This section will guide you through the process of joining and securing the arch structure.

Joining the Arch Pieces

To join the arch pieces, you will need wood glue and clamps. Here are the steps to follow:

  1. Apply wood glue on the mating surfaces of the arch pieces.
  2. Join the arch pieces together to form the arch shape.
  3. Use clamps to hold the arch pieces together while the glue dries.
  4. Wipe off any excess glue with a damp cloth.

Securing the Arch Structure

Once the glue has dried, it’s time to secure the arch structure. You will need screws and a drill. Here are the steps to follow:

  1. Drill pilot holes through the arch pieces where you want to place the screws.
  2. Insert screws through the pilot holes and into the mating arch piece.
  3. Tighten the screws until the arch pieces are securely fastened together.

It’s important to note that you should not over-tighten the screws as it can cause the wood to split. Also, make sure the screws are evenly spaced and aligned to ensure a strong and stable arch structure.

Congratulations! You have successfully assembled your wooden arch. In the next section, we will cover how to finish and decorate your arch.

Finishing Touches

Now that you have built your wooden arch, it’s time to add the finishing touches to make it truly stand out. Here are a few suggestions on how to add some personality and style to your arch.

Applying Wood Stain

One way to enhance the natural beauty of your wooden arch is by applying wood stain. Not only does it add color, but it also helps protect the wood from weather damage. Before applying the stain, make sure the wood is clean and dry. You can use a brush, roller, or spray gun to apply the stain. Follow the manufacturer’s instructions for the best results. Once the stain is dry, you can add a clear coat of polyurethane to protect the wood further.

Adding Decorative Elements

Another way to make your wooden arch unique is by adding decorative elements. Here are a few ideas:

  • Hang string lights or lanterns from the arch for a romantic ambiance.
  • Add floral arrangements or garlands to the arch for a natural and whimsical look.
  • Attach a sign or banner to the arch for a personalized touch.

Remember to choose elements that complement the overall style and purpose of your arch. With a little creativity, you can turn your wooden arch into a stunning focal point in your garden or outdoor space.

That’s it! Your wooden arch is now complete, and it’s ready to be enjoyed for years to come.

Maintenance Tips for Wooden Arch

Maintaining your wooden arch is essential to ensure it lasts for years to come. Here are some tips to help you keep your wooden arch in top condition:

1. Regular Cleaning

Regular cleaning is important to prevent dirt and debris from accumulating on the arch. Use a soft-bristled brush or a cloth to wipe away any dirt or dust. If there are any stubborn stains, use a mild soap solution and a soft brush to clean the arch. Rinse the arch with water and let it dry completely before applying any finish.

2. Apply a Protective Finish

Applying a protective finish to your wooden arch can help prevent moisture damage and protect it from the elements. You can use a clear coat or a stain that matches the color of your arch. Apply the finish according to the manufacturer’s instructions and allow it to dry completely before using the arch.

3. Inspect for Damage

Inspect your wooden arch regularly for any signs of damage such as cracks, splits, or warping. If you notice any damage, address it immediately to prevent further damage. Replace any damaged parts or contact a professional for repairs.

4. Store Properly

If you need to store your wooden arch for an extended period, make sure to store it in a dry and cool place. Cover the arch with a tarp or a sheet to protect it from dust and debris. Avoid storing the arch in direct sunlight or near sources of heat.

Taking care of your wooden arch can help prolong its life and keep it looking beautiful for years to come. By following these maintenance tips, you can ensure that your wooden arch remains a stunning addition to your garden or yard.

wooden-deck

How Long Does a Wooden Deck Last: A Comprehensive Guide

If you’re a homeowner with a wooden deck, you may be wondering how long it will last before needing to be replaced. The answer to this question can vary depending on a number of factors, including the type of wood used, how well the deck is maintained, and the climate in which you live.

According to industry experts, a traditional wooden deck can last anywhere from 10 to 15 years with proper care and maintenance. However, if you opt for a composite deck made from materials like plastic and wood fibers, you can expect it to last up to 30 years or more. Capped polymer decks, which are made from a superior material composition, can potentially last for 50 years or more.

It’s important to note that the lifespan of your wooden deck will also depend on how well you take care of it. Regular cleaning, staining, and sealing can help to extend the life of your deck and prevent damage from moisture, insects, and UV rays. With proper maintenance, your wooden deck can provide years of enjoyment and add value to your home.

Life Span of a Wooden Deck

wooden-deck

When it comes to building a deck in your backyard, you want to make sure it lasts as long as possible. The life span of a wooden deck will depend on several factors, including the type of wood, the quality of the installation, and how well you maintain it over time.

According to The International Association of Certified Home Inspectors, a traditional wood deck can last for 10-15 years, while a composite deck can last around 15 to 30 years. However, with proper maintenance, a wood deck can last anywhere from 10 to 30 years.

One of the biggest factors that can affect the life span of your wooden deck is the type of wood you choose. Different woods have different levels of durability and resistance to weather and insects. For example, cedar and redwood are known for their natural resistance to decay and insects, making them a popular choice for decks. Pressure-treated lumber is also a popular choice, as it is treated with chemicals to resist decay and insects.

Another factor to consider is the quality of the installation. A well-built deck that is properly supported and secured will last longer than a poorly built deck. It’s important to hire a professional contractor who has experience building decks and will use quality materials and construction techniques.

Finally, proper maintenance is crucial to extending the life span of your wooden deck. This includes regular cleaning, staining, and sealing to protect the wood from moisture, UV rays, and other environmental factors. You should also inspect your deck regularly for any signs of damage, such as rotting or splitting boards, and make repairs as needed.

Overall, the life span of a wooden deck will depend on several factors, but with proper care and maintenance, you can enjoy your deck for many years to come.

Factors Influencing Deck Durability

When it comes to the lifespan of your wooden deck, several factors come into play. Here are some of the most important factors that can influence the durability of your deck:

Quality of Wood

The quality of the wood used to build your deck is one of the most critical factors that can affect its lifespan. Some wood species are naturally more resistant to rot and decay than others. For instance, cedar and redwood are known for their natural resistance to rot and insects, while pine and spruce are less durable and require more maintenance.

Another crucial factor that can influence the quality of your deck is the grade of the wood used. Higher-grade wood has fewer knots and defects, making it more durable and long-lasting than lower-grade wood.

Climate and Weather Conditions

The climate and weather conditions in your area can also have a significant impact on the lifespan of your deck. If you live in an area with high humidity or frequent rainfall, your deck is more likely to experience moisture damage, which can lead to rot, decay, and warping.

Similarly, if you live in an area with extreme temperatures, such as hot summers and cold winters, your deck may be more prone to cracking, splitting, and fading.

Maintenance and Care

Proper maintenance and care are crucial for extending the lifespan of your deck. Regular cleaning, sealing, and staining can help protect your deck from weathering and moisture damage. It’s also essential to inspect your deck regularly for signs of wear and tear, such as splintering, cracking, or loose boards.

In addition to regular maintenance, you should also take steps to prevent damage to your deck. For instance, avoid placing heavy objects on your deck, such as grills or furniture, as this can cause dents and scratches. You should also avoid using harsh chemicals or pressure washers to clean your deck, as this can damage the wood.

Overall, the lifespan of your wooden deck depends on several factors, including the quality of wood, climate and weather conditions, and maintenance and care. By choosing high-quality wood, maintaining your deck regularly, and taking steps to prevent damage, you can extend the lifespan of your deck and enjoy it for years to come.

Types of Wood and Their Longevity

types-of-wood-and-their-longevity

When it comes to building a wooden deck, the type of wood you choose can have a big impact on its longevity. Here are some of the most common types of wood used for decks and how long you can expect them to last with proper maintenance:

Pressure-Treated Wood

Pressure-treated wood is a popular choice for deck building because it is affordable and resistant to rot and insects. However, it does require regular maintenance to prevent warping and cracking. With proper care, a pressure-treated wood deck can last up to 20 years.

Cedar Wood

Cedar wood is a beautiful and durable option for deck building. It is naturally resistant to rot and insects, and it has a warm, reddish-brown color that many people find appealing. With regular maintenance, a cedar wood deck can last up to 25 years.

Redwood

Redwood is another popular option for deck building because it is naturally resistant to rot and insects. It has a rich, reddish color that can add warmth and character to any outdoor space. With proper care, a redwood deck can last up to 30 years.

It’s important to note that these are just general guidelines, and the lifespan of your deck will depend on many factors, including the quality of the wood, the climate in your area, and how well you maintain it. Regular cleaning, sealing, and staining can help extend the life of your deck and keep it looking beautiful for years to come.

Warning Signs of Deck Aging

If you have a wooden deck, it’s essential to keep an eye on its condition. Even with proper maintenance, decks will show signs of aging over time. Here are some warning signs to look out for:

Wood Rot

One of the most common problems with wooden decks is wood rot. This occurs when moisture gets trapped in the wood, causing it to decay. Signs of wood rot include soft and spongy areas, discoloration, and a musty odor. If you notice any of these signs, it’s crucial to address the issue as soon as possible. Rot can spread quickly and compromise the structural integrity of your deck.

Loose Boards

Another warning sign of an aging deck is loose boards. Over time, the fasteners that hold the boards in place can become loose, causing the boards to shift and move. If left unchecked, this can lead to tripping hazards and even collapse. Check your deck regularly for loose boards and tighten any loose fasteners.

Fading and Discoloration

Wooden decks are exposed to the elements year-round, which can cause fading and discoloration. UV rays from the sun can cause the wood to fade, while moisture can cause it to turn gray or black. While this is a cosmetic issue, it can also be a sign of deeper problems. Fading and discoloration can be an indication that your deck is not properly sealed, which can lead to rot and decay.

In conclusion, keeping an eye on your wooden deck’s condition is crucial to ensure its longevity and safety. If you notice any of these warning signs, it’s essential to address them promptly to prevent further damage.

How to Extend the Life of Your Deck

If you want to get the most out of your wooden deck, it’s important to take care of it properly. With proper maintenance, your deck can last for many years. Here are some tips to help you extend the life of your deck.

Regular Cleaning

Regular cleaning is essential for keeping your deck in good condition. Dirt, leaves, and other debris can accumulate on your deck over time, which can lead to mold and mildew growth. To prevent this, you should sweep your deck regularly and remove any debris that you find.

In addition to sweeping, you should also give your deck a thorough cleaning at least once a year. You can use a pressure washer or a deck cleaner to remove dirt and stains. Be sure to follow the manufacturer’s instructions when using a deck cleaner, and rinse your deck thoroughly after cleaning.

Sealing and Staining

Sealing and staining your deck can help to protect it from the elements. Sealing your deck will help to prevent moisture from penetrating the wood, which can lead to rot and decay. Staining your deck will help to protect it from UV rays and other environmental factors.

You should plan to seal or stain your deck every two to three years. Before you do this, you should clean your deck thoroughly and allow it to dry completely. Then, you can apply the sealer or stain according to the manufacturer’s instructions.

Annual Inspections

It’s important to inspect your deck regularly to make sure that it’s in good condition. You should inspect your deck at least once a year, and look for signs of damage such as loose boards, cracks, and rot.

If you find any damage, you should repair it as soon as possible. This will help to prevent the damage from getting worse and potentially compromising the structural integrity of your deck.

By following these tips, you can extend the life of your wooden deck and keep it looking great for many years to come.

fix-scratches-on-wooden-door

How to Fix Scratches on Wooden Door: Easy DIY Solutions

If you have a wooden door, chances are you’ve had to deal with scratches at some point. Whether it’s from your pet’s claws or just general wear and tear, scratches can be unsightly and make your door look old and worn out. Fortunately, fixing scratches on a wooden door is a relatively easy DIY project that you can do yourself with a few simple tools and materials.

One of the easiest ways to fix scratches on a wooden door is to use a wood filler. Wood fillers come in various colors to match the shade of your door, and they can be used to fill in deep scratches and gouges. Once the filler is dry, you can sand it down and paint or stain it to match the rest of your door. Another quick fix for light scratches is to rub a walnut over the scratch, which can help fill in the scratch and mask its appearance.

Before you start fixing scratches on your wooden door, it’s important to clean the area thoroughly. Use a damp cloth to wipe away any dirt or debris, and let the area dry completely before you start working on it. Additionally, make sure you have all the necessary tools and materials on hand, including sandpaper, wood filler, and paint or stain. With a little bit of time and effort, you can restore your wooden door to its former glory and make it look as good as new.

Identifying the Type of Scratch

fix-scratches-on-wooden-door

Before you start fixing scratches on your wooden door, you need to identify the type of scratch you are dealing with. This is important because different types of scratches require different methods of repair.

Minor Scratches

Minor scratches are superficial and only affect the surface of the wood. They are usually caused by light abrasions or contact with sharp objects. You can identify minor scratches by their shallow depth and light color. They are often barely visible, but can still be felt when you run your finger over them.

To fix minor scratches, you can use a wood touch-up marker or crayon that matches the color of your door. Simply apply the marker or crayon to the scratch and wipe away any excess with a clean cloth. If the scratch is still visible, you can lightly sand it down with fine-grit sandpaper and then apply the touch-up marker or crayon again.

Deep Scratches

Deep scratches are more serious and penetrate deeper into the wood. They are often caused by heavy impacts or contact with sharp objects. You can identify deep scratches by their dark color and visible depth. They are often rough to the touch and can even expose the raw wood underneath.

To fix deep scratches, you will need to use a wood filler. First, clean the scratch with a damp cloth and let it dry completely. Then, apply the wood filler to the scratch, making sure to fill it completely. Smooth out the surface of the filler with a putty knife and let it dry according to the manufacturer’s instructions. Once the filler is dry, sand it down with fine-grit sandpaper until it is smooth and level with the surface of the door. Finally, apply a matching stain or paint to the area to blend it in with the rest of the door.

By identifying the type of scratch on your wooden door, you can choose the appropriate method of repair and achieve the best possible results.

Gathering Necessary Materials

Before you start fixing scratches on your wooden door, you need to gather some necessary materials. Here are the materials that you will need:

For Minor Scratches

For minor scratches, you will need:

Materials Description
Soft cloth To clean the surface of the door
Walnut To rub on the scratch
Wood filler To fill in the scratch
Sandpaper To sand down the filled area
Paint or stain To match the color of the door

For Deep Scratches

For deep scratches, you will need:

Materials Description
Soft cloth To clean the surface of the door
Wax wood filler stick To fill in the scratch
Sandpaper To sand down the filled area
Paint or stain To match the color of the door

It is important to note that the color of the paint or stain should match the color of the door. If you are unsure about the color, you can take a small piece of the door to a hardware store to match the color.

Make sure to wear gloves and eye protection when using wood filler and sandpaper. Also, work in a well-ventilated area to avoid inhaling any harmful fumes.

Now that you have gathered all the necessary materials, you are ready to start fixing the scratches on your wooden door.

Fixing Minor Scratches

If your wooden door has minor scratches, you can easily fix them yourself with a few simple steps. Here’s what you need to do:

Cleaning the Area

First, clean the scratched area with a soft cloth and a mild cleaner. This will remove any dirt or debris from the surface and ensure that the filler adheres properly.

Applying the Filler

Next, apply a wood filler to the scratched area. You can use a wax wood filler stick or a putty-like wood filler. Choose a color that matches the color of your wooden door. Apply the filler using a putty knife or your finger, making sure to fill the scratch completely.

Sanding and Finishing

After the filler has dried, sand the area with fine-grain sandpaper in the direction of the wood grain. This will smooth out the surface and blend the filler with the surrounding wood. Finish by applying a clear coat of polyurethane or wood finish to protect the repaired area and give it a uniform appearance.

With these simple steps, you can fix minor scratches on your wooden door and restore its beauty.

Fixing Deep Scratches

fixing-deep-scratches

If your wooden door has deep scratches, don’t worry. You can fix them with a few simple steps. Here’s how:

Preparing the Area

Before you start fixing the scratches, you need to prepare the area. Start by cleaning the door with a damp cloth to remove any dirt or debris. Then, use a sandpaper to sand down the area around the scratches. This will create a smooth surface for the wood filler to adhere to.

Applying Wood Filler

Next, apply wood filler to the scratches. You can use a wax wood filler stick or a wood filler paste. If you’re using a wax wood filler stick, rub it over the scratches until they are completely filled in. If you’re using a wood filler paste, apply it to the scratches with a putty knife and smooth it out. Make sure to choose a wood filler that matches the color of your door.

Sanding and Repainting

Once the wood filler has dried, sand it down with a sandpaper until it’s flush with the surface of the door. Then, repaint the area with a matching paint or stain. If you’re painting the door, use a brush or roller to apply the paint in thin, even coats. Let each coat dry completely before applying the next one.

By following these simple steps, you can fix deep scratches on your wooden door and make it look as good as new.

Maintaining Your Wooden Door

Wooden doors are a beautiful addition to any home, but they require proper maintenance to keep them looking their best. Here are some tips on how to maintain your wooden door to prevent scratches and other damage.

Regular Cleaning

Regular cleaning is essential to keep your wooden door looking its best. Dust and dirt can accumulate on the surface of the door, which can scratch the wood over time. To clean your wooden door, simply use a soft cloth or a feather duster to remove any dirt or dust. If the door is particularly dirty, you can use a mild soap and water solution to clean it. Be sure to dry the door thoroughly after cleaning to prevent water damage.

Using Protective Coatings

Using protective coatings is another way to maintain your wooden door and prevent scratches. Applying a clear coat of varnish or polyurethane can protect the wood from scratches and other damage. These coatings also help to seal the wood, preventing moisture from penetrating the surface and causing damage. Be sure to follow the manufacturer’s instructions when applying these coatings, and allow them to dry completely before using the door.

Avoiding Damage

Preventing scratches and other damage is the best way to maintain your wooden door. Avoid slamming the door, as this can cause dents and scratches. Also, be careful when moving furniture or other objects near the door, as these can also cause damage. If you have pets, be sure to keep their nails trimmed to prevent scratches on the door. Finally, avoid exposing your wooden door to direct sunlight, as this can cause the wood to fade and dry out over time.

By following these simple tips, you can maintain your wooden door and prevent scratches and other damage. Regular cleaning, using protective coatings, and avoiding damage are all essential to keep your wooden door looking its best for years to come.
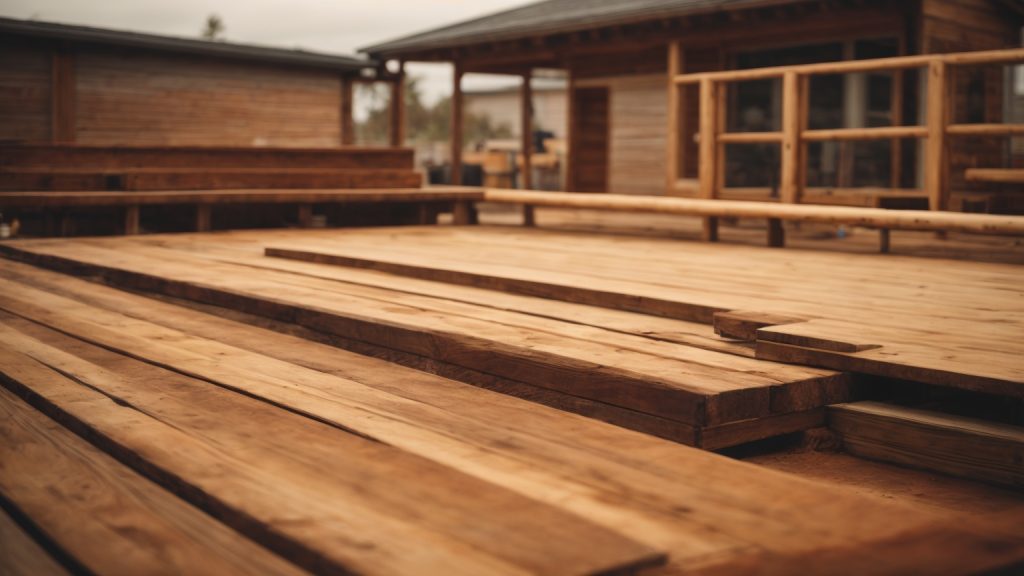
How to Paint a Wooden Garage Door: A Beginner's Guide

Are you looking to spruce up the curb appeal of your home? Painting your wooden garage door can be a simple and cost-effective way to achieve this. Not only will a fresh coat of paint enhance the appearance of your home, but it can also protect your garage door from the elements and extend its lifespan.

Before you get started, it’s important to properly prepare your garage door for painting. This includes cleaning the surface thoroughly and sanding any rough spots. You’ll also need to choose the right type of paint and tools for the job. With the right preparation and technique, you can achieve a professional-looking finish that will make your garage door the envy of the neighborhood.

Understanding the Basics of Painting

Before you start painting your wooden garage door, it’s important to understand the basics of painting. This will ensure that your project goes smoothly and that you end up with a beautiful and long-lasting finish.

Choosing the Right Paint

The first step in painting your garage door is choosing the right paint. You’ll want to choose a high-quality exterior paint that is specifically designed for use on wood. Look for a paint that is water-resistant and has UV protection to prevent fading and peeling.

When choosing a color, keep in mind that darker colors will absorb more heat from the sun, which can cause the paint to crack and peel over time. Lighter colors are a better choice if you live in a hot and sunny climate.

Identifying the Wood Type

Before you start painting, it’s important to identify the type of wood your garage door is made of. Different types of wood require different types of preparation and paint.

If your garage door is made of cedar or redwood, it’s important to use an oil-based primer before painting. This will help to seal the wood and prevent tannin stains from bleeding through the paint.

If your garage door is made of pine or another softwood, it’s important to use a wood conditioner before painting. This will help to even out the wood’s porosity and prevent the paint from soaking in too deeply.

By choosing the right paint and identifying the wood type, you’ll be well on your way to a successful garage door painting project.

Preparing the Garage Door

Before painting your wooden garage door, you need to prepare it properly to ensure that the paint will adhere well and last longer. This section will guide you on how to prepare your garage door for painting.

Cleaning the Door

The first step in preparing your garage door is to clean it thoroughly. Dirt, grime, and other substances can prevent the paint from sticking to the surface, causing it to peel off easily. Here’s how to clean your garage door:

  1. Remove any loose dirt and debris using a broom or a dry brush.
  2. Mix a solution of warm water and mild detergent in a bucket.
  3. Dip a sponge or a soft-bristled brush into the solution and scrub the garage door thoroughly.
  4. Rinse the door with a hose or a bucket of clean water to remove any soap residue.
  5. Let the door dry completely before moving on to the next step.

If your garage door has mold or mildew, you can use a solution of bleach and water to remove it. However, be careful when using bleach as it can damage some surfaces and cause discoloration.

Sanding the Surface

After cleaning the garage door, the next step is to sand the surface. Sanding helps to smooth out any rough spots and create a better surface for the paint to adhere to. Here’s how to sand your garage door:

  1. Use a fine-grit sandpaper (120-150 grit) to sand the entire surface of the door, including the edges and corners.
  2. Sand in the direction of the wood grain to avoid creating scratches or marks on the surface.
  3. Wipe the door with a clean, damp cloth to remove any dust or debris.
  4. Let the door dry completely before moving on to the next step.

If your garage door has any cracks or holes, you can use wood filler to fill them in before sanding. Wood filler is a putty-like substance that hardens when it dries, creating a smooth surface for painting.

By following these steps, you can ensure that your wooden garage door is properly prepared for painting. Taking the time to prepare the surface will help the paint to adhere well and last longer, saving you time and money in the long run.

Painting Techniques

When it comes to painting your wooden garage door, there are three main techniques you can use: using a brush, using a roller, and using a spray. Each technique has its own advantages and disadvantages, so it’s important to choose the one that works best for you.

Using a Brush

Using a brush is the most traditional way to paint a wooden garage door. It allows for precise control and is great for getting into tight corners and edges. However, it can be time-consuming and may leave brush marks if not done correctly.

To use a brush, start by dipping the brush into the paint and tapping off any excess. Then, apply the paint in long, even strokes, working from top to bottom. Be sure to overlap each stroke slightly to avoid leaving any gaps.

Using a Roller

Using a roller is a faster way to paint your garage door, and it’s great for larger, flat surfaces. It can also create a smoother finish than a brush. However, it can be difficult to get into tight corners and edges with a roller.

To use a roller, start by pouring the paint into a roller tray. Then, dip the roller into the paint and roll it back and forth in the tray to evenly distribute the paint. Apply the paint to the garage door in long, even strokes, working from top to bottom. Be sure to overlap each stroke slightly to avoid leaving any gaps.

Using a Spray

Using a spray is the fastest way to paint your garage door, and it can create a very smooth finish. However, it requires more equipment and can be messy if not done correctly. It’s also important to use a respirator mask to protect yourself from inhaling any paint fumes.

To use a spray, start by masking off any areas you don’t want to paint with painter’s tape and plastic sheeting. Then, fill the spray gun with paint and adjust the nozzle to the desired spray pattern. Apply the paint to the garage door in long, even strokes, working from top to bottom. Be sure to overlap each stroke slightly to avoid leaving any gaps.

No matter which technique you choose, be sure to follow the manufacturer’s instructions for the paint and equipment you’re using. And always wear gloves and protective clothing to avoid getting paint on your skin.

Caring for Your Painted Door

Once you’ve painted your wooden garage door, you want to make sure it stays looking great for as long as possible. Here are some tips for caring for your painted door.

Regular Cleaning

Regular cleaning is important to keep your painted garage door looking fresh and new. Here are some steps to follow:

  1. Use a soft-bristled brush or a sponge to remove any loose dirt or debris from the surface of the door.
  2. Mix a solution of warm water and mild detergent in a bucket.
  3. Dip a clean sponge or cloth into the solution and use it to gently clean the surface of the door.
  4. Rinse the door with clean water using a garden hose or a bucket of clean water and a clean sponge or cloth.
  5. Allow the door to air dry completely before closing it.

Touching Up Damages

Even with proper care, your painted garage door may still get scratches or chips. Here are some steps to follow to touch up damages:

  1. Clean the damaged area with soap and water to remove any dirt or debris.
  2. Sand the damaged area with fine-grit sandpaper until it is smooth and even with the surrounding area.
  3. Wipe away any dust with a clean, damp cloth and let it dry completely.
  4. Apply a small amount of paint to the damaged area using a small brush or roller.
  5. Allow the paint to dry completely before applying a second coat, if necessary.
  6. Once the paint is dry, inspect the area to ensure it matches the surrounding paint. If it does not, repeat steps 4-5 until it matches.

By following these tips, you can keep your painted garage door looking great for years to come.
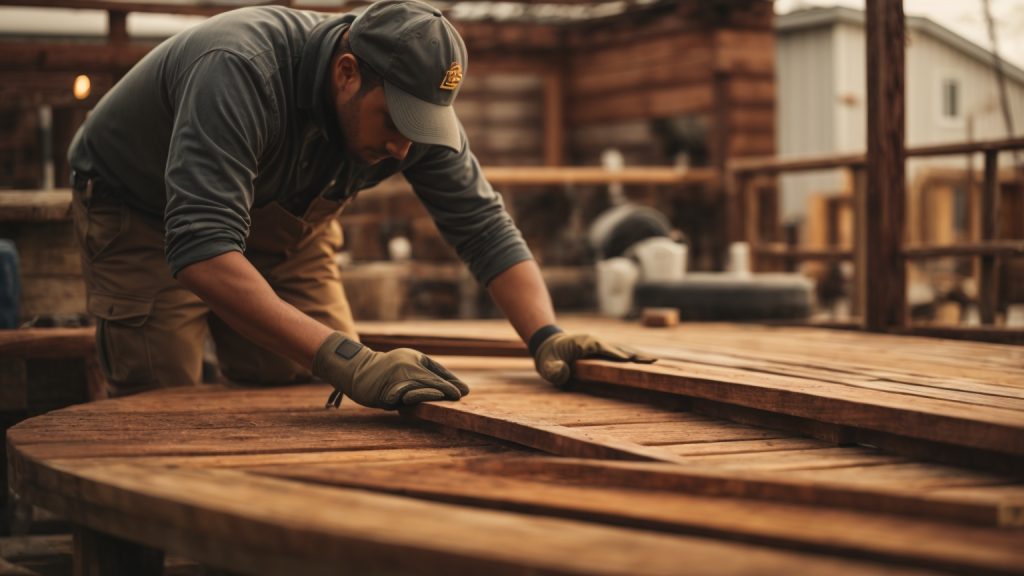
Safety Measures

When painting a wooden garage door, it is important to take safety measures to protect yourself and others around you. Here are some tips to ensure a safe painting process.

Using Protective Gear

Before you start painting, make sure to wear protective gear to avoid any accidents or injuries. Here are some essential items you should have:

  • Safety glasses or goggles to protect your eyes from paint splatters and debris.
  • Gloves to protect your hands from the paint and chemicals in the paint.
  • A respirator or mask to protect your lungs from inhaling paint fumes.

Wearing protective gear will not only keep you safe but also make the painting process more comfortable.

Proper Ventilation

Proper ventilation is crucial when painting a garage door. Paint fumes can be harmful if inhaled in large quantities, so it is important to have good air circulation. Here are some tips to ensure proper ventilation:

  • Open windows and doors to let fresh air in.
  • Use fans to circulate the air and push the fumes out.
  • If possible, paint outside or in a well-ventilated area.

Proper ventilation will help you breathe easier and make the painting process safer for everyone involved.

By following these safety measures, you can ensure a safe and successful painting process for your wooden garage door.