Tag Archives: includes safety glasses

how-to-build-outdoor-wooden-steps-a-beginners-guide-2

How to Build Outdoor Wooden Steps: A Beginner's Guide

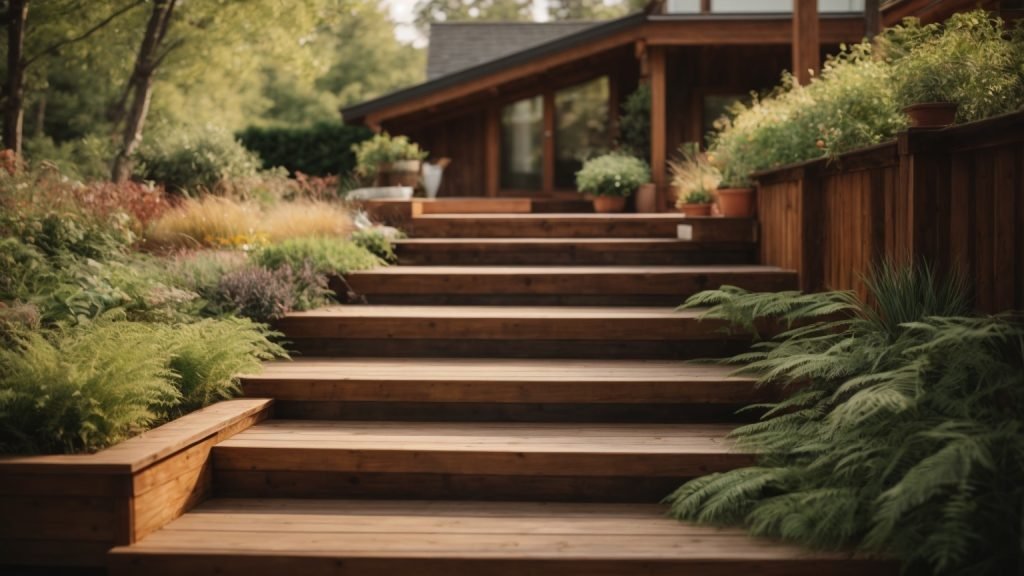
If you’re looking to spruce up your entryway, building outdoor wooden steps is a great way to do it. Not only do they add visual appeal, but they also provide a safe and sturdy way to access your home. However, building outdoor wooden steps can seem like a daunting task, especially if you’re not a seasoned DIYer. But fear not, with the right tools and a little know-how, you can build beautiful and functional outdoor wooden steps in no time.

Before you get started, it’s important to prepare the area where the steps will be located. This involves removing any shrubs or plants from the spot and leveling the ground. You’ll also need to build up low spots with fill dirt so that the area slopes away from the house. Once the area is prepped, it’s time to start building the steps. There are a few different methods you can use, depending on your skill level and the design you’re going for. In this article, we’ll cover the basics of building outdoor wooden steps, so you can tackle this project with confidence.

Understanding the Basics

how-to-build-outdoor-wooden-steps-a-beginners-guide-2

If you’re looking to add some charm to your outdoor space, building wooden steps is a great way to do so. Not only do they provide functionality, but they can also enhance the look of your home. In this section, we’ll cover the basics of building outdoor wooden steps.

Materials Needed

Before you start building, make sure you have all the necessary materials. Here’s a list of what you’ll need:

Materials
Pressure-treated lumber
Gravel
Concrete
Wood screws
Wood glue
Stain or paint

Pressure-treated lumber is the best type of wood to use for outdoor steps because it’s resistant to rot and decay. Gravel and concrete will be used to create a stable foundation for the steps. Wood screws and glue will be used to secure the steps together. Finally, you’ll need stain or paint to protect the wood from the elements.

Tools Required

In addition to the materials, you’ll need a few tools to complete the project. Here’s a list of what you’ll need:

  • Circular saw
  • Jigsaw
  • Hammer
  • Drill
  • Level
  • Tape measure
  • Square
  • Shovel
  • Wheelbarrow
  • Safety glasses
  • Work gloves

The circular saw and jigsaw will be used to cut the lumber to the appropriate size and shape. The hammer and drill will be used to attach the steps together. The level, tape measure, and square will be used to ensure the steps are level and square. The shovel and wheelbarrow will be used to move the gravel and concrete. Finally, safety glasses and work gloves are essential for protecting your eyes and hands during the construction process.

Now that you have an idea of what materials and tools you’ll need, let’s move on to the next section to learn how to prepare the area for building the steps.

Site Preparation

Before starting to build outdoor wooden steps, you need to prepare the site properly. Here are the steps you should follow:

Step 1: Choose the Location

The first thing you need to do is choose the location where you want to build your outdoor wooden steps. It could be alongside the house, a porch, or a deck. Make sure to choose a location that is safe and easy to access.

Step 2: Clear the Area

Once you have chosen the location, you need to clear the area of any shrubs, plants, or debris. This will ensure that you have a clear and level area to work with. Use a shovel or a rake to remove any debris and level the ground.

Step 3: Build up Low Spots

If the area where you want to build your outdoor wooden steps is not level, you need to build up the low spots with fill dirt. This will ensure that the area slopes away from the house and prevent water from accumulating around the steps.

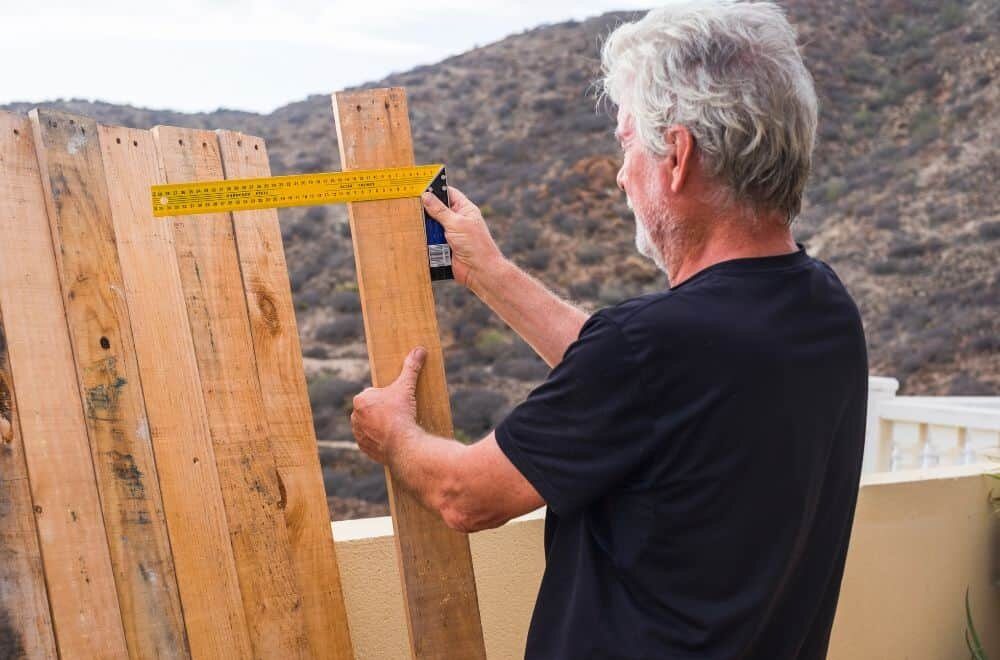
Step 4: Mark the Location

Use a measuring tape and stakes to mark the location where you want to build your outdoor wooden steps. This will help you to ensure that the steps are level and evenly spaced.

Step 5: Check for Utility Lines

Before you start digging, make sure to check for any utility lines such as gas, water, or electricity. You can call your local utility company to request a free utility locate service.

By following these steps, you can prepare the site properly for building your outdoor wooden steps.

Designing Your Steps

designing-your-steps

Before you start building your outdoor wooden steps, it’s important to consider the design of your steps. Here are a few things to keep in mind when designing your steps:

Step Size and Height

The size and height of your steps are essential for both safety and comfort. The general rule of thumb is that each step should be no higher than 7.5 inches and no deeper than 11 inches. If your steps are too steep or too shallow, it can make it difficult to climb up or down the stairs.

Number of Steps

The number of steps you need will depend on the height of your deck or porch. To determine the number of steps you need, divide the height of your deck or porch by the height of each step. For example, if your deck is 30 inches high and each step is 7.5 inches high, you will need four steps.

Materials

When it comes to building your outdoor wooden steps, you have several options for materials. Pressure-treated lumber is a popular choice because it is durable and weather-resistant. Cedar and redwood are also good choices because they are naturally resistant to decay and insects. If you want a more modern look, you can use metal or concrete for your steps.
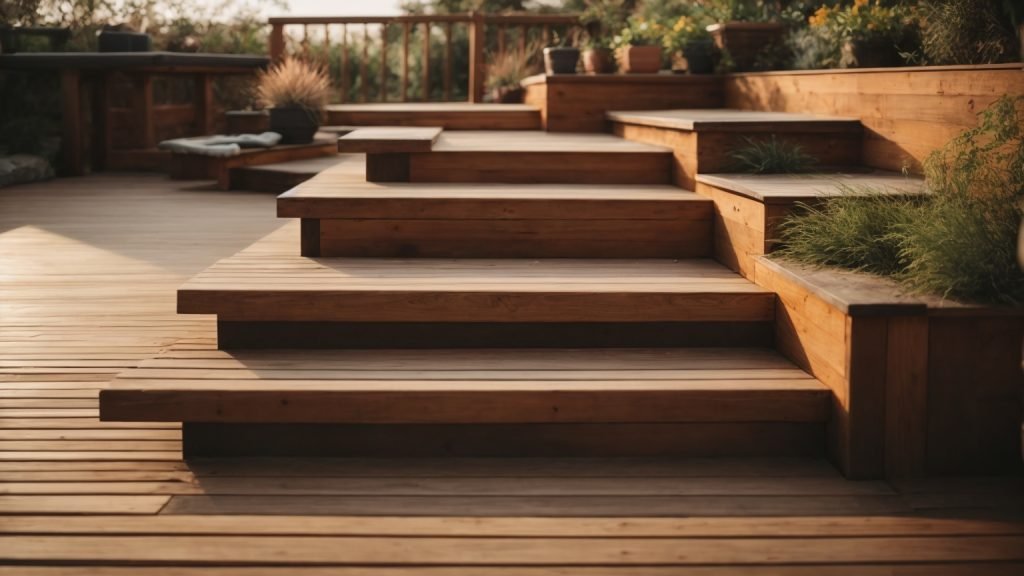
Style

The style of your outdoor wooden steps should match the style of your home and landscape. You can choose from a variety of styles, including straight, curved, or spiral. You can also add decorative elements, such as railings, to enhance the look of your steps.

By considering these factors, you can design outdoor wooden steps that are safe, comfortable, and aesthetically pleasing.

Cutting the Wood

Once you have measured and marked the wooden pieces for your outdoor steps, it’s time to cut them. Here are some tips to make the cutting process easier and more efficient:
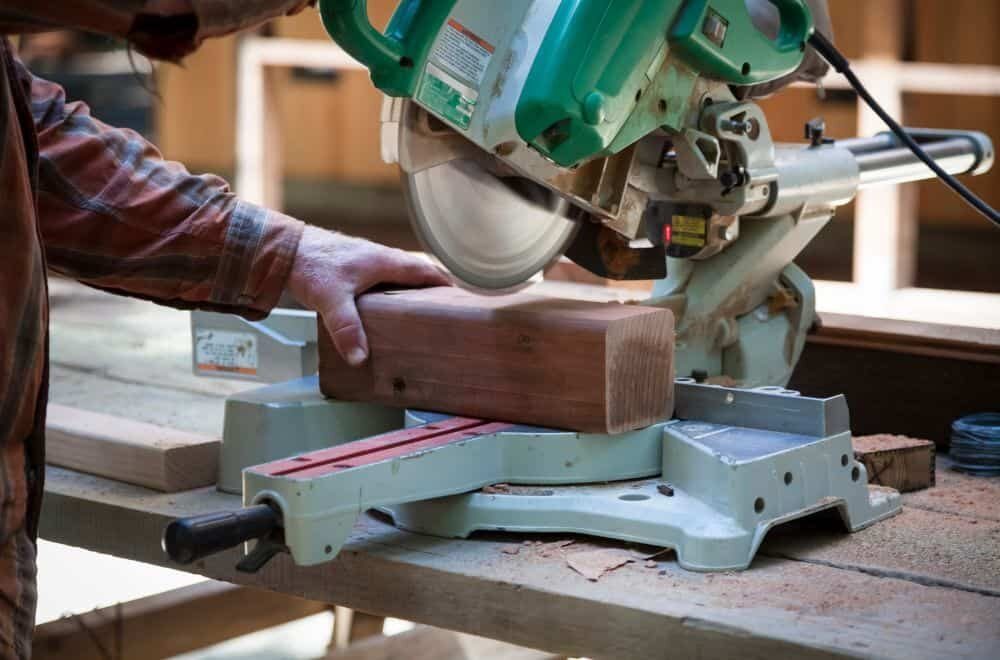
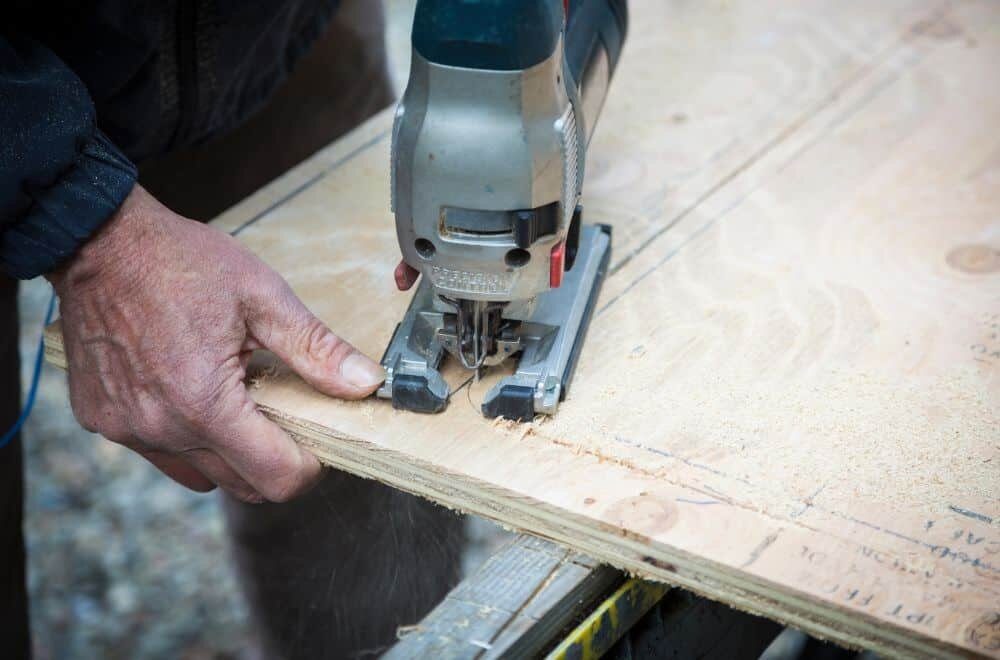
Use the Right Tools

To cut wooden pieces for your steps, you will need a circular saw, a handsaw, or a jigsaw. A circular saw is the most efficient tool for cutting long pieces of wood, while a handsaw or a jigsaw is better for cutting shorter pieces or making angled cuts.

Make sure the saw blade is sharp and in good condition before you start cutting. A dull blade can cause the wood to splinter or burn, which will ruin the cut and may damage the saw.

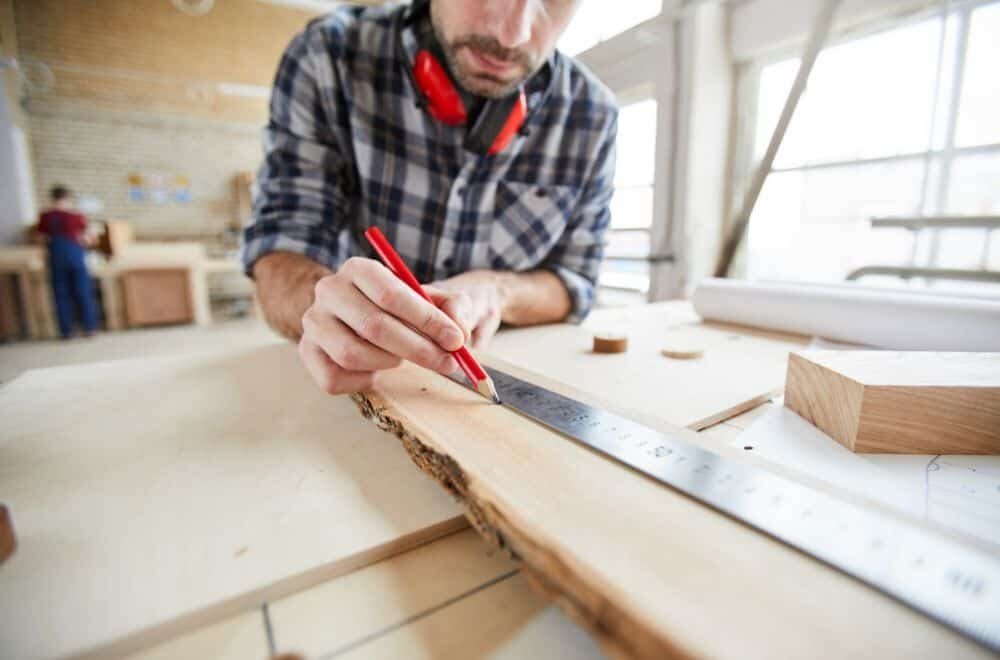
Measure Twice, Cut Once

Before you start cutting, double-check your measurements to make sure they are accurate. Measure twice, cut once is a good rule of thumb to follow to avoid wasting wood and time.
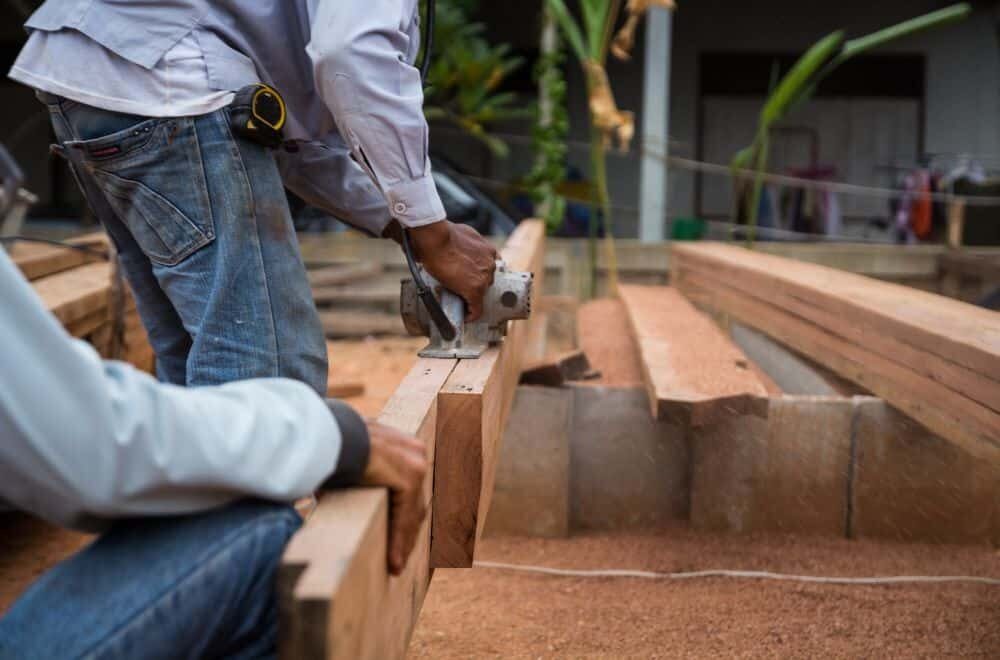
Cut Straight

To make straight cuts, use a straightedge or a guide to keep the saw blade on track. You can use a piece of scrap wood as a guide or purchase a commercial saw guide.

Cut at the Right Angle

If your steps require angled cuts, use a protractor or a bevel gauge to measure the angle accurately. Set the saw blade to the correct angle and make a test cut on a scrap piece of wood before cutting the actual piece.

Sand the Cut Edges

After you have cut the wooden pieces, sand the cut edges to remove any rough spots or splinters. This will make the steps safer to use and give them a more finished look.

By following these tips, you can cut the wooden pieces for your outdoor steps accurately and efficiently.

Assembling the Steps

Once you have completed the previous steps of preparing the area and cutting the stringers and treads, it’s time to assemble the steps. This is where you will put all the pieces together to create a sturdy and safe set of outdoor wooden steps. Here’s how to do it:

Joining the Stringers

The first step in assembling your wooden steps is to join the stringers. Stringers are the diagonal pieces that support the treads and risers. To join the stringers, you will need to use a metal angle bracket. Here’s how to do it:

  1. Position the stringers so that they are parallel and even with each other.
  2. Place the metal angle bracket over the stringers where they meet at the bottom.
  3. Use a drill to screw the bracket into place, using wood screws that are at least 2 inches long.
  4. Repeat this process for each step.

Attaching the Treads

Once the stringers are joined, it’s time to attach the treads. Treads are the horizontal pieces that you step on when walking up or down the stairs. Here’s how to attach them:

  1. Place a tread on top of the stringers, making sure that it is even and centered.
  2. Use a drill to screw the tread into place, using wood screws that are at least 2 inches long.
  3. Repeat this process for each step.

It’s important to note that you should leave a gap of about 1/4 inch between each tread to allow for water drainage. You can use a piece of scrap wood as a spacer to ensure that the gap is consistent.

Once you have attached all of the treads, your outdoor wooden steps are complete! You can add a coat of sealant or paint to protect the wood and enhance its appearance. With proper maintenance, your wooden steps will provide safe and reliable access to your home for years to come.

Installing the Steps

Now that you have built your outdoor wooden steps, it is time to install them. Here are the steps to follow:

  1. Start by measuring the distance between the top of the stairs and the bottom of the landing. This will give you the length of the stringers needed to support the steps.
  2. Cut the stringers to the appropriate length and attach them to the landing using metal brackets. Make sure the stringers are level and secure.
  3. Next, attach the treads to the stringers using screws or nails. Be sure to space them evenly and make sure they are level.
  4. Finally, attach the risers to the back of each tread using screws or nails. This will give your steps a finished look and prevent debris from getting trapped between the treads.
  5. If desired, you can add a railing to your steps for safety. This can be done using metal brackets or by attaching the railing directly to the stringers.

Congratulations! You have successfully built and installed your outdoor wooden steps. Enjoy your new entryway and the added curb appeal it brings to your home.

Safety Measures

When building outdoor wooden steps, it’s important to prioritize safety to avoid accidents and injuries. Here are some safety measures you should keep in mind:

Use Protective Gear

Before you start building, it’s important to wear the right protective gear. This includes safety glasses, gloves, and a dust mask. Safety glasses will protect your eyes from flying debris, while gloves will protect your hands from splinters and cuts. A dust mask will prevent you from inhaling sawdust and other particles that can cause respiratory problems.

Check the Weather

Make sure to check the weather forecast before you start building. Avoid working on rainy or windy days, as this can make it difficult to handle tools and materials. Wet surfaces can also be slippery and hazardous, so make sure the ground is dry and stable before you start building.

Use the Right Tools

Using the right tools is essential for safety and efficiency. Make sure to use sharp blades and bits, and keep your tools in good condition. Dull or damaged tools can cause accidents and injuries. Also, make sure to use the right tool for the job. Using the wrong tool can cause damage to your materials and increase the risk of accidents.

Follow Building Codes

Make sure to follow building codes and regulations in your area. This will ensure that your steps are safe and up to code. Building codes may vary depending on your location, so make sure to check with your local authorities before you start building.

Take Breaks

Building outdoor wooden steps can be a physically demanding task. Make sure to take breaks and stay hydrated to avoid exhaustion and fatigue. Stretching before and after working can also help prevent muscle strains and injuries.

By following these safety measures, you can ensure that your outdoor wooden steps are built safely and efficiently.

Maintaining Your Wooden Steps

Once you’ve built your outdoor wooden steps, it’s important to maintain them to ensure they last as long as possible. Here are some tips for maintaining your wooden steps:

Regular Cleaning

Regular cleaning is essential to keep your wooden steps looking good and to prevent the buildup of dirt and debris. You can use a broom to sweep away loose dirt and debris, and a stiff-bristled brush to scrub away any stubborn dirt or stains. You can also use a pressure washer on a low setting to clean your steps, but be careful not to use too much pressure as this can damage the wood.

Staining and Sealing

Staining and sealing your wooden steps can help to protect them from the elements and prevent them from rotting. You should stain and seal your steps every 2-3 years, or as needed. Before applying stain or sealer, make sure your steps are clean and dry. You can use a brush or sprayer to apply the stain or sealer, and make sure to follow the manufacturer’s instructions.

Repairing Damage

If your wooden steps become damaged, it’s important to repair them as soon as possible. Small cracks or splits can be filled with wood filler, while larger damage may require replacing the affected boards. You should also check your steps regularly for signs of rot, and replace any rotting boards as needed.

Preventative Measures

There are also some preventative measures you can take to help maintain your wooden steps. For example, you can place mats or rugs on your steps to prevent dirt and debris from accumulating. You can also install a roof or awning over your steps to protect them from the elements.

By following these tips, you can help to ensure that your outdoor wooden steps remain safe, sturdy, and attractive for years to come.

How to Make a Wooden Ashtray: A Step-by-Step Guide

Making a wooden ashtray is a fun and easy woodworking project that you can complete in just a few hours. Whether you’re a smoker yourself or you’re looking for a unique gift for a smoker in your life, a handmade wooden ashtray is a great choice. In this article, we’ll show you step-by-step how to make a wooden ashtray using simple tools and materials.

To get started, you’ll need some basic woodworking tools, including a saw, a drill, and sandpaper. You’ll also need a piece of wood that’s large enough to cut into the shape of an ashtray. You can use any type of wood you like, but hardwoods like oak, cherry, and walnut are good choices because they’re durable and look great when finished. If you’re new to woodworking, don’t worry – this project is suitable for beginners and doesn’t require any advanced skills or techniques.

Understanding Wood Types

When it comes to making a wooden ashtray, choosing the right type of wood is crucial. Not all woods are created equal, and each has its own unique characteristics that can affect the final product. Here are the two main types of wood to consider:

Hardwood

Hardwood comes from deciduous trees, which are trees that lose their leaves in the fall. They are generally denser and more durable than softwoods, making them a popular choice for furniture and other woodworking projects. Some common hardwoods used for ashtrays include:

  • Oak: A strong and durable wood with a prominent grain pattern.
  • Walnut: A rich, dark wood with a smooth finish.
  • Maple: A light-colored wood with a subtle grain pattern.

When choosing a hardwood for your ashtray, consider the color, grain pattern, and density of the wood. Hardwoods can be more expensive than softwoods, so keep that in mind when making your selection.

Softwood

Softwood comes from evergreen trees, which are trees that keep their leaves year-round. They are generally lighter and less dense than hardwoods, making them easier to work with. Some common softwoods used for ashtrays include:

  • Pine: A light-colored wood with a straight grain pattern.
  • Cedar: A reddish-brown wood with a distinctive aroma.
  • Spruce: A light-colored wood with a fine grain pattern.

When choosing a softwood for your ashtray, consider the ease of working with the wood, as well as its color and grain pattern. Softwoods are generally less expensive than hardwoods, but may not be as durable.

In conclusion, choosing the right type of wood for your ashtray is an important decision that can affect the final product. Consider the characteristics of both hardwoods and softwoods before making your selection, and choose a wood that fits your needs and budget.

Gathering Materials

Before you start making a wooden ashtray, you need to gather all the materials required. In this section, we will discuss the two main sub-sections of gathering materials: Wood Selection and Tools Needed.

Wood Selection

Choosing the right type of wood is crucial for making a wooden ashtray. You want a wood that is dense and hard enough to withstand the heat of a cigarette or cigar. Here are some of the best wood types for making an ashtray:

Wood Type Description
Oak Durable and strong, with a beautiful grain pattern.
Maple Hard and dense, with a light color that looks great when finished.
Walnut A dark wood with a rich, warm color. Durable and resistant to scratches.
Cherry A beautiful wood with a reddish-brown color that darkens over time.

When selecting wood, make sure it is free of knots, cracks, or other defects that could weaken the structure of the ashtray. You can also choose to use reclaimed wood or scraps from previous projects, as long as they are in good condition.

Tools Needed

To make a wooden ashtray, you will need a few basic tools. Here is a list of the most essential tools you will need:

  • Saw: A saw is necessary for cutting the wood to the desired size and shape.
  • Drill: You will need a drill to make the holes for the cigarettes or cigars.
  • Sandpaper: Sandpaper is used to smooth out the rough edges and surfaces of the wood.
  • Clamps: Clamps are used to hold the pieces of wood together while the glue dries.
  • Wood Glue: You will need wood glue to attach the pieces of wood together.

Other tools that can be useful but are not necessary include a wood lathe, a chisel, and a router. These tools can help you create more intricate designs and shapes for your ashtray.

By selecting the right type of wood and having the necessary tools, you are now ready to start making your wooden ashtray.

Safety Precautions

When working with wood, it’s important to take the necessary safety precautions to avoid any accidents or injuries. Here are a few things to keep in mind when making a wooden ashtray:

Wear Protective Gear

Before you start working with wood, make sure to wear appropriate protective gear. This includes safety glasses, a dust mask, and gloves. Safety glasses will protect your eyes from flying wood chips, while a dust mask will prevent you from inhaling sawdust. Gloves will protect your hands from splinters and other injuries.

Use Proper Tools

Make sure to use the proper tools for the job. Using the wrong tool can be dangerous and can damage your workpiece. Always use sharp tools, as dull tools can slip and cause injuries. Keep your tools clean and well-maintained to ensure they work properly.

Keep Your Work Area Clean

A cluttered work area can be dangerous, as it increases the risk of accidents and injuries. Make sure to keep your work area clean and organized. Sweep up sawdust and wood chips regularly, and dispose of them properly. Keep your tools and materials organized and stored away when not in use.

Use Caution When Cutting

When cutting wood, always use caution. Make sure to keep your fingers and other body parts away from the blade. Use a push stick or push block to guide the wood through the saw, and never use your hands to push the wood. Always make sure the blade is properly aligned and tightened before making any cuts.

Avoid Distractions

Finally, it’s important to avoid distractions when working with wood. Focus on the task at hand and avoid using your phone or other electronic devices while working. Distractions can cause you to lose focus and make mistakes, which can be dangerous when working with power tools.

By following these safety precautions, you can ensure a safe and enjoyable woodworking experience.

Designing Your Ashtray

When making a wooden ashtray, it’s important to consider the design carefully. You want to create a functional and visually appealing ashtray that you will enjoy using. Here are some tips to help you design your ashtray.

Sketching

Before you start building your ashtray, it’s a good idea to sketch out some designs. This will help you visualize how your ashtray will look and make it easier to make any necessary adjustments before you start building.

Consider the size and shape of your ashtray, as well as any decorative elements you want to include. You can also experiment with different types of wood to see how they will look with your design.

Size and Shape

The size and shape of your ashtray will depend on your personal preference and how you plan to use it. If you plan to use it for cigarettes, you may want a smaller ashtray that can fit on a table or desk. If you plan to use it for cigars, you may want a larger ashtray that can accommodate the size of the cigar.

Consider the shape of your ashtray as well. A rectangular ashtray may be more practical, but a round ashtray may be more visually appealing. You can also experiment with different shapes, such as oval or triangular, to see what works best for your design.

Remember to keep the size and shape of your ashtray in proportion to the size of your smoking materials. You don’t want your ashtray to be too small or too large for your cigarettes or cigars.

In summary, sketching and carefully considering the size and shape of your ashtray are important steps in designing a functional and visually appealing ashtray. Experiment with different designs and materials to find the perfect ashtray for your needs.

Cutting the Wood

To start making your wooden ashtray, you will need to cut your wood into equal dimensions. This will ensure that your ashtray is symmetrical and aesthetically pleasing. Here are some steps to follow when cutting your wood:

  1. Choose the right type of wood: For your ashtray, it is best to use hardwood such as walnut, oak, or maple. These types of wood are durable and have a beautiful grain pattern that will enhance the look of your ashtray.

  2. Measure and mark your wood: Using a ruler and pencil, mark your wood at the desired length and width. Make sure to measure twice and cut once to avoid any mistakes.

  3. Cut your wood: Using a saw, cut your wood along the marked lines. It is important to use a saw that is appropriate for the thickness of your wood. A handsaw or circular saw is ideal for thinner pieces, while a jigsaw or band saw is better for thicker pieces.

  4. Sand your wood: After cutting, sand your wood to remove any rough edges or splinters. Start with a coarse-grit sandpaper and gradually move to a finer-grit sandpaper until the surface is smooth to the touch.

  5. Finish your wood: To protect your wood from moisture and give it a beautiful finish, you can apply a coat of wood stain or oil. This will also enhance the natural grain pattern of your wood.

By following these steps, you can easily cut your wood into equal dimensions and prepare it for the next step in making your wooden ashtray.

Carving the Ashtray

Carving the ashtray is the most important part of the process. It requires precision and patience to create the perfect shape and size for the bowl. In this section, we will cover two sub-sections: Creating the Bowl and Adding Grooves.

Creating the Bowl

To create the bowl of the ashtray, you will need to use a router or a chisel. If you are using a router, attach a bowl cutter bit to it. If you are using a chisel, choose a size that matches the desired size of your bowl.

  1. Clamp the wooden block onto your workbench to prevent it from moving while you work.
  2. Begin carving the bowl by making small cuts around the perimeter of the circle.
  3. Gradually increase the depth of your cuts until you reach the desired depth.
  4. Smooth out the bottom of the bowl with sandpaper or a chisel.

Adding Grooves

Adding grooves to your ashtray can help prevent ash and cigarette butts from falling out. Here’s how to do it:

  1. Mark the location of the grooves on the side of the ashtray.
  2. Use a router or a chisel to carve out the grooves.
  3. Sand the grooves to remove any rough edges.

Remember to take your time and be patient when carving the ashtray. It’s better to make small cuts and adjustments than to make a mistake that ruins the entire piece.

Sanding and Smoothing

Now that you have your wooden ashtray cut and shaped, it’s time to sand and smooth it to perfection. This step is crucial to ensure that the ashtray is not only functional but also visually appealing.

Start by using coarse sandpaper with a grit of around 80 to remove any rough spots or splinters on the surface of the wood. Be sure to sand in the direction of the grain to avoid damaging the wood fibers. You can use a sanding block or simply fold the sandpaper in half and grip it with your hand to make the process easier.

Once you have removed all the rough spots, switch to a finer grit sandpaper, around 120-150, to smooth out the surface further. Repeat this process with even finer grit sandpaper until you reach the desired level of smoothness.

After sanding, use a soft cloth to remove any dust or debris from the surface of the ashtray. You can also use compressed air to blow away any remaining dust from hard-to-reach areas.

If you want to take the smoothing process to the next level, you can use a wood file or a wood scraper to remove any remaining rough spots or edges. This will give your ashtray a polished and professional look.

Remember, the smoother the surface, the easier it will be to clean the ashtray and keep it looking new. So take your time and make sure to sand and smooth your wooden ashtray thoroughly.

Finishing Touches

Once your wooden ashtray has been sanded and shaped, it’s time to add the finishing touches to protect and enhance the natural beauty of the wood. Here are two sub-sections to guide you through the process of staining and sealing your ashtray.

Staining

Staining your wooden ashtray is an optional step, but it can add depth and color to the wood. Before starting, make sure the surface is clean and free from dust and debris. Here are the steps to follow:

  1. Choose a wood stain that complements the color of your wood. Test it on a small, inconspicuous area to see how it looks before applying it to the entire surface.
  2. Apply the stain with a foam brush or a clean cloth, following the direction of the wood grain. Work in small sections to ensure an even coat.
  3. Let the stain sit for a few minutes, then wipe off any excess with a clean cloth.
  4. Allow the stain to dry completely before moving on to the next step.

Sealing

Sealing your wooden ashtray will protect it from moisture, dirt, and other contaminants. It will also give it a smooth, glossy finish. Here’s how to do it:

  1. Choose a clear, protective finish that is appropriate for your wood type. Polyurethane and lacquer are popular choices.
  2. Apply the finish with a foam brush or a clean cloth, following the direction of the wood grain. Work in small sections to ensure an even coat.
  3. Let the finish dry for the recommended time, then sand lightly with a fine-grit sandpaper.
  4. Apply a second coat of finish, following the same process as before.
  5. Let the finish dry completely before using your ashtray.

Remember to follow the manufacturer’s instructions for the stain and finish you choose. With these simple steps, your wooden ashtray will be ready to use and will look beautiful for years to come.

How to Make a Wooden 5 Point Star: A Beginner's Guide

Are you interested in learning how to make a wooden 5 point star? Whether you want to create a rustic decoration for your home or a unique gift for a friend, making a wooden star can be a fun and rewarding project. With a few basic materials and tools, you can create a beautiful 5 point star that will add charm and character to any space.

To get started, you will need to choose the type of wood you want to use for your star. Popular options include pine, cedar, and oak, but you can use any type of wood that you prefer. Once you have your wood, you will need to cut it to the size of your star and then mark out the points of the star with a pencil or ruler. From there, you can drill holes in each point of the star and assemble the pieces together using screws.

If you are new to woodworking, don’t worry. Making a wooden 5 point star can be a great beginner project that will help you develop your skills and gain confidence in your abilities. With a little patience and practice, you can create a beautiful wooden star that will be admired for years to come. So, let’s get started and learn how to make a wooden 5 point star together!

Understanding the Basics of a 5 Point Star

Geometry Behind a 5 Point Star

Before you start making a wooden 5 point star, it’s important to understand the basic geometry behind it. A 5 point star is essentially a polygon with five vertices and five edges. Each vertex of the star is formed by the intersection of two lines, and each edge is formed by the intersection of two adjacent lines.

The angle of each point in a 5 point star is 36 degrees, while the angle between each point is 72 degrees. To ensure that your star looks symmetrical and proportional, it’s important to keep these angles consistent and precise.

Importance of Precision

When making a wooden 5 point star, precision is key. Even small variations in the angles or lengths of the lines can significantly impact the final result. To ensure that your star looks perfect, it’s important to measure and cut each piece with care and accuracy.

One way to ensure precision is to use a miter saw or table saw to make precise angled cuts. You can also use a measuring tape to ensure that each piece is cut to the correct length.

Another important factor to consider is the type of wood you use. Cedar is a good option for outdoor stars, as it is durable and resistant to weathering. However, any type of wood can be used as long as it is cut and assembled with precision.

By understanding the basic geometry behind a 5 point star and emphasizing precision in your measurements and cuts, you can create a beautiful wooden star that is sure to impress.

Choosing the Right Wood

When it comes to making a wooden 5 point star, choosing the right type of wood is crucial. Not all types of wood are suitable for every project, and selecting the wrong wood can result in a failed project. In this section, we will cover the types of wood that are best suited for making a wooden 5 point star, as well as some safety precautions you should take when working with wood.

Types of Wood

There are many types of wood that are suitable for making a wooden 5 point star. Some of the most popular types include:

  • Pine: Pine is a softwood that is easy to work with and readily available. It is also affordable, making it a popular choice for beginners.

  • Oak: Oak is a hardwood that is durable and strong. It is also resistant to moisture and decay, making it a good choice for outdoor projects.

  • Walnut: Walnut is a hardwood that is prized for its rich, dark color and beautiful grain patterns. It is also strong and durable, making it a good choice for a project that will be used frequently.

  • Maple: Maple is a hardwood that is known for its light color and fine grain. It is also strong and durable, making it a good choice for furniture and other projects that will be subjected to heavy use.

Wood Safety Precautions

When working with wood, it is important to take certain safety precautions to protect yourself from injury. Some of the most important safety precautions to take when working with wood include:

  • Wearing protective gear: This includes safety glasses, earplugs, and a dust mask.

  • Using the right tools: Make sure you are using the right tools for the job and that they are in good condition.

  • Keeping your work area clean: This will help prevent accidents and make it easier to work.

  • Following proper procedures: Always follow the proper procedures for cutting, sanding, and finishing wood.

By following these safety precautions, you can help ensure that your project is a success and that you stay safe while working with wood.

Tools and Materials Needed

When it comes to making a wooden 5 point star, there are a few essential woodworking tools and safety equipment that you will need to have on hand. Here are the tools and materials you will need:

Essential Woodworking Tools

  1. Table Saw: You will need a table saw to cut the wood into the size and shape you need for your star. Make sure the saw has a sharp blade and is properly set up before use.

  2. Drill Press: You will need a drill press to make the holes in each point of the star. Make sure the drill press is properly set up and has the correct size drill bit for your screws.

  3. Sander: You will need a sander to smooth out the edges and surfaces of the wood. A belt sander or orbital sander will work well for this.

  4. Clamps: You will need clamps to hold the wood in place while you work on it. Make sure the clamps are the right size for your project and are properly tightened.

  5. Measuring Tools: You will need measuring tools such as a ruler or tape measure to ensure accuracy when cutting and drilling.

Safety Equipment

  1. Safety Glasses: You should always wear safety glasses when working with power tools to protect your eyes from flying debris.

  2. Ear Protection: Some power tools can be very loud, so it’s a good idea to wear ear protection to prevent hearing damage.

  3. Dust Mask: Sanding and cutting wood can create a lot of dust, which can be harmful to your lungs. Wear a dust mask to protect yourself.

  4. Work Gloves: Work gloves can help protect your hands from splinters and other injuries.

  5. Apron: An apron can help protect your clothing from sawdust and other debris.

By having these essential woodworking tools and safety equipment on hand, you will be well-prepared to make a beautiful wooden 5 point star.

Creating the Star Template

To make a wooden 5 point star, you will need a template to guide you through the process. Here are the steps to create a star template:

  1. Start by drawing a circle with a radius of your desired star size on a piece of paper. For example, if you want a 6-inch star, draw a circle with a 3-inch radius.

  2. Next, divide the circle into five equal parts. To do this, draw a line from the center of the circle to the edge, and rotate the paper slightly. Draw another line from the center to the edge, intersecting the first line. Repeat this process until you have five lines that divide the circle into equal parts.

  3. Now, draw a line from the center of the circle to the intersection point of two adjacent lines. This will be one of the five points of the star.

  4. Repeat step 3 for each of the five points, until you have a complete star shape.

  5. Cut out the star shape from the paper, and use it as a template to trace onto your wooden board.

  6. Once you have traced the star shape onto the wooden board, use a saw to cut out the shape. Be sure to cut carefully along the lines to ensure that your star is symmetrical.

  7. Sand the edges of the star to smooth out any rough edges and give it a finished look.

By following these steps, you can create a template for your wooden 5 point star that will guide you through the rest of the construction process.

Cutting the Wood

Marking the Wood

Before cutting your wood, you need to mark it properly. To make a 5 point star, you will need 5 equal-length pieces of wood. Measure and mark the length of each piece using a measuring tape and a pencil. Make sure that each piece is the same length.

Next, mark the angles on each piece of wood. To do this, use a protractor to measure and mark a 36-degree angle at each end of the wood. This will give you the 72-degree angle needed to make a 5 point star.

Sawing Technique

Once you have marked your wood, it’s time to start sawing. A jigsaw is the best tool to use for this job. It’s important to use a sharp blade and to keep the saw level and straight while cutting.

Start by cutting along the marked angles at each end of the wood. Then, carefully cut along the length of the wood to create each point of the star. Take your time and make sure your cuts are precise.

After cutting all 5 pieces, sand the edges and corners smooth using sandpaper. This will give your wooden star a professional look and prevent any splinters.

Remember to always wear safety glasses and protective gear while sawing and sanding. With these tips, you’ll be able to cut your wood with ease and create a beautiful 5 point star decoration for your home.

Assembling the Star

Once you have all the pieces cut and sanded, it’s time to assemble the 5 point star. This section will guide you through aligning the pieces and securing the star.

Aligning the Pieces

To ensure that the star is symmetrical, you need to align the pieces correctly. Here’s how to do it:

  1. Start by laying out all the pieces on a flat surface, with the points facing up.
  2. Arrange the pieces so that they form a star shape, with each point touching the adjacent one.
  3. Check that the angles between the pieces are all the same. If they are not, adjust the pieces until they are.
  4. Once you are satisfied with the alignment, mark the positions of the pieces with a pencil.

Securing the Star

Now that the pieces are aligned, it’s time to secure them together. You can use glue, screws, or both to hold the star together. Here are the steps to follow:

  1. Apply a small amount of wood glue to the joints where the pieces meet.
  2. If you choose to use screws, drill pilot holes through the points where the pieces meet and then screw them together. Make sure the screws are not too long, or they will poke through the other side of the wood.
  3. If you choose not to use screws, clamp the pieces together until the glue dries.
  4. Repeat this process for all the points of the star until it is fully assembled.

Congratulations! You have successfully assembled your wooden 5 point star. Now you can add any finishing touches you desire, such as sanding or staining.

Finishing Touches

After cutting and assembling the wooden pieces for your 5 point star, it’s time to give it a finishing touch. This will not only enhance its appearance but also protect it from wear and tear. Here are the steps to follow:

Sanding the Star

Before applying any finish, it’s important to sand the star to make it smooth and remove any rough edges. Start with a coarse sandpaper (around 80 grit) and gradually move to a finer grit (up to 220 grit) for a smooth finish. Sand in the direction of the grain to avoid scratches.

If you’re using a power sander, be careful not to apply too much pressure and remove too much wood. For hard-to-reach areas, you can use sandpaper wrapped around a dowel or a small piece of wood.

After sanding, wipe the star with a clean cloth to remove any dust or debris.

Applying a Finish

There are many types of finishes you can use for your wooden star, such as oil, wax, varnish, or lacquer. Each has its own advantages and disadvantages, so choose one that suits your needs.

Here’s how to apply a simple oil finish:

  1. Apply a thin coat of oil (such as tung oil or linseed oil) with a brush or a cloth. Make sure to cover all the surfaces evenly.
  2. Let the oil soak in for 15-20 minutes.
  3. Wipe off any excess oil with a clean cloth.
  4. Let the star dry for at least 24 hours.
  5. Apply another coat if desired.

For a more durable finish, you can use varnish or lacquer. These require more preparation and application time, but they provide a hard and glossy surface.

Whatever finish you choose, make sure to follow the manufacturer’s instructions and safety precautions. Wear gloves and work in a well-ventilated area.

With these simple steps, you can give your wooden 5 point star a beautiful and long-lasting finish.

How to Make Wooden Handles: A Beginner's Guide

Wooden handles are a great addition to any furniture or tool project. Not only are they functional, but they can also add a touch of warmth and character to your design. Making your own wooden handles can be a fun and rewarding experience, and it’s not as difficult as you might think.

To start, you’ll need to choose the type of wood you want to use for your handles. Hardwoods like oak, maple, and cherry are popular choices because they are strong and durable. Softwoods like pine and cedar can also work well, but they may not hold up as well over time. Once you’ve chosen your wood, you’ll need to decide on the size and shape of your handle. This will depend on the specific application and your personal preference.

There are several methods for shaping and attaching wooden handles, including drilling and carving. One popular method is to use a Forstner bit to create a recessed area for your fingers to grip. You can also use a chisel or carving knife to shape the handle to your liking. Attaching the handle can be done with screws or dowels, depending on the project. With a little bit of practice and patience, you can create beautiful and functional wooden handles for all of your woodworking projects.

Understanding Wood Types

When it comes to making wooden handles, choosing the right type of wood is essential. Different types of wood have different properties that affect their durability, strength, and appearance. Here are some of the most common wood types used for making wooden handles:

Hardwood

Hardwoods are dense and durable, making them ideal for frequently used handles that need to withstand wear and tear. Here are some popular hardwoods used for handles:

  • Oak: Oak is a strong and durable hardwood that is resistant to moisture and rot. It has a prominent grain pattern and is available in different colors.
  • Maple: Maple is a hard and dense wood that is easy to work with. It has a uniform texture and is available in different grades.
  • Walnut: Walnut is a dark and richly colored hardwood that is strong and durable. It has a straight grain pattern and is easy to work with.

Softwood

Softwoods are less dense than hardwoods, making them more suitable for handles that are not subjected to heavy use. Here are some popular softwoods used for handles:

  • Pine: Pine is a softwood that is easy to work with and has a straight grain pattern. It is available in different grades and is often used for decorative handles.
  • Cedar: Cedar is a softwood that is resistant to decay and insects. It has a pleasant aroma and is often used for outdoor handles.
  • Spruce: Spruce is a softwood that is strong and lightweight. It has a straight grain pattern and is often used for tool handles.

Remember that the type of wood you choose will affect the appearance and durability of your handle. Consider the intended use of the handle when selecting the wood type, and always choose a high-quality piece of wood to ensure the best results.

Choosing the Right Tools

When it comes to making wooden handles, choosing the right tools is essential to ensure a successful outcome. Here are some of the tools you will need:

Saw

A saw is required to cut the wooden handle to the desired length. A handsaw or a jigsaw can be used for this purpose. Ensure that the blade of the saw is sharp so that you can make a clean cut. A dull blade can cause the wood to splinter, ruining the handle.

Chisel

A chisel is used to remove any excess wood and to shape the handle. A sharp chisel will make it easier to carve the wood and create a smooth finish. Make sure to choose a chisel that is appropriate for the size of the handle you are making.

Sandpaper

Sandpaper is used to smooth out any rough edges and to create a polished finish. Start with a coarse sandpaper and gradually work your way up to a finer grit. This will ensure that the handle is smooth and free of any rough spots.

Varnish

Varnish is used to protect the wooden handle from moisture and wear and tear. It also gives the handle a glossy finish. Choose a varnish that is appropriate for the type of wood you are using and follow the manufacturer’s instructions for application.

By choosing the right tools and using them correctly, you can create a wooden handle that is both functional and aesthetically pleasing.

Designing Your Handle

When it comes to designing your wooden handle, there are a few things to consider. You want to make sure that the handle is not only functional but also visually appealing. Here are some tips to help you design your handle:

Consider the Purpose

The first thing to consider when designing your handle is the purpose of the handle. Is it going to be used for a cabinet or drawer? Is it going to be used for a door or a piece of furniture? The purpose of the handle will determine the size and shape of the handle.

Choose the Wood

The type of wood you choose will also play a role in the design of your handle. Hardwoods like oak, maple, and cherry are great choices for handles because they are durable and can withstand wear and tear. Softwoods like pine and cedar are also an option, but they may not be as durable as hardwoods.

Determine the Size and Shape

The size and shape of the handle will depend on the purpose of the handle and the size of the item it will be attached to. For example, a drawer handle will be smaller than a door handle. When determining the shape of the handle, consider the overall design of the item it will be attached to. A simple, streamlined handle may work best for a modern piece of furniture, while a more ornate handle may be better suited for a traditional piece.

Add Personal Touches

Don’t be afraid to add personal touches to your handle design. You can add decorative elements like carvings or inlays to make the handle unique. You can also experiment with different finishes to give the handle a different look. Just make sure that any decorative elements you add do not compromise the functionality of the handle.

By considering the purpose, wood type, size and shape, and personal touches, you can design a wooden handle that is not only functional but also visually appealing.

Cutting the Wood

Cutting the wood is the first step in making wooden handles. You can use a table saw, bandsaw, or handsaw to cut the wood. Make sure that the wood is straight and free of knots to prevent any issues during cutting.

When using a table saw, set the blade height to the thickness of the wood you are using. Use a push stick to guide the wood through the blade and keep your fingers away from the blade. If you are using a bandsaw, adjust the blade guide to the thickness of the wood and use a fence to guide the wood through the blade.

It is important to use a sharp saw blade to make clean cuts. Dull blades can cause the wood to splinter or chip, resulting in a rough finish. If you notice that the blade is dull, replace it before continuing.

Once you have cut the wood to the desired length and width, use a block plane or sandpaper to smooth the edges and remove any rough spots. This will make the handle more comfortable to hold and prevent any splinters.

In summary, cutting the wood is the first step in making wooden handles. Use a table saw, bandsaw, or handsaw to cut the wood and make sure that it is straight and free of knots. Use a sharp saw blade and smooth the edges with a block plane or sandpaper to create a comfortable handle.

Shaping the Handle

Now that you have your wooden block ready, it’s time to shape the handle. This is where you can get creative and really make the handle your own. Here are a few tips to get you started:

1. Sketch out your design

Before you start cutting, it’s a good idea to sketch out your design on the block of wood. This will help you visualize the final product and make any necessary adjustments before you start shaping the handle.

2. Use a rasp or file

To shape the handle, you can use a rasp or file. These tools will allow you to remove material quickly and shape the handle to your desired shape. Start by removing material from the sides of the handle and work your way towards the top.

3. Sand the handle

Once you have your desired shape, it’s time to sand the handle. Start with a coarse grit sandpaper and work your way towards a finer grit. This will help smooth out any rough edges and give the handle a polished look.

4. Apply a finish

To protect the handle and bring out the natural beauty of the wood, you can apply a finish. There are many different finishes you can use, such as oil, wax, or varnish. Apply the finish according to the manufacturer’s instructions and let it dry completely before using the handle.

With these tips, you should be able to shape a wooden handle that is both functional and beautiful. Just remember to take your time and have fun with the process!

Finishing the Handle

Finishing the handle is an important step in making a wooden tool handle. It not only protects the handle from wear and tear but also enhances its appearance. There are several ways to finish a wooden handle, but sanding and applying varnish are the most common methods.

Sanding

Sanding is the process of smoothing the surface of the handle by rubbing it with an abrasive material. It removes any rough spots, scratches, or imperfections on the surface of the handle. Here are a few tips for sanding a wooden handle:

  • Use sandpaper with a grit between 120 and 220 for initial sanding.
  • Sand in the direction of the grain to avoid damaging the wood fibers.
  • Use a sanding block to keep the sandpaper flat and even.
  • Sand the handle until it feels smooth to the touch.
  • Wipe the handle with a clean cloth to remove any dust or debris.

Applying Varnish

Applying varnish to a wooden handle not only protects it from moisture but also gives it a glossy finish. Here are a few tips for applying varnish to a wooden handle:

  • Choose a high-quality varnish that is suitable for the type of wood you are using.
  • Apply the varnish in a well-ventilated area to avoid inhaling fumes.
  • Use a clean brush to apply a thin coat of varnish to the handle.
  • Allow the varnish to dry for at least 24 hours before applying another coat.
  • Sand the handle lightly between coats to remove any bumps or bubbles.
  • Apply two to three coats of varnish for a durable finish.

In conclusion, sanding and applying varnish are essential steps in finishing a wooden handle. By following these tips, you can ensure that your wooden tool handle looks great and lasts for years to come.

Safety Measures

Woodworking can be a fun and rewarding activity, but it’s important to remember that safety should always be your top priority. Here are some safety measures to keep in mind when making wooden handles:

Wear Appropriate Safety Gear

Before you start working on your project, make sure you’re wearing the appropriate safety gear. This includes safety glasses, ear protection, and a dust mask. You should also wear a long-sleeved shirt and pants to protect your skin from sawdust and wood shavings.

Keep Your Workspace Clean and Organized

A clean and organized workspace is essential for safety. Make sure you have enough space to move around and that there are no obstacles in your way. Keep your tools and materials organized so you can easily find what you need without having to search through clutter.

Use Sharp Tools

Using dull tools can be dangerous, as they can slip and cause injury. Make sure your tools are sharp and in good condition before you start working. If you’re not sure how to sharpen your tools, there are plenty of resources available online or at your local hardware store.

Follow Tool Safety Guidelines

Each tool has its own safety guidelines that you should follow. Make sure you read the instructions carefully before using any new tool. Never use a tool for something it’s not intended for, and always use it in the way it was designed to be used.

Keep a First Aid Kit on Hand

Accidents can happen, even if you’re following all the safety guidelines. That’s why it’s important to keep a first aid kit on hand at all times. Make sure your kit includes bandages, gauze, antiseptic, and other essentials. If you’re not sure what to include in your first aid kit, ask your local pharmacist or healthcare provider for advice.

By following these safety measures, you can enjoy the process of making wooden handles while keeping yourself and those around you safe.

How to Make a Wooden Circle: A Beginner's Guide

Are you looking to make a perfect wooden circle for your next DIY project? Cutting a circle out of wood can be a daunting task, but with the right tools and techniques, it can be a breeze. Whether you want to make a round sign or a tabletop, there are several methods you can use to create a precise circle.

One of the easiest ways to make a wooden circle is by using a jigsaw. With a jigsaw, you can cut circles of various sizes and thicknesses. Another option is to use a router with a circle-cutting jig. This method allows you to create circles with a smooth edge and precise diameter. If you want to make a large circle, you can use a circular saw with a homemade circle-cutting jig. This method requires a bit more skill and precision, but it can be done with practice.

Understanding Wood Types

When making a wooden circle, it is important to choose the right type of wood for your project. Different types of wood have different properties that can affect the appearance, strength, and durability of your circle. Here are some common types of wood used for making circles:

Hardwoods

Hardwoods are dense and durable, making them a popular choice for furniture and other high-quality woodworking projects. Some common hardwoods used for making circles include:

  • Oak: A strong and durable wood that is resistant to moisture and rot.
  • Maple: A dense and heavy wood that is known for its beautiful grain patterns.
  • Cherry: A medium-hard wood that is prized for its warm, reddish-brown color.

Softwoods

Softwoods are lightweight and easy to work with, making them a popular choice for beginners and for projects that require a lot of cutting and shaping. Some common softwoods used for making circles include:

  • Pine: A soft and lightweight wood that is easy to work with and has a pale, yellowish color.
  • Cedar: A lightweight and durable wood that is known for its natural resistance to rot and insects.
  • Spruce: A soft and lightweight wood that is commonly used for making musical instruments.

Plywood

Plywood is a versatile and affordable material that is made by layering thin sheets of wood together. It is often used for making circles because it is easy to cut and shape, and it is available in a variety of thicknesses and grades. Some common types of plywood used for making circles include:

  • Baltic birch: A high-quality plywood that is known for its strength and durability.
  • Lauan: A lightweight and affordable plywood that is commonly used for making circles and other woodworking projects.
  • MDF: A type of engineered wood that is made by compressing wood fibers together. It is often used for making circles because it is easy to shape and has a smooth surface.

When choosing a type of wood for your circle, consider factors such as the appearance, strength, and durability of the wood, as well as your budget and the tools and techniques you will be using to shape and finish the circle. With the right wood and some basic woodworking skills, you can create a beautiful and functional wooden circle that will last for years to come.

Choosing the Right Tools

When it comes to making a wooden circle, having the right tools is essential. Here are some tips on selecting the right tools for the job.

Selecting a Saw

One of the most popular tools for cutting circles is a saw. Here are some types of saws you can use:

  • Jigsaw: A versatile and easy-to-use tool, a jigsaw is perfect for cutting curves and shapes in wood. With the right blade and proper technique, you can cut clean circles using a jigsaw.
  • Table saw: A table saw is a great option for cutting larger circles. You can use a circle-cutting jig to make precise cuts.
  • Band saw: A band saw is another great option for cutting circles. You can use a circle-cutting jig or a compass to make precise cuts.

When selecting a saw, consider the size of the circle you want to cut and the type of wood you will be cutting. Make sure to use the appropriate blade for the type of wood you are working with.

Choosing a Router

Another tool you can use to cut circles is a router. Here are some tips on selecting the right router:

  • Fixed-base router: A fixed-base router is a good choice for beginners. It is easy to use and provides precise cuts.
  • Plunge router: A plunge router is a more advanced option. It allows you to make cuts in the middle of a piece of wood, rather than just the edge.
  • Trim router: A trim router is a smaller, more compact option. It is great for making small cuts and working with smaller pieces of wood.

When selecting a router, consider the size of the circle you want to cut and the type of wood you will be cutting. Make sure to use the appropriate bit for the type of cut you want to make.

By selecting the right tools for the job, you can ensure that you make clean, precise cuts and create beautiful wooden circles.

Creating a Template

If you want to make a wooden circle, creating a template is the first step. A template is a guide that helps you cut wood into a specific shape. It is a simple tool that can be made from a variety of materials, including paper, card, or thin wood.

Materials

To create a template, you will need:

  • A piece of paper or card
  • A compass or a round object to trace around
  • A pencil
  • Scissors
  • Glue or tape

Steps

  1. Start by drawing a circle on your paper or card using the compass or round object. The size of the circle should be the same size as the wooden circle you want to make.

  2. Cut out the circle using scissors.

  3. To make the template more durable, you can glue or tape it onto a piece of thin wood. This will make it easier to trace around when cutting the wooden circle.

  4. If you need to make multiple circles of the same size, you can use the template to trace around the circle onto another piece of paper or card. Cut out the circle and glue or tape it onto another piece of thin wood.

Creating a template is a simple but important step in making a wooden circle. It will help you to achieve a precise and accurate cut every time. With a template, you can make multiple circles of the same size quickly and easily.

Cutting the Circle

Now that you have your wooden board and a circle template, it’s time to cut the circle. There are several ways to cut a circle, and the best method depends on the size of the circle you need and the tools you have available. Here are some common methods:

Method 1: Hole Saw

A hole saw is a circular saw that attaches to a drill. It’s the easiest way to cut small circles from 0.5 to 6 inches in diameter. Here’s how to use a hole saw:

  1. Attach the hole saw to your drill.
  2. Mark the center of the circle on your wooden board.
  3. Drill a small pilot hole at the center mark.
  4. Place the hole saw over the pilot hole and start drilling.
  5. Apply steady pressure and keep the drill perpendicular to the board.
  6. Once the hole saw has cut through the board, remove it and the wooden circle.

Method 2: Jigsaw

A jigsaw is a handheld saw that can cut curves and circles. It’s best for cutting larger circles from 6 to 24 inches in diameter. Here’s how to use a jigsaw:

  1. Clamp your wooden board securely to a workbench or table.
  2. Mark the center of the circle on your wooden board.
  3. Drill a small pilot hole at the center mark.
  4. Insert the jigsaw blade into the pilot hole and turn on the saw.
  5. Follow the circle template with the jigsaw, cutting the circle slowly and steadily.
  6. Once you’ve cut the circle, sand the edges smooth.

Method 3: Router

A router is a power tool that can cut circles and other shapes. It’s best for cutting precise circles and curves. Here’s how to use a router:

  1. Clamp your wooden board securely to a workbench or table.
  2. Attach a circle-cutting jig to your router.
  3. Adjust the jig to the size of the circle you need.
  4. Set the router bit to the correct depth.
  5. Turn on the router and cut the circle slowly and steadily.
  6. Once you’ve cut the circle, sand the edges smooth.

No matter which method you choose, make sure to wear eye and ear protection, and follow all safety precautions for your tools. With a little practice, you’ll be cutting perfect circles in no time!

Sanding and Finishing

After cutting the wooden circle, it’s time to sand and finish it to give it a smooth and polished look. In this section, we will discuss the two important sub-sections of sanding and finishing.

Sanding the Edges

Before sanding the edges, make sure to use a sandpaper with a grit of 120 or higher. This will help to remove any roughness and splinters from the edges. You can use a sanding block to make sure that the edges are even and smooth.

Start by sanding the edges with the sandpaper at a 45-degree angle. Move the sandpaper in a circular motion, making sure to cover the entire edge. Repeat this process with a finer grit sandpaper until the edges are smooth and even.

After sanding, use a soft cloth to wipe away any dust or debris from the surface of the circle.

Applying Wood Finish

Applying a wood finish to your wooden circle will not only protect it from damage but also enhance its natural beauty. There are various types of wood finishes available, such as oil-based, water-based, and wax-based finishes.

Before applying any finish, make sure to sand the surface of the circle with a fine grit sandpaper to remove any roughness or unevenness. Then, wipe the surface with a clean cloth to remove any dust or debris.

To apply the finish, use a brush or a cloth and apply it evenly on the surface of the circle. Make sure to follow the manufacturer’s instructions for the specific type of finish you are using.

After applying the first coat, let it dry completely before applying a second coat. Repeat this process until you achieve the desired look and protection for your wooden circle.

Remember, sanding and finishing your wooden circle is an important step in the woodworking process. It not only enhances the look of your project but also protects it from damage. Follow these simple steps to achieve a smooth and polished finish for your wooden circle.

Safety Measures

When working with wood, safety should always be your top priority. Here are some important safety measures to keep in mind when making a wooden circle:

Wear Protective Gear

Always wear appropriate safety equipment when working with wood. This includes safety glasses to protect your eyes from flying debris, earplugs or earmuffs to protect your hearing, and a dust mask to prevent inhalation of sawdust.

Keep Your Work Area Clean and Organized

A clean and organized work area can help prevent accidents. Make sure your workspace is well-lit and free of clutter. Keep your tools and materials organized so that you can easily find what you need without having to search through piles of wood and other debris.

Use the Right Tools for the Job

Using the wrong tool for the job can be dangerous and can also damage your materials. Make sure you are using the appropriate tools for the task at hand. For example, use a jigsaw or scroll saw to cut out your circle, rather than a circular saw.

Take Your Time

Rushing through a project can lead to mistakes and accidents. Take your time and work carefully, especially when using power tools. Remember, it’s better to take a little longer and get the job done right than to rush and end up with a sloppy or dangerous result.

Keep a First Aid Kit on Hand

Accidents can happen even when you take all the necessary precautions. Always keep a first aid kit nearby in case of cuts, scrapes, or other injuries. Make sure it is well-stocked with bandages, antiseptic, and other essentials.

How to Build a Wooden Rocking Chair: A Step-by-Step Guide

Are you looking to add a touch of comfort to your home with a beautiful wooden rocking chair? Building your own rocking chair can be a rewarding and fulfilling project that will provide you with a unique piece of furniture that you can cherish for years to come. Whether you’re an experienced woodworker or a beginner, building a wooden rocking chair is a project that can be accomplished with some patience and attention to detail.

To get started, you’ll need to gather the necessary materials and tools, including wood, screws, a saw, a drill, and sandpaper. There are many different styles and designs of rocking chairs to choose from, so you’ll want to decide on the one that best fits your needs and preferences. You can find plans and instructions online, or you can create your own design if you have some woodworking experience. Once you have your materials and plans in hand, it’s time to get started on your project.

Understanding the Basics

Before you start building a wooden rocking chair, it’s important to understand some basics. This section will cover the types of wood you can use and the tools you will need to get the job done.

Types of Wood

When choosing the type of wood for your rocking chair, consider both the look and durability. Some popular options include:

  • Cherry: A beautiful, reddish-brown wood that is both durable and easy to work with.
  • Maple: A strong, dense wood with a fine grain that is often used for furniture.
  • Oak: A classic, sturdy wood that is resistant to wear and tear.
  • Walnut: A dark, rich wood that is strong and durable.

You can also use other types of wood, but make sure they are strong enough to support the weight of a person and have a tight, even grain.

Tools Needed

To build a wooden rocking chair, you will need some basic tools:

  • Saw: A hand saw or power saw will be necessary to cut the wood to the right size.
  • Drill: You will need a drill to make holes for screws and other fasteners.
  • Screwdriver: A screwdriver will be necessary to tighten screws and other fasteners.
  • Sandpaper: You will need sandpaper to smooth out rough edges and surfaces.
  • Clamps: Clamps will be necessary to hold the wood in place while you work on it.
  • Measuring tape: You will need a measuring tape to ensure that all the pieces are cut to the right size.

Other tools you may need include a chisel, a hammer, and a router. Make sure you have all the necessary tools before you begin.

Now that you understand the basics of building a wooden rocking chair, it’s time to move on to the next step.

Designing Your Rocking Chair

When it comes to building a wooden rocking chair, the design process is crucial. You want to create a chair that is not only comfortable but also aesthetically pleasing and functional. In this section, we will cover the two main aspects of designing your rocking chair: choosing a design and creating a blueprint.

Choosing a Design

Before you start building your rocking chair, you need to choose a design that suits your needs and preferences. There are many different designs to choose from, ranging from traditional to modern styles. Here are some factors to consider when choosing a design:

  • Comfort: The most important factor to consider is comfort. You want to choose a design that will provide adequate support and comfort for your body.
  • Style: Consider the style of your rocking chair and how it will fit in with the rest of your furniture. If you have a traditional home, you may want to choose a classic design. If you have a modern home, you may want to choose a more contemporary design.
  • Materials: Think about the type of wood you want to use for your rocking chair. Different woods have different properties, and some are better suited for certain designs than others.
  • Size: Consider the size of your rocking chair and how it will fit in your space. You want to choose a design that is proportional to the room it will be in.

Creating a Blueprint

Once you have chosen a design for your rocking chair, the next step is to create a blueprint. A blueprint is a detailed plan that outlines the dimensions and specifications of your chair. Here are the steps to creating a blueprint:

  1. Measure and sketch: Measure the dimensions of your chair and sketch a rough outline of your design.
  2. Refine your sketch: Refine your sketch, adding more details and making adjustments to the dimensions as necessary.
  3. Add measurements: Add measurements to your sketch, including the height, width, and depth of each component.
  4. Create a parts list: Create a list of all the parts you will need to build your chair, including the type and quantity of wood, screws, and other materials.
  5. Review and revise: Review your blueprint and make any necessary revisions before you start building.

By following these steps, you can create a detailed blueprint that will guide you through the building process and ensure that your rocking chair turns out just the way you want it.

Preparing the Wood

Before you start building your wooden rocking chair, it’s important to prepare the wood properly. This will ensure that your chair is sturdy and long-lasting. In this section, we’ll cover the two main steps to prepare the wood: selecting the wood and cutting the wood.

Selecting the Wood

The first step in preparing the wood is to select the right type of wood. You want to choose a wood that is strong and durable, but also has a nice grain and texture. Some popular choices for a rocking chair include cherry, oak, and maple.

When selecting your wood, make sure that it is free of knots and cracks. These imperfections can weaken the wood and make it more prone to breaking. You should also choose wood that is straight and has a consistent thickness. This will make it easier to work with when cutting and shaping.

Cutting the Wood

Once you have selected your wood, the next step is to cut it to the right size and shape. You will need to cut several pieces of wood for your rocking chair, including the seat, back, legs, and rockers.

To cut the wood, you will need a saw and a measuring tape. Make sure to measure each piece of wood carefully to ensure that it is the right size. You can use a table saw or a circular saw to make the cuts, but make sure to use a guide to keep your cuts straight and even.

After you have cut your wood to the right size, you can start shaping it. You can use a variety of tools to shape the wood, including a router, chisels, and sandpaper. Make sure to take your time and work carefully to create smooth, even curves and angles.

By following these steps to prepare your wood, you can ensure that your wooden rocking chair is strong, durable, and beautiful. With a little patience and attention to detail, you can create a chair that you will enjoy for years to come.

Building the Chair

Assembling the Pieces

Now that you have cut and shaped all the wooden pieces for your rocking chair, it’s time to start assembling them together. Here are the steps you need to follow:

  1. Begin by attaching the front legs to the seat. Place the seat upside down on a flat surface and align the legs so they are perpendicular to the seat. Use wood glue and screws to secure them in place.

  2. Next, attach the back legs to the seat. Again, use wood glue and screws to secure them in place.

  3. Now it’s time to attach the backrest to the back legs. Align the backrest with the back legs and use wood glue and screws to secure it in place.

  4. Finally, attach the armrests to the front legs. Align them with the legs and use wood glue and screws to secure them in place.

Sanding and Finishing

Once you have assembled the chair, it’s important to sand it down and apply a finish to protect the wood and give it a polished look. Here’s what you need to do:

  1. Start by sanding the entire chair with coarse-grit sandpaper to remove any rough spots or imperfections. Then switch to a finer-grit sandpaper to smooth out the surface.

  2. Once you have finished sanding, wipe down the chair with a damp cloth to remove any dust or debris.

  3. Apply a wood stain or paint to the chair, following the manufacturer’s instructions. Be sure to apply an even coat and let it dry completely before applying a second coat.

  4. Finally, apply a clear coat of polyurethane or another protective finish to the chair to seal the wood and give it a glossy finish.

By following these steps, you can build a beautiful and sturdy wooden rocking chair that will last for years to come.

Safety Measures

When it comes to building a wooden rocking chair, safety should always be your top priority. Here are some safety measures you should take to ensure that you can build your chair without any accidents.

Wear Protective Gear

Before you begin building your rocking chair, make sure to wear protective gear. This includes safety glasses, gloves, and a dust mask. These items will protect you from flying wood chips, sawdust, and other debris that can cause serious injury.

Use Proper Tools

Using the right tools for the job is essential to building a safe and sturdy rocking chair. Make sure your tools are in good condition and that you know how to use them properly. If you’re not sure how to use a tool, ask someone with experience or do some research before you begin.

Follow Instructions Carefully

Make sure to read and follow the instructions carefully. This will help you avoid mistakes that can cause injury. If you’re not sure about something, don’t hesitate to ask for help.

Secure Your Workpiece

Make sure your workpiece is securely clamped or held in place before you begin cutting or drilling. This will prevent the wood from moving or shifting, which can cause the saw or drill to kick back and cause injury.

Take Breaks

Building a wooden rocking chair can be a time-consuming process. It’s important to take breaks and rest your eyes, hands, and back to prevent injury from repetitive motion.

By following these safety measures, you can build a wooden rocking chair without any accidents. Remember to always prioritize safety and take the necessary precautions to protect yourself while building.

Maintaining Your Rocking Chair

Congratulations on building your own wooden rocking chair! Now that you have this beautiful piece of furniture, it’s important to take care of it so it can last for years to come. Here are some tips for maintaining your rocking chair:

Cleaning

Regular cleaning is essential for keeping your rocking chair looking its best. Use a soft cloth or brush to remove any dust or debris from the surface of the chair. You can also use a damp cloth to wipe down the chair, but be sure to dry it thoroughly afterwards to prevent any water damage.

Oiling

Wooden furniture needs to be oiled periodically to keep it from drying out and cracking. Apply a thin layer of oil to your rocking chair using a soft cloth, and then wipe away any excess. Be sure to use an oil that is appropriate for your type of wood.

Tightening Screws and Bolts

Over time, the screws and bolts in your rocking chair may become loose. Periodically check to make sure that they are all tight and secure. If you notice any that are loose, tighten them with a screwdriver or wrench.

Avoiding Sunlight and Moisture

Direct sunlight and moisture can damage the finish and wood of your rocking chair. Try to keep your chair out of direct sunlight, and avoid placing it in areas where it may be exposed to moisture, such as near windows or in a damp basement.

By following these simple maintenance tips, you can keep your rocking chair looking beautiful and functioning properly for years to come.

diy-cornhole-boards-cutting-hole-jpg

How to Cut a Circle in Wood with Hand Tools: A Beginner's Guide

Cutting a circle in wood with hand tools can seem like a daunting task, but it’s actually quite simple once you know the right techniques. Whether you’re a beginner or an experienced woodworker, cutting circles by hand is a useful skill to have in your arsenal. With the right tools and a little bit of practice, you can create perfect circles every time.

One of the most common hand tools used for cutting circles in wood is a coping saw. This saw has a thin, flexible blade that allows you to make intricate cuts with ease. To use a coping saw, you’ll need to start by drilling a small hole in the center of your circle. Then, insert the blade of the saw into the hole and begin cutting along the line you’ve drawn. As you cut, be sure to keep the saw blade perpendicular to the wood to ensure a clean cut.

Another tool that can be used for cutting circles in wood is a hand-held jigsaw. This saw has a reciprocating blade that moves up and down, allowing you to make curved cuts with ease. To use a jigsaw, you’ll need to start by drilling a small hole in the center of your circle. Then, insert the blade of the saw into the hole and begin cutting along the line you’ve drawn. As you cut, be sure to keep the saw blade perpendicular to the wood to ensure a clean cut.

Understanding the Basics of Woodworking

understanding-the-basics-of-woodworking

Woodworking is a craft that involves creating objects from wood. It requires skill, patience, and the right tools. In this section, we will cover the basics of woodworking, including the types of wood and hand tools used in the craft.

Types of Wood

There are many types of wood used in woodworking, each with its own properties and characteristics. Some of the most common types of wood used in woodworking include:

  • Hardwoods: Hardwoods are dense and durable, making them ideal for furniture and flooring. Examples of hardwoods include oak, maple, and mahogany.
  • Softwoods: Softwoods are lightweight and easy to work with, making them ideal for construction and outdoor projects. Examples of softwoods include pine, spruce, and cedar.
  • Plywood: Plywood is made from thin layers of wood that are glued together. It is strong and durable, making it ideal for furniture and cabinetry.

When choosing wood for your woodworking project, consider the intended use of the object, as well as your budget and personal preferences.

Hand Tools for Woodworking

In woodworking, hand tools are used to shape and manipulate wood. Some of the most common hand tools used in woodworking include:

  • Chisels: Chisels are used to carve and shape wood. They come in a variety of sizes and shapes, and are used for different purposes.
  • Hand saws: Hand saws are used to cut wood into various shapes and sizes. They come in different types, including crosscut saws and rip saws.
  • Planes: Planes are used to smooth and shape wood. They come in different sizes and shapes, and are used for different purposes.
  • Clamps: Clamps are used to hold pieces of wood together while glue dries. They come in different sizes and styles, and are used for different purposes.

When choosing hand tools for your woodworking project, consider the type of wood you will be working with, as well as the intended use of the object. Invest in high-quality tools that will last for years to come.

Safety Measures When Cutting Wood

Cutting wood requires proper safety measures to prevent accidents and injuries. Here are some safety tips to keep in mind when cutting circles in wood with hand tools:

Wear Protective Gear

Before you start cutting wood, make sure you wear the appropriate protective gear. This includes safety glasses or goggles to protect your eyes from sawdust and wood chips, gloves to protect your hands from splinters, and a dust mask to prevent you from inhaling sawdust.

Use the Right Tool for the Job

Make sure you use the appropriate tool for the job. Using the wrong tool can be dangerous and can damage the wood. When cutting circles in wood, use a compass or a circle-cutting jig to ensure accurate cuts.

Secure the Wood

Secure the wood to a workbench or a sawhorse before you start cutting. This will prevent the wood from moving around while you cut and will ensure that your cuts are straight and accurate.

Keep Your Hands Away from the Blade

Make sure you keep your hands away from the blade when cutting wood. Use a push stick or a push block to guide the wood through the blade. This will prevent your hands from getting too close to the blade and will ensure that your cuts are straight and accurate.

Cut Away from Your Body

Always cut away from your body when cutting wood. This will prevent accidents and injuries in case the blade slips or the wood moves unexpectedly.

Take Breaks

Take frequent breaks when cutting wood to prevent fatigue and to ensure that you are always alert and focused. Cutting wood requires concentration and focus, and taking breaks can help you maintain your focus and prevent accidents and injuries.

By following these safety measures, you can ensure that you cut circles in wood safely and accurately.

Preparing the Wood

preparing-the-wood-1

Before you begin cutting a circle in wood with hand tools, you need to prepare the wood properly. Here are a few steps to follow:

Step 1: Choose the Right Wood

The type of wood you use will affect the ease of cutting and the finished product. Choose a wood that is easy to work with and has a smooth surface. Some popular choices include pine, poplar, and birch.

Step 2: Measure and Mark the Circle

Use a compass or a circle template to measure and mark the circle on the wood. Make sure the circle is centered and the size is correct.

Step 3: Secure the Wood

Secure the wood to a workbench or a clamp to prevent it from moving while you cut. This will ensure a straight and even cut.

Step 4: Choose the Right Tool

Choose the right tool for the job. For cutting circles in wood, you can use a coping saw, a jigsaw, or a hand-held rotary tool. Each tool has its advantages and disadvantages, so choose the one that you are most comfortable with.

Step 5: Choose the Right Blade

Choose the right blade for the tool you are using. A fine-toothed blade will give you a smoother cut, while a coarse-toothed blade will cut faster but leave a rougher edge.

By following these steps, you can prepare the wood properly for cutting a circle with hand tools.

Drawing the Circle

To cut a circle in wood with hand tools, you’ll need to start by drawing the circle onto the wood. Here are a few methods you can use to do this:

Method 1: Use a Compass

A compass is a tool used for drawing circles. To use a compass, follow these steps:

  1. Adjust the compass to the desired diameter of the circle.
  2. Place the point of the compass at the center of where you want the circle to be.
  3. Rotate the compass around the center point to draw the circle.

Method 2: Use a String and Pencil

If you don’t have a compass, you can use a string and pencil to draw a circle. Here’s how:

  1. Tie one end of the string to the pencil and the other end to a nail or other object.
  2. Place the nail at the center of where you want the circle to be.
  3. Pull the string taut and draw the circle by rotating the pencil around the center point.

Method 3: Use a Template

If you need to draw the same circle multiple times, you can create a template out of cardboard or another material. Here’s how:

  1. Cut out a circle of the desired size from cardboard or another material.
  2. Place the template on the wood where you want the circle to be.
  3. Trace around the template with a pencil.

Once you’ve drawn the circle onto the wood, you can move on to cutting it out using hand tools.

Cutting the Circle

cutting-the-circlediy-cornhole-boards-cutting-hole-jpg

Cutting a circle in wood can be done with a variety of hand tools. In this section, we will discuss two common methods: using a coping saw and using a jigsaw.

Using a Coping Saw

A coping saw is a small, handheld saw with a narrow blade that is used to make intricate cuts in wood. It is an excellent tool for cutting circles in wood, especially if you need to make small or irregular shapes.

To cut a circle with a coping saw, follow these steps:

  1. Draw the circle onto the wood using a compass or a circular template.
  2. Drill a hole in the center of the circle large enough to fit the coping saw blade.
  3. Insert the blade into the hole and tighten it.
  4. Begin cutting the circle by following the line you drew. Keep the saw blade perpendicular to the wood and use smooth, even strokes.
  5. When you have finished cutting the circle, sand the edges to smooth them out.

Using a Jigsaw

A jigsaw is a handheld power tool that uses a reciprocating blade to cut through wood. It is a versatile tool that can be used to make a variety of cuts, including circles.

To cut a circle with a jigsaw, follow these steps:

  1. Draw the circle onto the wood using a compass or a circular template.
  2. Clamp the wood to a workbench or sawhorse to keep it steady.
  3. Insert the jigsaw blade into the wood at the edge of the circle and turn on the saw.
  4. Follow the line you drew, keeping the jigsaw blade perpendicular to the wood and using smooth, even strokes.
  5. When you have finished cutting the circle, sand the edges to smooth them out.

Both of these methods are effective for cutting circles in wood. The choice of which method to use will depend on the size and shape of the circle you need to cut, as well as your personal preference and the tools you have available.

Refining the Circle

Once you have cut the circle in wood with hand tools, it’s time to refine it. This involves sanding the edges and polishing the circle to give it a smooth and finished look.

Sanding the Edges

To sand the edges of the circle, you will need sandpaper. Start with a coarse grit sandpaper and gradually work your way up to a finer grit. This will help smooth out any rough edges and make the circle more even.

To make the sandpaper easier to use, you can wrap it around a piece of dowel or a pencil. This will give you a firm grip and make it easier to sand the edges evenly.

When sanding, be sure to keep the sandpaper flat against the wood and move it in a circular motion. This will help prevent any flat spots or bumps from forming.

Polishing the Circle

Once you have sanded the edges, you can polish the circle to give it a smooth and shiny finish. To do this, you will need a polishing compound and a soft cloth.

Apply a small amount of the polishing compound to the cloth and rub it onto the surface of the circle in a circular motion. Be sure to cover the entire surface evenly.

After applying the polishing compound, use a clean part of the cloth to buff the surface of the circle. This will remove any excess compound and give the wood a smooth and shiny finish.

With these simple steps, you can refine the circle you cut with hand tools and give it a professional-looking finish.

Maintaining Your Tools

maintaining-your-tools

To ensure that your hand tools are in good condition and perform well, you need to take proper care of them. Here are some tips to help you maintain your tools:

  • Keep them clean: After every use, wipe your tools with a clean cloth to remove any dust or debris. If your tools are particularly dirty, you can use a mild detergent and water to clean them. Make sure to dry them thoroughly before storing them.
  • Sharpen them regularly: Sharpening your tools is essential to maintain their cutting edge. You can use a sharpening stone or a honing guide to sharpen your tools. Make sure to follow the manufacturer’s instructions when sharpening your tools.
  • Store them properly: Store your tools in a dry and cool place to prevent rust and corrosion. You can use a toolbox or a tool chest to store your tools. Make sure to organize your tools properly so that you can easily find them when you need them.
  • Oil them: To prevent rust and corrosion, you can oil your tools regularly. You can use a light machine oil or a rust inhibitor to oil your tools. Make sure to wipe off any excess oil before using your tools.
  • Check for damage: Regularly check your tools for any signs of damage, such as cracks or chips. If you find any damage, replace the tool or have it repaired by a professional.

By following these tips, you can ensure that your hand tools are in good condition and perform well. Proper maintenance of your tools can also help to extend their lifespan, saving you money in the long run.

Frequently Asked Questions

What is the best hand tool to cut circles in wood?

The best hand tool to cut circles in wood is a compass saw. It is a small, lightweight saw with a narrow blade that is perfect for cutting curves and circles. It has a pointed tip that allows you to start the cut in the center of the circle, and the narrow blade makes it easy to follow the curve of the circle.

How can I cut a circle in wood without a jigsaw?

If you don’t have a jigsaw, you can still cut a circle in wood using a compass saw or a coping saw. First, mark the center of the circle and draw the circle on the wood. Then, drill a hole in the center of the circle and insert the blade of the saw. Start cutting along the line of the circle, following the curve of the blade.

What is a circle cutting jig and how does it work?

A circle cutting jig is a tool that attaches to a jigsaw or a router and allows you to cut perfect circles in wood. It works by holding the wood in place and guiding the blade of the tool along the circumference of the circle. The jig can be adjusted to cut circles of different sizes.

How do I make a wooden circle frame using hand tools?

To make a wooden circle frame using hand tools, you will need a compass saw, a chisel, and a mallet. First, cut the circle out of the wood using the compass saw. Then, use the chisel and mallet to create a rabbet on the back of the circle. The rabbet should be the same depth as the thickness of the frame. Finally, cut the frame pieces to size and glue them to the circle.

What is the recommended drill bit for cutting circles in wood?

The recommended drill bit for cutting circles in wood is a hole saw. A hole saw is a circular saw blade with teeth that is used to cut holes in wood. It attaches to a drill and is available in different sizes. It is important to choose a hole saw that is the same size as the circle you want to cut.

What is the proper technique for cutting large circles in plywood with hand tools?

To cut large circles in plywood with hand tools, you will need a compass saw and a jigsaw. First, use the compass saw to cut a rough circle in the plywood. Then, use the jigsaw to cut along the line of the circle, following the curve of the blade. It is important to use a sharp blade and to take your time to ensure a clean cut.

tools-needed-for-a-45-degree-angle-cut

How to Measure and Cut a 45-Degree Angle in Wood: Easy Steps

If you’re new to woodworking, measuring and cutting wood at precise angles can be a daunting task. A 45-degree angle cut is a common cut used in many woodworking projects, such as creating frames or molding. But how do you measure and cut a 45-degree angle cut in wood?

First, you’ll need the right tools. A miter saw is the most common tool used for cutting 45-degree angles in wood. It’s a power tool that allows you to make precise cuts at various angles. You’ll also need a measuring tape, a pencil, and safety gear such as safety glasses and ear protection.

Once you have your tools, it’s time to measure and mark your wood. Measure the length of the wood you want to cut and mark it with a pencil. Then, use your measuring tape to find the halfway point of the wood and mark it with another pencil line. This will be the point at which you’ll make your 45-degree angle cut. The next step is to adjust your miter saw to a 45-degree angle and carefully cut along the marked line. With practice, you’ll be able to make precise 45-degree angle cuts in no time.

Understanding 45-Degree Angle Cuts

If you’re new to woodworking, you may be wondering what a 45-degree angle cut is and why it’s important. Simply put, a 45-degree angle cut is a diagonal cut made on a piece of wood at a 45-degree angle. This type of cut is commonly used in woodworking to create beveled edges, miter joints, and other angled cuts.

To make a 45-degree angle cut, you will need a combination square, a pencil, and a saw. The easiest way to make this cut is by using an electric miter saw, as it allows you to adjust the angle of the blade to precisely 45 degrees. However, if you don’t have a miter saw, you can still make a 45-degree angle cut using a handsaw or circular saw.

When measuring for a 45-degree angle cut, it’s important to measure to the long end of the miter. This means that if you need a 10-inch piece of wood with a 45-degree angle cut, you should measure 10 inches from the long end of the miter and mark the cut line with your pencil.

It’s also important to remember that a 45-degree angle cut is an opposite cut, which means that the angle of the cut will be in the opposite direction of the angle of the saw blade. To ensure that you make a clean and accurate cut, use a saddle square or combination square to guide your saw along the cut line.

In summary, understanding how to measure and cut a 45-degree angle cut in wood is an essential skill for any woodworker. With the right tools and techniques, you can create beveled edges, miter joints, and other angled cuts with precision and ease.

Tools Needed for a 45-Degree Angle Cut

tools-needed-for-a-45-degree-angle-cut

If you’re planning to make a 45-degree angle cut in wood, you’ll need to have the right tools for the job. Here are the tools you’ll need:

Measuring Tools

To make a precise 45-degree angle cut, you’ll need to measure and mark the wood accurately. Here are the measuring tools you’ll need:

  • Combination square: This is a versatile tool that you can use to measure angles and mark straight lines. It’s essential for making accurate 45-degree angle cuts.
  • Tape measure: You’ll need a tape measure to measure the length of the wood and mark the point where you want to make the cut.
  • Pencil: You’ll need a pencil to mark the wood where you want to make the cut. Make sure the pencil is sharp so that the mark is clear and accurate.

Cutting Tools

Once you’ve measured and marked the wood, you’ll need to cut it at a 45-degree angle. Here are the cutting tools you’ll need:

  • Miter saw: A miter saw is the best tool for making a 45-degree angle cut. It’s designed to make angled cuts, and you can set it to cut at a precise angle. You can use a miter saw to make crosscuts, bevel cuts, and compound cuts.
  • Table saw: If you don’t have a miter saw, you can use a table saw to make a 45-degree angle cut. You’ll need to use a miter gauge to guide the wood through the saw blade at the correct angle. Make sure the saw blade is sharp and clean to ensure a smooth and accurate cut.
  • Circular saw: A circular saw can also be used to make a 45-degree angle cut. You’ll need to adjust the saw blade to the correct angle and use a straight edge to guide the saw through the wood. Make sure the saw blade is sharp and clean to ensure a smooth and accurate cut.

With these tools, you’ll be able to make a precise 45-degree angle cut in wood. Make sure you take the time to measure and mark the wood accurately, and use the right cutting tool for the job.

Measuring a 45-Degree Angle

measuring-a-45-degree-angle

Measuring a 45-degree angle is essential if you want to make precise cuts in wood. There are different tools and methods you can use to measure a 45-degree angle, and we will discuss some of them below.

Using a Combination Square

A combination square is a versatile tool that can help you measure angles, distances, and depths. To measure a 45-degree angle with a combination square, follow these steps:

  1. Place the combination square on the wood, aligning the long side with the edge you want to cut.
  2. Rotate the square until the 45-degree mark on the ruler aligns with the edge of the wood.
  3. Use a pencil to draw a line along the edge of the ruler.

Using a Protractor

A protractor is a tool that measures angles. To measure a 45-degree angle with a protractor, follow these steps:

  1. Place the protractor on the wood, aligning the base with the edge you want to cut.
  2. Rotate the protractor until the 45-degree mark aligns with the edge of the wood.
  3. Use a pencil to draw a line along the edge of the protractor.

Using a Bevel Gauge

A bevel gauge is a tool that measures and transfers angles. To measure a 45-degree angle with a bevel gauge, follow these steps:

  1. Place the bevel gauge on the wood, aligning the base with the edge you want to cut.
  2. Adjust the bevel gauge until the blade aligns with the edge of the wood.
  3. Tighten the bevel gauge.
  4. Use a pencil to draw a line along the blade of the bevel gauge.

Using a Speed Square

A speed square is a tool that helps you make square cuts and angles. To measure a 45-degree angle with a speed square, follow these steps:

  1. Place the speed square on the wood, aligning the base with the edge you want to cut.
  2. Rotate the square until the 45-degree mark aligns with the edge of the wood.
  3. Use a pencil to draw a line along the edge of the square.

In conclusion, measuring a 45-degree angle is not difficult if you have the right tools and know-how. You can use a combination square, protractor, bevel gauge, or speed square to measure a 45-degree angle. Choose the tool that works best for you and your project, and always double-check your measurements before making any cuts.

Marking the Wood for a 45-Degree Cut

marking-the-wood-for-a-45-degree-cut

When it comes to measuring and cutting a 45-degree angle cut in wood, marking the wood properly is crucial to ensuring a precise and accurate cut. Here are a few steps to follow when marking the wood for a 45-degree cut:

  1. Measure the Length: First, measure the length of the wood piece you want to cut. Use a measuring tape or ruler to get an accurate measurement.
  2. Mark the Wood: Once you have measured the length, mark the wood where you want to make the cut. Use a pencil to make a visible mark that you can easily see.
  3. Measure the Angle: Next, you need to measure the angle of the cut. To do this, use a protractor or combination square. Place the protractor or square on the wood at the mark you made and align it with the edge of the wood. Then, adjust it to a 45-degree angle.
  4. Mark the Angle: Once you have measured the angle, mark it on the wood using a pencil. Make sure the mark is visible and easy to see.
  5. Double Check: Before making the cut, double-check your measurements and marks to ensure they are accurate. This will help you avoid any mistakes and ensure a precise cut.

By following these steps, you can accurately mark the wood for a 45-degree cut and ensure that your cut is precise and accurate. Remember to always measure twice and cut once to avoid any mistakes.

Cutting the Wood at a 45-Degree Angle

cutting-the-wood-at-a-45-degree-angle

Now that you have your wood marked at a 45-degree angle, it’s time to cut it. The easiest way to do this is by using an electric miter saw. Here’s how you can do it:

  1. Set your combination square on the 45-degree mark and draw the cut line across the wood.
  2. Adjust the miter saw to 45 degrees.
  3. Align the saw blade with the cut line you drew.
  4. Gently guide the saw into and through the wood.

Make sure to take your time and be careful while cutting the wood. If you rush the process, you may end up with a crooked cut or even injure yourself.

If you don’t have a miter saw, you can use a circular saw or a handsaw to make the cut. However, these methods may not be as accurate as using a miter saw.

Another thing to keep in mind is that the thickness of the wood can affect how the cut turns out. Thicker wood may require multiple passes with the saw to get a clean cut.

Remember to always wear appropriate safety gear, such as safety glasses and ear protection, when using power tools.

Safety Precautions During Cutting

safety-precautions-during-cutting

When working with power tools, it is important to prioritize safety. Here are a few precautions you should take when cutting a 45-degree angle in wood:

Wear Protective Gear

Before you begin cutting, make sure you are wearing the appropriate protective gear. This includes safety glasses or goggles to protect your eyes from flying debris, earplugs to protect your hearing from loud noises, and a dust mask to prevent inhalation of sawdust.

Secure the Wood

Make sure the wood you are cutting is securely clamped or held in place to prevent it from moving or slipping during the cut. This will help you maintain control over the saw and prevent accidents.

Use the Right Blade

Make sure you are using the appropriate blade for the type of cut you are making. For a 45-degree angle cut, a crosscut blade or a combination blade with a high tooth count is recommended.

Mind the Blade Guard

Always make sure the blade guard is in place and functioning properly before you begin cutting. The blade guard helps protect your fingers from the blade and also helps prevent debris from flying out of the saw.

Keep Your Hands Clear

When making the cut, keep your hands well clear of the blade and the path of the saw. Use a push stick or other tool to guide the wood through the saw, if necessary.

By following these safety precautions, you can help ensure a safe and successful 45-degree angle cut in wood.

Troubleshooting Common Issues

Cutting a 45-degree angle in wood may seem simple, but it can be frustrating when things don’t go as planned. Here are some common issues you may encounter and how to troubleshoot them:

Uneven Cut

If your 45-degree angle cut is uneven, it could be due to a few reasons. First, make sure your saw blade is sharp and in good condition. Dull blades can cause jagged cuts. Next, check that your wood is clamped securely in place and not moving during the cut. Finally, ensure that your saw is properly aligned and calibrated for a 45-degree cut.

Inaccurate Angle

If your 45-degree angle is not accurate, it may be due to incorrect measurements or saw adjustments. Double-check your measurements and use a combination square to ensure accuracy. If your saw is not calibrated correctly, adjust it accordingly and recheck your cut.

Tear-Out

Tear-out occurs when the wood fibers splinter or tear during the cut, leaving an unsightly finish. To prevent this, use a sharp saw blade with a high tooth count. You can also use masking tape on the wood surface to prevent splintering. Another option is to make a scoring cut before the 45-degree cut to weaken the wood fibers and reduce tear-out.

Safety Concerns

Always prioritize safety when using power tools. Wear safety glasses and ear protection, and keep your hands and fingers away from the blade at all times. Use a push stick to guide the wood through the saw and never force the cut. If you are unsure or uncomfortable with the process, seek guidance from a professional or experienced woodworker.

Tips for a Perfect 45-Degree Angle Cut

tips-for-a-perfect-45-degree-angle-cut

Cutting a 45-degree angle in wood can be a challenging task, but with the right tools and techniques, you can achieve a perfect cut every time. Here are some tips that will help you get the job done:

Use a Combination Square

A combination square is an essential tool for measuring and marking angles. To cut a 45-degree angle, set your combination square on the 45-degree mark and draw the cut line on the wood. This will ensure that your cut is accurate and straight.

Use an Electric Miter Saw

An electric miter saw is the best tool for cutting a 45-degree angle in wood. Adjust the miter saw to 45 degrees, align it to the cut line, and gently guide the saw into and through the wood. Make sure to wear safety goggles and gloves while using the saw.

Check Your Measurements

Before making the cut, double-check your measurements to ensure that they are accurate. Use a tape measure or ruler to measure the length of the wood and mark the 45-degree angle with a pencil. This will help you avoid mistakes and ensure that your cut is precise.

Practice on Scrap Wood

If you are new to woodworking, it is a good idea to practice cutting 45-degree angles on scrap wood before working on your project. This will help you get a feel for the saw and ensure that you are comfortable with the process before making the cut on your final piece.

Take Your Time

Cutting a 45-degree angle in wood requires patience and precision. Take your time and make sure that you are comfortable with each step of the process before moving on to the next. Rushing can lead to mistakes and a less-than-perfect cut.

By following these tips, you can achieve a perfect 45-degree angle cut in wood every time. Remember to always prioritize safety and take your time to ensure a quality result.

Frequently Asked Questions

What are some tips for cutting a 45-degree angle with a circular saw?

When using a circular saw to cut a 45-degree angle, it’s important to make sure that the saw blade is set to the correct angle. You can use a protractor or angle finder to measure the angle of the blade. It’s also important to use a guide to ensure that your cut is straight and accurate. You can use a straight edge or a piece of scrap wood as a guide.

How can I measure and cut a 45-degree angle with a tape measure?

To measure and cut a 45-degree angle with a tape measure, you can use the Pythagorean theorem. Measure the length of the side you want to cut, then divide it by the square root of 2. This will give you the length of the other side of the triangle. Use this measurement to mark your cut line, then use a saw to make the cut.

Is there an angle cut calculator that can help me with cutting 45-degree angles?

Yes, there are several angle cut calculators available online that can help you calculate the correct angle for your cut. Simply enter the length of the side you want to cut, and the calculator will give you the correct angle to use.

What is the best way to measure a 45-degree angle on wood?

The easiest way to measure a 45-degree angle on wood is to use a combination square. Set the square to 45 degrees, then use it to mark your cut line. You can also use a protractor or angle finder to measure the angle.

How can I cut trim at a 45-degree angle?

To cut trim at a 45-degree angle, you can use a miter saw or a coping saw. If using a miter saw, set the saw to a 45-degree angle and make your cut. If using a coping saw, cut along the profile of the trim at a 45-degree angle.

Are there any techniques for cutting a 45-degree angle without a miter saw?

Yes, there are several techniques for cutting a 45-degree angle without a miter saw. You can use a circular saw with a guide, a handsaw with a miter box, or a jigsaw with a bevel cut. It’s important to take your time and make sure that your cut is accurate.