Tag Archives: frequently asked questions

how-to-clean-wooden-spoons-simple-tips-and-tricks-2

How to Clean Wooden Spoons: Simple Tips and Tricks

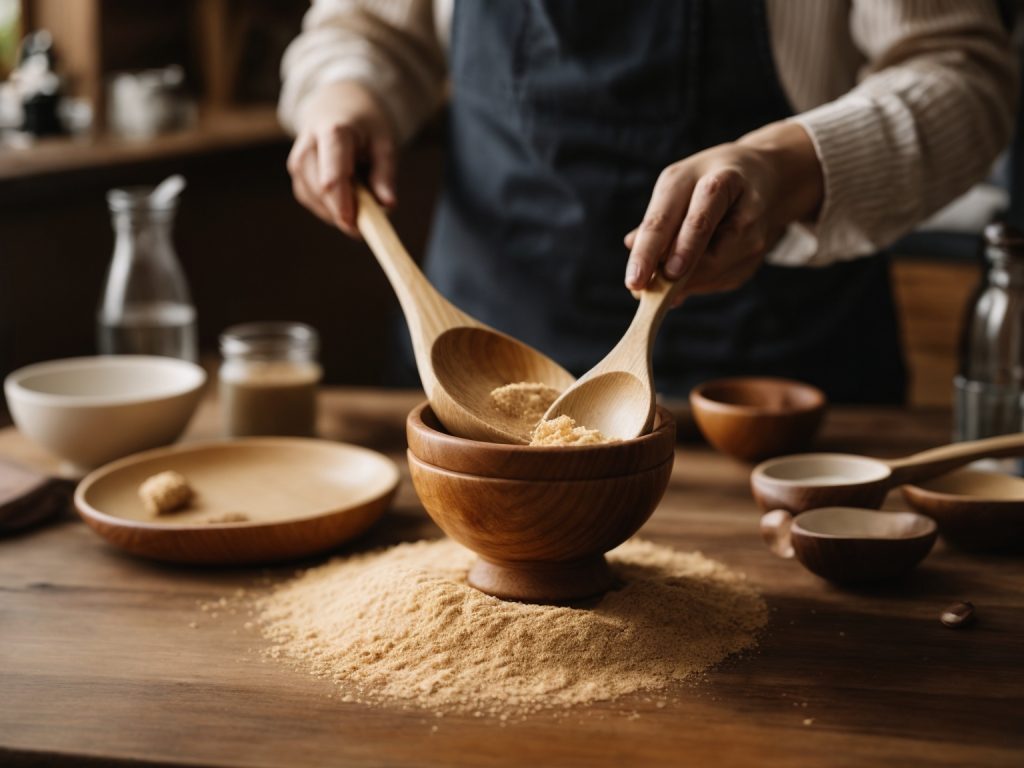
If you’re an avid cook, you know how important it is to have clean and well-maintained kitchen utensils. Wooden spoons are a staple in any kitchen, but they can be tricky to clean. Not only can they absorb flavors and odors, but they can also harbor bacteria if not cleaned properly. In this article, we’ll walk you through some simple steps to keep your wooden spoons clean and in good condition.

First and foremost, it’s important to wash your wooden spoons after each use. Use warm water and soap to remove any food residue, and then rinse thoroughly. Never put your wooden spoons in the dishwasher, as the high heat can cause them to warp or crack. Instead, wash them by hand and let them air dry.

If your wooden spoons are looking a bit worse for wear, don’t worry! There are a few simple steps you can take to restore them to their former glory. Some methods include soaking your spoons in a mixture of water and vinegar or hydrogen peroxide, while others suggest using a paste made of baking soda and lemon juice. We’ll go over these methods in more detail later in the article. By following these tips, you can keep your wooden spoons clean and in great condition for years to come.

Understanding the Importance of Cleaning Wooden Spoons

how-to-clean-wooden-spoons-simple-tips-and-tricks-2

Wooden spoons are a staple in most kitchens, and for good reason. They are versatile, durable, and gentle on your cookware. However, they require proper care and maintenance to ensure their longevity. One of the most important aspects of caring for wooden spoons is cleaning them regularly.

When you use wooden spoons to cook, they come into contact with various types of food, including acidic and oily substances. Over time, these substances can build up on the surface of the spoon, leading to discoloration, odors, and even mold growth. If left uncleaned, these spoons can become a breeding ground for harmful bacteria that can cause foodborne illnesses.

Regular cleaning of wooden spoons is essential to remove any build-up of food, oils, and bacteria. By cleaning your wooden spoons after each use, you will prevent any harmful substances from accumulating on the surface of the spoon. This will not only keep your spoons looking clean and new but also ensure that they are safe to use.

When cleaning wooden spoons, it is important to avoid using harsh chemicals or abrasive sponges, as these can damage the surface of the spoon. Instead, use mild soap and warm water to gently clean the spoon. You can also soak the spoon in a 50/50 mix of water and hydrogen peroxide or distilled white vinegar for a deep clean.

In conclusion, cleaning your wooden spoons regularly is crucial to maintaining their longevity and ensuring that they are safe to use. By taking the time to clean your spoons properly, you will not only keep them looking new but also protect your health and the health of those who use your kitchen.

Materials Needed for Cleaning

Cleaning your wooden spoons is a simple process that only requires a few materials. Here are the things you’ll need:

Dish soap

Dish soap is an essential ingredient for cleaning your wooden spoons. It helps to remove dirt, grime, and bacteria from the surface of the spoon.

Water

You’ll also need water to rinse off the soap and any debris from the spoon. Make sure to use warm water, as hot water can damage the wood.

Non-abrasive sponge

A non-abrasive sponge is perfect for cleaning wooden spoons. It’s gentle enough to avoid scratching the wood, but tough enough to remove any tough stains.

Hydrogen peroxide or distilled white vinegar

For a deep clean, you can use hydrogen peroxide or distilled white vinegar. These products have antibacterial properties that help to kill germs and bacteria on the surface of the spoon.

Mineral, walnut, tung, or linseed oil

To keep your wooden spoons in good condition, you’ll need to oil them periodically. Mineral, walnut, tung, or linseed oil are all excellent options for this. They help to keep the wood moisturized and prevent it from drying out and cracking.

Clean cloth

After cleaning and oiling your wooden spoons, you’ll need a clean cloth to wipe off any excess oil and make sure the spoon is dry before using it again.

By having these materials on hand, you’ll be able to keep your wooden spoons clean and in good condition for years to come.

Pre-Cleaning Steps

Before you start cleaning your wooden spoons, there are a few pre-cleaning steps you should take to ensure that the spoons are properly cleaned and maintained.

Rinsing the Spoons

The first step is to rinse the spoons under running water to remove any food particles or debris that may be stuck on them. You can use a non-abrasive sponge to gently scrub the surface of the spoons to remove any stubborn residue. Avoid using harsh detergents or abrasive cleaners as they can damage the wood and cause it to crack or split.

Inspecting for Damage

After rinsing the spoons, inspect them for any signs of damage. Check for cracks, splits, or splinters in the wood. If you find any damage, it’s best to discard the spoon as it can be a breeding ground for bacteria.

If the spoons are in good condition, you can proceed to the next step of cleaning them. Remember, it’s important to take care of your wooden spoons to extend their lifespan and ensure that they remain safe to use in your kitchen.

Deep Cleaning Process

When it comes to deep cleaning your wooden spoons, there are a few things to keep in mind. Here are two effective methods for deep cleaning your wooden spoons:

Using Mild Soap

To deep clean your wooden spoons with mild soap, follow these steps:

  1. Fill a sink or basin with warm water and add a small amount of mild dish soap.
  2. Place your wooden spoons in the water and use a non-abrasive sponge to gently scrub them.
  3. Rinse the spoons with warm water and dry them immediately with a clean towel.
  4. For extra protection, you can apply a thin layer of mineral oil to your wooden spoons after they have dried.

Using Vinegar

Another effective method for deep cleaning your wooden spoons is by using vinegar. Here’s how to do it:

  1. Mix equal parts of water and distilled white vinegar in a container.
  2. Immerse your wooden spoons in the mixture and let them soak for at least 15 minutes.
  3. Use a non-abrasive sponge to scrub the spoons gently.
  4. Rinse the spoons with warm water and dry them immediately with a clean towel.
  5. For extra protection, you can apply a thin layer of mineral oil to your wooden spoons after they have dried.

Remember, it’s important to avoid soaking your wooden spoons in water, as this can cause them to warp and crack. By following these deep cleaning methods, you can help extend the lifespan of your wooden spoons and keep them looking like new.

Drying Wooden Spoons Properly

After washing your wooden spoons, it is important to dry them properly to prevent warping, cracking, or mold growth. Here are some tips for drying your wooden spoons:

  • Air-dry your wooden spoons: The best way to dry wooden spoons is to let them air dry naturally. Place them in a dish rack or on a clean towel and let them dry completely before storing them.
  • Don’t use a dishwasher: Wooden spoons should never be washed in a dishwasher as the high heat and moisture can damage the wood and cause it to warp or crack.
  • Avoid direct sunlight: Direct sunlight can cause the wood to dry out too quickly and may cause it to crack. It is best to dry your wooden spoons in a shaded area or indoors.
  • Use a clean towel: If you need to dry your wooden spoons immediately, use a clean towel to wipe them dry. Make sure the towel is clean and dry to prevent any bacteria or mold growth.
  • Store your wooden spoons properly: Once your wooden spoons are completely dry, store them in a dry and well-ventilated area. Avoid storing them in airtight containers or plastic bags as this can trap moisture and cause mold growth.

By following these simple tips, you can ensure that your wooden spoons stay in good condition and last for years to come.

Maintenance Tips

Regular Cleaning

To keep your wooden spoons in good condition, it is essential to clean them regularly. Hand wash your wooden spoons with warm water and soap after each use. Avoid using harsh detergents or abrasive sponges that can damage the wood’s surface. Rinse the spoons thoroughly and dry them with a clean towel or air dry them.

If you notice any stubborn stains or food residue on the spoons, soak them in a mixture of warm water and vinegar for about 15 minutes before washing them. You can also use a non-abrasive sponge or a soft-bristled brush to scrub off any remaining stains. Make sure to rinse the spoons thoroughly and dry them completely before storing them.

Oil Treatment

Wooden spoons can dry out over time, which can cause them to split or crack. To prevent this from happening, it is essential to treat your wooden spoons with oil periodically. Mineral, walnut, tung, or linseed oil are all good options for treating wooden spoons.

To oil your wooden spoons, apply a small amount of oil to a clean cloth and rub it into the spoon’s surface. Make sure to coat the entire spoon, including the handle and any crevices or joints. Let the oil soak in for a few minutes, then wipe off any excess oil with a clean cloth. Repeat this process once a month or as needed to keep your wooden spoons in good condition.

By following these maintenance tips, you can extend the lifespan of your wooden spoons and keep them looking and functioning like new for years to come.

Common Mistakes to Avoid

When it comes to cleaning wooden spoons, there are a few common mistakes that people often make. Avoiding these mistakes will help ensure that your wooden spoons remain in good condition for years to come.

Mistake #1: Using Harsh Cleaners

One of the biggest mistakes people make when cleaning wooden spoons is using harsh cleaners. Harsh cleaners can damage the wood and cause it to dry out, crack, or split. Instead, use mild dish soap and warm water to clean your wooden spoons.

Mistake #2: Soaking Wooden Spoons

Another mistake people often make is soaking wooden spoons in water for extended periods. This can cause the wood to absorb too much moisture, which can lead to warping or cracking. Instead, wash your wooden spoons by hand and dry them immediately afterward.

Mistake #3: Putting Wooden Spoons in the Dishwasher

Putting wooden spoons in the dishwasher is a big no-no. The high heat and harsh detergents can damage the wood and cause it to split or crack. Instead, wash your wooden spoons by hand and dry them immediately afterward.

Mistake #4: Using High Heat to Dry Wooden Spoons

When drying your wooden spoons, avoid using high heat sources like ovens or microwaves. High heat can cause the wood to dry out too quickly, which can lead to cracking or splitting. Instead, air dry your wooden spoons or use a soft towel to dry them by hand.

By avoiding these common mistakes, you can help ensure that your wooden spoons remain in good condition for years to come.

FAQs About Cleaning Wooden Spoons

Cleaning wooden spoons is an essential part of maintaining their longevity and hygiene. Here are some frequently asked questions about how to clean wooden spoons.

How often should you clean your wooden spoons?

You should clean your wooden spoons after each use to prevent the buildup of bacteria and food residue. It’s best to wash them by hand with warm, soapy water and let them air dry completely before storing them.

Can you put wooden spoons in the dishwasher?

No, you should never put wooden spoons in the dishwasher. The high heat and harsh detergents can damage the wood and cause it to warp or crack. Hand washing is the best way to clean wooden spoons.

How do you remove stains from wooden spoons?

To remove stains from wooden spoons, mix equal parts baking soda and water to form a paste. Apply the paste to the stained area and let it sit for a few minutes before rinsing it off with warm water. For tougher stains, you can also try rubbing the area with a slice of lemon or a few drops of vinegar.

How do you prevent wooden spoons from drying out?

To prevent wooden spoons from drying out and cracking, it’s important to oil them regularly. Use a food-safe oil like mineral oil, walnut oil, or linseed oil. Apply a small amount of oil to a clean cloth and rub it into the wood, making sure to cover the entire surface. Let the oil soak in for a few hours before wiping off any excess with a clean cloth.

Can you use bleach to clean wooden spoons?

No, you should never use bleach to clean wooden spoons. Bleach is too harsh and can damage the wood, causing it to become brittle and crack. Stick to gentle, natural cleaning methods like soap and water or vinegar and baking soda.

comparing-the-wooden-stick-with-other-items-in-granny

What is the Wooden Stick for in Granny: A Quick Guide

If you’re a fan of horror games, you’ve likely heard of the popular mobile game, Granny. In this game, you play as a character trapped in Granny’s house, and you must find a way to escape before she catches you. One item that players often wonder about is the wooden stick. What is it for, and how can it help you escape?

The wooden stick is a crucial item in Granny, and it serves multiple purposes. First and foremost, it can be used to disable one of the locks on the escape pipe, which is necessary if you want to use that route to escape. Additionally, the wooden stick can be used as a weapon to defend yourself against Granny’s attacks. Knowing how to use the wooden stick effectively can make all the difference in your chances of escaping Granny’s house.

So, whether you’re a seasoned Granny player or just starting out, understanding the purpose of the wooden stick is essential. In this article, we’ll explore everything you need to know about this item, including how to find it, how to use it, and how it can help you escape Granny’s clutches.

The Wooden Stick in Granny: An Overview

the-wooden-stick-in-granny

When playing Granny, you may come across a wooden stick. This item is an essential tool that can help you escape Granny’s house. In this section, we will provide you with an overview of the wooden stick in Granny.

Appearance

The wooden stick in Granny has a simple appearance. It is a brown stick that is about a foot long. The stick is thin and has a curved end, which makes it easy to hold. You can find the wooden stick in various locations throughout the game.

Mechanics

The wooden stick has two main uses in Granny. Firstly, it can be used as a weapon to defend yourself against Granny’s attacks. Secondly, it can be used to trigger certain events within the game. For example, the wooden stick can be used to disable one of the locks that hold the escape pipe closed.

Usage

To use the wooden stick as a weapon, you simply need to hold it in your hand and hit Granny with it. This will stun her for a few seconds, giving you time to escape. To use the wooden stick to trigger an event, you need to find the location where it is needed and interact with it.

Spawning

The wooden stick can spawn in various locations throughout the game. It can be found in drawers, on shelves, or hidden in secret areas. Keep an eye out for it as it can be a crucial item for your escape.

Trivia

Here are some interesting facts about the wooden stick in Granny:

  • The wooden stick was added to Granny in Version 1.8.
  • The wooden stick is necessary for the Escape Pipe route.
  • The wooden stick can be used to disable one of the locks which holds the pipe closed.

That’s a brief overview of the wooden stick in Granny. Keep in mind that it can be a useful tool for your escape, so keep an eye out for it during your gameplay.

Role of the Wooden Stick

The Wooden Stick is a crucial item in Granny that serves multiple purposes. It is a versatile tool that can be used to defend yourself against Granny’s attacks, trigger certain events, and unlock the Escape Pipe route. Here is a breakdown of the different roles the Wooden Stick plays in the game:

Defense

One of the primary uses of the Wooden Stick is as a weapon for self-defense. You can use it to hit Granny and knock her out for a short period of time. This buys you some time to escape or complete an objective. However, it is important to note that the Wooden Stick is not a foolproof defense mechanism. Granny can still attack you while you are holding it, and it can break after a few uses.

Triggering Events

The Wooden Stick can also be used to trigger certain events within the game. For example, you can use it to knock a vase off a table, which will distract Granny and allow you to sneak past her. You can also use it to hit a button that opens a secret passage or reveals a hidden item.

Unlocking the Escape Pipe

Finally, the Wooden Stick is necessary for unlocking the Escape Pipe route. There are two locks on the pipe that need to be disabled before you can use it to escape Granny’s house. The Wooden Stick is needed to disable one of these locks, so it is an essential item for completing the game.

Overall, the Wooden Stick is an important tool for surviving and progressing in Granny. It has multiple uses that make it a valuable item to have in your inventory. However, it is important to use it wisely and strategically to maximize its effectiveness.

Gameplay Strategies with the Wooden Stick

The Wooden Stick is a crucial item in Granny that allows players to escape from the house through the Escape Pipe. Here are some useful gameplay strategies that you can use when playing with the Wooden Stick:

  1. Finding the Wooden Stick: The Wooden Stick can be found in various locations throughout the house, including the Basement, the Jail Room, and the Backyard. Keep an eye out for it as you explore the house.
  2. Using the Wooden Stick: Once you have found the Wooden Stick, you need to use it to unlock one of the locks that hold the Escape Pipe closed. To do this, go to the Escape Pipe and insert the Wooden Stick into the Lever Lock. This will unlock the lock and allow you to escape through the pipe.
  3. Be Careful: While the Wooden Stick is a useful item, it can also be dangerous if used incorrectly. Be careful not to drop it, as this will make noise that could alert Granny to your presence. Additionally, be aware that the Wooden Stick will not disable all of the locks on the Escape Pipe, so you will need to find other items to unlock the remaining locks.
  4. Practice: Like any other item in Granny, the Wooden Stick requires practice to use effectively. Try out different strategies and see what works best for you. With practice, you will become more skilled at using the Wooden Stick and escaping the house.

In summary, the Wooden Stick is a vital item in Granny that allows players to escape through the Escape Pipe. By following these gameplay strategies, you can use the Wooden Stick effectively and increase your chances of escaping from Granny’s house.

Common Locations of the Wooden Stick

When playing Granny, finding the Wooden Stick is crucial for escaping through the Sewer. Here are some common locations where you can find the Wooden Stick:

  • Main Room: The Wooden Stick can be found on a table in the Main Room, which is located on the ground floor of Granny’s house. Look for a table with a vase and a picture frame on it.
  • Basement: The Wooden Stick can also be found in the Basement, which is accessible through a hidden door in the Study. Look for a shelf with a small wooden crate on it.
  • Attic: Another location where the Wooden Stick can be found is in the Attic. Look for a wooden box on the floor near the entrance to the Secret Area.
  • Special Room: Sometimes, the Wooden Stick can be found in the Special Room, which is accessible through a hidden door in the Baby Room. Look for a table with a lamp and a vase on it.

Remember that the Wooden Stick can spawn in different locations, so keep searching until you find it. Once you have the Wooden Stick, you can use it to open the Escape Pipe and make your way to freedom.

It’s important to note that Granny can hear you when you drop the Wooden Stick, so be careful not to make too much noise. Additionally, if you’re playing on Hard mode, the Wooden Stick may be guarded by a Bear Trap, so be sure to check for traps before picking it up.

Overall, knowing where to find the Wooden Stick can greatly increase your chances of escaping Granny’s house. Keep these common locations in mind and use them to your advantage.

Tips and Tricks for Using the Wooden Stick

The wooden stick is an essential item in Granny that can be used to unlock the escape pipe and help you escape from Granny’s house. Here are some tips and tricks for using the wooden stick effectively:

  • Finding the Wooden Stick: The wooden stick is typically found in the sewer tunnel, which can be accessed through the hidden door in the basement. Once you enter the sewer tunnel, look around for a wooden stick lying on the ground.
  • Using the Wooden Stick: To use the wooden stick, you need to attach it to the lever lock of the escape pipe. To do this, hold the wooden stick in your hand and approach the escape pipe. Once you are close enough, a prompt will appear asking if you want to attach the wooden stick to the lever lock. Select “yes” to attach the wooden stick.
  • Be Careful: While holding the wooden stick, be careful not to make any noise or alert Granny to your presence. If Granny hears you, she will come running and try to catch you.
  • Timing is Key: Use the wooden stick at the right time to maximize its effectiveness. Wait until Granny is far away from the escape pipe before using the wooden stick to unlock it. This will give you more time to escape before Granny catches you.
  • Practice Makes Perfect: Using the wooden stick effectively takes practice. Try different strategies and techniques to see what works best for you.

By following these tips and tricks, you can use the wooden stick to escape from Granny’s house and win the game. Good luck!

Comparing the Wooden Stick with Other Items in Granny

comparing-the-wooden-stick-with-other-items-in-granny

In Granny, there are several items that you can use to escape or defend yourself. The Wooden Stick is one of them, and it has its own unique advantages and disadvantages compared to other items.

Here is a comparison of the Wooden Stick with other items in Granny:

Hammer

The Hammer is a weapon that you can use to knock out Granny for a short period of time. It is also useful for breaking open wooden boards that cover up windows and doors. However, the Hammer is a one-time use item, and once you use it, it will disappear from your inventory. In contrast, the Wooden Stick can be used multiple times, making it more versatile in certain situations.

Screwdriver

The Screwdriver is an item that you can use to unscrew bolts and screws on doors and other objects. It is also useful for opening up certain locks. However, the Screwdriver is a one-time use item, and once you use it, it will disappear from your inventory. The Wooden Stick, on the other hand, can be used multiple times, making it more useful in situations where you need to disable traps or open up locks multiple times.

Cutting Pliers

The Cutting Pliers are an item that you can use to cut through wires and cables. They are useful for disabling traps that are triggered by electrical circuits. However, the Cutting Pliers are a one-time use item, and once you use them, they will disappear from your inventory. The Wooden Stick, on the other hand, can be used multiple times, making it more useful in situations where you need to disable traps multiple times.

Master Key

The Master Key is an item that you can use to unlock any door in Granny’s house. It is a very useful item, but it is also very rare and difficult to find. The Wooden Stick, on the other hand, is much easier to find and can be used to open up certain locks as well.

Overall, the Wooden Stick is a versatile item that can be used in a variety of situations. While it may not be as powerful as some of the other items in Granny, its ability to be used multiple times makes it a valuable tool in your escape plan.

The Wooden Stick in Different Game Modes

In Granny, the wooden stick is a useful tool that can be used to retrieve items that are out of reach. It can also be used to activate certain mechanisms that are necessary to progress through the game. The wooden stick can be found in different game modes, and in this section, we’ll take a closer look at where you can find it and how it can be used.

Granny Mode

In Granny mode, the wooden stick can be found in various locations throughout the house. It can be used to retrieve items that are out of reach, such as keys and weapons. You can also use the wooden stick to activate certain mechanisms, such as opening a hidden passage or unlocking a door. It’s important to note that the wooden stick has limited durability, so use it wisely.

Practice Mode

In Practice mode, the wooden stick can be found in the same locations as in Granny mode. However, the game is more forgiving in this mode, and the wooden stick has unlimited durability. This means that you can use it as many times as you need to retrieve items or activate mechanisms.

Extreme Mode

In Extreme mode, the wooden stick is not available. This mode is designed to be more challenging than the other modes, and you’ll need to rely on your wits and skills to progress through the game. Without the wooden stick, you’ll need to find other ways to retrieve items and activate mechanisms.

Custom Mode

In Custom mode, you can choose whether or not the wooden stick is available. This mode allows you to customize the game to your liking, and you can adjust various settings to make the game easier or more challenging. If you want to make the game more challenging, you can disable the wooden stick and see how far you can get without it.

Overall, the wooden stick is a useful tool that can help you progress through the game. Whether you’re playing in Granny mode, Practice mode, or Custom mode, it’s important to use the wooden stick wisely and make the most of its limited durability.

The Evolution of the Wooden Stick in Granny Updates

If you have played the game Granny, you may be familiar with the Wooden Stick. This item is used for escaping Granny’s house, specifically for disabling one of the locks that hold the Escape Pipe closed. In this section, we will take a look at the evolution of the Wooden Stick in Granny updates.

Version 1.8

The Wooden Stick was added to Granny in Version 1.8. This update introduced the Escape Pipe route, which requires the Wooden Stick to be used in order to escape. When the player acquires the Wooden Stick, they can use it to disable one of the locks holding the pipe closed, making it easier to escape Granny’s house.

Version 1.9

In Version 1.9, the Wooden Stick was given a new use. It can now be used to close traps that Granny has set up around the house. This is a useful tool for players who want to avoid getting caught by Granny’s traps.

Version 1.9.1

In Version 1.9.1, the Wooden Stick was given a new spawn location. It can now be found in the Garage, making it easier for players to acquire it early on in the game.

Version 1.9.2

In Version 1.9.2, the Wooden Stick was given another new use. It can now be used to break the planks that Granny has placed over windows and doors. This is a useful tool for players who want to create new escape routes or avoid getting trapped in a room.

Version 1.9.3

In Version 1.9.3, the Wooden Stick was given a new spawn location. It can now be found in the Car, making it easier for players to acquire it early on in the game.

Overall, the Wooden Stick has evolved over the course of Granny updates, giving players more uses for this item and making it easier to acquire. Whether you are using it to escape Granny’s house or avoid her traps, the Wooden Stick is an essential item for any player looking to survive in Granny.

Frequently Asked Questions about the Wooden Stick

If you’re playing Granny, you might have come across the Wooden Stick. This item is essential for the Escape Pipe route, as it disables one of the locks that hold the pipe closed. Here are some frequently asked questions about the Wooden Stick:

What is the Wooden Stick?

The Wooden Stick is an escape type item in Granny. It is a wooden rod that can be used to unlock one of the locks on the Escape Pipe. It was added to Granny in Version 1.8.

Where can I find the Wooden Stick?

The Wooden Stick can be found in the Sewer Room. It is usually located on a table or on a shelf. You can also find it in the Secret Area, which can be accessed by using the Hammer to break the wall in the Backyard.

How do I use the Wooden Stick?

To use the Wooden Stick, you need to go to the Escape Pipe and find the lock that the Wooden Stick can unlock. Once you find it, select the Wooden Stick from your inventory and tap on the lock to use it. The lock will then be disabled, allowing you to escape through the pipe.

Can I use the Wooden Stick more than once?

No, you can only use the Wooden Stick once. Once you have used it to unlock the lock on the Escape Pipe, it will disappear from your inventory.

What happens if I don’t use the Wooden Stick?

If you don’t use the Wooden Stick, you won’t be able to escape through the Escape Pipe. You will need to find another way to escape from Granny’s house.

Overall, the Wooden Stick is a crucial item in Granny, and you need to find it if you want to escape through the Escape Pipe. Keep an eye out for it when you’re exploring Granny’s house, and make sure to use it wisely when you find it.

How Long to Soak Wooden Skewers: Quick Tips for Perfect Grilling

Are you planning on grilling some delicious kebabs this weekend? If so, you’re going to need some wooden skewers. But, do you know how long to soak them before using them? Soaking wooden skewers is an important step to prevent them from burning on the grill.

According to our research, soaking skewers for at least 30 minutes is recommended. This gives the wood enough time to absorb and trap moisture, which prevents them from burning. However, some sources suggest soaking them for up to 60 minutes for best results. Additionally, if you want to add an extra depth of flavor to your kebabs, you can experiment with soaking skewers in wine or juice. Just be sure to choose something that complements the meat and vegetables you’re using.

Overall, taking the time to soak your wooden skewers is a crucial step to ensure your kebabs turn out perfectly. So, next time you’re planning a barbecue, don’t forget to soak your skewers beforehand.

Understanding Wooden Skewers

If you’re planning to grill some kebabs, you’ll need to use skewers to hold the ingredients together. Wooden skewers are a popular choice because they’re affordable and widely available. However, they require some preparation before use. Here’s what you need to know about wooden skewers.

Soaking Wooden Skewers

Wooden skewers need to be soaked in water before use to prevent them from burning on the grill. Soaking the skewers also helps to keep the food from sticking to them. The length of time you need to soak your wooden skewers depends on a few factors, including the type of wood and the length of the skewers.

Most experts recommend soaking wooden skewers for at least 30 minutes before using them. Some even suggest soaking them for up to 2 hours, especially if you plan to cook the kebabs for a long time. However, soaking them overnight is not recommended as it can make them too soft and difficult to handle.

Types of Wooden Skewers

There are several types of wooden skewers available, each with its own advantages and disadvantages. Here are some of the most common types:

  • Bamboo skewers: Bamboo skewers are the most popular type of wooden skewers. They’re affordable, lightweight, and easy to find. However, they can be prone to breaking or splintering, especially if they’re not soaked properly.

  • Cedar skewers: Cedar skewers are a bit more expensive than bamboo skewers, but they’re sturdier and have a pleasant aroma. They’re a good choice for grilling fish and seafood.

  • Rosemary skewers: Rosemary skewers are made from fresh rosemary sprigs. They add a unique flavor to the food and are a great option for grilling vegetables and chicken.

Using Wooden Skewers

When using wooden skewers, it’s important to keep a few things in mind:

  • Soak the skewers in water for at least 30 minutes before using them.
  • Thread the food onto the skewers, leaving a little space between each piece.
  • Don’t overload the skewers as this can make them difficult to handle and may cause the food to cook unevenly.
  • Be careful when turning the skewers on the grill as they can be hot.
  • Use tongs or a spatula to remove the food from the skewers.

By following these tips, you can ensure that your kebabs turn out perfectly every time.

Why Soak Wooden Skewers

When it comes to grilling, wooden skewers are a popular choice for creating delicious kabobs. However, before you start grilling, it’s important to soak your wooden skewers in water. But why is soaking necessary?

Soaking your wooden skewers in water before grilling helps to prevent them from burning and breaking apart on the grill. The water helps to keep the skewers moist, which in turn prevents them from catching fire and breaking apart while you’re cooking. This is especially important if you’re cooking over high heat or for an extended period of time.

But how long should you soak your wooden skewers for? According to various sources, soaking your wooden skewers for at least 30 minutes is recommended. However, some recommend soaking for up to 4 hours for a more gourmet presentation and added depth of flavor.

It’s also important to note that you should never skip the soaking step. Soaking skewers for at least 30 minutes gives the brittle bamboo enough time to absorb and trap the moisture. If you skip the soaking step, the wood will dry out and burn quickly on the grill.

In summary, soaking your wooden skewers before grilling is an important step in ensuring your kabobs turn out perfectly. So take the time to soak your skewers in water before grilling, and you’ll be rewarded with delicious and perfectly cooked kabobs every time.

Ideal Soaking Time for Wooden Skewers

When it comes to grilling with wooden skewers, soaking them in water before use is essential. Soaking the skewers prevents them from burning and breaking apart on the grill. But how long should you soak your wooden skewers?

The general consensus is to soak them for at least 30 minutes. However, some experts recommend soaking them for up to 60 minutes for best results. Based on our research, we recommend soaking them for at least 60 minutes to ensure they are fully saturated with water.

Soaking the skewers for too long can cause them to become waterlogged and difficult to handle. It can also affect the taste of your food. Therefore, we suggest not soaking them for more than 2 hours.

It’s important to note that the soaking time may vary depending on the thickness of the skewers. Thicker skewers may require longer soaking times than thinner ones.

In summary, soaking wooden skewers in water is necessary to prevent them from burning and breaking apart on the grill. Soak them for at least 60 minutes, but no longer than 2 hours. Adjust the soaking time as needed based on the thickness of the skewers.

Factors Influencing Soaking Time

When it comes to soaking wooden skewers, there are several factors that can influence how long you need to soak them for. Here are three key factors to consider:

Type of Wood

Different types of wood have different levels of absorbency. Bamboo skewers, for example, are highly absorbent and can be soaked for as little as 30 minutes. Hardwood skewers, on the other hand, may require longer soaking times to fully absorb enough water to prevent burning.

Size of Skewers

The size of your skewers can also impact how long you need to soak them for. Thicker skewers will take longer to absorb water, so you may need to soak them for up to an hour to ensure they are fully saturated. Thinner skewers, on the other hand, may only require a 30-minute soak.

Type of Food

The type of food you plan to skewer can also impact how long you need to soak your skewers for. Foods that require longer cooking times, such as chicken or beef, may benefit from longer soaking times to prevent the skewers from burning. More delicate foods, such as shrimp or vegetables, may require less soaking time.

In general, it’s a good idea to soak your wooden skewers for at least 30 minutes before using them. However, depending on the type of wood, size of skewers, and type of food you plan to cook, you may need to adjust your soaking time accordingly. By taking these factors into account, you can ensure that your skewers are properly soaked and ready for the grill.

The Soaking Process

When it comes to grilling, wooden skewers are a popular choice for kebabs and other grilled dishes. However, before using wooden skewers, it’s important to soak them to prevent them from burning on the grill. Here are some tips for the soaking process.

Choosing the Right Container

First, choose a container that is large enough to hold the skewers. A baking dish or a large bowl works well. Make sure the container is deep enough to fully submerge the skewers in water.

Water Temperature

Next, fill the container with cold water. You can also add some flavor to the water by using wine, beer, or broth instead of plain water. However, keep in mind that the skewers will absorb the flavor of the liquid, so choose a liquid that complements the flavors of your dish.

It’s important to note that hot water should not be used to soak wooden skewers, as this can cause them to split and break. Instead, use cold water and give the skewers enough time to fully soak up the water.

Soaking Time

The general consensus is that wooden skewers should be soaked for at least 30 minutes before grilling. However, some experts recommend soaking them for up to 60 minutes to ensure they are fully saturated with water.

Keep in mind that the longer you soak the skewers, the less likely they are to burn on the grill. If you’re short on time, you can also soak the skewers for a few minutes and then wrap them in damp paper towels to help keep them moist.

In conclusion, soaking wooden skewers is an important step in preparing them for grilling. By choosing the right container, using cold water, and giving them enough time to soak, you can prevent the skewers from burning and ensure that your grilled dishes turn out perfectly.

Common Mistakes While Soaking Skewers

When it comes to grilling, using wooden skewers is a popular method to keep your food together and cook it evenly. However, if you don’t soak your skewers properly, they can easily burn and ruin your meal. Here are some common mistakes to avoid when soaking your skewers:

Mistake #1: Not soaking your skewers long enough

Soaking your skewers for at least 30 minutes is essential to prevent them from burning on the grill. However, some people make the mistake of not soaking them long enough. If you don’t give your skewers enough time to absorb water, they will still dry out and burn on the grill. To ensure your skewers are properly soaked, we recommend soaking them for at least 60 minutes.

Mistake #2: Soaking your skewers in hot water

Another common mistake is soaking your skewers in hot water. While it may seem like a good idea to speed up the soaking process, hot water can actually cause the skewers to split and break. Instead, use cold water to soak your skewers and give them enough time to absorb the moisture.

Mistake #3: Using the wrong type of skewers

Not all skewers are created equal, and using the wrong type of skewers can also lead to burning on the grill. Bamboo skewers are a popular choice, but they can be brittle and break easily if not soaked properly. If you want to avoid this problem altogether, consider using metal skewers or investing in high-quality wooden skewers that are designed to withstand high heat.

By avoiding these common mistakes, you can ensure that your skewers are properly soaked and ready to use on the grill. So take the time to soak your skewers properly, and you’ll be rewarded with perfectly cooked and deliciously grilled food every time!

Alternatives to Soaking Wooden Skewers

While soaking wooden skewers is the most common method to prevent them from burning on the grill, there are a few alternatives you can try if you’re short on time or simply don’t want to soak your skewers.

Metal Skewers

One option is to use metal skewers instead of wooden ones. Metal skewers are reusable, durable, and won’t burn on the grill. They also don’t require any soaking, making them a convenient alternative to wooden skewers.

Bamboo Skewers

Bamboo skewers are another option. They are similar to wooden skewers but are made from a denser bamboo material that is less likely to burn. They also don’t require as much soaking time as wooden skewers, so you can soak them for just 10-15 minutes before grilling.

Salt-Soaked Skewers

If you’re looking for a quick alternative to soaking, you can try salt-soaking your skewers. Simply dissolve a tablespoon of salt in a cup of water and soak your skewers in the solution for 10-15 minutes. The salt will help prevent the skewers from burning on the grill.

Oil-Coated Skewers

Another alternative is to coat your wooden skewers in oil before grilling. This will help prevent them from burning and add flavor to your food. You can use any type of oil, such as vegetable, olive, or sesame oil. Simply brush the skewers with oil before grilling.

While soaking wooden skewers is the most common method to prevent them from burning on the grill, there are a few alternatives you can try if you’re short on time or simply don’t want to soak your skewers. Metal skewers, bamboo skewers, salt-soaked skewers, and oil-coated skewers are all viable options that can help you achieve perfectly grilled kebabs without the hassle of soaking.

Frequently Asked Questions about Soaking Wooden Skewers

When it comes to grilling, wooden skewers are a popular choice for cooking kebabs, veggies, and other small items. However, to prevent the skewers from burning or splintering on the grill, it’s important to soak them in water before use. Here are some frequently asked questions about soaking wooden skewers:

How long should I soak wooden skewers?

The recommended soak time for wooden or bamboo skewers is at least 30 minutes. This gives the skewers enough time to absorb moisture, which helps prevent them from burning or splintering on the grill. If you plan to grill over high heat or for a prolonged cooking period, consider soaking the skewers for 1-2 hours or even overnight.

Can I reuse wooden skewers?

It is not recommended to reuse wooden skewers, even if you have soaked them before. Reusing skewers can increase the risk of cross-contamination and can also cause the skewers to weaken and break. Instead, use new skewers for each grilling session.

Can I use other liquids besides water to soak my skewers?

While water is the most common liquid used to soak wooden skewers, you can also use other liquids such as wine, beer, or juice to add flavor to your grilled items. However, keep in mind that using sugary or acidic liquids can cause the skewers to burn faster on the grill.

Do I need to soak metal skewers?

No, metal skewers do not need to be soaked before use. However, keep in mind that metal skewers can get hot on the grill, so be sure to use tongs or oven mitts when handling them.

Can I grill with dry skewers?

It is not recommended to grill with dry skewers, as they can easily burn or splinter on the grill. Soaking the skewers in water before use helps prevent them from burning and makes them more durable for grilling.

Remember, soaking your wooden skewers before grilling is an important step to prevent them from burning or splintering on the grill. By following these tips, you can ensure that your skewers are ready to go for your next grilling adventure.

How to Make Wooden Beads Without a Lathe: Easy DIY Guide

Are you interested in creating your own wooden beads but don’t have access to a lathe? Don’t worry, you can still make beautiful beads with just a few tools and some patience. In this article, we will guide you through the process of making wooden beads without a lathe.

One of the easiest ways to make wooden beads without a lathe is by using a Dremel drill. With the right attachments and techniques, you can create beads of any size and shape. Another method is by using a hand drill and sandpaper. This technique requires more effort and time, but it can produce beautiful results. We will cover both methods in detail, so you can choose the one that works best for you.

Whether you want to create unique jewelry pieces or decorate your home, making wooden beads is a fun and rewarding activity. With a little bit of practice, you can master the techniques and create beads that are as beautiful as they are functional. So, let’s get started and learn how to make wooden beads without a lathe!

Understanding the Basics of Wooden Beads

If you’re looking to create your own wooden beads without a lathe, it’s important to understand the basics of wooden beads. Wooden beads are commonly used in jewelry making, home decor, and other craft projects. They come in various shapes and sizes, and can be made from a variety of woods.

Types of Wood

Different types of wood can be used to make wooden beads. Some popular choices include:

  • Pine: A softwood that is easy to work with and has a light, natural color.
  • Oak: A hardwood that is durable and has a distinctive grain pattern.
  • Maple: A hardwood that is dense and has a smooth, uniform texture.
  • Cherry: A hardwood that has a reddish-brown color and a fine grain.

Shapes and Sizes

Wooden beads can be made in a variety of shapes and sizes. Some common shapes include:

  • Round: The most common shape for wooden beads, available in various sizes.
  • Oval: A more unique shape that can add interest to your projects.
  • Cube: A square-shaped bead that can add a modern touch to your designs.
  • Tube: A cylindrical bead that can be used as a spacer or focal bead.

Sizes of wooden beads can range from tiny seed beads to larger statement beads. It’s important to choose the right size for your project to ensure that it looks balanced and visually appealing.

Finishing Techniques

Once you’ve created your wooden beads, you may want to apply a finish to them. Some popular finishing techniques include:

  • Sanding: Sanding the beads with a fine-grit sandpaper can create a smooth surface and remove any rough spots.
  • Staining: Staining the beads can add color and depth to the wood grain.
  • Sealing: Sealing the beads with a clear coat can protect them from moisture and wear.

By understanding the basics of wooden beads, you can create your own unique beads to use in your craft projects. With a little practice and experimentation, you can create beads that are both beautiful and functional.

Choosing the Right Wood

When it comes to making wooden beads without a lathe, choosing the right wood is crucial. You want a wood that is easy to work with and won’t split or crack during the drilling process. Here are some tips to help you choose the right wood for your project:

Softwoods vs. Hardwoods

Softwoods are generally easier to work with than hardwoods because they are less dense and have a lower risk of splitting. Some good softwoods for making wooden beads include pine, cedar, and spruce. Hardwoods, on the other hand, are denser and can be more difficult to work with. However, they also tend to be more durable and have a nicer finish. Some good hardwoods for making wooden beads include oak, maple, and cherry.

Grain Direction

When choosing your wood, pay attention to the direction of the grain. You want to choose a piece of wood with a straight grain that runs parallel to the length of the bead. This will help prevent the wood from splitting or cracking during the drilling process.

Knots and Imperfections

Avoid using wood with knots or other imperfections. These can cause the wood to split or crack during drilling. Look for a piece of wood that is free of knots and other defects.

Moisture Content

Finally, make sure your wood is dry before you begin. Moisture in the wood can cause it to warp or split during the drilling process. You can test the moisture content of your wood by weighing it before and after drying it in an oven at 200 degrees Fahrenheit for several hours. If the weight changes by more than a few percent, the wood is still too moist to use.

By following these tips, you can choose the right wood for your wooden bead project and avoid any issues during the drilling process.

Tools and Materials Needed

To make wooden beads without a lathe, you will need a few tools and materials. Here are the essential items you will need:

Hand Drill

A hand drill is the most important tool you will need to make wooden beads. You can use either a cordless or corded drill. A cordless drill will give you more freedom of movement, but a corded drill will provide you with more power. Make sure to have a variety of drill bits in different sizes to create holes of different diameters in the wooden beads.

Sandpaper

Sandpaper is essential to smooth the surface of the wooden beads. You will need sandpaper in various grits, from coarse to fine. Coarse grit sandpaper will remove rough spots and smooth out the shape of the bead, while fine grit sandpaper will give the bead a polished finish.

Saw

You will need a saw to cut the wooden dowel into smaller pieces that you can work with. A hand saw or a miter saw will work well for this purpose. Make sure to choose a saw that is appropriate for the size of the wooden dowel you are working with.

In addition to these tools, you will also need wooden dowels, a ruler, a pencil, and a clamp to secure the wooden dowel in place while you work on it. Once you have gathered all the necessary tools and materials, you are ready to start making your own wooden beads without a lathe.

Preparing the Wood

Making wooden beads without a lathe is a fun and easy craft that anyone can do. The first step is to prepare the wood that you will be using. Here are some tips to get you started:

Choose the Right Wood

The type of wood you choose will affect the final look and durability of your beads. Some good options include:

  • Softwoods like pine or cedar
  • Hardwoods like oak or maple
  • Fruitwoods like apple or cherry

Avoid using wood that is too hard or too soft, as it will be difficult to work with or may not hold up well over time.

Cut the Wood into Strips

Once you have chosen your wood, the next step is to cut it into strips. You can use a saw or a sharp knife to do this. Make sure that the strips are uniform in size and thickness, as this will make it easier to shape them into beads.

Sand the Strips

After cutting the strips, sand them down to remove any rough edges or splinters. You can use sandpaper or a sanding block to do this. Start with a coarse grit and gradually work your way up to a finer grit for a smooth finish.

Mark the Center of Each Strip

To make your beads symmetrical, you will need to mark the center of each strip. You can do this by measuring the width of the strip and dividing it in half. Use a pencil or a small notch to mark the center.

Drill a Hole in Each Strip

Finally, use a drill to make a hole in the center of each strip. The size of the hole will depend on the size of the bead you want to make. Use a drill bit that is slightly smaller than the diameter of the bead you want to create.

By following these steps, you will be well on your way to making beautiful wooden beads without a lathe.

Creating the Bead

If you don’t have access to a lathe, you can still make your own wooden beads using a few simple tools. In this section, we’ll go over the steps to create a basic wooden bead using a drill.

Cutting the Wood

To start, you’ll need a piece of wood that’s roughly the size and shape you want your bead to be. You can use a saw to cut the wood into a rough cylinder shape, or you can use a knife or chisel to carve it into the desired shape.

Once you have your rough shape, use sandpaper to smooth out any rough edges or bumps. You want the surface of the wood to be as smooth as possible before you begin drilling.

Drilling the Hole

Next, you’ll need to drill a hole through the center of the bead. This is where you’ll be able to string the bead onto a necklace or bracelet.

To drill the hole, you’ll need a drill and a drill bit that’s the same size as the string or cord you’ll be using. Clamp the wood onto a work surface to keep it steady, and use the drill to make a hole straight through the center of the bead.

Be sure to drill slowly and carefully to avoid cracking or splitting the wood. Once you’ve drilled the hole, use sandpaper to smooth out any rough edges around the hole.

And that’s it! With a little bit of patience and some basic tools, you can create your own wooden beads without a lathe.

Finishing the Beads

Once you have drilled your wooden beads, it’s time to finish them. This step is essential to protect the wood and give it a polished look. Here are the two main steps to finish your wooden beads:

Sanding the Beads

Before you apply any finish, you need to sand the beads to remove any rough edges and make the surface smooth. Here’s how to sand your wooden beads:

  1. Start with a coarse grit sandpaper (around 100 grit) and sand the bead until all the rough edges are gone.
  2. Move on to a finer grit sandpaper (around 220 grit) and sand the bead again to make the surface even smoother.
  3. Finally, use a very fine grit sandpaper (around 400 grit) to give the bead a polished finish.

Make sure to sand the entire surface of the bead, including the hole where the string will go through. You can use a small piece of sandpaper to sand the inside of the hole.

Applying Finish

After you have sanded the beads, it’s time to apply the finish. There are many different types of finishes you can use, but some popular options include:

  • Beeswax: This is a natural and non-toxic option that will give your wooden beads a soft, matte finish.
  • Shellac: This is a quick-drying and easy-to-apply finish that will give your wooden beads a glossy look.
  • Polyurethane: This is a durable and water-resistant finish that will protect your wooden beads from wear and tear.

Here’s how to apply the finish to your wooden beads:

  1. Apply a small amount of the finish to a clean cloth.
  2. Rub the finish onto the surface of the bead, making sure to cover the entire surface.
  3. Allow the finish to dry completely before handling the bead.

You may need to apply multiple coats of the finish to get the desired look. Make sure to follow the manufacturer’s instructions for the specific finish you are using.

In conclusion, finishing your wooden beads is an important step to protect and enhance the wood. By sanding the beads and applying a finish, you can create beautiful and long-lasting wooden beads without the need for a lathe.

Safety Tips

When working with wood, it is important to take certain safety precautions to avoid injury. Here are some safety tips to keep in mind when making wooden beads without a lathe:

  • Wear protective gear: Always wear eye protection and a dust mask when working with wood. Sawdust can irritate your eyes and lungs, so it’s important to protect yourself.
  • Use sharp tools: Dull tools can slip and cause injury. Make sure your tools are sharp and in good condition before using them.
  • Secure your workpiece: Use clamps or a vise to secure your workpiece to a stable surface. This will prevent it from moving around while you work on it.
  • Take breaks: Working for long periods of time can lead to fatigue and increase the risk of injury. Take frequent breaks to rest and stretch your muscles.
  • Follow instructions: When using power tools, always follow the manufacturer’s instructions and safety guidelines. Improper use can lead to serious injury.
  • Keep your workspace clean: A cluttered workspace can be hazardous. Keep your work area clean and organized to avoid tripping or falling.

By following these safety tips, you can reduce the risk of injury and enjoy the process of making wooden beads without a lathe.

Frequently Asked Questions

Here are some common questions that people have when it comes to making wooden beads without a lathe:

Q: Can I use any type of wood to make beads?

A: Yes, you can use any type of wood that you like. However, some types of wood may be easier to work with than others. Soft woods like pine and cedar are easier to carve and drill than harder woods like oak or maple. You may also want to consider the color and grain of the wood when choosing what type to use.

Q: Do I need any special tools to make wooden beads?

A: No, you don’t need any special tools. All you need is a drill, sandpaper, and a saw to cut the wood into small pieces. If you want to add designs or patterns to your beads, you can use a wood burning tool or paint.

Q: What size should I make my beads?

A: The size of your beads is up to you. However, most wooden beads range in size from 4mm to 20mm in diameter. If you are making jewelry, you may want to consider the size of the beads in relation to the size of the holes in your findings.

Q: How do I drill the holes in the beads?

A: To drill the holes in your beads, you will need a drill and a small drill bit. You can use a hand drill or a power drill, whichever you feel more comfortable with. Be sure to clamp the wood securely before drilling to prevent it from moving around. Start with a small drill bit and work your way up to a larger size if needed.

Q: How do I finish my wooden beads?

A: You can finish your wooden beads with sandpaper to smooth out any rough edges or surfaces. You can also add a coat of varnish or sealant to protect the wood and give it a polished look. If you want to add color to your beads, you can use wood stain or paint.

Wood Glue vs Gorilla Glue: Which is Better for Woodworking?

When it comes to woodworking, choosing the right glue is essential to ensure that your project stays together for years to come. Two popular options are wood glue and Gorilla glue, but which one is better for gluing wood? Let’s take a closer look at the differences between the two types of glue to help you decide which one is right for your project.

Wood glue is a type of adhesive that is specifically designed for use with wood. It creates a strong, durable bond and is ideal for use on furniture, cabinetry, and other woodworking projects. Gorilla glue, on the other hand, is a polyurethane-based adhesive that can bond to a wide variety of surfaces, including wood, metal, and plastic. While it is known for its incredible strength, it can be more difficult to work with than wood glue. In this article, we’ll compare the two types of glue to help you determine which one is better suited for your woodworking needs.

Understanding Wood Glue

When it comes to woodworking, choosing the right glue is important for ensuring a strong and lasting bond between wood pieces. Wood glue is a popular adhesive used for woodworking projects, and there are different types of wood glue available in the market. In this section, we will discuss the composition, advantages, and disadvantages of wood glue.

Composition

Wood glue is made up of synthetic or natural polymers, and it works by creating a chemical bond between the wood fibers. The glue penetrates the wood pores and hardens, forming a strong bond between the two pieces of wood. The most common types of wood glue are PVA (polyvinyl acetate), aliphatic resin, and polyurethane.

Advantages

Wood glue has several advantages that make it a popular choice for woodworking projects. Some of the advantages of using wood glue are:

  • Strong bond: Wood glue creates a strong bond between wood pieces, making it ideal for woodworking projects that require a durable and lasting bond.
  • Easy to use: Wood glue is easy to apply and dries quickly, making it a convenient adhesive for woodworking projects.
  • Versatile: Wood glue can be used on a variety of wood types, including hardwoods, softwoods, and composite woods.
  • Sandable: Once the glue dries, it can be sanded, stained, or painted to match the surrounding wood.

Disadvantages

While wood glue has many advantages, it also has some disadvantages that should be considered before using it for woodworking projects. Some of the disadvantages of wood glue are:

  • Not waterproof: Most wood glues are not waterproof, which means they are not suitable for outdoor woodworking projects or projects that will be exposed to moisture.
  • Limited open time: Wood glue has a limited open time, which means you need to work quickly when applying it to wood surfaces.
  • Not gap-filling: Wood glue is not gap-filling, which means it cannot be used to fill gaps between wood pieces.

In the next section, we will compare wood glue with Gorilla Glue to help you decide which adhesive is better for your woodworking project.

Understanding Gorilla Glue

Gorilla Glue is a polyurethane-based adhesive that is known for its strong bonding capabilities. It is a versatile glue that can be used on a variety of surfaces, including wood, metal, ceramic, and more. In this section, we will explore the composition, advantages, and disadvantages of Gorilla Glue.

Composition

Gorilla Glue is made up of polyurethane, which is a type of polymer that is known for its strong bonding properties. It is activated by moisture, so it is important to dampen the surface before applying the glue. Once applied, the glue expands and fills any gaps in the surface, creating a strong bond.

Advantages

One of the main advantages of Gorilla Glue is its strength. It can bond to a wide range of surfaces and can handle even the toughest of jobs. It is also waterproof, making it ideal for outdoor projects. Additionally, it dries clear, so it won’t leave any visible residue on the surface.

Disadvantages

One of the main disadvantages of Gorilla Glue is that it can be difficult to remove. It cannot be washed off with water, and it must wear away over time. Additionally, it can foam excessively upon curing, which can be messy and difficult to clean up. It is also important to note that Gorilla Glue is not recommended for use on polyethylene or polypropylene plastics.

Overall, Gorilla Glue is a strong and versatile adhesive that is ideal for a wide range of projects. However, it is important to use it carefully and follow the instructions closely to avoid any issues.

Comparative Analysis

When it comes to choosing the right glue for your woodworking project, the two most popular options are wood glue and Gorilla Glue. While both types of adhesive have their advantages and disadvantages, it’s important to understand how they compare in terms of bond strength, drying time, versatility, and cost.

Bond Strength

One of the most important factors to consider when choosing a glue for woodworking is bond strength. Wood glue is known for its strong bond, especially when used on porous materials like wood. Gorilla Glue, on the other hand, is a polyurethane adhesive that creates a very strong bond that can withstand heavy loads and stress.

Drying Time

Another important consideration is drying time. Wood glue typically dries faster than Gorilla Glue, making it a more convenient option for projects that require quick bonding. However, Gorilla Glue has the advantage of expanding as it dries, filling gaps and creating a stronger bond.

Versatility

When it comes to versatility, Gorilla Glue has the upper hand. It can be used on a wide range of materials, including wood, metal, ceramics, and more. Wood glue, on the other hand, is specifically designed for use on wood and may not work as well on other materials.

Cost

Finally, cost is an important factor to consider when choosing a glue. Wood glue is generally less expensive than Gorilla Glue, making it a more budget-friendly option for those who don’t need the extra strength and versatility of polyurethane adhesives.

In conclusion, both wood glue and Gorilla Glue have their advantages and disadvantages. When deciding which one to use for your woodworking project, consider factors such as bond strength, drying time, versatility, and cost to make the best choice for your needs.

Choosing the Right Glue

When it comes to woodworking, choosing the right glue is essential for a strong and durable bond. Wood glue and Gorilla glue are two popular options, but which one is better for gluing wood? In this section, we’ll explore some factors to consider when choosing the right glue for your project.

Project Type

The type of project you’re working on can influence your choice of glue. For example, if you’re building furniture that will be exposed to moisture, such as outdoor furniture, you may want to choose a waterproof glue like Gorilla glue. On the other hand, if you’re working on an indoor project that won’t be exposed to moisture, wood glue may be a suitable option.

Material Compatibility

Another important factor to consider is material compatibility. While both wood glue and Gorilla glue can bond with wood, they may not work well with other materials. For example, Gorilla glue can bond with a wide range of materials, including metal, ceramic, and plastic, while wood glue is specifically designed for bonding wood.

User Experience

Finally, consider your experience level and personal preferences when choosing a glue. Gorilla glue can be a bit messier to work with and requires more care during application, but it can also provide a stronger bond. Wood glue, on the other hand, is easier to work with and can be cleaned up easily with water.

In summary, when choosing between wood glue and Gorilla glue for gluing wood, consider the project type, material compatibility, and your personal preferences. By taking these factors into account, you can choose the right glue for your project and achieve a strong and durable bond.

Frequently Asked Questions

What are the differences between Titebond and Gorilla Wood Glue?

Titebond and Gorilla Wood Glue are both popular choices for woodworking projects. Titebond is a PVA glue that is known for its strong bond and easy clean-up with water. Gorilla Wood Glue, on the other hand, is a polyurethane-based glue that is waterproof and can be used for exterior projects. While both glues are strong, Titebond is generally considered the better choice for wood-to-wood bonding, while Gorilla Wood Glue is better for water resistance.

Can Gorilla Glue be used on exterior wood?

Yes, Gorilla Wood Glue can be used on exterior wood. It is a waterproof glue that can withstand the elements and is ideal for outdoor projects.

Does wood glue expand when drying?

Some types of wood glue, such as polyurethane-based glues like Gorilla Glue, can expand as they dry. This can be useful for filling gaps in wood joints, but it can also create excess foam that needs to be cleaned up. Other types of wood glue, such as PVA glues like Titebond, do not expand as they dry.

What is the strongest glue for wood-to-wood bonding?

The strongest glue for wood-to-wood bonding is generally considered to be epoxy glue. Epoxy creates a very strong bond that can withstand heavy loads and stress. However, it can be difficult to work with and requires careful mixing and application.

What is the best glue for laminating wood?

The best glue for laminating wood is generally considered to be PVA glue, such as Titebond. PVA glue creates a strong bond between wood layers and is easy to work with. It also dries clear, which is important for visible laminations.

Which wood glue is considered the best for woodworking projects?

The best wood glue for woodworking projects depends on the specific project and needs. PVA glues like Titebond are generally considered the best for wood-to-wood bonding, while polyurethane-based glues like Gorilla Glue are better for water resistance. Epoxy glue is the strongest, but can be difficult to work with. It’s important to choose the right glue for the job to ensure a strong and lasting bond.

Understanding 2×4 Studs

What Kind of Wood is a 2×4 Stud? A Quick Guide to Identifying the Most Commonly Used Lumber for Framing.

If you’re new to woodworking or DIY projects, you might be wondering what type of wood is used for a 2×4 stud. The most common type of wood for 2×4 studs is pine, but they can also be made from other types of lumber, such as spruce or fir. Knowing the different types of wood can be helpful when selecting materials for your project.

Pine is a softwood that is easy to work with and is readily available at most home improvement stores. It’s also one of the most affordable woods, making it a popular choice for beginners. Spruce and fir are also softwoods that are commonly used for 2×4 studs. These woods are often chosen for their strength and durability, and they are also easy to work with.

Understanding 2×4 Studs

Understanding 2×4 Studs

If you are planning a construction project, you may have come across the term “2×4 studs.” A 2×4 stud is a piece of wood that is commonly used to build walls, frames, and other structures. But what type of wood is a 2×4 stud made of?

The most common type of wood used for 2×4 studs is pine. However, they can also be made from other types of lumber, such as spruce or fir. It is important to note that 2×4 studs made from different types of wood may have different properties, such as strength and durability.

When selecting materials for your project, it is important to consider the properties of the wood you are using. Softwoods like pine, spruce, and fir are commonly used for 2×4 studs because they are lightweight, easy to work with, and relatively inexpensive. Hardwoods, on the other hand, are denser and more difficult to work with, making them better suited for applications like flooring, decking, and furniture making.

It is also important to consider the dimensions of 2×4 studs. Despite their name, 2×4 studs are not actually 2 inches by 4 inches. Rather, they measure 1.5 inches by 3.5 inches. This is because the wood is planed and smoothed down to these dimensions for consistency and ease of use.

In summary, 2×4 studs are commonly made from softwoods like pine, spruce, and fir. They are lightweight, easy to work with, and relatively inexpensive. When selecting materials for your project, it is important to consider the properties of the wood you are using and to be aware of the actual dimensions of 2×4 studs.

Types of Wood for 2×4 Studs

When it comes to choosing the right type of wood for your 2×4 studs, there are a few options to consider. The most common types of wood used for 2×4 studs are pine, spruce, and fir. Each type of wood has its own unique characteristics and advantages.

Pine

Pine is the most commonly used wood for 2×4 studs. It is readily available and affordable, making it a popular choice for builders and DIY enthusiasts alike. Pine is a softwood, which means it is easy to work with and can be cut and shaped with basic tools. It is also lightweight, which makes it easy to transport and handle.

Spruce

Spruce is another popular choice for 2×4 studs. It is a softwood, like pine, but it is slightly stronger and more durable. Spruce is also known for its straight grain, which makes it easy to work with and gives it a uniform appearance. It is a good choice for projects that require a strong, stable wood.

Fir

Fir is a dense, strong wood that is often used for structural applications. It is a softwood, but it is harder and more durable than pine or spruce. Fir is also resistant to rot and decay, which makes it a good choice for outdoor projects. It is slightly more expensive than pine or spruce, but it is worth the investment for its strength and durability.

When choosing the right type of wood for your 2×4 studs, it is important to consider your specific needs and budget. Pine is a good choice for basic projects, while spruce and fir are better suited for projects that require a stronger, more durable wood. Whatever type of wood you choose, be sure to consult with a professional if you are unsure about which type is best for your specific needs.

Factors Affecting Wood Choice

When choosing the type of wood for your 2×4 studs, there are several factors to consider. These factors include climate, construction type, and budget.

Climate

The climate of the area where the wood will be used is an important factor to consider when selecting the type of wood for your 2×4 studs. Different types of wood have different levels of resistance to moisture, rot, and insects. If you live in an area with high humidity or frequent rainfall, you may want to consider using a type of wood that is more resistant to moisture, such as treated lumber. On the other hand, if you live in a dry climate, you may be able to use a less expensive type of wood that is not as resistant to moisture.

Construction Type

The type of construction you are working on is another important factor to consider when selecting the type of wood for your 2×4 studs. If you are building a structure that will be exposed to the elements, such as a deck or outdoor shed, you will need to use a type of wood that is more resistant to moisture and rot. If you are building an interior wall or a non-load-bearing structure, you may be able to use a less expensive type of wood.

Budget

Budget is always a consideration when choosing the type of wood for your 2×4 studs. Some types of wood are more expensive than others. If you are working on a tight budget, you may want to consider using a less expensive type of wood, such as pine. However, keep in mind that less expensive types of wood may not be as durable or resistant to moisture and insects as more expensive types of wood.

In conclusion, when selecting the type of wood for your 2×4 studs, it is important to consider the climate, construction type, and budget. By taking these factors into account, you can choose the right type of wood for your specific needs.

Benefits of Different Wood Types

When it comes to choosing the right wood for your 2×4 stud, you have several options to consider. Each type of wood has its own unique benefits, so it’s important to choose the one that best fits your needs. Here are some of the benefits of different wood types for 2×4 studs:

Durability

One of the most important factors to consider when choosing a wood type for your 2×4 stud is durability. You want a wood that is strong enough to support the weight of your structure and withstand the test of time. Here are some of the most durable wood types for 2×4 studs:

  • Douglas Fir: Douglas fir is a popular choice for 2×4 studs because it is strong, durable, and relatively affordable.
  • Hemlock: Hemlock is another strong and durable wood that is commonly used for 2×4 studs. It is also resistant to rot and decay.
  • Southern Yellow Pine: Southern yellow pine is a dense and strong wood that is ideal for 2×4 studs. It is also resistant to rot and decay.

Cost-Effectiveness

Another important factor to consider when choosing a wood type for your 2×4 stud is cost-effectiveness. You want a wood that is affordable without sacrificing quality. Here are some of the most cost-effective wood types for 2×4 studs:

  • Spruce: Spruce is a lightweight and affordable wood that is commonly used for 2×4 studs. It is also easy to work with.
  • Pine: Pine is another affordable wood that is commonly used for 2×4 studs. It is also easy to work with and has a natural resistance to decay.
  • Cedar: Cedar is a slightly more expensive wood than spruce or pine, but it is also more durable and resistant to rot and decay.

Availability

Finally, you want to choose a wood type for your 2×4 stud that is readily available in your area. Here are some of the most widely available wood types for 2×4 studs:

  • Spruce: Spruce is one of the most widely available wood types for 2×4 studs. It is commonly found in North America and Europe.
  • Pine: Pine is another widely available wood type for 2×4 studs. It is commonly found in North America and Europe.
  • Douglas Fir: Douglas fir is also widely available in North America and Europe and is commonly used for 2×4 studs.

In conclusion, when choosing the right wood type for your 2×4 stud, it’s important to consider factors such as durability, cost-effectiveness, and availability. By choosing the right wood type for your needs, you can ensure that your structure is strong, durable, and built to last.

Environmental Impact of Wood Choices

When choosing the type of wood for your construction project, it’s important to consider the environmental impact of your choice. Here are some factors to consider:

Sustainability

One important aspect of environmental impact is sustainability. This refers to whether the wood is being harvested in a way that allows the forest to regenerate and continue to provide wood in the future. Look for wood that has been certified by organizations like the Forest Stewardship Council (FSC) or the Sustainable Forestry Initiative (SFI).

Carbon Footprint

Another aspect to consider is the carbon footprint of the wood. Wood is a renewable resource, but harvesting, transporting, and processing it can still have a significant impact on the environment. Look for wood that has been harvested and processed locally to minimize transportation emissions.

End-of-Life Disposal

Finally, consider what will happen to the wood at the end of its life. Will it be recycled, reused, or sent to a landfill? Look for wood that can be easily recycled or reused, or that will break down naturally if it does end up in a landfill.

By considering these factors, you can choose a wood that has a minimal environmental impact and is sustainable for future generations.

Frequently Asked Questions

What are the dimensions of a 2×4 stud?

A 2×4 stud typically has actual dimensions of 1.5 inches by 3.5 inches. The length can vary depending on the intended use.

What is the longest length of a 2×4?

The longest length of a 2×4 stud is typically 16 feet. However, some lumber yards may carry longer lengths.

What type of wood is typically used for framing with 2x4s?

The most common type of wood used for framing with 2x4s is pine. However, other types of lumber such as spruce or fir can also be used.

What is the price range for a 2×4 at Lowe’s?

The price range for a 2×4 at Lowe’s can vary depending on the type of wood and length. On average, a 2×4 can cost between $2 and $5.

What are the different types of 2×4 wood?

There are several different types of 2×4 wood, including pine, spruce, fir, hemlock, and cedar. Each type of wood has its own unique characteristics and may be better suited for certain projects.

Is pine the most common type of wood used for 2x4s?

Yes, pine is the most common type of wood used for 2x4s. This is because it is readily available, affordable, and easy to work with. However, other types of wood can also be used depending on the project requirements.

hammer-1629587_1920

Will Liquid Nails Adhere Wood to Concrete? A Quick Guide

Are you considering using Liquid Nails to adhere wood to concrete? If so, you’re in luck. Liquid Nails is a popular construction adhesive that can be used for a variety of projects, including attaching wood to concrete surfaces. However, there are some important factors to consider before using Liquid Nails for this purpose.

First and foremost, it’s essential that both the wood and concrete surfaces are clean, dry, and free of dust and debris. This will ensure that the adhesive can properly bond to both surfaces. Additionally, the application temperature should be between 40-100° F (5-38° C) for optimal results. It’s also important to select the right type of Liquid Nails for your project, as there are various formulations available for different purposes. By following these guidelines, you can ensure that your wood-to-concrete project will be a success with the help of Liquid Nails.

Understanding Liquid Nails

hammer-1629587_1920

If you are looking for a heavy-duty construction adhesive, Liquid Nails is a popular choice that can provide you with harsh edition and durability in harsh weather conditions. Liquid Nails come in a variety of adhesives based on different purposes, and they are commonly used for bonding different materials, including wood, concrete, metal, and more.

Liquid Nails is a brand name for a line of construction adhesives that are designed to bond a wide range of materials. The adhesives are made from a variety of chemicals, including polyurethane, epoxy, and acrylic. The specific type of adhesive you need will depend on the materials you are bonding and the conditions under which the bond will be used.

When using Liquid Nails, it is important to follow the manufacturer’s instructions carefully. The surfaces you are bonding must be clean, dry, and free of dust and debris. The application temperature must be between 40-100° F (5-38° C). If the temperature is too low, the adhesive may not cure properly, and if it is too high, the adhesive may dry too quickly.

One of the most common applications for Liquid Nails is bonding wood to concrete. To achieve a strong bond, you must follow some crucial steps before applying the adhesive. The surface must be clean and dry beforehand; this means removing any dirt or debris from both the wood and concrete surfaces. Liquid Nails Polyurethane Construction Adhesive can be used to stick wood to concrete given the appropriate conditions.

Liquid Nails is a versatile construction adhesive that can be used for a wide range of applications. Whether you are bonding wood to concrete, repairing cracks in concrete, or bonding metal to metal, Liquid Nails has an adhesive that can meet your needs. Always follow the manufacturer’s instructions carefully and ensure that the surfaces you are bonding are clean, dry, and free of dust and debris.

Wood and Concrete: A Material Overview

Wood and concrete are two of the most commonly used building materials in construction projects. While wood is a natural material that comes from trees, concrete is a man-made material that is composed of cement, water, and aggregates. Both materials have their advantages and disadvantages, and they are often used together in construction projects.

Wood is a popular choice for building structures, such as houses, because it is lightweight, easy to work with, and has good insulation properties. It is also a renewable resource, which makes it an environmentally friendly option. However, wood is vulnerable to moisture, insects, and fire, which can cause it to decay, rot, or burn.

Concrete, on the other hand, is a durable and strong material that can withstand a lot of wear and tear. It is also fire-resistant and has good insulation properties. However, concrete is heavy, difficult to work with, and has a high carbon footprint. It also requires a lot of energy to produce, which makes it less environmentally friendly than wood.

When it comes to joining wood and concrete together, there are several options available. One popular method is to use mechanical fasteners, such as screws, bolts, or nails. However, this method can be time-consuming and may weaken the wood or concrete over time.

Another option is to use adhesives, such as Liquid Nails construction adhesive. This type of adhesive can bond wood to concrete, as long as the surfaces are clean, dry, and dust-free. It is also important to use the appropriate type of adhesive for the job, such as Liquid Nails Polyurethane Construction Adhesive.

Overall, wood and concrete are two versatile and useful materials that can be used together in many construction projects. Whether you choose to use mechanical fasteners or adhesives, it is important to follow the manufacturer’s instructions and take the appropriate safety precautions.

Adhesion Process

When using Liquid Nails to adhere wood to concrete, there are a few important steps you need to follow to ensure a strong bond.

First, make sure both the wood and concrete surfaces are clean and dry. Any dirt, dust, or debris can compromise the adhesion, so it’s important to thoroughly clean both surfaces before applying the adhesive.

Next, apply the Liquid Nails in a zigzag pattern on the back of the wood, making sure to leave enough space around the edges for the adhesive to spread out when the wood is pressed onto the concrete.

Once the adhesive is applied, press the wood firmly onto the concrete surface and hold it in place for at least 24 hours to allow the adhesive to fully cure. You can use clamps or weights to help hold the wood in place while the adhesive sets.

It’s important to note that the ideal temperature for applying Liquid Nails is between 40-100°F (5-38°C). If the temperature is too cold or too hot, the adhesive may not bond properly.

Overall, if you follow these steps and ensure the conditions are right, Liquid Nails can be an effective adhesive for adhering wood to concrete.

Factors Affecting Adhesion

When using Liquid Nails to adhere wood to concrete, there are several factors that can affect the strength and longevity of the bond. By properly preparing the surface, taking into account weather conditions, and using the correct application technique, you can ensure the best possible results.

Surface Preparation

One of the most important factors in achieving a strong bond between wood and concrete is surface preparation. Both surfaces should be clean, dry, and free of dust and debris before applying Liquid Nails. Any loose paint, rust, or other contaminants should be removed with a wire brush or scraper. For best results, use a solvent such as acetone to clean the surfaces before applying the adhesive.

Weather Conditions

The climate and fluctuation of temperature and humidity are major factors in determining the longevity of an adhesive bond between the wood and concrete. Wood tends to swell and contract over time with changing atmospheric conditions. Therefore, it is important to apply Liquid Nails when the temperature is between 40-100°F (5-38°C) and the humidity is low. Avoid applying the adhesive on rainy or damp days, as moisture can interfere with the bond.

Application Technique

The application technique is also important in achieving a strong bond. Liquid Nails should be applied in a continuous bead, with 1/4 inch (6mm) of adhesive per square inch (6.45cm²) of surface area. The adhesive should be applied to both surfaces, and then the surfaces should be pressed firmly together. Use clamps or other means to hold the surfaces in place while the adhesive sets. Allow the adhesive to dry for at least 24 hours before removing the clamps or other means of support.

By following these guidelines for surface preparation, weather conditions, and application technique, you can ensure the best possible results when using Liquid Nails to adhere wood to concrete.

Real-World Examples

If you’re wondering whether Liquid Nails will adhere wood to concrete, you’re not alone. Many people have used this popular construction adhesive for various DIY projects. Here are some real-world examples of how Liquid Nails worked for others:

Example 1: Attaching Wood to Concrete Stairs

One homeowner needed to attach wooden treads to concrete stairs in their basement. They used Liquid Nails Heavy Duty Construction Adhesive, and the result was impressive. The wood treads were securely attached to the concrete stairs, and they were able to walk up and down the stairs without any issues.

Example 2: Installing a Wood Floor on Concrete

Another DIY enthusiast wanted to install a wood floor in their basement, but the concrete subfloor was uneven. They used Liquid Nails Premium Polyurethane Construction Adhesive to attach plywood subflooring to the concrete. The adhesive worked perfectly, and the plywood subflooring was level and secure. They were able to install the wood floor on top of the subflooring without any problems.

Example 3: Building a Retaining Wall

A homeowner wanted to build a retaining wall in their backyard using concrete blocks and wood posts. They used Liquid Nails Landscape Block and Stone Adhesive to attach the concrete blocks to each other and the wood posts to the blocks. The adhesive worked well, and the retaining wall was sturdy and secure.

In conclusion, Liquid Nails can adhere wood to concrete in various DIY projects. However, it’s important to use the right type of Liquid Nails for the job and follow the manufacturer’s instructions carefully. With the appropriate conditions and application temperature, Liquid Nails can provide a strong and reliable bond between wood and concrete.

Safety Measures

When working with Liquid Nails to adhere wood to concrete, it is important to take the necessary safety measures to protect yourself and others in the area. Here are some safety tips to keep in mind:

Wear Protective Gear

Before you start using Liquid Nails, make sure you are wearing the appropriate protective gear. This includes gloves, safety glasses, and a respirator mask. The fumes from the adhesive can be harmful, so it is important to protect your lungs by wearing a mask.

Work in a Well-Ventilated Area

When using Liquid Nails, it is important to work in a well-ventilated area. Open windows and doors to allow fresh air to circulate, and use fans to help move the air around. This will help to reduce the amount of fumes in the air and make it safer for you to work.

Follow the Manufacturer’s Instructions

Always follow the manufacturer’s instructions when using Liquid Nails. This includes applying the adhesive in the correct temperature range, using the right amount of adhesive, and allowing enough time for the adhesive to dry. Failure to follow these instructions can result in a weaker bond and a less secure installation.

Keep Children and Pets Away

When working with Liquid Nails, it is important to keep children and pets away from the area. The adhesive can be harmful if ingested, and it is important to keep it out of reach of curious little hands and paws.

Clean Up Spills Immediately

If you spill Liquid Nails, clean it up immediately. The adhesive can be difficult to remove once it dries, and it can damage surfaces if left in place for too long. Use a solvent like mineral spirits to clean up any spills, and dispose of the rags or paper towels properly to prevent a fire hazard.

By following these safety measures, you can ensure that your project goes smoothly and that everyone stays safe.

Alternatives to Liquid Nails

While Liquid Nails is a popular choice for bonding wood to concrete, there are other alternatives available that may better suit your needs. Here are some options to consider:

Epoxy

Epoxy is a two-part adhesive that is known for its strength and durability. It can bond wood to concrete and other surfaces, and is often used in construction and woodworking projects. Epoxy sets quickly and is resistant to water and chemicals, making it a good choice for outdoor or high-moisture environments.

Construction Adhesive

Similar to Liquid Nails, there are other construction adhesives available that can bond wood to concrete. These adhesives come in a variety of formulas, such as polyurethane or acrylic, and may offer different strengths and drying times. Be sure to choose an adhesive that is appropriate for your specific project and follow the manufacturer’s instructions carefully.

Mechanical Fasteners

If you prefer not to use an adhesive, mechanical fasteners such as screws or nails can also be used to attach wood to concrete. However, this method may require drilling into the concrete, which can be difficult and time-consuming. Additionally, the fasteners may be visible and may not provide as strong of a bond as an adhesive.

Overall, the best option for bonding wood to concrete will depend on your specific project and needs. Consider factors such as strength, durability, and ease of use when choosing an adhesive or fastening method.

Frequently Asked Questions

Can Liquid Nails be used to attach wood to concrete?

Yes, Liquid Nails Polyurethane Construction Adhesive can be used to attach wood to concrete. However, it is important to ensure that the surfaces are clean, dry, and dust-free before applying the adhesive. Additionally, the application temperature should be between 40-100°F (5-38°C) for best results.

Is Liquid Nails a good adhesive for wood to concrete?

Liquid Nails is a popular and trusted adhesive for attaching wood to concrete. However, its effectiveness depends on the specific conditions of the project, such as the type of wood and concrete being used, as well as the temperature and humidity during application.

What is the best glue for attaching wood to concrete?

In addition to Liquid Nails, there are several other adhesives that can be used to attach wood to concrete, including epoxy, construction adhesive, and silicone adhesive. The best glue for your project will depend on the specific materials and conditions involved.

Can you glue wood to concrete without drilling?

Yes, it is possible to glue wood to concrete without drilling by using a strong adhesive such as Liquid Nails or construction adhesive. However, it is important to follow the manufacturer’s instructions carefully and ensure that the surfaces are properly prepared before applying the adhesive.

Will Liquid Nails adhere metal to concrete?

Yes, Liquid Nails can be used to adhere metal to concrete. However, it is important to choose the appropriate type of Liquid Nails for your specific project and ensure that the surfaces are properly prepared before applying the adhesive.

What is the best Liquid Nails for concrete?

The best Liquid Nails for concrete will depend on the specific conditions of your project. However, Liquid Nails Heavy Duty Construction Adhesive is a popular choice for attaching wood and other materials to concrete, as it is designed to withstand extreme temperatures and weather conditions.

Preparation Process

What are some ways to glue fabric to wood? Tips and tricks

If you’re a DIY enthusiast, you know that fabric and wood are two versatile materials that can be used to create a variety of beautiful projects. However, gluing fabric to wood can be a bit tricky, especially if you don’t have the right materials or technique. Fortunately, there are several ways to glue fabric to wood, and we’ll cover some of the most effective methods in this article.

One of the most popular methods for gluing fabric to wood is using Mod Podge. This all-in-one glue, sealer, and finish is perfect for adhering fabric to wood, and it dries clear, leaving a smooth and professional-looking finish. Another popular option is using spray adhesive, which is quick and easy to apply, and provides a strong bond between the fabric and wood. However, it’s important to use spray adhesive in a well-ventilated area and protect surrounding surfaces from overspray.

Another method for gluing fabric to wood is using a hot glue gun. This option is ideal for smaller projects or when you need a quick and strong bond. However, it’s important to be careful when using a hot glue gun, as the glue can be hot enough to cause burns. Additionally, hot glue may not be the best option for projects that will be exposed to high temperatures or moisture. Overall, there are several ways to glue fabric to wood, and the method you choose will depend on the project you’re working on and your personal preferences.

Understanding the Basics of Gluing Fabric to Wood

understanding-the-basics-of-gluing-fabric-to-wood

When it comes to gluing fabric to wood, it is important to understand the basics in order to achieve a successful outcome. Here are some key points to keep in mind:

Choosing the Right Adhesive Medium

Selecting the right adhesive medium is crucial when gluing fabric to wood. Using a typical crafting glue will not work well for this combination. Instead, you should choose an adhesive that is specifically designed for bonding fabric to wood. Some popular options include:

  • Fabric glue
  • Spray adhesive
  • Contact cement

Each of these adhesives has its own unique properties and application methods, so be sure to choose the one that best suits your project needs.

Preparing the Wood Surface

Before gluing fabric to wood, it is important to prepare the wood surface properly. This will help ensure a strong bond between the two materials. Here are some steps to follow:

  1. Sand the wood surface to remove any rough spots or debris.
  2. Wipe the surface clean with a damp cloth to remove any dust or dirt.
  3. Apply a coat of primer or sealer to the wood surface. This will help the adhesive bond more effectively.

Applying the Adhesive

When applying the adhesive, it is important to follow the manufacturer’s instructions carefully. Here are some general tips to keep in mind:

  • Apply the adhesive evenly and thinly to both the fabric and wood surfaces.
  • Allow the adhesive to dry until it becomes tacky before bonding the two surfaces together.
  • Use a brayer or scraper to smooth out any air bubbles or wrinkles in the fabric.

By following these basic guidelines, you can achieve a strong and long-lasting bond between fabric and wood.

Choosing the Right Glue

When it comes to gluing fabric to wood, choosing the right glue is essential to ensure a strong and long-lasting bond. There are several types of glue available, each with its own advantages and disadvantages. Here are some of the most common types of glue for fabric to wood:

Fabric Glue

Fabric glue is specially designed for bonding fabric to various surfaces, including wood. It is easy to use and dries clear, making it ideal for projects where appearance is important. Fabric glue is also washable, making it a great option for items that will be exposed to moisture or need to be cleaned regularly.

Wood Glue

Wood glue is a popular choice for bonding wood to other materials, including fabric. It is strong and durable, making it ideal for projects that require a long-lasting bond. However, wood glue can be messy and difficult to clean up, so it is important to use it carefully.

Hot Glue

Hot glue is a fast-drying adhesive that is ideal for bonding fabric to wood. It is easy to use and can be applied quickly, making it a great option for projects that require a quick turnaround time. However, hot glue can be messy and may not be the best choice for items that will be exposed to high temperatures.

Spray Adhesive

Spray adhesive is a popular choice for bonding fabric to wood because it creates an even layer of glue that is easy to apply. It is also fast-drying and can be used on a variety of surfaces. However, spray adhesive can be messy and may not be the best choice for projects that require precise application.

When choosing the right glue for your project, it is important to consider the materials you are working with, as well as the type of bond you need. Take the time to research your options and choose a glue that will provide a strong and long-lasting bond.

Preparation Process

Preparation Processpreparation-process-1

Before you start gluing fabric to wood, it is essential to prepare both the wood and the fabric. Proper preparation ensures that the fabric adheres well to the wood and the final product looks neat and professional. This section will guide you through the preparation process.

Cleaning the Wood

The first step in preparing the wood is to clean it thoroughly. Any dirt, dust, or grease on the wood surface can interfere with the adhesive’s effectiveness, leading to a weak bond. Here are the steps to follow when cleaning the wood:

  1. Wipe the wood surface with a dry cloth to remove any loose debris.
  2. Use a damp cloth to wipe the wood surface. Ensure the cloth is not too wet to avoid soaking the wood.
  3. Allow the wood to dry completely before proceeding to the next step.

Cutting the Fabric

Cutting the fabric is the next step in preparing it for gluing to the wood. The fabric should be cut to the same size as the wood surface to ensure a clean finish. Follow these steps to cut the fabric:

  1. Measure the wood surface using a measuring tape.
  2. Add an extra inch to the measurement to allow for folding the fabric over the edges of the wood surface.
  3. Cut the fabric to the required size using scissors.

By following these preparation steps, you will have a clean and well-prepared surface for gluing the fabric to the wood.

Step-By-Step Guide to Gluing

If you want to glue fabric to wood, there are a few steps you need to follow to ensure that the fabric stays in place and looks good. Here is a step-by-step guide to gluing fabric to wood.

Applying the Glue

The first step is to apply the glue to the wood. You can use any type of glue that is suitable for fabric and wood, such as Mod Podge or a fabric glue. Apply the glue to the wood using a brush or a roller, making sure to cover the entire surface evenly.

Positioning the Fabric

Once you have applied the glue, it’s time to position the fabric. Lay the fabric over the wood, making sure that it is centered and straight. Smooth out any wrinkles or bubbles in the fabric with your hands, starting from the center and working your way outwards.

Smoothing Out the Fabric

After you have positioned the fabric, use a tool to smooth out any wrinkles or bubbles that remain. You can use a credit card or a plastic scraper to do this. Start from the center of the fabric and work your way outwards, pressing down firmly as you go.

Allowing the Glue to Dry

Once you have smoothed out the fabric, allow the glue to dry completely. This can take anywhere from a few hours to overnight, depending on the type of glue you used and the humidity in the air. Once the glue is dry, your fabric should be firmly attached to the wood.

By following these simple steps, you can easily glue fabric to wood and create beautiful, unique pieces of art or furniture.

Tips for a Perfect Finish

tips-for-a-perfect-finish

When gluing fabric to wood, it’s important to achieve a smooth and flawless finish. Here are some tips to help you achieve the perfect finish for your project.

Dealing with Bubbles

Bubbles can be a common problem when gluing fabric to wood. To avoid them, make sure to apply the glue evenly and smoothly. Use a foam brush or a scraper to spread the glue evenly over the wood surface.

If you do end up with bubbles, don’t worry. You can easily fix them by using a pin or a needle to puncture the bubble. Then, use your finger or a scraper to smooth out the fabric over the punctured area.

Trimming Excess Fabric

After gluing the fabric to the wood, you may have excess fabric that needs to be trimmed. Use a sharp pair of scissors to carefully trim the excess fabric. Make sure to leave a small margin of fabric around the edges to avoid any fraying or unraveling.

If you need to trim the fabric around curves or corners, make small cuts to help the fabric lay flat. Be careful not to cut too much or you may end up with gaps or holes in your fabric.

By following these tips, you can achieve a perfect finish when gluing fabric to wood. Remember to take your time and work carefully to ensure the best results.

Safety Measures

When working with glue and wood, it is important to take the necessary safety measures to avoid accidents and injuries. Here are some safety tips to keep in mind:

Wear Protective Gear

Wear protective gear such as gloves and safety goggles to protect your skin and eyes from the glue and any debris that may fly off during the process. This is especially important if you are using power tools to sand the wood.

Work in a Well-Ventilated Area

Glue can emit fumes that can be harmful if inhaled in large quantities. Make sure you work in a well-ventilated area to avoid inhaling the fumes. If you are working indoors, open windows and doors to allow fresh air to circulate.

Use Glue Responsibly

Make sure you use glue responsibly and follow the manufacturer’s instructions carefully. Avoid using too much glue, as it can cause the fabric to wrinkle or bubble. Also, keep the glue away from children and pets.

Clean Up Properly

After you are done with the project, make sure you clean up properly. Wipe off any excess glue from the surface of the wood and dispose of any used glue containers properly. Store the glue in a safe place away from heat and flames.

By following these safety measures, you can ensure that your project is completed safely and without any accidents or injuries.

Maintaining Your Fabric-Wood Piece

maintaining-your-fabric-wood-piece

Once you’ve successfully glued fabric to wood, you’ll want to make sure it stays looking great for as long as possible. Here are some tips for maintaining your fabric-wood piece:

Avoid Direct Sunlight

Prolonged exposure to direct sunlight can cause the colors in your fabric to fade over time. If possible, avoid placing your fabric-wood piece in direct sunlight. If it must be in a sunny area, consider using curtains or blinds to block some of the light.

Clean Regularly

Dust and dirt can accumulate on your fabric-wood piece over time, making it look dingy and dull. To keep it looking its best, clean it regularly with a soft cloth or brush. If there are any stains, use a gentle cleaner and a damp cloth to remove them.

Use Furniture Wax

If your fabric-wood piece has a glossy finish, you can use furniture wax to help maintain its shine. Apply a thin layer of wax with a soft cloth, then buff it with a clean cloth to give it a nice shine.

Avoid Harsh Chemicals

When cleaning your fabric-wood piece, avoid using harsh chemicals that can damage the fabric or the wood. Stick to gentle cleaners and avoid anything with bleach or ammonia.

Store Carefully

If you need to store your fabric-wood piece for any length of time, make sure it’s stored in a cool, dry place where it won’t be exposed to sunlight or moisture. Cover it with a cloth or sheet to protect it from dust and dirt.

Frequently Asked Questions

How can I attach fabric to wood furniture?

If you want to attach fabric to wood furniture, there are a few ways to do it. One option is to use a staple gun to staple the fabric to the wood. Another option is to use a hot glue gun to glue the fabric to the wood. You can also use fabric glue or spray adhesive to attach the fabric to the wood.

What kind of glue works best for sticking fabric to wood?

The best glue for sticking fabric to wood is a PVA glue or a fabric glue. Both of these glues are designed specifically for use with fabric and wood, and they are strong enough to hold the fabric in place. You can also use a spray adhesive or a hot glue gun to attach the fabric to the wood.

What are some alternatives to fabric glue for attaching fabric to wood?

If you don’t have fabric glue, there are a few alternatives that you can use to attach fabric to wood. One option is to use a spray adhesive, which will create a strong bond between the fabric and the wood. Another option is to use a hot glue gun, which can be used to attach the fabric to the wood quickly and easily.

Can I use spray adhesive to attach fabric to wood?

Yes, you can use spray adhesive to attach fabric to wood. Spray adhesive is a great option if you want to attach the fabric to the wood quickly and easily. Simply spray the adhesive onto the wood and press the fabric onto the wood. The adhesive will create a strong bond between the fabric and the wood.

Will Gorilla Glue work for attaching fabric to wood?

While Gorilla Glue is a strong adhesive, it is not the best option for attaching fabric to wood. Gorilla Glue is designed for use with wood, metal, and plastic, and it may not bond well with fabric. It’s best to use a fabric glue or a spray adhesive when attaching fabric to wood.

Does PVA glue hold fabric to wood effectively?

Yes, PVA glue holds fabric to wood effectively. PVA glue is designed for use with porous materials like wood and fabric, and it creates a strong bond between the two materials. When using PVA glue to attach fabric to wood, be sure to apply a thin layer of glue to both the fabric and the wood for the best results.

Understanding Metal Surfaces

Does Wood Glue Work on Metal? A Comprehensive Guide

Have you ever wondered if wood glue works on metal? Many people believe that wood glue is only suitable for wood-to-wood bonding, but this is not entirely true. It is possible to use wood glue to attach metal to wood, but it depends on the type of glue you use.

While wood and metal have vastly different properties, there are certain types of wood glue that have been specifically designed to bond with metal. Two-part epoxy or acrylate glue are considered to be the strongest options for metal-to-wood bonding. However, polyurethane-based wood glue and contact cement can also work well. It’s important to choose the right type of glue based on the materials you are working with to ensure a strong and lasting bond.

Understanding Wood Glue

When it comes to woodworking, wood glue is an essential tool that can be used to bond pieces of wood together. But what about bonding wood to metal? Can wood glue be used for that purpose?

The answer is yes, but it’s important to understand the properties of wood glue and how they interact with metal surfaces.

Wood glue, also known as PVA glue, is a water-based adhesive that is specifically formulated to bond porous surfaces like wood. When applied to wood, the glue penetrates the pores and creates a strong bond between the wood fibers.

However, metal surfaces are non-porous and do not have the same type of structure as wood. This means that regular wood glue may not be effective for bonding metal surfaces.

To bond wood to metal, you will need to use a specialized type of wood glue that is designed to work with non-porous surfaces. These types of wood glue typically contain additives that help the glue adhere to metal surfaces.

It’s also important to note that the strength of the bond will depend on the type of metal you are working with. Some metals, like aluminum, are more difficult to bond than others.

In summary, wood glue can be used to bond wood to metal, but you need to use a specialized type of glue that is designed for non-porous surfaces. The strength of the bond will depend on the type of metal you are working with, so it’s important to choose the right type of glue for your project.

Understanding Metal Surfaces

understanding-metal-surfacesUnderstanding Metal Surfaces

When it comes to bonding metal to wood using glue, it is essential to understand the characteristics of the metal surface. Here are a few things to keep in mind:

  • Cleanliness: Before applying any glue, make sure the metal surface is clean. Dirt, grease, oil, and rust can all affect the bonding ability of the glue. Use a damp cloth to wipe the surface to get rid of any grease, oil, and dirt. Finish by wiping with a dry cloth so that you are left with bare metal.
  • Texture: The texture of the metal surface can also affect the bonding ability of the glue. Smooth, shiny surfaces may not provide enough surface area for the glue to bond properly. In contrast, rough or porous surfaces may absorb too much glue, weakening the bond. To improve bonding, consider sanding the metal surface lightly to create a slightly rougher texture.
  • Type of metal: Different types of metals have different properties that can affect the bonding ability of the glue. For example, aluminum is a lightweight metal that can be challenging to bond because it is non-porous and has a smooth surface. On the other hand, steel is a more porous metal that can bond well with glue.
  • Expansion and contraction: Metal and wood expand and contract at different rates due to temperature changes and moisture levels. This can cause stress on the bond, leading to failure over time. To minimize this effect, choose a glue that can handle some degree of flexibility and movement, such as 2-part epoxy.

By understanding the characteristics of the metal surface, you can choose the right glue and surface preparation techniques to create a strong bond between metal and wood.

Adhesion Principles

When it comes to bonding materials together, the process of adhesion is essential. Adhesion is the attraction between two different substances that causes them to stick together. The principles of adhesion are important to understand when considering whether wood glue can work on metal.

Adhesion occurs when the adhesive molecules interact with the surface of the material being bonded. The strength of the bond depends on several factors, including the surface energy of the materials, the adhesive’s chemical composition, and the environmental conditions during bonding.

Wood glue, also known as PVA glue, is designed to bond porous materials such as wood, paper, and fabric. It works by penetrating the pores of the material and creating a strong bond within the fibers. However, metal surfaces are non-porous, which means that wood glue may not be able to penetrate the surface and create a strong bond.

Another factor to consider is the chemical composition of the adhesive. Wood glue is typically water-based, which means that it may not be able to bond with metal surfaces that are not water-absorbent. In addition, wood glue may not be able to withstand the stress and strain that metal surfaces can experience.

Overall, while wood glue may be able to bond some types of metal surfaces, it is not recommended for use as a primary adhesive for metal bonding. Instead, it is best to use specialized metal adhesives that are designed specifically for bonding metal surfaces. These adhesives are formulated to provide strong bonds that can withstand the stress and strain of metal bonding, ensuring a long-lasting bond that will not fail over time.

Wood Glue on Metal: The General Consensus

When it comes to bonding metal and wood together, many people wonder if wood glue is a viable option. While some types of wood glue can be used on certain metals, the general consensus is that wood glue is not the best adhesive for metal bonding.

Regular wood glue, also known as polyvinyl acetate (PVA) glue, is formulated as a water-based adhesive. Its functionality is rooted in its ability to permeate the wood’s porous structure and establish a strong bond within the wood fibers. However, this mechanism is not effective on non-porous surfaces like metal, which makes it unsuitable for bonding most metals.

Wood glue can be used on soft metals like aluminum and copper, but the bond will be weaker than with other types of metal. PVA glues are also suitable for bonding steel, but again, the bond will not be as strong as with other adhesives.

If you need to bond metal and wood together, there are other adhesives that are more suitable for the job. Epoxy and polyurethane glue are the best options for attaching metal and wood as they form the strongest bond between the two materials. They are also more resistant to water and heat, making them ideal for outdoor or high-temperature applications.

In summary, while wood glue can be used on certain types of metal, it is not the best adhesive for bonding metal and wood together. If you need a strong and reliable bond, it is best to use epoxy or polyurethane glue instead.

Exploring Alternative Adhesives

When it comes to bonding wood and metal, wood glue may not always be the best option. In some cases, you may need to explore alternative adhesives to achieve a strong and durable bond. Here are a few options to consider:

Epoxy Resins

Epoxy resins are a popular choice for bonding metal and wood. These adhesives consist of two parts – a resin and a hardener – that must be mixed together before use. Once applied, epoxy resins cure to form a strong and durable bond that can withstand high stress and strain. They are also resistant to water, heat, and chemicals, making them ideal for use in harsh environments.

Here are a few things to keep in mind when using epoxy resins:

  • Mix the resin and hardener thoroughly before use
  • Apply the adhesive evenly to both surfaces
  • Clamp the surfaces together until the adhesive cures
  • Allow the adhesive to cure completely before subjecting the bond to stress or strain

Polyurethane Adhesives

Polyurethane adhesives are another option for bonding wood and metal. These adhesives are known for their high strength and flexibility, which makes them ideal for use in applications where the bond may be subjected to movement or vibration. They also have good resistance to water and chemicals.

Here are a few tips for using polyurethane adhesives:

  • Apply the adhesive evenly to both surfaces
  • Clamp the surfaces together until the adhesive cures
  • Allow the adhesive to cure completely before subjecting the bond to stress or strain

Cyanoacrylate Adhesives

Cyanoacrylate adhesives, also known as superglues, are a fast and easy option for bonding wood and metal. These adhesives work by reacting with moisture in the air to form a strong and durable bond. They are ideal for use in small applications where a quick bond is needed.

Here are a few things to keep in mind when using cyanoacrylate adhesives:

  • Apply the adhesive sparingly to one surface
  • Press the surfaces together firmly and hold for a few seconds
  • Allow the adhesive to cure completely before subjecting the bond to stress or strain

Overall, there are several alternative adhesives that can be used to bond wood and metal. The best option will depend on the specific application and the conditions the bond will be subjected to. By considering the properties of each adhesive and following the manufacturer’s instructions, you can achieve a strong and durable bond between wood and metal.

Practical Applications of Wood Glue on Metal

practical-applications-of-wood-glue-on-metal

If you’re wondering whether wood glue can be used on metal, the answer is yes. While wood glue is primarily used for bonding wood, it can also be used on metal surfaces. Here are some practical applications of using wood glue on metal:

1. Wood and Metal Combination Projects

Wood and metal combination projects are becoming increasingly popular in the world of DIY. If you’re working on a project that involves both wood and metal, using wood glue can be a great way to bond the two materials together. This will help you avoid the hassle of maintaining two sets of glue.

2. Repairing Metal Objects

If you have a metal object that needs repairing, wood glue can be a great solution. It can be used to bond broken pieces of metal together, or to fill in gaps and cracks. However, it’s important to keep in mind that not all types of wood glue are suitable for use on metal. Be sure to choose a wood glue that is specifically designed for use on metal surfaces.

3. Creating Metal Art

If you’re a fan of metal art, you can use wood glue to create unique and interesting pieces. For example, you can use wood glue to bond metal pieces together to create a sculpture or other decorative object. You can also use wood glue to attach other materials, such as wood or fabric, to metal surfaces.

4. Building Metal Furniture

If you’re building metal furniture, wood glue can be a great way to bond metal pieces together. It can also be used to attach other materials, such as wood or glass, to metal surfaces. However, it’s important to keep in mind that wood glue may not be strong enough for all types of metal furniture. Be sure to choose a wood glue that is strong enough for the job.

Overall, wood glue can be a great solution for bonding wood and metal surfaces together. However, it’s important to choose the right type of wood glue for the job, and to use it properly. With the right approach, you can create unique and interesting projects that combine the beauty of wood and metal.

Safety Measures When Using Adhesives

When using adhesives, safety should always be your top priority. Here are some safety measures to keep in mind when using wood glue or any other adhesive to attach metal to wood:

Wear Protective Gear

Wear protective gear to avoid any accidents. We recommend wearing safety goggles and nitrile gloves to protect your eyes and hands from any harmful chemicals that may be present in the adhesive.

Work in a Well-Ventilated Area

Make sure to work in a well-ventilated area to avoid inhaling any fumes that may be produced by the adhesive. If possible, work outside or in a room with open windows.

Follow the User Manual

Always follow the user manual that comes with the adhesive. The manual will provide you with important information about the adhesive, including how to use it safely.

Keep the Workspace Clear

Keep your workspace clear of any hazards that may cause accidents. Make sure that the surface you are working on is clean and free of any debris.

Store Adhesives Properly

Store adhesives in a cool, dry place, away from direct sunlight and heat sources. Make sure that the adhesive is stored in its original container with the lid tightly closed.

By following these safety measures, you can ensure that you use wood glue or any other adhesive safely and effectively.

Additional Tips for Adhesive Use

additional-tips-for-adhesive-use

When it comes to bonding wood and metal together using adhesive, there are a few additional tips that can help ensure a strong and long-lasting bond. Here are some tips to keep in mind:

1. Choose the Right Adhesive

While wood glue can work on metal, it is important to choose the right type of adhesive for the job. Some adhesives, such as epoxy and cyanoacrylate (super glue), are specifically designed to bond metal and wood together. Make sure to read the label carefully and choose an adhesive that is suitable for both materials.

2. Prepare the Surfaces

Before applying the adhesive, it is important to prepare the surfaces of the wood and metal. Make sure they are clean, dry, and free of any debris or dust. You can use sandpaper or a wire brush to roughen up the surface of the metal, which will help the adhesive bond better.

3. Apply the Adhesive Correctly

When applying the adhesive, make sure to follow the instructions carefully. Apply a thin, even layer of adhesive to both the wood and metal surfaces, and then press them together firmly. Use clamps or weights to hold the pieces in place while the adhesive dries.

4. Allow Time for Drying

Different adhesives have different drying times, so make sure to follow the instructions on the label. It is important to allow the adhesive to dry completely before using the bonded pieces. This will ensure a strong and long-lasting bond.

5. Consider Using Mechanical Fasteners

While adhesive can be a great way to bond wood and metal together, it is not always the strongest option. For heavy-duty applications, consider using mechanical fasteners such as screws or bolts in addition to adhesive. This will provide extra strength and durability.

By following these tips, you can ensure a strong and long-lasting bond between wood and metal using adhesive.

Frequently Asked Questions

What kind of glue works best for metal to metal bonding?

When it comes to metal to metal bonding, epoxy or cyanoacrylate (super glue) are the best options. These types of glue create a strong and durable bond that can withstand stress and pressure.

Can wood glue be used to attach metal to wood?

Regular wood glue is not recommended for attaching metal to wood as it is not designed to bond with metal. However, there are specialized wood glues available that are formulated to work with metal, such as polyurethane-based adhesives.

What is the strongest glue for metal to wood?

The strongest glue for metal to wood bonding is epoxy. Epoxy provides a strong and durable bond that can withstand stress and pressure. It is also resistant to water and chemicals, making it a great choice for outdoor projects.

How to attach metal to wood without screws or nails?

One option for attaching metal to wood without screws or nails is to use adhesive strips or double-sided tape. Another option is to use specialized metal-to-wood adhesives, such as epoxy or polyurethane-based adhesives.

Will Gorilla Wood Glue stick to metal?

No, Gorilla Wood Glue is not designed to bond with metal. It is specifically formulated for wood-to-wood bonding.

Will Titebond Wood Glue adhere to metal?

No, Titebond Wood Glue is not designed to bond with metal. It is specifically formulated for wood-to-wood bonding.

How much does a cord of wood weigh? A Complete Guide to Understanding Wood Measurements

If you’re someone who regularly uses wood as a source of heat during the colder months, then you’ve probably heard of the term “cord of wood.” But what exactly is a cord of wood and how much does it weigh? A cord of wood is a unit of measurement used to indicate the amount of firewood in a stack. It’s defined as a stack of wood that measures 4 feet high, 4 feet wide, and 8 feet long, with the logs being arranged in a neat and orderly manner.

Now, you may be wondering how much a cord of wood actually weighs. The weight of a cord of wood can vary depending on a few factors, such as the type of wood and whether it’s fresh or seasoned. Generally, a cord of seasoned firewood can weigh anywhere from 2,500 to 5,000 pounds, while a cord of green or freshly cut wood can weigh twice as much. It’s important to know the weight of a cord of wood, as it can affect the cost, transportation, and storage of your firewood.

Understanding the Cord of Wood

understanding-the-cord-of-wood

If you’re planning to buy firewood for your home, you’ll likely come across the term “cord of wood.” But what exactly does it mean? In this section, we’ll define a cord of wood and discuss its standard measurements.

Definition of a Cord

A cord of wood is a unit of measurement used to describe a stack of firewood. Specifically, a cord of wood is a stack that measures 4 feet high, 4 feet wide, and 8 feet long, resulting in a total volume of 128 cubic feet. This is equivalent to a stack of wood that measures approximately 4 feet by 4 feet by 8 feet.

It’s important to note that a cord of wood is a standard unit of measurement used in the United States and Canada. Other countries may use different measurements to describe a stack of firewood.

Standard Measurements

As we mentioned above, a cord of wood is a stack that measures 4 feet high, 4 feet wide, and 8 feet long. However, it’s important to note that not all firewood is created equal. The weight of a cord of wood can vary depending on a few factors, such as the species of wood and its moisture content.

On average, a cord of wood can weigh anywhere from 2,500 to 6,000 pounds. The weight of a cord of wood will depend on the species of wood involved, as some types of wood are heavier than others. For example, oak is generally heavier than pine.

To ensure that you’re getting a fair price for your firewood, it’s important to know how much a cord of wood weighs. You can use a cord of wood calculator to determine the weight of your firewood based on its dimensions.

In summary, a cord of wood is a standard unit of measurement used to describe a stack of firewood. It measures 4 feet high, 4 feet wide, and 8 feet long, resulting in a total volume of 128 cubic feet. The weight of a cord of wood can vary based on the species of wood and its moisture content.

Factors Affecting the Weight of a Cord of Wood

factors-affecting-the-weight-of-a-cord-of-wood

When it comes to the weight of a cord of wood, there are a few factors that can affect it. In this section, we will discuss two of the most important factors that can impact the weight of a cord of wood: the wood species and the moisture content.

Wood Species

The species of wood used to make a cord of wood can have a significant impact on its weight. Different species of wood have different densities, which means that some types of wood are heavier than others. For example, oak is a dense hardwood that is heavier than softer woods like pine.

Here is a table that shows the average weight of a cord of wood for some common wood species:

Wood Species Average Weight of a Cord of Wood
Oak 4,000 pounds
Maple 3,700 pounds
Hickory 4,200 pounds
Pine 2,500 pounds

Moisture Content

The moisture content of the wood used to make a cord of wood can also have a significant impact on its weight. Wood that is freshly cut and has a high moisture content will be heavier than wood that has been seasoned and has a lower moisture content.

Here is a table that shows the average weight of a cord of wood based on its moisture content:

Moisture Content Average Weight of a Cord of Wood
Freshly Cut 5,000 pounds
Seasoned 4,000 pounds
Kiln-Dried 3,000 pounds

It is important to note that the weight of a cord of wood can vary depending on how it is stacked. A tightly packed cord of wood will weigh more than a loosely stacked cord of wood. Additionally, the dimensions of the cord of wood can also impact its weight. A cord of wood that is cut into smaller pieces will weigh more than a cord of wood that is cut into larger pieces.

Average Weights of Common Wood Types

When it comes to buying firewood, knowing the average weight of different wood types can help you plan for transportation and storage. Here are the average weights of common hardwood and softwood types:

Hardwood

Hardwood is denser and heavier than softwood, making it a popular choice for long-burning fires. Here are the average weights of some common hardwood types:

Wood Type Green Weight (lbs/cord) Dry Weight (lbs/cord)
Oak 4,000 – 5,000 2,200 – 3,000
Maple 3,000 – 4,000 1,800 – 2,500
Hickory 4,000 – 5,000 2,500 – 3,500
Cherry 2,500 – 3,500 1,800 – 2,500
Ash 3,000 – 4,000 2,000 – 2,800

Softwood

Softwood is lighter and less dense than hardwood, making it easier to handle and transport. Here are the average weights of some common softwood types:

Wood Type Green Weight (lbs/cord) Dry Weight (lbs/cord)
Pine 2,500 – 3,000 1,500 – 2,000
Fir 2,500 – 3,000 1,500 – 2,000
Spruce 2,500 – 3,000 1,500 – 2,000
Cedar 2,000 – 2,500 1,200 – 1,800

Keep in mind that the weight of a cord of wood can vary depending on factors such as moisture content, how the wood is stacked, and the size of the logs. Also, remember that transporting overweight loads can be dangerous and illegal, so always check your vehicle’s weight capacity and local regulations before loading up on firewood.

Practical Implications of Wood Weight

practical-implications-of-wood-weight

When it comes to buying firewood, it is important to consider the weight of the wood. The weight will determine how much wood you can transport at once, as well as how much storage space you will need. Here are some practical implications of wood weight that you should keep in mind.

Transportation

Transporting firewood can be a challenge, especially if you have a small vehicle. The weight of the wood will determine how much you can transport at once. For example, if you have a half-ton pickup truck, you can typically transport a cord of seasoned firewood, which weighs between 2,000 to 3,000 pounds. However, if you have a smaller vehicle, you may need to make multiple trips or purchase smaller amounts of wood.

Here is a table that shows the weight of different amounts of firewood:

Amount of Firewood Weight
1/8 cord 250 – 375 pounds
1/4 cord 500 – 750 pounds
1/2 cord 1,000 – 1,500 pounds
1 cord 2,000 – 3,000 pounds

Storage

Storing firewood is another important consideration. The weight of the wood will determine how much storage space you will need. It is important to stack the wood properly to ensure that it stays dry and does not become a fire hazard.

Here are some tips for stacking firewood:

  • Stack the wood in a dry, well-ventilated area.
  • Stack the wood off the ground to prevent moisture from seeping in.
  • Stack the wood in a way that allows air to circulate around it.
  • Cover the top of the stack with a tarp to protect it from rain and snow.

It is also important to note that the weight of the wood will increase if it is not properly seasoned. Green, fresh-cut wood can weigh twice as much as dry wood. Make sure to purchase seasoned firewood to ensure that you are getting the most for your money.

Overall, the weight of firewood is an important consideration when buying and transporting wood. Keep these practical implications in mind to ensure that you have enough wood to keep your home warm all winter long.

Frequently Asked Questions

What is the weight of a cord of wood?

A cord of wood is a unit of measurement used to quantify the amount of firewood or timber that has been cut and stacked for use as fuel. The weight of a cord of wood depends on the type of wood, as some species are heavier than others. However, an average cord of wood can weigh about 5,000 pounds on the higher side based on the volume of 128 cubic feet.

How much does a cord of wood weigh in pounds?

A cord of wood can weigh about 5,000 pounds on the higher side based on the volume of 128 cubic feet. However, the weight of a cord of wood can vary depending on the species of wood involved.

How much does a 1/2 cord of wood weigh?

A half cord of wood is half the size of a full cord, measuring 4 feet high, 4 feet wide, and 4 feet long. Therefore, a half cord of wood will weigh approximately half of a full cord, or around 2,500 pounds on the higher side based on the volume of 64 cubic feet.

How much does a cord of oak wood weigh?

Oak wood is a dense hardwood that is commonly used for firewood. The weight of a cord of oak wood can vary depending on the moisture content, but on average, a cord of oak wood can weigh around 5,500 pounds.

Is a cord of wood a truckload?

No, a cord of wood is not necessarily a truckload. The amount of firewood that can fit in a truck depends on the size of the truck and the size of the firewood pieces. However, a standard pickup truck can typically hold around 1/2 to 1 cord of wood.

How big is a cord of wood stacked?

A cord of wood is traditionally measured as a stack that is 4 feet high, 4 feet wide, and 8 feet long. When the firewood is stacked, it should be tightly packed with minimal gaps between the pieces to ensure an accurate measurement.