Tag Archives: fine grit sandpaper

finishing-touches-12

How to Make a Wooden Frame: A Beginner's Guide

If you’re looking for a way to display your favorite photos or artwork, making a wooden frame is a simple and rewarding DIY project. With just a few basic tools and some inexpensive materials, you can create a custom frame that perfectly fits your style and decor.

To get started, you’ll need to choose the wood for your frame. Pine boards or plywood are affordable options that are easy to cut and paint, while hardwoods like oak or maple will give your frame a more polished look. Once you have your wood, you can cut it to size using a circular saw or miter saw. If you don’t have access to these tools, most home improvement stores will cut the wood for you.

Once you have your wood cut to size, it’s time to assemble the frame. There are several ways to do this, including using screws and carpenter’s glue or using a handheld router to create a groove for the glass and artwork to sit in. Whichever method you choose, be sure to measure carefully and use clamps to hold the pieces in place while the glue dries. With a little patience and some attention to detail, you’ll have a beautiful wooden frame that you can be proud to display in your home or give as a gift.

Understanding Wood Types

When it comes to making a wooden frame, choosing the right type of wood is crucial. Different types of wood have different properties and characteristics that affect their durability, strength, and appearance. Here are the three main types of wood you should consider:

Hardwood

Hardwood comes from deciduous trees, which are trees that lose their leaves in the fall. Hardwood is known for its strength and durability, making it a great choice for furniture and other high-traffic items. Some common types of hardwood include oak, maple, cherry, and walnut. Hardwood is more expensive than softwood, but it can also be more beautiful and long-lasting.

Softwood

Softwood comes from coniferous trees, which are trees that have needles instead of leaves. Softwood is generally less expensive than hardwood and is often used for construction, such as framing and decking. Some common types of softwood include pine, spruce, and cedar. Softwood is less dense than hardwood, which means it is more susceptible to dents and scratches.

Engineered Wood

Engineered wood is made by bonding together layers of wood veneers or fibers with adhesives. This type of wood is often used for furniture and other decorative items because it can be made to look like hardwood at a lower cost. Some common types of engineered wood include plywood, particleboard, and MDF (medium-density fiberboard). Engineered wood is often more stable and consistent than natural wood, which means it is less likely to warp or shrink.

When choosing the type of wood for your frame, consider the look you want to achieve, the durability you need, and your budget. Remember that different types of wood have different strengths and weaknesses, so choose wisely.

Choosing the Right Wood

When it comes to making a wooden frame, choosing the right wood is crucial. The type of wood you choose will affect the overall look and durability of your frame. Here are some factors to consider when selecting the right wood for your frame:

Wood Type

Different types of wood have different characteristics that can affect the look and feel of your frame. Some common woods used for frames include:

  • Pine: This is a softwood that is easy to work with and is ideal for painting or staining.
  • Oak: This hardwood is durable and has a distinctive grain pattern that can add character to your frame.
  • Maple: This hardwood has a smooth, even texture and is ideal for staining.

Wood Thickness

The thickness of the wood you choose will affect the overall weight and sturdiness of your frame. Thicker wood will be heavier and more durable, while thinner wood will be lighter and easier to work with.

Grain Pattern

The grain pattern of the wood can also affect the look of your frame. Some woods, like oak, have a distinctive grain pattern that can add character to your frame. Other woods, like maple, have a more subtle grain pattern that can provide a smoother, more uniform look.

Finish

The finish you choose for your frame can also affect the look and durability of your frame. Some common finishes include:

  • Stain: This can enhance the natural color and grain pattern of the wood.
  • Paint: This can provide a uniform color and finish to your frame.
  • Varnish: This can provide a protective layer that can help prevent scratches and damage to your frame.

Overall, choosing the right wood for your frame will depend on your personal preferences and the look you are trying to achieve. Consider the characteristics of different woods and finishes to find the perfect fit for your project.

Required Tools

required-tools-2

To make a wooden frame, you will need a few tools to help you along the way. Here are the essential tools you will need to make a wooden frame:

Saw

A saw is one of the most important tools you’ll need when making a wooden frame. A circular or miter saw is recommended to cut the wood according to the cut list. You can obtain cheap scrap wood, pine boards, or plywood at many home improvement or hardware stores.

Hammer

A hammer is a necessary tool for driving in nails to hold the frame together. A claw hammer is the most common type of hammer, and it has a claw on the back for removing nails.

Nails

Nails are needed to hold the frame together. The size of the nails will depend on the thickness of the wood you are using. It is recommended to use finishing nails for a more professional look.

Remember to always wear protective gear, such as safety goggles and gloves, when using power tools or handling sharp objects. With these essential tools, you will be well on your way to creating a beautiful wooden picture frame.
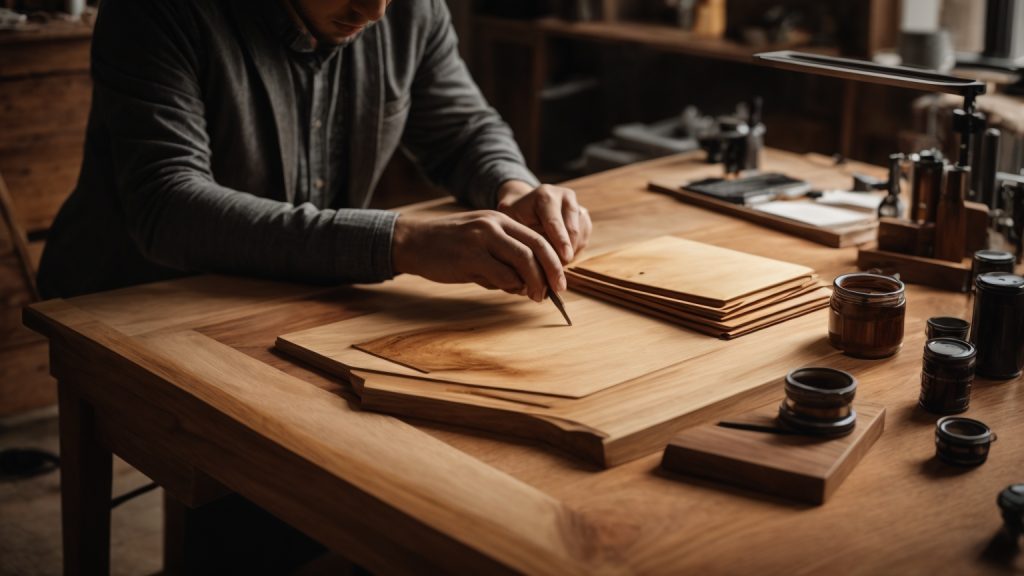
Cutting the Wood

Before you start cutting the wood, make sure you have all the necessary tools and materials. You will need a saw, measuring tape, pencil, and the wood you will be using to make your frame.

The first step is to measure and mark the wood to the desired length. Use the measuring tape to measure the length you need and then mark it with a pencil. Make sure the marks are straight and even, so your cuts will be accurate.

Once you have marked the wood, it’s time to start cutting. Use a saw to cut the wood to the desired length. If you are using a circular saw, make sure the blade is set to the correct depth and angle before you start cutting. If you are using a hand saw, make sure you have a firm grip on the saw and use long, even strokes to make your cuts.

When cutting the wood, be sure to follow all safety precautions. Wear safety glasses and keep your fingers away from the blade. If you are using a power saw, make sure the blade is sharp and the saw is properly maintained.

After you have cut the wood to the desired length, you may need to make additional cuts to create the desired shape for your frame. Use the same techniques as before to make these cuts, and be sure to measure and mark the wood accurately before you start cutting.

Overall, cutting the wood is an important step in making a wooden frame. Take your time and be careful to ensure your cuts are accurate and safe.

Assembling the Frame

assembling-the-frame-1

Now that you have all the necessary materials and have cut your wood to the appropriate lengths, it’s time to assemble your wooden frame.

  1. First, lay out your four frame sections on a flat surface, making sure they are lined up correctly and the corners form a perfect 90-degree angle.
  2. Apply a drop of wood glue to each of the eight miter faces. Spread the glue thinly over the miter faces.
  3. Take one of the plastic pegs and insert it into the hole at the end of one of the frame sections. Repeat this process for the other three frame sections.
  4. Gently press the four frame sections together, making sure the pegs are fully inserted into the holes.
  5. Wipe off any excess glue that may have seeped out of the joints with a damp cloth.
  6. Clamp the frame together with corner clamps or use a strap clamp to hold the frame securely while the glue dries.
  7. Allow the glue to dry completely according to the manufacturer’s instructions.
  8. Once the glue is dry, remove the clamps and sand any rough spots or excess glue from the frame.

Congratulations! You have now successfully assembled your own wooden frame.
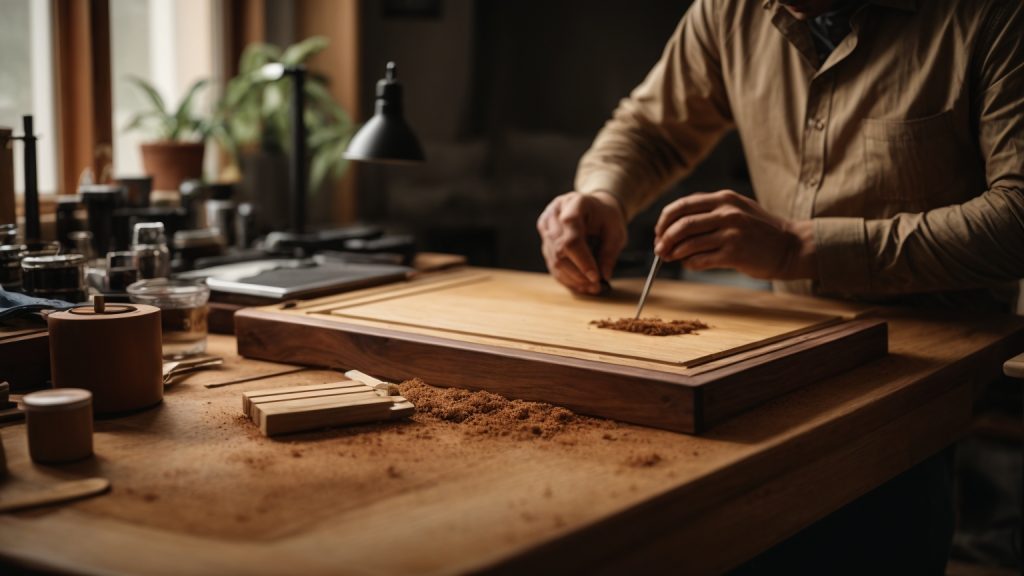
Sanding the Frame

Once you have joined the wooden pieces of your frame together, it’s time to sand it down. Sanding is a crucial step in creating a custom frame that looks professional and polished. However, it’s also where a frame can easily be ruined, so it’s important to take your time and be careful.

The first thing to keep in mind is that over-sanding is a common mistake that novice sanders make. If you sand too much, you can end up with a frame that is uneven or has rough spots. So, start with a coarse grit sandpaper and work your way up to a finer grit as you go. This will help you avoid removing too much material at once.

When sanding your frame, you should also pay attention to the direction of the grain. Sanding with the grain will help you achieve a smoother finish and prevent the wood from splintering or tearing. You can use a sanding block or a power sander to make the process easier, but be careful not to apply too much pressure or you could damage the wood.

Another thing to consider is the type of wood you are sanding. Some woods, like oak or maple, are harder and more difficult to sand than others. If you’re working with a harder wood, you may need to use a finer grit sandpaper or spend more time sanding to get the desired finish.

Finally, it’s important to clean your frame thoroughly after sanding. Use a tack cloth or a soft brush to remove any dust or debris, and make sure the surface is completely smooth before moving on to the next step. With these tips in mind, you should be able to sand your wooden frame like a pro!

Finishing Touches

finishing-touches-12

When it comes to creating a wooden frame, the finishing touches are what can really make it stand out. Here are some tips to help you add those final touches to your wooden frame.

Staining

Staining your wooden frame can help bring out the natural beauty of the wood and give it a more polished look. Here are some steps to follow when staining your wooden frame:

  1. Sand the frame: Before you begin staining, make sure the frame is smooth and free of any rough spots or imperfections. Sand the frame with a fine-grit sandpaper to achieve a smooth surface.
  2. Choose the right stain: Choose a stain that matches the color or tone you want to achieve. Test the stain on a small area of the frame to make sure it’s the right color before applying it to the entire frame.
  3. Apply the stain: Using a brush or cloth, apply the stain in the direction of the grain. Apply a thin, even coat and let it dry completely before applying a second coat if necessary.
  4. Seal the stain: Once the stain has dried, apply a clear sealer to protect the wood and give it a polished look.

Polishing

Polishing your wooden frame can give it a smooth, shiny finish and make it look more professional. Here are some steps to follow when polishing your wooden frame:

  1. Sand the frame: Sand the frame with a fine-grit sandpaper to achieve a smooth surface.
  2. Apply the polish: Apply a small amount of polish to a soft cloth and rub it onto the frame in a circular motion. Apply a thin, even coat and let it dry completely before applying a second coat if necessary.
  3. Buff the frame: Once the polish has dried, use a clean, dry cloth to buff the frame to a shine.

Remember to always work in a well-ventilated area and wear protective gear such as gloves and a mask when working with stains and polishes. With these tips, you can add the perfect finishing touches to your wooden frame and make it look like a professional piece of art.

Safety Precautions

When working with wood, it is important to take safety precautions to prevent accidents and injuries. In this section, we will cover two important safety precautions: protective gear and safe handling.

Protective Gear

Wearing the right protective gear can help prevent injuries. Here are some items you should consider wearing when working with wood:

  • Safety glasses: Protect your eyes from flying debris.
  • Work gloves: Protect your hands from splinters and cuts.
  • Dust mask: Protect your lungs from sawdust and other particles.
  • Earplugs or earmuffs: Protect your ears from loud noises.
  • Work boots with a heel and slip-resistant sole: Prevent falls.

Make sure your protective gear fits properly and is in good condition. Replace any damaged or worn-out gear.

Safe Handling

In addition to wearing protective gear, it is important to handle wood safely. Here are some tips:

  • Stack job materials near the work area to prevent tripping hazards.
  • Use mechanical lifting devices or a team to lift heavy or unstable loads.
  • Don’t lift and move loads that are too heavy or unstable.
  • Keep a first aid kit at your disposal in case of accidents.
  • Avoid drugs and alcohol when working with wood.

By following these safety precautions, you can help prevent accidents and injuries when making wooden frames.

designing-your-whistle

How to Make a Wooden Whistle: A Beginner's Guide

Are you interested in making your own wooden whistle? It’s a fun and simple woodworking project that can be completed in just a few minutes. With the right tools and materials, you can create a unique and functional whistle that you can use or gift to others.

There are many different ways to make a wooden whistle, and the process can vary depending on the design you choose. Some people prefer to use hand tools, while others may opt for power tools to speed up the process. Regardless of your approach, the basic steps for making a wooden whistle include selecting the right wood, drilling a hole through the center, and shaping the whistle to produce sound.

Whether you are a seasoned woodworker or a beginner looking for a new project, making a wooden whistle is a great way to hone your skills and create something useful and beautiful. So, grab your tools and let’s get started!

Understanding Wood Types

how-to-make-a-wooden-whistle-a-beginners-guide-2

When it comes to making a wooden whistle, understanding the types of wood available is important. Different woods have different properties, and choosing the right one can make all the difference in the sound quality and durability of your whistle.

Hardwood

Hardwood is a dense and durable type of wood that is often used in woodworking projects. It is a popular choice for making wooden whistles because it produces a clear and distinct sound. Some common types of hardwood include:

  • Oak
  • Maple
  • Cherry
  • Walnut
  • Mahogany

Each of these woods has its own unique properties. Oak, for example, is a strong and sturdy wood that is often used for furniture. Maple is a hard and dense wood that is ideal for making musical instruments. Cherry has a warm and rich tone, while walnut is known for its deep and rich color.

Softwood

Softwood, as the name suggests, is a softer and less dense type of wood. It is often used in construction and woodworking projects because it is easy to work with and readily available. However, it is not always the best choice for making wooden whistles because it can produce a muffled or unclear sound. Some common types of softwood include:

If you do choose to use softwood for your whistle, it is important to choose a high-quality piece of wood that is free of knots and other imperfections. This will help to ensure that your whistle produces a clear and distinct sound.

In general, it is best to choose a hardwood for making a wooden whistle. However, if you do decide to use softwood, be sure to choose a high-quality piece of wood and take extra care when carving and shaping it to ensure that it produces a clear and distinct sound.

Tools Needed

When it comes to making a wooden whistle, having the right tools is essential. In this section, we’ll go over the tools you’ll need to create your own beautiful and functional wooden whistle.

Carving Tools

To create the shape of your whistle, you’ll need some carving tools. Here are some of the essential carving tools you’ll need:

  • A carving knife – for roughing out the shape of the whistle
  • A gouge – for carving out the hollow portion of the whistle
  • A chisel – for creating the air channel in the whistle

Sanding Tools

Once you’ve carved the shape of your whistle, you’ll need to sand it down to create a smooth finish. Here are some sanding tools you’ll need:

  • Sandpaper – choose a variety of grits to get the right finish
  • Sanding block – to hold the sandpaper and create a flat surface for sanding
  • Dremel tool – for sanding hard-to-reach areas

Finishing Tools

To protect and enhance the beauty of your wooden whistle, you’ll need to apply a finish. Here are some of the finishing tools you’ll need:

  • Wax – to protect the wood and give it a nice shine
  • Varnish – for a more durable finish
  • Paint – if you want to add some color to your whistle

In conclusion, having the right tools is crucial to making a wooden whistle that looks and sounds great. By investing in the right carving, sanding, and finishing tools, you’ll be able to create a beautiful and functional whistle that you can be proud of.

Choosing the Right Wood

When it comes to making a wooden whistle, choosing the right type of wood is essential. Not all woods are created equal, and some will produce better results than others. Here are some things to consider when selecting the wood for your whistle:

Hardness

The hardness of the wood will affect the sound quality of your whistle. Softer woods, such as pine or cedar, will produce a softer, more mellow sound. Harder woods, such as oak or maple, will produce a louder, more piercing sound. Consider the sound you want your whistle to produce when choosing the wood.

Grain Direction

The direction of the wood grain can also affect the sound quality of your whistle. For the best results, choose a piece of wood with straight, even grain running parallel to the length of the whistle. This will allow the air to flow smoothly through the whistle, producing a clear, consistent sound.

Density

The density of the wood will also affect the sound quality of your whistle. A denser wood will produce a louder, clearer sound than a less dense wood. However, denser woods can be more difficult to work with, so consider your skill level and the tools you have available before choosing a dense wood.

Common Woods for Whistle Making

Here are some common woods used for making whistles, along with their characteristics:

Wood Type Characteristics
Cherry Medium hardness, good tone
Maple Hard, bright tone
Oak Hard, loud tone
Walnut Medium hardness, warm tone
Cedar Soft, mellow tone
Pine Soft, mellow tone

In general, hardwoods will produce a better sound than softwoods. However, softer woods can be easier to work with, especially for beginners. Ultimately, the best wood for your whistle will depend on your personal preferences and skill level.

Designing Your Whistle

designing-your-whistle

When it comes to designing your wooden whistle, there are a few things to keep in mind. First, you’ll want to consider the size and shape of your whistle. The size will determine the pitch of the sound, while the shape will affect the quality and volume of the sound.

Next, you’ll want to think about the placement of the finger holes. These holes will determine the notes that can be played on the whistle. You may want to experiment with different hole sizes and placements to achieve the desired sound.

Another factor to consider is the type of wood you’ll be using. Different types of wood can produce different sounds, so it’s important to choose a wood that will complement the sound you’re looking to achieve. Hardwoods like maple, oak, and cherry are good options for wooden whistles.

You may also want to add decorative elements to your whistle, such as carving or wood burning. These can add a personal touch and make your whistle unique.

Overall, designing your wooden whistle can be a fun and creative process. By considering the size, shape, finger hole placement, wood type, and decorative elements, you can create a whistle that produces the sound and look you desire.

Carving the Whistle

Carving the whistle is the most important part of the process. This is where you will shape and create the sound of the whistle. In this section, we will discuss how to shape the body and create the mouthpiece.

Shaping the Body

To shape the body of the whistle, you will need a woodblock that is soft enough for carving, a knife or ax (or both), and a carving and finishing tool (sander or sandpaper) to smooth edges and round the whistle once finished.

  1. First, draw the shape of the whistle on the woodblock using a pencil. Make sure to leave enough room for the mouthpiece and the sound hole.
  2. Use the knife or ax to carve the woodblock into the shape of the whistle. Be careful not to carve too much, as this can affect the sound of the whistle.
  3. Once you have the basic shape, use the carving and finishing tool to smooth the edges and round the whistle. This will help to create a better sound.

Creating the Mouthpiece

The mouthpiece is the most important part of the whistle, as it is where the sound is created. To create the mouthpiece, you will need a vice to help hold the wood in place, but it can be omitted if you’re careful.

  1. Clamp the woodblock in the vice, making sure that the part you want to carve is facing up.
  2. Using the knife or carving tool, carve a small hole in the top of the whistle to create the mouthpiece. Make sure the hole is small enough to create a high-pitched sound.
  3. Once you have created the hole, use the carving and finishing tool to smooth the edges and round the mouthpiece. This will help to create a better sound.

Remember, the key to creating a good whistle is to take your time and be patient. Don’t rush the process, and make sure to test the whistle frequently as you carve it. With a little practice, you’ll be able to create a beautiful and functional whistle that you can be proud of.

Creating the Sound Hole

The sound hole is a crucial part of your wooden whistle, as it is what produces the sound when you blow into the whistle. Here’s how you can create the sound hole:

  1. Determine the placement: Before you start drilling, you need to decide where you want your sound hole to be. Typically, the sound hole is located about 1/3 of the way down the whistle, but you can experiment with different placements to achieve different sounds.
  2. Mark the spot: Once you have determined the placement, use a pencil to mark the spot where you want to drill the sound hole.
  3. Drill the hole: Using a drill bit that is slightly smaller than the diameter of your whistle, drill a hole straight through the whistle at the marked spot. Be sure to drill all the way through the whistle.
  4. Create the escapement: The escapement is a small notch that you will create on the underside of the sound hole. This allows air to escape and produce the sound. To create the escapement, use a small file to carefully carve a small notch on the underside of the sound hole.
  5. Test the sound: Once you have created the sound hole and escapement, test the sound of your whistle by blowing into it. If the sound is not quite right, you can experiment with the size and shape of the sound hole to achieve the desired sound.

Remember to be patient and take your time when creating the sound hole, as it is a crucial part of your wooden whistle. With a little practice and experimentation, you’ll be able to create a beautiful and unique sound that is all your own.

Sanding the Whistle

Now that you have created your wooden whistle, it’s time to sand it down to give it a smooth and polished finish. Sanding the whistle will also help to remove any rough edges or splinters that may have been left behind during the carving process.

To begin sanding, you will need a few supplies, including sandpaper, a sanding block, and a soft cloth. Start by wrapping a piece of sandpaper around the sanding block and gently rubbing it over the surface of the whistle. Be sure to sand evenly and in the direction of the grain of the wood.

As you sand, you may notice that the surface of the whistle becomes smoother and more polished. If you find that there are still rough spots or areas that need further sanding, switch to a finer grit sandpaper and continue sanding until the surface is smooth and even.

Once you have finished sanding, use a soft cloth to wipe away any dust or debris that has accumulated on the surface of the whistle. You may also want to apply a coat of wood polish or wax to help protect the surface of the wood and give it a shiny finish.

Overall, sanding your wooden whistle is an important step in the process of creating a beautiful and functional instrument. With a little bit of time and effort, you can create a whistle that looks and sounds great.

Applying the Finish

Once your wooden whistle is complete, it’s time to apply the finish. This step is important as it helps to protect the wood and gives it a polished look. Here’s how to apply the finish:

  1. Sand the whistle: Before applying any finish, sand the whistle with fine-grit sandpaper to remove any rough spots or imperfections. Make sure to sand the whistle evenly to avoid any uneven finish.
  2. Choose your finish: There are many types of finishes you can use, such as paint, stain, or varnish. Each finish has its own advantages and disadvantages, so choose the one that best suits your needs. For example, if you want a natural look, use a clear varnish. If you want a colorful whistle, use paint.
  3. Apply the finish: Apply the finish using a brush, sponge, or cloth. Make sure to apply the finish evenly and follow the manufacturer’s instructions. If you’re using a varnish or stain, apply a thin layer and let it dry before applying another layer. If you’re using paint, apply two or three coats, letting each coat dry before applying the next.
  4. Let it dry: Once you’ve applied the finish, let the whistle dry completely. This can take several hours or even overnight, depending on the type of finish you used. Make sure to let the whistle dry in a well-ventilated area.
  5. Sand again: After the finish has dried, sand the whistle lightly with fine-grit sandpaper to remove any bumps or rough spots. This will give the whistle a smooth and polished look.
  6. Enjoy your whistle: Once the finish has dried and you’ve sanded the whistle, it’s ready to use. Blow into it and enjoy the sound of your handmade wooden whistle.

Remember, applying the finish is an important step in making a wooden whistle. It not only protects the wood but also gives it a polished look. Follow these steps, and you’ll have a beautiful and functional wooden whistle that you can be proud of.

Testing the Whistle

Once you have finished making your wooden whistle, it’s time to test it out and see how it sounds. Here are some tips to help you test your whistle:

1. Blow Gently

When testing your whistle, it’s important to blow gently at first. This will help you get a feel for the whistle and how it sounds. You can gradually increase the force of your breath to see how the sound changes.

2. Adjust the Airflow

The sound of your whistle can be affected by the amount of airflow that passes through it. You can adjust the airflow by moving your tongue and lips around the whistle’s mouthpiece. Experiment with different positions to see how it affects the sound.

3. Check for Cracks or Leaks

Before testing your whistle, make sure to inspect it for any cracks or leaks. If there are any, the sound may be affected. You can use a small amount of wood glue or wax to seal any cracks or leaks.

4. Compare with Other Whistles

To get a better sense of how your whistle sounds, you can compare it with other whistles. Try testing it alongside a store-bought whistle or another handmade whistle. This can help you identify any areas where your whistle may need improvement.

5. Practice Makes Perfect

Remember, making a wooden whistle takes practice. Don’t be discouraged if your first attempt doesn’t sound perfect. Keep practicing and experimenting with different techniques until you find the sound you’re looking for.

By following these tips, you’ll be able to test your wooden whistle and make any necessary adjustments to get the perfect sound. Enjoy the process and have fun making music with your handmade whistle!

how-to-fix-a-hole-in-a-wooden-door-simple-solutions-for-a-common-problem-2

How to Fix a Hole in a Wooden Door: Simple Solutions for a Common Problem

Fixing a hole in a wooden door may seem like a daunting task, but it is actually a simple DIY project that you can easily do yourself. Whether you have a hollow-core or solid wood door, there are a variety of methods you can use to repair the hole and make your door look as good as new.

If you have a hollow-core door, the most common method involves using a quick expansion filler to fill the space in the door and then sanding it down and painting it to match the existing color. For solid wood doors, you can use string, glue, and putty to fill the hole and make a seamless repair. With a little bit of time and effort, you can easily fix the hole and avoid the cost of replacing the entire door.

In this article, we will provide you with step-by-step instructions on how to fix a hole in a wooden door, including the tools and materials you will need. Whether you are a seasoned DIYer or a beginner, our guide will help you make the repair quickly and easily. So, roll up your sleeves and let’s get started!

Recognizing the Type of Hole

how-to-fix-a-hole-in-a-wooden-door-simple-solutions-for-a-common-problem-2

When it comes to fixing a hole in a wooden door, the first step is to recognize the type of hole you’re dealing with. Different types of holes require different approaches to repair. Here are some common types of holes you may encounter:

Small Holes

Small holes in wooden doors are typically caused by screws or nails. These holes are usually less than 1/4 inch in diameter. To fix a small hole, you can use wood filler or putty. Here’s how:

  1. Clean the hole with a damp cloth to remove any debris.
  2. Apply wood filler or putty to the hole, using a putty knife.
  3. Smooth out the surface of the filler or putty with the putty knife.
  4. Let the filler or putty dry completely, according to the manufacturer’s instructions.
  5. Sand the surface of the filler or putty until it’s smooth.
  6. Prime and paint the repaired area to match the rest of the door.

Large Holes

Large holes in wooden doors are usually caused by accidental impact or damage. These holes are typically more than 1/4 inch in diameter. To fix a large hole, you’ll need to use a patch or a new piece of wood. Here’s how:

  1. Cut a piece of wood that’s slightly larger than the hole.
  2. Place the wood over the hole and trace around it with a pencil.
  3. Cut out the traced area with a jigsaw or handsaw.
  4. Apply wood glue to the back of the patch or new piece of wood.
  5. Insert the patch or new piece of wood into the hole and press it firmly in place.
  6. Let the glue dry completely, according to the manufacturer’s instructions.
  7. Sand the surface of the patch or new piece of wood until it’s flush with the rest of the door.
  8. Prime and paint the repaired area to match the rest of the door.

Cracks or Splits

Cracks or splits in wooden doors are usually caused by changes in temperature or humidity. These types of holes can be more difficult to repair. Here’s how:

  1. Use a putty knife to clean out any debris from the crack or split.
  2. Apply wood glue to the crack or split, using a small brush.
  3. Use a clamp to hold the crack or split closed while the glue dries.
  4. Let the glue dry completely, according to the manufacturer’s instructions.
  5. Sand the surface of the repaired area until it’s smooth.
  6. Prime and paint the repaired area to match the rest of the door.

By recognizing the type of hole you’re dealing with, you can choose the appropriate method to fix it. With a little bit of effort, you can have your wooden door looking as good as new again.

Gathering Necessary Tools and Materials

Before you begin fixing a hole in your wooden door, you need to gather the necessary tools and materials. Here is a list of things you will need to fix a hole in a wooden door:

For Small Holes

If you have a small hole in your wooden door, you will need the following tools and materials:

Tools Materials
Hammer Wood filler
Sandpaper Paint or stain
Paintbrush

For Large Holes

If you have a large hole in your wooden door, you will need the following tools and materials:

Tools Materials
Jigsaw or handsaw Plywood or wooden patch
Sandpaper Wood glue
C-clamps Paint or stain
Paintbrush

For Cracks or Splits

If your wooden door has cracks or splits, you will need the following tools and materials:

Tools Materials
Chisel Wood glue
Hammer Clamps
Sandpaper Wood filler
Paint or stain Paintbrush

Make sure to gather all the necessary tools and materials before starting the repair process. This will make the process smoother and faster.

Fixing Small Holes

fixing-small-holes

Fixing small holes in a wooden door is a simple job that you can do yourself. Here are the steps to follow:

Preparation

Before you start, you need to gather the necessary materials. You will need wood filler, sandpaper, a putty knife, a damp cloth, and paint or stain that matches the door. Once you have everything you need, follow these steps:

  1. Clean the area around the hole with a damp cloth to remove any dirt or debris.
  2. Use a putty knife to apply wood filler to the hole. Make sure to fill the hole completely and smooth out the surface of the filler.
  3. Let the wood filler dry completely. This may take several hours depending on the product you are using.

Application of Wood Filler

Once the wood filler is dry, you can start sanding and finishing the door. Follow these steps:

  1. Use sandpaper to sand the surface of the wood filler until it is smooth and level with the surrounding wood.
  2. Use a damp cloth to remove any dust or debris from the surface of the door.
  3. Apply paint or stain to the door to match the existing color. You may need to apply more than one coat to achieve the desired color.

Sanding and Finishing

Once the paint or stain is dry, you can finish the job by sanding the surface of the door. Follow these steps:

  1. Use a fine-grit sandpaper to sand the surface of the door until it is smooth and even.
  2. Wipe the door with a damp cloth to remove any dust or debris.
  3. Apply a coat of finish to the door to protect it from future damage.

By following these simple steps, you can fix small holes in a wooden door and restore its appearance.

Repairing Large Holes

If you have a large hole in your wooden door, don’t worry, it can be fixed. Here is a step-by-step guide to repairing large holes in wooden doors.

Preparation

Before you begin the repair process, you need to prepare the door. First, remove any loose or splintered wood around the hole. Use sandpaper to smooth the edges of the hole and surrounding area. Clean the hole and the surrounding area with a cloth to remove any dust or debris.

Application of Wood Patch

Next, you need to apply a wood patch to fill the hole. There are different types of wood patches available, such as epoxy, wood filler, or wood putty. Choose the one that matches the color of your door.

To apply the wood patch, follow these steps:

  1. Mix the wood patch according to the instructions on the package.
  2. Apply the wood patch to the hole with a putty knife, filling it completely.
  3. Smooth the surface of the patch with the putty knife, making it level with the surface of the door.
  4. Let the patch dry completely, according to the instructions on the package.

Sanding and Finishing

Once the patch has dried, you need to sand and finish the door. Follow these steps:

  1. Sand the surface of the patch with sandpaper until it is smooth and level with the surface of the door.
  2. Clean the surface of the door with a cloth to remove any dust or debris.
  3. Apply a coat of primer to the patch and let it dry completely.
  4. Apply a coat of paint or stain to the patch, matching the color of the door. Let it dry completely.
  5. Apply a clear coat of varnish or polyurethane to the entire door to protect it from moisture and scratches.

By following these steps, you can repair a large hole in your wooden door and make it look like new again.

Mending Cracks or Splits

If your wooden door has cracks or splits, don’t worry. You can easily fix them with some wood glue and clamps. Here’s how:

Preparation

Before you start, gather the necessary materials. You’ll need wood glue, clamps, sandpaper, a putty knife, and a paintbrush. If the crack is dirty, clean it out with sandpaper. Then, apply wood glue to the crack using a putty knife. Make sure to spread the glue evenly over the entire crack.

Application of Wood Glue

Apply a generous amount of wood glue to the crack. Spread it evenly with a putty knife, making sure to fill the entire crack. If the crack is deep, you may need to apply the glue in layers, allowing each layer to dry before applying the next one.

Clamping and Finishing

Once you’ve applied the wood glue, clamp the crack shut. Use as many clamps as necessary to ensure a tight fit. Wipe off any excess glue with a damp cloth. Let the glue dry completely, which can take several hours or overnight. Once the glue is dry, sand the area smooth and paint or stain the door to match the rest of the surface.

By following these simple steps, you can mend cracks or splits in your wooden door and restore it to its original beauty.

Painting or Staining the Door

When it comes to fixing a hole in a wooden door, painting or staining the door is an essential step to make it look like new. Here are some tips to help you get the best results.

Choosing the Right Paint or Stain

Choosing the right paint or stain is crucial to ensure that the door looks good and lasts a long time. When selecting the paint or stain, consider the following:

  • Type of wood: Different types of wood require different types of paint or stain. Make sure to choose a product that is suitable for the type of wood that your door is made of.
  • Color: Choose a color that matches the existing color of the door or complements the overall color scheme of the room.
  • Finish: The finish you choose will affect the final look of the door. Choose a finish that suits the style of the door and the room.

Application Process

Once you have chosen the right paint or stain, it’s time to apply it to the door. Here are some steps to follow:

  1. Sand the door: Sand the door to remove any rough spots or imperfections. This will help the paint or stain adhere better to the surface.
  2. Clean the door: Clean the door thoroughly to remove any dust or debris. Use a damp cloth or sponge to wipe down the surface.
  3. Apply the paint or stain: Apply the paint or stain using a brush or roller. Make sure to apply it evenly and follow the manufacturer’s instructions.
  4. Allow to dry: Allow the paint or stain to dry completely before applying a second coat or reattaching the door to its hinges.
  5. Apply a second coat (optional): If necessary, apply a second coat of paint or stain to achieve the desired look.

Remember to take your time and follow the instructions carefully to get the best results. With a little patience and effort, you can make your door look as good as new.

Preventive Measures for Future Damage

To avoid having to repair holes in your wooden door, there are some preventive measures you can take. Proper door handling and regular maintenance are key to preventing future damage.

Proper Door Handling

One of the most common causes of damage to wooden doors is improper handling. Here are some tips to help you handle your door properly:

  • Avoid slamming the door shut, as this can cause the wood to crack or split.
  • Don’t lean or hang heavy objects on the door, as this can cause the hinges to bend or the wood to warp.
  • Use doorstops to prevent the door from swinging open too far and hitting the wall.

By following these simple tips, you can help prevent damage to your wooden door.

Regular Maintenance

Regular maintenance is also important to prevent damage to your wooden door. Here are some maintenance tips:

  • Keep the door clean and free of dirt and debris. This can help prevent scratches and other damage to the wood.
  • Apply a coat of wax or polish to the door every few months to help protect the wood and keep it looking new.
  • Check the hinges and other hardware regularly to make sure they are tight and functioning properly.

By following these maintenance tips, you can help keep your wooden door in good condition and prevent future damage.

Remember, prevention is key when it comes to maintaining your wooden door. By handling your door properly and performing regular maintenance, you can help prevent damage and keep your door looking great for years to come.

how-to-build-a-wooden-mailbox

How to Build a Wooden Mailbox: A Step-by-Step Guide

Are you tired of your old, rusty mailbox that just doesn’t fit the aesthetic of your home? Building a wooden mailbox may be just the solution you need. Not only is it a functional addition to your property, but it can also add some charm and character to your curb appeal.

Building a wooden mailbox may seem like a daunting task, but with the right tools and materials, it can be a fun and rewarding DIY project. Whether you’re a seasoned woodworker or a beginner, there are plenty of resources available to guide you through the process. From step-by-step tutorials to detailed plans, you can find everything you need to build a mailbox that is both functional and stylish. So why wait? Get started on building your very own wooden mailbox today!

Choosing the Right Wood

how-to-build-a-wooden-mailbox

When it comes to building a wooden mailbox, choosing the right type of wood is crucial to ensure the longevity and durability of your mailbox. Here are some factors to consider when selecting the right wood for your project.

Hardwood vs Softwood

The first decision you need to make is whether to use hardwood or softwood for your mailbox. Hardwoods, such as oak and maple, are denser and more durable, making them ideal for outdoor projects. However, they can be more expensive and harder to work with than softwoods.

Softwoods, such as cedar and pine, are more affordable and easier to work with, but they are less durable than hardwoods. If you choose to use a softwood, make sure it is treated to resist decay and insect damage.

Treated vs Untreated Wood

Another important factor to consider is whether to use treated or untreated wood for your mailbox. Treated wood is chemically treated to resist decay and insect damage, making it more durable and long-lasting than untreated wood. However, treated wood can be more expensive and may contain harmful chemicals.

Untreated wood, on the other hand, is more affordable but is more susceptible to decay and insect damage. If you choose to use untreated wood, make sure to apply a weather-resistant finish to protect it from the elements.

In summary, when selecting the right wood for your wooden mailbox, consider the durability, cost, and environmental impact of the wood. Hardwoods are denser and more durable, but they can be more expensive and harder to work with. Softwoods are more affordable and easier to work with, but they are less durable than hardwoods. Treated wood is more durable but may contain harmful chemicals, while untreated wood is more affordable but requires a weather-resistant finish to protect it from the elements.

Designing Your Mailbox

When designing your wooden mailbox, there are a few things to consider. In this section, we will cover size specifications and style considerations to help you create a unique and functional mailbox.

Size Specifications

Before you start building your wooden mailbox, you need to determine the size specifications. The size of your mailbox should be based on the amount of mail you receive and the size of your property.

Here are some general size guidelines to follow:

  • The mailbox should be large enough to hold letters, magazines, and small packages.
  • The mailbox should be at least 6 inches away from the curb or road.
  • The mailbox should be between 41 and 45 inches from the ground to the bottom of the mailbox.
  • The mailbox should be at least 8 inches deep and 6 inches wide.

By following these guidelines, you can ensure that your mailbox is the right size for your needs and meets the requirements of your local post office.

Style Considerations

When it comes to style considerations, there are many options to choose from. You can create a simple and classic mailbox or a more elaborate design that reflects your personal style.

Here are some style considerations to keep in mind:

  • Choose a wood that is durable and weather-resistant, such as cedar or redwood.
  • Consider adding decorative elements, such as a post cap or finial, to give your mailbox a unique look.
  • Decide on a mailbox door style, such as a hinged door or a drop-down door.
  • Choose a mailbox color that complements your home’s exterior.

By considering these style elements, you can create a wooden mailbox that not only functions well but also adds to the curb appeal of your home.

In conclusion, designing your wooden mailbox involves determining the size specifications and style considerations. By following these guidelines, you can create a unique and functional mailbox that adds to the overall aesthetic of your home.

Gathering Materials

Before starting to build your wooden mailbox, you need to gather all the necessary materials. This will ensure that you have everything you need at hand and won’t need to make any unnecessary trips to the hardware store. In this section, we will cover the materials you will need to build a wooden mailbox.

Wood and Hardware

The first thing you will need is wood. You can use any type of wood you like, but cedar, redwood, and pine are popular choices. Cedar and redwood are naturally resistant to rot and insects, while pine is an affordable option that can be treated to resist rot and insects.

In addition to wood, you will need hardware to assemble your wooden mailbox. Here is a list of hardware you will need:

  • Screws or nails
  • Hinges
  • Latch
  • Post cap
  • Post anchor

Make sure to choose hardware that is suitable for outdoor use and can withstand the elements.

Tools Needed

To build a wooden mailbox, you will need a few basic tools. Here is a list of tools you will need:

  • Circular saw or handsaw
  • Drill
  • Screwdriver or hammer
  • Measuring tape
  • Level
  • Pencil
  • Safety glasses
  • Work gloves

If you don’t own these tools, you can rent them from a hardware store or borrow them from a friend.

With these materials and tools, you are now ready to start building your wooden mailbox. In the next section, we will cover the steps to build a wooden mailbox.

Building the Mailbox

building-the-mailbox

Building a wooden mailbox can be a fun and rewarding project. In this section, we will guide you through the process of building your own wooden mailbox. We will cover the steps involved in cutting the wood, assembling the pieces, and installing the door.

Cutting the Wood

The first step in building your wooden mailbox is to cut the wood to size. You will need to cut the following pieces:

  • Two 4×4 posts, each 6 feet long
  • One 1×6 board, 6 feet long
  • Two 1×6 boards, each 2 feet long
  • One 1×6 board, 1 foot long
  • One 1×8 board, 1 foot long
  • One 1×2 board, 1 foot long

You can use a miter saw or a circular saw to cut the wood to size. Be sure to measure carefully and double-check your measurements before making any cuts.

Assembling the Pieces

Once you have cut the wood to size, you can begin assembling the pieces. Here are the steps involved:

  1. Attach the two 4×4 posts to the 2-foot-long 1×6 boards using screws. These will be the legs of your mailbox.
  2. Attach the 6-foot-long 1×6 board to the top of the posts using screws. This will be the bottom of your mailbox.
  3. Attach the 1-foot-long 1×6 board to the front of the bottom board using screws. This will be the front of your mailbox.
  4. Attach the 1-foot-long 1×8 board to the top of the front board using screws. This will be the top of your mailbox.
  5. Attach the 1-foot-long 1×2 board to the bottom of the front board using screws. This will be the bottom of your mailbox door.

Installing the Door

The final step in building your wooden mailbox is to install the door. Here’s how to do it:

  1. Cut a piece of plywood to fit the opening in the front of your mailbox.
  2. Attach the plywood to the 1×2 board using hinges.
  3. Attach a latch to the front of the door and the mailbox to keep the door closed.

Congratulations! You have now built your own wooden mailbox.

Finishing Touches

After building your wooden mailbox, it’s time to add the finishing touches to make it look great and protect it from the elements. Here are some tips to help you complete your project.

Sanding the Wood

Before you paint or stain your mailbox, it’s important to sand the wood to make it smooth and remove any rough spots. Start with a coarse-grit sandpaper and work your way up to a fine-grit sandpaper for a smooth finish. Be sure to sand in the direction of the wood grain to avoid scratches.

Painting or Staining

Once the wood is sanded, you can paint or stain your mailbox to match your home’s exterior. If you choose to paint, use a high-quality exterior paint and apply it in thin, even coats. Allow each coat to dry completely before applying the next one.

If you prefer the natural look of wood, you can stain your mailbox instead. Choose a stain that is designed for exterior use and apply it with a brush or rag. Be sure to follow the manufacturer’s instructions and apply the stain in thin coats for the best results.

Adding Numbers and Names

To make it easy for your mail carrier to find your mailbox, be sure to add your house number or name to the mailbox. You can use vinyl lettering, stencils, or even paint the numbers or name by hand.

If you want to add a decorative touch, consider adding a design or pattern to your mailbox. You can use stencils or tape to create a design, or even use a decal or sticker to add some personality to your mailbox.

By following these tips, you can add the finishing touches to your wooden mailbox and create a beautiful and functional addition to your home.

Installation Tips

When it comes to installing your wooden mailbox, there are a few things you need to keep in mind to ensure that your mailbox is secure and functional. In this section, we’ll cover some installation tips to help you get started.

Choosing a Location

The first thing you need to do when installing your wooden mailbox is to choose a suitable location. Here are some things to consider:

  • Accessibility: Make sure your mailbox is easily accessible from the road or sidewalk. The mailbox should be no more than 45 inches above street level, as per USPS requirements.
  • Visibility: Ensure that your mailbox is visible to the mail carrier and clearly marked with your house number.
  • Distance: Keep your mailbox at least 6-8 inches away from the curb or road to prevent damage from snowplows or passing vehicles.
  • Obstructions: Avoid installing your mailbox near trees, bushes, or other obstructions that could interfere with mail delivery.

Securing the Mailbox

Once you’ve chosen a suitable location, it’s time to secure your mailbox. Here are some tips to help you do so:

  • Use a sturdy post: A wooden mailbox post should be at least 4×4 inches in size and set in concrete to prevent it from tipping over.
  • Secure the mailbox to the post: Use screws or bolts to attach the mailbox to the post. Make sure the mailbox is level and securely attached.
  • Add a support arm: If you’re concerned about the weight of your mailbox, you can add a support arm to the post to help distribute the weight.
  • Consider a locking mailbox: If you’re concerned about mail theft, consider installing a locking mailbox to keep your mail secure.

By following these installation tips, you can ensure that your wooden mailbox is secure and functional for years to come.

how-to-remove-wax-from-wooden-table

How to Remove Wax from Wooden Table: A Quick and Easy Guide

If you have a wooden table that is covered in wax, you may be wondering how to remove it. Wax can build up over time, leaving your table looking dull and dirty. Fortunately, there are several methods you can use to remove wax from a wooden table.

One of the easiest ways to remove wax from a wooden table is with distilled vinegar and water. Mix equal parts of vinegar and water in a bowl, and then use a cloth to apply the solution to the table. Let the solution sit for a few minutes, and then wipe the table clean with a dry cloth.

Another method for removing wax from a wooden table is to use heat. Place a clean cloth over the wax, and then use a warm iron to heat the cloth. The heat will melt the wax, allowing it to be absorbed by the cloth. Repeat this process until all of the wax has been removed from the table.

Understanding Wax and Wood

how-to-remove-wax-from-wooden-table

If you have a wooden table that has been waxed, you may notice that over time, the wax can build up and leave a residue that can be difficult to remove. Before attempting to remove the wax, it’s important to understand a bit about how wax and wood interact.

How Wax Protects Wood

Wax is a natural substance that has been used for centuries to protect and beautify wood. When applied to wood, wax creates a protective layer that helps to repel water and other liquids. This can help to prevent stains and damage from spills.

Wax also helps to enhance the natural beauty of wood by bringing out its natural grain and color. This can give wood a warm, inviting glow that is difficult to achieve with other finishes.

Why Wax Buildup Occurs

While wax is a great way to protect and beautify wood, it can also cause problems if it is not properly maintained. Over time, wax can build up on the surface of wood, creating a hazy, cloudy appearance. This can make the wood look dull and unattractive.

Wax buildup can occur for a number of reasons, including:

  • Over-application of wax
  • Failure to properly buff the wax after application
  • Using the wrong type of wax for the wood
  • Failure to properly clean the wood before applying wax

How to Remove Wax from Wood

If you have a wooden table with wax buildup, there are several methods you can use to remove the wax. Some of the most effective methods include using heat, solvents, or a combination of both.

Before attempting to remove the wax, it’s important to test any method you plan to use on a small, inconspicuous area of the table to ensure that it does not damage the wood. Once you have determined that the method is safe to use, you can then proceed with removing the wax from the rest of the table.

By understanding how wax and wood interact, you can take steps to prevent wax buildup and keep your wooden table looking beautiful for years to come.

Precautions Before Starting

Before you start removing wax from your wooden table, there are a few precautions you should take to ensure that you don’t damage the wood or harm yourself. Here are some things to keep in mind:

Protect Your Hands

Wax removal typically involves using solvents or other chemicals that can be harmful to your skin. To protect your hands, wear gloves while working with these substances. Latex gloves are a good option, but if you have sensitive skin, you may want to opt for nitrile gloves instead.

Test the Solvent

Before you start removing wax from your table, test the solvent you plan to use on a small, inconspicuous area of the wood. This will help you determine whether the solvent will damage the finish or discolor the wood. Apply a small amount of the solvent to the test area and wait a few minutes to see if any damage occurs.

Work in a Well-Ventilated Area

Many wax removal solvents produce fumes that can be harmful if inhaled. To protect your health, work in a well-ventilated area. Open windows and doors to allow fresh air to circulate, and consider wearing a respirator mask if you’re working with particularly strong solvents.

Protect Your Work Surface

When removing wax from your table, you’ll likely be using solvents or other substances that can damage the surface of your work area. To protect your table or countertop, cover it with a drop cloth or plastic sheeting before you begin.

Be Patient

Removing wax from wood can be a time-consuming process, especially if the wax has been on the wood for a long time. Be patient and take your time to ensure that you remove all of the wax without damaging the wood. Rushing the process can lead to mistakes and damage to the wood.

Tools Needed for Wax Removal

Removing wax from a wooden table is not a difficult task, but you will need some tools to do it properly. Here are the tools you will need:

1. Soft Cloth

You will need a soft cloth to wipe the table after removing the wax. Make sure the cloth is clean and dry before using it.

2. Plastic Scraper

A plastic scraper is a useful tool for removing hardened wax from the table surface. It is important to use a plastic scraper to avoid scratching the wood.

3. Hair Dryer or Iron

A hair dryer or iron can be used to soften the wax before scraping it off. Be careful not to overheat the wood, as this can cause damage.

4. Distilled White Vinegar

Distilled white vinegar is a natural cleaning agent that can be used to remove wax residue from the table. Mix equal parts of vinegar and water in a bowl and use a soft cloth to apply the solution to the table.

5. Furniture Polish

After removing the wax, it is a good idea to apply furniture polish to the table to restore its shine. Choose a polish that is suitable for your type of wood and follow the instructions on the label.

Having these tools on hand will make the wax removal process much easier and more effective. With a little bit of patience and elbow grease, you can restore your wooden table to its former glory.

Step-by-Step Guide to Removing Wax

If you have a wooden table that has been covered in wax, don’t worry. Removing wax from a wooden table is a straightforward process that you can do yourself. Here is a step-by-step guide to help you remove wax from your wooden table:

  1. Scrape off the wax: Using a plastic scraper or credit card, gently scrape off as much of the wax as possible. Be careful not to scratch the surface of the wood.
  2. Soften the wax: If there is still wax remaining on the table, use a hair dryer or clothing iron on a low setting to soften the wax. Place a clean cloth over the wax and run the hair dryer or iron over the cloth. The heat will melt the wax, and the cloth will absorb it.
  3. Wipe off the wax: Once the wax has been softened, wipe it off with a clean cloth. Be sure to use a new section of the cloth for each wipe to avoid spreading the wax around.
  4. Remove any residue: If there is still residue left on the table, mix equal parts white vinegar and water in a spray bottle. Spray the solution onto a microfiber cloth and use it to wipe the surface of the furniture, following the direction of the wood grain. Apply firm but gentle pressure, focusing on areas with heavy wax buildup.
  5. Polish the table: After removing the wax and residue, polish the table with furniture polish or wax to restore its shine. Apply the polish or wax with a clean cloth, and buff it in with a separate cloth.

By following these simple steps, you can easily remove wax from your wooden table and restore its natural beauty.

Cleaning the Table After Wax Removal

cleaning-the-table-after-wax-removal

Now that you have successfully removed the wax from your wooden table, it’s time to clean it up and restore its shine. Here are some tips to help you clean your table effectively:

  • Use a damp cloth: After removing the wax, use a clean, damp cloth to wipe down the table. Make sure to remove any remaining wax residue and dirt.
  • Dry the table: After wiping down the table, use a dry cloth to remove any excess moisture. This will prevent water damage to the wood.
  • Apply furniture polish: To restore the shine of your wooden table, apply a furniture polish. Choose a polish that is specifically designed for wooden furniture. Apply the polish in a circular motion and buff it with a clean cloth.
  • Avoid harsh chemicals: Avoid using harsh chemicals or abrasive materials that can damage the wood. Instead, opt for gentle cleaning solutions that are safe for wooden surfaces.
  • Regular maintenance: To keep your wooden table looking its best, it’s important to maintain it regularly. Wipe it down with a damp cloth every few days and apply furniture polish once a month.

By following these simple tips, you can keep your wooden table looking beautiful for years to come.

Maintaining Your Wooden Table

Your wooden table is a beautiful and functional piece of furniture that can last for years with proper care. One of the most important aspects of maintaining your wooden table is to keep it clean and free of wax buildup. Here are some tips to help you keep your wooden table in top condition:

1. Clean spills immediately

Wood is a porous material and can easily absorb liquids, which can cause stains and damage to the surface. To prevent this, make sure to clean up spills immediately using a clean, damp cloth. Avoid using harsh chemicals or abrasive cleaners that can scratch the surface of the wood.

2. Use coasters and placemats

To protect your wooden table from scratches and stains, use coasters and placemats under glasses, plates, and other objects. This will help prevent water rings, heat marks, and other damage to the surface of the wood.

3. Dust regularly

Dust can accumulate on the surface of your wooden table, which can make it look dull and unattractive. To prevent this, dust your table regularly using a soft, dry cloth or a feather duster. Avoid using a wet cloth or cleaning products that can damage the finish of the wood.

4. Use furniture wax sparingly

While furniture wax can help protect the surface of your wooden table, it can also build up over time and create a dull, sticky residue. To prevent this, use furniture wax sparingly and only when necessary. Apply a thin layer of wax using a soft cloth and buff it gently with a clean, dry cloth.

By following these simple tips, you can keep your wooden table looking beautiful and functional for years to come.

Common Mistakes to Avoid

Removing wax from a wooden table can be a tricky task, and there are some common mistakes that people make that can actually make the problem worse. Here are some things to avoid when removing wax from your wooden table:

Using Hot Water

One common mistake people make when trying to remove wax from a wooden table is using hot water. While hot water may seem like a good idea because it can melt the wax, it can also damage the wood. Hot water can cause the wood to expand and warp, which can lead to permanent damage. Instead, use room temperature water to soften the wax before removing it.

Scrubbing Too Hard

Another mistake people make when removing wax from a wooden table is scrubbing too hard. Scrubbing too hard can scratch the surface of the wood, leaving it looking dull and damaged. Instead, use a soft cloth or sponge to gently remove the wax.

Using Harsh Chemicals

While it may be tempting to use harsh chemicals to remove wax from your wooden table, this can actually do more harm than good. Harsh chemicals can strip the finish off the wood, leaving it looking dull and damaged. Instead, use a mild cleaner that is safe for use on wood.

Not Protecting the Wood

After you have removed the wax from your wooden table, it is important to protect the wood to prevent further damage. One mistake people make is not protecting the wood after cleaning it. Be sure to apply a protective coating to the wood to prevent scratches and damage.

By avoiding these common mistakes, you can safely and effectively remove wax from your wooden table without causing any damage.

Alternative Methods for Stubborn Wax

If the wax on your wooden table is particularly stubborn, there are a few alternative methods you can try to remove it. Here are some options to consider:

Use Mineral Spirits

Mineral spirits are a type of solvent that can be effective at dissolving wax buildup on wooden surfaces. To use this method, follow these steps:

  1. Apply a small amount of mineral spirits to a clean, soft cloth.
  2. Rub the cloth over the wax buildup, applying gentle pressure.
  3. Continue rubbing until the wax is dissolved and removed.
  4. Wipe the area clean with a separate clean cloth.

It’s important to note that mineral spirits can be flammable, so be sure to use them in a well-ventilated area and away from any sources of heat or flames.

Try a Hair Dryer

Another option for removing stubborn wax is to use a hair dryer. Here’s how to do it:

  1. Set your hair dryer to its lowest heat setting.
  2. Hold the hair dryer a few inches away from the wax buildup.
  3. Move the hair dryer back and forth over the wax, heating it up until it begins to melt.
  4. Wipe the melted wax away with a clean cloth.
  5. Repeat as necessary until all the wax is removed.

Be careful not to hold the hair dryer too close to the wood, as this could cause damage.

Use a Plastic Scraper

If the wax on your table is particularly thick, you may need to use a plastic scraper to remove it. Here’s how:

  1. Use a plastic scraper to gently scrape away as much of the wax as possible.
  2. Apply a small amount of mineral spirits to a clean, soft cloth.
  3. Rub the cloth over the remaining wax buildup, applying gentle pressure.
  4. Continue rubbing until the wax is dissolved and removed.
  5. Wipe the area clean with a separate clean cloth.

Be careful not to use a metal scraper, as this could scratch or damage the wood.

Sand the Table

If all else fails, you may need to sand your table to remove the wax buildup. Here’s how:

  1. Use a fine-grit sandpaper to sand the wax buildup off the table.
  2. Be sure to sand with the grain of the wood to avoid causing any damage.
  3. Once the wax is removed, wipe the table clean with a damp cloth.
  4. Allow the table to dry completely before applying any new finish or wax.

Keep in mind that sanding your table should be a last resort, as it can be time-consuming and may damage the wood if not done carefully.

Professional Help for Wax Removal

If you have tried all the DIY methods and still cannot remove the wax from your wooden table, it may be time to call in the professionals. Here are some options to consider:

Furniture Restoration Companies

Many furniture restoration companies specialize in removing wax buildup from wooden furniture. These companies have the expertise and tools necessary to safely remove the wax without damaging your table.

When choosing a furniture restoration company, do your research to ensure that they have experience working with wooden tables and that they use safe and effective methods for wax removal.

Professional Cleaners

Professional cleaners may also be able to remove the wax from your table. Look for cleaners who specialize in wood cleaning and restoration.

When hiring a professional cleaner, make sure that they are experienced and have a good reputation. Ask for references and read reviews online before making a decision.

Furniture Refinishers

If your table has significant damage from the wax buildup, you may need to hire a furniture refinisher to restore it. Refinishers can repair and refinish the table to make it look like new again.

When choosing a furniture refinisher, make sure that they have experience working with wooden tables and that they use safe and effective methods for wax removal and refinishing.

Remember, hiring a professional can be more expensive than DIY methods, but it may be necessary if the wax buildup is severe or if you do not feel comfortable attempting to remove it yourself.

paint-wooden-beads

How to Paint Wooden Beads: A Beginner's Guide

If you’re looking for a fun and easy DIY project, painting wooden beads is a great option. Not only is it a relaxing activity, but it also allows you to create unique and personalized accessories for your home or wardrobe. Whether you’re a beginner or an experienced crafter, painting wooden beads can be a simple and enjoyable way to express your creativity.

To get started, you’ll need some basic supplies such as wooden beads, paint, brushes, and a skewer or toothpick. You can use any type of paint you like, including acrylic, watercolor, or spray paint, depending on your preference and the effect you want to achieve. Before you start painting, it’s a good idea to sand the wooden beads lightly to create a smooth surface for the paint to adhere to. Once you have your supplies ready, you can start experimenting with different colors, patterns, and techniques to create your own unique designs.

Understanding Wooden Beads

paint-wooden-beads

Wooden beads are a versatile and popular crafting material that can be used for a wide range of projects. They come in different shapes, sizes, and colors, and can be painted, stained, or left natural. Whether you’re a seasoned crafter or just starting out, understanding wooden beads is essential to creating beautiful and functional projects.

Types of Wooden Beads

There are several types of wooden beads available, each with its own unique characteristics. Here are some of the most common types:

  • Round beads: These are the most common type of wooden beads and come in a variety of sizes and colors. They are perfect for jewelry making, home decor, and other craft projects.
  • Faceted beads: These beads have flat surfaces that reflect light, creating a sparkling effect. They are often used in jewelry making and other decorative projects.
  • Barrel beads: These beads have a cylindrical shape and are often used in jewelry making and home decor projects.
  • Spacer beads: These beads are small and are used to separate other beads in jewelry making and other projects.

Choosing the Right Size

When choosing wooden beads for your project, size matters. Beads come in a wide range of sizes, from tiny seed beads to large statement beads. Here are some tips for choosing the right size:

  • Consider the project: The size of the beads you choose will depend on the project you’re working on. For example, if you’re making a delicate necklace, you’ll want to choose smaller beads. If you’re making a statement piece, larger beads may be more appropriate.
  • Think about the design: The size of the beads you choose can also impact the overall design of your project. Consider the other materials you’ll be using and choose beads that will complement them.
  • Experiment: Don’t be afraid to experiment with different sizes to find the perfect fit for your project.

Painting Wooden Beads

Painting wooden beads is a great way to customize them for your project. Here are some tips for painting wooden beads:

  • Choose the right paint: Acrylic paint is a good choice for painting wooden beads. It dries quickly and comes in a wide range of colors.
  • Prepare the beads: Before painting, sand the beads lightly to remove any rough spots. Wipe them clean with a damp cloth and let them dry completely.
  • Paint the beads: You can paint the beads with a brush or use a spray paint. Apply a thin coat of paint and let it dry completely before applying a second coat.
  • Seal the beads: To protect the paint and make it last longer, seal the beads with a clear varnish.

Understanding wooden beads is the first step to creating beautiful and unique projects. With the right tools and techniques, you can create stunning jewelry, home decor, and more.

Choosing the Right Paint

When it comes to painting wooden beads, choosing the right paint is crucial to achieving the desired result. There are several types of paint to choose from, each with its own unique properties. Here are some options to consider:

Acrylic Paint

Acrylic paint is a popular choice for painting wooden beads. It is water-based, which means it dries quickly and is easy to clean up. Acrylic paint is also versatile and can be used on a variety of surfaces, including wood, plastic, and metal. When using acrylic paint, it is important to thin it with water to achieve a smooth and consistent finish. You can also mix different colors of acrylic paint to create custom shades.

Spray Paint

Spray paint is another option for painting wooden beads. It is quick and easy to apply, and it dries quickly. Spray paint is available in a variety of colors and finishes, including matte, satin, and glossy. When using spray paint, it is important to protect your work surface and wear a mask to avoid inhaling fumes. Spray paint is not recommended for intricate designs or small details.

Oil-Based Paint

Oil-based paint is a durable option for painting wooden beads. It is resistant to water and can withstand wear and tear. Oil-based paint is also available in a variety of colors and finishes, including high-gloss and semi-gloss. When using oil-based paint, it is important to work in a well-ventilated area and wear gloves to avoid skin contact. Oil-based paint takes longer to dry than other types of paint, so be sure to allow plenty of time for it to dry before handling.

No matter which type of paint you choose, be sure to read the manufacturer’s instructions carefully and follow all safety precautions. Always work in a well-ventilated area and wear protective gear as necessary. With the right paint and a little creativity, you can create beautiful and unique wooden beads that are sure to impress.

Preparation of Wooden Beads

Before painting wooden beads, it is important to properly prepare them. This will ensure that the paint adheres well to the surface and that the finished product looks smooth and professional. Here are some steps to follow when preparing wooden beads for painting:

Cleaning the Beads

The first step in preparing wooden beads for painting is to clean them. This will remove any dirt, dust, or oils that may be on the surface and prevent the paint from adhering properly. To clean the beads, you can use a soft cloth or a small brush and a mild soap solution. Be sure to rinse the beads thoroughly with water and allow them to dry completely before proceeding to the next step.

Sanding the Beads

The next step in preparing wooden beads for painting is to sand them. Sanding the beads will help to smooth out any rough spots or imperfections on the surface and create a better surface for the paint to adhere to. To sand the beads, you can use a fine-grit sandpaper or a sanding sponge. Be sure to sand the beads lightly and evenly, and wipe away any dust with a soft cloth before proceeding to the next step.

By following these simple steps, you can ensure that your wooden beads are properly prepared for painting. This will help to create a smooth and professional-looking finished product that you can be proud of.

Painting Techniques

When it comes to painting wooden beads, there are several techniques you can use to achieve the desired result. In this section, we will explore three popular painting techniques: brush painting, dipping method, and spray painting.

Brush Painting

Brush painting is a traditional and straightforward method of painting wooden beads. It involves using a paintbrush to apply paint to the surface of the beads. This technique is ideal for those who want to achieve a more precise and detailed finish.

To brush paint wooden beads, you will need a few supplies, including a paintbrush, paint, and a palette. Start by pouring a small amount of paint onto the palette. Dip the tip of the brush into the paint and apply it to the surface of the bead. Make sure to cover the entire surface of the bead evenly. Allow the paint to dry completely before applying a second coat if needed.

Dipping Method

The dipping method is another popular technique for painting wooden beads. This method involves dipping the beads into a container of paint to coat them evenly. It is a quick and easy technique that is ideal for those who want to paint a large number of beads at once.

To use the dipping method, you will need a container of paint and a pair of tongs. Start by pouring the paint into the container. Hold the beads with the tongs and dip them into the paint. Make sure to coat the entire surface of the bead evenly. Allow the paint to dry completely before handling the beads.

Spray Painting

Spray painting is a modern and popular technique for painting wooden beads. It involves using a can of spray paint to apply an even coat of paint to the surface of the beads. This technique is ideal for those who want to achieve a smooth and even finish quickly.

To spray paint wooden beads, you will need a can of spray paint and a well-ventilated area. Start by placing the beads on a piece of cardboard or newspaper. Hold the can of spray paint about 6 inches away from the beads and spray a thin coat of paint evenly over the surface of the beads. Allow the paint to dry completely before handling the beads.

In conclusion, brush painting, dipping method, and spray painting are three popular techniques for painting wooden beads. Each technique has its advantages and disadvantages, so choose the one that best suits your needs and preferences.

Drying and Sealing

Proper Drying

After painting your wooden beads, it is important to let them dry completely before handling them. The drying time will depend on the type of paint you used and the humidity levels in your environment. If you are in a rush, you can use a hair dryer on a low setting to speed up the drying process. However, be careful not to hold the hair dryer too close to the beads, or they may go flying.

To avoid any sticking, it is recommended to place the beads on a paper towel or wax paper while they dry. This will prevent any paint from transferring onto other surfaces. Once the beads are completely dry, you can move on to the next step.

Applying Sealant

To protect your painted wooden beads from wear and tear, it is a good idea to apply a sealant. There are several types of sealants available, including varnish, polyurethane, and wax. Each type of sealant has its own advantages and disadvantages, so choose the one that best suits your needs.

Before applying the sealant, make sure the beads are completely dry. Then, use a brush to apply a thin layer of sealant to each bead. Be sure to cover the entire surface of the bead, including any crevices or details.

Once you have applied the sealant, let it dry completely before handling the beads. This will ensure that the sealant has enough time to cure and provide maximum protection. Depending on the type of sealant you used, you may need to apply multiple coats for optimal protection.

By properly drying and sealing your painted wooden beads, you can ensure that they will last for years to come.

Safety Tips

When painting wooden beads, safety should always be a top priority. Here are some safety tips to keep in mind:

Using Protective Gear

It is important to wear protective gear when painting wooden beads. This includes gloves, eye protection, and a mask. Gloves will protect your hands from the paint and eye protection will protect your eyes from any paint splatters. A mask will prevent you from inhaling any harmful fumes from the paint.

Proper Ventilation

Proper ventilation is also important when painting wooden beads. Make sure you are in a well-ventilated area, preferably outdoors or in a room with open windows. This will prevent you from inhaling any fumes from the paint. If you are painting indoors, consider using a fan to help circulate the air.

Remember to always follow the manufacturer’s instructions when using paint and other materials. By taking the necessary safety precautions, you can ensure a safe and enjoyable painting experience.

Troubleshooting Common Issues

Paint Bubbling

If you notice bubbling in your painted wooden beads, it could be due to a few reasons. One possible cause is that the paint was applied too thickly, causing air bubbles to form. Another cause could be that the surface of the beads was not properly cleaned before painting, causing the paint to bubble up as it dries.

To avoid paint bubbling, make sure to clean the surface of the wooden beads before painting. Additionally, apply the paint in thin layers, allowing each layer to dry completely before applying the next. If you do notice bubbling, gently sand the affected area and repaint.

Uneven Coating

An uneven coating on your wooden beads can be frustrating, but it is a common issue that can be easily fixed. One possible cause is that the paint was not mixed well enough before application, causing the pigment to settle and create an uneven finish.

To avoid uneven coating, make sure to mix the paint thoroughly before applying it to the wooden beads. Additionally, use a brush or spray paint in a well-ventilated area to avoid drips and uneven application. If you do notice an uneven coating, lightly sand the affected area and repaint.

Remember, with a little patience and attention to detail, you can easily troubleshoot common issues when painting wooden beads.

repair-a-wooden-fence

How to Repair a Wooden Fence: A Simple Guide for DIY Enthusiasts

If you have a wooden fence that’s seen better days, don’t worry. There are ways to repair it and bring it back to life. With a little bit of effort and some basic tools, you can fix most issues that commonly occur with wooden fences. In this article, we’ll walk you through the steps to repair a wooden fence and provide some helpful tips along the way.

One of the most common issues with wooden fences is rotting. This can happen to the fence posts, rails, or pickets. If you notice any signs of rot, such as soft or spongy wood, it’s important to address the issue as soon as possible. Another common problem is sagging or leaning fence sections. This can be caused by a number of factors, including loose or damaged hardware, soil erosion, or improper installation. Whatever the issue, we’ll show you how to fix it and get your fence looking great again.

Before you begin any repairs, it’s important to assess the damage and determine the best course of action. Depending on the severity of the issue, you may need to replace a section of the fence or simply make some minor repairs. With the right tools and techniques, you can tackle most fence repairs on your own and save money in the process. So, let’s get started and learn how to repair a wooden fence.

Understanding the Damage

repair-a-wooden-fence

When it comes to repairing a wooden fence, the first step is to understand the damage. This will help you determine whether you need to repair or replace the fence, as well as what materials and tools you’ll need. In this section, we’ll go over how to identify the types of damage and assess the severity of the damage.

Identifying Types of Damage

There are several types of damage that can occur to a wooden fence, including:

  • Rot: This is caused by exposure to moisture and can weaken the wood, making it more prone to breaking.
  • Warping: This is caused by changes in temperature and humidity and can cause the fence to become misshapen.
  • Splitting: This is caused by age and exposure to the elements and can cause the wood to crack and break.
  • Pests: Termites and other pests can damage the wood, leaving it weak and vulnerable.

By identifying the type of damage, you’ll be better equipped to determine the best course of action.

Assessing Severity of Damage

Once you’ve identified the type of damage, the next step is to assess the severity of the damage. This will help you determine whether you can repair the fence or if you need to replace it. Here are some things to look for when assessing the severity of the damage:

  • How extensive is the damage? Is it limited to a small area or does it cover a large portion of the fence?
  • How deep is the damage? Is it surface-level or does it go all the way through the wood?
  • How old is the fence? Older fences may be more prone to damage and may need to be replaced rather than repaired.

By assessing the severity of the damage, you’ll be able to make an informed decision about how to proceed with the repair or replacement of your wooden fence.

Gathering Necessary Tools and Materials

Before you begin repairing your wooden fence, it’s important to gather all the necessary tools and materials. This will save you time and frustration later on. Here are some things you’ll need:

Choosing the Right Tools

Having the right tools can make all the difference when it comes to repairing your fence. Here are some tools you should consider having on hand:

  • Electric drill: An electric drill is essential for drilling holes and screwing things together.
  • Post hole digger or auger: You’ll need a post hole digger or auger to dig new post holes or widen existing ones.
  • Screwdriver: A screwdriver will come in handy for removing screws and attaching new ones.
  • Saw: You may need a saw to cut new fence boards to size.
  • Hammer: A hammer will be useful for pounding in nails and removing old ones.
  • Level: A level will help ensure that your fence is straight and level.
  • Measuring tape: You’ll need a measuring tape to measure the length of your fence and the distance between posts.

Selecting Quality Materials

When it comes to repairing your fence, it’s important to use quality materials that will last. Here are some materials you should consider using:

  • Fence boards: Choose fence boards that are thick and sturdy. Look for boards that are free of knots and other defects.
  • Posts: Use pressure-treated posts that are resistant to rot and decay.
  • Concrete: Use concrete to anchor your fence posts in the ground. This will help prevent them from shifting or leaning over time.
  • Screws: Use screws instead of nails to attach your fence boards to the posts. Screws are stronger and less likely to come loose over time.
  • Paint or stain: Use paint or stain to protect your fence from the elements and give it a finished look.

By gathering the right tools and materials, you’ll be well on your way to repairing your wooden fence.

Preparation Steps

Before you start repairing your wooden fence, there are some preparation steps you need to take to ensure a successful repair. These steps include clearing the area and taking safety precautions.

Clearing the Area

The first step in repairing your wooden fence is to clear the area around it. This means removing any debris, such as leaves, branches, or rocks, that may be in the way. You should also clear any plants or grass that are growing too close to the fence, as they may interfere with the repair process.

If your fence is located near any structures, such as a house or garage, make sure to move any items away from the fence to avoid damaging them during the repair process.

Safety Precautions

When repairing a wooden fence, it is important to take safety precautions to avoid injury. Here are some safety tips to keep in mind:

  • Wear protective clothing, such as gloves and safety glasses, to protect yourself from splinters and debris.
  • Use caution when handling tools, such as saws and hammers, to avoid injury.
  • Make sure your tools are in good working condition and are appropriate for the job.
  • If you are working with power tools, make sure to follow the manufacturer’s instructions and use them only as intended.
  • If you are working on a ladder, make sure it is secure and on level ground.

By taking these preparation steps, you can ensure a safe and successful repair of your wooden fence.

Repairing Minor Damages

repairing-minor-damages

If your wooden fence has minor damages, you can easily fix them yourself. Here are some simple steps to help you repair your fence.

Fixing Loose Boards

If you have loose boards on your fence, you can fix them by following these steps:

  1. Remove the loose board from the fence.
  2. Clean the area where the board was removed.
  3. Apply wood glue to the area where the board was removed.
  4. Place the board back in its original position and secure it with screws.
  5. Wipe off any excess glue with a damp cloth.

Repairing Small Cracks

Small cracks in your wooden fence can be repaired using wood filler. Here’s how:

  1. Clean the area around the crack.
  2. Apply the wood filler to the crack with a putty knife.
  3. Smooth out the wood filler with the putty knife.
  4. Allow the wood filler to dry according to the manufacturer’s instructions.
  5. Sand the area with a fine-grit sandpaper until it is smooth.
  6. Paint or stain the area to match the rest of the fence.

Remember, if the damage to your fence is more severe, it’s best to call a professional to repair it.

Repairing Major Damages

If your wooden fence has suffered major damages, such as broken boards or rot, it’s important to take care of them as soon as possible to prevent further damage. Here are some tips on how to repair major damages to your wooden fence.

Replacing Broken Boards

If you have a broken board on your fence, it’s important to replace it as soon as possible to prevent further damage. Here’s how to do it:

  1. Remove the damaged board: Using a pry bar, remove the damaged board from the fence. Be careful not to damage any of the surrounding boards.
  2. Measure and cut the new board: Measure the length of the opening left by the removed board and cut a new board to fit.
  3. Install the new board: Place the new board into the opening and secure it in place with screws or nails.

Dealing with Rot

If you have rot on your fence, it’s important to remove it before it spreads. Here’s how to do it:

  1. Remove the affected area: Use a saw to cut away the affected area of the fence. Be sure to cut back to healthy wood.
  2. Treat the area: Apply a wood preservative to the affected area to prevent further rot.
  3. Replace the damaged area: Cut a new piece of wood to fit the opening left by the removed area and secure it in place with screws or nails.

Remember, prevention is key when it comes to wooden fence maintenance. Regularly inspect your fence for damages and take care of them as soon as possible to prevent further damage.

Maintaining Your Wooden Fence

Regular maintenance is essential to keep your wooden fence looking good and functioning properly. With proper care, you can extend the life of your fence and prevent costly repairs. Here are some tips on how to maintain your wooden fence.

Regular Inspections

Regular inspections are key to identifying problems early and preventing them from getting worse. Inspect your fence at least once a year, and after any major weather events. Look for signs of damage, such as rotting, cracking, or warping. Check the fence posts for stability and make sure they are not leaning or wobbling. If you notice any damage, address it immediately to prevent it from spreading.

Preventive Measures

Preventive measures can help protect your fence from damage and extend its life. Here are some tips on how to prevent damage to your wooden fence:

  • Keep the fence clean: Regularly clean your fence to remove dirt, debris, and mildew. Use a mild detergent and a soft-bristled brush to scrub the fence. Rinse thoroughly with a hose.
  • Seal the fence: Apply a sealant to your fence to protect it from moisture and UV rays. Choose a sealant that is specifically designed for wooden fences. Apply the sealant according to the manufacturer’s instructions.
  • Trim vegetation: Keep vegetation trimmed back from your fence to prevent it from growing into the fence and causing damage. This will also help improve air circulation around the fence, which can help prevent moisture buildup.
  • Avoid contact with soil: Make sure your fence does not come into contact with soil, as this can cause the wood to rot. Use concrete or metal posts to elevate the fence off the ground.

By following these tips, you can keep your wooden fence looking great and functioning properly for years to come. Regular inspections and preventive measures can help you avoid costly repairs and keep your fence in top condition.

build-a-wooden-spiral-staircase

How to Build a Wooden Spiral Staircase: Step-by-Step Guide with Pictures

If you’re looking to add a unique touch to your home or building, building a wooden spiral staircase might be just the project you’re looking for. Spiral staircases are not only functional, but also add an attractive element to any space. With a little planning and some basic woodworking skills, you can build your own wooden spiral staircase.

The first step in building a wooden spiral staircase is to decide on the location. Spiral staircases tend to work best in tight spaces and parts of the room that don’t receive heavy foot traffic. Once you’ve chosen the location, you’ll need to design the staircase. This involves deciding on the thickness and width of the treads, as well as the steepness of the spiral. Keep in mind that the International Residential Code (IRC) limits the distance from the bottom of one tread to the bottom of the next (the rise) to 9 1/2 inches.

Once you have a design in place, it’s time to start building. Building a wooden spiral staircase can be a challenging project, but with the right tools and materials, it’s definitely doable. In the next few paragraphs, we’ll walk you through the steps involved in building a wooden spiral staircase, from laying out the spiral to installing the treads and handrail. So grab your tools and let’s get started!

Understanding Spiral Staircases

build-a-wooden-spiral-staircase

If you’re looking for a stylish and space-saving solution for your home or building, a spiral staircase may be the perfect choice. Spiral staircases are not only visually appealing but also functional, allowing you to save valuable floor space. In this section, we’ll cover the basics of spiral staircases to help you understand what you need to know before you start building.

Design Considerations

Before you start building your spiral staircase, it’s important to consider a few design factors. Here are some things to keep in mind:

  • Location: Spiral staircases are ideal for small spaces or areas where a traditional staircase won’t fit. Consider where you want to install your spiral staircase and make sure there is enough room for it.
  • Materials: Spiral staircases can be made from a variety of materials, including wood, metal, and glass. Choose a material that fits your style and budget.
  • Safety: Safety is a crucial consideration when building a spiral staircase. Make sure your staircase meets local building codes and is structurally sound.

Advantages of Spiral Staircases

Spiral staircases offer several advantages over traditional staircases. Here are a few reasons why you might want to consider a spiral staircase:

  • Space-saving: Spiral staircases take up less floor space than traditional staircases, making them ideal for small homes or apartments.
  • Visual appeal: Spiral staircases are visually striking and can add a unique design element to any space.
  • Versatility: Spiral staircases can be installed in a variety of locations, including outdoor spaces, attics, and lofts.

Disadvantages of Spiral Staircases

While spiral staircases offer many benefits, they also have a few drawbacks. Here are some things to keep in mind:

  • Limited accessibility: Spiral staircases can be difficult for some people to use, especially those with mobility issues or disabilities.
  • Narrow treads: The treads on spiral staircases are narrower than those on traditional staircases, which can make them more difficult to use.
  • Higher cost: Spiral staircases can be more expensive to build than traditional staircases, especially if you choose high-end materials.

Materials Needed

When it comes to building a wooden spiral staircase, you’ll need to gather a variety of materials to ensure its stability and longevity. Here are the main materials you’ll need to get started:

Types of Wood

Choosing the right type of wood is crucial for building a sturdy and beautiful spiral staircase. Some of the best options include:

  • Oak: This hardwood is known for its durability and strength, making it a popular choice for staircase construction.
  • Maple: Another strong and durable hardwood, maple is often used for its attractive grain patterns.
  • Pine: A softwood that is easy to work with, pine is a budget-friendly option for those on a tight budget.

Other types of wood that can be used for spiral staircase construction include cherry, mahogany, and walnut. Be sure to choose a wood that will complement the overall design of your home or building.

Fasteners and Hardware

In addition to the wood itself, you’ll need a variety of fasteners and hardware to ensure that your spiral staircase is secure and stable. Some of the most important items include:

  • Screws: These will be used to attach the treads and risers to the center pole.
  • Bolts: Bolts are used to secure the center pole to the base plate and the top plate.
  • Nuts and washers: These are used in conjunction with bolts to ensure a tight and secure fit.
  • Center pole: This is the main support structure of the staircase and should be made of a strong and durable material such as steel or aluminum.
  • Base plate and top plate: These plates are used to secure the center pole to the floor and ceiling.

Be sure to choose high-quality fasteners and hardware to ensure that your spiral staircase is safe and secure for years to come.

Designing Your Staircase

designing-your-staircase

Before starting to build your wooden spiral staircase, you need to design it properly to ensure it fits your space and meets your needs. Here are some tips to help you design your staircase.

Determining the Dimensions

The first step in designing your spiral staircase is determining the dimensions. Measure the height from the floor to the ceiling where you want to install your staircase. This measurement will determine the number of steps you need. The standard height for each step is between 7 and 8 inches.

Next, measure the diameter of the space where you want to install your staircase. The diameter will determine the size of the center pole and the treads. The minimum diameter for a spiral staircase is 5 feet.

Once you have determined the height and diameter, you can use a spiral staircase calculator to determine the number of steps, the size of the center pole, and the size of the treads.

Creating a Blueprint

After determining the dimensions, create a blueprint of your staircase. The blueprint should include the height, diameter, number of steps, size of the center pole, and size of the treads. You can use software such as SketchUp or AutoCAD to create a 3D model of your staircase.

When creating your blueprint, consider the placement of your staircase. Spiral staircases work best in tight spaces and parts of the room that don’t receive heavy foot traffic, such as corners. You should also consider the aesthetic of your staircase and choose a design that complements your home’s style.

In conclusion, designing your wooden spiral staircase is an important step in the building process. By determining the dimensions and creating a blueprint, you can ensure that your staircase fits your space and meets your needs.

Building the Staircase

Building a wooden spiral staircase can seem like a daunting task, but with the right tools and materials, you can create a beautiful and functional staircase that will last for years to come. In this section, we will walk you through the steps of building a wooden spiral staircase, including cutting the wood, assembling the stairs, and installing the handrail.

Cutting the Wood

The first step in building your wooden spiral staircase is to cut the wood to the correct size and shape. You will need to cut the center post, the risers, and the treads to the appropriate length and angle. It is important to measure carefully and double-check your measurements before making any cuts.

To cut the wood, you will need a saw, such as a circular saw or a jigsaw, and a straight edge or a template to guide your cuts. You may also want to use a miter saw or a table saw for more precise cuts.

Assembling the Stairs

Once you have cut all of your wood to the correct size and shape, you can begin assembling the stairs. Start by attaching the risers to the center post, using screws or bolts to secure them in place. Then, attach the treads to the risers, making sure they are level and evenly spaced.

As you assemble the stairs, it is important to check for any gaps or unevenness and make adjustments as needed. You may also want to sand or finish the wood to give it a smooth and polished look.

Installing the Handrail

The final step in building your wooden spiral staircase is to install the handrail. The handrail provides safety and support as you climb the stairs and can also add a decorative touch to your staircase.

To install the handrail, you will need to drill holes in the center post and attach the handrail brackets. Then, slide the handrail onto the brackets and secure it in place with screws or bolts.

Overall, building a wooden spiral staircase requires patience, precision, and attention to detail. By following these steps and taking the time to do it right, you can create a beautiful and functional staircase that will enhance the look and feel of your home.

Finishing Touches

Sanding and Finishing

Once you have completed the installation of your wooden spiral staircase, it is important to sand and finish it properly. Sanding the stairs will help to smooth out any rough spots or splinters, and finishing will protect the wood from moisture and other damage.

Start by sanding the stairs with a fine-grit sandpaper, working your way up to a higher grit for a smoother finish. Be sure to sand the treads, risers, and balusters, as well as any other exposed wood surfaces.

Next, apply a finish to the stairs to protect the wood. There are many different types of finishes available, including varnish, stain, and polyurethane. Choose the finish that best suits your needs and apply it according to the manufacturer’s instructions.

Safety Checks

Before using your new spiral staircase, it is important to perform a safety check to ensure that it is secure and stable. Here are a few things to check:

  • Check that all screws and bolts are tight and secure.
  • Make sure that the handrail is securely attached and at the proper height.
  • Check that the treads are level and not loose.
  • Ensure that the staircase is properly anchored to the floor and ceiling.

Performing these safety checks will help to ensure that your new wooden spiral staircase is safe and secure for you and your family to use.

designing-your-wooden-desk

How to Make a Wooden Desk: A Beginner's Guide to Crafting Your Own Workspace

Looking to build your own wooden desk? Whether you’re a seasoned woodworker or a beginner, building your own desk can be a fun and rewarding project. Not only will you end up with a custom piece of furniture that perfectly fits your needs and style, but you’ll also have the satisfaction of knowing that you built it yourself.

Before you get started, you’ll need to decide on the type of desk you want to build. Do you want a simple, minimalist desk that can be built in a weekend, or are you looking for a more elaborate design that will require more time and skill? You’ll also need to consider the size and shape of your desk, as well as the type of wood you want to use. Once you’ve made these decisions, you’ll be ready to start gathering your materials and tools and getting to work on your new desk.

Understanding the Basics of Woodworking

make-a-wooden-desk

Woodworking is a rewarding and fulfilling hobby that allows you to create beautiful and functional pieces of furniture. However, before you start building your own wooden desk, there are a few basics you need to understand.

Types of Wood

There are many different types of wood available, each with its own unique characteristics. Some popular types of wood used in woodworking include:

  • Pine: A softwood that is easy to work with and relatively inexpensive.
  • Oak: A hardwood that is strong and durable, but can be difficult to work with due to its density.
  • Cherry: A hardwood that is known for its beautiful grain patterns and rich color.
  • Maple: A hardwood that is strong and durable, but can be difficult to work with due to its hardness.

When choosing wood for your desk, consider factors such as strength, durability, and appearance.

Safety Measures

Woodworking can be dangerous if proper safety measures are not taken. Always wear protective gear, such as safety glasses and earplugs, when working with power tools. Additionally, make sure to follow all safety instructions for each tool you use. Never rush or take shortcuts when working with wood.

Essential Tools

To build a wooden desk, you will need a few essential tools, including:

  • Saw: A saw is used to cut the wood to the desired size and shape.
  • Drill: A drill is used to make holes in the wood for screws and other fasteners.
  • Hammer: A hammer is used to drive nails and other fasteners into the wood.
  • Sandpaper: Sandpaper is used to smooth the wood and remove any rough edges.

Other useful tools include a measuring tape, square, and clamps.

By understanding the basics of woodworking, you will be well on your way to building your own beautiful and functional wooden desk. Remember to always prioritize safety and take your time to ensure a high-quality finished product.

Designing Your Wooden Desk

designing-your-wooden-desk

When it comes to designing your own wooden desk, there are a few key things to consider. By taking the time to think through these factors, you can create a desk that is both functional and visually appealing. Here are some sub-sections to help guide you through the design process:

Deciding the Size

The first step in designing your wooden desk is to decide on the size. Consider the space where the desk will be placed and how much room you need to work. You’ll want to make sure that your desk is large enough to accommodate all of your tools and equipment, but not so large that it takes up too much space in the room.

To help you determine the right size for your desk, take measurements of the area where it will be placed. Consider the height of the desk as well, and make sure that it is comfortable for you to work at for extended periods of time.

Choosing the Style

The style of your wooden desk is another important factor to consider. Do you want a modern, minimalist desk, or something more traditional? Think about the overall aesthetic of the room where the desk will be placed, and try to choose a style that complements it.

You’ll also want to consider the type of wood you’ll use for your desk. Different woods have different grains and colors, so choose one that matches your personal style and the look you’re going for.

Creating the Blueprint

Once you have an idea of the size and style of your desk, it’s time to create a blueprint. This will help you visualize the final product and ensure that everything fits together properly.

You can create a blueprint using software like SketchUp, or you can draw it by hand. Make sure to include all of the necessary measurements and details, including the size of the desk, the placement of drawers and shelves, and any other features you want to include.

By taking the time to design your wooden desk properly, you can create a beautiful and functional piece of furniture that will last for years to come.

Preparing the Wood

Before you start building your wooden desk, you need to prepare the wood. This involves selecting the right type of wood, cutting it to size, and sanding it to create a smooth surface.

Selecting the Wood

When selecting wood for your desk, you want to choose a type of wood that is sturdy and durable. Some popular options include oak, maple, and pine. You should also consider the color and grain pattern of the wood to ensure it matches your desired aesthetic.

Once you have selected the wood, you need to measure and cut it to the appropriate size.

Cutting the Wood

To cut the wood, you will need a saw. A miter saw or handsaw will work for this task. Make sure to measure the wood carefully before cutting to ensure accuracy.

If you are not comfortable using a saw, you can have the wood cut to size at a hardware store or lumber yard.

Sanding the Wood

Once the wood is cut to size, you need to sand it to create a smooth surface. Start with a coarse-grit sandpaper, such as 120-grit, and work your way up to a finer grit, such as 180-grit.

Make sure to sand with the grain of the wood to avoid creating scratches or marks. You can use a sanding block or an orbital sander to make the process easier.

After sanding, wipe the wood with a clean cloth to remove any dust or debris. Your wood is now ready to be assembled into a desk.

Assembling the Desk

Once you have all the pieces of your wooden desk cut and sanded, it’s time to put them together. This section will guide you through the process of assembling your desk. We will cover two sub-sections: Joining the Pieces and Securing the Structure.

Joining the Pieces

The first step in assembling your desk is to join the pieces together. You will need to use wood glue and clamps to ensure a strong bond between the pieces. Follow these steps to join the pieces:

  1. Apply wood glue to the edges of the pieces that will be joined together.
  2. Press the pieces together and use clamps to hold them in place.
  3. Wipe away any excess glue with a damp cloth.
  4. Allow the glue to dry completely before removing the clamps.

Securing the Structure

Once the pieces are joined together, you will need to secure the structure of the desk. This will ensure that your desk is sturdy and can hold the weight of your computer, books, and other items. Follow these steps to secure the structure:

  1. Attach the legs to the underside of the desk using wood screws.
  2. Install the cross supports between the legs to add stability to the desk.
  3. Attach the top of the desk to the frame using wood screws.
  4. Sand any rough edges or surfaces to ensure a smooth finish.

Congratulations! You have successfully assembled your wooden desk.

Finishing Touches

Applying the Finish

Now that you have assembled your wooden desk, it’s time to apply the finish. This will not only protect the wood but also enhance its beauty. There are various finishes you can choose from, such as stains, oils, and varnishes. Here are some tips to help you apply the finish:

  • Sand the surface of the desk with fine-grit sandpaper to remove any imperfections and ensure a smooth finish.
  • Apply the finish in thin coats using a brush or a cloth. It’s important to follow the manufacturer’s instructions and allow each coat to dry completely before applying the next one.
  • If you’re using a stain, make sure to wipe off any excess with a clean cloth after a few minutes. This will prevent the stain from becoming too dark or blotchy.
  • For a glossy finish, you can use a varnish or a polyurethane. Apply several coats, sanding lightly between each coat to remove any bumps or bubbles.

Adding Accessories

To make your wooden desk more functional and comfortable, you can add some accessories. Here are some ideas:

  • Desk lamp: A desk lamp will provide you with the right amount of light and reduce eye strain.
  • Desk organizer: Keep your desk clutter-free with a desk organizer. You can store pens, papers, and other office supplies in it.
  • Chair: Choose a comfortable chair that provides good support for your back. You’ll be spending a lot of time sitting at your desk, so it’s important to have a chair that is both comfortable and ergonomic.
  • Monitor stand: If you use a computer, a monitor stand will elevate your screen to eye level, reducing neck and eye strain.
  • Keyboard tray: A keyboard tray will help you maintain a good posture and prevent wrist strain.

With these finishing touches, your wooden desk will be ready for you to use and enjoy.

dye-wooden-beads

How to Dye Wooden Beads: A Simple Guide for DIY Enthusiasts

Are you looking for a fun and easy way to add some color to your wooden beads? Dyeing wooden beads is a simple and cost-effective way to customize your jewelry-making projects. With a few basic materials and some creativity, you can create beautiful, unique beads in a variety of colors and shades.

One of the best things about dyeing wooden beads is the versatility of the process. You can use a variety of dyes, including liquid dye, food coloring, and acrylic paint, to achieve different effects and colors. Additionally, you can experiment with different types of wood to see how they absorb the dye and create different shades and patterns. Whether you’re a beginner or an experienced crafter, dyeing wooden beads is a fun and rewarding project that you can enjoy with family and friends.

Understanding Wood and Beads

dye-wooden-beads

When it comes to dyeing wooden beads, it’s important to understand the materials you’re working with. Here are a few things to keep in mind:

Types of Wood

Not all types of wood are created equal when it comes to dyeing. Light-colored woods like maple, cherry, and pine are best for dyeing because they contain fewer natural oils that can interfere with the dye absorption process. If you’re unsure about the type of wood you’re working with, do a test dye on a small piece of wood before dyeing your beads.

Types of Beads

There are many different types of wooden beads available, each with its own unique characteristics. Here are a few common types:

  • Round beads: These are the most common type of wooden bead and come in a variety of sizes and colors.
  • Square beads: These are less common but can add an interesting element to your designs.
  • Barrel beads: These are shaped like small barrels and are great for making bracelets and necklaces.
  • Oval beads: These are oval-shaped and can add a unique touch to your designs.

Preparing Your Beads

Before dyeing your wooden beads, it’s important to prepare them properly. Here are a few steps to follow:

  1. Sand your beads: Use a fine-grit sandpaper to sand your beads lightly. This will help the dye absorb more evenly.
  2. Clean your beads: Use a damp cloth to wipe down your beads and remove any dust or debris.
  3. Soak your beads: Soak your beads in water for 10-15 minutes before dyeing. This will help the dye absorb more evenly.

By understanding the types of wood and beads you’re working with and properly preparing your beads, you can achieve beautiful, vibrant colors when dyeing your wooden beads.

Choosing the Right Type of Wood Beads

When it comes to dyeing wooden beads, it is important to choose the right type of wood. Not all woods are created equal, and some will take dye better than others. Here are some things to consider when selecting wood for your wooden beads:

Light-Colored Woods Work Best

Light-colored woods such as maple, cherry, or pine are the best choices for dyeing wooden beads. These woods have fewer natural oils, which can decrease the amount of dye absorbed by the wood. Lighter woods also allow for a wider range of color options, as darker woods can alter the final color of the dye.

Avoid Woods with Large Pores

Woods with large pores, such as oak or ash, can be difficult to dye evenly. The large pores can absorb more dye in some areas, resulting in a blotchy or uneven appearance. If you do choose to use a wood with large pores, consider using a darker dye to help even out the color.

Consider the Grain Pattern

The grain pattern of the wood can also affect the final appearance of the dyed beads. Woods with a tight, even grain pattern will produce a more uniform color, while woods with a more varied grain pattern may result in a more unique and interesting look.

Other Factors to Consider

In addition to the type of wood, there are other factors to consider when selecting wooden beads for dyeing. Make sure the beads are smooth and free of any rough spots or blemishes that could affect the dyeing process. It is also important to choose beads that are the right size and shape for your project.

By taking the time to choose the right type of wood for your wooden beads, you can ensure that your final product will be beautiful and long-lasting.

Materials Needed for Dyeing Wooden Beads

Dyeing wooden beads is a fun and easy DIY project that can add a pop of color to any craft or jewelry design. Here are the materials you will need to get started:

Wooden Beads

The first and most obvious material you will need is wooden beads. When choosing wooden beads, it is important to select light-colored woods such as maple, cherry, or pine. These woods will produce the best results when dyed as they contain fewer natural oils which can decrease the amount of dye absorbed by the wood.

Liquid Dye

Liquid dye is the most popular and easiest type of dye to use for dyeing wooden beads. You can find liquid dye at most craft stores and online. It comes in a variety of colors, and you can mix colors to create your own custom results.

Mason Jar

A mason jar or any other glass jar will work well for dyeing wooden beads. Make sure it is large enough to fit the amount of beads you want to dye.

Hot Water

You will need hot water to mix with the liquid dye. The hotter the water, the more intense the color will be.

Tablespoon or Two of Vinegar

Adding a tablespoon or two of vinegar to the dye mixture can help the dye adhere better to the wood.

Gloves

Wearing gloves will protect your hands from getting stained by the dye.

Plastic Spoon

A plastic spoon or any other non-reactive utensil will work well for stirring the dye mixture.

Paper Towels

Paper towels will come in handy for wiping up any spills or drips.

With these materials on hand, you are ready to start dyeing your wooden beads.

Preparation Before Dyeing

paint-wooden-beads

Before you start dyeing your wooden beads, it is important to prepare them properly. Here are some tips to ensure that your beads are ready to be dyed:

Choose Your Wooden Beads

When selecting wood for your wooden beads, it is important to choose light-colored woods such as maple, cherry, or pine. These woods will produce the best results when dyed as they contain fewer natural oils which can decrease the amount of dye absorbed by the wood.

Sand Your Beads

Before dyeing your wooden beads, make sure to sand them with fine-grit sandpaper. This will help to remove any rough spots or imperfections on the surface of the wood, allowing the dye to penetrate more evenly.

Soak Your Beads

To help the dye penetrate the wood more effectively, it is a good idea to soak your wooden beads in water for at least 30 minutes before dyeing them. This will help to open up the pores in the wood, allowing the dye to be absorbed more easily.

Protect Your Work Area

Dyeing wooden beads can be messy, so it is important to protect your work area before you start. Use a plastic tablecloth or newspaper to cover your work surface, and wear gloves and an apron to protect your clothing.

By following these simple steps, you can ensure that your wooden beads are properly prepared for dyeing, and that you will achieve the best possible results.

Selecting the Right Dye

When it comes to dyeing wooden beads, selecting the right dye is crucial to achieving the desired color and finish. Here are some factors to consider when selecting a dye:

Type of Dye

There are two main types of dyes to choose from: liquid dye and powder dye. Liquid dye is easier to use and provides more consistent results, but it may not be as vibrant as powder dye. Powder dye, on the other hand, is more concentrated and can produce brighter colors, but it requires more skill to use.

Colorfastness

Colorfastness refers to the ability of a dye to resist fading or bleeding when exposed to light, water, or other elements. When selecting a dye, it is important to choose one that is colorfast to ensure that the color stays vibrant and does not fade or bleed over time.

Compatibility with Wood Type

Not all dyes are compatible with all types of wood. Some dyes may work better with lighter woods, while others may work better with darker woods. It is important to choose a dye that is compatible with the type of wood you are using to ensure that the dye is absorbed evenly and produces the desired color.

Safety

When selecting a dye, it is important to consider safety. Some dyes may contain harmful chemicals that can be hazardous to your health if not used properly. It is important to choose a dye that is safe to use and follow all safety precautions when working with it.

Overall, selecting the right dye is an important step in the process of dyeing wooden beads. By considering factors such as type of dye, colorfastness, compatibility with wood type, and safety, you can ensure that you achieve the desired color and finish while also staying safe.

Step-by-Step Guide to Dyeing Wooden Beads

Dyeing wooden beads is a fun and creative way to add color to your jewelry and craft projects. Here is a step-by-step guide to help you dye your wooden beads:

Step 1: Soaking the Beads

Before dyeing your wooden beads, it is important to soak them in water for at least 30 minutes. This will help the beads absorb the dye evenly. You can also add a tablespoon of vinegar to the water to help the dye adhere better.

Step 2: Preparing the Dye

There are several types of dyes that you can use to color your wooden beads, such as liquid dye, food coloring, acrylic paint, and watercolor paint. Choose the type of dye that you prefer and mix it according to the manufacturer’s instructions.

You can also mix different colors to create your own custom shades. For example, mixing red and blue will give you purple, while mixing yellow and blue will give you green.

Step 3: Dyeing Process

Once your beads have soaked and your dye is prepared, it’s time to start dyeing your wooden beads. Here’s how:

  1. Place your wooden beads in the dye solution and stir them gently with a spoon or skewer to ensure that they are evenly coated.
  2. Let the beads soak in the dye for at least 30 minutes, or until they reach the desired color.
  3. If you want a darker color, you can leave the beads in the dye solution overnight.
  4. Once the beads have reached the desired color, remove them from the dye solution and rinse them under cold water to remove any excess dye.
  5. Pat the beads dry with a clean towel.

Step 4: Drying the Beads

After rinsing and drying your beads, it’s important to let them dry completely before using them in your craft projects. You can lay them out on a clean towel or paper towel to air dry, or you can use a hair dryer on low heat to speed up the drying process.

Once your beads are completely dry, you can use them to make colorful jewelry, keychains, or other craft projects. Have fun experimenting with different colors and dyeing techniques to create unique and beautiful wooden beads!

Safety Measures When Dyeing Wooden Beads

When dyeing wooden beads, it is important to take safety measures to prevent any accidents or injuries. Here are some safety tips to keep in mind:

1. Wear Protective Gear

Wear protective gear such as gloves, goggles, and an apron to protect your skin and eyes from the dye. Some dyes can be harmful if they come into contact with your skin or eyes, so it is important to take precautions.

2. Work in a Well-Ventilated Area

Dyeing wooden beads can produce fumes that can be harmful to your health if inhaled. Make sure to work in a well-ventilated area, such as near an open window or outside.

3. Use the Right Dye

Make sure to use a dye that is safe for wooden beads and that is appropriate for the type of wood you are using. Some dyes may not work well with certain types of wood or may cause the wood to warp or crack.

4. Follow Instructions Carefully

Always read and follow the instructions on the dye package carefully. Improper use of the dye can lead to accidents or injuries.

5. Dispose of Dye Properly

Dispose of any unused dye or dye containers properly. Some dyes may be harmful to the environment if not disposed of correctly, so make sure to follow the instructions on the package for proper disposal.

By following these safety measures, you can ensure a safe and successful dyeing process for your wooden beads.

Maintaining and Caring for Dyed Wooden Beads

Once you have successfully dyed your wooden beads, it is important to maintain and care for them properly. This will help to ensure that the color remains vibrant and the beads last for a long time.

Here are some tips for maintaining and caring for your dyed wooden beads:

  • Avoid getting them wet: Water can cause the dye to fade or bleed, so it is important to keep your dyed wooden beads dry. If you need to clean them, use a dry cloth or a soft-bristled brush to remove any dirt or dust.
  • Store them properly: To prevent damage to your dyed wooden beads, store them in a dry and cool place. Avoid exposing them to direct sunlight or extreme temperatures, as this can cause the color to fade or the wood to warp.
  • Handle them gently: Wooden beads can be fragile, so it is important to handle them gently. Avoid dropping them or exposing them to rough surfaces that could scratch or damage the surface.
  • Avoid using harsh chemicals: Harsh chemicals such as bleach or ammonia can damage the dye and the wood of your beads. Instead, use a mild soap and water to clean them if necessary.
  • Re-dye as needed: Over time, the color of your dyed wooden beads may fade or become less vibrant. If this happens, you can re-dye them to restore their color. Follow the same steps you used to dye them initially, and be sure to allow them to dry completely before using them again.

By following these tips, you can help to ensure that your dyed wooden beads remain vibrant and beautiful for a long time.

Exploring Creative Ideas with Dyed Wooden Beads

Dyed wooden beads can add a pop of color and a touch of personality to any DIY project. Whether you are making jewelry, home decor, or a fun craft with the kids, there are many creative ways to use dyed wooden beads. Here are a few ideas to get you started:

1. Jewelry Making

Dyed wooden beads can be used to make unique and colorful jewelry pieces. Mix and match different colors and sizes to create a one-of-a-kind necklace, bracelet, or pair of earrings. You can also use dyed wooden beads as accents for metal or glass beads to add a natural touch to your designs.

2. Home Decor

Dyed wooden beads can be used to add a pop of color to your home decor. String them together to make a colorful garland to hang on your wall or drape over a mantle. You can also use them as accents for picture frames, lampshades, or even as drawer pulls for a unique and colorful touch.

3. Kids Crafts

Dyed wooden beads are a great addition to any kids’ craft project. Use them to make colorful keychains, bracelets, or even as beads for a homemade dreamcatcher. Kids can also use them to make colorful necklaces or bracelets for themselves or as gifts for friends and family.

4. Gift Wrapping

Dyed wooden beads can also be used to add a unique touch to your gift wrapping. String them together to make a colorful gift tag or use them as accents for a ribbon or bow. You can also use them to make a colorful tassel to attach to a gift bag or box.

With these creative ideas, you can explore the endless possibilities of using dyed wooden beads in your DIY projects. Let your imagination run wild and see what colorful creations you can come up with!