Tag Archives: post hole digger

how-to-install-a-wooden-fence-a-beginners-guide-2

How to Install a Wooden Fence: A Beginner's Guide

Installing a wooden fence can be a great way to add privacy and security to your property while enhancing its overall aesthetic appeal. Whether you are looking to create a safe space for your children and pets to play or simply want to enjoy some peace and quiet in your backyard, a well-built fence can make all the difference. In this article, we will provide you with some helpful tips and step-by-step instructions on how to install a wooden fence.

Before you get started, it’s important to do some research and planning. You’ll need to determine the size and style of fence that best suits your needs, as well as any local regulations or permits required for installation. Once you have a clear idea of what you want, it’s time to gather your tools and materials and get to work. In the following sections, we’ll walk you through each step of the process, from preparing the ground to attaching the final picket.

Understanding the Basics of a Wooden Fence
how-to-install-a-wooden-fence-a-beginners-guide-2

Installing a wooden fence is a great way to add privacy and security to your property while also enhancing its aesthetic appeal. Before you begin the installation process, it’s important to understand the basics of a wooden fence.

Types of Wooden Fences

There are several types of wooden fences to choose from, each with its own unique design and functionality. The most common types of wooden fences include:

  • Privacy Fences: These fences are designed to provide maximum privacy by blocking the view from the outside. They are typically 6-8 feet tall and made of solid wood panels.
  • Picket Fences: These fences are shorter in height and have evenly spaced vertical boards. They are ideal for defining boundaries and adding charm to your property.
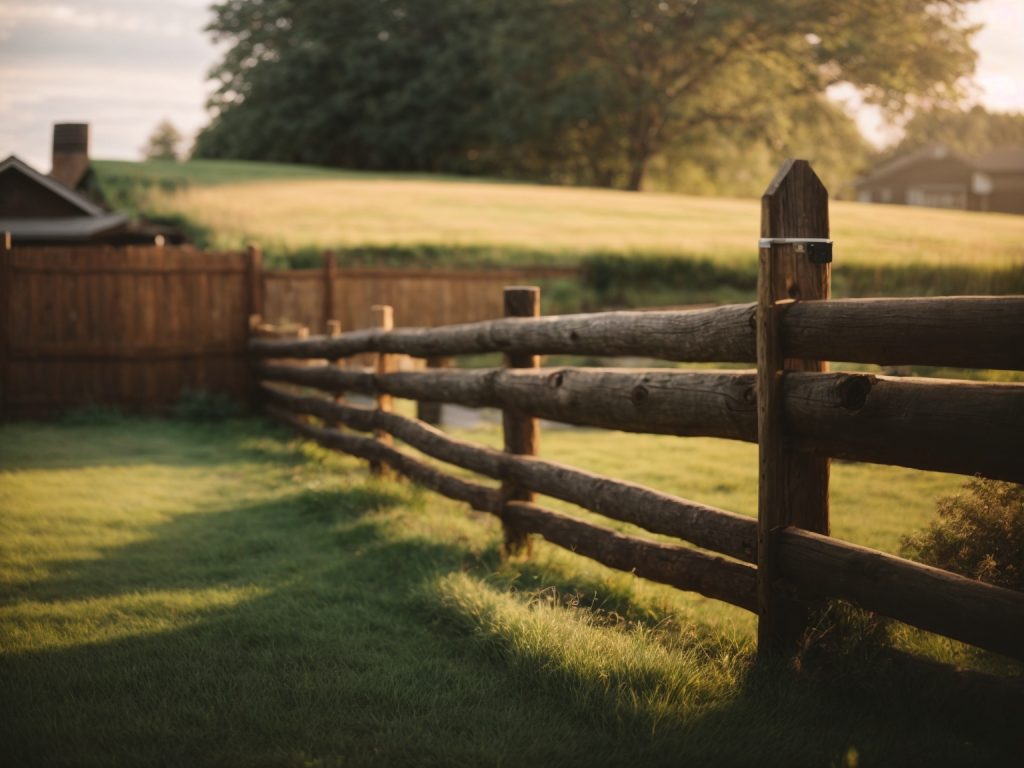
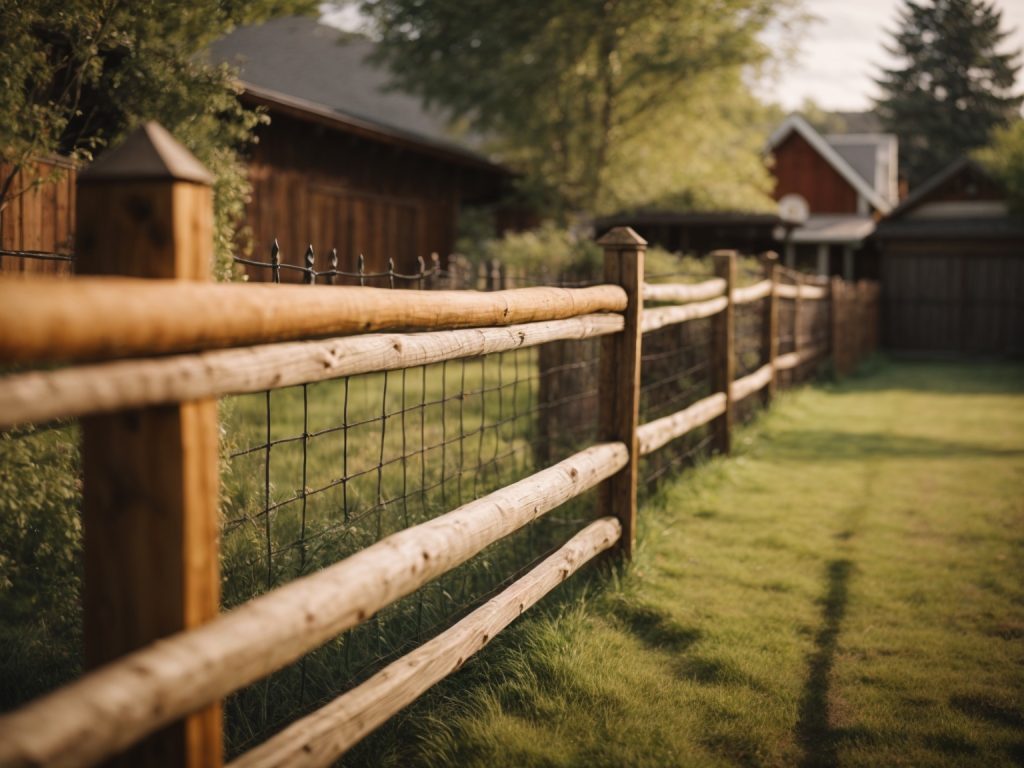
  • Split Rail Fences: These fences are made of rough-hewn wood and are often used in rural areas for livestock containment. They are also great for creating a rustic look on your property.

Benefits of a Wooden Fence
benefits-of-a-wooden-fence

Installing a wooden fence offers several benefits, including:

  • Privacy: Wooden fences provide a great deal of privacy, making them ideal for homes with outdoor living spaces or pools.
  • Security: A wooden fence can act as a barrier to keep unwanted visitors out of your property.
  • Aesthetic Appeal: Wooden fences come in a variety of styles and designs, allowing you to enhance the look of your property.
  • Affordability: Wooden fences are often more affordable than other types of fences, making them a popular choice among homeowners.

In conclusion, understanding the basics of a wooden fence is crucial to ensure a successful installation. By choosing the right type of fence and understanding its benefits, you can create a beautiful and functional addition to your property.

Tools and Materials Needed

To install a wooden fence, you will need the following tools and materials:

Tools

  • Post hole digger
  • Level
  • Tape measure
  • Circular saw
  • Screwdriver
  • Hammer
  • Drill with drill bits
  • Pneumatic nailer (optional)
  • Portable air compressor and hose (optional)

Materials

  • Wooden fence posts
  • Wooden fence pickets
  • Wooden fence rails/stringers
  • 2-in x 4-in pressure-treated board (actual 1.5-in x 3.5-in)
  • Exterior wood screws for pressure-treated lumber
  • Concrete mix
  • Furring strips
  • Nails

Before you start the installation process, make sure you have all the necessary tools and materials. It’s important to use pressure-treated wood for your fence posts, pickets, and rails to ensure they last longer and resist rotting. You can use either fence pickets or ready-made panels to build your wooden fence.

You will need a post hole digger to dig holes for your fence posts. Make sure to measure and plan the area your fence will cover before digging post holes. You will also need a level to ensure that your fence posts are straight and even. A circular saw will come in handy when cutting the wooden fence pickets and rails to size.

A drill with drill bits is necessary for drilling holes in your wooden fence posts and for attaching the pickets and rails to the posts. If you have a pneumatic nailer and portable air compressor, you can use them to nail the pickets and rails to the fence posts. However, a hammer and nails will also work.

Lastly, you will need concrete mix to set your fence posts in the ground. Furring strips can be used to attach your wooden fence to a masonry wall or other structure. Exterior wood screws for pressure-treated lumber will be necessary to attach the pickets and rails to the fence posts.

Choosing the Right Location

Installing a wooden fence requires careful planning and preparation to ensure a successful outcome. One of the first and most important steps in the process is choosing the right location for your fence. Here are some things to consider when selecting the perfect spot for your fence:

Property Lines

Before you start digging any holes or setting any posts, it’s important to know exactly where your property lines are. You don’t want to accidentally encroach on your neighbor’s land or violate any local zoning laws. Check your property survey or consult with a professional surveyor to determine the exact boundaries of your property.

Purpose of the Fence

Think about why you want to install a fence in the first place. Is it for privacy, security, or to keep pets or children safely contained? The purpose of your fence will help you determine the best location for it. For example, if you want privacy, you’ll want to install your fence in an area that’s not easily visible from the street or neighboring properties.

Terrain and Soil Conditions

The terrain and soil conditions of your property can also affect where you should install your fence. If your property is hilly or uneven, you may need to adjust the height of your fence or install it in sections to accommodate the slope. Similarly, if your soil is rocky or sandy, you may need to use different techniques for setting your posts.

Access and Maintenance

Finally, consider how easy it will be to access and maintain your fence once it’s installed. Will you need to mow or weed around it regularly? Will you be able to easily access both sides of the fence for repairs or painting? These factors can help you determine the best location for your fence.

By carefully considering these factors, you can choose the right location for your wooden fence and ensure that it will meet your needs for years to come.

Measuring and Marking the Fence Line

Before you start digging post holes and setting your fence posts, it’s essential to measure and mark out the fence line accurately. This will ensure that your fence is straight and level, and it will also help you estimate the amount of materials you’ll need.

Step 1: Determine the Property Line

The first step in measuring and marking your fence line is to determine your property line. You can usually find this information on your property survey or by contacting your local zoning office. It’s essential to make sure that your fence is entirely on your property and not encroaching on your neighbor’s land.

Step 2: Measure the Length of the Fence Line

Once you know where your property line is, you can measure the length of the fence line. Use a measuring tape to determine the distance between the two endpoints of the fence line. Make sure to account for any corners or changes in direction.

Step 3: Mark the Fence Line

After you’ve measured the length of the fence line, it’s time to mark it out. You can use wooden stakes and string to mark the fence line. Place a stake at each endpoint of the fence line and tie the string between them. Make sure the string is straight and level.

Next, place additional stakes along the fence line at intervals of 8 feet or less. This will help you keep the fence straight and level as you install it. You can also use spray paint or chalk to mark the fence line on the ground.

Step 4: Check for Obstacles

Before you start digging post holes, it’s essential to check for any obstacles that might be in the way. This could include underground utilities, tree roots, or rocks. Use a metal detector to locate any underground utilities, and carefully remove any obstacles that might be in the way.

By following these steps, you can ensure that your fence is installed straight and level and that it’s entirely on your property. Measuring and marking the fence line accurately is an essential part of the fence installation process, so take your time and make sure you get it right.

Digging the Post Holes

Now that you have your plan in hand, it’s time to start digging. This is the most physically demanding part of the job, so make sure you are up for it before you begin. Here are some tips to help make the process go more smoothly:

1. Mark the Post Locations

Using your plan, mark the locations of your fence posts with spray paint or flags. Make sure to measure and space them evenly according to your plan.

2. Get the Right Tools

You will need a pair of post hole diggers or a post hole digging machine to dig the holes. Make sure they are in good working order before you begin.

3. Dig the Holes

Dig the holes to the depth specified in your plan. In general, the holes should be at least 24 inches deep for a 6-foot tall fence. The diameter of the hole should be about three times the width of the post.

4. Set the Posts

Once the holes are dug, it’s time to set the posts. Place the post in the hole and use a level to make sure it is straight. Fill the hole with concrete mix, following the manufacturer’s instructions. Allow the concrete to dry completely before moving on to the next step.

5. Repeat

Repeat the process for each post, making sure they are evenly spaced and level. Once all the posts are in place, you can move on to installing the rails and pickets.

By following these steps, you can ensure that your fence posts are installed securely and evenly. Remember to take breaks and stay hydrated during the digging process to avoid injury.

Setting the Fence Posts

Before you start setting the fence posts, make sure you have all the necessary tools and materials. You will need metal or treated wood fence posts, posthole digger or auger, Quikrete All-Purpose Gravel, gloves, protective eyewear, and dust mask.

Mixing the Concrete

To mix the concrete, follow the instructions on the bag. Usually, you will need to mix one part cement to two parts sand to four parts gravel. Add water gradually and mix until you get a consistency similar to oatmeal.

Securing the Posts

  1. Measure the distance between the posts and mark the spots where you will dig the holes. Make sure the distance is consistent and accurate.
  2. Use the posthole digger or auger to dig the holes. Make sure the holes are deep enough to support the posts. As a general rule, the holes should be at least one-third the length of the posts.
  3. Pour some Quikrete All-Purpose Gravel into the holes to create a solid base for the posts.
  4. Insert the posts into the holes and make sure they are level. You can use a level or a plumb line to check the posts’ alignment.
  5. Fill the holes with the concrete mixture and make sure the posts are securely in place. Use a trowel to smooth the surface of the concrete and slope it away from the posts to prevent water from pooling around them.

Setting the fence posts is a crucial step in building a wooden fence. Make sure you take the time to do it right, and your fence will be sturdy and long-lasting.

Installing the Fence Rails

Now that you have installed the fence posts, it is time to install the fence rails. The fence rails are the horizontal boards that run between the fence posts and support the fence pickets. Here is a step-by-step guide on how to install the fence rails:

  1. Determine the number of rails you need: The number of rails you need will depend on the height of your fence. For a six-foot fence, you will need three rails per section, and for a four-foot fence, you will need two rails per section.
  2. Lay out the rails: Lay out the rails on the ground next to the fence posts. Make sure they are evenly spaced and level.
  3. Mark the posts: Use a pencil or marker to mark the posts where the rails will be installed. Mark the top of the rail on each post.
  4. Install the rails: Starting at one end of the fence, attach the rails to the posts. Use galvanized screws or nails to attach the rails to the posts. Make sure the rails are level and flush with the top of the posts.
  5. Secure the rails: Once the rails are attached to the posts, use a level to ensure they are level. Secure the rails to the posts with additional screws or nails.
  6. Repeat: Repeat the process for each section of the fence until all the rails are installed.

It is important to ensure that the fence rails are level and evenly spaced. This will ensure that the fence pickets are installed correctly and the fence looks uniform. If the rails are not level, the fence pickets will be uneven, and the fence may not be stable.

In conclusion, installing the fence rails is an important step in building a wooden fence. By following the steps outlined above, you can ensure that your fence rails are installed correctly and your fence looks great.

Attaching the Fence Boards

Now that your fence posts are in place and the concrete has dried, it’s time to attach the fence boards. This is the part where your fence really starts to take shape and look like a proper fence.

Tools You’ll Need

Before you get started, make sure you have the following tools on hand:

  • Power drill
  • Screws or nails (depending on your preference)
  • Measuring tape
  • Level
  • Saw (if you need to cut any fence boards to size)

Step-by-Step Instructions

  1. Start at one end of your fence and work your way down. Place the first fence board against the first fence post, making sure it’s level.
  2. Drill pilot holes through the fence board and into the fence post. This will prevent the wood from splitting when you attach it.
  3. Attach the fence board to the fence post using screws or nails. Repeat this process for each fence board, making sure they’re evenly spaced and level.
  4. If you need to cut any fence boards to size, measure twice and cut once. Use a saw to make your cuts and sand any rough edges.
  5. Once all of your fence boards are attached, step back and admire your handiwork! Your new fence is now complete.

Tips and Tricks

  • If you’re using screws instead of nails, make sure they’re long enough to go through the fence board and into the fence post.
  • Use a level to make sure your fence boards are straight. A crooked fence is not only unsightly, it’s also less sturdy.
  • If you’re having trouble getting your fence boards to stay level, try using a temporary brace. Simply attach a piece of wood between two fence posts to hold your fence boards in place while you attach them.
  • If you’re using pressure-treated wood, wait a few weeks before staining or painting your fence. This will allow the wood to dry out and absorb the stain or paint better.

Applying a Protective Finish

Once you have installed your wooden fence, it is important to apply a protective finish to ensure it lasts for many years. A protective finish will not only enhance the natural beauty of the wood but also protect it from the elements, such as rain, sun, and wind.

Choosing the Right Finish

Before applying any finish, it is important to choose the right one for your fence. There are several types of finishes available, including stains, paints, and sealers. Each has its own benefits and drawbacks, so it is important to consider your specific needs.

Stains are a popular choice as they enhance the natural beauty of the wood while providing protection from the elements. Paints, on the other hand, offer a wider range of color options and can provide a more uniform appearance. Sealers are a good choice if you want to maintain the natural color of the wood while providing protection.

Applying the Finish

Once you have chosen the right finish for your fence, it is time to apply it. Here are some steps to follow:

  1. Clean the fence: Before applying any finish, make sure the fence is clean and free of dirt, debris, and mildew. Use a power washer or a stiff-bristled brush to clean the fence thoroughly.
  2. Allow the fence to dry: After cleaning, allow the fence to dry completely before applying any finish. This may take a few days, depending on the weather conditions.
  3. Apply the finish: Using a brush, roller, or sprayer, apply the finish to the fence. Make sure to apply it evenly and cover all surfaces, including the ends of the boards.
  4. Allow the finish to dry: After applying the finish, allow it to dry completely before touching or using the fence. This may take a few days, depending on the type of finish and weather conditions.
  5. Apply a second coat (optional): Depending on the type of finish, you may need to apply a second coat for optimal protection and appearance. Follow the manufacturer’s instructions for applying a second coat.

By following these steps and choosing the right finish, you can ensure your wooden fence is protected and looks great for years to come.

Maintaining Your Wooden Fence

Once you’ve installed your wooden fence, it’s important to maintain it properly to ensure its longevity and keep it looking great. Here are some tips on how to maintain your wooden fence:

Apply a Protective Coating

Applying a protective coating to your wooden fence is essential to protect it from the elements. A wood preservative can help prevent rot and decay, and a water-repellent sealant can help protect it from water damage. You can find these products at your local home improvement or hardware store. Apply the coating according to the manufacturer’s instructions, and be sure to reapply it every few years to keep your fence in good condition.

Clean Your Fence Regularly

Cleaning your wooden fence regularly can help keep it looking great and prevent dirt and debris from building up. Use a soft-bristled brush or a pressure washer to remove any dirt or grime from the surface of your fence. Be sure to use a pressure washer with a low PSI to avoid damaging the wood. You can also use a mild detergent or a specialized fence cleaner to remove any stubborn stains.

Inspect Your Fence for Damage

Regularly inspect your fence for any signs of damage, such as cracks, warping, or rot. If you notice any damage, repair it as soon as possible to prevent it from getting worse. Replace any damaged or rotten boards, and reinforce any weak areas with additional support.

Trim Back Vegetation

Vegetation growing near your wooden fence can cause damage over time. Trim back any plants or vines that are growing too close to your fence to prevent them from causing damage or blocking airflow. This will help keep your fence dry and prevent moisture from building up, which can lead to rot and decay.

By following these tips, you can help ensure the longevity and beauty of your wooden fence for years to come.
repair-a-wooden-fence

How to Repair a Wooden Fence: A Simple Guide for DIY Enthusiasts

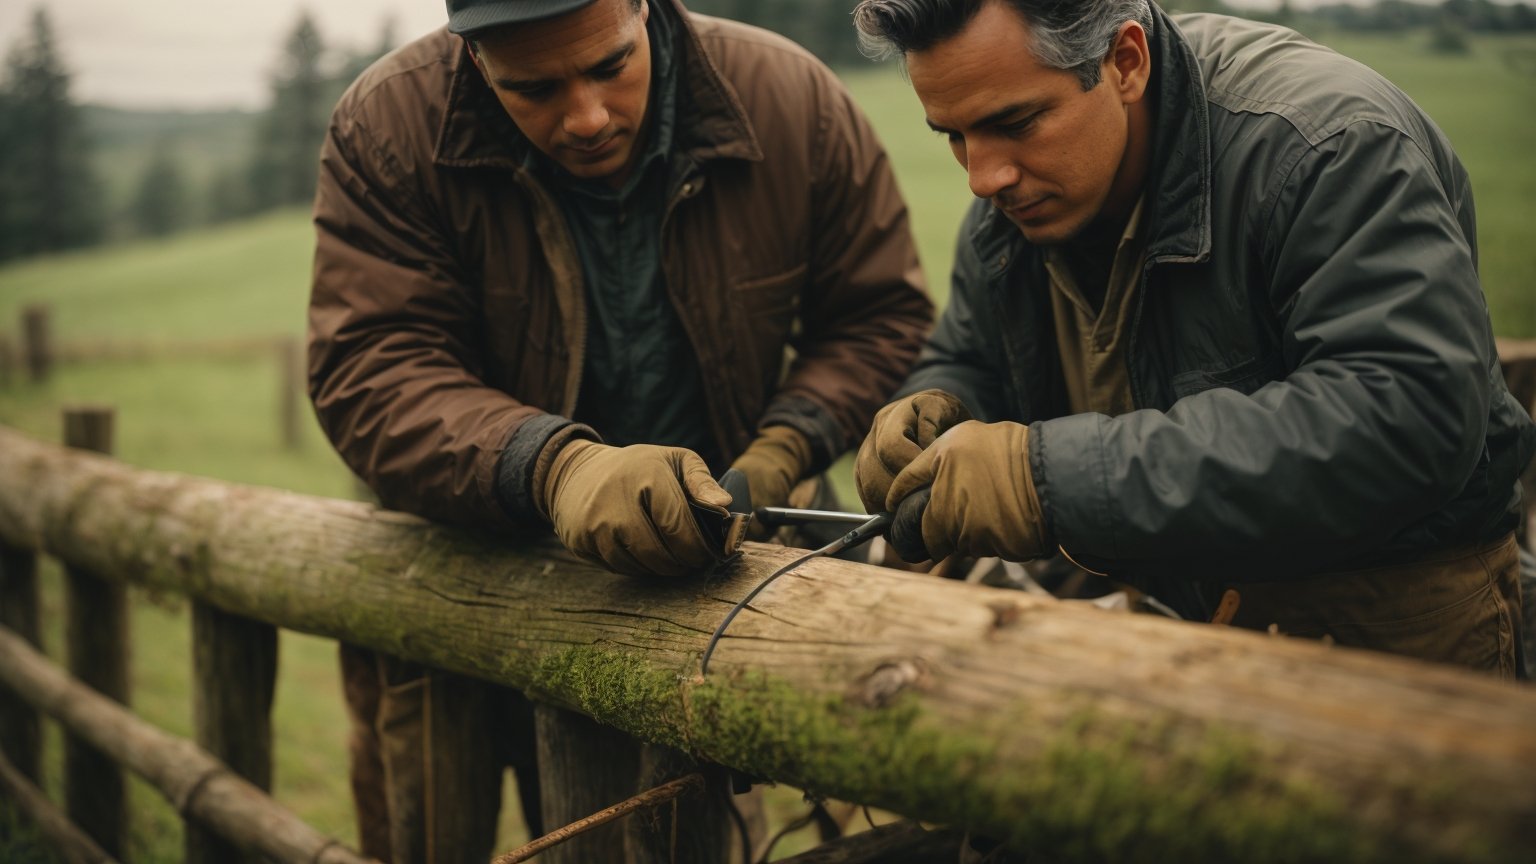
If you have a wooden fence that’s seen better days, don’t worry. There are ways to repair it and bring it back to life. With a little bit of effort and some basic tools, you can fix most issues that commonly occur with wooden fences. In this article, we’ll walk you through the steps to repair a wooden fence and provide some helpful tips along the way.

One of the most common issues with wooden fences is rotting. This can happen to the fence posts, rails, or pickets. If you notice any signs of rot, such as soft or spongy wood, it’s important to address the issue as soon as possible. Another common problem is sagging or leaning fence sections. This can be caused by a number of factors, including loose or damaged hardware, soil erosion, or improper installation. Whatever the issue, we’ll show you how to fix it and get your fence looking great again.

Before you begin any repairs, it’s important to assess the damage and determine the best course of action. Depending on the severity of the issue, you may need to replace a section of the fence or simply make some minor repairs. With the right tools and techniques, you can tackle most fence repairs on your own and save money in the process. So, let’s get started and learn how to repair a wooden fence.

Understanding the Damage

repair-a-wooden-fence

When it comes to repairing a wooden fence, the first step is to understand the damage. This will help you determine whether you need to repair or replace the fence, as well as what materials and tools you’ll need. In this section, we’ll go over how to identify the types of damage and assess the severity of the damage.

Identifying Types of Damage

There are several types of damage that can occur to a wooden fence, including:

  • Rot: This is caused by exposure to moisture and can weaken the wood, making it more prone to breaking.
  • Warping: This is caused by changes in temperature and humidity and can cause the fence to become misshapen.
  • Splitting: This is caused by age and exposure to the elements and can cause the wood to crack and break.
  • Pests: Termites and other pests can damage the wood, leaving it weak and vulnerable.

By identifying the type of damage, you’ll be better equipped to determine the best course of action.

Assessing Severity of Damage

Once you’ve identified the type of damage, the next step is to assess the severity of the damage. This will help you determine whether you can repair the fence or if you need to replace it. Here are some things to look for when assessing the severity of the damage:

  • How extensive is the damage? Is it limited to a small area or does it cover a large portion of the fence?
  • How deep is the damage? Is it surface-level or does it go all the way through the wood?
  • How old is the fence? Older fences may be more prone to damage and may need to be replaced rather than repaired.

By assessing the severity of the damage, you’ll be able to make an informed decision about how to proceed with the repair or replacement of your wooden fence.

Gathering Necessary Tools and Materials

Before you begin repairing your wooden fence, it’s important to gather all the necessary tools and materials. This will save you time and frustration later on. Here are some things you’ll need:

Choosing the Right Tools

Having the right tools can make all the difference when it comes to repairing your fence. Here are some tools you should consider having on hand:

  • Electric drill: An electric drill is essential for drilling holes and screwing things together.
  • Post hole digger or auger: You’ll need a post hole digger or auger to dig new post holes or widen existing ones.
  • Screwdriver: A screwdriver will come in handy for removing screws and attaching new ones.
  • Saw: You may need a saw to cut new fence boards to size.
  • Hammer: A hammer will be useful for pounding in nails and removing old ones.
  • Level: A level will help ensure that your fence is straight and level.
  • Measuring tape: You’ll need a measuring tape to measure the length of your fence and the distance between posts.

Selecting Quality Materials

When it comes to repairing your fence, it’s important to use quality materials that will last. Here are some materials you should consider using:

  • Fence boards: Choose fence boards that are thick and sturdy. Look for boards that are free of knots and other defects.
  • Posts: Use pressure-treated posts that are resistant to rot and decay.
  • Concrete: Use concrete to anchor your fence posts in the ground. This will help prevent them from shifting or leaning over time.
  • Screws: Use screws instead of nails to attach your fence boards to the posts. Screws are stronger and less likely to come loose over time.
  • Paint or stain: Use paint or stain to protect your fence from the elements and give it a finished look.

By gathering the right tools and materials, you’ll be well on your way to repairing your wooden fence.

Preparation Steps

Before you start repairing your wooden fence, there are some preparation steps you need to take to ensure a successful repair. These steps include clearing the area and taking safety precautions.

Clearing the Area

The first step in repairing your wooden fence is to clear the area around it. This means removing any debris, such as leaves, branches, or rocks, that may be in the way. You should also clear any plants or grass that are growing too close to the fence, as they may interfere with the repair process.

If your fence is located near any structures, such as a house or garage, make sure to move any items away from the fence to avoid damaging them during the repair process.

Safety Precautions

When repairing a wooden fence, it is important to take safety precautions to avoid injury. Here are some safety tips to keep in mind:

  • Wear protective clothing, such as gloves and safety glasses, to protect yourself from splinters and debris.
  • Use caution when handling tools, such as saws and hammers, to avoid injury.
  • Make sure your tools are in good working condition and are appropriate for the job.
  • If you are working with power tools, make sure to follow the manufacturer’s instructions and use them only as intended.
  • If you are working on a ladder, make sure it is secure and on level ground.

By taking these preparation steps, you can ensure a safe and successful repair of your wooden fence.

Repairing Minor Damages

repairing-minor-damages

If your wooden fence has minor damages, you can easily fix them yourself. Here are some simple steps to help you repair your fence.

Fixing Loose Boards

If you have loose boards on your fence, you can fix them by following these steps:

  1. Remove the loose board from the fence.
  2. Clean the area where the board was removed.
  3. Apply wood glue to the area where the board was removed.
  4. Place the board back in its original position and secure it with screws.
  5. Wipe off any excess glue with a damp cloth.

Repairing Small Cracks

Small cracks in your wooden fence can be repaired using wood filler. Here’s how:

  1. Clean the area around the crack.
  2. Apply the wood filler to the crack with a putty knife.
  3. Smooth out the wood filler with the putty knife.
  4. Allow the wood filler to dry according to the manufacturer’s instructions.
  5. Sand the area with a fine-grit sandpaper until it is smooth.
  6. Paint or stain the area to match the rest of the fence.

Remember, if the damage to your fence is more severe, it’s best to call a professional to repair it.

Repairing Major Damages

If your wooden fence has suffered major damages, such as broken boards or rot, it’s important to take care of them as soon as possible to prevent further damage. Here are some tips on how to repair major damages to your wooden fence.

Replacing Broken Boards

If you have a broken board on your fence, it’s important to replace it as soon as possible to prevent further damage. Here’s how to do it:

  1. Remove the damaged board: Using a pry bar, remove the damaged board from the fence. Be careful not to damage any of the surrounding boards.
  2. Measure and cut the new board: Measure the length of the opening left by the removed board and cut a new board to fit.
  3. Install the new board: Place the new board into the opening and secure it in place with screws or nails.

Dealing with Rot

If you have rot on your fence, it’s important to remove it before it spreads. Here’s how to do it:

  1. Remove the affected area: Use a saw to cut away the affected area of the fence. Be sure to cut back to healthy wood.
  2. Treat the area: Apply a wood preservative to the affected area to prevent further rot.
  3. Replace the damaged area: Cut a new piece of wood to fit the opening left by the removed area and secure it in place with screws or nails.

Remember, prevention is key when it comes to wooden fence maintenance. Regularly inspect your fence for damages and take care of them as soon as possible to prevent further damage.

Maintaining Your Wooden Fence

Regular maintenance is essential to keep your wooden fence looking good and functioning properly. With proper care, you can extend the life of your fence and prevent costly repairs. Here are some tips on how to maintain your wooden fence.

Regular Inspections

Regular inspections are key to identifying problems early and preventing them from getting worse. Inspect your fence at least once a year, and after any major weather events. Look for signs of damage, such as rotting, cracking, or warping. Check the fence posts for stability and make sure they are not leaning or wobbling. If you notice any damage, address it immediately to prevent it from spreading.

Preventive Measures

Preventive measures can help protect your fence from damage and extend its life. Here are some tips on how to prevent damage to your wooden fence:

  • Keep the fence clean: Regularly clean your fence to remove dirt, debris, and mildew. Use a mild detergent and a soft-bristled brush to scrub the fence. Rinse thoroughly with a hose.
  • Seal the fence: Apply a sealant to your fence to protect it from moisture and UV rays. Choose a sealant that is specifically designed for wooden fences. Apply the sealant according to the manufacturer’s instructions.
  • Trim vegetation: Keep vegetation trimmed back from your fence to prevent it from growing into the fence and causing damage. This will also help improve air circulation around the fence, which can help prevent moisture buildup.
  • Avoid contact with soil: Make sure your fence does not come into contact with soil, as this can cause the wood to rot. Use concrete or metal posts to elevate the fence off the ground.

By following these tips, you can keep your wooden fence looking great and functioning properly for years to come. Regular inspections and preventive measures can help you avoid costly repairs and keep your fence in top condition.

put-wooden-posts-in-the-ground

How to Put Wooden Posts in the Ground: A Step-by-Step Guide

Putting wooden posts in the ground is an essential part of many outdoor DIY projects, such as building a fence, a deck, or a garden structure. However, getting it right can be tricky, especially if you’re dealing with soft or wet ground, or if you want to ensure that your posts will last for years without rotting or leaning. In this article, we’ll guide you through the steps you need to follow to put wooden posts in the ground, from choosing the right materials to digging the hole, setting the post, and securing it in place.

Before you start digging, it’s important to choose the right type of wood for your posts. Pressure-treated lumber is a popular choice for outdoor projects, as it is resistant to rot, insects, and moisture. However, if you prefer the natural look of untreated wood, you can use cedar or redwood, which are naturally resistant to decay. Keep in mind that the size and spacing of your posts will depend on the type of project you’re working on and the local building codes, so make sure to check the requirements before you start.

Once you’ve selected your wood, the next step is to dig the hole. The size and depth of the hole will depend on the size of your post and the type of soil you’re working with. As a general rule, the hole should be at least one-third as deep as the length of the post, and wider than the post by a few inches. If you’re dealing with soft or wet ground, you may need to add gravel or concrete to the bottom of the hole to provide a stable base for the post. In the next section, we’ll look at how to set the post and secure it in place.

Understanding the Importance of Wooden Posts

put-wooden-posts-in-the-ground

Wooden posts are an essential component in many outdoor projects, including landscaping and construction. They are sturdy, durable, and easy to work with, making them a popular choice for many DIY enthusiasts. In this section, we’ll discuss the role of wooden posts in landscaping and construction and why they are essential for your projects.

Role in Landscaping

Wooden posts play a vital role in landscaping, providing support for a wide range of structures. They are commonly used to build garden fences, trellises, and pergolas. Posts also help to define the boundaries of your property and add a decorative touch to your outdoor space.

When selecting wooden posts for your landscaping project, it’s essential to consider the type of wood you use. Some woods, like cedar or redwood, are naturally resistant to rot and decay, making them ideal for outdoor use. Others, like pine, require treatment to protect them from moisture and insects.

Use in Construction

Wooden posts are also commonly used in construction, providing support for decks, porches, and other outdoor structures. They are an affordable and versatile option, allowing you to create a range of designs to suit your needs.

When installing wooden posts for construction, it’s crucial to ensure they are securely anchored in the ground. This can be achieved by using a variety of methods, including concrete footings, post anchors, or deadman supports. By properly anchoring your posts, you can ensure the stability and longevity of your structure.

In conclusion, wooden posts are a versatile and essential component in many outdoor projects. Whether you’re building a fence, a deck, or a pergola, wooden posts provide the support and stability you need to create a durable and long-lasting structure. By selecting the right type of wood and properly anchoring your posts, you can ensure the success of your project for years to come.

Choosing the Right Wooden Post

When it comes to installing a fence or any other wooden structure, the type of wooden post you select is critical. Choosing the right wooden post can ensure that your fence or structure is strong, long-lasting, and withstands the test of time. Here are a few things to consider when selecting the right wooden post.

Types of Wood

Different types of wood have different characteristics that make them suitable for different applications. Some of the most common types of wood used for fence posts include:

  • Cedar: It is naturally resistant to rot and decay and is known for its durability and strength. It is also lightweight, making it easy to work with.
  • Redwood: It is also naturally resistant to rot and decay and is known for its beauty and durability. It is also lightweight and easy to work with.
  • Pine: It is a popular choice for fence posts because it is affordable and readily available. However, it is not as durable as cedar or redwood and requires treatment to prevent rot and decay.

Size and Shape Considerations

The size and shape of your wooden post can also affect its durability and strength. Here are a few things to consider:

  • Diameter: A larger diameter post will be stronger and more durable than a smaller diameter post.
  • Length: The length of your post should be determined by the height of your fence or structure. A taller fence or structure will require a longer post for added stability.
  • Shape: Square posts are stronger and more durable than round posts. They are also easier to install and work with.

Treatment Options

To ensure that your wooden post is protected from rot and decay, it is essential to treat it with a preservative. Here are a few treatment options to consider:

  • Pressure-treated wood: This type of wood is treated with chemicals that protect it from rot and decay. It is a popular choice for fence posts because it is affordable and readily available.
  • Creosote: This is a tar-like substance that is applied to the wood to protect it from rot and decay. It is a popular choice for fence posts because it is long-lasting and effective.
  • Oil-based preservatives: These are natural oils that are applied to the wood to protect it from rot and decay. They are a popular choice for people who want to avoid chemicals.

By considering the type of wood, size and shape considerations, and treatment options, you can select the right wooden post for your fence or structure. Remember that selecting the right wooden post is critical to ensuring the longevity and durability of your fence or structure.

Preparation Steps

Before you start installing wooden posts in the ground, you need to prepare yourself and your tools. This section will cover the basic preparation steps that you need to take before beginning the installation process.

Gathering Tools

Before you start digging, you need to make sure you have all the necessary tools. Here are some of the tools you will need:

  • Shovel
  • Post hole digger
  • Measuring tape
  • Level
  • Hammer
  • Nails
  • Wooden posts
  • Concrete mix
  • Water

Make sure you have all the tools before you start the installation process. This will save you time and ensure that you can complete the job without any interruptions.

Marking the Spot

Once you have all the tools, you need to mark the spot where you want to install the wooden post. Here are the steps to follow:

  1. Use a measuring tape to determine the location of the post.
  2. Mark the spot with a stake or spray paint.
  3. Use a level to ensure that the spot is level.

Marking the spot is important because it will help you dig the hole in the right place.

Ensuring Safety

Before you start digging, you need to ensure that you are safe. Here are some safety tips to follow:

  • Wear safety glasses to protect your eyes from debris.
  • Wear gloves to protect your hands.
  • Make sure there are no utility lines or pipes in the area where you will be digging.
  • Call 811 to have the utility lines marked before you start digging.

Ensuring safety is important because it will prevent accidents and injuries.

By following these preparation steps, you will be ready to start installing wooden posts in the ground. Remember to take your time and follow the instructions carefully to ensure that the job is done correctly.

Digging the Hole

Digging the hole is the first step in installing a wooden post in the ground. It is important to dig the hole to the correct depth and width to ensure that the post is stable and secure. Here are some tips to help you dig the perfect hole.

Determining Depth

The depth of the hole will depend on the height of the post and the type of soil you are working with. As a general rule, the hole should be at least one-third the length of the post. For example, if you are installing a 6-foot post, the hole should be at least 2 feet deep.

If you are working with sandy soil, you may need to dig the hole deeper to ensure that the post is stable. On the other hand, if you are working with clay soil, you may need to add gravel to the bottom of the hole to improve drainage.

Width Requirements

The width of the hole is also important. The hole should be wide enough to allow for concrete or gravel to be added around the post. As a general rule, the width of the hole should be at least three times the width of the post.

For example, if you are installing a 4-inch post, the hole should be at least 12 inches wide. This will allow for enough space to add concrete or gravel around the post to ensure that it is stable.

When digging the hole, it is important to keep the sides as straight as possible. This will help to ensure that the post is straight and level once it is installed. You can use a level to check the depth and alignment of the hole as you dig.

By following these tips, you can ensure that you dig a hole that is the correct depth and width for your wooden post. This will help to ensure that your post is stable and secure, and will last for years to come.

Setting the Post

When it comes to setting a wooden post in the ground, there are a few key steps you need to follow to ensure that your fence or deck is stable and secure. Here are the three main sub-sections to keep in mind: Positioning the Post, Using Concrete Mix, and Checking Alignment.

Positioning the Post

Before you start digging, it’s important to make sure that you’re positioning your post in the right place. Check your local building codes and permits to ensure that you’re following all the necessary guidelines. Then, use a measuring tape to mark the spot where you want your post to go.

Next, use a post hole digger or auger to create a hole that’s deep enough to accommodate your post. The hole should be at least one-third the length of your post, and wider than the post itself to allow for some wiggle room.

Using Concrete Mix

Once you’ve dug your hole, it’s time to mix your concrete. Follow the instructions on the bag carefully, and make sure you’re mixing enough to fill the entire hole.

To set your post, pour some of the concrete mix into the hole, then place your post in the center. Use a level to make sure that the post is straight, and adjust as needed.

Next, pour more concrete mix into the hole, making sure to fill it up to ground level. Use a trowel or shovel to smooth out the surface of the concrete and create a slight slope away from the post to help with drainage.

Checking Alignment

After you’ve filled the hole with concrete, it’s important to double-check that your post is still straight and aligned properly. Use a level to ensure that the post is vertical on all sides, and adjust as needed.

If you notice any issues with alignment or stability, you may need to add more concrete or adjust the position of the post. It’s better to take the time to get it right now, rather than having to deal with a wobbly or unstable fence or deck later on.

By following these steps for setting a wooden post in the ground, you can ensure that your fence or deck will be strong and secure for years to come.

Post-Installation Care

post-installation-care

Once you have installed your wooden posts, it is important to take proper care of them to ensure they last as long as possible. Here are some tips for post-installation care:

Waterproofing

One of the most important things you can do to protect your wooden posts from rotting is to waterproof them. There are several ways to do this, including:

  • Applying a waterproof sealant or paint to the post
  • Wrapping the post in a waterproof membrane
  • Installing a post cap to keep water from seeping into the top of the post

Whatever method you choose, make sure to apply the waterproofing material to the entire post, paying special attention to the bottom where it is in contact with the ground.

Regular Inspection

Regularly inspecting your wooden posts can help you catch any problems early on, before they become major issues. Here are some things to look for during your inspections:

  • Cracks or splits in the wood
  • Signs of insect damage
  • Signs of rot or decay
  • Loose or missing hardware (such as screws or nails)

If you notice any of these issues, take steps to address them as soon as possible to prevent further damage.

Maintenance Tips

In addition to waterproofing and regular inspections, there are a few other things you can do to keep your wooden posts in good condition:

  • Keep the area around the posts clear of debris and vegetation
  • Avoid hitting the posts with lawn mowers or other equipment
  • Don’t lean heavy objects against the posts
  • Trim back any nearby trees or bushes that could fall onto the posts during a storm

By following these tips, you can help ensure that your wooden posts stay strong and sturdy for years to come.

How to Put Up a Wooden Fence: A Beginner's Guide

If you’re looking to add some privacy or security to your property, putting up a wooden fence is a great option. Not only does it provide a physical barrier, but it also adds an attractive feature to your yard. However, if you’ve never put up a fence before, the task can seem daunting. But don’t worry, with a little bit of knowledge and the right tools, you can easily put up a wooden fence yourself.

Before you start, it’s important to do some planning. Determine where you want your fence to go and mark the boundaries of your property. Check with your local government to see if there are any regulations or permits required for building a fence in your area. Once you have a plan in place, you can start gathering the necessary tools and materials. This will include things like fence posts, rails, pickets, concrete, and tools like a post hole digger, level, and saw. With everything you need at hand, you’ll be ready to start building your fence in no time.

Understanding the Basics of Fencing

If you’re looking to add privacy and security to your property, a wooden fence is a great option. Before you start building, it’s important to understand the basics of fencing. Here are some key things to consider.

Types of Wooden Fences

There are many different types of wooden fences to choose from. Here are some of the most common:

  • Picket fence: A picket fence is a classic choice that adds charm to any property. It consists of vertical wooden boards attached to horizontal rails.
  • Privacy fence: A privacy fence is taller and more solid than a picket fence. It’s designed to block the view of your property from the outside.
  • Split rail fence: A split rail fence is a rustic option that’s often used in rural areas. It consists of wooden posts with two or three horizontal rails.
  • Post and rail fence: A post and rail fence is similar to a split rail fence, but it has more vertical posts and fewer horizontal rails.

Why Choose a Wooden Fence

There are many reasons to choose a wooden fence for your property. Here are some of the most common:

  • Affordability: Wooden fences are often more affordable than other types of fencing, such as vinyl or wrought iron.
  • Customization: Wooden fences can be customized to fit your specific needs and style preferences.
  • Durability: With proper maintenance, a wooden fence can last for many years.
  • Natural look: Wooden fences have a natural look that blends in well with the surrounding landscape.
  • Privacy: A wooden fence can provide privacy and security for your property.

Now that you understand the basics of fencing and the benefits of a wooden fence, you can start planning your project. Remember to consider factors such as the size of your property, your budget, and any local regulations or permits required for fence installation.

Planning Your Wooden Fence

When planning to put up a wooden fence, there are several factors you need to consider to ensure that your fence is functional and aesthetically pleasing. In this section, we will discuss the key things you need to consider when planning your wooden fence.

Location Planning

The first step in planning your wooden fence is to determine where you want to install it. Consider the purpose of the fence and the areas you want to enclose. If you are installing a fence for privacy, you may want to enclose your backyard. If you have a pool, you may want to install a fence around it for safety reasons.

Before installing your fence, you should check your local building codes to ensure that you are complying with any regulations. You will also need to determine the property line and ensure that you are not encroaching on your neighbor’s property.

Materials Needed

Once you have determined the location of your fence, you need to decide on the materials you will use. Wood is a popular choice for fencing because it is affordable, easy to work with, and can be stained or painted to match your home’s exterior.

When selecting the type of wood to use, consider the climate in your area. Cedar and redwood are popular choices because they are naturally resistant to rot and insects. Pressure-treated lumber is also a good option because it is treated to resist rot and decay.

Budgeting

The cost of installing a wooden fence can vary depending on the size of your property, the type of wood you use, and the style of fence you choose. Before you start your project, it is important to set a budget and stick to it.

To get an idea of the cost of your project, you can use an online fence calculator. This will give you an estimate of the materials and labor costs.

In addition to the cost of materials and labor, you should also factor in any additional costs such as permits, tools, and equipment rental.

By taking the time to plan your wooden fence, you can ensure that your project is a success and that your fence meets your needs and budget.

Preparation Steps

Before you start building your wooden fence, there are a few important preparation steps that you need to take. These steps will help ensure that your fence is built correctly and meets any local regulations.

Marking Your Fence Line

The first step in preparing to build your wooden fence is to mark your fence line. This will help you determine where to install your fence posts and where to place your fence panels.

To mark your fence line, you will need to use stakes and string. Start by placing a stake at one corner of your property and tying a string to it. Then, walk to the opposite corner of your property and place another stake, pulling the string tight between the two stakes.

Continue this process until you have marked your entire fence line. Make sure that the string is level and straight to ensure that your fence will be level and straight as well.

Checking Local Regulations

The second step in preparing to build your wooden fence is to check any local regulations that may apply to your fence. This may include regulations regarding fence height, setback requirements, and materials.

To check local regulations, you can contact your local building department or visit their website. They should be able to provide you with information on any permits that you may need and any regulations that you need to follow.

It is important to follow these regulations to avoid any fines or legal issues. Additionally, following regulations will help ensure that your fence is safe and built to last.

By taking these preparation steps, you will be well on your way to building a sturdy and attractive wooden fence.

Building the Wooden Fence

When it comes to building a wooden fence, there are three main steps: setting the posts, attaching the rails, and installing the pickets. Each of these steps is important to ensure that your fence is sturdy and will last for years to come.

Setting the Posts

The first step in building your wooden fence is setting the posts. This is a crucial step because it will determine the overall stability of your fence. Here are the steps to follow:

  1. Determine the spacing for your posts. This will depend on the length of your fence panels and the size of your posts. Typically, you should space your posts 6-8 feet apart.

  2. Dig the post holes. The holes should be at least 2 feet deep, or deeper if you live in an area with a lot of wind or loose soil.

  3. Place the posts in the holes and fill them with concrete. Use a level to ensure that the posts are straight and level.

  4. Allow the concrete to dry for at least 24 hours before moving on to the next step.

Attaching the Rails

Once your posts are set, it’s time to attach the rails. The rails are the horizontal pieces that run between the posts and support the pickets. Here’s how to attach the rails:

  1. Measure and cut your rails to the correct length.

  2. Attach the rails to the posts using brackets or screws. Make sure that the rails are level and evenly spaced.

  3. Repeat this process for each section of your fence.

Installing the Pickets

The final step in building your wooden fence is installing the pickets. The pickets are the vertical pieces that run between the rails and provide privacy and security. Here’s how to install the pickets:

  1. Measure and cut your pickets to the correct length.

  2. Attach the pickets to the rails using nails or screws. Make sure that the pickets are evenly spaced and level.

  3. Repeat this process for each section of your fence.

With these three steps, you can build a sturdy and attractive wooden fence that will provide privacy and security for your home. Just remember to take your time and follow each step carefully to ensure that your fence is built to last.

Maintaining Your Wooden Fence

Wooden fences are a beautiful addition to any property, but they require some maintenance to keep them looking their best. Here are some tips to help you keep your wooden fence in good condition:

Regular Cleaning

Cleaning your fence regularly will help remove dirt, grime, and other debris that can accumulate over time. You can use a pressure washer to clean your fence, but be careful not to use too much pressure as it can damage the wood. Alternatively, you can use a soft-bristled brush and a mild detergent to clean your fence.

Repair and Replacement

Inspect your fence regularly for any signs of damage, such as cracks, splinters, or rot. If you notice any damage, repair it as soon as possible to prevent it from getting worse. Small cracks and splinters can be filled with wood filler, while larger cracks may require replacement of the affected section of the fence. If you notice any signs of rot, it is best to replace the affected section of the fence entirely.

Staining and Sealing

Staining and sealing your fence can help protect it from the elements and keep it looking its best. Stain can help enhance the natural beauty of the wood, while also providing protection against UV rays and moisture. Sealing your fence can help prevent moisture from getting into the wood, which can cause it to rot over time.

When staining or sealing your fence, it is important to choose the right product for your specific type of wood. Some products may work better on certain types of wood than others, so be sure to read the label carefully before making your purchase.

By following these tips, you can help ensure that your wooden fence stays in good condition for years to come.

How Long Does It Take to Put Up a Wooden Fence? A Quick Guide

If you’re planning to install a wooden fence, you may be wondering how long it will take to complete the project. The answer depends on a variety of factors, including the size of the fence, the type of wood used, and the experience level of the person doing the installation. However, on average, it takes about 2 days to install a standard-sized, 150-foot wooden fence.

One of the most time-consuming parts of installing a wooden fence is setting the posts. The posts need to be plumb and level to ensure that the fence is sturdy and looks good. Depending on the size of the fence, this can take several hours or even a full day. Once the posts are set, the rest of the installation process goes much more quickly.

Another factor that can affect the installation time is the type of wood used. Cedar is a popular choice for wooden fences because it is durable and can last up to 40 years when properly installed and maintained. However, cedar is also more expensive than other types of wood, which can increase the overall cost of the project. Other factors that can affect the installation time include the terrain of the installation site and any obstacles that need to be worked around.

Understanding the Basics of Wooden Fencing

If you’re considering installing a wooden fence, it’s important to understand the basics of wooden fencing. Wooden fences are a popular choice for homeowners looking to increase their home’s privacy and security. They’re also a great way to add a decorative touch to your property.

Types of Wooden Fences

There are several types of wooden fences to choose from, including:

  • Privacy fences: These fences are typically 6-8 feet tall and provide maximum privacy.
  • Picket fences: These fences are typically 3-4 feet tall and provide a decorative touch to your property.
  • Split-rail fences: These fences are typically used in rural areas and provide a rustic look to your property.
  • Basket-weave fences: These fences are made by weaving wooden slats together and provide a unique look to your property.

Materials Needed for Wooden Fencing

Before you start your wooden fence installation, you’ll need to gather the necessary materials. Here’s a list of the materials you’ll need:

  • Wooden fence posts: These are the vertical posts that support the fence.
  • Wooden fence rails: These are the horizontal pieces that connect the fence posts.
  • Wooden fence pickets: These are the vertical boards that make up the fence.
  • Concrete mix: This is used to secure the fence posts in the ground.
  • Nails or screws: These are used to attach the fence pickets to the fence rails.

Timeframe for Wooden Fence Installation

The time it takes to install a wooden fence depends on several factors, including the size of your property and the type of fence you’re installing. On average, it takes about 2 days to install a standard-sized, 150-foot wooden fence. However, if you’re installing a more complex fence, it may take longer.

Hiring a Professional vs. DIY

While it’s possible to install a wooden fence yourself, it’s often best to hire a professional. A professional fence company will have the necessary tools and experience to install your fence quickly and efficiently. They’ll also be able to ensure that your fence is installed correctly and meets all local building codes.

Overall, understanding the basics of wooden fencing is an important first step in installing a fence on your property. By choosing the right type of fence and gathering the necessary materials, you can create a beautiful and functional addition to your home.

Factors Influencing the Time to Put Up a Wooden Fence

When planning to install a wooden fence, it’s important to consider the factors that can influence the time it takes to complete the project. Here are some of the key factors that can impact the installation timeline.

Size of the Fence

The size of the fence is one of the most significant factors that can affect the time it takes to put up a wooden fence. Larger fences require more materials, more labor, and more time to complete. For instance, a 100-foot fence will take much longer to install than a 50-foot fence. It’s important to factor in the size of the fence when estimating the installation timeline.

Type of Wood

The type of wood used for the fence can also impact the installation timeline. Some types of wood are harder and more difficult to work with than others, which can slow down the installation process. For instance, cedar is a popular choice for wooden fences, but it’s a softer wood that can be more challenging to work with than other types of wood. On the other hand, pressure-treated pine is a harder wood that is easier to work with, which can speed up the installation process.

Weather Conditions

Weather conditions can also play a role in how long it takes to put up a wooden fence. Rainy or windy weather can slow down the installation process, making it more difficult to work with the materials and causing delays. Hot and dry weather can also be challenging, as it can cause the wood to warp or crack. Ideally, mild weather conditions with moderate temperatures and low wind are best for installing a wooden fence.

In conclusion, several factors can influence the time it takes to put up a wooden fence, including the size of the fence, the type of wood used, and weather conditions. By considering these factors, you can estimate the installation timeline and plan accordingly.

Steps to Install a Wooden Fence

Installing a wooden fence requires some planning and preparation, but it is a relatively straightforward DIY project. Here are the steps to follow:

Planning and Preparation

Before you start digging holes and setting posts, you need to plan your fence. Decide on the height and length of the fence, the spacing between posts, and the number of rails and pickets you will need. Make sure to check local building codes and obtain any necessary permits before starting.

Next, gather all the necessary tools and materials. Here’s a list of some of the tools and materials you’ll need:

  • Measuring tape
  • Level
  • Post hole digger
  • Shovel
  • Concrete mix
  • Wooden posts
  • Wooden rails
  • Wooden pickets
  • Nails or screws
  • Hammer or drill

Digging Post Holes

Using a post hole digger, dig a hole for each post. The holes should be at least 1/3 the height of the fence and spaced evenly along the fence line. Make sure the holes are deep enough to provide a sturdy foundation for the posts.

Setting the Posts

Insert a post into each hole and fill the hole with concrete mix. Use a level to make sure each post is plumb and straight. Allow the concrete to dry completely before moving on to the next step.

Attaching the Rails and Pickets

Once the posts are set, it’s time to attach the rails and pickets. Start by attaching the rails to the posts using nails or screws. Make sure the rails are level and evenly spaced. Next, attach the pickets to the rails using nails or screws. Make sure the pickets are evenly spaced and flush with the top and bottom rails.

With these steps, you should be able to install a wooden fence in a few days. Remember to take your time and follow all safety precautions to ensure a sturdy and long-lasting fence.

Common Challenges in Putting Up a Wooden Fence

Putting up a wooden fence can be a challenging task, especially if you’re doing it for the first time. Here are some common challenges you may encounter and how to overcome them.

Uneven Ground

Uneven ground can make it difficult to install a fence that is straight and level. If your property has a slope, you’ll need to adjust the height of each fence post to ensure that the top of the fence is level. Here are some tips to help you install a fence on uneven ground:

  • Use a level to determine the slope of the ground and adjust the height of each fence post accordingly.
  • Use a string line to ensure that the fence is straight.
  • Install the fence panels one at a time, making sure that each one is level before moving on to the next.

Obstacles on the Fence Line

Obstacles such as trees, rocks, and buildings can make it difficult to install a fence in a straight line. Here are some tips to help you overcome this challenge:

  • Use a string line to mark the fence line and ensure that it is straight.
  • If there is an obstacle in the way, you may need to adjust the fence line slightly to avoid it.
  • If the obstacle cannot be avoided, you may need to cut a hole in the fence panel to accommodate it.

By following these tips, you can overcome some of the common challenges of installing a wooden fence. Remember to take your time and be patient, and you’ll have a beautiful fence in no time!

Tips to Speed Up the Process

If you’re planning to put up a wooden fence, you may be wondering how long it will take. The time it takes to put up a fence can vary depending on several factors, including the size of your property and the type of fence you want. However, there are a few things you can do to speed up the process.

Use of Tools and Equipment

One way to speed up the process of putting up a wooden fence is to use the right tools and equipment. Here are a few tools that can help you get the job done more quickly:

  • Power drill: A power drill can make it easier to drill holes for the fence posts.
  • Post hole digger: A post hole digger can help you dig the holes for the fence posts more quickly.
  • Level: A level can help you ensure that the fence posts are straight and level.
  • Circular saw: A circular saw can help you cut the fence boards to the right length more quickly.

Getting Professional Help

Another way to speed up the process of putting up a wooden fence is to get professional help. Here are a few reasons why you might want to consider hiring a professional:

  • Experience: A professional fence installer will have experience putting up fences and will be able to get the job done more quickly and efficiently.
  • Tools: A professional fence installer will have all the tools and equipment needed to put up the fence quickly and correctly.
  • Quality: A professional fence installer will be able to ensure that the fence is installed correctly and will last for many years.

Overall, putting up a wooden fence can take anywhere from one to four days, depending on the size of your property and the type of fence you want. However, by using the right tools and equipment or getting professional help, you can speed up the process and have your new fence up in no time.

How to Make a Wooden Gate Frame: A Beginner's Guide

If you’re looking to add some privacy to your property or just want to secure your backyard, building a wooden gate frame is a great option. Not only does it provide security, but it can also add a decorative touch to your fence. Building a gate frame may seem like a daunting task, but with the right tools and materials, it can be a straightforward project.

To get started, you’ll need some basic carpentry tools such as a screwdriver, power drill, compound miter saw, carpenter’s level, and a jigsaw for cutting a decorative profile. You’ll also need pressure-treated lumber and stainless steel hinges for the gate. It’s important to choose the right type of wood for your gate frame, as it needs to withstand the elements and provide durability.

In this article, we’ll guide you through the steps to build a wooden gate frame that will complement your fence and provide security for your property. From choosing the right wood to measuring and cutting the frame, we’ll cover everything you need to know to get the job done. So, let’s get started on building your perfect gate frame.

Understanding the Basics of a Wooden Gate Frame

If you’re planning to build a wooden gate, it’s important to understand the basics of a gate frame. The frame is the backbone of the gate, and it needs to be strong and sturdy to support the weight of the gate and withstand the elements. In this section, we’ll cover the types of wood suitable for gate frames, as well as the essential tools and materials you’ll need to get started.

Types of Wood Suitable for Gate Frames

When it comes to choosing the right wood for your gate frame, you’ll want to look for a species that is strong, durable, and resistant to rot and insects. Some of the most common types of wood used for gate frames include:

  • Cedar: A popular choice for its natural beauty, resistance to decay, and insect-repelling properties.
  • Redwood: Another beautiful and durable option that is naturally resistant to rot and insects.
  • Pressure-treated pine: A cost-effective choice that has been chemically treated to resist rot and insects.

Before you choose a wood species, consider the climate in your area and the level of maintenance you’re willing to commit to. Some woods may require more upkeep than others to keep them looking their best.

Essential Tools and Materials

To build a wooden gate frame, you’ll need a few essential tools and materials. Here’s what you’ll need:

  • Wood: Choose a wood species that is suitable for gate frames, as discussed above.
  • Saw: A compound miter saw is ideal for cutting precise angles.
  • Drill: A power drill will make it easier to drive screws and attach hardware.
  • Screws: Use corrosion-resistant screws that are long enough to securely fasten the frame together.
  • Gate hardware: You’ll need hinges, a latch, and any other hardware necessary to attach the gate to the fence and allow it to swing open and closed.
  • Level: A carpenter’s level will help ensure that your gate frame is straight and level.
  • Measuring tape: Use a measuring tape to measure and mark your cuts.

With these tools and materials on hand, you’ll be ready to start building your wooden gate frame.

Designing Your Wooden Gate Frame

When it comes to designing your wooden gate frame, you need to consider both the size and style of your gate. Here are some tips to help you get started:

Choosing the Right Size

The size of your gate will depend on the size of the opening you want to cover. Measure the width and height of the opening to determine the size of your gate. Remember to leave some clearance for the gate to swing open and closed.

Once you have the measurements, you can choose the size of your gate frame. The most common sizes for gate frames are 4×4, 2×4, and 2×6. The size you choose will depend on the weight of your gate and the size of the opening.

Deciding on a Style

There are many different styles of wooden gates to choose from. Some popular styles include:

  • Picket fence gate
  • Privacy fence gate
  • Ranch-style gate
  • Arched gate

Choose a style that complements the style of your fence and your home. You can also add decorative elements to your gate, such as a lattice or a decorative cut-out.

When designing your gate, make sure to choose materials that are durable and weather-resistant. Cedar and redwood are both popular choices for wooden gates because they are naturally resistant to rot and decay.

By considering the size and style of your gate, you can design a wooden gate frame that is both functional and attractive.

Building the Wooden Gate Frame

When it comes to building a wooden gate, the frame is the foundation of the entire structure. Here’s how you can build a sturdy wooden gate frame in just a few easy steps.

Cutting the Wood

Before you can assemble the gate frame, you’ll need to cut your wood to the appropriate sizes. Here’s what you’ll need:

  • 2x4s for the vertical pieces
  • 2x6s for the horizontal pieces
  • A circular saw or miter saw
  • A measuring tape

Measure and cut your wood according to the size of your gate. For a standard 6-foot gate, you’ll need two vertical pieces that are 6 feet tall and two horizontal pieces that are 3 feet wide. Make sure to measure twice and cut once to ensure accuracy.

Assembling the Frame

Once you have your wood cut to size, it’s time to assemble the frame. Follow these steps:

  1. Lay out the vertical pieces parallel to each other with the ends flush.
  2. Place the horizontal pieces on top of the vertical pieces, making sure they are flush with the top and bottom.
  3. Use wood screws to attach the horizontal pieces to the vertical pieces. Make sure to pre-drill the holes to avoid splitting the wood.
  4. Check that the frame is square by measuring diagonally from corner to corner. The measurements should be equal.

Securing the Frame

To ensure that your gate frame is sturdy and secure, you’ll need to add additional support. Here’s how:

  1. Cut two diagonal braces from 2x4s. The length of the brace should be the distance from the top of the gate to the bottom of the opposite side.
  2. Attach the braces to the gate frame using wood screws. Make sure the braces are flush with the top and bottom of the frame.
  3. Check that the gate frame is still square by measuring diagonally from corner to corner.

With the gate frame complete, you’re ready to move on to adding the gate boards and hardware.

Installing the Wooden Gate Frame

When it comes to installing a wooden gate frame, there are a few key steps you need to follow. In this section, we’ll walk you through the process of preparing the installation area and mounting the frame.

Preparing the Installation Area

Before you can install your wooden gate frame, you need to prepare the installation area. Here’s what you need to do:

  1. Clear the area: Remove any debris, rocks, or other obstacles from the installation area. This will ensure that the gate frame sits level and secure.

  2. Measure and mark the placement: Measure and mark the placement of the gate frame using a tape measure and chalk line. Make sure the placement is level and square.

  3. Dig post holes: Use a post hole digger to dig holes for the gate posts. The depth of the holes will depend on the size of your gate and the soil conditions in your area. As a general rule, the holes should be one-third the height of the gate.

  4. Pour concrete: Pour concrete into the post holes and allow it to set for at least 24 hours. This will provide a solid foundation for the gate posts.

Mounting the Frame

Once you’ve prepared the installation area, it’s time to mount the gate frame. Here’s how:

  1. Attach hinges: Attach hinges to the gate frame using screws and a drill. Make sure the hinges are level and evenly spaced.

  2. Hang the gate: Hang the gate on the hinges and test its swing. Adjust the hinges as necessary to ensure a smooth swing.

  3. Install latch: Install a latch on the gate frame using screws and a drill. Make sure the latch is level and secure.

  4. Test the gate: Test the gate to make sure it opens and closes smoothly and latches securely.

By following these steps, you’ll be able to install a wooden gate frame that is secure and functional.

Maintenance Tips for a Wooden Gate Frame

If you want your wooden gate frame to last for a long time, you need to maintain it properly. Here are some maintenance tips that you can follow:

Regular Cleaning

Regular cleaning is essential to keep your wooden gate frame in good condition. Dirt, dust, and debris can accumulate on the gate, which can cause damage over time. To clean your wooden gate frame, you can follow these steps:

  1. Use a soft-bristled brush to remove dirt and debris from the surface of the gate.
  2. Mix a solution of mild soap and warm water.
  3. Dip a sponge or cloth into the solution and use it to clean the gate.
  4. Rinse the gate with clean water and let it dry completely.

Applying Protective Finishes

Applying protective finishes can help to protect your wooden gate frame from the elements and prevent it from rotting or warping. Here are some protective finishes that you can use:

  1. Stain: Stains are a great option if you want to enhance the natural beauty of the wood. They come in a variety of colors and can protect the wood from UV rays and water damage.
  2. Paint: Paint can provide a high level of protection for your wooden gate frame. It can protect the wood from moisture, UV rays, and insects. However, it can also hide the natural beauty of the wood.
  3. Sealant: Sealants can protect your wooden gate frame from moisture and UV rays. They can also prevent the wood from cracking or splitting.

Before applying any protective finish, make sure that the gate is clean and dry. Follow the manufacturer’s instructions for application and drying times.

By following these maintenance tips, you can ensure that your wooden gate frame lasts for a long time and continues to look great.