Tag Archives: pressure-treated lumber

how-to-install-a-wooden-fence-a-beginners-guide-2

How to Install a Wooden Fence: A Beginner's Guide

Installing a wooden fence can be a great way to add privacy and security to your property while enhancing its overall aesthetic appeal. Whether you are looking to create a safe space for your children and pets to play or simply want to enjoy some peace and quiet in your backyard, a well-built fence can make all the difference. In this article, we will provide you with some helpful tips and step-by-step instructions on how to install a wooden fence.

Before you get started, it’s important to do some research and planning. You’ll need to determine the size and style of fence that best suits your needs, as well as any local regulations or permits required for installation. Once you have a clear idea of what you want, it’s time to gather your tools and materials and get to work. In the following sections, we’ll walk you through each step of the process, from preparing the ground to attaching the final picket.

Understanding the Basics of a Wooden Fence
how-to-install-a-wooden-fence-a-beginners-guide-2

Installing a wooden fence is a great way to add privacy and security to your property while also enhancing its aesthetic appeal. Before you begin the installation process, it’s important to understand the basics of a wooden fence.

Types of Wooden Fences

There are several types of wooden fences to choose from, each with its own unique design and functionality. The most common types of wooden fences include:

  • Privacy Fences: These fences are designed to provide maximum privacy by blocking the view from the outside. They are typically 6-8 feet tall and made of solid wood panels.
  • Picket Fences: These fences are shorter in height and have evenly spaced vertical boards. They are ideal for defining boundaries and adding charm to your property.
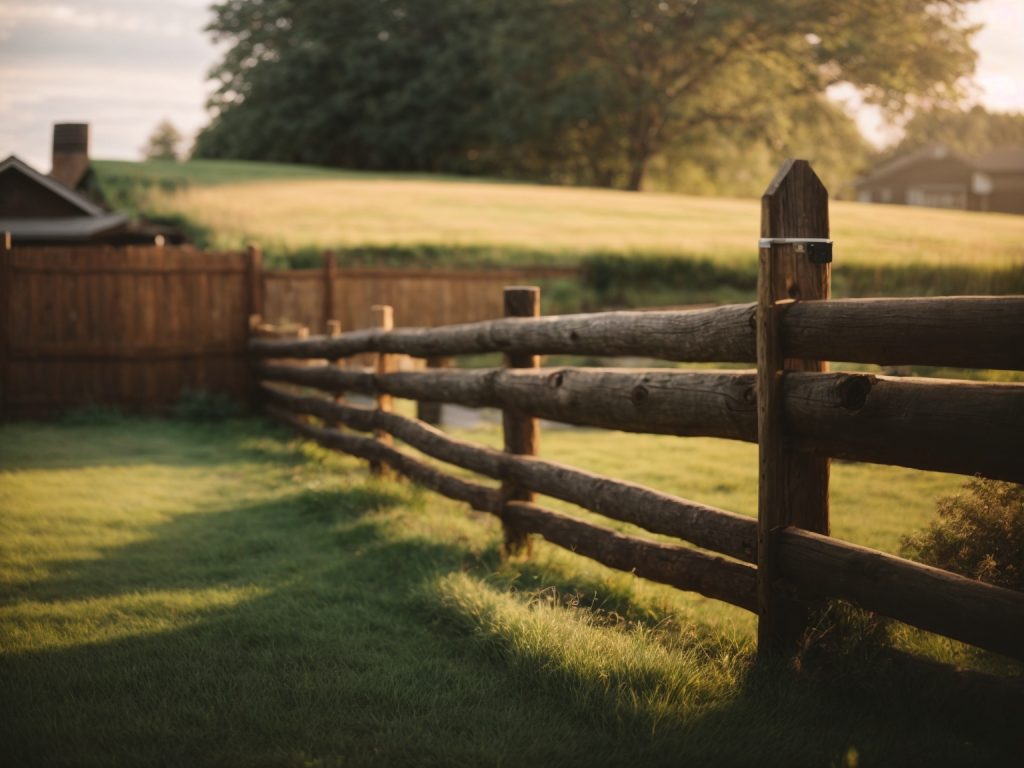
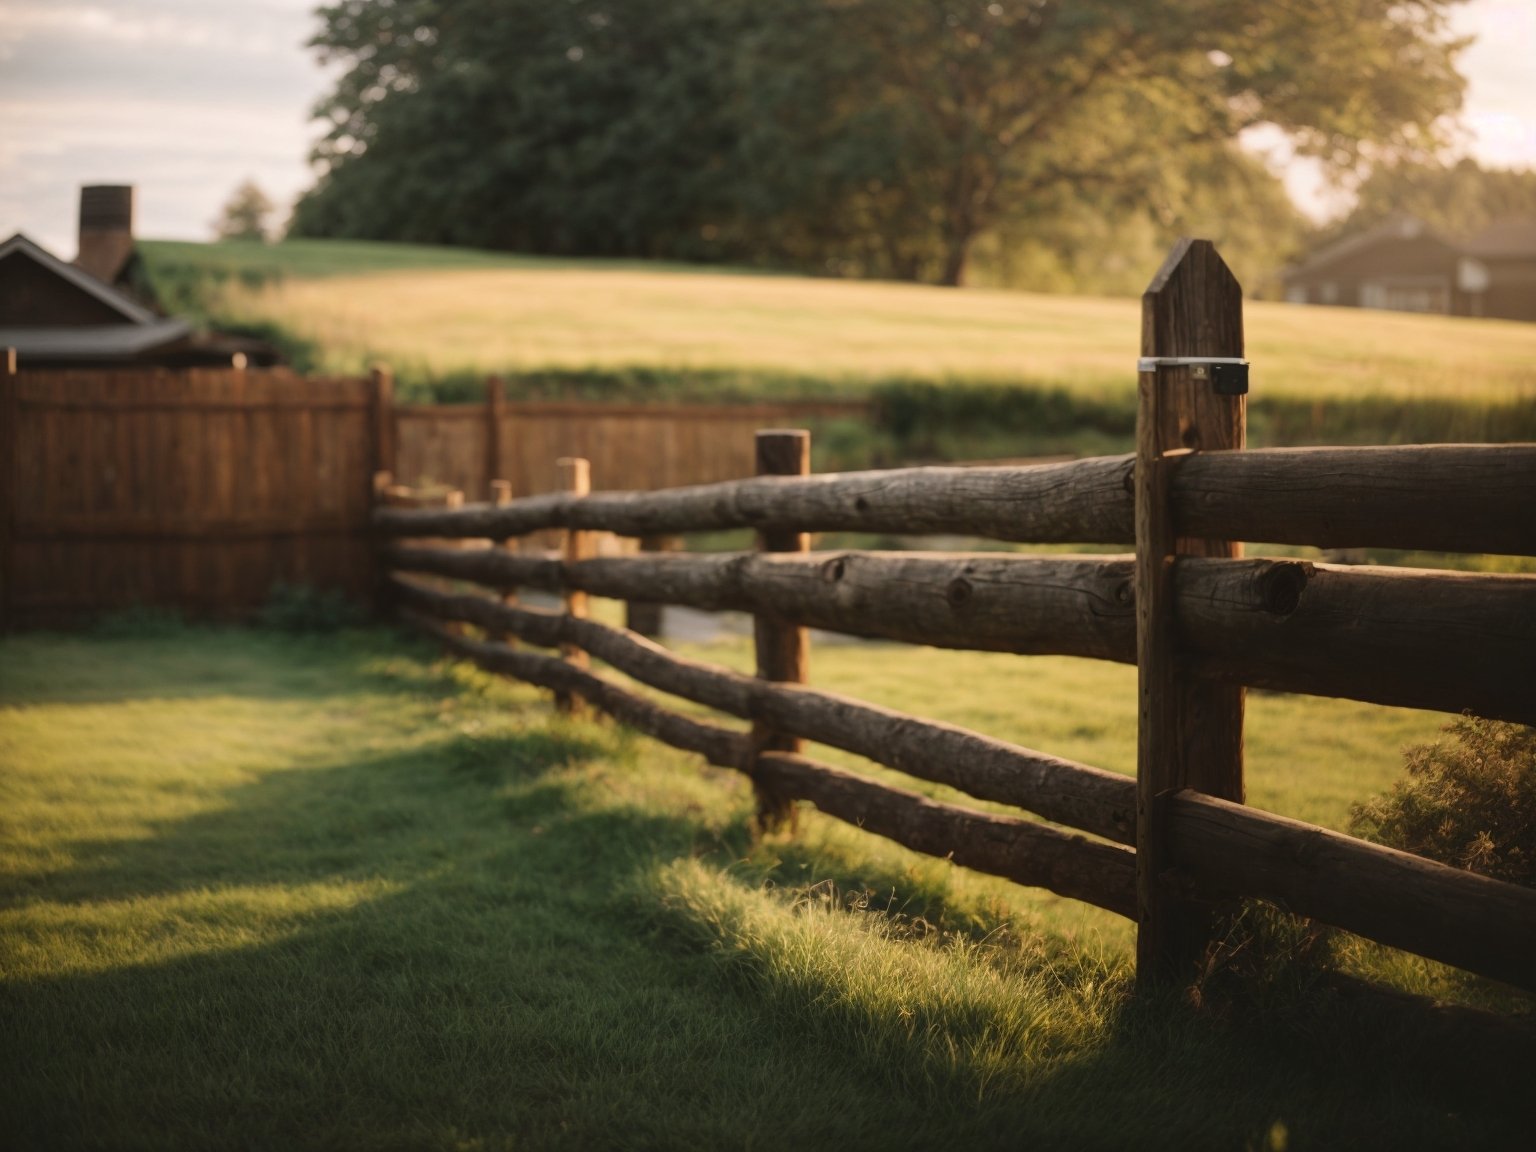
  • Split Rail Fences: These fences are made of rough-hewn wood and are often used in rural areas for livestock containment. They are also great for creating a rustic look on your property.

Benefits of a Wooden Fence
benefits-of-a-wooden-fence

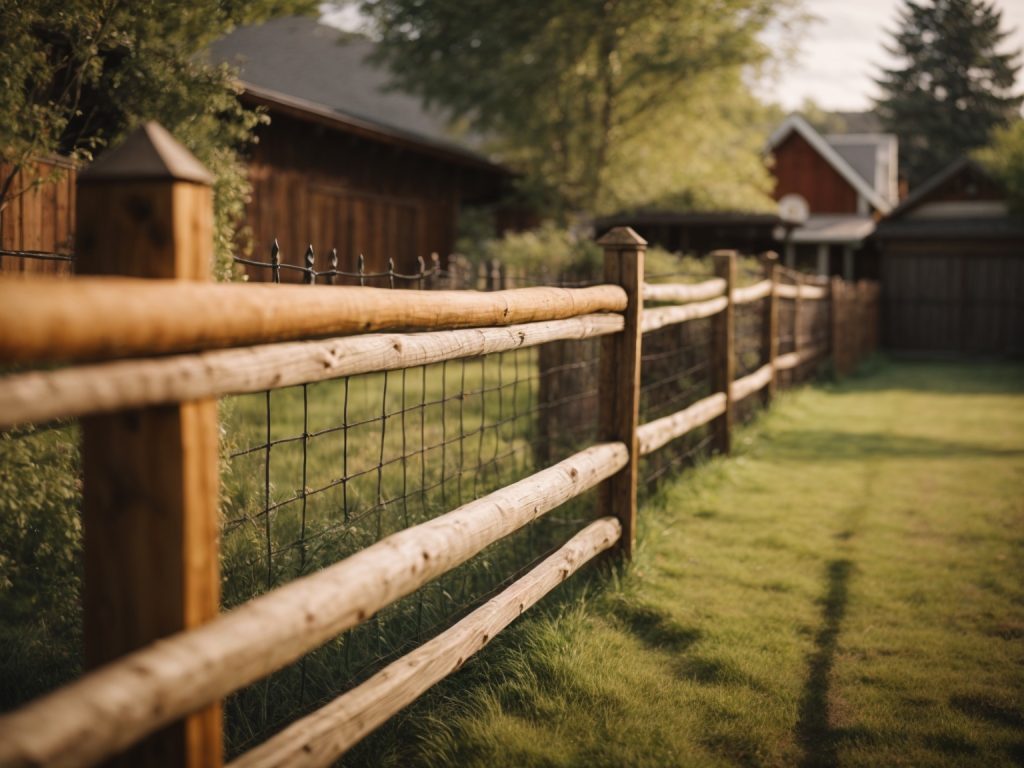
Installing a wooden fence offers several benefits, including:

  • Privacy: Wooden fences provide a great deal of privacy, making them ideal for homes with outdoor living spaces or pools.
  • Security: A wooden fence can act as a barrier to keep unwanted visitors out of your property.
  • Aesthetic Appeal: Wooden fences come in a variety of styles and designs, allowing you to enhance the look of your property.
  • Affordability: Wooden fences are often more affordable than other types of fences, making them a popular choice among homeowners.

In conclusion, understanding the basics of a wooden fence is crucial to ensure a successful installation. By choosing the right type of fence and understanding its benefits, you can create a beautiful and functional addition to your property.

Tools and Materials Needed

To install a wooden fence, you will need the following tools and materials:

Tools

  • Post hole digger
  • Level
  • Tape measure
  • Circular saw
  • Screwdriver
  • Hammer
  • Drill with drill bits
  • Pneumatic nailer (optional)
  • Portable air compressor and hose (optional)

Materials

  • Wooden fence posts
  • Wooden fence pickets
  • Wooden fence rails/stringers
  • 2-in x 4-in pressure-treated board (actual 1.5-in x 3.5-in)
  • Exterior wood screws for pressure-treated lumber
  • Concrete mix
  • Furring strips
  • Nails

Before you start the installation process, make sure you have all the necessary tools and materials. It’s important to use pressure-treated wood for your fence posts, pickets, and rails to ensure they last longer and resist rotting. You can use either fence pickets or ready-made panels to build your wooden fence.

You will need a post hole digger to dig holes for your fence posts. Make sure to measure and plan the area your fence will cover before digging post holes. You will also need a level to ensure that your fence posts are straight and even. A circular saw will come in handy when cutting the wooden fence pickets and rails to size.

A drill with drill bits is necessary for drilling holes in your wooden fence posts and for attaching the pickets and rails to the posts. If you have a pneumatic nailer and portable air compressor, you can use them to nail the pickets and rails to the fence posts. However, a hammer and nails will also work.

Lastly, you will need concrete mix to set your fence posts in the ground. Furring strips can be used to attach your wooden fence to a masonry wall or other structure. Exterior wood screws for pressure-treated lumber will be necessary to attach the pickets and rails to the fence posts.

Choosing the Right Location

Installing a wooden fence requires careful planning and preparation to ensure a successful outcome. One of the first and most important steps in the process is choosing the right location for your fence. Here are some things to consider when selecting the perfect spot for your fence:

Property Lines

Before you start digging any holes or setting any posts, it’s important to know exactly where your property lines are. You don’t want to accidentally encroach on your neighbor’s land or violate any local zoning laws. Check your property survey or consult with a professional surveyor to determine the exact boundaries of your property.

Purpose of the Fence

Think about why you want to install a fence in the first place. Is it for privacy, security, or to keep pets or children safely contained? The purpose of your fence will help you determine the best location for it. For example, if you want privacy, you’ll want to install your fence in an area that’s not easily visible from the street or neighboring properties.

Terrain and Soil Conditions

The terrain and soil conditions of your property can also affect where you should install your fence. If your property is hilly or uneven, you may need to adjust the height of your fence or install it in sections to accommodate the slope. Similarly, if your soil is rocky or sandy, you may need to use different techniques for setting your posts.

Access and Maintenance

Finally, consider how easy it will be to access and maintain your fence once it’s installed. Will you need to mow or weed around it regularly? Will you be able to easily access both sides of the fence for repairs or painting? These factors can help you determine the best location for your fence.

By carefully considering these factors, you can choose the right location for your wooden fence and ensure that it will meet your needs for years to come.

Measuring and Marking the Fence Line

Before you start digging post holes and setting your fence posts, it’s essential to measure and mark out the fence line accurately. This will ensure that your fence is straight and level, and it will also help you estimate the amount of materials you’ll need.

Step 1: Determine the Property Line

The first step in measuring and marking your fence line is to determine your property line. You can usually find this information on your property survey or by contacting your local zoning office. It’s essential to make sure that your fence is entirely on your property and not encroaching on your neighbor’s land.

Step 2: Measure the Length of the Fence Line

Once you know where your property line is, you can measure the length of the fence line. Use a measuring tape to determine the distance between the two endpoints of the fence line. Make sure to account for any corners or changes in direction.

Step 3: Mark the Fence Line

After you’ve measured the length of the fence line, it’s time to mark it out. You can use wooden stakes and string to mark the fence line. Place a stake at each endpoint of the fence line and tie the string between them. Make sure the string is straight and level.

Next, place additional stakes along the fence line at intervals of 8 feet or less. This will help you keep the fence straight and level as you install it. You can also use spray paint or chalk to mark the fence line on the ground.

Step 4: Check for Obstacles

Before you start digging post holes, it’s essential to check for any obstacles that might be in the way. This could include underground utilities, tree roots, or rocks. Use a metal detector to locate any underground utilities, and carefully remove any obstacles that might be in the way.

By following these steps, you can ensure that your fence is installed straight and level and that it’s entirely on your property. Measuring and marking the fence line accurately is an essential part of the fence installation process, so take your time and make sure you get it right.

Digging the Post Holes

Now that you have your plan in hand, it’s time to start digging. This is the most physically demanding part of the job, so make sure you are up for it before you begin. Here are some tips to help make the process go more smoothly:

1. Mark the Post Locations

Using your plan, mark the locations of your fence posts with spray paint or flags. Make sure to measure and space them evenly according to your plan.

2. Get the Right Tools

You will need a pair of post hole diggers or a post hole digging machine to dig the holes. Make sure they are in good working order before you begin.

3. Dig the Holes

Dig the holes to the depth specified in your plan. In general, the holes should be at least 24 inches deep for a 6-foot tall fence. The diameter of the hole should be about three times the width of the post.

4. Set the Posts

Once the holes are dug, it’s time to set the posts. Place the post in the hole and use a level to make sure it is straight. Fill the hole with concrete mix, following the manufacturer’s instructions. Allow the concrete to dry completely before moving on to the next step.

5. Repeat

Repeat the process for each post, making sure they are evenly spaced and level. Once all the posts are in place, you can move on to installing the rails and pickets.

By following these steps, you can ensure that your fence posts are installed securely and evenly. Remember to take breaks and stay hydrated during the digging process to avoid injury.

Setting the Fence Posts

Before you start setting the fence posts, make sure you have all the necessary tools and materials. You will need metal or treated wood fence posts, posthole digger or auger, Quikrete All-Purpose Gravel, gloves, protective eyewear, and dust mask.

Mixing the Concrete

To mix the concrete, follow the instructions on the bag. Usually, you will need to mix one part cement to two parts sand to four parts gravel. Add water gradually and mix until you get a consistency similar to oatmeal.

Securing the Posts

  1. Measure the distance between the posts and mark the spots where you will dig the holes. Make sure the distance is consistent and accurate.
  2. Use the posthole digger or auger to dig the holes. Make sure the holes are deep enough to support the posts. As a general rule, the holes should be at least one-third the length of the posts.
  3. Pour some Quikrete All-Purpose Gravel into the holes to create a solid base for the posts.
  4. Insert the posts into the holes and make sure they are level. You can use a level or a plumb line to check the posts’ alignment.
  5. Fill the holes with the concrete mixture and make sure the posts are securely in place. Use a trowel to smooth the surface of the concrete and slope it away from the posts to prevent water from pooling around them.

Setting the fence posts is a crucial step in building a wooden fence. Make sure you take the time to do it right, and your fence will be sturdy and long-lasting.

Installing the Fence Rails

Now that you have installed the fence posts, it is time to install the fence rails. The fence rails are the horizontal boards that run between the fence posts and support the fence pickets. Here is a step-by-step guide on how to install the fence rails:

  1. Determine the number of rails you need: The number of rails you need will depend on the height of your fence. For a six-foot fence, you will need three rails per section, and for a four-foot fence, you will need two rails per section.
  2. Lay out the rails: Lay out the rails on the ground next to the fence posts. Make sure they are evenly spaced and level.
  3. Mark the posts: Use a pencil or marker to mark the posts where the rails will be installed. Mark the top of the rail on each post.
  4. Install the rails: Starting at one end of the fence, attach the rails to the posts. Use galvanized screws or nails to attach the rails to the posts. Make sure the rails are level and flush with the top of the posts.
  5. Secure the rails: Once the rails are attached to the posts, use a level to ensure they are level. Secure the rails to the posts with additional screws or nails.
  6. Repeat: Repeat the process for each section of the fence until all the rails are installed.

It is important to ensure that the fence rails are level and evenly spaced. This will ensure that the fence pickets are installed correctly and the fence looks uniform. If the rails are not level, the fence pickets will be uneven, and the fence may not be stable.

In conclusion, installing the fence rails is an important step in building a wooden fence. By following the steps outlined above, you can ensure that your fence rails are installed correctly and your fence looks great.

Attaching the Fence Boards

Now that your fence posts are in place and the concrete has dried, it’s time to attach the fence boards. This is the part where your fence really starts to take shape and look like a proper fence.

Tools You’ll Need

Before you get started, make sure you have the following tools on hand:

  • Power drill
  • Screws or nails (depending on your preference)
  • Measuring tape
  • Level
  • Saw (if you need to cut any fence boards to size)

Step-by-Step Instructions

  1. Start at one end of your fence and work your way down. Place the first fence board against the first fence post, making sure it’s level.
  2. Drill pilot holes through the fence board and into the fence post. This will prevent the wood from splitting when you attach it.
  3. Attach the fence board to the fence post using screws or nails. Repeat this process for each fence board, making sure they’re evenly spaced and level.
  4. If you need to cut any fence boards to size, measure twice and cut once. Use a saw to make your cuts and sand any rough edges.
  5. Once all of your fence boards are attached, step back and admire your handiwork! Your new fence is now complete.

Tips and Tricks

  • If you’re using screws instead of nails, make sure they’re long enough to go through the fence board and into the fence post.
  • Use a level to make sure your fence boards are straight. A crooked fence is not only unsightly, it’s also less sturdy.
  • If you’re having trouble getting your fence boards to stay level, try using a temporary brace. Simply attach a piece of wood between two fence posts to hold your fence boards in place while you attach them.
  • If you’re using pressure-treated wood, wait a few weeks before staining or painting your fence. This will allow the wood to dry out and absorb the stain or paint better.

Applying a Protective Finish

Once you have installed your wooden fence, it is important to apply a protective finish to ensure it lasts for many years. A protective finish will not only enhance the natural beauty of the wood but also protect it from the elements, such as rain, sun, and wind.

Choosing the Right Finish

Before applying any finish, it is important to choose the right one for your fence. There are several types of finishes available, including stains, paints, and sealers. Each has its own benefits and drawbacks, so it is important to consider your specific needs.

Stains are a popular choice as they enhance the natural beauty of the wood while providing protection from the elements. Paints, on the other hand, offer a wider range of color options and can provide a more uniform appearance. Sealers are a good choice if you want to maintain the natural color of the wood while providing protection.

Applying the Finish

Once you have chosen the right finish for your fence, it is time to apply it. Here are some steps to follow:

  1. Clean the fence: Before applying any finish, make sure the fence is clean and free of dirt, debris, and mildew. Use a power washer or a stiff-bristled brush to clean the fence thoroughly.
  2. Allow the fence to dry: After cleaning, allow the fence to dry completely before applying any finish. This may take a few days, depending on the weather conditions.
  3. Apply the finish: Using a brush, roller, or sprayer, apply the finish to the fence. Make sure to apply it evenly and cover all surfaces, including the ends of the boards.
  4. Allow the finish to dry: After applying the finish, allow it to dry completely before touching or using the fence. This may take a few days, depending on the type of finish and weather conditions.
  5. Apply a second coat (optional): Depending on the type of finish, you may need to apply a second coat for optimal protection and appearance. Follow the manufacturer’s instructions for applying a second coat.

By following these steps and choosing the right finish, you can ensure your wooden fence is protected and looks great for years to come.

Maintaining Your Wooden Fence

Once you’ve installed your wooden fence, it’s important to maintain it properly to ensure its longevity and keep it looking great. Here are some tips on how to maintain your wooden fence:

Apply a Protective Coating

Applying a protective coating to your wooden fence is essential to protect it from the elements. A wood preservative can help prevent rot and decay, and a water-repellent sealant can help protect it from water damage. You can find these products at your local home improvement or hardware store. Apply the coating according to the manufacturer’s instructions, and be sure to reapply it every few years to keep your fence in good condition.

Clean Your Fence Regularly

Cleaning your wooden fence regularly can help keep it looking great and prevent dirt and debris from building up. Use a soft-bristled brush or a pressure washer to remove any dirt or grime from the surface of your fence. Be sure to use a pressure washer with a low PSI to avoid damaging the wood. You can also use a mild detergent or a specialized fence cleaner to remove any stubborn stains.

Inspect Your Fence for Damage

Regularly inspect your fence for any signs of damage, such as cracks, warping, or rot. If you notice any damage, repair it as soon as possible to prevent it from getting worse. Replace any damaged or rotten boards, and reinforce any weak areas with additional support.

Trim Back Vegetation

Vegetation growing near your wooden fence can cause damage over time. Trim back any plants or vines that are growing too close to your fence to prevent them from causing damage or blocking airflow. This will help keep your fence dry and prevent moisture from building up, which can lead to rot and decay.

By following these tips, you can help ensure the longevity and beauty of your wooden fence for years to come.
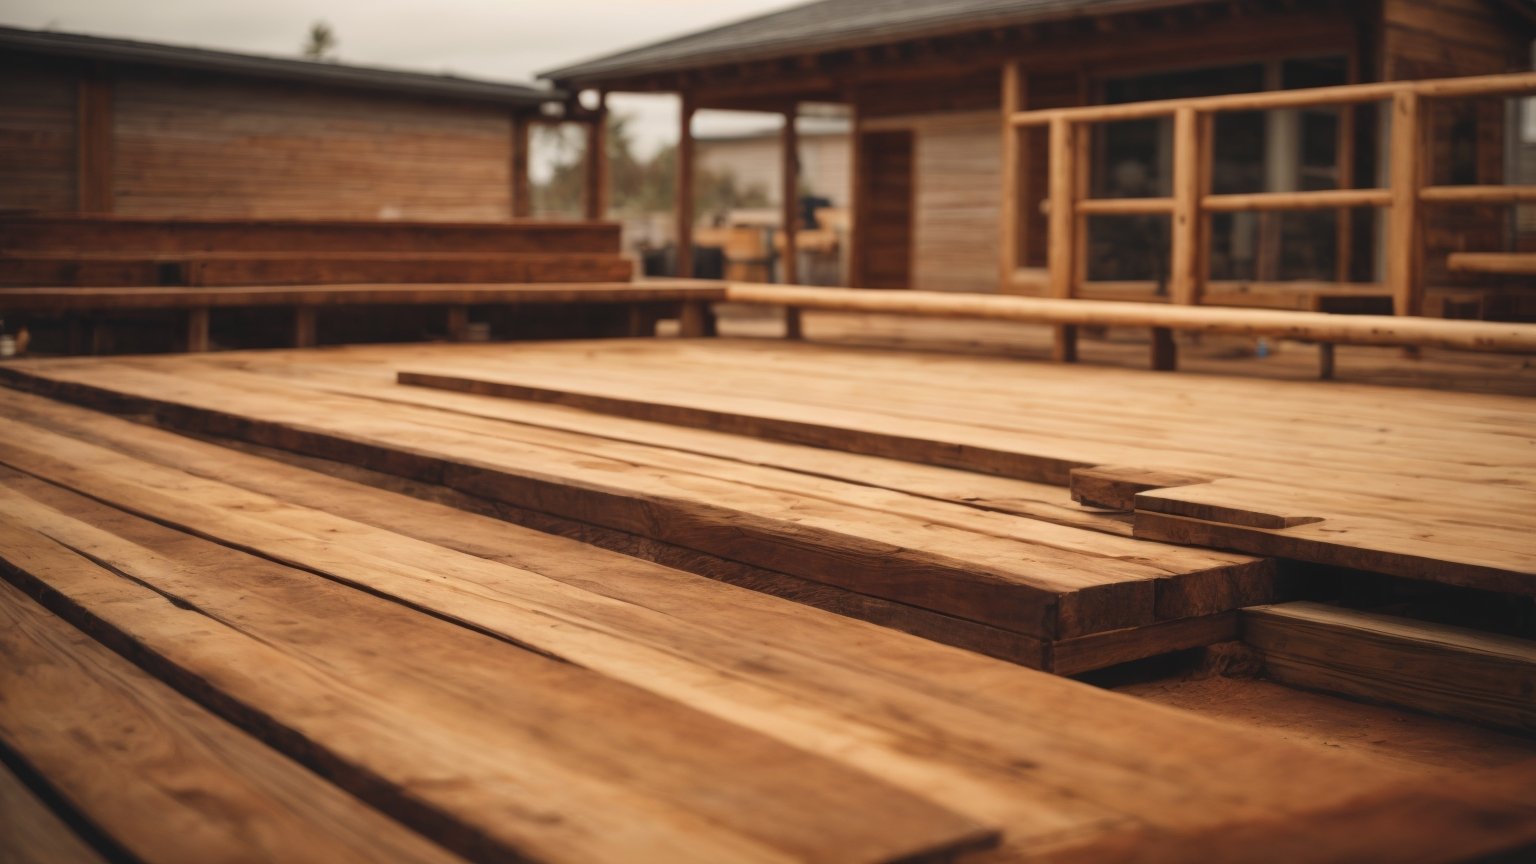
how-to-build-outdoor-wooden-steps-a-beginners-guide-2

How to Build Outdoor Wooden Steps: A Beginner's Guide

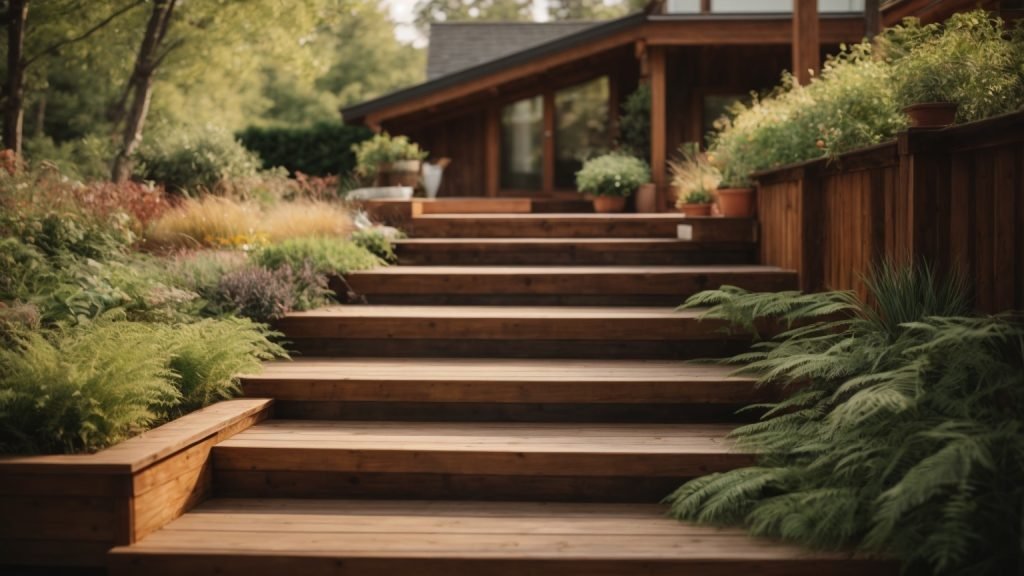
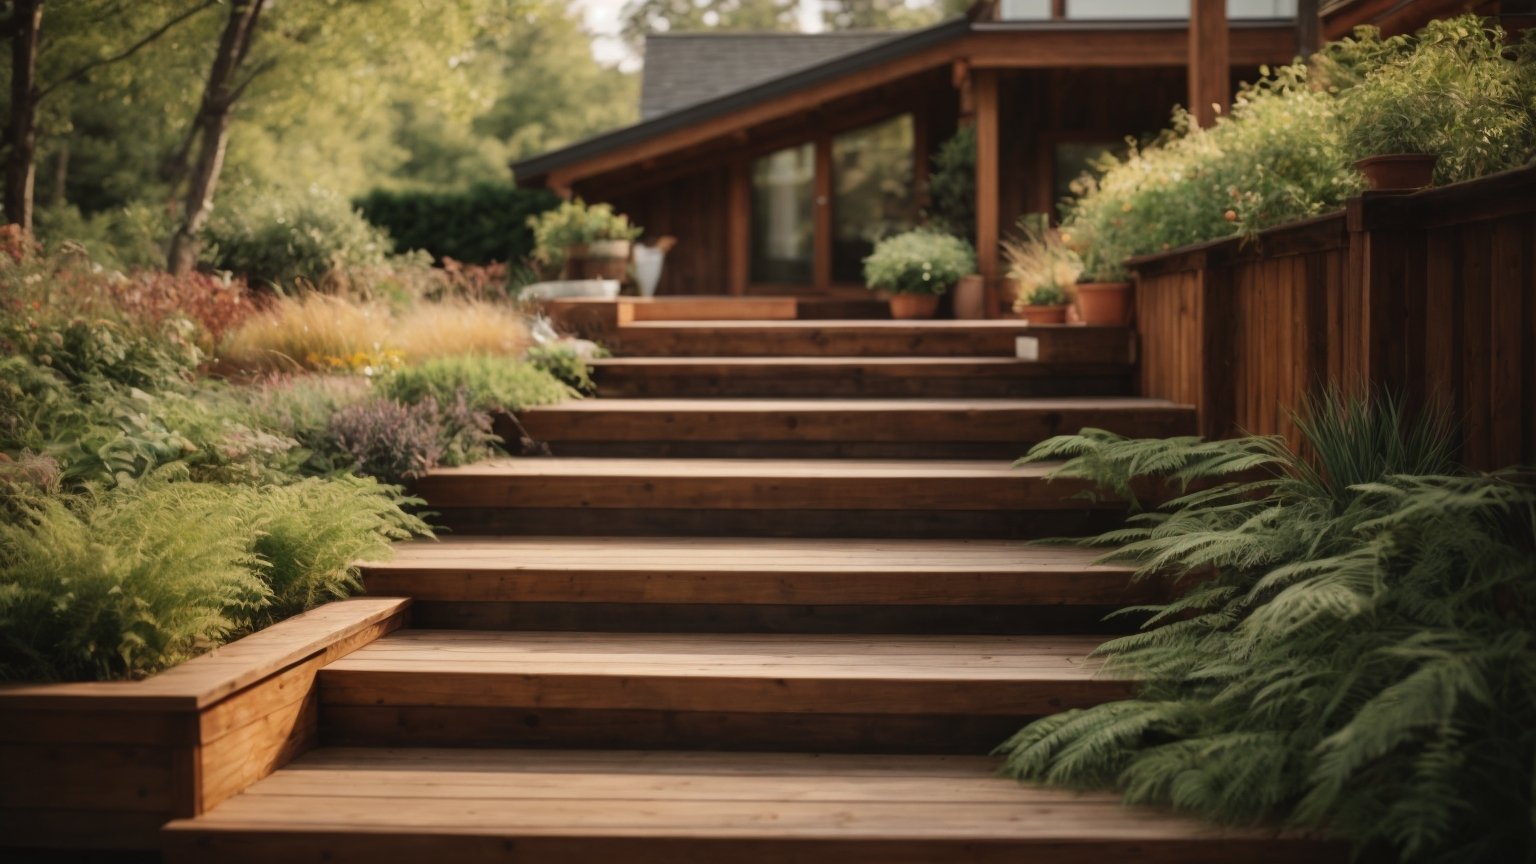
If you’re looking to spruce up your entryway, building outdoor wooden steps is a great way to do it. Not only do they add visual appeal, but they also provide a safe and sturdy way to access your home. However, building outdoor wooden steps can seem like a daunting task, especially if you’re not a seasoned DIYer. But fear not, with the right tools and a little know-how, you can build beautiful and functional outdoor wooden steps in no time.

Before you get started, it’s important to prepare the area where the steps will be located. This involves removing any shrubs or plants from the spot and leveling the ground. You’ll also need to build up low spots with fill dirt so that the area slopes away from the house. Once the area is prepped, it’s time to start building the steps. There are a few different methods you can use, depending on your skill level and the design you’re going for. In this article, we’ll cover the basics of building outdoor wooden steps, so you can tackle this project with confidence.

Understanding the Basics

how-to-build-outdoor-wooden-steps-a-beginners-guide-2

If you’re looking to add some charm to your outdoor space, building wooden steps is a great way to do so. Not only do they provide functionality, but they can also enhance the look of your home. In this section, we’ll cover the basics of building outdoor wooden steps.

Materials Needed

Before you start building, make sure you have all the necessary materials. Here’s a list of what you’ll need:

Materials
Pressure-treated lumber
Gravel
Concrete
Wood screws
Wood glue
Stain or paint

Pressure-treated lumber is the best type of wood to use for outdoor steps because it’s resistant to rot and decay. Gravel and concrete will be used to create a stable foundation for the steps. Wood screws and glue will be used to secure the steps together. Finally, you’ll need stain or paint to protect the wood from the elements.

Tools Required

In addition to the materials, you’ll need a few tools to complete the project. Here’s a list of what you’ll need:

  • Circular saw
  • Jigsaw
  • Hammer
  • Drill
  • Level
  • Tape measure
  • Square
  • Shovel
  • Wheelbarrow
  • Safety glasses
  • Work gloves

The circular saw and jigsaw will be used to cut the lumber to the appropriate size and shape. The hammer and drill will be used to attach the steps together. The level, tape measure, and square will be used to ensure the steps are level and square. The shovel and wheelbarrow will be used to move the gravel and concrete. Finally, safety glasses and work gloves are essential for protecting your eyes and hands during the construction process.

Now that you have an idea of what materials and tools you’ll need, let’s move on to the next section to learn how to prepare the area for building the steps.

Site Preparation

Before starting to build outdoor wooden steps, you need to prepare the site properly. Here are the steps you should follow:

Step 1: Choose the Location

The first thing you need to do is choose the location where you want to build your outdoor wooden steps. It could be alongside the house, a porch, or a deck. Make sure to choose a location that is safe and easy to access.

Step 2: Clear the Area

Once you have chosen the location, you need to clear the area of any shrubs, plants, or debris. This will ensure that you have a clear and level area to work with. Use a shovel or a rake to remove any debris and level the ground.

Step 3: Build up Low Spots

If the area where you want to build your outdoor wooden steps is not level, you need to build up the low spots with fill dirt. This will ensure that the area slopes away from the house and prevent water from accumulating around the steps.

Step 4: Mark the Location

Use a measuring tape and stakes to mark the location where you want to build your outdoor wooden steps. This will help you to ensure that the steps are level and evenly spaced.

Step 5: Check for Utility Lines

Before you start digging, make sure to check for any utility lines such as gas, water, or electricity. You can call your local utility company to request a free utility locate service.

By following these steps, you can prepare the site properly for building your outdoor wooden steps.

Designing Your Steps

designing-your-steps

Before you start building your outdoor wooden steps, it’s important to consider the design of your steps. Here are a few things to keep in mind when designing your steps:

Step Size and Height

The size and height of your steps are essential for both safety and comfort. The general rule of thumb is that each step should be no higher than 7.5 inches and no deeper than 11 inches. If your steps are too steep or too shallow, it can make it difficult to climb up or down the stairs.

Number of Steps

The number of steps you need will depend on the height of your deck or porch. To determine the number of steps you need, divide the height of your deck or porch by the height of each step. For example, if your deck is 30 inches high and each step is 7.5 inches high, you will need four steps.

Materials

When it comes to building your outdoor wooden steps, you have several options for materials. Pressure-treated lumber is a popular choice because it is durable and weather-resistant. Cedar and redwood are also good choices because they are naturally resistant to decay and insects. If you want a more modern look, you can use metal or concrete for your steps.

Style

The style of your outdoor wooden steps should match the style of your home and landscape. You can choose from a variety of styles, including straight, curved, or spiral. You can also add decorative elements, such as railings, to enhance the look of your steps.

By considering these factors, you can design outdoor wooden steps that are safe, comfortable, and aesthetically pleasing.

Cutting the Wood

Once you have measured and marked the wooden pieces for your outdoor steps, it’s time to cut them. Here are some tips to make the cutting process easier and more efficient:

Use the Right Tools

To cut wooden pieces for your steps, you will need a circular saw, a handsaw, or a jigsaw. A circular saw is the most efficient tool for cutting long pieces of wood, while a handsaw or a jigsaw is better for cutting shorter pieces or making angled cuts.

Make sure the saw blade is sharp and in good condition before you start cutting. A dull blade can cause the wood to splinter or burn, which will ruin the cut and may damage the saw.

Measure Twice, Cut Once

Before you start cutting, double-check your measurements to make sure they are accurate. Measure twice, cut once is a good rule of thumb to follow to avoid wasting wood and time.

Cut Straight

To make straight cuts, use a straightedge or a guide to keep the saw blade on track. You can use a piece of scrap wood as a guide or purchase a commercial saw guide.

Cut at the Right Angle

If your steps require angled cuts, use a protractor or a bevel gauge to measure the angle accurately. Set the saw blade to the correct angle and make a test cut on a scrap piece of wood before cutting the actual piece.

Sand the Cut Edges

After you have cut the wooden pieces, sand the cut edges to remove any rough spots or splinters. This will make the steps safer to use and give them a more finished look.

By following these tips, you can cut the wooden pieces for your outdoor steps accurately and efficiently.

Assembling the Steps

Once you have completed the previous steps of preparing the area and cutting the stringers and treads, it’s time to assemble the steps. This is where you will put all the pieces together to create a sturdy and safe set of outdoor wooden steps. Here’s how to do it:

Joining the Stringers

The first step in assembling your wooden steps is to join the stringers. Stringers are the diagonal pieces that support the treads and risers. To join the stringers, you will need to use a metal angle bracket. Here’s how to do it:

  1. Position the stringers so that they are parallel and even with each other.
  2. Place the metal angle bracket over the stringers where they meet at the bottom.
  3. Use a drill to screw the bracket into place, using wood screws that are at least 2 inches long.
  4. Repeat this process for each step.

Attaching the Treads

Once the stringers are joined, it’s time to attach the treads. Treads are the horizontal pieces that you step on when walking up or down the stairs. Here’s how to attach them:

  1. Place a tread on top of the stringers, making sure that it is even and centered.
  2. Use a drill to screw the tread into place, using wood screws that are at least 2 inches long.
  3. Repeat this process for each step.

It’s important to note that you should leave a gap of about 1/4 inch between each tread to allow for water drainage. You can use a piece of scrap wood as a spacer to ensure that the gap is consistent.

Once you have attached all of the treads, your outdoor wooden steps are complete! You can add a coat of sealant or paint to protect the wood and enhance its appearance. With proper maintenance, your wooden steps will provide safe and reliable access to your home for years to come.

Installing the Steps

Now that you have built your outdoor wooden steps, it is time to install them. Here are the steps to follow:

  1. Start by measuring the distance between the top of the stairs and the bottom of the landing. This will give you the length of the stringers needed to support the steps.
  2. Cut the stringers to the appropriate length and attach them to the landing using metal brackets. Make sure the stringers are level and secure.
  3. Next, attach the treads to the stringers using screws or nails. Be sure to space them evenly and make sure they are level.
  4. Finally, attach the risers to the back of each tread using screws or nails. This will give your steps a finished look and prevent debris from getting trapped between the treads.
  5. If desired, you can add a railing to your steps for safety. This can be done using metal brackets or by attaching the railing directly to the stringers.

Congratulations! You have successfully built and installed your outdoor wooden steps. Enjoy your new entryway and the added curb appeal it brings to your home.

Safety Measures

When building outdoor wooden steps, it’s important to prioritize safety to avoid accidents and injuries. Here are some safety measures you should keep in mind:

Use Protective Gear

Before you start building, it’s important to wear the right protective gear. This includes safety glasses, gloves, and a dust mask. Safety glasses will protect your eyes from flying debris, while gloves will protect your hands from splinters and cuts. A dust mask will prevent you from inhaling sawdust and other particles that can cause respiratory problems.

Check the Weather

Make sure to check the weather forecast before you start building. Avoid working on rainy or windy days, as this can make it difficult to handle tools and materials. Wet surfaces can also be slippery and hazardous, so make sure the ground is dry and stable before you start building.

Use the Right Tools

Using the right tools is essential for safety and efficiency. Make sure to use sharp blades and bits, and keep your tools in good condition. Dull or damaged tools can cause accidents and injuries. Also, make sure to use the right tool for the job. Using the wrong tool can cause damage to your materials and increase the risk of accidents.

Follow Building Codes

Make sure to follow building codes and regulations in your area. This will ensure that your steps are safe and up to code. Building codes may vary depending on your location, so make sure to check with your local authorities before you start building.

Take Breaks

Building outdoor wooden steps can be a physically demanding task. Make sure to take breaks and stay hydrated to avoid exhaustion and fatigue. Stretching before and after working can also help prevent muscle strains and injuries.

By following these safety measures, you can ensure that your outdoor wooden steps are built safely and efficiently.

Maintaining Your Wooden Steps

Once you’ve built your outdoor wooden steps, it’s important to maintain them to ensure they last as long as possible. Here are some tips for maintaining your wooden steps:

Regular Cleaning

Regular cleaning is essential to keep your wooden steps looking good and to prevent the buildup of dirt and debris. You can use a broom to sweep away loose dirt and debris, and a stiff-bristled brush to scrub away any stubborn dirt or stains. You can also use a pressure washer on a low setting to clean your steps, but be careful not to use too much pressure as this can damage the wood.

Staining and Sealing

Staining and sealing your wooden steps can help to protect them from the elements and prevent them from rotting. You should stain and seal your steps every 2-3 years, or as needed. Before applying stain or sealer, make sure your steps are clean and dry. You can use a brush or sprayer to apply the stain or sealer, and make sure to follow the manufacturer’s instructions.

Repairing Damage

If your wooden steps become damaged, it’s important to repair them as soon as possible. Small cracks or splits can be filled with wood filler, while larger damage may require replacing the affected boards. You should also check your steps regularly for signs of rot, and replace any rotting boards as needed.

Preventative Measures

There are also some preventative measures you can take to help maintain your wooden steps. For example, you can place mats or rugs on your steps to prevent dirt and debris from accumulating. You can also install a roof or awning over your steps to protect them from the elements.

By following these tips, you can help to ensure that your outdoor wooden steps remain safe, sturdy, and attractive for years to come.

how-to-build-wooden-steps-a-beginners-guide-2

How to Build Wooden Steps: A Beginner's Guide

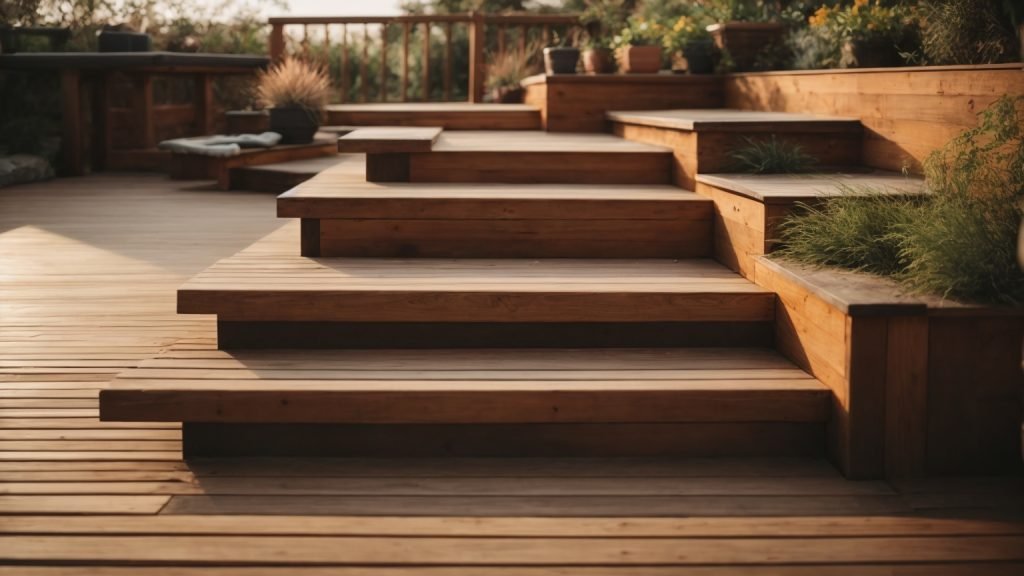
Are you looking to add some charm and functionality to your outdoor space? Building wooden steps can be a great way to enhance the look of your yard and provide easy access to different levels of your property. Whether you’re looking to build steps for a deck, patio, or garden, this article will provide you with the basics of how to build wooden steps.

Before you start building, it’s important to prepare the area where the steps will be located. This means removing any shrubs or plants and ensuring the ground is level. You may need to build up low spots with fill dirt so the area slopes away from your house. Once you’ve prepared the area, you’ll need to determine the height and width of the steps. This will depend on the location and purpose of the steps, as well as the materials you’ll be using.

Understanding the Basics of Wooden Steps

how-to-build-wooden-steps-a-beginners-guide-2

When it comes to building wooden steps, there are a few things you need to keep in mind. In this section, we’ll cover the basics of wooden steps, including the types of wood you can use and the safety measures you need to take.

Types of Wood

When it comes to choosing the right type of wood for your steps, there are a few things you need to consider. First, you want to choose a wood that is strong and durable, as your steps will need to support a lot of weight over time. Some of the most popular types of wood for steps include:

  • Cedar: A popular choice for outdoor steps, cedar is a durable and weather-resistant wood that is also resistant to insects and rot.
  • Redwood: Another popular choice for outdoor steps, redwood is a durable and weather-resistant wood that is also resistant to insects and rot.
  • Pressure-treated pine: A popular choice for indoor and outdoor steps, pressure-treated pine is a durable and affordable wood that is treated to resist insects and rot.

When choosing your wood, make sure to choose a type that is appropriate for your climate and the location of your steps.

Safety Measures

When building wooden steps, safety should always be your top priority. Here are a few safety measures you should take:

  • Use a level: Make sure your steps are level and evenly spaced to prevent tripping hazards.
  • Use non-slip treads: Consider using non-slip treads on your steps to prevent slipping, especially if your steps will be used in wet or icy conditions.
  • Install handrails: Handrails can provide additional support and stability when using your steps, especially for children and elderly individuals.
  • Use appropriate tools and equipment: Make sure you have the right tools and equipment for the job, and use them safely and appropriately.

By following these basic guidelines, you can ensure that your wooden steps are safe and durable for years to come.

Tools and Materials Needed

Building wooden steps can be a fun and rewarding DIY project. Before you get started, it’s important to gather all the necessary tools and materials. Here’s what you’ll need:

Tools

  • Circular saw
  • Jigsaw
  • Power drill
  • Hammer
  • Measuring tape
  • Carpenter’s square
  • Level
  • Safety glasses
  • Work gloves

Materials

  • Pressure-treated lumber (2x12s for stringers, 2x6s for treads, and 4x4s for posts)
  • Gravel or crushed stone
  • Concrete mix
  • Galvanized screws or nails
  • Post spikes or concrete anchors

Make sure to choose high-quality materials that are suitable for outdoor use. Pressure-treated lumber is a popular choice because it is durable and resistant to rot and insect damage. You’ll also need gravel or crushed stone to create a stable base for your steps, as well as concrete mix to anchor the posts.

In terms of tools, a circular saw and jigsaw are essential for cutting the lumber to size. A power drill is necessary for drilling pilot holes and attaching the pieces together with screws or nails. A measuring tape and carpenter’s square will help ensure accurate cuts and angles. Don’t forget to wear safety glasses and work gloves to protect yourself while working with power tools.

By gathering all the necessary tools and materials before you start, you’ll be well-prepared to tackle your wooden step project with confidence.

Designing Your Wooden Steps

When building wooden steps, it’s important to consider both functionality and aesthetics. In this section, we’ll cover the key factors to consider when designing your wooden steps.

Step Measurements

Before you start building your wooden steps, you need to measure the area where they will be installed. Here are the key measurements you’ll need to take:

  • Total Rise: Measure the height from the ground to the top of where the steps will end. This will determine the number of steps you need to build.
  • Total Run: Measure the horizontal distance from the bottom of the steps to the top.
  • Tread Depth: This is the horizontal depth of each step. It should be at least 10 inches for comfort and safety.
  • Riser Height: This is the vertical height of each step. It should be between 6 and 8 inches for safety and ease of use.

Once you have these measurements, you can start designing your steps.

Choosing the Design

choosing-the-design

When it comes to designing your wooden steps, there are a few different options to consider. Here are some popular designs:

  • Straight Steps: These are the most basic design, with steps that go straight up and down. They’re easy to build and work well in most situations.
  • L-Shaped Steps: These steps have a landing or platform halfway up, which makes them easier to climb and can add visual interest to your design.
  • U-Shaped Steps: These steps have two landings or platforms, making them ideal for longer staircases. They can be more difficult to build, but they offer a unique and impressive look.

When choosing your design, consider the overall style of your home and the surrounding landscape. You want your wooden steps to complement your property and enhance its curb appeal.

By taking accurate measurements and choosing a design that fits your needs and style, you can create beautiful and functional wooden steps that will last for years to come.

Building the Steps

When it comes to building wooden steps, there are three main steps you need to follow: cutting the wood, assembling the steps, and securing the steps. Here’s a breakdown of each step:

Cutting the Wood

Before you can start assembling your wooden steps, you’ll need to cut the wood to the right size. To do this, you’ll need a saw, a measuring tape, and a pencil. Here’s what you need to do:

  1. Measure the height and width of the area where you want to install the steps.
  2. Cut two pieces of wood to the width of the area where you want to install the steps.
  3. Cut two more pieces of wood to the height of the area where you want to install the steps.
  4. Cut several smaller pieces of wood to the same width as the two larger pieces. These will be used as the steps themselves.

Assembling the Steps

Once you’ve cut all of the wood to the right size, it’s time to start assembling the steps. Here’s what you need to do:

  1. Lay the two larger pieces of wood on the ground where you want to install the steps. These will be the sides of the steps.
  2. Place the smaller pieces of wood on top of the larger pieces, evenly spaced apart. These will be the steps themselves.
  3. Use a level to make sure each step is level before moving on to the next step.
  4. Once you’ve placed all of the steps, use a drill to attach them to the larger pieces of wood on either side.

Securing the Steps

After you’ve assembled the steps, it’s important to make sure they’re secure. Here’s what you need to do:

  1. Use wood glue to attach each step to the larger pieces of wood on either side.
  2. Once the glue has dried, use screws to attach each step to the larger pieces of wood on either side.
  3. Use a level to make sure the steps are still level after you’ve secured them.

By following these three steps, you’ll be able to build wooden steps that are sturdy, secure, and safe to use.

Finishing Touches

Once you have completed building your wooden steps, it’s time to give them a finishing touch. This will not only make them look more attractive but also protect them from the elements. Here are some steps you can take to finish your wooden steps.

Sanding the Steps

Before applying any finish, it’s important to sand your wooden steps. This will help smooth out any rough spots and ensure that the finish adheres properly. Start by using a coarse grit sandpaper, such as 60-grit, to remove any rough spots or splinters. Then, move on to a finer grit sandpaper, such as 120-grit, to smooth out the surface of the wood.

Make sure to sand in the direction of the grain to avoid damaging the wood. You can use a sanding block or an orbital sander to make the job easier. Once you’re done sanding, wipe down the steps with a damp cloth to remove any dust.

Applying the Finish

There are several types of finishes you can use on your wooden steps, including paint, stain, or varnish. Each has its own advantages and disadvantages, so choose the one that best suits your needs.

If you want to paint your steps, make sure to use a high-quality exterior paint that is designed for wood surfaces. Apply the paint in thin, even coats, and allow each coat to dry completely before applying the next.

If you prefer a natural look, you can use a stain to enhance the natural beauty of the wood. Choose a stain that is designed for exterior use and apply it in thin coats with a brush or rag. Make sure to wipe off any excess stain with a clean cloth.

Finally, if you want to protect your steps from the elements, you can use a varnish or sealer. These products will help prevent water damage and protect the wood from UV rays. Apply the varnish or sealer in thin coats, and allow each coat to dry completely before applying the next.

With these finishing touches, your wooden steps will look great and last for years to come.

Maintenance Tips

Taking care of your wooden steps is essential to ensure their longevity and safety. Here are some maintenance tips to keep them in good condition for years to come.

Regular Cleaning

Regular cleaning of your wooden steps is crucial to maintain their appearance and prevent the buildup of dirt and debris. Here are some steps to follow:

  • Sweep the steps regularly to remove dirt, leaves, and other debris.
  • Use a stiff-bristled brush to scrub the steps with a solution of mild soap and water.
  • Rinse the steps thoroughly with water and allow them to dry completely before use.
  • Avoid using a pressure washer as it can damage the wood.

Wood Treatment

Wooden steps are prone to damage from moisture, sunlight, and insects. To prevent this, it is essential to treat them regularly. Here are some tips to follow:

  • Apply a wood preservative to protect the wood from moisture and insects. Follow the manufacturer’s instructions for application and frequency of treatment.
  • Apply a coat of exterior wood sealer or stain to protect the wood from sunlight and weather damage. Choose a product that is suitable for your climate and follow the manufacturer’s instructions for application and frequency of treatment.
  • Inspect the steps regularly for signs of damage such as cracks, splinters, and rot. Repair any damage promptly to prevent further deterioration.

By following these maintenance tips, you can keep your wooden steps in good condition and ensure their safety for you and your family.

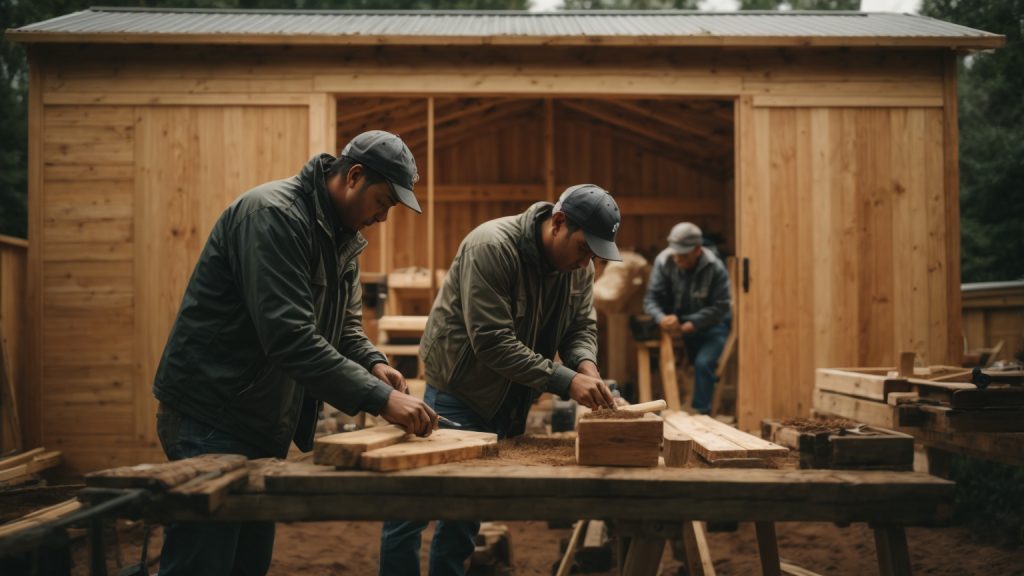
building-a-wooden-shed

How to Build a Wooden Shed: A Beginner's Guide

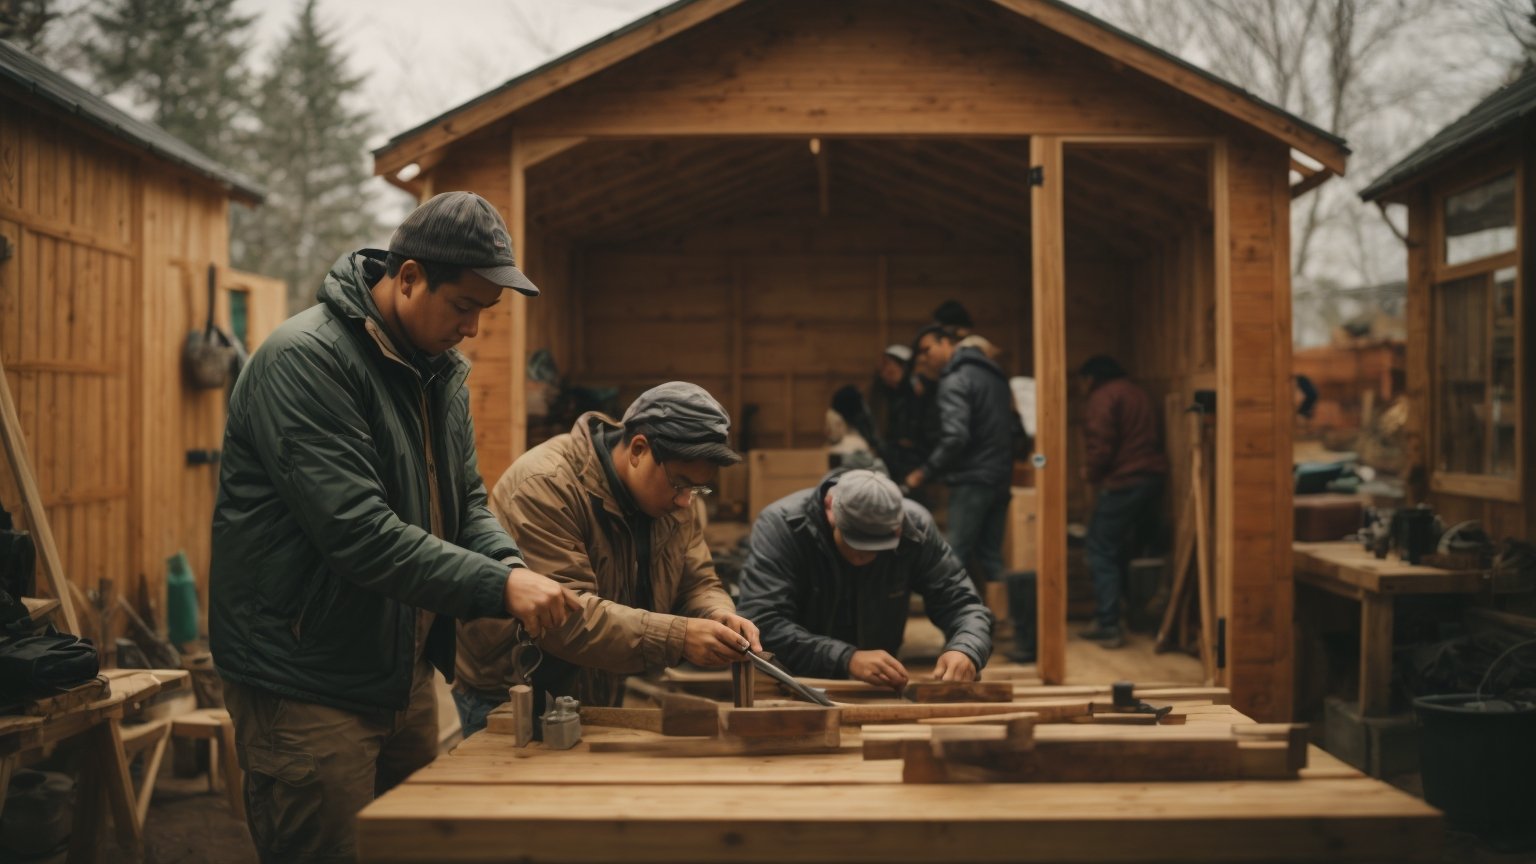
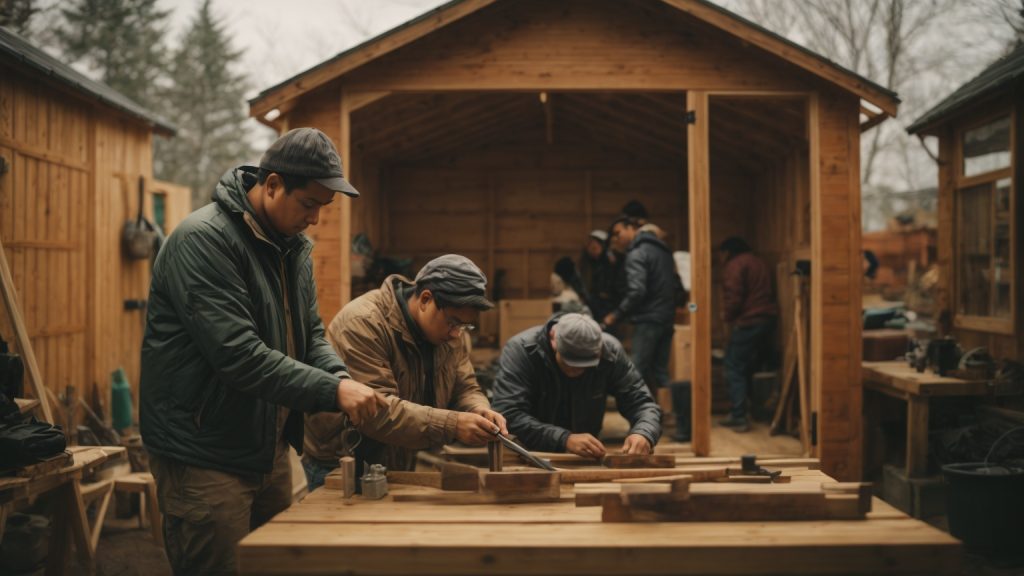
Building a wooden shed can be a fun and rewarding project for any DIY enthusiast. Whether you need extra storage space or a workshop, a wooden shed is a great addition to any backyard. In this article, we will provide you with step-by-step instructions on how to build a wooden shed from scratch.

Before you begin building your wooden shed, you will need to determine the size and location of your shed. Consider the purpose of your shed and the amount of space you have available in your backyard. Once you have determined the size and location of your shed, you can begin gathering the necessary materials and tools. In the following paragraphs, we will provide you with a list of materials and tools you will need to build your wooden shed.

Why Build a Wooden Shed?

building-a-wooden-shed

When it comes to building a shed, there are many different materials to choose from. However, wood remains one of the most popular choices for many reasons. In this section, we will explore why building a wooden shed might be the right choice for you.

Aesthetics

One of the primary reasons people choose wood as their shed building material is aesthetics. Wood has a natural beauty that can’t be replicated by other materials. It adds warmth and character to any outdoor space, making it an ideal choice for those who want their shed to blend in with the surrounding environment.

Versatility

Wooden sheds are incredibly versatile and can be customized to suit your specific needs. Whether you need a small storage shed or a larger workshop, wood can be used to create a structure that fits your requirements. Additionally, wood can be painted or stained to match your home or other outdoor structures, making it a great choice for those who want a cohesive look.

Durability

While it’s true that wood requires more maintenance than other materials, it’s also incredibly durable. With proper care and maintenance, a wooden shed can last for decades. Additionally, wood is a renewable resource, making it an environmentally friendly choice.

Affordability

Compared to other materials, wood is relatively affordable. While there are certainly more expensive options out there, wood is a great choice for those who want a quality shed without breaking the bank. Additionally, wood is easy to work with, making it a great choice for those who want to build their shed themselves.

In conclusion, there are many great reasons to choose wood as your shed building material. From its natural beauty to its affordability, wood is a versatile and durable choice that will provide you with years of use and enjoyment.

Choosing the Right Wood

When building a wooden shed, choosing the right type of wood is crucial to ensure the longevity and durability of your structure. In this section, we will discuss the different types of wood and wood treatment options available to help you make an informed decision.

Types of Wood

There are several types of wood that can be used for building a shed. Here are some of the most common options:

  • Cedar: Cedar is a popular choice for shed building because of its natural resistance to rot and insects. It also has a pleasant aroma and is visually appealing with its reddish-brown color.
  • Pine: Pine is a cost-effective option for shed building. It is readily available and easy to work with. However, it is not as durable as other types of wood and requires regular maintenance to prevent rot and insect damage.
  • Redwood: Redwood is a premium option for shed building because of its natural resistance to decay and insects. It also has a beautiful color and grain pattern. However, it is more expensive than other types of wood.
  • Pressure-treated lumber: Pressure-treated lumber is a popular choice for shed building because it is treated with chemicals to resist rot and insect damage. It is also affordable and readily available. However, it may not be suitable for certain applications, such as interior framing.

Wood Treatment

In addition to choosing the right type of wood, it is important to consider wood treatment options to further protect your shed from the elements. Here are some common wood treatment options:

  • Paint: Painting your shed can help protect it from moisture and UV rays. It also adds a decorative touch and can be easily changed if desired.
  • Stain: Staining your shed can enhance the natural beauty of the wood while also providing protection from moisture and UV rays. It is a popular choice for cedar and redwood sheds.
  • Sealant: Applying a sealant to your shed can help prevent moisture penetration and rot. It is a good option for pressure-treated lumber and pine sheds.

Remember to always follow the manufacturer’s instructions when applying wood treatment products. With the right type of wood and proper treatment, your wooden shed can provide years of use and enjoyment.

Designing Your Shed

When it comes to designing your wooden shed, there are a few important factors to consider. In this section, we’ll discuss the size and layout of your shed, as well as the placement of doors and windows, and the design of your shed’s roof.

Size and Layout

The size and layout of your shed will depend on a few key factors. First, consider how much storage space you need. This will help you determine the overall size of your shed. You should also take into account the available space in your backyard and any zoning regulations that may apply in your area.

Once you have determined the overall size of your shed, consider the layout. Think about how you will use the space inside the shed and plan accordingly. You may want to include shelves or workbenches, for example, or leave space for larger items like lawn mowers or bicycles.

Door and Window Placement

The placement of doors and windows in your shed is important for both functionality and aesthetics. You should consider how you will enter and exit the shed, as well as how much natural light you want to let in.

When it comes to doors, consider whether you want a single or double door, and where you want it to be located. A double door may be more convenient for larger items, while a single door may be more space-efficient.

For windows, think about how many you want and where you want them to be located. Windows can provide natural light and ventilation, but too many windows may compromise the structural integrity of your shed.

Roof Design

The design of your shed’s roof is an important consideration, both for practical and aesthetic reasons. A sloped roof is recommended for shedding rainwater and snow, and can also give your shed a more traditional look.

You should also consider the type of roofing material you want to use. Asphalt shingles are a popular option, but you may also want to consider metal roofing or even a thatched roof for a more unique look.

Overall, designing your wooden shed requires careful consideration of several key factors. By taking the time to plan out your shed’s size, layout, door and window placement, and roof design, you can create a functional and attractive addition to your backyard.

Gathering Materials

When it comes to building a wooden shed, gathering the right materials is essential. In this section, we’ll cover the three main categories of materials you’ll need: wood, tools, and fasteners and hardware.

Wood

The type of wood you choose for your shed will affect its durability, appearance, and cost. Here are some common types of wood used for shed construction:

Type of Wood Pros Cons
Pressure-treated lumber Resistant to rot and insects More expensive than untreated lumber
Cedar Naturally resistant to rot and insects More expensive than other types of wood
Pine Affordable and easy to work with Not as durable as other types of wood

In addition to the type of wood, you’ll also need to consider the size and shape of the boards you’ll be using. Common sizes include 2x4s, 2x6s, and 4x4s.

Tools

Having the right tools on hand will make your shed-building project much easier and more efficient. Here are some essential tools you’ll need:

  • Circular saw
  • Power drill
  • Hammer
  • Level
  • Tape measure
  • Square
  • Chalk line
  • Sawhorses
  • Safety glasses
  • Work gloves

In addition to these basic tools, you may also need specialized tools depending on the design of your shed. For example, if you plan to install a metal roof, you’ll need a metal-cutting blade for your saw.

Fasteners and Hardware

Fasteners and hardware are the small but important components that hold your shed together. Here are some common types you’ll need:

  • Nails: Used to attach boards together
  • Screws: Used for a stronger hold than nails
  • Bolts: Used to attach larger pieces of wood together
  • Hinges: Used to attach doors to the frame
  • Latches: Used to keep doors closed
  • Roofing nails: Used to attach shingles or other roofing materials
  • L-brackets: Used to reinforce corners and joints

Make sure to choose fasteners and hardware that are appropriate for the type of wood you’re using and the design of your shed. For example, if you’re using pressure-treated lumber, you’ll need to use galvanized or stainless steel fasteners to prevent corrosion.

Building the Foundation

building-the-foundation


Before you start building your wooden shed, you need to create a sturdy foundation that will keep it level and protected from moisture. In this section, we’ll go over the three main steps of building a wooden shed foundation: choosing the location, leveling the ground, and laying the foundation.

Choosing the Location

The first step in building a wooden shed foundation is choosing the location. You want to find a spot that is level, dry, and away from any trees or other structures that could damage the shed. Make sure to also check with your local building codes to ensure you are following any regulations.

Leveling the Ground

Once you have chosen the location for your wooden shed, you need to level the ground. This is an important step to ensure that your shed will be stable and secure. You can use a shovel, rake, or other tools to remove any rocks, debris, or vegetation that may be in the way. You can also use a level to check that the ground is even and adjust as necessary.

Laying the Foundation

After you have leveled the ground, it’s time to lay the foundation. There are several different types of foundations you can choose from, including on-grade and frost-proof choices. On-grade foundations are usually made of concrete blocks, while frost-proof foundations are made of concrete footings or piers.

To lay the foundation, start by marking out the perimeter of your shed with stakes and string. Then, dig the holes for your foundation and pour in the concrete. Make sure to let the concrete dry completely before moving on to the next step.

In conclusion, building a wooden shed foundation is an essential step in creating a sturdy and long-lasting shed. By following these three steps of choosing the location, leveling the ground, and laying the foundation, you can ensure that your shed will be secure and protected for years to come.

Constructing the Walls

Now that you have built the base of your wooden shed, it’s time to construct the walls. This is where the real fun begins!

Materials Needed

Before you start building the walls, make sure you have all the necessary materials. Here’s a list of what you’ll need:

  • 2×4 lumber for framing the walls
  • Plywood sheets for the exterior sheathing
  • Nails or screws to secure the lumber and plywood
  • Saw for cutting the lumber and plywood to size
  • Hammer or drill for attaching the lumber and plywood
  • Level to ensure the walls are straight and level

Framing the Walls

Start by measuring and cutting the lumber to the appropriate size for the walls. Use a saw to cut the lumber to the correct length and width. Once you have all the lumber cut, it’s time to start framing the walls.

To frame the walls, start by attaching the bottom plate to the base using nails or screws. Then attach the top plate to the top of the wall using the same method. Once the top and bottom plates are in place, you can start attaching the studs. Make sure to space the studs evenly, usually 16 inches apart, and attach them to the top and bottom plates.

Sheathing the Walls

Once the framing is complete, it’s time to sheath the walls with plywood. Cut the plywood sheets to size and attach them to the framing using nails or screws. Make sure to leave a small gap between each sheet to allow for expansion and contraction due to changes in temperature and humidity.

Adding Windows and Doors

If you plan on adding windows or doors to your shed, make sure to frame them out before sheathing the walls. This will make installation much easier.

Conclusion

Constructing the walls of your wooden shed is a crucial step in the building process. Make sure to take your time and follow the steps carefully to ensure a sturdy and long-lasting structure.

Installing the Roof

Once you have built the walls of your wooden shed, it’s time to install the roof. This section will guide you through the process of installing a wooden shed roof.

Framing the Roof

The first step in installing a wooden shed roof is to frame the roof. To frame the roof, you need to install the roof rafters and ridge beam. The roof rafters are the wooden beams that support the roof sheathing and shingles. The ridge beam is the horizontal beam that runs along the top of the rafters.

To frame the roof, follow these steps:

  1. Measure and cut the roof rafters to the correct length.
  2. Install the ridge beam on top of the walls of the shed.
  3. Attach the roof rafters to the ridge beam and the top plate of the wall.
  4. Install collar ties to prevent the roof from sagging.

Applying the Sheathing

Once the roof is framed, the next step is to apply the sheathing. Sheathing is the layer of plywood or OSB that covers the roof rafters and provides a base for the shingles.

To apply the sheathing, follow these steps:

  1. Measure and cut the sheathing to size.
  2. Install the sheathing perpendicular to the roof rafters.
  3. Nail the sheathing to the roof rafters with 8d nails.
  4. Leave a 1/8-inch gap between the sheathing panels to allow for expansion.

Adding the Shingles

The final step in installing a wooden shed roof is to add the shingles. Shingles are the overlapping pieces of material that cover the sheathing and protect the roof from the elements.

To add the shingles, follow these steps:

  1. Install the drip edge along the eaves of the roof.
  2. Install the underlayment over the sheathing.
  3. Install the starter shingles along the eaves of the roof.
  4. Install the shingles in rows, starting at the bottom of the roof and working your way up.
  5. Cut the shingles to fit around vents and other roof penetrations.
  6. Install the ridge cap shingles along the ridge of the roof.

Congratulations! You have successfully installed a wooden shed roof.

Adding Doors and Windows

Adding doors and windows to your wooden shed is an essential step in creating a functional and comfortable space. Here are some tips to help you with the process:

Choosing the Right Doors and Windows

When selecting doors and windows for your shed, it’s important to consider the following factors:

  • Size: Make sure that the doors and windows you choose are the right size for your shed. Doors should be wide enough to accommodate large items, and windows should be large enough to let in plenty of natural light.
  • Material: Wooden doors and windows are a popular choice for sheds because they are durable and can be painted or stained to match the rest of the structure. However, you can also choose doors and windows made from other materials, such as vinyl or metal.
  • Style: Doors and windows come in a variety of styles, from traditional to modern. Choose a style that complements the overall look of your shed.

Installing Doors and Windows

Once you’ve chosen your doors and windows, it’s time to install them. Here are some general steps to follow:

  1. Measure the rough opening: Measure the width and height of the rough opening for the door or window.
  2. Cut the opening: Cut the opening in the shed wall using a saw.
  3. Install the frame: Install the frame for the door or window using screws or nails.
  4. Install the door or window: Place the door or window in the frame and secure it in place using screws or nails.
  5. Add weatherstripping: Install weatherstripping around the edges of the door or window to prevent drafts and moisture from entering the shed.

Tips for Adding Windows

Adding windows to your shed can provide natural light and ventilation. Here are some tips to keep in mind:

  • Position the windows strategically: Place the windows in a position that allows for maximum natural light and ventilation.
  • Consider the size of the windows: Larger windows will let in more light and provide a better view, but they may also be more expensive.
  • Choose the right type of glass: Consider using tempered glass for safety and durability.
  • Add window coverings: Consider adding blinds or curtains to the windows for privacy and to control the amount of light that enters the shed.

By following these tips, you can add doors and windows to your wooden shed with ease, creating a functional and comfortable space for all your storage needs.

Finishing Touches

Once you have completed the construction of your wooden shed, it’s time to add the finishing touches to make it look complete and attractive. Here are some ideas to help you finish off your shed:

Painting or Staining

One of the easiest ways to give your shed a finished look is to paint or stain it. Not only does this add a layer of protection to the wood, but it also adds color and personality to your shed. Before you begin painting or staining, make sure to clean the surface thoroughly and let it dry completely. You may also want to sand the surface lightly to ensure that the paint or stain adheres properly.

When choosing a paint or stain, consider the climate in your area. If you live in a humid environment, you may want to choose a paint or stain that is specifically formulated to resist mildew and mold. If you live in an area with harsh winters, you may want to choose a paint or stain that is formulated to withstand extreme temperatures.

Adding Trim

Another way to give your shed a finished look is to add trim. Trim can be used to cover up any gaps or rough edges, and it can also add a decorative touch to your shed. There are many different types of trim available, including corner trim, fascia trim, and window trim.

When adding trim to your shed, make sure to measure carefully and cut the trim to the correct length. You may also want to pre-paint or stain the trim before installing it. Use finishing nails or screws to attach the trim to the shed, and make sure to fill any nail or screw holes with wood filler before painting or staining.

By adding a coat of paint or stain and some trim, you can give your wooden shed a polished, finished look that will make it the envy of your neighborhood.

Maintaining Your Wooden Shed

To ensure your wooden shed lasts for years to come, it’s important to maintain it properly. Regular maintenance will help you avoid costly repairs and keep your shed looking great. Here are some tips for maintaining your wooden shed:

Regular Inspections

Regular inspections are important to catch any damage or problems early on. Inspect your shed at least once a year, ideally before winter when the weather can cause the most damage. Look for signs of rot, mold, mildew, or insect infestations. Check the roof, walls, and foundation for any cracks, leaks, or other damage. Inspect the door and windows for proper sealing and operation.

Repairing Damage

If you do find any damage during your inspection, it’s important to repair it as soon as possible. Small problems can quickly turn into big ones if left unaddressed. Replace any damaged or rotting wood, fix any leaks, and repair any cracks. Use wood filler to fill in any gaps or holes. Sand and repaint any areas that need it to prevent further damage.

Weatherproofing

To protect your shed from the elements, it’s important to weatherproof it. Use a high-quality waterproof sealant on the exterior of your shed to prevent water from seeping in. Apply a fresh coat of paint or stain every few years to protect the wood from UV rays and moisture. Make sure the roof is in good condition and replace any missing or damaged shingles. You can also add gutters to direct water away from your shed.

Regular maintenance and proper care will help your wooden shed last for years to come. By following these tips, you can keep your shed looking great and avoid costly repairs.

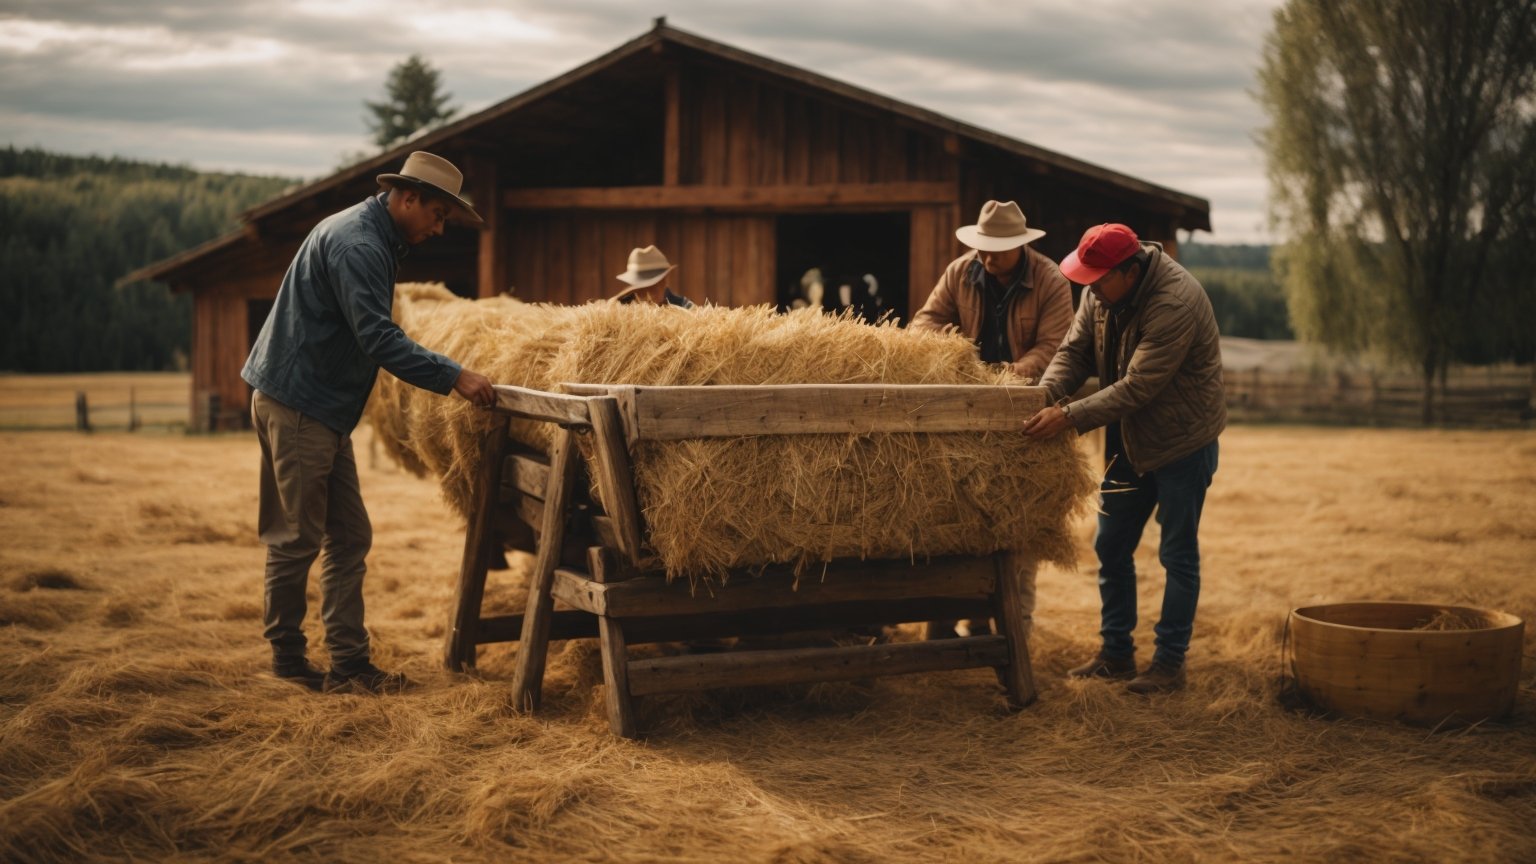
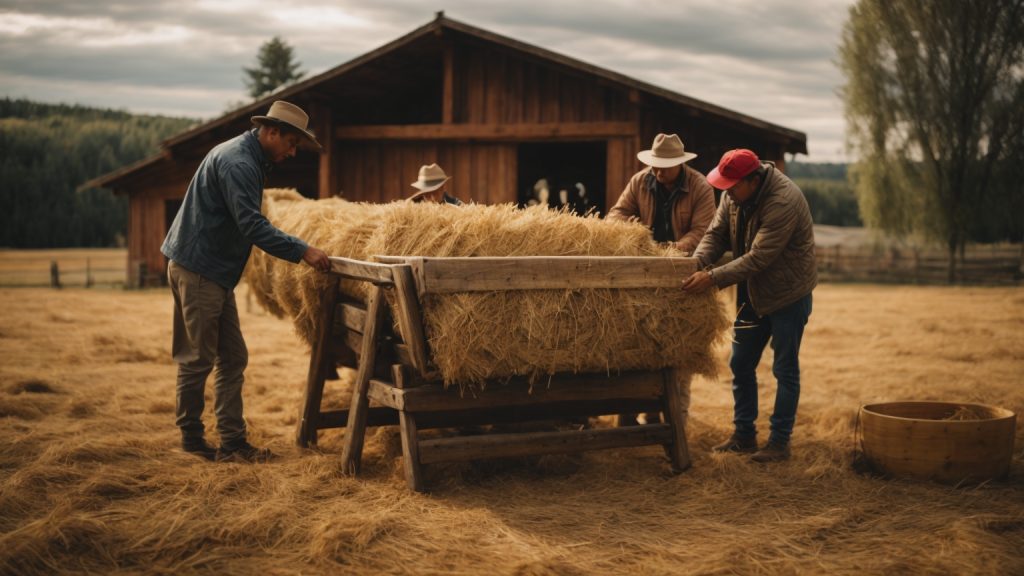
make-a-wooden-hay-feeder-for-horses

How to Make a Wooden Hay Feeder for Horses: A Simple Guide

If you’re a horse owner, you know how important it is to ensure that your horses are getting the right nutrition. One way to do this is by using a hay feeder. A hay feeder can help reduce the amount of hay wasted, promote better digestion, and even help prevent digestive issues like colic. However, buying a hay feeder can be expensive. Fortunately, making your own wooden hay feeder for horses is a relatively simple and cost-effective solution.

To make a wooden hay feeder for horses, you’ll need some basic woodworking skills and tools. The good news is that you don’t need to be an expert woodworker to build a hay feeder. With a little bit of patience and some guidance, you can create a sturdy and functional hay feeder for your horses. In this article, we’ll walk you through the steps of making your own wooden hay feeder for horses. We’ll cover everything from selecting the right materials to assembling the feeder. So whether you’re a seasoned woodworker or a beginner, you’ll be able to follow along and create a hay feeder that your horses will love.

Understanding Horse Feeding Habits

make-a-wooden-hay-feeder-for-horses

When it comes to feeding horses, it’s important to understand their natural feeding habits. Horses are grazers and are designed to eat small amounts of food throughout the day. In the wild, horses will spend up to 16 hours a day grazing on grasses and other vegetation.

When feeding horses, it’s important to mimic their natural feeding habits as much as possible. This means providing them with access to hay or grass throughout the day. However, it’s also important to control their intake to prevent overfeeding and potential health issues such as colic.

One way to control a horse’s hay intake is by using a wooden hay feeder. A hay feeder allows the horse to eat hay in a controlled manner, preventing them from consuming too much at once and reducing waste.

When building a wooden hay feeder for your horse, it’s important to consider the size of the feeder and the amount of hay your horse will consume. A feeder that is too small will not provide enough hay, while a feeder that is too large may encourage overeating.

Overall, understanding your horse’s natural feeding habits and providing them with a controlled feeding environment can help promote their health and well-being.

Materials Needed for a Wooden Hay Feeder

If you’re considering building a wooden hay feeder for your horses, you’ll need to gather some materials first. Here are the things you’ll need to get started:

Pressure-treated lumber

Pressure-treated lumber is a popular choice for building a wooden hay feeder because it’s resistant to rot, decay, and insect damage. When selecting pressure-treated lumber, make sure it’s marked as “ground contact” or “exterior use” to ensure it’s suitable for outdoor use.

Screws

You’ll need screws to hold the wooden pieces together. Make sure to use screws that are long enough to securely fasten the lumber together.

Saw

A saw is necessary to cut the pressure-treated lumber to the desired dimensions of your hay feeder. A circular saw or a miter saw are both good options for this task.

Measuring tape

Measuring tape is an essential tool for accurately measuring the lumber pieces. Make sure to measure twice to avoid any mistakes.

Drill

A drill is necessary for drilling pilot holes for the screws. This will prevent the wood from splitting when the screws are inserted.

Hardware cloth

Hardware cloth is a mesh material that can be used to cover the hay feeder to prevent the horses from wasting hay or injuring themselves on sharp edges. Make sure to use a heavy-duty hardware cloth to ensure it’s durable enough for outdoor use.

Paint or stain

Paint or stain can be used to protect the wooden hay feeder from the elements and to improve its appearance. Make sure to use a paint or stain that’s suitable for outdoor use and safe for horses.

By gathering these materials, you’ll be well on your way to building a sturdy and functional wooden hay feeder for your horses.

Choosing the Right Wood

When it comes to building a wooden hay feeder for your horses, choosing the right wood is crucial. You want to make sure that the wood you use is durable, safe, and resistant to weathering. Here are a few options to consider:

Pressure-Treated Lumber

Pressure-treated lumber is a popular choice for building horse hay feeders. The wood is treated with chemicals that protect it from rot, insects, and decay, making it a long-lasting option. However, it’s important to note that some horses may have allergies or sensitivities to the chemicals used in pressure-treated lumber. If you decide to use this type of wood, make sure to let it dry and air out for a few weeks before putting it in the pasture.

Cedar

Cedar is a naturally rot-resistant wood that is also resistant to insects. It has a pleasant aroma and is less likely to splinter than other types of wood. However, cedar can be more expensive than other options.

Oak

Oak is a strong and durable wood that is resistant to rot and insects. It’s a good option if you’re looking for a wood that will last a long time. However, oak can be more expensive and harder to work with than other types of wood.

Pine

Pine is a commonly used wood for horse hay feeders because it’s affordable and readily available. However, it’s important to choose a high-quality pine that is free from knots and defects. Pine is also more likely to rot and decay over time than other types of wood.

In conclusion, choosing the right wood for your horse hay feeder is important for the safety and longevity of the structure. Consider the pros and cons of each type of wood and choose the one that best fits your needs and budget.

Designing Your Hay Feeder

designing-your-hay-feeder

When it comes to designing your wooden hay feeder for horses, there are a few important considerations to keep in mind. This section will cover the key factors to consider when designing your hay feeder.

Size and Dimensions

The size and dimensions of your hay feeder will depend on a few factors, including the number of horses you have, their size, and their feeding habits. Here are some general guidelines to follow:

  • A single horse should have access to at least 2 feet of linear feeder space.
  • If you have multiple horses, you’ll need to provide enough feeder space for all of them to eat comfortably without competing for food.
  • The height of the feeder should be such that the horse can easily reach the hay without having to stretch too far or bend down too low.
  • The depth of the feeder should be deep enough to hold a sufficient amount of hay but not so deep that the horse has difficulty reaching the hay at the bottom.

Here is a table summarizing some recommended dimensions for your hay feeder:

Number of Horses Linear Feeder Space Height Depth
1 2 feet 4 feet 2 feet
2 4 feet 4 feet 3 feet
3 6 feet 4 feet 4 feet

Feeder Placement

The placement of your hay feeder is also an important consideration. Here are some guidelines to follow:

  • The feeder should be placed in a well-ventilated area to prevent mold growth.
  • The feeder should be placed away from high-traffic areas to prevent injury to the horses.
  • The feeder should be placed in an area that is easy to access for filling and cleaning.

Here are a few additional tips to keep in mind:

  • Consider placing multiple feeders in different areas of the pasture to prevent competition for food.
  • If you have a particularly aggressive eater, consider using a feeder with a grate or mesh to slow down their eating and prevent choking.

By following these guidelines, you can design a hay feeder that meets the needs of your horses and helps ensure their health and safety.

Building the Frame

When building a wooden hay feeder for your horses, the frame is an essential component that provides stability and support. In this section, we will cover the steps involved in building the frame for your hay feeder.

Cutting the Wood

The first step in building the frame is to cut the wood to the appropriate size. You will need four pieces of wood for the frame, two long pieces, and two short pieces. The length of the long pieces will depend on the size of your hay feeder, while the short pieces should be the same width as the long pieces.

To ensure accuracy, it is essential to measure and mark the wood before cutting it. You can use a table saw or a circular saw to cut the wood to the correct size.

Assembling the Frame

Once you have cut the wood to the right size, the next step is to assemble the frame. Start by laying the two long pieces on a flat surface, parallel to each other, and then place the two short pieces between them, perpendicular to the long pieces.

To secure the frame, you can use wood screws or nails. Make sure to pre-drill the holes to avoid splitting the wood. You can use a clamp to hold the pieces together while you attach them.

After attaching the pieces, check to make sure the frame is square and level. You can use a carpenter’s square and a level to ensure accuracy.

With the frame assembled, you can now move on to the next step in building your wooden hay feeder for your horses.

Adding the Feeding Area

Once you have assembled the wooden structure of your hay feeder, it’s time to add the feeding area. This is where your horses will access the hay, so it’s important to ensure that it is secure and easy to use.

Creating the Hay Slots

The first step is to create the hay slots. These are the openings where your horses will access the hay. To create the hay slots, you will need to measure and mark the location of the slots on the feeding area. Once you have marked the location, use a jigsaw or circular saw to cut out the slots.

It’s important to make sure that the slots are large enough for your horses to access the hay, but not so large that they can easily pull out large amounts of hay at once. A good size for the slots is around 4-6 inches wide and 12-16 inches long.

Attaching the Feeding Area to the Frame

Once you have created the hay slots, it’s time to attach the feeding area to the frame of the hay feeder. To do this, you will need to use screws or bolts to secure the feeding area to the frame.

Make sure that the feeding area is level and securely attached to the frame. You don’t want it to wobble or come loose, as this could be dangerous for your horses.

Once you have attached the feeding area, you can add hay to the feeder and watch your horses enjoy their new feeding station. Remember to regularly check the hay feeder for any damage or wear and tear, and make any necessary repairs to ensure that it remains safe and functional for your horses.

Safety Measures

When building a wooden hay feeder for your horses, it is important to take safety measures to ensure that the feeder is secure and safe for your horses to use. Here are some safety measures to consider:

Sanding the Wood

Before assembling the wooden structure of your hay feeder, it is important to sand the wood to remove any rough edges or splinters that could harm your horses. Use sandpaper with a fine grit to sand down the edges of the wood pieces. Make sure to wear gloves and a dust mask to protect yourself from the dust and debris created by sanding.

Securing the Feeder

Once you have assembled the wooden structure of your hay feeder, it is important to secure it in place to prevent it from tipping over or collapsing. You can secure the feeder to the ground using stakes or anchors. Alternatively, you can attach the feeder to a wall or fence using brackets or screws.

It is also important to ensure that the feeder is stable and balanced. Make sure that the feeder is level and that the legs are evenly spaced. If the feeder wobbles or tips over, it could injure your horses or damage the feeder.

By taking these safety measures, you can ensure that your wooden hay feeder is safe and secure for your horses to use.

Maintenance Tips

To ensure that your wooden hay feeder lasts a long time and remains safe for your horses, it is important to perform routine maintenance checks and make any necessary repairs or replacements. Here are some tips to help you maintain your wooden hay feeder:

Routine Checks

Performing routine checks on your wooden hay feeder can help you identify any potential problems early on and prevent them from becoming bigger issues. Here are some things to check:

  • Check for any signs of wear and tear, such as cracks, splinters, or loose screws.
  • Inspect the feeder for any damage caused by weather or pests, such as water damage or termite infestation.
  • Make sure the feeder is level and stable, and that it is securely anchored to the ground.
  • Check the feeder periodically to make sure it is still in good condition and functioning properly.

Repair and Replacement

If you notice any damage or wear and tear on your wooden hay feeder, it is important to make any necessary repairs or replacements as soon as possible. Here are some tips to help you repair or replace your feeder:

  • If you notice any cracks or splinters in the wood, sand them down and seal the wood with a waterproof sealant to prevent further damage.
  • If any screws are loose or missing, replace them with new screws and make sure they are securely fastened.
  • If any parts of the feeder are damaged beyond repair, replace them with new pieces of wood or hardware.
  • If the feeder becomes unstable or unsafe, it may be necessary to replace it entirely.

By performing routine maintenance checks and making any necessary repairs or replacements, you can help ensure that your wooden hay feeder remains safe and functional for your horses.

wooden-deck

How Long Does a Wooden Deck Last: A Comprehensive Guide

If you’re a homeowner with a wooden deck, you may be wondering how long it will last before needing to be replaced. The answer to this question can vary depending on a number of factors, including the type of wood used, how well the deck is maintained, and the climate in which you live.

According to industry experts, a traditional wooden deck can last anywhere from 10 to 15 years with proper care and maintenance. However, if you opt for a composite deck made from materials like plastic and wood fibers, you can expect it to last up to 30 years or more. Capped polymer decks, which are made from a superior material composition, can potentially last for 50 years or more.

It’s important to note that the lifespan of your wooden deck will also depend on how well you take care of it. Regular cleaning, staining, and sealing can help to extend the life of your deck and prevent damage from moisture, insects, and UV rays. With proper maintenance, your wooden deck can provide years of enjoyment and add value to your home.

Life Span of a Wooden Deck

wooden-deck

When it comes to building a deck in your backyard, you want to make sure it lasts as long as possible. The life span of a wooden deck will depend on several factors, including the type of wood, the quality of the installation, and how well you maintain it over time.

According to The International Association of Certified Home Inspectors, a traditional wood deck can last for 10-15 years, while a composite deck can last around 15 to 30 years. However, with proper maintenance, a wood deck can last anywhere from 10 to 30 years.

One of the biggest factors that can affect the life span of your wooden deck is the type of wood you choose. Different woods have different levels of durability and resistance to weather and insects. For example, cedar and redwood are known for their natural resistance to decay and insects, making them a popular choice for decks. Pressure-treated lumber is also a popular choice, as it is treated with chemicals to resist decay and insects.

Another factor to consider is the quality of the installation. A well-built deck that is properly supported and secured will last longer than a poorly built deck. It’s important to hire a professional contractor who has experience building decks and will use quality materials and construction techniques.

Finally, proper maintenance is crucial to extending the life span of your wooden deck. This includes regular cleaning, staining, and sealing to protect the wood from moisture, UV rays, and other environmental factors. You should also inspect your deck regularly for any signs of damage, such as rotting or splitting boards, and make repairs as needed.

Overall, the life span of a wooden deck will depend on several factors, but with proper care and maintenance, you can enjoy your deck for many years to come.

Factors Influencing Deck Durability

When it comes to the lifespan of your wooden deck, several factors come into play. Here are some of the most important factors that can influence the durability of your deck:

Quality of Wood

The quality of the wood used to build your deck is one of the most critical factors that can affect its lifespan. Some wood species are naturally more resistant to rot and decay than others. For instance, cedar and redwood are known for their natural resistance to rot and insects, while pine and spruce are less durable and require more maintenance.

Another crucial factor that can influence the quality of your deck is the grade of the wood used. Higher-grade wood has fewer knots and defects, making it more durable and long-lasting than lower-grade wood.

Climate and Weather Conditions

The climate and weather conditions in your area can also have a significant impact on the lifespan of your deck. If you live in an area with high humidity or frequent rainfall, your deck is more likely to experience moisture damage, which can lead to rot, decay, and warping.

Similarly, if you live in an area with extreme temperatures, such as hot summers and cold winters, your deck may be more prone to cracking, splitting, and fading.

Maintenance and Care

Proper maintenance and care are crucial for extending the lifespan of your deck. Regular cleaning, sealing, and staining can help protect your deck from weathering and moisture damage. It’s also essential to inspect your deck regularly for signs of wear and tear, such as splintering, cracking, or loose boards.

In addition to regular maintenance, you should also take steps to prevent damage to your deck. For instance, avoid placing heavy objects on your deck, such as grills or furniture, as this can cause dents and scratches. You should also avoid using harsh chemicals or pressure washers to clean your deck, as this can damage the wood.

Overall, the lifespan of your wooden deck depends on several factors, including the quality of wood, climate and weather conditions, and maintenance and care. By choosing high-quality wood, maintaining your deck regularly, and taking steps to prevent damage, you can extend the lifespan of your deck and enjoy it for years to come.

Types of Wood and Their Longevity

types-of-wood-and-their-longevity

When it comes to building a wooden deck, the type of wood you choose can have a big impact on its longevity. Here are some of the most common types of wood used for decks and how long you can expect them to last with proper maintenance:

Pressure-Treated Wood

Pressure-treated wood is a popular choice for deck building because it is affordable and resistant to rot and insects. However, it does require regular maintenance to prevent warping and cracking. With proper care, a pressure-treated wood deck can last up to 20 years.

Cedar Wood

Cedar wood is a beautiful and durable option for deck building. It is naturally resistant to rot and insects, and it has a warm, reddish-brown color that many people find appealing. With regular maintenance, a cedar wood deck can last up to 25 years.

Redwood

Redwood is another popular option for deck building because it is naturally resistant to rot and insects. It has a rich, reddish color that can add warmth and character to any outdoor space. With proper care, a redwood deck can last up to 30 years.

It’s important to note that these are just general guidelines, and the lifespan of your deck will depend on many factors, including the quality of the wood, the climate in your area, and how well you maintain it. Regular cleaning, sealing, and staining can help extend the life of your deck and keep it looking beautiful for years to come.

Warning Signs of Deck Aging

If you have a wooden deck, it’s essential to keep an eye on its condition. Even with proper maintenance, decks will show signs of aging over time. Here are some warning signs to look out for:

Wood Rot

One of the most common problems with wooden decks is wood rot. This occurs when moisture gets trapped in the wood, causing it to decay. Signs of wood rot include soft and spongy areas, discoloration, and a musty odor. If you notice any of these signs, it’s crucial to address the issue as soon as possible. Rot can spread quickly and compromise the structural integrity of your deck.

Loose Boards

Another warning sign of an aging deck is loose boards. Over time, the fasteners that hold the boards in place can become loose, causing the boards to shift and move. If left unchecked, this can lead to tripping hazards and even collapse. Check your deck regularly for loose boards and tighten any loose fasteners.

Fading and Discoloration

Wooden decks are exposed to the elements year-round, which can cause fading and discoloration. UV rays from the sun can cause the wood to fade, while moisture can cause it to turn gray or black. While this is a cosmetic issue, it can also be a sign of deeper problems. Fading and discoloration can be an indication that your deck is not properly sealed, which can lead to rot and decay.

In conclusion, keeping an eye on your wooden deck’s condition is crucial to ensure its longevity and safety. If you notice any of these warning signs, it’s essential to address them promptly to prevent further damage.

How to Extend the Life of Your Deck

If you want to get the most out of your wooden deck, it’s important to take care of it properly. With proper maintenance, your deck can last for many years. Here are some tips to help you extend the life of your deck.

Regular Cleaning

Regular cleaning is essential for keeping your deck in good condition. Dirt, leaves, and other debris can accumulate on your deck over time, which can lead to mold and mildew growth. To prevent this, you should sweep your deck regularly and remove any debris that you find.

In addition to sweeping, you should also give your deck a thorough cleaning at least once a year. You can use a pressure washer or a deck cleaner to remove dirt and stains. Be sure to follow the manufacturer’s instructions when using a deck cleaner, and rinse your deck thoroughly after cleaning.

Sealing and Staining

Sealing and staining your deck can help to protect it from the elements. Sealing your deck will help to prevent moisture from penetrating the wood, which can lead to rot and decay. Staining your deck will help to protect it from UV rays and other environmental factors.

You should plan to seal or stain your deck every two to three years. Before you do this, you should clean your deck thoroughly and allow it to dry completely. Then, you can apply the sealer or stain according to the manufacturer’s instructions.

Annual Inspections

It’s important to inspect your deck regularly to make sure that it’s in good condition. You should inspect your deck at least once a year, and look for signs of damage such as loose boards, cracks, and rot.

If you find any damage, you should repair it as soon as possible. This will help to prevent the damage from getting worse and potentially compromising the structural integrity of your deck.

By following these tips, you can extend the life of your wooden deck and keep it looking great for many years to come.

How to Build a Wooden Handrail for Outdoor Steps: A Beginner's Guide

If you have outdoor steps leading up to your home, adding a handrail is a crucial safety feature. A wooden handrail not only provides support while going up and down the stairs, but it can also add a decorative touch to your home’s exterior. Building a handrail for outdoor steps may seem daunting, but with the right tools and materials, it can be a manageable DIY project.

Before you begin, it’s important to check your local building codes to ensure that your handrail meets the necessary safety requirements. Once you have the green light, gather your materials. You will need pressure-treated lumber, screws, a saw, a drill, and a level. Depending on the design you choose, you may also need additional tools such as a miter saw or a metal punch.

In this article, we will walk you through the steps to build a wooden handrail for outdoor steps. From measuring and cutting the lumber to attaching the handrail to the steps, we will provide clear instructions and tips to help you complete the project successfully. With a little bit of effort and patience, you can create a beautiful and functional handrail that will make your outdoor steps safer and more attractive.

Understanding the Fundamentals

When it comes to building a wooden handrail for outdoor steps, there are a few fundamentals that you need to understand first. In this section, we will cover the types of wood you can use and the weather considerations you need to keep in mind.

Types of Wood

Choosing the right type of wood for your handrail is crucial. You want a wood that is strong, durable, and can withstand the elements. Here are some of the most common types of wood used for outdoor handrails:

  • Cedar: Cedar is a popular choice for outdoor handrails because it is naturally resistant to rot, decay, and insects. It also has a beautiful, natural look that can complement any outdoor decor.
  • Redwood: Redwood is another popular choice for outdoor handrails. Like cedar, it is naturally resistant to rot, decay, and insects. It is also very strong and durable, making it a great choice for high-traffic areas.
  • Pressure-Treated Pine: Pressure-treated pine is an affordable option for outdoor handrails. It is treated with chemicals to resist rot and decay, making it a durable choice. However, it may not have the same natural look as cedar or redwood.

Weather Considerations

When building a wooden handrail for outdoor steps, you need to consider the weather conditions in your area. Exposure to the elements can cause wood to warp, crack, or rot over time. Here are some weather considerations to keep in mind:

  • Moisture: Moisture is one of the biggest enemies of outdoor wood. Make sure your handrail is properly sealed to protect it from rain, snow, and humidity.
  • Sunlight: UV rays from the sun can cause wood to fade and dry out. Consider using a UV-resistant sealant or stain to protect your handrail from the sun.
  • Temperature: Extreme temperatures can cause wood to expand and contract, which can lead to warping or cracking. Make sure your handrail is properly installed to allow for natural expansion and contraction.

By understanding the types of wood you can use and the weather considerations you need to keep in mind, you can build a wooden handrail for outdoor steps that is both beautiful and durable.

Gathering Materials

When it comes to building a wooden handrail for your outdoor steps, it’s important to gather all the necessary tools and materials before you begin. This will help ensure that the process goes smoothly and that you have everything you need to complete the project.

Tools Needed

Here are the tools you’ll need to build a wooden handrail for your outdoor steps:

Tools
Chop saw/miter saw
Power drill
Spade drill (1/2″ and 5/8″)
Hammer drill
Masonry bit (1/2″)
Sheet metal punch (or the spade drill from before)
Hammer
Crescent wrench
Sheet metal shears

Wood and Hardware

In addition to the tools listed above, you’ll also need to gather the following wood and hardware:

Materials
4″x 4″ x 8′ Pressure treated lumber (3)
2″ x 4″ x 10′ Pressure treated lumber (1)
Wood screws
Lag bolts
Washers
Nails
Wood glue
Sandpaper

It’s important to use pressure-treated lumber for outdoor projects, as it is more resistant to rot and decay. You’ll also want to choose screws and bolts that are appropriate for outdoor use, such as galvanized or stainless steel.

By gathering all of the necessary tools and materials before you begin, you’ll be well-prepared to build a sturdy and attractive wooden handrail for your outdoor steps.

Step by Step Guide

If you’re looking to build a wooden handrail for your outdoor steps, you’ve come to the right place. In this guide, we’ll walk you through the process step by step. By the end of this guide, you’ll have a sturdy and beautiful handrail that will provide vital support when climbing or descending stairs.

Measuring and Cutting

Before you start building your handrail, you’ll need to measure the length of your stairs to determine how much wood you’ll need. Once you have your measurements, you can purchase the wood and cut it to the appropriate lengths. Here are the steps to follow:

  1. Measure the length of your stairs using a measuring tape.
  2. Cut the rails and posts to the appropriate lengths using a saw. Be sure to wear protective gear, such as safety glasses and gloves, when using power tools.

Assembling the Handrail

Once you have your wood cut to the appropriate lengths, it’s time to assemble the handrail. Here are the steps to follow:

  1. Place the post holders on the stairs where you want the handrail to go.
  2. Install the posts into the holders and secure them with screws.
  3. Attach the rails to the posts using screws. Be sure to use a level to ensure that the rails are straight.
  4. If desired, add decorative caps to the top of the posts.

Installing the Handrail

Now that your handrail is assembled, it’s time to install it. Here are the steps to follow:

  1. Attach the handrail to the posts using screws.
  2. Seal the handrail with a weather-resistant sealant to protect it from the elements.

And that’s it! With these simple steps, you can build a wooden handrail for your outdoor steps that will provide both safety and beauty.

Maintenance Tips

Maintaining your wooden handrail is essential to ensure its longevity and safety. Here are some tips to keep your handrail in good condition:

Cleaning

Regular cleaning is necessary to prevent dirt and grime buildup on your handrail. You can clean your handrail using a mild soap and water solution. Scrub the handrail with a soft-bristled brush and rinse thoroughly with water. Avoid using harsh chemicals or abrasive materials that can damage the wood.

Repairs and Replacements

Inspect your handrail regularly for any signs of damage or wear and tear. If you notice any cracks, splits, or rotting, it’s time to repair or replace your handrail. You can repair minor damages by sanding and refinishing the affected area. For major damages, consider replacing the entire handrail.

When replacing your handrail, make sure to choose a wood species that is suitable for outdoor use and can withstand the elements. Cedar, redwood, and pressure-treated pine are some of the best options for outdoor handrails.

In conclusion, maintaining your wooden handrail is essential to ensure its safety and longevity. Regular cleaning and inspection can help prevent damages and prolong the life of your handrail. If you notice any damages, make sure to repair or replace your handrail promptly to avoid any accidents or injuries.

Safety Precautions

Building a wooden handrail for outdoor steps is a great DIY project that can add both safety and style to your home. However, it’s important to take safety precautions to ensure that the handrail is sturdy and secure.

First and foremost, make sure to wear appropriate safety gear, such as gloves and safety glasses, when handling tools and materials. This will protect you from any potential injuries while working on the project.

Before you start building, it’s also important to check with your local building codes to ensure that your handrail meets all necessary safety requirements. This will help to ensure that your handrail is safe and up to code.

When building the handrail, make sure to use high-quality materials that are suitable for outdoor use. This will help to ensure that the handrail is sturdy and can withstand the elements.

Additionally, make sure to properly secure the handrail to the steps and any nearby structures, such as the house or a nearby wall. This will help to ensure that the handrail is secure and won’t wobble or come loose.

Finally, always use caution when using tools and handling materials. Take your time and work carefully to ensure that the handrail is built safely and securely.

How to Make Wooden Planters: A Beginner's Guide

If you’re looking to add a touch of nature to your home or garden, building your own wooden planter is a great way to do it. Not only is it a fun and rewarding DIY project, but it also allows you to customize the size and style of the planter to perfectly fit your space and needs. In this article, we’ll provide you with step-by-step instructions on how to make wooden planters, as well as tips and tricks to ensure your planter is sturdy and long-lasting.

Before you begin, it’s important to decide on the size and shape of your planter. Consider the space where you’ll be placing the planter, as well as the types of plants you want to grow. Once you have a general idea of the size and shape, you’ll need to gather the necessary materials, including wood, screws, and a saw. If you’re new to woodworking, don’t worry – we’ll guide you through the process and provide helpful tips along the way. So grab your tools and let’s get started on building your own wooden planter!

Understanding the Basics of Wooden Planters

When it comes to gardening, wooden planters are a popular choice for many gardeners. They provide a rustic and natural look to your garden and are perfect for growing a variety of plants. In this section, we will discuss the basics of wooden planters, including the types of wood used and the benefits of using wooden planters.

Types of Wood

There are several types of wood that can be used to make wooden planters. The most popular types of wood are cedar, redwood, and pressure-treated pine. Let’s take a closer look at each of these types of wood.

  • Cedar: Cedar is a popular choice for making wooden planters because it is naturally resistant to decay and insects. It also has a beautiful natural color that looks great in any garden.

  • Redwood: Redwood is another popular choice for making wooden planters. Like cedar, it is naturally resistant to decay and insects. It is also a very durable wood that can last for many years.

  • Pressure-treated pine: Pressure-treated pine is a more affordable option for making wooden planters. It is treated with chemicals to make it resistant to decay and insects. However, it is important to line the planter with plastic to prevent the chemicals from harming your plants.

Benefits of Wooden Planters

There are several benefits to using wooden planters in your garden. Here are a few:

  • Natural look: Wooden planters provide a natural and rustic look to your garden.

  • Customizable: Wooden planters can be made in any size or shape, making them customizable to fit your specific needs.

  • Good drainage: Wooden planters allow for good drainage, which is important for the health of your plants.

  • Durable: Depending on the type of wood used, wooden planters can last for many years.

In summary, wooden planters are a great choice for any gardener looking to add a natural and rustic look to their garden. Cedar and redwood are popular choices for their natural resistance to decay and insects, while pressure-treated pine is a more affordable option. Wooden planters are customizable, provide good drainage, and are durable, making them a great investment for any gardener.

Materials and Tools Needed

Choosing the Right Wood

When it comes to building wooden planters, choosing the right wood is crucial. You want a type of wood that is durable, weather-resistant, and won’t rot easily. Here are some options to consider:

  • Cedar: Cedar is a popular choice for outdoor projects because it is naturally resistant to rot and insects. It also has a beautiful natural color and grain pattern.

  • Redwood: Redwood is another great choice for outdoor projects. It is also naturally resistant to rot and insects and has a beautiful color and grain pattern.

  • Pressure-treated lumber: If you’re on a budget, pressure-treated lumber can be a good option. It is treated with chemicals to resist rot and insects, but it is important to line the planter with plastic to prevent the chemicals from leaching into the soil.

  • Other options: Other types of wood that can work well for planters include cypress, teak, and oak.

Essential Tools

To build a wooden planter, you will need a few essential tools. Here are the tools you’ll need:

  • Saw: You will need a saw to cut the wood to the right size. A circular saw or a handsaw will work.

  • Drill: A drill is essential for making holes for screws and drainage.

  • Screws: You will need screws to hold the planter together. Make sure to choose screws that are appropriate for outdoor use and the type of wood you are using.

  • Sandpaper: Sandpaper is necessary for smoothing the edges of the wood and getting rid of any rough spots.

  • Measuring tape: You will need a measuring tape to make sure you are cutting the wood to the right size.

  • Pencil: A pencil is necessary for marking the wood before cutting.

  • Safety gear: It is important to wear safety gear, such as gloves and safety glasses, when working with power tools and wood.

By choosing the right wood and having the essential tools, you’ll be well on your way to building a beautiful and functional wooden planter.

Designing Your Wooden Planter

When designing your wooden planter, there are a few things to consider that will help ensure the success of your project. In this section, we will cover the two main design considerations: Size and Shape, and Drainage.

Size and Shape

The size and shape of your wooden planter will depend on a few factors. First, consider the space where you plan to place the planter. If you have a small balcony or patio, a smaller planter may be more appropriate. If you have a larger outdoor area, you may want to consider a larger planter or even a series of planters.

Second, consider the types of plants you want to grow. Some plants, like herbs or small flowers, may only require a shallow planter, while larger plants or vegetables may require a deeper planter.

Finally, consider the overall aesthetic you are going for. Do you want a traditional rectangular planter or something more unique and modern? The shape and style of your planter can help tie your outdoor space together.

Drainage Considerations

One of the most important considerations when designing your wooden planter is drainage. Without proper drainage, your plants can become waterlogged and die.

To ensure proper drainage, you will need to create drainage holes in the bottom of your planter. The size and number of holes will depend on the size of your planter. As a general rule, you should have at least one drainage hole for every square foot of planter surface area.

You may also want to consider adding a layer of gravel or rocks at the bottom of your planter to help with drainage. This can help prevent the soil from becoming compacted and waterlogged.

By considering the size and shape of your planter and ensuring proper drainage, you can create a beautiful and functional wooden planter that will provide a home for your plants for years to come.

Building the Wooden Planter

Building a wooden planter is a simple project that can add a touch of natural beauty to your outdoor space. Here are the steps to follow.

Cutting the Wood

Start by cutting the wood to size. You will need four pieces for the sides and four pieces for the bottom. The size will depend on the dimensions you want for your planter. You can use a saw to cut the wood, or you can have it cut at a hardware store.

Ensure that the wood is straight and free of knots. You can use treated timber to ensure that the planter lasts longer. Cut the wood to the following dimensions:

Piece Dimensions
Sides 20 x 120cm
Bottom 20 x 60cm

Assembling the Pieces

Once you have cut the wood to size, it’s time to assemble the pieces. Start by attaching the sides to the bottom. You can use screws or nails to do this. Ensure that the sides are flush with the bottom.

Next, attach the remaining sides to the bottom. You should now have a rectangular frame. Check that the corners are square and adjust if necessary.

Now, attach the remaining pieces of wood to the frame to create the planter box. You can use screws or nails to do this. Ensure that the pieces are flush with the sides and bottom.

Adding the Finishing Touches

Once the planter box is assembled, you can add the finishing touches. Sand the edges and corners to remove any rough spots or splinters. You can also add a coat of paint or stain to protect the wood and give it a finished look.

Finally, add drainage holes to the bottom of the planter. This will prevent the soil from becoming waterlogged and damaging the plants. You can use a drill to make the holes.

And that’s it! You now have a beautiful wooden planter that you can use to grow your favorite plants.

Maintaining Your Wooden Planter

Wooden planters can last for many years with proper maintenance. Here are some tips to keep your wooden planter in good condition.

Regular Cleaning

Cleaning your wooden planter regularly can prevent dirt and debris from accumulating, which can cause the wood to rot. Here’s how to clean your planter:

  1. Remove any plants or soil from the planter.
  2. Use a soft-bristled brush to remove any dirt or debris from the surface of the wood.
  3. Mix a solution of equal parts water and vinegar.
  4. Dip a clean cloth into the solution and wring it out.
  5. Wipe the surface of the planter with the damp cloth.
  6. Rinse the planter with clean water and let it dry completely before adding soil and plants back in.

Weather Protection

Wooden planters can be damaged by exposure to the elements. Here are some tips to protect your planter from the weather:

  1. Apply a coat of waterproofing sealant to the inside and outside of the planter before adding soil and plants.
  2. Use a liner, such as plastic or landscape fabric, to protect the wood from moisture.
  3. Move the planter to a covered area during extreme weather conditions, such as heavy rain or snow.
  4. Apply a fresh coat of sealant every year to protect the wood from weather damage.

By following these maintenance tips, you can keep your wooden planter looking great for years to come.

How to Build a Wooden Ramp for a Shed: A Step-by-Step Guide

Building a wooden ramp for your shed can make it easier to move heavy equipment and tools in and out of your storage space. Whether you have a small garden shed or a larger storage shed, a ramp can be a practical addition to your property. With a few tools and some basic carpentry skills, you can build a sturdy ramp that will last for years.

Before you start building your ramp, it’s important to consider the materials you’ll need. Pressure-treated lumber is a popular choice for shed ramps because it is durable and can withstand exposure to the elements. You’ll also need screws, a saw, a drill, and other basic tools. It’s a good idea to sketch out a plan for your ramp and measure the area where you’ll be building it to ensure that it will fit properly. Once you have your materials and plan in place, you can begin building your ramp.

Understanding the Basics of Ramp Construction

When it comes to building a ramp for your shed, there are a few basics you need to understand before you get started. In this section, we’ll cover the importance of ramp angle and choosing the right wood for your project.

Importance of Ramp Angle

The angle of your ramp is crucial for ensuring safe and easy access to your shed. If the ramp is too steep, it can be difficult to climb and potentially dangerous. On the other hand, if the ramp is too shallow, it may take up too much space and not provide enough incline for easy access.

The ideal angle for a ramp is between 15 and 20 degrees. This provides a good balance between ease of use and space efficiency. To determine the length of your ramp, you’ll need to measure the distance from the ground to the entrance of your shed and calculate the angle based on that height.

Choosing the Right Wood

When it comes to building a ramp, choosing the right type of wood is essential. You want a wood that is strong, durable, and resistant to water damage. Here are a few options to consider:

  • Pressure-treated lumber: This is a popular choice for ramps because it is resistant to rot and decay. It is also affordable and easy to work with.
  • Cedar: Cedar is naturally resistant to rot and insect damage, making it a great option for outdoor projects. It is also lightweight and easy to work with.
  • Redwood: Redwood is another durable and rot-resistant option. It is more expensive than other types of wood, but it has a beautiful natural color and texture.

No matter what type of wood you choose, make sure it is treated or coated with a waterproof sealant to protect it from moisture damage.

By understanding the basics of ramp construction, you can ensure that your ramp is safe, sturdy, and built to last. Remember to choose the right angle and wood for your project, and take your time to build it properly.

Gathering Materials

Before you start building your wooden ramp for your shed, you need to gather all the necessary materials. This section will guide you through the process of selecting the right wood and plywood, as well as the necessary tools you will need to complete the project.

Wood and Plywood Selection

When selecting the wood and plywood for your ramp, it is important to choose materials that are strong and durable. Here are some tips to keep in mind when selecting your materials:

  • Use pressure-treated lumber to prevent rot and decay.
  • Choose lumber that is straight and free of knots.
  • Use 2×6 or 2×8 boards for the frame of the ramp.
  • Use 3/4-inch plywood for the ramp surface.

It’s important to note that the length of your ramp will determine the amount of wood and plywood you will need. Be sure to measure the distance from the ground to the floor of your shed to determine the length of your ramp.

Necessary Tools

To build your wooden ramp, you will need a few basic tools. Here’s a list of the tools you will need:

  • Circular saw or handsaw
  • Drill
  • Measuring tape
  • Level
  • Hammer
  • Screws and nails
  • Sawhorses or workbench

Make sure you have all the necessary tools before you start building your ramp. This will ensure that the project goes smoothly and that you don’t have to stop in the middle of the project to go buy more tools.

Now that you know what materials and tools you will need, it’s time to start building your wooden ramp for your shed.

Creating a Ramp Plan

Before you start building your wooden ramp for your shed, you need to create a plan. A ramp plan will help you determine the materials you need and the dimensions of the ramp. Here are the steps to create a ramp plan.

Measuring the Shed Entrance

The first step is to measure the entrance of your shed. You need to measure the width and height of the entrance. Use a measuring tape to get accurate measurements. Write down the measurements on a piece of paper.

Calculating the Ramp Length

The next step is to calculate the ramp length. You need to determine the slope of the ramp. The slope should not be too steep, as it will be difficult to climb up with heavy items. The ADA guidelines recommend a slope of 1:12, which means for every inch of rise, you need 12 inches of ramp length.

To calculate the ramp length, you need to know the height of the shed entrance. Multiply the height by 12 to get the minimum ramp length. For example, if the height of the shed entrance is 18 inches, the minimum ramp length should be 18 x 12 = 216 inches.

However, you also need to consider the available space you have for the ramp. If you don’t have enough space, you may need to make the ramp steeper. Use the following table as a guide for the ramp length based on the slope:

Slope Rise Run (Ramp Length)
1:12 1″ 12″
2:12 2″ 24″
3:12 3″ 36″
4:12 4″ 48″
5:12 5″ 60″
6:12 6″ 72″

Keep in mind that the ramp should also be wide enough to accommodate the items you will be carrying in and out of the shed. A width of 36 inches is recommended.

By following these steps, you can create a ramp plan that will help you build a wooden ramp for your shed that is safe and functional.

Building the Ramp

Building a wooden ramp for your shed is a great way to make it easier to move heavy equipment in and out of the shed. Here are the steps to follow to build a sturdy ramp for your shed.

Cutting the Wood

The first step in building a ramp for your shed is to cut the wood to the correct size. You will need pressure-treated 2x6s for the ramp and pressure-treated 4x4s for the supports. Cut the 2x6s to the length of the ramp and the 4x4s to the correct length to support the ramp.

Assembling the Ramp

Once you have cut the wood to the correct size, it’s time to assemble the ramp. First, attach the 2x6s to the 4x4s using deck screws. Make sure the screws are long enough to go through the 2x6s and into the 4x4s. Space the screws evenly along the length of the ramp.

Next, add additional 2x6s to the ramp to create a sturdy surface. Attach the additional 2x6s to the first set of 2x6s using deck screws. Again, make sure the screws are long enough to go through the 2x6s and into the 4x4s.

Securing the Ramp to the Shed

The final step in building a ramp for your shed is to secure the ramp to the shed. Start by attaching a pressure-treated 2×4 to the shed where the ramp will rest. Use deck screws to attach the 2×4 to the shed.

Next, place the ramp on the supports and position it so that it is level. Attach the ramp to the 2×4 on the shed using deck screws. Make sure the ramp is securely attached to the shed and that it is level.

With these steps, you can build a sturdy wooden ramp for your shed that will make it easier to move heavy equipment in and out.

Safety Measures

When building a wooden ramp for your shed, safety should be your top priority. Here are some important safety measures to consider:

Adding Non-Slip Surface

One of the most important safety features of a ramp is its surface. Without a non-slip surface, the ramp can become dangerously slippery when wet or covered in debris. There are several options for adding a non-slip surface to your ramp:

  • Apply a non-slip coating: There are several types of non-slip coatings available that can be applied to the surface of your ramp. These coatings can provide excellent traction and are often resistant to weather and UV rays.
  • Use non-slip tape: Non-slip tape is an inexpensive and easy way to add traction to your ramp. Simply apply the tape to the surface of the ramp, making sure to cover all areas that will be walked on.
  • Install a non-slip surface: There are several types of non-slip surfaces that can be installed on your ramp, including rubber mats, perforated metal, and textured concrete. These surfaces provide excellent traction and are often very durable.

Ensuring Proper Weight Capacity

Another important safety consideration when building a ramp is ensuring that it can support the weight of the objects and people that will be using it. Here are some tips for ensuring proper weight capacity:

  • Choose the right materials: When building your ramp, make sure to choose materials that are strong enough to support the weight of the heaviest objects that will be using it. This may mean using thicker or stronger lumber, or using metal brackets and supports.
  • Calculate the weight capacity: To ensure that your ramp can support the weight of the objects and people that will be using it, you will need to calculate its weight capacity. This will depend on the size and strength of the materials you use, as well as the angle and length of the ramp.
  • Test the ramp: Once your ramp is built, it is important to test it to ensure that it can support the weight of the objects and people that will be using it. This can be done by placing heavy objects on the ramp and walking on it yourself to ensure that it feels sturdy and secure.

How Much Does It Cost to Build a Wooden Ramp: A Comprehensive Guide

If you or a loved one uses a wheelchair, you may be wondering how much it would cost to build a wooden ramp to make your home more accessible. The cost of building a wooden ramp can vary depending on several factors, including the length of the ramp, the materials used, and whether you hire a professional or do it yourself.

According to HomeAdvisor, the average cost to build a wooden ramp is between $1,031 and $3,313. However, this cost can increase or decrease depending on the specific details of your project. For example, a longer ramp will cost more than a shorter ramp, and if you hire a professional to build the ramp, you can expect to pay more for their labor. It’s also important to note that the cost of materials can vary depending on where you live and the availability of certain materials.

When planning to build a wooden ramp, it’s important to consider your budget and the specific needs of the person who will be using the ramp. While it may be tempting to cut costs by doing it yourself, it’s important to ensure that the ramp is built to code and is safe to use. Hiring a professional can ensure that the ramp is built correctly and can give you peace of mind knowing that it will be safe for your loved one to use.

Understanding Wooden Ramp Construction

If you are planning to build a wooden ramp for your home or business, it is important to understand the basics of ramp construction. This will help you make informed decisions about the materials and labor costs involved in the project.

Materials Needed

Before you start building your wooden ramp, you will need to gather the necessary materials. Here are some of the most common materials needed for a wooden ramp:

  • Pressure-treated lumber: This is the most common material used for building wooden ramps. It is durable and resistant to rot and decay. The cost of pressure-treated lumber varies depending on the size and thickness of the boards.
  • Plywood: This is used to create the ramp’s surface. Plywood comes in different grades, and the cost varies accordingly.
  • Screws and nails: You will need screws and nails to fasten the lumber and plywood together. The cost of screws and nails varies depending on the quantity and type of fasteners used.
  • Concrete footings: If you are building a ramp that is more than a few feet off the ground, you will need to install concrete footings to support the ramp. The cost of concrete footings varies depending on the size and depth of the footings.

Labor Costs

The cost of labor is another important factor to consider when building a wooden ramp. The labor costs will depend on the complexity of the ramp and the experience of the contractor. Here are some of the factors that can affect the labor costs:

  • Ramp design: The more complex the ramp design, the more time and labor it will take to build. A straight ramp is the easiest to build, while a ramp with turns and landings will require more labor.
  • Ramp height: The higher the ramp, the more labor it will take to build. A ramp that is more than a few feet off the ground will require more labor to build.
  • Contractor experience: A more experienced contractor will charge more for their services, but they may be able to complete the project more quickly and efficiently.

In general, the labor costs for building a wooden ramp can range from $100 to $250 per linear foot. This includes the cost of materials and labor. The final cost will depend on the size and complexity of the ramp, as well as the contractor’s experience and location.

Overall, building a wooden ramp can be a cost-effective way to provide accessibility for wheelchair users and others with mobility issues. By understanding the materials and labor costs involved, you can make informed decisions about the design and construction of your ramp.

Factors Affecting the Cost

When planning to build a wooden ramp, there are several factors that can affect the cost. Here are some of the most important factors to consider:

Size of the Ramp

The size of the ramp is one of the most significant factors that can affect the cost of building a wooden ramp. The longer and wider the ramp, the more materials and labor will be required to build it. Generally, the cost per linear foot of a wooden ramp ranges from $80 to $120, depending on the materials used and the complexity of the design.

Complexity of Design

The complexity of the design is another factor that can affect the cost of building a wooden ramp. A simple, straight ramp will be less expensive to build than a ramp with turns, landings, or other features. Additionally, if you need to build a ramp that conforms to the Americans with Disabilities Act (ADA) guidelines, the design may be more complex and require additional materials and labor.

To keep costs down, you may want to consider a prefabricated ramp kit with aluminum sections. These kits can cost around $100 per linear foot, and you can assemble the sections yourself. However, keep in mind that these kits may take a while to order and ship.

In summary, the size of the ramp and the complexity of the design are two of the most important factors that can affect the cost of building a wooden ramp. By considering these factors and choosing the right materials and design, you can build a ramp that meets your needs and fits your budget.

Cost of Permits and Inspections

Before starting the construction of your wooden ramp, it is important to obtain the necessary permits and inspections required by your local building code. The cost of permits and inspections can vary depending on your location and the scope of your project.

According to HomeGuide, a building permit for a small project like a wooden ramp can cost between $50 to $300. However, for larger projects such as building a house or room additions, the cost can range from $500 to $2,000. The Family Handyman also notes that fence permits generally cost between $50 and $100.

Keep in mind that some cities may require an inspection in addition to the permit fee. The inspection may check for the depth and stability of the post holes and the overall safety of the ramp. The cost of inspections can also vary depending on your location and the type of inspection required.

It is important to budget for the cost of permits and inspections in addition to the materials and labor costs for building your wooden ramp. Failure to obtain the necessary permits and inspections can result in fines or even having to remove the ramp altogether. Therefore, it is essential to check with your local building department to ensure that you have all the necessary permits and inspections before starting your project.

Maintenance and Long-Term Costs

When it comes to building a wooden ramp, maintenance is an important consideration. While wooden ramps can last for many years, they do require regular upkeep to stay in good condition. Here are some things to keep in mind when it comes to maintenance and long-term costs:

Regular Cleaning

One of the most important things you can do to keep your wooden ramp in good condition is to clean it regularly. This will help prevent dirt, debris, and moisture from building up and causing damage. To clean your ramp, simply sweep it with a broom or use a pressure washer on a low setting. You can also use a mild detergent and a soft brush to remove stubborn stains.

Staining and Sealing

To help protect your wooden ramp from the elements, you should consider staining and sealing it every few years. This will help prevent moisture from penetrating the wood and causing rot or decay. Additionally, staining and sealing can help enhance the natural beauty of the wood and give it a longer lifespan.

Repairing Damage

Over time, your wooden ramp may become damaged due to wear and tear or weather-related issues. When this happens, it’s important to address the issue as soon as possible to prevent further damage. Small issues like loose boards or cracks can often be repaired with simple tools and materials, but more serious damage may require professional help.

Long-Term Costs

While the initial cost of building a wooden ramp may be relatively low, it’s important to consider the long-term costs of maintenance and repair. Depending on the size and complexity of your ramp, you may need to spend several hundred dollars per year on upkeep. However, by taking good care of your ramp and addressing issues as they arise, you can help keep these costs to a minimum and ensure that your ramp lasts for many years to come.

Potential Cost Saving Tips

Building a wooden ramp can be a cost-effective way to provide accessibility to your home or business, but it’s important to keep the costs in check. Here are a few tips to help you save money on your ramp project:

Do it Yourself

One of the easiest ways to save money on a wooden ramp is to build it yourself. While it may seem intimidating, there are plenty of resources available online that can guide you through the process. By doing it yourself, you can save on the cost of labor and have more control over the materials used.

Use Recycled Materials

Another way to save money on a wooden ramp is to use recycled materials. Check with local construction companies or salvage yards to see if they have any usable wood or other materials that can be repurposed for your ramp. Not only is this a cost-effective solution, but it’s also an environmentally friendly one.

Keep it Simple

When designing your ramp, try to keep it as simple as possible. The more complex the design, the more expensive it will be to build. Stick to a basic design that meets your accessibility needs without adding unnecessary features.

Shop Around

Finally, don’t be afraid to shop around for the best prices on materials. Check with multiple suppliers to see who can offer the best deals on wood, hardware, and other materials. You may be able to save a significant amount of money by doing some comparison shopping.

By following these tips, you can build a wooden ramp that meets your accessibility needs without breaking the bank.