Tag Archives: cedar wood cedar wood

wooden-deck

How Long Does a Wooden Deck Last: A Comprehensive Guide

If you’re a homeowner with a wooden deck, you may be wondering how long it will last before needing to be replaced. The answer to this question can vary depending on a number of factors, including the type of wood used, how well the deck is maintained, and the climate in which you live.

According to industry experts, a traditional wooden deck can last anywhere from 10 to 15 years with proper care and maintenance. However, if you opt for a composite deck made from materials like plastic and wood fibers, you can expect it to last up to 30 years or more. Capped polymer decks, which are made from a superior material composition, can potentially last for 50 years or more.

It’s important to note that the lifespan of your wooden deck will also depend on how well you take care of it. Regular cleaning, staining, and sealing can help to extend the life of your deck and prevent damage from moisture, insects, and UV rays. With proper maintenance, your wooden deck can provide years of enjoyment and add value to your home.

Life Span of a Wooden Deck

wooden-deck

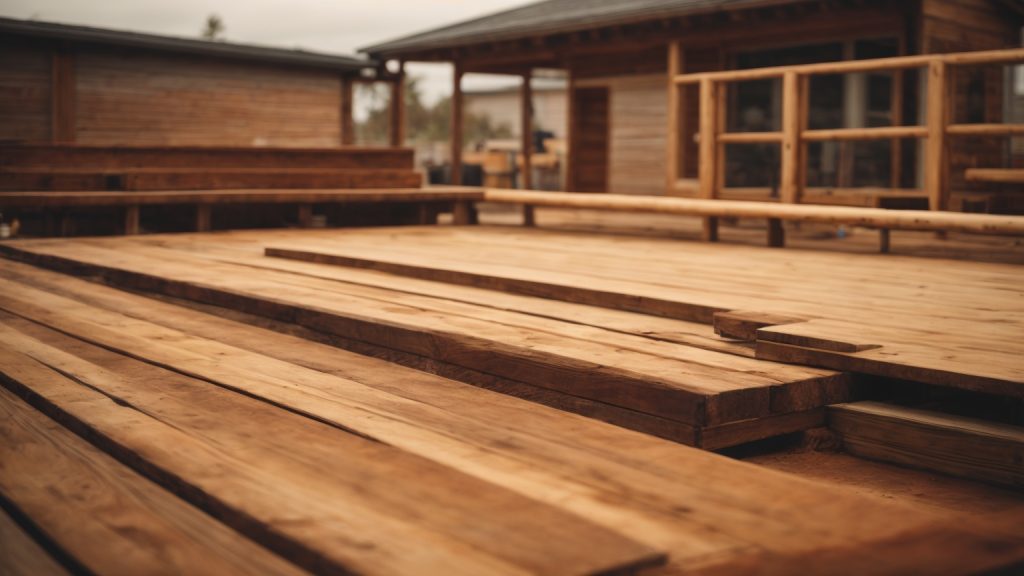
When it comes to building a deck in your backyard, you want to make sure it lasts as long as possible. The life span of a wooden deck will depend on several factors, including the type of wood, the quality of the installation, and how well you maintain it over time.

According to The International Association of Certified Home Inspectors, a traditional wood deck can last for 10-15 years, while a composite deck can last around 15 to 30 years. However, with proper maintenance, a wood deck can last anywhere from 10 to 30 years.

One of the biggest factors that can affect the life span of your wooden deck is the type of wood you choose. Different woods have different levels of durability and resistance to weather and insects. For example, cedar and redwood are known for their natural resistance to decay and insects, making them a popular choice for decks. Pressure-treated lumber is also a popular choice, as it is treated with chemicals to resist decay and insects.

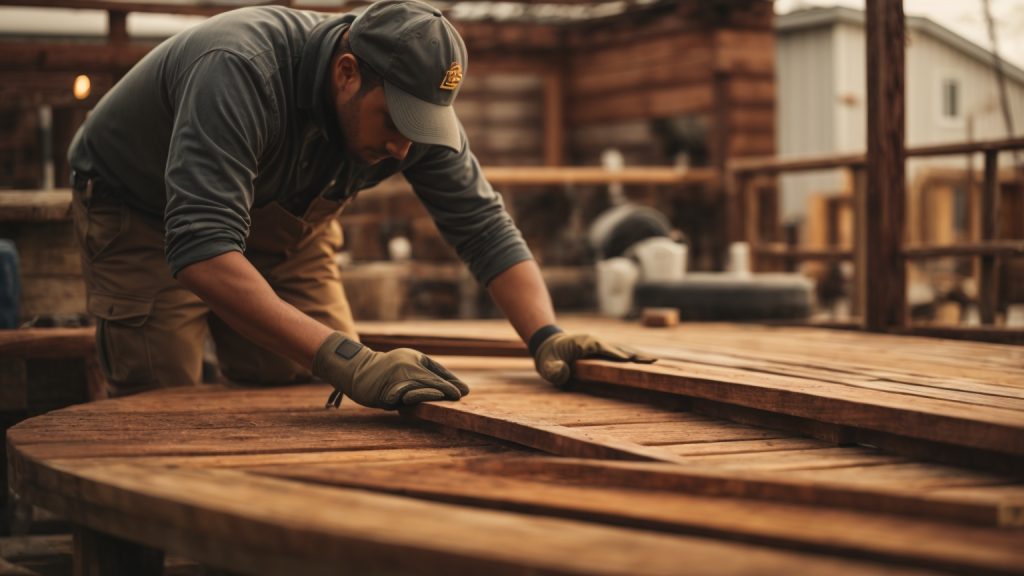
Another factor to consider is the quality of the installation. A well-built deck that is properly supported and secured will last longer than a poorly built deck. It’s important to hire a professional contractor who has experience building decks and will use quality materials and construction techniques.

Finally, proper maintenance is crucial to extending the life span of your wooden deck. This includes regular cleaning, staining, and sealing to protect the wood from moisture, UV rays, and other environmental factors. You should also inspect your deck regularly for any signs of damage, such as rotting or splitting boards, and make repairs as needed.

Overall, the life span of a wooden deck will depend on several factors, but with proper care and maintenance, you can enjoy your deck for many years to come.

Factors Influencing Deck Durability

When it comes to the lifespan of your wooden deck, several factors come into play. Here are some of the most important factors that can influence the durability of your deck:

Quality of Wood

The quality of the wood used to build your deck is one of the most critical factors that can affect its lifespan. Some wood species are naturally more resistant to rot and decay than others. For instance, cedar and redwood are known for their natural resistance to rot and insects, while pine and spruce are less durable and require more maintenance.

Another crucial factor that can influence the quality of your deck is the grade of the wood used. Higher-grade wood has fewer knots and defects, making it more durable and long-lasting than lower-grade wood.

Climate and Weather Conditions

The climate and weather conditions in your area can also have a significant impact on the lifespan of your deck. If you live in an area with high humidity or frequent rainfall, your deck is more likely to experience moisture damage, which can lead to rot, decay, and warping.

Similarly, if you live in an area with extreme temperatures, such as hot summers and cold winters, your deck may be more prone to cracking, splitting, and fading.

Maintenance and Care

Proper maintenance and care are crucial for extending the lifespan of your deck. Regular cleaning, sealing, and staining can help protect your deck from weathering and moisture damage. It’s also essential to inspect your deck regularly for signs of wear and tear, such as splintering, cracking, or loose boards.

In addition to regular maintenance, you should also take steps to prevent damage to your deck. For instance, avoid placing heavy objects on your deck, such as grills or furniture, as this can cause dents and scratches. You should also avoid using harsh chemicals or pressure washers to clean your deck, as this can damage the wood.

Overall, the lifespan of your wooden deck depends on several factors, including the quality of wood, climate and weather conditions, and maintenance and care. By choosing high-quality wood, maintaining your deck regularly, and taking steps to prevent damage, you can extend the lifespan of your deck and enjoy it for years to come.

Types of Wood and Their Longevity

types-of-wood-and-their-longevity

When it comes to building a wooden deck, the type of wood you choose can have a big impact on its longevity. Here are some of the most common types of wood used for decks and how long you can expect them to last with proper maintenance:

Pressure-Treated Wood

Pressure-treated wood is a popular choice for deck building because it is affordable and resistant to rot and insects. However, it does require regular maintenance to prevent warping and cracking. With proper care, a pressure-treated wood deck can last up to 20 years.

Cedar Wood

Cedar wood is a beautiful and durable option for deck building. It is naturally resistant to rot and insects, and it has a warm, reddish-brown color that many people find appealing. With regular maintenance, a cedar wood deck can last up to 25 years.

Redwood

Redwood is another popular option for deck building because it is naturally resistant to rot and insects. It has a rich, reddish color that can add warmth and character to any outdoor space. With proper care, a redwood deck can last up to 30 years.

It’s important to note that these are just general guidelines, and the lifespan of your deck will depend on many factors, including the quality of the wood, the climate in your area, and how well you maintain it. Regular cleaning, sealing, and staining can help extend the life of your deck and keep it looking beautiful for years to come.

Warning Signs of Deck Aging

If you have a wooden deck, it’s essential to keep an eye on its condition. Even with proper maintenance, decks will show signs of aging over time. Here are some warning signs to look out for:

Wood Rot

One of the most common problems with wooden decks is wood rot. This occurs when moisture gets trapped in the wood, causing it to decay. Signs of wood rot include soft and spongy areas, discoloration, and a musty odor. If you notice any of these signs, it’s crucial to address the issue as soon as possible. Rot can spread quickly and compromise the structural integrity of your deck.

Loose Boards

Another warning sign of an aging deck is loose boards. Over time, the fasteners that hold the boards in place can become loose, causing the boards to shift and move. If left unchecked, this can lead to tripping hazards and even collapse. Check your deck regularly for loose boards and tighten any loose fasteners.

Fading and Discoloration

Wooden decks are exposed to the elements year-round, which can cause fading and discoloration. UV rays from the sun can cause the wood to fade, while moisture can cause it to turn gray or black. While this is a cosmetic issue, it can also be a sign of deeper problems. Fading and discoloration can be an indication that your deck is not properly sealed, which can lead to rot and decay.

In conclusion, keeping an eye on your wooden deck’s condition is crucial to ensure its longevity and safety. If you notice any of these warning signs, it’s essential to address them promptly to prevent further damage.

How to Extend the Life of Your Deck

If you want to get the most out of your wooden deck, it’s important to take care of it properly. With proper maintenance, your deck can last for many years. Here are some tips to help you extend the life of your deck.

Regular Cleaning

Regular cleaning is essential for keeping your deck in good condition. Dirt, leaves, and other debris can accumulate on your deck over time, which can lead to mold and mildew growth. To prevent this, you should sweep your deck regularly and remove any debris that you find.

In addition to sweeping, you should also give your deck a thorough cleaning at least once a year. You can use a pressure washer or a deck cleaner to remove dirt and stains. Be sure to follow the manufacturer’s instructions when using a deck cleaner, and rinse your deck thoroughly after cleaning.

Sealing and Staining

Sealing and staining your deck can help to protect it from the elements. Sealing your deck will help to prevent moisture from penetrating the wood, which can lead to rot and decay. Staining your deck will help to protect it from UV rays and other environmental factors.

You should plan to seal or stain your deck every two to three years. Before you do this, you should clean your deck thoroughly and allow it to dry completely. Then, you can apply the sealer or stain according to the manufacturer’s instructions.

Annual Inspections

It’s important to inspect your deck regularly to make sure that it’s in good condition. You should inspect your deck at least once a year, and look for signs of damage such as loose boards, cracks, and rot.

If you find any damage, you should repair it as soon as possible. This will help to prevent the damage from getting worse and potentially compromising the structural integrity of your deck.

By following these tips, you can extend the life of your wooden deck and keep it looking great for many years to come.

How to Make Wooden Steps for a Caravan: A Simple Guide

If you own a caravan, you know how important it is to have sturdy and reliable steps to enter and exit your vehicle. While there are pre-built options available on the market, building your own wooden steps can be a fun and rewarding project. With the right tools and materials, you can create steps that are customized to fit your specific caravan and style preferences.

Before you begin building your wooden steps, it’s important to consider the size and height of your caravan. Measure the distance from the ground to the entrance of your caravan to determine how many steps you will need and what the height of each step should be. Additionally, consider the width of your entrance and the space available for your steps. Once you have these measurements, you can begin gathering your materials and planning your design. With a little bit of effort, you can have beautiful and functional wooden steps that will make entering and exiting your caravan a breeze.

Understanding the Basics of Caravan Steps

If you own a caravan, then you know that one of the essential things to consider is the steps. Building a set of wooden steps for your caravan is a great way to add convenience and safety to your mobile home. Here are some basics you need to understand before you start building your caravan steps.

Step Dimensions

The first thing to consider when building caravan steps is the dimensions. The size of the steps will depend on the height of your caravan’s entrance. You will need to measure the height of your caravan from the ground to the entrance. Then, you can calculate the number of steps you need and the dimensions of each step.

Materials

The materials you use for your caravan steps will depend on your preference and budget. However, pressure-treated wood is a popular choice for caravan steps because it is durable and resistant to rot and decay. You can also use decking boards or plywood for the steps.

Tools

To build your caravan steps, you will need some tools, including a saw, drill, screwdriver, and measuring tape. You may also need a hammer, nails, and screws.

Building Process

The building process of caravan steps is relatively simple. You will need to measure the area where you want to install the steps and cut the wood to the right size. Then, you can assemble the steps using screws or nails. Finally, you can attach the steps to your caravan.

In summary, building wooden steps for your caravan is a great way to add convenience and safety to your mobile home. By understanding the basics of caravan steps, you can build a set of steps that will last for years and make your caravan more comfortable to use.

Choosing the Right Wood

When it comes to building wooden steps for your caravan, choosing the right type of wood is crucial. You want a wood that is durable, strong, and can withstand the outdoor elements. Here are some of the best types of wood for building caravan steps:

Pressure-Treated Wood

Pressure-treated wood is a popular choice for building caravan steps because it is resistant to rot and decay. This type of wood is treated with chemicals that make it more durable and long-lasting. It is also affordable and widely available.

Cedar Wood

Cedar wood is another great option for building caravan steps. It is naturally resistant to rot and decay, and it has a beautiful natural color that can add to the aesthetic of your caravan. Cedar wood is also lightweight, making it easy to work with.

Redwood

Redwood is a strong and durable wood that is resistant to rot and decay. It is also naturally resistant to insects, making it a great choice for outdoor use. Redwood has a beautiful natural color that can add to the look of your caravan.

Oak

Oak is a strong and durable wood that is commonly used for outdoor projects. It is resistant to rot and decay and can withstand harsh weather conditions. Oak is also a beautiful wood with a natural grain pattern that can add to the aesthetic of your caravan.

When choosing the right wood for your caravan steps, it is important to consider the climate in which you will be using them. If you live in a wet or humid climate, you may want to choose a wood that is more resistant to rot and decay. If you live in a dry climate, you may want to choose a wood that is more resistant to cracking and splitting. By choosing the right wood, you can ensure that your caravan steps will last for years to come.

Tools Required

Making wooden steps for your caravan is a great DIY project that can be easily completed with the right tools. Here are the essential tools you will need to get started:

1. Measuring Tape

Before you start building your wooden steps, you need to measure the height of your caravan entrance. This will help you determine the number of steps you need to build and the height of each step.

2. Circular Saw

A circular saw is an essential tool for cutting the wooden boards to the correct size. It is important to make precise cuts to ensure that the steps are level and safe to use.

3. Jigsaw

A jigsaw is useful for cutting out any curved or angled shapes that may be required for your steps.

4. Drill

A drill is essential for creating pilot holes and screwing the wooden boards together. It is also useful for attaching the steps to the caravan.

5. Screwdriver

A screwdriver is necessary for tightening screws and attaching the wooden boards together securely.

6. Sandpaper

After cutting and drilling the wooden boards, it is important to smooth out any rough edges with sandpaper. This will ensure that the steps are safe to use and do not cause any splinters.

7. Safety Equipment

When using power tools, it is important to wear safety equipment such as safety glasses and gloves to protect yourself from any potential accidents.

Safety Precautions

When building wooden steps for your caravan, safety should be a top priority. Here are some safety precautions to keep in mind:

1. Use Appropriate Materials

Make sure to use materials that are sturdy and can support the weight of individuals using the steps. Avoid using weak or brittle wood that can easily break or splinter.

2. Use Proper Tools

Using the right tools for the job can help prevent accidents and ensure that the steps are built correctly. Make sure to use tools that are appropriate for the type of wood you are using and follow all safety instructions.

3. Measure Twice, Cut Once

Take accurate measurements and double-check them before cutting any wood. This can help prevent mistakes and ensure that the steps fit properly.

4. Secure the Steps

Make sure the steps are securely attached to the caravan and won’t shift or move while in use. Use screws or bolts to secure the steps to the caravan and make sure they are tightly fastened.

5. Add Non-Slip Surface

Adding a non-slip surface to the steps can help prevent slips and falls. This can be achieved by adding grip tape or a non-slip coating to the steps.

6. Regular Maintenance

Regularly inspect the steps and make any necessary repairs or adjustments. Over time, the steps may become loose or damaged, so it’s important to keep them in good condition.

By following these safety precautions, you can ensure that your wooden steps are safe and secure for use with your caravan.

Step-by-Step Guide to Making Wooden Steps

Making your own wooden steps for your caravan is a great way to add a personal touch to your home on wheels. With just a few tools and materials, you can create a sturdy and stylish set of steps that will last for years to come. Here’s how to do it:

Measuring and Cutting the Wood

The first step in making your wooden steps is to measure and cut the wood to the right size. You will need two long pieces of wood for the sides of the steps, and several shorter pieces for the steps themselves.

To measure the wood, start by measuring the height from the ground to the bottom of your caravan door. This will give you the overall height of your steps. Next, measure the width of your caravan door to determine how wide your steps should be.

Once you have your measurements, use a circular saw or handsaw to cut the wood to the right size. Be sure to wear safety goggles and follow all safety precautions when using power tools.

Assembling the Steps

Once you have your wood cut to the right size, it’s time to assemble the steps. Start by attaching the shorter pieces of wood to the longer side pieces using wood screws. Be sure to pre-drill the holes to prevent the wood from splitting.

Once all of the steps are attached, you can add additional support by attaching diagonal braces between the steps and the side pieces. This will help to make your steps more sturdy and stable.

Finishing the Steps

With the steps assembled, it’s time to add the finishing touches. Sand the wood to remove any rough edges or splinters, and apply a coat of wood stain or paint to protect the wood from the elements.

To add extra grip, you can also attach non-slip treads or strips to the steps. These can be found at most hardware stores and will help to prevent slips and falls.

And there you have it – a simple and easy way to make your own wooden steps for your caravan. With a little bit of time and effort, you can create a set of steps that will make your caravan feel like home.

Maintaining Your Wooden Steps

Congratulations, you have built your own wooden steps for your caravan! Now that you have them, you want to make sure they last as long as possible. Here are some tips to help maintain your wooden steps:

1. Keep them clean

Dirt and debris can accumulate on your wooden steps, which can cause them to deteriorate over time. To keep them clean, sweep them regularly or use a leaf blower to remove any debris. You can also use a mild soap and water to clean them, but make sure to rinse them thoroughly and let them dry completely before using them again.

2. Protect them from the elements

Wooden steps can be damaged by exposure to the elements, especially moisture. To protect them, consider applying a water-resistant sealant or paint. This will help prevent water from penetrating the wood and causing it to rot. Make sure to apply the sealant or paint according to the manufacturer’s instructions.

3. Check for damage regularly

Regularly inspect your wooden steps for any signs of damage, such as cracks or splits in the wood. If you notice any damage, repair it as soon as possible to prevent it from getting worse. You can use wood filler or epoxy to repair minor damage, but for more serious damage, it may be best to replace the affected part of the step.

4. Avoid placing heavy objects on them

Wooden steps are designed to support the weight of people, but placing heavy objects on them can cause them to weaken or break. Avoid placing heavy objects on your wooden steps, and if you need to move heavy objects up or down the steps, consider using a dolly or hand truck.

By following these tips, you can help ensure that your wooden steps last as long as possible and continue to provide safe and reliable access to your caravan.

Troubleshooting Common Issues

Even with proper planning and execution, it is possible to encounter some issues when building wooden steps for your caravan. Here are some common problems and how to troubleshoot them:

Uneven Steps

If you notice that your steps are uneven, it may be due to the ground being uneven. To fix this, you can try adjusting the height of the legs on the bottom of the steps. Alternatively, you can add a shim to the bottom of the shorter leg to even it out.

Steps That Are Too Steep

If your steps are too steep, it can be difficult to climb up and down them. To fix this, you can try adjusting the height of the legs on the bottom of the steps. Alternatively, you can add an additional step to reduce the height of each individual step.

Steps That Are Too Slippery

Slippery steps can be dangerous, especially when wet. To fix this, you can add non-slip strips to the surface of each step. Another option is to apply a non-slip coating to the steps.

Steps That Are Too Wobbly

Wobbly steps can be unstable and unsafe. To fix this, you can try adjusting the height of the legs on the bottom of the steps. Alternatively, you can add cross braces between the legs to provide additional stability.

Steps That Are Too Heavy

If your steps are too heavy, it can be difficult to move them around. To fix this, you can try using lighter materials or reducing the size of the steps. Another option is to add wheels to the bottom of the steps to make them easier to move.