
Installing a wooden fence can be a great way to add privacy and security to your property while enhancing its overall aesthetic appeal. Whether you are looking to create a safe space for your children and pets to play or simply want to enjoy some peace and quiet in your backyard, a well-built fence can make all the difference. In this article, we will provide you with some helpful tips and step-by-step instructions on how to install a wooden fence.
Before you get started, it’s important to do some research and planning. You’ll need to determine the size and style of fence that best suits your needs, as well as any local regulations or permits required for installation. Once you have a clear idea of what you want, it’s time to gather your tools and materials and get to work. In the following sections, we’ll walk you through each step of the process, from preparing the ground to attaching the final picket.
Understanding the Basics of a Wooden Fence

Installing a wooden fence is a great way to add privacy and security to your property while also enhancing its aesthetic appeal. Before you begin the installation process, it’s important to understand the basics of a wooden fence.
Types of Wooden Fences
There are several types of wooden fences to choose from, each with its own unique design and functionality. The most common types of wooden fences include:
- Privacy Fences: These fences are designed to provide maximum privacy by blocking the view from the outside. They are typically 6-8 feet tall and made of solid wood panels.
- Picket Fences: These fences are shorter in height and have evenly spaced vertical boards. They are ideal for defining boundaries and adding charm to your property.
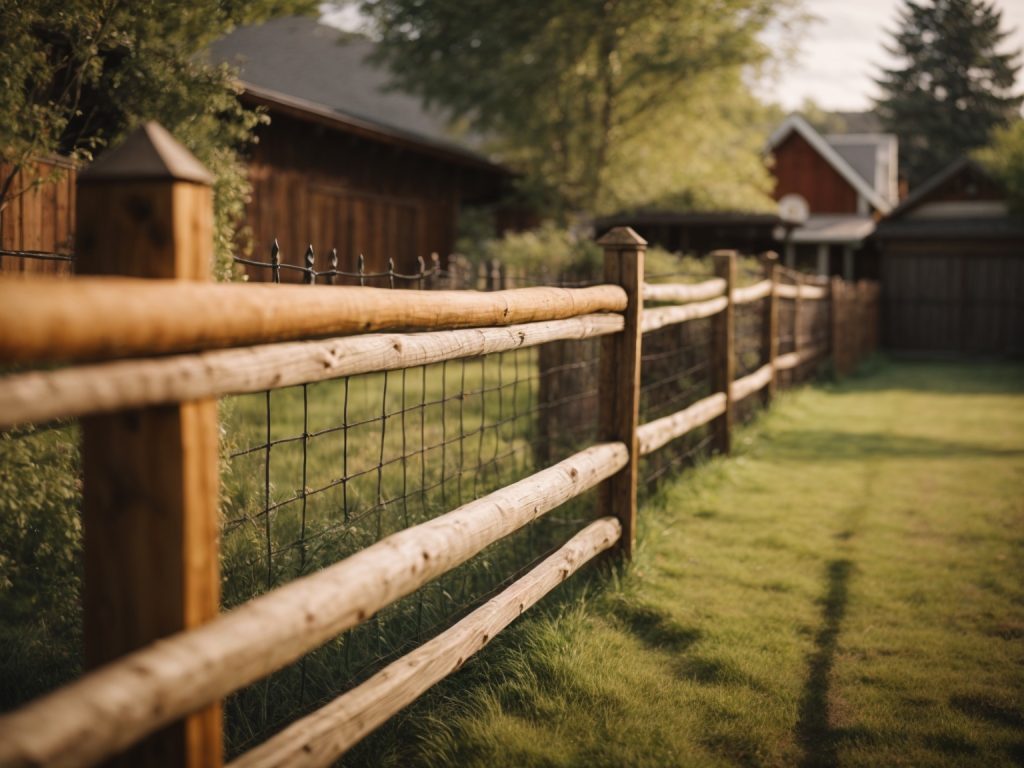
- Split Rail Fences: These fences are made of rough-hewn wood and are often used in rural areas for livestock containment. They are also great for creating a rustic look on your property.
Benefits of a Wooden Fence
Installing a wooden fence offers several benefits, including:
- Privacy: Wooden fences provide a great deal of privacy, making them ideal for homes with outdoor living spaces or pools.
- Security: A wooden fence can act as a barrier to keep unwanted visitors out of your property.
- Aesthetic Appeal: Wooden fences come in a variety of styles and designs, allowing you to enhance the look of your property.
- Affordability: Wooden fences are often more affordable than other types of fences, making them a popular choice among homeowners.
In conclusion, understanding the basics of a wooden fence is crucial to ensure a successful installation. By choosing the right type of fence and understanding its benefits, you can create a beautiful and functional addition to your property.
Tools and Materials Needed
To install a wooden fence, you will need the following tools and materials:
Tools
- Post hole digger
- Level
- Tape measure
- Circular saw
- Screwdriver
- Hammer
- Drill with drill bits
- Pneumatic nailer (optional)
- Portable air compressor and hose (optional)
Materials
- Wooden fence posts
- Wooden fence pickets
- Wooden fence rails/stringers
- 2-in x 4-in pressure-treated board (actual 1.5-in x 3.5-in)
- Exterior wood screws for pressure-treated lumber
- Concrete mix
- Furring strips
- Nails
Before you start the installation process, make sure you have all the necessary tools and materials. It’s important to use pressure-treated wood for your fence posts, pickets, and rails to ensure they last longer and resist rotting. You can use either fence pickets or ready-made panels to build your wooden fence.
You will need a post hole digger to dig holes for your fence posts. Make sure to measure and plan the area your fence will cover before digging post holes. You will also need a level to ensure that your fence posts are straight and even. A circular saw will come in handy when cutting the wooden fence pickets and rails to size.
A drill with drill bits is necessary for drilling holes in your wooden fence posts and for attaching the pickets and rails to the posts. If you have a pneumatic nailer and portable air compressor, you can use them to nail the pickets and rails to the fence posts. However, a hammer and nails will also work.
Lastly, you will need concrete mix to set your fence posts in the ground. Furring strips can be used to attach your wooden fence to a masonry wall or other structure. Exterior wood screws for pressure-treated lumber will be necessary to attach the pickets and rails to the fence posts.
Choosing the Right Location
Installing a wooden fence requires careful planning and preparation to ensure a successful outcome. One of the first and most important steps in the process is choosing the right location for your fence. Here are some things to consider when selecting the perfect spot for your fence:
Property Lines
Before you start digging any holes or setting any posts, it’s important to know exactly where your property lines are. You don’t want to accidentally encroach on your neighbor’s land or violate any local zoning laws. Check your property survey or consult with a professional surveyor to determine the exact boundaries of your property.
Purpose of the Fence
Think about why you want to install a fence in the first place. Is it for privacy, security, or to keep pets or children safely contained? The purpose of your fence will help you determine the best location for it. For example, if you want privacy, you’ll want to install your fence in an area that’s not easily visible from the street or neighboring properties.
Terrain and Soil Conditions
The terrain and soil conditions of your property can also affect where you should install your fence. If your property is hilly or uneven, you may need to adjust the height of your fence or install it in sections to accommodate the slope. Similarly, if your soil is rocky or sandy, you may need to use different techniques for setting your posts.
Access and Maintenance
Finally, consider how easy it will be to access and maintain your fence once it’s installed. Will you need to mow or weed around it regularly? Will you be able to easily access both sides of the fence for repairs or painting? These factors can help you determine the best location for your fence.
By carefully considering these factors, you can choose the right location for your wooden fence and ensure that it will meet your needs for years to come.
Measuring and Marking the Fence Line
Before you start digging post holes and setting your fence posts, it’s essential to measure and mark out the fence line accurately. This will ensure that your fence is straight and level, and it will also help you estimate the amount of materials you’ll need.
Step 1: Determine the Property Line
The first step in measuring and marking your fence line is to determine your property line. You can usually find this information on your property survey or by contacting your local zoning office. It’s essential to make sure that your fence is entirely on your property and not encroaching on your neighbor’s land.
Step 2: Measure the Length of the Fence Line
Once you know where your property line is, you can measure the length of the fence line. Use a measuring tape to determine the distance between the two endpoints of the fence line. Make sure to account for any corners or changes in direction.
Step 3: Mark the Fence Line
After you’ve measured the length of the fence line, it’s time to mark it out. You can use wooden stakes and string to mark the fence line. Place a stake at each endpoint of the fence line and tie the string between them. Make sure the string is straight and level.
Next, place additional stakes along the fence line at intervals of 8 feet or less. This will help you keep the fence straight and level as you install it. You can also use spray paint or chalk to mark the fence line on the ground.
Step 4: Check for Obstacles
Before you start digging post holes, it’s essential to check for any obstacles that might be in the way. This could include underground utilities, tree roots, or rocks. Use a metal detector to locate any underground utilities, and carefully remove any obstacles that might be in the way.
By following these steps, you can ensure that your fence is installed straight and level and that it’s entirely on your property. Measuring and marking the fence line accurately is an essential part of the fence installation process, so take your time and make sure you get it right.
Digging the Post Holes
Now that you have your plan in hand, it’s time to start digging. This is the most physically demanding part of the job, so make sure you are up for it before you begin. Here are some tips to help make the process go more smoothly:
1. Mark the Post Locations
Using your plan, mark the locations of your fence posts with spray paint or flags. Make sure to measure and space them evenly according to your plan.
2. Get the Right Tools
You will need a pair of post hole diggers or a post hole digging machine to dig the holes. Make sure they are in good working order before you begin.
3. Dig the Holes
Dig the holes to the depth specified in your plan. In general, the holes should be at least 24 inches deep for a 6-foot tall fence. The diameter of the hole should be about three times the width of the post.
4. Set the Posts
Once the holes are dug, it’s time to set the posts. Place the post in the hole and use a level to make sure it is straight. Fill the hole with concrete mix, following the manufacturer’s instructions. Allow the concrete to dry completely before moving on to the next step.
5. Repeat
Repeat the process for each post, making sure they are evenly spaced and level. Once all the posts are in place, you can move on to installing the rails and pickets.
By following these steps, you can ensure that your fence posts are installed securely and evenly. Remember to take breaks and stay hydrated during the digging process to avoid injury.
Setting the Fence Posts
Before you start setting the fence posts, make sure you have all the necessary tools and materials. You will need metal or treated wood fence posts, posthole digger or auger, Quikrete All-Purpose Gravel, gloves, protective eyewear, and dust mask.
Mixing the Concrete
To mix the concrete, follow the instructions on the bag. Usually, you will need to mix one part cement to two parts sand to four parts gravel. Add water gradually and mix until you get a consistency similar to oatmeal.
Securing the Posts
- Measure the distance between the posts and mark the spots where you will dig the holes. Make sure the distance is consistent and accurate.
- Use the posthole digger or auger to dig the holes. Make sure the holes are deep enough to support the posts. As a general rule, the holes should be at least one-third the length of the posts.
- Pour some Quikrete All-Purpose Gravel into the holes to create a solid base for the posts.
- Insert the posts into the holes and make sure they are level. You can use a level or a plumb line to check the posts’ alignment.
- Fill the holes with the concrete mixture and make sure the posts are securely in place. Use a trowel to smooth the surface of the concrete and slope it away from the posts to prevent water from pooling around them.
Setting the fence posts is a crucial step in building a wooden fence. Make sure you take the time to do it right, and your fence will be sturdy and long-lasting.
Installing the Fence Rails
Now that you have installed the fence posts, it is time to install the fence rails. The fence rails are the horizontal boards that run between the fence posts and support the fence pickets. Here is a step-by-step guide on how to install the fence rails:
- Determine the number of rails you need: The number of rails you need will depend on the height of your fence. For a six-foot fence, you will need three rails per section, and for a four-foot fence, you will need two rails per section.
- Lay out the rails: Lay out the rails on the ground next to the fence posts. Make sure they are evenly spaced and level.
- Mark the posts: Use a pencil or marker to mark the posts where the rails will be installed. Mark the top of the rail on each post.
- Install the rails: Starting at one end of the fence, attach the rails to the posts. Use galvanized screws or nails to attach the rails to the posts. Make sure the rails are level and flush with the top of the posts.
- Secure the rails: Once the rails are attached to the posts, use a level to ensure they are level. Secure the rails to the posts with additional screws or nails.
- Repeat: Repeat the process for each section of the fence until all the rails are installed.
It is important to ensure that the fence rails are level and evenly spaced. This will ensure that the fence pickets are installed correctly and the fence looks uniform. If the rails are not level, the fence pickets will be uneven, and the fence may not be stable.
In conclusion, installing the fence rails is an important step in building a wooden fence. By following the steps outlined above, you can ensure that your fence rails are installed correctly and your fence looks great.
Attaching the Fence Boards
Now that your fence posts are in place and the concrete has dried, it’s time to attach the fence boards. This is the part where your fence really starts to take shape and look like a proper fence.
Tools You’ll Need
Before you get started, make sure you have the following tools on hand:
- Power drill
- Screws or nails (depending on your preference)
- Measuring tape
- Level
- Saw (if you need to cut any fence boards to size)
Step-by-Step Instructions
- Start at one end of your fence and work your way down. Place the first fence board against the first fence post, making sure it’s level.
- Drill pilot holes through the fence board and into the fence post. This will prevent the wood from splitting when you attach it.
- Attach the fence board to the fence post using screws or nails. Repeat this process for each fence board, making sure they’re evenly spaced and level.
- If you need to cut any fence boards to size, measure twice and cut once. Use a saw to make your cuts and sand any rough edges.
- Once all of your fence boards are attached, step back and admire your handiwork! Your new fence is now complete.
Tips and Tricks
- If you’re using screws instead of nails, make sure they’re long enough to go through the fence board and into the fence post.
- Use a level to make sure your fence boards are straight. A crooked fence is not only unsightly, it’s also less sturdy.
- If you’re having trouble getting your fence boards to stay level, try using a temporary brace. Simply attach a piece of wood between two fence posts to hold your fence boards in place while you attach them.
- If you’re using pressure-treated wood, wait a few weeks before staining or painting your fence. This will allow the wood to dry out and absorb the stain or paint better.
Applying a Protective Finish
Once you have installed your wooden fence, it is important to apply a protective finish to ensure it lasts for many years. A protective finish will not only enhance the natural beauty of the wood but also protect it from the elements, such as rain, sun, and wind.
Choosing the Right Finish
Before applying any finish, it is important to choose the right one for your fence. There are several types of finishes available, including stains, paints, and sealers. Each has its own benefits and drawbacks, so it is important to consider your specific needs.
Stains are a popular choice as they enhance the natural beauty of the wood while providing protection from the elements. Paints, on the other hand, offer a wider range of color options and can provide a more uniform appearance. Sealers are a good choice if you want to maintain the natural color of the wood while providing protection.
Applying the Finish
Once you have chosen the right finish for your fence, it is time to apply it. Here are some steps to follow:
- Clean the fence: Before applying any finish, make sure the fence is clean and free of dirt, debris, and mildew. Use a power washer or a stiff-bristled brush to clean the fence thoroughly.
- Allow the fence to dry: After cleaning, allow the fence to dry completely before applying any finish. This may take a few days, depending on the weather conditions.
- Apply the finish: Using a brush, roller, or sprayer, apply the finish to the fence. Make sure to apply it evenly and cover all surfaces, including the ends of the boards.
- Allow the finish to dry: After applying the finish, allow it to dry completely before touching or using the fence. This may take a few days, depending on the type of finish and weather conditions.
- Apply a second coat (optional): Depending on the type of finish, you may need to apply a second coat for optimal protection and appearance. Follow the manufacturer’s instructions for applying a second coat.
By following these steps and choosing the right finish, you can ensure your wooden fence is protected and looks great for years to come.
Maintaining Your Wooden Fence
Once you’ve installed your wooden fence, it’s important to maintain it properly to ensure its longevity and keep it looking great. Here are some tips on how to maintain your wooden fence:
Apply a Protective Coating
Applying a protective coating to your wooden fence is essential to protect it from the elements. A wood preservative can help prevent rot and decay, and a water-repellent sealant can help protect it from water damage. You can find these products at your local home improvement or hardware store. Apply the coating according to the manufacturer’s instructions, and be sure to reapply it every few years to keep your fence in good condition.
Clean Your Fence Regularly
Cleaning your wooden fence regularly can help keep it looking great and prevent dirt and debris from building up. Use a soft-bristled brush or a pressure washer to remove any dirt or grime from the surface of your fence. Be sure to use a pressure washer with a low PSI to avoid damaging the wood. You can also use a mild detergent or a specialized fence cleaner to remove any stubborn stains.
Inspect Your Fence for Damage
Regularly inspect your fence for any signs of damage, such as cracks, warping, or rot. If you notice any damage, repair it as soon as possible to prevent it from getting worse. Replace any damaged or rotten boards, and reinforce any weak areas with additional support.
Trim Back Vegetation
Vegetation growing near your wooden fence can cause damage over time. Trim back any plants or vines that are growing too close to your fence to prevent them from causing damage or blocking airflow. This will help keep your fence dry and prevent moisture from building up, which can lead to rot and decay.
By following these tips, you can help ensure the longevity and beauty of your wooden fence for years to come.