Tag Archives: withstand harsh weather conditions

What Paint to Use on Outdoor Wooden Bench: Tips and Recommendations

What Paint to Use on Outdoor Wooden Bench: Tips and Recommendations

Are you looking to spruce up your outdoor wooden bench with a fresh coat of paint? Choosing the right type of paint for your project is crucial to ensure it lasts through various weather conditions. With so many options available, it can be overwhelming to determine the best paint to use on your outdoor wooden bench.

One of the most efficient and visually appealing ways to paint your outdoor wooden bench is by using spray paint. This type of paint provides even coverage and a glossy finish, making your bench look brand new. Additionally, spray paint is less time-consuming compared to brush painting, making it a great option for those who want to complete their project quickly. Oil-based spray paints are also a great choice as they provide a stronger finish than latex paint, making it more durable for outdoor use.

Understanding Outdoor Paints
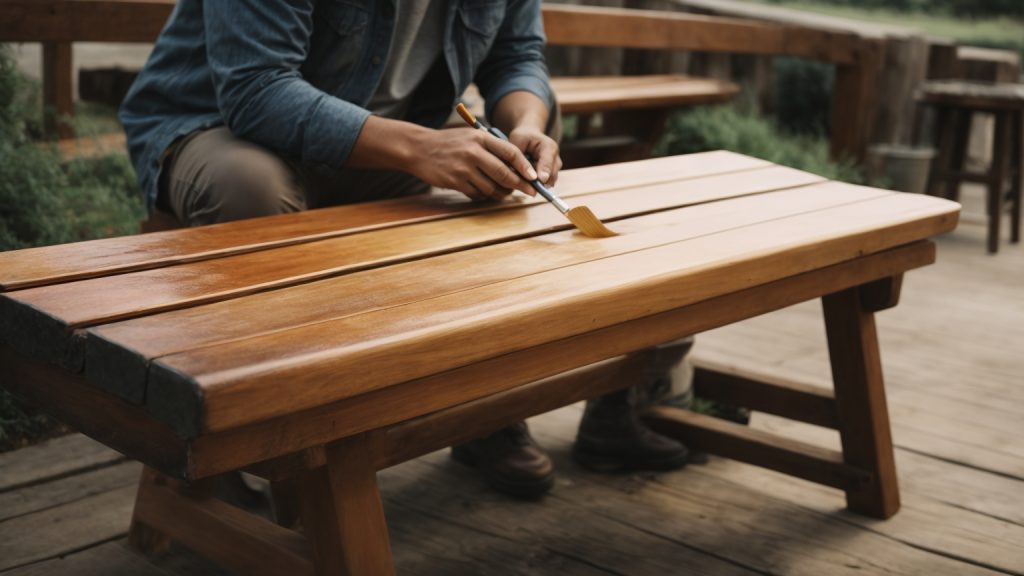
paint-to-use-on-outdoor-wooden-bench

When it comes to painting an outdoor wooden bench, it is crucial to choose the right type of paint that will provide protection against the elements. There are several types of outdoor paints available in the market, each with its unique features and benefits. In this section, we’ll take a closer look at some of the most commonly used outdoor paints and what makes them suitable for use on wooden benches.

Latex Paint

Latex paint is a popular choice for outdoor wooden benches because it is easy to apply, dries quickly, and is resistant to cracking and peeling. This type of paint is water-based, making it easy to clean up with soap and water. Latex paint also comes in a variety of finishes, from flat to high gloss, allowing you to choose the perfect look for your bench.

Oil-based Paint

Oil-based paint is another popular choice for outdoor wooden benches because it offers excellent durability and protection against the elements. This type of paint is resistant to moisture, UV rays, and mildew, making it an excellent choice for areas with high humidity or frequent rain. However, oil-based paint takes longer to dry than latex paint and requires mineral spirits or paint thinner for cleanup.

Acrylic Paint

Acrylic paint is a versatile type of paint that can be used on a variety of surfaces, including wood, metal, and plastic. This type of paint is water-based, making it easy to clean up, and dries quickly. Acrylic paint is also resistant to fading, cracking, and peeling, making it an excellent choice for outdoor wooden benches.

Stain

Stain is another option for protecting your outdoor wooden bench. Stain allows the natural beauty of the wood to show through while providing protection against the elements. Stain comes in a variety of colors, from natural to deep brown, allowing you to choose the perfect look for your bench. However, stain does not provide as much protection as paint and may need to be reapplied more frequently.

In summary, when choosing a paint for your outdoor wooden bench, it is essential to consider the durability, protection, and ease of use of the paint. Each type of paint has its unique features and benefits, so it’s important to choose the one that best suits your needs and preferences.

Types of Paint for Outdoor Wooden Bench

When it comes to painting your outdoor wooden bench, there are a few types of paint to choose from. Each type has its own advantages and disadvantages, so it’s important to choose the right one for your specific needs. Here are some of the most common types of paint for outdoor wooden benches:

Latex Paint

Latex paint is a popular choice for outdoor wooden benches because it is easy to use and dries quickly. It is also water-resistant and can withstand harsh weather conditions. Latex paint is available in a variety of colors and finishes, so you can choose the one that best suits your style.

One of the best latex paints for outdoor wooden benches is Behr Premium Plus Exterior Paint & Primer. It offers excellent adhesion, coverage, and durability, and is available in a variety of finishes. It is also low VOC, which means it has fewer harmful chemicals than other types of paint.

Oil-Based Paint

Oil-based paint is another option for outdoor wooden benches. It is more durable than latex paint and can withstand harsh weather conditions. It also provides a smooth, glossy finish that looks great on wooden benches. However, oil-based paint takes longer to dry and requires more cleanup than latex paint.

One of the best oil-based paints for outdoor wooden benches is Rust-Oleum Marine Coatings Topside Paint. It is specifically designed for use on boats, so it can withstand even the harshest weather conditions. It provides a high-gloss finish and is available in a variety of colors.

Chalk Paint

Chalk paint is a popular choice for those who want a more rustic or shabby-chic look for their outdoor wooden bench. It is easy to use and dries quickly, and it provides a matte finish that looks great on wooden benches. However, chalk paint is not as durable as other types of paint, so it may need to be reapplied more frequently.

One of the best chalk paints for outdoor wooden benches is Annie Sloan Chalk Paint. It is water-based and non-toxic, so it is safe to use around children and pets. It is also available in a variety of colors and can be used on a variety of surfaces, including wood, metal, and concrete.

In conclusion, when choosing the right type of paint for your outdoor wooden bench, it’s important to consider your specific needs and preferences. Latex paint is a great all-around option, oil-based paint is more durable, and chalk paint is perfect for those who want a more rustic look. Whatever type of paint you choose, be sure to follow the manufacturer’s instructions for best results.

Factors to Consider When Choosing Paint

When it comes to painting an outdoor wooden bench, there are several factors you should consider to ensure that the paint you choose is durable and long-lasting. Here are some of the most important factors to keep in mind.

Weather Conditions

One of the most important factors to consider when choosing paint for your outdoor wooden bench is the weather conditions it will be exposed to. If your bench will be exposed to harsh sunlight, rain, or other weather elements, you will need to choose a paint that is specifically designed to withstand these conditions. Look for paint that is labeled as “weather-resistant” or “outdoor use.”

Durability

Another important factor to consider is the durability of the paint. You want a paint that will last for years without chipping, cracking, or fading. Look for paint that is labeled as “durable” or “long-lasting.” You may also want to consider using a paint that is specifically designed for outdoor use, as these paints tend to be more durable than indoor paints.

Color and Aesthetic Appeal

While durability and weather resistance are important factors, you also want to choose a paint that looks good and complements the overall aesthetic of your outdoor space. Consider the color of your bench and the surrounding environment when choosing a paint color. You may also want to consider using a paint that has a matte or satin finish, as these finishes tend to look more natural and blend in better with the outdoor environment.

In summary, when choosing paint for your outdoor wooden bench, it is important to consider factors such as weather conditions, durability, and color and aesthetic appeal. By taking these factors into account, you can choose a paint that will protect your bench and look great for years to come.

Preparation of Wooden Bench for Painting
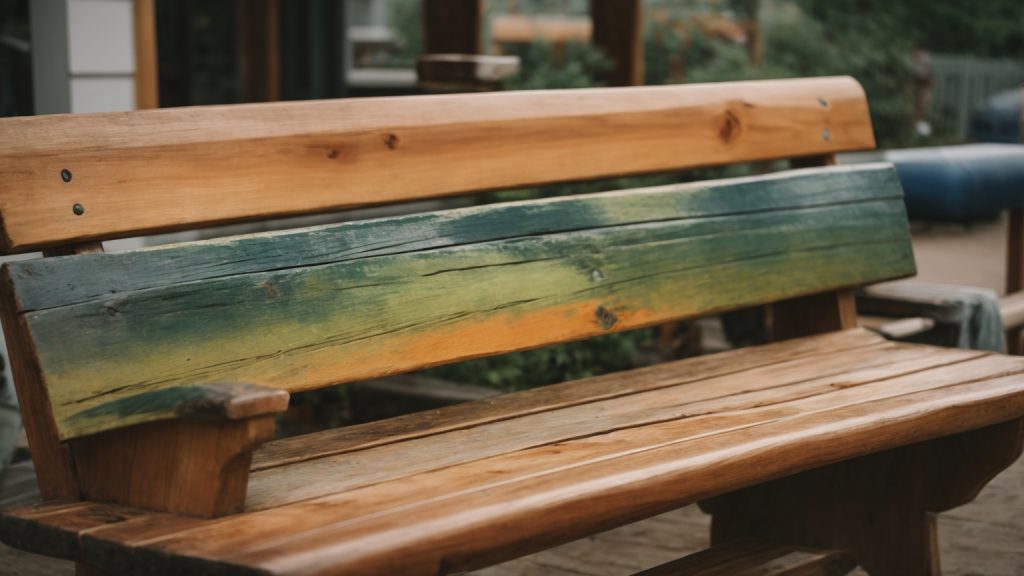
preparation-of-wooden-bench-for-painting

Before you start painting your outdoor wooden bench, it is important to prepare the surface properly to ensure the paint adheres well and lasts longer. Here are the steps you should follow to prepare your wooden bench for painting.

Cleaning

The first step in preparing your wooden bench for painting is to clean it thoroughly. Use a stiff-bristled brush to remove any dirt, debris, or loose paint from the surface of the bench. You can also use a pressure washer to clean the bench, but be careful not to damage the wood.

Once you have removed all the dirt and debris, wash the bench with a mixture of warm water and mild soap. Rinse the bench with clean water and let it dry completely before moving on to the next step.

Sanding

After the bench is dry, sand the surface with medium-grit sandpaper to remove any remaining loose paint or rough spots. Sand in the direction of the wood grain to avoid damaging the surface. Once you have finished sanding, wipe the bench with a clean cloth to remove any dust or debris.

For a smoother finish, you can also sand the bench with fine-grit sandpaper. This will help to create a smooth surface and ensure the paint adheres well.

Priming

Before you start painting, it is important to prime the surface of the bench. Priming will help the paint adhere better and last longer. Apply a coat of primer to the bench using a brush or roller, making sure to cover the entire surface evenly.

Allow the primer to dry completely before applying the paint. The drying time will depend on the type of primer you use, so be sure to read the manufacturer’s instructions carefully.

By following these simple steps, you can prepare your wooden bench for painting and ensure a smooth, long-lasting finish.

Painting Techniques for Outdoor Wooden Bench

When it comes to painting an outdoor wooden bench, there are several techniques to choose from. The most common methods are brushing, spraying, and rolling. Each technique has its own advantages and disadvantages, so it’s important to choose the one that works best for you.

Brushing

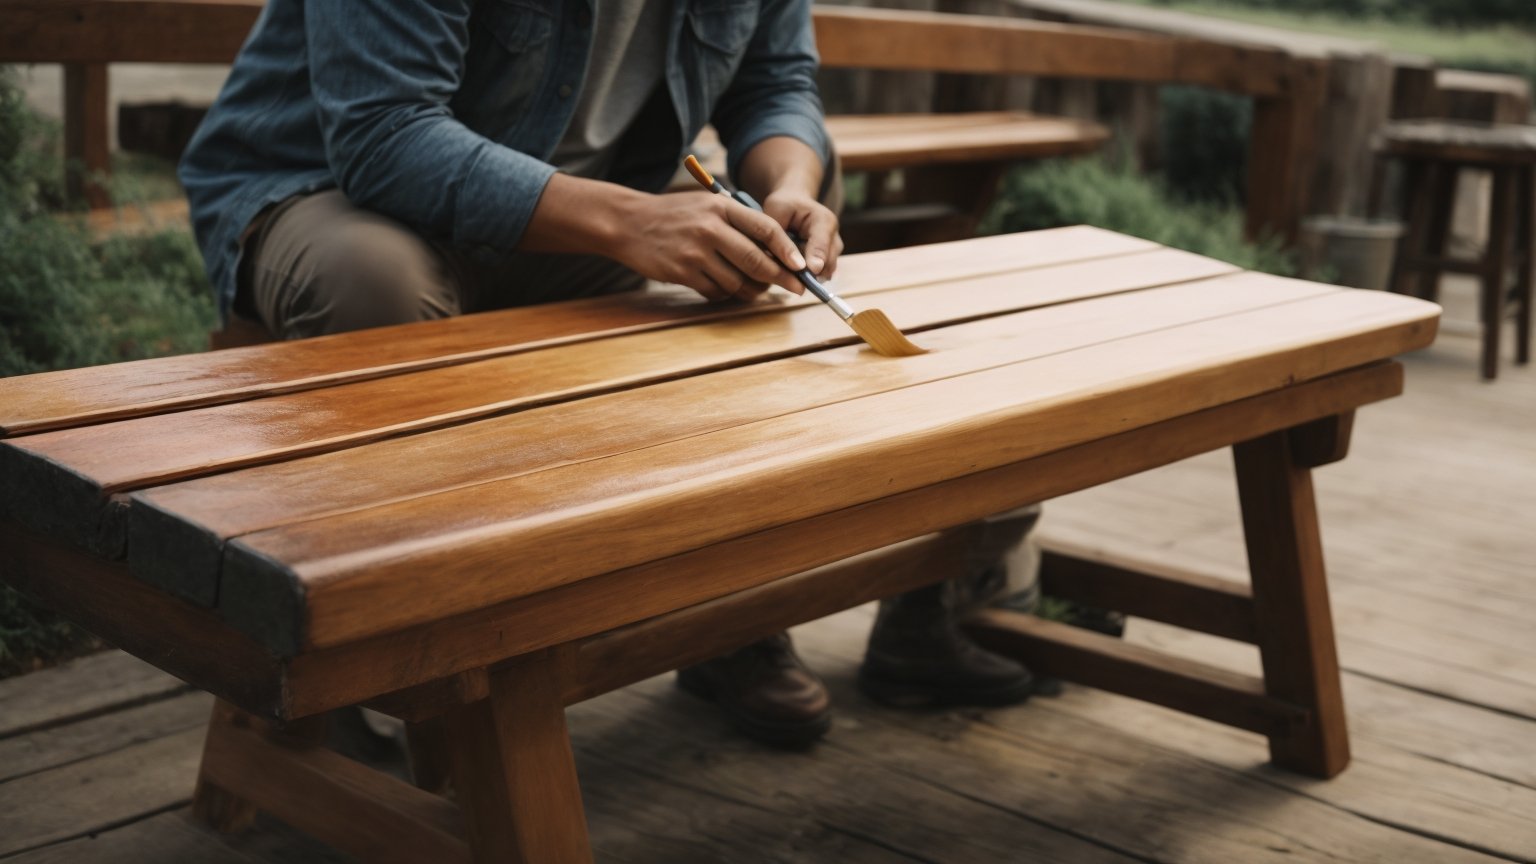
Brushing is the most traditional method of painting and is great for small projects. It’s a good option if you want to achieve a more textured finish. However, it can be time-consuming and may require multiple coats to achieve the desired coverage. If you choose to use a brush, make sure to choose one that is appropriate for the type of paint you are using.

Spraying

Spraying is a popular technique for painting outdoor wooden benches because it is quick and easy. It is also great for achieving a smooth finish. However, it can be messy and requires more preparation than other methods. You will need to cover the surrounding area to prevent overspray. Additionally, you will need to use a respirator mask to protect yourself from inhaling the fumes.

Rolling

Rolling is a good option if you want to achieve a smooth finish without the mess of spraying. It is also less time-consuming than brushing. However, it can be difficult to get into tight spaces with a roller. Additionally, you will need to choose the right type of roller for the type of paint you are using.

No matter which technique you choose, make sure to properly prepare the surface before painting. This includes cleaning and sanding the bench to ensure that the paint adheres properly. Additionally, make sure to choose a high-quality outdoor paint that is specifically designed for wooden surfaces. This will ensure that your bench looks great and lasts for years to come.

Maintenance Tips for Painted Outdoor Wooden Bench

If you want your painted outdoor wooden bench to last longer and look good, you need to take good care of it. Here are some maintenance tips to help you keep your bench in good condition.

Routine Cleaning

Cleaning your painted outdoor wooden bench regularly is essential to keep it looking good. You can use a soft-bristled brush or a sponge to remove dirt, dust, and debris from the surface of your bench. You can also use a mild detergent and warm water to clean your bench.

Avoid using harsh chemicals or abrasive cleaners as they can damage the paint or the wood. After cleaning, rinse your bench thoroughly with clean water and let it dry completely before using it.

Touch-Ups

Over time, the paint on your outdoor wooden bench may start to fade or chip. To keep your bench looking good, you may need to do some touch-ups. You can use a small brush and some touch-up paint to fix any chips or scratches on your bench.

Before you start touching up your bench, make sure it is clean and dry. Apply the touch-up paint carefully and let it dry completely before using your bench.

Re-Painting

If the paint on your outdoor wooden bench is severely faded or damaged, you may need to repaint it. Repainting your bench can give it a fresh new look and protect it from the elements.

Before you start repainting your bench, you need to remove the old paint. You can use a paint stripper or sandpaper to remove the old paint. Once you have removed the old paint, clean your bench thoroughly and let it dry completely.

Apply a primer to your bench before painting it. The primer will help the paint adhere better and last longer. Once the primer is dry, you can paint your bench with a high-quality outdoor paint.

In conclusion, taking good care of your painted outdoor wooden bench is essential to keep it looking good and lasting longer. Regular cleaning, touch-ups, and repainting can help you maintain your bench and protect it from the elements.
How to Paint Your Wooden Porch: A Beginner's Guide

How to Paint Your Wooden Porch: A Beginner's Guide

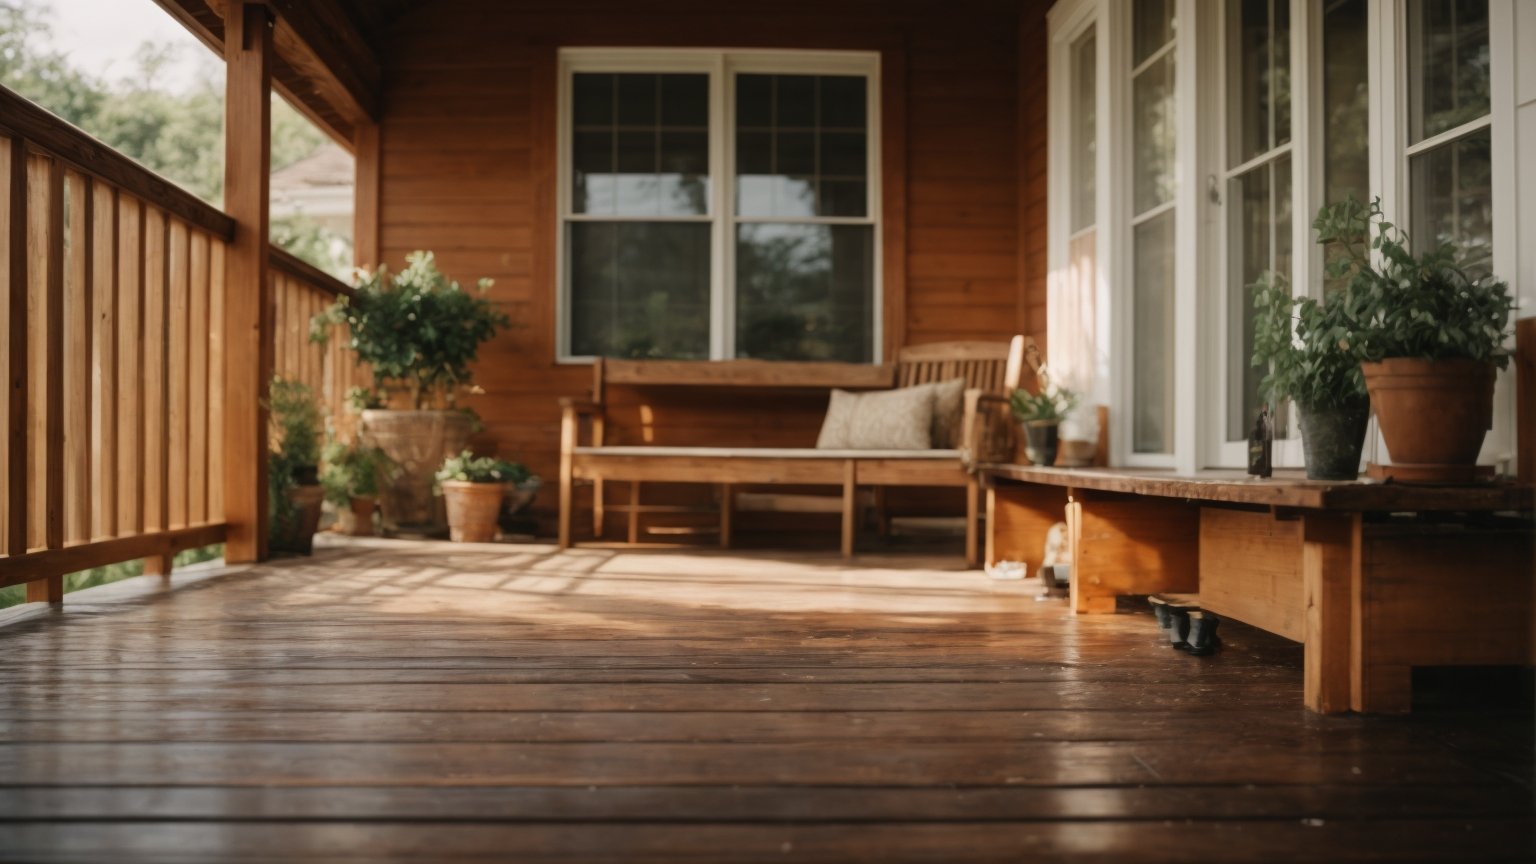
Painting a wooden porch is a great way to give your home a fresh and updated look. Whether you’re looking to enhance your curb appeal or just want to protect your porch from the elements, painting is a simple and effective solution. In this article, we’ll guide you through the process of painting your wooden porch step-by-step, so you can achieve a professional-looking finish.

Before you begin painting, it’s important to properly prepare your porch. This includes removing any furniture or decor, sweeping away debris, and cleaning the surface thoroughly. Once your porch is clean and dry, you can begin the painting process. We’ll cover everything from choosing the right paint and tools, to applying the paint and finishing touches. With our help, you’ll be able to paint your wooden porch with ease and confidence.

Choosing the Right Paint

paint-your-wooden-porch

When it comes to painting your wooden porch, choosing the right paint is crucial to ensure a long-lasting finish. Here are some things to consider when selecting the right paint for your porch.

Types of Paint for Wood

There are two main types of paint to consider when painting your wooden porch: oil-based and latex-based.

Oil-based paint is known for its durability and ability to withstand harsh weather conditions. It also has a glossy finish that can enhance the natural beauty of wood. However, it takes longer to dry and requires mineral spirits for cleanup.

Latex-based paint, on the other hand, dries faster and is easier to clean up with soap and water. It also has a low odor and is more environmentally friendly. However, it may not be as durable as oil-based paint and may not adhere as well to bare wood.

Weather Considerations

The weather in your area is an important factor to consider when choosing the right paint for your porch. If you live in an area with harsh weather conditions, such as extreme heat or cold, rain, or snow, you’ll want to choose a paint that can withstand these conditions.

Look for a paint that is labeled as “exterior” and “weather-resistant.” These types of paints are formulated to withstand exposure to the elements and will provide long-lasting protection for your porch.

In addition to choosing the right paint, it’s also important to properly prepare your porch before painting. This includes cleaning the surface, repairing any damage, and priming the wood to ensure proper adhesion of the paint.

By taking the time to choose the right paint for your porch and properly preparing the surface, you can ensure a beautiful and long-lasting finish that will enhance the look of your outdoor space.

Preparing the Wooden Porch

Before you start painting your wooden porch, it’s important to prepare the surface properly. This will ensure that the paint adheres well and lasts longer. Here are some steps to follow:

Cleaning the Surface

The first step in preparing your wooden porch is to clean the surface thoroughly. This will remove any dirt, grime, or mildew that may have accumulated on the surface. Here’s how you can clean the surface:

  • Sweep the porch with a broom to remove loose dirt and debris.
  • Use a pressure washer or a garden hose with a spray nozzle to wash the surface. If there is mildew, you can use a solution of bleach and water to remove it. Be sure to follow the manufacturer’s instructions for the bleach solution.
  • Let the surface dry completely before moving on to the next step.

Sanding the Wood

After cleaning the surface, you need to sand the wood to create a smooth surface for the paint to adhere to. Here’s how you can sand the wood:

  • Use a coarse sandpaper (60-80 grit) to sand the surface. This will remove any rough spots or splinters.
  • Use a medium sandpaper (100-150 grit) to sand the surface again. This will smooth out any rough spots left by the coarse sandpaper.
  • Use a fine sandpaper (220 grit) to sand the surface one final time. This will create a smooth surface for the paint to adhere to.

After sanding the surface, be sure to remove any dust or debris with a damp cloth or a vacuum cleaner. This will ensure that the paint adheres well to the surface.

By following these steps, you can prepare your wooden porch for painting and ensure that the paint lasts longer.

Priming the Porch

Before you start painting your wooden porch, you need to prime it. Priming is an essential step that ensures the paint adheres well to the surface, and it also helps to protect the wood from moisture and other elements. In this section, you will learn how to choose and apply the right primer for your porch.

Choosing a Primer

When it comes to choosing a primer, there are a few things to consider. First, make sure you choose a primer that is specifically designed for exterior use. Exterior primers are formulated to withstand the elements and provide a strong base for the paint. Second, consider the type of paint you will be using. If you are using an oil-based paint, you will need to use an oil-based primer. If you are using a latex-based paint, you can use either a latex-based or an oil-based primer.

Another thing to consider is the condition of your porch. If your porch is new or in good condition, you can use a regular primer. However, if your porch is old or has a lot of cracks and imperfections, you may want to use a filler primer. Filler primers are thicker and can fill in small cracks and imperfections, giving you a smoother surface to paint.

Applying the Primer

Before you apply the primer, make sure your porch is clean and dry. Use a stiff-bristled brush to remove any loose or peeling paint, and then sweep the porch to remove any dust or debris.

To apply the primer, use a paintbrush or roller. If you are using a roller, use a brush to cut in around the edges and corners. Work in small sections to ensure thorough coverage. Apply the primer in thin, even coats, and make sure to follow the manufacturer’s instructions for drying time.

Once the primer is dry, you can start painting your porch. Remember to choose a paint that is specifically designed for exterior use, and follow the manufacturer’s instructions for application and drying time.

By following these steps, you can ensure that your porch is properly primed and ready for painting. A little extra effort in the priming stage can go a long way in ensuring a smooth and long-lasting paint job.

Painting Techniques

wooden-painting-techniques

When it comes to painting your wooden porch, there are a few different techniques you can use. Each technique has its own advantages and disadvantages, so it’s important to choose the one that’s right for you.

Using a Brush

Using a brush is a great way to get a precise, detailed finish. It’s also a good option if you’re working in a small area or need to touch up certain spots. To use a brush, simply dip it into the paint and apply it to the wood in smooth, even strokes. Be sure to work in the direction of the wood grain to get the best results.

One downside to using a brush is that it can be time-consuming, especially if you’re painting a large area. It can also be difficult to avoid brush marks, so you may need to do some sanding and touch-ups after the paint has dried.

Using a Roller

Using a roller is a faster way to paint your porch, especially if you’re working in a large area. It’s also a good option if you want a smooth, even finish. To use a roller, simply dip it into the paint and roll it onto the wood in long, even strokes. Be sure to work in sections to avoid overlapping.

One downside to using a roller is that it can be difficult to get into tight corners and edges. You may need to use a brush to touch up these areas after the paint has dried.

Using a Sprayer

Using a sprayer is the fastest way to paint your porch, especially if you’re working in a large area. It’s also a good option if you want a smooth, even finish without any brush marks. To use a sprayer, simply fill it with paint and spray it onto the wood in long, even strokes. Be sure to work in sections to avoid overlapping.

One downside to using a sprayer is that it can be messy and difficult to control. You may also need to use a brush to touch up certain areas after the paint has dried. Additionally, you’ll need to take extra precautions to protect nearby surfaces from overspray.

Maintenance and Care

Taking care of your newly painted wooden porch will help it look great for years to come. Here are some tips for routine cleaning and touch-ups and repairs.

Routine Cleaning

Regular cleaning is important to prevent dirt and grime buildup that can damage your porch’s finish. Here are some tips for keeping your porch clean:

  • Sweep your porch regularly to remove dirt, leaves, and other debris. Use a broom with soft bristles to avoid scratching the surface.
  • Use a mild soap and water solution to clean your porch. Avoid using harsh chemicals or abrasive cleaners that can damage the finish.
  • Rinse with a hose or pressure washer, being careful not to use too much pressure that can damage the wood.
  • Dry your porch thoroughly after cleaning to prevent water damage.

Touch-Ups and Repairs

Even with proper care, your porch may need touch-ups and repairs from time to time. Here are some tips for keeping your porch looking its best:

  • Check your porch regularly for any signs of damage, such as cracks, peeling paint, or rot. Repair any damage as soon as possible to prevent further damage.
  • Sand any rough spots or peeling paint before applying touch-up paint. Use a fine-grit sandpaper and be careful not to sand too much of the surrounding area.
  • Use a high-quality exterior paint that is designed for wooden surfaces. Apply the paint with a brush or roller, following the manufacturer’s instructions.
  • Allow the paint to dry completely before using your porch.

By following these tips, you can keep your wooden porch looking great for years to come.

Safety Precautions

When painting your wooden porch, it’s important to take certain safety precautions to protect yourself and those around you. Here are some safety tips to keep in mind:

Use of Protective Gear

Before you start painting, make sure to wear the appropriate protective gear. This includes gloves, protective eyewear, and a mask to prevent inhaling any paint fumes. In addition, make sure to wear clothing that you don’t mind getting dirty or potentially ruined by paint.

Proper Ventilation

It’s important to ensure that you have proper ventilation when painting your porch. This means opening windows, doors, and using fans to circulate air. If you’re using a paint sprayer, make sure to wear a respirator to prevent inhaling any paint particles.

In addition, keep in mind that some paints and solvents can be flammable, so avoid smoking or using any open flames near the paint. Store all paint and solvents in a cool, dry place away from any heat sources.

By taking these safety precautions, you can ensure that you and your loved ones stay safe while painting your porch.

How to Remove Paint from Wooden Deck: A Simple Guide

If you have a wooden deck that has been painted, you may want to remove the paint to restore its natural beauty. However, removing paint from a wooden deck can be a daunting task. Fortunately, there are a few methods you can use to remove paint from your deck, and we will cover them in this article.

One of the methods for removing paint from a wooden deck is using a chemical paint stripper. This method involves applying a chemical paint stripper to the painted surface and allowing it to sit for a certain amount of time before scraping off the paint. Another method for removing paint from a wooden deck is using a heat gun and scraper. This method involves heating the painted surface with a heat gun and then scraping off the paint with a scraper. These methods can be effective, but they require caution and proper safety measures to avoid damaging the wood or injuring yourself.

Understanding the Type of Paint

Before you start removing paint from your wooden deck, it is important to understand the type of paint that was used. Different types of paint require different methods of removal. Here are some common types of paint and their characteristics:

Latex Paint

Latex paint, also known as water-based paint, is a popular choice for wooden decks because it is easy to apply and dries quickly. It is also easy to clean up with soap and water. However, latex paint can be difficult to remove once it has dried.

Oil-Based Paint

Oil-based paint is another common type of paint used on wooden decks. It provides a durable finish that can withstand harsh weather conditions. However, it takes longer to dry and requires solvents such as mineral spirits or turpentine for cleanup. Oil-based paint is also more difficult to remove than latex paint.

Solid Stains

Solid stains are a type of paint that penetrates the wood and provides a protective coating. They are available in a range of colors and are a popular choice for wooden decks. Solid stains are more difficult to remove than regular paint because they penetrate the wood.

Semi-Transparent Stains

Semi-transparent stains are similar to solid stains, but they allow some of the wood grain to show through. They are also more difficult to remove than regular paint because they penetrate the wood.

Lead-Based Paint

If your deck was painted before 1978, it may contain lead-based paint. Lead-based paint is hazardous to your health and should be removed by a professional. Do not attempt to remove lead-based paint yourself.

By understanding the type of paint that was used on your wooden deck, you can choose the appropriate method for removal. Always follow safety precautions and manufacturer instructions when using paint removers and other chemicals.

Safety Measures When Removing Paint

Removing paint from a wooden deck can be a tedious and messy task. It is important to take necessary safety measures to avoid accidents and injuries. Here are some safety tips to keep in mind when removing paint from your deck:

Wear Protective Gear

Before starting the paint removal process, make sure to wear appropriate personal protective equipment (PPE). This includes a face mask, safety glasses, and gloves. The PPE will help protect you from inhaling paint fumes, getting paint in your eyes, and coming in contact with the chemicals used in the paint stripper.

Work in a Well-Ventilated Area

Paint strippers contain strong chemicals that emit fumes that can be harmful if inhaled. It is important to work in a well-ventilated area to avoid breathing in the fumes. If possible, work outside or in a well-ventilated room with open windows and doors.

Keep Children and Pets Away

Paint removal can be dangerous for children and pets. Keep them away from the work area to avoid accidents and injuries.

Follow Manufacturer’s Instructions

Always read the manufacturer’s instructions before using a paint stripper. Follow the instructions carefully to avoid accidents and injuries. Make sure to use the recommended amount of paint stripper and apply it evenly to the deck.

Dispose of Paint and Chemicals Properly

After removing the paint from your deck, dispose of the paint and chemicals properly. Do not pour them down the drain or throw them in the trash. Contact your local waste management facility to find out how to properly dispose of them.

By following these safety measures, you can safely remove paint from your wooden deck without any accidents or injuries.

Materials and Tools Needed

Removing paint from a wooden deck can be a daunting task, but with the right materials and tools, it can be done effectively. Here are the essential items you need to have before starting the project:

Choosing the Right Paint Stripper

Choosing the right paint stripper is essential for removing paint from your wooden deck. There are different types of paint strippers available in the market, but you need to select the one that is suitable for your deck. Here are some factors to consider when choosing a paint stripper:

  • Type of paint: Different types of paint require different types of strippers. Make sure to choose a stripper that is suitable for the type of paint on your deck.
  • Deck material: The type of deck material can also influence the type of stripper you need. For example, some strippers may not be suitable for use on softwood decks.
  • Safety: Always prioritize safety when choosing a paint stripper. Look for a product that is safe for you and the environment.

Other Essential Tools

In addition to a paint stripper, you will need other essential tools to remove paint from your wooden deck effectively. Here are some of the tools you should have:

  • Paint scraper: A manual paint scraper is the most basic tool for removing paint from your deck. It is useful for getting the paint off tight spaces and corners.
  • Pressure washer: A pressure washer is useful for removing paint from large areas of the deck quickly.
  • Scrub brush: A scrub brush is useful for loosening and removing the softened paint after applying the stripper.
  • Putty knife: A putty knife is useful for getting under stubborn areas of paint.
  • Safety gear: Always prioritize safety when working with paint strippers. Wear gloves, goggles, and a respirator to protect yourself from the chemicals.

By having the right materials and tools, you can effectively remove paint from your wooden deck and restore its natural beauty.

Preparation of the Wooden Deck

Before removing paint from your wooden deck, you need to prepare the deck surface to ensure the best results. Here are the steps you should follow:

Step 1: Clear the Deck

Remove all furniture, potted plants, and other items from the deck. This will give you more space to work and prevent any damage to your belongings.

Step 2: Inspect the Deck

Check the deck for any rot or damage. If you find any, make sure to repair it before proceeding. Also, check for any popped nails or screws and fix them.

Step 3: Protect Surrounding Areas

Cover any nearby plants, bushes, or other areas that you don’t want to get paint stripper or debris on. Use plastic sheeting or drop cloths to protect the surrounding areas.

Step 4: Wear Protective Gear

Wear protective gear such as gloves, goggles, and a respirator mask to protect yourself from any chemicals or debris that may fly around during the paint removal process.

Step 5: Choose a Paint Removal Method

Choose a paint removal method that suits your needs and the condition of your deck. You can use chemical paint strippers or mechanical methods such as scraping, sanding, or power washing. You can also combine chemical methods with power washing for faster results.

By following these preparation steps, you can ensure that your deck is ready for paint removal and that you achieve the best results possible.

Applying the Paint Stripper

Now that you have prepared your deck, it’s time to apply the paint stripper. Follow these steps to ensure that you apply it correctly:

  1. Read the instructions on the paint stripper carefully before you begin. Different products may have different application methods, so make sure you understand how to use the one you’ve chosen.

  2. Put on your protective gear, including gloves and safety glasses, before you begin applying the paint stripper. This will help keep you safe from any chemicals that may be in the stripper.

  3. Apply the paint stripper to a small section of your deck to test its effectiveness. This will give you an idea of how long you need to leave it on and how much you need to use.

  4. Once you know how the paint stripper works, apply it to the rest of your deck. Use a brush or roller to apply a thick coat of the stripper to the painted areas. Make sure you cover the entire surface evenly.

  5. Let the paint stripper sit on the deck for the amount of time recommended on the label. This will usually be between 15 and 30 minutes, but it can vary depending on the product.

  6. After the paint stripper has had time to work, use a scraper to remove the paint. Start at one end of the deck and work your way across, scraping off the paint as you go. Be careful not to gouge the wood with the scraper.

  7. Once you have removed all the paint, use a pressure washer or hose to rinse the deck thoroughly. This will help remove any remaining paint stripper and paint residue.

Remember to dispose of the paint stripper and any paint residue properly. Check with your local waste management facility for guidelines on how to do this safely and responsibly.

Scraping Off the Paint

Now that you have prepared your deck and applied the paint stripper, it is time to start scraping off the paint. This step can be a bit messy, so be sure to wear gloves and old clothing to protect yourself.

Using a paint scraper, start at one end of the deck and work your way towards the other end, scraping off the softened paint. Be sure to apply even pressure and scrape in the direction of the wood grain to avoid damaging the wood.

If you come across areas with multiple layers of paint, you may need to use a putty knife to get under stubborn areas of paint. Take your time and be patient as this step can take some time, especially if you have a large deck.

As you scrape off the paint, be sure to collect the paint chips in a disposable container or bag. Do not let the paint chips accumulate on the deck as they can be a slipping hazard.

Once you have scraped off all the paint, rinse the deck thoroughly with a garden hose to remove any remaining paint chips and paint stripper residue. Allow the deck to dry completely before moving on to the next step.

In the next section, we will discuss sanding the deck to prepare it for a new coat of paint or stain.

Sanding the Wooden Deck

After removing the paint using chemical strippers, you may still have some paint residue on your wooden deck. Sanding is an effective way to remove the remaining paint and smooth out the surface of the wood. Here are some steps to follow when sanding your wooden deck:

  1. Choose the right sandpaper: You’ll want to use a coarse sandpaper with a grit of 60 to 80 to remove the paint. Once the paint is removed, switch to a finer grit of 120 to 150 to smooth out the wood.

  2. Sand with the grain: Always sand with the grain of the wood to avoid damaging the surface. Use a sanding block or a power sander to make the job easier.

  3. Sand the edges: Don’t forget to sand the edges of the deck boards and any hard-to-reach areas with a sanding sponge or a piece of sandpaper wrapped around a block of wood.

  4. Clean up: After sanding, use a broom or a vacuum to remove any dust and debris from the deck. Wipe the surface with a damp cloth to remove any remaining dust.

  5. Apply a sealer: Once the deck is sanded and cleaned, it’s a good idea to apply a sealer to protect the wood from moisture and UV rays. Choose a sealer that is specifically designed for outdoor use and follow the manufacturer’s instructions.

By following these steps, you can remove the paint from your wooden deck and restore its natural beauty. Sanding may take some time and effort, but the end result is worth it.

Cleaning and Final Touches

Congratulations! You’ve successfully removed the paint from your wooden deck. Now it’s time to clean up and add some final touches to make your deck look brand new.

Cleaning

Start by sweeping the deck to remove any debris or dust that may have accumulated during the paint removal process. You can also use a leaf blower to make this process faster and more efficient.

Next, mix a solution of warm water and mild soap in a bucket. Dip a scrub brush into the solution and scrub the entire deck to remove any remaining paint residue. Rinse the deck thoroughly with a hose or pressure washer to remove all soap residue.

Final Touches

After cleaning, your deck may look a bit dull and worn out. To bring back its natural shine and protect it from further damage, you can apply a protective finish. There are two main types of finishes: oil-based and water-based.

Oil-based finishes provide a longer-lasting protection but can be more difficult to apply and clean up. Water-based finishes are easier to apply and clean up, but may not provide as long-lasting protection.

Before applying the finish, make sure the deck is completely dry. Apply the finish using a brush or roller, following the manufacturer’s instructions. Make sure to apply the finish evenly and let it dry completely before using the deck.

In addition to applying a protective finish, you can also add some final touches to make your deck look even better. Consider adding some outdoor furniture, plants, or lighting to create a cozy and inviting atmosphere.

With these final touches, your deck will look brand new and ready for you to enjoy.

Preventing Future Paint Problems

Now that you have removed the old paint from your wooden deck, it’s time to take some preventive measures to ensure that the new paint lasts longer. Here are some tips to help you prevent future paint problems:

1. Clean the Surface

Before applying new paint, make sure the surface is clean and free of debris. Sweep the deck and use a power washer to remove any dirt, grime, or mildew. Let the surface dry completely before applying any new paint.

2. Choose the Right Paint

Select a paint that is suitable for outdoor use and made specifically for wooden surfaces. Look for a paint that is water-resistant and has UV protection to prevent fading. Also, consider the color of the paint, as darker colors tend to absorb more heat and can cause the wood to expand and contract, leading to cracks and peeling.

3. Apply Multiple Coats

To ensure that the paint lasts longer, apply multiple coats. Follow the manufacturer’s instructions on how many coats to apply and how long to wait between coats. Applying too much paint at once can cause it to bubble and peel.

4. Maintain the Deck

Regular maintenance can help prevent future paint problems. Keep the deck clean and free of debris, and inspect it regularly for any signs of damage. Make any necessary repairs promptly to prevent further damage.

By following these tips, you can prevent future paint problems and keep your wooden deck looking great for years to come.

How to Build a Wooden Trailer Gate: Step-by-Step Guide

Are you looking to build a wooden trailer gate? A trailer gate can be a useful addition to your trailer, allowing you to easily load and unload heavy items. Building a wooden trailer gate can be a cost-effective and customizable solution for your trailer. In this article, we will provide step-by-step instructions on how to build a wooden trailer gate.

Before starting your project, it is important to measure the height and width of your trailer opening to ensure your gate fits properly. Keep in mind that the gate should be slightly shorter than the height of the trailer opening to allow for clearance and easy opening and closing. Once you have your measurements, you can begin gathering the necessary tools and materials.

In this article, we will provide detailed instructions on how to build a wooden trailer gate using common hand-held carpentry tools. We will also include tips on selecting the right wood for your gate and how to properly install hinges and latches. By following our guide, you can build a sturdy and functional wooden trailer gate that meets your specific needs.

Understanding the Basics of a Wooden Trailer Gate

If you are planning to build a wooden trailer gate, it is essential to understand the basics of the gate’s construction. Here are a few things you need to know before you start building:

Materials

The first thing to consider when building a wooden trailer gate is the materials you will need. Some of the essential materials include lumber (2x4s, 2x6s, 1x4s, and 1x6s), screws, hinges, gate latch, wood glue, paint or stain, jigsaw, drill, and drill bits. Make sure to choose the right type of lumber for your gate. Pressure-treated lumber is an excellent choice for outdoor projects as it is resistant to rot and decay.

Planning and Measuring

Before you start building, you need to measure the height and width of the trailer opening to determine the size of your gate. Make sure to leave some clearance between the gate and the trailer to prevent damage. Once you have the measurements, you can start planning your gate’s design.

Building the Frame

The frame is the most crucial part of your wooden trailer gate. It provides the gate with its strength and stability. To build the frame, you will need to cut the lumber to the desired length and assemble it using screws and wood glue. Make sure to use a level to ensure that the frame is straight and square.

Adding the Boards

Once you have built the frame, you can add the boards to create the gate’s surface. Measure the width of the opening and cut the boards accordingly. Use screws and wood glue to attach the boards to the frame. Make sure to leave some space between the boards to allow for expansion and contraction due to changes in temperature and humidity.

Installing the Hinges and Latch

The final step is to install the hinges and latch. Attach the hinges to the gate and then to the trailer. Make sure to use screws that are long enough to provide a secure attachment. Install the gate latch on the opposite side of the hinges to keep the gate closed.

By understanding the basics of a wooden trailer gate, you can build a gate that is strong, durable, and functional. With the right materials, tools, and techniques, you can create a gate that will last for many years to come.

Choosing the Right Materials

When building a wooden trailer gate, selecting the right materials is crucial. You want to ensure that the gate is sturdy, durable, and can withstand the weight of the trailer. In this section, we will discuss how to choose the right materials for your wooden trailer gate.

Selecting the Wood

The first step in choosing the right materials for your wooden trailer gate is selecting the right wood. The most commonly used wood for trailer gates is pressure-treated pine. This type of wood is affordable, readily available, and resistant to rot and insects.

Another popular choice is cedar. Cedar is more expensive than pressure-treated pine, but it is naturally resistant to rot and insects. It is also more aesthetically pleasing and will give your trailer gate a beautiful finish.

When selecting your wood, make sure to choose boards that are straight and free of knots. Knots weaken the wood and can cause it to break under pressure.

Identifying the Necessary Hardware

In addition to the wood, you will also need to select the necessary hardware for your wooden trailer gate. This includes hinges, screws, and bolts.

When selecting hinges, make sure to choose heavy-duty hinges that can support the weight of the gate. The number of hinges you need will depend on the size of your gate. As a general rule, use three hinges for gates up to 8 feet wide and four hinges for gates over 8 feet wide.

For screws and bolts, make sure to choose ones that are rust-resistant and can withstand the weight of the gate. Use screws to attach the hinges to the gate and bolts to attach the hinges to the post.

By selecting the right wood and hardware, you can ensure that your wooden trailer gate is sturdy, durable, and can withstand the weight of your trailer.

Designing the Trailer Gate

Before you start building your wooden trailer gate, you need to design it. This involves determining the size of the gate and sketching the design.

Determining the Size

The first step in designing your trailer gate is to determine the size of the opening. Measure the height and width of the trailer opening to determine the height and width of your gate. Keep in mind that the gate should be slightly shorter than the height of the trailer opening to allow for clearance and easy opening and closing.

Sketching the Design

Once you have determined the size of the gate, you can start sketching the design. You can use graph paper or a computer program to create a detailed sketch of your trailer gate. Your design should include the following:

  • The overall dimensions of the gate
  • The type of wood you will use
  • The style of the gate
  • The hardware you will use (hinges, latch, etc.)

Consider the style of your trailer gate. Will it be a solid gate or will it have a mesh or slatted design? The style of your gate will depend on your personal preference and the intended use of your trailer.

When sketching your design, make sure to include the hardware you will use. This includes hinges, a latch, and any other necessary hardware. You may also want to include a handle or other decorative elements.

In conclusion, designing your trailer gate is an important step in the building process. By determining the size and sketching the design, you can ensure that your gate will fit your trailer and meet your needs.

Building the Frame

The frame is the backbone of your trailer gate, and it’s important to build it strong and sturdy. Here are the steps to building a wooden trailer gate frame:

  1. Measure the width and height of the trailer opening and cut the boards accordingly. Use a saw to cut the boards to the desired length.

  2. Cut two long boards for the sides of the frame and two shorter boards for the top and bottom of the frame. Make sure the boards are straight and free from knots or other defects that could weaken the frame.

  3. Lay the boards on a flat surface and arrange them in a rectangle shape. Use clamps to hold the boards in place.

  4. Drill pilot holes through the boards where they will be joined together. This will help prevent the wood from splitting when you insert screws.

  5. Apply wood glue to the ends of the boards that will be joined together. This will help create a strong bond between the boards.

  6. Insert screws through the pilot holes and into the adjoining board. Use a power drill to make this process faster and easier.

  7. Once the frame is complete, use a carpenter’s level to make sure it is straight and level. Adjust the frame as necessary.

  8. If you want to add diagonal bracing to the frame for extra strength, cut two diagonal boards and attach them to the corners of the frame.

  9. Sand the frame smooth to remove any rough edges or splinters.

  10. Apply a coat of wood sealer or paint to protect the frame from the elements.

By following these steps, you can build a strong and sturdy wooden frame for your trailer gate. With the frame complete, you can move on to adding the gate hinges, latch pins, and flooring or deck.

Attaching the Wood Panels

Once you have constructed the frame of your wooden trailer gate, the next step is to attach the wood panels. This is where your gate will start to take shape and look like a functional gate.

Before attaching the wood panels, you need to decide on the type of wood you want to use. You can use any type of wood, but it is recommended to use pressure-treated lumber or cedar as they are more durable and can withstand harsh weather conditions.

Here are the steps to attach the wood panels to your trailer gate:

  1. Measure the width and height of the frame to determine the size of the wood panels you need.
  2. Cut the wood panels to the desired size using a saw.
  3. Apply wood glue to the back of the wood panels and place them onto the frame.
  4. Secure the wood panels to the frame using screws. Make sure to use screws that are long enough to penetrate through the wood panels and into the frame.
  5. Repeat this process until all the wood panels are attached to the frame.

It is important to note that the wood panels should be evenly spaced and flush with the frame to ensure the gate opens and closes smoothly.

Once all the wood panels are attached, you can sand the surface of the gate to make it smooth. You can also apply paint or stain to protect the wood from moisture and give it a finished look.

In conclusion, attaching the wood panels is a crucial step in building a wooden trailer gate. By following these steps, you can ensure that your gate is sturdy, durable, and looks great.

Installing the Hardware

Once you have built your wooden trailer gate, it is time to install the hardware. This includes hinges and a latch. In this section, we will go over the steps to install both.

Hinges Installation

The hinges are what allow the gate to swing open and closed. You will need to install two hinges, one on the top and one on the bottom of the gate. Here are the steps to install the hinges:

  1. Determine the location of the hinges on the gate. They should be evenly spaced, with one near the top and one near the bottom.
  2. Mark the location of the hinges on the gate.
  3. Pre-drill holes for the screws using a drill bit that is slightly smaller than the diameter of the screws.
  4. Attach the hinges to the gate using screws.
  5. Hold the gate up to the trailer opening and mark the location of the hinges on the trailer.
  6. Pre-drill holes for the screws using a drill bit that is slightly smaller than the diameter of the screws.
  7. Attach the hinges to the trailer using screws.

Make sure the hinges are securely attached to both the gate and the trailer. Test the gate to ensure it swings open and closed smoothly.

Latch Installation

The latch is what keeps the gate closed when it is not in use. Here are the steps to install the latch:

  1. Determine the location of the latch on the gate. It should be placed near the top of the gate.
  2. Mark the location of the latch on the gate.
  3. Pre-drill holes for the screws using a drill bit that is slightly smaller than the diameter of the screws.
  4. Attach the latch to the gate using screws.
  5. Hold the gate up to the trailer opening and mark the location of the latch on the trailer.
  6. Pre-drill holes for the screws using a drill bit that is slightly smaller than the diameter of the screws.
  7. Attach the latch to the trailer using screws.

Make sure the latch is securely attached to both the gate and the trailer. Test the latch to ensure it keeps the gate closed tightly.

Congratulations, you have successfully installed the hardware for your wooden trailer gate!

Securing the Gate to the Trailer

Now that you have built your wooden trailer gate, it’s time to secure it to the trailer. The process of securing the gate is crucial, as it ensures the safety of your cargo during transportation. In this section, we will guide you through the steps to secure your gate to your trailer.

Step 1: Positioning the Gate

Before securing the gate to the trailer, make sure it is in the right position. The gate should be centered and level with the trailer opening. Use a level to ensure the gate is straight and adjust it if necessary. Once the gate is in the correct position, you can move on to the next step.

Step 2: Attaching Hinges

The hinges are an essential part of securing the gate to the trailer. Use heavy-duty hinges that can support the weight of the gate and the cargo. Attach the hinges to the gate first, making sure they are evenly spaced and level. Then, attach the hinges to the trailer, using bolts or screws that are appropriate for the material of your trailer.

Step 3: Installing Latch Pins

Latch pins are used to keep the gate closed during transportation. Install latch pins on both sides of the gate, making sure they are aligned with the latch on the trailer. Use a locking pin or a padlock to secure the latch pins and prevent them from opening during transportation.

Step 4: Adding Support

To ensure the gate stays in place during transportation, you may need to add additional support. Use braces or chains to secure the gate to the trailer. Braces should be installed on both sides of the gate, while chains can be used to secure the gate to the trailer bed.

Step 5: Testing the Gate

Once you have secured the gate to the trailer, it’s time to test it. Open and close the gate to ensure it moves smoothly and locks securely. Test the latch pins to ensure they are working correctly. If everything is working correctly, your gate is now secured and ready for transportation.

In conclusion, securing your wooden trailer gate is an essential step in ensuring the safety of your cargo during transportation. Follow these steps to secure your gate to the trailer properly, and you can transport your cargo with confidence.

Maintenance Tips for a Wooden Trailer Gate

Now that you have built your wooden trailer gate, it is important to properly maintain it to ensure its longevity. Here are some helpful maintenance tips to keep your wooden trailer gate in great condition:

Regular Cleaning

One of the easiest ways to maintain your wooden trailer gate is to keep it clean. Dirt, debris, and moisture can accumulate on the surface of the gate, leading to rot and decay. You should clean your wooden trailer gate regularly with a mild soap and water solution. Be sure to rinse it thoroughly and allow it to dry completely before applying any sealant or paint.

Sealant or Paint

To protect your wooden trailer gate from the elements, it is important to apply a sealant or paint. A sealant will help to repel moisture and prevent rot, while paint will add an extra layer of protection against the sun’s UV rays. Be sure to choose a high-quality sealant or paint that is specifically designed for outdoor use.

Inspect for Damage

Regularly inspect your wooden trailer gate for any signs of damage, such as cracks, splits, or warping. If you notice any damage, it is important to address it as soon as possible to prevent further deterioration. Depending on the severity of the damage, you may need to replace the affected boards or the entire gate.

Lubricate Hinges and Latches

The hinges and latches on your wooden trailer gate can become stiff and difficult to operate over time. To prevent this, you should lubricate them regularly with a silicone-based lubricant. This will help to keep them moving smoothly and prevent them from rusting.

By following these simple maintenance tips, you can keep your wooden trailer gate looking great and functioning properly for years to come.

How to Make Wooden Steps for a Caravan: A Simple Guide

If you own a caravan, you know how important it is to have sturdy and reliable steps to enter and exit your vehicle. While there are pre-built options available on the market, building your own wooden steps can be a fun and rewarding project. With the right tools and materials, you can create steps that are customized to fit your specific caravan and style preferences.

Before you begin building your wooden steps, it’s important to consider the size and height of your caravan. Measure the distance from the ground to the entrance of your caravan to determine how many steps you will need and what the height of each step should be. Additionally, consider the width of your entrance and the space available for your steps. Once you have these measurements, you can begin gathering your materials and planning your design. With a little bit of effort, you can have beautiful and functional wooden steps that will make entering and exiting your caravan a breeze.

Understanding the Basics of Caravan Steps

If you own a caravan, then you know that one of the essential things to consider is the steps. Building a set of wooden steps for your caravan is a great way to add convenience and safety to your mobile home. Here are some basics you need to understand before you start building your caravan steps.

Step Dimensions

The first thing to consider when building caravan steps is the dimensions. The size of the steps will depend on the height of your caravan’s entrance. You will need to measure the height of your caravan from the ground to the entrance. Then, you can calculate the number of steps you need and the dimensions of each step.

Materials

The materials you use for your caravan steps will depend on your preference and budget. However, pressure-treated wood is a popular choice for caravan steps because it is durable and resistant to rot and decay. You can also use decking boards or plywood for the steps.

Tools

To build your caravan steps, you will need some tools, including a saw, drill, screwdriver, and measuring tape. You may also need a hammer, nails, and screws.

Building Process

The building process of caravan steps is relatively simple. You will need to measure the area where you want to install the steps and cut the wood to the right size. Then, you can assemble the steps using screws or nails. Finally, you can attach the steps to your caravan.

In summary, building wooden steps for your caravan is a great way to add convenience and safety to your mobile home. By understanding the basics of caravan steps, you can build a set of steps that will last for years and make your caravan more comfortable to use.

Choosing the Right Wood

When it comes to building wooden steps for your caravan, choosing the right type of wood is crucial. You want a wood that is durable, strong, and can withstand the outdoor elements. Here are some of the best types of wood for building caravan steps:

Pressure-Treated Wood

Pressure-treated wood is a popular choice for building caravan steps because it is resistant to rot and decay. This type of wood is treated with chemicals that make it more durable and long-lasting. It is also affordable and widely available.

Cedar Wood

Cedar wood is another great option for building caravan steps. It is naturally resistant to rot and decay, and it has a beautiful natural color that can add to the aesthetic of your caravan. Cedar wood is also lightweight, making it easy to work with.

Redwood

Redwood is a strong and durable wood that is resistant to rot and decay. It is also naturally resistant to insects, making it a great choice for outdoor use. Redwood has a beautiful natural color that can add to the look of your caravan.

Oak

Oak is a strong and durable wood that is commonly used for outdoor projects. It is resistant to rot and decay and can withstand harsh weather conditions. Oak is also a beautiful wood with a natural grain pattern that can add to the aesthetic of your caravan.

When choosing the right wood for your caravan steps, it is important to consider the climate in which you will be using them. If you live in a wet or humid climate, you may want to choose a wood that is more resistant to rot and decay. If you live in a dry climate, you may want to choose a wood that is more resistant to cracking and splitting. By choosing the right wood, you can ensure that your caravan steps will last for years to come.

Tools Required

Making wooden steps for your caravan is a great DIY project that can be easily completed with the right tools. Here are the essential tools you will need to get started:

1. Measuring Tape

Before you start building your wooden steps, you need to measure the height of your caravan entrance. This will help you determine the number of steps you need to build and the height of each step.

2. Circular Saw

A circular saw is an essential tool for cutting the wooden boards to the correct size. It is important to make precise cuts to ensure that the steps are level and safe to use.

3. Jigsaw

A jigsaw is useful for cutting out any curved or angled shapes that may be required for your steps.

4. Drill

A drill is essential for creating pilot holes and screwing the wooden boards together. It is also useful for attaching the steps to the caravan.

5. Screwdriver

A screwdriver is necessary for tightening screws and attaching the wooden boards together securely.

6. Sandpaper

After cutting and drilling the wooden boards, it is important to smooth out any rough edges with sandpaper. This will ensure that the steps are safe to use and do not cause any splinters.

7. Safety Equipment

When using power tools, it is important to wear safety equipment such as safety glasses and gloves to protect yourself from any potential accidents.

Safety Precautions

When building wooden steps for your caravan, safety should be a top priority. Here are some safety precautions to keep in mind:

1. Use Appropriate Materials

Make sure to use materials that are sturdy and can support the weight of individuals using the steps. Avoid using weak or brittle wood that can easily break or splinter.

2. Use Proper Tools

Using the right tools for the job can help prevent accidents and ensure that the steps are built correctly. Make sure to use tools that are appropriate for the type of wood you are using and follow all safety instructions.

3. Measure Twice, Cut Once

Take accurate measurements and double-check them before cutting any wood. This can help prevent mistakes and ensure that the steps fit properly.

4. Secure the Steps

Make sure the steps are securely attached to the caravan and won’t shift or move while in use. Use screws or bolts to secure the steps to the caravan and make sure they are tightly fastened.

5. Add Non-Slip Surface

Adding a non-slip surface to the steps can help prevent slips and falls. This can be achieved by adding grip tape or a non-slip coating to the steps.

6. Regular Maintenance

Regularly inspect the steps and make any necessary repairs or adjustments. Over time, the steps may become loose or damaged, so it’s important to keep them in good condition.

By following these safety precautions, you can ensure that your wooden steps are safe and secure for use with your caravan.

Step-by-Step Guide to Making Wooden Steps

Making your own wooden steps for your caravan is a great way to add a personal touch to your home on wheels. With just a few tools and materials, you can create a sturdy and stylish set of steps that will last for years to come. Here’s how to do it:

Measuring and Cutting the Wood

The first step in making your wooden steps is to measure and cut the wood to the right size. You will need two long pieces of wood for the sides of the steps, and several shorter pieces for the steps themselves.

To measure the wood, start by measuring the height from the ground to the bottom of your caravan door. This will give you the overall height of your steps. Next, measure the width of your caravan door to determine how wide your steps should be.

Once you have your measurements, use a circular saw or handsaw to cut the wood to the right size. Be sure to wear safety goggles and follow all safety precautions when using power tools.

Assembling the Steps

Once you have your wood cut to the right size, it’s time to assemble the steps. Start by attaching the shorter pieces of wood to the longer side pieces using wood screws. Be sure to pre-drill the holes to prevent the wood from splitting.

Once all of the steps are attached, you can add additional support by attaching diagonal braces between the steps and the side pieces. This will help to make your steps more sturdy and stable.

Finishing the Steps

With the steps assembled, it’s time to add the finishing touches. Sand the wood to remove any rough edges or splinters, and apply a coat of wood stain or paint to protect the wood from the elements.

To add extra grip, you can also attach non-slip treads or strips to the steps. These can be found at most hardware stores and will help to prevent slips and falls.

And there you have it – a simple and easy way to make your own wooden steps for your caravan. With a little bit of time and effort, you can create a set of steps that will make your caravan feel like home.

Maintaining Your Wooden Steps

Congratulations, you have built your own wooden steps for your caravan! Now that you have them, you want to make sure they last as long as possible. Here are some tips to help maintain your wooden steps:

1. Keep them clean

Dirt and debris can accumulate on your wooden steps, which can cause them to deteriorate over time. To keep them clean, sweep them regularly or use a leaf blower to remove any debris. You can also use a mild soap and water to clean them, but make sure to rinse them thoroughly and let them dry completely before using them again.

2. Protect them from the elements

Wooden steps can be damaged by exposure to the elements, especially moisture. To protect them, consider applying a water-resistant sealant or paint. This will help prevent water from penetrating the wood and causing it to rot. Make sure to apply the sealant or paint according to the manufacturer’s instructions.

3. Check for damage regularly

Regularly inspect your wooden steps for any signs of damage, such as cracks or splits in the wood. If you notice any damage, repair it as soon as possible to prevent it from getting worse. You can use wood filler or epoxy to repair minor damage, but for more serious damage, it may be best to replace the affected part of the step.

4. Avoid placing heavy objects on them

Wooden steps are designed to support the weight of people, but placing heavy objects on them can cause them to weaken or break. Avoid placing heavy objects on your wooden steps, and if you need to move heavy objects up or down the steps, consider using a dolly or hand truck.

By following these tips, you can help ensure that your wooden steps last as long as possible and continue to provide safe and reliable access to your caravan.

Troubleshooting Common Issues

Even with proper planning and execution, it is possible to encounter some issues when building wooden steps for your caravan. Here are some common problems and how to troubleshoot them:

Uneven Steps

If you notice that your steps are uneven, it may be due to the ground being uneven. To fix this, you can try adjusting the height of the legs on the bottom of the steps. Alternatively, you can add a shim to the bottom of the shorter leg to even it out.

Steps That Are Too Steep

If your steps are too steep, it can be difficult to climb up and down them. To fix this, you can try adjusting the height of the legs on the bottom of the steps. Alternatively, you can add an additional step to reduce the height of each individual step.

Steps That Are Too Slippery

Slippery steps can be dangerous, especially when wet. To fix this, you can add non-slip strips to the surface of each step. Another option is to apply a non-slip coating to the steps.

Steps That Are Too Wobbly

Wobbly steps can be unstable and unsafe. To fix this, you can try adjusting the height of the legs on the bottom of the steps. Alternatively, you can add cross braces between the legs to provide additional stability.

Steps That Are Too Heavy

If your steps are too heavy, it can be difficult to move them around. To fix this, you can try using lighter materials or reducing the size of the steps. Another option is to add wheels to the bottom of the steps to make them easier to move.

How to Paint a Wooden Bench: Tips and Tricks for a Perfect Finish

Are you looking to add a pop of color to your outdoor space? Painting a wooden bench is a simple and cost-effective way to give your patio or garden a fresh new look. Whether you have an old, weathered bench or a brand new one, painting it can protect the wood from the elements and add some personality to your outdoor decor.

Before you start, it’s important to prepare the bench properly. This includes sanding down the wood to create a smooth surface for the paint to adhere to, and removing any loose paint or debris. You’ll also want to choose the right type of paint for your bench, depending on whether it will be exposed to the elements or not. With a few simple steps and some patience, you can transform your wooden bench into a beautiful and functional piece of outdoor furniture.

Understanding the Importance of Surface Preparation

Before you start painting your wooden bench, it is crucial to prepare the surface properly. Proper surface preparation ensures that the paint adheres well to the surface, resulting in a smooth and long-lasting finish. In this section, we will discuss the importance of surface preparation and the steps involved.

Choosing the Right Sandpaper

The first step in preparing the surface is to sand the bench. Sanding helps to remove any bumps or uneven surfaces, making the surface smoother and easier to paint. It also helps to remove any old paint or varnish, which can interfere with the new paint’s adhesion.

When sanding, it is essential to choose the right sandpaper grit. The grit determines how coarse or fine the sandpaper is. A coarser grit, such as 60 or 80, is suitable for removing old paint or varnish. A finer grit, such as 120 or 150, is suitable for smoothing out the surface.

Cleaning the Bench

After sanding, it is crucial to clean the bench thoroughly. Any dust or debris left on the surface can interfere with the paint’s adhesion. Start by wiping the surface with a dry cloth or brush to remove any loose debris. Then, use a damp cloth to wipe the surface clean. If there are any stubborn stains or dirt, use a mild detergent or cleaner to clean the surface.

Once the surface is clean, allow it to dry completely before painting. It is essential to ensure that the surface is completely dry, as any moisture left on the surface can cause the paint to bubble or peel.

In summary, surface preparation is a crucial step in painting a wooden bench. It ensures that the paint adheres well to the surface, resulting in a smooth and long-lasting finish. Choose the right sandpaper grit and clean the bench thoroughly before painting. With proper surface preparation, your wooden bench will look beautiful and last for years to come.

Selecting the Right Paint

When it comes to painting a wooden bench, selecting the right paint is crucial for a long-lasting finish. In this section, we will discuss the two main types of paint – water-based and oil-based – and how to choose the right color for your bench.

Water vs. Oil Based

Water-based paint is a popular choice for painting wooden benches, as it dries quickly and emits fewer fumes than oil-based paint. It is also easier to clean up with just soap and water. However, it may not be as durable as oil-based paint and may not hold up well against harsh weather conditions.

On the other hand, oil-based paint is more durable and can withstand harsh weather conditions. It also provides a smoother finish than water-based paint. However, it emits strong fumes and takes longer to dry. Cleanup requires solvents such as mineral spirits.

When deciding between water-based and oil-based paint, consider your project’s needs and your personal preferences.

Choosing the Right Color

Choosing the right color for your bench is just as important as selecting the right type of paint. Here are some tips to help you choose the perfect color:

  • Consider the bench’s location. If it will be placed in a sunny area, choose a lighter color to prevent it from fading quickly.
  • Think about the surrounding decor. Choose a color that complements the colors of your outdoor space.
  • Consider the bench’s purpose. If it will be used for a children’s play area, choose a bright and playful color.

Remember to always test the color on a small, inconspicuous area before painting the entire bench to ensure you are happy with the color.

Protecting Your Surroundings

Painting a wooden bench can be a messy job, but it doesn’t have to leave your surroundings covered in paint. Taking a few precautions can help protect your floors, walls, and other items from accidental paint splatters and spills.

Here are some tips to help protect your surroundings while painting a wooden bench:

Cover the Floor

Before you start painting, lay down a drop cloth or old sheet to protect your floor from paint drips and spills. If you don’t have a drop cloth, you can also use old newspapers or cardboard boxes.

Tape Off Surrounding Areas

If your bench is located near walls or other items that you don’t want to get paint on, use painter’s tape to tape off the surrounding areas. This will help prevent accidental paint splatters and make cleanup easier.

Wear Protective Clothing

Wearing old clothes or a painting smock can help protect your clothing from paint splatters. You may also want to wear gloves to protect your hands.

Use a Paint Shield

A paint shield is a tool that can help prevent paint from getting on surrounding areas. It’s a flat piece of metal or plastic that you hold against the surface you’re painting, creating a barrier between the paint and the surrounding area.

Clean Up Spills Immediately

If you do accidentally spill paint, clean it up immediately with a damp cloth or paper towel. The longer you wait, the harder it will be to remove the paint.

By taking these simple precautions, you can protect your surroundings while painting a wooden bench and avoid any unnecessary cleanup.

Applying the Primer

Choosing the Right Primer

Before you start painting your wooden bench, it is important to choose the right primer. The primer is essential for creating a smooth, even surface that the paint can adhere to. Here are some tips for choosing the right primer:

  • Choose a primer that is specifically designed for wood surfaces.
  • If you are painting an outdoor bench, choose a primer that is weather-resistant and can withstand the elements.
  • If you are painting a bench that has been previously painted, choose a primer that is compatible with the type of paint that was previously used.

Applying the Primer Correctly

Once you have chosen the right primer, it is time to apply it to your wooden bench. Here are some tips for applying the primer correctly:

  1. Start by cleaning the bench thoroughly to remove any dirt, dust, or debris. Use a damp cloth or sponge and allow the bench to dry completely before proceeding.

  2. If the bench has any rough spots or imperfections, use sandpaper to smooth them out before applying the primer.

  3. Apply the primer in thin, even coats using a paintbrush or roller. Be sure to follow the manufacturer’s instructions for drying time between coats.

  4. Allow the primer to dry completely before sanding it lightly with fine-grit sandpaper. This will help to create a smooth surface for the paint to adhere to.

  5. If necessary, apply a second coat of primer and repeat the sanding process.

By following these tips for choosing and applying the primer, you can ensure that your wooden bench is properly prepared for painting.

Painting the Bench

Painting a wooden bench can give it a fresh new look and protect it from the elements. Here are some steps to follow when painting your wooden bench.

Applying the First Coat

  1. Start by preparing the bench surface. Sand the bench with a medium grit sandpaper to remove any rough spots and create a smooth surface. Wipe the bench clean with a damp cloth to remove any dust or debris.

  2. Apply a coat of primer to the bench. The primer will help the paint adhere to the wood and provide a smooth surface for the paint to go on. Use a brush or roller to apply the primer evenly across the bench. Let the primer dry completely before moving on to the next step.

  3. Apply the first coat of paint to the bench. Use a brush or roller to apply the paint evenly across the bench. Be sure to work in the direction of the wood grain for a smooth finish. Let the paint dry completely before adding additional coats.

Adding Additional Coats

  1. Once the first coat of paint is completely dry, lightly sand the bench with a fine grit sandpaper. This will help the next coat of paint adhere to the surface and create a smooth finish.

  2. Apply a second coat of paint to the bench. Use the same technique as before, working in the direction of the wood grain for a smooth finish. Let the paint dry completely before adding additional coats.

  3. Depending on the color and quality of the paint, you may need to add additional coats to achieve the desired finish. Be sure to sand the bench lightly between each coat to create a smooth surface.

  4. Once you have achieved the desired finish, let the bench dry completely before using it. This will ensure that the paint has fully cured and will be durable enough to withstand regular use.

Painting a wooden bench can be a fun and rewarding project. By following these steps, you can give your bench a fresh new look and protect it from the elements.

Maintaining Your Painted Bench

After you have successfully painted your wooden bench, it is important to maintain it properly to keep it looking great for years to come. Here are some tips for maintaining your painted bench:

Routine Cleaning

Routine cleaning is essential to keep your painted bench looking fresh and clean. Here are some steps to follow:

  • Start by removing any loose dirt or debris with a soft-bristled brush or a damp cloth.
  • Mix a mild detergent with warm water and use a soft cloth to clean the bench. Avoid using abrasive cleaners or harsh chemicals as they can damage the paint.
  • Rinse the bench thoroughly with clean water and dry it with a soft cloth.

Touching Up Damages

Despite your best efforts, your painted bench may get scratched or damaged over time. Here are some steps to follow to touch up any damages:

  • Start by cleaning the damaged area with a mild detergent and warm water. Dry the area with a soft cloth.
  • Sand the damaged area lightly with fine-grit sandpaper. Be careful not to sand away too much of the paint.
  • Apply a small amount of touch-up paint to the damaged area using a small brush. Allow the paint to dry completely.
  • Sand the area lightly with fine-grit sandpaper to blend the touch-up paint with the surrounding area.
  • Apply a clear coat of polyurethane to protect the touch-up paint and the surrounding area.

By following these simple steps, you can keep your painted bench looking great for years to come.

How to Build a Wooden Swing Set: A Beginner's Guide

Are you looking to build a wooden swing set for your kids or grandkids? Building a swing set can be a fun and rewarding project for the whole family. Not only will your children have a blast playing on it, but you’ll have the satisfaction of knowing that you built it yourself.

Before you get started, it’s important to have a plan in place. You’ll need to decide on the size and style of your swing set, as well as the materials you’ll use. There are many resources available online, including free plans and tutorials, that can help guide you through the process. Keep in mind that building a swing set will require some basic carpentry skills and tools.

Choosing the Right Wood

When it comes to building a wooden swing set, choosing the right type of wood is crucial. You want to make sure that the wood you use is durable, weather-resistant, and safe for your children to play on. In this section, we’ll go over the different types of wood you can use for your swing set and the treatments that can be applied to make it last longer.

Types of Wood

The most common types of wood used for swing sets are redwood, cedar, and pressure-treated pine. Each type of wood has its own unique properties and benefits.

  • Redwood: Redwood is a popular choice for swing sets because it is naturally resistant to decay and insects. It is also a very strong and durable wood that can withstand harsh weather conditions. However, redwood is one of the more expensive options.

  • Cedar: Cedar is another popular choice for swing sets because it is naturally resistant to decay and insects. It is also a lightweight wood that is easy to work with. Cedar is a good choice if you have concerns about the chemicals used in pressure-treated pine.

  • Pressure-Treated Pine: Pressure-treated pine is the most durable, weather-resistant, and inexpensive of the three. It is treated with chemicals that help protect it from decay and insects. However, there are concerns about the chemicals used in pressure-treated pine, so it may not be the best choice if you have young children.

Wood Treatment

No matter what type of wood you choose, it’s important to treat it to help protect it from the elements and extend its lifespan. There are several treatments that can be applied to wood to make it more durable.

  • Paint: Painting your swing set is a good way to protect it from the elements and give it a fresh look. However, paint can chip and peel over time, so it may need to be reapplied every few years.

  • Stain: Staining your swing set is another good way to protect it from the elements. Stain penetrates the wood and provides a long-lasting finish. It also enhances the natural beauty of the wood.

  • Sealant: A sealant is a clear coating that is applied to the wood to protect it from moisture and UV rays. It does not change the color of the wood, but it does provide a long-lasting finish.

In conclusion, choosing the right type of wood and treating it properly can help ensure that your swing set lasts for many years to come. Consider the pros and cons of each type of wood and treatment option before making your final decision.

Designing the Swing Set

When it comes to building a wooden swing set, designing it is one of the most important steps. In this section, we will discuss the two main sub-sections of designing: choosing a design and creating a blueprint.

Choosing a Design

Before you start building your swing set, you need to decide on a design. There are many different designs to choose from, and you should choose one that fits your needs and budget. Some factors to consider when choosing a design include:

  • Age of children: If you have younger children, you may want a swing set with lower swings and a smaller slide.
  • Available space: Consider the size of your yard and how much space you have for the swing set.
  • Budget: Wooden swing sets can range from a few hundred dollars to several thousand dollars. Determine your budget before you start looking at designs.
  • Features: Some swing sets come with additional features such as monkey bars, rock walls, and tire swings. Consider which features you want and which ones you can do without.

Once you have considered these factors, you can start looking at different designs. You can find designs online, in books, or by visiting local playgrounds.

Creating a Blueprint

Once you have chosen a design, you need to create a blueprint. A blueprint is a detailed plan of your swing set that includes measurements, materials, and instructions. Creating a blueprint will help you stay organized and ensure that you have all the materials you need before you start building.

To create a blueprint, follow these steps:

  1. Measure your yard: Measure the area where you plan to build the swing set. This will help you determine the size of the swing set you can build.

  2. Sketch your design: Draw a rough sketch of your swing set design. Include all the features you want and the size of each feature.

  3. Determine materials: Determine what materials you will need for each part of the swing set. This will include wood, screws, bolts, and other hardware.

  4. Create a materials list: Create a list of all the materials you will need. Include the quantity of each item and the size.

  5. Write instructions: Write detailed instructions for each part of the swing set. Include any tips or tricks that will make the building process easier.

By following these steps, you can create a detailed blueprint that will make building your swing set much easier.

Gathering Materials

Before you start building your wooden swing set, you need to gather all the necessary materials. This includes tools and wood. Here are the things you need to do before you start building.

Required Tools

To build a wooden swing set, you will need the following tools:

  • Saw
  • Drill
  • Hammer
  • Measuring tape
  • Level
  • Socket set
  • Screwdriver
  • Safety glasses
  • Gloves

Purchasing the Wood

When it comes to purchasing wood for your swing set, you have two options. You can either purchase pre-cut wood or cut it yourself. If you choose to cut it yourself, you will need to purchase the following:

  • 4×4 lumber for the legs
  • 4×6 lumber for the top beam
  • 2×4 lumber for the cross beams
  • 1×6 lumber for the swing seats
  • 2×6 lumber for the slide

Make sure to purchase pressure-treated wood to ensure it lasts longer and is resistant to rot and insects. You can purchase wood at your local home improvement store or lumber yard.

Before purchasing, make sure to measure the area where you want to build your swing set to ensure you purchase the correct amount of wood. It’s always better to purchase a little extra just in case.

By gathering all the necessary materials before you start building, you can ensure a smoother and more efficient building process.

Building the Frame

Building the frame is the first step in building a wooden swing set. It is important to ensure that the frame is sturdy and strong enough to support the weight of the swings and the children who will be using them. This section will guide you through the process of building the frame, including cutting the wood and assembling the frame.

Cutting the Wood

Before you start cutting the wood, it is important to have a plan in place. You should have a detailed plan or blueprint of the swing set that you want to build. This will help you determine the amount of wood that you will need and the dimensions of each piece.

Once you have your plan in place, you can start cutting the wood. Use a saw to cut the wood to the appropriate lengths and angles. Make sure that each piece is cut accurately to ensure that the frame will be sturdy and strong.

Assembling the Frame

Once you have cut all of the wood, you can start assembling the frame. Begin by laying out all of the pieces of wood on the ground in the shape of the frame. Use clamps to hold the pieces of wood together while you drill holes and attach them together.

Start by attaching the top beam to the two side beams. Drill holes through the beams and use bolts to attach them together. Repeat this process for the bottom beam.

Next, attach the A-frame braces to the top beam and the side beams. Use bolts to attach the braces to the beams.

Finally, attach the crossbeam to the A-frame braces and the top beam. Drill holes through the beams and use bolts to attach them together.

Once you have assembled the frame, you can add the swings and any other accessories that you want to include. Make sure that everything is secure and sturdy before allowing children to use the swing set.

Adding the Swing

Once you have built the A-frame structure of your swing set, it’s time to add the swing. This is the fun part that your kids have been waiting for! In this section, we will cover how to choose the right swing and how to attach it to your swing set.

Choosing the Swing

When it comes to choosing the swing, there are a few things to consider like the age and weight of your children, the material of the swing, and the type of swing you want. Here are some options to consider:

  • Belt Swing: A belt swing is a classic option that is suitable for all ages. It’s made of sturdy materials and can support a lot of weight.

  • Tire Swing: A tire swing is a fun option that can be made from an old tire. It’s suitable for younger children but can also support older kids.

  • Bucket Swing: A bucket swing is a great option for toddlers and younger children. It has a high back and comes with a safety belt.

  • Rope Swing: A rope swing is a fun and adventurous option that is suitable for older children. It’s made of durable materials and can support a lot of weight.

Choose the swing that best suits your children’s needs and interests.

Attaching the Swing

Once you have chosen the swing, it’s time to attach it to your swing set. Here are the steps to follow:

  1. Measure the height: Measure the height from the ground to the top of the swing beam. This will help you determine the length of the swing chains.

  2. Attach the chains: Attach the chains to the swing hangers using S-hooks. Make sure the chains are the same length.

  3. Attach the swing: Attach the swing to the chains using S-hooks. Make sure the swing is level and centered.

  4. Test the swing: Test the swing by giving it a gentle push. Make sure it is stable and secure.

  5. Adjust the height: Adjust the height of the swing by moving the S-hooks up or down the swing chains. Make sure the swing is at a comfortable height for your children.

With these simple steps, you can add the swing to your swing set and give your children hours of fun and adventure.

Safety Measures

Building a wooden swing set can be a fun project, but it’s important to prioritize safety for your children. Here are some safety measures to keep in mind:

Securing the Structure

When building your wooden swing set, make sure that it is securely anchored to the ground. This will prevent the structure from tipping over during use. You can use concrete footings or ground anchors to secure the posts.

Additionally, make sure that all bolts and screws are tightly secured. Loose hardware can lead to instability and potential accidents. You may also want to consider using lock washers or thread-locking adhesive to prevent bolts from loosening over time.

Checking for Sharp Edges

Before allowing your children to use the swing set, inspect it for any sharp edges or splinters. Sand down any rough areas and cover any exposed hardware with plastic caps to prevent injury.

You should also consider using soft materials, such as rubber mulch or sand, around the base of the swing set to cushion potential falls.

By taking these safety measures, you can ensure that your children can enjoy their wooden swing set without the risk of injury.

Maintenance Tips

To ensure that your wooden swing set lasts for a long time, you need to perform regular maintenance. Here are some tips to help you keep your swing set in good condition.

Regular Inspection

Inspect your swing set regularly to identify any signs of wear and tear. Check the wood for cracks, splinters, and rot. Look for loose screws, bolts, and nuts. Inspect the chains and ropes for fraying or wear. If you find any issues, address them immediately to prevent further damage.

Wood Treatment Reapplication

Staining and sealing the wood is one of the most effective ways to keep your swing set looking and working like new. However, the treatment will wear off over time, especially if your swing set is exposed to the elements. You should reapply the treatment every 2-3 years or as needed.

To reapply the treatment, follow these steps:

  1. Clean the wood with a mild detergent and water.
  2. Let the wood dry completely.
  3. Sand the wood to remove any rough spots or splinters.
  4. Apply the stain or sealant with a brush or sprayer, following the manufacturer’s instructions.
  5. Let the treatment dry completely before using the swing set.

By following these maintenance tips, you can ensure that your wooden swing set remains safe, sturdy, and enjoyable for years to come.

Where to Buy Wooden Fence Panels: A Guide to Finding the Best Options

If you’re looking to add a wooden fence to your property, you may be wondering where to buy wooden fence panels. Fortunately, there are many options available to you. You can purchase wooden fence panels at home improvement stores, fencing companies, and even online.

One popular option for purchasing wooden fence panels is at home improvement stores such as Lowe’s or Home Depot. These stores offer a wide variety of fence panels in different styles and sizes. Additionally, they often have knowledgeable staff who can assist you in selecting the right panel for your needs.

Another option is to purchase wooden fence panels from fencing companies. These companies specialize in fencing and can offer a wider selection of panels than home improvement stores. They may also be able to provide installation services or custom design options. However, keep in mind that their prices may be higher than what you would find at a home improvement store.

Why Choose Wooden Fence Panels

Wooden fence panels are a popular choice for homeowners who want to add privacy, security, and aesthetic appeal to their property. There are several reasons why you should consider wooden fence panels for your property.

Durability

Wooden fence panels are durable and can last for many years with proper maintenance. They can withstand harsh weather conditions such as rain, wind, and snow. Wooden fence panels are also resistant to insects and pests, which can damage other types of fencing materials.

Aesthetic Appeal

Wooden fence panels are available in a wide range of styles and designs, making it easy to find a fence that complements the look of your home. They can be painted or stained to match the color of your home or to create a unique look. Wooden fence panels also add a natural and warm feel to your property.

Privacy

Wooden fence panels provide privacy and security to your property. They can be designed to completely block the view from the outside, giving you peace of mind knowing that your property is secure and private. Wooden fence panels also help to reduce noise pollution from the outside.

Overall, wooden fence panels are a great choice for homeowners who want to add privacy, security, and aesthetic appeal to their property. They are durable, aesthetically pleasing, and provide privacy and security to your property.

Best Places to Buy Wooden Fence Panels

If you are looking to buy wooden fence panels, there are a few places you can go to find what you need. Here are some of the best options for purchasing wooden fence panels.

Local Hardware Stores

Local hardware stores are a great option for purchasing wooden fence panels. They often carry a variety of sizes and styles, and you can usually find someone to help you with any questions you may have. Some popular hardware stores that carry wooden fence panels include Home Depot, Lowe’s, and Ace Hardware.

Online Marketplaces

Online marketplaces are another great option for purchasing wooden fence panels. They offer a wide selection of styles and sizes, and you can often find great deals. Some popular online marketplaces for purchasing wooden fence panels include Amazon, Wayfair, and Walmart.

When purchasing wooden fence panels online, it is important to read the product description carefully to ensure that you are getting the right size and style for your needs. You should also check the seller’s return policy in case the panels arrive damaged or are not what you expected.

Specialty Wood Shops

If you are looking for a more unique or custom wooden fence panel, a specialty wood shop may be your best option. These shops often carry high-quality, handcrafted wooden fence panels that are made to order. Some popular specialty wood shops for purchasing wooden fence panels include The Home Depot, Lowe’s, and Menards.

When purchasing from a specialty wood shop, it is important to communicate your needs clearly to the salesperson or craftsman. This will ensure that you get the exact style and size of wooden fence panel that you need for your project.

Overall, there are many great options for purchasing wooden fence panels. Whether you choose to shop at a local hardware store, an online marketplace, or a specialty wood shop, be sure to do your research and choose a reputable seller to ensure that you get the best quality panels for your money.

Factors to Consider When Buying

When it comes to buying wooden fence panels, there are several factors to consider before making a purchase. These factors include the type of wood, panel size, and price.

Wood Type

The type of wood used for your fence panels can affect the overall look, durability, and maintenance of your fence. Here are some common types of wood used for fence panels:

  • Pressure-treated pine: This is a popular and affordable option that is resistant to rot and insects. However, it may require regular maintenance and may not last as long as other types of wood.
  • Cedar: This is a more expensive option that is naturally resistant to rot and insects. It also has a beautiful, natural look and requires less maintenance than pressure-treated pine.
  • Redwood: This is a premium option that is naturally resistant to rot, insects, and moisture. It has a beautiful red color and is prized for its aesthetics and strength.

Consider your budget and the look and durability you desire when choosing the type of wood for your fence panels.

Panel Size

The size of your fence panels can affect the overall cost and ease of installation. Here are some common panel sizes:

  • 6 feet x 8 feet: This is a standard size that is widely available and easy to install.
  • 8 feet x 8 feet: This is a larger size that may be more expensive and difficult to install, but can provide more privacy.

Consider the size of your yard and the level of privacy you desire when choosing the size of your fence panels.

Price

The price of your fence panels can vary depending on the type of wood and panel size. Here are some average prices for wooden fence panels:

  • Pressure-treated pine: $20-$30 per panel
  • Cedar: $30-$40 per panel
  • Redwood: $50-$70 per panel

Consider your budget and the level of quality and durability you desire when choosing the price of your fence panels.

Overall, when buying wooden fence panels, consider the type of wood, panel size, and price to ensure you make the best purchase for your needs and budget.

Installation Tips

When it comes to installing wooden fence panels, there are two main options: DIY installation or hiring professionals. Here are some tips to help you decide which option is best for you.

DIY Installation

If you’re handy with tools and have some experience with DIY projects, installing wooden fence panels yourself can be a great way to save money. Here are some tips to help you get started:

  • Make sure you have all the necessary tools and materials before you begin. This includes fence panels, posts, rails, screws, and a post hole digger.
  • Measure the area where you want to install the fence panels to determine how many panels you’ll need. Be sure to take into account any slopes or uneven terrain.
  • Start by installing the fence posts. Dig holes for the posts using a post hole digger, and then set the posts in concrete. Make sure the posts are level and plumb before the concrete dries.
  • Once the posts are in place, attach the rails to the posts using screws. Make sure the rails are level and evenly spaced.
  • Finally, attach the fence panels to the rails using screws. Be sure to leave a small gap between each panel to allow for expansion and contraction due to changes in temperature and humidity.

Hiring Professionals

If you don’t have the time, tools, or experience to install wooden fence panels yourself, hiring professionals can be a great option. Here are some tips to help you find the right professionals for the job:

  • Ask for recommendations from friends, family, or neighbors who have recently had a fence installed.
  • Research local fence installation companies online. Look for companies with positive reviews and a good reputation.
  • Get quotes from several different companies before making a decision. Make sure each quote includes all the necessary materials and labor costs.
  • Once you’ve chosen a company, make sure they have all the necessary licenses and insurance before they begin work.

Whether you choose to install wooden fence panels yourself or hire professionals, following these tips can help ensure a successful installation.

How to Build Wooden Trusses: A Beginner's Guide

Are you looking to build a wooden truss for your structure but don’t know where to start? Building a wooden truss may seem like a daunting task, but with the right tools and knowledge, it can be a straightforward process. In this article, we will guide you through the steps necessary to build a simple wooden truss.

Before you begin, it’s important to determine the size and shape of the truss needed for your structure. Trusses can be built in various shapes and sizes, depending on the dimensions of the structure being reinforced. Once you have measured the overall length and height of your structure, you can begin plotting the exact specifications of your truss. In this article, we will provide step-by-step instructions on how to build a simple wooden truss, including how to secure it to the frame and leave an appropriate overhang.

Understanding Wooden Trusses

Wooden trusses are an essential component of many structures, including residential, commercial, and industrial buildings. They are designed to provide support to the roof and transfer the weight of the roof to the walls of the building. Understanding wooden trusses is important if you plan to build or work with them.

Types of Wooden Trusses

There are several types of wooden trusses, and each type has its unique characteristics. The most common types of wooden trusses are:

  • King Post Truss
  • Queen Post Truss
  • Howe Truss
  • Pratt Truss
  • Warren Truss
  • Fink Truss
  • Scissor Truss

Each type of truss has a specific purpose and is designed to accommodate different roof spans and loads. It is essential to select the appropriate truss type based on the structural requirements of the building.

Components of Wooden Trusses

Wooden trusses consist of several components, including:

  • Top Chord
  • Bottom Chord
  • Web Members
  • Gussets

The top chord is the uppermost member of the truss, and the bottom chord is the lowermost member. The web members connect the top and bottom chords and provide support to the roof. Gussets are metal plates that connect the web members to the top and bottom chords.

Advantages of Wooden Trusses

Wooden trusses offer several advantages over other types of roof structures. Some of the advantages include:

  • Cost-effectiveness
  • Versatility
  • Strength and durability
  • Ease of installation
  • Aesthetic appeal

Wooden trusses are cost-effective because they are prefabricated off-site, reducing labor costs and construction time. They are versatile and can be designed to accommodate different roof spans and loads. Wooden trusses are strong and durable, and they can withstand harsh weather conditions. They are also easy to install, reducing construction time. Finally, wooden trusses offer an aesthetic appeal that other types of roof structures cannot match.

Understanding wooden trusses is essential if you plan to build or work with them. Knowing the different types of trusses, their components, and their advantages will help you make informed decisions when selecting and installing wooden trusses in your building.

Materials Required

When it comes to building wooden trusses, you’ll need to gather a few essential materials to ensure a sturdy and safe structure. In this section, we’ll cover the two main categories of materials you’ll need: wood types and hardware essentials.

Wood Types

The type of wood you choose for your trusses will depend on a few factors, such as the load capacity and the overall look you’re going for. Here are some common wood types used for truss construction:

Wood Type Description
Douglas Fir Strong and durable, commonly used for heavy loads
Spruce Lightweight and easy to work with, ideal for smaller structures
Pine Affordable and versatile, suitable for most truss designs
Cedar Resistant to rot and insects, great for outdoor structures

Keep in mind that the thickness of the wood you choose will also affect the load capacity of your trusses. Be sure to consult a professional or use load calculation software to determine the appropriate wood size for your project.

Hardware Essentials

In addition to wood, you’ll need a few hardware essentials to connect the truss components and ensure a secure structure. Here are some common hardware items you’ll need:

  • Gusset plates: These metal plates are used to connect the truss joints and distribute the load evenly.
  • Screws: Use screws to attach the gusset plates to the wood components.
  • Timber connectors: These metal brackets are used to connect the truss to the rest of the structure, such as the walls or beams.
  • Nails: Use nails to secure the timber connectors to the wood components.

Be sure to choose hardware that is appropriate for the size and weight of your trusses. Using the wrong hardware can compromise the safety and stability of your structure.

By gathering the right wood types and hardware essentials, you’ll be well on your way to building strong and reliable wooden trusses.

Safety Precautions

When building wooden trusses, safety should always be a top priority. Here are some important safety precautions to keep in mind:

1. Wear Appropriate Protective Gear

Make sure to wear appropriate protective gear, such as gloves, safety glasses, and hard hats. This will help protect you from injuries while handling materials and tools.

2. Use Proper Lifting Techniques

When lifting heavy materials, use proper lifting techniques to avoid straining your back or other muscles. Lift with your legs, not your back, and avoid twisting your body while lifting.

3. Use Tools Safely

Always use tools safely and according to the manufacturer’s instructions. Make sure to use the appropriate tool for the task at hand, and keep tools in good condition.

4. Follow Truss Design Specifications

Follow the truss design specifications carefully to ensure that the trusses are built correctly and safely. Don’t make any modifications or alterations to the truss design without consulting a qualified engineer.

5. Store Trusses Properly

To protect the stability of the trusses, store them properly by supporting them off of the ground, on platforms, etc. Don’t cut, drill, or alter trusses unless you have explicit instructions to do so from the truss manufacturer. Make sure stored trusses are kept bundled together so they don’t slide and shift.

6. Work with a Partner

Working with a partner can help ensure that you stay safe while building wooden trusses. Your partner can help you lift heavy materials, hold materials in place, and provide assistance in case of an emergency.

Designing Your Truss

When building a wooden truss, the design is a crucial step in ensuring the stability and strength of the structure. Before starting the construction process, you need to determine the shape and dimensions of your truss. This section will guide you through the two main steps of designing your wooden truss.

Determining Truss Shape

The shape of your truss will depend on the type of structure you are building. There are various truss shapes to choose from, including king post, queen post, and Howe trusses. Each shape has its own unique characteristics and is suitable for different types of structures.

To determine the best truss shape for your project, you need to consider the following factors:

  • The size of your structure
  • The load-bearing capacity required
  • The aesthetic appeal you want to achieve

Once you have considered these factors, you can choose the truss shape that best suits your needs.

Calculating Dimensions

After selecting the truss shape, you need to calculate the dimensions of your truss. This includes determining the length, height, and width of the truss.

To calculate the dimensions, you need to consider the following factors:

  • The span of your structure
  • The pitch of your roof
  • The load-bearing capacity required

Using these factors, you can calculate the length and height of your truss. The width of your truss will depend on the size of your structure and the load-bearing capacity required.

It is important to note that the dimensions of your truss will also depend on the type of wood you are using. Different types of wood have different load-bearing capacities, so it is essential to choose the right type of wood for your truss.

In conclusion, designing your wooden truss is a critical step in ensuring the stability and strength of your structure. By determining the truss shape and calculating the dimensions, you can create a truss that is not only functional but also aesthetically pleasing.

Building the Truss

Building a wooden truss is a great way to reinforce your structure and add some extra support. Here’s how you can build your own truss in just a few simple steps.

Cutting the Wood

The first step in building a wooden truss is to cut the wood to size. You’ll need to measure the length and height of your structure to determine how big your truss needs to be. Once you have your measurements, use a saw to cut your wood to size. Be sure to wear protective gear, such as safety glasses and gloves, while cutting your wood.

Assembling the Truss

Once you have your wood cut to size, it’s time to assemble your truss. Lay out your wood pieces on a flat surface and begin assembling them according to your truss design. You can use truss-design software to help you create your design or draw your plans by hand.

To assemble your truss, you’ll need to use galvanized steel connector plates, also known as gusset plates, to secure the joints. Place the connector plates on the joints and use screws to attach them to the wood. Be sure to follow the manufacturer’s instructions when using connector plates.

Securing the Joints

After you’ve assembled your truss, it’s important to secure the joints to ensure that your truss is stable and secure. You can use additional screws or metal brackets to secure the joints. Be sure to use screws or brackets that are appropriate for the size and weight of your truss.

Once you’ve secured the joints, your wooden truss is complete and ready to be installed. Be sure to follow all safety guidelines and manufacturer’s instructions when installing your truss.

Building a wooden truss can be a fun and rewarding project. With the right tools and materials, you can create a strong and durable truss that will provide extra support for your structure.

Installation Process

Preparing the Installation Area

Before you begin installing your wooden trusses, it’s important to make sure that the installation area is clean and free of any debris that might interfere with the installation process. The area should also be level and have enough space to accommodate the trusses.

To prepare the area, start by clearing away any debris or obstacles that might get in the way of the truss installation. Next, use a level to ensure that the area is flat and even. If necessary, you may need to add some fill dirt or gravel to level out the area.

It’s also a good idea to mark out the location of each truss on the installation area. This will help you keep track of where each truss goes and ensure that they are installed in the correct location.

Installing the Truss

Once the installation area is prepared, it’s time to start installing the trusses. Begin by lifting the first truss into place and securing it to the support structure using the appropriate hardware.

Next, install the remaining trusses, making sure that they are properly aligned and spaced according to your design plans. Use a level to ensure that each truss is level and plumb, and adjust as necessary.

Once all of the trusses are installed, it’s important to secure them to the support structure using additional hardware such as hurricane ties or truss clips. This will help ensure that the trusses are securely fastened and will not shift or move over time.

Overall, installing wooden trusses requires careful planning and attention to detail. By following these steps and taking the time to properly prepare the installation area and secure the trusses, you can ensure that your truss system is safe, stable, and built to last.

Maintenance Tips

Once you have successfully built your wooden trusses, it is important to maintain them regularly to ensure they remain in good condition. Here are some tips to help you keep your wooden trusses in top shape:

Inspect Regularly

Inspect your wooden trusses regularly to check for any signs of damage or wear and tear. Look for cracks, splits, or any other signs of damage that could compromise the integrity of the truss. If you notice any issues, address them immediately to prevent further damage.

Keep Them Clean

Dirt and debris can accumulate on your wooden trusses over time, which can lead to decay and deterioration. Regularly clean your trusses to remove any dirt or debris that has accumulated. You can use a soft brush or a vacuum cleaner to remove any dirt or debris that has accumulated on your trusses.

Protect Them From Moisture

Moisture can cause wooden trusses to rot and decay over time. To protect your trusses from moisture, make sure they are properly sealed and painted. You can also use a waterproofing sealer to protect your trusses from moisture.

Trim Surrounding Trees

If you have trees surrounding your wooden trusses, make sure to trim them regularly to prevent them from falling on your trusses. Falling trees can cause serious damage to your trusses, so it is important to keep them trimmed and away from your trusses.

Hire a Professional

If you are unsure about how to maintain your wooden trusses, it is best to hire a professional to do the job for you. A professional can inspect your trusses and provide you with recommendations on how to maintain them properly. They can also perform any necessary repairs or maintenance to keep your trusses in top condition.

Common Mistakes to Avoid

When building wooden trusses, there are some common mistakes that you should avoid to ensure that your trusses are strong and safe. Here are a few mistakes to watch out for:

1. Incorrect Measurements

One of the most common mistakes when building wooden trusses is incorrect measurements. Taking accurate measurements is crucial for ensuring that your trusses fit properly and are structurally sound. Make sure to measure twice and cut once to avoid any mistakes.

2. Poor Quality Wood

Another mistake to avoid is using poor quality wood. Trusses need to be strong and durable, so using low-quality wood can compromise their structural integrity. Make sure to use high-quality wood that is appropriate for your project.

3. Incorrect Angles

When building trusses, it’s important to get the angles right. If the angles are incorrect, the trusses won’t fit together properly and may not be able to support the weight of the roof. Make sure to double-check all angles before cutting any wood.

4. Inadequate Bracing

Trusses need to be properly braced to ensure that they are stable and secure. Inadequate bracing can lead to sagging or collapsing trusses, which can be dangerous. Make sure to follow the manufacturer’s instructions for bracing your trusses.

5. Ignoring Safety Precautions

Finally, it’s important to always follow safety precautions when building wooden trusses. Wear appropriate safety gear, such as goggles and gloves, and use power tools safely. Don’t take shortcuts or rush through the process, as this can lead to mistakes and accidents.

By avoiding these common mistakes, you can ensure that your wooden trusses are strong, safe, and built to last.

How to Make a Wooden Chicken Coop Door: A Step-by-Step Guide

Are you thinking about building a chicken coop? One important aspect of constructing a chicken coop is the door. A sturdy and secure door is essential to keep your chickens safe from predators and to provide them with a comfortable living environment.

Making a wooden chicken coop door can be a fun and rewarding DIY project. With a few basic tools and some building materials, you can create a functional and attractive door that will last for years. In this article, we will guide you through the steps to make a wooden chicken coop door. We will cover everything from measuring and cutting the materials to attaching the hardware and locks. By the end of this article, you will have the knowledge and skills to build a door that will keep your chickens safe and happy.

Understanding the Basics of a Chicken Coop Door

When building your own chicken coop, one of the most important elements to consider is the door. A chicken coop door serves several purposes, including keeping your chickens safe from predators, regulating temperature and ventilation, and providing access for cleaning and maintenance.

Here are some basics to keep in mind when designing and building your chicken coop door:

Size and Placement

The size of your chicken coop door will depend on the size of your coop and the number of chickens you have. As a general rule, the door should be large enough to allow easy access for you to clean and maintain the coop, but not so large that it compromises the structural integrity of the coop or makes it difficult to regulate temperature and ventilation.

In terms of placement, the door should be positioned to allow for easy access to the coop, but also high enough off the ground to prevent predators from easily entering. It’s also important to consider the direction of prevailing winds and weather patterns when deciding where to position your door.

Materials

When it comes to materials, there are several options to choose from. Wood is a popular choice for its durability and natural insulation properties. However, metal or plastic doors may be more practical in areas with extreme weather conditions or high predator activity.

Type of Door

There are several types of doors to consider, including hinged doors, sliding doors, and automatic doors. Hinged doors are the most common and can be easily built with basic tools and materials. Sliding doors are ideal for coops with limited space or where hinged doors may be obstructed. Automatic doors are a convenient option for those who want to automate the process of opening and closing the coop door.

Security

The security of your chicken coop door is of utmost importance. Predators such as raccoons, foxes, and even dogs can easily break into a poorly secured coop. Make sure your door is securely fastened with locks or latches and consider adding additional security measures such as wire mesh or electric fencing.

By keeping these basics in mind, you can ensure that your chicken coop door is functional, secure, and provides a safe and comfortable environment for your chickens.

Choosing the Right Wood

When building a chicken coop door, choosing the right wood is crucial to ensure durability and longevity. Here are some factors to consider when selecting the wood for your project:

Durability

The wood you choose should be able to withstand harsh weather conditions, as well as the wear and tear of daily use. Cedar and redwood are popular choices for their natural resistance to rot and insects. However, they can be more expensive than other types of wood.

Cost

If you’re on a tight budget, consider using pine or fir. These woods are affordable and readily available at most hardware stores. However, they may not be as durable as cedar or redwood and may require more maintenance over time.

Appearance

The type of wood you choose can also affect the overall appearance of your chicken coop. If you’re looking for a rustic, natural look, consider using rough-cut lumber. For a more polished look, opt for smoother, finished lumber.

Sustainability

If sustainability is important to you, consider using reclaimed or salvaged wood. This can add character to your chicken coop door while also reducing waste.

In summary, when choosing the right wood for your chicken coop door, consider factors such as durability, cost, appearance, and sustainability. Cedar and redwood are durable but can be more expensive, while pine and fir are affordable but may require more maintenance. Reclaimed or salvaged wood can also be a sustainable option.

Tools Needed

To make a wooden chicken coop door, you will need some basic tools. Here is a list of the tools you’ll need:

Measuring Tools

Cutting Tools

  • Circular saw
  • Jigsaw
  • Hand saw

Assembly Tools

  • Hammer
  • Drill
  • Screwdriver
  • Wood glue
  • Clamps

Hardware

  • Hinges
  • Latch or lock
  • Screws

Make sure to gather all of the necessary tools and materials before starting your project. With the right tools, building a chicken coop door can be a fun and rewarding project.

Step by Step Guide to Making a Wooden Chicken Coop Door

If you’re looking to make a wooden chicken coop door, this step-by-step guide will help you get started. Making your own door can save you money and give you the satisfaction of creating something useful with your own hands. Here are the three main steps to follow:

Measuring and Cutting the Wood

The first step is to measure and cut the wood for your door. You will need to measure the opening of your chicken coop to determine the size of the door. Once you have the measurements, you can purchase the wood and cut it to size. Here are the materials you will need:

  • Wood boards (thickness depends on your preference)
  • Saw
  • Measuring tape
  • Sandpaper

Use the saw to cut the wood to the correct size and sand the edges to smooth them out. You can also add any decorative touches at this stage, such as carving or painting the wood.

Assembling the Door

Once you have all the wood cut to size, it’s time to assemble the door. Here are the materials you will need:

  • Wood boards
  • Screws
  • Screwdriver
  • Hinges
  • Latch

Lay out the wood boards in the correct order and attach them together using screws. Then, attach the hinges to the door and the chicken coop. Finally, add the latch to keep the door securely closed.

Installing the Door

The final step is to install the door on your chicken coop. Here are the materials you will need:

  • Drill
  • Screws
  • Screwdriver
  • Hinges

Use the drill to attach the hinges to the chicken coop and then attach the door to the hinges. Make sure the door fits snugly and opens and closes smoothly. You may need to make some adjustments at this stage to ensure that the door is level and secure.

That’s it! With these simple steps, you can make your own wooden chicken coop door. Not only will it keep your chickens safe and secure, but it will also add a touch of rustic charm to your coop.

Safety Measures

When building a wooden chicken coop door, it’s important to keep safety in mind. Here are some measures you can take to ensure the safety of both your chickens and yourself:

Use Appropriate Tools and Materials

Make sure you have the right tools and materials for the job. Using the wrong tools can lead to accidents, and using the wrong materials can compromise the structural integrity of the door. Always use tools and materials that are appropriate for the job and follow the manufacturer’s instructions.

Wear Protective Gear

Wearing protective gear can help prevent injuries. When working with wood, wear safety glasses to protect your eyes from sawdust and flying debris. Gloves can also protect your hands from splinters and cuts. If you’re using power tools, wear ear protection to prevent hearing damage.

Secure the Door Properly

It’s important to ensure that the door is secure and won’t accidentally open or close on its own. Use sturdy hinges and a latch that can withstand the weight of the door and the force of the wind. Make sure the latch is easy to use but also secure enough to keep predators out.

Install the Door Correctly

Proper installation is key to ensuring the door functions correctly and safely. Make sure the door fits snugly in the frame and opens and closes smoothly. Check for any gaps or areas where predators could enter and make any necessary adjustments.

Regularly Inspect and Maintain the Door

Regularly inspecting and maintaining the door can help prevent accidents and ensure the safety of your chickens. Check for any signs of wear and tear, such as cracks or damage to the hinges or latch. Lubricate the hinges and make any necessary repairs or replacements.

By taking these safety measures, you can ensure that your wooden chicken coop door is not only functional but also safe for both you and your chickens.

Maintenance Tips for a Wooden Chicken Coop Door

A wooden chicken coop door is a great addition to any coop, but it requires regular maintenance to keep it in good condition. Here are some tips to help you maintain your wooden chicken coop door:

1. Protect the wood

Wooden doors are susceptible to rotting, warping, and cracking when exposed to moisture and sunlight. To protect the wood, apply a coat of sealant or paint to the door. This will help to prevent water from penetrating the wood and causing damage.

2. Keep it clean

Dirt and debris can accumulate on the door, which can cause the wood to deteriorate over time. To keep your door clean, wipe it down with a damp cloth or sponge regularly. Avoid using harsh chemicals or abrasive cleaners, as these can damage the wood.

3. Check for damage

Regularly inspect your door for signs of damage, such as cracks, splits, or warping. If you notice any damage, repair it as soon as possible to prevent further damage. You can use wood filler to fill in cracks or splits, or sand down warped areas to restore the door to its original shape.

4. Lubricate the hinges

The hinges on your door can become stiff or rusted over time, which can make it difficult to open and close the door. To prevent this, lubricate the hinges with a spray lubricant or oil. This will help to keep the hinges moving smoothly and prevent them from rusting.

5. Secure the locks

Make sure that the locks on your door are secure and functioning properly. Loose or broken locks can allow predators to enter the coop and harm your chickens. If you notice any issues with the locks, repair or replace them as soon as possible.

By following these maintenance tips, you can keep your wooden chicken coop door in good condition for years to come.