Tag Archives: silicone-based lubricant

How to Restore a Weathered Wooden Front Door: Easy Tips and Tricks

How to Restore a Weathered Wooden Front Door: Easy Tips and Tricks

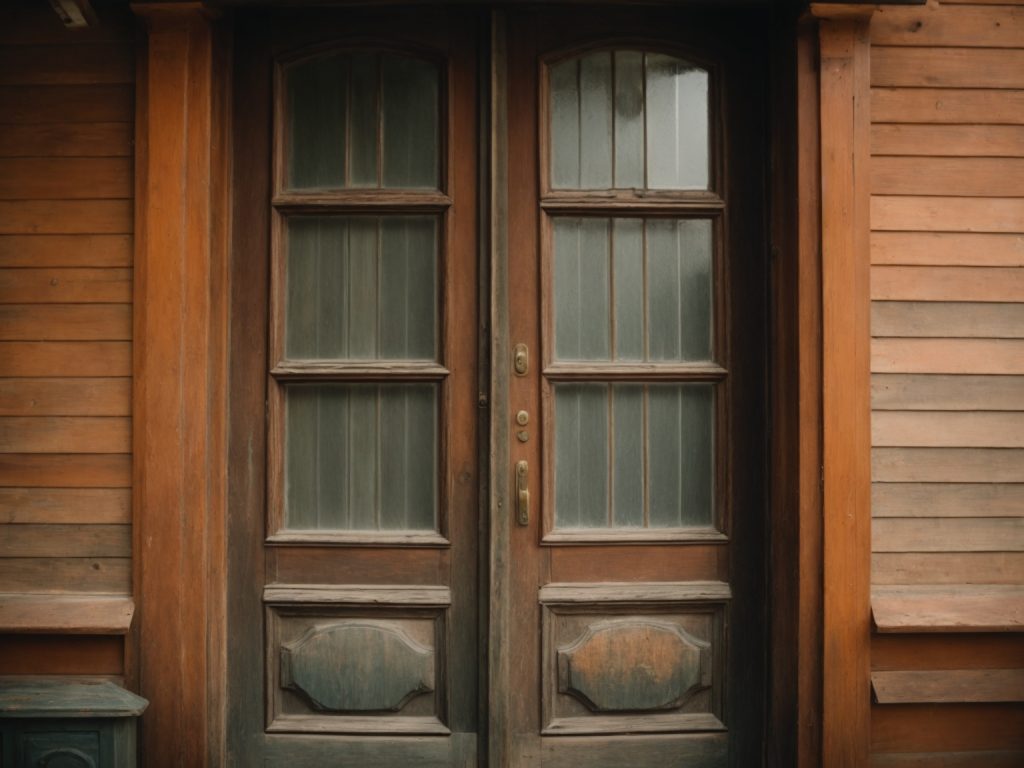
Is your wooden front door looking weathered and worn? If so, you’re not alone. Over time, exposure to the elements can cause wood doors to fade, crack, and peel. However, there’s good news! Restoring a weathered wooden front door is a simple and affordable process that can breathe new life into your entryway.

One easy step to restore your weathered wood door is to use a product called Sun Shield. This product can help to restore the finish of your door, making it look like new again. Additionally, you can refinish your door by sanding it down with a random-orbit sander and applying a fresh coat of varnish. By following these simple steps, you can restore your weathered wooden front door and make a great first impression on your guests.

Understanding the Damage
how-to-restore-a-weathered-wooden-front-door

If your wooden front door is looking weathered and worn, it’s important to understand the type of damage it has sustained before attempting to restore it. Here are some common types of damage that can occur:

Sun Damage

The sun’s UV rays can cause wood to dry out, fade, and crack over time. If your front door is exposed to direct sunlight for long periods of time, it’s likely that it has sustained sun damage.

Weather Damage

Rain, snow, and other types of weather can also take a toll on your front door. Moisture can cause wood to swell, warp, and rot, which can lead to structural damage over time.

Wear and Tear

Daily use can cause your front door to become scratched, dented, or chipped. This type of damage is usually cosmetic, but it can still detract from the overall appearance of your door.

Insect Damage

Termites and other wood-boring insects can cause serious damage to your front door over time. If you notice small holes or sawdust around your door, it’s possible that insects are present.

By understanding the type of damage your front door has sustained, you can choose the right restoration method and materials to bring it back to life.

Materials and Tools Needed

Restoring a weathered wooden front door is a simple DIY task that can be accomplished with a few basic tools and materials. Here’s what you’ll need:

Materials

  • Sandpaper (80-grit, 100-grit, and 120-grit)
  • Wood stain or paint
  • Clear coat or sealant
  • Rag or cloth
  • Mineral spirits (if using oil-based products)
  • Painter’s tape

Tools

  • Random-orbit sander
  • Paintbrush or foam roller
  • Screwdriver
  • Sawhorses or a sturdy work surface
  • Drop cloth or tarp

Before you begin, make sure you have all the necessary materials and tools. You may already have some of them on hand, but if not, they can be easily found at your local hardware or home improvement store.

When choosing your materials, consider the type of wood your door is made of and the look you want to achieve. If you prefer a natural wood look, choose a stain that complements the wood’s natural color. If you prefer a painted finish, choose a high-quality paint that is designed for exterior use.

Using a clear coat or sealant will help protect your door from future weather damage and ensure that your hard work lasts for years to come.

Preparation of the Door

Before you start restoring your weathered wooden front door, you need to prepare it properly. Here are the steps you should follow:

  1. Remove the Door: The first thing you need to do is remove the door from its hinges. This will make it easier to work on the door and ensure that you don’t accidentally damage the surrounding area.
  2. Clean the Door: Use a soft-bristled brush or a cloth to remove any dirt, dust, or debris from the door. You can also use a vacuum cleaner with a soft brush attachment to remove the dirt from the nooks and crannies.
  3. Sand the Door: Use sandpaper to remove any loose or flaking paint, varnish, or stain from the door. Start with a coarse-grit sandpaper and then move to a finer-grit sandpaper to achieve a smooth surface. Be sure to sand with the grain of the wood.
  4. Repair Any Damage: If your door has any cracks, holes, or other damage, you need to repair it before you start restoring it. Use wood filler to fill any holes or cracks and then sand the area smooth.
  5. Apply a Stripper: If your door has a lot of old paint or varnish, you may need to use a paint stripper to remove it. Be sure to follow the manufacturer’s instructions and wear protective gloves and eyewear.
  6. Clean Again: Once you have stripped the door, you need to clean it again to remove any residue from the stripper. Use a cloth and a mild detergent to clean the door thoroughly.

By following these steps, you can prepare your weathered wooden front door for restoration.

Stripping the Old Paint

If your wooden front door is covered in old paint, it’s important to strip it off before refinishing the wood. Here are the steps you need to follow to strip the old paint off your front door.

Safety Measures

Before you start stripping the paint off your front door, it’s important to take some safety measures to protect yourself from the chemicals involved in the process. Here are some things you should do:

  • Wear gloves and protective eyewear to protect your skin and eyes from the chemicals.
  • Work in a well-ventilated area to avoid inhaling fumes.
  • Cover the surrounding area with drop cloths to avoid getting paint stripper on anything else.

Process of Stripping

Here’s how to strip the old paint off your front door:

  1. Apply paint stripper to the door using a brush or roller. Be sure to follow the manufacturer’s instructions for the specific product you’re using.
  2. Wait for the paint stripper to work. This can take anywhere from a few minutes to several hours depending on the product and the thickness of the paint.
  3. Use a scraper to remove the paint. Be sure to scrape in the direction of the wood grain to avoid damaging the wood.
  4. Repeat steps 1-3 until all the paint is removed.
  5. Once all the paint is removed, use a fine-grit sandpaper to smooth out any rough spots.

Remember to dispose of the paint stripper and any paint chips in accordance with your local regulations. With the old paint stripped off, your front door is now ready for refinishing.

Sanding the Door

When restoring a weathered wooden front door, sanding is a crucial step to prepare the surface for refinishing. Here are some tips to help you sand your door effectively and efficiently.

Choosing the Right Sandpaper

Before starting, it’s important to choose the right sandpaper grit for your door. A lower grit sandpaper, such as 60 or 80, is best for removing old paint or finish. Once the old finish is removed, switch to a higher grit sandpaper, such as 120 or 150, to smooth out the surface and prepare it for refinishing.

Sanding Technique

When sanding your door, it’s important to use a consistent and even pressure. Sand with the grain of the wood to avoid creating scratches or marks on the surface. Use a sanding block or tool to ensure an even finish. Be sure to sand all areas of the door, including the edges and corners.

After sanding, use a tack cloth or a damp cloth to remove any dust or debris from the surface. This will ensure a smooth and even finish when refinishing your door.

Remember, sanding is a crucial step in restoring a weathered wooden front door. With the right sandpaper and technique, you can achieve a beautiful and long-lasting finish.

Addressing Weather Damage

If your wooden front door has been exposed to the elements for a long time, it can develop cracks, splits, and rot. These issues can make your door look unsightly and can even compromise its structural integrity. Fortunately, there are steps you can take to address these problems and restore your door to its former glory.

Fixing Cracks and Splits

If your door has developed cracks or splits, you can fix them using wood filler. Here’s how:

  1. Clean the damaged area with a stiff-bristled brush to remove any loose or splintered wood.
  2. Apply wood filler to the damaged area using a putty knife. Make sure to fill the crack or split completely.
  3. Smooth the surface of the wood filler with the putty knife.
  4. Allow the wood filler to dry completely, following the manufacturer’s instructions.
  5. Sand the surface of the wood filler with fine-grit sandpaper until it is smooth and flush with the surrounding wood.
  6. Apply a coat of primer to the repaired area to seal the wood filler and prepare it for paint or stain.

Treating Rotten Wood

If your door has developed rot, you will need to remove the affected wood and replace it with new wood. Here’s how:

  1. Use a screwdriver or chisel to remove any loose or rotten wood.
  2. Cut a piece of new wood to fit the area you removed.
  3. Apply wood glue to the edges of the new wood and the surrounding wood.
  4. Insert the new wood into the hole and press it firmly in place.
  5. Clamp the new wood in place and allow the glue to dry completely, following the manufacturer’s instructions.
  6. Sand the surface of the new wood until it is smooth and flush with the surrounding wood.
  7. Apply a coat of primer to the repaired area to seal the new wood and prepare it for paint or stain.

By following these steps, you can address weather damage to your wooden front door and restore its appearance and function.

Priming the Door

Now that you have cleaned and sanded your weathered wooden front door, it’s time to prime it. Priming the door is an essential step that will help the new paint or stain adhere better and last longer. Here are a few steps to follow when priming your door:

  1. Choose the right primer: There are many types of primers available, so make sure you choose the right one for your door. If you plan to stain your door, choose a wood conditioner or a clear primer. If you plan to paint your door, choose a primer that is compatible with the type of paint you will be using.
  2. Apply the primer: Using a brush or a roller, apply a thin and even coat of primer to the door. Make sure to apply the primer in the direction of the wood grain and avoid leaving any drips or brush marks. If you are using a spray primer, make sure to follow the manufacturer’s instructions and wear a mask to protect yourself from fumes.
  3. Let the primer dry: Allow the primer to dry completely before applying the paint or stain. The drying time will depend on the type of primer and the weather conditions, so make sure to check the label for instructions.
  4. Sand the primer: Once the primer is dry, use a fine-grit sandpaper to sand the surface of the door lightly. This will help smooth out any rough spots and create a better surface for the paint or stain to adhere to.
  5. Clean the door: Use a tack cloth or a damp cloth to remove any dust or debris from the surface of the door. Make sure the surface is clean and dry before applying the paint or stain.

By following these steps, you can ensure that your weathered wooden front door is properly primed and ready for the final coat of paint or stain.

Painting the Door

If you want to restore your weathered wooden front door, painting it is a great option. Here are some tips to help you get started.

Choosing the Right Paint

When choosing a paint for your front door, it’s important to select an exterior-grade paint that can withstand the elements. Look for a paint that is specifically designed for use on wood and offers UV protection to prevent fading from the sun.

Consider the color of your door and the style of your home when selecting a paint color. A bright color can add a pop of personality to your home, while a more neutral color can create a classic look.

Painting Technique

Before you start painting, make sure your door is clean and dry. Sand any rough spots or peeling paint to create a smooth surface.

Apply a primer to the door to help the paint adhere and create a more even finish. Once the primer is dry, apply the paint in thin, even coats. It’s better to apply multiple thin coats than one thick coat, which can lead to drips and an uneven finish.

Use a high-quality brush or roller to apply the paint, and work in the direction of the wood grain. Be sure to paint the edges of the door as well.

Allow each coat of paint to dry completely before applying the next coat. Once you’re happy with the coverage, allow the final coat to dry for at least 24 hours before reattaching any hardware or closing the door.

By following these tips, you can restore your weathered wooden front door with a fresh coat of paint.

Maintaining Your Restored Door

Once you’ve restored your weathered wooden front door, it’s important to maintain it properly to keep it looking beautiful and protect it from the elements. Here are some tips for maintaining your restored door:

Regular Cleaning

Regular cleaning is essential to keep your door looking great. Here’s what you need to do:

  • Use a soft cloth or sponge to wipe down the door with warm, soapy water. Avoid using harsh chemicals or abrasive materials, as these can damage the finish.
  • Rinse the door thoroughly with clean water and dry it with a soft towel.
  • If your door has glass panels, clean them with a glass cleaner and a soft cloth.

Annual Check-up

It’s a good idea to give your door an annual check-up to make sure it’s still in good condition. Here’s what you need to do:

  • Inspect the door for any signs of wear or damage, such as cracks, chips, or peeling paint. If you notice any problems, address them as soon as possible to prevent further damage.
  • Check the weatherstripping around the door to make sure it’s still in good condition. Replace any worn or damaged weatherstripping to keep your home energy-efficient.
  • Lubricate the hinges and locks with a silicone-based lubricant to keep them working smoothly.

By following these simple maintenance tips, you can keep your restored wooden front door looking beautiful for years to come.
How to Open a Stuck Wooden Window Easily

How to Open a Stuck Wooden Window Easily

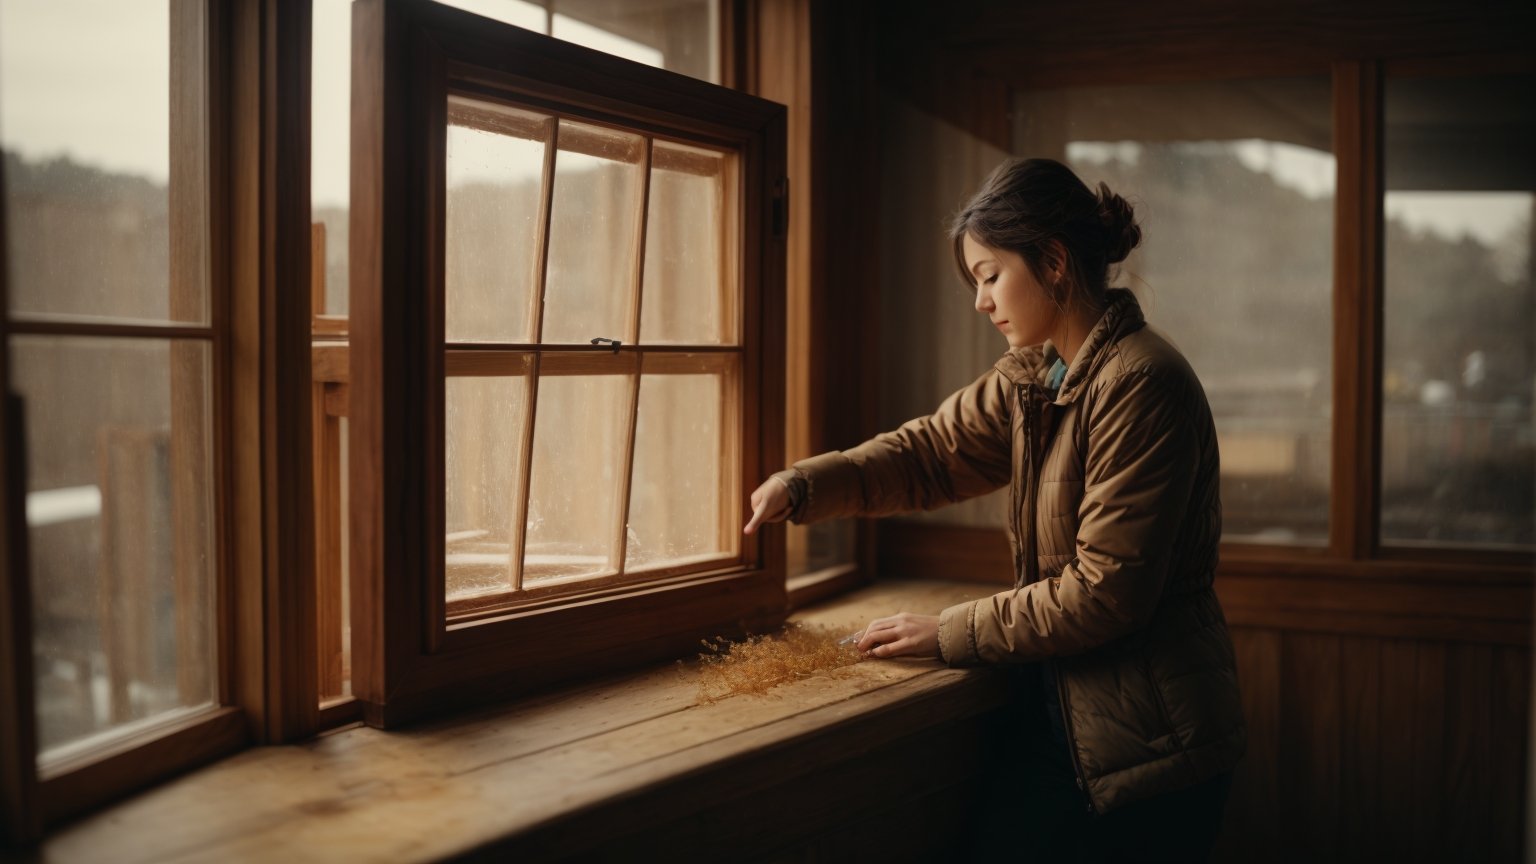
Are you struggling to open a stuck wooden window? It can be frustrating when you want some fresh air or need to close the window but it just won’t budge. Fortunately, there are several methods you can try to open a stuck wooden window without damaging it.

Before attempting any of these methods, it’s important to assess the window and determine why it might be stuck. Is it due to paint buildup, humidity, or a broken mechanism? Once you have identified the cause, you can choose the best method to address it. Some common techniques include using a putty knife to loosen the window, applying lubricant to the tracks, or gently tapping the frame with a rubber mallet.

Remember to be patient and gentle when attempting to open a stuck wooden window. Rushing or using excessive force can cause damage to the window or surrounding structure. With a little bit of effort and the right approach, you can successfully open your window and enjoy the benefits of fresh air and natural light.

Understanding the Problem

open-a-stuck-wooden-window

If you have a wooden window that won’t budge, it can be frustrating. However, before you start trying to force it open, it’s important to understand the problem. Here are some things to consider:

Identifying the Type of Window

The first step is to identify the type of window you have. There are several types of wooden windows, including double-hung, single-hung, casement, and awning. Each type of window has its own specific opening mechanism, so it’s important to know what you’re dealing with.

Recognizing Common Issues

Once you know what type of window you have, you can start to identify common issues that might be preventing it from opening. Here are a few things to look out for:

  • Paint Buildup: Over time, paint can build up around the edges of the window, making it difficult to open. You may need to scrape away the paint with a putty knife or other tool.
  • Loose or Broken Hardware: If the hardware on your window is loose or broken, it can prevent the window from opening. Check the locks, hinges, and other hardware to make sure everything is in working order.
  • Warped Wood: Wooden windows can warp over time, especially if they are exposed to moisture. This can cause the window to become stuck in the frame. If you suspect that this is the problem, you may need to replace the window entirely.

By understanding the problem with your wooden window, you can take the necessary steps to fix it and get it working properly again.

Safety Precautions

When opening a stuck wooden window, it’s important to take some safety precautions to avoid injury. Here are a few things to keep in mind:

  • Wear gloves and safety goggles to protect your hands and eyes from any debris or broken glass.
  • Check the stability of the window before attempting to open it. If the window frame is damaged or loose, it could fall out and cause injury.
  • Be careful when using tools like putty knives or screwdrivers to avoid damaging the window frame or glass.
  • If you’re using a ladder to reach the window, make sure it’s stable and on level ground. Have someone hold the ladder steady while you work.
  • If the window is located on an upper floor, use caution and consider hiring a professional to avoid the risk of falling.

By following these safety precautions, you can minimize the risk of injury while opening a stuck wooden window.

Gathering Necessary Tools

Before attempting to open a stuck wooden window, you’ll need to gather some necessary tools. Here are some items you’ll want to have on hand:

Putty Knife

A putty knife is a thin, flat tool that is perfect for prying open a stuck window. Look for a putty knife with a stiff blade that is at least 4 inches wide. This will give you enough leverage to pry open the window without damaging the wood.

Hammer

You may need a hammer to gently tap the putty knife into the gap between the window and the frame. Look for a hammer with a small head that is easy to maneuver in tight spaces.

Screwdriver

If your window has screws holding it in place, you’ll need a screwdriver to remove them. Look for a screwdriver with a comfortable grip and a magnetic tip to make it easier to handle small screws.

Lubricant

A lubricant can help loosen up any dirt or debris that may be causing your window to stick. Look for a silicone-based lubricant that won’t damage the wood or leave behind a residue.

Safety Gear

Finally, be sure to wear safety gear when attempting to open a stuck window. Gloves will protect your hands from splinters and cuts, while safety goggles will protect your eyes from flying debris.

By having these tools on hand, you’ll be well-equipped to tackle a stuck wooden window and get it open in no time.

Step-by-Step Guide to Opening a Stuck Wooden Window

If you have a stuck wooden window, don’t worry. There are several ways to open it. In this guide, we will take you through the process step-by-step.

Loosening the Window

The first step is to examine the window and see if it can be opened. Look for any visible obstructions, like dirt or debris, that may be preventing the window from opening. If there are no obstructions, try loosening the window by tapping it gently with a hammer. This can help to break up any paint or dirt that may be holding it in place.

Using a Pry Bar

If tapping the window doesn’t work, the next step is to use a pry bar. Place the pry bar between the window frame and the sill and gently pry the window open. Be careful not to damage the window or the frame. If the window still won’t budge, try prying it from the top or bottom.

Applying a Lubricant

If the window is still stuck, the final step is to apply a lubricant. There are several types of lubricants that can be used, including silicone spray and WD-40. Spray the lubricant around the edges of the window and let it sit for a few minutes. Then try to open the window again.

By following these steps, you should be able to open your stuck wooden window. If the window still won’t open, it may be time to call a professional for help.

Dealing with Paint-Sealed Windows

dealing-with-paint-sealed-windows

If you have an old wooden window that won’t open, it’s likely that it has been painted shut. Over time, layers of paint can build up and seal the window closed. But don’t worry, with a little bit of effort, you can free up your window and get some fresh air flowing into your home.

Here are some steps you can take to deal with paint-sealed windows:

  1. Inspect the Window
    • Look for any signs of damage or wear and tear that may be contributing to the window being stuck.
    • Check the sash cords to make sure they are still in good condition.
    • Determine if the window is painted shut or if there are other issues causing it to stick.
  2. Loosen the Paint
    • Use a utility knife to score along the edges of the window frame where it meets the sash.
    • Apply heat to the paint using a heat gun or hair dryer to soften it up.
    • Gently tap the edges of the window frame with a putty knife to break the seal.
  3. Open the Window
    • Once the paint has been loosened, try gently pushing or pulling on the window to see if it will open.
    • If it’s still stuck, use a window zipper to slide between the stop bead and the window sash to release it.
    • If necessary, use a window saw to cut through any remaining paint or debris.

Remember to take your time and be patient when dealing with a stuck window. Rushing the process can cause damage to the window or frame. With a little bit of effort, you can successfully free up your paint-sealed window and enjoy the fresh air.

Preventing Future Sticking

To prevent your wooden windows from sticking in the future, regular maintenance is key. This can include:

Regular Maintenance

  • Cleaning: Dirt, dust, and debris can build up in the tracks and joints of your windows, causing them to stick. Regular cleaning with a soft cloth and mild soap can prevent this buildup and keep your windows operating smoothly.
  • Lubrication: Applying a small amount of silicone spray or wax to the tracks and joints of your windows can help them slide more easily and prevent sticking.
  • Inspection: Regularly inspecting your windows for signs of wear and tear can help you catch any issues before they become major problems. Look for cracks, warping, or other damage that could be causing your windows to stick.

Weatherstripping

Another key factor in preventing your wooden windows from sticking is proper weatherstripping. Weatherstripping helps to seal your windows against drafts and moisture, but it can also cause them to stick if it is not installed properly.

  • Check your weatherstripping regularly to make sure it is in good condition and properly installed.
  • If your weatherstripping is damaged or worn, replace it as soon as possible to prevent drafts and moisture from getting in and causing your windows to stick.
  • Make sure your weatherstripping is not too tight, as this can cause your windows to stick. If necessary, adjust or replace your weatherstripping to ensure a proper seal without impeding the movement of your windows.

By following these simple maintenance and weatherstripping tips, you can help prevent your wooden windows from sticking in the future and keep them operating smoothly for years to come.

When to Seek Professional Help

In most cases, opening a stuck wooden window can be done with a little bit of effort and the right tools. However, there are times when it may be best to seek professional help. Here are some situations where you may want to consider calling in a pro:

1. The window is damaged

If the window is damaged, it may be best to call a professional. Attempting to force a damaged window open can cause further damage, which may end up costing you more in the long run. A professional can assess the damage and determine the best course of action.

2. The window is painted shut

If the window is painted shut, it can be difficult to open without damaging the frame or the sash. While there are DIY methods for removing paint from windows, it can be a time-consuming and messy process. A professional can safely remove the paint and restore the window to its proper function.

3. You don’t have the right tools or experience

If you’re not comfortable using tools or don’t have the right equipment, it may be best to leave the job to a professional. Attempting to open a stuck window without the proper tools or experience can be dangerous and may result in injury or damage to the window.

In general, if you’re not confident in your ability to open a stuck wooden window, it’s best to call a professional. They have the knowledge, experience, and tools to safely and effectively restore your window to its proper function.

How to Easily Open Jammed Wooden Drawers

How to Easily Open Jammed Wooden Drawers

Are you struggling with a jammed wooden drawer? It can be frustrating to have a drawer that won’t open or close properly, especially if it’s a drawer you use frequently. Fortunately, there are several simple solutions you can try to get your drawer unstuck and working smoothly again.

One common cause of a jammed wooden drawer is a lack of lubrication. Over time, the wood can dry out and cause the drawer to stick. Applying a lubricant such as paraffin wax or dry spray lubricant can help loosen the drawer and make it easier to open and close. Another cause of a stuck drawer may be misaligned tracks or damaged hardware. In this case, you may need to adjust or replace the tracks or hardware to get the drawer functioning properly again.

By following a few simple steps, you can get your jammed wooden drawer back on track. In this article, we’ll explore some of the most effective methods for fixing a stuck drawer, so you can get back to using your furniture without any frustration. Whether you’re dealing with a minor issue or a more serious problem, we’ve got you covered with practical tips and tricks to help you get the job done.

Understanding the Problem

open-jammed-wooden-drawers

When you have a jammed wooden drawer, it can be frustrating and time-consuming to try to open it. However, understanding the problem and its causes can help you fix it quickly and easily. In this section, we’ll discuss how to identify the type of jam and determine the cause of the jam.

Identifying the Type of Jam

The first step in fixing a jammed wooden drawer is to identify the type of jam. There are two main types of jams: side-to-side jams and front-to-back jams.

Side-to-side jams occur when the drawer is stuck and won’t move from side to side. This type of jam is often caused by a misaligned drawer slide or a buildup of debris on the slide.

Front-to-back jams occur when the drawer is stuck and won’t move in and out of the cabinet. This type of jam is often caused by a misaligned drawer guide or a buildup of debris on the guide.

Determining the Cause of the Jam

Once you’ve identified the type of jam, the next step is to determine the cause of the jam. There are several possible causes for a jammed wooden drawer, including:

  • Humidity: Wooden drawers can expand and contract with changes in humidity, which can cause them to become stuck.
  • Loose or worn parts: Loose or worn drawer slides, guides, or rollers can cause the drawer to become misaligned and stuck.
  • Debris: Buildup of debris on the drawer slides, guides, or rollers can prevent the drawer from moving smoothly.
  • Warped wood: Warped wood can cause the drawer to become misaligned and stuck.

By identifying the cause of the jam, you can take the necessary steps to fix it and prevent it from happening in the future. In the next section, we’ll discuss how to fix each type of jam and its causes.

Basic Techniques to Open Jammed Drawers

If you’re dealing with a jammed wooden drawer, don’t panic. There are a few basic techniques you can try to open it up without causing any damage. Here are three methods to try:

The ‘Tap and Pull’ Method

This is a simple, yet effective way to coax a jammed drawer open. First, try tapping the drawer on the sides with your hand to loosen it up. Then, pull the drawer out slowly and steadily. If the drawer is still stuck, try wiggling it gently from side to side as you pull.

The ‘Wiggle’ Method

If tapping and pulling doesn’t work, try wiggling the drawer from side to side to loosen it up. Hold onto the drawer with both hands and gently wiggle it back and forth. As you wiggle, try pulling the drawer out slowly and steadily. If the drawer still won’t budge, try pushing it back in slightly and then pulling it out again.

Using Lubrication

Another way to free up a jammed wooden drawer is to use a lubricant. Rub paraffin wax on the parts of the drawer where the wood meets. You can find paraffin wax at most hobby and craft stores, or in the canning supplies section of your local grocery store. In a pinch, you can also use candles, bar soap, or even dry spray lubricant.

If the drawer is still stuck after trying these methods, it may be time to call in a professional. Don’t force the drawer open, as this can cause damage to the wood and the tracks. With a little patience and persistence, you should be able to open up that stubborn drawer and get back to using your furniture as normal.

Advanced Techniques to Open Jammed Drawers

advanced-techniques-to-open-jammed-drawers

If you’ve tried the basic techniques to open a jammed wooden drawer and they didn’t work, don’t worry. There are still a few advanced techniques you can try to get that drawer open. In this section, we’ll cover two advanced techniques: using tools and dismantling the drawer.

Using Tools

Sometimes, all you need is a little extra force to get a stubborn drawer open. Here are some tools you can use:

  • Pry bar: A pry bar can help you gently pry the drawer open without damaging the wood or the drawer slides.
  • Rubber mallet: A rubber mallet can help you gently tap the sides of the drawer to loosen it from the frame.
  • Screwdriver: A screwdriver can help you remove any screws that may be holding the drawer in place.

When using tools, be careful not to damage the wood or the drawer slides. Use gentle force and stop if you feel resistance.

Dismantling the Drawer

If all else fails, you may need to dismantle the drawer to get it open. Here’s how:

  1. Remove the drawer from the frame: If the drawer is stuck closed, you may need to remove it from the frame to work on it. Check for any screws or nails holding the drawer in place and remove them.
  2. Remove the drawer face: If the drawer is still stuck closed, you may need to remove the drawer face to access the inside of the drawer. Check for any screws or nails holding the face in place and remove them.
  3. Inspect the drawer slides: Once you have access to the inside of the drawer, inspect the drawer slides for any damage or debris. Clean the slides with a soft cloth and lubricate them with wax or a dry spray lubricant.
  4. Reassemble the drawer: Once you have cleaned and lubricated the drawer slides, reassemble the drawer and try opening it again.

Remember, dismantling the drawer should be a last resort. If you’re not confident in your ability to reassemble the drawer, consider hiring a professional.

Preventive Measures for Future

To avoid the frustration of dealing with jammed wooden drawers in the future, there are some preventive measures that you can take. Here are a few tips:

Regular Maintenance

Regular maintenance is key to keeping your wooden drawers in good working condition. Here are some maintenance tasks you should perform on a regular basis:

  • Clean the drawers: Dust and debris can accumulate inside the drawers and cause them to stick. Regularly clean the drawers with a damp cloth to remove any dirt or debris.
  • Lubricate the drawers: Use a silicone-based lubricant or wax to keep the drawer gliding smoothly. Apply the lubricant to the tracks and slides of the drawer.
  • Check for loose screws: Loose screws can cause the drawer to become misaligned and stick. Check the screws on a regular basis and tighten them if necessary.

Proper Usage

Proper usage is also important to prevent wooden drawers from becoming jammed. Here are some tips for proper usage:

  • Don’t overload the drawers: Overloading the drawers can cause them to become misaligned and stick. Be sure to distribute the weight evenly and don’t put too much weight in one drawer.
  • Use the drawers properly: Don’t slam the drawers shut or force them open. Use a gentle touch when opening and closing the drawers.
  • Keep the drawers dry: Moisture can cause the wood to swell and the drawers to stick. Keep the drawers dry and avoid placing damp items inside them.

By following these preventive measures, you can keep your wooden drawers in good working condition and avoid the frustration of dealing with jammed drawers in the future.

How to Build a Wooden Trailer Gate: Step-by-Step Guide

Are you looking to build a wooden trailer gate? A trailer gate can be a useful addition to your trailer, allowing you to easily load and unload heavy items. Building a wooden trailer gate can be a cost-effective and customizable solution for your trailer. In this article, we will provide step-by-step instructions on how to build a wooden trailer gate.

Before starting your project, it is important to measure the height and width of your trailer opening to ensure your gate fits properly. Keep in mind that the gate should be slightly shorter than the height of the trailer opening to allow for clearance and easy opening and closing. Once you have your measurements, you can begin gathering the necessary tools and materials.

In this article, we will provide detailed instructions on how to build a wooden trailer gate using common hand-held carpentry tools. We will also include tips on selecting the right wood for your gate and how to properly install hinges and latches. By following our guide, you can build a sturdy and functional wooden trailer gate that meets your specific needs.

Understanding the Basics of a Wooden Trailer Gate

If you are planning to build a wooden trailer gate, it is essential to understand the basics of the gate’s construction. Here are a few things you need to know before you start building:

Materials

The first thing to consider when building a wooden trailer gate is the materials you will need. Some of the essential materials include lumber (2x4s, 2x6s, 1x4s, and 1x6s), screws, hinges, gate latch, wood glue, paint or stain, jigsaw, drill, and drill bits. Make sure to choose the right type of lumber for your gate. Pressure-treated lumber is an excellent choice for outdoor projects as it is resistant to rot and decay.

Planning and Measuring

Before you start building, you need to measure the height and width of the trailer opening to determine the size of your gate. Make sure to leave some clearance between the gate and the trailer to prevent damage. Once you have the measurements, you can start planning your gate’s design.

Building the Frame

The frame is the most crucial part of your wooden trailer gate. It provides the gate with its strength and stability. To build the frame, you will need to cut the lumber to the desired length and assemble it using screws and wood glue. Make sure to use a level to ensure that the frame is straight and square.

Adding the Boards

Once you have built the frame, you can add the boards to create the gate’s surface. Measure the width of the opening and cut the boards accordingly. Use screws and wood glue to attach the boards to the frame. Make sure to leave some space between the boards to allow for expansion and contraction due to changes in temperature and humidity.

Installing the Hinges and Latch

The final step is to install the hinges and latch. Attach the hinges to the gate and then to the trailer. Make sure to use screws that are long enough to provide a secure attachment. Install the gate latch on the opposite side of the hinges to keep the gate closed.

By understanding the basics of a wooden trailer gate, you can build a gate that is strong, durable, and functional. With the right materials, tools, and techniques, you can create a gate that will last for many years to come.

Choosing the Right Materials

When building a wooden trailer gate, selecting the right materials is crucial. You want to ensure that the gate is sturdy, durable, and can withstand the weight of the trailer. In this section, we will discuss how to choose the right materials for your wooden trailer gate.

Selecting the Wood

The first step in choosing the right materials for your wooden trailer gate is selecting the right wood. The most commonly used wood for trailer gates is pressure-treated pine. This type of wood is affordable, readily available, and resistant to rot and insects.

Another popular choice is cedar. Cedar is more expensive than pressure-treated pine, but it is naturally resistant to rot and insects. It is also more aesthetically pleasing and will give your trailer gate a beautiful finish.

When selecting your wood, make sure to choose boards that are straight and free of knots. Knots weaken the wood and can cause it to break under pressure.

Identifying the Necessary Hardware

In addition to the wood, you will also need to select the necessary hardware for your wooden trailer gate. This includes hinges, screws, and bolts.

When selecting hinges, make sure to choose heavy-duty hinges that can support the weight of the gate. The number of hinges you need will depend on the size of your gate. As a general rule, use three hinges for gates up to 8 feet wide and four hinges for gates over 8 feet wide.

For screws and bolts, make sure to choose ones that are rust-resistant and can withstand the weight of the gate. Use screws to attach the hinges to the gate and bolts to attach the hinges to the post.

By selecting the right wood and hardware, you can ensure that your wooden trailer gate is sturdy, durable, and can withstand the weight of your trailer.

Designing the Trailer Gate

Before you start building your wooden trailer gate, you need to design it. This involves determining the size of the gate and sketching the design.

Determining the Size

The first step in designing your trailer gate is to determine the size of the opening. Measure the height and width of the trailer opening to determine the height and width of your gate. Keep in mind that the gate should be slightly shorter than the height of the trailer opening to allow for clearance and easy opening and closing.

Sketching the Design

Once you have determined the size of the gate, you can start sketching the design. You can use graph paper or a computer program to create a detailed sketch of your trailer gate. Your design should include the following:

  • The overall dimensions of the gate
  • The type of wood you will use
  • The style of the gate
  • The hardware you will use (hinges, latch, etc.)

Consider the style of your trailer gate. Will it be a solid gate or will it have a mesh or slatted design? The style of your gate will depend on your personal preference and the intended use of your trailer.

When sketching your design, make sure to include the hardware you will use. This includes hinges, a latch, and any other necessary hardware. You may also want to include a handle or other decorative elements.

In conclusion, designing your trailer gate is an important step in the building process. By determining the size and sketching the design, you can ensure that your gate will fit your trailer and meet your needs.

Building the Frame

The frame is the backbone of your trailer gate, and it’s important to build it strong and sturdy. Here are the steps to building a wooden trailer gate frame:

  1. Measure the width and height of the trailer opening and cut the boards accordingly. Use a saw to cut the boards to the desired length.

  2. Cut two long boards for the sides of the frame and two shorter boards for the top and bottom of the frame. Make sure the boards are straight and free from knots or other defects that could weaken the frame.

  3. Lay the boards on a flat surface and arrange them in a rectangle shape. Use clamps to hold the boards in place.

  4. Drill pilot holes through the boards where they will be joined together. This will help prevent the wood from splitting when you insert screws.

  5. Apply wood glue to the ends of the boards that will be joined together. This will help create a strong bond between the boards.

  6. Insert screws through the pilot holes and into the adjoining board. Use a power drill to make this process faster and easier.

  7. Once the frame is complete, use a carpenter’s level to make sure it is straight and level. Adjust the frame as necessary.

  8. If you want to add diagonal bracing to the frame for extra strength, cut two diagonal boards and attach them to the corners of the frame.

  9. Sand the frame smooth to remove any rough edges or splinters.

  10. Apply a coat of wood sealer or paint to protect the frame from the elements.

By following these steps, you can build a strong and sturdy wooden frame for your trailer gate. With the frame complete, you can move on to adding the gate hinges, latch pins, and flooring or deck.

Attaching the Wood Panels

Once you have constructed the frame of your wooden trailer gate, the next step is to attach the wood panels. This is where your gate will start to take shape and look like a functional gate.

Before attaching the wood panels, you need to decide on the type of wood you want to use. You can use any type of wood, but it is recommended to use pressure-treated lumber or cedar as they are more durable and can withstand harsh weather conditions.

Here are the steps to attach the wood panels to your trailer gate:

  1. Measure the width and height of the frame to determine the size of the wood panels you need.
  2. Cut the wood panels to the desired size using a saw.
  3. Apply wood glue to the back of the wood panels and place them onto the frame.
  4. Secure the wood panels to the frame using screws. Make sure to use screws that are long enough to penetrate through the wood panels and into the frame.
  5. Repeat this process until all the wood panels are attached to the frame.

It is important to note that the wood panels should be evenly spaced and flush with the frame to ensure the gate opens and closes smoothly.

Once all the wood panels are attached, you can sand the surface of the gate to make it smooth. You can also apply paint or stain to protect the wood from moisture and give it a finished look.

In conclusion, attaching the wood panels is a crucial step in building a wooden trailer gate. By following these steps, you can ensure that your gate is sturdy, durable, and looks great.

Installing the Hardware

Once you have built your wooden trailer gate, it is time to install the hardware. This includes hinges and a latch. In this section, we will go over the steps to install both.

Hinges Installation

The hinges are what allow the gate to swing open and closed. You will need to install two hinges, one on the top and one on the bottom of the gate. Here are the steps to install the hinges:

  1. Determine the location of the hinges on the gate. They should be evenly spaced, with one near the top and one near the bottom.
  2. Mark the location of the hinges on the gate.
  3. Pre-drill holes for the screws using a drill bit that is slightly smaller than the diameter of the screws.
  4. Attach the hinges to the gate using screws.
  5. Hold the gate up to the trailer opening and mark the location of the hinges on the trailer.
  6. Pre-drill holes for the screws using a drill bit that is slightly smaller than the diameter of the screws.
  7. Attach the hinges to the trailer using screws.

Make sure the hinges are securely attached to both the gate and the trailer. Test the gate to ensure it swings open and closed smoothly.

Latch Installation

The latch is what keeps the gate closed when it is not in use. Here are the steps to install the latch:

  1. Determine the location of the latch on the gate. It should be placed near the top of the gate.
  2. Mark the location of the latch on the gate.
  3. Pre-drill holes for the screws using a drill bit that is slightly smaller than the diameter of the screws.
  4. Attach the latch to the gate using screws.
  5. Hold the gate up to the trailer opening and mark the location of the latch on the trailer.
  6. Pre-drill holes for the screws using a drill bit that is slightly smaller than the diameter of the screws.
  7. Attach the latch to the trailer using screws.

Make sure the latch is securely attached to both the gate and the trailer. Test the latch to ensure it keeps the gate closed tightly.

Congratulations, you have successfully installed the hardware for your wooden trailer gate!

Securing the Gate to the Trailer

Now that you have built your wooden trailer gate, it’s time to secure it to the trailer. The process of securing the gate is crucial, as it ensures the safety of your cargo during transportation. In this section, we will guide you through the steps to secure your gate to your trailer.

Step 1: Positioning the Gate

Before securing the gate to the trailer, make sure it is in the right position. The gate should be centered and level with the trailer opening. Use a level to ensure the gate is straight and adjust it if necessary. Once the gate is in the correct position, you can move on to the next step.

Step 2: Attaching Hinges

The hinges are an essential part of securing the gate to the trailer. Use heavy-duty hinges that can support the weight of the gate and the cargo. Attach the hinges to the gate first, making sure they are evenly spaced and level. Then, attach the hinges to the trailer, using bolts or screws that are appropriate for the material of your trailer.

Step 3: Installing Latch Pins

Latch pins are used to keep the gate closed during transportation. Install latch pins on both sides of the gate, making sure they are aligned with the latch on the trailer. Use a locking pin or a padlock to secure the latch pins and prevent them from opening during transportation.

Step 4: Adding Support

To ensure the gate stays in place during transportation, you may need to add additional support. Use braces or chains to secure the gate to the trailer. Braces should be installed on both sides of the gate, while chains can be used to secure the gate to the trailer bed.

Step 5: Testing the Gate

Once you have secured the gate to the trailer, it’s time to test it. Open and close the gate to ensure it moves smoothly and locks securely. Test the latch pins to ensure they are working correctly. If everything is working correctly, your gate is now secured and ready for transportation.

In conclusion, securing your wooden trailer gate is an essential step in ensuring the safety of your cargo during transportation. Follow these steps to secure your gate to the trailer properly, and you can transport your cargo with confidence.

Maintenance Tips for a Wooden Trailer Gate

Now that you have built your wooden trailer gate, it is important to properly maintain it to ensure its longevity. Here are some helpful maintenance tips to keep your wooden trailer gate in great condition:

Regular Cleaning

One of the easiest ways to maintain your wooden trailer gate is to keep it clean. Dirt, debris, and moisture can accumulate on the surface of the gate, leading to rot and decay. You should clean your wooden trailer gate regularly with a mild soap and water solution. Be sure to rinse it thoroughly and allow it to dry completely before applying any sealant or paint.

Sealant or Paint

To protect your wooden trailer gate from the elements, it is important to apply a sealant or paint. A sealant will help to repel moisture and prevent rot, while paint will add an extra layer of protection against the sun’s UV rays. Be sure to choose a high-quality sealant or paint that is specifically designed for outdoor use.

Inspect for Damage

Regularly inspect your wooden trailer gate for any signs of damage, such as cracks, splits, or warping. If you notice any damage, it is important to address it as soon as possible to prevent further deterioration. Depending on the severity of the damage, you may need to replace the affected boards or the entire gate.

Lubricate Hinges and Latches

The hinges and latches on your wooden trailer gate can become stiff and difficult to operate over time. To prevent this, you should lubricate them regularly with a silicone-based lubricant. This will help to keep them moving smoothly and prevent them from rusting.

By following these simple maintenance tips, you can keep your wooden trailer gate looking great and functioning properly for years to come.

How to Stop a Wooden Bed from Squeaking: Quick and Easy Solutions

Is your wooden bed squeaking? It can be quite annoying to hear creaking noises every time you move while trying to sleep. Luckily, fixing a squeaky wooden bed is a relatively easy task that you can do yourself. In this article, we will provide you with some simple and effective tips to stop your wooden bed from squeaking.

Before we dive into the solutions, it’s important to understand why your bed might be making noise. The most common reason for a squeaky wooden bed is due to loose joints or connections. Over time, the screws and bolts that hold the bed frame together can become loose, causing the wood to rub against each other and create noise. Another reason could be that the wood has dried out and shrunk, causing gaps between the joints. Whatever the reason may be, the good news is that you can fix it without having to replace the entire bed frame.

Understanding Why Beds Squeak

If you are experiencing a squeaky bed, you are not alone! Many people have the same issue, and it can be quite frustrating. Fortunately, there are several reasons why a bed might squeak, and most of them are fixable.

The most common reason for a squeaky bed is a loose joint. Over time, the joints in your bed frame can loosen, which can cause the bed to squeak. Another common reason is a worn-out mattress or box spring. If your mattress or box spring is old and worn, it can cause the bed to squeak when you move around.

Sometimes, the cause of a squeaky bed is not the bed itself, but rather the floor it is on. If your bed is on a hardwood or tile floor, it can cause the bed to squeak when you move around. This is because the bed frame is rubbing against the floor.

If you have ruled out the above reasons, it is possible that your bed frame is simply not sturdy enough. This can be the case if you have a cheap or poorly made bed frame. In this case, you may need to invest in a new, more sturdy bed frame to eliminate the squeaking.

In summary, there are several reasons why a bed might squeak, including loose joints, a worn-out mattress or box spring, a hardwood or tile floor, or a cheap or poorly made bed frame. By identifying the cause of the squeaking, you can take the necessary steps to fix it and enjoy a peaceful night’s sleep.

Materials Needed to Fix a Squeaky Bed

If you’re tired of your wooden bed frame making noise every time you move, it’s time to fix it. Here are the materials you’ll need to get the job done:

1. Lubricant

A good lubricant can help reduce friction between the wooden components of your bed frame. You can use a silicone-based lubricant or a dry lubricant like graphite powder. Avoid using oil-based lubricants as they can attract dust and dirt, which can make the problem worse.

2. Screwdriver

You’ll need a screwdriver to tighten any loose screws or bolts that might be causing the squeaking. Make sure you have the right size screwdriver for the job.

3. Hammer

If your bed frame is held together with wooden dowels or pegs, a hammer can help you tap them back into place. Make sure you use a soft mallet or a piece of wood to protect the wood from damage.

4. Wood Glue

If your bed frame has loose joints, a little bit of wood glue can help strengthen them and reduce the noise. Apply the glue to the joint, then clamp it together until it dries.

5. Wax

Wax can be used to lubricate any joints or areas where two wooden components rub against each other. Rub a small amount of wax onto the area and then buff it with a cloth to create a smooth surface.

6. Cork

Cork can be used to fill any gaps between the wooden components of your bed frame. Cut small pieces of cork and wedge them between the bottom of the mattress and the wooden components of the bed frame.

With these materials, you’ll be able to fix your squeaky wooden bed frame and enjoy a peaceful night’s sleep.

Checking the Bed Frame

When your wooden bed frame starts to squeak, it’s time to check for any issues that might be causing the noise. Here are a few things you can do to inspect your bed frame:

Inspecting for Loose Screws

One of the most common causes of a squeaky bed frame is loose screws. If the screws holding your bed frame together are not tight enough, they can cause the frame to squeak when you move around on it. To check for loose screws, you’ll need a screwdriver.

First, remove the mattress and box spring from the bed frame. Then, use the screwdriver to tighten any loose screws you find. If a screw is stripped or won’t tighten properly, you may need to replace it with a new one.

Looking for Cracks and Breaks

Another possible cause of a squeaky bed frame is cracks or breaks in the wood. Over time, the wood in your bed frame can become weakened, leading to cracks or breaks that can cause the frame to squeak.

To check for cracks or breaks, you’ll need to inspect the bed frame carefully. Look for any visible damage, such as cracks or splits in the wood. You should also check the joints where the different pieces of the frame come together. If you find any damage, you may need to repair or replace the affected parts.

In conclusion, checking your bed frame for loose screws and cracks or breaks is an important step in stopping your wooden bed from squeaking. By taking the time to inspect your bed frame, you can identify and fix any issues that might be causing the noise.

Addressing the Bed Slats

If you’re dealing with a squeaky wooden bed, the slats may be the culprit. Here are a few ways to address the issue:

Tightening Loose Slats

One common reason for squeaky bed slats is that they have become loose over time. Tightening them up can help reduce or eliminate the noise. Here’s how to do it:

  1. Remove the mattress and any bedding from the bed frame.
  2. Inspect the slats for any damage or warping. Replace any damaged slats.
  3. Tighten the screws or bolts that hold the slats in place. Use a screwdriver or wrench as necessary.
  4. Check the slats again to make sure they are securely fastened.

Padding Noisy Slats

Another way to reduce noise from bed slats is to add some padding. This can help cushion the slats and prevent them from rubbing against each other or the bed frame. Here are a few options:

  1. Place a piece of felt or rubber padding between the slats and the bed frame. This can help reduce friction and noise.
  2. Use foam padding or a mattress topper between the slats and the mattress. This can also help absorb noise and make the bed more comfortable.
  3. Apply wax or lubricant to the slats where they rub against the bed frame. This can help reduce friction and noise.

By tightening loose slats or padding noisy ones, you can help reduce or eliminate squeaks and creaks from your wooden bed.

Dealing with the Box Spring

If you have a wooden bed that squeaks, it’s likely that the culprit is your box spring. Fortunately, there are a few things you can do to address this issue.

Inspecting the Box Spring

Before you can fix your squeaky box spring, you need to figure out what’s causing the noise. Start by inspecting the box spring for any loose or broken parts. Check the frame, slats, and any screws or bolts that hold the box spring together. If you notice any damage or loose parts, tighten or replace them as necessary.

Padding the Box Spring

If your box spring is in good condition but still squeaks, you can try padding it to reduce the noise. One option is to place a piece of foam padding between the box spring and the bed frame. This will help absorb some of the vibrations and reduce the noise.

Another option is to use felt pads. These can be attached to the bottom of the box spring where it meets the bed frame. The felt will help reduce friction and prevent squeaks.

Finally, you can try using rubber pads. These can be placed between the box spring and the bed frame to absorb vibrations and reduce noise.

By inspecting and padding your box spring, you should be able to reduce or eliminate the squeaking noise coming from your wooden bed.

Fixing a Squeaky Mattress

If your wooden bed is squeaking, it’s likely that the mattress is the culprit. Here are a few things you can do to fix the problem.

Checking for Sagging Areas

First, check your mattress for any sagging areas. If your mattress is sagging, it can cause the bed to squeak. Place a straight edge, such as a ruler or yardstick, across the surface of the mattress. If you notice any gaps between the straight edge and the mattress, it’s likely that the mattress is sagging.

If your mattress is sagging, you may need to replace it. However, if you’re not ready to invest in a new mattress just yet, you can try rotating it.

Rotating the Mattress

Rotating your mattress can help distribute the weight evenly and reduce sagging. To rotate your mattress, follow these steps:

  1. Remove all bedding from the mattress.
  2. Lift one end of the mattress and rotate it 180 degrees.
  3. Lower the end of the mattress you just rotated and lift the other end.
  4. Rotate the other end of the mattress 180 degrees.
  5. Lower the end of the mattress you just rotated.

By rotating your mattress, you may be able to reduce the sagging and stop the bed from squeaking. Keep in mind that you should rotate your mattress every three to six months to prevent sagging and prolong its lifespan.

In summary, if your wooden bed is squeaking, it’s likely that the mattress is the issue. Check for sagging areas and rotate the mattress to distribute the weight evenly. If these steps don’t work, you may need to replace the mattress or seek professional help.

Maintaining Your Bed to Prevent Future Squeaks

Now that you have fixed the squeaks in your wooden bed, it’s important to maintain it to prevent future squeaks. Here are some tips to keep your bed in good condition:

1. Tighten Screws and Bolts

Check the screws and bolts of your bed regularly. Over time, they can loosen and cause squeaks. Use a screwdriver or wrench to tighten them as necessary.

2. Lubricate Joints

Apply lubricant to the joints of your bed frame to prevent friction and noise. You can use WD-40 or any other lubricant that is safe for wood.

3. Replace Worn Parts

If you notice any parts of your bed frame that are worn or damaged, replace them immediately. This includes slats, screws, bolts, and any other components that are essential to the structure of your bed.

4. Keep Your Bed Clean

Dust and debris can accumulate in the joints and crevices of your bed frame, causing friction and noise. Regularly clean your bed with a soft cloth or vacuum to prevent this from happening.

5. Avoid Jumping on Your Bed

Jumping on your bed can cause damage to the frame and springs, leading to squeaks and other problems. Avoid jumping on your bed to keep it in good condition.

By following these tips, you can maintain your wooden bed and prevent future squeaks. Remember to check your bed regularly and address any issues as soon as they arise.

How to Easily Open a Stuck Wooden Door: Tips and Tricks

Is your wooden door sticking and refusing to open? A stuck door can be frustrating and inconvenient, especially if you’re in a hurry or have guests waiting outside. Fortunately, there are several simple techniques you can try to open a stuck wooden door without causing any damage.

Before you start trying to force the door open, it’s important to identify the cause of the problem. A door can become stuck for a variety of reasons, such as humidity, changes in temperature, or worn-out hinges. Once you understand the cause of the problem, you can choose the best method to fix it. In this article, we will explore some effective techniques to open a stuck wooden door, including using lubricants, sandpaper, and basic tools. With a little patience and effort, you can get your door open and back to functioning properly in no time.

Understanding the Problem

When a wooden door gets stuck, it can be frustrating and inconvenient. However, with a few simple tools and techniques, you can easily fix the problem and get your door functioning properly again. Before attempting to fix a stuck door, it is important to understand the problem and its cause. In this section, we will discuss how to identify the type of door and determine the cause of the jam.

Identifying the Type of Door

There are several types of wooden doors, each with its own unique characteristics. The most common types of wooden doors include solid wood doors, hollow core doors, and panel doors. Solid wood doors are made entirely of wood and are the heaviest and most durable type of wooden door. Hollow core doors are made with a wood frame and a cardboard or veneer center, making them lightweight and less durable. Panel doors are made up of several panels and are the most decorative type of wooden door.

Determining the Cause of the Jam

There are several reasons why a wooden door may become stuck. One common cause is humidity. When the air is humid, wooden doors can absorb moisture and expand, causing them to rub against the door frame. Another common cause of a stuck door is a loose hinge or latch. If the hinges or latch are loose, the door may not be able to close properly, causing it to become stuck.

To determine the cause of the jam, start by examining the door and frame for any visible damage or obstructions. Look for scratches in the paint, grime buildup, or any other noticeable damage. If the door appears to be in good condition, check the hinges and latch for any signs of wear or looseness. If the problem persists, you may need to use some basic techniques to fix the problem, such as using a lubricant or sandpaper to smooth out any rough spots.

Gathering Necessary Tools

Before you start fixing your stuck wooden door, you need to gather some necessary tools. Here are some tools you might need:

1. Screwdriver

A screwdriver is essential for removing screws from the hinges and other parts of the door. It is important to have a screwdriver that fits the screws on your door properly to avoid damaging them.

2. Hammer

A hammer is useful for tapping the door gently to loosen it from the frame. You can also use it to remove nails or screws from the door.

3. Lubricant

A lubricant such as WD-40 can help to loosen the door and make it easier to open. You can apply the lubricant to the hinges and other parts of the door that may be causing the problem.

4. Shims

Shims are thin pieces of wood or plastic that you can use to adjust the position of the door. They can be used to fill gaps between the door and the frame to prevent it from sticking.

5. Electric Planer

An electric planer is a power tool that can be used to shave off small amounts of wood from the door. This can be useful if the door is rubbing against the frame.

6. Sandpaper

Sandpaper can be used to smooth rough edges on the door or frame. It can also be used to remove paint or other coatings that may be causing the door to stick.

By gathering these tools, you will be prepared to tackle the problem of a stuck wooden door. Remember to use caution when working with power tools and to follow all safety instructions.

Simple Techniques to Open a Stuck Wooden Door

If you find yourself struggling to open a stuck wooden door, don’t worry. There are some simple techniques you can try to get your door swinging freely again. Here are a few methods you can use:

Using a Credit Card

Believe it or not, a credit card can be a useful tool when trying to open a stuck wooden door. First, wedge the card between the door and the frame at the level of the latch. Then, wiggle the card up and down while simultaneously pushing on the door. This technique can help to dislodge the latch and allow the door to open.

Applying Force

If the credit card method doesn’t work, you can try using force to open the door. Take a sturdy object, like a hammer or a rubber mallet, and tap the door near the handle. This can help to loosen the door and make it easier to open. If that doesn’t work, you can try pushing or pulling on the door with all your might. Be careful not to hurt yourself or damage the door or frame.

Adjusting the Hinges

If the door is still stuck, the problem may be with the hinges. Check to see if the screws are loose or if the hinges are bent. Tightening loose screws or replacing them with longer ones can help to secure the hinges and make the door easier to open. If the hinges are bent, you may need to replace them entirely.

Remember, opening a stuck wooden door can be frustrating, but with a little patience and persistence, you can get the job done. Try these simple techniques, and you’ll have your door swinging freely in no time.

Advanced Techniques to Open a Stuck Wooden Door

If you have tried the basic techniques to open a stuck wooden door and they did not work, you may need to use more advanced techniques. Here are some techniques you can try:

Using a Screwdriver

If your door is stuck because the latch is not retracting, you can try using a screwdriver to manually retract the latch. To do this, remove the doorknob and the latch plate. Insert the screwdriver into the hole where the doorknob was and push it in the direction of the latch. This should retract the latch and allow you to open the door.

Applying a Lubricant

If your door is stuck because it is rubbing against the frame, you can try applying a lubricant to the areas where the door is rubbing. You can use a lubricant such as WD-40 or silicone spray. Apply the lubricant to the areas where the door is rubbing and then try to open the door. If the door still does not open, you may need to sand the door (see next section).

Sanding the Door

If your door is stuck because it is rubbing against the frame, you can try sanding the door. To do this, remove the door from the hinges and lay it flat on a work surface. Use sandpaper to sand the areas where the door is rubbing against the frame. Sand the areas evenly until the door fits properly in the frame. Once you have sanded the door, rehang it and try to open it.

Remember, if you are not comfortable trying these techniques, you can always call a professional for help. With these advanced techniques, you should be able to open a stuck wooden door and get back to your day.

When to Call a Professional

Opening a stuck wooden door can be a frustrating experience, but before you attempt any DIY fixes, it’s important to assess whether the problem is something you can handle yourself or if you need to call in a professional. Here are a few situations where it’s best to leave the job to an expert:

The Door is Damaged

If your door is visibly damaged, such as having cracks, splits, or holes, it’s best to call a professional. Attempting to fix the door yourself can cause further damage and end up costing you more money in the long run. A professional can assess the damage and recommend the best course of action, whether it’s repairing the door or replacing it altogether.

You’re Not Comfortable with DIY Fixes

If you’re not comfortable with DIY fixes, it’s best to call a professional. Attempting to fix a stuck door when you’re not confident in your abilities can lead to further damage and potentially harm yourself. A professional can safely and effectively open the door without causing any damage.

The Door is an Antique or Has Historical Value

If your door is an antique or has historical value, it’s best to call a professional. Attempting to fix the door yourself can damage its historical integrity and potentially decrease its value. A professional can open the door without causing any damage and ensure its historical value is preserved.

In general, if you’re unsure whether you can handle fixing a stuck wooden door yourself, it’s always best to call a professional. They have the experience and knowledge to safely and effectively open the door without causing any damage.

Maintaining Your Wooden Door

Wooden doors are a beautiful addition to any home, but they require some maintenance to keep them looking and functioning their best. Here are some tips to help you maintain your wooden door:

Keep it Clean

Dirt and grime can build up on your wooden door over time, making it more difficult to open and close. To keep your door clean, wipe it down with a damp cloth regularly. Avoid using harsh chemicals or abrasive sponges that could damage the wood.

Seal the Wood

Wooden doors can absorb moisture, which can cause them to warp or rot over time. To prevent this, it’s important to seal the wood with a protective finish. There are many different types of finishes available, including varnish, paint, and stain. Choose the one that best suits your needs and apply it according to the manufacturer’s instructions.

Lubricate the Hinges

Hinges can become stiff or squeaky over time, making it difficult to open and close the door. To keep your hinges working smoothly, lubricate them with a silicone-based lubricant. Apply a small amount to each hinge and move the door back and forth to distribute the lubricant.

Check for Damage

Regularly inspect your wooden door for any signs of damage, such as cracks, chips, or scratches. If you notice any damage, repair it as soon as possible to prevent further damage. Small chips or scratches can be filled in with wood filler, while larger damage may require the assistance of a professional.

By following these simple tips, you can keep your wooden door looking and functioning its best for years to come.