Tag Archives: choose heavy-duty hinges

build-a-wooden-gate-door

How to Build a Wooden Gate Door: A Beginner's Guide

Building a wooden gate door is a great way to add both functionality and aesthetic appeal to your fence. Whether you’re looking to keep your pets and children safe, or simply want to enhance the look of your property, a wooden gate door can be a great addition to your home. With the right tools and materials, building a wooden gate door can be a fun and rewarding DIY project.

Before you get started, it’s important to determine the size and style of gate that you want to build. You’ll also need to gather the necessary tools and materials, which may include a screwdriver, power drill, compound miter saw, carpenter’s level, jigsaw, gate brackets, hinges, and screws. Once you have everything you need, you can begin measuring and cutting the wood to fit your desired dimensions. With a little patience and attention to detail, you can create a beautiful and functional wooden gate door that will last for years to come.

Understanding the Basics of a Wooden Gate Door
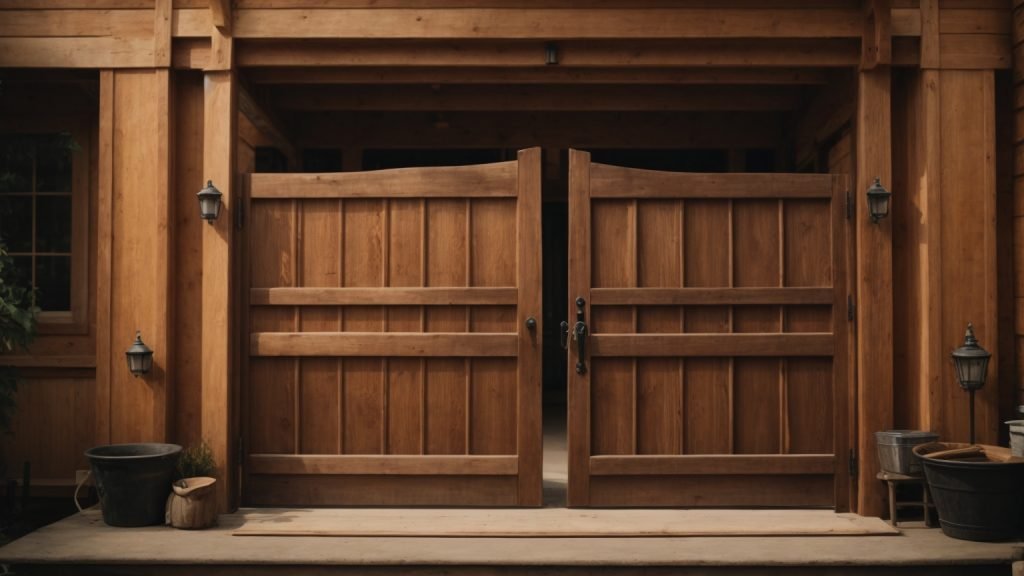
build-a-wooden-gate-door

If you’re looking to add some privacy or security to your property, building a wooden gate door is a great option. Not only is it functional, but it can also add a touch of style to your property. However, before you get started, it’s important to understand the basics of building a wooden gate door.

Materials Needed

Here are the materials you’ll need to build a wooden gate door:

Materials Quantity
Wood Depends on the size of your gate
Gate hardware Hinges, latch, screws, etc.
Wood glue 1 bottle
Wood filler 1 can
Sandpaper 1 pack
Paint or stain 1 can

Tools Required

Here are the tools you’ll need to build a wooden gate door:

  • Tape measure
  • Circular saw or handsaw
  • Drill
  • Screwdriver
  • Level
  • Clamps
  • Chisel
  • Hammer
  • Paintbrush or roller

Once you have all the necessary materials and tools, you can move on to building your wooden gate door.

Remember, safety is important when working with power tools. Wear safety glasses, gloves, and ear protection when necessary and follow all safety instructions.

In the next section, we’ll go over the steps you need to follow to build a wooden gate door.

Planning Your Wooden Gate Door

Before starting to build your wooden gate door, it is important to plan and prepare. This will ensure that you have the right materials and tools, and that your gate will function properly and look great. In this section, we will go over some important considerations when planning your wooden gate door.

Determining the Size

The first step in planning your wooden gate door is to determine the size you need. Measure the width of the opening where the gate will be installed, and add a few extra inches to allow for clearance and hardware. You should also consider the height of the gate, depending on your needs for privacy and security.

Choosing the Right Design

There are many different designs to choose from when it comes to wooden gate doors. You can opt for a traditional, simple design, or get creative with a more ornate style. Consider the overall look of your property and choose a design that complements it. You should also think about the function of the gate – will it be used for security, privacy, or simply as a decorative element?

Selecting the Wood Type

Choosing the right type of wood is crucial for the durability and longevity of your wooden gate door. Some common options include cedar, redwood, and pressure-treated pine. Each type of wood has its own unique characteristics and benefits, so it’s important to do your research and choose the one that best fits your needs and budget.

In summary, planning your wooden gate door is an important step in the building process. Determine the size you need, choose a design that complements your property, and select the right type of wood for durability and longevity. With these considerations in mind, you’ll be well on your way to building a beautiful and functional wooden gate door.

Preparing the Wood

Before you start building your wooden gate, you need to prepare the wood. This involves cutting and sanding the wood to the right size and shape. Here are the steps you need to follow:

Cutting the Wood

The first step in preparing the wood for your gate is to cut it to the right size. You will need a compound miter saw to make precise cuts. Make sure you measure the wood carefully before cutting it. Here are some tips to keep in mind:

  • Cut the wood slightly larger than the final size you need. This will give you some extra room to sand the wood down to the exact size you need.
  • Make sure the corners are square. You can use a carpenter’s level to check this.
  • Cut the wood slowly and steadily. Rushing can lead to mistakes and uneven cuts.

Sanding the Wood

Once you have cut the wood to the right size, it’s time to sand it down. Sanding is important because it removes any rough edges or splinters that could cause injury. Here are some tips to keep in mind:

  • Use a coarse sandpaper to start with and then move to a finer sandpaper. This will help you achieve a smooth finish.
  • Sand the edges of the wood to remove any sharp corners or edges.
  • Sand the wood in the direction of the grain. This will help you achieve a smooth finish without damaging the wood.
  • Use a dust mask to avoid inhaling sawdust.

By following these steps, you can prepare the wood for your wooden gate. Once you have completed these steps, you can move on to the next stage of building your gate.

Assembling the Wooden Gate Door
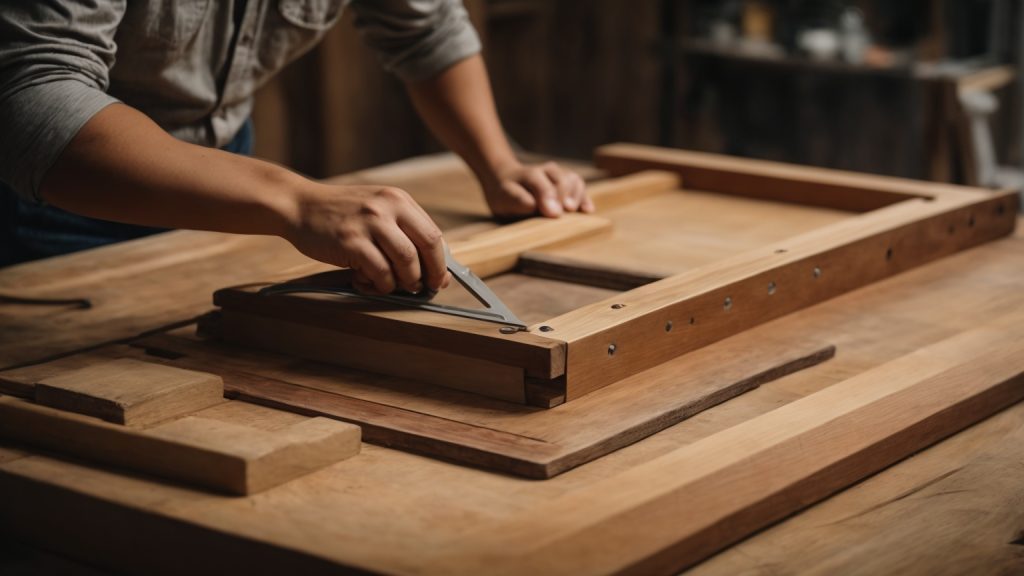
assembling-the-wooden-gate-door

When it comes to assembling a wooden gate door, there are a few key steps you need to follow to ensure a sturdy and reliable end result. In this section, we’ll walk you through the process of building the frame, attaching the panels, and installing the cross braces.

Building the Frame

The first step in assembling your wooden gate door is to build the frame. To do this, you’ll need to measure and cut your wooden boards to the correct length and width. Once you have your boards cut, you can begin assembling the frame.

To assemble the frame, you’ll need to attach the boards together using wood screws or nails. Make sure to use a level to ensure that your frame is square and even. You may also want to add diagonal braces to the corners of your frame for added stability.

Attaching the Panels

Once your frame is assembled, you can begin attaching the panels. To do this, measure and cut your wooden panels to the correct size and shape. Then, attach them to the frame using wood screws or nails.

Make sure to leave a small gap between each panel to allow for expansion and contraction due to changes in temperature and humidity. You may also want to add a diagonal brace across the panels for added stability.

Installing the Cross Braces

The final step in assembling your wooden gate door is to install the cross braces. Cross braces are wooden boards that run diagonally across the back of the gate to provide added support and prevent sagging.

To install the cross braces, measure and cut your boards to the correct length and angle. Then, attach them to the back of the gate using wood screws or nails. Make sure that the cross braces are securely attached and evenly spaced for maximum stability.

By following these steps, you can assemble a sturdy and reliable wooden gate door that will provide years of use and enjoyment.

Finishing Touches

Once you have constructed your wooden gate, it’s time to add the finishing touches to make it look great and function properly. This section will cover two essential finishing touches: painting or staining and adding hardware.

Painting or Staining

Painting or staining your wooden gate can help protect it from the elements and give it a polished look. Before you start, make sure the wood is clean and dry. Here are some tips to help you paint or stain your wooden gate:

  • Choose a paint or stain that is specifically designed for outdoor use.
  • Apply a primer before painting to help the paint adhere better to the wood.
  • Use a brush or roller to apply the paint or stain evenly.
  • Apply two coats of paint or stain for maximum protection.

Adding Hardware

Adding hardware to your wooden gate is essential for functionality and security. Here are some hardware options to consider:

  • Hinges: Choose heavy-duty hinges that can support the weight of your gate.
  • Latch: A latch will keep your gate securely closed. There are several types of latches to choose from, including thumb latches, ring latches, and slide bolts.
  • Handles: Handles make it easier to open and close your gate. Choose a handle that is sturdy and matches the style of your gate.

When installing hardware, make sure to follow the manufacturer’s instructions carefully. It’s also important to choose hardware that is rust-resistant and can withstand outdoor conditions.

By following these tips, you can add the finishing touches to your wooden gate and enjoy a beautiful and functional addition to your property.

Installing the Wooden Gate Door

Once you have built your wooden gate door, it’s time to install it. Follow these steps to ensure a secure and functional installation.

Positioning the Gate

Before you install the gate, make sure you have the correct measurements for your opening. The gate should fit snugly within the opening with a small gap for clearance.

Once you have the correct measurements, position the gate in the opening. Use shims to hold the gate in place and ensure it is level.

Securing the Hinges

Attach the hinges to the gate first, then to the post or fence. Make sure the hinges are secured with screws that are long enough to hold the weight of the gate.

Once the hinges are attached, remove the shims and test the gate to ensure it swings freely and smoothly. Adjust the hinges as necessary to ensure the gate is level and swings properly.

Attaching the Latch

Attach the latch to the gate and the post or fence. Make sure the latch is aligned properly and securely fastened. Test the latch to ensure it opens and closes smoothly and securely.

If necessary, add a drop rod to the gate to keep it from sagging. A drop rod is a metal rod that attaches to the bottom of the gate and goes into the ground to keep the gate from sagging over time.

With these steps, you should have a secure and functional wooden gate door. Remember to maintain and inspect your gate regularly to ensure it stays in good condition.

Maintaining Your Wooden Gate Door

To ensure the longevity and functionality of your wooden gate door, it’s essential to perform regular maintenance. Here are some tips to help you maintain your wooden gate door:

Regular Cleaning

Cleaning your wooden gate door regularly is crucial to prevent dirt and debris from accumulating, which can lead to rot and other damage. Here’s how to clean your wooden gate door:

  • Use a soft-bristled brush or cloth to remove any loose dirt and debris from the surface of the gate.
  • Mix a solution of mild soap and water and apply it to the gate using a cloth or sponge.
  • Rinse the gate thoroughly with clean water and allow it to dry completely before applying any finish or sealer.

Yearly Inspections

Performing a yearly inspection of your wooden gate door can help you identify any potential issues early on and prevent costly repairs down the line. Here’s what to look for during your yearly inspection:

  • Check for any signs of rot, warping, or cracking in the wood.
  • Inspect the gate’s hardware, including hinges and latches, to ensure they are functioning correctly.
  • Look for any signs of insect damage, such as holes or sawdust.

Repairing Damage

If you notice any damage or issues during your inspection, it’s essential to address them promptly to prevent further damage. Here are some tips for repairing damage to your wooden gate door:

  • For small cracks or splits, use wood filler to fill in the damaged area.
  • For larger cracks or splits, you may need to replace the damaged section of the gate.
  • If you notice signs of rot, you may need to replace the entire gate or the affected section.

By following these tips for maintaining your wooden gate door, you can ensure that it remains functional and beautiful for years to come.
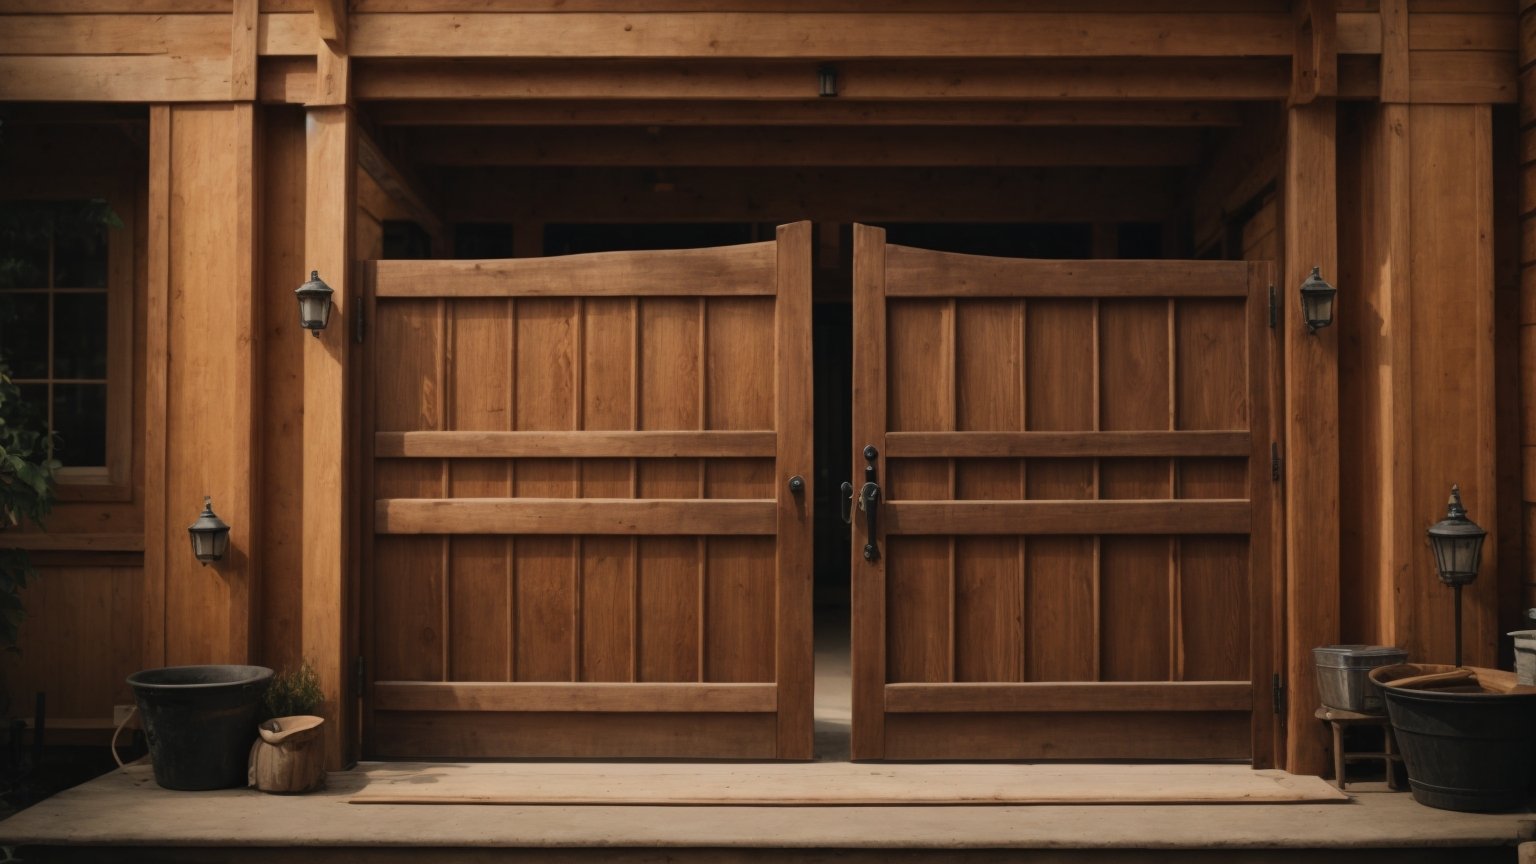
How to Build a Wooden Trailer Gate: Step-by-Step Guide

Are you looking to build a wooden trailer gate? A trailer gate can be a useful addition to your trailer, allowing you to easily load and unload heavy items. Building a wooden trailer gate can be a cost-effective and customizable solution for your trailer. In this article, we will provide step-by-step instructions on how to build a wooden trailer gate.

Before starting your project, it is important to measure the height and width of your trailer opening to ensure your gate fits properly. Keep in mind that the gate should be slightly shorter than the height of the trailer opening to allow for clearance and easy opening and closing. Once you have your measurements, you can begin gathering the necessary tools and materials.

In this article, we will provide detailed instructions on how to build a wooden trailer gate using common hand-held carpentry tools. We will also include tips on selecting the right wood for your gate and how to properly install hinges and latches. By following our guide, you can build a sturdy and functional wooden trailer gate that meets your specific needs.

Understanding the Basics of a Wooden Trailer Gate

If you are planning to build a wooden trailer gate, it is essential to understand the basics of the gate’s construction. Here are a few things you need to know before you start building:

Materials

The first thing to consider when building a wooden trailer gate is the materials you will need. Some of the essential materials include lumber (2x4s, 2x6s, 1x4s, and 1x6s), screws, hinges, gate latch, wood glue, paint or stain, jigsaw, drill, and drill bits. Make sure to choose the right type of lumber for your gate. Pressure-treated lumber is an excellent choice for outdoor projects as it is resistant to rot and decay.

Planning and Measuring

Before you start building, you need to measure the height and width of the trailer opening to determine the size of your gate. Make sure to leave some clearance between the gate and the trailer to prevent damage. Once you have the measurements, you can start planning your gate’s design.

Building the Frame

The frame is the most crucial part of your wooden trailer gate. It provides the gate with its strength and stability. To build the frame, you will need to cut the lumber to the desired length and assemble it using screws and wood glue. Make sure to use a level to ensure that the frame is straight and square.

Adding the Boards

Once you have built the frame, you can add the boards to create the gate’s surface. Measure the width of the opening and cut the boards accordingly. Use screws and wood glue to attach the boards to the frame. Make sure to leave some space between the boards to allow for expansion and contraction due to changes in temperature and humidity.

Installing the Hinges and Latch

The final step is to install the hinges and latch. Attach the hinges to the gate and then to the trailer. Make sure to use screws that are long enough to provide a secure attachment. Install the gate latch on the opposite side of the hinges to keep the gate closed.

By understanding the basics of a wooden trailer gate, you can build a gate that is strong, durable, and functional. With the right materials, tools, and techniques, you can create a gate that will last for many years to come.

Choosing the Right Materials

When building a wooden trailer gate, selecting the right materials is crucial. You want to ensure that the gate is sturdy, durable, and can withstand the weight of the trailer. In this section, we will discuss how to choose the right materials for your wooden trailer gate.

Selecting the Wood

The first step in choosing the right materials for your wooden trailer gate is selecting the right wood. The most commonly used wood for trailer gates is pressure-treated pine. This type of wood is affordable, readily available, and resistant to rot and insects.

Another popular choice is cedar. Cedar is more expensive than pressure-treated pine, but it is naturally resistant to rot and insects. It is also more aesthetically pleasing and will give your trailer gate a beautiful finish.

When selecting your wood, make sure to choose boards that are straight and free of knots. Knots weaken the wood and can cause it to break under pressure.

Identifying the Necessary Hardware

In addition to the wood, you will also need to select the necessary hardware for your wooden trailer gate. This includes hinges, screws, and bolts.

When selecting hinges, make sure to choose heavy-duty hinges that can support the weight of the gate. The number of hinges you need will depend on the size of your gate. As a general rule, use three hinges for gates up to 8 feet wide and four hinges for gates over 8 feet wide.

For screws and bolts, make sure to choose ones that are rust-resistant and can withstand the weight of the gate. Use screws to attach the hinges to the gate and bolts to attach the hinges to the post.

By selecting the right wood and hardware, you can ensure that your wooden trailer gate is sturdy, durable, and can withstand the weight of your trailer.

Designing the Trailer Gate

Before you start building your wooden trailer gate, you need to design it. This involves determining the size of the gate and sketching the design.

Determining the Size

The first step in designing your trailer gate is to determine the size of the opening. Measure the height and width of the trailer opening to determine the height and width of your gate. Keep in mind that the gate should be slightly shorter than the height of the trailer opening to allow for clearance and easy opening and closing.

Sketching the Design

Once you have determined the size of the gate, you can start sketching the design. You can use graph paper or a computer program to create a detailed sketch of your trailer gate. Your design should include the following:

  • The overall dimensions of the gate
  • The type of wood you will use
  • The style of the gate
  • The hardware you will use (hinges, latch, etc.)

Consider the style of your trailer gate. Will it be a solid gate or will it have a mesh or slatted design? The style of your gate will depend on your personal preference and the intended use of your trailer.

When sketching your design, make sure to include the hardware you will use. This includes hinges, a latch, and any other necessary hardware. You may also want to include a handle or other decorative elements.

In conclusion, designing your trailer gate is an important step in the building process. By determining the size and sketching the design, you can ensure that your gate will fit your trailer and meet your needs.

Building the Frame

The frame is the backbone of your trailer gate, and it’s important to build it strong and sturdy. Here are the steps to building a wooden trailer gate frame:

  1. Measure the width and height of the trailer opening and cut the boards accordingly. Use a saw to cut the boards to the desired length.

  2. Cut two long boards for the sides of the frame and two shorter boards for the top and bottom of the frame. Make sure the boards are straight and free from knots or other defects that could weaken the frame.

  3. Lay the boards on a flat surface and arrange them in a rectangle shape. Use clamps to hold the boards in place.

  4. Drill pilot holes through the boards where they will be joined together. This will help prevent the wood from splitting when you insert screws.

  5. Apply wood glue to the ends of the boards that will be joined together. This will help create a strong bond between the boards.

  6. Insert screws through the pilot holes and into the adjoining board. Use a power drill to make this process faster and easier.

  7. Once the frame is complete, use a carpenter’s level to make sure it is straight and level. Adjust the frame as necessary.

  8. If you want to add diagonal bracing to the frame for extra strength, cut two diagonal boards and attach them to the corners of the frame.

  9. Sand the frame smooth to remove any rough edges or splinters.

  10. Apply a coat of wood sealer or paint to protect the frame from the elements.

By following these steps, you can build a strong and sturdy wooden frame for your trailer gate. With the frame complete, you can move on to adding the gate hinges, latch pins, and flooring or deck.

Attaching the Wood Panels

Once you have constructed the frame of your wooden trailer gate, the next step is to attach the wood panels. This is where your gate will start to take shape and look like a functional gate.

Before attaching the wood panels, you need to decide on the type of wood you want to use. You can use any type of wood, but it is recommended to use pressure-treated lumber or cedar as they are more durable and can withstand harsh weather conditions.

Here are the steps to attach the wood panels to your trailer gate:

  1. Measure the width and height of the frame to determine the size of the wood panels you need.
  2. Cut the wood panels to the desired size using a saw.
  3. Apply wood glue to the back of the wood panels and place them onto the frame.
  4. Secure the wood panels to the frame using screws. Make sure to use screws that are long enough to penetrate through the wood panels and into the frame.
  5. Repeat this process until all the wood panels are attached to the frame.

It is important to note that the wood panels should be evenly spaced and flush with the frame to ensure the gate opens and closes smoothly.

Once all the wood panels are attached, you can sand the surface of the gate to make it smooth. You can also apply paint or stain to protect the wood from moisture and give it a finished look.

In conclusion, attaching the wood panels is a crucial step in building a wooden trailer gate. By following these steps, you can ensure that your gate is sturdy, durable, and looks great.

Installing the Hardware

Once you have built your wooden trailer gate, it is time to install the hardware. This includes hinges and a latch. In this section, we will go over the steps to install both.

Hinges Installation

The hinges are what allow the gate to swing open and closed. You will need to install two hinges, one on the top and one on the bottom of the gate. Here are the steps to install the hinges:

  1. Determine the location of the hinges on the gate. They should be evenly spaced, with one near the top and one near the bottom.
  2. Mark the location of the hinges on the gate.
  3. Pre-drill holes for the screws using a drill bit that is slightly smaller than the diameter of the screws.
  4. Attach the hinges to the gate using screws.
  5. Hold the gate up to the trailer opening and mark the location of the hinges on the trailer.
  6. Pre-drill holes for the screws using a drill bit that is slightly smaller than the diameter of the screws.
  7. Attach the hinges to the trailer using screws.

Make sure the hinges are securely attached to both the gate and the trailer. Test the gate to ensure it swings open and closed smoothly.

Latch Installation

The latch is what keeps the gate closed when it is not in use. Here are the steps to install the latch:

  1. Determine the location of the latch on the gate. It should be placed near the top of the gate.
  2. Mark the location of the latch on the gate.
  3. Pre-drill holes for the screws using a drill bit that is slightly smaller than the diameter of the screws.
  4. Attach the latch to the gate using screws.
  5. Hold the gate up to the trailer opening and mark the location of the latch on the trailer.
  6. Pre-drill holes for the screws using a drill bit that is slightly smaller than the diameter of the screws.
  7. Attach the latch to the trailer using screws.

Make sure the latch is securely attached to both the gate and the trailer. Test the latch to ensure it keeps the gate closed tightly.

Congratulations, you have successfully installed the hardware for your wooden trailer gate!

Securing the Gate to the Trailer

Now that you have built your wooden trailer gate, it’s time to secure it to the trailer. The process of securing the gate is crucial, as it ensures the safety of your cargo during transportation. In this section, we will guide you through the steps to secure your gate to your trailer.

Step 1: Positioning the Gate

Before securing the gate to the trailer, make sure it is in the right position. The gate should be centered and level with the trailer opening. Use a level to ensure the gate is straight and adjust it if necessary. Once the gate is in the correct position, you can move on to the next step.

Step 2: Attaching Hinges

The hinges are an essential part of securing the gate to the trailer. Use heavy-duty hinges that can support the weight of the gate and the cargo. Attach the hinges to the gate first, making sure they are evenly spaced and level. Then, attach the hinges to the trailer, using bolts or screws that are appropriate for the material of your trailer.

Step 3: Installing Latch Pins

Latch pins are used to keep the gate closed during transportation. Install latch pins on both sides of the gate, making sure they are aligned with the latch on the trailer. Use a locking pin or a padlock to secure the latch pins and prevent them from opening during transportation.

Step 4: Adding Support

To ensure the gate stays in place during transportation, you may need to add additional support. Use braces or chains to secure the gate to the trailer. Braces should be installed on both sides of the gate, while chains can be used to secure the gate to the trailer bed.

Step 5: Testing the Gate

Once you have secured the gate to the trailer, it’s time to test it. Open and close the gate to ensure it moves smoothly and locks securely. Test the latch pins to ensure they are working correctly. If everything is working correctly, your gate is now secured and ready for transportation.

In conclusion, securing your wooden trailer gate is an essential step in ensuring the safety of your cargo during transportation. Follow these steps to secure your gate to the trailer properly, and you can transport your cargo with confidence.

Maintenance Tips for a Wooden Trailer Gate

Now that you have built your wooden trailer gate, it is important to properly maintain it to ensure its longevity. Here are some helpful maintenance tips to keep your wooden trailer gate in great condition:

Regular Cleaning

One of the easiest ways to maintain your wooden trailer gate is to keep it clean. Dirt, debris, and moisture can accumulate on the surface of the gate, leading to rot and decay. You should clean your wooden trailer gate regularly with a mild soap and water solution. Be sure to rinse it thoroughly and allow it to dry completely before applying any sealant or paint.

Sealant or Paint

To protect your wooden trailer gate from the elements, it is important to apply a sealant or paint. A sealant will help to repel moisture and prevent rot, while paint will add an extra layer of protection against the sun’s UV rays. Be sure to choose a high-quality sealant or paint that is specifically designed for outdoor use.

Inspect for Damage

Regularly inspect your wooden trailer gate for any signs of damage, such as cracks, splits, or warping. If you notice any damage, it is important to address it as soon as possible to prevent further deterioration. Depending on the severity of the damage, you may need to replace the affected boards or the entire gate.

Lubricate Hinges and Latches

The hinges and latches on your wooden trailer gate can become stiff and difficult to operate over time. To prevent this, you should lubricate them regularly with a silicone-based lubricant. This will help to keep them moving smoothly and prevent them from rusting.

By following these simple maintenance tips, you can keep your wooden trailer gate looking great and functioning properly for years to come.

How to Build a Double Wooden Gate: A Beginner's Guide

Are you looking to add some privacy and security to your property? Building a double wooden gate is a great DIY project that can accomplish both of these goals. Not only will it provide an attractive entrance to your yard, but it can also help keep unwanted visitors out.

Before you get started, it’s important to have a plan in place. Consider the size of your gate and the materials you’ll need. You’ll also want to think about the type of hardware you’ll use, such as hinges and latches. With the right tools and a little bit of patience, you can build a sturdy and functional double wooden gate that will last for years to come.

Understanding the Basics

If you’re planning to build a double wooden gate, it’s important to understand the basics of gate construction. This will help ensure that your gate is sturdy, secure, and functional. In this section, we’ll cover the types of wood and gates you can use for your project.

Types of Wood

When it comes to building a wooden gate, you have a variety of wood types to choose from. Here are some common options:

  • Cedar: This wood is naturally resistant to rot and insects, making it a popular choice for outdoor projects.
  • Redwood: Like cedar, redwood is naturally resistant to rot and insects. It’s also known for its attractive color and texture.
  • Pine: Pine is a more affordable option that can be stained or painted to match your desired aesthetic. However, it’s not as durable as cedar or redwood and may require more maintenance over time.

Consider your budget, desired aesthetic, and climate when selecting the type of wood for your gate.

Types of Gates

There are several types of gates to consider when building a double wooden gate. Here are some common options:

  • Swinging gate: This is the most common type of gate, and it swings open and closed like a door.
  • Sliding gate: A sliding gate slides open and closed on a track. This type of gate is ideal for areas with limited space.
  • Bi-fold gate: A bi-fold gate folds in half when it’s opened, making it a good option for narrow spaces.

Consider the space you have available and your desired level of security and privacy when selecting the type of gate for your project.

Now that you understand the basics of wood and gate types, you’re ready to move on to the next step of building your double wooden gate.

Planning Your Double Wooden Gate

When planning to build a double wooden gate, there are several factors to consider to ensure that you end up with a gate that is functional, durable, and aesthetically pleasing. Here are some guidelines to help you plan your double wooden gate project.

Choosing the Right Size

The first step in planning your double wooden gate is to determine the right size for your gate. The size of your gate will depend on various factors, including the size of the opening, the width of your driveway or pathway, and the height of the gate. Ideally, your gate should be wide enough to allow easy access for vehicles, equipment, and people.

To determine the right size for your gate, measure the width of the opening and add a few inches to allow for clearance. A typical double gate is around 12 to 16 feet wide, but you can adjust the size to fit your specific needs. Also, consider the height of the gate, especially if you have pets or children that might try to climb over the gate.

Selecting the Right Design

The design of your double wooden gate should complement the style of your home and landscape. There are various designs to choose from, including traditional, modern, rustic, and more. You can also customize your gate with decorative elements such as scrollwork, pickets, or lattice.

When selecting the design for your double wooden gate, consider the level of privacy and security you need. A solid gate provides more privacy and security, while a gate with openings allows better visibility and ventilation. Also, consider the hardware and accessories you will need, such as hinges, latches, and locks.

Considerations for Material

The material you choose for your double wooden gate will affect its durability, maintenance, and cost. Common materials for wooden gates include cedar, redwood, pine, and spruce. Each material has its own pros and cons, so it’s important to choose the right material for your needs and budget.

Cedar and redwood are popular choices for their natural resistance to rot, decay, and insects. They also have an attractive appearance and require minimal maintenance. Pine and spruce are more affordable options but require more maintenance and may not last as long as cedar or redwood.

In conclusion, planning your double wooden gate involves choosing the right size, selecting the right design, and considering the material. By following these guidelines, you can build a double wooden gate that is functional, durable, and adds value to your property.

Gathering Your Tools and Materials

Before you start building your double wooden gate, you need to make sure you have all the necessary tools and materials. Here are the essential tools and required materials you’ll need:

Essential Tools

  • Power drill: This tool is essential for drilling holes and driving screws.
  • Screwdriver: You’ll need a screwdriver for tightening screws.
  • Compound miter saw: This saw will help you make precise cuts at different angles.
  • Carpenter’s level: A level will ensure that your gate is straight and level.
  • Jigsaw: You’ll need a jigsaw for cutting a decorative profile if desired.
  • Tape measure: You’ll need a tape measure to take accurate measurements.
  • Safety glasses: Protect your eyes with safety glasses when using power tools.

Required Materials

  • Wood boards: You’ll need wood boards for the frame and slats of your gate. Cedar or redwood are good choices for outdoor use.
  • Gate hardware: You’ll need hinges, latches, and screws to attach your gate to the fence and secure it.
  • Wood glue: You’ll need wood glue to strengthen the joints of your gate.
  • Wood screws: You’ll need wood screws to attach the boards together.
  • Sandpaper: Sandpaper will help you smooth out rough edges and surfaces.
  • Paint or stain: You’ll need paint or stain to protect your gate from the elements and give it a finished look.

Make sure you have all the necessary tools and materials before you start building your double wooden gate. Having everything you need on hand will save you time and frustration later on.

Building the Gate

Building a double wooden gate is a great way to add both security and style to your property. Here are the steps you need to follow to build your own double wooden gate.

Preparing the Frame

Before you start assembling your gate, you need to prepare the frame. First, measure the space where you want to install the gate. The frame should be slightly smaller than the space to allow for easy opening and closing.

Next, cut the wood for the frame. You will need four pieces of wood for the frame: two horizontal pieces and two vertical pieces. Make sure the wood is straight and free from knots.

Once you have cut the wood, sand the edges to remove any rough spots. Then, assemble the frame using screws and wood glue. Make sure the frame is square by measuring diagonally from corner to corner.

Assembling the Gate

Once the frame is complete, it’s time to assemble the gate. Cut the wood for the gate boards to the right length and width. You will need enough boards to cover the entire frame.

Next, attach the gate boards to the frame using screws and wood glue. Make sure the boards are evenly spaced and level. You can add decorative touches to the gate boards if you like, such as a diagonal or curved pattern.

Installing the Hinges

Finally, it’s time to install the hinges. You will need two hinges for each gate. Choose heavy-duty hinges that can support the weight of the gate.

First, attach one half of each hinge to the gate frame. Then, attach the other half of each hinge to the gate post. Make sure the hinges are level and properly aligned.

Test the gate to make sure it opens and closes smoothly. If necessary, adjust the hinges until the gate operates correctly.

That’s it! With these simple steps, you can build a sturdy and stylish double wooden gate that will provide both security and beauty to your property.

Finishing Touches

Once you have built your double wooden gate, it’s time to add the finishing touches. This step is important not only for aesthetics but also for functionality and durability. Here are some tips for finishing your gate.

Painting and Staining

Painting or staining your gate is an important step to protect it from weather damage. Before you start painting or staining, make sure the wood is clean and dry. You can use a pressure washer or a mild soap and water solution to clean the wood. Let it dry completely before proceeding.

If you want to paint your gate, choose a high-quality exterior paint that is designed for wood. Apply the paint in thin, even coats and let each coat dry before applying the next. You may need to apply two or three coats for full coverage.

If you prefer the natural wood look, you can stain your gate instead of painting it. Choose a stain that is designed for exterior use and that matches the color of your existing fence or the color you want to achieve. Apply the stain with a brush or a sprayer and let it dry completely before adding a second coat if needed.

Adding Decorative Elements

Adding decorative elements can make your gate stand out and add curb appeal to your property. Here are some ideas for adding decorative elements to your gate:

  • Add hardware such as hinges, latches, and handles that match the style of your gate and fence.
  • Install decorative post caps on the gate posts for a finished look.
  • Attach metal scrollwork or other decorative elements to the gate for a unique look.
  • Use wood carving or wood burning techniques to add designs or patterns to the gate.

Remember to choose decorative elements that are designed for exterior use and that will hold up to weather and wear over time.

By following these tips for finishing your double wooden gate, you can ensure that it will look great and last for years to come.

Maintaining Your Double Wooden Gate

To ensure the longevity of your double wooden gate, it is important to perform regular maintenance. Here are some tips to help you keep your gate in good condition.

Regular Cleaning

Dirt and debris can accumulate on your gate over time, which can cause it to deteriorate faster. To prevent this, clean your gate regularly using a soft-bristled brush and mild soap. Rinse it off with a hose and let it dry completely before applying any treatments.

Yearly Inspection

Inspect your gate once a year to check for any signs of damage or wear and tear. Look for cracks, warping, and rotting wood. If you notice any issues, address them as soon as possible to prevent further damage.

Repair and Replacement

If you notice any damage to your gate, it is important to repair or replace it as soon as possible. Here are some common issues and how to address them:

  • Cracks: Fill in cracks with wood filler and sand it down. Apply a fresh coat of paint or stain to protect the wood.
  • Warping: If your gate is warping, you can try to straighten it out by tightening or loosening the hinges. If this doesn’t work, you may need to replace the gate altogether.
  • Rotting wood: If you notice rotting wood, you will need to replace the affected areas or the entire gate. Make sure to use treated wood to prevent future rotting.

By following these tips, you can help ensure that your double wooden gate lasts for years to come.

How to Make an Arched Wooden Gate: A Step-by-Step Guide

Are you looking to add some charm and personality to your garden or yard? A wooden arched gate may be just the thing you need! Not only is it a beautiful addition to any outdoor space, but it also serves as a functional way to keep unwanted visitors out and pets or children in. In this article, we will guide you through the steps to make your own arched wooden gate.

First, you will need to gather the necessary materials. This includes wood boards, screws, hinges, a latch, and any decorative elements you may want to add. You will also need tools such as a saw, drill, screwdriver, and measuring tape. Once you have all the materials, you can begin the process of designing and building your gate.

The key to a successful arched wooden gate is to create a sturdy frame that can support the weight of the gate and withstand the elements. This involves cutting the wood boards to the correct size and shape, assembling them into a frame, and adding the arch. With some patience and attention to detail, you can create a beautiful and functional arched wooden gate that will provide a warm welcome to your home.

Understanding Arch Wooden Gates

If you’re looking to add a touch of elegance to your garden or yard, an arched wooden gate might be just what you need. These gates are not only beautiful but also functional, providing privacy and security while enhancing the overall look of your property.

Here are a few things you should know before you start building your own arched wooden gate:

Design

Arched wooden gates come in a variety of designs, from simple and traditional to more elaborate and ornate. Consider the style of your home and the overall aesthetic of your property when choosing a design. You should also consider the size of the gate, ensuring that it is proportionate to the size of your property and the surrounding landscape.

Materials

The most common materials used to build arched wooden gates are cedar, redwood, and pressure-treated pine. Cedar and redwood are both naturally resistant to rot and decay, making them ideal for outdoor use. Pressure-treated pine is a more affordable option but may not last as long as cedar or redwood.

Construction

Building an arched wooden gate requires some woodworking skills and tools. You will need to measure and cut the wood to the correct size and shape, and you will need to assemble the gate using screws or nails. If you’re not comfortable with woodworking, you may want to consider hiring a professional to build the gate for you.

Maintenance

To ensure that your arched wooden gate lasts for many years, you will need to perform regular maintenance. This includes cleaning the gate periodically and applying a protective finish to prevent rot and decay. You should also inspect the gate regularly for any signs of damage or wear and tear and make repairs as necessary.

Overall, an arched wooden gate can be a beautiful and functional addition to your property. With the right design, materials, and construction, your gate can provide privacy and security while enhancing the overall look of your home and garden.

Materials Needed

To build an arched wooden gate, you’ll need a few materials to get started. Here are the essentials you’ll need to gather before you begin.

Wood Selection

Choosing the right type of wood is crucial for the durability and longevity of your gate. Here are some options to consider:

  • Cedar: Naturally resistant to rot and insects, cedar is a popular choice for outdoor projects.
  • Redwood: Another rot-resistant option, redwood is known for its beautiful color and grain patterns.
  • Pressure-treated pine: A more affordable option, pressure-treated pine is chemically treated to resist rot and decay.

Once you’ve chosen your wood, make sure to select boards that are straight and free of knots and cracks. You’ll also need to decide on the thickness of your boards based on the size of your gate and the weight it will need to support.

Hardware Essentials

In addition to the wood, you’ll need a few hardware essentials to assemble your gate. Here’s what you’ll need:

  • Hinges: Choose heavy-duty hinges that can support the weight of your gate.
  • Latch: Depending on your preference, you can choose from a variety of latch options, such as a simple hook-and-eye latch or a more secure gate latch.
  • Screws: Use corrosion-resistant screws to prevent rust and ensure a secure hold.
  • Wood glue: Use wood glue to reinforce joints and prevent warping.

Make sure to measure and mark where your hardware will go before you begin assembly to ensure a smooth installation process. With these materials on hand, you’ll be ready to start building your arched wooden gate.

Designing the Arch Wooden Gate

When designing an arched wooden gate, there are two main aspects to consider: the dimensions and the arch style.

Dimensions

The dimensions of your gate will depend on the size of the opening you want to cover. Measure the width and height of the opening and add a few inches to each measurement to allow for the gate to swing freely.

It’s important to keep in mind that the arch of your gate will also affect the clearance height. Make sure to measure the clearance height as well, especially if the gate will be installed in a low clearance area such as under a roof or overhang.

Arch Style

There are several arch styles to choose from when designing your wooden gate. Some popular options include:

  • Flat top with an arch cutout: This style features a flat top with an arch cutout at the center. It’s a simple and elegant design that works well with a variety of architectural styles.

  • True arch: A true arch is a smooth, continuous curve that creates a graceful, flowing look. This style is more complex to construct but can add a touch of sophistication to your gate.

  • Gothic arch: A gothic arch features a pointed top that adds a dramatic, medieval touch to your gate. This style works well with homes that have a gothic or medieval architectural style.

When choosing your arch style, consider the overall aesthetic of your home and landscape. A gate that complements the existing design elements will enhance the curb appeal of your property.

By considering the dimensions and arch style when designing your wooden gate, you can create a beautiful and functional addition to your home.

Preparation Steps

Before you start building your arched wooden gate, there are a few preparation steps that you need to take. This will ensure that you have everything you need and that the site is ready for construction.

Wood Cutting

The first step is to cut the wood to the required size. You will need to measure the dimensions of the gate and then cut the wood accordingly. You can use a compound miter saw or a jigsaw for this task. Make sure that you have all the necessary tools, including a carpenter’s level, to ensure that the wood is cut straight and even.

Site Preparation

Once you have cut the wood, it’s time to prepare the site for construction. Start by clearing the area where the gate will be installed. Remove any debris, rocks, or plants that may be in the way. You should also level the ground to ensure that the gate will be installed on a flat surface.

Next, you need to install the gate posts. These should be installed at least two feet deep in the ground and should be spaced apart according to the width of the gate. Use a post hole digger to dig the holes and then fill them with concrete. Make sure that the posts are level and plumb before the concrete dries.

Once the posts are in place, you can start assembling the gate. Use screws or nails to attach the wood pieces together, making sure that everything is aligned and level. You may also want to add decorative elements to the gate, such as a curved top or a lattice pattern.

In conclusion, taking the time to prepare for the construction of your arched wooden gate will ensure that the project goes smoothly and that the end result is a beautiful and functional gate that will last for years to come.

Building the Gate Frame

To build the frame of your arched wooden gate, you will need to gather a few materials and tools. Here’s what you need:

Materials

  • 2×4 lumber
  • 1×4 lumber
  • Wood glue
  • Wood screws
  • Gate hardware (hinges, latch, etc.)

Tools

  • Circular saw or handsaw
  • Drill
  • Drill bit set
  • Screwdriver
  • Carpenter’s square
  • Clamps
  • Level

Once you have gathered all the necessary materials and tools, you can begin building the frame of your arched wooden gate.

  1. Cut the 2×4 lumber to the desired length for the height and width of your gate. Use a circular saw or handsaw to make the cuts.

  2. Cut the 1×4 lumber into shorter pieces to use as cross braces for the gate frame. Cut them to fit between the 2x4s, making sure they are evenly spaced and level.

  3. Apply wood glue to the ends of the cross braces and attach them to the 2x4s using wood screws. Use clamps to hold the pieces in place while the glue dries.

  4. Cut the arch shape into the top of the gate frame using a jigsaw or circular saw with a small diameter blade. You can create a template for the arch shape by tracing it onto a piece of cardboard or plywood and using it as a guide.

  5. Sand the edges of the gate frame and arch to smooth out any rough spots.

  6. Attach the gate hardware, including hinges and a latch, to the gate frame. Make sure they are properly aligned and securely fastened.

Congratulations! You have now built the frame of your arched wooden gate. The next step is to attach the pickets or slats to the frame to complete the gate.

Creating the Arch

Creating an arch for your wooden gate can add a touch of elegance and style to your garden or home. Here are some steps to help you create the arch for your wooden gate:

Step 1: Cut the Gate Rails

First, you need to cut the gate rails to the desired length. The length of the rails will depend on the width of your gate. Use a saw to cut the rails to the desired length.

Step 2: Create the Arch Pattern

Next, you need to create the arch pattern on a piece of paper or cardboard. You can use a compass or a template to create the arch pattern. Once you have the pattern, trace it onto the top of the gate rails.

Step 3: Cut the Arch

Use a jigsaw or a handsaw to cut along the arch pattern. Take your time and make sure the cut is smooth and even. Once you have cut the arch on one rail, use it as a template to cut the arch on the other rail.

Step 4: Sand the Edges

After cutting the arch, sand the edges to make them smooth. Use a sandpaper with a fine grit to avoid damaging the wood.

Step 5: Attach the Arch

Finally, attach the arch rails to the gate posts. Use screws or nails to secure the rails to the posts. Make sure the arch is level and centered before attaching it to the posts.

By following these steps, you can create a beautiful and elegant arched wooden gate that will enhance the beauty of your garden or home.

Assembling the Gate

Now that you have cut and shaped all the pieces, it’s time to assemble your wooden gate. Follow these steps to put everything together:

  1. Lay out all the pieces of your gate on a flat surface. Make sure you have all the necessary hardware, such as screws, hinges, and latches, ready to use.

  2. Start by attaching the top and bottom rails to the arched frame. Use screws to secure them in place, making sure they’re level and square.

  3. Next, attach the vertical boards to the frame, spacing them evenly. Use a level to ensure they’re straight and plumb.

  4. Once the boards are attached, trim any excess wood that extends beyond the frame using a saw.

  5. Attach the hinges to the gate frame and then to the post or fence where you’ll be hanging the gate. Make sure the hinges are level and secure.

  6. Finally, attach the latch to the gate and the post or fence. Test the gate to make sure it swings smoothly and latches securely.

Congratulations! You’ve successfully assembled your arched wooden gate. With proper maintenance, it should provide years of beauty and functionality to your garden or yard.

Painting and Finishing

When it comes to painting and finishing your arched wooden gate, there are a few things you need to consider to ensure that it looks its best and lasts a long time. In this section, we’ll cover the basics of choosing the right paint and how to add the finishing touches to your gate.

Choosing the Right Paint

Choosing the right paint is essential to ensure that your gate looks great and lasts a long time. Here are a few things to keep in mind when selecting paint for your arched wooden gate:

  • Use an exterior-grade paint: Exterior-grade paint is designed to withstand the elements, including rain, sun, and wind. It’s essential to use this type of paint to ensure that your gate lasts a long time and looks great.

  • Choose a color that complements your home: Consider the color of your home when selecting a paint color for your gate. You want to choose a color that complements your home and blends in well with the surrounding environment.

  • Consider a primer: If you’re painting a new gate or one that hasn’t been painted before, consider using a primer before applying the paint. A primer will help the paint adhere to the wood and provide a more even finish.

Finishing Touches

Once you’ve painted your gate, there are a few finishing touches you can add to make it look even better. Here are some ideas:

  • Add hardware: Adding hardware, such as hinges and a latch, can give your gate a more polished look. Choose hardware that complements the style of your gate and your home.

  • Seal the wood: If you want to protect your gate from the elements, consider sealing the wood with a clear sealant. This will help prevent the wood from warping or cracking over time.

  • Add a decorative accent: If you want to add a decorative touch to your gate, consider adding a stencil or carving a design into the wood. This can add a unique touch to your gate and make it stand out.

By following these tips, you can ensure that your arched wooden gate looks great and lasts a long time. Remember to choose the right paint, add the finishing touches, and take care of your gate to keep it looking its best.

Installation

Positioning the Gate

Before installing your arched wooden gate, it’s important to ensure that the gate is properly positioned. You want to make sure that the gate is level and that it swings smoothly. Here are the steps to properly position your gate:

  1. Measure the width of the gate opening and the height of the gate.
  2. Using a level, mark the location for the gate posts on either side of the opening.
  3. Dig holes for the posts that are at least one-third the length of the post and wide enough to accommodate the post.
  4. Set the posts in the holes and fill with concrete.
  5. Attach the hinges to the gate and the gate posts.
  6. Hang the gate on the hinges and make any necessary adjustments to ensure that the gate is level and swings smoothly.

Securing the Gate

Once your arched wooden gate is properly positioned, it’s important to secure it in place. Here are the steps to secure your gate:

  1. Install a gate latch on the gate and the gate post.
  2. Install a gate stop on the gate post to prevent the gate from swinging too far.
  3. If desired, install a decorative latch or handle on the gate for added style and functionality.

By following these steps, you can easily install and secure your arched wooden gate. With proper installation, your gate will not only look great but will also function properly for years to come.

Maintenance Tips

After building your arched wooden gate, it’s important to maintain it properly to ensure its longevity. Here are some tips to keep your gate looking and functioning its best:

Regular Cleaning

To keep your gate looking its best, it’s important to clean it regularly. Use a soft-bristled brush or a cloth to remove any dirt, dust, or debris that has accumulated on the gate. You can use a mild soap and water solution to clean the gate, but be sure to rinse it thoroughly with clean water to prevent any soap residue from damaging the wood.

Check for Damage

Regularly inspect your gate for any signs of damage. Look for cracks, splinters, or any other signs of wear and tear. If you notice any damage, it’s important to address it as soon as possible to prevent it from getting worse.

Apply a Protective Finish

To protect your gate from the elements, it’s important to apply a protective finish. There are many different types of finishes available, including paints, stains, and sealers. Choose a finish that is appropriate for your climate and the type of wood your gate is made from.

Lubricate the Hinges

To ensure that your gate opens and closes smoothly, it’s important to lubricate the hinges. Use a lubricant specifically designed for outdoor use, such as a silicone spray or a graphite powder. Apply the lubricant to the hinges and move the gate back and forth to distribute it evenly.

By following these maintenance tips, you can keep your arched wooden gate looking and functioning its best for years to come.

How to Make a Wooden Gate Fence: A Step-by-Step Guide

If you’re looking to add a touch of privacy and security to your property, a wooden gate fence is a great option. Not only does it provide a functional barrier, but it can also add beauty and charm to your home. Building a wooden gate fence may seem like a daunting task, but with the right tools and materials, it can be a fun and rewarding DIY project.

Before you start building your wooden gate fence, it’s important to plan out the design and layout. Consider the size and style of your fence, as well as the location and purpose of the gate. You’ll also need to gather the necessary tools and materials, including wood, screws, hinges, and a latch. Once you have everything you need, you can begin the construction process. With a little patience and attention to detail, you can create a beautiful and functional wooden gate fence that will enhance the look and value of your property.

Understanding the Basics of Wooden Gate Fence

If you’re planning to build a wooden fence, adding a gate can provide both functionality and aesthetic appeal. A well-built wooden gate fence can add value to your property and provide an extra layer of security. In this section, we’ll cover the basics of wooden gate fences, including the types of wood used and the types of gates available.

Types of Wood

When it comes to building a wooden gate fence, the type of wood you choose is an important factor to consider. Some of the most popular types of wood used for fence gates include:

  • Cedar: Cedar is a popular choice for fence gates because of its natural resistance to decay and insects. It’s also lightweight and easy to work with, making it a great option for DIY projects.

  • Redwood: Redwood is another popular choice for fence gates because of its natural resistance to decay and insects. It’s also a durable and attractive wood that can add value to your property.

  • Pine: Pine is a more affordable option for fence gates, but it’s not as durable as cedar or redwood. It’s also more prone to decay and insect damage, so it may not be the best choice for areas with high moisture levels.

Types of Gates

There are several types of gates available for wooden fence gates, including:

  • Single Swing Gate: A single swing gate is a popular choice for smaller fence openings. It’s a simple gate that swings open and closed on hinges.

  • Double Swing Gate: A double swing gate is similar to a single swing gate, but it’s designed for larger fence openings. It’s made up of two gate panels that swing open and closed on hinges.

  • Sliding Gate: A sliding gate is a great option for areas where space is limited. It slides open and closed on a track, making it a space-saving option.

  • Driveway Gate: A driveway gate is a larger gate that’s designed to open and close to allow vehicles to pass through. It can be a single swing gate or a double swing gate, depending on the size of the driveway.

When choosing a gate for your wooden fence, consider the size of the opening, the amount of space available, and the level of security you need. With the right type of gate and wood, you can create a beautiful and functional fence that will last for years to come.

Materials Needed

Building a wooden gate fence requires specific materials to ensure its durability and longevity. Here are the materials you will need to build a wooden gate fence that won’t sag:

Wood

The main material you will need is wood. You will need two or three 2x4s for the gate rails and 7-10 fence pickets, depending on how wide your gate is. Cedar is a popular choice for its natural resistance to rot and insects, but other types of wood can also be used.

Screws

You will need 1-5/8″ screws for attaching the fence pickets to the gate rails and 4″ screws for securing the hinges to the gate posts.

Gate Hinges

Gate hinges are necessary to attach the gate to the gate post. Be sure to choose heavy-duty hinges that can support the weight of the gate.

Gate Latch

A gate latch is essential for keeping the gate securely closed. There are various types of gate latches available, so choose one that suits your needs.

Gate Handle

A gate handle is optional but can make opening and closing the gate easier. Choose a handle that is comfortable to grip and matches the style of your gate.

Tools

In addition to the materials listed above, you will need some common hand-held carpentry tools, including:

  • Screwdriver
  • Power drill
  • Compound miter saw
  • Carpenter’s level
  • Jigsaw (for cutting a decorative profile)

Make sure you have all the necessary materials and tools before starting your project. This will save you time and ensure that you can complete the project smoothly.

Safety Precautions

Before you start building your wooden fence gate, it’s important to take some safety precautions to ensure that you don’t get injured during the process. Here are a few things you should keep in mind:

Wear Protective Gear

When working with wood, there are a lot of sharp edges and flying debris that can cause injury. To protect yourself, make sure you wear the following protective gear:

  • Safety glasses or goggles
  • Work gloves
  • Steel-toed boots
  • Earplugs or earmuffs

Use the Right Tools

Using the wrong tool for the job can be dangerous and can also damage your materials. Make sure you have the following tools on hand before you start building your fence gate:

  • Circular saw or jigsaw
  • Power drill
  • Compound miter saw
  • Carpenter’s level
  • Measuring tape
  • Clamps

Work in a Safe Environment

Before you start building your fence gate, make sure you’re working in a safe environment. Here are a few things to keep in mind:

  • Make sure your work area is well-lit and well-ventilated.
  • Keep your work area clean and free of clutter.
  • Make sure your tools are in good condition and working properly.
  • Don’t work in wet or damp conditions, as this can make the wood slippery and more difficult to work with.

By following these safety precautions, you can ensure that you stay safe while building your wooden fence gate.

Step-by-Step Guide to Building a Wooden Gate Fence

Building a wooden gate fence can be a great DIY project that adds both security and aesthetics to your property. Here’s a step-by-step guide to building a wooden gate fence.

Designing the Gate

Before you start building, you need to design your gate. Consider the size of your gate, the style you want, and the materials you’ll use. You can use online resources or consult with a professional to help you with your design.

Cutting the Wood

Once you have your design, it’s time to cut the wood. Use a circular saw or a compound miter saw to cut the wood to the desired length. Make sure to measure twice and cut once to avoid any mistakes.

Assembling the Gate

Now that you have your wood cut to size, you can start assembling the gate. Use a power drill and screws to attach the wood pieces together. You can also use a gate kit to make the assembly process easier.

Installing the Gate

Finally, it’s time to install your gate. Use gate hinges to attach the gate to your fence post. Make sure the gate is level and swings smoothly. You can also install a gate latch and handle to make opening and closing your gate easier.

By following these simple steps, you can build a wooden gate fence that adds both beauty and security to your property.

Maintaining Your Wooden Gate Fence

Proper maintenance is essential to ensure that your wooden gate fence lasts for a long time. Regular cleaning, periodic inspection, and repair or replacement are important steps to keep your fence looking great and functioning properly.

Regular Cleaning

Dirt, dust, and debris can accumulate on your fence over time, making it look dull and dirty. Regular cleaning can help remove these particles and keep your fence looking new. Here are some tips for cleaning your wooden gate fence:

  • Use a soft-bristled brush and a mild detergent to scrub your fence gently.
  • Rinse your fence thoroughly with a hose.
  • Allow your fence to dry completely before applying any sealant or stain.

Periodic Inspection

Periodic inspection is an important step to identify any issues with your fence before they become major problems. Here are some tips for inspecting your wooden gate fence:

  • Check for any signs of rot, decay, or insect damage.
  • Look for loose or damaged boards, posts, and hardware.
  • Check for any signs of warping or twisting.

Repair and Replacement

If you notice any issues during your inspection, it’s important to address them promptly to prevent further damage. Here are some tips for repairing and replacing your wooden gate fence:

  • Replace any damaged or rotten boards, posts, or hardware.
  • Use a wood filler to fill any cracks or holes in your fence.
  • Apply a sealant or stain to protect your fence from the elements.

By following these tips, you can ensure that your wooden gate fence remains in good condition for years to come.