
Building a wooden gate door is a great way to add both functionality and aesthetic appeal to your fence. Whether you’re looking to keep your pets and children safe, or simply want to enhance the look of your property, a wooden gate door can be a great addition to your home. With the right tools and materials, building a wooden gate door can be a fun and rewarding DIY project.
Before you get started, it’s important to determine the size and style of gate that you want to build. You’ll also need to gather the necessary tools and materials, which may include a screwdriver, power drill, compound miter saw, carpenter’s level, jigsaw, gate brackets, hinges, and screws. Once you have everything you need, you can begin measuring and cutting the wood to fit your desired dimensions. With a little patience and attention to detail, you can create a beautiful and functional wooden gate door that will last for years to come.
Understanding the Basics of a Wooden Gate Door
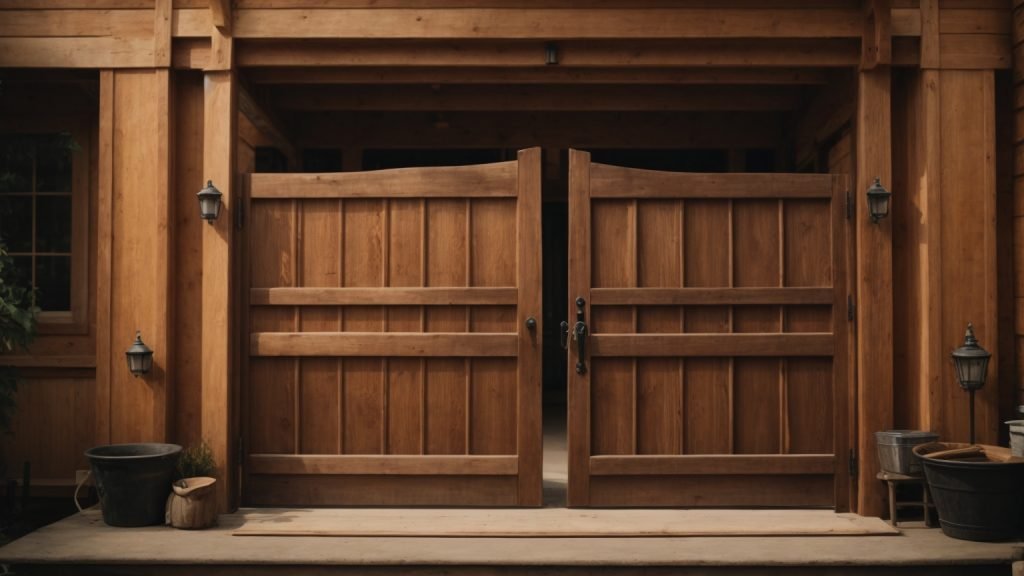
If you’re looking to add some privacy or security to your property, building a wooden gate door is a great option. Not only is it functional, but it can also add a touch of style to your property. However, before you get started, it’s important to understand the basics of building a wooden gate door.
Materials Needed
Here are the materials you’ll need to build a wooden gate door:
| Materials | Quantity |
|---|---|
| Wood | Depends on the size of your gate |
| Gate hardware | Hinges, latch, screws, etc. |
| Wood glue | 1 bottle |
| Wood filler | 1 can |
| Sandpaper | 1 pack |
| Paint or stain | 1 can |
Tools Required
Here are the tools you’ll need to build a wooden gate door:
- Tape measure
- Circular saw or handsaw
- Drill
- Screwdriver
- Level
- Clamps
- Chisel
- Hammer
- Paintbrush or roller
Once you have all the necessary materials and tools, you can move on to building your wooden gate door.
Remember, safety is important when working with power tools. Wear safety glasses, gloves, and ear protection when necessary and follow all safety instructions.
In the next section, we’ll go over the steps you need to follow to build a wooden gate door.
Planning Your Wooden Gate Door
Before starting to build your wooden gate door, it is important to plan and prepare. This will ensure that you have the right materials and tools, and that your gate will function properly and look great. In this section, we will go over some important considerations when planning your wooden gate door.
Determining the Size
The first step in planning your wooden gate door is to determine the size you need. Measure the width of the opening where the gate will be installed, and add a few extra inches to allow for clearance and hardware. You should also consider the height of the gate, depending on your needs for privacy and security.
Choosing the Right Design
There are many different designs to choose from when it comes to wooden gate doors. You can opt for a traditional, simple design, or get creative with a more ornate style. Consider the overall look of your property and choose a design that complements it. You should also think about the function of the gate – will it be used for security, privacy, or simply as a decorative element?
Selecting the Wood Type
Choosing the right type of wood is crucial for the durability and longevity of your wooden gate door. Some common options include cedar, redwood, and pressure-treated pine. Each type of wood has its own unique characteristics and benefits, so it’s important to do your research and choose the one that best fits your needs and budget.
In summary, planning your wooden gate door is an important step in the building process. Determine the size you need, choose a design that complements your property, and select the right type of wood for durability and longevity. With these considerations in mind, you’ll be well on your way to building a beautiful and functional wooden gate door.
Preparing the Wood
Before you start building your wooden gate, you need to prepare the wood. This involves cutting and sanding the wood to the right size and shape. Here are the steps you need to follow:
Cutting the Wood
The first step in preparing the wood for your gate is to cut it to the right size. You will need a compound miter saw to make precise cuts. Make sure you measure the wood carefully before cutting it. Here are some tips to keep in mind:
- Cut the wood slightly larger than the final size you need. This will give you some extra room to sand the wood down to the exact size you need.
- Make sure the corners are square. You can use a carpenter’s level to check this.
- Cut the wood slowly and steadily. Rushing can lead to mistakes and uneven cuts.
Sanding the Wood
Once you have cut the wood to the right size, it’s time to sand it down. Sanding is important because it removes any rough edges or splinters that could cause injury. Here are some tips to keep in mind:
- Use a coarse sandpaper to start with and then move to a finer sandpaper. This will help you achieve a smooth finish.
- Sand the edges of the wood to remove any sharp corners or edges.
- Sand the wood in the direction of the grain. This will help you achieve a smooth finish without damaging the wood.
- Use a dust mask to avoid inhaling sawdust.
By following these steps, you can prepare the wood for your wooden gate. Once you have completed these steps, you can move on to the next stage of building your gate.
Assembling the Wooden Gate Door
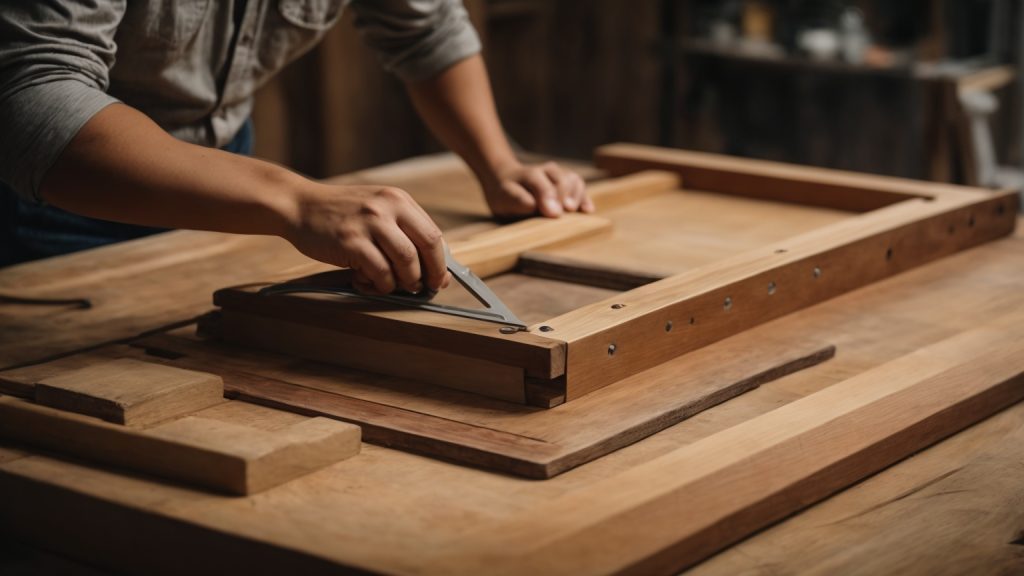
When it comes to assembling a wooden gate door, there are a few key steps you need to follow to ensure a sturdy and reliable end result. In this section, we’ll walk you through the process of building the frame, attaching the panels, and installing the cross braces.
Building the Frame
The first step in assembling your wooden gate door is to build the frame. To do this, you’ll need to measure and cut your wooden boards to the correct length and width. Once you have your boards cut, you can begin assembling the frame.
To assemble the frame, you’ll need to attach the boards together using wood screws or nails. Make sure to use a level to ensure that your frame is square and even. You may also want to add diagonal braces to the corners of your frame for added stability.
Attaching the Panels
Once your frame is assembled, you can begin attaching the panels. To do this, measure and cut your wooden panels to the correct size and shape. Then, attach them to the frame using wood screws or nails.
Make sure to leave a small gap between each panel to allow for expansion and contraction due to changes in temperature and humidity. You may also want to add a diagonal brace across the panels for added stability.
Installing the Cross Braces
The final step in assembling your wooden gate door is to install the cross braces. Cross braces are wooden boards that run diagonally across the back of the gate to provide added support and prevent sagging.
To install the cross braces, measure and cut your boards to the correct length and angle. Then, attach them to the back of the gate using wood screws or nails. Make sure that the cross braces are securely attached and evenly spaced for maximum stability.
By following these steps, you can assemble a sturdy and reliable wooden gate door that will provide years of use and enjoyment.
Finishing Touches
Once you have constructed your wooden gate, it’s time to add the finishing touches to make it look great and function properly. This section will cover two essential finishing touches: painting or staining and adding hardware.
Painting or Staining
Painting or staining your wooden gate can help protect it from the elements and give it a polished look. Before you start, make sure the wood is clean and dry. Here are some tips to help you paint or stain your wooden gate:
- Choose a paint or stain that is specifically designed for outdoor use.
- Apply a primer before painting to help the paint adhere better to the wood.
- Use a brush or roller to apply the paint or stain evenly.
- Apply two coats of paint or stain for maximum protection.
Adding Hardware
Adding hardware to your wooden gate is essential for functionality and security. Here are some hardware options to consider:
- Hinges: Choose heavy-duty hinges that can support the weight of your gate.
- Latch: A latch will keep your gate securely closed. There are several types of latches to choose from, including thumb latches, ring latches, and slide bolts.
- Handles: Handles make it easier to open and close your gate. Choose a handle that is sturdy and matches the style of your gate.
When installing hardware, make sure to follow the manufacturer’s instructions carefully. It’s also important to choose hardware that is rust-resistant and can withstand outdoor conditions.
By following these tips, you can add the finishing touches to your wooden gate and enjoy a beautiful and functional addition to your property.
Installing the Wooden Gate Door
Once you have built your wooden gate door, it’s time to install it. Follow these steps to ensure a secure and functional installation.
Positioning the Gate
Before you install the gate, make sure you have the correct measurements for your opening. The gate should fit snugly within the opening with a small gap for clearance.
Once you have the correct measurements, position the gate in the opening. Use shims to hold the gate in place and ensure it is level.
Securing the Hinges
Attach the hinges to the gate first, then to the post or fence. Make sure the hinges are secured with screws that are long enough to hold the weight of the gate.
Once the hinges are attached, remove the shims and test the gate to ensure it swings freely and smoothly. Adjust the hinges as necessary to ensure the gate is level and swings properly.
Attaching the Latch
Attach the latch to the gate and the post or fence. Make sure the latch is aligned properly and securely fastened. Test the latch to ensure it opens and closes smoothly and securely.
If necessary, add a drop rod to the gate to keep it from sagging. A drop rod is a metal rod that attaches to the bottom of the gate and goes into the ground to keep the gate from sagging over time.
With these steps, you should have a secure and functional wooden gate door. Remember to maintain and inspect your gate regularly to ensure it stays in good condition.
Maintaining Your Wooden Gate Door
To ensure the longevity and functionality of your wooden gate door, it’s essential to perform regular maintenance. Here are some tips to help you maintain your wooden gate door:
Regular Cleaning
Cleaning your wooden gate door regularly is crucial to prevent dirt and debris from accumulating, which can lead to rot and other damage. Here’s how to clean your wooden gate door:
- Use a soft-bristled brush or cloth to remove any loose dirt and debris from the surface of the gate.
- Mix a solution of mild soap and water and apply it to the gate using a cloth or sponge.
- Rinse the gate thoroughly with clean water and allow it to dry completely before applying any finish or sealer.
Yearly Inspections
Performing a yearly inspection of your wooden gate door can help you identify any potential issues early on and prevent costly repairs down the line. Here’s what to look for during your yearly inspection:
- Check for any signs of rot, warping, or cracking in the wood.
- Inspect the gate’s hardware, including hinges and latches, to ensure they are functioning correctly.
- Look for any signs of insect damage, such as holes or sawdust.
Repairing Damage
If you notice any damage or issues during your inspection, it’s essential to address them promptly to prevent further damage. Here are some tips for repairing damage to your wooden gate door:
- For small cracks or splits, use wood filler to fill in the damaged area.
- For larger cracks or splits, you may need to replace the damaged section of the gate.
- If you notice signs of rot, you may need to replace the entire gate or the affected section.
By following these tips for maintaining your wooden gate door, you can ensure that it remains functional and beautiful for years to come.