Tag Archives: basic woodworking skills

how-to-build-wooden-shutters-a-beginners-guide-2

How to Build Wooden Shutters: A Beginner's Guide

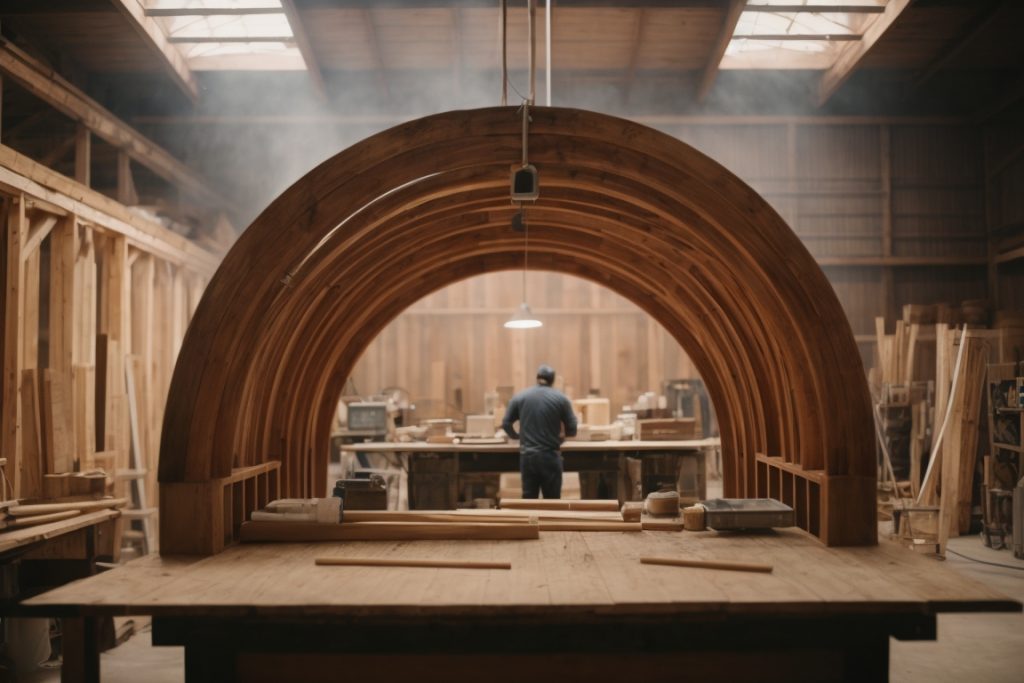
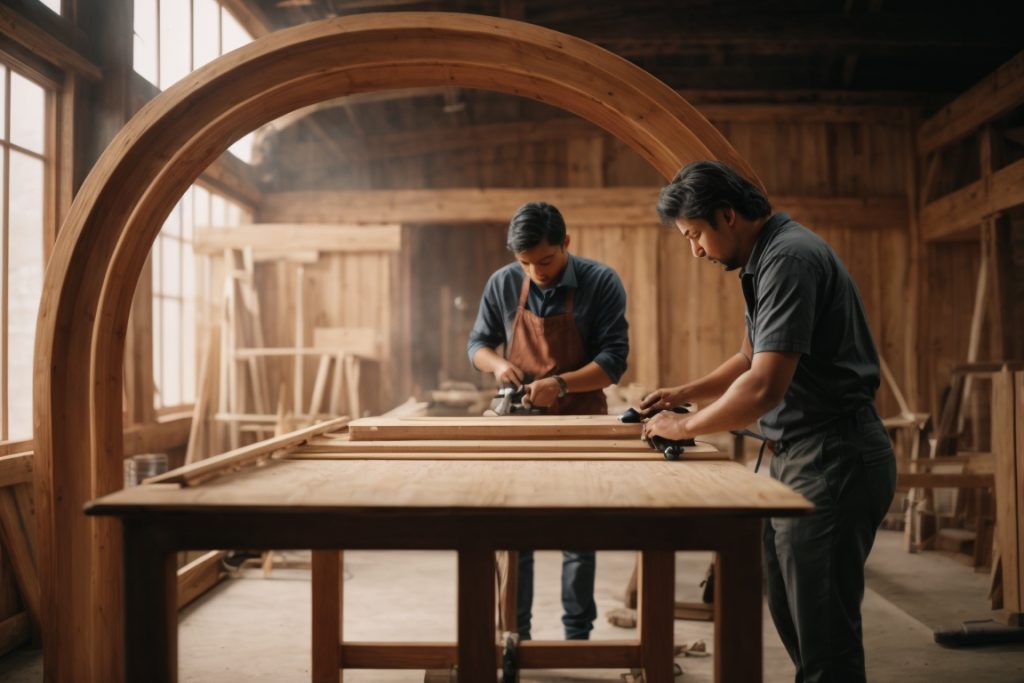
Are you looking for a way to add some charm to your home’s exterior? Wooden shutters can be a great addition to any home, providing both aesthetic appeal and functionality. With a little bit of effort and some basic woodworking skills, you can build your own custom shutters that perfectly fit your windows and match your home’s style.

Before you get started, it’s important to consider the purpose of your shutters. Are you looking to add some privacy to your home? Do you want to protect your windows during storms? Or are you simply looking to enhance your home’s curb appeal? Understanding your goals will help you choose the right materials and design for your shutters. Once you have a plan in place, building your own wooden shutters can be a fun and rewarding project.

Understanding the Basics of Wooden Shutters

how-to-build-wooden-shutters-a-beginners-guide-2

If you’re looking for a way to add some charm and character to your home’s exterior, wooden shutters are a great option. They’re not only functional but also aesthetically pleasing. Before you start building your own wooden shutters, it’s important to understand some basic concepts.

Types of Wooden Shutters

There are several types of wooden shutters, including:

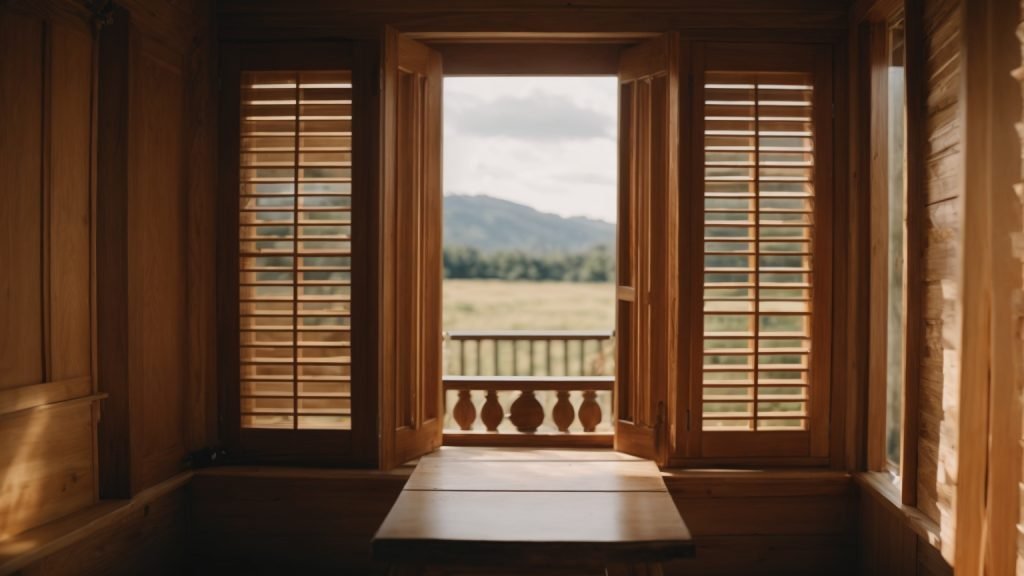
  • Louvered shutters: These have angled slats that allow air and light to pass through.
  • Raised panel shutters: These have a solid panel that’s raised above the frame.
  • Board and batten shutters: These are made of vertical boards held together by horizontal battens.

Materials

The most common materials for wooden shutters are cedar and redwood. These woods are durable and naturally resistant to rot and insects. Other types of wood, such as pine or fir, can also be used but may not last as long.

Sizing

To determine the size of your shutters, measure the height and width of your windows. The shutters should be slightly larger than the window opening to ensure proper coverage. Keep in mind that shutters that are too small will look out of proportion, while shutters that are too large may overpower the window.

Hardware

Shutters are typically mounted to the house using hinges. You’ll need to choose the appropriate size and style of hinge based on the weight of your shutters. You may also want to consider adding decorative hardware, such as shutter dogs or holdbacks, to add some extra flair.

By understanding these basic concepts, you’ll be well on your way to building your own wooden shutters.

Choosing the Right Wood

When it comes to building wooden shutters, choosing the right wood is crucial. The type of wood you choose will affect the durability, appearance, and overall quality of your shutters. Here are some factors to consider when selecting the right wood for your shutters:

Durability

Wooden shutters are exposed to the elements, so it’s important to choose a wood that can withstand moisture, sunlight, and temperature changes. Cedar and redwood are popular choices because they are naturally resistant to decay and insect damage. Pine is also a good option for indoor and outdoor shutters since it’s durable and easily workable.

Appearance

The type of wood you choose will also affect the appearance of your shutters. Cedar has a warm, reddish-brown color and a distinctive grain pattern that can add character to your shutters. Redwood is also known for its natural beauty, with a rich, reddish hue that can complement a variety of home styles. If you prefer a more rustic look, elm wood shutters can give you a natural, weathered appearance.

Workability

Some woods are easier to work with than others, which can affect the installation process and the final look of your shutters. Pine is a soft wood that is easy to cut, sand, and finish, making it a popular choice for DIY shutter builders. Cedar and redwood are also workable, but they are harder and denser than pine, which can make them more difficult to shape and sand.

Cost

The cost of the wood will also be a factor in your decision. Cedar and redwood are more expensive than pine, but they are also more durable and have a more attractive appearance. If you’re on a budget, pine can be a good option since it’s affordable and readily available.

Overall, choosing the right wood for your shutters will depend on your personal preferences, budget, and the specific needs of your project. Consider the factors above and do your research to find the best wood for your shutters.

Gathering Your Tools

Before you start building your wooden shutters, it’s important to gather all the necessary tools. Here are the tools you will need to build your shutters:

Measuring Tools

To ensure that your shutters fit perfectly, you’ll need to use measuring tools. Here are the measuring tools you’ll need:

  • Tape measure
  • Speed square
  • Pencil

The tape measure will help you measure the dimensions of your windows, while the speed square will help you ensure that your cuts are straight and accurate. Don’t forget to use a pencil to mark your measurements.

Cutting Tools

Once you’ve measured your windows, it’s time to start cutting your wood. Here are the cutting tools you’ll need:

  • Circular saw
  • Jigsaw
  • Miter saw
  • Table saw

The circular saw is great for making long cuts, while the jigsaw is better for curved cuts. The miter saw and table saw will help you make precise cuts at different angles.

Finishing Tools

After you’ve cut your wood, you’ll need to finish your shutters. Here are the finishing tools you’ll need:

  • Sandpaper
  • Paint or stain
  • Paintbrush or roller
  • Screwdriver

Sandpaper will help you smooth out any rough edges, while paint or stain will help protect your wood from the elements. A paintbrush or roller will help you apply the paint or stain evenly. Finally, a screwdriver will help you attach your shutters to your windows.

By gathering these tools before you start building your shutters, you’ll be well-prepared to create a beautiful and functional addition to your home’s exterior.

Creating Your Design

Before you start building your wooden shutters, you need to create a design that fits your windows and complements your home’s exterior. Here are some steps to help you create your design:

Step 1: Measure Your Windows

Measure the height and width of your windows to determine the size of your shutters. Make sure to measure each window individually, as they may not all be the same size.

Step 2: Choose Your Louver Size and Type

Decide on the size and type of louvers you want for your shutters. Louvers are the horizontal slats that allow you to adjust the amount of light and air that enters your home. Rockler Woodworking and Hardware offers a free design wizard that can help you choose the right louvers for your shutters.

Step 3: Choose Your Material

Choose the type of wood you want to use for your shutters. Cedar, redwood, and cypress are popular choices because they are durable and weather-resistant.

Step 4: Decide on the Style

Decide on the style of your shutters. Board and batten shutters are a classic style that features vertical boards and horizontal battens. Plantation shutters have wider louvers and a more modern look.

Step 5: Create Your Design

Sketch out your design on paper or use a design software program to create a digital design. Make sure to include all the necessary measurements and details, such as the size and placement of the louvers and the number of boards and battens.

By following these steps, you can create a custom design that fits your windows and enhances the look of your home.

Measuring and Cutting the Wood

measuring-and-cutting-the-wood

Before you start building your wooden shutters, you need to measure and cut the wood to the appropriate size. Here are the steps to follow:

  1. Measure the Window: Measure the height and width of the window where you plan to install the shutters. Make sure to measure both the inside and outside of the window frame. This will ensure that the shutters fit properly and look balanced.
  2. Choose the Wood: Choose the type of wood you want to use for your shutters. Cedar, redwood, and cypress are popular choices because they are durable and weather-resistant. You can also use pine or poplar if you plan to paint the shutters.
  3. Cut the Wood: Use a saw to cut the wood to the appropriate size. The width of each board should be between 4 and 6 inches, depending on the size of your window. The length of each board should be equal to the height of the window.
  4. Sand the Edges: Use sandpaper to smooth the edges of each board. This will prevent splinters and make the shutters look more polished.
  5. Drill Holes: Use a drill to make holes for the hinges and screws. Make sure the holes are evenly spaced and aligned with the hinges.
  6. Paint or Stain: If you plan to paint or stain the shutters, do it before you install them. This will make it easier to cover all the surfaces and edges.

By following these steps, you can measure and cut the wood for your wooden shutters with ease.

Assembling the Shutter

Now that you have cut all the pieces of your wooden shutter, it is time to assemble them. Follow these steps to assemble your shutter:

  1. Lay out the vertical boards: Place the two outer vertical boards on a flat surface, facing up. Then, place the remaining vertical boards between them, evenly spaced.
  2. Attach the horizontal boards: Place the top and bottom horizontal boards on top of the vertical boards, lining them up with the edges. Then, attach them using wood glue and screws. Make sure to pre-drill the holes to avoid splitting the wood.
  3. Add the middle horizontal board: Measure and mark the center of the shutter. Then, attach the middle horizontal board using wood glue and screws.
  4. Sand and finish: Once the shutter is assembled, sand it down to remove any rough edges or splinters. Then, apply a finish of your choice, such as paint or stain, to protect the wood from the elements.
  5. Install the shutter: Finally, it’s time to install the shutter. Hold the shutter up to the window and mark the location of the hinges. Attach the hinges to the shutter and then to the window frame. Make sure to use screws that are long enough to secure the hinges to the frame.

By following these steps, you can assemble a beautiful and functional wooden shutter for your home. Remember to take your time and be careful when handling the wood and tools. Good luck!

Finishing the Shutter

Once you have built your wooden shutters, it’s time to finish them. This step is crucial to ensure the longevity of your shutters and to give them a polished look. In this section, we’ll cover the two main steps for finishing your shutters: sanding and painting or staining.

Sanding

Before painting or staining your shutters, you need to sand them down. This will remove any rough spots or splinters and create a smooth surface for the paint or stain to adhere to. Start with a coarse grit sandpaper, such as 80-grit, and work your way up to a finer grit, such as 220-grit. Sand in the direction of the wood grain to avoid scratches.

Once you’re done sanding, wipe down the shutters with a damp cloth to remove any dust or debris. Let them dry completely before moving on to the next step.

Painting or Staining

Now that your shutters are sanded and clean, it’s time to apply your finish. You have two options: painting or staining.

Painting

If you choose to paint your shutters, start by applying a primer to help the paint adhere better. Once the primer is dry, apply your paint in thin, even coats. Use a brush or a roller, depending on the size of your shutters. Allow each coat to dry completely before applying the next one.

Staining

If you prefer the natural look of wood, you can choose to stain your shutters. Start by applying a wood conditioner to help the stain absorb evenly. Once the conditioner is dry, apply your stain with a brush or a rag, following the direction of the wood grain. Wipe off any excess stain with a clean rag. Allow the stain to dry completely before applying a sealer to protect the wood.

No matter which finish you choose, be sure to follow the manufacturer’s instructions and apply multiple coats if necessary. This will ensure your shutters are protected from the elements and look great for years to come.

Installing the Shutter

Once you have built your wooden shutters, it’s time to install them. Here are the steps to follow:

  1. Hold the shutter up to the window and mark the placement of the hinges on both the shutter and the window frame. Use a level to ensure the shutter is straight.
  2. Pre-drill holes for the screws in both the shutter and the window frame where you marked the hinge placement.
  3. Attach the hinges to the shutter using screws, making sure they are flush with the wood.
  4. Hold the shutter up to the window again and attach the hinges to the window frame using screws. Make sure the shutter swings open and closed smoothly.
  5. Install any additional hardware, such as a latch or pull, according to the manufacturer’s instructions.

It’s important to note that shutters are typically mounted purely for aesthetics and do not actually open and close. However, if you have functional shutters, make sure they cover the entire window when closed to function properly.

With these simple steps, you can install your wooden shutters and add a touch of charm to your home’s exterior.

make-a-wooden-doll-house

How to Make a Wooden Doll House: A Beginner's Guide

Are you looking for a fun and creative project to do with your kids or just for yourself? Making a wooden dollhouse from scratch is a great way to spend time together and create something beautiful that you can cherish for years to come. With a little bit of planning, patience, and some basic woodworking skills, you can build a dollhouse that is customized to your liking and fits perfectly in your home.

Before you start building your wooden dollhouse, there are a few things you need to consider. First, decide on the size and style of the dollhouse you want to build. You can choose from a variety of designs, such as a Victorian-style mansion or a modern minimalist house. You also need to determine what materials you will need and what tools you will use. Once you have all the necessary supplies, you can get started on your project. In the next section, we will go over some basic steps to help you build your very own wooden dollhouse.

Choosing the Right Wood

When building a wooden dollhouse, choosing the right type of wood is crucial. You want to select a wood that is sturdy, easy to work with, and will hold up over time. In this section, we will discuss how to identify different types of wood and how to select the best wood for dollhouses.

Identifying Different Types of Wood

Wood can be classified into two main categories: hardwood and softwood. Hardwood comes from deciduous trees such as oak, maple, and cherry, while softwood comes from coniferous trees such as pine, cedar, and spruce.

Hardwood is generally more expensive than softwood, but it is also stronger and more durable. Softwood is easier to work with and is often used in construction due to its affordability.

When selecting wood for your dollhouse, it’s important to consider the grain pattern. The grain pattern refers to the direction in which the wood fibers run. Some woods, such as oak, have a prominent grain pattern, while others, such as maple, have a more subtle grain pattern.

Selecting the Best Wood for Doll Houses

When selecting wood for your dollhouse, there are a few factors to consider. First, you want to choose a wood that is easy to work with. Softwoods such as pine and cedar are great options for beginners because they are easy to cut and shape.

Second, you want to choose a wood that is sturdy and will hold up over time. Hardwoods such as oak and maple are great options for dollhouses because they are strong and durable.

Finally, you want to choose a wood that will look great once it is finished. Woods such as cherry and mahogany have a beautiful finish and are perfect for dollhouses that will be on display.

In summary, when choosing wood for your dollhouse, consider the type of wood, the grain pattern, and the ease of use. Softwoods such as pine and cedar are great for beginners, while hardwoods such as oak and maple are strong and durable. Choose a wood that will look great once finished, and your dollhouse will be a beautiful addition to your collection.

Designing Your Doll House

make-a-wooden-doll-house

When it comes to designing your wooden doll house, there are a few things to consider to make sure your final product is everything you want it to be. Here are some tips to get you started:

Sketching Your Design

Before you start building, it’s a good idea to sketch out your design. This will help you visualize the final product and make any necessary adjustments before you start cutting wood. You can use graph paper to create a scale drawing of your design, or simply sketch it out on a piece of paper.

Consider the number of rooms you want, the size of each room, and any special features you want to include, such as a balcony or porch. Think about the style of the house you want to create, whether it’s a cozy cottage or a grand mansion.

Size and Scale Considerations

When designing your doll house, it’s important to consider the size and scale of your dolls. Make sure the rooms are large enough to accommodate your dolls and any furniture you plan to include. You should also consider the overall size of the doll house, as this will affect the amount of materials you will need and the time it will take to build.

Another important consideration is the scale of your doll house. Most doll houses are built to a scale of 1:12, which means that one inch of doll house equals one foot of real life. However, you can choose a different scale if you prefer. Just make sure all the elements of your doll house are in proportion to each other.

By taking the time to carefully design your wooden doll house, you’ll end up with a beautiful and functional toy that your child will love to play with for years to come.

Cutting the Wood

Cutting the wood is an essential part of building a wooden dollhouse. In this section, we will discuss safety measures and how to use a saw when cutting the wood.

Safety Measures

Before you start cutting the wood, it is important to take some safety measures to avoid any accidents. Here are some tips to keep in mind:

  • Wear safety goggles to protect your eyes from sawdust and wood chips.
  • Use a dust mask to avoid inhaling sawdust.
  • Wear earplugs or earmuffs to protect your ears from the noise of the saw.
  • Use a clamp to secure the wood to the workbench to avoid any movement while cutting.
  • Keep your fingers away from the saw blade and use a push stick to guide the wood through the saw.

Using a Saw

There are different types of saws you can use to cut the wood for your dollhouse, such as a jigsaw, miter saw, or circular saw. Here are some tips on how to use a saw:

  • Read the instructions carefully before using the saw and make sure you know how to operate it.
  • Adjust the blade depth according to the thickness of the wood you are cutting.
  • Use a straight edge or a square to guide the saw for straight cuts.
  • For curved cuts, use a jigsaw and follow the lines carefully.
  • Use a miter saw to make angled cuts for corners and roof pieces.
  • Always keep the saw blade clean and sharp for better results.

By following these safety measures and tips on how to use a saw, you can cut the wood for your dollhouse accurately and safely.

Assembling the Doll House

photoreal_process_making_a_wooden_doll_house_1

Before you begin assembling your wooden doll house, make sure you have all the necessary materials and tools. You will need wood glue, nails, a hammer, a saw, and sandpaper. Once you have everything you need, you can begin the assembly process.

Joining the Pieces

The first step in assembling your doll house is to join the pieces together. To do this, you will need to use wood glue and nails. Apply a small amount of glue to the edges of the pieces you are joining together, and then use nails to secure them in place. Make sure the pieces are aligned properly before nailing them together.

It’s important to work slowly and carefully when joining the pieces together. Take your time to ensure that each piece is properly aligned and secured before moving on to the next one.

Securing with Glue

Once you have joined all the pieces together, you can use wood glue to reinforce the joints. Apply a small amount of glue to each joint, and then use a brush or your finger to spread it evenly. Make sure you apply enough glue to fully cover the joint, but not so much that it drips or runs.

After applying the glue, use clamps or weights to hold the pieces in place while the glue dries. This will help ensure that the joints are strong and secure.

Once the glue has dried, use sandpaper to smooth out any rough edges or surfaces. This will give your doll house a polished and professional look.

In conclusion, assembling a wooden doll house requires patience and attention to detail. By following these steps and taking your time, you can create a beautiful and sturdy doll house that will provide hours of enjoyment.

Finishing Touches

Once you have completed building your wooden dollhouse, it’s time to add the finishing touches that will make it look complete and beautiful. This section will cover two important sub-sections: Sanding the Edges and Painting and Decorating.

Sanding the Edges

Before painting and decorating your dollhouse, it’s essential to sand the edges to ensure that they are smooth and free of splinters. You can use a sanding block or sandpaper to sand the edges. Be sure to sand in the direction of the grain to avoid creating scratches on the surface of the wood.

Once you have sanded the edges, you can use a damp cloth to wipe away any dust or debris. Then, let the dollhouse dry completely before moving on to the next step.

Painting and Decorating

Painting and decorating your dollhouse is where you can get creative and add your personal touch. You can use a variety of materials such as paint, wallpaper, fabric, and stickers to decorate your dollhouse.

Before painting, it’s important to prime the surface with a primer to ensure that the paint adheres properly. You can use acrylic or latex paint to paint the dollhouse. Be sure to use a paintbrush that is appropriate for the size of the surface you are painting.

When decorating the dollhouse, you can use wallpaper to add patterns and texture to the walls. You can also use fabric to create curtains and bedding for the dollhouse. Stickers can be used to add small details such as flowers or animals.

It’s important to let each layer of paint or glue dry completely before adding another layer. This will ensure that the final result looks neat and professional.

In conclusion, sanding the edges and painting and decorating the dollhouse are essential steps in completing your wooden dollhouse. With a little bit of creativity and patience, you can create a beautiful and unique dollhouse that you will be proud to display.

Maintenance Tips

Taking care of your wooden dollhouse is essential to ensure it lasts for years to come. Here are some maintenance tips to keep your dollhouse in top condition:

Cleaning Your Wooden Doll House

Cleaning your wooden dollhouse is a crucial part of maintenance. Here are some tips to help you keep your dollhouse clean:

  • Use a soft cloth or brush to remove dust and dirt from the surface of your dollhouse.
  • Avoid using water or any cleaning agents that contain harsh chemicals as they can damage the wood.
  • If you need to clean the inside of your dollhouse, use a small vacuum cleaner or a soft brush to remove dust and dirt.
  • If you notice any stains or marks on your dollhouse, try using a mild soap and water solution to clean them off.

Minor Repairs

Over time, your wooden dollhouse may require minor repairs. Here are some tips to help you fix any minor issues:

  • If you notice any loose parts, use wood glue to reattach them.
  • If any parts of your dollhouse become damaged, use wood filler to fill in any cracks or holes.
  • If you need to repaint your dollhouse, use a primer before applying the paint to ensure it adheres properly to the wood.

By following these maintenance tips, you can ensure that your wooden dollhouse stays in great condition for years to come.

build-a-wooden-spiral-staircase

How to Build a Wooden Spiral Staircase: Step-by-Step Guide with Pictures

If you’re looking to add a unique touch to your home or building, building a wooden spiral staircase might be just the project you’re looking for. Spiral staircases are not only functional, but also add an attractive element to any space. With a little planning and some basic woodworking skills, you can build your own wooden spiral staircase.

The first step in building a wooden spiral staircase is to decide on the location. Spiral staircases tend to work best in tight spaces and parts of the room that don’t receive heavy foot traffic. Once you’ve chosen the location, you’ll need to design the staircase. This involves deciding on the thickness and width of the treads, as well as the steepness of the spiral. Keep in mind that the International Residential Code (IRC) limits the distance from the bottom of one tread to the bottom of the next (the rise) to 9 1/2 inches.

Once you have a design in place, it’s time to start building. Building a wooden spiral staircase can be a challenging project, but with the right tools and materials, it’s definitely doable. In the next few paragraphs, we’ll walk you through the steps involved in building a wooden spiral staircase, from laying out the spiral to installing the treads and handrail. So grab your tools and let’s get started!

Understanding Spiral Staircases

build-a-wooden-spiral-staircase

If you’re looking for a stylish and space-saving solution for your home or building, a spiral staircase may be the perfect choice. Spiral staircases are not only visually appealing but also functional, allowing you to save valuable floor space. In this section, we’ll cover the basics of spiral staircases to help you understand what you need to know before you start building.

Design Considerations

Before you start building your spiral staircase, it’s important to consider a few design factors. Here are some things to keep in mind:

  • Location: Spiral staircases are ideal for small spaces or areas where a traditional staircase won’t fit. Consider where you want to install your spiral staircase and make sure there is enough room for it.
  • Materials: Spiral staircases can be made from a variety of materials, including wood, metal, and glass. Choose a material that fits your style and budget.
  • Safety: Safety is a crucial consideration when building a spiral staircase. Make sure your staircase meets local building codes and is structurally sound.

Advantages of Spiral Staircases

Spiral staircases offer several advantages over traditional staircases. Here are a few reasons why you might want to consider a spiral staircase:

  • Space-saving: Spiral staircases take up less floor space than traditional staircases, making them ideal for small homes or apartments.
  • Visual appeal: Spiral staircases are visually striking and can add a unique design element to any space.
  • Versatility: Spiral staircases can be installed in a variety of locations, including outdoor spaces, attics, and lofts.

Disadvantages of Spiral Staircases

While spiral staircases offer many benefits, they also have a few drawbacks. Here are some things to keep in mind:

  • Limited accessibility: Spiral staircases can be difficult for some people to use, especially those with mobility issues or disabilities.
  • Narrow treads: The treads on spiral staircases are narrower than those on traditional staircases, which can make them more difficult to use.
  • Higher cost: Spiral staircases can be more expensive to build than traditional staircases, especially if you choose high-end materials.

Materials Needed

When it comes to building a wooden spiral staircase, you’ll need to gather a variety of materials to ensure its stability and longevity. Here are the main materials you’ll need to get started:

Types of Wood

Choosing the right type of wood is crucial for building a sturdy and beautiful spiral staircase. Some of the best options include:

  • Oak: This hardwood is known for its durability and strength, making it a popular choice for staircase construction.
  • Maple: Another strong and durable hardwood, maple is often used for its attractive grain patterns.
  • Pine: A softwood that is easy to work with, pine is a budget-friendly option for those on a tight budget.

Other types of wood that can be used for spiral staircase construction include cherry, mahogany, and walnut. Be sure to choose a wood that will complement the overall design of your home or building.

Fasteners and Hardware

In addition to the wood itself, you’ll need a variety of fasteners and hardware to ensure that your spiral staircase is secure and stable. Some of the most important items include:

  • Screws: These will be used to attach the treads and risers to the center pole.
  • Bolts: Bolts are used to secure the center pole to the base plate and the top plate.
  • Nuts and washers: These are used in conjunction with bolts to ensure a tight and secure fit.
  • Center pole: This is the main support structure of the staircase and should be made of a strong and durable material such as steel or aluminum.
  • Base plate and top plate: These plates are used to secure the center pole to the floor and ceiling.

Be sure to choose high-quality fasteners and hardware to ensure that your spiral staircase is safe and secure for years to come.

Designing Your Staircase

designing-your-staircase

Before starting to build your wooden spiral staircase, you need to design it properly to ensure it fits your space and meets your needs. Here are some tips to help you design your staircase.

Determining the Dimensions

The first step in designing your spiral staircase is determining the dimensions. Measure the height from the floor to the ceiling where you want to install your staircase. This measurement will determine the number of steps you need. The standard height for each step is between 7 and 8 inches.

Next, measure the diameter of the space where you want to install your staircase. The diameter will determine the size of the center pole and the treads. The minimum diameter for a spiral staircase is 5 feet.

Once you have determined the height and diameter, you can use a spiral staircase calculator to determine the number of steps, the size of the center pole, and the size of the treads.

Creating a Blueprint

After determining the dimensions, create a blueprint of your staircase. The blueprint should include the height, diameter, number of steps, size of the center pole, and size of the treads. You can use software such as SketchUp or AutoCAD to create a 3D model of your staircase.

When creating your blueprint, consider the placement of your staircase. Spiral staircases work best in tight spaces and parts of the room that don’t receive heavy foot traffic, such as corners. You should also consider the aesthetic of your staircase and choose a design that complements your home’s style.

In conclusion, designing your wooden spiral staircase is an important step in the building process. By determining the dimensions and creating a blueprint, you can ensure that your staircase fits your space and meets your needs.

Building the Staircase

Building a wooden spiral staircase can seem like a daunting task, but with the right tools and materials, you can create a beautiful and functional staircase that will last for years to come. In this section, we will walk you through the steps of building a wooden spiral staircase, including cutting the wood, assembling the stairs, and installing the handrail.

Cutting the Wood

The first step in building your wooden spiral staircase is to cut the wood to the correct size and shape. You will need to cut the center post, the risers, and the treads to the appropriate length and angle. It is important to measure carefully and double-check your measurements before making any cuts.

To cut the wood, you will need a saw, such as a circular saw or a jigsaw, and a straight edge or a template to guide your cuts. You may also want to use a miter saw or a table saw for more precise cuts.

Assembling the Stairs

Once you have cut all of your wood to the correct size and shape, you can begin assembling the stairs. Start by attaching the risers to the center post, using screws or bolts to secure them in place. Then, attach the treads to the risers, making sure they are level and evenly spaced.

As you assemble the stairs, it is important to check for any gaps or unevenness and make adjustments as needed. You may also want to sand or finish the wood to give it a smooth and polished look.

Installing the Handrail

The final step in building your wooden spiral staircase is to install the handrail. The handrail provides safety and support as you climb the stairs and can also add a decorative touch to your staircase.

To install the handrail, you will need to drill holes in the center post and attach the handrail brackets. Then, slide the handrail onto the brackets and secure it in place with screws or bolts.

Overall, building a wooden spiral staircase requires patience, precision, and attention to detail. By following these steps and taking the time to do it right, you can create a beautiful and functional staircase that will enhance the look and feel of your home.

Finishing Touches

Sanding and Finishing

Once you have completed the installation of your wooden spiral staircase, it is important to sand and finish it properly. Sanding the stairs will help to smooth out any rough spots or splinters, and finishing will protect the wood from moisture and other damage.

Start by sanding the stairs with a fine-grit sandpaper, working your way up to a higher grit for a smoother finish. Be sure to sand the treads, risers, and balusters, as well as any other exposed wood surfaces.

Next, apply a finish to the stairs to protect the wood. There are many different types of finishes available, including varnish, stain, and polyurethane. Choose the finish that best suits your needs and apply it according to the manufacturer’s instructions.

Safety Checks

Before using your new spiral staircase, it is important to perform a safety check to ensure that it is secure and stable. Here are a few things to check:

  • Check that all screws and bolts are tight and secure.
  • Make sure that the handrail is securely attached and at the proper height.
  • Check that the treads are level and not loose.
  • Ensure that the staircase is properly anchored to the floor and ceiling.

Performing these safety checks will help to ensure that your new wooden spiral staircase is safe and secure for you and your family to use.

build-a-wooden-arch

How to Build a Wooden Arch: A Step-by-Step Guide

If you’re looking to add a touch of elegance to your garden or backyard, building a wooden arch is a great way to do it. Not only does it add a beautiful focal point to your outdoor space, but it can also serve as a support for climbing plants like roses, ivy, and wisteria. In this article, we’ll go over the steps involved in building a wooden arch so that you can create a stunning addition to your garden.

The first step in building a wooden arch is to gather the necessary tools and materials. You’ll need plywood sheets, a circular saw, a cordless drill, a posthole digger, safety glasses, and other tools depending on the design you choose. Once you have everything you need, you can start building the arch.

The process of building a wooden arch involves cutting and shaping the plywood sheets into the desired shape, assembling the arch, and securing it in place. Depending on the design you choose, you may also need to add additional support structures like posts or braces. With a little patience and some basic woodworking skills, you can create a beautiful wooden arch that will enhance the look of your garden or backyard.

Understanding the Basics of a Wooden Arch

build-a-wooden-arch

If you’re looking to add a touch of elegance to your garden or outdoor space, a wooden arch is a great way to do it. Wooden arches are easy to build and can be customized to fit any style or design. In this section, we’ll cover the basics of building a wooden arch, including the importance of wood type and arch design principles.

Importance of Wood Type

When it comes to building a wooden arch, the type of wood you use is crucial. You want to choose a wood that is strong and durable enough to withstand the elements and support the weight of the arch. Some of the best types of wood for building a wooden arch include:

  • Cedar: Cedar is a popular choice for building outdoor structures because it is naturally resistant to rot and insect damage. It is also lightweight and easy to work with.
  • Redwood: Redwood is another popular choice for outdoor structures because it is naturally resistant to decay and insect damage. It is also strong and durable, making it a great choice for building a wooden arch.
  • Pressure-treated pine: Pressure-treated pine is a cost-effective option for building a wooden arch. It is treated with chemicals to make it resistant to rot and insect damage, but it is important to note that these chemicals can be harmful to the environment.

Arch Design Principles

When it comes to designing your wooden arch, there are a few key principles to keep in mind:

  • Height: The height of your arch will depend on its intended use. If you’re building an arch to frame a garden path, a height of 7 feet is usually sufficient. If you’re building an arch for a wedding or other special event, you may want to go taller.
  • Width: The width of your arch will depend on the size of the space you’re working with. A width of 4-5 feet is usually sufficient for a garden path. If you’re building an arch for a wedding or other special event, you may want to go wider.
  • Shape: The shape of your arch will depend on your personal preference. Some popular shapes include a classic gothic arch, a rounded arch, and a flat arch.
  • Bracing: It’s important to include bracing in your design to ensure that your arch is stable and secure. Bracing can be added to the sides or the back of the arch, depending on the design.

By keeping these design principles in mind and choosing the right type of wood, you can build a beautiful and functional wooden arch that will add a touch of elegance to your outdoor space.

Materials and Tools Required

When it comes to building a wooden arch, having the right materials and tools is essential. Here are the things you’ll need to get started:

Choosing the Right Wood

The first step in building a wooden arch is to choose the right type of wood. You’ll want to select wood that is strong, durable, and able to withstand the elements. Some good options include:

  • Cedar: This is a popular choice for outdoor projects because it is naturally resistant to rot and decay.
  • Redwood: This is another durable option that is resistant to insects and decay.
  • Pressure-treated lumber: This type of wood is treated with chemicals to resist rot, insects, and decay.

Before you start building, make sure to inspect your wood for any defects or damage. You’ll want to avoid using any wood that is warped, cracked, or has knots that could weaken the structure.

Essential Tools

To build a wooden arch, you’ll need a few essential tools:

  • Circular saw: This will be used to cut your wood to size.
  • Drill: You’ll need a drill to make holes for screws and bolts.
  • Jigsaw: This tool is useful for cutting curved shapes in your wood.
  • Screwdriver: You’ll need a screwdriver to tighten screws and bolts.
  • Clamps: These will help hold your wood in place while you work.
  • Measuring tape: You’ll need to measure your wood to ensure it is cut to the correct size.
  • Pencil: This will be used to mark your wood before cutting.
  • Safety gear: Make sure to wear safety glasses and gloves to protect yourself while working with power tools.

Having the right materials and tools is crucial to building a wooden arch that is strong and durable. With the right materials and a little bit of know-how, you’ll be able to create a beautiful arch that will last for years to come.

Creating Your Arch Design

creating-your-arch-design

Designing your wooden arch is an important step that will determine the final look and functionality of your arch. In this section, we will go over the steps to create your arch design.

Drawing the Arch Blueprint

Before you start building your arch, you need to create a blueprint. This will help you visualize the final product and make any necessary adjustments before you start building.

To create your blueprint, you can use a pencil and paper or a computer-aided design (CAD) program. Draw the arch shape you want and make sure to include the height, width, and depth of the arch. You can also add any decorative elements you want to include, such as carvings or cutouts.

Determining the Arch Dimensions

Once you have your blueprint, you need to determine the dimensions of your arch. This will depend on the size of the space where you want to install the arch and the purpose of the arch.

To determine the dimensions, measure the height and width of the space where you want to install the arch. Make sure to add a few extra inches to the measurements to ensure a proper fit. You also need to consider the purpose of the arch. If it is for decoration, you may want to make it smaller. If it is for a garden or walkway, you may want to make it larger to accommodate people walking underneath.

After you have determined the dimensions, you can start selecting the materials you will need to build your arch. Make sure to choose high-quality wood that is sturdy and durable. You can also choose to add a finish to your arch, such as paint or stain, to protect it from the elements and enhance its appearance.

By following these steps, you can create a beautiful and functional wooden arch that will enhance the look of your garden or walkway.

Preparing the Wood

Before building a wooden arch, it is important to properly prepare the wood to ensure a sturdy and long-lasting structure. This section will cover two key steps in preparing the wood: cutting and sanding.

Cutting the Wood

To begin, you will need to cut the wood to the appropriate length and shape. This will depend on the specific design of your arch. It is important to use a circular saw or jigsaw to make precise cuts. A framing square or combination square can be used to ensure that the cuts are straight and accurate.

To make curved cuts, a router can be used to create a smooth and consistent shape. Alternatively, a template can be used to guide the saw or jigsaw along the desired curve.

Sanding the Wood

Once the wood is cut to the appropriate size and shape, it is important to sand it to remove any rough edges or splinters. This will also help to create a smooth and even surface for painting or staining.

Start with a coarse sandpaper, such as 80-grit, and gradually work your way up to a finer grit, such as 220-grit. Sand in the direction of the grain to avoid damaging the wood.

After sanding, wipe the wood down with a damp cloth to remove any dust or debris. This will ensure that the surface is clean and ready for finishing.

By properly preparing the wood through cutting and sanding, you can ensure that your wooden arch will be strong, durable, and visually appealing.

Assembling the Arch

After cutting the arch pieces, it’s time to assemble them. This section will guide you through the process of joining and securing the arch structure.

Joining the Arch Pieces

To join the arch pieces, you will need wood glue and clamps. Here are the steps to follow:

  1. Apply wood glue on the mating surfaces of the arch pieces.
  2. Join the arch pieces together to form the arch shape.
  3. Use clamps to hold the arch pieces together while the glue dries.
  4. Wipe off any excess glue with a damp cloth.

Securing the Arch Structure

Once the glue has dried, it’s time to secure the arch structure. You will need screws and a drill. Here are the steps to follow:

  1. Drill pilot holes through the arch pieces where you want to place the screws.
  2. Insert screws through the pilot holes and into the mating arch piece.
  3. Tighten the screws until the arch pieces are securely fastened together.

It’s important to note that you should not over-tighten the screws as it can cause the wood to split. Also, make sure the screws are evenly spaced and aligned to ensure a strong and stable arch structure.

Congratulations! You have successfully assembled your wooden arch. In the next section, we will cover how to finish and decorate your arch.

Finishing Touches

Now that you have built your wooden arch, it’s time to add the finishing touches to make it truly stand out. Here are a few suggestions on how to add some personality and style to your arch.

Applying Wood Stain

One way to enhance the natural beauty of your wooden arch is by applying wood stain. Not only does it add color, but it also helps protect the wood from weather damage. Before applying the stain, make sure the wood is clean and dry. You can use a brush, roller, or spray gun to apply the stain. Follow the manufacturer’s instructions for the best results. Once the stain is dry, you can add a clear coat of polyurethane to protect the wood further.

Adding Decorative Elements

Another way to make your wooden arch unique is by adding decorative elements. Here are a few ideas:

  • Hang string lights or lanterns from the arch for a romantic ambiance.
  • Add floral arrangements or garlands to the arch for a natural and whimsical look.
  • Attach a sign or banner to the arch for a personalized touch.

Remember to choose elements that complement the overall style and purpose of your arch. With a little creativity, you can turn your wooden arch into a stunning focal point in your garden or outdoor space.

That’s it! Your wooden arch is now complete, and it’s ready to be enjoyed for years to come.

Maintenance Tips for Wooden Arch

Maintaining your wooden arch is essential to ensure it lasts for years to come. Here are some tips to help you keep your wooden arch in top condition:

1. Regular Cleaning

Regular cleaning is important to prevent dirt and debris from accumulating on the arch. Use a soft-bristled brush or a cloth to wipe away any dirt or dust. If there are any stubborn stains, use a mild soap solution and a soft brush to clean the arch. Rinse the arch with water and let it dry completely before applying any finish.

2. Apply a Protective Finish

Applying a protective finish to your wooden arch can help prevent moisture damage and protect it from the elements. You can use a clear coat or a stain that matches the color of your arch. Apply the finish according to the manufacturer’s instructions and allow it to dry completely before using the arch.

3. Inspect for Damage

Inspect your wooden arch regularly for any signs of damage such as cracks, splits, or warping. If you notice any damage, address it immediately to prevent further damage. Replace any damaged parts or contact a professional for repairs.

4. Store Properly

If you need to store your wooden arch for an extended period, make sure to store it in a dry and cool place. Cover the arch with a tarp or a sheet to protect it from dust and debris. Avoid storing the arch in direct sunlight or near sources of heat.

Taking care of your wooden arch can help prolong its life and keep it looking beautiful for years to come. By following these maintenance tips, you can ensure that your wooden arch remains a stunning addition to your garden or yard.

how-to-make-a-wooden-knife-handle

How to Make a Wooden Knife Handle: A Beginner's Guide

Are you interested in making your own knife handle out of wood? Crafting a wooden handle for your knife is a great way to add a personal touch and improve the grip of your knife. While it may seem like a daunting task, making a wooden knife handle can be done with just a few tools and some basic woodworking skills.

Before you begin, it’s important to choose the right type of wood for your handle. Some popular choices include maple, walnut, and oak. Make sure the wood you choose is strong and durable enough to withstand the rigors of use. Once you have your wood selected, you’ll need to cut it to the right size and shape for your knife. This can be done with a saw or other cutting tool. Next, you’ll need to sand the wood down to a smooth finish and then apply a protective coating to help preserve the wood. With a little patience and some attention to detail, you’ll have a beautiful and functional wooden knife handle in no time.

Understanding the Basics of a Wooden Knife Handle

how-to-make-a-wooden-knife-handle

When it comes to making a knife, the handle is just as important as the blade. A well-designed handle can improve your grip and make the knife more comfortable to use. Wooden knife handles are a popular choice because they are durable, attractive, and easy to work with. In this section, we will discuss the basics of a wooden knife handle.

Choosing the Right Wood

The first step in making a wooden knife handle is choosing the right wood. You want a wood that is strong, durable, and resistant to moisture. Some popular choices include:

  • Maple
  • Walnut
  • Rosewood
  • Ebony
  • Cocobolo

When selecting your wood, make sure it is free of defects such as knots or cracks. You also want to make sure the wood is dry and stable. Green wood or wood with a high moisture content can warp or crack over time.

Preparing the Wood

Once you have selected your wood, you need to prepare it for use. This involves cutting it to the desired size and shape and sanding it smooth. You may also want to add some texture or grip to the handle by carving or sanding in some grooves or ridges.

Attaching the Handle to the Blade

Attaching the handle to the blade is the final step in making a wooden knife handle. There are a few different methods you can use, including:

  • Gluing: Apply a strong adhesive to the tang of the blade and slide the handle onto it. Clamp the handle in place until the glue dries.
  • Pinning: Drill holes through the handle and tang of the blade and insert pins to hold the handle in place.
  • Riveting: Drill holes through the handle and tang of the blade and insert a rivet to hold the handle in place.

No matter which method you choose, make sure the handle is securely attached to the blade and that there are no gaps or spaces between the handle and the blade.

In conclusion, making a wooden knife handle is a fun and rewarding project that can improve the look and feel of your knife. By choosing the right wood, preparing it properly, and attaching it securely to the blade, you can create a handle that is both functional and beautiful.

Choosing the Right Wood

Choosing the right wood for your knife handle is crucial to ensure durability, strength, and comfort. Here are some factors to consider when selecting the wood for your knife handle:

Hardness

The hardness of the wood affects the durability and strength of the knife handle. Hardwoods such as cocobolo, ebony, and rosewood are great options for knife handles because of their high density and strength. Softwoods like pine or spruce are not recommended as they can easily dent and scratch.

Grain Pattern

The grain pattern of the wood can also affect the durability and aesthetics of the knife handle. Straight-grained woods like maple or cherry are easier to work with and provide a classic look. Burls or figured woods like curly maple or birdseye maple can add a unique and eye-catching design to the knife handle.

Stability

The wood’s stability is important to consider, especially if you live in an area with high humidity or temperature changes. Woods like ebony and cocobolo are known for their stability, while woods like maple or walnut can be prone to warping or cracking.

Availability

The availability of the wood can also be a factor to consider. Some exotic woods like cocobolo or ebony can be expensive and difficult to find. Birch, maple, and walnut are more widely available and affordable options.

Overall, choosing the right wood for your knife handle depends on your personal preferences and needs. Consider the hardness, grain pattern, stability, and availability of the wood before making your final decision.

Designing Your Knife Handle

When making a wooden knife handle, designing it is an important step. The handle should not only look good, but it should also be comfortable and functional. In this section, we will discuss the different aspects of designing your knife handle.

Shape

The shape of your knife handle is important because it affects how comfortable it is to hold and use. There are many different shapes you can choose from, but it’s important to consider the type of knife you are making and what it will be used for. For example, a chef’s knife handle may have a different shape than a hunting knife handle.

Size

The size of your knife handle is also important. It should fit comfortably in your hand and be easy to grip. If the handle is too small, it may be difficult to hold onto, and if it’s too large, it may be uncomfortable to use. Consider the size of your own hand when designing your handle.

Ergonomics

Ergonomics refers to the study of how people interact with objects and how to make those objects more comfortable, efficient, and safe to use. When designing your knife handle, consider the ergonomics of your design. A well-designed handle will reduce the risk of hand fatigue and strain and make it more comfortable to use for extended periods of time.

In conclusion, designing your knife handle is an important step in the knife-making process. Consider the shape, size, and ergonomics of your design to create a handle that is not only aesthetically pleasing but also comfortable and functional to use.

Preparing the Materials

Before you start making a wooden knife handle, it’s important to gather all the necessary materials and tools. This will ensure that you have everything you need to complete the project successfully. In this section, we’ll cover the two main steps involved in preparing the materials: cutting the wood and gathering other essentials.

Cutting the Wood

The first step in making a wooden knife handle is to select the wood you want to use. You can choose from a variety of woods, including walnut, maple, and oak. Once you’ve chosen your wood, it’s time to cut it to size.

To do this, you’ll need a saw. A bandsaw is ideal for this step as it will give you a clean, straight cut. If you don’t have a bandsaw, a handsaw or jigsaw will also work.

Measure the length of your knife handle and mark the wood accordingly. Use your saw to cut the wood to the desired length. Make sure to wear safety goggles and gloves to protect yourself while cutting the wood.

Gathering Other Essentials

In addition to the wood, you’ll need a few other essentials to make a wooden knife handle. These include:

  • Sandpaper: You’ll need sandpaper to smooth out the edges of the wood and give it a polished finish. Start with a coarse grit and work your way up to a finer grit for a smooth finish.
  • Drill: You’ll need a drill to make holes in the wood for the pins that will hold the handle together.
  • Pins: You’ll need pins to hold the handle together. Brass or stainless steel pins are good options.
  • Epoxy: You’ll need epoxy to glue the pins in place and to attach the handle to the knife blade.
  • Clamps: You’ll need clamps to hold the handle in place while the epoxy dries.

Once you have all of these materials, you’re ready to move on to the next step: shaping the wood into a handle.

Carving the Handle

carving-the-handle

Carving the handle is the most important part of making a wooden knife handle. It requires precision and attention to detail to ensure that the handle is comfortable to hold and fits the knife blade perfectly. Here are some steps to follow when carving the handle:

  1. Choose the right wood: The first step is to choose the right wood for your handle. Hardwoods like maple, oak, and cherry are great options because they are durable and can withstand the wear and tear of regular use.
  2. Mark the outline: Once you have selected your wood, use a pencil to mark the outline of your handle on the wood. Make sure to leave some extra space around the outline to allow for carving.
  3. Carve the basic shape: Use a carving knife or chisel to carve the basic shape of the handle. Start by removing the excess wood around the outline and then slowly work your way towards the center of the handle.
  4. Sand the handle: After you have carved the basic shape of the handle, use sandpaper to smooth out any rough edges or bumps. Sand the handle in the direction of the grain to avoid damaging the wood.
  5. Add the details: Once the handle is smooth, you can add any details you want, such as a grip pattern or decorative carvings. Use a small chisel or carving knife to add these details.
  6. Finish the handle: Finally, apply a finish to the handle to protect the wood from moisture and give it a polished look. You can use a variety of finishes, such as oil, wax, or varnish, depending on your preference.

Carving a wooden knife handle requires patience and practice, but with these steps, you can create a beautiful and functional handle for your knife.

Sanding and Finishing

Sanding Process

After shaping and attaching the wooden scales to the tang of your knife handle, it is time to sand the handle to a smooth finish. Sanding the handle will not only make it look better but also make it more comfortable to hold.

Start with a coarse grit sandpaper, such as 80 or 120 grit, to remove any rough spots or imperfections on the wood. Sand the handle in the direction of the wood grain, using even pressure. Move on to a finer grit sandpaper, such as 220 or 320 grit, to smooth out the handle further. Finally, use a very fine grit sandpaper, such as 400 or 600 grit, to achieve a smooth finish.

It is important to take your time and not rush the sanding process. Rushing the process can result in uneven sanding and an unsatisfactory finish. Make sure to sand the handle evenly and avoid over-sanding any particular area.

Applying Finish

Once you have sanded the handle to your desired smoothness, it is time to apply a finish to protect the wood and enhance its appearance. There are various finishes you can use, such as oils, waxes, and varnishes.

One popular finish is boiled linseed oil. Boiled linseed oil is easy to apply and penetrates the wood to provide a protective layer. Apply the oil generously to the handle, making sure to cover all areas evenly. Let the oil soak into the wood for about 10 to 15 minutes, then wipe off any excess oil with a clean cloth. Repeat this process until the handle has absorbed enough oil.

Another option is to use a wax finish. Wax finishes provide a protective layer and enhance the natural beauty of the wood. Apply the wax to the handle using a clean cloth, making sure to cover all areas evenly. Let the wax dry for a few minutes, then buff the handle with a clean cloth to achieve a shiny finish.

No matter which finish you choose, make sure to follow the manufacturer’s instructions and apply the finish in a well-ventilated area. Allow the finish to dry completely before handling the knife.

Assembling the Knife and Handle

Once you have prepared the wood for your knife handle, it’s time to attach it to the blade. This process can be broken down into two main steps: attaching the handle and securing the handle.

Attaching the Handle

To attach the handle, you will need to use epoxy or another strong adhesive. Here’s how to do it:

  1. Apply a thin layer of epoxy to the tang of the blade.
  2. Carefully slide the handle onto the tang, making sure it is aligned properly.
  3. Use clamps to hold the handle in place while the epoxy dries. Make sure the clamps are tight enough to hold the handle securely, but not so tight that they damage the wood.
  4. Allow the epoxy to dry completely according to the manufacturer’s instructions.

Securing the Handle

Once the epoxy has dried, you will need to secure the handle to the tang of the blade. Here are a few different methods you can use:

  • Rivets: Drill holes through the tang and handle, then insert rivets to hold them together. This method is commonly used for full-tang knives.
  • Corby bolts: Similar to rivets, but with a threaded bolt that screws into the handle. This method is also commonly used for full-tang knives.
  • Mosaic pins: Decorative pins that also help to secure the handle to the tang. These are often used in combination with epoxy or other adhesives.
  • Peening: For hidden-tang knives, the tang can be peened or hammered to create a mushroom-shaped head that holds the handle in place.

No matter which method you choose, make sure the handle is securely attached to the blade before using the knife. With a little bit of patience and attention to detail, you can create a beautiful and functional knife that will last for years to come.

Maintenance Tips

Now that you have successfully made your wooden knife handle, it is important to maintain it properly to ensure its longevity. Here are some tips to help you take care of your wooden knife handle:

Wash and Dry by Hand

Even though wooden knife handles are durable, they are not dishwasher safe. You should always wash your knife handle by hand and dry it off quickly after use. This will prevent water from seeping into the wood grain and causing it to warp or crack.

Oil Your Handle

One of the most effective ways to maintain wooden knife handles is by oiling them. Oiling wooden handles helps to protect and nourish the wood. This enhances the handle’s appearance by bringing out the natural patterns and colors of the wood. You can use mineral oil, linseed oil, or even olive oil to oil your handle. Apply the oil generously to the handle and let it soak in for a few hours before wiping off any excess oil.

Store Properly

When storing your knife, make sure to keep it in a dry place away from direct sunlight. Avoid storing it in a damp or humid area, as this can cause the wood to swell and warp. You can also use a knife block or sheath to protect the handle from scratches and dents.

Avoid Harsh Chemicals

Harsh chemicals can damage the wood and cause it to lose its natural luster. Avoid using bleach, ammonia, or any other abrasive cleaners on your wooden knife handle. Instead, use a mild soap and warm water to clean it.

By following these simple maintenance tips, you can ensure that your wooden knife handle stays in excellent condition for years to come.

How to Build a Wooden Frame for a Shed: A Beginner's Guide

Are you looking to add some extra storage space to your backyard? Building a wooden frame for a shed is a great DIY project that can provide you with the perfect solution. Whether you need to store your gardening tools, lawnmower, or bicycles, a shed can help keep your outdoor space organized and clutter-free.

Before you start building your shed, it is important to determine the size you need and the location where it will be placed. You will also need to select the type of wood you want to use for your frame. Lightweight wood like poplar or pine is easy to lift into place, but if you want a more durable frame, consider using hardwoods like oak or maple. Once you have your materials and location sorted, it’s time to start building. With some basic woodworking skills and the right tools, you can build a sturdy wooden frame for your shed that will last for years to come.

Understanding the Basics

Types of Wood

When it comes to building a timber frame shed, the type of wood you choose is crucial. You want a wood that is strong, durable, and resistant to rot and insects. Here are some of the most popular types of wood used for timber framing:

  • Douglas Fir: This is a popular choice for timber framing due to its strength and durability. It is also resistant to rot and insects.

  • Oak: Oak is a hardwood that is known for its strength and durability. It is also resistant to rot and insects.

  • Cedar: Cedar is a softwood that is naturally resistant to rot and insects. It is also lightweight and easy to work with.

  • Pine: Pine is a softwood that is easy to work with and readily available. It is also affordable, making it a popular choice for timber framing.

Essential Tools

To build a timber frame shed, you will need a few essential tools. Here are some of the tools you will need:

  • Circular saw: A circular saw is essential for cutting the timber to size.

  • Chisels: Chisels are used for cutting mortises and tenons in the timber.

  • Mallet: A mallet is used to drive the chisels into the timber.

  • Drill: A drill is used to make holes in the timber for pegs and screws.

  • Clamps: Clamps are used to hold the timber in place while you work on it.

  • Square: A square is used to ensure that the timber is cut at the correct angle.

  • Level: A level is used to ensure that the timber is straight and level.

  • Tape measure: A tape measure is used to measure the timber and ensure that it is cut to the correct size.

By having these essential tools at your disposal, you will be well-equipped to build a timber frame shed that is strong, durable, and built to last.

Designing Your Shed Frame

When building a wooden frame for your shed, it’s important to take the time to plan and design it properly. This will ensure that your shed is sturdy, functional, and meets your needs. In this section, we’ll cover some key considerations when designing your shed frame.

Choosing the Right Size

The first step in designing your shed frame is to determine the size of your shed. Consider how you’ll be using the shed and what you’ll be storing in it. This will help you determine how much space you’ll need.

Once you have an idea of the size you need, consider the space you have available in your yard. Measure the area where you plan to build the shed and make sure there is enough space for the shed and for you to move around it.

Creating a Blueprint

Once you’ve determined the size of your shed, it’s time to create a blueprint. This will serve as a guide for building your shed frame.

When creating your blueprint, consider the following:

  • The pitch of the roof: The pitch of the roof will affect the amount of headroom inside the shed. A steeper pitch will provide more headroom, but may require more materials and be more difficult to build.
  • The type of foundation: The foundation is an important part of your shed frame. You’ll need to decide whether to use a concrete foundation or a foundation made of wood or gravel.
  • The type of wood: The type of wood you use will affect the durability and strength of your shed frame. Cedar and redwood are popular choices for their natural resistance to decay and insects.
  • The type of joint: The joints in your shed frame will affect the strength and stability of the structure. Consider using mortise and tenon joints for added strength.

Once you’ve created your blueprint, review it carefully to ensure that it meets your needs and that all of the necessary components are included. With a well-designed shed frame, you’ll be able to build a sturdy and functional shed that will last for years to come.

Preparation

Before you begin building your timber-frame shed, there are a few things you need to do to prepare. This section will cover the two main steps you need to take: gathering materials and preparing the site.

Gathering Materials

The first step in building a timber-frame shed is to gather all the necessary materials. Here’s a list of the materials you’ll need:

Materials Quantity
Timber Depends on the size of your shed
Plywood 8 sheets
Roofing material Depends on the type of roofing you choose
Nails 3-inch and 1.5-inch
Screws 2-inch and 3-inch
Concrete blocks Depends on the size of your shed
Gravel Depends on the size of your shed

You can purchase these materials at your local hardware store or lumberyard. Be sure to measure the area where you will be building your shed to ensure you purchase enough materials.

Preparing the Site

Once you have all the necessary materials, you need to prepare the site where you will be building your shed. Here’s what you need to do:

  1. Clear the area where you will be building your shed. Remove any debris, rocks, or plants that may be in the way.

  2. Level the ground where you will be building your shed. Use a shovel and a level to ensure the ground is flat and even.

  3. Lay down a layer of gravel. This will help with drainage and prevent water from accumulating under your shed.

  4. Place concrete blocks on top of the gravel. These will serve as the foundation for your shed.

  5. Use a level to ensure the concrete blocks are even and level.

By following these steps, you’ll be well on your way to building a sturdy and durable timber-frame shed.

Building the Frame

Building a wooden frame for a shed can be an exciting and rewarding project. With the right tools, materials, and instructions, you can create a sturdy and attractive structure that will last for years to come. In this section, we will guide you through the process of building the frame, including creating the base, assembling the walls, and installing the roof.

Creating the Base

The first step in building a wooden frame for your shed is to create a solid base. This will provide a stable foundation for the rest of the structure. Here are the steps to follow:

  1. Choose a location for your shed that is level and free from obstructions.
  2. Measure and mark out the area for your base, ensuring that it is square and level.
  3. Dig a shallow trench around the perimeter of the base area, and fill it with gravel or crushed stone for drainage.
  4. Install wooden stakes around the perimeter of the base area, and attach them to the ground using screws or nails.
  5. Cut pressure-treated lumber to the size of your base area, and attach it to the stakes using screws or nails.
  6. Check that the base is level, and adjust as necessary.

Assembling the Walls

Once you have created a solid base, you can begin assembling the walls of your shed. This will involve cutting and joining pieces of lumber to create a frame that will support the roof. Here are the steps to follow:

  1. Cut the lumber to the required lengths, using a saw or circular saw.
  2. Mark out the positions of the studs on the top and bottom plates, and attach them using screws or nails.
  3. Cut the door and window openings, using a jigsaw or circular saw.
  4. Install the headers and sills for the door and window openings, using screws or nails.
  5. Raise the walls into position, and attach them to the base using screws or nails.
  6. Check that the walls are plumb and square, and adjust as necessary.

Installing the Roof

The final step in building a wooden frame for your shed is to install the roof. This will involve cutting and joining pieces of lumber to create a frame that will support the roofing material. Here are the steps to follow:

  1. Cut the rafters to the required length, using a saw or circular saw.
  2. Install the ridge beam, using screws or nails.
  3. Install the rafters, ensuring that they are spaced evenly and attached securely to the ridge beam and wall plates.
  4. Install the roof sheathing, using screws or nails.
  5. Install the roofing material, following the manufacturer’s instructions.
  6. Install the fascia and soffit, using screws or nails.

Congratulations! You have now built a wooden frame for your shed. With proper care and maintenance, it will provide a functional and attractive addition to your property for many years to come.

Finishing Touches

Now that you have completed the timber frame for your shed, it is time to add the finishing touches. This will not only make your shed look better, but also protect it from the elements. Here are some important finishing touches to consider:

Painting and Sealing

Painting your shed not only adds an aesthetic appeal, but also protects the wood from moisture and rot. Before painting, make sure to clean the wood thoroughly and let it dry completely. You can use a power washer or a stiff-bristled brush to clean the wood. Once it is clean and dry, apply a primer to seal the wood. After the primer has dried, apply your chosen paint color. Make sure to use exterior-grade paint to protect your shed from the elements.

Sealing the wood is also important to protect it from moisture and rot. You can use a clear sealer or a stain to enhance the natural beauty of the wood. Make sure to apply the sealer or stain evenly and let it dry completely before using the shed.

Adding Doors and Windows

Adding doors and windows not only improves the functionality of your shed, but also adds to its aesthetic appeal. When adding doors, make sure to choose a door that fits the size of your shed. You can choose from a variety of materials such as wood, steel, or fiberglass. Make sure to install the door properly and add weatherstripping to prevent drafts.

When adding windows, make sure to choose a window that fits the style and size of your shed. You can choose from a variety of materials such as wood, vinyl, or aluminum. Make sure to install the window properly and add weatherstripping to prevent drafts.

Overall, adding the finishing touches to your shed will not only make it look better, but also protect it from the elements. Make sure to follow the proper steps when painting and sealing the wood, and when adding doors and windows. With these finishing touches, your shed will be ready to use for years to come.

How to Build a Skirt on a Wooden Table: A Simple Guide

Building a skirt on a wooden table can be a fun and creative way to add some flair to your furniture. Whether you’re looking to cover up unsightly legs or just want to add some extra style, building a skirt is a simple project that can be completed in just a few hours. With a few basic tools and some creativity, you can transform your wooden table into a beautiful piece of furniture that will be the envy of all your friends.

To get started, you’ll need to choose the right materials for your project. Depending on the style of your table, you may want to use wood, fabric, or even tulle to create your skirt. Once you’ve chosen your materials, you’ll need to measure the length and width of your table to ensure that your skirt fits properly. You’ll also need to decide on the height of your skirt, which can vary depending on your personal preferences.

Once you have your materials and measurements, it’s time to start building your skirt. Depending on the materials you’ve chosen, you may need to cut and sew fabric or use a saw to cut wood. Regardless of the materials you use, it’s important to take your time and work carefully to ensure that your skirt is sturdy and secure. With a little patience and some creativity, you can build a beautiful skirt that will add style and elegance to any wooden table.

Understanding Table Skirts

Purpose of Table Skirts

Table skirts are a great way to add an extra touch of elegance to your wooden table. They are also used to hide the legs of the table and any other unsightly elements underneath. Table skirts can be used for both formal and informal occasions, such as weddings, banquets, or even just a family dinner.

Table skirts are also a great way to protect your table from scratches and spills. They can be easily removed and washed, making them a practical addition to any wooden table.

Types of Table Skirts

There are many different types of table skirts to choose from, each with its own unique style and function. Here are some of the most popular types:

  • Box pleat: This type of table skirt is made from a series of pleats that are sewn together in a box pattern. It is a classic and formal style that works well for weddings and other formal events.

  • Shirred: A shirred table skirt is made from a series of gathers that are sewn together. This style is more casual and works well for outdoor events and family dinners.

  • Ruffled: A ruffled table skirt is made from layers of fabric that are gathered together to create a ruffled effect. This style is perfect for a vintage or shabby chic look.

  • Tablecloth and topper: This type of table skirt is made from a tablecloth that is draped over the table and a topper that is placed on top of it. This style is versatile and can be used for both formal and informal occasions.

When choosing a table skirt, it is important to consider the style of your event and the overall look you are trying to achieve. With so many different types to choose from, you are sure to find one that suits your needs.

Materials Needed

When building a skirt on a wooden table, you will need to gather a few materials and tools to get started. Here are the materials you will need:

Wood Selection

Choosing the right wood is crucial to ensure a sturdy and long-lasting table skirt. Here are some common types of wood that are ideal for table skirts:

Wood Type Description
Pine A softwood that is easy to work with and affordable. It has a light color and is ideal for painting or staining.
Oak A hardwood that is durable and has a beautiful grain pattern. It is more expensive than pine but is worth the investment.
Beech A hardwood that is similar to oak but has a lighter color. It is also more affordable than oak.

When selecting your wood, make sure it is straight and free of knots or cracks. You should also consider the thickness of the wood, depending on the design of your table skirt.

Tools Required

In addition to the wood, you will also need some tools to build your table skirt. Here are the tools you will need:

  • Measuring tape
  • Saw (circular or table saw)
  • Drill
  • Sandpaper (various grits)
  • Clamps
  • Wood glue
  • Screws or nails
  • Paint or stain (optional)

Make sure your tools are in good condition and sharp. You may also want to wear protective gear, such as safety glasses and gloves, when working with wood.

With these materials and tools, you will be ready to build a beautiful and functional table skirt.

Designing Your Table Skirt

When it comes to designing your table skirt, there are a few things you need to consider to ensure that it fits your table perfectly and complements your decor. Here are some key factors to keep in mind:

Measurement and Proportions

Before you start designing your table skirt, it’s essential to measure your table accurately. Measure the length and width of your table, as well as the height from the floor to the tabletop. These measurements will help you determine how much fabric you’ll need and how long your skirt should be.

When it comes to proportions, you want to make sure that your skirt is in proportion to your table. A general rule of thumb is to have the skirt drop about halfway between the tabletop and the floor. However, you can adjust this based on your personal preference and the style of your table.

Choosing a Design

When it comes to choosing a design for your table skirt, the possibilities are endless. Here are some ideas to get you started:

  • Ruffled Skirt: A ruffled skirt adds a touch of elegance and femininity to your table. It’s perfect for a formal dining room or a special occasion.

  • Pleated Skirt: A pleated skirt is more structured than a ruffled skirt and gives your table a tailored look. It’s ideal for a modern or minimalist decor.

  • Gathered Skirt: A gathered skirt is a simple and classic design that works well with any decor style. It’s easy to make and adds a soft touch to your table.

  • Tassel Skirt: A tassel skirt is a unique and playful design that adds a bohemian vibe to your table. It’s perfect for a casual dining area or outdoor space.

When choosing a design, consider the style of your table and the overall decor of your room. You want your skirt to complement your existing decor, not clash with it.

With these tips in mind, you’re ready to start designing your table skirt. Keep in mind that the most important thing is to have fun and create a skirt that reflects your personal style and taste.

Building the Table Skirt

When building a wooden table, the skirt is an essential component that provides support and stability to the tabletop. In this section, we will discuss the steps involved in building a table skirt.

Cutting the Wood

The first step in building a table skirt is cutting the wood to the required size. You will need to measure the length and width of the table and then cut the wood accordingly. The wood used for the skirt should be of the same thickness as the tabletop.

Once you have the measurements, use a saw to cut the wood into four pieces, one for each side of the table. Make sure to cut the wood at a 45-degree angle at each corner to ensure a tight fit.

Assembling the Skirt

Once you have cut the wood, the next step is to assemble the skirt. To do this, you will need to attach the pieces of wood to each other using wood glue and clamps.

Apply wood glue to the edges of the wood and then press them together firmly. Use clamps to hold the pieces of wood together while the glue dries. Make sure to wipe off any excess glue with a damp cloth.

Once the glue has dried, you can reinforce the joints by attaching metal brackets to the inside of the skirt. These brackets will help to prevent the skirt from coming apart over time.

In conclusion, building a table skirt is a relatively simple process that requires some basic woodworking skills. By following the steps outlined in this section, you can build a sturdy and reliable table skirt that will provide support and stability to your table for years to come.

Attaching the Skirt to the Table

When building a wooden table, attaching a skirt is an important step to add stability and style to the finished product. Here are some tips on how to attach the skirt to the table.

Alignment and Positioning

Before attaching the skirt, it is important to ensure that it is properly aligned and positioned. This will ensure that the table is stable and looks aesthetically pleasing. Here are some steps to follow:

  1. Measure the distance from the top of the table to the bottom of the skirt. This will ensure that the skirt is positioned evenly around the table.
  2. Use a level to ensure that the skirt is straight and even. This will prevent any wobbling or unevenness in the finished table.
  3. Use clamps to hold the skirt in place while attaching it to the table. This will prevent any movement during the attachment process.

Securing the Skirt

Once the skirt is properly aligned and positioned, it is time to secure it to the table. Here are some methods to consider:

  1. Use screws to attach the skirt to the table. This method is simple and effective, but it may be visible on the finished table.
  2. Use table skirting clips to attach the skirt to the table. This method is easy to use and provides a clean, professional look.
  3. Use mortise and tenon joints to attach the skirt to the table. This method provides a strong, durable connection, but it may require more advanced woodworking skills.

No matter which method you choose, be sure to use enough fasteners to ensure that the skirt is securely attached to the table. This will prevent any wobbling or movement in the finished product.

By following these tips, you can attach a skirt to your wooden table with ease, creating a stable and stylish finished product.

Finishing Touches

After building the skirt for your wooden table, it’s time to add the finishing touches that will make it look polished and professional. This section will cover two important steps: sanding and smoothing, as well as painting or staining.

Sanding and Smoothing

Before you paint or stain your skirt, you need to make sure the surface is smooth and free of any imperfections. Start by using a coarse-grit sandpaper (around 80-100 grit) to remove any bumps or rough spots. Then, switch to a finer grit sandpaper (around 150-220 grit) to smooth out the surface.

Make sure to sand in the direction of the wood grain to avoid creating scratches or marks. You can use a sanding block or an orbital sander to make the job easier and more efficient. After sanding, wipe the surface with a damp cloth to remove any dust or debris.

Painting or Staining

Once the surface is smooth and clean, it’s time to add color to your skirt. You can either paint or stain the wood, depending on your preference and the look you want to achieve.

If you choose to paint, make sure to use a primer first to ensure the paint adheres properly. Then, apply several thin coats of paint, allowing each coat to dry completely before applying the next one. You can use a brush, a roller, or a sprayer to apply the paint.

If you prefer a natural wood look, you can stain the skirt instead. Choose a stain that matches the color of your table or complements it. Apply the stain with a brush or a cloth, making sure to follow the manufacturer’s instructions. Wipe off any excess stain with a clean cloth.

After painting or staining, let the skirt dry completely before attaching it to your table. This will ensure the finish is durable and long-lasting.

By following these simple steps, you can create a beautiful and functional skirt for your wooden table that will enhance its appearance and protect it from damage.

How to Make an Inexpensive Wooden Dummy for Martial Arts Training

Looking to improve your martial arts skills but don’t want to break the bank? One way to do so is by making your own wooden dummy. Wooden dummies, also known as Wing Chun dummies, are used in martial arts training to improve technique, timing, and precision. While they can be expensive to purchase, making your own can be a cost-effective solution.

To make an inexpensive wooden dummy, you’ll need some basic woodworking skills and tools. There are several different designs and materials you can use, but many DIY enthusiasts opt for a flat board design using plywood and PVC pipe. This design is easy to make and can be customized to fit your specific needs.

In this article, we’ll provide step-by-step instructions for making your own wooden dummy, including a list of necessary materials and tools. Whether you’re a seasoned martial artist or a beginner looking to improve your skills, making your own wooden dummy is a fun and rewarding project that can help you achieve your goals without breaking the bank.

Why Choose a Wooden Dummy

If you’re looking to improve your martial arts skills, a wooden dummy can be an invaluable tool. Here are a few reasons why you might want to consider building one for yourself.

Cost-Effective

One of the biggest advantages of building a wooden dummy is that it can be a cost-effective solution for your training needs. Compared to other training equipment, such as punching bags or grappling dummies, wooden dummies can be relatively cheap to build. With some basic woodworking skills and a few materials, you can create a wooden dummy that will last for years.

Easy to Build

Another advantage of building a wooden dummy is that it’s relatively easy to do. While you will need some basic woodworking skills, you don’t need to be an expert to create a functional wooden dummy. There are plenty of plans and tutorials available online that can guide you through the process step-by-step. Plus, because you’re building the dummy yourself, you can customize it to fit your specific training needs.

Overall, if you’re looking for a cost-effective and easy-to-build solution for your martial arts training, a wooden dummy is definitely worth considering. With a little bit of effort and some basic woodworking skills, you can create a training tool that will help you improve your skills and reach your goals.

Materials Needed

If you’re looking to build an inexpensive wooden dummy, you’ll need a few key materials. Here’s a breakdown of what you’ll need:

Type of Wood

The type of wood you choose will depend on your budget and personal preferences. Some popular options include:

  • Pine: A softwood that is affordable and easy to work with.
  • Poplar: A hardwood that is slightly more expensive than pine but is more durable and resistant to wear and tear.
  • Oak: A hardwood that is the most expensive option but is extremely durable and long-lasting.

Regardless of the type of wood you choose, make sure it is straight and free of knots and cracks.

Tools Required

To build a wooden dummy, you’ll need a few basic tools:

  • Saw: You’ll need a saw to cut the wood to size.
  • Drill: A drill will be necessary to make holes for the arms and legs.
  • Chisel: A chisel will be used to carve out the arms and legs.
  • Sandpaper: You’ll need sandpaper to smooth out any rough edges.
  • Measuring tape: To ensure accurate measurements.

In addition to these basic tools, you may also want to consider using clamps to hold the wood in place while you work, as well as a square to ensure your cuts are straight and precise.

With these materials and tools, you’ll be well on your way to building your own wooden dummy.

Designing Your Dummy

When designing your wooden dummy, there are two main things to consider: dimensions and style.

Dimensions

The dimensions of your wooden dummy will depend on your height and reach. Generally, the dummy should be about the same height as you and the arms should be at the same level as your chest. The following table provides some general guidelines for dimensions based on height:

Height Dummy Height Arm Length
5’0″ – 5’6″ 60″ 12″
5’7″ – 6’0″ 64″ 13″
6’1″ – 6’6″ 68″ 14″

Of course, these are just general guidelines and you may need to adjust the dimensions to fit your specific body type.

Style

There are many different styles of wooden dummies, but the most common is the Wing Chun dummy. This style features three arms and a leg for practicing kicks, as well as a central post for practicing strikes. However, you can also design your dummy to fit your specific needs.

When designing the style of your dummy, consider the following:

  • How many arms and legs do you want?
  • What angles should the arms and legs be at?
  • How thick should the arms and legs be?

Ultimately, the style of your dummy will depend on your specific training needs and preferences.

By considering both the dimensions and style of your wooden dummy, you can create a training tool that is tailored to your individual needs.

Building Steps

Building an inexpensive wooden dummy is a great way to practice your Wing Chun skills without breaking the bank. Here are the steps you need to follow to build your own dummy:

Cutting the Wood

The first step is to cut the wood into the right sizes. You will need two 6-foot long 4x4s, one 3-foot long 2×4, and one 2-foot long 2×4. Cut one of the 6-foot 4x4s into four 18-inch pieces, and cut the other 6-foot 4×4 into two 24-inch pieces and two 30-inch pieces. Cut the 3-foot 2×4 into two 18-inch pieces, and cut the 2-foot 2×4 into two 12-inch pieces.

Assembling the Parts

Once you have all the pieces cut, it’s time to assemble them. Start by attaching the two 24-inch pieces to one of the 30-inch pieces to form a T-shape. Then, attach the two 18-inch pieces to the other end of the 30-inch piece to form a cross-shape. Next, attach the four 18-inch pieces to the cross-shaped frame, two on each side, to form the arms and legs of the dummy.

Attach the two 12-inch pieces to the bottom of the dummy to form the feet. Then, attach the two 18-inch pieces to the top of the dummy to form the arms. Finally, attach the two 18-inch pieces to the sides of the dummy to form the body.

Finishing Touches

Once the dummy is assembled, it’s time to add some finishing touches. Sand all the rough edges and corners to make sure the dummy is smooth and safe to use. You can also add padding to the arms and legs to make them more comfortable to hit.

You can also add some weight to the bottom of the dummy to make it more stable. You can use sandbags or concrete blocks for this. Finally, you can paint the dummy to give it a more finished look.

That’s it! Follow these steps, and you’ll have your very own inexpensive wooden dummy to practice your Wing Chun skills on.

Maintaining Your Dummy

Maintaining your wooden dummy is crucial to ensure it lasts a long time and continues to be a valuable training tool. In this section, we will discuss how to clean your dummy and how to repair and replace parts that may become damaged over time.

Cleaning

Cleaning your wooden dummy is a simple process that should be done regularly to keep it in good condition. Here are the steps to follow:

  1. Use a soft cloth or brush to remove any dust or debris from the surface of the dummy.
  2. Mix a solution of mild soap and warm water in a bucket.
  3. Dip a clean cloth into the solution and wring out any excess water.
  4. Wipe down the surface of the dummy with the damp cloth, making sure to get into all the crevices and corners.
  5. Use a dry cloth to remove any excess water and allow the dummy to air dry completely before using it again.

Repair and Replacement

Even with proper maintenance, parts of your wooden dummy may become damaged over time. Here are some common issues and how to address them:

Loose Arms or Legs

If the arms or legs of your dummy become loose, you can fix them by tightening the screws that hold them in place. Use a screwdriver to tighten the screws until they are snug.

Cracks or Splits

If you notice any cracks or splits in the wood, you should address them immediately to prevent further damage. Use a wood filler to fill in the crack or split and sand it down until it is smooth. You can also apply a wood sealer to protect the repaired area.

Broken Arms or Legs

If an arm or leg of your dummy becomes broken, you may need to replace it. You can purchase replacement arms and legs online or from a martial arts supply store. Remove the damaged arm or leg and replace it with the new one, making sure to tighten the screws securely.

By following these simple steps, you can keep your wooden dummy in great condition and continue to use it as a valuable training tool.

How to Make Wooden Shelf Brackets: A Step-by-Step Guide

If you’re looking for a way to add some extra storage space to your home, making your own wooden shelf brackets is a great DIY project to take on. Not only is it a fun and rewarding task, but it also allows you to create a unique and personalized look for your shelves. Plus, making your own shelf brackets can be much more affordable than buying pre-made ones.

To get started, you’ll need some basic woodworking tools and materials such as a saw, drill, screws, and a sturdy piece of wood. The type of wood you choose will depend on your personal preference and the weight of the items you plan to store on your shelves. Pine and oak are popular choices for their durability and affordability. Once you have your materials, you can begin measuring and cutting your wood to the desired size for your brackets.

One of the great things about making your own wooden shelf brackets is that you can customize them to fit your specific needs and design preferences. You can choose from a variety of styles, such as simple and minimalist or more ornate and decorative. With a little creativity and some basic woodworking skills, you can create beautiful and functional shelf brackets that will add both style and storage to your home.

Understanding Wooden Shelf Brackets

Wooden shelf brackets are an essential component for any DIY shelf project. They are used to support the weight of the shelf and its contents. In this section, we will discuss what wooden shelf brackets are and the importance of using them in your DIY projects.

What are Wooden Shelf Brackets?

Wooden shelf brackets are support structures that are used to hold up shelves. They are typically made out of wood and come in a variety of sizes and styles. Wooden shelf brackets are designed to provide stability and support to shelves, preventing them from sagging or collapsing under the weight of their contents.

Importance of Wooden Shelf Brackets

Using wooden shelf brackets in your DIY projects is important for several reasons. Firstly, they provide stability and support to your shelves. Without them, your shelves would be more likely to sag or collapse under the weight of their contents.

Secondly, wooden shelf brackets can add aesthetic value to your shelves. They come in a variety of styles and can be painted or stained to match your decor. This allows you to create a custom look that complements your home’s style.

Lastly, wooden shelf brackets are relatively easy to install. With a few basic tools, you can attach them to your walls and have them ready to support your shelves in no time.

In summary, wooden shelf brackets are an important component for any DIY shelf project. They provide stability and support to your shelves, add aesthetic value, and are easy to install. When choosing wooden shelf brackets, be sure to select ones that are the right size and style for your project.

Materials Needed

If you’re looking to make wooden shelf brackets, you’ll need a few materials to get started. Here are the types of wood and essential tools you’ll need:

Types of Wood

Choosing the right type of wood is important when making shelf brackets. You want to choose a wood that is strong enough to support the weight of your shelves, but also one that is easy to work with. Here are some popular options:

  • Pine: Pine is a popular choice for shelf brackets because it is affordable and easy to work with. It has a light color and a straight grain, which makes it a good option if you want to stain or paint your brackets.
  • Oak: Oak is a strong and durable wood that is often used for furniture. It has a distinctive grain pattern and a warm color that can add character to your shelves.
  • Maple: Maple is a hard, dense wood that is known for its durability. It has a light color and a fine grain, which makes it a good option if you want a smooth finish on your brackets.

Essential Tools

In addition to wood, you’ll need a few essential tools to make your shelf brackets. Here are the tools you’ll need:

  • Circular Saw: A circular saw is a power tool that is used to cut wood. It is essential for cutting your wood to the right size.
  • Drill: A drill is used to make holes in your wood for screws and other hardware.
  • Sander: A sander is used to smooth out rough edges and surfaces on your wood.
  • Measuring Tape: You’ll need a measuring tape to measure your wood and make sure your brackets are the right size.
  • Screwdriver: A screwdriver is used to tighten screws and other hardware.

With these materials and tools, you’ll be well on your way to making your own wooden shelf brackets.

Choosing the Right Design

When it comes to making your own wooden shelf brackets, there are a variety of design options to choose from. Here are a few things to consider when choosing the right design for your project:

1. Functionality

The first thing to consider when choosing a design for your wooden shelf brackets is functionality. Think about what you will be using the shelves for and how much weight they will need to support. If you plan on storing heavy items, you will need to choose a design that is sturdy and can support the weight.

2. Aesthetic Appeal

The design of your wooden shelf brackets can also add to the aesthetic appeal of your space. Consider the style of your room and choose a design that complements it. For example, if you have a rustic or farmhouse-style room, you may want to choose a design that incorporates natural wood elements.

3. Level of Difficulty

Some designs may be more difficult to make than others, depending on your skill level and the tools you have available. If you are a beginner, you may want to choose a simpler design that is easier to make.

4. Materials

The type of wood you choose for your shelf brackets can also impact the design. Some woods are more durable and can support heavier weights, while others may be more affordable or have a more unique look.

Overall, choosing the right design for your wooden shelf brackets comes down to considering your needs, style preferences, and skill level. With the right design, you can create a functional and aesthetically pleasing addition to your space.

Creating Your Template

Before you start cutting your wood, you need to create a template for your shelf brackets. This will help ensure that all of your brackets are the same size and shape. Here are the steps to create your template:

  1. Measure your shelf: First, measure the width and depth of your shelf. This will help you determine the size of your brackets.

  2. Draw your template: Using a piece of cardboard or paper, draw the shape of your bracket. Make sure to include the length and width of your bracket, as well as any angles or curves you want to incorporate.

  3. Cut out your template: Once you have drawn your template, use scissors or a utility knife to cut it out. This will give you a physical representation of your bracket.

  4. Test your template: Hold your template up to your shelf to ensure that it fits properly. Make any necessary adjustments before moving on to the next step.

  5. Trace your template: Once your template is complete, use a pencil to trace it onto your wood. This will give you an outline to cut along.

By creating a template, you can ensure that your brackets are the correct size and shape for your shelf. It may take a little extra time upfront, but it will save you time and frustration in the long run.

Cutting the Brackets

Now that you have the measurements and design of your wooden shelf brackets, it’s time to start cutting them. Here are some tips to help you make clean and accurate cuts:

1. Choose the Right Saw

The type of saw you use will depend on the thickness of the wood and the angle of the cuts you need to make. A miter saw is ideal for making angled cuts, while a circular saw can be used for straight cuts. If you don’t have access to power tools, a hand saw can also do the job.

2. Mark Your Cuts

Before you start cutting, use a pencil and a ruler to mark the measurements on your wood. Double-check your measurements to avoid any mistakes. You can also use painter’s tape to mark the cuts and reduce the risk of splintering.

3. Use a Clamping System

To ensure that your wood stays in place while you cut it, use a clamping system. This can be a corner clamp, a bar clamp, or a bench vise. A clamping system will keep the wood steady and reduce the risk of injury.

4. Take Your Time

Don’t rush the cutting process. Take your time to make sure your cuts are accurate and clean. If you need to make multiple cuts, take breaks in between to avoid fatigue.

5. Sand the Edges

After you’ve made your cuts, use sandpaper to smooth out the edges. This will prevent splintering and make your brackets look more polished.

By following these tips, you can make clean and precise cuts for your wooden shelf brackets.

Sanding and Finishing

Sanding Process

Now that you have assembled your wooden shelf brackets, it’s time to sand them down to give them a smooth finish. Sanding is an essential step in the process of making wooden shelf brackets as it helps to remove any rough edges, splinters, or imperfections that may have occurred during the cutting and drilling process.

To start, use a coarse grit sandpaper (around 80 grit) to remove any rough edges or high spots. Then, switch to a finer grit (around 120 grit) to smooth out the surface of the brackets. Finally, use an even finer grit (around 220 grit) to give the brackets a nice, smooth finish.

Make sure to sand the brackets evenly and pay extra attention to any areas that may be more difficult to reach, such as corners or curves.

Applying Finish

Once you have sanded the brackets, it’s time to apply a finish. Finishing your wooden shelf brackets not only enhances their appearance but also protects them from wear and tear. There are many different types of finishes available, including stains, paints, and varnishes.

Before applying any finish, make sure to clean the brackets thoroughly to remove any dust or debris. Then, apply the finish evenly using a brush or cloth. Follow the manufacturer’s instructions for the specific finish you have chosen.

If you prefer a more natural look, you can also choose to leave the brackets unfinished. This will give them a rustic, raw look that can be quite charming.

Remember, the finish you choose will affect the overall look and durability of your wooden shelf brackets, so choose wisely.

Installation Process

Once you have built your wooden shelf brackets, it’s time to install them. Follow these simple steps to properly install your brackets and create beautiful, functional shelves.

Positioning the Brackets

The first step is to determine where you want to place your shelves. Use a level to ensure that they will be straight. Once you have determined the location, mark the spot where you want to install the brackets.

Next, measure the distance between the brackets and mark the location for the second bracket. Be sure to measure carefully to ensure that your shelves will be level and sturdy.

Securing the Brackets

Now it’s time to secure the brackets to the wall. Use a drill to make pilot holes for the screws. Make sure the holes are slightly smaller than the screws you will be using.

Once you have made the pilot holes, attach the brackets to the wall using screws. Be sure to use screws that are long enough to securely attach the brackets to the wall.

Finally, place your wooden shelves on top of the brackets and secure them in place using screws or brackets. Be sure to use screws that are the appropriate length for your shelves.

By following these simple steps, you can easily install your wooden shelf brackets and create beautiful, functional shelves that will last for years to come.

Maintenance Tips

To ensure the longevity of your wooden shelf brackets, it is important to perform regular maintenance. This will help to prevent any damage or wear and tear over time. Here are some tips to keep your wooden shelf brackets looking great:

Cleaning Wooden Shelf Brackets

Cleaning your wooden shelf brackets is simple and can be done using a few basic household items. Start by wiping down the brackets with a damp cloth to remove any dust or debris. Then, mix a solution of mild soap and warm water and use a soft-bristled brush or sponge to gently scrub the brackets. Be sure to rinse the brackets thoroughly with clean water and dry them with a soft cloth. Avoid using harsh chemicals or abrasive cleaners, as these can damage the wood.

Regular Inspection

Regularly inspecting your wooden shelf brackets is important to catch any issues early on. Check for any signs of wear and tear, such as cracks, splits, or warping. If you notice any damage, it is important to address it as soon as possible to prevent further damage. You can also inspect the brackets for any loose screws or hardware, and tighten them if necessary.

By following these simple maintenance tips, you can keep your wooden shelf brackets looking great for years to come. Regular cleaning and inspection will help to prevent any damage or wear and tear, and ensure that your shelves are safe and secure.

How to Make a Wooden Chest: A Beginner's Guide

To make a wooden chest, you will need some basic woodworking skills and tools. Whether you want to create a storage chest for blankets, toys, or other items, building your own wooden chest can be a fun and rewarding project. In this article, we will provide you with step-by-step instructions on how to make a wooden chest DIY style.

First, you will need to gather all the necessary materials and tools. This includes wood, screws, hinges, a saw, a drill, sandpaper, and wood glue. You can choose the type of wood you want to use based on your personal preference and budget. Once you have all the materials, you can start measuring and cutting the wood according to the dimensions of your desired chest.

Next, you will need to assemble the chest by attaching the sides, bottom, and lid together. You can use wood glue and screws to secure the pieces in place. After the chest is assembled, you can sand it down to make it smooth and apply a finish or paint if desired. With a little bit of patience and effort, you can create a beautiful and functional wooden chest that will last for years to come.

Understanding the Basics of Woodworking

Woodworking is a fun and rewarding hobby that allows you to create beautiful and functional objects out of wood. However, it is important to understand the basics of woodworking before you start any project. In this section, we will cover two important aspects of woodworking: choosing the right wood and safety measures.

Choosing the Right Wood

Choosing the right wood is crucial for any woodworking project. Here are some factors to consider when selecting wood:

  • Type of Wood: There are many types of wood available, each with its own unique characteristics. Some common types of wood used in woodworking include oak, maple, cherry, and pine. Consider the color, grain pattern, and hardness of the wood when making your selection.

  • Moisture Content: The moisture content of the wood is important because it affects how the wood will behave during the woodworking process. Wood that is too wet or too dry can be difficult to work with. It is best to use wood with a moisture content between 6% and 8%.

  • Grade: Wood is graded based on its quality and appearance. Select the grade that is appropriate for your project. For example, if you are making a rustic piece of furniture, you may want to use lower-grade wood with knots and other imperfections.

Safety Measures in Woodworking

Woodworking can be dangerous if proper safety measures are not taken. Here are some important safety tips to keep in mind:

  • Wear Safety Gear: Always wear safety goggles, ear protection, and a dust mask when working with wood. Wear gloves to protect your hands and avoid loose clothing that can get caught in machinery.

  • Use Sharp Tools: Dull tools are more dangerous than sharp tools because they require more force to use. Keep your tools sharp and in good condition.

  • Use Machinery Safely: Follow the manufacturer’s instructions when using machinery. Keep your hands and fingers away from moving parts, and never reach over or under a machine while it is running.

By following these basic guidelines, you can ensure that your woodworking projects are safe and successful.

Required Tools for Making a Wooden Chest

When making a wooden chest, you will need several tools to help you complete the project. Here are the basic tools you will need to make a wooden chest.

Measuring Tools

Before you begin making a wooden chest, you need to make sure that you have the right measurements. Here are some measuring tools you will need:

  • Tape measure
  • Combination square
  • Carpenter’s square
  • Marking gauge
  • Pencil

Cutting Tools

Once you have the right measurements, you will need to cut the wood to size. Here are some cutting tools you will need:

  • Circular saw
  • Table saw
  • Hand saw
  • Jigsaw
  • Miter saw

Joinery Tools

Joinery tools help you to join the pieces of wood together. Here are some joinery tools you will need:

  • Hammer
  • Chisels
  • Screwdrivers
  • Nails
  • Screws

Having the right tools is essential to making a wooden chest. Make sure that you have all the necessary tools before starting your project.

Designing Your Wooden Chest

When it comes to designing your wooden chest, there are a few key things to consider. In this section, we will go over how to determine the size of your chest and how to sketch out your design.

Determining the Size

The size of your wooden chest will largely depend on what you plan to use it for. If you are using it as a toy box or for storing blankets, you may want to make it larger. If you are using it for smaller items like jewelry or keepsakes, you may want to make it smaller.

One way to determine the size of your chest is to measure the items you plan to store in it. This will give you a good idea of how much space you will need. You can also consider the space where you plan to keep the chest and make sure it fits comfortably in that area.

Sketching the Design

Once you have determined the size of your chest, it’s time to sketch out your design. You can use graph paper to help you create a to-scale drawing of your chest. This will help you visualize what the finished product will look like and make it easier to make any necessary adjustments.

When sketching your design, consider the following:

  • The overall shape of the chest
  • The placement of any handles or hinges
  • The type of wood you plan to use
  • Any decorative elements you want to include

Keep in mind that the design of your chest should be both functional and aesthetically pleasing. You want to create a piece that is not only useful but also looks great in your home.

By taking the time to carefully consider the size and design of your wooden chest, you can create a beautiful and functional piece that will last for years to come.

Preparing the Wood

Before you start building your wooden chest, it’s important to prepare the wood properly. This will ensure that your final product looks great and is sturdy enough to last for years to come. In this section, we’ll go over the two main steps in preparing the wood: cutting and sanding.

Cutting the Wood

The first step in preparing the wood is cutting it to the right size. You’ll need to measure and mark the wood according to your plans, and then use a saw to make the cuts. Here are a few tips to keep in mind:

  • Use a sharp saw: A dull saw will make rough cuts and may damage the wood. Make sure your saw is sharp before you start cutting.
  • Measure twice, cut once: Double-check your measurements before you start cutting to avoid mistakes.
  • Cut slowly and carefully: Take your time when cutting to ensure that your cuts are straight and accurate.

Sanding the Wood

Once you’ve cut the wood to size, it’s time to sand it. Sanding will smooth out any rough edges and prepare the wood for staining or painting. Here’s what you need to know:

  • Start with coarse sandpaper: Use a coarse sandpaper (around 80-100 grit) to remove any rough spots or splinters.
  • Move to finer sandpaper: Once the rough spots are gone, switch to a finer sandpaper (around 150-200 grit) to smooth out the wood.
  • Sand with the grain: Always sand with the grain of the wood to avoid scratches and to ensure a smooth finish.
  • Use a sanding block: A sanding block will help you apply even pressure and ensure that your sanding is consistent.

By following these steps, you’ll be able to prepare your wood for building a beautiful and sturdy wooden chest.

Assembling the Wooden Chest

Now that you have all the pieces cut, sanded, and stained, it’s time to put the wooden chest together. This section will guide you through the process of assembling the chest.

Joining the Pieces

First, you need to join the sides of the chest to the front and back panels. Apply wood glue to the edges of the front and back panels and attach them to the sides. Use clamps to hold the pieces together while the glue dries.

Next, you can attach the base of the chest. Apply glue to the bottom edges of the chest sides and attach the base. You can also use screws to secure the base to the sides.

Installing the Lid

Now it’s time to install the lid of the chest. Attach the hinges to the back of the lid and the back of the chest. Make sure the hinges are evenly spaced and level. Once the hinges are attached, you can attach the lid to the chest.

If you want to add a handle to the lid, now is the time to do so. You can use a metal handle or make your own out of wood. To attach the handle, drill holes in the lid and attach the handle with screws.

Congratulations! Your wooden chest is now assembled and ready to use.

Finishing Touches

Once you have completed building your wooden chest, it’s time to apply the finishing touches. This will not only enhance the appearance of your chest but also protect it from wear and tear. In this section, we will discuss the two essential finishing touches: Applying the Finish and Adding Hardware.

Applying the Finish

Before applying the finish, make sure that the surface of your chest is smooth and free of any dust or debris. You can use a sandpaper to sand the surface of your chest until it’s smooth. Once you have done that, you can apply the finish of your choice. There are several types of finishes available, including paint, stain, and varnish.

If you want to paint your chest, make sure that you use a paint that is suitable for wood. You can also use a primer to ensure that the paint adheres to the surface of your chest. If you want to stain your chest, choose a stain that is suitable for the type of wood you have used. Apply the stain with a brush and wipe off any excess stain with a cloth. If you want to use varnish, apply it in thin coats with a brush and let it dry completely before applying another coat.

Adding Hardware

Adding hardware to your wooden chest can enhance its appearance and make it more functional. You can use handles, hinges, locks, and other hardware to add character and functionality to your chest. When choosing hardware, make sure that it is suitable for the size and weight of your chest.

To attach handles, mark the position where you want to attach them and drill holes in the marked position. Insert the screws through the holes and attach the handles. For hinges, mark the position where you want to attach them and drill pilot holes. Attach the hinges with screws and make sure that they are aligned properly. For locks, mark the position where you want to attach them and drill holes for the lock mechanism. Attach the lock mechanism and the keyhole plate with screws.

In conclusion, applying the finish and adding hardware are essential finishing touches that can enhance the appearance and functionality of your wooden chest. By following these simple steps, you can create a beautiful and functional wooden chest that will last for years to come.