Tag Archives: hang string lights

planning-your-wooden-trellis

How to Build a Wooden Trellis: A Step-by-Step Guide

Looking to add some height and interest to your garden? A wooden trellis is a great way to support climbing plants and create a beautiful focal point in your outdoor space. With a few basic tools and materials, building a wooden trellis can be a fun and rewarding DIY project.

When it comes to building a wooden trellis, there are a variety of designs and styles to choose from. Some trellises are designed to stand alone, while others can be attached to a wall or fence. You can also choose from a range of materials, including cedar, pine, and redwood, depending on your budget and desired aesthetic. Whether you’re a seasoned woodworker or a beginner, building a wooden trellis is a project that can be customized to fit your skill level and design preferences.

In this article, we’ll walk you through the steps to build a basic wooden trellis, as well as provide some inspiration for more advanced designs. From choosing the right materials to adding decorative touches, we’ll cover everything you need to know to create a beautiful and functional trellis for your garden. So grab your tools and let’s get started!

Understanding the Basic Design of a Wooden Trellis
how-to-build-a-wooden-trellis-a-step-by-step-guide-2

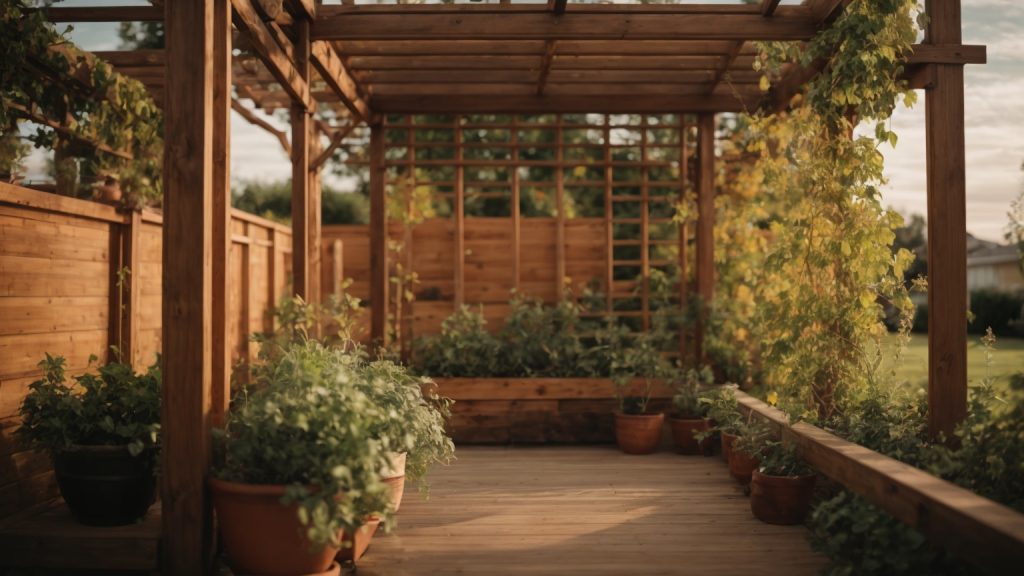
If you’re looking to add a touch of elegance to your garden or outdoor space, a wooden trellis is a perfect addition. Not only do they provide a beautiful aesthetic, but they also serve a functional purpose as support for climbing plants. In this section, we’ll go over the basic design of a wooden trellis, including the types of wooden trellis and key components.

Types of Wooden Trellis

There are several types of wooden trellises that you can choose from depending on your preference and the plants you are looking to support. Here are a few common types:

  • Lattice trellis: This type of trellis features a crisscross pattern and is perfect for climbing plants like ivy or roses.
  • Fan trellis: This trellis has a fan-like shape and is ideal for training climbing plants against a wall or fence.
  • Obelisk trellis: This trellis is a tall, pyramid-shaped structure that is perfect for supporting climbing plants like clematis or morning glory.

Key Components of a Wooden Trellis

Regardless of the type of wooden trellis you choose, there are some key components that all trellises should have. Here are the basic components of a wooden trellis:

  • Frame: The frame is the backbone of the trellis and provides the structure that supports the climbing plants. The frame can be made from a variety of materials, but wood is the most common.
  • Lattice: The lattice is the crisscross pattern that provides the climbing plants with support. The lattice can be made from wood or other materials like wire or plastic.
  • Posts: The posts are the vertical supports that hold the trellis in place. The number of posts you need will depend on the size of your trellis and the weight of the climbing plants you plan to support.
  • Crosspieces: Crosspieces are horizontal pieces of wood that connect the posts and provide additional support for the lattice.

By understanding the basic design of a wooden trellis, you can create a beautiful and functional addition to your outdoor space. Whether you choose a lattice, fan, or obelisk trellis, make sure to include all of the key components for a sturdy and reliable structure.

Choosing the Right Materials

When building a wooden trellis, choosing the right materials is crucial to ensure the longevity of your structure. In this section, we’ll discuss the types of wood you can use and the essential tools and equipment you’ll need.

Types of Wood

When selecting wood for your trellis, it’s important to choose a type of wood that is resistant to rot and decay. Cedar and redwood are excellent options due to their natural resistance to water and insects. Pine and spruce are also good choices, but they will need to be treated with a wood preservative to prevent rotting.

Here’s a breakdown of the different types of wood you can use for your trellis:

Wood Type Pros Cons
Cedar Naturally resistant to water and insects, lightweight, easy to work with Expensive
Redwood Naturally resistant to water and insects, durable, attractive Expensive
Pine Affordable, widely available, easy to work with Prone to rotting and decay
Spruce Affordable, widely available, easy to work with Prone to rotting and decay

Essential Tools and Equipment

To build a wooden trellis, you’ll need a few essential tools and equipment. Here’s a list of what you’ll need:

  • Circular saw or handsaw
  • Drill
  • Screwdriver
  • Wood screws
  • Wood glue
  • Clamps
  • Tape measure
  • Pencil
  • Safety goggles
  • Work gloves

It’s important to wear safety goggles and work gloves when working with wood to protect your eyes and hands. Clamps are also helpful to hold pieces of wood in place while you drill and screw them together.

In summary, when building a wooden trellis, it’s important to choose a type of wood that is resistant to rot and decay, such as cedar or redwood. You’ll also need essential tools and equipment, including a circular saw or handsaw, drill, screwdriver, wood screws, wood glue, clamps, tape measure, pencil, safety goggles, and work gloves.

Planning Your Wooden Trellis

planning-your-wooden-trellis

Before you start building your wooden trellis, it’s important to plan out the size and shape of the trellis. By doing so, you’ll be able to determine the amount of materials you’ll need and ensure that the finished product will fit your specific needs.

Deciding the Size and Shape

The first step in planning your wooden trellis is to decide the size and shape of the trellis. Consider the following factors:

  • The height and width of the plants you’ll be growing on the trellis
  • The amount of space you have available for the trellis
  • The desired aesthetic of the trellis

Once you have these factors in mind, you can begin to sketch out a rough design of the trellis. You can use graph paper or a computer program to create a blueprint of the trellis.

Creating a Blueprint

Creating a blueprint of your wooden trellis will help you visualize the finished product and ensure that you have all the materials you need before you start building. Here are some tips for creating a blueprint:

  • Start by drawing the outline of the trellis, including the height and width.
  • Determine the spacing of the slats or lattice work. This will depend on the size of the plants you’ll be growing on the trellis.
  • Decide on the type of wood you’ll be using for the trellis and calculate the amount of wood needed for the project.
  • Consider adding decorative elements to the trellis, such as finials or decorative cutouts.

Once you have a blueprint of your wooden trellis, you’re ready to start building. By taking the time to plan out your trellis, you’ll be able to create a beautiful and functional addition to your garden.

Building the Wooden Trellis

If you want to build a wooden trellis, you’ll need to prepare the wood, assemble the structure, and secure it in place. Here’s how to do it:

Preparing the Wood

Before you start building your trellis, you’ll need to prepare the wood. You can use any type of wood, but cedar and redwood are popular choices because they’re naturally resistant to rot and insects. Here’s what you’ll need to do:

  1. Measure and cut your wood to the desired length and width using a saw. Make sure your cuts are straight and accurate.
  2. Sand the edges of your wood to smooth out any rough spots or splinters.
  3. Apply a wood preservative or sealant to protect your wood from moisture and decay.

Assembling the Trellis

Once your wood is prepared, you can start assembling your trellis. Here’s how to do it:

  1. Lay out your pieces of wood on a flat surface. Arrange them in the shape of your trellis, making sure everything lines up evenly.
  2. Use wood screws or nails to attach your pieces of wood together. Make sure your screws or nails are long enough to penetrate both pieces of wood and hold them securely in place.
  3. Add any decorative elements, such as lattice or trim, to your trellis.

Securing the Structure

Now that your trellis is assembled, you’ll need to secure it in place. Here’s how to do it:

  1. Choose a location for your trellis. Make sure it’s in a spot that gets plenty of sunlight and is easily accessible.
  2. Dig two holes for your trellis posts. The holes should be deep enough to support the height of your trellis and wide enough to accommodate your post holders.
  3. Place your post holders in the holes and fill them with concrete. Make sure your post holders are level and secure.
  4. Slide your trellis posts into the post holders and secure them with screws or bolts.

And that’s it! Your wooden trellis is now ready to support your climbing plants and add a beautiful touch to your garden.

Maintaining Your Wooden Trellis

To ensure that your wooden trellis lasts for years to come, it’s important to perform regular maintenance. This includes inspecting your trellis for damage and cleaning it as needed. Here are some tips for maintaining your wooden trellis:

Regular Inspection

It’s important to inspect your wooden trellis regularly to catch any damage early on. This will help prevent further damage and prolong the life of your trellis. Here’s what to look for during your inspection:

  • Check for any signs of rot or decay in the wood.
  • Look for any loose or missing screws, bolts, or nails.
  • Check for any cracks or splits in the wood.
  • Look for any signs of insect damage, such as holes or sawdust.

If you notice any damage during your inspection, it’s important to address it as soon as possible to prevent further damage.

Cleaning and Repairs

Cleaning your wooden trellis will help remove dirt, grime, and other debris that can accumulate over time. Here’s how to clean your trellis:

  1. Use a soft-bristled brush to remove any loose dirt or debris.
  2. Mix a solution of mild soap and water.
  3. Dip a clean cloth or sponge into the solution and use it to gently scrub the trellis.
  4. Rinse the trellis thoroughly with clean water.
  5. Allow the trellis to dry completely before applying any treatments or making repairs.

If you notice any damage during your inspection, such as rot or cracks, it’s important to make repairs as soon as possible. Here’s how to make repairs to your wooden trellis:

  1. Use a wood filler to fill any cracks or splits in the wood.
  2. Sand the repaired area until it’s smooth and level with the surrounding wood.
  3. Apply a wood sealer or preservative to the repaired area to help protect it from further damage.

By performing regular maintenance on your wooden trellis, you can help ensure that it lasts for years to come.

Customizing Your Wooden Trellis

Once you’ve built your wooden trellis, you can customize it to fit your personal style and garden needs. Here are some ideas to get you started:

Painting and Finishing

One way to customize your trellis is by painting or staining it. This not only adds color and personality to your garden, but also helps protect the wood from weather and insects. Here are some tips for painting and finishing your trellis:

  • Choose an exterior-grade paint or stain that is safe for plants and animals.
  • Apply a primer before painting to help the paint adhere better and last longer.
  • Consider using a clear sealant to protect the wood and add shine.
  • Don’t forget to paint or stain the back of the trellis as well to ensure complete protection.

Adding Decorative Elements

Another way to customize your trellis is by adding decorative elements. This can be as simple as hanging a potted plant or as elaborate as attaching metal sculptures. Here are some ideas for adding decorative elements to your trellis:

  • Hang string lights or lanterns to create a cozy atmosphere in your garden.
  • Attach small shelves or hooks to hold plants, tools, or other decorations.
  • Use decorative brackets or corbels to add a touch of elegance to your trellis.
  • Install a mirror or stained glass panel to reflect light and add interest.

Remember, the possibilities are endless when it comes to customizing your wooden trellis. Get creative and have fun!
build-a-wooden-arch

How to Build a Wooden Arch: A Step-by-Step Guide

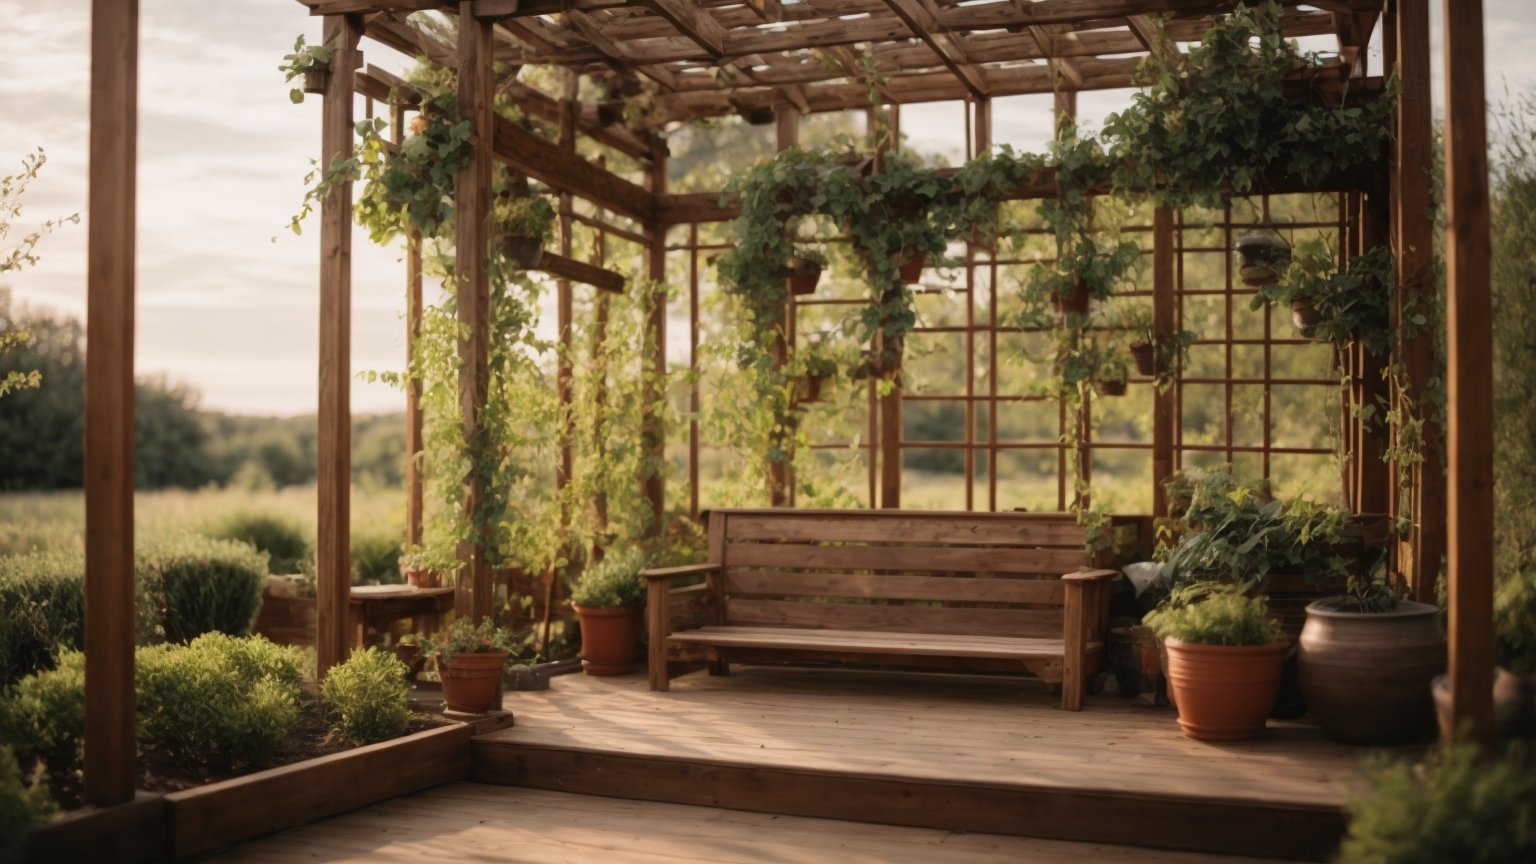
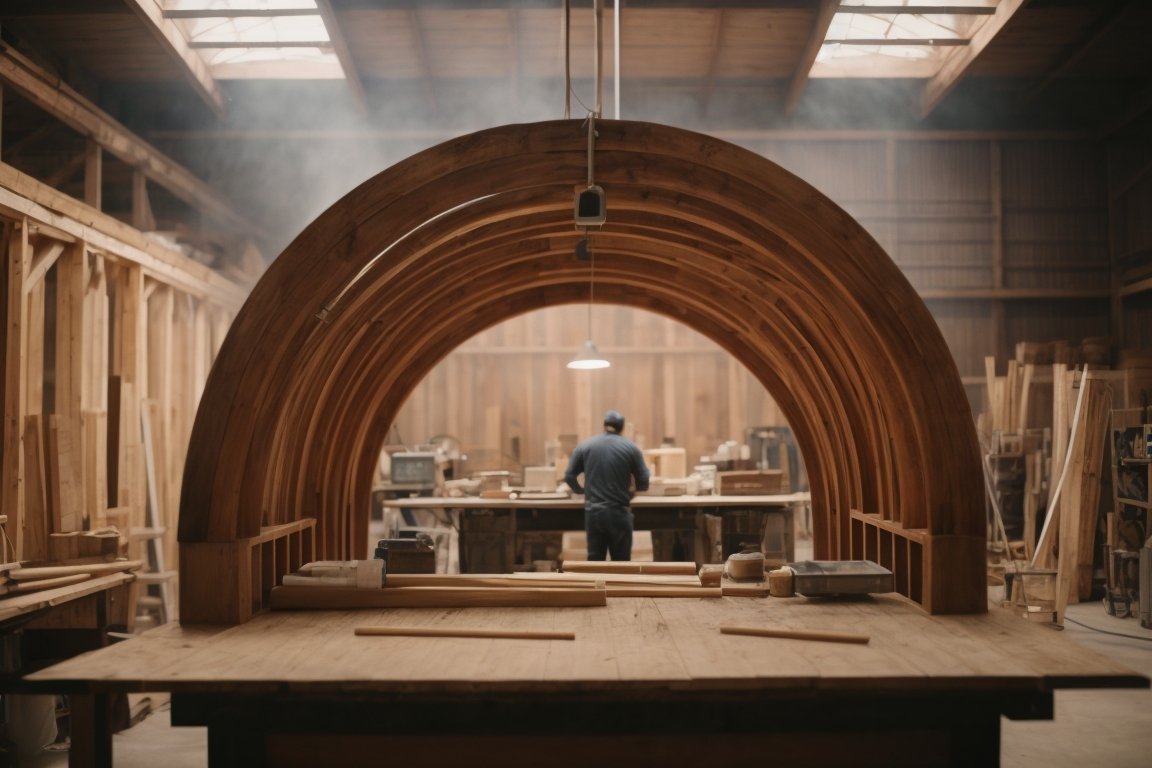
If you’re looking to add a touch of elegance to your garden or backyard, building a wooden arch is a great way to do it. Not only does it add a beautiful focal point to your outdoor space, but it can also serve as a support for climbing plants like roses, ivy, and wisteria. In this article, we’ll go over the steps involved in building a wooden arch so that you can create a stunning addition to your garden.

The first step in building a wooden arch is to gather the necessary tools and materials. You’ll need plywood sheets, a circular saw, a cordless drill, a posthole digger, safety glasses, and other tools depending on the design you choose. Once you have everything you need, you can start building the arch.

The process of building a wooden arch involves cutting and shaping the plywood sheets into the desired shape, assembling the arch, and securing it in place. Depending on the design you choose, you may also need to add additional support structures like posts or braces. With a little patience and some basic woodworking skills, you can create a beautiful wooden arch that will enhance the look of your garden or backyard.

Understanding the Basics of a Wooden Arch

build-a-wooden-arch

If you’re looking to add a touch of elegance to your garden or outdoor space, a wooden arch is a great way to do it. Wooden arches are easy to build and can be customized to fit any style or design. In this section, we’ll cover the basics of building a wooden arch, including the importance of wood type and arch design principles.

Importance of Wood Type

When it comes to building a wooden arch, the type of wood you use is crucial. You want to choose a wood that is strong and durable enough to withstand the elements and support the weight of the arch. Some of the best types of wood for building a wooden arch include:

  • Cedar: Cedar is a popular choice for building outdoor structures because it is naturally resistant to rot and insect damage. It is also lightweight and easy to work with.
  • Redwood: Redwood is another popular choice for outdoor structures because it is naturally resistant to decay and insect damage. It is also strong and durable, making it a great choice for building a wooden arch.
  • Pressure-treated pine: Pressure-treated pine is a cost-effective option for building a wooden arch. It is treated with chemicals to make it resistant to rot and insect damage, but it is important to note that these chemicals can be harmful to the environment.

Arch Design Principles

When it comes to designing your wooden arch, there are a few key principles to keep in mind:

  • Height: The height of your arch will depend on its intended use. If you’re building an arch to frame a garden path, a height of 7 feet is usually sufficient. If you’re building an arch for a wedding or other special event, you may want to go taller.
  • Width: The width of your arch will depend on the size of the space you’re working with. A width of 4-5 feet is usually sufficient for a garden path. If you’re building an arch for a wedding or other special event, you may want to go wider.
  • Shape: The shape of your arch will depend on your personal preference. Some popular shapes include a classic gothic arch, a rounded arch, and a flat arch.
  • Bracing: It’s important to include bracing in your design to ensure that your arch is stable and secure. Bracing can be added to the sides or the back of the arch, depending on the design.

By keeping these design principles in mind and choosing the right type of wood, you can build a beautiful and functional wooden arch that will add a touch of elegance to your outdoor space.

Materials and Tools Required

When it comes to building a wooden arch, having the right materials and tools is essential. Here are the things you’ll need to get started:

Choosing the Right Wood

The first step in building a wooden arch is to choose the right type of wood. You’ll want to select wood that is strong, durable, and able to withstand the elements. Some good options include:

  • Cedar: This is a popular choice for outdoor projects because it is naturally resistant to rot and decay.
  • Redwood: This is another durable option that is resistant to insects and decay.
  • Pressure-treated lumber: This type of wood is treated with chemicals to resist rot, insects, and decay.

Before you start building, make sure to inspect your wood for any defects or damage. You’ll want to avoid using any wood that is warped, cracked, or has knots that could weaken the structure.

Essential Tools

To build a wooden arch, you’ll need a few essential tools:

  • Circular saw: This will be used to cut your wood to size.
  • Drill: You’ll need a drill to make holes for screws and bolts.
  • Jigsaw: This tool is useful for cutting curved shapes in your wood.
  • Screwdriver: You’ll need a screwdriver to tighten screws and bolts.
  • Clamps: These will help hold your wood in place while you work.
  • Measuring tape: You’ll need to measure your wood to ensure it is cut to the correct size.
  • Pencil: This will be used to mark your wood before cutting.
  • Safety gear: Make sure to wear safety glasses and gloves to protect yourself while working with power tools.

Having the right materials and tools is crucial to building a wooden arch that is strong and durable. With the right materials and a little bit of know-how, you’ll be able to create a beautiful arch that will last for years to come.

Creating Your Arch Design

creating-your-arch-design

Designing your wooden arch is an important step that will determine the final look and functionality of your arch. In this section, we will go over the steps to create your arch design.

Drawing the Arch Blueprint

Before you start building your arch, you need to create a blueprint. This will help you visualize the final product and make any necessary adjustments before you start building.

To create your blueprint, you can use a pencil and paper or a computer-aided design (CAD) program. Draw the arch shape you want and make sure to include the height, width, and depth of the arch. You can also add any decorative elements you want to include, such as carvings or cutouts.

Determining the Arch Dimensions

Once you have your blueprint, you need to determine the dimensions of your arch. This will depend on the size of the space where you want to install the arch and the purpose of the arch.

To determine the dimensions, measure the height and width of the space where you want to install the arch. Make sure to add a few extra inches to the measurements to ensure a proper fit. You also need to consider the purpose of the arch. If it is for decoration, you may want to make it smaller. If it is for a garden or walkway, you may want to make it larger to accommodate people walking underneath.

After you have determined the dimensions, you can start selecting the materials you will need to build your arch. Make sure to choose high-quality wood that is sturdy and durable. You can also choose to add a finish to your arch, such as paint or stain, to protect it from the elements and enhance its appearance.

By following these steps, you can create a beautiful and functional wooden arch that will enhance the look of your garden or walkway.

Preparing the Wood

Before building a wooden arch, it is important to properly prepare the wood to ensure a sturdy and long-lasting structure. This section will cover two key steps in preparing the wood: cutting and sanding.

Cutting the Wood

To begin, you will need to cut the wood to the appropriate length and shape. This will depend on the specific design of your arch. It is important to use a circular saw or jigsaw to make precise cuts. A framing square or combination square can be used to ensure that the cuts are straight and accurate.

To make curved cuts, a router can be used to create a smooth and consistent shape. Alternatively, a template can be used to guide the saw or jigsaw along the desired curve.

Sanding the Wood

Once the wood is cut to the appropriate size and shape, it is important to sand it to remove any rough edges or splinters. This will also help to create a smooth and even surface for painting or staining.

Start with a coarse sandpaper, such as 80-grit, and gradually work your way up to a finer grit, such as 220-grit. Sand in the direction of the grain to avoid damaging the wood.

After sanding, wipe the wood down with a damp cloth to remove any dust or debris. This will ensure that the surface is clean and ready for finishing.

By properly preparing the wood through cutting and sanding, you can ensure that your wooden arch will be strong, durable, and visually appealing.

Assembling the Arch

After cutting the arch pieces, it’s time to assemble them. This section will guide you through the process of joining and securing the arch structure.

Joining the Arch Pieces

To join the arch pieces, you will need wood glue and clamps. Here are the steps to follow:

  1. Apply wood glue on the mating surfaces of the arch pieces.
  2. Join the arch pieces together to form the arch shape.
  3. Use clamps to hold the arch pieces together while the glue dries.
  4. Wipe off any excess glue with a damp cloth.

Securing the Arch Structure

Once the glue has dried, it’s time to secure the arch structure. You will need screws and a drill. Here are the steps to follow:

  1. Drill pilot holes through the arch pieces where you want to place the screws.
  2. Insert screws through the pilot holes and into the mating arch piece.
  3. Tighten the screws until the arch pieces are securely fastened together.

It’s important to note that you should not over-tighten the screws as it can cause the wood to split. Also, make sure the screws are evenly spaced and aligned to ensure a strong and stable arch structure.

Congratulations! You have successfully assembled your wooden arch. In the next section, we will cover how to finish and decorate your arch.

Finishing Touches

Now that you have built your wooden arch, it’s time to add the finishing touches to make it truly stand out. Here are a few suggestions on how to add some personality and style to your arch.

Applying Wood Stain

One way to enhance the natural beauty of your wooden arch is by applying wood stain. Not only does it add color, but it also helps protect the wood from weather damage. Before applying the stain, make sure the wood is clean and dry. You can use a brush, roller, or spray gun to apply the stain. Follow the manufacturer’s instructions for the best results. Once the stain is dry, you can add a clear coat of polyurethane to protect the wood further.

Adding Decorative Elements

Another way to make your wooden arch unique is by adding decorative elements. Here are a few ideas:

  • Hang string lights or lanterns from the arch for a romantic ambiance.
  • Add floral arrangements or garlands to the arch for a natural and whimsical look.
  • Attach a sign or banner to the arch for a personalized touch.

Remember to choose elements that complement the overall style and purpose of your arch. With a little creativity, you can turn your wooden arch into a stunning focal point in your garden or outdoor space.

That’s it! Your wooden arch is now complete, and it’s ready to be enjoyed for years to come.

Maintenance Tips for Wooden Arch

Maintaining your wooden arch is essential to ensure it lasts for years to come. Here are some tips to help you keep your wooden arch in top condition:

1. Regular Cleaning

Regular cleaning is important to prevent dirt and debris from accumulating on the arch. Use a soft-bristled brush or a cloth to wipe away any dirt or dust. If there are any stubborn stains, use a mild soap solution and a soft brush to clean the arch. Rinse the arch with water and let it dry completely before applying any finish.

2. Apply a Protective Finish

Applying a protective finish to your wooden arch can help prevent moisture damage and protect it from the elements. You can use a clear coat or a stain that matches the color of your arch. Apply the finish according to the manufacturer’s instructions and allow it to dry completely before using the arch.

3. Inspect for Damage

Inspect your wooden arch regularly for any signs of damage such as cracks, splits, or warping. If you notice any damage, address it immediately to prevent further damage. Replace any damaged parts or contact a professional for repairs.

4. Store Properly

If you need to store your wooden arch for an extended period, make sure to store it in a dry and cool place. Cover the arch with a tarp or a sheet to protect it from dust and debris. Avoid storing the arch in direct sunlight or near sources of heat.

Taking care of your wooden arch can help prolong its life and keep it looking beautiful for years to come. By following these maintenance tips, you can ensure that your wooden arch remains a stunning addition to your garden or yard.

How to Make a Wooden Pallet Couch: A DIY Guide

Making a wooden pallet couch is a great way to add a unique and stylish piece of furniture to your home without breaking the bank. Pallets are readily available and can often be found for free, making them an affordable option for DIY projects. Plus, repurposing pallets is an eco-friendly way to reduce waste and create something new and useful.

To get started, you’ll need to gather your materials. You’ll need pallets, screws, a saw, sandpaper, and foam cushions. Once you have your materials, you can begin by disassembling the pallets and cutting the wood to size. Sand the wood to remove any rough edges or splinters, and then assemble the pieces into the frame of your couch. Finally, add the cushions and any finishing touches to complete your project.

Understanding the Basics of a Pallet Couch

If you’re looking for a unique and affordable way to furnish your living space, a wooden pallet couch might be the perfect solution. Building your own pallet couch can be a fun and rewarding DIY project, but it’s important to understand the basics before you get started.

Types of Wood

When it comes to building a pallet couch, the type of wood you choose is crucial. Pallets can be made from a variety of different woods, including pine, oak, and cedar. Pine is a popular choice because it’s inexpensive and readily available, but it’s also a softwood that can be prone to splitting and warping over time. Oak and cedar, on the other hand, are hardwoods that are more durable and resistant to weathering.

Before you start building your pallet couch, it’s important to inspect the pallets you’ll be using. Look for pallets that are in good condition, with no signs of rot or insect damage. You should also avoid pallets that have been treated with chemicals, as these can be harmful to your health.

Safety Measures

Building a pallet couch can be a fun and rewarding project, but it’s important to take safety precautions to avoid injury. Here are some tips to keep in mind:

  • Wear protective gear, such as gloves and safety glasses, when handling pallets.
  • Use a saw with a fine-toothed blade to avoid splintering the wood.
  • Sand the pallets thoroughly to remove any rough edges or splinters.
  • Use a drill to secure the pallets together, rather than nails, which can split the wood.
  • Make sure your finished pallet couch is stable and won’t tip over.

By following these basic guidelines, you can build a safe and sturdy wooden pallet couch that will add a unique touch to your living space.

Gathering Necessary Tools

Before you begin building your wooden pallet couch, it is important to gather all the necessary tools. Having the right tools will make the process smoother and more efficient. In this section, we will discuss the measuring tools, cutting tools, and fastening tools you will need for this project.

Measuring Tools

Accurate measurements are crucial when building a wooden pallet couch. The following measuring tools will come in handy:

  • Tape measure
  • Combination square
  • Carpenter’s square

Cutting Tools

Cutting the pallets to the right size is an important step in building a wooden pallet couch. The following cutting tools will be useful:

  • Circular saw
  • Hand saw
  • Jigsaw

Fastening Tools

To hold the pallets together, you will need the right fastening tools. The following tools will be useful:

  • Drill
  • Screws
  • Nails
  • Hammer

It is important to note that the type and size of screws or nails you use will depend on the type of wood used for the pallets. Make sure to choose the right fastening tools for your project.

With these measuring, cutting, and fastening tools, you will be well-equipped to build your own wooden pallet couch. Make sure to have all the necessary tools on hand before you begin the project to ensure a smooth and successful build.

Finding the Right Pallets

When making a wooden pallet couch, finding the right pallets is crucial. Here are some things to consider when selecting pallets for your project.

Pallet Size

The size of the pallets you choose will depend on the size of the couch you want to make. Standard pallets are usually around 48 inches by 40 inches. However, you can find pallets in a variety of sizes. Consider the dimensions of your space and the size of the cushions you plan to use when selecting pallets.

Pallet Condition

The condition of the pallets is also important. You want to make sure that the pallets you choose are sturdy and in good condition. Here are some things to look for when selecting pallets:

  • No broken or cracked boards
  • No signs of insect infestation
  • No signs of mold or mildew

It’s also a good idea to look for pallets that have been heat treated rather than chemically treated. Heat-treated pallets are safer for indoor use and do not contain harmful chemicals.

When selecting pallets, it’s important to keep in mind that you may need to do some sanding and cleaning before using them for your couch. However, with a little bit of effort, you can find the perfect pallets for your project.

Preparing the Pallets

Before you start building your wooden pallet couch, you need to prepare the pallets. This involves cleaning, sanding, and cutting the pallets to the desired size.

Cleaning

The first step in preparing the pallets is to clean them. Pallets are often used for shipping and can be dirty or covered in debris. To clean the pallets, use a stiff-bristled brush to remove any dirt or debris. You can also use a pressure washer if you have one available.

After cleaning, inspect the pallets for any nails or staples that may be sticking out. These can be dangerous and should be removed or hammered down.

Sanding

Once the pallets are clean, the next step is to sand them. Sanding will remove any rough spots or splinters on the pallets. Use a medium-grit sandpaper to sand the pallets, starting with the rougher areas and working your way to the smoother areas.

After sanding, wipe the pallets down with a damp cloth to remove any dust or debris.

Cutting

The final step in preparing the pallets is cutting them to the desired size. Use a circular saw to cut the pallets to the desired length and width. Be sure to measure carefully and wear safety goggles and gloves while cutting.

Once the pallets are cut, inspect them for any rough edges or splinters and sand them down if necessary.

By cleaning, sanding, and cutting the pallets, you will have a solid foundation for building your wooden pallet couch.

Assembling the Couch

Once you have all the materials and tools ready, it’s time to start assembling your wooden pallet couch. This section will guide you through the process step by step.

Building the Frame

The first step is to build the frame of the couch. Start by laying out the pallets on the ground, and arrange them in a rectangular shape to form the base of the couch. Make sure to align the pallets properly and use screws to secure them together.

Next, attach the legs to the corners of the frame. You can use either pre-made legs or make your own using scrap wood. To attach the legs, drill pilot holes and then screw them into the corners of the frame.

Adding the Seating Area

Once the frame is complete, it’s time to add the seating area. Start by measuring the dimensions of the frame, and then cut the plywood to fit the dimensions. Place the plywood on top of the frame, and then add foam padding on top of the plywood.

To cover the foam, you can use either fabric or leather. Cut the fabric/leather to fit the dimensions of the seating area, and then staple it to the plywood. Make sure to pull the fabric/leather tight to avoid any wrinkles or sagging.

Securing the Backrest

The final step is to secure the backrest to the frame. To do this, you can use either more pallets or scrap wood. Measure the height and width of the backrest, and then cut the wood/pallets to fit those dimensions.

Attach the backrest to the frame using screws, and then add foam padding and fabric/leather to cover it. Make sure to pull the fabric/leather tight to avoid any wrinkles or sagging.

Congratulations, you have now assembled your own wooden pallet couch!

Adding Finishing Touches

Once you’ve built your wooden pallet couch, it’s time to add some finishing touches to make it comfortable and stylish. Here are some ideas for painting, cushioning, and decorating your couch.

Painting

Painting your pallet couch is a great way to add a pop of color and protect the wood from wear and tear. Here are some tips for painting your couch:

  • Sand the surface of the pallets to make them smooth and remove any splinters.
  • Use a primer to create a smooth surface for the paint to adhere to.
  • Apply two or three coats of paint, allowing each coat to dry completely before adding the next.

You can choose any color you like, but consider using a durable outdoor paint if you plan to use your couch outside.

Cushioning

Cushions can make your pallet couch comfortable and cozy. Here are some tips for cushioning your couch:

  • Measure the dimensions of your couch and choose cushions that fit snugly.
  • Consider using outdoor cushions made from waterproof or water-resistant materials if you plan to use your couch outside.
  • Layer cushions of different sizes and shapes to create a comfortable and stylish look.

You can also make your own cushions by sewing covers from fabric and stuffing them with foam or batting.

Decorating

Finally, you can add some decorative touches to your pallet couch to make it unique and stylish. Here are some ideas:

  • Add throw pillows in different colors and patterns to create a cozy and inviting look.
  • Use a decorative throw blanket to add texture and warmth.
  • Hang string lights or lanterns above your couch for a cozy and romantic ambiance.

With these finishing touches, your wooden pallet couch will be a comfortable and stylish addition to your home or outdoor space.