Tag Archives: mild soap solution

how-to-install-wooden-blinds

How to Install Wooden Blinds: A Step-by-Step Guide

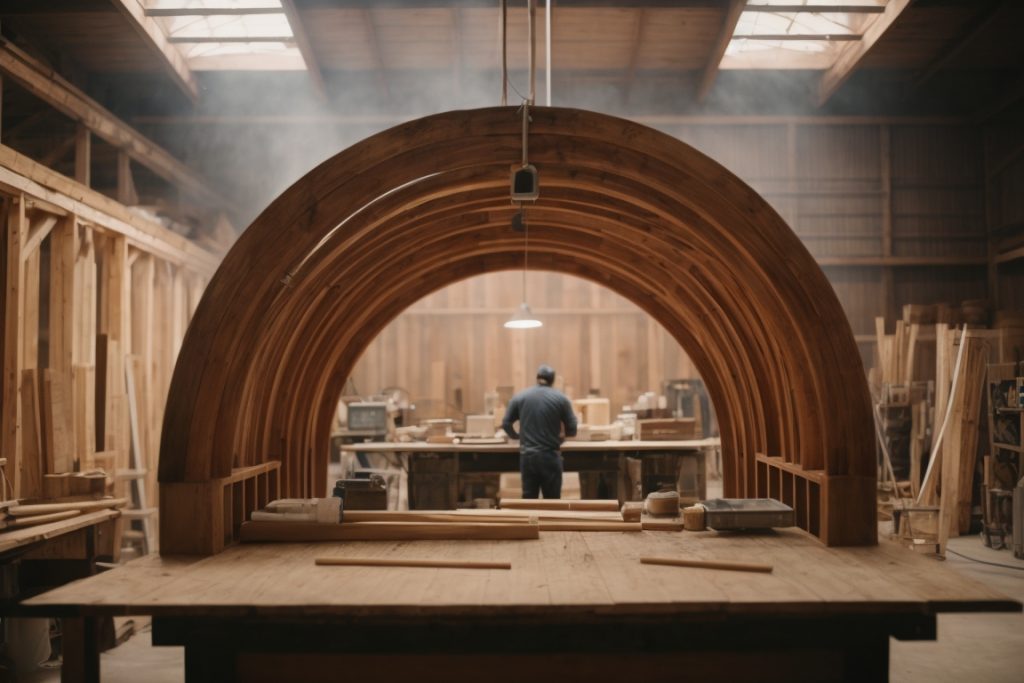
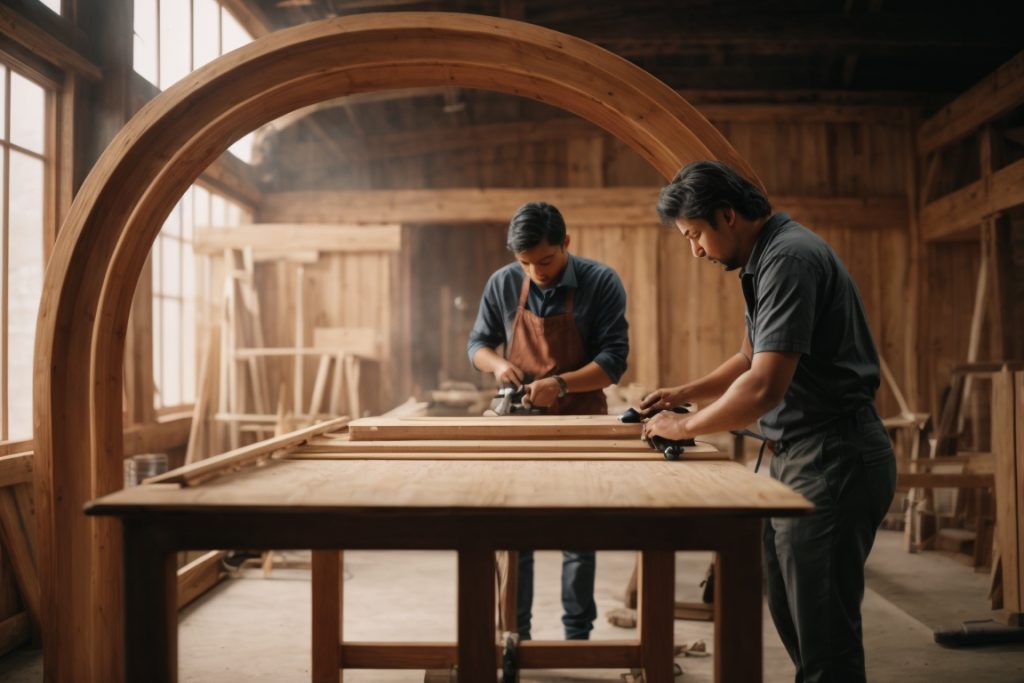
Are you looking to add some style and functionality to your windows? Installing wooden blinds can be a great way to achieve both. Wooden blinds are a classic and timeless choice that can complement any decor style. Plus, they offer privacy and light control, making them a practical choice as well.

Before you get started, it’s important to choose the right type of wooden blinds for your windows. Consider the size and shape of your windows, as well as the amount of light you want to let in. You can choose from inside mount, outside mount, or ceiling mount installation, depending on your preferences and the type of windows you have. With the right tools and a little bit of patience, you can easily install wooden blinds yourself and enjoy the benefits they offer.

Understanding Wooden Blinds

how-to-install-wooden-blinds

If you’re considering adding wooden blinds to your home, it’s important to understand the different types of wooden blinds available and the benefits they offer. In this section, we’ll cover the basics of wooden blinds so you can make an informed decision.

Types of Wooden Blinds

There are two main types of wooden blinds: real wood and faux wood. Real wood blinds are made from natural wood, such as basswood, oak, or cherry. Faux wood blinds, on the other hand, are made from composite materials that mimic the look of real wood.

Real wood blinds are generally more expensive than faux wood blinds, but they offer a more authentic and natural look. Faux wood blinds are more durable and resistant to moisture, making them a great option for high-humidity areas like bathrooms and kitchens.

Benefits of Wooden Blinds

Wooden blinds offer several benefits, including:

  • Insulation: Wooden blinds can help insulate your windows and keep your home cooler in the summer and warmer in the winter.
  • Light control: Wooden blinds offer excellent light control, allowing you to adjust the amount of light that enters your room.
  • Durability: Wooden blinds are durable and long-lasting, making them a great investment for your home.
  • Style: Wooden blinds offer a classic and timeless look that can complement any decor style.

Overall, wooden blinds are a great option for homeowners who want a stylish and functional window treatment. Whether you choose real wood or faux wood blinds, you’ll enjoy the benefits of improved insulation, light control, and durability.

Preparation

Before you start installing wooden blinds, it’s important to ensure that you have all the necessary tools and that you have accurately measured your window. This will help ensure that the installation process goes smoothly and that your blinds fit perfectly.

Tools Needed

Here are the tools you’ll need to install wooden blinds:

Tools
Measuring tape
Screwdriver or power drill
Level
Pencil
Mounting brackets
Screws

Make sure you have all the necessary tools before you start installing your wooden blinds. If you’re missing anything, you can find most of these tools at your local hardware store.

Measuring Your Window

Before you start installing your wooden blinds, you’ll need to measure your window to ensure that your blinds fit properly. Here’s how to do it:

  1. Measure the width of your window from the inside of the frame at the top, middle, and bottom. Record the smallest measurement.
  2. Measure the height of your window from the inside of the frame at the left, center, and right. Record the longest measurement.
  3. If you’re installing inside mount wooden blinds, subtract 1/2 inch from the width and height measurements to allow for clearance. This will ensure that your blinds fit inside the frame of your window.
  4. If you’re installing outside mount wooden blinds, add 2 to 4 inches to the width and height measurements to ensure that your blinds cover the entire window.

By following these steps, you’ll be able to accurately measure your window and ensure that your wooden blinds fit perfectly.

Purchasing Your Wooden Blinds

purchasing-your-wooden-blinds

When it comes to purchasing wooden blinds, there are a few things you should consider to ensure that you get the right product for your needs. Here are some tips to help you make an informed decision:

1. Measure your windows

Before you start shopping for wooden blinds, you need to know the size of your windows. Measure the width and height of each window to determine the size of the blinds you need. It’s important to get accurate measurements to ensure that your blinds fit properly.

2. Choose the right type of wood

There are several types of wood to choose from when it comes to wooden blinds. Some popular options include basswood, bamboo, and faux wood. Each type of wood has its own unique characteristics, so it’s important to choose the one that best suits your needs.

3. Consider the color and finish

Wooden blinds come in a variety of colors and finishes, so you can choose the one that best matches your decor. Some popular options include natural wood finishes, white, and black. Consider the color of your walls and furniture when choosing the color and finish of your blinds.

4. Decide on the style

Wooden blinds come in several styles, including Venetian, vertical, and horizontal. Venetian blinds are the most popular option, but vertical and horizontal blinds can also be a good choice depending on your needs.

5. Check the warranty

When purchasing wooden blinds, it’s important to check the warranty. Make sure you understand the terms and conditions of the warranty before making your purchase.

By considering these factors, you can choose the right wooden blinds for your home and enjoy the benefits of this classic window treatment.

Installation Process

Installing wooden blinds is a simple process that can be done by anyone with basic DIY skills. Here are the steps you need to follow:

Attaching the Brackets

The first step in installing wooden blinds is to attach the brackets to the window frame. Use a measuring tape to determine the location of the brackets, and mark the spots with a pencil. Position the brackets at the same height on both sides of the window. Use a level to ensure that the brackets are straight, and then screw them into place.

Inserting the Blinds

Once the brackets are in place, you can insert the blinds into the brackets. Hold the headrail of the blinds at an angle and insert one end into the bracket. Then, snap the other end of the headrail into the second bracket. Make sure that the blinds are level and centered in the window frame.

Securing the Valance

The valance is the decorative piece that covers the headrail of the blinds. Most wooden blinds come with a valance that can be attached after the blinds are installed. To attach the valance, slide it onto the headrail and secure it with the provided clips or screws.

Adjusting the Length

If the blinds are too long for your window, you can adjust the length by removing some of the slats. Use a pair of scissors or a saw to cut the excess slats from the bottom of the blinds. Be sure to measure the blinds carefully before cutting to avoid making any mistakes.

Testing the Blinds

Before you finish the installation process, test the blinds to make sure they are working properly. Open and close the blinds a few times to ensure that they move smoothly and evenly. If you notice any problems, adjust the brackets or the blinds until they work correctly.

That’s it! By following these simple steps, you can install wooden blinds in your home and enjoy the benefits of beautiful, functional window treatments.

Maintenance Tips

Cleaning

To keep your wooden blinds looking their best, regular cleaning is key. Dust and debris can accumulate quickly, so it’s important to establish a cleaning routine. Here are some tips for cleaning your wooden blinds:

  • Use a soft, dry cloth or feather duster to remove dust from the slats. Be gentle to avoid damaging the finish.
  • For more thorough cleaning, use a damp cloth or sponge. Avoid using too much water, as excess moisture can warp the wood.
  • If your blinds are heavily soiled, you can use a mild soap solution. Be sure to rinse thoroughly and dry completely.
  • Never use abrasive cleaners or harsh chemicals, as these can damage the finish.

Repairing Minor Damages

Despite your best efforts, accidents can happen. If your wooden blinds sustain minor damages, there are a few things you can do to repair them:

  • If a slat becomes bent or warped, you can try gently bending it back into place. Be careful not to apply too much pressure, as this can cause further damage.
  • If a slat breaks, you can replace it with a new one. Most blinds come with extra slats for this purpose. Simply remove the old slat and slide the new one into place.
  • If the cord becomes tangled or frayed, you can untangle it or trim off the frayed end. If the cord is severely damaged, you may need to replace it. Most blinds come with replacement cords and instructions for how to install them.

By following these maintenance tips, you can keep your wooden blinds looking beautiful for years to come.

build-a-wooden-arch

How to Build a Wooden Arch: A Step-by-Step Guide

If you’re looking to add a touch of elegance to your garden or backyard, building a wooden arch is a great way to do it. Not only does it add a beautiful focal point to your outdoor space, but it can also serve as a support for climbing plants like roses, ivy, and wisteria. In this article, we’ll go over the steps involved in building a wooden arch so that you can create a stunning addition to your garden.

The first step in building a wooden arch is to gather the necessary tools and materials. You’ll need plywood sheets, a circular saw, a cordless drill, a posthole digger, safety glasses, and other tools depending on the design you choose. Once you have everything you need, you can start building the arch.

The process of building a wooden arch involves cutting and shaping the plywood sheets into the desired shape, assembling the arch, and securing it in place. Depending on the design you choose, you may also need to add additional support structures like posts or braces. With a little patience and some basic woodworking skills, you can create a beautiful wooden arch that will enhance the look of your garden or backyard.

Understanding the Basics of a Wooden Arch

build-a-wooden-arch

If you’re looking to add a touch of elegance to your garden or outdoor space, a wooden arch is a great way to do it. Wooden arches are easy to build and can be customized to fit any style or design. In this section, we’ll cover the basics of building a wooden arch, including the importance of wood type and arch design principles.

Importance of Wood Type

When it comes to building a wooden arch, the type of wood you use is crucial. You want to choose a wood that is strong and durable enough to withstand the elements and support the weight of the arch. Some of the best types of wood for building a wooden arch include:

  • Cedar: Cedar is a popular choice for building outdoor structures because it is naturally resistant to rot and insect damage. It is also lightweight and easy to work with.
  • Redwood: Redwood is another popular choice for outdoor structures because it is naturally resistant to decay and insect damage. It is also strong and durable, making it a great choice for building a wooden arch.
  • Pressure-treated pine: Pressure-treated pine is a cost-effective option for building a wooden arch. It is treated with chemicals to make it resistant to rot and insect damage, but it is important to note that these chemicals can be harmful to the environment.

Arch Design Principles

When it comes to designing your wooden arch, there are a few key principles to keep in mind:

  • Height: The height of your arch will depend on its intended use. If you’re building an arch to frame a garden path, a height of 7 feet is usually sufficient. If you’re building an arch for a wedding or other special event, you may want to go taller.
  • Width: The width of your arch will depend on the size of the space you’re working with. A width of 4-5 feet is usually sufficient for a garden path. If you’re building an arch for a wedding or other special event, you may want to go wider.
  • Shape: The shape of your arch will depend on your personal preference. Some popular shapes include a classic gothic arch, a rounded arch, and a flat arch.
  • Bracing: It’s important to include bracing in your design to ensure that your arch is stable and secure. Bracing can be added to the sides or the back of the arch, depending on the design.

By keeping these design principles in mind and choosing the right type of wood, you can build a beautiful and functional wooden arch that will add a touch of elegance to your outdoor space.

Materials and Tools Required

When it comes to building a wooden arch, having the right materials and tools is essential. Here are the things you’ll need to get started:

Choosing the Right Wood

The first step in building a wooden arch is to choose the right type of wood. You’ll want to select wood that is strong, durable, and able to withstand the elements. Some good options include:

  • Cedar: This is a popular choice for outdoor projects because it is naturally resistant to rot and decay.
  • Redwood: This is another durable option that is resistant to insects and decay.
  • Pressure-treated lumber: This type of wood is treated with chemicals to resist rot, insects, and decay.

Before you start building, make sure to inspect your wood for any defects or damage. You’ll want to avoid using any wood that is warped, cracked, or has knots that could weaken the structure.

Essential Tools

To build a wooden arch, you’ll need a few essential tools:

  • Circular saw: This will be used to cut your wood to size.
  • Drill: You’ll need a drill to make holes for screws and bolts.
  • Jigsaw: This tool is useful for cutting curved shapes in your wood.
  • Screwdriver: You’ll need a screwdriver to tighten screws and bolts.
  • Clamps: These will help hold your wood in place while you work.
  • Measuring tape: You’ll need to measure your wood to ensure it is cut to the correct size.
  • Pencil: This will be used to mark your wood before cutting.
  • Safety gear: Make sure to wear safety glasses and gloves to protect yourself while working with power tools.

Having the right materials and tools is crucial to building a wooden arch that is strong and durable. With the right materials and a little bit of know-how, you’ll be able to create a beautiful arch that will last for years to come.

Creating Your Arch Design

creating-your-arch-design

Designing your wooden arch is an important step that will determine the final look and functionality of your arch. In this section, we will go over the steps to create your arch design.

Drawing the Arch Blueprint

Before you start building your arch, you need to create a blueprint. This will help you visualize the final product and make any necessary adjustments before you start building.

To create your blueprint, you can use a pencil and paper or a computer-aided design (CAD) program. Draw the arch shape you want and make sure to include the height, width, and depth of the arch. You can also add any decorative elements you want to include, such as carvings or cutouts.

Determining the Arch Dimensions

Once you have your blueprint, you need to determine the dimensions of your arch. This will depend on the size of the space where you want to install the arch and the purpose of the arch.

To determine the dimensions, measure the height and width of the space where you want to install the arch. Make sure to add a few extra inches to the measurements to ensure a proper fit. You also need to consider the purpose of the arch. If it is for decoration, you may want to make it smaller. If it is for a garden or walkway, you may want to make it larger to accommodate people walking underneath.

After you have determined the dimensions, you can start selecting the materials you will need to build your arch. Make sure to choose high-quality wood that is sturdy and durable. You can also choose to add a finish to your arch, such as paint or stain, to protect it from the elements and enhance its appearance.

By following these steps, you can create a beautiful and functional wooden arch that will enhance the look of your garden or walkway.

Preparing the Wood

Before building a wooden arch, it is important to properly prepare the wood to ensure a sturdy and long-lasting structure. This section will cover two key steps in preparing the wood: cutting and sanding.

Cutting the Wood

To begin, you will need to cut the wood to the appropriate length and shape. This will depend on the specific design of your arch. It is important to use a circular saw or jigsaw to make precise cuts. A framing square or combination square can be used to ensure that the cuts are straight and accurate.

To make curved cuts, a router can be used to create a smooth and consistent shape. Alternatively, a template can be used to guide the saw or jigsaw along the desired curve.

Sanding the Wood

Once the wood is cut to the appropriate size and shape, it is important to sand it to remove any rough edges or splinters. This will also help to create a smooth and even surface for painting or staining.

Start with a coarse sandpaper, such as 80-grit, and gradually work your way up to a finer grit, such as 220-grit. Sand in the direction of the grain to avoid damaging the wood.

After sanding, wipe the wood down with a damp cloth to remove any dust or debris. This will ensure that the surface is clean and ready for finishing.

By properly preparing the wood through cutting and sanding, you can ensure that your wooden arch will be strong, durable, and visually appealing.

Assembling the Arch

After cutting the arch pieces, it’s time to assemble them. This section will guide you through the process of joining and securing the arch structure.

Joining the Arch Pieces

To join the arch pieces, you will need wood glue and clamps. Here are the steps to follow:

  1. Apply wood glue on the mating surfaces of the arch pieces.
  2. Join the arch pieces together to form the arch shape.
  3. Use clamps to hold the arch pieces together while the glue dries.
  4. Wipe off any excess glue with a damp cloth.

Securing the Arch Structure

Once the glue has dried, it’s time to secure the arch structure. You will need screws and a drill. Here are the steps to follow:

  1. Drill pilot holes through the arch pieces where you want to place the screws.
  2. Insert screws through the pilot holes and into the mating arch piece.
  3. Tighten the screws until the arch pieces are securely fastened together.

It’s important to note that you should not over-tighten the screws as it can cause the wood to split. Also, make sure the screws are evenly spaced and aligned to ensure a strong and stable arch structure.

Congratulations! You have successfully assembled your wooden arch. In the next section, we will cover how to finish and decorate your arch.

Finishing Touches

Now that you have built your wooden arch, it’s time to add the finishing touches to make it truly stand out. Here are a few suggestions on how to add some personality and style to your arch.

Applying Wood Stain

One way to enhance the natural beauty of your wooden arch is by applying wood stain. Not only does it add color, but it also helps protect the wood from weather damage. Before applying the stain, make sure the wood is clean and dry. You can use a brush, roller, or spray gun to apply the stain. Follow the manufacturer’s instructions for the best results. Once the stain is dry, you can add a clear coat of polyurethane to protect the wood further.

Adding Decorative Elements

Another way to make your wooden arch unique is by adding decorative elements. Here are a few ideas:

  • Hang string lights or lanterns from the arch for a romantic ambiance.
  • Add floral arrangements or garlands to the arch for a natural and whimsical look.
  • Attach a sign or banner to the arch for a personalized touch.

Remember to choose elements that complement the overall style and purpose of your arch. With a little creativity, you can turn your wooden arch into a stunning focal point in your garden or outdoor space.

That’s it! Your wooden arch is now complete, and it’s ready to be enjoyed for years to come.

Maintenance Tips for Wooden Arch

Maintaining your wooden arch is essential to ensure it lasts for years to come. Here are some tips to help you keep your wooden arch in top condition:

1. Regular Cleaning

Regular cleaning is important to prevent dirt and debris from accumulating on the arch. Use a soft-bristled brush or a cloth to wipe away any dirt or dust. If there are any stubborn stains, use a mild soap solution and a soft brush to clean the arch. Rinse the arch with water and let it dry completely before applying any finish.

2. Apply a Protective Finish

Applying a protective finish to your wooden arch can help prevent moisture damage and protect it from the elements. You can use a clear coat or a stain that matches the color of your arch. Apply the finish according to the manufacturer’s instructions and allow it to dry completely before using the arch.

3. Inspect for Damage

Inspect your wooden arch regularly for any signs of damage such as cracks, splits, or warping. If you notice any damage, address it immediately to prevent further damage. Replace any damaged parts or contact a professional for repairs.

4. Store Properly

If you need to store your wooden arch for an extended period, make sure to store it in a dry and cool place. Cover the arch with a tarp or a sheet to protect it from dust and debris. Avoid storing the arch in direct sunlight or near sources of heat.

Taking care of your wooden arch can help prolong its life and keep it looking beautiful for years to come. By following these maintenance tips, you can ensure that your wooden arch remains a stunning addition to your garden or yard.

How to Make Layered Wooden Crosses: A Step-by-Step Guide

If you’re looking for a unique and meaningful way to decorate your home or give a thoughtful gift, making a layered wooden cross might be just what you need. These crosses are made by layering different types of wood to create a stunning and intricate design. The possibilities for customization are endless, making it a perfect DIY project for anyone.

To get started, you’ll need to gather your materials. This can include various types of wood, saws, sandpaper, glue, and clamps. It’s important to choose wood that has contrasting colors and grains to really make the layers stand out. Once you have your materials, you can begin cutting the wood into the desired shapes and sizes. The layers can be glued together and clamped until the glue dries to create a sturdy and beautiful cross.

Understanding the Basics of Woodworking

Safety Measures

Before you start any woodworking project, it is important to take necessary safety measures to protect yourself and others around you. Here are some safety tips to keep in mind:

  • Always wear safety glasses to protect your eyes from flying debris.
  • Use earplugs or earmuffs to protect your hearing.
  • Wear a dust mask to protect your lungs from sawdust and other airborne particles.
  • Keep your work area clean and free of clutter to avoid tripping hazards.
  • Never wear loose clothing or jewelry that could get caught in machinery.
  • Keep your hands away from the cutting area of the saws and other tools.
  • Always use sharp tools to avoid slipping and causing injury.

Tools and Equipment

To make a layered wooden cross, you will need some basic woodworking tools and equipment. Here is a list of some essential tools:

Tool Description
Circular Saw Used for making straight cuts
Jigsaw Used for making curved cuts
Drill Used for making holes and driving screws
Clamps Used for holding pieces of wood together
Sandpaper Used for smoothing out rough edges

In addition to these tools, you will also need some materials such as wood glue, wood stain, and varnish to finish your project. When selecting wood for your cross, it is important to choose a type of wood that is easy to work with and has a nice grain pattern.

By following these basic safety measures and having the right tools and equipment, you can successfully create a beautiful layered wooden cross.

Choosing the Right Wood

When it comes to making layered wooden crosses, selecting the right type of wood is crucial. Not all types of wood are created equal, and some may be better suited for this type of project than others. In this section, we will discuss the different types of wood and wood grading to help you make an informed decision.

Types of Wood

There are many types of wood available, each with its own unique characteristics. Some of the most popular types of wood for making layered wooden crosses include:

  • Maple: Maple is a hard, dense wood that is easy to work with and has a fine, uniform texture. It is a popular choice for making layered crosses due to its durability and strength.

  • Cherry: Cherry is a medium-hard wood that is known for its rich, warm colors and smooth texture. It is often used for making high-end furniture and decorative items.

  • Walnut: Walnut is a hard, strong wood that is known for its dark, rich color and beautiful grain patterns. It is a popular choice for making layered crosses due to its durability and aesthetic appeal.

  • Mahogany: Mahogany is a hardwood that is known for its deep, rich color and beautiful grain patterns. It is often used for making high-end furniture and decorative items.

Wood Grading

In addition to the type of wood, it is also important to consider the wood grading. Wood grading is a system used to classify wood based on its quality and appearance. The most common wood grading systems include:

  • Select: Select grade wood is the highest quality and has the fewest defects. It is often used for high-end furniture and decorative items.

  • Common: Common grade wood is less expensive than select grade and has more defects, such as knots and blemishes. It is often used for more rustic or casual projects.

  • Rustic: Rustic grade wood is the lowest quality and has the most defects. It is often used for projects where the natural, imperfect look is desired.

When selecting wood for your layered wooden cross, consider both the type of wood and the wood grading to ensure that you choose a high-quality, durable material that will look beautiful and stand the test of time.

Designing Your Cross

When it comes to making a layered wooden cross, the design is an important aspect to consider. Here are a few sub-sections to help you with the design process:

Sketching the Design

Before you start cutting any wood, it’s important to sketch out your design. This will give you a visual representation of what you want your cross to look like. You can use a pencil and paper or a digital sketching tool to create your design.

When sketching your design, consider the size of your cross and the number of layers you want to include. You can also experiment with different shapes and patterns to create a unique look. Don’t be afraid to play around with different ideas until you find a design that you’re happy with.

Determining the Layers

Once you have your design sketched out, it’s time to determine the number of layers you’ll need. This will depend on the size of your cross and the thickness of your wood. For a 20-inch cross, you may want to aim for 5-7 layers.

When determining your layers, consider the depth you want to create. You can create depth by using different thicknesses of wood or by adding additional layers. You can also experiment with different wood stains to create a unique look.

Overall, designing your layered wooden cross is a fun and creative process. By sketching your design and determining your layers, you can create a beautiful and unique cross that you’ll be proud to display.

Cutting the Wood

Cutting the wood is a crucial step in making a layered wooden cross. It requires precision and accuracy to ensure that all the pieces fit together perfectly. In this section, we will discuss how to cut the wood for your layered cross.

Creating the First Layer

To create the first layer of your cross, you will need to cut two pieces of wood to the same size. These pieces will be the base of your cross. You can use any type of wood, but it is recommended to use a hardwood like oak or cherry for durability.

Measure the length and width of your wood pieces and mark them with a pencil. Then, using a table saw or a circular saw, cut the wood to the appropriate size. Make sure your cuts are straight and even to ensure a tight fit.

Making Subsequent Layers

After creating the first layer, you will need to cut the remaining pieces of wood for the subsequent layers. These pieces will be smaller in size and will fit on top of the first layer.

Measure the length and width of your wood pieces and mark them with a pencil. Then, using a miter saw or a circular saw, cut the wood to the appropriate size. Make sure your cuts are at a 45-degree angle to create a perfect fit.

It is important to note that the number of layers you create will depend on your personal preference. Some people prefer a simple two-layer cross, while others may want to create a more intricate design with multiple layers.

In conclusion, cutting the wood is an important step in making a layered wooden cross. Take your time and ensure that your cuts are precise and accurate to create a beautiful and lasting cross.

Assembling the Cross

Once you have all the layers of your wooden cross cut and sanded, it’s time to start assembling them. This section will guide you through the process, step-by-step.

Joining the Layers

To join the layers of your cross, you’ll need wood glue and clamps. Apply a thin layer of wood glue to the back of each layer, making sure to cover the entire surface. Then, carefully stack the layers on top of each other, making sure they are aligned properly.

Once the layers are stacked, use clamps to hold them together while the glue dries. Be sure to wipe away any excess glue that squeezes out from between the layers.

Securing the Structure

After the glue has dried, remove the clamps and inspect the cross for any gaps or imperfections. If necessary, use wood filler to fill in any gaps or holes.

Next, you’ll need to secure the structure of the cross. One way to do this is to attach a backer board to the back of the cross using wood screws. This will add stability and help prevent the cross from warping over time.

Finally, you can add any finishing touches you like, such as staining or painting the cross. Be sure to let the finish dry completely before hanging or displaying your new layered wooden cross.

By following these simple steps, you can create a beautiful and unique cross that will be a cherished addition to your home or office decor.

Finishing Touches

After assembling your layered wooden cross, it’s time to add the finishing touches. This is where you can really make your cross stand out and showcase your personal style. In this section, we’ll cover two important aspects of finishing touches: sanding and painting or staining.

Sanding

Sanding is an important step in finishing your wooden cross. It helps to smooth out any rough edges and imperfections, and prepares the wood for painting or staining. Here are a few tips to help you sand your cross:

  • Start with a coarse grit sandpaper (around 80 grit) and work your way up to a finer grit (around 220 grit).
  • Sand in the direction of the wood grain to avoid scratches.
  • Use a sanding block or sanding sponge to ensure even sanding.
  • Be sure to sand all edges and corners to avoid any sharp edges.

Painting or Staining

Painting or staining your wooden cross is a great way to add color and character. Here are some tips to help you get started:

  • Choose a paint or stain that complements the wood and matches your personal style.
  • Apply a thin coat of paint or stain using a brush or rag. Allow it to dry completely before applying a second coat.
  • Use a clear coat to protect the wood and give it a glossy finish.
  • Consider adding decorative elements such as stencils or decals to make your cross unique.

With these finishing touches, your layered wooden cross is complete and ready to be displayed. Whether you choose to paint it, stain it, or leave it natural, your cross will be a beautiful and meaningful addition to any space.

Maintenance Tips

Congratulations on making your own layered wooden cross! Now that you have completed your project, it’s important to know how to properly maintain it to ensure it lasts for years to come. Here are a few maintenance tips to keep in mind:

Cleaning

To keep your layered wooden cross looking its best, it’s important to keep it clean. Dust and dirt can accumulate on the surface, so it’s recommended to wipe it down with a soft, dry cloth on a regular basis. If you need to clean it more thoroughly, you can use a damp cloth with a mild soap solution. Be sure to dry it off completely afterwards to prevent any water damage.

Protection

To protect your layered wooden cross from scratches and other damage, it’s a good idea to place it in a safe location. Avoid placing it in direct sunlight or near any sources of heat or moisture. You can also apply a coat of wax or oil to the surface to help protect it from any potential damage.

Repair

If your layered wooden cross becomes damaged, it’s important to repair it as soon as possible to prevent any further damage. Depending on the type and severity of the damage, you may be able to repair it yourself or you may need to seek professional help. For minor scratches or dents, you can use wood filler or sandpaper to smooth out the surface. For more serious damage, it’s best to consult with a professional to ensure it’s repaired properly.

By following these maintenance tips, you can ensure that your layered wooden cross remains in excellent condition for years to come.

How to Easily Replace a Window Pane in a Wooden Frame

Replacing a window pane in a wooden frame may seem like a daunting task, but with the right tools and steps, it can be done easily and efficiently. Whether you are looking to fix a broken pane or simply want to upgrade your windows, this guide will provide you with the necessary steps to get the job done.

To start, it is important to determine what kind of window you are working with and what type of glass is required. Building codes in your area may require tempered glass for storm windows and doors, but regular pane glass may be suitable for inside windows and doors. Be sure to check local codes and regulations before beginning the project.

Once you have determined the type of glass needed, the next step is to measure the precise length and width of the grooves in which the pane will fit. Have the new glass cut so it measures 1/8 inch shorter than the exact groove dimensions in both the length and width. With the right measurements and glass, you can now move on to the actual replacement process.

Understanding the Basics of Window Pane Replacement

Replacing a broken window pane in a wooden frame can seem like a daunting task, but with the right tools and techniques, it can be a straightforward process. Here are some basics to keep in mind when replacing a window pane:

1. Safety First

Before you begin, make sure you have the proper safety equipment. Gloves, safety glasses, and a mask are essential to protect yourself from glass shards and potential lead in the window. It’s also a good idea to have a helper to assist with removing the window and holding it steady while you work.

2. Removing the Old Pane

To remove the old pane, use a utility knife to cut the glazing around the broken windowpane. Be sure to wear gloves and safety glasses during this process. Once the glazing is removed, carefully remove any remaining glass shards.

3. Measuring for the New Pane

Measure the opening for the new pane, making sure to measure both the height and width of the opening. It’s important to measure accurately to ensure a proper fit.

4. Choosing the Right Glass

When choosing the new glass, consider the thickness and type of glass needed for the specific window. Double-pane windows require a specific type of glass, and the thickness of the glass will depend on the size of the window and the location of the pane within the window.

5. Installing the New Pane

Once you have the new pane, apply a thin layer of glazing compound around the edges of the opening. Then, carefully insert the new pane into the opening, pressing it firmly into the glazing compound. Finally, apply additional glazing compound around the edges of the pane to seal it in place.

By following these basic steps, you can replace a broken window pane in a wooden frame with confidence. Remember to prioritize safety and accuracy throughout the process, and don’t hesitate to seek professional help if needed.

Identifying the Type of Glass and Measurements

Before you start replacing the broken glass pane, you need to identify the type of glass you need and take accurate measurements. Here are the steps you should follow:

Identify the Type of Glass

The type of glass you need depends on the location of the window and the purpose it serves. Here are some common types of glass:

  • Annealed glass: This is a basic type of glass that breaks into sharp pieces and is not suitable for areas where safety is a concern.
  • Tempered glass: This type of glass is stronger than annealed glass and breaks into small, rounded pieces that are less dangerous. It is commonly used in areas where safety is a concern, such as doors and windows near the ground.
  • Laminated glass: This type of glass consists of two or more layers of glass with a plastic interlayer in between. It is commonly used in areas where security is a concern, such as storefronts and banks.
  • Low-E glass: This type of glass has a special coating that reflects heat back into the room, making it energy-efficient. It is commonly used in areas with extreme temperatures.

Once you have identified the type of glass you need, you can move on to taking measurements.

Take Accurate Measurements

To take accurate measurements, you will need a measuring tape and a notepad. Here are the steps you should follow:

  1. Measure the width and height of the opening where the glass pane will fit. Take three measurements of both the width and height, and record the smallest measurement.

  2. Subtract 1/8 inch from the smallest measurement to allow for expansion and contraction of the glass.

  3. If the glass pane has curved edges, make a template of the curve using a piece of cardboard or paper. Place the template on the glass and trace around it with a marker. Cut the glass along the traced line using a glass cutter.

By following these steps, you can ensure that you get the right type of glass and the correct measurements for your replacement window pane.

Materials Needed for Replacement

Replacing a broken window pane in a wooden frame is a task that requires some basic tools and materials. Here are the tools and materials you will need:

Tools

Tool Description
Utility knife Used to cut the glazing around the broken window pane
Putty knife Used to remove the old putty
Glass suction cups Used to lift and move the glass pane
Chisel Used to remove the old glazing points
Hammer Used to tap the chisel and remove the old glazing points
Pliers Used to remove the old glazing points
Caulking gun Used to apply the new putty
Paint scraper Used to remove any excess putty

Materials

Material Description
Replacement glass pane Make sure to measure the size of the old glass pane accurately
Glazing points Used to hold the glass pane in place
Putty Used to seal the glass pane in place
Paint Used to paint the putty after it has dried

It is important to note that safety glasses and gloves should be worn when handling broken glass to avoid injury. Additionally, if the window frame is old, it may contain lead paint. In this case, it is important to take appropriate precautions to avoid lead exposure.

Removing the Old Window Pane

Before you start removing the old window pane, it’s important to take safety precautions to protect yourself from potential injuries.

Safety Precautions

  • Wear gloves, safety glasses, and a mask to protect yourself from broken glass and dust.
  • Make sure the area around the window is clear of any furniture or objects that could get in your way.
  • If you’re working on a high window, use a sturdy ladder and have someone hold the ladder steady for you.
  • If the window is painted, be aware that the paint may contain lead. Use a mask to avoid inhaling any lead dust.

Step-by-Step Removal

  1. Lay a drop cloth or sheet under the window to catch any debris.
  2. Use a utility knife to cut the glazing around the window pane.
  3. Gently tap the center of the window pane with a hammer to loosen it from the frame.
  4. With gloved hands, wiggle free any pieces that remain embedded in the putty.
  5. Carefully remove the window pane from the frame and set it aside.

If the window pane is broken, be extra careful when removing it to avoid getting cut by any sharp pieces. If the pane is painted, be careful not to damage the paint on the frame when removing it.

By following these steps, you can safely remove the old window pane and prepare the frame for the installation of the new pane.

Preparing the Wooden Frame

Replacing a broken window pane in a wooden frame requires some preparation work to ensure that the new pane fits securely and is properly sealed. Follow these steps to prepare the wooden frame:

  1. Remove the old glazing compound: Use a putty knife to carefully remove the old glazing compound from around the edges of the frame. Be gentle to avoid damaging the frame or the remaining glass.

  2. Remove any remaining glass: If there are any pieces of glass still attached to the frame, carefully remove them using pliers or a glass cutter.

  3. Clean the frame: Use a clean cloth or brush to remove any debris or dust from the frame. This will help ensure that the new pane fits properly and is sealed correctly.

  4. Apply primer: If the frame is not already primed, apply a coat of primer to the exposed wood. This will help protect the frame from moisture and ensure that the new glazing compound adheres properly.

  5. Measure the opening: Measure the opening where the new pane will be installed. Make sure to measure both the height and width, as well as the depth of the rabbet where the glass will sit.

By following these steps, you can prepare the wooden frame for the new window pane. This will ensure that the new pane fits securely and is properly sealed, helping to prevent any drafts or moisture from entering your home.

Installing the New Window Pane

After removing the broken window pane, it’s time to install the new one. Follow these steps to ensure a successful installation.

Placement

First, measure the dimensions of the opening to ensure that the new pane is the correct size. Place the new pane into the opening and center it. Use shims to make adjustments if necessary.

Securing the Pane

Next, secure the pane in place using glazing points. These small metal pieces hold the pane in place while the glazing compound dries. Place the glazing points along the edge of the frame, about 2 inches apart. Use a putty knife to gently press the points into the wood.

Once the glazing points are in place, apply glazing compound around the edge of the frame to seal the pane in place. Use a putty knife to spread the compound evenly and ensure that there are no gaps. Allow the compound to dry completely before painting or finishing.

Remember to wear gloves when handling the glazing compound to avoid skin irritation. Additionally, make sure that the pane is placed securely in the frame to prevent it from falling out or breaking.

By following these steps, you can successfully replace a broken window pane in a wooden frame.

Applying Putty and Finishing Touches

Once the new glass pane is securely in place, you can begin the process of applying putty to seal it. Here’s how to do it:

  1. Take a small amount of putty and roll it into a thin, snake-like shape. Place it along the edge of the glass, pressing it down firmly into the wooden frame. Repeat this process until the entire edge of the glass is covered with putty.

  2. Use a putty knife to smooth out the putty, making sure that it is even and flush with the glass and frame. Be sure to remove any excess putty from the knife as you work.

  3. Allow the putty to dry for at least 24 hours before painting it. If you need to paint the frame, use a high-quality primer and paint to ensure that the putty adheres properly.

  4. Once the putty and paint are dry, use a razor blade to carefully remove any excess putty or paint from the glass. Be sure to work slowly and carefully to avoid damaging the new glass pane.

  5. Finally, clean the glass thoroughly with a glass cleaner and a soft, lint-free cloth. This will ensure that your new window pane looks great and performs well for years to come.

By following these simple steps, you can replace a broken window pane in a wooden frame and restore the beauty and functionality of your home’s windows.

Maintenance Tips for Wooden Frame Windows

Wooden frame windows add a classic touch to any home, but they do require some maintenance to keep them in good condition. Regular upkeep can prevent damage and prolong the life of your windows. Here are some tips to help you maintain your wooden frame windows:

Keep the Windows Clean

Cleaning your windows regularly can help prevent dirt and grime buildup, which can damage the window frame and make it harder to open and close the window. Use a soft cloth or sponge and a mild soap solution to clean the windows. Avoid using abrasive cleaners or tools that can scratch the glass or damage the frame.

Check for Damage

Inspect your windows regularly for signs of damage such as cracks, rot, or warping. Repair any damage as soon as possible to prevent it from spreading and causing further damage. If the damage is extensive, you may need to replace the window.

Paint or Stain the Frames

Painting or staining the frames can help protect them from the elements and prevent moisture damage. Choose a high-quality paint or stain that is designed for use on wooden surfaces. Apply a new coat of paint or stain every few years to keep the frames looking their best.

Seal the Windows

Sealing the windows can help prevent drafts and reduce energy costs. Use weatherstripping or caulking to seal any gaps around the window frame. This can also help prevent moisture from getting inside the frame and causing damage.

Use Proper Installation Techniques

If you are installing new windows or replacing old ones, make sure to use proper installation techniques. This can help prevent damage to the frame and ensure that the window operates smoothly. Follow the manufacturer’s instructions carefully or hire a professional to install the windows for you.

By following these maintenance tips, you can keep your wooden frame windows in great condition for years to come.

How to Fix a Dent in a Wooden Door: Easy DIY Solutions

Are you tired of looking at that unsightly dent in your wooden door? Luckily, fixing it is easier than you might think. With a few simple tools and techniques, you can have your door looking as good as new in no time.

One of the easiest and most effective ways to fix a dent in a wooden door is by using a plunger. Simply place the plunger over the dent and push and pull until the suction of the plunger pops the dent back out. If the dent is particularly stubborn, you can try heating the area with a hair dryer or hot water before using the plunger to make the wood more pliable.

Another method for fixing dents in wooden doors is by using a clothes iron or steam iron. By applying heat and moisture to the affected area, you can soften the wood and make it easier to manipulate. From there, you can use a variety of tools, such as a rubber mallet or even your fingers, to gently push the dent back out.

Understanding the Damage

If you have a dent in your wooden door, it’s important to understand the extent of the damage before attempting to fix it. Here are some things to consider:

Size and Depth of the Dent

The size and depth of the dent will affect the method you use to fix it. If the dent is small and shallow, you may be able to fix it with a simple solution like using a plunger or steam iron. However, if the dent is large and deep, you may need to use wood filler or even replace the affected section of the door.

Type of Wood

The type of wood your door is made of will also impact the repair process. Hardwoods like oak and maple are more durable and may require a different approach than softwoods like pine or cedar. It’s important to research the best methods for your specific type of wood to avoid causing further damage.

Finish and Stain

The finish and stain on your door can also affect the repair process. If the dent has damaged the finish or stain, you may need to refinish or restain the entire door to avoid color discrepancies. Make sure to match the finish or stain as closely as possible to ensure a seamless repair.

Location of the Dent

The location of the dent can also affect the repair process. If the dent is on a visible part of the door, you’ll want to take extra care to ensure the repair is as unnoticeable as possible. If the dent is on the bottom or back of the door, you may be able to use a simpler repair method without worrying about the appearance.

Gathering Necessary Tools

Before you start fixing a dent in your wooden door, you need to gather the necessary tools. Having the right tools will make the process easier and more efficient. Here are the essential and optional tools you will need:

Essential Tools

  1. Steam Iron: A steam iron is essential for fixing dents in a wooden door. It will help soften the wood around the dent, making it easier to push out or smooth out.
  2. Clean Cloth: You will need a clean cloth to wipe the wooden door before and after the repair.
  3. Water: You will need water to moisten the cloth and to fill a container for the boiling water method.
  4. Boiling Water: Boiling water is used to engorge and raise the wood fibers, erasing the dent. You will need a container to hold the boiling water.

Optional Tools

  1. Hair Dryer: A hair dryer can be used instead of a steam iron to soften the wood around the dent.
  2. Rubber Mallet: A rubber mallet can be used to tap the raised wood fibers down to their original position.
  3. Wood Filler: If the dent is deep and cannot be completely removed, you can use wood filler to fill in the remaining space.
  4. Sandpaper: Sandpaper can be used to smooth out the wood filler after it dries.
  5. Paint or Stain: If the wooden door has paint or stain, you will need to match the color after the repair.

By having these tools on hand, you will be prepared to fix any dents that appear on your wooden door. Remember to always follow the instructions carefully and take your time to ensure a successful repair.

Preparing the Door

Before you start fixing the dent in your wooden door, you need to prepare the surface and remove any hardware that may be in the way.

Cleaning the Surface

The first step in preparing the door is to clean the surface around the dent. This will ensure that there is no dirt, dust, or debris that could get in the way of the repair. To clean the surface, you can use a damp cloth or sponge and wipe down the area around the dent. If there is any stubborn dirt or grime, you can use a mild soap solution to help remove it.

Removing Hardware

If there is any hardware on the door, such as a doorknob or lock, you will need to remove it before you can fix the dent. This will ensure that you have access to the entire surface of the door and that you don’t accidentally damage the hardware during the repair process. To remove the hardware, you will need a screwdriver or other appropriate tools. Make sure to keep all of the screws and other parts in a safe place so that you can easily reassemble the hardware once the repair is complete.

By properly preparing the door, you can ensure that the surface is clean and free of any obstacles that could get in the way of the repair. This will help you to achieve the best possible results and restore your wooden door to its original condition.

Applying Wood Filler

If you have a dent in your wooden door, you can easily fix it with wood filler. Wood filler is a material that can be used to fill in gaps, cracks, and holes in wood. It is a great solution for repairing dents in wooden doors. In this section, we will discuss the process of applying wood filler to fix a dent in your wooden door.

Choosing the Right Filler

Before you start applying wood filler, you need to choose the right type of filler for your project. There are two main types of wood filler: water-based and solvent-based. Water-based fillers are easier to work with and clean up with water. Solvent-based fillers are more durable and water-resistant. Choose the type of filler based on your needs and preferences.

When choosing a wood filler, consider the color of your door. You want to choose a filler that matches the color of your door as closely as possible. Most wood fillers can be stained or painted to match the color of your door.

Application Process

Here is the step-by-step process for applying wood filler to fix a dent in your wooden door:

  1. Clean the damaged area: Use a clean, dry cloth to wipe the damaged area of your door. Make sure there is no dust, debris, or loose wood fibers.

  2. Apply wood filler: Use a putty knife to apply the wood filler to the dent. Make sure to fill the dent completely with the filler. Smooth out the surface of the filler with the putty knife.

  3. Let the filler dry: Allow the filler to dry completely. The drying time will depend on the type of filler you are using. Follow the manufacturer’s instructions for drying time.

  4. Sand the surface: Once the filler is dry, use sandpaper to sand the surface of the filler. Sand the surface until it is smooth and even with the surface of the door.

  5. Stain or paint the door: If necessary, stain or paint the door to match the color of the filler. Allow the stain or paint to dry completely.

By following these steps, you can easily fix a dent in your wooden door using wood filler. With a little bit of time and effort, your door will look as good as new!

Sanding the Surface

When it comes to fixing a dent in a wooden door, sanding the surface is an important step in the process. Sanding helps to smooth out any rough areas and prepare the surface for further repairs. Here are some tips on how to sand the surface of your wooden door effectively.

Choosing Sandpaper

Choosing the right sandpaper is crucial to achieving a smooth finish. The grit of the sandpaper determines how rough or smooth the surface will be. For sanding a wooden door, it is recommended to use a medium-grit sandpaper (between 80 and 120 grit).

You can also use a fine-grit sandpaper (between 150 and 180 grit) for a smoother finish. However, be careful not to over-sand the surface, as this can create an uneven surface.

Sanding Technique

When sanding the surface of your wooden door, it is important to use the right technique to avoid damaging the wood. Here are some tips on how to sand the surface effectively:

  • Start with a medium-grit sandpaper to remove any rough areas or bumps on the surface.
  • Sand in the direction of the grain to avoid creating scratches or marks on the wood.
  • Use light pressure when sanding to avoid removing too much wood.
  • Check the surface frequently to ensure that you are sanding evenly.
  • After sanding with the medium-grit sandpaper, switch to a fine-grit sandpaper to achieve a smoother finish.

Overall, sanding the surface of your wooden door is an important step in fixing a dent. By choosing the right sandpaper and using the right technique, you can achieve a smooth and even surface that is ready for further repairs.

Repainting or Restaining

Selecting Paint or Stain

When it comes to selecting paint or stain for your wooden door, you have a few options to choose from. You can either choose to repaint the entire door or just the repaired area. If you choose to repaint the entire door, make sure to select a paint that matches the existing color of the door. If you want to change the color of the door, make sure to select a paint that is suitable for wooden surfaces.

On the other hand, if you choose to restain the door, you need to select a stain that matches the existing color of the door. To do this, you can take a small piece of the door to the hardware store and match it with the available stains.

Applying Paint or Stain

Before applying paint or stain, make sure that the repaired area is completely dry. If you have used wood filler to repair the dent, sand the area lightly to create a smooth surface. Once the surface is smooth, you can start applying paint or stain.

If you are painting the door, use a paintbrush or roller to apply the paint. Make sure to apply the paint in thin layers to avoid drips. If you are restaining the door, use a clean cloth to apply the stain. Make sure to apply the stain evenly and wipe off any excess stain with a clean cloth.

After applying the first coat of paint or stain, let it dry completely before applying a second coat. Once the second coat is dry, inspect the repaired area to make sure that it matches the surrounding wood. If necessary, apply a third coat of paint or stain.

That’s it! By following these simple steps, you can easily repair a dent in your wooden door and restore its beauty.

Reinstalling Hardware

Once you have fixed the dent in your wooden door, you will need to reinstall any hardware that you removed before starting the repair process. Here are some tips to make the reinstallation process go smoothly:

  • Inspect the hardware: Before reinstalling any hardware, inspect it for damage or wear. If you notice any issues, replace the hardware with new pieces.

  • Clean the hardware: If the hardware is dirty or has accumulated rust or grime, clean it before reinstalling it. You can use a mild detergent and warm water to clean most hardware. For stubborn stains or rust, use a wire brush or sandpaper to remove them.

  • Align the hardware: Make sure that the hardware is aligned properly before tightening any screws or bolts. If the hardware is not aligned correctly, it can cause the door to stick or not close properly.

  • Use the right tools: Use the appropriate tools to reinstall the hardware. For example, use a Phillips head screwdriver for screws with a cross-shaped indentation, and a flathead screwdriver for screws with a single slot.

  • Tighten screws gradually: When tightening screws or bolts, do so gradually and evenly. This will help ensure that the hardware is installed securely without damaging the wood.

By following these tips, you can ensure that the hardware on your wooden door is reinstalled correctly and functions properly.