Tag Archives: high-traffic areas

how-to-clean-a-wooden-floor-tips-and-tricks-2

How to Clean a Wooden Floor: Tips and Tricks

Cleaning wooden floors can be a daunting task, but it doesn’t have to be. With the right tools and techniques, you can keep your wooden floors looking shiny and new for years to come. Here are some tips on how to clean a wooden floor effectively.

First, it’s important to determine the type of finish on your wooden floor. This will help you choose the right cleaning solution and avoid damaging the wood. If you’re unsure, try a small test area with a mild cleaning solution to see how the wood reacts. Once you know the type of finish, you can choose a cleaning solution that is safe and effective for your wooden floor.

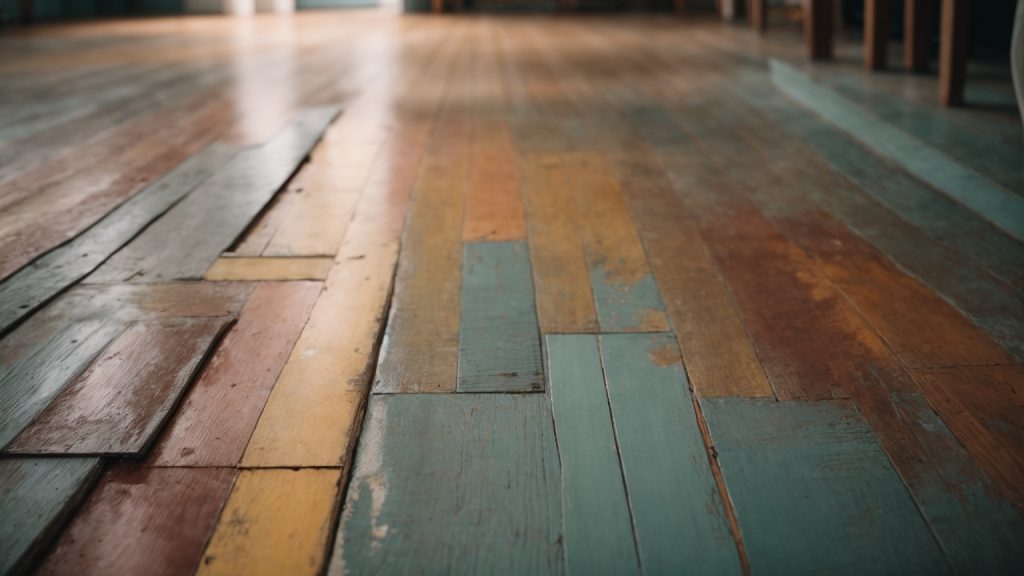
Understanding Wood Floors

Wood floors add warmth and a unique look to your home decor. They are durable and can last for years if appropriately maintained. However, before you begin cleaning your wood floors, it’s essential to understand the type of wood and finish you have.

Types of Wood Floors

There are two types of wood floors: solid and engineered. Solid wood floors are made of one solid piece of wood and are available in various thicknesses. Engineered wood floors are made of several layers of wood and are more stable than solid wood floors.

Types of Wood Floor Finishes

There are three types of wood floor finishes: surface-sealed, penetrating-seal, and oil-treated. Surface-sealed finishes are the most common and have a protective layer on top of the wood. Penetrating-seal finishes soak into the wood and harden, providing a protective layer from the inside. Oil-treated finishes penetrate the wood and provide a natural look and feel.

How to Clean Wood Floors

Cleaning your wood floors is essential to maintain their shine and prevent damage. Here are some tips to clean your wood floors:

  • Sweep or vacuum your wood floors regularly to remove dirt and debris.
  • Use a damp mop with a mild cleaning solution to clean your wood floors. Avoid using excess water as it can damage the wood.
  • Wipe up spills immediately to prevent damage to your wood floors.
  • Use furniture pads to protect your wood floors from scratches and dents.
  • Avoid using harsh chemicals, vinegar, or steam cleaners as they can damage the finish of your wood floors.

By understanding the type of wood and finish you have and following these cleaning tips, you can keep your wood floors looking beautiful for years to come.

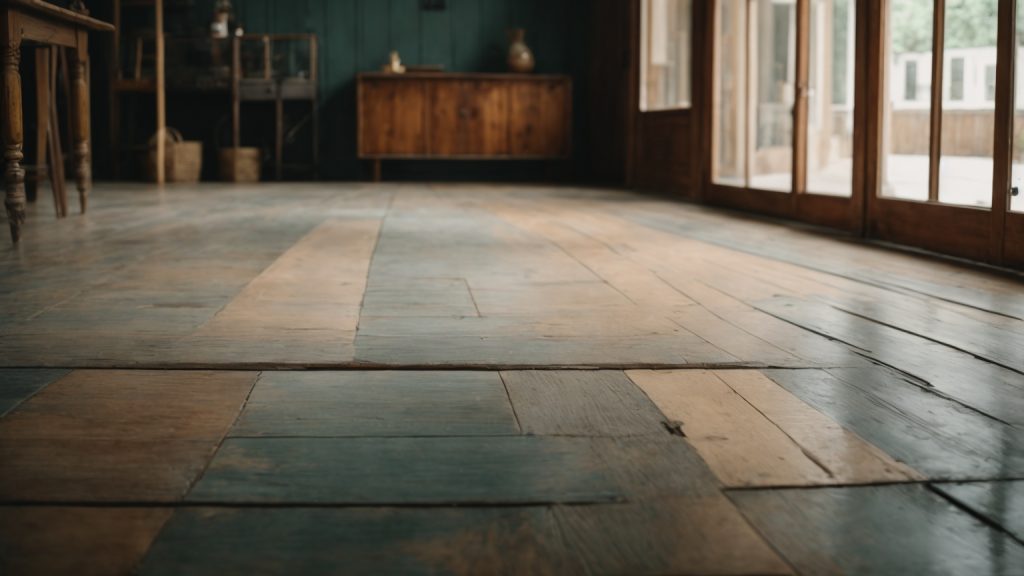
Preparatory Steps Before Cleaning

how-to-clean-a-wooden-floor-tips-and-tricks-2

Before you start cleaning your wooden floor, there are some preparatory steps you should take to ensure the best possible results. Here are some things you should do:

Remove Furniture and Rugs

First, remove any furniture and rugs from the room. This will give you more space to work and prevent any damage to your belongings. If you can’t move some furniture, use furniture pads or sliders to protect the legs and prevent scratches.

Sweep or Vacuum the Floor

Next, sweep or vacuum the floor to remove any loose dirt, dust, or debris. Use a soft-bristled broom or a vacuum cleaner with a hardwood floor attachment to avoid scratching the surface. If your vacuum has a beater bar, turn it off or adjust the height to the lowest setting.

Identify the Type of Wood and Finish

Before you start cleaning, identify the type of wood and finish of your floor. This will help you choose the right cleaning method and products that won’t damage the surface. Solid hardwood, engineered hardwood, and laminate wood-look flooring require different care, so make sure you know what you have.

Test the Cleaning Solution

Before you apply any cleaning solution to the entire floor, test it on a small, inconspicuous area first. This will help you make sure the solution doesn’t discolor or damage the wood. If you notice any adverse effects, try a different cleaning solution or consult a professional.

By following these preparatory steps, you’ll be able to clean your wooden floor more effectively and safely.

Choosing the Right Cleaning Supplies

Cleaning a wooden floor requires the right cleaning supplies to avoid damage to the wood. Here are some things to consider when choosing the right cleaning supplies for your wooden floor:

Type of Wood

Different types of wood require different cleaning supplies. For example, hardwood floors need a cleaner that is gentle and pH-neutral, while laminate floors require a cleaner that is specifically designed for laminate. Be sure to check the manufacturer’s recommendations to ensure you’re using the right cleaner for your wooden floor.

Cleaning Solution

When choosing a cleaning solution, avoid using harsh chemicals that can damage the wood. Instead, opt for a cleaner that is specifically formulated for wooden floors. You can also make your own cleaning solution by mixing water and vinegar or water and dish soap.

Cleaning Tools

The right cleaning tools can make all the difference when it comes to cleaning your wooden floor. A microfiber mop or cloth is gentle on the wood and won’t scratch the surface. Avoid using abrasive scrub brushes or steel wool, which can damage the wood.

Other Considerations

Here are a few other things to consider when choosing the right cleaning supplies for your wooden floor:

  • Avoid using too much water, as excess moisture can damage the wood.
  • Test any new cleaning supplies on a small, inconspicuous area of the floor before using them on the entire surface.
  • Regularly sweep or vacuum your wooden floor to remove dirt and debris that can scratch the surface.

By choosing the right cleaning supplies, you can keep your wooden floor looking clean and beautiful for years to come.
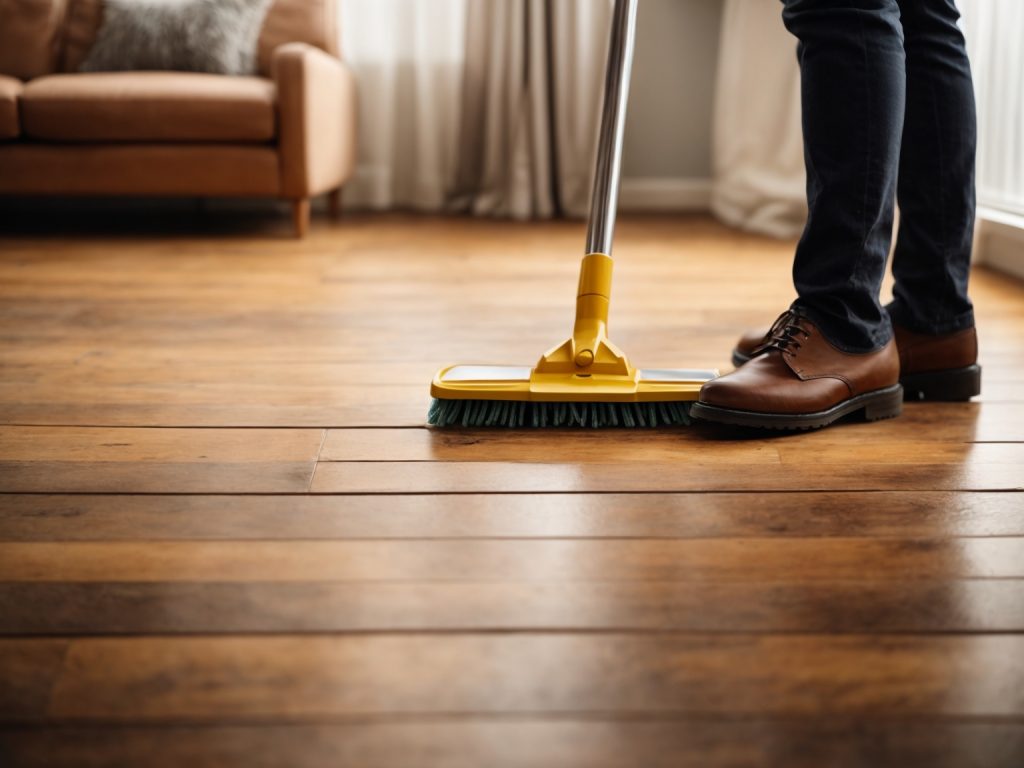
Cleaning Process

Cleaning your wooden floors regularly is essential to maintain their shine and keep them looking new. Here are the steps you can follow to clean your wooden floors effectively:

  1. Start by removing any loose dirt or debris from the floor using a soft-bristled broom or a vacuum cleaner. Make sure to use a vacuum cleaner with a hardwood floor attachment to avoid scratching the surface of the floor.
  2. Once you have removed the loose dirt, it’s time to mop the floor. You can use a microfiber mop or a soft cloth to clean the floor. Avoid using a wet mop as excess water can damage the floor. Instead, dampen the mop or cloth with a hardwood floor cleaner and wring out any excess water.
  3. Begin mopping the floor from one end of the room to the other, working in small sections. Make sure to overlap each section to avoid missing any spots.
  4. If you come across any stubborn stains or spills, use a hardwood floor cleaner and a soft cloth to gently scrub the area. Avoid using harsh chemicals or abrasive cleaners as they can damage the floor.
  5. Once you have finished mopping the floor, use a dry microfiber mop or cloth to remove any excess water or cleaner. Make sure to dry the floor thoroughly to avoid any water damage.
  6. Finally, if you want to give your wooden floors an extra shine, you can use a hardwood floor polish. Apply the polish using a soft cloth or mop, following the manufacturer’s instructions.

By following these simple steps, you can keep your wooden floors looking clean and shiny for years to come.

The Do’s and Don’ts of Cleaning Wooden Floors

Cleaning wooden floors is not rocket science, but there are some things you should and shouldn’t do to keep them looking their best. Here are some do’s and don’ts to keep in mind:

Do’s

  • Sweep or vacuum regularly: Dirt and dust can scratch and dull wooden floors, so it’s important to keep them clean. Use a soft-bristled broom or a vacuum cleaner with a hardwood floor attachment to remove dirt and debris.
  • Clean up spills promptly: Water and other liquids can damage wooden floors, so it’s important to clean up spills as soon as possible. Use a soft, absorbent cloth to blot up the liquid, then clean the area with a damp cloth and dry it thoroughly.
  • Use a gentle cleaner: When it’s time to give your wooden floors a deeper clean, use a cleaner that’s specifically designed for hardwood floors. Avoid using harsh chemicals or abrasive cleaners, which can damage the finish.
  • Protect your floors: Use furniture pads under the legs of chairs, tables, and other furniture to prevent scratches and dents. Place doormats at entryways to trap dirt and debris before it gets onto your floors.

Don’ts

  • Don’t use too much water: Wooden floors and water don’t mix well, so avoid using too much water when you’re cleaning them. Use a damp cloth, not a soaking wet one, and dry the floor thoroughly after cleaning.
  • Don’t use steam cleaners: Steam cleaners can damage wooden floors by forcing moisture into the wood. Stick to using a gentle cleaner and a damp cloth.
  • Don’t use abrasive cleaners: Avoid using harsh chemicals or abrasive cleaners, which can scratch and damage the finish of your wooden floors.
  • Don’t use wax or oil-based cleaners: Wax and oil-based cleaners can leave a residue on your wooden floors, making them slippery and dull-looking.

By following these do’s and don’ts, you can keep your wooden floors looking their best for years to come.

Maintaining Your Wooden Floor

maintaining-your-wooden-floor-2

To keep your wooden floor looking great for years to come, it’s important to maintain it properly. Here are a few tips to help you maintain your wooden floor:

Sweep or Vacuum Regularly

One of the most important things you can do to maintain your wooden floor is to sweep or vacuum it regularly. Dirt, dust, and debris can scratch the surface of your floor, so it’s important to keep them off as much as possible. Use a soft-bristled broom or a vacuum with a hardwood floor attachment to sweep your floor daily.

Clean Up Spills Immediately

If you spill something on your wooden floor, be sure to clean it up immediately. Liquids can seep into the wood and cause damage if left to sit for too long. Use a soft cloth or paper towel to soak up the spill, then clean the area with a hardwood floor cleaner.

Use a Hardwood Floor Cleaner

When it’s time to clean your wooden floor, use a hardwood floor cleaner that is specifically designed for your type of flooring. Avoid using harsh chemicals or abrasive cleaners that can damage the finish of your floor. Follow the manufacturer’s instructions for best results.

Use Mats and Rugs

To help protect your wooden floor from scratches and wear, use mats and rugs in high-traffic areas, such as entryways and hallways. Be sure to use mats with a non-slip backing to prevent them from sliding around on your floor.

Avoid Excess Moisture

Excess moisture can cause your wooden floor to warp and buckle. Avoid using steam cleaners or wet mops on your floor, and be sure to clean up spills immediately. If you live in a humid environment, consider using a dehumidifier to help control moisture levels in your home.

By following these simple tips, you can help keep your wooden floor looking great for years to come.

Addressing Stains and Spills

Even with the best preventative measures, spills and stains are bound to happen on your wooden floors. Here are some tips on how to address them:

White Water Stains

White water stains are the result of moisture penetrating the finish and reaching the wood. To remove them, try one of the following methods:

  • Apply a small amount of non-gel toothpaste to the stain and gently rub it with a soft cloth.
  • Mix equal parts of baking soda and white toothpaste to create a paste. Apply it to the stain, let it sit for a few minutes, then wipe it away with a damp cloth.

Dark Stains

Dark stains are more difficult to remove and may require sanding and refinishing. However, before taking that drastic step, try the following:

  • Mix equal parts of vinegar and olive oil. Apply the mixture to the stain and let it sit for several hours. Wipe it away with a clean cloth.
  • If the stain is still present, mix equal parts of bleach and water. Apply it to the stain and let it sit for several hours. Rinse thoroughly with water and dry the area.

Spills

Spills should be addressed immediately to prevent them from seeping into the wood. Here’s what to do:

  • For liquid spills, use a clean cloth or paper towel to blot up as much of the liquid as possible. Do not rub the spill, as this will push it deeper into the wood.
  • For solid spills, use a plastic scraper or spatula to gently remove the spill. Be careful not to scratch the wood.
  • Once the spill has been removed, clean the area with a damp cloth and dry it thoroughly.

By following these tips, you can keep your wooden floors looking their best, even when spills and stains occur.

Professional Cleaning and When to Consider It

While cleaning your hardwood floors at home can be a simple task, sometimes it may be necessary to seek professional help. Here are some situations where you may want to consider hiring a professional:

Deep Stains

If your hardwood floors have deep stains that you cannot remove with regular cleaning methods, it may be time to call in a professional. They have access to specialized equipment and cleaning solutions that can effectively remove stubborn stains without damaging your floors.

Extensive Damage

If your hardwood floors have extensive damage such as deep scratches, gouges, or warping, it may be time to consider professional refinishing. Refinishing can restore your floors to their former glory and make them look brand new again.

Time Constraints

If you lead a busy life and don’t have the time to devote to cleaning your hardwood floors, consider hiring a professional cleaning service. They can take care of your floors while you focus on other important tasks.

Inexperience

If you are unsure about how to properly clean and maintain your hardwood floors, it may be best to leave it to the professionals. They have the knowledge and experience to properly care for your floors and can provide you with tips and advice on how to keep them looking their best.

Overall, professional cleaning can be a great option for those who want to ensure their hardwood floors are properly cared for. Just be sure to do your research and choose a reputable and experienced professional to ensure the best results.

preparing-your-wooden-floors

How to Paint Wooden Floors: A Beginner's Guide

Are you tired of your old, worn-out wooden floors? Painting them can be a great way to give them a fresh new look without the expense of replacing them. Painting wooden floors is a relatively easy DIY project that can be done in a weekend. In this article, we will provide you with some tips on how to paint your wooden floors and achieve a professional-looking finish.

Before you start painting, it is important to prepare your floors properly. This involves cleaning, sanding, and priming the surface to ensure that the paint adheres properly and lasts for a long time. We will walk you through the steps of preparing your floors and choosing the right paint color and finish. We will also provide you with some ideas on how to create interesting patterns and designs on your floors using stencils or painter’s tape. With the right tools and techniques, you can transform your wooden floors into a beautiful and stylish feature of your home.

Understanding the Basics of Painting Wooden Floors

paint-wooden-floors

If you’re thinking of painting your wooden floors, it’s important to understand the basics before you start. Painting your floors can give your home a fresh new look, but it’s not a project to take lightly. Here are some things to keep in mind:

Choose the Right Paint

Not all paints are created equal, and this is especially true when it comes to painting floors. You’ll want to choose a paint that’s specifically designed for floors, as these paints are formulated to be more durable and resistant to wear and tear. Look for paints labeled as “porch and floor” or “deck and floor” paints. These paints are usually oil-based or water-based enamels and are available in a range of colors.

Prepare the Surface

Proper surface preparation is key to a successful floor painting project. Start by thoroughly cleaning the floors to remove any dirt, dust, or debris. Sand the floors lightly to create a rough surface that will help the paint adhere. Fill any cracks or holes with wood filler, and sand again once the filler is dry. Finally, vacuum and wipe down the floors to remove any remaining dust.

Use the Right Tools

To get the best results, it’s important to use the right tools. You’ll need a high-quality brush or roller designed for use with floor paints. A brush will give you a smoother finish, but a roller is faster. You may also want to use a paint sprayer if you have a large area to cover. Be sure to choose the right size brush or roller for your project, and use a high-quality paint tray to hold your paint.

Apply the Paint

When you’re ready to paint, start by cutting in around the edges of the room with a brush. Then, use a roller or sprayer to apply the paint in even, thin coats. Be sure to follow the manufacturer’s instructions for drying time and recoat time. It’s better to apply several thin coats of paint than one thick coat, as this will help prevent drips and ensure a smooth finish.

Allow for Drying Time

Once you’ve finished painting, it’s important to allow plenty of time for the paint to dry before you start using the floors again. This can take anywhere from a few hours to a few days, depending on the type of paint you used and the humidity in your area. Be sure to follow the manufacturer’s instructions for drying time, and avoid walking on the floors or placing furniture on them until the paint is fully cured.

By following these basic tips, you can achieve beautiful, long-lasting results when painting your wooden floors.

Choosing the Right Paint and Tools

When it comes to painting wooden floors, choosing the right paint and tools is crucial to achieving a beautiful and long-lasting finish. In this section, we will go over the key factors to consider when selecting your paint and tools.

Selecting the Paint

When it comes to selecting the paint for your wooden floors, there are a few things to keep in mind. First, you’ll want to choose a paint that is specifically designed for floors. These paints are formulated to be durable and resistant to wear and tear, which is essential for high-traffic areas like floors.

Second, consider the color and finish of the paint. While white is a popular choice for painted wooden floors, you can choose any color you like. Just be sure to test a small area first to make sure you like the color and that it complements the rest of your decor. As for the finish, a glossy or semi-glossy finish is recommended for floors as it is easier to clean and more durable than a matte finish.

Lastly, make sure the paint is compatible with the type of wood you are painting. Some paints may not adhere well to certain types of wood, so be sure to check the label or consult with a professional if you are unsure.

Picking the Right Brushes and Rollers

The tools you use to apply the paint are just as important as the paint itself. When it comes to brushes and rollers, there are a few things to consider.

For brushes, choose a high-quality brush with synthetic bristles. These brushes will provide a smooth and even finish and are easier to clean than natural bristle brushes. Look for a brush with a comfortable grip and a size that is appropriate for the size of your floor.

For rollers, choose a high-quality roller with a medium nap. This will allow the paint to be applied evenly and will prevent drips and streaks. Look for a roller with a sturdy frame and a comfortable grip.

In addition to brushes and rollers, you may also need other tools such as sandpaper, painter’s tape, and a paint tray. Be sure to have all the necessary tools on hand before you begin painting.

By selecting the right paint and tools, you can ensure a successful and long-lasting paint job on your wooden floors.

Preparing Your Wooden Floors

preparing-your-wooden-floors

Before you start painting your wooden floors, you need to prepare them properly. This step is crucial to ensure that the paint adheres well and lasts for a long time. Follow these sub-sections to prepare your floors:

Cleaning the Floor

The first step is to clean your wooden floors thoroughly. You should remove any dirt, dust, or debris that may be present on the surface. Here are some tips to clean your floors:

  • Sweep the floor with a broom to remove loose dirt and debris.
  • Use a vacuum cleaner to remove dust and small particles from the floor.
  • Clean the floor with a damp mop and a mild detergent. Avoid using harsh chemicals that can damage the wood.

Make sure the floor is completely dry before you move on to the next step.

Sanding the Surface

The next step is to sand the surface of your wooden floors. Sanding helps to remove any rough spots, scratches, or stains on the surface. It also helps to create a smooth surface for the paint to adhere to. Here are some tips to sand your floors:

  • Use a floor sander to sand the surface of the floor. Make sure you follow the manufacturer’s instructions carefully.
  • Sand the floor in the direction of the grain to avoid damaging the wood.
  • Start with a coarse sandpaper and gradually move to a finer grit to create a smooth surface.
  • After sanding, use a vacuum cleaner to remove any dust or debris from the floor.

By following these steps, you can prepare your wooden floors for painting. Remember to take your time and be patient during this process. Proper preparation will ensure that your paint job looks great and lasts for a long time.

Applying Primer to the Floor

Before you start painting your wooden floors, you need to prepare the surface by applying a primer. Priming the floor will help the paint adhere better and last longer. Here are the steps to follow when applying primer to your wooden floors:

  1. Choose the Right Primer: Make sure to choose a primer that is suitable for your paint type. If you are using oil-based paint, use an oil-based primer. If you are using water-based paint, use a water-based primer.
  2. Prepare the Surface: Sand the floorboards with 150-grit sandpaper to remove any rough spots or imperfections. Then, clean the floor thoroughly with a powdered detergent cleaner to remove all dust and deposits. Rinse the floor with clean water and allow it to dry completely. This may take a couple of days.
  3. Apply the Primer: Apply the primer to the floor using a paint roller or brush. Start at the farthest corner of the room and work your way towards the door. Make sure to apply the primer in thin, even coats. Allow the primer to dry completely before applying the paint. It is recommended to let the primer dry overnight.
  4. Sand the Floor: Once the primer is dry, lightly sand the floor with 220-grit sandpaper to remove any rough spots or imperfections. Wipe the floor with a cloth or rag dampened with mineral spirits to remove any dust or debris.
  5. Apply a Second Coat of Primer (Optional): If you notice any areas where the primer did not cover well, you can apply a second coat of primer. Allow the primer to dry completely before applying the paint.

By following these steps, you will ensure that your wooden floors are properly primed and ready for painting.

Painting Your Wooden Floors

If you’re looking to give your wooden floors a fresh new look, painting them can be a great option. Here are some tips on how to paint your wooden floors.

Applying the First Coat

Before you begin painting, make sure your floors are clean and free of any debris. You can sweep or vacuum them to remove any dust or dirt. Once they’re clean, you can apply the first coat of paint.

When it comes to choosing paint, make sure you choose a paint that is specifically designed for floors. This type of paint is more durable and will hold up better over time. You can choose any color you like, but be sure to test a small area first to make sure you like the color and finish.

When applying the first coat of paint, use a roller or brush and work in small sections. Start at one end of the room and work your way across, making sure to overlap each section slightly to avoid leaving any gaps. Allow the first coat to dry completely before adding additional coats.

Adding Additional Coats

Once the first coat is dry, you can add additional coats of paint. Depending on the color and finish you’ve chosen, you may need to apply two or three coats to achieve the desired look.

When applying additional coats, be sure to use a light touch and work in small sections. You don’t want to apply too much paint at once, as this can lead to drips and uneven coverage. Allow each coat to dry completely before adding the next one.

When you’re finished painting, allow the floors to dry completely before walking on them or placing any furniture back in the room. This will ensure that the paint has had time to fully cure and will help prevent any damage or scuffs.

Maintaining Your Painted Floors

Once you’ve painted your wooden floors, it’s important to maintain them properly to ensure they look great for years to come. Here are some tips to help you keep your painted floors in top condition.

Regular Cleaning

Regular cleaning is essential to maintain the appearance of your painted floors. Here are some tips for cleaning your painted floors:

  • Sweep or vacuum your floors regularly to remove dust and dirt.
  • Damp mop your floors with a mild detergent to remove any dirt or grime that has accumulated.
  • Avoid using harsh chemicals or abrasive cleaners, as they can damage the paint on your floors.
  • Wipe up spills immediately to avoid staining or damaging the paint on your floors.

Dealing with Scratches and Scuffs

Even with regular cleaning, your painted floors may still get scratched or scuffed over time. Here are some tips for dealing with scratches and scuffs:

  • Use a touch-up kit to repair small scratches and scuffs. These kits usually contain paint and a small brush, and can be used to touch up small areas of damage.
  • For larger scratches or scuffs, you may need to repaint the affected area. Sand the damaged area lightly to remove any loose paint, and then apply a new coat of paint.
  • To prevent scratches and scuffs, place felt pads on the bottom of furniture legs and avoid wearing shoes with hard soles on your floors.

By following these tips, you can keep your painted floors looking great for years to come.

How to Build Wooden Crate DayZ: A Beginner's Guide

If you’re playing DayZ, you know that storage is crucial. Whether you’re trying to hide your valuables or just need extra space for your supplies, wooden crates are a great solution. In this article, we’ll go over how to build a wooden crate in DayZ.

Crafting a wooden crate is a simple process that requires just a few materials. Once you have your crate, you can store it in an underground stash or even in the built-in slot of an M3S truck. Not only does this provide extra storage, but it also prevents your items from despawning during server shutdowns. So, let’s get started on building your wooden crate.

To build a wooden crate, you’ll need to gather some planks and nails. Once you have these materials, you can use them to craft the wooden crate. From there, you can place your items inside and store it in a secure location. With a little bit of planning and preparation, you can ensure that your supplies are safe and secure in DayZ.

Understanding Wooden Crates in DayZ

In DayZ, wooden crates are a crucial item for storing your valuables and supplies. They are simple to craft and provide ample storage space for your items. Here’s what you need to know about wooden crates in DayZ:

Crafting Wooden Crates

To craft a wooden crate, you will need 8 wooden planks and 16 nails. You can obtain wooden planks by using a saw on a tree or by dismantling wooden items such as doors or fences. Nails can be found in industrial areas or crafted by combining scrap metal and a stone.

Once you have the necessary materials, you can craft a wooden crate by selecting the planks and nails in your inventory and choosing the “craft” option. The wooden crate will appear in your inventory and can be placed on the ground for storage.

Using Wooden Crates

Wooden crates have 50 storage slots, making them a great option for storing large amounts of items. You can place items in the crate by opening it and dragging the item into the appropriate slot. You can also take items out of the crate by dragging them from the crate to your inventory.

One important thing to note is that wooden crates can be buried in an underground stash, making them much harder for bandits to find and raid. This is a great option for storing your most valuable items and supplies.

Maintaining Wooden Crates

Wooden crates can decay over time and eventually become ruined. To prevent this, you can use a spray paint can to paint the wooden crate and increase its lifespan. You can also repair a damaged wooden crate by using a toolbox on it.

In conclusion, wooden crates are a must-have item for any DayZ player looking to store their items and supplies. They are easy to craft, provide ample storage space, and can be buried for added security. Remember to maintain your wooden crates to ensure they last as long as possible.

Materials Needed

To build a Wooden Crate in DayZ, you will need the following materials:

Wood Logs

The first material you will need to build a Wooden Crate is Wood Logs. You can obtain Wood Logs by using a Hatchet or a Saw to chop down trees. Once you have acquired Wood Logs, you will need to use a Saw to turn them into Wooden Planks. You will need a total of 8 Wooden Planks to build one Wooden Crate.

Nails

The second material you will need to build a Wooden Crate is Nails. You can find Nails in various locations throughout the game, such as Construction Sites or Industrial Areas. You can also craft Nails by using a Hammer or a Hatchet to dismantle Wooden Crates or Pallets. You will need a total of 16 Nails to build one Wooden Crate.

Hammer or Hatchet

The third material you will need to build a Wooden Crate is either a Hammer or a Hatchet. You can use a Hammer to craft Nails from scrap metal or to dismantle Wooden Crates and Pallets for Nails. Alternatively, you can use a Hatchet to chop down trees for Wood Logs, which can be turned into Wooden Planks. You will need either a Hammer or a Hatchet to build a Wooden Crate.

In summary, to build a Wooden Crate in DayZ, you will need 8 Wooden Planks, 16 Nails, and either a Hammer or a Hatchet. Make sure to gather all of these materials before attempting to build a Wooden Crate.

Finding the Right Location

When building a wooden crate in DayZ, finding the right location is crucial. You want to make sure that your crate is hidden and secure from other players who may try to steal your items. Here are some tips to help you find the perfect spot:

  • Look for areas that are not easily accessible: Try to find a spot that is off the beaten path and not easily visible from main roads or popular areas. This will help keep your crate hidden from other players.

  • Consider burying your crate: Burying your crate is a great way to keep it hidden and secure. You can bury your crate in an underground stash, which makes it much harder for bandits to find and raid.

  • Look for areas with natural cover: Try to find a spot that has natural cover such as trees or bushes. This will help conceal your crate and make it harder for other players to spot.

  • Avoid building your crate in high traffic areas: Avoid building your crate in areas where other players frequently pass through. This will increase the likelihood of your crate being discovered and raided.

  • Be mindful of server restarts: When placing your crate, be mindful of when the server is scheduled to restart. Placing items in your crate prevents them from despawning during periodic server shutdowns.

By following these tips, you can find the perfect location to build your wooden crate in DayZ. Remember to always be cautious and aware of other players in the area.

Steps to Build a Wooden Crate

If you’re playing DayZ, you know that storage is essential, especially when you need to hide your valuables if your base isn’t built yet. In this section, we’ll guide you through the steps to build a wooden crate in DayZ.

Collecting Materials

Before you can start crafting a wooden crate, you’ll need to gather some materials. Here’s what you’ll need:

Materials Quantity
Wooden Planks 8
Nails 20

You can find wooden planks in many places, including lumber yards, construction sites, and abandoned buildings. Nails can be found in hardware stores, construction sites, and other similar locations.

Crafting the Crate

Once you have all the necessary materials, you can start crafting your wooden crate. Follow these steps:

  1. Open your inventory and select the crafting tab.
  2. Look for the wooden crate recipe and click on it.
  3. If you have all the required materials, the recipe will be highlighted. Click on it to craft the wooden crate.

Placing the Crate

Now that you’ve crafted your wooden crate, it’s time to place it. Here’s how:

  1. Select your wooden crate from your inventory.
  2. Look for a flat surface to place your crate on.
  3. Use the action button to place the crate on the ground.

You can also bury your wooden crate by selecting it from your inventory and using the bury action. This will make it much harder for bandits to find and raid.

That’s it! You’ve successfully built a wooden crate in DayZ. Use it to store your valuable items and keep them safe.

Maintaining Your Wooden Crate

Once you’ve crafted your Wooden Crate in DayZ, it’s important to maintain it properly to ensure that it lasts as long as possible. Here are some tips on how to maintain your Wooden Crate:

Keep it Dry

Wooden Crates in DayZ can become damaged if they are exposed to water for too long. To prevent this from happening, make sure you keep your Wooden Crate in a dry location. If you need to transport it across a body of water, make sure to put it in a waterproof container first.

Protect it from the Elements

In addition to keeping your Wooden Crate dry, you should also protect it from the sun and other elements. Direct sunlight can cause the wood to warp, while extreme temperatures can cause it to crack. If you need to leave your Wooden Crate outside for an extended period of time, consider covering it with a tarp or other protective covering.

Check for Damage

Regularly check your Wooden Crate for any signs of damage. Look for cracks, warping, or other signs of wear and tear. If you notice any damage, repair it as soon as possible to prevent it from getting worse.

Clean it Regularly

Dirt, dust, and other debris can accumulate on your Wooden Crate over time. To keep it looking its best, clean it regularly with a soft cloth or brush. You can also use a mild soap and water to remove any stubborn stains.

By following these simple tips, you can ensure that your Wooden Crate in DayZ lasts as long as possible. With proper maintenance, your Wooden Crate can provide you with a reliable storage solution for all of your gear and supplies.

Safety Precautions

When building a wooden crate in DayZ, it is important to take some safety precautions to avoid any unnecessary injuries. Here are some tips to keep in mind:

Choose a Safe Location

When selecting a location to build your wooden crate, make sure it is a safe and secure area. Avoid building it in high-traffic areas or near popular landmarks, as this can attract unwanted attention from other players. Also, be sure to choose a location that is easily accessible, but not too close to your base or stash.

Gather Materials Safely

To build a wooden crate, you will need to gather materials such as planks and nails. When collecting these resources, be sure to use caution and avoid dangerous areas. Use your axe or hacksaw to chop down trees to gather planks, and search for nails in abandoned buildings or industrial areas.

Watch for Other Players

When building your wooden crate, keep an eye out for other players who may be nearby. If you see someone approaching, be prepared to defend yourself or move to a safer location. Always be aware of your surroundings and stay alert for any potential threats.

Use Tools Safely

When building your wooden crate, be sure to use your tools safely. Avoid swinging your axe or hacksaw near other players, and be careful not to injure yourself or others. Also, be sure to store your tools in a safe location when you are not using them.

By following these safety precautions, you can build a wooden crate in DayZ without putting yourself or others at risk. Remember to stay alert and use caution at all times to ensure a safe and successful building experience.

Additional Tips and Tricks

Building a Wooden Crate in DayZ can be a lifesaver when it comes to storing your valuable items and gear. But there are a few tips and tricks that can make the process even smoother.

Use a Crowbar to Get More Nails

Nails are a crucial component in building a Wooden Crate, but they can be hard to come by. One way to get more nails is by using a crowbar to dismantle items like fences or wooden crates. This will give you a chance to salvage some nails, which can be used in building your own Wooden Crate.

Consider Burying Your Crate

If you’re worried about bandits raiding your base and stealing all your gear, consider burying your Wooden Crate. Just like the Sea Chest, the Wooden Crate can be buried in an Underground Stash, making it much harder for bandits to find and raid. Plus, placing items in the Wooden Crate prevents them from despawning during periodic server shutdowns.

Use Multiple Crates for Organization

If you have a lot of items to store, consider using multiple Wooden Crates for organization. You can label each crate with a specific category of items, such as food, medical supplies, or weapons. This will make it easier to find what you need quickly and efficiently.

Upgrade to a Sea Chest

While the Wooden Crate is a great storage solution, it does have its limitations. If you find yourself running out of space, consider upgrading to a Sea Chest. The Sea Chest has more storage capacity and is also able to be buried in an Underground Stash. However, keep in mind that the Sea Chest requires more resources to build.

By following these tips and tricks, you’ll be able to build and use your Wooden Crate in DayZ more effectively. Happy looting!

How to Build a Wooden Handrail for Outdoor Steps: A Beginner's Guide

If you have outdoor steps leading up to your home, adding a handrail is a crucial safety feature. A wooden handrail not only provides support while going up and down the stairs, but it can also add a decorative touch to your home’s exterior. Building a handrail for outdoor steps may seem daunting, but with the right tools and materials, it can be a manageable DIY project.

Before you begin, it’s important to check your local building codes to ensure that your handrail meets the necessary safety requirements. Once you have the green light, gather your materials. You will need pressure-treated lumber, screws, a saw, a drill, and a level. Depending on the design you choose, you may also need additional tools such as a miter saw or a metal punch.

In this article, we will walk you through the steps to build a wooden handrail for outdoor steps. From measuring and cutting the lumber to attaching the handrail to the steps, we will provide clear instructions and tips to help you complete the project successfully. With a little bit of effort and patience, you can create a beautiful and functional handrail that will make your outdoor steps safer and more attractive.

Understanding the Fundamentals

When it comes to building a wooden handrail for outdoor steps, there are a few fundamentals that you need to understand first. In this section, we will cover the types of wood you can use and the weather considerations you need to keep in mind.

Types of Wood

Choosing the right type of wood for your handrail is crucial. You want a wood that is strong, durable, and can withstand the elements. Here are some of the most common types of wood used for outdoor handrails:

  • Cedar: Cedar is a popular choice for outdoor handrails because it is naturally resistant to rot, decay, and insects. It also has a beautiful, natural look that can complement any outdoor decor.
  • Redwood: Redwood is another popular choice for outdoor handrails. Like cedar, it is naturally resistant to rot, decay, and insects. It is also very strong and durable, making it a great choice for high-traffic areas.
  • Pressure-Treated Pine: Pressure-treated pine is an affordable option for outdoor handrails. It is treated with chemicals to resist rot and decay, making it a durable choice. However, it may not have the same natural look as cedar or redwood.

Weather Considerations

When building a wooden handrail for outdoor steps, you need to consider the weather conditions in your area. Exposure to the elements can cause wood to warp, crack, or rot over time. Here are some weather considerations to keep in mind:

  • Moisture: Moisture is one of the biggest enemies of outdoor wood. Make sure your handrail is properly sealed to protect it from rain, snow, and humidity.
  • Sunlight: UV rays from the sun can cause wood to fade and dry out. Consider using a UV-resistant sealant or stain to protect your handrail from the sun.
  • Temperature: Extreme temperatures can cause wood to expand and contract, which can lead to warping or cracking. Make sure your handrail is properly installed to allow for natural expansion and contraction.

By understanding the types of wood you can use and the weather considerations you need to keep in mind, you can build a wooden handrail for outdoor steps that is both beautiful and durable.

Gathering Materials

When it comes to building a wooden handrail for your outdoor steps, it’s important to gather all the necessary tools and materials before you begin. This will help ensure that the process goes smoothly and that you have everything you need to complete the project.

Tools Needed

Here are the tools you’ll need to build a wooden handrail for your outdoor steps:

Tools
Chop saw/miter saw
Power drill
Spade drill (1/2″ and 5/8″)
Hammer drill
Masonry bit (1/2″)
Sheet metal punch (or the spade drill from before)
Hammer
Crescent wrench
Sheet metal shears

Wood and Hardware

In addition to the tools listed above, you’ll also need to gather the following wood and hardware:

Materials
4″x 4″ x 8′ Pressure treated lumber (3)
2″ x 4″ x 10′ Pressure treated lumber (1)
Wood screws
Lag bolts
Washers
Nails
Wood glue
Sandpaper

It’s important to use pressure-treated lumber for outdoor projects, as it is more resistant to rot and decay. You’ll also want to choose screws and bolts that are appropriate for outdoor use, such as galvanized or stainless steel.

By gathering all of the necessary tools and materials before you begin, you’ll be well-prepared to build a sturdy and attractive wooden handrail for your outdoor steps.

Step by Step Guide

If you’re looking to build a wooden handrail for your outdoor steps, you’ve come to the right place. In this guide, we’ll walk you through the process step by step. By the end of this guide, you’ll have a sturdy and beautiful handrail that will provide vital support when climbing or descending stairs.

Measuring and Cutting

Before you start building your handrail, you’ll need to measure the length of your stairs to determine how much wood you’ll need. Once you have your measurements, you can purchase the wood and cut it to the appropriate lengths. Here are the steps to follow:

  1. Measure the length of your stairs using a measuring tape.
  2. Cut the rails and posts to the appropriate lengths using a saw. Be sure to wear protective gear, such as safety glasses and gloves, when using power tools.

Assembling the Handrail

Once you have your wood cut to the appropriate lengths, it’s time to assemble the handrail. Here are the steps to follow:

  1. Place the post holders on the stairs where you want the handrail to go.
  2. Install the posts into the holders and secure them with screws.
  3. Attach the rails to the posts using screws. Be sure to use a level to ensure that the rails are straight.
  4. If desired, add decorative caps to the top of the posts.

Installing the Handrail

Now that your handrail is assembled, it’s time to install it. Here are the steps to follow:

  1. Attach the handrail to the posts using screws.
  2. Seal the handrail with a weather-resistant sealant to protect it from the elements.

And that’s it! With these simple steps, you can build a wooden handrail for your outdoor steps that will provide both safety and beauty.

Maintenance Tips

Maintaining your wooden handrail is essential to ensure its longevity and safety. Here are some tips to keep your handrail in good condition:

Cleaning

Regular cleaning is necessary to prevent dirt and grime buildup on your handrail. You can clean your handrail using a mild soap and water solution. Scrub the handrail with a soft-bristled brush and rinse thoroughly with water. Avoid using harsh chemicals or abrasive materials that can damage the wood.

Repairs and Replacements

Inspect your handrail regularly for any signs of damage or wear and tear. If you notice any cracks, splits, or rotting, it’s time to repair or replace your handrail. You can repair minor damages by sanding and refinishing the affected area. For major damages, consider replacing the entire handrail.

When replacing your handrail, make sure to choose a wood species that is suitable for outdoor use and can withstand the elements. Cedar, redwood, and pressure-treated pine are some of the best options for outdoor handrails.

In conclusion, maintaining your wooden handrail is essential to ensure its safety and longevity. Regular cleaning and inspection can help prevent damages and prolong the life of your handrail. If you notice any damages, make sure to repair or replace your handrail promptly to avoid any accidents or injuries.

Safety Precautions

Building a wooden handrail for outdoor steps is a great DIY project that can add both safety and style to your home. However, it’s important to take safety precautions to ensure that the handrail is sturdy and secure.

First and foremost, make sure to wear appropriate safety gear, such as gloves and safety glasses, when handling tools and materials. This will protect you from any potential injuries while working on the project.

Before you start building, it’s also important to check with your local building codes to ensure that your handrail meets all necessary safety requirements. This will help to ensure that your handrail is safe and up to code.

When building the handrail, make sure to use high-quality materials that are suitable for outdoor use. This will help to ensure that the handrail is sturdy and can withstand the elements.

Additionally, make sure to properly secure the handrail to the steps and any nearby structures, such as the house or a nearby wall. This will help to ensure that the handrail is secure and won’t wobble or come loose.

Finally, always use caution when using tools and handling materials. Take your time and work carefully to ensure that the handrail is built safely and securely.

Why Do Wooden Floors Creak? Exploring the Causes of Creaky Floors

Do you have wooden floors that creak and groan every time you take a step? It can be frustrating to tiptoe around your own home, trying not to wake up your family or disturb your neighbors. But why do wooden floors creak in the first place?

One common reason for creaky floors is seasonal changes in temperature and humidity. As the weather changes, the wood in your floors can expand and contract, causing gaps between floorboards. When you step on these loose boards, they rub against each other and create a creaking sound. This is especially common in older homes with wooden floors, but it can happen to any type of wood flooring.

Another cause of creaky floors is inadequate subfloor support. If the subfloor beneath your wood flooring is not sturdy enough, it can bend and flex when you walk on it. This movement can cause the floorboards to rub against each other and create noise. Loose floorboards can also contribute to creaking floors, as they can shift and move when you step on them.

Understanding Wooden Floors

If you have wooden floors in your home, you may have noticed that they creak or squeak from time to time. While this can be annoying, it’s usually nothing to worry about. In this section, we’ll take a closer look at wooden floors and why they creak.

Wooden floors are made up of individual boards that are attached to a subfloor. Over time, the boards can shift and move, causing them to rub against each other or against the subfloor. This movement can create friction, which in turn can cause the boards to creak or squeak.

One of the main reasons why wooden floors creak is due to changes in temperature and humidity. As the temperature and humidity levels in your home fluctuate, the wood in your floors can expand and contract. This movement can cause the boards to rub against each other or against the subfloor, which can create a creaking or squeaking sound.

Another common cause of creaky wooden floors is inadequate subfloor support. If the subfloor is not properly supported, it can sag or shift, which can cause the boards to move and rub against each other. This can create a creaking or squeaking sound.

Finally, loose floorboards can also cause creaky wooden floors. Over time, the nails or screws that hold the boards in place can become loose, which can cause the boards to shift and move. This movement can create friction, which can cause the boards to creak or squeak.

In summary, wooden floors can creak for a variety of reasons, including changes in temperature and humidity, inadequate subfloor support, and loose floorboards. While creaky floors can be annoying, they are usually nothing to worry about. If you’re concerned about the creaking in your floors, a flooring expert can help you identify the underlying cause and recommend a solution.

The Science Behind Creaking

Have you ever wondered why your wooden floors creak so much? It turns out that there’s actually a scientific explanation behind this phenomenon. In this section, we’ll explore the science behind creaking and what causes it.

Wooden floors creak mainly due to the movement and friction between floorboards, subfloor, and nails. This movement is often triggered by changes in humidity, temperature, or pressure from foot traffic. Over time, these factors can cause boards to warp or nails to loosen, leading to that characteristic creaking sound.

One of the primary causes of creaking is changes in temperature and humidity. When the temperature and humidity fluctuate, the wood in your floors will expand and contract. This can cause the planks to separate slightly from each other, which leads to creaking sounds when you walk across the floor.

Another cause of creaking is improper installation or workmanship. If the floorboards are not installed correctly, they may not be able to expand and contract properly, which can lead to creaking. Similarly, if the nails are not properly driven into the subfloor, they can become loose over time, which can also cause creaking.

Finally, settling and foundation movement can also cause creaking in wooden floors. As a house settles over time, the subfloor can shift slightly, which can cause the floorboards to rub against each other and create creaking sounds.

In summary, creaking in wooden floors is caused by a combination of factors, including changes in temperature and humidity, improper installation or workmanship, and settling and foundation movement. By understanding the science behind creaking, you can take steps to prevent it from happening in your own home.

Factors Contributing to Wooden Floors Creaking

If you have wooden floors, you may have noticed that they creak or squeak from time to time. This is a common problem that many homeowners face, and it can be caused by a variety of factors. In this section, we will explore some of the most common factors that contribute to wooden floors creaking.

Age of the Wood

One of the main factors that can contribute to wooden floors creaking is the age of the wood. Over time, wood can become dry and brittle, which can cause it to creak when pressure is applied. This is especially true for older homes that have original hardwood floors. If your floors are older, you may need to have them inspected by a professional to determine if they need to be repaired or replaced.

Humidity and Temperature Changes

Changes in humidity and temperature can also cause wooden floors to creak. When the humidity levels in your home change, the wood in your floors can expand or contract, which can cause the planks to separate slightly from each other. This can create gaps between the planks, which can cause them to creak when pressure is applied. Similarly, changes in temperature can cause the wood to expand or contract, which can also contribute to creaking.

Improper Installation

Another factor that can contribute to wooden floors creaking is improper installation. If your floors were not installed correctly, they may shift or move when pressure is applied, which can cause them to creak. This can be caused by a variety of factors, including using the wrong type of nails or not leaving enough space between the planks.

In conclusion, there are several factors that can contribute to wooden floors creaking. If you are experiencing this problem, it is important to identify the underlying cause so that you can take steps to fix it. By addressing the issue promptly, you can help to ensure that your floors remain in good condition for years to come.

How to Prevent Wooden Floors from Creaking

If you’re tired of hearing your wooden floors creak every time you take a step, there are a few things you can do to prevent it from happening. Here are some tips to help you keep your floors quiet and comfortable to walk on:

1. Keep Your Floors Clean and Dry

One of the main causes of creaky floors is moisture. When wooden floors absorb moisture, they can expand and contract, causing the boards to rub against each other and create noise. To prevent this from happening, make sure to keep your floors clean and dry. Wipe up spills and leaks immediately, and use a dehumidifier to keep the humidity levels in your home under control.

2. Use Rugs and Mats

Another way to prevent creaky floors is to use rugs and mats. These can help absorb sound and prevent the boards from rubbing against each other. Place rugs and mats in high-traffic areas, such as hallways and entryways, to reduce the amount of wear and tear on your floors.

3. Tighten Loose Floorboards

If you have loose floorboards, they can rub against each other and cause creaking. To fix this problem, you can tighten the loose boards. Use a hammer and nails or screws to secure the boards in place. Be sure to use the right size and type of fasteners for your floors to prevent damage.

4. Lubricate the Flooring

Another effective way to prevent creaky floors is to lubricate the flooring. You can use talcum powder, graphite powder, or silicone spray to reduce friction between the boards. Apply the lubricant to the joints between the boards, and work it in with a soft brush or cloth.

5. Hire a Professional

If you’re still having problems with creaky floors, it may be time to call in a professional. A flooring specialist can assess the condition of your floors and recommend the best course of action. They may suggest refinishing or replacing your floors to prevent further damage and reduce noise.

By following these tips, you can prevent creaky floors and enjoy a quieter, more comfortable home.

Common Misconceptions About Creaking Floors

If you’re experiencing creaky floors, you may have heard some common misconceptions about why they occur. Here are a few of those misconceptions and the truth behind them:

Misconception: Creaking floors mean your home is poorly constructed.

While it’s true that poorly constructed homes can have creaky floors, it’s not always the case. Creaking floors can occur in any home, regardless of its construction quality. Factors such as temperature changes, humidity, and foot traffic can all contribute to creaky floors.

Misconception: Creaky floors can’t be fixed.

Creaky floors can be fixed. There are several methods that can be used to repair creaky floors, including adding shims, tightening loose boards, and lubricating the joints between boards. If you’re unsure about how to fix your creaky floors, it’s best to consult a professional.

Misconception: Creaky floors are a sign of a serious problem.

While creaky floors can be annoying, they’re not always a sign of a serious problem. In most cases, creaky floors are simply a result of normal wear and tear. However, if your floors are excessively creaky or if you notice other signs of structural damage, such as cracks in the walls or ceiling, it’s best to consult a professional to ensure that there are no underlying issues.

Misconception: Creaky floors are caused by pests.

While pests such as termites and rodents can cause damage to your floors, they’re not usually the cause of creaky floors. More often than not, creaky floors are caused by natural factors such as humidity and temperature changes.

Overall, creaky floors can be a nuisance, but they’re not always a sign of a serious problem. By understanding the common misconceptions about creaky floors, you can take steps to fix them and enjoy a quieter, more comfortable home.

How to Do Wooden Flooring: A Beginner's Guide

If you’re looking to add a touch of warmth and elegance to your home, installing hardwood flooring is a great way to do it. Solid hardwood flooring is a classic choice that never goes out of style. Not only does it add value to your home, but it’s also durable and easy to clean. If you’re up for a DIY project, you can install hardwood flooring yourself and save money on installation costs.

Before you begin, it’s important to choose the right type of wood flooring for your home. Solid hardwood flooring is typically nailed down during installation, while engineered flooring can be clicked together or glued down. You’ll also need to consider the type of subfloor you have and your budget. Once you’ve chosen your flooring and gathered your tools, you’re ready to get started.

Installing hardwood flooring can seem daunting, but with the right tools and a little bit of patience, it’s a project that you can tackle yourself. In this article, we’ll walk you through the steps of installing hardwood flooring, from preparing your subfloor to laying the last plank. By the end of this guide, you’ll have a beautiful new hardwood floor that you can be proud of.

Understanding Wooden Flooring

If you’re planning to install wooden flooring in your home, it’s important to understand the different types of wooden flooring available and their benefits. This will help you make an informed decision when choosing the right flooring for your home.

Types of Wooden Flooring

There are two main types of wooden flooring: solid wood flooring and engineered wood flooring.

Solid Wood Flooring: This type of flooring is made from a single piece of wood and is available in various thicknesses and widths. Solid wood flooring is more expensive than engineered wood flooring, but it’s also more durable and can be sanded and refinished multiple times.

Engineered Wood Flooring: This type of flooring is made from layers of wood that are glued together. The top layer is made from real wood, while the bottom layers are made from plywood or high-density fiberboard (HDF). Engineered wood flooring is less expensive than solid wood flooring, but it’s also less durable and can only be sanded and refinished a few times.

Benefits of Wooden Flooring

Wooden flooring offers several benefits over other types of flooring, including:

  • Durability: Wooden flooring is durable and can last for decades if properly maintained.

  • Aesthetics: Wooden flooring adds warmth and character to any room and comes in a variety of colors and finishes.

  • Easy to Clean: Wooden flooring is easy to clean and maintain, requiring only regular sweeping and occasional mopping.

  • Hypoallergenic: Wooden flooring doesn’t trap dust, pollen, or other allergens like carpet does, making it a great choice for people with allergies.

  • Increases Home Value: Installing wooden flooring can increase the value of your home and make it more attractive to potential buyers.

Overall, wooden flooring is a great investment for any home. Whether you choose solid wood or engineered wood flooring, you can enjoy the many benefits of this beautiful and durable flooring option.

Materials Needed for Wooden Flooring

Before you start installing your hardwood floor, it is important to make sure you have all the necessary materials. Here are the materials you will need:

1. Hardwood Flooring

The first and most obvious material you will need is the hardwood flooring itself. You can choose from a variety of species, colors, and finishes. Make sure to purchase enough flooring to cover the square footage of your room, plus an additional 10-15% for cuts and waste.

2. Underlayment

Underlayment is a thin layer of material that is installed between the subfloor and the hardwood flooring. It helps to reduce noise, absorb moisture, and provide a smooth surface for the flooring to rest on. There are several types of underlayment available, including foam, cork, and felt.

3. Moisture Barrier

A moisture barrier is a thin layer of plastic that is installed over the subfloor to prevent moisture from seeping up into the hardwood flooring. This is especially important if you are installing the flooring over a concrete slab.

4. Nails or Staples

You will need nails or staples to attach the hardwood flooring to the subfloor. The type of fastener you use will depend on the type of flooring you have and the method of installation.

5. Saw

You will need a saw to cut the hardwood flooring to fit around obstacles such as doorways and heating vents. A table saw or miter saw is recommended for this task.

6. Hammer or Flooring Nailer

You will need a hammer or flooring nailer to drive the nails or staples into the hardwood flooring. A flooring nailer is recommended for a more professional and efficient installation.

7. Tape Measure

You will need a tape measure to measure the square footage of your room and to make accurate cuts in the hardwood flooring.

8. Level

A level is important to ensure that your hardwood flooring is installed evenly and without any dips or bumps.

9. Safety Equipment

Lastly, it is important to wear safety equipment such as eye protection and ear plugs when using power tools and installing hardwood flooring.

Preparation for Wooden Flooring

Before you start installing your wooden floor, there are a few essential steps you need to take to ensure a successful installation. In this section, we will cover the two crucial steps of preparing your subfloor and acclimating your wood.

Inspecting the Subfloor

Inspecting your subfloor is an essential step before installing your wooden floor. You need to ensure that your subfloor is clean, dry, and level. Any unevenness in your subfloor can cause problems with the installation and lead to an uneven floor.

If your subfloor is not level, you may need to use a self-leveling compound to even it out. You can also use a moisture meter to check the moisture levels in your subfloor. If the moisture levels are too high, you need to address the issue before proceeding with the installation. High moisture levels can cause the wooden floor to warp, buckle, or cup.

Acclimating the Wood

Acclimating your wood is a crucial step before installing your wooden floor. Wood is a natural material that can expand or contract depending on the humidity and temperature of the environment. Acclimating your wood allows it to adjust to the conditions of your home, ensuring a stable and long-lasting installation.

To acclimate your wood, you need to leave it in the room where it will be installed for at least 72 hours before installation. This allows the wood to adjust to the temperature and humidity of the environment. Make sure to keep the wood at least four inches off the ground and away from any direct sunlight or heating vents.

In conclusion, inspecting your subfloor and acclimating your wood is a crucial step in preparing for your wooden floor installation. These steps ensure that your wooden floor is installed correctly and will last for years to come.

Installing Wooden Flooring

If you’re looking to give your home a facelift, installing wooden flooring is a great way to do it. Not only does it add value to your home, but it also adds warmth and beauty. Here’s how to install wooden flooring in your home.

Laying the Underlayment

Before you start installing the wooden planks, you need to lay down the underlayment. The underlayment is a layer of material that goes between the subfloor and the wooden planks. It helps to cushion the flooring, reduce noise, and prevent moisture from seeping in.

To lay the underlayment, follow these steps:

  1. Clean the subfloor: Make sure the subfloor is clean and free of debris. Sweep or vacuum it thoroughly.
  2. Roll out the underlayment: Roll out the underlayment across the entire floor, making sure it’s flat and smooth.
  3. Cut the underlayment: Cut the underlayment to fit the room, leaving a 1/4 inch gap around the edges.
  4. Tape the seams: Tape the seams of the underlayment together using a moisture-resistant tape.

Installing the Wooden Planks

Now that you’ve laid down the underlayment, it’s time to install the wooden planks. Here’s how to do it:

  1. Measure the room: Measure the length and width of the room to determine how many planks you’ll need. Add 10% to the total to account for waste.
  2. Acclimate the planks: Allow the wooden planks to acclimate to the room for at least 48 hours before installation.
  3. Start in the corner: Start in the corner of the room and work your way out.
  4. Lay the planks: Lay the planks down, making sure they fit snugly together. Use a rubber mallet to tap them into place.
  5. Cut the planks: Cut the planks to fit around obstacles like door frames and vents.
  6. Stagger the planks: Stagger the planks so that the ends of each plank are not lined up with the ends of the adjacent planks.
  7. Nail the planks: Nail the planks down using a nail gun, making sure to nail them into the subfloor and not the underlayment.
  8. Sand and finish: Sand the floor to remove any rough spots and finish it with a sealant or stain.

That’s it! With a little bit of time and effort, you can install wooden flooring in your home and enjoy the beauty and warmth it brings.

Finishing Touches

Once you have installed your wooden floor, it’s time to give it the finishing touches. This step is important as it will ensure that your floor looks beautiful and lasts for a long time. There are two main aspects to finishing touches: sanding and finishing, and caring for your wooden floor.

Sanding and Finishing

The first step in sanding and finishing your wooden floor is to ensure that it is clean and free of any debris. Use a broom or vacuum cleaner to get rid of any dust or dirt. Once your floor is clean, you can start sanding it. Sanding helps to remove any rough spots or imperfections on the surface of the wood.

When sanding your wooden floor, it’s important to use the right equipment. A drum sander is the most efficient tool for sanding large areas of wood. However, if you’re working on a smaller area, you can use a handheld sander. After sanding, you can apply a finish to your wooden floor. There are several different types of finishes to choose from, including oil-based, water-based, and wax finishes.

Caring for Your Wooden Floor

Once you have finished sanding and applying a finish to your wooden floor, it’s important to take care of it properly to ensure that it lasts for a long time. Here are some tips for caring for your wooden floor:

  • Use a soft-bristled broom or vacuum cleaner to remove any dirt or debris from your floor.
  • Clean up any spills or stains immediately to prevent them from damaging the wood.
  • Use a wood cleaner specifically designed for wooden floors to clean your floor. Avoid using harsh chemicals or abrasive cleaners as they can damage the finish on your floor.
  • Place rugs or mats in high traffic areas to protect your wooden floor from wear and tear.
  • Avoid wearing high heels or shoes with spikes on your wooden floor as they can scratch the surface of the wood.

By following these tips, you can ensure that your wooden floor looks beautiful and lasts for a long time.

How Many Satchels for Wooden Floor: A Quick Guide

Are you wondering how many satchels you need to destroy a wooden floor in Rust? Look no further. Satchels can be used to raid bases and destroy structures in Rust, but it’s important to know how many you need to use for each type of structure. Wooden floors can be particularly tricky, as they can be upgraded with a hammer.

When it comes to wooden floors in Rust, it typically takes 3 satchels to destroy them. However, this can vary depending on the type of wooden floor you are dealing with. If the wooden floor has been upgraded with a hammer, it may take more satchels to destroy it. It’s important to keep in mind that satchels can be expensive to make, so it’s important to use them strategically when raiding in Rust.

Understanding Satchels for Wooden Floors

When it comes to raiding in Rust, satchel charges are a popular choice for breaking into wooden floors. But how many satchels do you need to take down a wooden floor? Here’s what you need to know.

Assess the Size of the Wooden Floor

The number of satchels you need to take down a wooden floor depends on the size of the floor. A small wooden floor may only require one or two satchels, while a larger floor may require three or more.

Consider the Type of Wooden Floor

Different types of wooden floors may also require different numbers of satchels. For example, a wooden floor that has been upgraded with a hammer may require more satchels than a basic wooden floor.

How Many Satchels for a Wooden Floor?

Based on the information above, here’s a general guide for how many satchels you’ll need to take down a wooden floor:

  • Basic wooden floor: 1-2 satchels
  • Wooden floor upgraded with a hammer: 3 satchels

Keep in mind that these are just general guidelines, and the number of satchels you need may vary depending on the specific circumstances of your raid.

Tips for Using Satchels on Wooden Floors

Here are a few tips to keep in mind when using satchels to raid wooden floors:

  • Always make sure you have enough satchels before starting the raid.
  • Be aware of any potential hazards, such as traps or other defenses, that may be present around the wooden floor.
  • Consider using a combination of satchels and other raiding tools, such as explosive ammo or rockets, to take down wooden floors more efficiently.

Overall, understanding how many satchels you need for a wooden floor is an important part of raiding in Rust. By assessing the size and type of the floor, you can determine the number of satchels you need and plan your raid accordingly.

Types of Satchels

When it comes to using satchels to break through wooden floors, it’s important to understand the different types of satchels available. Here are some of the most common types of satchels you may encounter:

Leather Satchels

Leather satchels are a popular choice for those looking for a durable and reliable option. They are made from high-quality materials and can withstand a lot of wear and tear. Leather satchels are also resistant to water and other environmental factors, making them a great choice for outdoor use.

Synthetic Satchels

Synthetic satchels are another popular option. They are made from a variety of materials, including nylon and polyester, and are designed to be lightweight and easy to carry. Synthetic satchels are also resistant to water and other environmental factors, making them a great choice for outdoor use.

Heavy-Duty Satchels

If you’re looking for a satchel that can withstand a lot of wear and tear, a heavy-duty satchel may be the right choice for you. These satchels are made from high-quality materials and are designed to be durable and long-lasting. They are also resistant to water and other environmental factors, making them a great choice for outdoor use.

Cloth Satchels

Cloth satchels are a more affordable option and are often used for lighter-duty tasks. They are made from a variety of materials, including cotton and canvas, and are designed to be lightweight and easy to carry. While cloth satchels may not be as durable as leather or synthetic satchels, they are still a great choice for those on a budget.

Overall, when it comes to choosing the right satchel for breaking through a wooden floor, it’s important to consider your specific needs and requirements. Whether you need a satchel that is lightweight and easy to carry or one that is heavy-duty and can withstand a lot of wear and tear, there is a satchel out there that is perfect for you.

How Many Satchels Do You Need

When it comes to raiding a wooden floor in Rust, you need to have a clear idea of how many satchels you require. The number of satchels you need may vary depending on the thickness of the floor and the type of door you’re trying to break.

As a general rule, you need two satchels to break a wooden floor. However, if the floor is thicker, you may need more satchels. For example, if the floor is made of double-layered wooden planks, you may need up to four satchels to break it.

Additionally, the type of door you’re trying to break can also affect the number of satchels you need. A wooden door typically requires two satchels, while an iron door may require up to four satchels. An HQM door, on the other hand, may require up to 12 satchels.

Here’s a quick breakdown of the number of satchels you need for different types of doors:

  • Wooden door: 2 satchels
  • Iron door: 4 satchels
  • HQM door: 12 satchels

It’s important to note that these numbers are just a general guideline. The actual number of satchels you need may vary depending on the specific situation. Factors such as the quality of the satchels, the durability of the door, and the presence of traps or defenders can all affect the number of satchels needed.

In summary, when raiding a wooden floor in Rust, you typically need two satchels. However, the number of satchels you need may vary depending on the thickness of the floor and the type of door you’re trying to break. Always be prepared with extra satchels, and remember to take into account any other factors that may affect the raid.

Factors Influencing the Number of Satchels

When it comes to determining the number of satchels required to breach a wooden floor in Rust, there are several factors to consider. Here are some of the most important factors that can influence the number of satchels you will need to use:

1. Floor Thickness

The thickness of your wooden floor is one of the most important factors to consider when determining the number of satchels required. Thicker floors will require more explosives to breach, so it’s important to take this into account when planning your raid.

2. Floor Type

Different types of wooden floors have different durability levels, which can affect the number of satchels required to breach them. For example, a reinforced wooden floor will require more satchels than a regular wooden floor.

3. Floor Area

The total area of the wooden floor that you need to breach is another factor to consider. The larger the area, the more satchels you will need to use to breach it.

4. Obstacles

Obstacles such as walls, pillars, or other structures can affect the number of satchels required to breach a wooden floor. If there are obstacles in the way, you may need to use more satchels to get through them.

5. Resources

Finally, the resources you have available will also play a role in the number of satchels required. If you have limited resources, you may need to use fewer satchels and find alternative ways to breach the wooden floor.

Overall, it’s important to carefully consider all of these factors when determining the number of satchels required to breach a wooden floor in Rust. By doing so, you can ensure that you have enough explosives to get the job done without wasting resources or putting yourself at unnecessary risk.

Size of the Wooden Floor

When it comes to figuring out how many satchels you need for your wooden floor, the first thing you need to determine is the size of the floor. Here are some guidelines for different sizes of wooden floors:

Small Floors

If you have a small wooden floor, such as one in a closet or bathroom, you may only need a few satchels to get the job done. A small wooden floor typically measures between 10 and 50 square feet. Depending on the thickness of the floor and the type of wood, you may need between 1 and 3 satchels to blow it up.

Medium Floors

A medium-sized wooden floor is typically found in a bedroom or living room. This type of floor measures between 50 and 150 square feet. For a medium-sized wooden floor, you may need between 3 and 6 satchels to blow it up.

Large Floors

If you have a large wooden floor, such as one in a dining room or kitchen, you will need more satchels to get the job done. A large wooden floor typically measures over 150 square feet. For a large wooden floor, you may need between 6 and 10 satchels to blow it up.

Remember, these are just guidelines, and the number of satchels you need may vary depending on the thickness of the floor and the type of wood. It’s always a good idea to measure your floor and consult with a professional before starting any demolition work.

Material of Satchels

When it comes to choosing the right satchels for your wooden floor, you need to consider the material of the satchels. Satchels are made of different materials, and each material has its own unique properties. Here are some common materials used to make satchels:

Leather

Leather satchels are a popular choice for wooden floors because they are durable and long-lasting. They are also resistant to scratches and moisture, which makes them ideal for high-traffic areas. Leather satchels come in different colors and styles, so you can choose one that matches your decor.

Synthetic Material

Satchels made of synthetic materials like nylon and polyester are also a good choice for wooden floors. They are lightweight, easy to clean, and resistant to stains and moisture. Synthetic satchels are available in a wide range of colors and designs, so you can find one that suits your taste.

Cloth

Cloth satchels are another option for wooden floors. They are lightweight and easy to install, but they are not as durable as leather or synthetic satchels. Cloth satchels are best suited for low-traffic areas like bedrooms and closets.

Jute

Jute satchels are made of natural fibers and are environmentally friendly. They are durable and resistant to moisture, but they are not as strong as leather or synthetic satchels. Jute satchels are available in different colors and designs, and they are a good choice for eco-conscious homeowners.

In conclusion, the material of satchels is an important factor to consider when installing a wooden floor. Leather and synthetic satchels are the most durable and long-lasting, while cloth and jute satchels are best suited for low-traffic areas. Choose a satchel material that suits your needs and budget, and enjoy your beautiful new wooden floor.

Cost Implications of Satchels

When considering the number of satchels needed to destroy a wooden floor, it’s important to also consider the cost implications. Satchels can be expensive, and it’s crucial to know how many you will need before purchasing them.

The number of satchels required to destroy a wooden floor varies depending on the size of the floor. As a general rule, it’s recommended to use one satchel per 30 square feet. Therefore, if you have a 300 square foot wooden floor, you will need approximately ten satchels.

It’s worth noting that the cost of satchels can vary depending on where you purchase them from. It’s a good idea to shop around and compare prices to ensure you’re getting the best deal. Additionally, some suppliers may offer discounts for bulk purchases, so it’s worth enquiring about this option.

When calculating the cost of satchels, it’s also important to factor in the cost of any additional equipment you may need, such as a hammer or detonator. These items can add to the overall cost of the project, so it’s important to budget for them accordingly.

In summary, the cost of satchels can be a significant factor when considering the destruction of a wooden floor. It’s important to calculate how many satchels you will need before purchasing them and to shop around for the best prices. Additionally, it’s important to factor in the cost of any additional equipment you may need.

Satchels and Floor Maintenance

When it comes to maintaining your wooden floors, it’s important to understand how many satchels are required for proper floor installation. Satchels are explosive charges that can be used to destroy walls, doors, and floors in Rust. In this section, we’ll discuss the number of satchels required for wooden floors and some tips for floor maintenance.

How Many Satchels for Wooden Floors?

The number of satchels required for wooden floors depends on the size and amount of flooring you need. On average, it takes about 2 satchels to destroy a wooden floor. However, this number can vary depending on the type of wood and the thickness of the floor. For example, hardwood floors are more resilient than softwood floors and may require more satchels to destroy.

To determine the right number of satchels for your wooden floors, consider the foot traffic in your home. High-traffic areas like living rooms and hallways may require more satchels to ensure proper installation and durability. Conversely, low-traffic areas like bedrooms may require fewer satchels.

Tips for Floor Maintenance

Proper maintenance is essential for the longevity of your wooden floors. Here are some tips to keep your floors looking great:

  • Sweep or vacuum your floors regularly to remove dirt and debris.
  • Use a damp mop to clean your floors, but avoid using excessive water as it can damage the wood.
  • Avoid using harsh chemicals or abrasive cleaners on your floors as they can cause damage and discoloration.
  • Use furniture pads to protect your floors from scratches and dents.
  • Consider refinishing your floors every few years to maintain their appearance and durability.

By following these tips and understanding the number of satchels required for proper floor installation, you can ensure that your wooden floors remain beautiful and durable for years to come.

How to Install Wooden Flooring: A Beginner's Guide

Looking to add a touch of elegance and warmth to your home? Installing wooden flooring is a great way to do just that. Not only does it add value to your property, but it also provides a durable and long-lasting flooring solution that is easy to maintain.

Before you begin your installation, it’s important to understand the different types of wooden flooring available and which one is best suited for your needs. Solid hardwood flooring is a popular option that can be nailed or glued down, while engineered hardwood flooring is made up of layers of wood and can be installed as a floating floor. Additionally, laminate flooring provides a cost-effective alternative that mimics the look of hardwood without the same level of durability.

Once you’ve chosen your flooring type, it’s time to get started on the installation process. From preparing your subfloor to laying down the planks, there are several steps involved in achieving a professional-looking finish. With the right tools and a little bit of patience, you can transform your space with the beauty and warmth of wooden flooring.

Understanding Wooden Flooring

If you’re considering installing new flooring in your home, wooden flooring is an excellent choice. Not only does it add warmth and character to your space, but it can also increase the value of your home. Here’s what you need to know about wooden flooring.

Types of Wooden Flooring

There are two main types of wooden flooring: solid and engineered. Solid wood flooring is made from a single piece of wood and is typically thicker than engineered wood flooring. Engineered wood flooring, on the other hand, is made from several layers of wood and is more stable than solid wood flooring.

Within these two categories, there are several different types of wood to choose from, including oak, maple, cherry, and walnut. Each type of wood has its own unique characteristics, so it’s important to choose the one that best suits your needs and preferences.

Benefits of Wooden Flooring

There are many benefits to choosing wooden flooring for your home. Here are just a few:

  • Durability: Wooden flooring is incredibly durable and can last for decades with proper care and maintenance.
  • Easy to clean: Wooden flooring is easy to clean and maintain, making it a great choice for busy households.
  • Adds value: Wooden flooring can increase the value of your home, making it a smart investment.
  • Versatile: Wooden flooring comes in a variety of colors and styles, so you can choose the one that best suits your decor.

Overall, wooden flooring is a great choice for any home. Whether you prefer the classic look of solid wood or the versatility of engineered wood, there’s a wooden flooring option that’s perfect for you.

Selecting the Right Wood

When it comes to selecting the right wood for your flooring, there are a few things to consider. In this section, we will go over two important factors to keep in mind: choosing the wood type and considering the room usage.

Choosing the Wood Type

There are many different types of wood to choose from when it comes to flooring. Some popular options include oak, maple, cherry, and walnut. Each type of wood has its own unique characteristics, such as color, grain pattern, and hardness.

When selecting a wood type, consider the overall look and feel you want to achieve in your space. If you are going for a traditional, classic look, oak or maple may be a good choice. For a more modern or contemporary feel, consider a darker wood like cherry or walnut.

It’s also important to consider the durability of the wood. Harder woods like oak and maple are more resistant to scratches and dents, making them a good choice for high-traffic areas. Softer woods like pine and cedar may be better suited for low-traffic areas like bedrooms.

Considering the Room Usage

Another important factor to consider when selecting the right wood for your flooring is the room usage. Different rooms in your home have different needs when it comes to flooring.

For example, if you are installing flooring in a kitchen or bathroom, you will want to choose a wood that is resistant to moisture. Oak and maple are good options for these types of rooms, as they are both durable and moisture-resistant.

If you are installing flooring in a bedroom or living room, you may want to choose a wood that is softer and more comfortable underfoot. Pine and cedar are good options for these types of rooms, as they are softer and have a more natural, rustic look.

Overall, selecting the right wood for your flooring is an important decision that will have a big impact on the look and feel of your space. Consider the overall style you want to achieve, as well as the durability and moisture-resistance of the wood, to make the best choice for your home.

Preparation for Installation

Installing hardwood floors can be a great way to add value and style to your home. However, it’s important to take the necessary steps to prepare for installation to ensure that the process goes smoothly and the end result is exactly what you want.

Clear the Room

Before you begin installing your hardwood floors, you’ll need to clear the room of all furniture and other items. This will give you plenty of space to work and will also prevent any damage to your belongings during the installation process.

Check the Subfloor

Before you install your hardwood floors, you’ll need to check the subfloor to make sure it’s level and in good condition. Any bumps or unevenness in the subfloor can cause problems with the installation and can also lead to problems with the finished product. If you find any issues with the subfloor, you’ll need to address them before you begin installing your hardwood floors.

Acclimate the Flooring

Wood is a natural material that can expand and contract with changes in temperature and humidity. To prevent problems with your hardwood floors down the line, it’s important to acclimate the flooring to the room before installation. This involves leaving the flooring in the room for a few days to allow it to adjust to the temperature and humidity of the space.

Seal Off Rooms

During the installation process, dust and debris can be created that can spread throughout your home. To prevent this from happening, it’s a good idea to seal off rooms that will not be sanded. This can be done by closing the doors and covering the doorway with plastic sheets secured with painter’s tape.

Gather Tools and Supplies

Finally, before you begin installing your hardwood floors, you’ll need to gather all of the necessary tools and supplies. This may include a pneumatic flooring nailer, a saw, a hammer, and other items. Make sure you have everything you need before you begin to avoid any delays or complications during the installation process.

Installation Process

Tools Required

Before starting the installation process, you will need to gather the following tools:

Tools Description
Measuring tape Used to measure the length and width of the room
Chalk line Used to mark straight lines on the subfloor
Circular saw Used to cut the wooden planks to size
Table saw Used to rip the planks to width
Jigsaw Used to make intricate cuts around obstacles
Flooring stapler Used to secure the planks to the subfloor
Pry bar Used to remove baseboards and existing flooring
Hammer Used to nail down the subfloor
Level Used to ensure the subfloor is level
Safety gear Gloves, eye protection, and a dust mask

Step by Step Guide

  1. Prepare the subfloor: Before installing the wooden planks, ensure the subfloor is clean, level, and free of any debris. If necessary, remove the existing flooring and baseboards.

  2. Acclimate the wood: Allow the wooden planks to acclimate to the room’s temperature and humidity for at least 48 hours before installation.

  3. Plan the layout: Plan the layout of the wooden planks, taking into account the direction of the room’s natural light and the placement of furniture.

  4. Install the underlayment: Install a layer of underlayment to provide a moisture barrier and cushioning between the subfloor and wooden planks.

  5. Install the first row: Install the first row of wooden planks, ensuring they are straight and aligned with the chalk line.

  6. Install the subsequent rows: Install the subsequent rows of wooden planks, using the flooring stapler to secure them to the subfloor.

  7. Cut the planks: Use the circular saw, table saw, or jigsaw to cut the wooden planks to size and shape around obstacles such as doorways and vents.

  8. Install the last row: Install the final row of wooden planks, ensuring they fit snugly against the wall.

  9. Install the baseboards: Install the baseboards, covering the expansion gap between the wooden planks and the wall.

  10. Finish the floor: Sand and finish the wooden floor according to the manufacturer’s instructions.

By following these steps and using the necessary tools, you can install wooden flooring in your home and achieve a beautiful and long-lasting result.

Post Installation Care

After installing your beautiful new hardwood flooring, it’s important to take proper care of it to ensure it lasts for many years to come. Here are some tips for post-installation care:

Cleaning and Maintenance

To keep your hardwood floors looking their best, it’s important to clean them regularly. Here are some tips for cleaning and maintenance:

  • Sweep or vacuum your floors regularly to remove dirt and debris that can scratch the surface of your floors.
  • Use a damp mop to clean your floors, but avoid using too much water, as excess water can damage your floors.
  • Use a hardwood floor cleaner that is specifically designed for your type of flooring. Avoid using harsh chemicals or abrasive cleaners that can damage your floors.
  • Wipe up spills immediately to prevent them from soaking into your floors and causing damage.
  • Place mats at entryways to prevent dirt and debris from being tracked onto your floors.

Preventing Damage

While hardwood floors are durable, they can still be damaged if not properly cared for. Here are some tips for preventing damage to your floors:

  • Avoid wearing high heels or shoes with cleats on your hardwood floors, as they can scratch and damage the surface of your floors.
  • Place felt pads on the bottom of your furniture legs to prevent them from scratching your floors when moved.
  • Avoid dragging heavy furniture across your floors, as this can also cause scratches and damage.
  • Use area rugs in high traffic areas to protect your floors from wear and tear.
  • Keep your floors out of direct sunlight, as this can cause fading and discoloration over time.

By following these post-installation care tips, you can help ensure that your hardwood floors stay looking beautiful for years to come.

Troubleshooting Common Issues

Wooden flooring is a beautiful addition to any home, but it can come with its own set of problems. Here are some common issues you may encounter and how to troubleshoot them:

Gaps between planks

Gaps between planks can occur due to changes in humidity levels or improper installation. If the gaps are small, they can be filled with wood filler. However, if the gaps are large, it may be necessary to remove the affected planks and reinstall them properly.

Cupping or crowning

Cupping or crowning occurs when the edges of the planks are higher than the center, or vice versa. This can be caused by changes in humidity levels or improper installation. If the problem is minor, it may be possible to sand down the affected planks. However, if the problem is severe, it may be necessary to replace the affected planks.

Scratches and dents

Scratches and dents are inevitable with wooden flooring, but they can be minimized with proper care. Use felt pads on furniture legs to prevent scratches, and avoid wearing high heels or dragging heavy objects across the floor. For minor scratches, use a wood filler or touch-up pen. For deeper scratches or dents, it may be necessary to sand down the affected area and refinish the floor.

Squeaks

Squeaks are often caused by loose floorboards. To fix the problem, locate the squeaky board and secure it with screws or nails. If the problem persists, it may be necessary to reinforce the subfloor.

Stains

Stains can be caused by spills or pet accidents. To remove stains, use a wood cleaner and a soft cloth. For stubborn stains, use a wood bleach or sand down the affected area and refinish the floor.

By troubleshooting these common issues, you can keep your wooden flooring looking beautiful for years to come.

How to Cover Wooden Stairs: A Step-by-Step Guide for a Fresh Look

If you’re looking to give your wooden stairs a fresh new look, covering them is a great option. Not only does it improve the appearance of your stairs, but it also adds an extra layer of protection to your wood. In this article, we’ll go over some tips and tricks on how to cover your wooden stairs.

Before you start covering your stairs, it’s important to prepare them properly. This includes removing any existing carpet or finishes, sanding down the wood, and filling in any gaps or cracks. Once your stairs are prepped and ready, you can start considering your options for covering them. There are a variety of materials you can use, from hardwood treads to stair overlays and even carpet. We’ll explore each of these options and their pros and cons so you can make an informed decision on what will work best for your home.

Understanding the Basics of Wooden Stairs

If you’re planning to cover your wooden stairs, it’s essential to have a basic understanding of stairs’ anatomy. Wooden stairs consist of three main components: treads, risers, and stringers.

Treads

The tread is the horizontal part of a stair that you step on. It’s the part that supports your foot as you climb up or down the stairs. Treads are usually made of wood, but they can also be made of other materials such as concrete, steel, or stone.

Risers

Risers are the vertical part of a stair that connects one tread to the next. They’re the part you see when you’re standing at the bottom of the stairs, looking up. Risers can be made of wood, but they can also be covered with other materials such as carpet or tile.

Stringers

Stringers are the structural support for the stairs. They’re the angled pieces of wood that run along each side of the stairs and support the treads and risers. Stringers can be made of wood, but they can also be made of other materials such as steel.

When covering your wooden stairs, you’ll need to consider the type of wood, the finish, and the design. You can choose from a variety of wood species, including oak, maple, cherry, and pine. Each wood species has its unique characteristics, such as grain patterns, color, and hardness.

You can also choose from a variety of finishes, including paint, stain, and varnish. The finish you choose will depend on the look you want to achieve and the level of protection you need.

Finally, you’ll need to consider the design of your staircase. You can choose from a variety of designs, including traditional, modern, and contemporary. You can also add decorative elements such as balusters, handrails, and newel posts to enhance the look of your staircase.

Choosing the Right Material for Covering

When it comes to covering wooden stairs, there are several materials to choose from. Each material has its own advantages and disadvantages, so you need to consider your personal preferences and requirements before making a decision. Here are some of the most popular options:

Carpet

Carpet is a classic choice for covering stairs. It provides a soft and comfortable surface to walk on, and it can be customized to match your decor. However, carpet can be difficult to clean and maintain, and it can wear out quickly in high-traffic areas. If you have pets or children, you may want to consider a more durable option.

Hardwood

If you want to maintain the natural beauty of your wooden stairs, hardwood is a great option. It can be stained or painted to match your decor, and it provides a durable and long-lasting surface. However, hardwood can be slippery and noisy, and it may not be the best choice if you have pets or children.

Laminate

Laminate is a popular choice for covering stairs because it is affordable and easy to install. It can mimic the look of hardwood or tile, and it provides a durable and low-maintenance surface. However, laminate can be slippery and noisy, and it may not be as long-lasting as other options.

Tile

Tile is a great option for covering exterior stairs or for adding a touch of elegance to your interior stairs. It comes in a variety of colors and patterns, and it provides a durable and easy-to-clean surface. However, tile can be slippery and cold, and it may not be the best choice if you have pets or children.

Vinyl

Vinyl is a versatile and affordable option for covering stairs. It comes in a variety of colors and patterns, and it provides a durable and easy-to-clean surface. Vinyl can also be slip-resistant, making it a great choice for families with pets or children. However, it may not be as long-lasting as other options, and it can be difficult to repair if damaged.

Overall, there are many factors to consider when choosing the right material for covering your wooden stairs. By weighing the pros and cons of each option and considering your personal preferences and requirements, you can make an informed decision that will provide a safe and stylish surface for your stairs.

Preparation Before Covering Wooden Stairs

Before you start covering your wooden stairs, there are some important steps you need to take to ensure a successful project. Here are some tips to help you prepare:

1. Remove any existing carpet or flooring

Before you can cover your wooden stairs, you need to remove any existing carpet or flooring. Use a utility knife and pry bar to carefully remove the carpet or flooring, being careful not to damage the wooden stairs underneath.

2. Clean the stairs

Once the carpet or flooring is removed, it’s important to thoroughly clean the stairs. Use a broom or vacuum to remove any debris, and then wipe down the stairs with a damp cloth to remove any dirt or dust.

3. Measure the stairs

Measure the length and width of each stair to determine how much material you will need to cover them. It’s important to measure each stair individually, as the sizes may vary slightly.

4. Choose your covering material

There are many different materials you can use to cover your wooden stairs, including hardwood, laminate, carpet, and more. Consider the look you want to achieve and the durability of the material when making your choice.

5. Gather your tools and materials

Make sure you have all the tools and materials you need before you start covering your stairs. Depending on the material you choose, you may need a saw, hammer, nails, adhesive, and more.

By following these steps, you can ensure that your wooden stairs are properly prepared for covering, and that you have everything you need to complete the project successfully.

Step-by-Step Guide to Cover Wooden Stairs

If you’re looking to update the look of your wooden stairs, covering them with a new material is a great option. Here’s a step-by-step guide to help you cover your wooden stairs with ease.

Gathering Necessary Tools

Before you get started, make sure you have all the necessary tools. Here’s a list of what you’ll need:

  • Measuring tape
  • Pencil
  • Straight edge
  • Utility knife
  • Staple gun
  • Safety glasses

Measuring and Cutting the Material

  1. Start by measuring each of your stairs. Measure the width and depth of each stair tread, as well as the height and width of each riser.

  2. Once you have your measurements, use a straight edge and pencil to mark the measurements on your new material. Be sure to add an extra inch to each measurement to ensure a proper fit.

  3. Use a utility knife to cut the material along the lines you marked. Be sure to cut the material carefully and precisely.

Securing the Material to the Stairs

  1. Begin by securing the material to the top of the first stair tread. Use a staple gun to attach the material to the back of the tread, starting at the center and working your way out to the edges.

  2. Once the top of the tread is secured, move on to the sides and front of the tread. Pull the material tightly around the edges of the tread and staple it in place.

  3. Repeat this process for each stair tread, making sure to pull the material tightly and staple it securely.

  4. Once all of the treads are covered, move on to the risers. Cut the material to size and staple it in place, starting at the top of the riser and working your way down.

By following these simple steps, you can easily cover your wooden stairs with a new material and give them a fresh new look.

Maintaining Your Covered Wooden Stairs

Covering your wooden stairs is an excellent way to protect them from daily use and enhance the overall appearance of your home. However, it is essential to maintain them regularly to ensure their longevity. Here are a few tips to help you keep your covered wooden stairs in top condition:

1. Clean Regularly

Cleaning your covered wooden stairs regularly is crucial to maintaining their appearance and preventing damage. Use a soft cloth or vacuum cleaner to remove dust and dirt from the surface. Avoid using abrasive cleaners or harsh chemicals that can damage the finish.

2. Protect from Moisture

Moisture is the enemy of wooden stairs. Protect your covered wooden stairs from moisture by wiping up spills immediately and avoiding excessive exposure to water. Use a mat or rug on the stairs to prevent water from getting on the surface.

3. Apply Protective Coating

Applying a protective coating to your covered wooden stairs can help prevent scratches and damage from daily use. Use a wood oil or polyurethane varnish to protect the surface. Apply the coating according to the manufacturer’s instructions and allow it to dry completely before using the stairs.

4. Inspect Regularly

Inspect your covered wooden stairs regularly for any signs of damage or wear. Check for scratches, dents, or cracks in the surface. Address any issues as soon as possible to prevent further damage.

By following these simple tips, you can maintain your covered wooden stairs and keep them looking beautiful for years to come.

Possible Challenges and Solutions

Dealing with Uneven Stairs

One of the challenges you may face when covering wooden stairs is dealing with uneven surfaces. Uneven stairs can be a safety hazard, causing tripping and falling. If your stairs are uneven, you will need to take extra precautions to ensure they are covered safely.

One solution is to use stair treads. Stair treads are pre-cut pieces of material that fit over the existing stairs. They come in a variety of materials, including rubber, carpet, and vinyl. Stair treads are an easy and affordable solution for covering uneven stairs.

Another solution is to sand down the high spots and fill in the low spots with wood filler. Once the wood filler is dry, sand the stairs again to create a smooth surface. This solution requires more work but can be a more permanent solution for uneven stairs.

Addressing Slippery Surfaces

Another challenge you may face when covering wooden stairs is addressing slippery surfaces. Wooden stairs can be slippery, especially when wet or if you are wearing socks or smooth-soled shoes. Slippery stairs can be a safety hazard, causing slipping and falling.

One solution is to use non-slip stair treads. Non-slip stair treads are designed to provide extra traction on slippery surfaces. They come in a variety of materials, including rubber, vinyl, and carpet. Non-slip stair treads are an easy and affordable solution for addressing slippery surfaces.

Another solution is to apply a non-slip coating to the stairs. Non-slip coatings can be applied to the surface of the stairs to provide extra traction. They come in a variety of finishes, including clear and colored. Non-slip coatings are a more permanent solution for addressing slippery surfaces.

In conclusion, covering wooden stairs can present challenges, but there are solutions available to address these challenges. Whether you are dealing with uneven stairs or slippery surfaces, there are options available to make your stairs safer and more attractive.

Tips for Enhancing the Aesthetics of Covered Wooden Stairs

If you’ve decided to cover your wooden stairs, you’re probably looking for ways to enhance their aesthetics. Here are some tips to help you achieve a stunning look:

  • Choose the right material: When it comes to covering wooden stairs, you have several options, including tiles, carpet, and hardwood. Each material has its own advantages and disadvantages, so it’s important to choose the one that best suits your needs and preferences. For example, if you want a durable and low-maintenance option, tiles are a good choice. If you prefer a soft and cozy feel, carpet is a great option. If you want a classic and elegant look, hardwood is the way to go.

  • Consider the color scheme: The color scheme of your covered stairs can greatly affect their overall look and feel. You can choose a color that complements the rest of your home’s décor or go for a bold and contrasting color to make a statement. If you’re not sure what color to choose, consider using a color wheel to help you find the perfect match.

  • Add some texture: Adding texture to your covered stairs can make them more interesting and visually appealing. You can achieve this by using materials such as textured tiles, patterned carpets, or distressed hardwood. Textured materials can also provide better traction, making your stairs safer to walk on.

  • Don’t forget the lighting: Proper lighting can greatly enhance the look of your covered stairs. You can use overhead lighting, wall sconces, or even LED strips to create a warm and inviting atmosphere. If you have artwork or decorative items on your stairs, consider using accent lighting to highlight them.

  • Accessorize: Finally, don’t forget to accessorize your covered stairs. You can add decorative elements such as plants, artwork, or family photos to make your stairs more personal and inviting. You can also use stair runners, stair treads, or stair risers to add some extra flair to your stairs.

By following these tips, you can enhance the aesthetics of your covered wooden stairs and create a beautiful and inviting space in your home.

How to Make a Wooden Stool Seat: A Beginner's Guide

If you’re looking to add a new piece of furniture to your home, why not try making a wooden stool seat? Not only is it a practical addition that can be used in various rooms, but it’s also a fun and rewarding DIY project. With a few basic tools and materials, you can create a custom stool seat that fits your style and needs.

Before getting started, it’s important to consider the type of wood you’ll be using. Hardwoods like oak, maple, and cherry are durable and long-lasting, but can be more expensive. Softwoods like pine and cedar are more affordable, but may not hold up as well over time. Once you’ve chosen your wood, you’ll need to measure and cut it to the desired size and shape. From there, you can add decorative touches like carving or staining to give your stool seat a unique look.

Understanding Wood Types

When it comes to making a wooden stool seat, choosing the right type of wood is crucial. Different types of wood have different properties, including hardness, durability, and grain patterns, which can affect the overall look and feel of your stool. In this section, we’ll explore the two main categories of wood: hardwood and softwood.

Hardwood

Hardwood is a popular choice for furniture making due to its durability and strength. It is derived from deciduous trees, such as oak, maple, and cherry. Hardwood is generally more expensive than softwood, but it is also more resistant to wear and tear.

Here are some common types of hardwood and their properties:

Type of Hardwood Properties
Oak Strong, durable, and resistant to moisture
Maple Hard, dense, and resistant to scratches
Cherry Warm, rich color, and easy to work with

When choosing hardwood for your stool, consider the overall aesthetic you want to achieve. Oak, for example, has a distinctive grain pattern that can add character to your stool, while cherry has a warm, inviting color that can give your stool a cozy feel.

Softwood

Softwood is derived from coniferous trees, such as pine, spruce, and cedar. It is generally less expensive than hardwood, but it is also less durable and more prone to wear and tear.

Here are some common types of softwood and their properties:

Type of Softwood Properties
Pine Lightweight, easy to work with, and affordable
Spruce Straight grain pattern, and lightweight
Cedar Resistant to rot and insects, and has a pleasant aroma

Softwood is a good choice if you’re on a budget or if you want a more rustic look for your stool. Pine, for example, has a light color and a distinctive grain pattern that can give your stool a natural, outdoorsy feel. Cedar, on the other hand, has a pleasant aroma and is resistant to rot and insects, making it a good choice for outdoor stools.

When choosing between hardwood and softwood, consider your budget, the overall aesthetic you want to achieve, and the durability you need for your stool. With the right type of wood, you can create a beautiful and functional stool that will last for years to come.

Tools Needed

When making a wooden stool seat, you will need a few tools to get the job done. Below are some of the essential tools you will need to make a wooden stool seat.

Saw

A saw is an essential tool when making a wooden stool seat. You will need a saw to cut the wood to the right size. There are different types of saws you can use, such as a hand saw, circular saw, or jigsaw. Choose the saw that you are most comfortable using.

Hammer

A hammer is another essential tool you will need when making a wooden stool seat. You will use a hammer to drive nails or screws into the wood. A claw hammer is a good choice because it has a claw on one end that you can use to remove nails.

Sandpaper

After cutting the wood to the right size, you will need to sand it to make it smooth. Sandpaper comes in different grits, so you will need to choose the right one for the job. Coarse grit sandpaper is good for rough sanding, while fine grit sandpaper is good for finishing.

Screws and Nails

You will need screws and nails to hold the wooden stool seat together. There are different types of screws and nails you can use, such as wood screws, finishing nails, or brads. Choose the type of screw or nail that is appropriate for the job.

With these tools, you can make a wooden stool seat that is sturdy and functional. Make sure to use the right tools for the job and take your time to ensure that the stool seat is well-made.

Choosing the Right Wood

When it comes to making a wooden stool seat, choosing the right wood is crucial. You want a wood that is both sturdy and attractive. Here are some factors to consider when choosing the right wood for your stool seat:

Durability

The durability of the wood is an important consideration, especially if the stool seat will be subjected to daily use. Hardwoods such as oak, maple, and cherry are great options for their strength and durability. Softwoods such as pine and cedar are less durable but can still be used if properly treated.

Appearance

The appearance of the wood is also important. You want a wood that is visually appealing and matches the overall aesthetic of the stool. Woods such as walnut and mahogany have rich, dark tones that can add a touch of elegance to your stool. Lighter woods such as birch and ash have a more natural, rustic look.

Grain Pattern

The grain pattern of the wood can also affect the appearance of the stool. Woods with straight, uniform grain patterns such as maple and cherry are great for a classic, timeless look. Woods with more pronounced grain patterns such as oak and ash can add a unique, rustic touch to your stool.

Sustainability

It’s important to consider the sustainability of the wood you choose. Look for wood that is responsibly sourced and certified by organizations such as the Forest Stewardship Council (FSC). Using sustainable wood not only helps protect the environment but also ensures a reliable supply of wood for future projects.

Overall, choosing the right wood for your stool seat requires careful consideration of factors such as durability, appearance, grain pattern, and sustainability. By taking these factors into account, you can ensure that your stool is both functional and visually appealing.

Designing Your Stool Seat

When it comes to designing your wooden stool seat, there are a few important factors to consider. In this section, we’ll go over the size and shape of your seat, as well as some comfort considerations to keep in mind.

Size and Shape

The size and shape of your stool seat will depend on a few different factors. First and foremost, consider the intended use of your stool. Will it be used as a dining chair or a barstool? Will it be used as a decorative piece or as a functional seat?

Once you’ve determined the intended use of your stool, think about the space it will occupy. Measure the height of your table or bar and make sure your stool seat is at a comfortable height for the user. Additionally, consider the width and depth of your seat to ensure it fits comfortably within the space.

Comfort Considerations

When designing your stool seat, comfort should be a top priority. Think about the ergonomics of your seat and how it will support the user’s body. A few things to keep in mind include:

  • Seat height: Make sure the height of your seat allows the user’s feet to rest comfortably on the ground.
  • Seat depth: A deeper seat will provide more support for the user’s back and legs.
  • Seat width: Consider the size of the user and make sure the seat is wide enough to accommodate their body comfortably.
  • Backrest: If you plan on including a backrest, make sure it provides adequate support for the user’s back.

By keeping these factors in mind, you can design a stool seat that is both functional and comfortable for the user.

Cutting the Wood

First, you will need to gather the materials needed to make your wooden stool seat. This includes the wood you will be using, a saw, a measuring tape, and a pencil. You can use any type of wood you prefer, but make sure it is sturdy enough to support the weight of a person.

Measure the length and width of your stool seat and mark these measurements on your wood with a pencil. Make sure your measurements are accurate to ensure a proper fit.

Next, use your saw to cut the wood according to your measurements. If you are using a circular saw, make sure to use a guide to ensure straight cuts. If you are using a hand saw, take your time and use long, smooth strokes to avoid splintering the wood.

After cutting the wood, use sandpaper to smooth out any rough edges or surfaces. This will give your stool seat a professional and polished look.

If you plan on staining or painting your stool seat, now is the time to do so. Make sure to follow the manufacturer’s instructions and allow sufficient drying time before moving on to the next step.

In summary, cutting the wood for your wooden stool seat is a simple process that requires attention to detail and accuracy. By following these steps, you can create a sturdy and attractive stool seat that will last for years to come.

Assembling the Stool

Now that you have all the pieces cut and sanded, it’s time to assemble your wooden stool. Follow these steps to put it all together:

  1. Start by attaching the legs to the seat. Apply wood glue to the top of each leg and then position them on the underside of the seat. Use clamps to hold everything in place while the glue dries.

  2. Once the legs are attached, you can add the cross braces. Apply glue to the ends of each brace and then position them between the legs. Use clamps to hold everything in place while the glue dries.

  3. After the cross braces are attached, you can add the footrest. Apply glue to the ends of the footrest and then position it between the legs. Use clamps to hold everything in place while the glue dries.

  4. Finally, you can add any finishing touches to your stool. Sand down any rough edges and apply a coat of finish to protect the wood.

  5. Your wooden stool is now complete! Congratulations on your new piece of furniture.

Sanding and Finishing

Sanding Process

When it comes to sanding your wooden stool seat, there are a few important things to keep in mind. First, you’ll want to start with a relatively coarse grit sandpaper, such as 80 or 100 grit. This will help you to remove any rough spots or imperfections in the wood. As you progress through the sanding process, you should gradually move to finer grit sandpaper, such as 220 or 320 grit. This will help you to achieve a smooth, even finish.

When sanding, be sure to always sand with the grain of the wood. Sanding against the grain can cause scratches and other damage to the surface of the wood. Additionally, be sure to keep the sandpaper moving in a circular or back-and-forth motion. This will help to prevent uneven wear on the sandpaper and ensure that you achieve an even finish.

Applying Finish

Once you’ve finished sanding your wooden stool seat, it’s time to apply a finish. There are a variety of different finishes you can use, including oil-based finishes, water-based finishes, and polyurethane finishes.

Oil-based finishes are a popular choice because they provide a warm, natural look to the wood. Water-based finishes are a good choice if you’re looking for a clear, non-yellowing finish. Polyurethane finishes are durable and long-lasting, making them a good choice for high-traffic areas.

Regardless of the type of finish you choose, be sure to follow the manufacturer’s instructions carefully. Apply the finish in thin, even coats, and allow each coat to dry completely before applying the next. Depending on the type of finish you’re using, you may need to apply several coats to achieve the desired level of protection and shine.

Overall, sanding and finishing your wooden stool seat is a relatively simple process that can help you to achieve a beautiful, long-lasting finish. With a little bit of patience and attention to detail, you can create a stool seat that will be both functional and stylish.