Tag Archives: avoid wearing high heels

how-to-install-wooden-flooring-on-concrete-a-step-by-step-guide-2

How to Install Wooden Flooring on Concrete: A Step-by-Step Guide

If you’re looking to install wooden flooring on a concrete surface, you may be wondering where to start. While it can be a bit more challenging than installing on a wood subfloor, it’s definitely possible. With the right tools, materials, and some patience, you can have beautiful wooden floors in your home in no time.

One of the first things you’ll need to do is prepare the concrete surface. This involves checking for moisture, ensuring the surface is level, and filling any cracks or holes. Once the surface is ready, you’ll need to install a moisture barrier to protect your wooden flooring from any moisture that may seep through the concrete. From there, you can lay down underlayment and start installing your wooden planks. It’s important to plan out your layout beforehand to ensure a seamless and professional-looking finish.

Overall, installing wooden flooring on concrete may require a bit more work than other surfaces, but it’s definitely worth it in the end. With the right preparation and installation techniques, you can transform your space and add value to your home.

Understanding the Basics of Wooden Flooring
how-to-install-wooden-flooring-on-concrete-a-step-by-step-guide-2

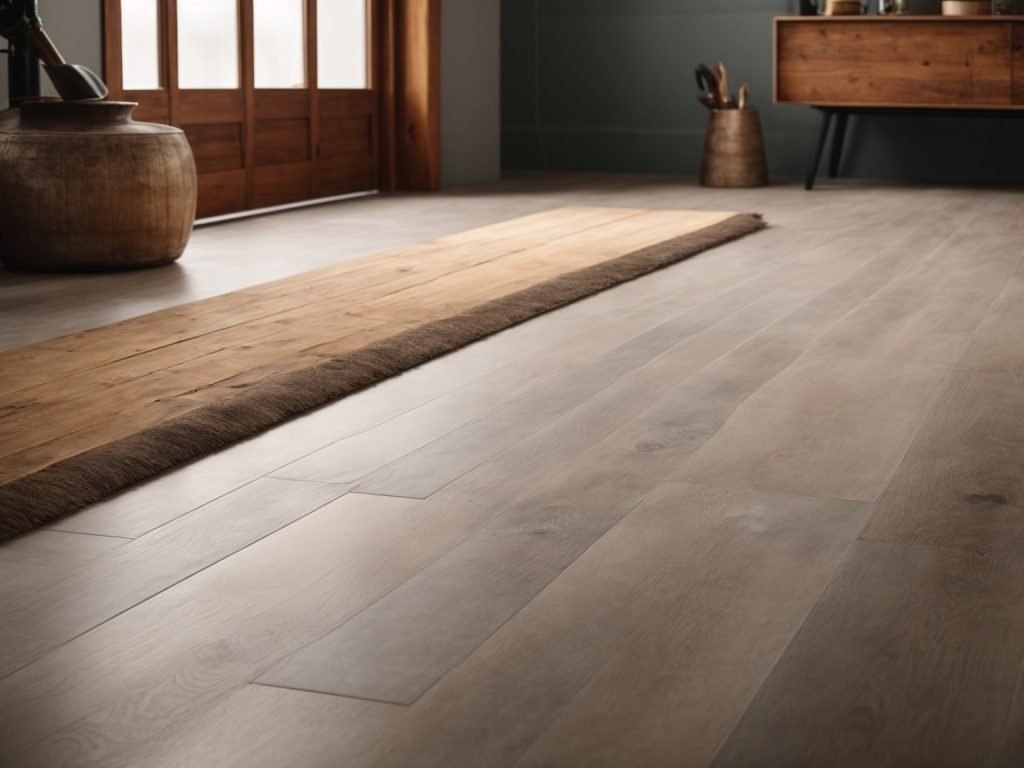
Wooden flooring is an excellent way to add warmth, beauty, and value to your home. If you’re looking to install wooden flooring on concrete, there are a few things you need to know. In this section, we’ll cover the basics of wooden flooring, including the types of wooden flooring and the benefits of installing wooden flooring on concrete.

Types of Wooden Flooring

There are three basic types of wooden flooring: solid hardwood, engineered hardwood, and laminate. Each type has its own unique characteristics and advantages.

  • Solid hardwood flooring is made from a single piece of wood and is the most traditional type of wooden flooring. It is durable, long-lasting, and can be sanded and refinished multiple times. However, it is susceptible to moisture damage and can be expensive.
  • Engineered hardwood flooring is made from multiple layers of wood and is more stable than solid hardwood flooring. It is also less expensive and can be installed over concrete. However, it cannot be sanded and refinished as many times as solid hardwood flooring.
  • Laminate flooring is made from a high-density fiberboard core with a photographic layer that mimics the look of wood. It is less expensive than both solid and engineered hardwood flooring and is easy to install. However, it cannot be sanded or refinished and is not as durable as hardwood flooring.

Benefits of Wooden Flooring on Concrete
benefits-of-wooden-flooring-on-concrete

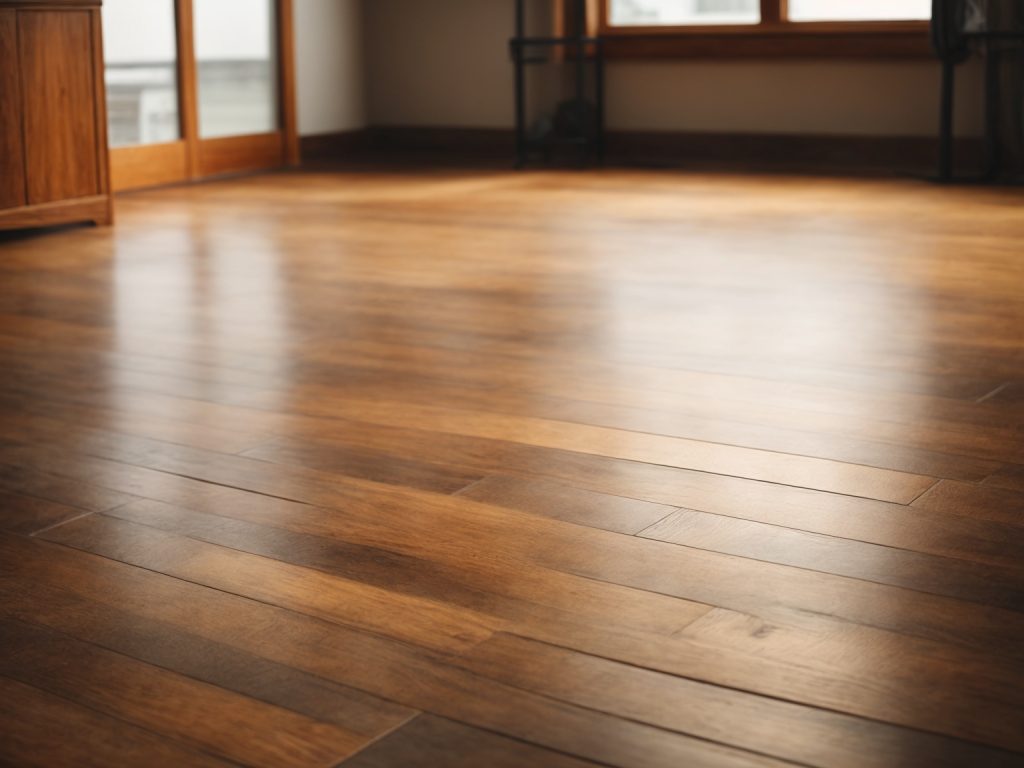
Installing wooden flooring on concrete has several benefits, including:

  • Improved aesthetics: Wooden flooring adds warmth and beauty to any space.
  • Increased home value: Wooden flooring is a desirable feature that can increase the value of your home.
  • Durability: Wooden flooring is durable and long-lasting, especially if you choose solid hardwood flooring.
  • Easy maintenance: Wooden flooring is easy to clean and maintain, making it a practical choice for busy households.
  • Improved indoor air quality: Wooden flooring does not trap dust and allergens like carpet, improving indoor air quality.

In summary, wooden flooring is an excellent choice for adding beauty, value, and durability to your home. When installed on concrete, it can provide a stable and long-lasting flooring solution.

Preparation Before Installation

Before you start installing wooden flooring on concrete, you need to prepare the surface properly. This will ensure that the flooring is installed correctly and will last for a long time. In this section, we will discuss the tools and materials you need and how to prepare the concrete surface.

Tools and Materials Needed

To prepare the concrete surface, you will need the following tools and materials:

  • Vacuum cleaner
  • Broom
  • Dustpan
  • Damp mop
  • Moisture barrier
  • Underlayment
  • Tape measure
  • Chalk line
  • Circular saw
  • Jigsaw
  • Hammer
  • Pry bar
  • Long level
  • Carpenter’s square
  • Trowel
  • Wood flooring adhesive
  • Wood flooring nails
  • Wood flooring screws
  • Wood flooring planks

Make sure you have all these tools and materials before you start the installation.

Preparing the Concrete Surface

The first step in preparing the concrete surface is to clean it thoroughly. Use a vacuum cleaner, broom, and dustpan to remove any dirt, debris, and dust. Then, damp mop the surface to remove any remaining dirt and dust.

Next, you need to check the moisture level of the concrete. If the moisture level is high, you need to install a moisture barrier. This will prevent moisture from seeping into the wood and causing damage.

After installing the moisture barrier, you need to install the underlayment. This will provide a smooth surface for the wood flooring to be installed on. Use a tape measure and chalk line to mark the layout of the underlayment.

Once the underlayment is installed, you need to check the level of the concrete surface. Use a long level and carpenter’s square to ensure that the surface is level. If it is not, you need to use a self-leveling compound to even it out.

Finally, you need to let the surface dry completely before installing the wood flooring. Follow the manufacturer’s instructions for drying time. Once the surface is dry, you can start installing the wood flooring.

By properly preparing the concrete surface, you can ensure that your wooden flooring will be installed correctly and will last for a long time.

Installing the Wooden Flooring

Installing wooden flooring over concrete can be challenging, but with the right tools and techniques, you can achieve a beautiful and durable result. In this section, we will guide you through the process step-by-step, from laying the moisture barrier to laying the wooden planks.

Laying the Moisture Barrier

Before you start laying the wooden planks, it is essential to lay a moisture barrier to prevent moisture from penetrating the wood. Here are the steps to follow:

  1. Clean the concrete surface thoroughly to remove any dirt or debris.
  2. Roll out the moisture barrier over the entire surface of the concrete, making sure to overlap the seams by at least 6 inches.
  3. Cut the moisture barrier to fit the room’s dimensions, leaving a 2-inch gap around the perimeter of the room.
  4. Tape the seams of the moisture barrier with waterproof tape to ensure a tight seal.

Spreading the Adhesive

Once the moisture barrier is in place, it’s time to spread the adhesive. Here’s how to do it:

  1. Apply a layer of adhesive to a small section of the concrete surface using a trowel.
  2. Use a notched trowel to spread the adhesive evenly over the surface, making sure to cover the entire area.
  3. Lay the wooden planks onto the adhesive, making sure to leave a 1/2 inch gap around the perimeter of the room.
  4. Repeat the process, working in small sections until the entire floor is covered.

Laying the Wooden Planks

Now that the adhesive is in place, it’s time to lay the wooden planks. Here’s how to do it:

  1. Start laying the wooden planks along the longest wall, making sure to leave a 1/2 inch gap around the perimeter of the room.
  2. Use a rubber mallet to tap the wooden planks into place, making sure they are snug against each other.
  3. Continue laying the wooden planks row by row, making sure to stagger the joints to create a random pattern.
  4. Use a saw to cut the wooden planks to fit the edges of the room.

By following these steps, you can install wooden flooring over concrete and enjoy a beautiful and durable result.

Post-Installation Care

Congratulations! You have successfully installed your wooden flooring on concrete. Now, it’s time to take care of your new investment to ensure it lasts for years to come. Here are some tips for post-installation care:

Cleaning and Maintenance

Regular cleaning and maintenance will keep your wooden flooring looking its best. Here are some tips:

  • Sweep or vacuum your floors regularly to remove dirt and debris.
  • Use a damp mop and a mild cleaner to clean your floors. Avoid using harsh chemicals or abrasive cleaners that can damage the finish.
  • Wipe up spills immediately to prevent staining.
  • Use furniture pads to prevent scratches and dents from furniture.

Preventing Damage

Preventing damage is key to maintaining the durability and longevity of your wooden flooring. Here are some tips:

  • Place doormats at entryways to prevent dirt and debris from being tracked onto your floors.
  • Avoid wearing high heels or shoes with cleats on your wooden flooring, as they can cause scratches and dents.
  • Keep your floors dry and avoid exposing them to excessive moisture, as this can cause warping and damage.
  • Use area rugs in high traffic areas to protect your floors from wear and tear.

By following these simple tips, you can keep your wooden flooring looking beautiful for years to come.
How to Clean Lacquered Wooden Floors: A Simple Guide

Keeping your lacquered wooden floors clean can be a challenge, but it’s essential to maintain their appearance and prolong their lifespan. Regular cleaning can prevent dirt and dust from scratching the surface, which can lead to permanent damage over time. In this article, we will discuss some tips and tricks on how to clean lacquered wooden floors effectively.

Before we dive into the cleaning process, it’s important to understand what lacquered wood is and how to identify it. Lacquered wood is a type of hardwood flooring that has been coated with a protective layer of lacquer. This layer helps to protect the wood from scratches, stains, and other types of damage. To identify whether your floors are lacquered, look for a shiny and glossy finish. Once you’ve determined that your floors are lacquered, it’s time to start cleaning them.

Understanding Lacquered Wooden Floors

If you have lacquered wooden floors in your home, it’s important to understand what they are and how to properly care for them. Lacquered floors are made from real wood that has been coated with a clear, protective layer of lacquer. This layer helps to protect the wood from scratches, stains, and other types of damage. Here are some things to keep in mind when caring for your lacquered wooden floors:

1. Cleaning Frequency

Lacquered wooden floors should be cleaned regularly to keep them looking their best. You can use a broom or vacuum cleaner to remove any dirt or debris from the surface of the floor. It’s also a good idea to use a slightly damp mop or sponge to clean up any spills or stains that may occur. However, be sure to wring out the mop or sponge well before using it on the floor to avoid leaving excess moisture behind.

2. Avoid Harsh Chemicals

When cleaning your lacquered wooden floors, it’s important to avoid using harsh chemicals or abrasive cleaning tools. These can damage the protective layer of lacquer and cause the wood to become discolored or warped. Instead, use a gentle cleaning solution that is specifically designed for use on lacquered floors.

3. Protecting the Floor

To prevent damage to your lacquered wooden floors, it’s important to take steps to protect them from scratches and other types of damage. This can include using furniture pads under the legs of chairs and tables, placing rugs or mats in high-traffic areas, and avoiding wearing shoes with hard soles on the floor.

By following these simple tips, you can help to keep your lacquered wooden floors looking their best for years to come.

Gathering Necessary Cleaning Supplies

Before you begin cleaning your lacquered wooden floors, it’s important to gather all the necessary supplies. Here are some tips on what you’ll need:

Choosing the Right Cleaning Agent

When it comes to cleaning lacquered wooden floors, it’s important to choose the right cleaning agent. Using the wrong cleaning agent can damage the finish of your floors. Here are some options to consider:

  • Neutral detergent: A neutral detergent can be used on very stubborn stains, but to avoid any risks, opt for a lacquered wood floor maintenance product, such as Panaget’s special lacquered wood floor cleaner.
  • Solvent-based polish: If you prefer to use a solvent-based polish, make sure it’s specifically designed for lacquered wooden floors.
  • One-step cleaner: A one-step cleaner is a great option if you want to save time. Make sure to choose a cleaner that’s appropriate for lacquered wooden floors.

Selecting Appropriate Cleaning Tools

In addition to choosing the right cleaning agent, it’s important to select appropriate cleaning tools. Here are some options to consider:

  • Microfiber mop: A microfiber mop is a great tool for cleaning lacquered wooden floors. It’s gentle on the surface and won’t scratch the finish.
  • Bona Applicator Pad: If you’re using a maintenance product like Bona’s Freshen Up, you’ll want to use their applicator pad. It’s designed to work with their products and will help you achieve the best results.
  • Soft-bristled brush: For stubborn stains, you may need to use a soft-bristled brush to gently scrub the affected area.

By choosing the right cleaning agent and tools, you’ll be able to effectively clean your lacquered wooden floors without damaging the finish.

Pre-Cleaning Steps

Before you start cleaning your lacquered wooden floor, there are a few pre-cleaning steps you need to follow to ensure that you achieve the best results.

Removing Dust and Debris

The first step is to remove any dust and debris from the floor. You can use a vacuum cleaner or a soft-bristled broom to do this. Make sure that you get into all the corners and crevices of the floor to remove any dirt that may have accumulated there.

If you are using a vacuum cleaner, make sure that you use the appropriate attachment to avoid scratching the surface of the floor. If you are using a broom, make sure that you sweep gently to avoid damaging the floor.

Checking for Damage

The next step is to check the floor for any damage. Look for any scratches, dents, or cracks on the surface of the floor. If you find any damage, make sure that you address it before you start cleaning.

If you find any scratches or dents, you can use a wood filler to repair them. Apply the wood filler to the damaged area and smooth it out with a putty knife. Once the wood filler has dried, sand the area gently to make it smooth.

If you find any cracks on the surface of the floor, you may need to call in a professional to repair them. Cracks can be a sign of a more serious problem, such as a structural issue with the floor.

By following these pre-cleaning steps, you can ensure that your lacquered wooden floor is ready for cleaning. This will help you achieve the best results and keep your floor looking beautiful for years to come.

Cleaning Process

To keep your lacquered wooden floors looking their best, you need to clean them regularly. Here’s a step-by-step guide to the cleaning process:

Applying the Cleaning Agent

  1. Start by sweeping or vacuuming the floor to remove any loose dirt and debris.
  2. Dilute your chosen cleaning agent according to the manufacturer’s instructions.
  3. Apply the cleaning solution to a small section of the floor using a mop or cloth.
  4. Work the cleaning agent into the floor using a circular motion, making sure to cover the entire area thoroughly.

Scrubbing the Floor

  1. Once the cleaning agent has been applied, use a scrub brush or pad to work the solution into the floor.
  2. Scrub the floor in a circular motion, paying extra attention to any areas that are particularly dirty or stained.
  3. Be careful not to scrub too hard, as this can damage the lacquer finish on the floor.

Wiping Off the Cleaning Agent

  1. Once you’ve finished scrubbing the floor, use a clean, damp mop or cloth to wipe away the cleaning solution.
  2. Rinse the mop or cloth frequently to ensure that you’re removing as much of the cleaning agent as possible.
  3. Repeat the process until you’ve cleaned the entire floor.

Remember to only use cleaning products that are specifically designed for use on lacquered wooden floors. Avoid using abrasive cleaners or tools, as these can scratch or damage the floor. With regular cleaning and maintenance, your lacquered wooden floors will stay looking beautiful for years to come.

Post-Cleaning Care

Congratulations! You have successfully cleaned your lacquered wooden floors. But wait, there’s more! Proper post-cleaning care is essential to maintaining the beauty and longevity of your floors. Here are some tips to help you take care of your floors after cleaning.

Drying the Floor

After cleaning your lacquered wooden floors, it is important to dry them thoroughly. Moisture can damage the wood and the lacquer finish. Use a clean, dry cloth or mop to wipe up any excess water. If necessary, use a fan or open windows to help dry the floor. Do not walk on the floor until it is completely dry.

Polishing the Floor

Polishing your lacquered wooden floors can help restore their shine and protect them from scratches and wear. However, it is important to use the right products and techniques to avoid damaging the lacquer finish. Here are some tips for polishing your floors:

  • Use a high-quality polish specifically designed for lacquered wooden floors.
  • Apply the polish with a clean, dry cloth or mop, following the manufacturer’s instructions.
  • Do not apply too much polish, as this can create a sticky residue that attracts dirt and dust.
  • Buff the floor with a clean, dry cloth or mop to remove any excess polish and create a shiny finish.

Remember to only polish your floors as needed, as too much polishing can actually damage the lacquer finish. With proper care and maintenance, your lacquered wooden floors will stay beautiful and durable for years to come.

Maintaining Lacquered Wooden Floors

If you want to keep your lacquered wooden floors looking their best, it’s important to follow a regular cleaning schedule and take steps to prevent scratches and damage. Here are some tips to help you keep your floors in top condition:

Regular Cleaning Schedule

To keep your lacquered wooden floors looking their best, it’s important to clean them regularly. Here’s a simple cleaning schedule that you can follow:

  • Daily: Use a soft-bristled broom or vacuum cleaner with a soft brush attachment to remove any dirt or debris from your floors. This will help prevent scratches and other damage.
  • Weekly: Use a damp mop to clean your floors. Avoid using too much water, as this can damage the lacquer. Instead, use a well-wrung mop or a spray mop with a cleaning solution specifically designed for lacquered wooden floors.
  • Monthly: Give your floors a deep clean by using a cleaning product that is specifically designed for lacquered wooden floors. Follow the manufacturer’s instructions carefully, and be sure to rinse your floors thoroughly after cleaning.

Preventing Scratches and Damage

In addition to following a regular cleaning schedule, there are a few steps that you can take to prevent scratches and other damage to your lacquered wooden floors. Here are some tips:

  • Use furniture pads: Place furniture pads under the legs of your chairs, tables, and other furniture to prevent scratches and scuffs.
  • Avoid wearing high heels: High heels can cause scratches and other damage to your floors. If you must wear high heels, consider using heel protectors to prevent damage.
  • Trim your pet’s nails: If you have pets, be sure to keep their nails trimmed to prevent scratches on your floors.
  • Clean up spills immediately: If you spill anything on your floors, be sure to clean it up immediately to prevent damage to the lacquer.

By following these simple tips, you can keep your lacquered wooden floors looking their best for years to come.

How to Clean Wooden Floors: A Quick and Easy Guide

Cleaning wooden floors is an important task that should be done regularly to keep your home looking its best. Wooden floors are a popular choice for many homeowners due to their durability, natural beauty, and timeless appeal. However, they require proper care and maintenance to keep them looking their best.

To start, it’s important to understand the type of wood your floors are made of and the finish that has been applied. Different types of wood and finishes may require different cleaning methods. Once you know this information, you can begin cleaning your wooden floors. Regular sweeping or vacuuming is important to remove dirt and debris that can scratch the surface of the wood. Using a microfiber dust mop or a vacuum with a hard floor setting can help prevent scratches and damage to the floor.

Understanding the Nature of Wood

When it comes to cleaning wooden floors, it’s essential to understand the nature of wood. Different types of wood have different properties, which can affect how they react to cleaning products and methods. In this section, we will look at the different types of wood and the effect of cleaning products on wood.

Different Types of Wood

There are two main types of wood: hardwood and softwood. Hardwood comes from deciduous trees, while softwood comes from coniferous trees. Hardwood is denser and more durable than softwood, making it ideal for flooring. Some common hardwoods used for flooring include oak, maple, and cherry. Softwood, on the other hand, is less dense and less durable than hardwood. Pine and cedar are popular softwoods for flooring.

Each type of wood has its own unique characteristics. For example, oak is known for its durability and resistance to wear and tear. Maple is a hard, dense wood that resists scratches and dents. Cherry, on the other hand, is softer and may be more prone to scratches and dents.

Effect of Cleaning Products on Wood

Cleaning products can have a significant impact on the appearance and longevity of your wood floors. Harsh chemicals can strip the finish off of your floors, leaving them dull and vulnerable to damage. It’s essential to use cleaning products that are specifically designed for wood floors.

When choosing a cleaning product, look for one that is pH-neutral and doesn’t contain harsh chemicals like bleach or ammonia. Avoid using water or steam to clean your wood floors, as excess moisture can cause the wood to warp or buckle.

In addition to using the right cleaning products, it’s important to clean your floors regularly. Dirt and debris can scratch the surface of your floors, so it’s important to sweep or vacuum them regularly. You can also use a microfiber mop to clean your floors, as it will pick up dirt and debris without scratching the surface.

By understanding the nature of wood and using the right cleaning products and methods, you can keep your wooden floors looking beautiful for years to come.

Preparation for Cleaning

Before you start cleaning your wooden floors, there are a few things you need to do to prepare. In this section, we will cover two sub-sections: Clearing the Area and Inspecting the Floor for Damage.

Clearing the Area

The first step in preparing to clean your wooden floors is to clear the area. Remove all furniture, rugs, and any other items that could get in the way of your cleaning. This will make it easier to clean the entire floor and ensure that you don’t miss any spots.

If you have heavy furniture that is difficult to move, consider using furniture sliders or pads to protect your floors. These can help you move furniture without scratching or damaging the wood.

Inspecting the Floor for Damage

Before you start cleaning, it’s important to inspect your wooden floors for any damage. Look for scratches, dents, or any other signs of wear and tear. If you notice any damage, you may need to take special care when cleaning those areas.

For example, if you have deep scratches in your wooden floors, you may need to use a special wood filler to repair the damage before cleaning. Similarly, if you have areas of the floor that are particularly dirty or stained, you may need to use a stronger cleaning solution or a specialized cleaner to remove the dirt and stains.

By taking the time to clear the area and inspect your wooden floors for damage, you can ensure that your cleaning process is as effective as possible. This will help you maintain the beauty and durability of your wooden floors for years to come.

Choosing the Right Cleaning Products

When it comes to cleaning wooden floors, choosing the right cleaning products is essential. Using the wrong cleaning solution can damage your floors, leaving them looking dull and lifeless. In this section, we’ll discuss the different types of cleaning products available and which ones are the best for your wooden floors.

Natural Cleaning Solutions

If you prefer to use natural cleaning solutions, there are several options available. Here are a few natural cleaning solutions that are safe for use on wooden floors:

  • Vinegar and Water: A mixture of vinegar and water is an effective natural cleaning solution for wooden floors. Mix one cup of vinegar with one gallon of water and use a damp mop to clean your floors.
  • Baking Soda and Water: Baking soda is another natural cleaning solution that can be used to clean wooden floors. Mix 1/2 cup of baking soda with a gallon of warm water and use a damp mop to clean your floors.
  • Tea: Black tea is a natural cleaning solution that can be used to clean wooden floors. Brew a few tea bags in a gallon of hot water and use a damp mop to clean your floors.

Commercial Cleaning Products

If you prefer to use commercial cleaning products, there are several options available. Here are a few commercial cleaning products that are safe for use on wooden floors:

  • Bona Hardwood Floor Cleaner: Bona is a popular brand of hardwood floor cleaner that is safe for use on all types of wooden floors. It is available in both spray and mop form.
  • Murphy Oil Soap: Murphy Oil Soap is a well-known brand of cleaning product that is safe for use on wooden floors. It is available in both liquid and spray form.
  • Method Squirt + Mop Wood Floor Cleaner: Method is a brand of cleaning product that is known for its natural ingredients. Their Squirt + Mop Wood Floor Cleaner is safe for use on wooden floors and is available in several different scents.

When choosing a commercial cleaning product, be sure to read the label carefully to ensure that it is safe for use on wooden floors. Avoid using products that contain harsh chemicals or abrasive materials, as these can damage your floors over time.

The Cleaning Process

Cleaning wooden floors is an essential task to maintain their beauty and prolong their lifespan. Here are the steps to clean your wooden floors effectively:

Dry Cleaning

Before starting with wet cleaning, it’s essential to remove all the dirt and dust from the floor. You can use a broom, vacuum cleaner, or dust mop for this purpose. Make sure to clean the corners and edges of the floor as well. If you are using a vacuum cleaner, ensure that it has a floor-brush attachment to prevent any scratches on the surface.

Wet Cleaning

After dry cleaning, it’s time to move on to wet cleaning. For this, you can use a wood floor cleaner that is specifically designed for wooden floors. Mix the cleaner with water as per the instructions on the label. Dip a mop or a soft cloth into the solution and wring it out well. Then, start mopping the floor, starting from one end of the room and moving towards the other end. Avoid using too much water, as excess water can damage the wood.

Spot Cleaning

If you notice any spills or stains on the floor, it’s essential to clean them immediately. For this, you can use a damp cloth or a sponge. If the stain is stubborn, you can use a wood floor cleaner and a soft-bristled brush to scrub the area gently. Avoid using harsh chemicals or abrasive tools, as they can damage the surface of the wood.

In conclusion, cleaning wooden floors is a simple task that can be done with a few tools and the right cleaning solution. By following the above steps, you can keep your wooden floors looking new and beautiful for years to come.

Maintaining Your Wooden Floors

Regular Cleaning Schedule

Keeping a regular cleaning schedule is essential to maintain the beauty and longevity of your wooden floors. Here are some tips to help you keep your wooden floors clean:

  • Sweep or vacuum your floors daily to remove dirt and debris that can scratch or dull the surface.
  • Use a damp mop to clean your floors once a week. Avoid using too much water as it can damage the wood.
  • Use a cleaning solution that is specifically designed for wooden floors. Avoid using vinegar or harsh chemicals as they can damage the finish of your floors.
  • Wipe up spills immediately to prevent them from seeping into the wood and causing damage.

Preventive Measures

Preventive measures can help keep your wooden floors looking their best for years to come. Here are some tips to help you prevent damage to your floors:

  • Place doormats at all entrances to your home to prevent dirt and debris from being tracked onto your floors.
  • Use furniture pads on the legs of your furniture to prevent scratches and dents.
  • Avoid wearing high heels or shoes with spikes on your wooden floors as they can cause damage.
  • Keep your pets’ nails trimmed to prevent them from scratching the surface of your floors.

By following these tips, you can help keep your wooden floors looking beautiful and extend their lifespan.

How to Do Wooden Flooring: A Beginner's Guide

If you’re looking to add a touch of warmth and elegance to your home, installing hardwood flooring is a great way to do it. Solid hardwood flooring is a classic choice that never goes out of style. Not only does it add value to your home, but it’s also durable and easy to clean. If you’re up for a DIY project, you can install hardwood flooring yourself and save money on installation costs.

Before you begin, it’s important to choose the right type of wood flooring for your home. Solid hardwood flooring is typically nailed down during installation, while engineered flooring can be clicked together or glued down. You’ll also need to consider the type of subfloor you have and your budget. Once you’ve chosen your flooring and gathered your tools, you’re ready to get started.

Installing hardwood flooring can seem daunting, but with the right tools and a little bit of patience, it’s a project that you can tackle yourself. In this article, we’ll walk you through the steps of installing hardwood flooring, from preparing your subfloor to laying the last plank. By the end of this guide, you’ll have a beautiful new hardwood floor that you can be proud of.

Understanding Wooden Flooring

If you’re planning to install wooden flooring in your home, it’s important to understand the different types of wooden flooring available and their benefits. This will help you make an informed decision when choosing the right flooring for your home.

Types of Wooden Flooring

There are two main types of wooden flooring: solid wood flooring and engineered wood flooring.

Solid Wood Flooring: This type of flooring is made from a single piece of wood and is available in various thicknesses and widths. Solid wood flooring is more expensive than engineered wood flooring, but it’s also more durable and can be sanded and refinished multiple times.

Engineered Wood Flooring: This type of flooring is made from layers of wood that are glued together. The top layer is made from real wood, while the bottom layers are made from plywood or high-density fiberboard (HDF). Engineered wood flooring is less expensive than solid wood flooring, but it’s also less durable and can only be sanded and refinished a few times.

Benefits of Wooden Flooring

Wooden flooring offers several benefits over other types of flooring, including:

  • Durability: Wooden flooring is durable and can last for decades if properly maintained.

  • Aesthetics: Wooden flooring adds warmth and character to any room and comes in a variety of colors and finishes.

  • Easy to Clean: Wooden flooring is easy to clean and maintain, requiring only regular sweeping and occasional mopping.

  • Hypoallergenic: Wooden flooring doesn’t trap dust, pollen, or other allergens like carpet does, making it a great choice for people with allergies.

  • Increases Home Value: Installing wooden flooring can increase the value of your home and make it more attractive to potential buyers.

Overall, wooden flooring is a great investment for any home. Whether you choose solid wood or engineered wood flooring, you can enjoy the many benefits of this beautiful and durable flooring option.

Materials Needed for Wooden Flooring

Before you start installing your hardwood floor, it is important to make sure you have all the necessary materials. Here are the materials you will need:

1. Hardwood Flooring

The first and most obvious material you will need is the hardwood flooring itself. You can choose from a variety of species, colors, and finishes. Make sure to purchase enough flooring to cover the square footage of your room, plus an additional 10-15% for cuts and waste.

2. Underlayment

Underlayment is a thin layer of material that is installed between the subfloor and the hardwood flooring. It helps to reduce noise, absorb moisture, and provide a smooth surface for the flooring to rest on. There are several types of underlayment available, including foam, cork, and felt.

3. Moisture Barrier

A moisture barrier is a thin layer of plastic that is installed over the subfloor to prevent moisture from seeping up into the hardwood flooring. This is especially important if you are installing the flooring over a concrete slab.

4. Nails or Staples

You will need nails or staples to attach the hardwood flooring to the subfloor. The type of fastener you use will depend on the type of flooring you have and the method of installation.

5. Saw

You will need a saw to cut the hardwood flooring to fit around obstacles such as doorways and heating vents. A table saw or miter saw is recommended for this task.

6. Hammer or Flooring Nailer

You will need a hammer or flooring nailer to drive the nails or staples into the hardwood flooring. A flooring nailer is recommended for a more professional and efficient installation.

7. Tape Measure

You will need a tape measure to measure the square footage of your room and to make accurate cuts in the hardwood flooring.

8. Level

A level is important to ensure that your hardwood flooring is installed evenly and without any dips or bumps.

9. Safety Equipment

Lastly, it is important to wear safety equipment such as eye protection and ear plugs when using power tools and installing hardwood flooring.

Preparation for Wooden Flooring

Before you start installing your wooden floor, there are a few essential steps you need to take to ensure a successful installation. In this section, we will cover the two crucial steps of preparing your subfloor and acclimating your wood.

Inspecting the Subfloor

Inspecting your subfloor is an essential step before installing your wooden floor. You need to ensure that your subfloor is clean, dry, and level. Any unevenness in your subfloor can cause problems with the installation and lead to an uneven floor.

If your subfloor is not level, you may need to use a self-leveling compound to even it out. You can also use a moisture meter to check the moisture levels in your subfloor. If the moisture levels are too high, you need to address the issue before proceeding with the installation. High moisture levels can cause the wooden floor to warp, buckle, or cup.

Acclimating the Wood

Acclimating your wood is a crucial step before installing your wooden floor. Wood is a natural material that can expand or contract depending on the humidity and temperature of the environment. Acclimating your wood allows it to adjust to the conditions of your home, ensuring a stable and long-lasting installation.

To acclimate your wood, you need to leave it in the room where it will be installed for at least 72 hours before installation. This allows the wood to adjust to the temperature and humidity of the environment. Make sure to keep the wood at least four inches off the ground and away from any direct sunlight or heating vents.

In conclusion, inspecting your subfloor and acclimating your wood is a crucial step in preparing for your wooden floor installation. These steps ensure that your wooden floor is installed correctly and will last for years to come.

Installing Wooden Flooring

If you’re looking to give your home a facelift, installing wooden flooring is a great way to do it. Not only does it add value to your home, but it also adds warmth and beauty. Here’s how to install wooden flooring in your home.

Laying the Underlayment

Before you start installing the wooden planks, you need to lay down the underlayment. The underlayment is a layer of material that goes between the subfloor and the wooden planks. It helps to cushion the flooring, reduce noise, and prevent moisture from seeping in.

To lay the underlayment, follow these steps:

  1. Clean the subfloor: Make sure the subfloor is clean and free of debris. Sweep or vacuum it thoroughly.
  2. Roll out the underlayment: Roll out the underlayment across the entire floor, making sure it’s flat and smooth.
  3. Cut the underlayment: Cut the underlayment to fit the room, leaving a 1/4 inch gap around the edges.
  4. Tape the seams: Tape the seams of the underlayment together using a moisture-resistant tape.

Installing the Wooden Planks

Now that you’ve laid down the underlayment, it’s time to install the wooden planks. Here’s how to do it:

  1. Measure the room: Measure the length and width of the room to determine how many planks you’ll need. Add 10% to the total to account for waste.
  2. Acclimate the planks: Allow the wooden planks to acclimate to the room for at least 48 hours before installation.
  3. Start in the corner: Start in the corner of the room and work your way out.
  4. Lay the planks: Lay the planks down, making sure they fit snugly together. Use a rubber mallet to tap them into place.
  5. Cut the planks: Cut the planks to fit around obstacles like door frames and vents.
  6. Stagger the planks: Stagger the planks so that the ends of each plank are not lined up with the ends of the adjacent planks.
  7. Nail the planks: Nail the planks down using a nail gun, making sure to nail them into the subfloor and not the underlayment.
  8. Sand and finish: Sand the floor to remove any rough spots and finish it with a sealant or stain.

That’s it! With a little bit of time and effort, you can install wooden flooring in your home and enjoy the beauty and warmth it brings.

Finishing Touches

Once you have installed your wooden floor, it’s time to give it the finishing touches. This step is important as it will ensure that your floor looks beautiful and lasts for a long time. There are two main aspects to finishing touches: sanding and finishing, and caring for your wooden floor.

Sanding and Finishing

The first step in sanding and finishing your wooden floor is to ensure that it is clean and free of any debris. Use a broom or vacuum cleaner to get rid of any dust or dirt. Once your floor is clean, you can start sanding it. Sanding helps to remove any rough spots or imperfections on the surface of the wood.

When sanding your wooden floor, it’s important to use the right equipment. A drum sander is the most efficient tool for sanding large areas of wood. However, if you’re working on a smaller area, you can use a handheld sander. After sanding, you can apply a finish to your wooden floor. There are several different types of finishes to choose from, including oil-based, water-based, and wax finishes.

Caring for Your Wooden Floor

Once you have finished sanding and applying a finish to your wooden floor, it’s important to take care of it properly to ensure that it lasts for a long time. Here are some tips for caring for your wooden floor:

  • Use a soft-bristled broom or vacuum cleaner to remove any dirt or debris from your floor.
  • Clean up any spills or stains immediately to prevent them from damaging the wood.
  • Use a wood cleaner specifically designed for wooden floors to clean your floor. Avoid using harsh chemicals or abrasive cleaners as they can damage the finish on your floor.
  • Place rugs or mats in high traffic areas to protect your wooden floor from wear and tear.
  • Avoid wearing high heels or shoes with spikes on your wooden floor as they can scratch the surface of the wood.

By following these tips, you can ensure that your wooden floor looks beautiful and lasts for a long time.

How to Install Wooden Flooring: A Beginner's Guide

Looking to add a touch of elegance and warmth to your home? Installing wooden flooring is a great way to do just that. Not only does it add value to your property, but it also provides a durable and long-lasting flooring solution that is easy to maintain.

Before you begin your installation, it’s important to understand the different types of wooden flooring available and which one is best suited for your needs. Solid hardwood flooring is a popular option that can be nailed or glued down, while engineered hardwood flooring is made up of layers of wood and can be installed as a floating floor. Additionally, laminate flooring provides a cost-effective alternative that mimics the look of hardwood without the same level of durability.

Once you’ve chosen your flooring type, it’s time to get started on the installation process. From preparing your subfloor to laying down the planks, there are several steps involved in achieving a professional-looking finish. With the right tools and a little bit of patience, you can transform your space with the beauty and warmth of wooden flooring.

Understanding Wooden Flooring

If you’re considering installing new flooring in your home, wooden flooring is an excellent choice. Not only does it add warmth and character to your space, but it can also increase the value of your home. Here’s what you need to know about wooden flooring.

Types of Wooden Flooring

There are two main types of wooden flooring: solid and engineered. Solid wood flooring is made from a single piece of wood and is typically thicker than engineered wood flooring. Engineered wood flooring, on the other hand, is made from several layers of wood and is more stable than solid wood flooring.

Within these two categories, there are several different types of wood to choose from, including oak, maple, cherry, and walnut. Each type of wood has its own unique characteristics, so it’s important to choose the one that best suits your needs and preferences.

Benefits of Wooden Flooring

There are many benefits to choosing wooden flooring for your home. Here are just a few:

  • Durability: Wooden flooring is incredibly durable and can last for decades with proper care and maintenance.
  • Easy to clean: Wooden flooring is easy to clean and maintain, making it a great choice for busy households.
  • Adds value: Wooden flooring can increase the value of your home, making it a smart investment.
  • Versatile: Wooden flooring comes in a variety of colors and styles, so you can choose the one that best suits your decor.

Overall, wooden flooring is a great choice for any home. Whether you prefer the classic look of solid wood or the versatility of engineered wood, there’s a wooden flooring option that’s perfect for you.

Selecting the Right Wood

When it comes to selecting the right wood for your flooring, there are a few things to consider. In this section, we will go over two important factors to keep in mind: choosing the wood type and considering the room usage.

Choosing the Wood Type

There are many different types of wood to choose from when it comes to flooring. Some popular options include oak, maple, cherry, and walnut. Each type of wood has its own unique characteristics, such as color, grain pattern, and hardness.

When selecting a wood type, consider the overall look and feel you want to achieve in your space. If you are going for a traditional, classic look, oak or maple may be a good choice. For a more modern or contemporary feel, consider a darker wood like cherry or walnut.

It’s also important to consider the durability of the wood. Harder woods like oak and maple are more resistant to scratches and dents, making them a good choice for high-traffic areas. Softer woods like pine and cedar may be better suited for low-traffic areas like bedrooms.

Considering the Room Usage

Another important factor to consider when selecting the right wood for your flooring is the room usage. Different rooms in your home have different needs when it comes to flooring.

For example, if you are installing flooring in a kitchen or bathroom, you will want to choose a wood that is resistant to moisture. Oak and maple are good options for these types of rooms, as they are both durable and moisture-resistant.

If you are installing flooring in a bedroom or living room, you may want to choose a wood that is softer and more comfortable underfoot. Pine and cedar are good options for these types of rooms, as they are softer and have a more natural, rustic look.

Overall, selecting the right wood for your flooring is an important decision that will have a big impact on the look and feel of your space. Consider the overall style you want to achieve, as well as the durability and moisture-resistance of the wood, to make the best choice for your home.

Preparation for Installation

Installing hardwood floors can be a great way to add value and style to your home. However, it’s important to take the necessary steps to prepare for installation to ensure that the process goes smoothly and the end result is exactly what you want.

Clear the Room

Before you begin installing your hardwood floors, you’ll need to clear the room of all furniture and other items. This will give you plenty of space to work and will also prevent any damage to your belongings during the installation process.

Check the Subfloor

Before you install your hardwood floors, you’ll need to check the subfloor to make sure it’s level and in good condition. Any bumps or unevenness in the subfloor can cause problems with the installation and can also lead to problems with the finished product. If you find any issues with the subfloor, you’ll need to address them before you begin installing your hardwood floors.

Acclimate the Flooring

Wood is a natural material that can expand and contract with changes in temperature and humidity. To prevent problems with your hardwood floors down the line, it’s important to acclimate the flooring to the room before installation. This involves leaving the flooring in the room for a few days to allow it to adjust to the temperature and humidity of the space.

Seal Off Rooms

During the installation process, dust and debris can be created that can spread throughout your home. To prevent this from happening, it’s a good idea to seal off rooms that will not be sanded. This can be done by closing the doors and covering the doorway with plastic sheets secured with painter’s tape.

Gather Tools and Supplies

Finally, before you begin installing your hardwood floors, you’ll need to gather all of the necessary tools and supplies. This may include a pneumatic flooring nailer, a saw, a hammer, and other items. Make sure you have everything you need before you begin to avoid any delays or complications during the installation process.

Installation Process

Tools Required

Before starting the installation process, you will need to gather the following tools:

Tools Description
Measuring tape Used to measure the length and width of the room
Chalk line Used to mark straight lines on the subfloor
Circular saw Used to cut the wooden planks to size
Table saw Used to rip the planks to width
Jigsaw Used to make intricate cuts around obstacles
Flooring stapler Used to secure the planks to the subfloor
Pry bar Used to remove baseboards and existing flooring
Hammer Used to nail down the subfloor
Level Used to ensure the subfloor is level
Safety gear Gloves, eye protection, and a dust mask

Step by Step Guide

  1. Prepare the subfloor: Before installing the wooden planks, ensure the subfloor is clean, level, and free of any debris. If necessary, remove the existing flooring and baseboards.

  2. Acclimate the wood: Allow the wooden planks to acclimate to the room’s temperature and humidity for at least 48 hours before installation.

  3. Plan the layout: Plan the layout of the wooden planks, taking into account the direction of the room’s natural light and the placement of furniture.

  4. Install the underlayment: Install a layer of underlayment to provide a moisture barrier and cushioning between the subfloor and wooden planks.

  5. Install the first row: Install the first row of wooden planks, ensuring they are straight and aligned with the chalk line.

  6. Install the subsequent rows: Install the subsequent rows of wooden planks, using the flooring stapler to secure them to the subfloor.

  7. Cut the planks: Use the circular saw, table saw, or jigsaw to cut the wooden planks to size and shape around obstacles such as doorways and vents.

  8. Install the last row: Install the final row of wooden planks, ensuring they fit snugly against the wall.

  9. Install the baseboards: Install the baseboards, covering the expansion gap between the wooden planks and the wall.

  10. Finish the floor: Sand and finish the wooden floor according to the manufacturer’s instructions.

By following these steps and using the necessary tools, you can install wooden flooring in your home and achieve a beautiful and long-lasting result.

Post Installation Care

After installing your beautiful new hardwood flooring, it’s important to take proper care of it to ensure it lasts for many years to come. Here are some tips for post-installation care:

Cleaning and Maintenance

To keep your hardwood floors looking their best, it’s important to clean them regularly. Here are some tips for cleaning and maintenance:

  • Sweep or vacuum your floors regularly to remove dirt and debris that can scratch the surface of your floors.
  • Use a damp mop to clean your floors, but avoid using too much water, as excess water can damage your floors.
  • Use a hardwood floor cleaner that is specifically designed for your type of flooring. Avoid using harsh chemicals or abrasive cleaners that can damage your floors.
  • Wipe up spills immediately to prevent them from soaking into your floors and causing damage.
  • Place mats at entryways to prevent dirt and debris from being tracked onto your floors.

Preventing Damage

While hardwood floors are durable, they can still be damaged if not properly cared for. Here are some tips for preventing damage to your floors:

  • Avoid wearing high heels or shoes with cleats on your hardwood floors, as they can scratch and damage the surface of your floors.
  • Place felt pads on the bottom of your furniture legs to prevent them from scratching your floors when moved.
  • Avoid dragging heavy furniture across your floors, as this can also cause scratches and damage.
  • Use area rugs in high traffic areas to protect your floors from wear and tear.
  • Keep your floors out of direct sunlight, as this can cause fading and discoloration over time.

By following these post-installation care tips, you can help ensure that your hardwood floors stay looking beautiful for years to come.

Troubleshooting Common Issues

Wooden flooring is a beautiful addition to any home, but it can come with its own set of problems. Here are some common issues you may encounter and how to troubleshoot them:

Gaps between planks

Gaps between planks can occur due to changes in humidity levels or improper installation. If the gaps are small, they can be filled with wood filler. However, if the gaps are large, it may be necessary to remove the affected planks and reinstall them properly.

Cupping or crowning

Cupping or crowning occurs when the edges of the planks are higher than the center, or vice versa. This can be caused by changes in humidity levels or improper installation. If the problem is minor, it may be possible to sand down the affected planks. However, if the problem is severe, it may be necessary to replace the affected planks.

Scratches and dents

Scratches and dents are inevitable with wooden flooring, but they can be minimized with proper care. Use felt pads on furniture legs to prevent scratches, and avoid wearing high heels or dragging heavy objects across the floor. For minor scratches, use a wood filler or touch-up pen. For deeper scratches or dents, it may be necessary to sand down the affected area and refinish the floor.

Squeaks

Squeaks are often caused by loose floorboards. To fix the problem, locate the squeaky board and secure it with screws or nails. If the problem persists, it may be necessary to reinforce the subfloor.

Stains

Stains can be caused by spills or pet accidents. To remove stains, use a wood cleaner and a soft cloth. For stubborn stains, use a wood bleach or sand down the affected area and refinish the floor.

By troubleshooting these common issues, you can keep your wooden flooring looking beautiful for years to come.

How to Lay Laminate Flooring on Wooden Floorboards: A Beginner's Guide

If you’re looking to update the look of your home, installing laminate flooring on top of your wooden floorboards is a great way to do it. Laminate flooring is easy to install, durable, and comes in a wide variety of styles and colors to suit any taste. Plus, it’s a budget-friendly option that can give your home a fresh, modern look without breaking the bank.

Before you begin, it’s important to make sure your wooden floorboards are in good condition. Check for any loose boards or nails that need to be hammered down. If there are any damaged or warped boards, you’ll need to replace them before installing the laminate flooring. Once your floorboards are in good shape, you can start the installation process.

Understanding Laminate Flooring

Laminate flooring is a popular choice for homeowners who want a durable and cost-effective alternative to hardwood floors. It’s made up of several layers of synthetic materials that are fused together to create a strong, resilient surface. Here are some essential things you need to know about laminate flooring before you start installing it on your wooden floorboards.

Advantages of Laminate Flooring

Laminate flooring has several advantages over other types of flooring. Here are some of the most significant benefits:

  • Durability: Laminate flooring is highly durable and can withstand heavy foot traffic, scratches, and stains.

  • Easy to Install: Laminate flooring is easy to install and doesn’t require any special tools or skills.

  • Cost-Effective: Laminate flooring is less expensive than hardwood flooring, making it an affordable option for homeowners on a budget.

  • Low Maintenance: Laminate flooring is easy to clean and maintain, requiring only regular sweeping or vacuuming and occasional mopping.

Types of Laminate Flooring

There are several types of laminate flooring available in the market. Here are some of the most common types:

  • High-Pressure Laminate (HPL): HPL is the most durable type of laminate flooring and is suitable for high-traffic areas like commercial buildings.

  • Direct Pressure Laminate (DPL): DPL is a less expensive type of laminate flooring that is suitable for residential use.

  • Embossed Laminate: Embossed laminate has a textured surface that mimics the look and feel of natural wood.

  • Smooth Laminate: Smooth laminate has a sleek, glossy surface that gives a modern look to your home.

Installation Process

Installing laminate flooring on your wooden floorboards is a straightforward process that you can do yourself. Here are the basic steps involved:

  1. Prepare the Subfloor: Ensure that the subfloor is clean, dry, and level before installing laminate flooring.

  2. Measure and Cut the Laminate Flooring: Measure the length and width of the room and cut the laminate flooring accordingly.

  3. Install the Underlayment: Install a foam underlayment on the subfloor to provide a cushioning effect and reduce noise.

  4. Lay the Laminate Flooring: Start laying the laminate flooring from one corner of the room and work your way across the floor.

  5. Cut the Laminate Flooring to Fit: Use a saw to cut the laminate flooring to fit around corners and edges.

  6. Install the Baseboards: Install the baseboards around the perimeter of the room to cover the gaps between the laminate flooring and the walls.

By following these simple steps, you can install laminate flooring on your wooden floorboards and enjoy the benefits of a beautiful, durable, and cost-effective flooring option.

Preparation of Wooden Floorboards

Before you start laying laminate flooring, you need to prepare the wooden floorboards. Here are the steps you need to follow:

Step 1: Inspect the Floorboards

First, inspect the floorboards to ensure that they are in good condition. Check for any loose or damaged boards, and replace them if necessary. Also, make sure that the floorboards are level and free from any bumps or dips.

Step 2: Clean the Floorboards

Next, clean the floorboards thoroughly. Use a vacuum cleaner or broom to remove any dirt, dust, or debris. Then, wipe the floorboards with a damp cloth to remove any remaining dirt or grime.

Step 3: Sand the Floorboards

If the floorboards are uneven or have rough spots, you may need to sand them down. Use a plane, sander, or sandpaper to smooth out any rough areas. Be sure to wear a dust mask and eye protection when sanding.

Step 4: Fill in Gaps and Cracks

If there are any gaps or cracks in the floorboards, fill them in with wood filler. Apply the filler with a putty knife, and smooth it out so that it is level with the surrounding wood. Allow the filler to dry completely before proceeding.

Step 5: Nail Down Loose Boards

If there are any loose floorboards, nail them down securely using a hammer and nail punch. Be sure to countersink the nails so that they are below the surface of the wood.

By following these steps, you can ensure that your wooden floorboards are properly prepared for the installation of laminate flooring.

Materials and Tools Needed

Before you start laying laminate flooring on wooden floorboards, it is essential to ensure that you have all the necessary tools and materials. Here is a list of everything you will need:

Materials

  • Laminate flooring
  • Underlayment
  • Damp-proof membrane (if required)
  • Waterproof tape (if using damp-proof membrane)
  • Flooring spacers
  • Screws (if required to secure loose boards)

Tools

  • Tape measure
  • Chalk line
  • Circular saw or jigsaw
  • Hammer and nails or nail gun
  • Pry bar
  • Tapping block
  • Pull bar
  • Utility knife
  • Safety glasses
  • Knee pads

Make sure that you have all the materials and tools before starting the installation process. This will save you time and prevent any delays during the installation process. Additionally, it is essential to ensure that the tools are in good condition and functioning correctly.

Laminate flooring is relatively easy to install, but it requires precision and attention to detail. Having the right tools and materials will make the process smoother and more manageable.

Laying the Underlay

Before you start laying the laminate flooring on your wooden floorboards, you need to lay the underlay. The underlay is a thin layer of material that goes between the floorboards and the laminate flooring.

The purpose of the underlay is to provide a smooth surface for the laminate flooring to sit on, to absorb any minor imperfections in the floorboards, and to act as a barrier against moisture. It also helps to reduce noise and provides insulation.

Here are the steps to follow when laying the underlay:

  1. Clear the floorboards of any debris, dust, or dirt. Sweep or vacuum the floor to make sure it is clean and dry.

  2. Roll out the underlay over the floorboards. Make sure the underlay is flush against the wall, with no gaps or overlaps.

  3. Cut the underlay to size using a utility knife. Make sure to leave a small gap (about 1/4 inch) between the underlay and the wall to allow for expansion.

  4. Tape the seams of the underlay using underlay tape. This will help to keep the underlay in place and prevent it from shifting during installation.

  5. Once the underlay is in place, you can start laying the laminate flooring on top of it.

Remember, the quality of the underlay is just as important as the quality of the laminate flooring. Make sure to choose a good quality underlay that is appropriate for your specific flooring needs.

Installing the Laminate Flooring

Now that you have prepped your wooden floorboards, it’s time to start installing the laminate flooring. Here are the steps you need to follow:

  1. Start by measuring the length and width of your room to determine how much flooring you will need. Add about 10% to that number to account for any mistakes or waste.

  2. Lay down a moisture barrier over the wooden floorboards. This will help prevent any moisture from seeping up into the laminate flooring and causing damage. You can use a plastic sheeting or a foam underlayment as a moisture barrier.

  3. Begin by laying the first row of laminate flooring along the longest wall of the room. Make sure to leave a 1/4 inch gap between the flooring and the wall to allow for expansion and contraction.

  4. Use spacers to maintain the gap between the flooring and the wall. You can use scrap wood pieces as spacers.

  5. Use a tapping block and a hammer to connect the tongue and groove of the laminate flooring. Make sure to tap gently to avoid damaging the flooring.

  6. Continue laying the rows of laminate flooring, making sure to stagger the joints so that they don’t line up. This will help make the flooring more stable.

  7. Use a saw to cut the laminate flooring to fit around any obstacles, such as doorways or corners.

  8. Once you have laid all of the laminate flooring, install the baseboards or quarter round to cover the gap between the flooring and the wall.

  9. Finally, clean up any debris or sawdust from the installation process.

With these steps, you should be able to successfully install laminate flooring over your wooden floorboards. Remember to take your time and follow the manufacturer’s instructions for the best results.

Cutting and Fitting Laminate Flooring

Once you have prepared the floor and laid the underlay, it’s time to start cutting and fitting your laminate flooring. Here are some tips to help you get started:

1. Measure and Cut Your Planks

Before you start cutting, measure the length of the room and the width of each plank. Cut the planks to the desired length using a saw. Make sure to leave a small gap between the wall and the plank to allow for expansion. You can use a jigsaw or handsaw to cut the planks to fit around any obstacles, such as pipes or door frames.

2. Fit the Planks Together

Once you have cut your planks to size, it’s time to start fitting them together. Start in one corner of the room and work your way across. Fit the tongue of one plank into the groove of the previous plank and press down firmly. Use a tapping block and hammer to gently tap the planks together if necessary. Make sure to stagger the joints of the planks to create a more natural look.

3. Cut Around Obstacles

When you come across obstacles, such as pipes or door frames, you will need to cut the planks to fit around them. Measure the size of the obstacle and transfer the measurements onto the plank. Use a jigsaw or handsaw to cut the plank to fit around the obstacle. Make sure to leave a small gap between the obstacle and the plank to allow for expansion.

4. Fit the Final Row

When you reach the final row, you will need to cut the planks to fit the remaining space. Measure the width of the remaining space and cut the planks to fit. Use a pull bar to fit the final row into place. Make sure to leave a small gap between the final row and the wall to allow for expansion.

By following these tips, you can easily cut and fit your laminate flooring on wooden floorboards. Remember to take your time and measure twice before cutting to ensure a perfect fit.

Finishing Touches

Congratulations! You’ve successfully laid your new laminate flooring on top of your wooden floorboards. Now, it’s time to add some finishing touches to make your new flooring look even better and last longer.

Install Skirting Boards

One of the first things you should do is to install skirting boards around the edges of your new flooring. Skirting boards not only cover up the expansion gap between the flooring and the wall, but they also protect the edges of your new flooring from damage. You can choose from a variety of skirting board designs and materials to match your new flooring.

Install Door Trims

Another finishing touch you can add is to install door trims. Door trims are small strips of wood or metal that cover the gap between the flooring and the door frame. They not only improve the appearance of your new flooring but also protect the edges of your new flooring from damage.

Clean Your New Laminate Flooring

Before you start using your new laminate flooring, make sure it’s clean. Use a soft-bristled broom or vacuum cleaner to remove any dust or debris from the surface of your new flooring. Then, use a damp mop or cloth to clean your new flooring. Avoid using harsh chemicals or abrasive cleaners that can damage the surface of your new flooring.

Use Furniture Pads

To prevent scratches and dents on your new laminate flooring, use furniture pads under the legs of your furniture. Furniture pads are small felt or rubber pads that stick to the bottom of your furniture legs. They not only protect your new flooring but also make it easier to move your furniture around.

Regular Maintenance

Finally, to keep your new laminate flooring looking great, you need to perform regular maintenance. This includes sweeping or vacuuming your new flooring regularly, wiping up spills immediately, and avoiding dragging heavy furniture or sharp objects across your new flooring. With proper care and maintenance, your new laminate flooring will last for many years to come.

Maintenance and Care of Laminate Flooring

Laminate flooring is a popular choice for many homeowners due to its durability, affordability, and easy maintenance. However, to ensure your laminate flooring lasts for many years, it’s essential to take proper care of it. Here are some tips to help you maintain and care for your laminate flooring:

Regular Cleaning

Regular cleaning is the key to keeping your laminate flooring looking its best. Sweep or vacuum the floor regularly to remove dirt, dust, and debris. Use a soft-bristled brush attachment to avoid scratching the surface. If you prefer to use a mop, make sure it’s damp, not wet, as excess water can damage the flooring.

Spill and Stain Removal

Accidents happen, and spills are inevitable. If you spill something on your laminate flooring, clean it up immediately. Use a soft cloth or paper towel to blot up the spill. Avoid using abrasive cleaners, steel wool, or scouring pads, as they can scratch the surface of the flooring.

For stubborn stains, use a mild cleaning solution and a soft-bristled brush to gently scrub the affected area. Rinse the area with clean water and dry it thoroughly.

Preventative Measures

Preventative measures can help prolong the life of your laminate flooring. Place mats or rugs at entrances to catch dirt and debris. Use furniture pads under the legs of your furniture to prevent scratches and dents. Avoid wearing high heels or shoes with cleats on your laminate flooring, as they can cause damage.

Avoid Excess Moisture

Excess moisture can cause damage to your laminate flooring. Avoid using steam cleaners, as they can cause the flooring to warp or buckle. If you need to mop the floor, use a damp mop, not a wet one. Wipe up spills immediately to prevent water from seeping into the flooring.

Conclusion

By following these simple maintenance and care tips, you can keep your laminate flooring looking its best for many years to come. Regular cleaning, spill and stain removal, preventative measures, and avoiding excess moisture will help ensure your flooring stays in top condition.

Common Mistakes to Avoid

Laying laminate flooring over wooden floorboards can be a great way to update your home’s look, but it’s important to avoid common mistakes that can lead to problems down the line. Here are some common mistakes to avoid when laying laminate flooring on wooden floorboards:

Not Preparing the Subfloor

One of the most common mistakes people make when laying laminate flooring is not properly preparing the subfloor. Before you begin installation, make sure the floorboards are level and free of any debris. If there are any high spots, grind them down, and fill in any low spots with leveling compound.

Not Using Spacers

Another mistake to avoid is not using spacers during installation. Spacers are essential for maintaining the correct expansion gap between the flooring and the walls. Without spacers, your flooring could buckle or warp over time.

Starting in the Wrong Place

Starting your laminate flooring in the wrong place can also cause problems. It’s generally recommended to start laying the flooring in the corner of the room farthest from the entrance. This will help ensure a more even look and make it easier to install the flooring around doorways and other obstacles.

Not Allowing for Expansion

Laminate flooring needs room to expand and contract with changes in temperature and humidity. Failing to leave enough space for expansion can cause the flooring to buckle or warp. Make sure to leave at least a quarter-inch gap between the flooring and the walls, and use spacers to maintain this gap during installation.

Laying in the Wrong Environment

Finally, it’s important to consider the environment when laying laminate flooring. Avoid laying laminate in rooms with high moisture, such as bathrooms or laundry rooms. If you do choose to install laminate in these areas, make sure to use a moisture barrier and seal the edges of the flooring to prevent water from seeping underneath.

By avoiding these common mistakes, you can ensure a successful and long-lasting installation of your laminate flooring.

How to Fix Wooden Flooring: A Beginner's Guide to Repairing Your Hardwood Floors

If you have hardwood flooring in your home, you know how beautiful and durable it can be. However, even the best wood floors are subject to damage. Scratches, water damage, gouges, and dents can all take away from the natural beauty of your hardwood floors. Fortunately, many of these issues can be fixed with a little bit of know-how and some DIY effort.

One common issue with hardwood flooring is surface scratches. These can be caused by anything from pet claws to furniture being dragged across the floor. Fortunately, there are several DIY solutions for fixing surface scratches. For example, you can try using a solution such as Lumber Liquidators’ Scratch Away, which can help fade light scratches. For deeper scratches, you may need to sand and refinish the affected area.

Another common issue with hardwood flooring is water damage. Whether it’s from a spill or a leak, water can cause serious damage to wood floors if left untreated. If you notice water damage on your hardwood floors, the first step is to dry the affected area as quickly as possible. Once the area is dry, you can try sanding and refinishing the floor to repair any damage. If the damage is severe, you may need to replace the affected boards.

Understanding the Issue

If you have wooden flooring in your home, you may run into issues with it over time. However, don’t worry, as many common problems can be fixed with a little DIY know-how. Before you start repairing your wooden flooring, it’s important to understand the issue and the type of wooden flooring you have.

Identifying Damage

The first step in repairing wooden flooring is identifying the damage. Common issues include scratches, dents, and gaps between planks. Some damage may be visible, while other issues may be harder to detect. For example, if your flooring is squeaking, it may be a sign that the subfloor is loose.

Types of Wooden Flooring

There are several types of wooden flooring, and the type you have will affect the way you repair it. Solid wood flooring is made from a single piece of wood and can be sanded and refinished several times. Engineered wood flooring is made from multiple layers of wood and is more resistant to moisture and changes in temperature. Laminate flooring is made from a high-density fiberboard core with a photographic layer on top that mimics wood.

Before you start repairing your wooden flooring, make sure you know what type of flooring you have. This will help you choose the right repair method and materials.

In summary, understanding the issue and the type of wooden flooring you have is crucial before attempting any repairs. Take the time to identify the damage and research the best repair methods for your specific flooring type. With a little effort, you can restore your wooden flooring and keep it looking beautiful for years to come.

Tools and Materials Needed

To fix wooden flooring, you will need a few tools and materials. Here is a list of what you will need:

Tools

  • Hammer
  • Pry bar
  • Circular saw or handsaw
  • Chisel
  • Drill
  • Pneumatic or cordless nailer
  • Shop vacuum or dust extractor
  • Drum or belt floor sander
  • Edger sander
  • Protective eye wear and respirator mask

Materials

  • Replacement wood flooring planks
  • Wood filler or wood patch
  • Painter’s tape
  • Plastic sheeting

Before you start the repair process, make sure you have all of the necessary tools and materials. You don’t want to start the project and realize halfway through that you are missing a crucial tool or material.

The tools listed above are necessary for removing damaged planks, cutting replacement planks to size, fastening the new planks in place, and sanding the repaired area to match the surrounding flooring.

The materials listed above are necessary for filling gaps and holes in the repaired area, protecting surrounding surfaces, and ensuring a smooth and even finish.

Overall, having the right tools and materials is essential for successfully repairing wooden flooring. Make sure you have everything you need before starting the repair process.

Preparation Steps

Before you start repairing your wooden flooring, you need to prepare the area and ensure that you are taking the necessary safety measures. Here are the steps you should follow:

Clearing the Area

The first step is to clear the area where you will be working. Remove all furniture, rugs, and other objects from the room. If you cannot move some of the furniture, cover it with plastic sheets to protect it from dust and debris.

Next, remove all the baseboards and trim around the edges of the room. This will give you more space to work and ensure that you can sand and refinish the entire floor. Use a pry bar and a hammer to gently remove the trim. Be careful not to damage it, as you will need to reinstall it later.

Safety Measures

Repairing wooden flooring can be a hazardous task, so it’s important to take some safety precautions. Here are some tips to keep in mind:

  • Wear protective gear such as safety goggles, a dust mask, and earplugs to protect your eyes, lungs, and ears from dust and noise.
  • Turn off the electricity in the room to avoid any accidents with power tools.
  • Use a fire extinguisher in case of any accidents or fires.
  • Keep the room well-ventilated by opening windows or using fans.
  • Use caution when handling power tools, especially the drum sander, which can be heavy and difficult to control.

By following these preparation steps and safety measures, you can ensure that your wooden flooring repair project goes smoothly and safely.

Repairing Minor Damages

If your wooden flooring has minor damages, you can easily repair them yourself. Here are some tips on how to fix scratches and fill gaps.

Fixing Scratches

If you have light surface scratches on your wooden floors, you can make them fade by applying a solution like Lumber Liquidators’ Scratch Away. Start by cleaning the entire area around the scratch to remove all traces of dust and grime on the floor. Pay close attention to the inside of the scratch itself, which should be totally free of dirt if possible.

Apply the Scratch Away solution to a clean, dry cloth and rub it into the scratch. Let it sit for a few minutes, then wipe away any excess solution. Repeat the process until the scratch is no longer visible. You can also use a wax stick that matches the color of your flooring to fill in deeper scratches. Rub the wax stick over the scratch until it is filled, then buff the area with a clean cloth.

Filling Gaps

If you notice gaps between your wooden floorboards, you can fill them in with wood filler. First, clean the gaps with a vacuum or dry-mop to remove any debris. Then, apply the wood filler to the gaps using a putty knife. Make sure to overfill the gaps slightly to allow for shrinkage.

Let the wood filler dry completely according to the manufacturer’s instructions. Once it is dry, sand the surface of the wood filler until it is flush with the surrounding floorboards. You can then stain or paint the wood filler to match the color of your flooring.

By following these tips, you can easily repair minor damages to your wooden flooring and keep it looking great for years to come.

Handling Major Damages

If you have major damages on your wooden flooring, don’t worry. There are a few steps you can take to fix it. This section will cover two of the most common methods for handling major damages: replacing damaged planks and refinishing the floor.

Replacing Damaged Planks

If you have a damaged plank, you can replace it with a new one. Here are the steps to follow:

  1. Remove the damaged plank: Use a circular saw to cut the plank into small pieces. Then, use a chisel to remove the pieces.

  2. Cut the new plank: Use a circular saw to cut the new plank to the correct size.

  3. Install the new plank: Apply adhesive to the back of the new plank and place it in the empty space. Use a hammer and nails to secure it in place.

  4. Sand and finish: Sand the new plank to make it level with the surrounding planks. Then, apply a finish to the entire floor to ensure that the new plank matches the rest of the floor.

Refinishing the Floor

If you have multiple damaged planks or the damage is widespread, refinishing the floor may be the best option. Here are the steps to follow:

  1. Sand the floor: Use a floor sander to sand the entire floor. This will remove the damaged finish and expose the bare wood.

  2. Stain the floor: Apply a stain to the floor to give it the desired color.

  3. Apply the finish: Apply a finish to the floor to protect it from future damage. You can choose between oil-based and water-based finishes. Oil-based finishes are more durable but take longer to dry, while water-based finishes are less durable but dry faster.

By following these steps, you can handle major damages to your wooden flooring and restore it to its former glory.

Maintenance Tips

Keeping your wooden flooring in top condition requires regular maintenance. Here are some tips to help you keep your floors looking great for years to come.

Regular Cleaning

To prevent dirt and grime buildup, it’s important to sweep or vacuum your wooden floors regularly. Use a soft-bristled broom or a vacuum with a hardwood floor attachment to avoid scratching the surface. You can also use a damp mop or cloth to clean up spills and stains, but be sure to avoid using too much water, as it can damage the wood.

For a deeper clean, you can use a hardwood floor cleaner. Be sure to choose a cleaner specifically designed for wooden floors and follow the manufacturer’s instructions carefully. Avoid using harsh chemicals or abrasive cleaners, as they can damage the finish on your floors.

Preventing Scratches and Dents

Preventing scratches and dents on your wooden floors is key to maintaining their beauty and longevity. Here are some tips to help you protect your floors:

  • Use furniture pads or felt protectors on the legs of your furniture to prevent scratches and dents.
  • Avoid wearing high heels or shoes with heavy treads on your wooden floors, as they can cause damage.
  • Place doormats at all entrances to your home to prevent dirt and debris from being tracked onto your floors.
  • Trim your pet’s nails regularly to prevent scratches on your floors.

By following these maintenance tips, you can help keep your wooden floors looking their best for years to come.