Tag Archives: high-density fiberboard core

how-to-install-wooden-flooring-on-concrete-a-step-by-step-guide-2

How to Install Wooden Flooring on Concrete: A Step-by-Step Guide

If you’re looking to install wooden flooring on a concrete surface, you may be wondering where to start. While it can be a bit more challenging than installing on a wood subfloor, it’s definitely possible. With the right tools, materials, and some patience, you can have beautiful wooden floors in your home in no time.

One of the first things you’ll need to do is prepare the concrete surface. This involves checking for moisture, ensuring the surface is level, and filling any cracks or holes. Once the surface is ready, you’ll need to install a moisture barrier to protect your wooden flooring from any moisture that may seep through the concrete. From there, you can lay down underlayment and start installing your wooden planks. It’s important to plan out your layout beforehand to ensure a seamless and professional-looking finish.

Overall, installing wooden flooring on concrete may require a bit more work than other surfaces, but it’s definitely worth it in the end. With the right preparation and installation techniques, you can transform your space and add value to your home.

Understanding the Basics of Wooden Flooring
how-to-install-wooden-flooring-on-concrete-a-step-by-step-guide-2

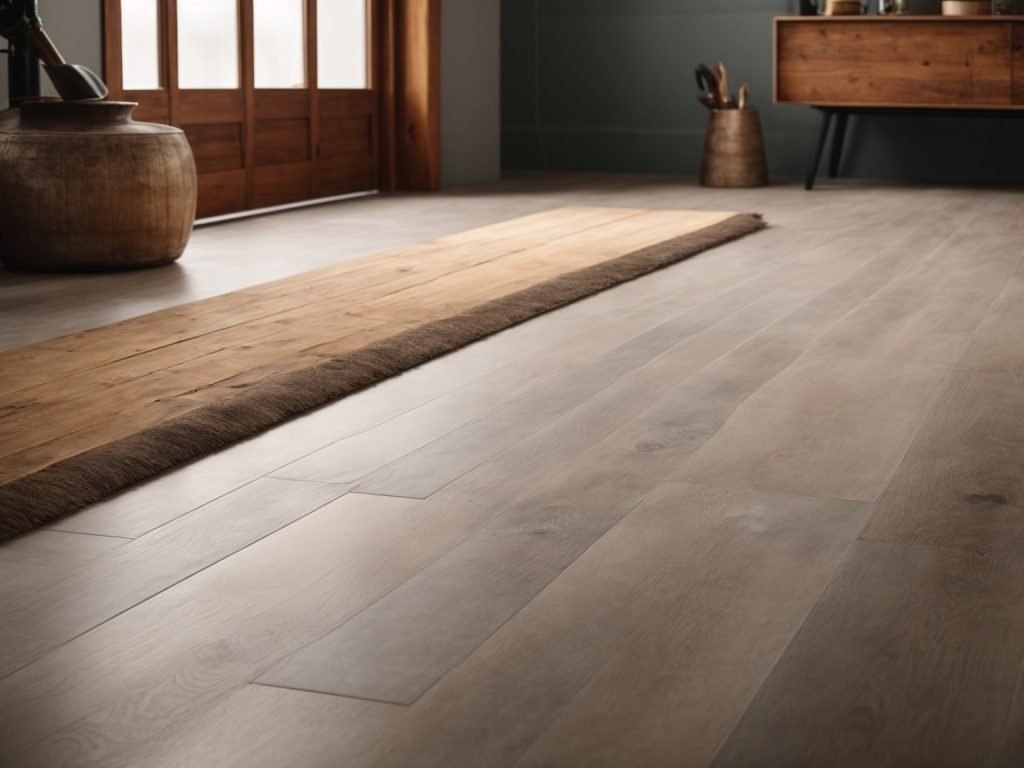
Wooden flooring is an excellent way to add warmth, beauty, and value to your home. If you’re looking to install wooden flooring on concrete, there are a few things you need to know. In this section, we’ll cover the basics of wooden flooring, including the types of wooden flooring and the benefits of installing wooden flooring on concrete.

Types of Wooden Flooring

There are three basic types of wooden flooring: solid hardwood, engineered hardwood, and laminate. Each type has its own unique characteristics and advantages.

  • Solid hardwood flooring is made from a single piece of wood and is the most traditional type of wooden flooring. It is durable, long-lasting, and can be sanded and refinished multiple times. However, it is susceptible to moisture damage and can be expensive.
  • Engineered hardwood flooring is made from multiple layers of wood and is more stable than solid hardwood flooring. It is also less expensive and can be installed over concrete. However, it cannot be sanded and refinished as many times as solid hardwood flooring.
  • Laminate flooring is made from a high-density fiberboard core with a photographic layer that mimics the look of wood. It is less expensive than both solid and engineered hardwood flooring and is easy to install. However, it cannot be sanded or refinished and is not as durable as hardwood flooring.

Benefits of Wooden Flooring on Concrete
benefits-of-wooden-flooring-on-concrete

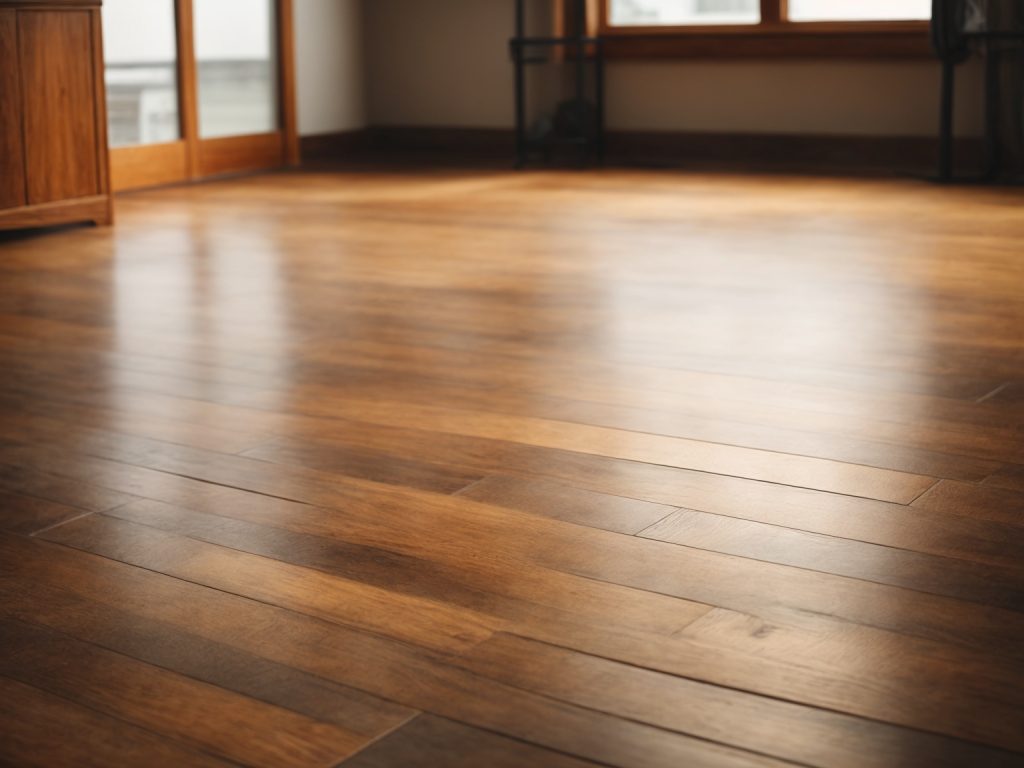
Installing wooden flooring on concrete has several benefits, including:

  • Improved aesthetics: Wooden flooring adds warmth and beauty to any space.
  • Increased home value: Wooden flooring is a desirable feature that can increase the value of your home.
  • Durability: Wooden flooring is durable and long-lasting, especially if you choose solid hardwood flooring.
  • Easy maintenance: Wooden flooring is easy to clean and maintain, making it a practical choice for busy households.
  • Improved indoor air quality: Wooden flooring does not trap dust and allergens like carpet, improving indoor air quality.

In summary, wooden flooring is an excellent choice for adding beauty, value, and durability to your home. When installed on concrete, it can provide a stable and long-lasting flooring solution.

Preparation Before Installation

Before you start installing wooden flooring on concrete, you need to prepare the surface properly. This will ensure that the flooring is installed correctly and will last for a long time. In this section, we will discuss the tools and materials you need and how to prepare the concrete surface.

Tools and Materials Needed

To prepare the concrete surface, you will need the following tools and materials:

  • Vacuum cleaner
  • Broom
  • Dustpan
  • Damp mop
  • Moisture barrier
  • Underlayment
  • Tape measure
  • Chalk line
  • Circular saw
  • Jigsaw
  • Hammer
  • Pry bar
  • Long level
  • Carpenter’s square
  • Trowel
  • Wood flooring adhesive
  • Wood flooring nails
  • Wood flooring screws
  • Wood flooring planks

Make sure you have all these tools and materials before you start the installation.

Preparing the Concrete Surface

The first step in preparing the concrete surface is to clean it thoroughly. Use a vacuum cleaner, broom, and dustpan to remove any dirt, debris, and dust. Then, damp mop the surface to remove any remaining dirt and dust.

Next, you need to check the moisture level of the concrete. If the moisture level is high, you need to install a moisture barrier. This will prevent moisture from seeping into the wood and causing damage.

After installing the moisture barrier, you need to install the underlayment. This will provide a smooth surface for the wood flooring to be installed on. Use a tape measure and chalk line to mark the layout of the underlayment.

Once the underlayment is installed, you need to check the level of the concrete surface. Use a long level and carpenter’s square to ensure that the surface is level. If it is not, you need to use a self-leveling compound to even it out.

Finally, you need to let the surface dry completely before installing the wood flooring. Follow the manufacturer’s instructions for drying time. Once the surface is dry, you can start installing the wood flooring.

By properly preparing the concrete surface, you can ensure that your wooden flooring will be installed correctly and will last for a long time.

Installing the Wooden Flooring

Installing wooden flooring over concrete can be challenging, but with the right tools and techniques, you can achieve a beautiful and durable result. In this section, we will guide you through the process step-by-step, from laying the moisture barrier to laying the wooden planks.

Laying the Moisture Barrier

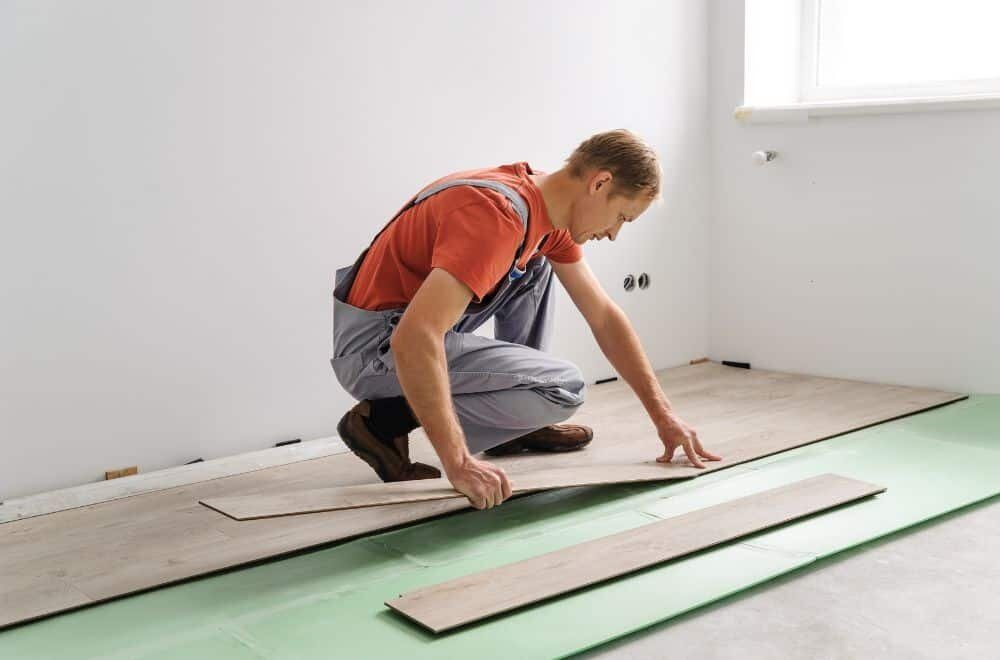
Before you start laying the wooden planks, it is essential to lay a moisture barrier to prevent moisture from penetrating the wood. Here are the steps to follow:

  1. Clean the concrete surface thoroughly to remove any dirt or debris.
  2. Roll out the moisture barrier over the entire surface of the concrete, making sure to overlap the seams by at least 6 inches.
  3. Cut the moisture barrier to fit the room’s dimensions, leaving a 2-inch gap around the perimeter of the room.
  4. Tape the seams of the moisture barrier with waterproof tape to ensure a tight seal.

Spreading the Adhesive

Once the moisture barrier is in place, it’s time to spread the adhesive. Here’s how to do it:

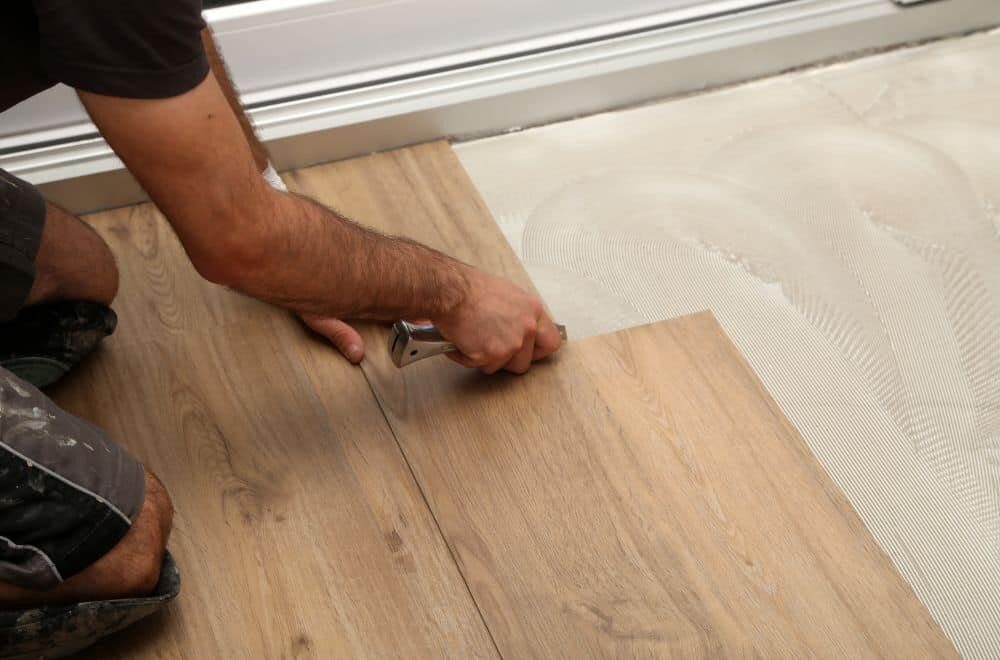
  1. Apply a layer of adhesive to a small section of the concrete surface using a trowel.
  2. Use a notched trowel to spread the adhesive evenly over the surface, making sure to cover the entire area.
  3. Lay the wooden planks onto the adhesive, making sure to leave a 1/2 inch gap around the perimeter of the room.
  4. Repeat the process, working in small sections until the entire floor is covered.

Laying the Wooden Planks

Now that the adhesive is in place, it’s time to lay the wooden planks. Here’s how to do it:

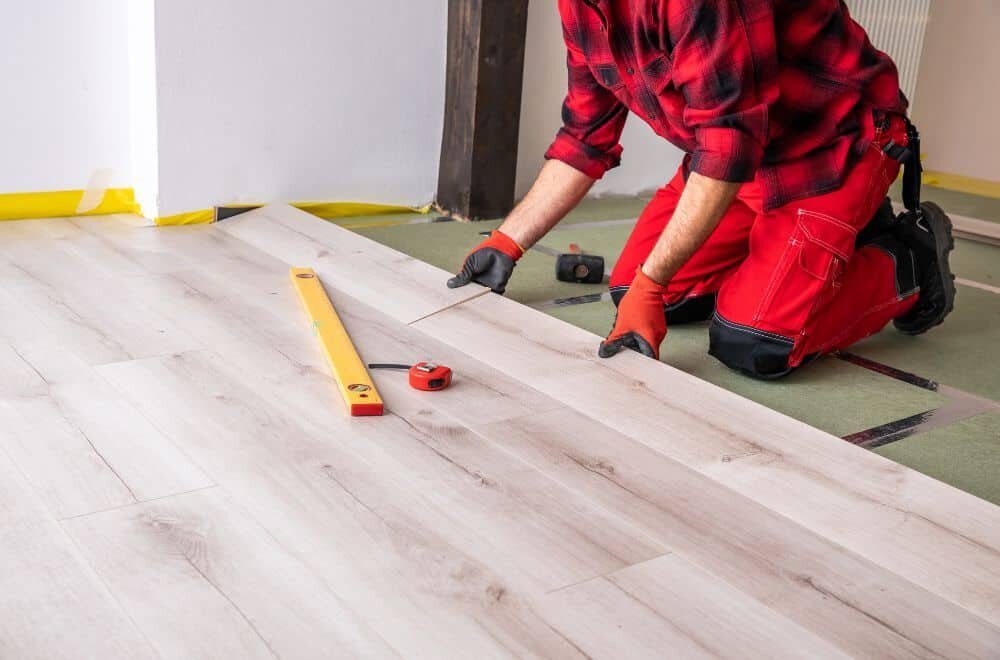
  1. Start laying the wooden planks along the longest wall, making sure to leave a 1/2 inch gap around the perimeter of the room.
  2. Use a rubber mallet to tap the wooden planks into place, making sure they are snug against each other.
  3. Continue laying the wooden planks row by row, making sure to stagger the joints to create a random pattern.
  4. Use a saw to cut the wooden planks to fit the edges of the room.

By following these steps, you can install wooden flooring over concrete and enjoy a beautiful and durable result.

Post-Installation Care

Congratulations! You have successfully installed your wooden flooring on concrete. Now, it’s time to take care of your new investment to ensure it lasts for years to come. Here are some tips for post-installation care:

Cleaning and Maintenance

Regular cleaning and maintenance will keep your wooden flooring looking its best. Here are some tips:

  • Sweep or vacuum your floors regularly to remove dirt and debris.
  • Use a damp mop and a mild cleaner to clean your floors. Avoid using harsh chemicals or abrasive cleaners that can damage the finish.
  • Wipe up spills immediately to prevent staining.
  • Use furniture pads to prevent scratches and dents from furniture.

Preventing Damage

Preventing damage is key to maintaining the durability and longevity of your wooden flooring. Here are some tips:

  • Place doormats at entryways to prevent dirt and debris from being tracked onto your floors.
  • Avoid wearing high heels or shoes with cleats on your wooden flooring, as they can cause scratches and dents.
  • Keep your floors dry and avoid exposing them to excessive moisture, as this can cause warping and damage.
  • Use area rugs in high traffic areas to protect your floors from wear and tear.

By following these simple tips, you can keep your wooden flooring looking beautiful for years to come.
How to Fix Wooden Flooring: A Beginner's Guide to Repairing Your Hardwood Floors

If you have hardwood flooring in your home, you know how beautiful and durable it can be. However, even the best wood floors are subject to damage. Scratches, water damage, gouges, and dents can all take away from the natural beauty of your hardwood floors. Fortunately, many of these issues can be fixed with a little bit of know-how and some DIY effort.

One common issue with hardwood flooring is surface scratches. These can be caused by anything from pet claws to furniture being dragged across the floor. Fortunately, there are several DIY solutions for fixing surface scratches. For example, you can try using a solution such as Lumber Liquidators’ Scratch Away, which can help fade light scratches. For deeper scratches, you may need to sand and refinish the affected area.

Another common issue with hardwood flooring is water damage. Whether it’s from a spill or a leak, water can cause serious damage to wood floors if left untreated. If you notice water damage on your hardwood floors, the first step is to dry the affected area as quickly as possible. Once the area is dry, you can try sanding and refinishing the floor to repair any damage. If the damage is severe, you may need to replace the affected boards.

Understanding the Issue

If you have wooden flooring in your home, you may run into issues with it over time. However, don’t worry, as many common problems can be fixed with a little DIY know-how. Before you start repairing your wooden flooring, it’s important to understand the issue and the type of wooden flooring you have.

Identifying Damage

The first step in repairing wooden flooring is identifying the damage. Common issues include scratches, dents, and gaps between planks. Some damage may be visible, while other issues may be harder to detect. For example, if your flooring is squeaking, it may be a sign that the subfloor is loose.

Types of Wooden Flooring

There are several types of wooden flooring, and the type you have will affect the way you repair it. Solid wood flooring is made from a single piece of wood and can be sanded and refinished several times. Engineered wood flooring is made from multiple layers of wood and is more resistant to moisture and changes in temperature. Laminate flooring is made from a high-density fiberboard core with a photographic layer on top that mimics wood.

Before you start repairing your wooden flooring, make sure you know what type of flooring you have. This will help you choose the right repair method and materials.

In summary, understanding the issue and the type of wooden flooring you have is crucial before attempting any repairs. Take the time to identify the damage and research the best repair methods for your specific flooring type. With a little effort, you can restore your wooden flooring and keep it looking beautiful for years to come.
Tools and Materials Needed

To fix wooden flooring, you will need a few tools and materials. Here is a list of what you will need:

Tools

  • Hammer
  • Pry bar
  • Circular saw or handsaw
  • Chisel
  • Drill
  • Pneumatic or cordless nailer
  • Shop vacuum or dust extractor
  • Drum or belt floor sander
  • Edger sander
  • Protective eye wear and respirator mask

Materials

  • Replacement wood flooring planks
  • Wood filler or wood patch
  • Painter’s tape
  • Plastic sheeting

Before you start the repair process, make sure you have all of the necessary tools and materials. You don’t want to start the project and realize halfway through that you are missing a crucial tool or material.

The tools listed above are necessary for removing damaged planks, cutting replacement planks to size, fastening the new planks in place, and sanding the repaired area to match the surrounding flooring.

The materials listed above are necessary for filling gaps and holes in the repaired area, protecting surrounding surfaces, and ensuring a smooth and even finish.

Overall, having the right tools and materials is essential for successfully repairing wooden flooring. Make sure you have everything you need before starting the repair process.

Preparation Steps

Before you start repairing your wooden flooring, you need to prepare the area and ensure that you are taking the necessary safety measures. Here are the steps you should follow:

Clearing the Area

The first step is to clear the area where you will be working. Remove all furniture, rugs, and other objects from the room. If you cannot move some of the furniture, cover it with plastic sheets to protect it from dust and debris.

Next, remove all the baseboards and trim around the edges of the room. This will give you more space to work and ensure that you can sand and refinish the entire floor. Use a pry bar and a hammer to gently remove the trim. Be careful not to damage it, as you will need to reinstall it later.

Safety Measures

Repairing wooden flooring can be a hazardous task, so it’s important to take some safety precautions. Here are some tips to keep in mind:

  • Wear protective gear such as safety goggles, a dust mask, and earplugs to protect your eyes, lungs, and ears from dust and noise.
  • Turn off the electricity in the room to avoid any accidents with power tools.
  • Use a fire extinguisher in case of any accidents or fires.
  • Keep the room well-ventilated by opening windows or using fans.
  • Use caution when handling power tools, especially the drum sander, which can be heavy and difficult to control.

By following these preparation steps and safety measures, you can ensure that your wooden flooring repair project goes smoothly and safely.

Repairing Minor Damages

If your wooden flooring has minor damages, you can easily repair them yourself. Here are some tips on how to fix scratches and fill gaps.

Fixing Scratches

If you have light surface scratches on your wooden floors, you can make them fade by applying a solution like Lumber Liquidators’ Scratch Away. Start by cleaning the entire area around the scratch to remove all traces of dust and grime on the floor. Pay close attention to the inside of the scratch itself, which should be totally free of dirt if possible.

Apply the Scratch Away solution to a clean, dry cloth and rub it into the scratch. Let it sit for a few minutes, then wipe away any excess solution. Repeat the process until the scratch is no longer visible. You can also use a wax stick that matches the color of your flooring to fill in deeper scratches. Rub the wax stick over the scratch until it is filled, then buff the area with a clean cloth.

Filling Gaps

If you notice gaps between your wooden floorboards, you can fill them in with wood filler. First, clean the gaps with a vacuum or dry-mop to remove any debris. Then, apply the wood filler to the gaps using a putty knife. Make sure to overfill the gaps slightly to allow for shrinkage.

Let the wood filler dry completely according to the manufacturer’s instructions. Once it is dry, sand the surface of the wood filler until it is flush with the surrounding floorboards. You can then stain or paint the wood filler to match the color of your flooring.

By following these tips, you can easily repair minor damages to your wooden flooring and keep it looking great for years to come.

Handling Major Damages

If you have major damages on your wooden flooring, don’t worry. There are a few steps you can take to fix it. This section will cover two of the most common methods for handling major damages: replacing damaged planks and refinishing the floor.

Replacing Damaged Planks

If you have a damaged plank, you can replace it with a new one. Here are the steps to follow:

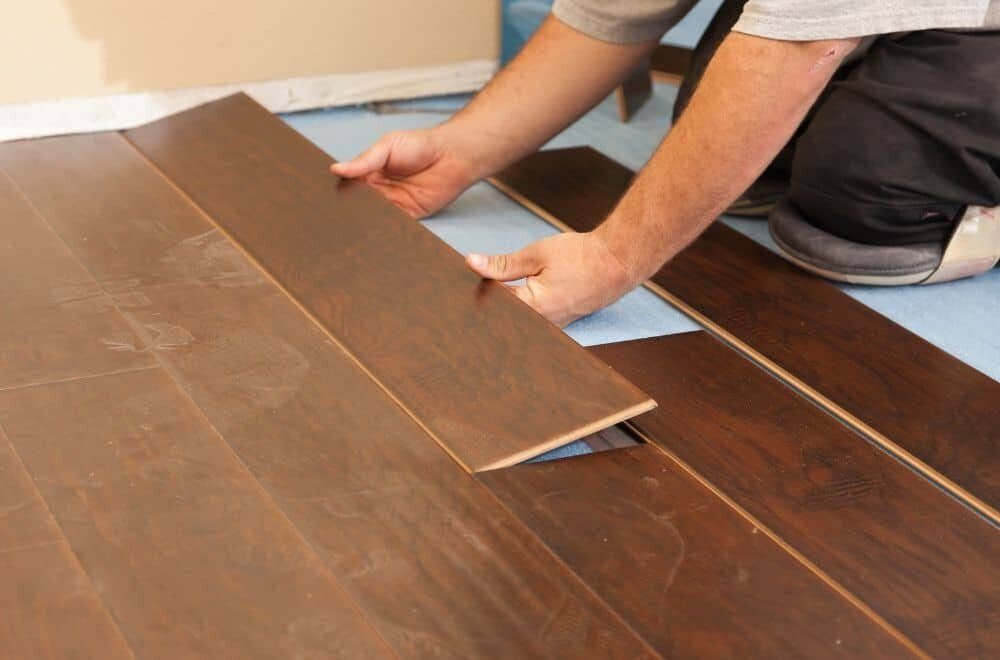
  1. Remove the damaged plank: Use a circular saw to cut the plank into small pieces. Then, use a chisel to remove the pieces.

  2. Cut the new plank: Use a circular saw to cut the new plank to the correct size.

  3. Install the new plank: Apply adhesive to the back of the new plank and place it in the empty space. Use a hammer and nails to secure it in place.

  4. Sand and finish: Sand the new plank to make it level with the surrounding planks. Then, apply a finish to the entire floor to ensure that the new plank matches the rest of the floor.

Refinishing the Floor

If you have multiple damaged planks or the damage is widespread, refinishing the floor may be the best option. Here are the steps to follow:

  1. Sand the floor: Use a floor sander to sand the entire floor. This will remove the damaged finish and expose the bare wood.

  2. Stain the floor: Apply a stain to the floor to give it the desired color.

  3. Apply the finish: Apply a finish to the floor to protect it from future damage. You can choose between oil-based and water-based finishes. Oil-based finishes are more durable but take longer to dry, while water-based finishes are less durable but dry faster.

By following these steps, you can handle major damages to your wooden flooring and restore it to its former glory.

Maintenance Tips

Keeping your wooden flooring in top condition requires regular maintenance. Here are some tips to help you keep your floors looking great for years to come.

Regular Cleaning

To prevent dirt and grime buildup, it’s important to sweep or vacuum your wooden floors regularly. Use a soft-bristled broom or a vacuum with a hardwood floor attachment to avoid scratching the surface. You can also use a damp mop or cloth to clean up spills and stains, but be sure to avoid using too much water, as it can damage the wood.

For a deeper clean, you can use a hardwood floor cleaner. Be sure to choose a cleaner specifically designed for wooden floors and follow the manufacturer’s instructions carefully. Avoid using harsh chemicals or abrasive cleaners, as they can damage the finish on your floors.

Preventing Scratches and Dents

Preventing scratches and dents on your wooden floors is key to maintaining their beauty and longevity. Here are some tips to help you protect your floors:

  • Use furniture pads or felt protectors on the legs of your furniture to prevent scratches and dents.
  • Avoid wearing high heels or shoes with heavy treads on your wooden floors, as they can cause damage.
  • Place doormats at all entrances to your home to prevent dirt and debris from being tracked onto your floors.
  • Trim your pet’s nails regularly to prevent scratches on your floors.

By following these maintenance tips, you can help keep your wooden floors looking their best for years to come.

understanding-the-basics-of-wood-floor-installation

Wood Floor Installation: Home Depot, Lowes, or Costco?

If you’re looking to install wood floors in your home, you may be wondering whether to hire Home Depot, Lowes or Costco. These big box stores have programs where independent contractors can sign up and be fed jobs in exchange for a commission paid to the store. However, it’s important to understand that the big box stores do not do the work themselves, so things could go well or badly depending on the particular contractor you end up with.

One advantage of working with a big box store is that they may offer financing options or warranties that an independent contractor may not be able to provide. Additionally, working with a big box store may offer more convenience, as they have a larger selection of materials and appliances available for purchase. However, it’s important to do your research and read reviews before making a decision, as the quality of work can vary greatly depending on the contractor.

Ultimately, the decision of whether to hire Home Depot, Lowes or Costco for your wood floor installation will depend on your specific needs and preferences. It’s important to weigh the pros and cons and do your due diligence before making a decision.

Understanding the Basics of Wood Floor Installation

understanding-the-basics-of-wood-floor-installation

Installing wood floors in your home can be a great way to add value and beauty to your space. However, before you decide to hire a professional to install your wood floors, it’s important to understand the basics of wood floor installation.

Types of Wood Floors

There are three basic types of wood floors: solid, engineered, and laminate.

Solid wood floors are made from one solid piece of wood and are typically more expensive than other types of wood floors. They can be sanded and refinished multiple times, which makes them a durable and long-lasting choice.

Engineered wood floors are made from multiple layers of wood that are bonded together. They are less expensive than solid wood floors and are more resistant to moisture and temperature changes.

Laminate wood floors are made from a high-density fiberboard core with a photographic layer that mimics the look of wood. They are the least expensive option and are easy to install, but they are not as durable as solid or engineered wood floors.

Installation Process

The installation process for wood floors typically involves several steps:

  1. Acclimation: The wood needs to acclimate to the environment in which it will be installed. This involves leaving the wood in the room where it will be installed for a few days to adjust to the temperature and humidity.
  2. Preparation: The subfloor needs to be cleaned and leveled before the wood can be installed. This may involve removing old flooring, installing a moisture barrier, and repairing any damage to the subfloor.
  3. Installation: The wood is then installed using one of three methods: nail-down, glue-down, or floating. Nail-down involves nailing the wood to the subfloor, glue-down involves gluing the wood to the subfloor, and floating involves locking the wood together without attaching it to the subfloor.
  4. Finishing: The wood is then sanded and finished with a protective coating to enhance its durability and appearance.

Overall, the installation process for wood floors can be complex and time-consuming. It’s important to hire a professional who has experience with wood floor installation to ensure that the job is done correctly and efficiently.

Hiring Home Depot

hiring-home-depot

If you are considering hiring Home Depot to install wood floors in your home, here is what you need to know.

Services Overview

Home Depot offers a variety of services related to flooring installation, including:

  • In-home measurement and consultation
  • Professional installation
  • Removal and disposal of old flooring
  • Financing options

Their installation services include hardwood, laminate, vinyl, and tile flooring. Home Depot also offers a one-year labor warranty on their installation services.

Pros and Cons

Here are some pros and cons to consider when hiring Home Depot for your flooring installation:

Pros

  • Home Depot has a wide selection of flooring options to choose from.
  • Their installation services come with a one-year labor warranty.
  • They offer financing options to help make your flooring installation more affordable.

Cons

  • Home Depot’s installation services can be more expensive than hiring an independent contractor.
  • Some customers have reported issues with the quality of Home Depot’s installation services.
  • Home Depot’s contractors may have limited availability and longer lead times for scheduling installation.

Overall, hiring Home Depot can be a convenient option for those looking to install new wood floors in their home. However, it’s important to carefully consider the pros and cons and decide if their services are the right fit for your needs and budget.

Hiring Lowes

hiring-lowes

Services Overview

When it comes to installing wood floors in your home, Lowe’s offers a variety of services to make the process easier for you. They have a team of experienced professionals who can provide you with a free consultation to help you choose the best type of wood flooring for your home. They also offer installation services, which include removing your old flooring, preparing your subfloor, and installing your new wood flooring.

Lowe’s offers a wide range of wood flooring options, including solid hardwood, engineered hardwood, and bamboo flooring. They also offer a variety of colors and finishes to choose from, so you can find the perfect wood flooring to match your home’s decor.

Pros and Cons

Before you decide to hire Lowe’s to install your wood floors, it’s important to consider the pros and cons.

Pros

  • Free consultation: Lowe’s offers a free consultation to help you choose the best type of wood flooring for your home.
  • Installation services: Lowe’s provides installation services, which include removing your old flooring, preparing your subfloor, and installing your new wood flooring.
  • Wide range of options: Lowe’s offers a wide range of wood flooring options, including solid hardwood, engineered hardwood, and bamboo flooring, as well as a variety of colors and finishes.

Cons

  • Price: Lowe’s installation services can be more expensive than hiring an independent contractor.
  • Quality of work: The quality of work can vary depending on the individual contractors hired by Lowe’s.
  • Liability: If something goes wrong during the installation process, Lowe’s may not be liable, as they hire independent contractors to do the work.

Overall, if you’re looking for a hassle-free experience and a wide range of wood flooring options, Lowe’s may be a good choice for you. However, if you’re looking to save money or want to ensure the highest quality of work, you may want to consider hiring an independent contractor instead.

Hiring Costco

hiring-costco

If you are considering hiring Costco to install wood floors in your home, here is what you need to know.

Services Overview

Costco offers installation services for various products, including hardwood flooring. They have a network of independent contractors who are licensed and insured to provide installation services. Costco’s installation services come with a satisfaction guarantee, which means if you are not satisfied with the quality of work, they will make it right.

Before hiring Costco, you can get a free consultation to discuss your project and get an estimate. The consultation includes an evaluation of your space and an assessment of any potential issues that may arise during the installation process.

Pros and Cons

Here are some pros and cons to consider when hiring Costco for your wood flooring installation:

Pros

  • Competitive pricing: Costco’s installation services are competitively priced, and they offer discounts to members.
  • Satisfaction guarantee: Costco’s satisfaction guarantee ensures that you are happy with the quality of work.
  • Licensed and insured contractors: Costco’s contractors are licensed and insured, which means you can trust them to do the job right.

Cons

  • Limited selection: Costco’s selection of hardwood flooring options may be limited compared to other retailers.
  • Limited customization: Costco’s contractors may have limited options for customizing the installation to your specific needs.
  • Limited availability: Costco’s installation services may not be available in all areas.

Overall, if you are looking for a competitively priced, licensed and insured contractor to install your wood floors, Costco may be a good option for you. However, if you are looking for a wider selection of flooring options or more customization options, you may want to consider other retailers.

Customer Reviews and Experiences

When it comes to choosing a company to install wood floors in your home, it’s important to do your research and read customer reviews and experiences. Here are some things to keep in mind when looking at reviews:

  • Look for reviews that are recent and from customers who had a similar project to yours.
  • Pay attention to both positive and negative reviews, and read them carefully to understand the specific issues customers had.
  • Consider the overall rating of the company, but also look at the number of reviews. A company with a 5-star rating but only a handful of reviews may not be as reliable as a company with a 4-star rating and hundreds of reviews.

Here are some customer reviews and experiences for Home Depot, Lowes, and Costco:

Home Depot

  • “I had a great experience with Home Depot’s installation team. They were professional and efficient, and the floors look amazing.” – Sarah, 2022
  • “The installation process was a bit of a nightmare. The team showed up late and didn’t communicate well. The floors look good, but I wouldn’t use Home Depot again.” – John, 2021

Lowes

  • “I was really impressed with the quality of work from Lowes’ installation team. They were friendly and knowledgeable, and the floors look great.” – Emily, 2023
  • “Lowes’ installation team damaged some of my furniture during the installation process, and it was a hassle to get it resolved. The floors look good, but I wouldn’t use Lowes again.” – Mike, 2020

Costco

  • “I was hesitant to use Costco for my flooring installation, but I’m so glad I did. The team was professional and the floors look amazing. Plus, the price was unbeatable!” – Lisa, 2023
  • “I had a terrible experience with Costco’s installation team. They were unprofessional and the floors had several issues. It was a nightmare to get it resolved.” – Tom, 2021

Remember, every customer experience is unique, so it’s important to read a variety of reviews and make your own decision based on your specific needs and preferences.

Comparing Prices

When it comes to installing wood floors in your home, one of the most important factors to consider is the cost. Home Depot, Lowes, and Costco are all popular options for purchasing and installing flooring, but which one offers the best prices?

First, it’s important to note that the cost of installation can vary depending on the type of wood flooring you choose, the size of the room, and any additional services you may need. However, we can still compare the prices of each retailer to get a general idea of which one is the most affordable.

Here’s a breakdown of the prices for wood flooring installation at Home Depot, Lowes, and Costco:

Retailer Price per square foot
Home Depot $1.99 – $3.99
Lowes $1.99 – $3.99
Costco $1.99 – $3.99

As you can see, the prices for installation are virtually identical across all three retailers. However, it’s worth noting that Costco requires a minimum purchase of 500 square feet, while Home Depot and Lowes do not have a minimum requirement.

In addition to installation costs, it’s also important to consider the cost of the actual wood flooring. Again, prices can vary depending on the type of wood and the quality of the product. However, here’s a general overview of the prices for wood flooring at each retailer:

Retailer Price per square foot
Home Depot $2.99 – $7.99
Lowes $2.99 – $7.99
Costco $2.99 – $7.99

Once again, the prices are very similar across all three retailers. However, it’s worth noting that Costco often offers discounts and promotions on their flooring products, which could potentially make them the most affordable option.

Overall, when comparing prices for wood flooring installation, there isn’t a clear winner between Home Depot, Lowes, and Costco. However, it’s important to do your research and compare prices for the specific type of flooring you’re interested in purchasing.

Assessing Quality of Service

assessing-quality-of-service

When it comes to hiring a company to install wood floors in your home, you want to make sure you are getting the best quality of service possible. Here are some factors to consider when assessing the quality of service provided by Home Depot, Lowes, and Costco:

Reputation

One important factor to consider is the reputation of the company. You can check online reviews and ratings to see what other customers have to say about their experiences with each company. Look for patterns in the reviews, such as consistent complaints or praise for certain aspects of the service.

Expertise

Another important factor is the expertise of the installers. You want to make sure that the company has experienced and knowledgeable installers who can provide high-quality work. You can ask about the qualifications and experience of the installers before hiring a company.

Customer Service

Good customer service is essential when hiring a company to install wood floors in your home. You want a company that is responsive to your questions and concerns, and that will work with you to ensure your satisfaction. Look for a company that provides clear communication and is easy to reach.

Price

Price is always a consideration when hiring a company for any service. However, it is important to remember that the cheapest option may not always be the best. Consider the overall value of the service you are getting, including factors such as quality of work, expertise, and customer service.

By considering these factors, you can make an informed decision about which company to hire for your wood floor installation needs.

Final Considerations

Before making a final decision on which store to hire for your wood floor installation, consider the following:

  • Cost: While the prices may be similar, it’s important to consider any additional fees or charges that may be added on. Be sure to ask for a detailed estimate from each store to compare.
  • Quality: Look for reviews and ratings from previous customers to get an idea of the quality of work each store provides. Keep in mind that individual contractors may vary in skill level, so be sure to ask for references and examples of previous work.
  • Timeline: Consider your timeline for the project. Some stores may have longer wait times for installation than others, so be sure to ask for an estimated timeline for completion.
  • Warranty: Check the warranty offered by each store and the individual contractor. Make sure you understand what is covered and for how long.
  • Customer Service: Consider the level of customer service you received when contacting each store. Did they answer your questions thoroughly and promptly? Were they friendly and professional? Good customer service can make a big difference in your overall experience.

By taking these factors into consideration, you can make an informed decision on which store to hire for your wood floor installation.

Frequently Asked Questions

Which store offers the best quality wood flooring installation?

It’s difficult to determine which store offers the best quality wood flooring installation as it can vary from location to location. However, Home Depot and Lowe’s both have a good reputation for their installation services.

Are there any reviews for Costco’s wood flooring installation services?

Yes, you can find reviews for Costco’s wood flooring installation services on their website. Keep in mind that reviews can vary depending on the location and installer.

What are the average labor costs for installing pre-finished hardwood flooring?

The average labor costs for installing pre-finished hardwood flooring can vary depending on the location and the store. However, Home Depot and Lowe’s both offer free estimates for their installation services.

Does Lowe’s offer wood flooring installation services?

Yes, Lowe’s offers wood flooring installation services. They have a team of professional installers who can help you with your flooring needs.

What factors should I consider when choosing between Home Depot, Lowes, and Costco for wood flooring installation?

When choosing between Home Depot, Lowe’s, and Costco for wood flooring installation, consider the quality of their products, the reputation of their installation services, the cost of labor, and the availability of local installers.

Can I find local flooring installers near me through any of these stores?

Yes, Home Depot, Lowe’s, and Costco all have local installers who can help you with your flooring needs. Contact your local store for more information.