Tag Archives: rewarding diy project

how-to-build-a-wooden-fence

How to Build a Wooden Fence: A Beginner's Guide

If you’re looking to add some privacy to your yard or simply want to create a boundary around your property, building a wooden fence might be just what you need. A wooden fence is not only functional, but it can also add aesthetic appeal to your home. However, building a fence can be a daunting task, especially if you’ve never done it before. In this article, we’ll provide you with a step-by-step guide on how to build a wooden fence.

Before you start building your fence, it’s important to do some preparation work. This includes checking with your local authorities to ensure that you’re allowed to build a fence on your property and that you’re following any regulations or guidelines. You’ll also need to determine the location and dimensions of your fence, as well as the type of wood you want to use. Once you have all of this information, you can start gathering your materials and tools.

Building a wooden fence can be a fun and rewarding DIY project, but it does require some time and effort. In the following sections, we’ll take you through the steps of building a wooden fence, from setting the posts to attaching the pickets. By the end of this article, you’ll have the knowledge and skills you need to build a beautiful and functional wooden fence for your home.

Understanding the Basics
how-to-build-a-wooden-fence

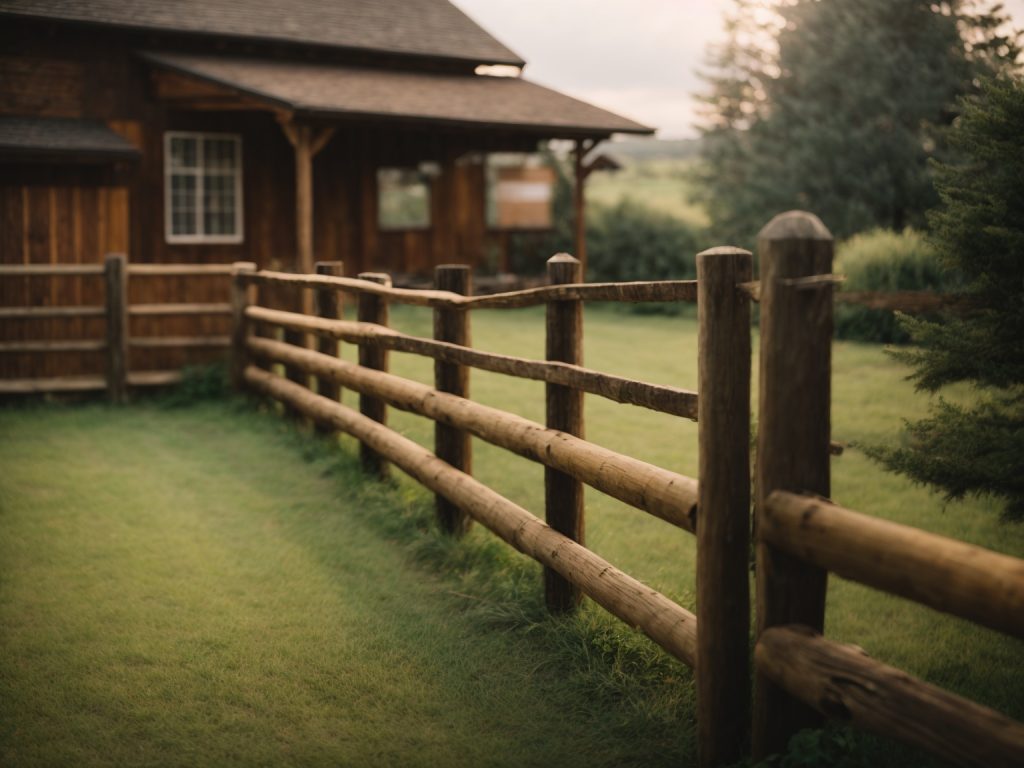
If you’re looking to build a wooden fence, it’s important to understand the basics before you get started. In this section, we’ll cover the types of wood commonly used for fencing and the benefits of choosing a wooden fence.

Types of Wood

When it comes to choosing the right wood for your fence, there are a few options to consider. Some of the most popular types of wood for fencing include:

  • Cedar: This wood is naturally resistant to rot and insects, making it a great choice for outdoor use. It’s also lightweight and easy to work with, which can make installation easier.
  • Pine: Pine is a more affordable option than cedar, but it’s also less durable. It may require regular maintenance to keep it looking its best.
  • Redwood: This is a beautiful, durable wood that is naturally resistant to decay and insects. However, it’s also one of the most expensive options.

Benefits of a Wooden Fence

There are several benefits to choosing a wooden fence for your property. Some of the most notable include:

  • Privacy: A wooden fence can provide a barrier between your property and the outside world, giving you more privacy and security.
  • Aesthetics: Wooden fences have a classic, timeless look that can complement any home or landscape.
  • Customization: Wooden fences can be customized to fit your specific needs and preferences. You can choose the height, style, and color that best suits your property.

Overall, building a wooden fence can be a great way to improve the look and function of your property. By choosing the right wood and understanding the benefits of a wooden fence, you can create a beautiful and functional fence that will last for years to come.

Planning Your Fence

Before you start building your wooden fence, you need to plan it out carefully. This will help you avoid mistakes and ensure that your fence is sturdy and meets local regulations. Here are some important things to consider when planning your fence:

Determining the Layout

The first step in planning your fence is to determine its layout. You need to decide where you want to place your fence and how long it should be. This will help you calculate the amount of materials you need to buy.

To determine the layout, you can use stakes and string to mark the boundaries of your fence. You can also use a measuring tape to measure the length of each side. Make sure to keep the corners at a 90-degree angle to ensure that your fence is square.

Checking Local Regulations

Before you start building your fence, you need to check local regulations to make sure that your fence meets the requirements. This includes checking for any height restrictions, setback requirements, and other regulations that may apply in your area.

You can check with your local zoning department or homeowners’ association to find out what regulations apply in your area. Make sure to obtain any necessary permits before you start building your fence.

Choosing the Right Tools

When building your fence, it’s important to have the right tools. This includes a post hole digger, a level, a saw, and a drill. Make sure to choose high-quality tools that are suitable for the job.

You may also need to rent a power auger if you have a large fence to build. This will help you dig the post holes more quickly and efficiently.

By carefully planning your fence, checking local regulations, and choosing the right tools, you can ensure that your wooden fence is built to last.

Purchasing Materials

When building a wooden fence, purchasing quality materials is essential to ensure that your fence lasts for many years to come. Here are some tips to help you select the right materials for your project.

Selecting Quality Wood

Choosing the right type of wood is crucial to the longevity and appearance of your fence. Some popular options include cedar, redwood, and pressure-treated pine. Cedar and redwood are naturally resistant to decay and insect damage, while pressure-treated pine has been treated with chemicals to resist rot and decay.

When selecting your wood, look for boards that are straight, free of knots, and have minimal warping or twisting. You may also want to consider the grade of the wood, which can affect its appearance and durability. Higher grades of wood will have fewer knots and defects, but may also be more expensive.

Buying Necessary Hardware

In addition to your wood, you will also need to purchase hardware to assemble your fence. This includes posts, rails, pickets, and fasteners such as nails or screws. When selecting your hardware, make sure that it is compatible with the type of wood you have chosen.

You will also need to consider the size and spacing of your hardware. For example, if you are building a fence with 6-foot pickets, you will need to purchase rails that are long enough to accommodate the pickets. You may also want to consider using metal brackets or connectors to reinforce your fence and ensure that it stays sturdy over time.

Overall, taking the time to carefully select your materials and hardware will help ensure that your wooden fence is both beautiful and durable.

Preparing the Ground

Before you start building your wooden fence, it’s important to prepare the ground. This will help ensure that your fence is stable, level, and long-lasting. In this section, we will cover two important sub-sections: “Clearing the Area” and “Measuring and Marking”.

Clearing the Area

The first step in preparing the ground is to clear the area where you will be building your fence. This means removing any plants, rocks, or other debris that may be in the way. You’ll want to clear a path that is at least 3 feet wide so that you have enough space to work.

If there are any large rocks or tree stumps in the way, you may need to remove them using a shovel, pickaxe, or other digging tool. Make sure to wear gloves and eye protection when doing this, as it can be dangerous work.

Once you’ve cleared the area, you’ll want to make sure that the ground is level. Use a level to check for any high or low spots, and use a shovel to fill in any holes or low spots. This will help ensure that your fence is straight and level.

Measuring and Marking

The next step is to measure and mark the area where you will be building your fence. Use a measuring tape to measure the length of your fence line, and mark the corners and end points with stakes or flags.

Next, use a string line to mark the exact location of your fence line. Tie one end of the string to a stake or flag at one corner of your fence line, and stretch the string to the opposite corner. Make sure the string is level and straight, and tie it off at the other end.

Use a tape measure to measure the distance between the string and the ground at each stake or flag. This will help you determine how deep to dig your fence post holes.

By following these steps to prepare the ground, you’ll be well on your way to building a sturdy and long-lasting wooden fence.

Building the Fence

Building a wooden fence can be a challenging task, but with the right tools and a little bit of patience, you can create a beautiful fence that will last for years to come. In this section, we will cover the three main steps to building a wooden fence: setting the posts, attaching the rails, and installing the pickets.

Setting the Posts

The first step in building a wooden fence is to set the posts. This is a critical step because it will determine the stability and durability of your fence. Here are the steps to set the posts:

  1. Measure and mark the location of each post. Make sure the distance between each post is consistent.
  2. Dig a hole for each post using a post-hole digger. The depth of the hole should be at least one-third the length of the post.
  3. Place the post in the hole and fill it with concrete. Use a level to make sure the post is straight and plumb.
  4. Allow the concrete to dry for at least 24 hours before moving on to the next step.

Attaching the Rails

Once the posts are set, you can attach the rails. The rails are the horizontal pieces of wood that connect the posts and provide support for the pickets. Here are the steps to attach the rails:

  1. Measure and cut the rails to the correct length. Make sure they are level and evenly spaced.
  2. Attach the rails to the posts using galvanized screws or nails. Make sure the rails are flush with the top of the posts and evenly spaced.

Installing the Pickets

The final step in building a wooden fence is to install the pickets. The pickets are the vertical pieces of wood that are attached to the rails and provide privacy and security. Here are the steps to install the pickets:

  1. Measure and cut the pickets to the correct length. Make sure they are evenly spaced and level.
  2. Attach the pickets to the rails using galvanized screws or nails. Make sure they are flush with the top and bottom rails.
  3. Fill any gaps between the pickets with wood filler or caulk.

By following these steps, you can build a beautiful and sturdy wooden fence that will enhance the look of your property and provide privacy and security for years to come.

Maintaining Your Wooden Fence

To ensure that your wooden fence lasts as long as possible, you will need to take proper care of it. This includes regular cleaning, applying protective sealant, and repairing any damage that may occur.

Regular Cleaning

Cleaning your wooden fence regularly is important to prevent the buildup of dirt, grime, and other debris that can cause damage over time. Here are some tips for cleaning your fence:

  • Use a pressure washer or a garden hose to rinse off any loose dirt or debris.
  • Apply a wood or fence cleaner to the fence and work from the bottom to the top, coating the entire fence in the cleaner.
  • To get the solution behind tight areas, dip a brush into the solution and apply it between boards or tight corners.
  • Rinse the fence thoroughly with clean water.

Applying Protective Sealant

Applying a protective sealant to your wooden fence can help to prevent damage from the sun, moisture, and other elements. Here are some tips for applying sealant:

  • Choose a high-quality sealant that is appropriate for your specific type of wood.
  • Apply the sealant with a brush or sprayer, making sure to cover all surfaces of the fence.
  • Allow the sealant to dry completely before applying a second coat.
  • Repeat this process every few years to keep your fence protected.

Repairing Damage

Even with proper care, your wooden fence may become damaged over time. Here are some tips for repairing damage:

  • Replace any broken or damaged boards as soon as possible to prevent further damage.
  • Use wood filler to fill in any cracks or holes in the wood.
  • Sand the repaired areas smooth and apply a protective sealant to prevent further damage.

By following these tips for maintaining your wooden fence, you can help to ensure that it lasts for many years to come.
how-to-make-a-wooden-signpost

How to Make a Wooden Signpost: A Step-by-Step Guide

Are you looking for a cost-effective way to display your real estate signs? Look no further than creating your own wooden signposts. Not only is it a budget-friendly option, but it’s also a convenient way to have full control over the design and placement of your signs.

To get started, you’ll need some basic woodworking tools and materials, including wood planks, screws, a saw, and a drill. Once you have everything you need, it’s just a matter of cutting the wood to the desired length and shape, drilling holes for the screws, and assembling the pieces together. With a little practice, you’ll be able to create custom signposts that perfectly fit your needs.

Whether you’re a real estate agent looking to save money on signposts or just someone who wants to add a personal touch to their outdoor signage, making your own wooden signposts is a fun and rewarding DIY project. With the right tools and a bit of creativity, you can create beautiful and functional signposts that will last for years to come.

Choosing the Right Wood

how-to-make-a-wooden-signpost

When it comes to making a wooden signpost, choosing the right type of wood is crucial. Not all woods are created equal, and some are better suited for outdoor use than others. In this section, we’ll take a look at the different types of wood you can use for your signpost and what to look for in terms of wood quality.

Types of Wood

There are several types of wood that are commonly used for signposts, and each has its own unique characteristics. Here are some of the most popular options:

  • Cedar: Cedar is a popular choice for outdoor signs because it is naturally resistant to rot and decay. It also has a beautiful grain pattern and is lightweight, making it easy to work with.
  • Redwood: Like cedar, redwood is naturally resistant to rot and decay. It is also very durable and has a distinctive reddish-brown color.
  • Pine: Pine is a softwood that is easy to work with and relatively inexpensive. However, it is not as durable as cedar or redwood and may not hold up as well over time.
  • Oak: Oak is a hardwood that is very strong and durable. It is also quite heavy, which can make it difficult to work with.

Wood Quality

Regardless of the type of wood you choose, it’s important to select high-quality wood for your signpost. Here are some things to look for:

  • Straightness: Look for boards that are straight and free of knots or other defects.
  • Density: The denser the wood, the stronger and more durable it will be.
  • Moisture content: Make sure the wood is dry before you start working with it. Wet wood can warp or split as it dries, which can ruin your signpost.
  • Treatment: If you plan to use your signpost outdoors, consider using pressure-treated wood. This type of wood has been treated with chemicals that make it resistant to rot and decay.

By choosing the right type of wood and paying attention to wood quality, you can create a beautiful and durable signpost that will last for years to come.

Tools and Materials Needed

Essential Tools

To make a wooden signpost, you will need a few essential tools. These include:

Tool Purpose
Saw To cut the wood to the desired size
Drill To make holes for screws
Screwdriver To attach the post to the base
Sandpaper To smooth out rough edges
Paintbrush To apply paint or stain

Additional Materials

In addition to the essential tools, you will also need some additional materials. These include:

  • Wood: Choose a sturdy and durable type of wood, such as cedar or redwood. The wood should be at least 4 inches wide and 6 feet tall.
  • Post Cap: A decorative piece that goes on top of the post to give it a finished look.
  • Base: A sturdy base to anchor the post and keep it upright. You can use a pre-made base or make one yourself.
  • Screws: To attach the post to the base.
  • Wood Glue: To attach the post cap to the top of the post.
  • Paint or Stain: To protect the wood from the elements and add color or texture to the finished signpost.

With these tools and materials, you can create a beautiful and functional wooden signpost that will add charm and character to your home or business.

Designing Your Signpost

designing-your-signpost

Before you start building your wooden signpost, it’s important to design it properly. This will ensure that the signpost looks good and serves its intended purpose. In this section, we’ll go over some important design considerations for your signpost.

Sketching the Design

The first thing you’ll want to do is sketch out your design. This will help you visualize what your signpost will look like and make any necessary adjustments before you start building. When sketching your design, consider the following:

  • What message do you want your signpost to convey?
  • What kind of style do you want your signpost to have?
  • What kind of graphics or images do you want to include?

Once you have a rough sketch of your design, you can start refining it and making any necessary adjustments.

Choosing the Right Size

The size of your signpost will depend on a few factors, including the location where it will be installed and the message you want to convey. Here are some things to consider when choosing the right size for your signpost:

  • Make sure your signpost is visible from a distance.
  • Consider the height of the signpost and the angle at which it will be viewed.
  • Make sure your signpost is proportional to the surrounding environment.

It’s important to choose the right size for your signpost to ensure that it is effective and serves its intended purpose.

By taking the time to properly design your signpost, you’ll ensure that it looks good and serves its intended purpose. Consider sketching your design and choosing the right size to make sure your signpost is effective and visible.

Preparing the Wood

Before you can start making your wooden signpost, it’s important to properly prepare the wood. This involves cutting it to size and sanding it to create a smooth surface for painting or staining. Here are the steps you need to follow:

Cutting the Wood

The first step is to choose a piece of wood that is the right size for your signpost. If you can’t find a block in the right size, choose a piece that is slightly larger, as you can always cut it to size later. Soft wood like pine, beech, or spruce generally makes for good wooden signs.

Once you have your wood, use a saw to cut it to the desired size. Make sure to measure carefully and use a straight edge to ensure a straight cut. If you don’t have a saw, you can often have the wood cut to size for you at a hardware or craft store.

Sanding the Wood

After cutting the wood, the next step is to sand it to create a smooth surface for painting or staining. Sanding is a wood surface preparation step which is very likely to be overlooked. Many tend to believe that bare wood is naturally ready-to-go. However, it’s a crucial step to ensure the quality and uniformity of finished wood signs for home.

Start by using coarse-grit sandpaper to remove any rough spots or imperfections on the surface of the wood. Then, switch to a finer-grit sandpaper to create a smooth surface. Make sure to sand in the direction of the wood grain to avoid creating scratches or marks on the surface.

Once you have sanded the wood, wipe it down with a damp cloth to remove any dust or debris. You can also use a tack cloth to ensure that the surface is completely clean before painting or staining.

By following these steps, you can prepare your wood for making a beautiful and professional-looking wooden signpost.

Creating the Signpost

If you want to make your own wooden signpost, there are a few steps you’ll need to follow. First, you’ll need to decide on the design you want to carve into the wood. Then, you’ll need to gather the necessary materials and tools. Finally, you’ll need to assemble the signpost.

Carving the Design

The first step in creating your signpost is to carve the design into the wood. You can use a variety of tools for this, including chisels, knives, and even a Dremel. If you’re not comfortable with carving, you can also use stencils or decals to create the design.

Before you start carving, make sure the wood is smooth and free of any knots or imperfections. You can use sandpaper to smooth out the surface if needed. Then, sketch out your design on the wood using a pencil. Once you’re happy with the design, start carving.

Take your time and be careful not to remove too much wood at once. You can always go back and make adjustments later. Once you’re finished carving, use sandpaper to smooth out any rough edges.

Assembling the Signpost

Once you’ve carved the design into the wood, it’s time to assemble the signpost. You’ll need a few additional materials for this, including a wooden post, screws, and a bracket.

Start by attaching the bracket to the post using screws. Then, attach the sign to the bracket using more screws. Make sure the sign is level and secure before tightening the screws.

Finally, you’ll need to install the signpost in the ground. Dig a hole deep enough for the post and fill it with concrete. Once the concrete has dried, insert the post and pack soil around it to secure it in place.

With these steps, you can create your own wooden signpost that’s perfect for your home or business.

Finishing Touches

Once you have assembled your wooden signpost, it’s time to add the finishing touches. This is where you can really make your signpost stand out and showcase your personal style. In this section, we will cover two important aspects of finishing touches: painting the signpost and applying the finish.

Painting the Signpost

Painting your signpost is a great way to add color and personality. Here are some tips to help you get started:

  • Choose the right paint: Look for a high-quality outdoor paint that is designed to withstand the elements. Acrylic and latex paints are good options.
  • Prep the surface: Make sure your signpost is clean and dry before you start painting. Sand any rough spots or imperfections to create a smooth surface.
  • Apply the paint: Use a brush or roller to apply the paint in thin, even coats. Allow each coat to dry completely before applying the next one.
  • Add details: Once the base coat is dry, you can add details like lettering or designs. Use stencils or freehand painting to create your desired look.

Applying the Finish

Adding a finish to your signpost will help protect it from the elements and give it a polished look. Here are some options to consider:

  • Stain: A wood stain will enhance the natural grain of the wood and provide a protective layer. Choose a stain that is designed for outdoor use and apply it with a brush or rag.
  • Varnish: A clear varnish will add a glossy finish to your signpost while also protecting it from moisture and UV rays. Apply the varnish with a brush or spray can.
  • Sealant: A sealant will create a waterproof barrier that will protect your signpost from rain and snow. Apply the sealant with a brush or spray can.

No matter which finish you choose, make sure to follow the manufacturer’s instructions carefully. Apply the finish in a well-ventilated area and allow it to dry completely before handling your signpost.

With these finishing touches, your wooden signpost will be ready to display proudly in your yard or garden.

Installation Tips

Choosing the Location

Before installing your wooden signpost, it’s important to carefully choose the location. Here are some tips to help you make the best decision:

  • Consider the purpose of the sign: Is it a directional sign, a warning sign, or an informational sign? The location should be easily visible and accessible to the intended audience.
  • Check local regulations: Make sure you are allowed to install a signpost in the chosen location. Some areas have specific rules and regulations regarding sign placement.
  • Avoid obstructing views: Don’t place the signpost where it may block the view of drivers or pedestrians.
  • Consider the ground conditions: Make sure the ground is level and stable enough to support the signpost.

Installing the Signpost

Once you have chosen the location, it’s time to install the signpost. Here are some tips to help you get the job done:

  • Dig the hole: Use a post hole digger to dig a hole that is deep enough to support the signpost. The hole should be at least 1/3 the length of the signpost.
  • Insert the signpost: Place the signpost in the hole and make sure it is straight and level.
  • Secure the signpost: Use concrete to secure the signpost in place. Fill the hole with concrete and allow it to dry completely.
  • Add the sign: Once the concrete is dry, attach the sign to the signpost using screws or bolts.

Remember to take your time and follow these tips to ensure your wooden signpost is installed correctly and safely.

Nikmati pengalaman bermain slot paling fun di Vio88! Temukan berbagai permainan slot yang seru dan menarik dengan peluang besar untuk meraih kemenangan. Ayo, bergabunglah sekarang dan rasakan sensasi bermain di Vio88!

how-to-build-a-wooden-mailbox

How to Build a Wooden Mailbox: A Step-by-Step Guide

Are you tired of your old, rusty mailbox that just doesn’t fit the aesthetic of your home? Building a wooden mailbox may be just the solution you need. Not only is it a functional addition to your property, but it can also add some charm and character to your curb appeal.

Building a wooden mailbox may seem like a daunting task, but with the right tools and materials, it can be a fun and rewarding DIY project. Whether you’re a seasoned woodworker or a beginner, there are plenty of resources available to guide you through the process. From step-by-step tutorials to detailed plans, you can find everything you need to build a mailbox that is both functional and stylish. So why wait? Get started on building your very own wooden mailbox today!

Choosing the Right Wood

how-to-build-a-wooden-mailbox

When it comes to building a wooden mailbox, choosing the right type of wood is crucial to ensure the longevity and durability of your mailbox. Here are some factors to consider when selecting the right wood for your project.

Hardwood vs Softwood

The first decision you need to make is whether to use hardwood or softwood for your mailbox. Hardwoods, such as oak and maple, are denser and more durable, making them ideal for outdoor projects. However, they can be more expensive and harder to work with than softwoods.

Softwoods, such as cedar and pine, are more affordable and easier to work with, but they are less durable than hardwoods. If you choose to use a softwood, make sure it is treated to resist decay and insect damage.

Treated vs Untreated Wood

Another important factor to consider is whether to use treated or untreated wood for your mailbox. Treated wood is chemically treated to resist decay and insect damage, making it more durable and long-lasting than untreated wood. However, treated wood can be more expensive and may contain harmful chemicals.

Untreated wood, on the other hand, is more affordable but is more susceptible to decay and insect damage. If you choose to use untreated wood, make sure to apply a weather-resistant finish to protect it from the elements.

In summary, when selecting the right wood for your wooden mailbox, consider the durability, cost, and environmental impact of the wood. Hardwoods are denser and more durable, but they can be more expensive and harder to work with. Softwoods are more affordable and easier to work with, but they are less durable than hardwoods. Treated wood is more durable but may contain harmful chemicals, while untreated wood is more affordable but requires a weather-resistant finish to protect it from the elements.

Designing Your Mailbox

When designing your wooden mailbox, there are a few things to consider. In this section, we will cover size specifications and style considerations to help you create a unique and functional mailbox.

Size Specifications

Before you start building your wooden mailbox, you need to determine the size specifications. The size of your mailbox should be based on the amount of mail you receive and the size of your property.

Here are some general size guidelines to follow:

  • The mailbox should be large enough to hold letters, magazines, and small packages.
  • The mailbox should be at least 6 inches away from the curb or road.
  • The mailbox should be between 41 and 45 inches from the ground to the bottom of the mailbox.
  • The mailbox should be at least 8 inches deep and 6 inches wide.

By following these guidelines, you can ensure that your mailbox is the right size for your needs and meets the requirements of your local post office.

Style Considerations

When it comes to style considerations, there are many options to choose from. You can create a simple and classic mailbox or a more elaborate design that reflects your personal style.

Here are some style considerations to keep in mind:

  • Choose a wood that is durable and weather-resistant, such as cedar or redwood.
  • Consider adding decorative elements, such as a post cap or finial, to give your mailbox a unique look.
  • Decide on a mailbox door style, such as a hinged door or a drop-down door.
  • Choose a mailbox color that complements your home’s exterior.

By considering these style elements, you can create a wooden mailbox that not only functions well but also adds to the curb appeal of your home.

In conclusion, designing your wooden mailbox involves determining the size specifications and style considerations. By following these guidelines, you can create a unique and functional mailbox that adds to the overall aesthetic of your home.

Gathering Materials

Before starting to build your wooden mailbox, you need to gather all the necessary materials. This will ensure that you have everything you need at hand and won’t need to make any unnecessary trips to the hardware store. In this section, we will cover the materials you will need to build a wooden mailbox.

Wood and Hardware

The first thing you will need is wood. You can use any type of wood you like, but cedar, redwood, and pine are popular choices. Cedar and redwood are naturally resistant to rot and insects, while pine is an affordable option that can be treated to resist rot and insects.

In addition to wood, you will need hardware to assemble your wooden mailbox. Here is a list of hardware you will need:

  • Screws or nails
  • Hinges
  • Latch
  • Post cap
  • Post anchor

Make sure to choose hardware that is suitable for outdoor use and can withstand the elements.

Tools Needed

To build a wooden mailbox, you will need a few basic tools. Here is a list of tools you will need:

  • Circular saw or handsaw
  • Drill
  • Screwdriver or hammer
  • Measuring tape
  • Level
  • Pencil
  • Safety glasses
  • Work gloves

If you don’t own these tools, you can rent them from a hardware store or borrow them from a friend.

With these materials and tools, you are now ready to start building your wooden mailbox. In the next section, we will cover the steps to build a wooden mailbox.

Building the Mailbox

building-the-mailbox

Building a wooden mailbox can be a fun and rewarding project. In this section, we will guide you through the process of building your own wooden mailbox. We will cover the steps involved in cutting the wood, assembling the pieces, and installing the door.

Cutting the Wood

The first step in building your wooden mailbox is to cut the wood to size. You will need to cut the following pieces:

  • Two 4×4 posts, each 6 feet long
  • One 1×6 board, 6 feet long
  • Two 1×6 boards, each 2 feet long
  • One 1×6 board, 1 foot long
  • One 1×8 board, 1 foot long
  • One 1×2 board, 1 foot long

You can use a miter saw or a circular saw to cut the wood to size. Be sure to measure carefully and double-check your measurements before making any cuts.

Assembling the Pieces

Once you have cut the wood to size, you can begin assembling the pieces. Here are the steps involved:

  1. Attach the two 4×4 posts to the 2-foot-long 1×6 boards using screws. These will be the legs of your mailbox.
  2. Attach the 6-foot-long 1×6 board to the top of the posts using screws. This will be the bottom of your mailbox.
  3. Attach the 1-foot-long 1×6 board to the front of the bottom board using screws. This will be the front of your mailbox.
  4. Attach the 1-foot-long 1×8 board to the top of the front board using screws. This will be the top of your mailbox.
  5. Attach the 1-foot-long 1×2 board to the bottom of the front board using screws. This will be the bottom of your mailbox door.

Installing the Door

The final step in building your wooden mailbox is to install the door. Here’s how to do it:

  1. Cut a piece of plywood to fit the opening in the front of your mailbox.
  2. Attach the plywood to the 1×2 board using hinges.
  3. Attach a latch to the front of the door and the mailbox to keep the door closed.

Congratulations! You have now built your own wooden mailbox.

Finishing Touches

After building your wooden mailbox, it’s time to add the finishing touches to make it look great and protect it from the elements. Here are some tips to help you complete your project.

Sanding the Wood

Before you paint or stain your mailbox, it’s important to sand the wood to make it smooth and remove any rough spots. Start with a coarse-grit sandpaper and work your way up to a fine-grit sandpaper for a smooth finish. Be sure to sand in the direction of the wood grain to avoid scratches.

Painting or Staining

Once the wood is sanded, you can paint or stain your mailbox to match your home’s exterior. If you choose to paint, use a high-quality exterior paint and apply it in thin, even coats. Allow each coat to dry completely before applying the next one.

If you prefer the natural look of wood, you can stain your mailbox instead. Choose a stain that is designed for exterior use and apply it with a brush or rag. Be sure to follow the manufacturer’s instructions and apply the stain in thin coats for the best results.

Adding Numbers and Names

To make it easy for your mail carrier to find your mailbox, be sure to add your house number or name to the mailbox. You can use vinyl lettering, stencils, or even paint the numbers or name by hand.

If you want to add a decorative touch, consider adding a design or pattern to your mailbox. You can use stencils or tape to create a design, or even use a decal or sticker to add some personality to your mailbox.

By following these tips, you can add the finishing touches to your wooden mailbox and create a beautiful and functional addition to your home.

Installation Tips

When it comes to installing your wooden mailbox, there are a few things you need to keep in mind to ensure that your mailbox is secure and functional. In this section, we’ll cover some installation tips to help you get started.

Choosing a Location

The first thing you need to do when installing your wooden mailbox is to choose a suitable location. Here are some things to consider:

  • Accessibility: Make sure your mailbox is easily accessible from the road or sidewalk. The mailbox should be no more than 45 inches above street level, as per USPS requirements.
  • Visibility: Ensure that your mailbox is visible to the mail carrier and clearly marked with your house number.
  • Distance: Keep your mailbox at least 6-8 inches away from the curb or road to prevent damage from snowplows or passing vehicles.
  • Obstructions: Avoid installing your mailbox near trees, bushes, or other obstructions that could interfere with mail delivery.

Securing the Mailbox

Once you’ve chosen a suitable location, it’s time to secure your mailbox. Here are some tips to help you do so:

  • Use a sturdy post: A wooden mailbox post should be at least 4×4 inches in size and set in concrete to prevent it from tipping over.
  • Secure the mailbox to the post: Use screws or bolts to attach the mailbox to the post. Make sure the mailbox is level and securely attached.
  • Add a support arm: If you’re concerned about the weight of your mailbox, you can add a support arm to the post to help distribute the weight.
  • Consider a locking mailbox: If you’re concerned about mail theft, consider installing a locking mailbox to keep your mail secure.

By following these installation tips, you can ensure that your wooden mailbox is secure and functional for years to come.

refinish-a-wooden-table

How to Refinish a Wooden Table: A Beginner's Guide

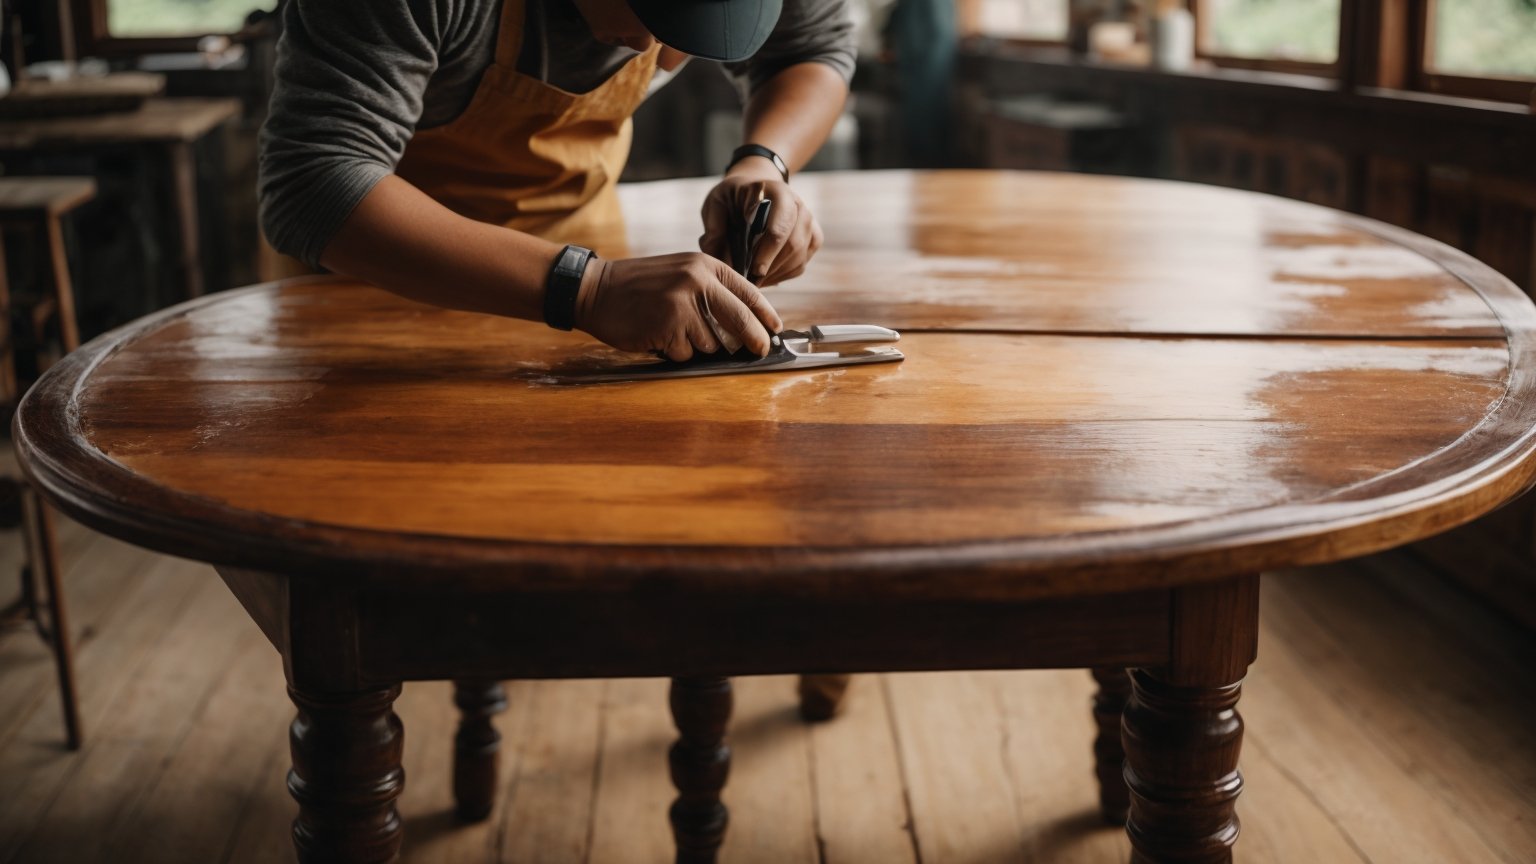
Refinishing a wooden table can breathe new life into an old piece of furniture. Whether you have a family heirloom or a thrift store find, refinishing a table can be a fun and rewarding DIY project. With a little bit of elbow grease and some basic supplies, you can transform a dull or damaged table into a beautiful centerpiece for your home.

Before you get started, it’s important to understand the level of detail and effort required for your specific table. Super ornamental furniture may require more attention to detail, while a simple table may be easier to refinish. The first step in refinishing a table is to clean it thoroughly to remove any dirt or grime that may inhibit the refinishing process. Depending on the condition of your table, you may also need to strip the old finish or sand down any imperfections. With a little bit of patience and some helpful tips, you can successfully refinish a wooden table and enjoy it for years to come.

Understanding the Type of Wood

refinish-a-wooden-table

When it comes to refinishing a wooden table, the first step is to understand the type of wood you’re working with. Different types of wood require different approaches to refinishing, so it’s important to identify the type of wood before you begin.

Identifying Hardwood and Softwood

The first step in identifying the type of wood is to determine whether it is hardwood or softwood. Hardwood comes from deciduous trees, while softwood comes from coniferous trees. Hardwood is denser and more durable than softwood, making it a popular choice for furniture.

To determine whether your table is made of hardwood or softwood, you can look at the grain of the wood. Hardwood has a more complex grain pattern than softwood, which tends to have a straight grain. You can also try scratching the surface of the wood with your fingernail. Hardwood is harder than softwood, so it will be more difficult to scratch.

Distinguishing Wood Species

Once you’ve determined whether your table is made of hardwood or softwood, the next step is to identify the specific wood species. Different wood species have different characteristics, such as color, grain pattern, and hardness.

One way to identify the wood species is to look for identifying marks, such as knots or distinctive grain patterns. You can also try comparing the wood to a wood identification guide or consulting with a professional.

Some common wood species used for furniture include oak, maple, cherry, and mahogany. Each of these species has its own unique characteristics and requires a different approach to refinishing. For example, oak has a distinctive grain pattern and can be difficult to stain evenly, while cherry has a reddish-brown color that can darken over time.

By understanding the type of wood and wood species of your table, you can choose the right approach to refinishing and ensure that your table looks beautiful for years to come.

Safety Precautions

When refinishing a wooden table, it is important to take certain safety precautions to protect yourself from harmful chemicals and dust. Here are some safety tips to follow:

Proper Ventilation

When working with chemicals, it is important to have proper ventilation to avoid inhaling harmful fumes. Work in a well-ventilated area, such as a covered porch or garage, or use a fan to circulate air. Make sure all windows and doors are open to allow fresh air to flow through the room.

Safety Equipment

It is important to wear the appropriate safety equipment when refinishing a wooden table. Here are some items you should have on hand:

  • N95 respirator: Wear a respirator to protect yourself from inhaling harmful dust and fumes.
  • Waterproof gloves: Wear gloves to protect your hands from chemicals and stains.
  • Safety goggles: Wear goggles to protect your eyes from dust and debris.
  • Dust mask: Wear a dust mask to protect your lungs from dust particles.

In addition to these items, it is also important to wear appropriate clothing, such as long sleeves and pants, to protect your skin from chemicals and stains.

By following these safety precautions, you can ensure that your refinishing project is completed safely and without any harm to yourself.

Gathering Necessary Tools

To refinish a wooden table, you will need to gather some necessary tools. Here are the three main categories of tools you will need:

Stripping Tools

To remove the old finish from your table, you will need some stripping tools. Here are some common options:

  • Chemical Stripper: This is a liquid that dissolves the old finish. You apply it with a brush, wait for it to soften the finish, and then scrape it off.
  • Heat Gun: This is a tool that uses hot air to soften the finish, making it easier to scrape off.
  • Sandpaper: If you don’t want to use chemicals or heat, you can use sandpaper to sand off the old finish.

Sanding Tools

After you have removed the old finish, you will need to sand the table to prepare it for the new finish. Here are some tools you will need:

  • Sandpaper: You will need sandpaper of varying grits to sand the table. Start with a coarse grit and work your way up to a finer grit.
  • Sanding Block: This will help you sand the table evenly.
  • Power Sander: If you have a large table or want to save time, you can use a power sander to sand the table.

Finishing Tools

After you have sanded the table, you will need to apply the new finish. Here are some tools you will need:

  • Stain: If you want to change the color of your table, you will need to apply a stain.
  • Polyurethane: This is a clear coat that will protect the table and give it a shiny finish.
  • Brushes: You will need brushes to apply the stain and polyurethane.
  • Rags: You will need rags to wipe off excess stain and polyurethane.

By gathering these necessary tools, you will be well on your way to refinishing your wooden table.

Removing the Old Finish

removing-the-old-finish

Before you can refinish your wooden table, you need to remove the old finish. This can be a messy and time-consuming process, but with the right tools and techniques, you can do it yourself.

Applying the Stripper

The first step in removing the old finish is to apply a chemical stripper. This will dissolve the old finish so that it can be easily removed. Here’s how to do it:

  1. Choose a well-ventilated area to work in. Chemical strippers can be harmful if inhaled, so it’s important to work in a space with good airflow.
  2. Apply the stripper to the table using a brush or spray bottle. Be sure to follow the manufacturer’s instructions for application and safety precautions.
  3. Wait for the stripper to work. This can take anywhere from a few minutes to several hours, depending on the type of stripper and the thickness of the old finish.
  4. Test a small area to see if the finish is ready to be removed. Use a scraper or steel wool to remove the finish. If it comes off easily, the rest of the finish is ready to be removed. If not, wait a little longer and test again.

Removing the Stripper

Once the old finish has been dissolved by the stripper, it’s time to remove it. Here’s how to do it:

  1. Use a scraper or steel wool to remove the old finish. Work in the direction of the grain to avoid damaging the wood.
  2. Wipe away the old finish with a rag or paper towel.
  3. Repeat the process until all of the old finish has been removed.
  4. Use a fine-grit sandpaper to smooth out any rough spots or remaining finish. Be sure to sand in the direction of the grain.
  5. Clean the table thoroughly with a mild soap and water solution to remove any leftover stripper and debris.

Removing the old finish is an important step in refinishing your wooden table. Take your time and be patient, and you’ll be rewarded with a beautiful new finish that will make your table look like new again.

Sanding the Table

Once you have stripped the old finish and repaired any damages, it’s time to sand the table to prepare it for the new finish. Sanding is a crucial step in the refinishing process that helps to remove any remaining finish, smooth out the surface, and open up the wood’s pores to accept the new stain or finish. In this section, we will discuss how to sand a wooden table, including choosing the right grit and sanding techniques.

Choosing the Right Grit

Choosing the right sandpaper grit is essential to achieving a smooth and even finish. The grit number refers to the size of the abrasive particles on the sandpaper. The lower the number, the coarser the sandpaper, and the higher the number, the finer the sandpaper. Here are some guidelines for choosing the right grit:

  • Coarse grit (60-80): Use coarse grit sandpaper to remove any remaining finish, scratches, or dents on the table’s surface.
  • Medium grit (100-150): Use medium grit sandpaper to smooth out any rough spots left by the coarse grit sandpaper.
  • Fine grit (220-240): Use fine grit sandpaper to create a smooth and even surface that is ready for staining or finishing.

Sanding Techniques

Here are some tips for sanding a wooden table:

  • Sand in the direction of the wood grain to avoid creating scratches or marks on the surface.
  • Start with the coarsest-grit sandpaper and work your way up to the finest-grit sandpaper.
  • Use a sanding block or an orbital sander to ensure even sanding and to prevent over-sanding in certain areas.
  • Be careful when sanding edges and corners to avoid rounding them off.
  • Wipe the table down with a tack cloth after sanding to remove any dust or debris.

By following these tips, you can achieve a smooth and even surface that is ready for staining or finishing. Sanding is a crucial step in the refinishing process that requires patience and attention to detail, but the results are worth the effort.

Applying the New Finish

Refinishing a wooden table can give it a new lease on life. Once you have sanded and removed the old finish, it’s time to apply a new one. Here are some tips to help you choose and apply the new finish.

Choosing the Finish

There are many different types of finishes available, each with its own advantages and disadvantages. Some popular options include:

  • Polyurethane: This is a durable and water-resistant finish that is easy to apply. It comes in both oil-based and water-based formulations.
  • Varnish: Varnish is a traditional finish that provides a hard, protective coating. It is available in both glossy and matte finishes.
  • Lacquer: Lacquer is a fast-drying finish that provides a hard, durable coating. It is available in both spray and brush-on formulations.
  • Oil: Oil finishes penetrate the wood and provide a natural look. They are easy to apply but may require more maintenance than other finishes.

Consider the look you want to achieve and the level of durability you need when choosing a finish.

Applying the Finish

Before applying the finish, make sure the surface is clean and free of dust. Use a tack cloth or a damp cloth to remove any debris.

When applying the finish, follow these steps:

  1. Apply a thin coat of finish with a brush or a cloth. Work in the direction of the grain.
  2. Wait for the finish to dry according to the manufacturer’s instructions.
  3. Sand the surface lightly with fine-grit sandpaper.
  4. Apply another coat of finish and repeat the process until you achieve the desired level of coverage.

Be sure to work in a well-ventilated area and follow all safety instructions on the product label. With a little patience and care, you can apply a new finish that will protect and enhance the beauty of your wooden table.

Maintaining Your Refinished Table

Congratulations! You’ve successfully refinished your wooden table and it looks amazing. Now, it’s important to maintain your hard work to keep your table looking beautiful for years to come. Here are some tips to help you maintain your newly refinished table.

Regular Cleaning

To keep your table looking great, it’s important to clean it regularly. Here are some tips to help you keep your table clean:

  • Dust your table regularly with a soft cloth or a feather duster.
  • Use a damp cloth to clean up spills and stains as soon as possible.
  • Avoid using harsh chemicals or abrasive cleaners on your table.
  • If you need to use a cleaner, choose a mild soap and water solution.

Preventing Damage

To prevent damage to your table, it’s important to take some precautions. Here are some tips to help you prevent damage:

  • Use coasters and placemats to protect your table from scratches, stains, and water rings.
  • Avoid placing hot items directly on your table. Always use a trivet or a hot pad.
  • Keep your table out of direct sunlight to prevent fading and warping.
  • Avoid placing heavy objects on your table, as this can cause damage to the finish.

By following these simple tips, you can keep your newly refinished table looking beautiful for years to come.

build-a-wooden-gate-door

How to Build a Wooden Gate Door: A Beginner's Guide

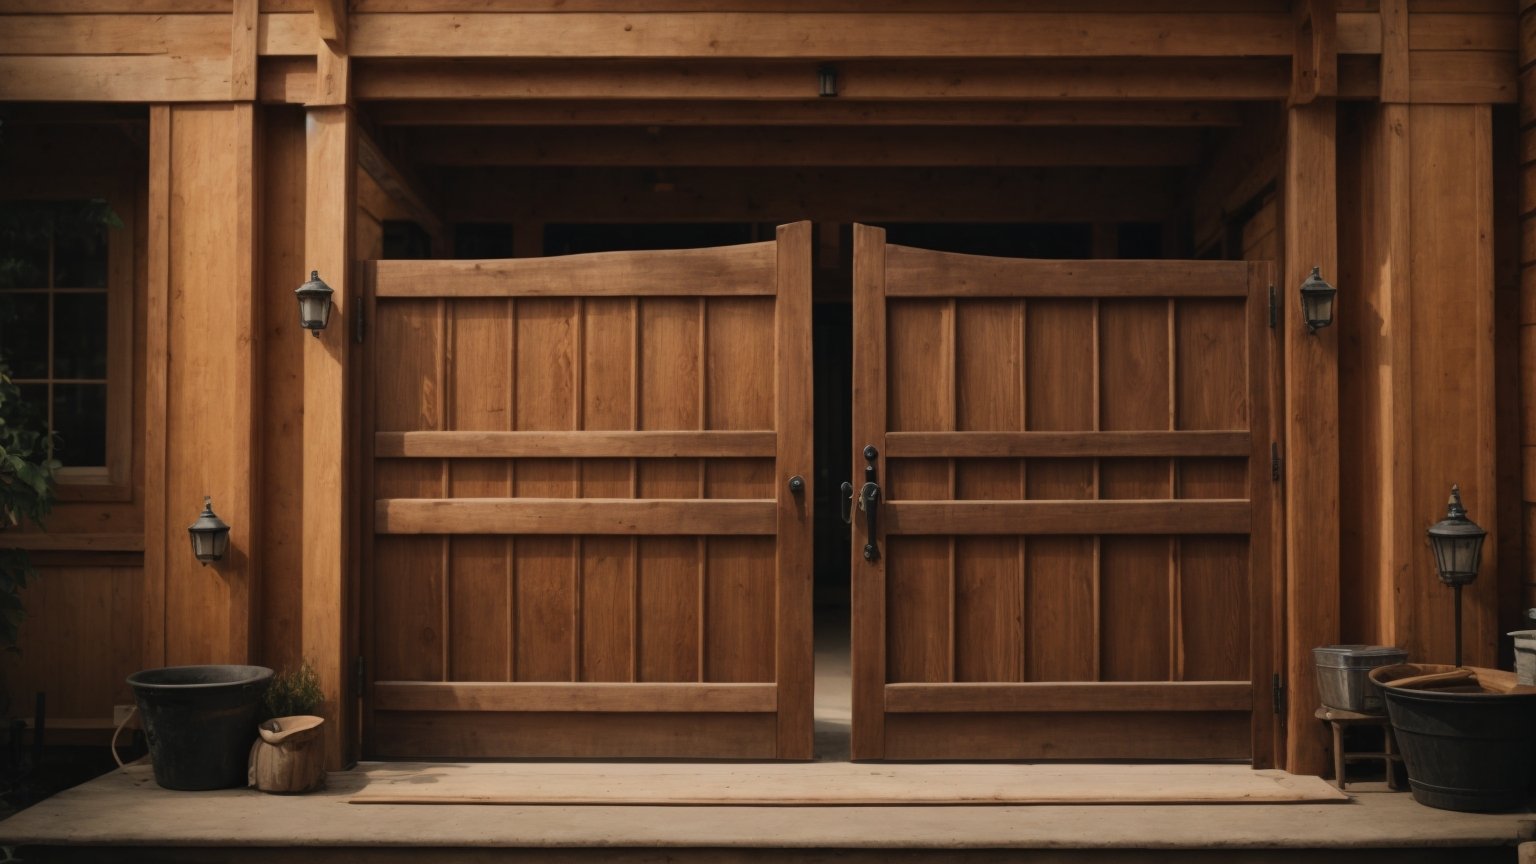
Building a wooden gate door is a great way to add both functionality and aesthetic appeal to your fence. Whether you’re looking to keep your pets and children safe, or simply want to enhance the look of your property, a wooden gate door can be a great addition to your home. With the right tools and materials, building a wooden gate door can be a fun and rewarding DIY project.

Before you get started, it’s important to determine the size and style of gate that you want to build. You’ll also need to gather the necessary tools and materials, which may include a screwdriver, power drill, compound miter saw, carpenter’s level, jigsaw, gate brackets, hinges, and screws. Once you have everything you need, you can begin measuring and cutting the wood to fit your desired dimensions. With a little patience and attention to detail, you can create a beautiful and functional wooden gate door that will last for years to come.

Understanding the Basics of a Wooden Gate Door

build-a-wooden-gate-door

If you’re looking to add some privacy or security to your property, building a wooden gate door is a great option. Not only is it functional, but it can also add a touch of style to your property. However, before you get started, it’s important to understand the basics of building a wooden gate door.

Materials Needed

Here are the materials you’ll need to build a wooden gate door:

Materials Quantity
Wood Depends on the size of your gate
Gate hardware Hinges, latch, screws, etc.
Wood glue 1 bottle
Wood filler 1 can
Sandpaper 1 pack
Paint or stain 1 can

Tools Required

Here are the tools you’ll need to build a wooden gate door:

  • Tape measure
  • Circular saw or handsaw
  • Drill
  • Screwdriver
  • Level
  • Clamps
  • Chisel
  • Hammer
  • Paintbrush or roller

Once you have all the necessary materials and tools, you can move on to building your wooden gate door.

Remember, safety is important when working with power tools. Wear safety glasses, gloves, and ear protection when necessary and follow all safety instructions.

In the next section, we’ll go over the steps you need to follow to build a wooden gate door.

Planning Your Wooden Gate Door

Before starting to build your wooden gate door, it is important to plan and prepare. This will ensure that you have the right materials and tools, and that your gate will function properly and look great. In this section, we will go over some important considerations when planning your wooden gate door.

Determining the Size

The first step in planning your wooden gate door is to determine the size you need. Measure the width of the opening where the gate will be installed, and add a few extra inches to allow for clearance and hardware. You should also consider the height of the gate, depending on your needs for privacy and security.

Choosing the Right Design

There are many different designs to choose from when it comes to wooden gate doors. You can opt for a traditional, simple design, or get creative with a more ornate style. Consider the overall look of your property and choose a design that complements it. You should also think about the function of the gate – will it be used for security, privacy, or simply as a decorative element?

Selecting the Wood Type

Choosing the right type of wood is crucial for the durability and longevity of your wooden gate door. Some common options include cedar, redwood, and pressure-treated pine. Each type of wood has its own unique characteristics and benefits, so it’s important to do your research and choose the one that best fits your needs and budget.

In summary, planning your wooden gate door is an important step in the building process. Determine the size you need, choose a design that complements your property, and select the right type of wood for durability and longevity. With these considerations in mind, you’ll be well on your way to building a beautiful and functional wooden gate door.

Preparing the Wood

Before you start building your wooden gate, you need to prepare the wood. This involves cutting and sanding the wood to the right size and shape. Here are the steps you need to follow:

Cutting the Wood

The first step in preparing the wood for your gate is to cut it to the right size. You will need a compound miter saw to make precise cuts. Make sure you measure the wood carefully before cutting it. Here are some tips to keep in mind:

  • Cut the wood slightly larger than the final size you need. This will give you some extra room to sand the wood down to the exact size you need.
  • Make sure the corners are square. You can use a carpenter’s level to check this.
  • Cut the wood slowly and steadily. Rushing can lead to mistakes and uneven cuts.

Sanding the Wood

Once you have cut the wood to the right size, it’s time to sand it down. Sanding is important because it removes any rough edges or splinters that could cause injury. Here are some tips to keep in mind:

  • Use a coarse sandpaper to start with and then move to a finer sandpaper. This will help you achieve a smooth finish.
  • Sand the edges of the wood to remove any sharp corners or edges.
  • Sand the wood in the direction of the grain. This will help you achieve a smooth finish without damaging the wood.
  • Use a dust mask to avoid inhaling sawdust.

By following these steps, you can prepare the wood for your wooden gate. Once you have completed these steps, you can move on to the next stage of building your gate.

Assembling the Wooden Gate Door

assembling-the-wooden-gate-door

When it comes to assembling a wooden gate door, there are a few key steps you need to follow to ensure a sturdy and reliable end result. In this section, we’ll walk you through the process of building the frame, attaching the panels, and installing the cross braces.

Building the Frame

The first step in assembling your wooden gate door is to build the frame. To do this, you’ll need to measure and cut your wooden boards to the correct length and width. Once you have your boards cut, you can begin assembling the frame.

To assemble the frame, you’ll need to attach the boards together using wood screws or nails. Make sure to use a level to ensure that your frame is square and even. You may also want to add diagonal braces to the corners of your frame for added stability.

Attaching the Panels

Once your frame is assembled, you can begin attaching the panels. To do this, measure and cut your wooden panels to the correct size and shape. Then, attach them to the frame using wood screws or nails.

Make sure to leave a small gap between each panel to allow for expansion and contraction due to changes in temperature and humidity. You may also want to add a diagonal brace across the panels for added stability.

Installing the Cross Braces

The final step in assembling your wooden gate door is to install the cross braces. Cross braces are wooden boards that run diagonally across the back of the gate to provide added support and prevent sagging.

To install the cross braces, measure and cut your boards to the correct length and angle. Then, attach them to the back of the gate using wood screws or nails. Make sure that the cross braces are securely attached and evenly spaced for maximum stability.

By following these steps, you can assemble a sturdy and reliable wooden gate door that will provide years of use and enjoyment.

Finishing Touches

Once you have constructed your wooden gate, it’s time to add the finishing touches to make it look great and function properly. This section will cover two essential finishing touches: painting or staining and adding hardware.

Painting or Staining

Painting or staining your wooden gate can help protect it from the elements and give it a polished look. Before you start, make sure the wood is clean and dry. Here are some tips to help you paint or stain your wooden gate:

  • Choose a paint or stain that is specifically designed for outdoor use.
  • Apply a primer before painting to help the paint adhere better to the wood.
  • Use a brush or roller to apply the paint or stain evenly.
  • Apply two coats of paint or stain for maximum protection.

Adding Hardware

Adding hardware to your wooden gate is essential for functionality and security. Here are some hardware options to consider:

  • Hinges: Choose heavy-duty hinges that can support the weight of your gate.
  • Latch: A latch will keep your gate securely closed. There are several types of latches to choose from, including thumb latches, ring latches, and slide bolts.
  • Handles: Handles make it easier to open and close your gate. Choose a handle that is sturdy and matches the style of your gate.

When installing hardware, make sure to follow the manufacturer’s instructions carefully. It’s also important to choose hardware that is rust-resistant and can withstand outdoor conditions.

By following these tips, you can add the finishing touches to your wooden gate and enjoy a beautiful and functional addition to your property.

Installing the Wooden Gate Door

Once you have built your wooden gate door, it’s time to install it. Follow these steps to ensure a secure and functional installation.

Positioning the Gate

Before you install the gate, make sure you have the correct measurements for your opening. The gate should fit snugly within the opening with a small gap for clearance.

Once you have the correct measurements, position the gate in the opening. Use shims to hold the gate in place and ensure it is level.

Securing the Hinges

Attach the hinges to the gate first, then to the post or fence. Make sure the hinges are secured with screws that are long enough to hold the weight of the gate.

Once the hinges are attached, remove the shims and test the gate to ensure it swings freely and smoothly. Adjust the hinges as necessary to ensure the gate is level and swings properly.

Attaching the Latch

Attach the latch to the gate and the post or fence. Make sure the latch is aligned properly and securely fastened. Test the latch to ensure it opens and closes smoothly and securely.

If necessary, add a drop rod to the gate to keep it from sagging. A drop rod is a metal rod that attaches to the bottom of the gate and goes into the ground to keep the gate from sagging over time.

With these steps, you should have a secure and functional wooden gate door. Remember to maintain and inspect your gate regularly to ensure it stays in good condition.

Maintaining Your Wooden Gate Door

To ensure the longevity and functionality of your wooden gate door, it’s essential to perform regular maintenance. Here are some tips to help you maintain your wooden gate door:

Regular Cleaning

Cleaning your wooden gate door regularly is crucial to prevent dirt and debris from accumulating, which can lead to rot and other damage. Here’s how to clean your wooden gate door:

  • Use a soft-bristled brush or cloth to remove any loose dirt and debris from the surface of the gate.
  • Mix a solution of mild soap and water and apply it to the gate using a cloth or sponge.
  • Rinse the gate thoroughly with clean water and allow it to dry completely before applying any finish or sealer.

Yearly Inspections

Performing a yearly inspection of your wooden gate door can help you identify any potential issues early on and prevent costly repairs down the line. Here’s what to look for during your yearly inspection:

  • Check for any signs of rot, warping, or cracking in the wood.
  • Inspect the gate’s hardware, including hinges and latches, to ensure they are functioning correctly.
  • Look for any signs of insect damage, such as holes or sawdust.

Repairing Damage

If you notice any damage or issues during your inspection, it’s essential to address them promptly to prevent further damage. Here are some tips for repairing damage to your wooden gate door:

  • For small cracks or splits, use wood filler to fill in the damaged area.
  • For larger cracks or splits, you may need to replace the damaged section of the gate.
  • If you notice signs of rot, you may need to replace the entire gate or the affected section.

By following these tips for maintaining your wooden gate door, you can ensure that it remains functional and beautiful for years to come.

How to Make a Wooden Coffee Table: A Beginner's Guide

Are you tired of browsing furniture stores for the perfect coffee table, only to be disappointed by the limited options and high prices? Why not make your own wooden coffee table instead? Not only will it be a unique addition to your living space, but it will also be a fun and rewarding DIY project.

Building a wooden coffee table may seem daunting, but with the right tools and materials, it can be a straightforward process. Whether you prefer a simple design or something more intricate, there are plenty of plans and tutorials available to guide you through the process. From selecting the right wood to finishing touches, making your own coffee table allows you to customize every aspect of the piece to fit your personal style and needs.

Before you begin, it’s important to have a clear idea of the size and style you want for your coffee table. Consider the dimensions of your space and the function you want the table to serve. Do you need extra storage? Do you want a specific type of wood or finish? Once you have a solid plan in place, you can start gathering the necessary materials and tools to bring your vision to life.

Choosing the Right Wood

When it comes to making a wooden coffee table, choosing the right wood is crucial. The type of wood you choose will affect the appearance, durability, and cost of your table. In this section, we’ll discuss the types of wood commonly used for coffee tables and how to choose wood that is both high quality and durable.

Types of Wood

There are many types of wood to choose from when making a coffee table. Some popular options include:

  • Oak: A durable hardwood with a prominent grain pattern that can range from light to dark.
  • Maple: A light-colored hardwood with a fine, uniform grain pattern.
  • Cherry: A rich, reddish-brown hardwood with a distinctive grain pattern.
  • Walnut: A dark, luxurious hardwood with a straight grain pattern.

These are just a few examples of the many types of wood available. When choosing wood for your coffee table, consider the color, grain pattern, and texture of the wood. You should also think about the style and decor of your room and choose a wood that complements it.

Wood Quality and Durability

In addition to choosing the right type of wood, it’s important to consider the quality and durability of the wood. Look for wood that is free of knots and cracks, as these can weaken the structure of your table. You should also choose wood that has been properly dried and seasoned to prevent warping and cracking over time.

When it comes to durability, hardwoods like oak and maple are generally the best choice. Softwoods like pine and cedar are less durable and may not hold up as well over time. However, softwoods can be a good option if you’re on a budget or if you’re looking for a more rustic or casual look.

Overall, choosing the right wood for your coffee table is an important decision that will impact the appearance and durability of your table. Take the time to consider your options and choose a wood that meets your needs and fits your style.

Gathering Necessary Tools

Before starting to build your wooden coffee table, you need to gather all the necessary tools. Below are the woodworking tools and safety equipment that you will need.

Woodworking Tools

  • Table Saw: A table saw is used to cut the wood to the desired size and shape. It is a crucial tool for making a coffee table.
  • Circular Saw: A circular saw is another option for cutting the wood. It is useful for making straight cuts and is ideal for beginners.
  • Jigsaw: A jigsaw is used for making curved cuts in the wood. It is a versatile tool that can be used for various woodworking projects.
  • Drill: A drill is essential for making holes in the wood. You will need it to attach the legs and other parts of the coffee table.
  • Sander: A sander is used to smooth out the surface of the wood. It is necessary to achieve a polished and professional look.
  • Clamps: Clamps are used to hold the wood in place while cutting, drilling, or sanding. They are essential for safety and precision.

Safety Equipment

  • Safety Glasses: Safety glasses are necessary to protect your eyes from flying debris while cutting or sanding the wood.
  • Dust Mask: A dust mask is essential to protect your lungs from sawdust and other particles that may be released during the woodworking process.
  • Ear Protection: Ear protection is necessary to protect your ears from the loud noise produced by the power tools.

Make sure to have all the necessary tools and safety equipment before starting your project. It is important to prioritize safety and to use the tools properly to avoid accidents.

Designing Your Coffee Table

When it comes to designing your own wooden coffee table, there are a few things to consider. In this section, we will cover the size and shape of your coffee table, as well as how to add some personal touches to make it unique to your style.

Size and Shape

The size and shape of your coffee table will depend on your personal preferences and the space you have available. Here are some things to consider when designing your coffee table:

  • Height: A typical coffee table is around 18-20 inches tall, but you can adjust the height to fit your needs.
  • Length and width: Consider the size of your room and the other furniture in it. You want your coffee table to be proportional to the space and not overwhelm the room.
  • Shape: A rectangular or square coffee table is the most common, but you can also consider a round or oval shape for something different.

Once you have an idea of the size and shape you want, you can start planning the materials and construction.

Adding Personal Touches

One of the best things about making your own coffee table is the ability to add personal touches that reflect your style. Here are some ideas to consider:

  • Stain or paint: Choose a stain or paint color that matches your decor or adds a pop of color to the room.
  • Inlay design: Add a unique design or pattern to the top of your coffee table using inlay techniques.
  • Hardware: Choose hardware that complements the style of your coffee table, such as vintage knobs or modern handles.
  • Storage: Add drawers or shelves to your coffee table for added functionality.

Remember, the design possibilities are endless when it comes to making your own wooden coffee table. Take your time and have fun with the process!

Preparing the Wood

Before you can start building your wooden coffee table, you need to prepare the wood. This involves cutting the wood to size and sanding it to make it smooth.

Cutting the Wood

The first step in preparing the wood is to cut it to the right size. You will need a saw for this, and it’s important to measure carefully to ensure that you get the right dimensions.

When cutting the wood, make sure that you use a straight edge to guide the saw. This will help you to make straight cuts and ensure that your coffee table looks professional.

Sanding the Wood

Once you have cut the wood to the right size, it’s time to sand it. Sanding is important because it helps to smooth out any rough edges and make the wood more comfortable to touch.

To sand the wood, you will need sandpaper and a sanding block. Start with a coarse grit sandpaper and work your way up to a finer grit. This will help you to achieve a smooth finish.

When sanding, make sure that you sand with the grain of the wood. This will help you to avoid creating scratches or marks on the surface of the wood.

By following these steps, you can prepare your wood for building a beautiful and functional coffee table.

Assembling the Table

Now that you have all the pieces cut, it’s time to assemble the coffee table. This section will guide you through the process of joining the pieces and securing the table top.

Joining the Pieces

  1. Start by assembling the base of the table. Attach the legs to the apron using wood glue and pocket screws. Use a clamp to hold the pieces in place while the glue dries.

  2. Once the base is assembled, attach the tabletop supports. These will hold the tabletop in place. Use wood glue and pocket screws to attach the supports to the apron.

  3. Now it’s time to attach the tabletop. Apply wood glue to the tabletop supports and place the tabletop on top. Use clamps to hold the tabletop in place while the glue dries.

Securing the Table Top

  1. Once the glue is dry, it’s time to secure the tabletop to the base. Flip the table over and use screws to attach the tabletop to the tabletop supports.

  2. To hide the screws, you can add wooden plugs. Use a plug cutter to cut plugs from the same type of wood as your tabletop. Glue the plugs into the holes and sand them flush with the tabletop.

  3. Finish the table with a coat of stain or paint to protect the wood and give it a finished look.

By following these steps, you can assemble your own wooden coffee table that is both functional and beautiful.

Finishing Touches

After constructing your wooden coffee table, it’s time to add the finishing touches. This step is crucial to protect the wood and enhance its natural beauty. In this section, we’ll cover two important sub-sections: Staining the Wood and Sealing the Wood.

Staining the Wood

Staining the wood is an optional step that can add color and depth to your coffee table. Before staining, make sure the wood is sanded smooth and free of dust. You can use a pre-stain wood conditioner to ensure an even application of the stain.

When choosing a stain, consider the wood species and the desired color. Test the stain on a scrap piece of wood or an inconspicuous area of the table to ensure you’re happy with the color. Apply the stain with a brush or cloth, following the wood grain. Wipe off any excess stain with a clean cloth and let it dry completely before moving on to the next step.

Sealing the Wood

Sealing the wood is essential to protect it from moisture, scratches, and other damage. There are several options for sealing your coffee table, including polyurethane, varnish, and wax. Polyurethane is a popular choice because it’s durable and easy to apply.

Before applying the sealer, make sure the stain (if applied) is completely dry. Apply the sealer with a brush or cloth, following the wood grain. Let it dry according to the manufacturer’s instructions, then lightly sand the surface with fine-grit sandpaper. Wipe off any dust with a clean cloth and apply a second coat of sealer. Repeat this process until you achieve the desired level of protection.

In conclusion, staining and sealing your wooden coffee table will not only protect it but also enhance its natural beauty. Take your time and follow these steps carefully for a stunning finished product.

How to Repaint a Wooden Bench: A Beginner's Guide

Repainting a wooden bench can be a fun and rewarding DIY project that can breathe new life into an old piece of furniture. Whether you want to update the look of your outdoor bench or restore an old piece to its former glory, repainting can be a cost-effective way to achieve your desired results.

Before you get started, it’s important to gather the necessary tools and materials, including sandpaper, primer, paint, and a paintbrush or roller. You’ll also want to make sure you have a drop cloth or newspaper to protect your work area from any spills or splatters. If your bench has any existing paint or finish, you’ll need to remove it before applying a new coat of paint.

In this article, we’ll provide step-by-step guidelines on how to repaint a wooden bench, including tips on sanding, priming, and painting. By following these easy guidelines, you can transform your old bench into a beautiful and functional piece of furniture that you’ll be proud to display in your home or garden. So grab your paintbrush and let’s get started!

Understanding the Basics of Repainting

When it comes to repainting a wooden bench, there are some basic things you should understand before you get started. This section will cover the types of paint you can use and some safety precautions you should take.

Types of Paint for Wood

There are several types of paint you can use when repainting a wooden bench. Here are some common options:

  • Latex paint: This is a water-based paint that is easy to use and dries quickly. It is a good choice for indoor benches or outdoor benches that are not exposed to harsh weather conditions.
  • Oil-based paint: This type of paint is more durable than latex paint and provides a smoother finish. It is a good choice for outdoor benches that are exposed to harsh weather conditions.
  • Spray paint: This type of paint is easy to use and can provide a smooth finish. However, it may not be as durable as other types of paint.

Before you choose a type of paint, consider the location of your bench and the weather conditions it will be exposed to. You should also consider the color you want and whether you want a glossy or matte finish.

Safety Precautions

When repainting a wooden bench, it is important to take some safety precautions to protect yourself and others. Here are some things to keep in mind:

  • Wear protective gear: You should wear gloves, eye protection, and a mask to protect yourself from fumes and dust.
  • Work in a well-ventilated area: Make sure you are working in an area with good ventilation to avoid inhaling fumes.
  • Follow the manufacturer’s instructions: Be sure to read and follow the instructions on the paint can to ensure that you are using the paint correctly.
  • Dispose of paint and materials properly: After you are finished painting, dispose of any leftover paint and materials according to your local regulations.

By understanding the basics of repainting and taking the necessary safety precautions, you can successfully repaint your wooden bench and give it a fresh new look.

Materials and Tools Needed

Repainting a wooden bench can be a fun and easy DIY project that can give new life to an old piece of furniture. Before you get started, make sure you have all the necessary materials and tools on hand. Here is a list of what you will need:

Materials

  • Sandpaper (for sanding down the wood)
  • Protective gloves and eyewear
  • Primer and paint
  • Painter’s tape (to cover areas that you do not wish to paint)
  • Dropcloth (to protect the surrounding areas from paint splatters)

Tools

  • Paintbrush or roller (for applying the primer and paint)
  • Screwdriver (to remove any hardware on the bench)
  • Palm sander (optional, but helpful for sanding larger areas)
  • Tack cloth (to remove any dust or debris after sanding)
  • Spray bottle filled with water (to wet the wood before sanding, if necessary)

When selecting your primer and paint, make sure to choose products that are suitable for outdoor use and can withstand the elements. Look for products that are specifically designed for wood surfaces and provide good coverage and durability.

Additionally, it’s important to wear protective gloves and eyewear while working with paint and sandpaper to avoid any injuries or irritation. And don’t forget to cover the surrounding areas with a dropcloth to protect them from any paint splatters.

Overall, having the right materials and tools on hand can make all the difference in achieving a successful repainting project.

Preparing the Wooden Bench

Before you start repainting your wooden bench, it’s essential to prepare it properly to ensure the new paint adheres well and looks great. Here are two crucial steps to follow when preparing your wooden bench for repainting.

Cleaning the Bench

The first step in preparing your wooden bench for repainting is to clean it thoroughly. Dirt, grime, and other debris can interfere with the paint’s adherence, so it’s crucial to get the surface as clean as possible.

To clean your bench, follow these steps:

  1. Use a stiff-bristled brush to remove loose dirt and debris from the bench’s surface.
  2. Fill a bucket with warm water and add a small amount of dish soap or wood cleaner.
  3. Dip a clean cloth into the soapy water and use it to scrub the bench’s surface thoroughly.
  4. Rinse the bench with clean water until all soap residue is removed.
  5. Allow the bench to dry completely before moving on to the next step.

Sanding the Surface

Once the bench is clean and dry, the next step is to sand the surface. Sanding helps remove any bumps or uneven surfaces, making the surface smoother and easier to paint. It also helps the new paint adhere better to the wood.

To sand your bench, follow these steps:

  1. Use a light grit sandpaper to sand the entire surface of the bench. Be sure to sand in the direction of the wood grain.
  2. Sand until the surface is smooth and all rough spots and imperfections are removed.
  3. Use a damp cloth to wipe away any dust or debris from sanding.
  4. Allow the bench to dry completely before moving on to the next step.

By following these two crucial steps, you’ll ensure that your wooden bench is well-prepared for repainting. A clean and well-sanded surface will help the new paint adhere better and look great for years to come.

Applying the Primer

Now that you have sanded and cleaned your wooden bench, it’s time to apply the primer. The primer will help the paint adhere to the wood and prevent any stains or discoloration from showing through the final coat of paint. Here are the steps to apply the primer:

  1. Choose the right primer: Make sure to choose a primer that is suitable for outdoor wooden surfaces. Look for a primer that is specifically formulated for wood and is compatible with the type of paint you plan to use.

  2. Apply the primer: Use a paintbrush or a roller to apply the primer evenly over the entire surface of the bench. Make sure to cover all the nooks and crannies and apply a thin, even coat. If you notice any drips or uneven areas, smooth them out with a paintbrush before the primer dries.

  3. Let the primer dry: Allow the primer to dry completely before applying the final coat of paint. This may take anywhere from a few hours to overnight, depending on the type of primer you are using and the weather conditions.

  4. Sand the primer: Once the primer is dry, lightly sand the entire surface of the bench with fine-grit sandpaper. This will help smooth out any rough spots or brush marks and ensure that the final coat of paint goes on smoothly.

  5. Clean the bench: Finally, use a clean, damp cloth to wipe down the entire surface of the bench and remove any dust or debris before applying the final coat of paint.

By following these steps, you can ensure that your wooden bench is properly primed and ready for the final coat of paint.

Painting the Bench

Once you have sanded and primed your wooden bench, it’s time to paint it. Here are some tips to help you get the best results possible.

Choosing the Color

Before you start painting, consider what color you want your bench to be. You can choose a color that matches your outdoor decor or go for something bold and eye-catching. If you’re not sure what color to choose, take a look at some color swatches or paint samples to get an idea of what will work best.

Applying the Paint

When it comes to applying the paint, there are a few things to keep in mind. First, make sure you have the right type of paint for your bench. For outdoor furniture, it’s best to use a paint that is weather-resistant and can withstand the elements. You can choose between oil-based, water-based, or spray paint.

Once you have your paint, apply it in thin, even coats. Use a paintbrush or roller to apply the paint, depending on the size of your bench. Make sure to cover all areas of the bench, including any hard-to-reach spots.

If you’re using a spray paint, make sure to do it in a well-ventilated area and wear a mask to avoid inhaling fumes. Apply the spray paint in thin, even coats, and let each coat dry before applying the next.

After you’ve applied the first coat of paint, let it dry completely before applying the second coat. Depending on the color and type of paint you’re using, you may need to apply more than two coats to get the desired finish.

With these tips, you can paint your wooden bench with ease and achieve a beautiful, long-lasting finish.

Finishing Touches

After you’ve painted your wooden bench, it’s time to add the finishing touches to ensure a long-lasting and beautiful finish. Here are some essential steps to follow:

Sealing the Paint

To protect your newly painted bench from the elements and everyday wear and tear, it’s crucial to apply a sealant. A clear polyurethane or varnish will not only add a protective layer but also give your bench a glossy finish.

Before applying the sealant, make sure the paint is completely dry. Use a clean brush to apply a thin layer of sealant, following the grain of the wood. Allow the first coat to dry completely before applying a second coat.

Drying and Curing Time

It’s important to let your bench dry and cure properly to avoid damaging the paint job. While the paint may feel dry to the touch after a few hours, it’s recommended to wait at least 24 hours before using the bench.

During the first week, avoid placing any heavy objects or sitting on the bench for extended periods. This will allow the paint to fully cure and harden, ensuring a durable finish.

By following these simple finishing touches, your painted wooden bench will look great for years to come.

How to Build a Wooden Coffee Table: A Beginner's Guide

Building your own wooden coffee table can be a fun and rewarding DIY project. Not only can you customize it to fit your personal style and decor, but you can also save money compared to buying a pre-made table. With the right tools and materials, building a wooden coffee table can be a relatively simple project that even a beginner woodworker can tackle.

Before you start building your coffee table, you’ll need to decide on the design and size that you want. There are many different styles to choose from, including traditional, modern, rustic, and more. You’ll also need to consider the size of your space and how much room you want the table to take up. Once you have a design in mind, you can start gathering your materials and tools.

When it comes to materials, you’ll need to choose the type of wood you want to use for your coffee table. Popular choices include oak, pine, and maple, but there are many other types of wood to choose from as well. You’ll also need screws, wood glue, sandpaper, and a finish to protect the wood and give it a polished look. With these materials and the right tools, you’ll be ready to start building your very own wooden coffee table.

Understanding the Basics

If you’re looking to build a wooden coffee table, there are a few basics you need to understand before you get started. In this section, we’ll cover the types of wood you can use and the essential tools you’ll need.

Types of Wood

When it comes to building a coffee table, you have a few options when it comes to the type of wood you use. Here are some of the most popular options:

  • Pine: Pine is a softwood that’s easy to work with and relatively inexpensive. It’s a good option if you’re a beginner or on a budget.
  • Oak: Oak is a hardwood that’s durable and has a beautiful grain pattern. It’s more expensive than pine but can add a touch of elegance to your coffee table.
  • Maple: Maple is another hardwood that’s known for its durability. It has a lighter color than oak and a more subtle grain pattern.
  • Walnut: Walnut is a hardwood that’s known for its rich, dark color and beautiful grain pattern. It’s one of the more expensive options but can add a touch of sophistication to your coffee table.

Essential Tools

To build a wooden coffee table, you’ll need a few essential tools. Here are the tools you’ll need:

  • Circular saw or table saw: You’ll need a saw to cut the wood to size. A circular saw or table saw will work well for this.
  • Drill: You’ll need a drill to make pilot holes and attach screws.
  • Jigsaw: A jigsaw can be useful for cutting curves or other intricate shapes.
  • Clamps: Clamps can hold the wood in place while you work on it.
  • Sandpaper: Sandpaper will help you smooth out any rough edges or surfaces.

With these basics in mind, you’re ready to start building your wooden coffee table.

Designing Your Coffee Table

When it comes to designing your coffee table, there are a few important factors to consider. You want to make sure that the table fits your space, matches your decor, and serves the functions that you need it to. Here are some tips on how to design your coffee table to meet your needs.

Choosing the Style

The first step in designing your coffee table is to choose the style that you want. There are many different styles to choose from, including rustic, modern, traditional, and more. Consider the overall look and feel of your space when choosing a style for your coffee table. You want it to complement your existing decor and not clash with it.

Determining the Size

The next step in designing your coffee table is to determine the size that you need. Consider the size of your space, the size of your seating area, and the functions that you need your coffee table to serve. If you have a small space, you may want to choose a smaller coffee table to avoid overcrowding the area. If you have a large space, you may want to choose a larger coffee table to fill the space and provide ample surface area for drinks and snacks.

When determining the size of your coffee table, consider the height as well. You want to make sure that the table is the right height for your seating area. A coffee table that is too high or too low can be uncomfortable to use.

In conclusion, designing your coffee table is an important step in creating a functional and stylish living space. By choosing the right style and size for your needs, you can create a coffee table that perfectly complements your decor and serves the functions that you need it to.

Preparing the Wood

Before you can start building your wooden coffee table, you need to prepare the wood. This involves selecting the right type of wood and cutting it to the appropriate size.

Selecting the Wood

When selecting wood for your coffee table, you want to choose a type of wood that is both sturdy and attractive. Some popular choices include oak, maple, cherry, and walnut. Keep in mind that different types of wood have different properties, such as hardness, grain pattern, and color. Consider what will match the style of your home and what will fit your budget.

Once you have selected your wood, you need to make sure it is properly dried and cured. This will prevent the wood from warping or cracking later on. You can either buy pre-dried wood or dry it yourself by storing it in a dry, well-ventilated area for several weeks.

Cutting the Wood

After selecting the wood, the next step is to cut it to the appropriate size. This will depend on the dimensions of the coffee table you want to build. You can use a saw, such as a circular saw or a table saw, to cut the wood. Make sure to measure twice and cut once to avoid any mistakes.

You may also want to consider using a planer to smooth out the wood and remove any imperfections. This will give your coffee table a more polished look. Additionally, you can use a router to add decorative edges to the wood.

Overall, preparing the wood is an important step in building a wooden coffee table. By selecting the right type of wood and cutting it to the appropriate size, you can ensure that your coffee table will be both sturdy and attractive.

Assembling Your Coffee Table

Now that you have all the parts cut and ready, it’s time to assemble your coffee table. This section will guide you through the process of joining the parts and securing the structure.

Joining the Parts

  1. Start by assembling the base of your coffee table. Use pocket-hole screws to attach the legs to the aprons. Make sure to use a square to ensure that everything is aligned properly.

  2. Once the base is assembled, it’s time to attach the tabletop. Apply wood glue to the top of the aprons and place the tabletop on top. Make sure that the tabletop is centered and overhangs the aprons evenly on all sides.

  3. Use clamps to hold the tabletop in place while you attach it to the aprons. Drill pilot holes and use screws to secure the tabletop to the aprons.

  4. Finally, attach the tabletop trim using pocket-hole screws. Make sure that the trim is flush with the top of the tabletop.

Securing the Structure

  1. Once your coffee table is fully assembled, it’s important to make sure that it’s structurally sound. Check that all joints are tight and that the legs are level.

  2. If you notice any wobbling, adjust the legs until the table is stable. You can also use shims to level the table if necessary.

  3. Sand any rough edges or surfaces and apply a coat of finish to protect your coffee table and give it a polished look.

By following these steps, you’ll have a beautiful and sturdy wooden coffee table that you can be proud of.

Finishing Touches

Once your wooden coffee table is assembled, it’s time to add the finishing touches to make it look polished and professional. This section will cover the final steps of sanding and applying the finish.

Sanding the Surface

Before applying the finish, you’ll want to make sure the surface of your coffee table is smooth and free of any rough spots or imperfections. Start by using a coarse grit sandpaper, such as 80-grit, and work your way up to a finer grit, such as 220-grit, for a smooth finish.

To avoid scratching the surface of your table, make sure to sand with the grain of the wood. Use a sanding block or a power sander to make the job easier and more efficient. Once you’ve sanded the surface to your liking, wipe it down with a clean, dry cloth to remove any dust or debris.

Applying the Finish

There are many different finishes you can use to protect and enhance the beauty of your wooden coffee table. Some popular options include polyurethane varnish, tung oil, and wax. Here’s a brief overview of each:

  • Polyurethane Varnish: This is a durable and long-lasting finish that provides excellent protection against scratches and stains. It’s available in both oil-based and water-based formulas, and can be applied with a brush, roller, or spray gun.

  • Tung Oil: This is a natural oil that penetrates the wood to provide a deep, rich finish. It’s easy to apply and provides good protection against moisture and stains. However, it does require more maintenance than polyurethane varnish.

  • Wax: This is a traditional finish that provides a soft, matte sheen. It’s easy to apply and provides good protection against moisture and stains. However, it’s not as durable as polyurethane varnish or tung oil.

When applying the finish, make sure to follow the manufacturer’s instructions carefully. Apply the finish in a well-ventilated area, and use a clean brush or cloth to ensure a smooth and even application. Allow the finish to dry completely before using your coffee table.

How to Make a Wooden Outdoor Table: A Beginner's Guide

Are you looking for a way to add some charm to your outdoor space? A wooden outdoor table might be just what you need! Not only can it be a beautiful addition to your backyard, but it can also be a practical one. You can use it for outdoor dining, entertaining guests, or simply as a surface for your plants and decor.

Making an outdoor table out of wood can seem like a daunting task, but with the right tools and instructions, it can be a fun and rewarding DIY project. There are a variety of designs and styles to choose from, so you can customize it to fit your personal taste and needs. Whether you want a rustic farmhouse style or a sleek modern look, you can find a plan that works for you. So, roll up your sleeves and let’s get started on creating a beautiful wooden outdoor table that you can enjoy for years to come.

Understanding the Basics of Outdoor Table Making

When it comes to making an outdoor table, there are a few basics you need to understand before you start. In this section, we’ll cover the types of wood you should consider and the essential tools and materials you’ll need.

Types of Wood for Outdoor Tables

Choosing the right type of wood is crucial when making an outdoor table. You want a wood that is durable, weather-resistant, and able to withstand the elements. Here are some popular options:

  • Cedar: A popular choice due to its natural resistance to decay and insects, as well as its beautiful color and grain pattern.
  • Redwood: Another durable and weather-resistant option, with a distinctive reddish hue.
  • Teak: A high-end option that is extremely durable and resistant to water, making it perfect for outdoor use.
  • Pressure-treated pine: A more affordable option that is treated with chemicals to resist rot and decay.

Essential Tools and Materials

To make an outdoor table, you’ll need a few essential tools and materials. Here’s what you’ll need:

  • Wood: Choose the type of wood that best suits your needs and budget.
  • Saw: You’ll need a saw to cut the wood to size.
  • Drill: A drill will be necessary to make holes for screws and bolts.
  • Screws and bolts: You’ll need these to assemble the table.
  • Sandpaper: Use sandpaper to smooth rough edges and surfaces.
  • Wood stain or sealer: A stain or sealer will help protect the wood from the elements.

With these basics in mind, you’re ready to start making your own outdoor table. Just remember to choose the right type of wood and gather all the necessary tools and materials before you begin.

Choosing the Right Design for Your Outdoor Table

When it comes to building an outdoor wooden table, choosing the right design is crucial. The design you choose will not only affect the table’s appearance but also its functionality and durability. Here are some factors to consider when selecting the right design for your outdoor table:

1. Size and Shape

The size and shape of your outdoor table will depend on how much space you have, how many people you want to seat, and how you plan to use the table. A rectangular table is the most common shape for outdoor tables, but you can also consider round, square, or oval tables. The size of your table should be proportional to the space you have and the number of people you plan to seat.

2. Material

Wood is a popular choice for outdoor tables because of its natural beauty and durability. However, not all wood is suitable for outdoor use. You should choose a wood species that is resistant to rot, decay, and insect damage, such as cedar, redwood, or teak. You can also consider using pressure-treated lumber, which is treated with chemicals to resist decay and insect damage.

3. Style

The style of your outdoor table should complement your outdoor space and your personal taste. You can choose a rustic, farmhouse-style table, a sleek and modern design, or a classic and traditional look. You can also consider adding decorative elements such as carved details, inlays, or metal accents.

4. Functionality

Consider how you plan to use your outdoor table. Will you use it for dining, entertaining, or as a work surface? If you plan to use it for dining, make sure it is the right height and has enough space for plates, glasses, and utensils. If you plan to use it for entertaining, consider adding built-in coolers, storage compartments, or a fire pit. If you plan to use it as a work surface, make sure it is sturdy and has enough space for your tools and materials.

By considering these factors, you can choose the right design for your outdoor wooden table that will not only look great but also meet your needs and last for years to come.

Preparing the Wood

Before starting to build your outdoor wooden table, it’s important to prepare the wood properly. This will help ensure that your table lasts for years to come, even in harsh weather conditions. Here are some steps to follow:

1. Choose the Right Type of Wood

When selecting the wood for your outdoor table, it’s important to choose a type of wood that is suitable for outdoor use. Cedar, redwood, and teak are all popular choices for outdoor furniture because they are naturally resistant to decay and insects. Pressure-treated pine is another option, but it should be sealed or painted to prevent water damage.

2. Sand the Wood

Once you have your wood, the first step is to sand it down. This will help remove any rough spots or splinters and create a smooth surface for staining or painting. Use a coarse-grit sandpaper to start, then switch to a finer grit for a smoother finish.

3. Apply a Stain or Sealer

Applying a stain or sealer to your outdoor table will help protect it from the elements. Choose a product that is specifically designed for outdoor use and follow the manufacturer’s instructions for application. Be sure to apply the stain or sealer in a well-ventilated area and wear gloves to protect your hands.

4. Allow the Wood to Dry

After applying the stain or sealer, allow the wood to dry completely before moving on to the next step. This may take several hours or even overnight, depending on the product and weather conditions.

By taking the time to properly prepare your wood, you can ensure that your outdoor table will look great and last for years to come.

Building the Table Top

Now that you have the base of your outdoor table ready, it’s time to build the table top. Here are the steps to follow:

Step 1: Choose the Right Wood

Choosing the right wood is crucial for the durability and appearance of your table. Cedar, redwood, and pressure-treated pine are popular choices for outdoor furniture as they are resistant to rot and decay. You can also use hardwoods like teak or ipe for a more luxurious look.

Step 2: Cut the Wood to Size

Cut the wood to the desired size for your table top. Make sure the boards are straight and free of knots. You can use a circular saw or a table saw to make the cuts.

Step 3: Sand the Boards

Sand the boards to remove any rough spots or splinters. Start with a coarse grit sandpaper and work your way up to a finer grit for a smooth finish.

Step 4: Arrange the Boards

Arrange the boards in the desired pattern for your table top. You can create a simple plank-style top or a more intricate design like a herringbone pattern.

Step 5: Attach the Boards

Attach the boards together using wood glue and clamps. Make sure the boards are aligned and flush with each other. You can also use pocket screws or dowels for added strength.

Step 6: Sand the Table Top

Sand the table top again to smooth out any uneven spots or glue residue. Finish with a fine grit sandpaper for a polished look.

Step 7: Finish the Table Top

Apply a coat of outdoor wood sealer or stain to protect the table top from the elements. Follow the manufacturer’s instructions for application and drying time.

By following these steps, you can build a sturdy and beautiful table top for your outdoor table.

Constructing the Legs and Base

The legs and base of your outdoor wooden table are crucial for ensuring its stability and durability. Here are the steps to follow when constructing the legs and base:

Step 1: Cut the Wood

Begin by cutting the wood for the legs and base to the desired size. You can use a table saw or circular saw for this task. Make sure to measure accurately to avoid any mistakes.

Step 2: Assemble the Legs

Next, assemble the legs. You can use a pocket hole jig to join the pieces together or simply use wood glue and screws. Make sure to clamp the pieces together tightly to ensure a strong joint.

Step 3: Attach the Base

Once the legs are assembled, attach the base. The base can be made up of a series of horizontal and diagonal pieces. Use wood glue and screws to attach the pieces to the legs. Make sure to check for levelness as you go to ensure the table will sit flat on the ground.

Step 4: Add Cross Braces

To add extra stability to your table, consider adding cross braces between the legs. These can be made from scrap wood and attached with wood glue and screws.

Step 5: Sand and Finish

Finally, sand the legs and base smooth and apply a finish of your choice. This will help protect the wood from the elements and give it a polished look.

By following these steps, you can construct a sturdy and attractive base for your outdoor wooden table.

Assembling the Table

Now that you’ve cut all the wood pieces to the correct sizes, it’s time to start assembling the table. Here’s how to do it:

  1. First, lay out all the pieces of the table on a flat surface. Make sure you have all the pieces you need and that they are the correct sizes.

  2. Next, start by assembling the legs. Take two of the 4×4 boards and attach them together using wood glue and screws. Repeat this step for the other two legs.

  3. Once the legs are assembled, attach them to the table top using screws. Make sure the legs are evenly spaced and level.

  4. Next, attach the apron pieces to the legs using screws. The apron pieces should be flush with the top of the legs.

  5. Finally, attach the table top to the apron pieces using screws. Make sure the table top is centered and level.

  6. Sand the table to smooth out any rough edges or surfaces.

  7. Apply a coat of weather-resistant stain or paint to protect the wood from the elements.

Congratulations! You’ve successfully assembled your outdoor wooden table. It’s now ready to be used for outdoor dining or entertaining.

Finishing Touches

After building your outdoor wooden table, it’s time to add the finishing touches that will not only make it look great but also protect it from the elements. Here are the two main steps to finish your outdoor table:

Sanding the Table

Before applying any finish, it’s essential to sand the table’s surface to ensure it’s smooth and free of any rough spots or splinters. Here are the steps to follow:

  1. Start by using a coarse-grit sandpaper (around 80 grit) to remove any rough spots and splinters. Sand in the direction of the grain, and be sure to sand evenly across the surface.
  2. Move up to a finer-grit sandpaper (around 120 grit) and repeat the sanding process, again sanding in the direction of the grain.
  3. Finally, use a very fine-grit sandpaper (around 220 grit) to give the table a smooth finish.

After sanding, wipe the table down with a damp cloth to remove any sawdust or debris.

Applying Protective Finish

Once the table is sanded, it’s time to apply a protective finish to help it withstand the elements. Here are the steps to follow:

  1. Choose a finish that is suitable for outdoor use, such as an oil-based exterior varnish or a polyurethane finish.
  2. Apply the finish evenly across the table’s surface using a brush or a clean cloth. Be sure to follow the manufacturer’s instructions for application and drying times.
  3. After the first coat has dried, lightly sand the surface with a very fine-grit sandpaper (around 220 grit) to remove any rough spots or bubbles.
  4. Apply a second coat of finish and repeat the sanding process after it has dried. You can repeat this process for additional coats until you achieve the desired level of protection and finish.

By following these simple steps, you can ensure that your outdoor wooden table will look great and last for years to come.

Maintenance Tips for Your Wooden Outdoor Table

Your wooden outdoor table is a beautiful addition to your patio or backyard. It adds warmth and charm to your outdoor space. However, it also requires regular maintenance to keep it looking its best. Here are a few tips to help you maintain your wooden outdoor table:

Clean Your Table Regularly

Dirt, dust, and grime can accumulate on your wooden outdoor table over time, which can cause it to look dull and dirty. To prevent this, clean your table regularly with a soft-bristled brush and mild soap and water. Scrub lightly and evenly, then rinse with clean water. Allow it to dry completely before using it again.

Protect Your Table from the Elements

Your wooden outdoor table is exposed to the elements, which can cause it to deteriorate over time. To protect it from the sun, rain, and wind, consider using a cover when it’s not in use. You can also apply a sealant to the table to preserve its color and provide added protection.

Apply a High-Quality Wood Oil

To maintain and preserve the color of your wooden outdoor table, apply a high-quality wood oil each season. This will help to keep the wood looking like new and prevent it from drying out or cracking. Be sure to follow the manufacturer’s instructions when applying the oil.

Avoid Placing Hot or Wet Items on Your Table

Placing hot or wet items on your wooden outdoor table can cause damage to the wood. To prevent this, use coasters or trivets under hot or wet items. This will help to protect the surface of your table and keep it looking its best.

Store Your Table Properly During the Off-Season

If you live in an area with harsh winters or extreme weather conditions, consider storing your wooden outdoor table indoors during the off-season. This will help to protect it from the elements and prolong its lifespan. Be sure to clean and dry the table thoroughly before storing it.

How to Take Apart a Wooden Pallet: A Beginner's Guide

Taking apart a wooden pallet may seem like a daunting task, but with the right tools and techniques, it can be a breeze. Whether you’re looking to repurpose the wood for a DIY project or simply need to dispose of the pallet, knowing how to properly dismantle it is essential. In this article, we’ll walk you through the steps to take apart a wooden pallet without damaging the wood.

Before you begin, it’s important to choose a pallet that is in good condition and free from any signs of deterioration. This will ensure that the wood is strong enough to be repurposed and will not break apart during the dismantling process. Once you have selected your pallet, you can begin the process of taking it apart using a variety of methods, including a reciprocating saw, pry bar, or hammer and chisel. We’ll explore each of these methods in detail and provide tips to help you safely and efficiently dismantle your pallet.

Understanding Pallets

When it comes to taking apart a wooden pallet, it’s important to understand the different types of pallets and how to identify their quality. In this section, we’ll cover the basics to help you get started.

Types of Pallets

There are two main types of pallets: stringer pallets and block pallets. Stringer pallets have two long pieces of wood, called stringers, that run the length of the pallet and support the deck boards. Block pallets have additional pieces of wood, called blocks, that are placed between the stringers to provide extra support.

Block pallets are generally considered to be stronger and more durable than stringer pallets, but they can also be more difficult to take apart because of the additional pieces of wood.

Identifying Wood Quality

When selecting a pallet to take apart, it’s important to look for signs of quality. Here are a few things to keep in mind:

  • Look for pallets that are in good condition with no signs of rot or damage.
  • Check the quality of the wood by looking at the grain and knots. Straight grain and few knots typically indicate higher quality wood.
  • Avoid pallets that have been treated with chemicals, as these can be harmful to your health and the environment.
  • Look for pallets that have been stamped with an IPPC (International Plant Protection Convention) mark. This indicates that the pallet has been heat-treated to prevent the spread of pests and diseases.

By understanding the different types of pallets and how to identify quality wood, you can select the best pallets to take apart and ensure that the wood is safe and usable for your projects.

Safety Precautions

Before you start taking apart a wooden pallet, it’s important to take some safety precautions to avoid any injuries. Here are some things to keep in mind:

Protective Gear

Wearing protective gear is crucial when working with wood. Here are some items you should consider wearing:

  • Gloves: Wear gloves to protect your hands from splinters, nails, and other sharp objects.
  • Eye protection: Wear safety glasses or goggles to protect your eyes from flying debris.
  • Dust mask: Wear a dust mask to protect your lungs from sawdust and other debris.

Safe Work Environment

Creating a safe work environment is important to avoid accidents. Here are some tips to keep in mind:

  • Clear the area: Make sure the area around you is clear of any obstacles or tripping hazards.
  • Stable surface: Work on a stable surface to avoid any wobbling or tipping.
  • Proper lighting: Make sure you have proper lighting to avoid any accidents or mistakes.
  • Tools: Make sure you are using the right tools for the job. Using the wrong tool can be dangerous and may cause damage to the wood.

By following these safety precautions, you can ensure that you are working in a safe environment and avoid any injuries.

Tools Required

Taking apart a wooden pallet can be a fun and rewarding DIY project, but it requires the right tools for the job. Here are the essential tools you will need to take apart a pallet safely and efficiently:

Claw Hammer

A claw hammer is a versatile tool that can be used to remove nails from the pallet boards. It is important to use a hammer with a clawed end, as this will make it easier to grip and remove the nails. Make sure the hammer is comfortable to hold and has a good grip to prevent slipping.

Pry Bar

A pry bar is a useful tool for removing stubborn nails or boards from the pallet. It is important to choose a pry bar with a flat end, as this will prevent damage to the wood. Look for a pry bar with a comfortable grip and a sturdy construction.

Reciprocating Saw

A reciprocating saw is a power tool that can be used to quickly and easily cut through the nails and boards of a pallet. It is important to choose a saw with a demolition or bi-metal blade, as this will be more durable and effective. Make sure the saw has a comfortable grip and is easy to control.

Safety Gear

Taking apart a pallet can be a messy and potentially dangerous process, so it is important to wear the right safety gear. This includes gloves to protect your hands, safety glasses to protect your eyes, and a dust mask to prevent inhalation of dust and debris.

By using these essential tools, you can take apart a wooden pallet safely and efficiently. Remember to always use caution and follow safety guidelines when working with power tools.

Disassembling the Pallet

When it comes to disassembling a wooden pallet, there are two main steps you need to take: removing the nails and separating the boards. Here’s how to do it:

Removing Nails

Before you can separate the boards, you need to remove the nails that are holding them together. There are a few different methods you can use to do this:

  • Pry Bar: A pry bar is a great tool to use for removing nails from a pallet. Simply slide the flat end of the pry bar under the nail head and use leverage to pull the nail out.
  • Hammer: If you don’t have a pry bar, you can also use a hammer to remove the nails. Use the claw end of the hammer to grip the nail and pull it out.
  • Reciprocating Saw: If you have a reciprocating saw, you can use it to cut through the nails and separate the boards. However, this method can be more dangerous and should only be attempted by experienced users.

No matter which method you choose, be sure to wear gloves and eye protection to avoid injury.

Separating Boards

Once you’ve removed the nails, you can start separating the boards. Here are a few tips to make the process easier:

  • Use a Crowbar: A crowbar is a great tool to use for separating the boards. Slide the flat end of the crowbar between the boards and use leverage to pry them apart.
  • Tap with a Hammer: If the boards are still stuck together, you can tap them with a hammer to loosen them up. Be careful not to damage the boards while doing this.
  • Use a Jigsaw: If you have a jigsaw, you can use it to cut through any stubborn boards that won’t come apart. However, this method can be time-consuming and should only be used as a last resort.

Remember to take your time and be patient when separating the boards. With a little bit of effort, you can turn a wooden pallet into a pile of usable lumber for your next project.

Post-Disassembly Tips

Once you have successfully disassembled your wooden pallet, there are a few things you can do to ensure that the wood is ready for your next project. Here are some post-disassembly tips to keep in mind:

Cleaning the Wood

Before using the wood from your disassembled pallet, it’s important to clean it thoroughly. You can use a wire brush to remove any dirt or debris that may be stuck in the wood. You can also use sandpaper to smooth out any rough spots or splinters.

Once you have cleaned the wood, you can choose to stain or paint it to give it a new look. You can also leave it natural if you prefer the rustic look.

Storing Disassembled Pallets

If you have disassembled more pallets than you need for your current project, you may want to store the extra wood for future use. Here are some tips for storing disassembled pallets:

  • Keep the wood in a dry, cool place to prevent warping or rotting.
  • Store the wood flat to prevent it from bending or warping.
  • If you have a large amount of wood, consider stacking it on a pallet or shelf to keep it organized and easy to access.

By following these post-disassembly tips, you can ensure that your wooden pallets are ready for your next project and will last for years to come.