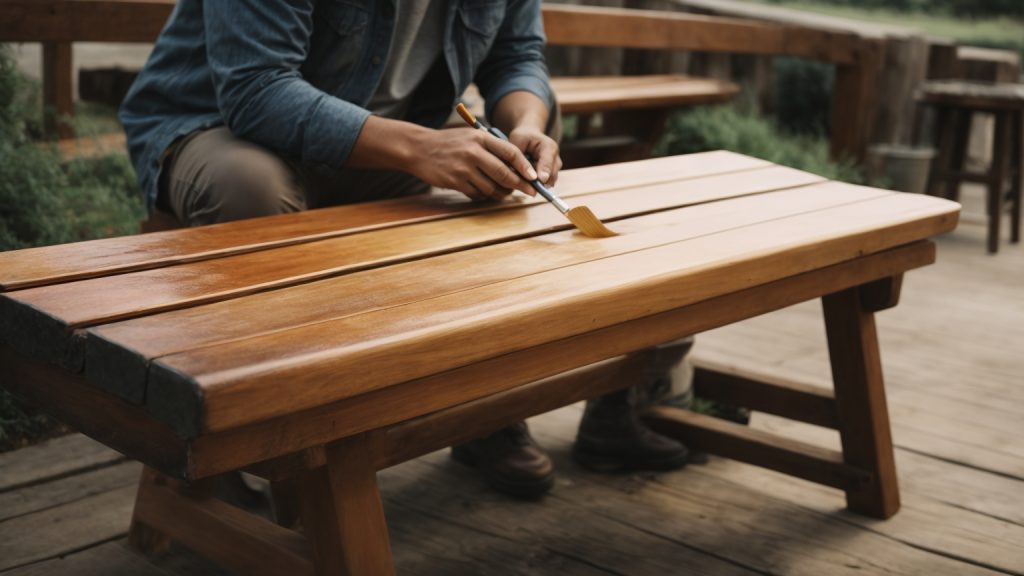
Tag Archives: high-quality outdoor paint

How to Make a Wooden Signpost: A Step-by-Step Guide

How to Make a Wooden Signpost: A Step-by-Step Guide

Are you looking for a cost-effective way to display your real estate signs? Look no further than creating your own wooden signposts. Not only is it a budget-friendly option, but it’s also a convenient way to have full control over the design and placement of your signs.

To get started, you’ll need some basic woodworking tools and materials, including wood planks, screws, a saw, and a drill. Once you have everything you need, it’s just a matter of cutting the wood to the desired length and shape, drilling holes for the screws, and assembling the pieces together. With a little practice, you’ll be able to create custom signposts that perfectly fit your needs.

Whether you’re a real estate agent looking to save money on signposts or just someone who wants to add a personal touch to their outdoor signage, making your own wooden signposts is a fun and rewarding DIY project. With the right tools and a bit of creativity, you can create beautiful and functional signposts that will last for years to come.

Choosing the Right Wood

how-to-make-a-wooden-signpost

When it comes to making a wooden signpost, choosing the right type of wood is crucial. Not all woods are created equal, and some are better suited for outdoor use than others. In this section, we’ll take a look at the different types of wood you can use for your signpost and what to look for in terms of wood quality.

Types of Wood

There are several types of wood that are commonly used for signposts, and each has its own unique characteristics. Here are some of the most popular options:

  • Cedar: Cedar is a popular choice for outdoor signs because it is naturally resistant to rot and decay. It also has a beautiful grain pattern and is lightweight, making it easy to work with.
  • Redwood: Like cedar, redwood is naturally resistant to rot and decay. It is also very durable and has a distinctive reddish-brown color.
  • Pine: Pine is a softwood that is easy to work with and relatively inexpensive. However, it is not as durable as cedar or redwood and may not hold up as well over time.
  • Oak: Oak is a hardwood that is very strong and durable. It is also quite heavy, which can make it difficult to work with.

Wood Quality

Regardless of the type of wood you choose, it’s important to select high-quality wood for your signpost. Here are some things to look for:

  • Straightness: Look for boards that are straight and free of knots or other defects.
  • Density: The denser the wood, the stronger and more durable it will be.
  • Moisture content: Make sure the wood is dry before you start working with it. Wet wood can warp or split as it dries, which can ruin your signpost.
  • Treatment: If you plan to use your signpost outdoors, consider using pressure-treated wood. This type of wood has been treated with chemicals that make it resistant to rot and decay.

By choosing the right type of wood and paying attention to wood quality, you can create a beautiful and durable signpost that will last for years to come.

Tools and Materials Needed

Essential Tools

To make a wooden signpost, you will need a few essential tools. These include:

Tool Purpose
Saw To cut the wood to the desired size
Drill To make holes for screws
Screwdriver To attach the post to the base
Sandpaper To smooth out rough edges
Paintbrush To apply paint or stain

Additional Materials

In addition to the essential tools, you will also need some additional materials. These include:

  • Wood: Choose a sturdy and durable type of wood, such as cedar or redwood. The wood should be at least 4 inches wide and 6 feet tall.
  • Post Cap: A decorative piece that goes on top of the post to give it a finished look.
  • Base: A sturdy base to anchor the post and keep it upright. You can use a pre-made base or make one yourself.
  • Screws: To attach the post to the base.
  • Wood Glue: To attach the post cap to the top of the post.
  • Paint or Stain: To protect the wood from the elements and add color or texture to the finished signpost.

With these tools and materials, you can create a beautiful and functional wooden signpost that will add charm and character to your home or business.

Designing Your Signpost

designing-your-signpost

Before you start building your wooden signpost, it’s important to design it properly. This will ensure that the signpost looks good and serves its intended purpose. In this section, we’ll go over some important design considerations for your signpost.

Sketching the Design

The first thing you’ll want to do is sketch out your design. This will help you visualize what your signpost will look like and make any necessary adjustments before you start building. When sketching your design, consider the following:

  • What message do you want your signpost to convey?
  • What kind of style do you want your signpost to have?
  • What kind of graphics or images do you want to include?

Once you have a rough sketch of your design, you can start refining it and making any necessary adjustments.

Choosing the Right Size

The size of your signpost will depend on a few factors, including the location where it will be installed and the message you want to convey. Here are some things to consider when choosing the right size for your signpost:

  • Make sure your signpost is visible from a distance.
  • Consider the height of the signpost and the angle at which it will be viewed.
  • Make sure your signpost is proportional to the surrounding environment.

It’s important to choose the right size for your signpost to ensure that it is effective and serves its intended purpose.

By taking the time to properly design your signpost, you’ll ensure that it looks good and serves its intended purpose. Consider sketching your design and choosing the right size to make sure your signpost is effective and visible.

Preparing the Wood

Before you can start making your wooden signpost, it’s important to properly prepare the wood. This involves cutting it to size and sanding it to create a smooth surface for painting or staining. Here are the steps you need to follow:

Cutting the Wood

The first step is to choose a piece of wood that is the right size for your signpost. If you can’t find a block in the right size, choose a piece that is slightly larger, as you can always cut it to size later. Soft wood like pine, beech, or spruce generally makes for good wooden signs.

Once you have your wood, use a saw to cut it to the desired size. Make sure to measure carefully and use a straight edge to ensure a straight cut. If you don’t have a saw, you can often have the wood cut to size for you at a hardware or craft store.

Sanding the Wood

After cutting the wood, the next step is to sand it to create a smooth surface for painting or staining. Sanding is a wood surface preparation step which is very likely to be overlooked. Many tend to believe that bare wood is naturally ready-to-go. However, it’s a crucial step to ensure the quality and uniformity of finished wood signs for home.

Start by using coarse-grit sandpaper to remove any rough spots or imperfections on the surface of the wood. Then, switch to a finer-grit sandpaper to create a smooth surface. Make sure to sand in the direction of the wood grain to avoid creating scratches or marks on the surface.

Once you have sanded the wood, wipe it down with a damp cloth to remove any dust or debris. You can also use a tack cloth to ensure that the surface is completely clean before painting or staining.

By following these steps, you can prepare your wood for making a beautiful and professional-looking wooden signpost.

Creating the Signpost

If you want to make your own wooden signpost, there are a few steps you’ll need to follow. First, you’ll need to decide on the design you want to carve into the wood. Then, you’ll need to gather the necessary materials and tools. Finally, you’ll need to assemble the signpost.

Carving the Design

The first step in creating your signpost is to carve the design into the wood. You can use a variety of tools for this, including chisels, knives, and even a Dremel. If you’re not comfortable with carving, you can also use stencils or decals to create the design.

Before you start carving, make sure the wood is smooth and free of any knots or imperfections. You can use sandpaper to smooth out the surface if needed. Then, sketch out your design on the wood using a pencil. Once you’re happy with the design, start carving.

Take your time and be careful not to remove too much wood at once. You can always go back and make adjustments later. Once you’re finished carving, use sandpaper to smooth out any rough edges.

Assembling the Signpost

Once you’ve carved the design into the wood, it’s time to assemble the signpost. You’ll need a few additional materials for this, including a wooden post, screws, and a bracket.

Start by attaching the bracket to the post using screws. Then, attach the sign to the bracket using more screws. Make sure the sign is level and secure before tightening the screws.

Finally, you’ll need to install the signpost in the ground. Dig a hole deep enough for the post and fill it with concrete. Once the concrete has dried, insert the post and pack soil around it to secure it in place.

With these steps, you can create your own wooden signpost that’s perfect for your home or business.

Finishing Touches

Once you have assembled your wooden signpost, it’s time to add the finishing touches. This is where you can really make your signpost stand out and showcase your personal style. In this section, we will cover two important aspects of finishing touches: painting the signpost and applying the finish.

Painting the Signpost

Painting your signpost is a great way to add color and personality. Here are some tips to help you get started:

  • Choose the right paint: Look for a high-quality outdoor paint that is designed to withstand the elements. Acrylic and latex paints are good options.
  • Prep the surface: Make sure your signpost is clean and dry before you start painting. Sand any rough spots or imperfections to create a smooth surface.
  • Apply the paint: Use a brush or roller to apply the paint in thin, even coats. Allow each coat to dry completely before applying the next one.
  • Add details: Once the base coat is dry, you can add details like lettering or designs. Use stencils or freehand painting to create your desired look.

Applying the Finish

Adding a finish to your signpost will help protect it from the elements and give it a polished look. Here are some options to consider:

  • Stain: A wood stain will enhance the natural grain of the wood and provide a protective layer. Choose a stain that is designed for outdoor use and apply it with a brush or rag.
  • Varnish: A clear varnish will add a glossy finish to your signpost while also protecting it from moisture and UV rays. Apply the varnish with a brush or spray can.
  • Sealant: A sealant will create a waterproof barrier that will protect your signpost from rain and snow. Apply the sealant with a brush or spray can.

No matter which finish you choose, make sure to follow the manufacturer’s instructions carefully. Apply the finish in a well-ventilated area and allow it to dry completely before handling your signpost.

With these finishing touches, your wooden signpost will be ready to display proudly in your yard or garden.

Installation Tips

Choosing the Location

Before installing your wooden signpost, it’s important to carefully choose the location. Here are some tips to help you make the best decision:

  • Consider the purpose of the sign: Is it a directional sign, a warning sign, or an informational sign? The location should be easily visible and accessible to the intended audience.
  • Check local regulations: Make sure you are allowed to install a signpost in the chosen location. Some areas have specific rules and regulations regarding sign placement.
  • Avoid obstructing views: Don’t place the signpost where it may block the view of drivers or pedestrians.
  • Consider the ground conditions: Make sure the ground is level and stable enough to support the signpost.

Installing the Signpost

Once you have chosen the location, it’s time to install the signpost. Here are some tips to help you get the job done:

  • Dig the hole: Use a post hole digger to dig a hole that is deep enough to support the signpost. The hole should be at least 1/3 the length of the signpost.
  • Insert the signpost: Place the signpost in the hole and make sure it is straight and level.
  • Secure the signpost: Use concrete to secure the signpost in place. Fill the hole with concrete and allow it to dry completely.
  • Add the sign: Once the concrete is dry, attach the sign to the signpost using screws or bolts.

Remember to take your time and follow these tips to ensure your wooden signpost is installed correctly and safely.

Nikmati pengalaman bermain slot paling fun di Vio88! Temukan berbagai permainan slot yang seru dan menarik dengan peluang besar untuk meraih kemenangan. Ayo, bergabunglah sekarang dan rasakan sensasi bermain di Vio88!

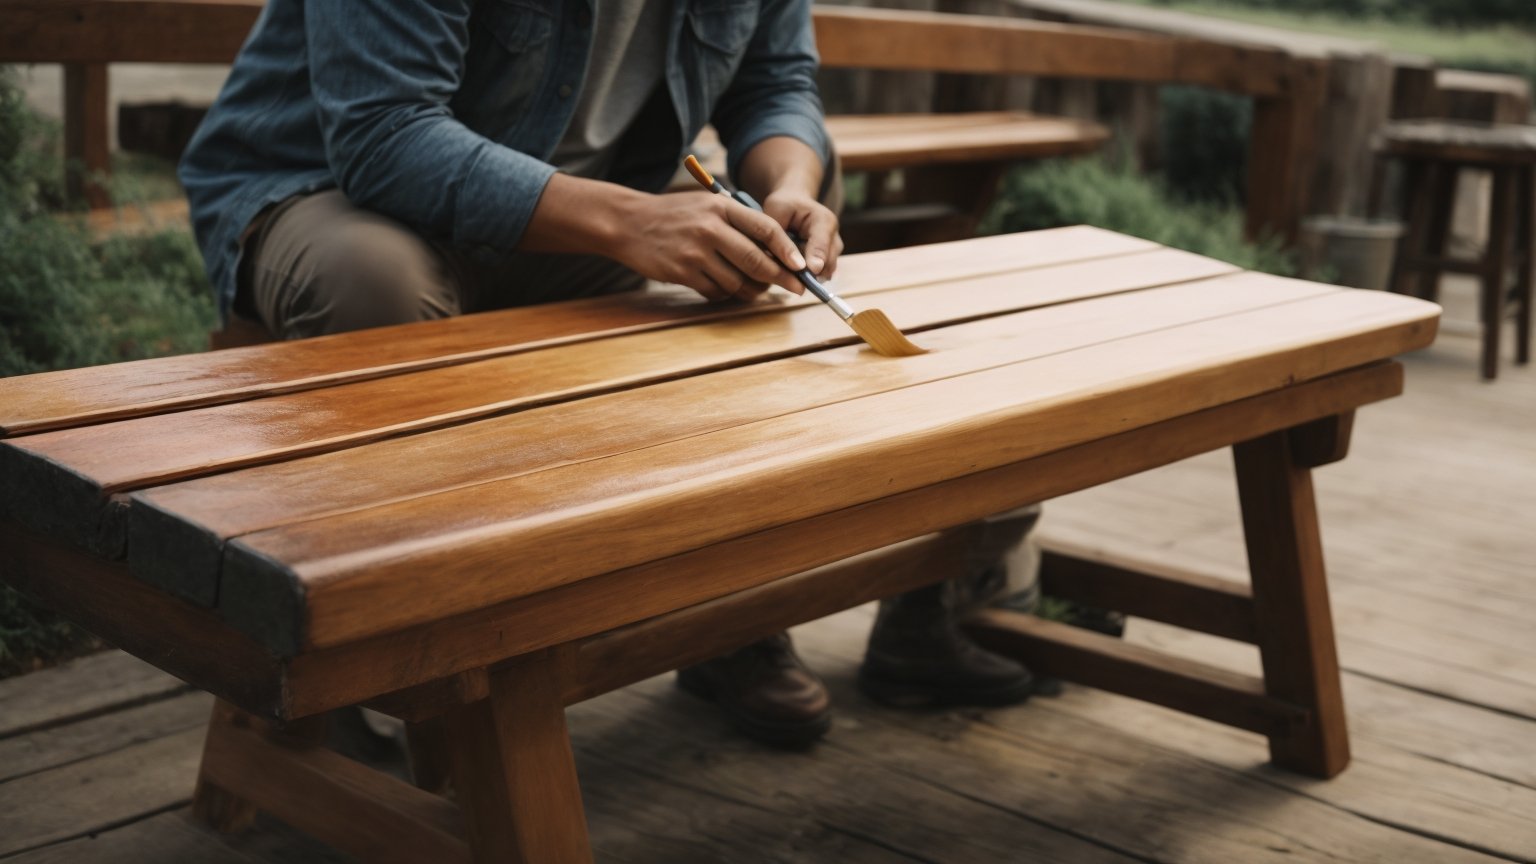
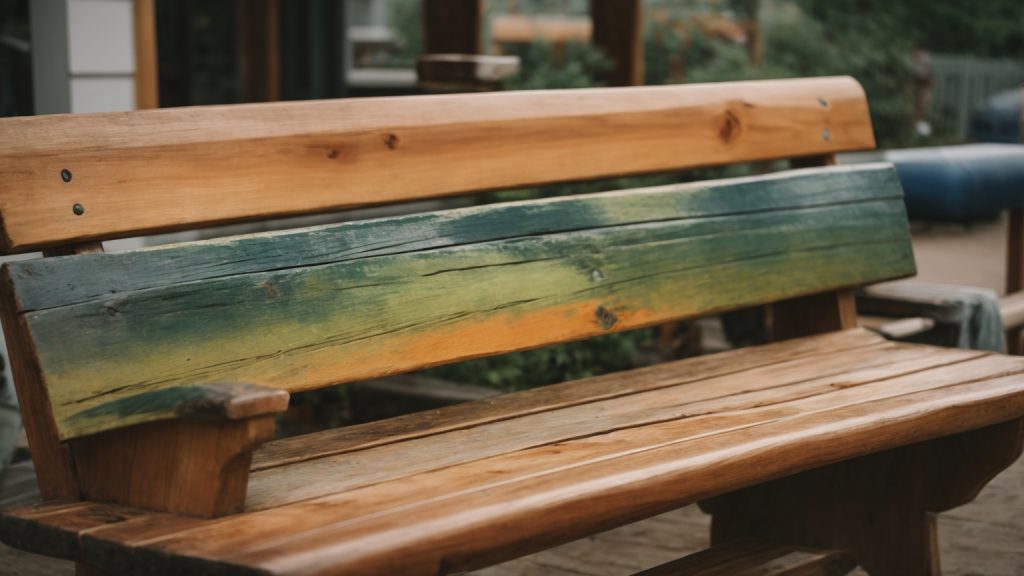
What Paint to Use on Outdoor Wooden Bench: Tips and Recommendations

What Paint to Use on Outdoor Wooden Bench: Tips and Recommendations

Are you looking to spruce up your outdoor wooden bench with a fresh coat of paint? Choosing the right type of paint for your project is crucial to ensure it lasts through various weather conditions. With so many options available, it can be overwhelming to determine the best paint to use on your outdoor wooden bench.

One of the most efficient and visually appealing ways to paint your outdoor wooden bench is by using spray paint. This type of paint provides even coverage and a glossy finish, making your bench look brand new. Additionally, spray paint is less time-consuming compared to brush painting, making it a great option for those who want to complete their project quickly. Oil-based spray paints are also a great choice as they provide a stronger finish than latex paint, making it more durable for outdoor use.

Understanding Outdoor Paints

paint-to-use-on-outdoor-wooden-bench

When it comes to painting an outdoor wooden bench, it is crucial to choose the right type of paint that will provide protection against the elements. There are several types of outdoor paints available in the market, each with its unique features and benefits. In this section, we’ll take a closer look at some of the most commonly used outdoor paints and what makes them suitable for use on wooden benches.

Latex Paint

Latex paint is a popular choice for outdoor wooden benches because it is easy to apply, dries quickly, and is resistant to cracking and peeling. This type of paint is water-based, making it easy to clean up with soap and water. Latex paint also comes in a variety of finishes, from flat to high gloss, allowing you to choose the perfect look for your bench.

Oil-based Paint

Oil-based paint is another popular choice for outdoor wooden benches because it offers excellent durability and protection against the elements. This type of paint is resistant to moisture, UV rays, and mildew, making it an excellent choice for areas with high humidity or frequent rain. However, oil-based paint takes longer to dry than latex paint and requires mineral spirits or paint thinner for cleanup.

Acrylic Paint

Acrylic paint is a versatile type of paint that can be used on a variety of surfaces, including wood, metal, and plastic. This type of paint is water-based, making it easy to clean up, and dries quickly. Acrylic paint is also resistant to fading, cracking, and peeling, making it an excellent choice for outdoor wooden benches.

Stain

Stain is another option for protecting your outdoor wooden bench. Stain allows the natural beauty of the wood to show through while providing protection against the elements. Stain comes in a variety of colors, from natural to deep brown, allowing you to choose the perfect look for your bench. However, stain does not provide as much protection as paint and may need to be reapplied more frequently.

In summary, when choosing a paint for your outdoor wooden bench, it is essential to consider the durability, protection, and ease of use of the paint. Each type of paint has its unique features and benefits, so it’s important to choose the one that best suits your needs and preferences.

Types of Paint for Outdoor Wooden Bench

When it comes to painting your outdoor wooden bench, there are a few types of paint to choose from. Each type has its own advantages and disadvantages, so it’s important to choose the right one for your specific needs. Here are some of the most common types of paint for outdoor wooden benches:

Latex Paint

Latex paint is a popular choice for outdoor wooden benches because it is easy to use and dries quickly. It is also water-resistant and can withstand harsh weather conditions. Latex paint is available in a variety of colors and finishes, so you can choose the one that best suits your style.

One of the best latex paints for outdoor wooden benches is Behr Premium Plus Exterior Paint & Primer. It offers excellent adhesion, coverage, and durability, and is available in a variety of finishes. It is also low VOC, which means it has fewer harmful chemicals than other types of paint.

Oil-Based Paint

Oil-based paint is another option for outdoor wooden benches. It is more durable than latex paint and can withstand harsh weather conditions. It also provides a smooth, glossy finish that looks great on wooden benches. However, oil-based paint takes longer to dry and requires more cleanup than latex paint.

One of the best oil-based paints for outdoor wooden benches is Rust-Oleum Marine Coatings Topside Paint. It is specifically designed for use on boats, so it can withstand even the harshest weather conditions. It provides a high-gloss finish and is available in a variety of colors.

Chalk Paint

Chalk paint is a popular choice for those who want a more rustic or shabby-chic look for their outdoor wooden bench. It is easy to use and dries quickly, and it provides a matte finish that looks great on wooden benches. However, chalk paint is not as durable as other types of paint, so it may need to be reapplied more frequently.

One of the best chalk paints for outdoor wooden benches is Annie Sloan Chalk Paint. It is water-based and non-toxic, so it is safe to use around children and pets. It is also available in a variety of colors and can be used on a variety of surfaces, including wood, metal, and concrete.

In conclusion, when choosing the right type of paint for your outdoor wooden bench, it’s important to consider your specific needs and preferences. Latex paint is a great all-around option, oil-based paint is more durable, and chalk paint is perfect for those who want a more rustic look. Whatever type of paint you choose, be sure to follow the manufacturer’s instructions for best results.

Factors to Consider When Choosing Paint

When it comes to painting an outdoor wooden bench, there are several factors you should consider to ensure that the paint you choose is durable and long-lasting. Here are some of the most important factors to keep in mind.

Weather Conditions

One of the most important factors to consider when choosing paint for your outdoor wooden bench is the weather conditions it will be exposed to. If your bench will be exposed to harsh sunlight, rain, or other weather elements, you will need to choose a paint that is specifically designed to withstand these conditions. Look for paint that is labeled as “weather-resistant” or “outdoor use.”

Durability

Another important factor to consider is the durability of the paint. You want a paint that will last for years without chipping, cracking, or fading. Look for paint that is labeled as “durable” or “long-lasting.” You may also want to consider using a paint that is specifically designed for outdoor use, as these paints tend to be more durable than indoor paints.

Color and Aesthetic Appeal

While durability and weather resistance are important factors, you also want to choose a paint that looks good and complements the overall aesthetic of your outdoor space. Consider the color of your bench and the surrounding environment when choosing a paint color. You may also want to consider using a paint that has a matte or satin finish, as these finishes tend to look more natural and blend in better with the outdoor environment.

In summary, when choosing paint for your outdoor wooden bench, it is important to consider factors such as weather conditions, durability, and color and aesthetic appeal. By taking these factors into account, you can choose a paint that will protect your bench and look great for years to come.

Preparation of Wooden Bench for Painting

preparation-of-wooden-bench-for-painting

Before you start painting your outdoor wooden bench, it is important to prepare the surface properly to ensure the paint adheres well and lasts longer. Here are the steps you should follow to prepare your wooden bench for painting.

Cleaning

The first step in preparing your wooden bench for painting is to clean it thoroughly. Use a stiff-bristled brush to remove any dirt, debris, or loose paint from the surface of the bench. You can also use a pressure washer to clean the bench, but be careful not to damage the wood.

Once you have removed all the dirt and debris, wash the bench with a mixture of warm water and mild soap. Rinse the bench with clean water and let it dry completely before moving on to the next step.

Sanding

After the bench is dry, sand the surface with medium-grit sandpaper to remove any remaining loose paint or rough spots. Sand in the direction of the wood grain to avoid damaging the surface. Once you have finished sanding, wipe the bench with a clean cloth to remove any dust or debris.

For a smoother finish, you can also sand the bench with fine-grit sandpaper. This will help to create a smooth surface and ensure the paint adheres well.

Priming

Before you start painting, it is important to prime the surface of the bench. Priming will help the paint adhere better and last longer. Apply a coat of primer to the bench using a brush or roller, making sure to cover the entire surface evenly.

Allow the primer to dry completely before applying the paint. The drying time will depend on the type of primer you use, so be sure to read the manufacturer’s instructions carefully.

By following these simple steps, you can prepare your wooden bench for painting and ensure a smooth, long-lasting finish.

Painting Techniques for Outdoor Wooden Bench

When it comes to painting an outdoor wooden bench, there are several techniques to choose from. The most common methods are brushing, spraying, and rolling. Each technique has its own advantages and disadvantages, so it’s important to choose the one that works best for you.

Brushing

Brushing is the most traditional method of painting and is great for small projects. It’s a good option if you want to achieve a more textured finish. However, it can be time-consuming and may require multiple coats to achieve the desired coverage. If you choose to use a brush, make sure to choose one that is appropriate for the type of paint you are using.

Spraying

Spraying is a popular technique for painting outdoor wooden benches because it is quick and easy. It is also great for achieving a smooth finish. However, it can be messy and requires more preparation than other methods. You will need to cover the surrounding area to prevent overspray. Additionally, you will need to use a respirator mask to protect yourself from inhaling the fumes.

Rolling

Rolling is a good option if you want to achieve a smooth finish without the mess of spraying. It is also less time-consuming than brushing. However, it can be difficult to get into tight spaces with a roller. Additionally, you will need to choose the right type of roller for the type of paint you are using.

No matter which technique you choose, make sure to properly prepare the surface before painting. This includes cleaning and sanding the bench to ensure that the paint adheres properly. Additionally, make sure to choose a high-quality outdoor paint that is specifically designed for wooden surfaces. This will ensure that your bench looks great and lasts for years to come.

Maintenance Tips for Painted Outdoor Wooden Bench

If you want your painted outdoor wooden bench to last longer and look good, you need to take good care of it. Here are some maintenance tips to help you keep your bench in good condition.

Routine Cleaning

Cleaning your painted outdoor wooden bench regularly is essential to keep it looking good. You can use a soft-bristled brush or a sponge to remove dirt, dust, and debris from the surface of your bench. You can also use a mild detergent and warm water to clean your bench.

Avoid using harsh chemicals or abrasive cleaners as they can damage the paint or the wood. After cleaning, rinse your bench thoroughly with clean water and let it dry completely before using it.

Touch-Ups

Over time, the paint on your outdoor wooden bench may start to fade or chip. To keep your bench looking good, you may need to do some touch-ups. You can use a small brush and some touch-up paint to fix any chips or scratches on your bench.

Before you start touching up your bench, make sure it is clean and dry. Apply the touch-up paint carefully and let it dry completely before using your bench.

Re-Painting

If the paint on your outdoor wooden bench is severely faded or damaged, you may need to repaint it. Repainting your bench can give it a fresh new look and protect it from the elements.

Before you start repainting your bench, you need to remove the old paint. You can use a paint stripper or sandpaper to remove the old paint. Once you have removed the old paint, clean your bench thoroughly and let it dry completely.

Apply a primer to your bench before painting it. The primer will help the paint adhere better and last longer. Once the primer is dry, you can paint your bench with a high-quality outdoor paint.

In conclusion, taking good care of your painted outdoor wooden bench is essential to keep it looking good and lasting longer. Regular cleaning, touch-ups, and repainting can help you maintain your bench and protect it from the elements.

How to Make Wooden Adirondack Chairs: A Beginner's Guide

Looking to add some comfortable and stylish seating to your outdoor space? Why not try building your own wooden Adirondack chairs? These classic chairs are perfect for relaxing in the sun, enjoying a cold drink, or simply taking in the scenery around you. Plus, building them yourself can be a fun and rewarding DIY project for any skill level.

To get started, you’ll need some basic woodworking tools and materials like wood screws, wood glue, and sandpaper. There are a variety of plans and templates available online to help guide you through the process, or you can even create your own design if you’re feeling adventurous. Whether you prefer a traditional look or want to add your own personal flair, making your own Adirondack chairs is a great way to customize your outdoor space and create a comfortable place to unwind.

Understanding Adirondack Chairs

If you’re looking for a comfortable and stylish outdoor chair, the Adirondack chair is a great choice. With its slanted seat and backrest, wide armrests, and sturdy construction, it’s perfect for relaxing on your patio or in your garden.

Here are a few things to keep in mind when building your own Adirondack chair:

Materials

Adirondack chairs are typically made of wood, although you can also find plastic and metal versions. When choosing wood, look for a durable and weather-resistant species like cedar, teak, or redwood. Avoid softwoods like pine, which can warp and rot over time.

Design

Adirondack chairs have a distinctive design that sets them apart from other outdoor chairs. They feature a slanted seat and backrest, wide armrests, and a low profile that makes them perfect for lounging. Some chairs also have a curved backrest for added comfort.

Assembly

Building an Adirondack chair requires some woodworking skills, but it’s a relatively simple project that can be completed in a few days. You’ll need basic tools like a saw, drill, and sander, as well as some woodworking clamps and glue. Follow a set of plans carefully to ensure that your chair is sturdy and comfortable.

Maintenance

To keep your Adirondack chair looking great, you’ll need to take care of it properly. Regularly clean it with soap and water, and apply a protective finish to prevent weather damage. If you live in a damp or humid climate, you may need to store your chair indoors during the winter months.

Materials Needed

When it comes to building wooden Adirondack chairs, you’ll need a few materials to get started. Here are the two main sub-sections to consider:

Choosing the Wood

The first step is to choose the wood you’ll use for your Adirondack chair. You want to select a durable wood that can withstand outdoor elements. Cedar, cypress, and redwood are popular choices for Adirondack chairs because of their durability and resistance to rot and insect damage. Pine and fir are also options, but they may not last as long as the others.

When selecting your wood, make sure it is straight, free of knots, and has a smooth surface. You’ll also want to choose wood that is the right thickness for your project. Typically, 1-inch thick boards are used for the seat, back, and arms, while 2-inch thick boards are used for the legs.

Gathering Tools and Hardware

In addition to the wood, you’ll need a few tools and pieces of hardware to build your Adirondack chair. Here’s a list of what you’ll need:

  • Saw (circular or jigsaw)
  • Drill
  • Drill bits
  • Screws (1 1/4 inch and 2 inch)
  • Wood glue
  • Clamps
  • Sandpaper (80-grit and 120-grit)
  • Paint or stain (optional)

Make sure you have all of these tools and hardware before you start building your chair. It’s also a good idea to have a workbench or table to work on and a set of safety glasses to protect your eyes while working.

With these materials and tools, you’ll be well on your way to building your own Adirondack chair.

Preparation

Before you start building your Adirondack chair, there are a few things you need to do to ensure that the process goes smoothly. This section will cover the two main aspects of preparation: design and planning, and cutting the wood.

Design and Planning

The first step in building your Adirondack chair is to decide on a design. There are many different styles to choose from, so take some time to research and find one that suits your taste. Once you have a design in mind, it’s a good idea to create a plan or blueprint. This will help you stay organized and ensure that you have all of the necessary materials.

When creating your plan, be sure to include the following:

  • Dimensions: Determine the size of your chair based on your needs and the available space.
  • Materials: Decide on the type of wood you want to use and how much you will need.
  • Tools: Make a list of the tools you will need, such as a saw, drill, and sander.
  • Assembly: Plan out the steps you will need to take to assemble the chair.

Cutting the Wood

Once you have your design and plan in place, it’s time to start cutting the wood. This is a crucial step, as it will determine the overall quality and appearance of your chair.

Before you begin cutting, make sure you have all of the necessary tools and safety equipment, such as gloves and safety goggles. It’s also a good idea to mark your wood pieces to ensure accuracy.

When cutting the wood, be sure to:

  • Measure twice, cut once: Take accurate measurements and double-check them before making any cuts.
  • Use a saw that is appropriate for the job: A jigsaw is ideal for cutting curves, while a circular saw is better for straight cuts.
  • Cut slowly and carefully: Rushing can lead to mistakes and uneven cuts.

By taking the time to properly design and plan your chair, as well as carefully cutting the wood, you will be well on your way to creating a beautiful and functional Adirondack chair.

Building the Chair

Building an Adirondack chair can be a fun and rewarding project that will provide you with a comfortable and stylish outdoor seating option. In this section, we’ll go over the steps involved in building the chair, including assembling the base, creating the seat, and building the backrest.

Assembling the Base

The base of the Adirondack chair consists of two legs and two armrests that are connected by a series of horizontal slats. To assemble the base, follow these steps:

  1. Cut the legs and armrests to the desired length and shape.
  2. Cut the horizontal slats to the appropriate length and shape.
  3. Attach the slats to the legs and armrests using screws or nails.
  4. Use a level to ensure that the base is even and stable.

Creating the Seat

The seat of the Adirondack chair is made up of several slats that are attached to the base. To create the seat, follow these steps:

  1. Cut the seat slats to the appropriate length and shape.
  2. Attach the slats to the base using screws or nails.
  3. Use a level to ensure that the seat is even and stable.
  4. Sand the seat to remove any rough edges or splinters.

Building the Backrest

The backrest of the Adirondack chair is made up of several slats that are angled to provide a comfortable sitting position. To build the backrest, follow these steps:

  1. Cut the backrest slats to the appropriate length and shape.
  2. Angle the top of each slat to provide a comfortable sitting position.
  3. Attach the slats to the seat using screws or nails.
  4. Use a level to ensure that the backrest is even and stable.
  5. Sand the backrest to remove any rough edges or splinters.

By following these steps, you can build your own Adirondack chair that will provide a comfortable and stylish seating option for your outdoor space.

Finishing Touches

After you’ve completed building your Adirondack chair, it’s time to add the finishing touches to make it look great and protect it from the elements. In this section, we’ll cover sanding and smoothing, as well as painting or staining options.

Sanding and Smoothing

Before you apply any finish, it’s important to sand and smooth your chair to ensure a clean and even surface. Start with a coarse sandpaper (around 80 grit) to remove any rough spots or tool marks. Then, gradually work your way up to a finer grit (around 220) to achieve a smooth finish. Be sure to sand in the direction of the wood grain to avoid scratches.

Once you’ve finished sanding, use a damp cloth to wipe down the chair and remove any dust. You may also want to use a tack cloth to pick up any remaining particles.

Painting or Staining

Now that your chair is smooth and clean, you can choose to paint or stain it to achieve your desired look. Here are some options to consider:

  • Paint: If you want a bold, colorful look, paint is a great option. Choose a high-quality outdoor paint and apply it in thin, even coats. Be sure to let each coat dry completely before applying the next.

  • Stain: If you prefer a more natural look, stain is a great choice. Choose a stain that is specifically designed for outdoor use and apply it with a brush or rag. Be sure to follow the manufacturer’s instructions and apply multiple coats as needed.

  • Sealant: No matter which option you choose, it’s important to apply a sealant to protect your chair from the elements. Choose a high-quality outdoor sealant and apply it in thin, even coats. Be sure to let each coat dry completely before applying the next.

With these finishing touches, your Adirondack chair will look great and be ready to withstand the elements for years to come.

Maintenance and Care

Congratulations on making your own Adirondack chairs! Now that you have them, it’s important to take care of them so they can last for years to come. Here are some tips on how to maintain and care for your wooden Adirondack chairs:

Cleaning

To keep your Adirondack chairs looking their best, it’s important to clean them regularly. Use a soft cloth, warm water, and a mild detergent like dish soap. Once you’re done washing it with soap, give it a thorough rinse to prevent any residue from lingering on the wood.

If your chairs are stained or have accumulated dirt or grime, you can use a wood cleaner specifically designed for outdoor furniture. Be sure to follow the manufacturer’s instructions and test the cleaner on a small, inconspicuous area first.

Protecting

Protecting your Adirondack chairs from the elements is key to their longevity. If you live in an area with harsh weather conditions, consider storing your chairs indoors during the off-season. If that’s not an option, invest in some high-quality furniture covers to protect them from rain, snow, and UV rays.

If you prefer the natural look of your wooden Adirondack chairs, you can apply a clear sealant or wood preservative to protect them from moisture and UV rays. Be sure to choose a product that’s specifically designed for outdoor use and follow the manufacturer’s instructions.

Maintenance

Regular maintenance is important to keep your Adirondack chairs in good condition. Here are some tips on how to maintain your chairs:

  • Check for loose screws or bolts and tighten them as needed.
  • Sand down any rough spots or splinters to prevent injury.
  • If your chairs are stained, consider reapplying the stain every 1-7 years depending on the quality of the stain used, the number of coats applied, and the type of application.
  • If your chairs are painted, consider repainting them every 3-5 years to keep them looking fresh.

With proper maintenance and care, your Adirondack chairs can last for many years and provide you with a comfortable and stylish place to relax outdoors.