Tag Archives: wood cleaner specifically designed

pre-cleaning-steps

How to Clean Wooden Blinds: A Friendly Guide

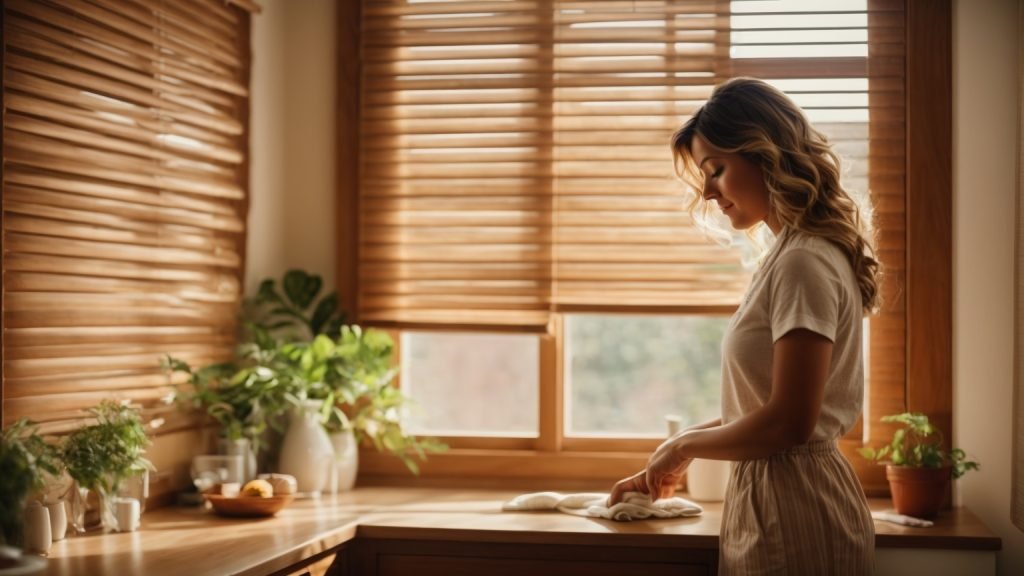
Cleaning wooden blinds can be a daunting task, but it doesn’t have to be. With the right tools and techniques, you can have your blinds looking like new in no time. Whether you’re dealing with dust, grime, or stubborn stains, there are a variety of methods you can use to get your wooden blinds clean and looking great.

One of the most important things to keep in mind when cleaning wooden blinds is to avoid using harsh chemicals or abrasive materials that can damage the wood. Instead, opt for gentle cleaners and soft cloths or brushes that won’t scratch or scrape the surface of the blinds. Additionally, it’s important to take your time and be gentle when cleaning your blinds to avoid accidentally bending or breaking any of the slats.

There are a variety of methods you can use to clean wooden blinds, from dusting and vacuuming to more intensive deep cleaning techniques. Depending on the level of dirt and grime on your blinds, you may need to use a combination of methods to get them looking their best. So, let’s dive into some of the best ways to clean wooden blinds and get your windows looking sparkling clean.

Understanding the Type of Wood

how-to-clean-wooden-blinds

When it comes to cleaning wooden blinds, it’s important to understand the type of wood they’re made of. Different types of wood require different cleaning methods to avoid damaging the material.

Hardwood vs. Softwood

Wooden blinds are typically made from either hardwood or softwood. Hardwood blinds are made from dense wood such as oak, cherry, or maple, while softwood blinds are made from lighter woods such as pine or cedar.

Stained vs. Painted

Another factor to consider is whether your wooden blinds are stained or painted. Stained blinds have a natural wood finish that allows the grain to show through, while painted blinds have a solid color finish.

Cleaning Tips

Here are some general tips for cleaning wooden blinds:

  • Use a soft, clean cloth to dust your blinds regularly to prevent buildup.
  • Avoid using water or harsh chemicals on your blinds, as this can damage the wood.
  • For stained blinds, use a wood cleaner specifically designed for the type of wood your blinds are made from.
  • For painted blinds, use a mild soap and water solution to gently clean the surface.
  • Always dry your blinds thoroughly after cleaning to prevent warping or damage.

By understanding the type of wood your blinds are made of and using the proper cleaning methods, you can keep them looking great for years to come.

Choosing the Right Cleaning Supplies

Cleaning your wooden blinds can be a daunting task, but with the right cleaning supplies, it can be a breeze. Here are some tips to help you choose the right cleaning supplies for your wooden blinds.

Microfiber Cloth

A microfiber cloth is an excellent tool for cleaning wooden blinds. It is gentle on the wood and won’t scratch or damage the surface. Plus, it is reusable and can be washed and used again and again. When cleaning your wooden blinds, be sure to use a clean microfiber cloth to avoid spreading dust and dirt around.

Cleaning Solution

When it comes to choosing a cleaning solution, it’s essential to select one that is safe for your wooden blinds. Avoid using harsh chemicals or abrasive cleaners that can damage the wood. Instead, opt for a mild, non-acidic dish soap mixed with warm water. You can also use a specialized wood cleaner designed specifically for wooden blinds.

Vacuum Cleaner

A vacuum cleaner with an upholstery brush attachment can be a handy tool for cleaning wooden blinds. It can quickly remove dust and dirt from the surface of the blinds, making it easier to clean with a microfiber cloth or cleaning solution. Be sure to use the lowest setting on your vacuum cleaner to avoid damaging the wood.

Stepladder

A sturdy stepladder is necessary when cleaning wooden blinds that are out of reach. It’s essential to have a stable and secure platform to stand on to avoid accidents and injuries. When using a stepladder, be sure to follow safety guidelines and never stand on the top rung.

By choosing the right cleaning supplies, you can keep your wooden blinds looking clean and beautiful for years to come.

Pre-Cleaning Steps

pre-cleaning-steps

Before you start cleaning your wooden blinds, it’s important to take some pre-cleaning steps to ensure that the cleaning process goes smoothly and effectively. Here are some steps you should take:

Dusting the Blinds

The first step in cleaning your wooden blinds is to dust them thoroughly. Use a soft-bristled brush or a microfiber cloth to gently sweep the dust off each slat. Make sure to dust both sides of the blinds, as well as the cords and the headrail.

If your blinds are particularly dusty, you can use a vacuum cleaner with a soft brush attachment to remove the dust. Simply run the brush attachment over each slat, making sure to get into all the crevices and corners.

Removing Stains

If your wooden blinds have stains or spots on them, you’ll need to remove them before you can start cleaning the blinds. Here are some tips for removing common stains:

  • Water stains: If your blinds have water stains, you can remove them by rubbing the affected area with a soft cloth dipped in a mixture of equal parts white vinegar and water. Make sure to dry the area thoroughly afterwards.
  • Grease stains: To remove grease stains, mix a small amount of dish soap with warm water and use a soft cloth to gently scrub the affected area. Rinse the area with clean water and dry thoroughly.
  • Ink stains: Ink stains can be difficult to remove, but you can try using rubbing alcohol or nail polish remover to dissolve the ink. Apply a small amount of the solution to a clean cloth and gently rub the stain until it disappears.

By taking these pre-cleaning steps, you’ll be able to ensure that your wooden blinds are clean and looking their best.

Cleaning Process

Cleaning your wooden blinds is an essential task to keep them looking new and to prevent dust and dirt from building up. There are two primary methods for cleaning wooden blinds: wet cleaning and dry cleaning.

Wet Cleaning Method

To wet clean your wooden blinds, you will need a soft cloth, mild detergent or vinegar, and warm water. Follow these steps:

  1. Begin by closing the blinds and dusting them with a feather duster or microfiber cloth.
  2. Fill a bowl or bucket with warm water and add a small amount of mild detergent or vinegar.
  3. Dip the cloth into the solution and wring it out thoroughly.
  4. Starting from the top, wipe each slat with the damp cloth, using gentle pressure. Be careful not to scrub too hard, as this can damage the wood.
  5. Once you have cleaned all the slats, rinse the cloth in clean water and wring it out.
  6. Wipe each slat again with the damp cloth to remove any remaining soap residue.
  7. Finally, dry the blinds with a clean, dry cloth.

Dry Cleaning Method

To dry clean your wooden blinds, you can use a microfiber cloth or a feather duster. Follow these steps:

  1. Close the blinds and dust them with a microfiber cloth or a feather duster, starting from the top.
  2. If there are any stubborn spots or stains, use a soft-bristled brush to gently scrub them away.
  3. Once you have dusted all the slats, use a clean, dry cloth to wipe them down.

Remember to clean your wooden blinds regularly to keep them looking their best. Wet cleaning is recommended once or twice a year, while dry cleaning can be done as often as needed.

Post-Cleaning Care

After cleaning your wooden blinds, it is essential to take proper care of them to ensure their longevity. Here are some post-cleaning care tips that you can follow to keep your wooden blinds looking great for years to come.

Drying the Blinds

Once you have finished cleaning your wooden blinds, it is crucial to dry them thoroughly to prevent any water damage. Use a clean, dry cloth to wipe the blinds down, removing any excess water. Then, leave them open to air dry completely before closing them again.

Regular Maintenance Tips

To keep your wooden blinds looking their best, it is essential to perform regular maintenance. Here are some tips to help you maintain your wooden blinds:

  • Dust your blinds regularly using a soft microfiber cloth or feather duster. This will help prevent dust buildup, which can cause discoloration and damage to the wood.
  • Avoid using harsh chemicals or abrasive cleaners on your wooden blinds. Instead, use a mild soap and water solution to clean them.
  • If you live in a dry climate, use a wood conditioner to keep your blinds moisturized and prevent cracking or warping.
  • If you have pets, vacuum your blinds regularly with a soft upholstery brush attachment to remove any pet hair or dander.

By following these post-cleaning care tips and regular maintenance tips, you can keep your wooden blinds looking beautiful and extend their lifespan.

How to Do Wooden Flooring: A Beginner's Guide

If you’re looking to add a touch of warmth and elegance to your home, installing hardwood flooring is a great way to do it. Solid hardwood flooring is a classic choice that never goes out of style. Not only does it add value to your home, but it’s also durable and easy to clean. If you’re up for a DIY project, you can install hardwood flooring yourself and save money on installation costs.

Before you begin, it’s important to choose the right type of wood flooring for your home. Solid hardwood flooring is typically nailed down during installation, while engineered flooring can be clicked together or glued down. You’ll also need to consider the type of subfloor you have and your budget. Once you’ve chosen your flooring and gathered your tools, you’re ready to get started.

Installing hardwood flooring can seem daunting, but with the right tools and a little bit of patience, it’s a project that you can tackle yourself. In this article, we’ll walk you through the steps of installing hardwood flooring, from preparing your subfloor to laying the last plank. By the end of this guide, you’ll have a beautiful new hardwood floor that you can be proud of.

Understanding Wooden Flooring

If you’re planning to install wooden flooring in your home, it’s important to understand the different types of wooden flooring available and their benefits. This will help you make an informed decision when choosing the right flooring for your home.

Types of Wooden Flooring

There are two main types of wooden flooring: solid wood flooring and engineered wood flooring.

Solid Wood Flooring: This type of flooring is made from a single piece of wood and is available in various thicknesses and widths. Solid wood flooring is more expensive than engineered wood flooring, but it’s also more durable and can be sanded and refinished multiple times.

Engineered Wood Flooring: This type of flooring is made from layers of wood that are glued together. The top layer is made from real wood, while the bottom layers are made from plywood or high-density fiberboard (HDF). Engineered wood flooring is less expensive than solid wood flooring, but it’s also less durable and can only be sanded and refinished a few times.

Benefits of Wooden Flooring

Wooden flooring offers several benefits over other types of flooring, including:

  • Durability: Wooden flooring is durable and can last for decades if properly maintained.

  • Aesthetics: Wooden flooring adds warmth and character to any room and comes in a variety of colors and finishes.

  • Easy to Clean: Wooden flooring is easy to clean and maintain, requiring only regular sweeping and occasional mopping.

  • Hypoallergenic: Wooden flooring doesn’t trap dust, pollen, or other allergens like carpet does, making it a great choice for people with allergies.

  • Increases Home Value: Installing wooden flooring can increase the value of your home and make it more attractive to potential buyers.

Overall, wooden flooring is a great investment for any home. Whether you choose solid wood or engineered wood flooring, you can enjoy the many benefits of this beautiful and durable flooring option.

Materials Needed for Wooden Flooring

Before you start installing your hardwood floor, it is important to make sure you have all the necessary materials. Here are the materials you will need:

1. Hardwood Flooring

The first and most obvious material you will need is the hardwood flooring itself. You can choose from a variety of species, colors, and finishes. Make sure to purchase enough flooring to cover the square footage of your room, plus an additional 10-15% for cuts and waste.

2. Underlayment

Underlayment is a thin layer of material that is installed between the subfloor and the hardwood flooring. It helps to reduce noise, absorb moisture, and provide a smooth surface for the flooring to rest on. There are several types of underlayment available, including foam, cork, and felt.

3. Moisture Barrier

A moisture barrier is a thin layer of plastic that is installed over the subfloor to prevent moisture from seeping up into the hardwood flooring. This is especially important if you are installing the flooring over a concrete slab.

4. Nails or Staples

You will need nails or staples to attach the hardwood flooring to the subfloor. The type of fastener you use will depend on the type of flooring you have and the method of installation.

5. Saw

You will need a saw to cut the hardwood flooring to fit around obstacles such as doorways and heating vents. A table saw or miter saw is recommended for this task.

6. Hammer or Flooring Nailer

You will need a hammer or flooring nailer to drive the nails or staples into the hardwood flooring. A flooring nailer is recommended for a more professional and efficient installation.

7. Tape Measure

You will need a tape measure to measure the square footage of your room and to make accurate cuts in the hardwood flooring.

8. Level

A level is important to ensure that your hardwood flooring is installed evenly and without any dips or bumps.

9. Safety Equipment

Lastly, it is important to wear safety equipment such as eye protection and ear plugs when using power tools and installing hardwood flooring.

Preparation for Wooden Flooring

Before you start installing your wooden floor, there are a few essential steps you need to take to ensure a successful installation. In this section, we will cover the two crucial steps of preparing your subfloor and acclimating your wood.

Inspecting the Subfloor

Inspecting your subfloor is an essential step before installing your wooden floor. You need to ensure that your subfloor is clean, dry, and level. Any unevenness in your subfloor can cause problems with the installation and lead to an uneven floor.

If your subfloor is not level, you may need to use a self-leveling compound to even it out. You can also use a moisture meter to check the moisture levels in your subfloor. If the moisture levels are too high, you need to address the issue before proceeding with the installation. High moisture levels can cause the wooden floor to warp, buckle, or cup.

Acclimating the Wood

Acclimating your wood is a crucial step before installing your wooden floor. Wood is a natural material that can expand or contract depending on the humidity and temperature of the environment. Acclimating your wood allows it to adjust to the conditions of your home, ensuring a stable and long-lasting installation.

To acclimate your wood, you need to leave it in the room where it will be installed for at least 72 hours before installation. This allows the wood to adjust to the temperature and humidity of the environment. Make sure to keep the wood at least four inches off the ground and away from any direct sunlight or heating vents.

In conclusion, inspecting your subfloor and acclimating your wood is a crucial step in preparing for your wooden floor installation. These steps ensure that your wooden floor is installed correctly and will last for years to come.

Installing Wooden Flooring

If you’re looking to give your home a facelift, installing wooden flooring is a great way to do it. Not only does it add value to your home, but it also adds warmth and beauty. Here’s how to install wooden flooring in your home.

Laying the Underlayment

Before you start installing the wooden planks, you need to lay down the underlayment. The underlayment is a layer of material that goes between the subfloor and the wooden planks. It helps to cushion the flooring, reduce noise, and prevent moisture from seeping in.

To lay the underlayment, follow these steps:

  1. Clean the subfloor: Make sure the subfloor is clean and free of debris. Sweep or vacuum it thoroughly.
  2. Roll out the underlayment: Roll out the underlayment across the entire floor, making sure it’s flat and smooth.
  3. Cut the underlayment: Cut the underlayment to fit the room, leaving a 1/4 inch gap around the edges.
  4. Tape the seams: Tape the seams of the underlayment together using a moisture-resistant tape.

Installing the Wooden Planks

Now that you’ve laid down the underlayment, it’s time to install the wooden planks. Here’s how to do it:

  1. Measure the room: Measure the length and width of the room to determine how many planks you’ll need. Add 10% to the total to account for waste.
  2. Acclimate the planks: Allow the wooden planks to acclimate to the room for at least 48 hours before installation.
  3. Start in the corner: Start in the corner of the room and work your way out.
  4. Lay the planks: Lay the planks down, making sure they fit snugly together. Use a rubber mallet to tap them into place.
  5. Cut the planks: Cut the planks to fit around obstacles like door frames and vents.
  6. Stagger the planks: Stagger the planks so that the ends of each plank are not lined up with the ends of the adjacent planks.
  7. Nail the planks: Nail the planks down using a nail gun, making sure to nail them into the subfloor and not the underlayment.
  8. Sand and finish: Sand the floor to remove any rough spots and finish it with a sealant or stain.

That’s it! With a little bit of time and effort, you can install wooden flooring in your home and enjoy the beauty and warmth it brings.

Finishing Touches

Once you have installed your wooden floor, it’s time to give it the finishing touches. This step is important as it will ensure that your floor looks beautiful and lasts for a long time. There are two main aspects to finishing touches: sanding and finishing, and caring for your wooden floor.

Sanding and Finishing

The first step in sanding and finishing your wooden floor is to ensure that it is clean and free of any debris. Use a broom or vacuum cleaner to get rid of any dust or dirt. Once your floor is clean, you can start sanding it. Sanding helps to remove any rough spots or imperfections on the surface of the wood.

When sanding your wooden floor, it’s important to use the right equipment. A drum sander is the most efficient tool for sanding large areas of wood. However, if you’re working on a smaller area, you can use a handheld sander. After sanding, you can apply a finish to your wooden floor. There are several different types of finishes to choose from, including oil-based, water-based, and wax finishes.

Caring for Your Wooden Floor

Once you have finished sanding and applying a finish to your wooden floor, it’s important to take care of it properly to ensure that it lasts for a long time. Here are some tips for caring for your wooden floor:

  • Use a soft-bristled broom or vacuum cleaner to remove any dirt or debris from your floor.
  • Clean up any spills or stains immediately to prevent them from damaging the wood.
  • Use a wood cleaner specifically designed for wooden floors to clean your floor. Avoid using harsh chemicals or abrasive cleaners as they can damage the finish on your floor.
  • Place rugs or mats in high traffic areas to protect your wooden floor from wear and tear.
  • Avoid wearing high heels or shoes with spikes on your wooden floor as they can scratch the surface of the wood.

By following these tips, you can ensure that your wooden floor looks beautiful and lasts for a long time.

How to Make Wooden Adirondack Chairs: A Beginner's Guide

Looking to add some comfortable and stylish seating to your outdoor space? Why not try building your own wooden Adirondack chairs? These classic chairs are perfect for relaxing in the sun, enjoying a cold drink, or simply taking in the scenery around you. Plus, building them yourself can be a fun and rewarding DIY project for any skill level.

To get started, you’ll need some basic woodworking tools and materials like wood screws, wood glue, and sandpaper. There are a variety of plans and templates available online to help guide you through the process, or you can even create your own design if you’re feeling adventurous. Whether you prefer a traditional look or want to add your own personal flair, making your own Adirondack chairs is a great way to customize your outdoor space and create a comfortable place to unwind.

Understanding Adirondack Chairs

If you’re looking for a comfortable and stylish outdoor chair, the Adirondack chair is a great choice. With its slanted seat and backrest, wide armrests, and sturdy construction, it’s perfect for relaxing on your patio or in your garden.

Here are a few things to keep in mind when building your own Adirondack chair:

Materials

Adirondack chairs are typically made of wood, although you can also find plastic and metal versions. When choosing wood, look for a durable and weather-resistant species like cedar, teak, or redwood. Avoid softwoods like pine, which can warp and rot over time.

Design

Adirondack chairs have a distinctive design that sets them apart from other outdoor chairs. They feature a slanted seat and backrest, wide armrests, and a low profile that makes them perfect for lounging. Some chairs also have a curved backrest for added comfort.

Assembly

Building an Adirondack chair requires some woodworking skills, but it’s a relatively simple project that can be completed in a few days. You’ll need basic tools like a saw, drill, and sander, as well as some woodworking clamps and glue. Follow a set of plans carefully to ensure that your chair is sturdy and comfortable.

Maintenance

To keep your Adirondack chair looking great, you’ll need to take care of it properly. Regularly clean it with soap and water, and apply a protective finish to prevent weather damage. If you live in a damp or humid climate, you may need to store your chair indoors during the winter months.

Materials Needed

When it comes to building wooden Adirondack chairs, you’ll need a few materials to get started. Here are the two main sub-sections to consider:

Choosing the Wood

The first step is to choose the wood you’ll use for your Adirondack chair. You want to select a durable wood that can withstand outdoor elements. Cedar, cypress, and redwood are popular choices for Adirondack chairs because of their durability and resistance to rot and insect damage. Pine and fir are also options, but they may not last as long as the others.

When selecting your wood, make sure it is straight, free of knots, and has a smooth surface. You’ll also want to choose wood that is the right thickness for your project. Typically, 1-inch thick boards are used for the seat, back, and arms, while 2-inch thick boards are used for the legs.

Gathering Tools and Hardware

In addition to the wood, you’ll need a few tools and pieces of hardware to build your Adirondack chair. Here’s a list of what you’ll need:

  • Saw (circular or jigsaw)
  • Drill
  • Drill bits
  • Screws (1 1/4 inch and 2 inch)
  • Wood glue
  • Clamps
  • Sandpaper (80-grit and 120-grit)
  • Paint or stain (optional)

Make sure you have all of these tools and hardware before you start building your chair. It’s also a good idea to have a workbench or table to work on and a set of safety glasses to protect your eyes while working.

With these materials and tools, you’ll be well on your way to building your own Adirondack chair.

Preparation

Before you start building your Adirondack chair, there are a few things you need to do to ensure that the process goes smoothly. This section will cover the two main aspects of preparation: design and planning, and cutting the wood.

Design and Planning

The first step in building your Adirondack chair is to decide on a design. There are many different styles to choose from, so take some time to research and find one that suits your taste. Once you have a design in mind, it’s a good idea to create a plan or blueprint. This will help you stay organized and ensure that you have all of the necessary materials.

When creating your plan, be sure to include the following:

  • Dimensions: Determine the size of your chair based on your needs and the available space.
  • Materials: Decide on the type of wood you want to use and how much you will need.
  • Tools: Make a list of the tools you will need, such as a saw, drill, and sander.
  • Assembly: Plan out the steps you will need to take to assemble the chair.

Cutting the Wood

Once you have your design and plan in place, it’s time to start cutting the wood. This is a crucial step, as it will determine the overall quality and appearance of your chair.

Before you begin cutting, make sure you have all of the necessary tools and safety equipment, such as gloves and safety goggles. It’s also a good idea to mark your wood pieces to ensure accuracy.

When cutting the wood, be sure to:

  • Measure twice, cut once: Take accurate measurements and double-check them before making any cuts.
  • Use a saw that is appropriate for the job: A jigsaw is ideal for cutting curves, while a circular saw is better for straight cuts.
  • Cut slowly and carefully: Rushing can lead to mistakes and uneven cuts.

By taking the time to properly design and plan your chair, as well as carefully cutting the wood, you will be well on your way to creating a beautiful and functional Adirondack chair.

Building the Chair

Building an Adirondack chair can be a fun and rewarding project that will provide you with a comfortable and stylish outdoor seating option. In this section, we’ll go over the steps involved in building the chair, including assembling the base, creating the seat, and building the backrest.

Assembling the Base

The base of the Adirondack chair consists of two legs and two armrests that are connected by a series of horizontal slats. To assemble the base, follow these steps:

  1. Cut the legs and armrests to the desired length and shape.
  2. Cut the horizontal slats to the appropriate length and shape.
  3. Attach the slats to the legs and armrests using screws or nails.
  4. Use a level to ensure that the base is even and stable.

Creating the Seat

The seat of the Adirondack chair is made up of several slats that are attached to the base. To create the seat, follow these steps:

  1. Cut the seat slats to the appropriate length and shape.
  2. Attach the slats to the base using screws or nails.
  3. Use a level to ensure that the seat is even and stable.
  4. Sand the seat to remove any rough edges or splinters.

Building the Backrest

The backrest of the Adirondack chair is made up of several slats that are angled to provide a comfortable sitting position. To build the backrest, follow these steps:

  1. Cut the backrest slats to the appropriate length and shape.
  2. Angle the top of each slat to provide a comfortable sitting position.
  3. Attach the slats to the seat using screws or nails.
  4. Use a level to ensure that the backrest is even and stable.
  5. Sand the backrest to remove any rough edges or splinters.

By following these steps, you can build your own Adirondack chair that will provide a comfortable and stylish seating option for your outdoor space.

Finishing Touches

After you’ve completed building your Adirondack chair, it’s time to add the finishing touches to make it look great and protect it from the elements. In this section, we’ll cover sanding and smoothing, as well as painting or staining options.

Sanding and Smoothing

Before you apply any finish, it’s important to sand and smooth your chair to ensure a clean and even surface. Start with a coarse sandpaper (around 80 grit) to remove any rough spots or tool marks. Then, gradually work your way up to a finer grit (around 220) to achieve a smooth finish. Be sure to sand in the direction of the wood grain to avoid scratches.

Once you’ve finished sanding, use a damp cloth to wipe down the chair and remove any dust. You may also want to use a tack cloth to pick up any remaining particles.

Painting or Staining

Now that your chair is smooth and clean, you can choose to paint or stain it to achieve your desired look. Here are some options to consider:

  • Paint: If you want a bold, colorful look, paint is a great option. Choose a high-quality outdoor paint and apply it in thin, even coats. Be sure to let each coat dry completely before applying the next.

  • Stain: If you prefer a more natural look, stain is a great choice. Choose a stain that is specifically designed for outdoor use and apply it with a brush or rag. Be sure to follow the manufacturer’s instructions and apply multiple coats as needed.

  • Sealant: No matter which option you choose, it’s important to apply a sealant to protect your chair from the elements. Choose a high-quality outdoor sealant and apply it in thin, even coats. Be sure to let each coat dry completely before applying the next.

With these finishing touches, your Adirondack chair will look great and be ready to withstand the elements for years to come.

Maintenance and Care

Congratulations on making your own Adirondack chairs! Now that you have them, it’s important to take care of them so they can last for years to come. Here are some tips on how to maintain and care for your wooden Adirondack chairs:

Cleaning

To keep your Adirondack chairs looking their best, it’s important to clean them regularly. Use a soft cloth, warm water, and a mild detergent like dish soap. Once you’re done washing it with soap, give it a thorough rinse to prevent any residue from lingering on the wood.

If your chairs are stained or have accumulated dirt or grime, you can use a wood cleaner specifically designed for outdoor furniture. Be sure to follow the manufacturer’s instructions and test the cleaner on a small, inconspicuous area first.

Protecting

Protecting your Adirondack chairs from the elements is key to their longevity. If you live in an area with harsh weather conditions, consider storing your chairs indoors during the off-season. If that’s not an option, invest in some high-quality furniture covers to protect them from rain, snow, and UV rays.

If you prefer the natural look of your wooden Adirondack chairs, you can apply a clear sealant or wood preservative to protect them from moisture and UV rays. Be sure to choose a product that’s specifically designed for outdoor use and follow the manufacturer’s instructions.

Maintenance

Regular maintenance is important to keep your Adirondack chairs in good condition. Here are some tips on how to maintain your chairs:

  • Check for loose screws or bolts and tighten them as needed.
  • Sand down any rough spots or splinters to prevent injury.
  • If your chairs are stained, consider reapplying the stain every 1-7 years depending on the quality of the stain used, the number of coats applied, and the type of application.
  • If your chairs are painted, consider repainting them every 3-5 years to keep them looking fresh.

With proper maintenance and care, your Adirondack chairs can last for many years and provide you with a comfortable and stylish place to relax outdoors.