Tag Archives: soft-bristled broom

how-to-clean-a-wooden-floor-tips-and-tricks-2

How to Clean a Wooden Floor: Tips and Tricks

Cleaning wooden floors can be a daunting task, but it doesn’t have to be. With the right tools and techniques, you can keep your wooden floors looking shiny and new for years to come. Here are some tips on how to clean a wooden floor effectively.

First, it’s important to determine the type of finish on your wooden floor. This will help you choose the right cleaning solution and avoid damaging the wood. If you’re unsure, try a small test area with a mild cleaning solution to see how the wood reacts. Once you know the type of finish, you can choose a cleaning solution that is safe and effective for your wooden floor.

Understanding Wood Floors

Wood floors add warmth and a unique look to your home decor. They are durable and can last for years if appropriately maintained. However, before you begin cleaning your wood floors, it’s essential to understand the type of wood and finish you have.

Types of Wood Floors

There are two types of wood floors: solid and engineered. Solid wood floors are made of one solid piece of wood and are available in various thicknesses. Engineered wood floors are made of several layers of wood and are more stable than solid wood floors.

Types of Wood Floor Finishes

There are three types of wood floor finishes: surface-sealed, penetrating-seal, and oil-treated. Surface-sealed finishes are the most common and have a protective layer on top of the wood. Penetrating-seal finishes soak into the wood and harden, providing a protective layer from the inside. Oil-treated finishes penetrate the wood and provide a natural look and feel.

How to Clean Wood Floors

Cleaning your wood floors is essential to maintain their shine and prevent damage. Here are some tips to clean your wood floors:

  • Sweep or vacuum your wood floors regularly to remove dirt and debris.
  • Use a damp mop with a mild cleaning solution to clean your wood floors. Avoid using excess water as it can damage the wood.
  • Wipe up spills immediately to prevent damage to your wood floors.
  • Use furniture pads to protect your wood floors from scratches and dents.
  • Avoid using harsh chemicals, vinegar, or steam cleaners as they can damage the finish of your wood floors.

By understanding the type of wood and finish you have and following these cleaning tips, you can keep your wood floors looking beautiful for years to come.

Preparatory Steps Before Cleaning
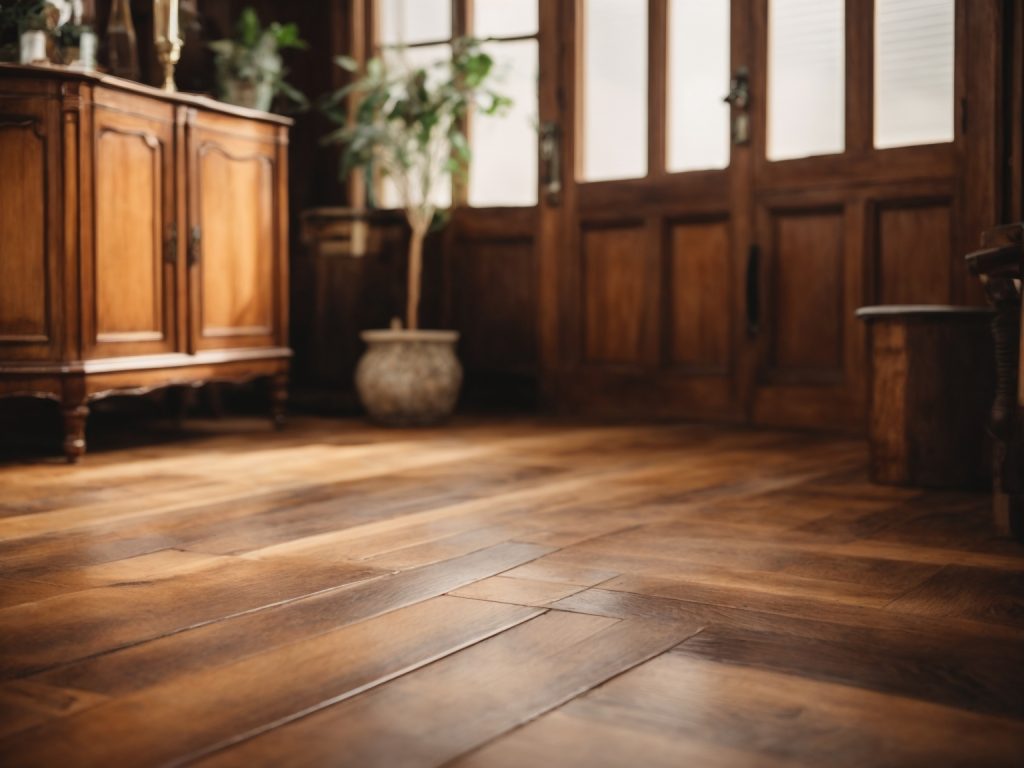
how-to-clean-a-wooden-floor-tips-and-tricks-2

Before you start cleaning your wooden floor, there are some preparatory steps you should take to ensure the best possible results. Here are some things you should do:

Remove Furniture and Rugs

First, remove any furniture and rugs from the room. This will give you more space to work and prevent any damage to your belongings. If you can’t move some furniture, use furniture pads or sliders to protect the legs and prevent scratches.

Sweep or Vacuum the Floor

Next, sweep or vacuum the floor to remove any loose dirt, dust, or debris. Use a soft-bristled broom or a vacuum cleaner with a hardwood floor attachment to avoid scratching the surface. If your vacuum has a beater bar, turn it off or adjust the height to the lowest setting.

Identify the Type of Wood and Finish

Before you start cleaning, identify the type of wood and finish of your floor. This will help you choose the right cleaning method and products that won’t damage the surface. Solid hardwood, engineered hardwood, and laminate wood-look flooring require different care, so make sure you know what you have.

Test the Cleaning Solution

Before you apply any cleaning solution to the entire floor, test it on a small, inconspicuous area first. This will help you make sure the solution doesn’t discolor or damage the wood. If you notice any adverse effects, try a different cleaning solution or consult a professional.

By following these preparatory steps, you’ll be able to clean your wooden floor more effectively and safely.

Choosing the Right Cleaning Supplies

Cleaning a wooden floor requires the right cleaning supplies to avoid damage to the wood. Here are some things to consider when choosing the right cleaning supplies for your wooden floor:

Type of Wood

Different types of wood require different cleaning supplies. For example, hardwood floors need a cleaner that is gentle and pH-neutral, while laminate floors require a cleaner that is specifically designed for laminate. Be sure to check the manufacturer’s recommendations to ensure you’re using the right cleaner for your wooden floor.

Cleaning Solution

When choosing a cleaning solution, avoid using harsh chemicals that can damage the wood. Instead, opt for a cleaner that is specifically formulated for wooden floors. You can also make your own cleaning solution by mixing water and vinegar or water and dish soap.

Cleaning Tools

The right cleaning tools can make all the difference when it comes to cleaning your wooden floor. A microfiber mop or cloth is gentle on the wood and won’t scratch the surface. Avoid using abrasive scrub brushes or steel wool, which can damage the wood.

Other Considerations

Here are a few other things to consider when choosing the right cleaning supplies for your wooden floor:

  • Avoid using too much water, as excess moisture can damage the wood.
  • Test any new cleaning supplies on a small, inconspicuous area of the floor before using them on the entire surface.
  • Regularly sweep or vacuum your wooden floor to remove dirt and debris that can scratch the surface.

By choosing the right cleaning supplies, you can keep your wooden floor looking clean and beautiful for years to come.

Cleaning Process

Cleaning your wooden floors regularly is essential to maintain their shine and keep them looking new. Here are the steps you can follow to clean your wooden floors effectively:

  1. Start by removing any loose dirt or debris from the floor using a soft-bristled broom or a vacuum cleaner. Make sure to use a vacuum cleaner with a hardwood floor attachment to avoid scratching the surface of the floor.
  2. Once you have removed the loose dirt, it’s time to mop the floor. You can use a microfiber mop or a soft cloth to clean the floor. Avoid using a wet mop as excess water can damage the floor. Instead, dampen the mop or cloth with a hardwood floor cleaner and wring out any excess water.
  3. Begin mopping the floor from one end of the room to the other, working in small sections. Make sure to overlap each section to avoid missing any spots.
  4. If you come across any stubborn stains or spills, use a hardwood floor cleaner and a soft cloth to gently scrub the area. Avoid using harsh chemicals or abrasive cleaners as they can damage the floor.
  5. Once you have finished mopping the floor, use a dry microfiber mop or cloth to remove any excess water or cleaner. Make sure to dry the floor thoroughly to avoid any water damage.
  6. Finally, if you want to give your wooden floors an extra shine, you can use a hardwood floor polish. Apply the polish using a soft cloth or mop, following the manufacturer’s instructions.

By following these simple steps, you can keep your wooden floors looking clean and shiny for years to come.

The Do’s and Don’ts of Cleaning Wooden Floors

Cleaning wooden floors is not rocket science, but there are some things you should and shouldn’t do to keep them looking their best. Here are some do’s and don’ts to keep in mind:

Do’s

  • Sweep or vacuum regularly: Dirt and dust can scratch and dull wooden floors, so it’s important to keep them clean. Use a soft-bristled broom or a vacuum cleaner with a hardwood floor attachment to remove dirt and debris.
  • Clean up spills promptly: Water and other liquids can damage wooden floors, so it’s important to clean up spills as soon as possible. Use a soft, absorbent cloth to blot up the liquid, then clean the area with a damp cloth and dry it thoroughly.
  • Use a gentle cleaner: When it’s time to give your wooden floors a deeper clean, use a cleaner that’s specifically designed for hardwood floors. Avoid using harsh chemicals or abrasive cleaners, which can damage the finish.
  • Protect your floors: Use furniture pads under the legs of chairs, tables, and other furniture to prevent scratches and dents. Place doormats at entryways to trap dirt and debris before it gets onto your floors.

Don’ts

  • Don’t use too much water: Wooden floors and water don’t mix well, so avoid using too much water when you’re cleaning them. Use a damp cloth, not a soaking wet one, and dry the floor thoroughly after cleaning.
  • Don’t use steam cleaners: Steam cleaners can damage wooden floors by forcing moisture into the wood. Stick to using a gentle cleaner and a damp cloth.
  • Don’t use abrasive cleaners: Avoid using harsh chemicals or abrasive cleaners, which can scratch and damage the finish of your wooden floors.
  • Don’t use wax or oil-based cleaners: Wax and oil-based cleaners can leave a residue on your wooden floors, making them slippery and dull-looking.

By following these do’s and don’ts, you can keep your wooden floors looking their best for years to come.

Maintaining Your Wooden Floor
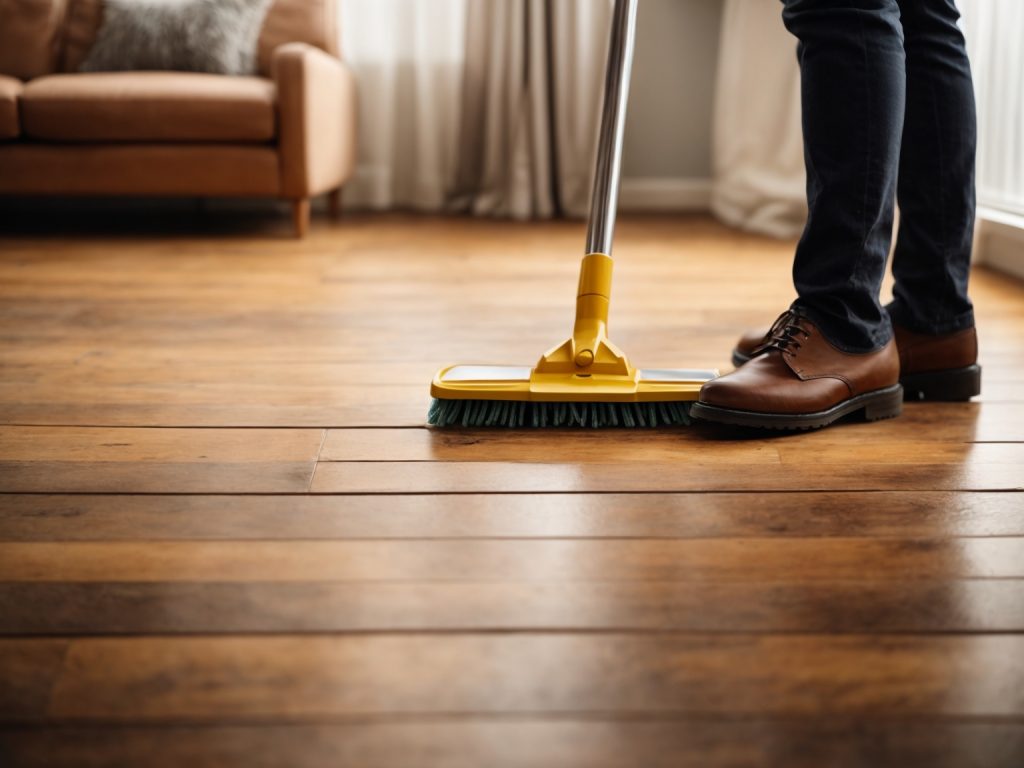
maintaining-your-wooden-floor-2

To keep your wooden floor looking great for years to come, it’s important to maintain it properly. Here are a few tips to help you maintain your wooden floor:

Sweep or Vacuum Regularly

One of the most important things you can do to maintain your wooden floor is to sweep or vacuum it regularly. Dirt, dust, and debris can scratch the surface of your floor, so it’s important to keep them off as much as possible. Use a soft-bristled broom or a vacuum with a hardwood floor attachment to sweep your floor daily.

Clean Up Spills Immediately

If you spill something on your wooden floor, be sure to clean it up immediately. Liquids can seep into the wood and cause damage if left to sit for too long. Use a soft cloth or paper towel to soak up the spill, then clean the area with a hardwood floor cleaner.

Use a Hardwood Floor Cleaner

When it’s time to clean your wooden floor, use a hardwood floor cleaner that is specifically designed for your type of flooring. Avoid using harsh chemicals or abrasive cleaners that can damage the finish of your floor. Follow the manufacturer’s instructions for best results.

Use Mats and Rugs

To help protect your wooden floor from scratches and wear, use mats and rugs in high-traffic areas, such as entryways and hallways. Be sure to use mats with a non-slip backing to prevent them from sliding around on your floor.

Avoid Excess Moisture

Excess moisture can cause your wooden floor to warp and buckle. Avoid using steam cleaners or wet mops on your floor, and be sure to clean up spills immediately. If you live in a humid environment, consider using a dehumidifier to help control moisture levels in your home.

By following these simple tips, you can help keep your wooden floor looking great for years to come.

Addressing Stains and Spills

Even with the best preventative measures, spills and stains are bound to happen on your wooden floors. Here are some tips on how to address them:

White Water Stains

White water stains are the result of moisture penetrating the finish and reaching the wood. To remove them, try one of the following methods:

  • Apply a small amount of non-gel toothpaste to the stain and gently rub it with a soft cloth.
  • Mix equal parts of baking soda and white toothpaste to create a paste. Apply it to the stain, let it sit for a few minutes, then wipe it away with a damp cloth.

Dark Stains

Dark stains are more difficult to remove and may require sanding and refinishing. However, before taking that drastic step, try the following:

  • Mix equal parts of vinegar and olive oil. Apply the mixture to the stain and let it sit for several hours. Wipe it away with a clean cloth.
  • If the stain is still present, mix equal parts of bleach and water. Apply it to the stain and let it sit for several hours. Rinse thoroughly with water and dry the area.

Spills

Spills should be addressed immediately to prevent them from seeping into the wood. Here’s what to do:

  • For liquid spills, use a clean cloth or paper towel to blot up as much of the liquid as possible. Do not rub the spill, as this will push it deeper into the wood.
  • For solid spills, use a plastic scraper or spatula to gently remove the spill. Be careful not to scratch the wood.
  • Once the spill has been removed, clean the area with a damp cloth and dry it thoroughly.

By following these tips, you can keep your wooden floors looking their best, even when spills and stains occur.

Professional Cleaning and When to Consider It

While cleaning your hardwood floors at home can be a simple task, sometimes it may be necessary to seek professional help. Here are some situations where you may want to consider hiring a professional:

Deep Stains

If your hardwood floors have deep stains that you cannot remove with regular cleaning methods, it may be time to call in a professional. They have access to specialized equipment and cleaning solutions that can effectively remove stubborn stains without damaging your floors.

Extensive Damage

If your hardwood floors have extensive damage such as deep scratches, gouges, or warping, it may be time to consider professional refinishing. Refinishing can restore your floors to their former glory and make them look brand new again.

Time Constraints

If you lead a busy life and don’t have the time to devote to cleaning your hardwood floors, consider hiring a professional cleaning service. They can take care of your floors while you focus on other important tasks.

Inexperience

If you are unsure about how to properly clean and maintain your hardwood floors, it may be best to leave it to the professionals. They have the knowledge and experience to properly care for your floors and can provide you with tips and advice on how to keep them looking their best.

Overall, professional cleaning can be a great option for those who want to ensure their hardwood floors are properly cared for. Just be sure to do your research and choose a reputable and experienced professional to ensure the best results.
How to Remove Carpet Glue from Wooden Floor: A Step-by-Step Guide

Removing carpet glue from a wooden floor can be a daunting task, but it is necessary if you want to restore the natural beauty of your hardwood floors. Carpet glue can be stubborn and difficult to remove, but with the right tools and techniques, you can get the job done quickly and efficiently.

One of the most important things to keep in mind when removing carpet glue from a wooden floor is to be patient. It may take some time and effort to get all of the glue off, but rushing the process can damage your floors. It is also important to use the right tools and techniques to avoid damaging the wood. With the right approach, you can remove the glue without causing any harm to your floors.

Understanding Carpet Glue

If you have ever removed carpeting from a wood floor, you know that it can be a tedious task. One of the most challenging parts of this process is removing the residual glue that remains on the floor. Carpet glue is a stiff and strong solvent used to adhere a carpet to a floor. Because of its toughness, removing it is difficult, and as you will see, taking off carpet glue or adhesive off wood floors is not as simple as it looks.

Carpet glue is typically made of synthetic polymer resins that are mixed with solvents. The solvents help to dissolve the resins, which allows the glue to be spread evenly on the floor. Once the glue dries, it forms a strong bond with the floor, which keeps the carpet in place.

There are several types of carpet glue available on the market, and each has its unique properties. Some glue is water-based, while others are solvent-based. Some glue is designed for use on concrete floors, while others are designed for use on wood floors. It is essential to understand the type of glue you are dealing with to remove it effectively.

Carpet glue varies in color, texture, and thickness. Some glue looks more terrible than others. Some glue is easy to remove, while others require more effort and time. The type of carpet glue you are dealing with will determine the best method to remove it.

In the next section, we will look at some of the methods you can use to remove carpet glue from a wood floor.

Necessary Tools and Materials

Removing carpet glue from a wooden floor requires specific tools and materials. Here are the essential items that you will need:

Scraper

A scraper is a tool that you will use to remove the carpet glue from the wooden floor. You can use a spackling tool or a hoe as a scraper. A spackling tool is a flat metal tool that you can use to scrape off the glue from the floor. A hoe is a tool with a flat blade that you can use to scrape off the glue from the floor.

Adhesive Remover

An adhesive remover is a solvent that you can use to dissolve the carpet glue from the wooden floor. You can use a mineral-based solvent or an orange-based solvent. A mineral-based solvent is more effective in removing the glue, while an orange-based solvent is less pervasive. Make sure to read the instructions on the adhesive remover before using it.

Protective Gear

Protective gear is essential when removing carpet glue from a wooden floor. You should wear rubber gloves, rubber boots, and goggles to protect your skin and eyes from the adhesive remover. The adhesive remover can be harmful to your skin and eyes, so make sure to take the necessary precautions.

In summary, to remove carpet glue from a wooden floor, you will need a scraper, an adhesive remover, and protective gear. These tools and materials will help you remove the glue effectively and safely.

Safety Precautions

When removing carpet glue from a wooden floor, there are some safety precautions you should take to ensure your well-being and the safety of your property. Here are some tips to keep in mind:

Wear Protective Gear

Before starting the process, make sure you wear protective gear, including rubber gloves, goggles, and rubber boots. This will protect your skin from chemical burns, splinters, and other injuries that may occur during the removal process.

Ventilate the Room

When using any chemical solvents, make sure you have proper ventilation in the room. Open windows and doors to allow fresh air to circulate. If you are using a chemical solvent, wear a mask to avoid inhaling fumes.

Keep the Area Clean

Make sure the area you are working in is clean and free of clutter. This will prevent accidents and make it easier to move around. Also, keep children and pets away from the area to avoid any accidents.

Follow Instructions

Read and follow the instructions on the product label carefully. Some solvents may require specific instructions for use, and not following them may lead to accidents or damage to the floor.

Test the Solvent

Before using any solvent, test it on a small, inconspicuous area of the floor to make sure it does not damage the wood. If the solvent causes damage, do not use it on the rest of the floor.

By following these safety precautions, you can ensure a safe and successful removal of carpet glue from your wooden floor.

Step-By-Step Guide

Removing carpet glue from a wooden floor may seem like a daunting task, but with the right tools and techniques, it can be done efficiently. Here is a step-by-step guide to help you remove carpet glue from your wooden floor.

Clearing the Area

Before starting, clear the area around the wooden floor. Remove any furniture, rugs, or other items that may obstruct your work. Cover any vents, electrical outlets, or other openings to prevent dust and debris from entering.

Applying the Adhesive Remover

Apply adhesive remover to a small section of the wooden floor. Allow the adhesive remover to sit for a few minutes to dissolve the glue. Use a scraper to remove the softened glue. Repeat the process until all the glue is removed.

Scraping Off the Glue

Use a scraper to remove any remaining glue from the wooden floor. Be careful not to scratch the surface of the wood. Use a plastic scraper or putty knife to avoid damage to the surface.

Sanding the Floor

After removing the glue, sand the wooden floor to remove any remaining residue. Start with a coarse grit sandpaper and work your way up to a finer grit sandpaper. Sand in the direction of the wood grain to avoid damaging the surface.

Cleaning the Wooden Floor

After sanding, clean the wooden floor with a vacuum cleaner or broom to remove any dust or debris. Then, use a damp mop to clean the surface. Allow the floor to dry completely before applying any finish.

By following these steps, you can remove carpet glue from your wooden floor and restore its natural beauty.

Troubleshooting Common Problems

Residual Glue

If you have removed the carpet from your wooden floor, you may still be left with residual glue. This can be difficult to remove, but there are a few things you can try. First, try scraping the glue with a plastic putty knife. If this doesn’t work, you can try using a solvent to dissolve the glue. Be sure to follow the manufacturer’s instructions carefully and wear protective gear such as rubber gloves and a respirator. You may need to repeat the process several times to completely remove the glue.

Damage to the Wooden Floor

Removing carpet glue from a wooden floor can be a delicate process, and it’s possible to damage the floor if you’re not careful. If you notice any damage to the floor, stop immediately and assess the situation. If the damage is minor, you may be able to sand it out. If the damage is more severe, you may need to replace the affected boards.

It’s also important to be careful when using tools such as scrapers and sanders. Make sure you’re using the right tool for the job and that you’re using it correctly. If you’re not sure, it’s always a good idea to consult a professional.

In summary, removing carpet glue from a wooden floor can be a challenging task, but with the right tools and techniques, it can be done. Be patient, take your time, and be careful not to damage the floor. If you run into any problems, don’t hesitate to seek professional help.

Maintaining Your Wooden Floor After Glue Removal

Now that you have successfully removed the carpet glue from your wooden floor, it’s time to focus on maintaining your floor’s beauty and longevity. Here are some tips to help you take care of your wooden floor after glue removal:

1. Clean Your Floor Regularly

You should clean your wooden floor regularly to keep it looking good and to prevent any damage. Use a soft-bristled broom or a vacuum cleaner to remove dirt, dust, and debris. Avoid using a wet mop as it can damage your wooden floor.

2. Use a Protective Coating

After removing the glue, you can apply a protective coating to your wooden floor. This will help protect your floor from scratches, stains, and other damage. There are different types of protective coatings available, including polyurethane and wax. Choose the one that suits your needs and preferences.

3. Avoid Water Spills

Water can damage your wooden floor, so it’s important to avoid spills. If you spill water on your wooden floor, clean it up immediately. You can use a dry cloth or a mop to absorb the water. Don’t let water sit on your wooden floor for too long as it can cause warping and other damage.

4. Use Furniture Pads

Furniture can scratch your wooden floor, so it’s important to use furniture pads. These pads can be placed under the legs of your furniture to protect your floor from scratches. You can find furniture pads in different sizes and materials, such as felt or rubber.

By following these tips, you can maintain the beauty and longevity of your wooden floor after removing the carpet glue. Remember to clean your floor regularly, use a protective coating, avoid water spills, and use furniture pads.

How to Do Wooden Flooring: A Beginner's Guide

If you’re looking to add a touch of warmth and elegance to your home, installing hardwood flooring is a great way to do it. Solid hardwood flooring is a classic choice that never goes out of style. Not only does it add value to your home, but it’s also durable and easy to clean. If you’re up for a DIY project, you can install hardwood flooring yourself and save money on installation costs.

Before you begin, it’s important to choose the right type of wood flooring for your home. Solid hardwood flooring is typically nailed down during installation, while engineered flooring can be clicked together or glued down. You’ll also need to consider the type of subfloor you have and your budget. Once you’ve chosen your flooring and gathered your tools, you’re ready to get started.

Installing hardwood flooring can seem daunting, but with the right tools and a little bit of patience, it’s a project that you can tackle yourself. In this article, we’ll walk you through the steps of installing hardwood flooring, from preparing your subfloor to laying the last plank. By the end of this guide, you’ll have a beautiful new hardwood floor that you can be proud of.

Understanding Wooden Flooring

If you’re planning to install wooden flooring in your home, it’s important to understand the different types of wooden flooring available and their benefits. This will help you make an informed decision when choosing the right flooring for your home.

Types of Wooden Flooring

There are two main types of wooden flooring: solid wood flooring and engineered wood flooring.

Solid Wood Flooring: This type of flooring is made from a single piece of wood and is available in various thicknesses and widths. Solid wood flooring is more expensive than engineered wood flooring, but it’s also more durable and can be sanded and refinished multiple times.

Engineered Wood Flooring: This type of flooring is made from layers of wood that are glued together. The top layer is made from real wood, while the bottom layers are made from plywood or high-density fiberboard (HDF). Engineered wood flooring is less expensive than solid wood flooring, but it’s also less durable and can only be sanded and refinished a few times.

Benefits of Wooden Flooring

Wooden flooring offers several benefits over other types of flooring, including:

  • Durability: Wooden flooring is durable and can last for decades if properly maintained.

  • Aesthetics: Wooden flooring adds warmth and character to any room and comes in a variety of colors and finishes.

  • Easy to Clean: Wooden flooring is easy to clean and maintain, requiring only regular sweeping and occasional mopping.

  • Hypoallergenic: Wooden flooring doesn’t trap dust, pollen, or other allergens like carpet does, making it a great choice for people with allergies.

  • Increases Home Value: Installing wooden flooring can increase the value of your home and make it more attractive to potential buyers.

Overall, wooden flooring is a great investment for any home. Whether you choose solid wood or engineered wood flooring, you can enjoy the many benefits of this beautiful and durable flooring option.

Materials Needed for Wooden Flooring

Before you start installing your hardwood floor, it is important to make sure you have all the necessary materials. Here are the materials you will need:

1. Hardwood Flooring

The first and most obvious material you will need is the hardwood flooring itself. You can choose from a variety of species, colors, and finishes. Make sure to purchase enough flooring to cover the square footage of your room, plus an additional 10-15% for cuts and waste.

2. Underlayment

Underlayment is a thin layer of material that is installed between the subfloor and the hardwood flooring. It helps to reduce noise, absorb moisture, and provide a smooth surface for the flooring to rest on. There are several types of underlayment available, including foam, cork, and felt.

3. Moisture Barrier

A moisture barrier is a thin layer of plastic that is installed over the subfloor to prevent moisture from seeping up into the hardwood flooring. This is especially important if you are installing the flooring over a concrete slab.

4. Nails or Staples

You will need nails or staples to attach the hardwood flooring to the subfloor. The type of fastener you use will depend on the type of flooring you have and the method of installation.

5. Saw

You will need a saw to cut the hardwood flooring to fit around obstacles such as doorways and heating vents. A table saw or miter saw is recommended for this task.

6. Hammer or Flooring Nailer

You will need a hammer or flooring nailer to drive the nails or staples into the hardwood flooring. A flooring nailer is recommended for a more professional and efficient installation.

7. Tape Measure

You will need a tape measure to measure the square footage of your room and to make accurate cuts in the hardwood flooring.

8. Level

A level is important to ensure that your hardwood flooring is installed evenly and without any dips or bumps.

9. Safety Equipment

Lastly, it is important to wear safety equipment such as eye protection and ear plugs when using power tools and installing hardwood flooring.

Preparation for Wooden Flooring

Before you start installing your wooden floor, there are a few essential steps you need to take to ensure a successful installation. In this section, we will cover the two crucial steps of preparing your subfloor and acclimating your wood.

Inspecting the Subfloor

Inspecting your subfloor is an essential step before installing your wooden floor. You need to ensure that your subfloor is clean, dry, and level. Any unevenness in your subfloor can cause problems with the installation and lead to an uneven floor.

If your subfloor is not level, you may need to use a self-leveling compound to even it out. You can also use a moisture meter to check the moisture levels in your subfloor. If the moisture levels are too high, you need to address the issue before proceeding with the installation. High moisture levels can cause the wooden floor to warp, buckle, or cup.

Acclimating the Wood

Acclimating your wood is a crucial step before installing your wooden floor. Wood is a natural material that can expand or contract depending on the humidity and temperature of the environment. Acclimating your wood allows it to adjust to the conditions of your home, ensuring a stable and long-lasting installation.

To acclimate your wood, you need to leave it in the room where it will be installed for at least 72 hours before installation. This allows the wood to adjust to the temperature and humidity of the environment. Make sure to keep the wood at least four inches off the ground and away from any direct sunlight or heating vents.

In conclusion, inspecting your subfloor and acclimating your wood is a crucial step in preparing for your wooden floor installation. These steps ensure that your wooden floor is installed correctly and will last for years to come.

Installing Wooden Flooring

If you’re looking to give your home a facelift, installing wooden flooring is a great way to do it. Not only does it add value to your home, but it also adds warmth and beauty. Here’s how to install wooden flooring in your home.

Laying the Underlayment

Before you start installing the wooden planks, you need to lay down the underlayment. The underlayment is a layer of material that goes between the subfloor and the wooden planks. It helps to cushion the flooring, reduce noise, and prevent moisture from seeping in.

To lay the underlayment, follow these steps:

  1. Clean the subfloor: Make sure the subfloor is clean and free of debris. Sweep or vacuum it thoroughly.
  2. Roll out the underlayment: Roll out the underlayment across the entire floor, making sure it’s flat and smooth.
  3. Cut the underlayment: Cut the underlayment to fit the room, leaving a 1/4 inch gap around the edges.
  4. Tape the seams: Tape the seams of the underlayment together using a moisture-resistant tape.

Installing the Wooden Planks

Now that you’ve laid down the underlayment, it’s time to install the wooden planks. Here’s how to do it:

  1. Measure the room: Measure the length and width of the room to determine how many planks you’ll need. Add 10% to the total to account for waste.
  2. Acclimate the planks: Allow the wooden planks to acclimate to the room for at least 48 hours before installation.
  3. Start in the corner: Start in the corner of the room and work your way out.
  4. Lay the planks: Lay the planks down, making sure they fit snugly together. Use a rubber mallet to tap them into place.
  5. Cut the planks: Cut the planks to fit around obstacles like door frames and vents.
  6. Stagger the planks: Stagger the planks so that the ends of each plank are not lined up with the ends of the adjacent planks.
  7. Nail the planks: Nail the planks down using a nail gun, making sure to nail them into the subfloor and not the underlayment.
  8. Sand and finish: Sand the floor to remove any rough spots and finish it with a sealant or stain.

That’s it! With a little bit of time and effort, you can install wooden flooring in your home and enjoy the beauty and warmth it brings.

Finishing Touches

Once you have installed your wooden floor, it’s time to give it the finishing touches. This step is important as it will ensure that your floor looks beautiful and lasts for a long time. There are two main aspects to finishing touches: sanding and finishing, and caring for your wooden floor.

Sanding and Finishing

The first step in sanding and finishing your wooden floor is to ensure that it is clean and free of any debris. Use a broom or vacuum cleaner to get rid of any dust or dirt. Once your floor is clean, you can start sanding it. Sanding helps to remove any rough spots or imperfections on the surface of the wood.

When sanding your wooden floor, it’s important to use the right equipment. A drum sander is the most efficient tool for sanding large areas of wood. However, if you’re working on a smaller area, you can use a handheld sander. After sanding, you can apply a finish to your wooden floor. There are several different types of finishes to choose from, including oil-based, water-based, and wax finishes.

Caring for Your Wooden Floor

Once you have finished sanding and applying a finish to your wooden floor, it’s important to take care of it properly to ensure that it lasts for a long time. Here are some tips for caring for your wooden floor:

  • Use a soft-bristled broom or vacuum cleaner to remove any dirt or debris from your floor.
  • Clean up any spills or stains immediately to prevent them from damaging the wood.
  • Use a wood cleaner specifically designed for wooden floors to clean your floor. Avoid using harsh chemicals or abrasive cleaners as they can damage the finish on your floor.
  • Place rugs or mats in high traffic areas to protect your wooden floor from wear and tear.
  • Avoid wearing high heels or shoes with spikes on your wooden floor as they can scratch the surface of the wood.

By following these tips, you can ensure that your wooden floor looks beautiful and lasts for a long time.