Tag Archives: food-grade mineral oil

tips-for-regular-maintenance

How to Clean Wooden Toys: Simple and Safe Methods

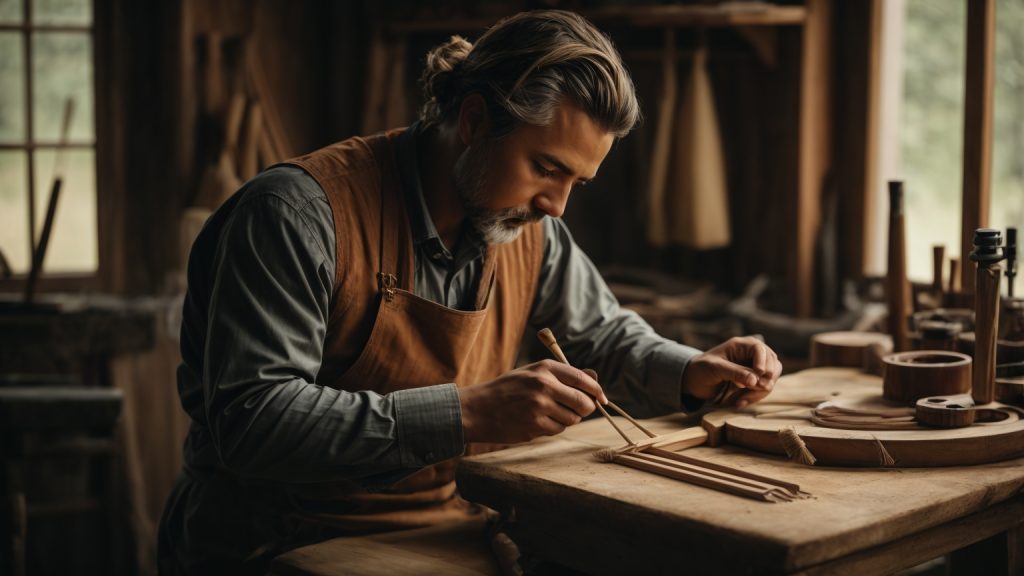
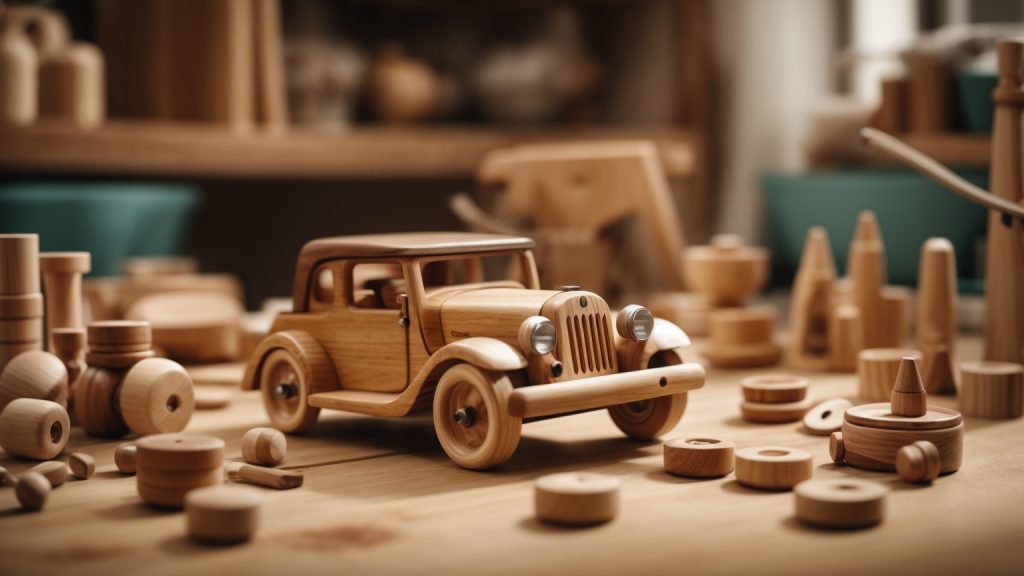
If you have wooden toys, you know how important it is to keep them clean and well-maintained. Wooden toys are durable and long-lasting, but they can also accumulate dirt and grime over time. Cleaning wooden toys is not only important for hygiene reasons, but it can also help extend the lifespan of the toys.

Cleaning wooden toys is a simple process that can be done with a few basic supplies. Warm water and a mild cleaning solution are all you need to get started. You can use white vinegar, apple cider vinegar, or a non-toxic cleaning product that is safe for children. Optional extras include a spray bottle for your water mixture and olive oil or mineral oil for moisturizing the wood. In the following paragraphs, we will discuss the best methods for cleaning different types of wooden toys, as well as important factors to consider when cleaning them.

Understanding the Importance of Cleaning Wooden Toys

clean-wooden-toys

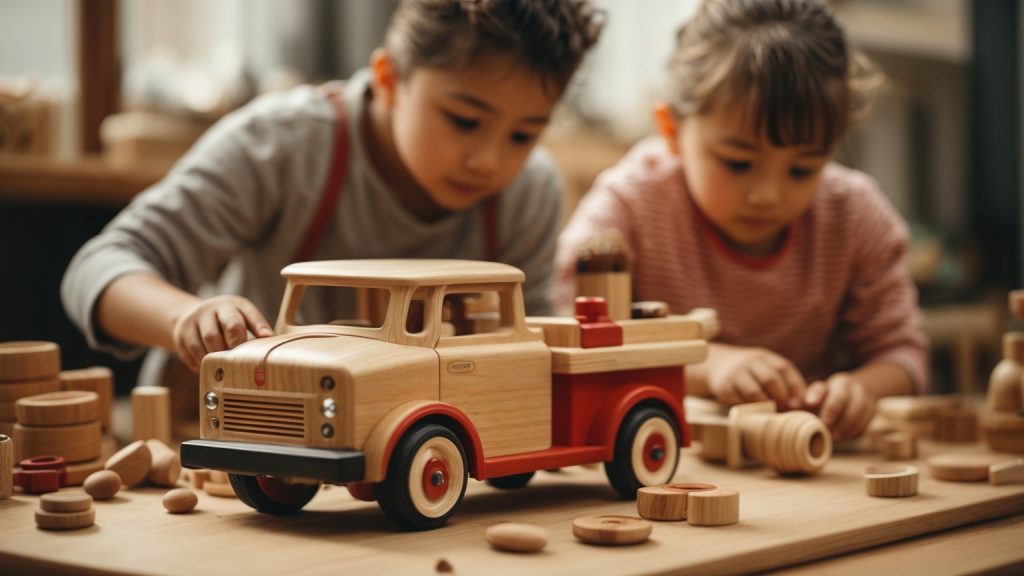
When it comes to keeping your child safe and healthy, cleaning their toys is just as important as feeding them a balanced diet. Wooden toys are a popular choice for parents because they are durable, long-lasting, and don’t contain harmful chemicals. However, they can also be a breeding ground for bacteria and germs, especially if they are not cleaned regularly. In this section, we will discuss the importance of cleaning wooden toys and provide tips on how to do it effectively.

Preventing Bacterial Growth

Wooden toys can harbor bacteria and germs from your child’s hands, mouth, and the environment. If left unchecked, these bacteria can multiply and cause infections or illnesses. Regular cleaning of wooden toys can help prevent the growth of bacteria and keep your child safe from harm.

One way to prevent bacterial growth is to clean wooden toys after each use. Use a damp cloth with warm water and mild soap to wipe down the toy’s surface. Avoid soaking the toy in water as it can cause the wood to swell and warp. Dry the toy thoroughly with a clean cloth before storing it away.

Another way to prevent bacterial growth is to rotate your child’s toys regularly. This will give you time to clean and dry the toys properly before they are used again. It also reduces the chances of your child coming into contact with bacteria from toys that have not been cleaned yet.

Maintaining Toy Quality

Cleaning wooden toys not only prevents bacterial growth but also helps maintain their quality. Over time, dirt and grime can accumulate on the toy’s surface, making it look dull and unappealing. Regular cleaning can help keep the toy looking new and vibrant.

When cleaning wooden toys, it is important to use the right cleaning products. Avoid using harsh chemicals that can damage the wood or remove its natural finish. Instead, use mild soap or vinegar diluted with water to clean the toy’s surface. Be sure to rinse the toy thoroughly with clean water and dry it with a clean cloth.

In conclusion, cleaning wooden toys is a crucial part of keeping your child safe and healthy. Regular cleaning can prevent bacterial growth and maintain the toy’s quality. By following these simple tips, you can ensure that your child’s wooden toys remain safe, clean, and enjoyable for years to come.

Choosing the Right Cleaning Supplies

When it comes to cleaning wooden toys, it’s important to choose the right cleaning supplies to ensure that you’re not damaging the wood or exposing your child to harmful chemicals. Here are some things to keep in mind when selecting cleaning supplies for your wooden toys.

Natural Cleaning Agents

Using natural cleaning agents is a great way to clean your wooden toys without exposing your child to harmful chemicals. Here are some natural cleaning agents that you can use:

  • White vinegar: White vinegar is a great all-purpose cleaner that can be used to clean wooden toys. Mix equal parts white vinegar and water in a spray bottle and use it to clean your wooden toys.
  • Baking soda: Baking soda is another great natural cleaner that can be used to clean wooden toys. Mix baking soda and water to form a paste, apply it to the toy, and scrub gently with a soft cloth.
  • Castile soap: Castile soap is a mild and gentle soap that can be used to clean wooden toys. Mix a small amount of Castile soap with water and use it to clean your wooden toys.

Avoiding Harmful Chemicals

When selecting cleaning supplies for your wooden toys, it’s important to avoid harmful chemicals that can damage the wood or expose your child to toxins. Here are some chemicals to avoid:

  • Bleach: Bleach is a harsh chemical that can damage the wood and expose your child to toxins. Avoid using bleach to clean your wooden toys.
  • Ammonia: Ammonia is another harsh chemical that can damage the wood and expose your child to toxins. Avoid using ammonia to clean your wooden toys.
  • Harsh detergents: Harsh detergents can also damage the wood and expose your child to toxins. Avoid using harsh detergents to clean your wooden toys.

By choosing the right cleaning supplies, you can ensure that your wooden toys are clean and safe for your child to play with. Remember to always test any cleaning solution on a small, inconspicuous area of the toy before applying it to the entire surface.

Step by Step Cleaning Process

Cleaning wooden toys is an essential part of maintaining their quality and safety. Here is a step-by-step guide on how to clean wooden toys properly.

Pre-Cleaning Inspection

Before you begin cleaning, inspect the wooden toys for any damage or loose parts. If you find any issues, repair them before cleaning. Also, check for any stickers or labels that may need to be removed before cleaning.

Cleaning Procedure

  1. Start by removing any loose dirt or debris from the wooden toy surface. You can use a soft-bristled brush or a dry cloth for this purpose.
  2. Next, prepare a cleaning solution according to the type of wooden toy and the level of dirt and grime on its surface. You can use warm water and a mild soap solution or a mixture of white vinegar and water in a 1:10 ratio. Do not use harsh chemicals or abrasive cleaners.
  3. Dip a clean cloth in the cleaning solution and wring it out until it is damp but not soaking wet. Use this damp cloth to wipe the wooden toy surface thoroughly. Make sure to clean all the nooks and crannies of the toy.
  4. For stubborn stains or grime, you can use a soft-bristled brush or an old toothbrush dipped in the cleaning solution to scrub the affected area gently.
  5. Once you have cleaned the entire surface of the wooden toy, rinse it thoroughly with clean water to remove any soap residue.

Drying and Polishing

  1. After rinsing, use a dry cloth to wipe the wooden toy surface and remove any excess water.
  2. Let the wooden toy air dry completely before using it again. Do not use a hairdryer or any other heat source to speed up the drying process.
  3. Once the wooden toy is dry, you can apply a coat of food-grade mineral oil or beeswax polish to protect and preserve the wood. Apply the oil or polish with a clean cloth and let it absorb into the wood for a few hours before wiping off any excess.

By following these simple steps, you can keep your wooden toys clean, safe, and long-lasting.

Tips for Regular Maintenance

tips-for-regular-maintenance

Keeping your child’s wooden toys clean is essential for their health and safety. Regular maintenance can help preserve the quality of the toys and extend their lifespan. Here are some tips for maintaining your wooden toys.

Frequent Light Cleaning

Frequent light cleaning can help prevent build-up of dirt and grime on your child’s wooden toys. Here are some tips for frequent light cleaning:

  • Use a clean, damp cloth to wipe down the toys after each use.
  • Avoid using harsh chemicals or abrasive cleaners that can damage the wood.
  • Keep the toys away from direct sunlight and moisture to prevent warping and cracking.
  • Store the toys in a dry, cool place when not in use.

Deep Cleaning Schedule

Deep cleaning your child’s wooden toys on a regular schedule can help remove any build-up of dirt and grime that may have accumulated over time. Here are some tips for deep cleaning:

  • Use a mixture of warm water and a mild soap solution to clean the toys. You can also use white vinegar or apple cider vinegar as a natural cleaning solution.
  • Avoid soaking the toys in water as this can cause the wood to warp or crack.
  • Use a soft-bristled brush to gently scrub the toys and remove any dirt or grime.
  • Rinse the toys thoroughly with clean water and dry them with a clean, dry cloth.
  • Apply a small amount of olive oil or mineral oil to the toys to help preserve the wood and prevent it from drying out.

By following these tips for regular maintenance, you can keep your child’s wooden toys clean and safe for playtime. Remember to always supervise your child during playtime and inspect the toys regularly for any signs of damage or wear.

Safety Precautions While Cleaning

Cleaning wooden toys is an important part of maintaining their quality and safety. However, it is essential to take safety precautions to ensure that the toys are not damaged during the cleaning process. Here are some safety precautions to keep in mind:

Avoiding Water Damage

Wooden toys can easily get damaged if they are exposed to water for a prolonged period. Therefore, it is important to avoid using too much water while cleaning them. Here are some tips to help you avoid water damage:

  • Use a damp cloth instead of soaking the toy in water.
  • Wipe the toy with a dry cloth immediately after cleaning it with a damp cloth.
  • Avoid using hot water, as it can warp the wood.
  • Do not use a high-pressure water spray to clean the toy.

Ensuring Toy Safety After Cleaning

After cleaning the wooden toy, it is important to ensure that it is safe for your child to play with. Here are some tips to help you ensure toy safety after cleaning:

  • Check the toy for any loose parts or splinters that may have come loose during cleaning.
  • Ensure that the toy is completely dry before giving it to your child to play with.
  • If the toy has any cracks or chips, do not give it to your child to play with. It may be unsafe and could cause injury.
  • If you are unsure about the safety of the toy after cleaning, consult the manufacturer or a toy safety expert.

By following these safety precautions, you can ensure that your child’s wooden toys are clean and safe for playtime.

how-to-oil-a-wooden-cutting-board

How to Oil a Wooden Cutting Board: A Step-by-Step Guide

Maintaining a wooden cutting board is crucial to ensure its longevity and prevent bacteria buildup. One of the most important steps in maintaining a wooden cutting board is oiling it regularly. Oiling a wooden cutting board helps to protect it from moisture, prevent warping, and keep it looking new.

To oil a wooden cutting board, you need to clean it thoroughly first. Use hot water and soap to wash both sides of the board, then let it air dry completely. Once the board is dry, apply a generous amount of food-grade mineral oil to the surface of the board. You can use a clean cloth or paper towel to spread the oil evenly on the board. Let the oil soak in for a few hours, or overnight if possible. Finally, wipe off any excess oil with a clean cloth before using the board again.

Regularly oiling your wooden cutting board will not only help to keep it looking new, but it will also protect it from bacteria buildup and prevent it from warping. It’s recommended to oil your wooden cutting board at least once a month, or more often if you use it frequently. With just a little bit of maintenance, your wooden cutting board can last for years to come.

Understanding the Importance of Oiling a Wooden Cutting Board

how-to-oil-a-wooden-cutting-board

If you own a wooden cutting board, it is essential to take proper care of it. One of the most important things you can do to extend the life of your wooden cutting board is to oil it regularly. Here are some reasons why oiling your wooden cutting board is so important:

Prevents Drying Out and Cracking

Wooden cutting boards are prone to drying out and cracking over time. When you oil your cutting board, it helps to keep the wood moisturized and prevents it from drying out. This can help to prevent cracks from forming and can extend the life of your cutting board.

Protects Against Bacteria

Wooden cutting boards can harbor bacteria if they are not properly cleaned and maintained. When you oil your cutting board, it helps to create a barrier that can protect against bacteria and other harmful substances. This can help to keep your food safe and prevent contamination.

Enhances Appearance

Oiling your wooden cutting board can also enhance its appearance. The oil can help to bring out the natural beauty of the wood and give it a rich, warm glow. This can make your cutting board look more attractive and can add to the overall aesthetic of your kitchen.

Improves Durability

When you oil your cutting board, it can also help to improve its durability. The oil can help to strengthen the wood and make it more resistant to wear and tear. This can help to extend the life of your cutting board and ensure that it remains in good condition for years to come.

Overall, oiling your wooden cutting board is an essential step in its maintenance. By doing so, you can help to prevent cracking, protect against bacteria, enhance appearance, and improve durability. So, make sure to oil your cutting board regularly to keep it in good condition and ensure that it lasts for years to come.

Choosing the Right Oil

When it comes to oiling your wooden cutting board, there are several options to choose from. Here are a few popular choices:

Food-Grade Mineral Oil

Food-grade mineral oil is a popular choice for many people because it is odorless, tasteless, and doesn’t go rancid. It is also affordable and readily available. Mineral oil is a petroleum byproduct, so some people prefer to use a natural oil instead.

Beeswax

Beeswax is not technically an oil, but it is an excellent option for seasoning cutting boards. It repels water and forms a tight, protective seal. Beeswax can also add a nice luster to the wood and help extend the lifespan of your cutting board.

Coconut Oil

Coconut oil is a popular choice for those who prefer natural oils. It has natural antimicrobial properties and is a great moisturizer for the wood. However, some people find that it can go rancid over time and leave a coconut scent on the board.

Walnut Oil

Walnut oil is another natural option that is popular for its rich color and nutty aroma. It is also high in antioxidants and has natural antimicrobial properties. However, it can be expensive and may not be as readily available as other oils.

When choosing an oil for your cutting board, it is important to consider the pros and cons of each option and choose the one that best suits your needs and preferences. Remember to always use a food-grade oil and follow the manufacturer’s instructions for application and maintenance.

Preparation Before Oiling

preparation-before-oiling

Before you start oiling your wooden cutting board, it’s important to prepare it properly. This will ensure that the oil is absorbed evenly and that the board is protected from damage. Here are some steps to follow:

Cleaning the Board

The first step is to clean the cutting board thoroughly. Use warm water and dish soap to wash both sides of the board. Make sure to scrub any food particles or stains off the surface. Avoid using harsh chemicals or abrasive sponges, as they can damage the wood.

After washing the board, rinse it with clean water and dry it with a clean towel. Don’t forget to clean the edges and corners of the board as well.

Drying the Board

Once the board is clean, it’s time to dry it. Make sure the board is completely dry before you start oiling it. You can use a clean towel to dry it, or let it air dry for a few hours.

It’s important to dry both sides of the board evenly. If one side is wetter than the other, it can cause the board to warp or crack when you apply the oil.

You can also use a hair dryer or a fan to speed up the drying process. Just make sure not to overheat the board, as this can also cause damage.

By following these steps, you’ll ensure that your wooden cutting board is clean and dry before you start oiling it. This will help the oil absorb evenly and protect the board from damage.

Step-by-Step Guide to Oiling

If you want to keep your wooden cutting board in good shape, you need to oil it regularly. Here’s a step-by-step guide to oiling your cutting board:

Applying the Oil

  1. Choose the right oil: mineral oil, beeswax, or a combination of both are good options.
  2. Pour a generous amount of oil onto the board surface, starting with one side at a time.
  3. Use a clean cloth or paper towel to spread the oil evenly over the surface of the board. Make sure you cover the entire board, including the sides.
  4. Be careful not to use too much oil. You don’t want to see oil pooling up on the board, but you also don’t want to be too stingy.

Letting the Board Absorb the Oil

  1. Once you’ve applied the oil, let the board sit for at least 20 minutes to allow the oil to soak in.
  2. During this time, you can flip the board over and apply oil to the other side.
  3. If the board is very dry, you may need to apply a second coat of oil.

Wiping Off Excess Oil

  1. After the oil has had time to soak in, use a clean cloth or paper towel to wipe off any excess oil.
  2. Be sure to wipe the board thoroughly to prevent any excess oil from going rancid.
  3. Let the board sit for a few hours or overnight to allow the oil to fully absorb into the wood before using it again.

By following these simple steps, you can keep your wooden cutting board in great condition for years to come.

Frequency of Oiling

To keep your wooden cutting board in top condition, it is important to oil it regularly. But how often should you oil your cutting board? The answer depends on how frequently you use it and how much care you want to take.

As a general rule, you should oil your cutting board once a month. This will help to keep the wood moisturized and prevent it from drying out or cracking. However, if you use your cutting board frequently or if it is exposed to a lot of moisture, you may need to oil it more often.

You can tell if your cutting board needs oiling by looking at its surface. If the wood looks dry or dull, it is time to oil it. You can also try the water test: sprinkle a few drops of water on the board. If the water beads up and doesn’t soak in, the board is well-oiled. If the water soaks in quickly or leaves a dark spot, it’s time to oil the board.

In addition to regular oiling, you should also clean your cutting board after each use. Use a mild dish soap and warm water to clean the board, then rinse it thoroughly and dry it with a clean towel. Avoid soaking the board in water or putting it in the dishwasher, as this can cause the wood to warp or crack.

By oiling your cutting board regularly and taking good care of it, you can extend its lifespan and keep it looking and functioning like new for years to come.

Maintaining Your Oiled Cutting Board

Once you have oiled your wooden cutting board, it is important to maintain it properly to ensure its longevity. Here are some tips for maintaining your oiled cutting board:

Regular Cleaning

To keep your cutting board clean, wash it with warm, soapy water after each use and dry it thoroughly with a clean towel. Avoid soaking the board in water or putting it in the dishwasher, as this can cause the wood to warp or crack. Additionally, avoid using abrasive cleaners or scrubbers, as they can damage the board’s surface.

Avoiding Excessive Heat and Humidity

Wooden cutting boards are sensitive to changes in temperature and humidity. Avoid exposing your board to excessive heat or moisture, as this can cause the wood to warp or crack. For example, do not place your board near a stove or in direct sunlight, and avoid storing it in a damp or humid environment.

Preventing Cross Contamination

To prevent cross-contamination, it is important to use separate cutting boards for different types of food. For example, use one board for raw meat and another for vegetables. Additionally, be sure to clean your board thoroughly after each use to remove any bacteria or food particles.

By following these simple tips, you can ensure that your oiled cutting board remains in good condition for years to come.

how-to-oil-wooden-spoons-for-long-lasting-use-2

How to Oil Wooden Spoons for Long-lasting Use

If you’re someone who loves to cook, you probably have a collection of wooden spoons and cutting boards in your kitchen. Wooden spoons are a versatile tool that can be used for stirring, mixing, and even serving. However, over time, wooden spoons can become dry and brittle, making them more susceptible to cracking and splintering. That’s where oiling comes in – it’s a simple process that can help keep your wooden spoons in great condition for years to come.

To oil your wooden spoons, you’ll need to choose an oil that’s safe for food use. Mineral oil is a popular choice, as it’s odorless, tasteless, and won’t go rancid. You can also use walnut oil, tung oil, or linseed oil – just be sure to read the label to make sure it’s safe for food use. Once you’ve chosen your oil, you’ll want to apply it generously to your wooden spoons, making sure to cover all surfaces. Let the oil soak in for at least 30 minutes, or overnight if possible, before wiping off any excess with a clean cloth.

By oiling your wooden spoons regularly, you’ll help keep them from drying out and cracking, which can extend their lifespan and make them a joy to use for years to come. With just a little bit of effort and the right oil, you can keep your wooden spoons in great condition and enjoy using them in your kitchen for many meals to come.

Understanding Wooden Spoons

how-to-oil-wooden-spoons-for-long-lasting-use-2

Wooden spoons are a staple in any kitchen. They are versatile, durable, and gentle on cookware. However, they require proper care and maintenance to ensure their longevity. In this section, we will discuss the benefits of using wooden spoons, the different types of wood used to make them, and how to properly care for them.

Benefits of Using Wooden Spoons

There are several benefits to using wooden spoons. They are:

  • Gentle on cookware: Unlike metal utensils, wooden spoons do not scratch or damage non-stick cookware.
  • Versatile: Wooden spoons can be used for stirring, mixing, scraping, and even serving.
  • Durable: Wooden spoons can last for years with proper care and maintenance.
  • Natural and eco-friendly: Wooden spoons are made from renewable resources and are biodegradable.

Types of Wood Used to Make Wooden Spoons

Different types of wood are used to make wooden spoons. The most common types are:

  • Maple: Maple wood is hard and durable, making it ideal for kitchen utensils. It has a light color and a tight grain pattern.
  • Cherry: Cherry wood is also hard and durable. It has a reddish-brown color and a distinctive grain pattern.
  • Olive: Olive wood is dense and heavy, making it perfect for cooking utensils. It has a unique grain pattern and a warm color.

Caring for Wooden Spoons

Proper care and maintenance are essential to keep your wooden spoons in good condition. Here are some tips:

  • Wash your wooden spoons by hand with warm, soapy water. Avoid soaking them in water as it can cause the wood to warp or crack.
  • Dry them thoroughly after washing. You can air dry them or use a towel to dry them off.
  • Oil your wooden spoons regularly to prevent them from drying out and cracking. Use food-grade mineral oil or walnut oil to oil your spoons.
  • Store your wooden spoons in a dry place away from heat and moisture. A utensil holder or a drawer organizer is ideal for storing them.

By following these tips, you can keep your wooden spoons in good condition for years to come.

Why Oiling is Important

If you use wooden spoons regularly, it’s important to keep them in good condition. Oiling your wooden spoons can help extend their lifespan and keep them looking beautiful. Here are a few reasons why oiling is important:

Prevents Drying and Cracking

Wooden spoons can dry out over time, especially if they’re exposed to heat or moisture. When wood dries out, it can become brittle and prone to cracking. Oiling your spoons helps to keep them hydrated, preventing them from drying out and cracking.

Protects Against Stains and Odors

Wooden spoons can absorb stains and odors from the foods you’re cooking. Oiling your spoons can help to create a barrier that protects against these stains and odors. This can help to keep your spoons looking and smelling great for longer.

Enhances the Wood’s Natural Beauty

Oiling your wooden spoons can bring out the natural beauty of the wood. It can help to highlight the grain and color of the wood, giving your spoons a unique and attractive appearance.

Improves Grip and Comfort

Oiling your wooden spoons can also improve their grip and comfort. The oil can help to smooth out any rough spots on the spoon, making it more comfortable to use. Additionally, the oil can help to create a non-slip surface, making it easier to grip the spoon while you’re cooking.

Overall, oiling your wooden spoons is an easy and effective way to keep them in great condition. By preventing drying and cracking, protecting against stains and odors, enhancing the wood’s natural beauty, and improving grip and comfort, oiling can help to extend the lifespan of your spoons and keep them looking and feeling great for years to come.

Choosing the Right Oil

choosing-the-right-oil

When it comes to oiling wooden spoons, there are a few options to consider. Here are three popular choices:

Food Grade Mineral Oil

Food grade mineral oil is a popular choice for oiling wooden spoons and cutting boards. It is a colorless, odorless, and tasteless oil that is safe for food contact. Mineral oil is also affordable and easy to find in most stores.

To use mineral oil, simply apply a small amount to the wood surface and rub it in with a clean cloth. Let it sit for a few hours or overnight, then wipe away any excess oil with a dry cloth. Repeat this process every few months to keep your wooden spoons in good condition.

Beeswax

Beeswax is a natural wax that can be used to protect and seal wooden spoons. It creates a barrier that prevents moisture from penetrating the wood and helps to prevent cracking. Beeswax also gives wooden spoons a warm, natural finish.

To use beeswax, melt a small amount in a double boiler or microwave. Apply the melted wax to the wood surface using a clean cloth or brush. Let it sit for a few minutes, then buff the surface with a dry cloth to remove any excess wax. Repeat this process every few months to maintain the protective barrier.

Coconut Oil

Coconut oil is a popular alternative to mineral oil for those who prefer a natural option. It is a solid oil at room temperature, but melts easily when warmed up. Coconut oil is also known for its antibacterial properties, which can help to keep wooden spoons clean and hygienic.

To use coconut oil, warm up a small amount until it becomes liquid. Apply the oil to the wood surface using a clean cloth, and rub it in well. Let it sit for a few hours or overnight, then wipe away any excess oil with a dry cloth. Repeat this process every few months to keep your wooden spoons in good condition.

Remember, whichever oil you choose, be sure to use a food-grade option that is safe for food contact. And always follow the manufacturer’s instructions for best results.

Oiling Process

Wooden spoons are a great addition to any kitchen, but they require proper care to maintain their quality and longevity. One of the most important steps in caring for your wooden spoons is oiling them regularly. Here is a step-by-step guide on how to oil your wooden spoons properly.

Cleaning the Spoons

Before you start oiling your wooden spoons, you need to make sure they are clean. Wash them with warm soapy water and rinse thoroughly. You can also use a mild abrasive like baking soda to remove any stains or discoloration. Once the spoons are clean, dry them with a towel and allow them to air dry completely.

Applying the Oil

Now it’s time to apply the oil. There are many different types of oils you can use, but we recommend using food-grade mineral oil or walnut oil. These oils are safe for use with food and will not turn rancid over time. Pour a small amount of oil onto a clean cloth and rub it into the wood, making sure to cover all surfaces. You can also use a brush to apply the oil if you prefer. Be sure to apply the oil generously, but not so much that it pools on the surface.

Drying and Curing

After you have applied the oil, let the spoons sit for at least 30 minutes to allow the oil to penetrate the wood. You can also let the spoons sit overnight for best results. Once the oil has had time to soak in, wipe off any excess with a clean cloth. Then, place the spoons in a well-ventilated area to dry and cure for at least 24 hours. This will help the oil to fully cure and harden, creating a protective barrier on the surface of the wood.

By following these simple steps, you can keep your wooden spoons in great condition for years to come. Remember to oil them regularly to prevent drying and cracking, and to keep them looking their best.

Maintaining Oiled Spoons

After oiling your wooden spoons, it is important to maintain them properly to ensure their longevity. Here are some tips on how to maintain your oiled spoons:

Regular Oiling

To keep your wooden spoons in good condition, it is recommended to oil them regularly. This will help prevent the wood from drying out, which can cause cracking and splintering. You can use food-grade mineral oil or coconut oil to oil your spoons.

To oil your spoons, simply apply a small amount of oil to a soft cloth or paper towel and rub it onto the surface of the spoon. Make sure to cover all crevices and the handle. Leave the oil on the spoon for a few hours or overnight to allow it to soak into the wood.

Avoiding Dishwasher

It is important to avoid washing your wooden spoons in the dishwasher. The high heat and harsh detergents can damage the wood and cause it to dry out. Instead, wash your spoons by hand using warm water and mild dish soap.

After washing, dry your spoons thoroughly with a clean towel and let them air dry completely before storing them. Do not store your spoons in a damp or humid environment, as this can cause the wood to warp or crack.

By following these simple tips, you can maintain the beauty and functionality of your oiled wooden spoons for years to come.

how-to-make-a-wooden-bow-maker

How to Make a Wooden Bow Maker: A Step-by-Step Guide

Are you tired of struggling to make perfect bows? A wooden bow maker might be just what you need! With a few simple materials and some basic woodworking skills, you can create your very own bow maker to help you create stunning bows every time.

To make a wooden bow maker, you will need a wooden board, a wood dowel, an electric saw, an electric drill, glue, sandpaper, a measuring tape, and a pencil. First, cut the wooden board to a size of 1 by 4 feet. Then, cut the wood dowel to a length of 12 to 18 inches and drill two small holes in the wooden board the same diameter as the dowel. Stick the dowel into the holes and mark it in 1-inch increments to make it easier to measure the size of your bow. Sand the edges of the board and dowel to smooth them out, and your bow maker is ready to use!

Making your own wooden bow maker is not only cost-effective, but it also allows you to customize it to your specific needs. Whether you’re creating bows for wreaths, floral arrangements, or home decor accents, a bow maker can save you time and frustration. So why not give it a try and see how it can improve your bow-making skills?

Understanding Wood Types

how-to-make-a-wooden-bow-maker

When it comes to making a wooden bow maker, choosing the right type of wood is crucial. The type of wood you use will affect the durability, flexibility, and overall performance of your bow maker. In this section, we will discuss the two main types of wood: hardwood and softwood.

Hardwood

Hardwood is a popular choice for bow makers due to its strength, durability, and flexibility. Some of the best hardwoods for bow making include Osage Orange, Yew, Maple, Black Locust, Hickory, and Ash. These woods can be easily found depending on where you live.

Each type of hardwood has its own unique characteristics. For example, Osage Orange is known for its bright orange color and high density, making it an excellent choice for a bow maker that needs to be both strong and flexible. Yew, on the other hand, is known for its strength, flexibility, and beautiful grain patterns.

Softwood

Softwood is another option for bow makers, although it is not as popular as hardwood. Softwood is less dense and less durable than hardwood, but it can still be a good choice for those on a budget or for those who prefer a lighter bow maker.

Some of the best softwoods for bow making include Pine, Cedar, and Spruce. These woods are lightweight and easy to work with, making them a good choice for beginners.

When choosing the type of wood for your bow maker, it is important to consider your skill level, budget, and the type of bow you want to make. Hardwood is generally the better choice for more experienced bow makers who want a high-performance bow maker, while softwood is a good choice for beginners or those on a budget.

Choosing the Right Wood

When it comes to making a wooden bow maker, choosing the right wood is crucial. Not all woods are created equal, and some are better suited for bow making than others. Here are some factors to consider when choosing the right wood for your bow maker:

Strength and Durability

The wood you choose should be strong and durable enough to withstand the pressure of holding the bow in place while you tie the ribbon. Some of the best hardwoods for bow making include Osage Orange, Yew, Maple, Black Locust, Hickory, and Ash. These woods have a high modulus of rupture (MOR) and low modulus of elasticity (MOE), meaning they can be bent with relative ease without breaking.

Flexibility

Flexibility is also an important factor to consider when choosing wood for your bow maker. The wood should be flexible enough to bend without breaking, but not so flexible that it loses its shape. Some woods, such as Osage Orange, have a natural elasticity that makes them ideal for bow making.

Moisture Content

The moisture content of the wood you choose is also important. Wood that is too dry or too wet can be difficult to work with and may not hold up well over time. Look for wood with a moisture content of around 10-12% for best results.

Availability

Finally, consider the availability of the wood you choose. Some woods may be harder to find than others, depending on where you live. Choose a wood that is readily available in your area to make the process easier and more affordable.

In conclusion, choosing the right wood for your bow maker is crucial for ensuring its strength, durability, and flexibility. Consider the factors outlined above when making your choice to ensure the best possible results.

Tools Needed

To make a wooden bow maker, you will need a few tools to get started. Here are the main tools that you will need:

Saw

A saw is an essential tool for making a wooden bow maker. You will need a saw to cut the wood into the right size and shape. A hand saw or a circular saw can be used, depending on your preference and the type of wood you are using.

Knife

A sharp knife is also necessary for making a wooden bow maker. You will need a knife to carve the wood and shape it into the desired form. A good quality carving knife with a sharp blade is recommended.

Rasp

A rasp is a tool that you will need to shape the wood and smooth out any rough edges. A half-round rasp is ideal for shaping the wood, while a flat rasp is perfect for smoothing out the surface. A rasp is an essential tool for making a wooden bow maker.

Having the right tools is crucial for making a wooden bow maker. With the right tools, you can easily shape the wood and create a bow maker that is both functional and aesthetically pleasing. Make sure to invest in high-quality tools that will last for a long time and make your job easier.

Creating the Bow Shape

creating-the-bow-shape

To create the perfect bow shape, you will need to use your wooden bow maker. Follow these simple steps to create the perfect bow:

  1. Cut a piece of ribbon to the desired length and lay it across the center of the bow maker.
  2. Take one end of the ribbon and loop it over the top of the bow maker, making sure the pretty side of the ribbon is facing up.
  3. Loop the other end of the ribbon over the top of the bow maker, making sure the pretty side of the ribbon is facing up as well.
  4. Take the first loop and bring it down to the bottom of the bow maker, making sure the ribbon is flat and not twisted.
  5. Take the second loop and bring it down to the bottom of the bow maker, making sure the ribbon is flat and not twisted.
  6. Tie the two loops together in the center of the bow maker with a piece of string or ribbon.
  7. Remove the bow from the bow maker and fluff the loops to create the desired shape.

Creating the perfect bow shape takes practice, but with the help of a wooden bow maker, it can be easy and fun. Experiment with different ribbon sizes and colors to create unique and beautiful bows for any occasion.

Carving the Bow

Now that you have your wooden board prepared, it’s time to carve the bow. Follow these steps to create a functional and sturdy bow:

  1. Choose a wood that is flexible enough to bend without breaking. Yew, hickory, and Osage orange are popular choices for bow making.
  2. Use a drawknife or a hand saw to shape the bow. Start by marking the center of the board and draw a line down the length of the board to indicate the center. Then, draw the shape of the bow on the board. Make sure to leave enough wood for the grip and the tips of the bow.
  3. Carve the bow with a rasp or a file. Start by shaping the grip of the bow and then move on to the limbs. The limbs should be thinner at the tips and thicker at the grip. Make sure to keep the limbs symmetrical and smooth.
  4. Sand the bow with fine-grit sandpaper to smooth out any rough spots or splinters. This will also help to remove any tool marks left by the rasp or file.
  5. Apply a finish to the bow to protect it from moisture and wear. Tung oil, linseed oil, or varnish are popular choices for bow finishes.

Remember to take your time and be patient while carving the bow. It may take several hours or even days to create a well-crafted bow. But with practice and persistence, you will be able to create a beautiful and functional bow that you can be proud of.

Sanding and Finishing

Once you have created your wooden bow maker, you will want to make sure that it is sanded and finished properly to ensure that it lasts a long time and looks great. Here are some tips on how to do that:

Sanding

Sanding is an important step in finishing your wooden bow maker. It helps to smooth out any rough edges and create a polished finish. Here are some tips on how to sand your bow maker:

  • Use sandpaper with a fine grit, such as 220 or 320, to sand the surface of the wood.
  • Sand in the direction of the wood grain to avoid creating scratches or marks.
  • Use a sanding block to keep the sandpaper flat and even.
  • Sand both the inside and outside of the bow maker to ensure that it is smooth all around.

Finishing

Finishing your wooden bow maker will help to protect it from the elements and give it a professional look. Here are some tips on how to finish your bow maker:

  • Use a wood sealer to protect the wood from moisture and prevent it from warping or cracking.
  • Apply the sealer in thin coats, using a brush or cloth to ensure that it covers the entire surface of the wood.
  • Allow the sealer to dry completely before applying a second coat.
  • Once the sealer is dry, you can apply a wood stain or paint to give your bow maker a unique look.
  • Use a clear coat to protect the stain or paint and give your bow maker a glossy finish.

By following these tips, you can create a beautiful and long-lasting wooden bow maker that will help you create stunning bows every time.

Stringing the Bow

Once you have completed shaping your wooden bow, it’s time to string it. This is where the bowstring comes in. The bowstring is what connects the two ends of the bow and creates the tension necessary for the bow to function.

To string the bow, you will need a bowstring that is the correct length for your bow. You can purchase pre-made bowstrings or make your own using bowstring material.

To attach the bowstring, follow these steps:

  1. Place the bow on a flat surface with the bottom facing up.
  2. Take the bowstring and place one end on the bottom tip of the bow.
  3. Bend the bow slightly and loop the other end of the bowstring around the top tip of the bow.
  4. Adjust the bowstring until it is snug against the bow and centered on the handle.
  5. Check the bowstring tension by pulling it back slightly. It should be taut but not overly tight.

It’s important to note that the bowstring will stretch over time, so it’s important to check the tension regularly and adjust as necessary.

With your bow now strung, you’re ready to start practicing your archery skills. Remember to always use caution and proper safety measures when handling a bow and arrow.

Safety Tips

When working with wood and power tools, safety should always be your top priority. Here are a few tips to keep in mind when making your wooden bow maker:

  • Wear protective gear: Always wear safety goggles, ear protection, and a dust mask when using power tools. Gloves can also be helpful when handling rough wood.
  • Keep your workspace clean: Make sure your workspace is well-lit and free of clutter. Keep your tools organized and within reach, but out of the way of your movements.
  • Use the right tools: Make sure you have the right tools for the job and that they are in good working condition. Using the wrong tool or a damaged tool can be dangerous.
  • Follow the instructions: Read and follow the instructions that come with your power tools and equipment. If you are unsure about how to use a tool or machine, ask for help or seek guidance from an expert.
  • Take breaks: Take frequent breaks to rest your eyes, stretch your muscles, and clear your mind. Working for extended periods of time can lead to fatigue and mistakes.
  • Be aware of your surroundings: Always be aware of your surroundings and the people around you. Keep your focus on your work and avoid distractions.

By following these safety tips, you can help ensure a safe and enjoyable woodworking experience.

Maintaining Your Wooden Bow Maker

Congratulations on making your own wooden bow maker! Now that you have it, you’ll want to make sure it stays in good condition so you can continue to create beautiful bows. Here are some tips for maintaining your wooden bow maker:

Keep it Clean

To keep your wooden bow maker in good condition, it’s important to keep it clean. After each use, wipe it down with a damp cloth to remove any excess glue or debris. If necessary, use a soft-bristled brush to remove any stubborn debris. Avoid using harsh chemicals or abrasive cleaners, as they can damage the wood.

Store it Properly

When not in use, store your wooden bow maker in a dry, cool place. Avoid exposing it to direct sunlight or extreme temperatures, as this can cause the wood to warp or crack. You may want to consider storing it in a protective case or bag to prevent dust and debris from accumulating on it.

Oil the Wood

To keep the wood from drying out and cracking, it’s a good idea to oil it periodically. You can use a food-grade mineral oil or a specialized wood oil to keep the wood moisturized. Apply the oil with a soft cloth, and wipe away any excess.

Check for Wear and Tear

Regularly check your wooden bow maker for any signs of wear and tear. If you notice any cracks, splits, or other damage, stop using it immediately and repair or replace it as necessary. It’s better to catch any problems early on, before they become more serious.

By following these simple tips, you can keep your wooden bow maker in good condition for years to come. Happy bow-making!

How to Clean a Wooden Charcuterie Board: Tips and Tricks

Keeping your wooden charcuterie board clean is essential for maintaining its longevity and ensuring your food stays safe to eat. While wooden boards are beautiful and functional, they require a bit more care than other materials. In this article, we’ll go over the best practices for cleaning your wooden charcuterie board to keep it in top condition.

First things first, it’s important to avoid soaking your wooden board in water or putting it in the dishwasher. This can cause the wood to warp or crack, which can ruin the board. Instead, use a sponge or cloth with warm water and soap to clean the board thoroughly. Scrubbing the board well and being generous with the amount of water is more important than using soap in flushing any food and bacteria off the board. After washing, air dry the board immediately on a raised rack or standing on a towel to allow airflow on both sides.

Next, it’s important to oil your wooden board regularly to prevent it from drying out and cracking. Using a soft, lint-free cloth, apply a small amount of food-grade mineral oil to the surface of the board and buff it in until the wood is no longer absorbing the product. Wipe off any excess oil and let the board sit for a few hours before using it again. By following these simple steps, you can keep your wooden charcuterie board in great condition for years to come.

Understanding the Nature of Your Wooden Charcuterie Board

If you’re the proud owner of a wooden charcuterie board, you know how important it is to keep it clean and well-maintained. But before you start cleaning your board, it’s important to understand the nature of the wood and how it reacts to different cleaning methods.

Types of Wood

Charcuterie boards are often made from hardwoods like maple, oak, and walnut. These woods are durable and can withstand the repeated use and cleaning that charcuterie boards require. However, not all woods are created equal, and some may be more prone to warping or cracking than others.

Porosity

Wood is a porous material, which means it can absorb moisture and bacteria. This is why it’s important to properly clean and sanitize your charcuterie board after each use. However, some woods are more porous than others, which can make them more susceptible to absorbing moisture and bacteria.

Cutting vs. Serving

It’s important to note that there is a difference between a cutting board and a serving board. Cutting boards are designed to withstand the repeated use of knives, while serving boards are meant to showcase food and be used for serving only. If you plan to use your charcuterie board for cutting, make sure it’s thick enough to withstand the pressure of a knife.

Cleaning and Maintenance

When it comes to cleaning and maintaining your wooden charcuterie board, there are a few things to keep in mind. First, never soak your board in water or put it in the dishwasher. This can cause the wood to warp or crack. Instead, use a damp sponge or cloth to clean the surface of the board.

It’s also important to regularly sanitize your board to prevent the growth of bacteria. You can do this by using a mixture of coarse salt and lemon juice, or by using a food-safe disinfectant spray.

By understanding the nature of your wooden charcuterie board, you can ensure that it stays in good condition for years to come.

Pre-Cleaning Preparations

Before you start cleaning your wooden charcuterie board, it’s important to gather all the essential cleaning materials and prepare your cleaning area. This will ensure that you have everything you need and that the cleaning process goes smoothly.

Gathering Essential Cleaning Materials

To properly clean your wooden charcuterie board, you will need the following materials:

  • Warm water
  • Mild dish soap
  • Sponge or cloth
  • Distilled white vinegar or 3% hydrogen peroxide
  • Food-grade mineral oil
  • Lint-free cloth
  • Optional: Food-grade wax finish, such as butcher block wax or Clapham’s Salad Bowl Finish

Make sure to use food-grade materials that are safe for use with your charcuterie board. Avoid using harsh chemicals or abrasive materials that can damage the wood.

Preparing Your Cleaning Area

Before you start cleaning your wooden charcuterie board, you should prepare your cleaning area. Here are a few steps you can take to prepare:

  1. Clear the area: Remove any items from the area around your charcuterie board to prevent them from getting in the way or getting dirty.

  2. Lay down a towel: Place a clean towel or cloth on your work surface to protect it from water and cleaning solutions.

  3. Set up your materials: Arrange your cleaning materials within easy reach. This will make the cleaning process more efficient and prevent you from having to search for materials mid-way through.

By taking these steps to prepare your cleaning area, you can ensure that you have a clean and organized space to work in. This will make the cleaning process easier and more effective.

The Cleaning Process

When it comes to cleaning your wooden charcuterie board, it’s important to take the right steps to ensure that it stays in good condition and free from bacteria. Here’s a step-by-step guide on how to clean your board properly.

Wiping Down the Board

The first step in cleaning your wooden charcuterie board is to wipe it down with a damp cloth or sponge. This will remove any loose debris and crumbs from the surface of the board. It’s important to use a damp cloth rather than a wet one, as excess water can cause the wood to warp and crack.

Applying the Cleaning Solution

Once you have wiped down the board, it’s time to apply the cleaning solution. There are a few different options for cleaning solutions, but one of the most effective is a mixture of warm water and mild dish soap. You can also use a solution of equal parts white vinegar and water, or a mixture of baking soda and water.

To apply the cleaning solution, dip a clean sponge or cloth into the solution and wring it out so that it’s damp but not dripping. Then, use the sponge or cloth to gently scrub the surface of the board, working in the direction of the grain. Be sure to get into all the corners and crevices of the board.

Scrubbing the Board

After you have applied the cleaning solution, it’s time to scrub the board. Using a soft-bristled brush or a scrubbing pad, gently scrub the surface of the board in circular motions. Be careful not to scrub too hard, as this can damage the wood.

Once you have scrubbed the entire surface of the board, rinse it thoroughly with warm water to remove any remaining cleaning solution. Then, use a clean towel to dry the board completely. It’s important to let the board air dry completely before using it again, as excess moisture can cause the wood to warp and crack.

By following these simple steps, you can keep your wooden charcuterie board clean and free from bacteria, ensuring that it lasts for years to come.

Drying the Board Properly

After washing your wooden charcuterie board, it’s important to dry it properly to prevent any warping or cracking. Here are some tips for drying your board:

  1. Air dry: The best way to dry your board is to let it air dry completely. Place it on a raised rack or stand it on a towel to allow airflow on both sides. This will ensure that both sides of the board dry evenly.

  2. Towel dry: If you’re in a hurry, you can towel dry your board. Use a clean, dry towel to wipe away any excess water. Make sure to dry both sides of the board thoroughly.

  3. Avoid heat: Do not place your board near a heat source or in direct sunlight to dry. This can cause the board to warp or crack.

  4. Don’t stack: Do not stack your boards while they are still wet. This can trap moisture between the boards and cause them to warp or stick together.

  5. Oil the board: Once your board is completely dry, you can apply a thin layer of food-grade mineral oil to protect and condition the wood. Use a soft cloth to apply the oil in the direction of the grain, and let it soak in for a few hours before wiping away any excess oil.

By following these simple steps, you can ensure that your wooden charcuterie board stays in good condition for years to come.

Maintenance Tips for Your Wooden Charcuterie Board

If you want your wooden charcuterie board to last for years, it’s essential to take good care of it. Here are some maintenance tips to help you keep your board in excellent condition.

Regular Cleaning

To prevent bacteria growth, you should clean your wooden charcuterie board after each use. Here’s how to do it:

  1. Rinse the board with hot water and use a sponge or cloth to remove any food debris.
  2. Use a mild dish soap and warm water to clean the board thoroughly.
  3. Rinse the board with hot water and dry it with a clean towel.
  4. Let the board air dry completely before storing it.

Proper Storage

Proper storage is crucial to keep your wooden charcuterie board in good condition. Here are some tips:

  1. Store your board in a dry, cool place away from direct sunlight.
  2. Never stack your board on top of other boards or objects.
  3. Store your board flat or on its side to prevent warping.

When to Oil Your Board

Oiling your wooden charcuterie board is essential to keep it from drying out and cracking. Here’s how to do it:

  1. Apply a food-grade mineral oil to your board using a clean cloth or paper towel.
  2. Rub the oil into the board, making sure to cover the entire surface.
  3. Let the oil soak into the board for at least 30 minutes.
  4. Wipe off any excess oil with a clean cloth or paper towel.

You should oil your board once a month or as needed, depending on how often you use it.

By following these maintenance tips, you can keep your wooden charcuterie board in excellent condition and enjoy it for years to come.

How Often to Oil Your Wooden Cutting Board: A Guide to Keeping it in Top Condition

If you’re a home cook who loves using a wooden cutting board, you know how important it is to take care of it properly. One of the most important things you can do to maintain your cutting board’s longevity is to oil it regularly. But how often should you oil your wooden cutting board?

According to experts, you should oil your wooden cutting board at least once a month. This will help prevent the wood from drying out and cracking, which can lead to bacteria growth and make your cutting board unsafe to use. However, the frequency of oiling your cutting board may depend on how often you use it and how frequently you clean it.

If you’re not sure whether your cutting board needs oiling, you can perform a simple water test. Just flick a few drops of water onto the board, and if it beads up, your board is still well-oiled. If the water soaks into the board, it’s time to oil it. By oiling your cutting board regularly, you’ll help keep it in good condition and ensure it lasts for years to come.

Understanding Your Wooden Cutting Board

If you’re a fan of cooking, you know that a good cutting board is a must-have in every kitchen. While plastic cutting boards are popular, wooden cutting boards are a great choice because they are durable, long-lasting, and can be resurfaced when they become worn. However, wooden cutting boards require proper care and maintenance to keep them in good condition.

Wooden cutting boards are made from different types of wood, including maple, teak, cherry, and walnut. Each type of wood has its unique characteristics and requires different care. For example, maple is a hard and durable wood that is perfect for cutting boards. On the other hand, teak is a softwood that is naturally resistant to water and moisture, making it ideal for outdoor furniture.

When it comes to maintaining your wooden cutting board, the most important thing you can do is to keep it clean and dry. After each use, wash your cutting board with warm soapy water, rinse it thoroughly, and dry it with a clean towel. Never soak your wooden cutting board in water or put it in the dishwasher, as this can cause the wood to warp and crack.

Another essential step in maintaining your wooden cutting board is to oil it regularly. Oiling your cutting board helps to seal the wood and prevent it from drying out, cracking, or absorbing moisture. The type of oil you use will depend on your personal preference, but food-grade mineral oil is a popular choice. You can also use coconut oil, beeswax, or a combination of oils and waxes.

In general, you should oil your wooden cutting board once a month, or more often if you use it frequently. When oiling your cutting board, apply a thin layer of oil to the entire surface of the board, using a clean cloth or paper towel. Let the oil soak in for a few hours or overnight, then wipe off any excess oil with a clean cloth.

By understanding the type of wood your cutting board is made from and following proper care and maintenance, you can ensure that your wooden cutting board will last for years to come.

Why Oil Your Wooden Cutting Board

If you own a wooden cutting board, it’s important to oil it regularly. Oiling your cutting board will help preserve the wood and prevent bacteria growth. Here are some reasons why you should oil your wooden cutting board:

Preserving the Wood

Wooden cutting boards are a great addition to any kitchen because they are durable and can last for years. However, without proper maintenance, they can become dry and brittle, which can lead to cracking and splitting. By oiling your wooden cutting board regularly, you can help preserve the wood and extend its lifespan.

When you oil your cutting board, the oil penetrates the wood and helps to keep it moisturized. This prevents the wood from drying out and becoming brittle. Oiling also helps to protect the wood from moisture and humidity, which can cause the wood to warp or crack.

Preventing Bacteria Growth

Another important reason to oil your wooden cutting board is to prevent bacteria growth. When you cut food on a wooden cutting board, the knife can create small grooves and scratches in the wood. These grooves can trap food particles and bacteria, which can lead to cross-contamination and foodborne illness.

Oiling your wooden cutting board helps to fill in these grooves and create a smooth surface that is less likely to trap bacteria. Additionally, some oils have natural antimicrobial properties that can help to kill bacteria and prevent it from growing on your cutting board.

Overall, oiling your wooden cutting board is an important step in maintaining its quality and preventing bacteria growth. By taking the time to oil your cutting board regularly, you can ensure that it lasts for years and keeps your food safe.

Choosing the Right Oil

When it comes to choosing the right oil for your wooden cutting board, there are a few things you want to keep in mind. In this section, we will discuss food-grade oils and avoiding certain oils.

Food-Grade Oils

When selecting an oil for your cutting board, it is important to choose a food-grade oil. This means that the oil is safe for consumption and will not harm you if ingested accidentally. Here are some of the most popular food-grade oils for cutting boards:

  • Mineral Oil: This is the most commonly used oil for cutting boards. It is odorless, tasteless, and does not go rancid. It is also affordable and easy to find in most stores.
  • Coconut Oil: This oil has natural antimicrobial properties and can help prevent bacteria from growing on your cutting board. It also has a pleasant scent and taste.
  • Beeswax: This oil is often used in combination with mineral oil to create a board cream. It helps protect the board from moisture and can help fill in any small cracks or scratches.

Avoiding Certain Oils

While there are many food-grade oils that are safe for use on cutting boards, there are also some oils you should avoid. These oils can go rancid quickly and may leave a sticky residue on your board. Here are some oils to avoid:

  • Olive Oil: This oil can go rancid quickly and may leave a sticky residue on your board.
  • Vegetable Oil: This oil can also go rancid quickly and may leave a sticky residue on your board.
  • Nut Oils: These oils can cause allergic reactions in some people and may go rancid quickly.

In conclusion, choosing the right oil for your wooden cutting board is important for maintaining its longevity and keeping it safe for use. Stick to food-grade oils and avoid oils that can go rancid quickly or cause allergic reactions.

How Often to Oil Your Wooden Cutting Board

Keeping your wooden cutting board well-oiled is essential to ensure its longevity. But how often should you oil it? The answer depends on how frequently you use it and how well you maintain it.

As a general rule of thumb, you should oil your wooden cutting board once a month. However, if you use it heavily or notice that it looks dry, you may need to oil it more often.

To oil your cutting board, start by cleaning it thoroughly with soap and water. Let it dry completely before applying the oil. You can use mineral oil, food-grade linseed oil, or coconut oil to oil your cutting board. Avoid using vegetable or olive oil as they can turn rancid and leave a bad taste.

Apply a generous amount of oil to the board and spread it evenly with a clean cloth or paper towel. Let the oil soak in for a few hours or overnight. Then, wipe off any excess oil with a clean cloth.

In addition to regular oiling, you should also wax your cutting board once or twice a month. Waxing helps to seal the wood and prevent moisture from penetrating it. To wax your cutting board, apply a small amount of beeswax or board cream to the surface and buff it in with a clean cloth.

Remember, a well-oiled and waxed cutting board not only looks good but also helps to prevent bacteria from growing on its surface. So, make sure to oil and wax your wooden cutting board regularly to keep it in top condition.

Signs Your Cutting Board Needs Oiling

If you use a wooden cutting board, it’s crucial to oil it regularly to keep it in good condition. But how do you know when it’s time to oil your board? Here are some signs to look out for:

1. Dryness

If your cutting board feels dry to the touch or looks dull, it’s a sign that it needs oiling. A dry board can easily crack and split, which can be dangerous when you’re using a knife.

2. Water Absorption

Wooden cutting boards are porous, which means they can absorb water. If your board is soaking up water and feels heavier than usual, it’s time to oil it. Over time, excess water can cause the board to warp or even develop mold.

3. Rough Texture

If your cutting board feels rough or has visible scratches, it’s a sign that it needs oiling. Oiling can help fill in the scratches and smooth out the surface of the board.

4. Foul Odor

If your cutting board has a bad smell, it’s a sign that bacteria may be growing on it. Oiling can help prevent bacteria from growing and eliminate any unpleasant odors.

By oiling your cutting board regularly, you can extend its lifespan and keep it in good condition. Keep an eye out for these signs, and be sure to oil your board at least once a month to keep it in top shape.

The Oiling Process

When it comes to maintaining your wooden cutting board, oiling is an essential step that you should not skip. Proper oiling can help extend the life of your board and keep it looking like new for years to come. Here are the steps you should follow to oil your wooden cutting board:

Cleaning Before Oiling

Before you start the oiling process, it is important to clean your board thoroughly. Use warm, soapy water and a sponge to scrub the surface of the board. Rinse with clean water and dry with a towel. Make sure the board is completely dry before you start applying the oil.

Applying the Oil

When it comes to selecting an oil for your cutting board, there are several options available. Mineral oil, coconut oil, and beeswax are all popular choices. Apply the oil to the board using a clean, dry cloth. Rub the oil into the board in a circular motion, making sure to cover the entire surface of the board. Be sure to pay special attention to the edges and corners of the board.

Drying Time

After you have applied the oil, let the board sit for at least 30 minutes to allow the oil to soak in. If the board still feels dry after this time, you can apply another coat of oil. Once the board has absorbed the oil, wipe off any excess with a clean, dry cloth. Let the board sit for at least 24 hours before using it again.

By following these simple steps, you can keep your wooden cutting board in top condition for years to come. Remember to oil your board regularly to ensure it stays looking like new.

How Long Do Wooden Spoons Last? A Friendly Guide to Wooden Spoon Lifespan

Wooden spoons are a staple in many kitchens, but have you ever wondered how long they should last? While some may believe that wooden spoons are a one-time purchase, the truth is that they do have a lifespan. The good news is that with proper care, wooden spoons can last for years.

According to Her World, wooden spoons should be replaced every five years or so. One sign that it’s time to replace your spoon is if it has any cracks, as bacteria can live in them and spread germs. However, with regular cleaning and oiling, you can extend the life of your wooden spoons and ensure that they remain a valuable kitchen tool for years to come.

To care for your wooden spoons, hand-wash them with hot water and mild dish soap. Avoid putting them in the dishwasher, as the high temperatures and long cycles can cause damage. Additionally, periodically rub your wooden spoons with mineral, walnut, tung, or linseed oil to revive them and ensure that they remain in good condition. By following these simple steps, you can keep your wooden spoons in top shape and enjoy using them in your kitchen for years to come.

Understanding Wooden Spoons

Wooden spoons are a staple in most kitchens. They are versatile, easy to use, and don’t scratch cookware. But how long do they really last? The answer depends on how well you take care of them.

Wooden spoons are made from various types of wood, including maple, cherry, and olive. Each type of wood has its own unique properties, but they all have one thing in common: they are porous. This means that if they are not properly cared for, they can absorb moisture and bacteria, which can lead to cracks, warping, and even mold.

To ensure that your wooden spoons last as long as possible, it’s important to follow some basic care guidelines:

  • Hand wash your wooden spoons with warm, soapy water and dry them immediately. Do not soak them in water or put them in the dishwasher, as this can cause them to warp and crack.
  • Oil your wooden spoons regularly with food-grade mineral oil or beeswax to keep them from drying out and cracking. Apply the oil or wax with a clean cloth and let it absorb for a few hours before wiping off any excess.
  • Avoid exposing your wooden spoons to extreme temperatures or direct sunlight, as this can cause them to warp and crack.
  • If your wooden spoons develop rough spots or splinters, sand them down with fine-grit sandpaper and re-oil them.

By following these simple tips, you can extend the life of your wooden spoons and enjoy their many benefits for years to come.

Factors Affecting the Lifespan of Wooden Spoons

When it comes to wooden spoons, the lifespan can vary depending on several factors. Here are some of the most important factors that can affect how long your wooden spoons last.

Material Quality

The quality of the wood used to make your wooden spoons can have a significant impact on their lifespan. High-quality woods like maple, cherry, and walnut are more durable and resistant to cracking and splitting than softer woods like pine or cedar. Additionally, wooden spoons made from laminated or composite woods tend to last longer than those made from a single piece of wood.

Usage

The way you use your wooden spoons can also affect their lifespan. Using your spoons to stir hot liquids or acidic foods can cause the wood to warp or crack over time. Similarly, using your spoons to scrape the bottom of a pan or pot can cause the edges to become rough and splintered, which can make them less effective and shorten their lifespan.

Maintenance

Proper maintenance is essential for extending the lifespan of your wooden spoons. Here are some tips to keep in mind:

  • Hand wash your spoons with hot water and mild soap, and dry them immediately after washing.
  • Avoid soaking your spoons in water or putting them in the dishwasher, as this can cause the wood to swell and warp.
  • Use a food-safe oil like mineral oil or beeswax to condition your spoons regularly. This will help protect the wood and prevent it from drying out and cracking.
  • Store your spoons in a dry, cool place away from direct sunlight and heat sources.

By taking these factors into account and properly caring for your wooden spoons, you can help ensure that they last for years to come.

Signs of Wear and Tear

Wooden spoons are a kitchen staple, but they don’t last forever. Over time, wooden spoons can become worn and damaged, making them less effective and potentially unsafe to use. Here are some signs that it’s time to replace your wooden spoon:

  • Cracks: If your wooden spoon has any cracks, it’s time to replace it. Cracks can harbor bacteria and germs, which can be transferred to your food and potentially make you sick. Check your wooden spoons regularly for cracks, and replace them if you find any.

  • Splintering: If your wooden spoon is splintering, it’s time to replace it. Splinters can break off in your food, which can be a choking hazard or cause injury to your mouth or throat. If you notice any splintering, it’s best to err on the side of caution and replace your spoon.

  • Warping: If your wooden spoon is warped, it may not be effective for stirring or scraping. Warped spoons can also scratch your cookware, which can damage non-stick coatings. If your spoon is warped, it’s time to replace it.

  • Discoloration: If your wooden spoon is discolored, it may be a sign that it’s time to replace it. Discoloration can be a sign of mold or mildew, which can be harmful to your health. If you can’t remove the discoloration with cleaning, it’s best to replace your spoon.

  • Odor: If your wooden spoon has a strong odor, it may be a sign that it’s time to replace it. Odors can be a sign of bacteria or mold, which can be harmful to your health. If you can’t remove the odor with cleaning, it’s best to replace your spoon.

In general, it’s a good idea to replace your wooden spoons every few years, depending on how often you use them and how well you take care of them. Regularly inspect your wooden spoons for signs of wear and tear, and replace them if you notice any issues. By doing so, you can keep your kitchen safe and your food delicious.

Proper Care and Maintenance of Wooden Spoons

When cared for properly, wooden spoons can last for many years. Here are some tips on how to clean, store, and maintain your wooden spoons.

Cleaning

Hand-washing is the best way to clean wooden spoons. Use hot water and mild dish soap to clean them thoroughly. Avoid using abrasive sponges or pads that can scratch the surface of the wood. Rinse the spoons well and dry them with a clean towel.

Never put wooden spoons in the dishwasher, as the high heat and moisture can cause the wood to warp or crack. Also, avoid soaking wooden spoons in water for extended periods of time, as this can cause the wood to swell and crack.

Storage

Proper storage is key to keeping your wooden spoons in good condition. Store them in a dry place away from direct sunlight and heat sources. You can keep them in a utensil holder or a drawer. If you store them in a drawer, make sure they are not crowded, as this can cause them to become scratched or damaged.

Periodic Maintenance

To keep your wooden spoons looking and functioning their best, you should oil them periodically. Mineral, walnut, tung, or linseed oil are good options. Rub a small amount of oil onto the surface of the spoon with a clean cloth, and let it sit for a few hours or overnight. Wipe off any excess oil with a clean cloth before using the spoon.

If your wooden spoons become stained or discolored, you can try using a mixture of baking soda and water to remove the stains. Mix a small amount of baking soda with enough water to form a paste, and apply it to the stained area. Let it sit for a few minutes, and then rinse it off with water. Dry the spoon thoroughly before using it again.

By following these simple tips, you can extend the life of your wooden spoons and keep them looking and functioning their best for years to come.

Environmental Impact of Wooden Spoons

When it comes to the environmental impact of wooden spoons, there are a few things to consider. First, wooden spoons are made from a renewable resource – trees. This means that they have a lower environmental impact than utensils made from non-renewable resources like plastic or metal.

Additionally, wooden spoons are biodegradable and compostable. This means that when they reach the end of their life, they can be disposed of in a way that is much better for the environment than plastic utensils that can take hundreds of years to break down.

However, it is important to note that not all wooden spoons are created equal. Some wooden spoons may be made from unsustainable sources or may be treated with chemicals that are harmful to the environment. It is important to do your research and choose wooden spoons that are sustainably sourced and do not contain harmful chemicals.

Overall, wooden spoons are a great option for those looking to reduce their environmental impact in the kitchen. They are made from a renewable resource, are biodegradable and compostable, and can be used for many years before needing to be replaced.

Alternatives to Wooden Spoons

While wooden spoons are a popular choice for cooking and baking, there are other materials you can consider. Here are some alternatives to wooden spoons:

Silicone Spoons

Silicone spoons are a great alternative to wooden spoons. They are heat-resistant, non-stick, and easy to clean. They come in a variety of colors and sizes, making them a fun addition to your kitchen.

Stainless Steel Spoons

Stainless steel spoons are durable and easy to clean. They are great for cooking and stirring hot foods. They also come in a variety of sizes and shapes, making them versatile for different cooking needs.

Nylon Spoons

Nylon spoons are lightweight and flexible. They are great for cooking and baking, especially for non-stick cookware. They are also dishwasher safe, making them easy to clean.

Bamboo Spoons

Bamboo spoons are similar to wooden spoons but are more eco-friendly. They are durable and easy to clean, making them a great alternative to traditional wooden spoons.

Plastic Spoons

Plastic spoons are affordable and come in a variety of colors and sizes. They are great for cooking and baking, but may not be as durable as other materials.

When choosing an alternative to wooden spoons, consider your cooking needs and personal preferences. Each material has its own benefits and drawbacks, so choose the one that best suits your needs.

How to Decorate Wooden Spoons: Simple DIY Ideas for Your Kitchen

Are you looking for a fun and creative way to add some personality to your kitchen utensils? Look no further than decorating your wooden spoons! With just a few supplies and some imagination, you can transform plain wooden spoons into unique and personalized pieces that will add a touch of charm to your cooking routine.

One popular method for decorating wooden spoons is decoupage. This involves cutting out images or patterns from paper or fabric and adhering them to the surface of the spoon with glue or Mod Podge. Another option is to use paint or markers to draw designs directly onto the wooden surface. You can also experiment with adding texture using materials like yarn or twine. The possibilities are endless, and the end result is a one-of-a-kind utensil that reflects your personal style.

Whether you’re looking to create a thoughtful handmade gift or just want to spruce up your own kitchen, decorating wooden spoons is a fun and easy DIY project that anyone can tackle. So grab some supplies and get creative – your kitchen (and your taste buds) will thank you!

Understanding Wooden Spoons

Wooden spoons are a versatile kitchen tool that can be used for cooking, serving, and even decoration. They are typically made of hardwood, which is durable and resistant to heat and moisture. Some common types of wood used for wooden spoons include maple, cherry, beech, and olive wood.

One of the benefits of using wooden spoons is that they are gentle on cookware and won’t scratch non-stick surfaces. They are also less likely to transfer heat than metal utensils, which can be helpful when stirring hot liquids or sauces.

When selecting a wooden spoon, look for one that is well-crafted and has a smooth finish. Avoid spoons with rough or splintered edges, as they may be uncomfortable to hold and can be difficult to clean.

It’s important to properly care for your wooden spoons to ensure their longevity. Avoid soaking them in water for extended periods of time, as this can cause the wood to swell and warp. Instead, wash them by hand with mild soap and warm water, and dry them thoroughly before storing.

In addition to their practical uses, wooden spoons can also be decorated to add a personal touch to your kitchen. You can use a variety of techniques, such as decoupage, painting, or wood burning, to create unique designs on your spoons.

Overall, wooden spoons are a versatile and practical addition to any kitchen. With proper care and maintenance, they can last for many years and provide a touch of warmth and charm to your home.

Choosing the Right Wooden Spoons

When it comes to decorating wooden spoons, choosing the right type of wood, size, and shape can make all the difference. Here are some factors to consider before you start decorating your wooden spoons.

Type of Wood

The type of wood you choose for your wooden spoons can affect their durability, appearance, and overall quality. Here are some common types of wood used for wooden spoons:

  • Beechwood: Beechwood is a popular choice for wooden spoons because it is durable, lightweight, and has a neutral color that can be easily stained or painted.
  • Maple: Maple is another popular choice for wooden spoons because it is hard, dense, and has a fine grain that looks great when polished.
  • Cherry: Cherry wood has a warm, reddish-brown color that looks great when oiled or waxed. It is also durable and has a smooth, fine grain that is easy to carve.
  • Walnut: Walnut wood has a rich, dark color and a straight grain that looks great when polished. It is also durable and resistant to cracking and splitting.

When choosing the type of wood for your wooden spoons, consider your personal preferences, the type of decoration you plan to apply, and the intended use of the spoons.

Size and Shape

The size and shape of your wooden spoons can also affect their appearance and functionality. Here are some factors to consider when choosing the size and shape of your wooden spoons:

  • Length: The length of your wooden spoons can affect their reach and versatility. Longer spoons are great for stirring soups and stews, while shorter spoons are better for mixing small batches of ingredients.
  • Bowl Shape: The shape of the spoon bowl can affect its ability to scoop and hold ingredients. A round bowl is great for stirring and mixing, while a flat or angled bowl is better for scraping and spreading.
  • Handle Shape: The shape of the handle can affect the grip and comfort of the spoon. A straight handle is great for precision tasks, while a curved handle can provide a more ergonomic grip.

When choosing the size and shape of your wooden spoons, consider the tasks you will be using them for and your personal preferences for comfort and style.

With these factors in mind, you can choose the right wooden spoons for your decorating project and create beautiful, functional kitchen utensils that will last for years to come.

Materials Needed for Decoration

Decorating wooden spoons is a fun and easy DIY project that anyone can do. Before you start, you will need to gather a few materials to get you started. Here are the materials you will need:

Wooden Spoons

The first thing you will need is a set of wooden spoons. You can find these at most craft stores or online. Make sure to choose spoons that are smooth and have no cracks or splinters.

Paint

You will need paint to decorate your wooden spoons. Acrylic paint is a great option because it is easy to work with and comes in a wide range of colors. You can also use spray paint if you want a more even finish.

Brushes

You will need brushes to apply the paint to your wooden spoons. Make sure to choose brushes that are the right size for the designs you want to create.

Decoupage Glue

Decoupage glue is a great option if you want to add paper or fabric designs to your wooden spoons. This glue dries clear and will give your spoons a nice finish.

Embellishments

If you want to add some extra flair to your wooden spoons, you can use embellishments like beads, buttons, or ribbon. These can be glued on with craft glue.

Sealer

To protect your designs and make your spoons last longer, you will need to apply a sealer. Mod Podge or a clear acrylic spray sealer are both good options.

With these materials, you will be ready to start decorating your wooden spoons. Get creative and have fun!

Safety Precautions

When decorating wooden spoons, it’s important to take some safety precautions to ensure that you don’t harm yourself or others. Here are some tips to keep in mind:

Choose the Right Spoon

Make sure you choose wooden spoons that are safe to use. Avoid spoons that have cracks, splinters, or other damage that could cause injury. Also, make sure the spoons are made from food-safe materials.

Protect Your Work Area

Cover your work area with newspaper or a drop cloth to protect it from spills and stains. If you’re using paint or other materials that produce fumes, make sure you work in a well-ventilated area.

Use Protective Gear

Wear gloves and a mask when working with certain materials, such as epoxy or resin. These materials can be harmful if they come into contact with your skin or if you inhale their fumes.

Follow Instructions Carefully

Always read the instructions on the materials you’re using and follow them carefully. Improper use of materials can result in injury or damage to your spoons.

Properly Dispose of Materials

Dispose of materials properly to avoid harm to yourself, others, or the environment. Follow local regulations for disposing of hazardous materials.

By following these safety precautions, you can ensure that your wooden spoon decorating project is safe and enjoyable.

Preparing the Spoons for Decoration

Before you start decorating your wooden spoons, it’s important to prepare them properly. This will ensure that the decorations adhere well and last for a long time. In this section, we’ll cover the two main steps of preparing your spoons for decoration: cleaning and sanding.

Cleaning

The first step in preparing your wooden spoons for decoration is to clean them thoroughly. This will remove any dirt, grease, or other contaminants that could prevent the decorations from adhering properly. Here’s how to clean your wooden spoons:

  1. Fill a bowl with warm water and add a few drops of dish soap or vinegar.
  2. Dip a soft cloth or sponge into the soapy water and use it to wipe down the spoons, paying special attention to any areas that are particularly dirty or greasy.
  3. Rinse the spoons under running water to remove any soap residue.
  4. Dry the spoons with a clean towel.

Sanding

The second step in preparing your wooden spoons for decoration is to sand them lightly. Sanding will create a smooth surface that will help the decorations adhere better. Here’s how to sand your wooden spoons:

  1. Use a fine-grit sandpaper (such as 220-grit) to sand the entire surface of each spoon, including the handle and the bowl.
  2. Be sure to sand with the grain of the wood, not against it.
  3. Wipe away any dust with a clean cloth.

By following these two steps, you’ll have clean, smooth wooden spoons that are ready to be decorated.

Decoration Techniques

When it comes to decorating wooden spoons, there are several techniques you can use to transform them into unique and personalized gifts or kitchen accessories. In this section, we will explore three popular decoration techniques: painting, wood burning, and decoupage.

Painting

Painting is a simple and versatile way to decorate wooden spoons. You can use acrylic or enamel paints to create a variety of designs, from solid colors to intricate patterns. Here are some tips to get you started:

  • Sand the spoon lightly with fine-grit sandpaper to create a smooth surface for painting.
  • Apply a base coat of paint and let it dry completely before adding any designs.
  • Use stencils or freehand painting to create your designs.
  • Seal the paint with a clear coat of varnish or polyurethane to protect it from wear and tear.

Wood Burning

Wood burning, also known as pyrography, involves using a heated tool to burn designs into the surface of the wood. This technique can create intricate and detailed designs that are permanent and long-lasting. Here are some tips for wood burning wooden spoons:

  • Choose a wood burning tool with a fine tip for detailed designs.
  • Sketch your design lightly onto the spoon with a pencil before burning.
  • Use a steady hand and slow, even strokes to burn the design into the wood.
  • Sand the spoon lightly after burning to remove any rough edges.

Decoupage

Decoupage involves adhering paper or fabric designs onto a surface using a special glue or adhesive. This technique can create a variety of textures and designs on wooden spoons. Here are some tips for decoupaging wooden spoons:

  • Choose thin paper or fabric that will adhere smoothly to the surface of the spoon.
  • Apply a thin layer of decoupage glue or adhesive to the spoon and carefully lay the paper or fabric onto the surface.
  • Smooth out any wrinkles or bubbles with a soft brush or your fingers.
  • Apply a top coat of decoupage glue or varnish to seal the design and protect it from wear and tear.

In conclusion, whether you choose to paint, wood burn, or decoupage your wooden spoons, the possibilities for creativity and personalization are endless. With a little imagination and some simple techniques, you can transform ordinary wooden spoons into beautiful and functional works of art.

Sealing and Finishing

Choosing the Right Sealer

When it comes to sealing and finishing your decorated wooden spoons, you have a few options to choose from. Here are some of the most popular sealers and their benefits:

  • Mineral Oil: This is a popular choice for wooden spoons because it is food-safe and easy to apply. It also helps to bring out the natural beauty of the wood.
  • Beeswax: Beeswax is another food-safe option that can provide a protective layer to your spoons. It can also give your spoons a nice shine.
  • Polyurethane: If you want a more durable and long-lasting finish, polyurethane may be the way to go. However, it is not food-safe, so it is best used for decorative spoons only.

Consider your intended use for the spoons when choosing a sealer. If you plan on using them for cooking, stick to food-safe options like mineral oil or beeswax.

Application Process

Once you have chosen your sealer, it’s time to apply it to your spoons. Here are some general tips to follow:

  • Sand your spoons before applying the sealer to ensure a smooth surface.
  • Apply the sealer in a well-ventilated area and follow the manufacturer’s instructions for application.
  • Use a clean, soft cloth to apply the sealer in thin, even coats.
  • Allow the sealer to dry completely before applying additional coats.
  • Depending on the sealer, you may need to reapply it periodically to maintain the finish.

Remember to always follow safety precautions when working with sealers and finishes. With the right sealer and application process, your decorated wooden spoons will be both beautiful and functional.

Maintenance Tips

To ensure that your decorated wooden spoons last for a long time, it is important to take good care of them. Here are some maintenance tips that you should follow:

Hand Wash Only

Avoid using a dishwasher to clean your decorated wooden spoons. The high temperature and strong detergents can damage the finish and cause the colors to fade. Instead, wash them by hand using mild dish soap and warm water.

Dry Thoroughly

After washing your decorated wooden spoons, make sure to dry them thoroughly before storing them. Use a clean towel to wipe off any excess water and then let them air dry completely.

Oil Regularly

To keep your decorated wooden spoons looking shiny and new, you should oil them regularly. Use food-grade mineral oil or beeswax to coat the surface of the spoon. Apply a thin layer of oil using a clean cloth and let it soak in for a few hours before wiping off any excess.

Store Properly

When storing your decorated wooden spoons, make sure to keep them in a dry and cool place. Avoid exposing them to direct sunlight or extreme temperatures as this can cause the wood to warp or crack.

By following these maintenance tips, you can keep your decorated wooden spoons looking beautiful for years to come.

Creative Ideas for Decorated Wooden Spoons

Decorating wooden spoons is a fun and easy way to add a personal touch to your kitchen. With a little creativity and some basic materials, you can transform plain wooden spoons into beautiful works of art. Here are some creative ideas to get you started:

1. Painted Wooden Spoons

Painting wooden spoons is a simple and effective way to add color and personality to your kitchen. You can use acrylic or enamel paints to create bold, vibrant designs, or opt for a more subtle look with pastel or muted colors. You can also use stencils or tape to create patterns and shapes on your spoons.

2. Decoupage Wooden Spoons

Decoupage is a great way to add texture and interest to wooden spoons. You can use a variety of materials, such as tissue paper, napkins, or magazine cutouts, to create unique designs. Simply cut out your desired shapes, apply a layer of decoupage glue to the spoon, and press the paper onto the surface. Once dry, you can add additional layers of decoupage glue to seal the design.

3. Wood Burning

Wood burning, also known as pyrography, is a technique that involves burning designs into wood using a heated tool. You can use this technique to create intricate designs, patterns, or even personalized messages on your wooden spoons. This method requires some skill and practice, but the end result is a beautiful and unique piece of art.

4. Embellished Wooden Spoons

Embellishing wooden spoons is a great way to add some sparkle and shine to your kitchen. You can use beads, sequins, or rhinestones to create a dazzling design on your spoons. Simply apply a small amount of glue to the back of your embellishments and press them onto the spoon. You can also use ribbon or fabric to create a more textured look.

With these creative ideas, you can transform plain wooden spoons into beautiful and functional works of art. Whether you choose to paint, decoupage, wood burn, or embellish your spoons, the possibilities are endless. So grab some supplies and get creative!

What Should You Cut on a Wooden Cutting Board? Tips and Tricks to Keep Your Board in Top Condition

When it comes to cutting boards, there are a lot of options to choose from. Wooden cutting boards are a popular choice due to their durability and natural beauty. However, many people wonder what types of foods are safe to cut on a wooden cutting board.

The good news is that wooden cutting boards are safe to use for a variety of foods, including fruits, vegetables, bread, and cheese. In fact, many chefs prefer using wooden cutting boards for their ability to absorb some of the moisture from foods, which can help prevent sticking and make for easier cutting.

However, when it comes to cutting raw meat, there are some important considerations to keep in mind. While it is safe to cut raw meat on a wooden cutting board, it is important to take extra precautions to avoid cross-contamination. This includes thoroughly cleaning the board with hot, soapy water after each use and using a separate cutting board for raw meat to avoid contaminating other foods.

Understanding Wooden Cutting Boards

When it comes to cutting boards, wooden ones are a popular choice for many home cooks. They are durable, long-lasting, and can add a rustic charm to your kitchen. However, it’s important to understand how to properly care for and use a wooden cutting board to ensure it remains safe to use.

Choosing the Right Wood

Not all woods are created equal, and some are better suited for cutting boards than others. Hardwoods like maple, walnut, and cherry are great options as they are dense and less likely to develop deep grooves from knife cuts. Softer woods like pine or bamboo can be used but may require more frequent replacement.

Maintaining Your Cutting Board

To keep your wooden cutting board in good condition, it’s important to regularly clean and oil it. After each use, wash the board with hot, soapy water and dry it thoroughly. Avoid soaking the board in water or putting it in the dishwasher as this can cause the wood to warp or crack.

To prevent the wood from drying out, apply a food-safe oil like mineral oil or beeswax regularly. This will help to seal the wood and prevent it from absorbing moisture and odors.

What to Cut on a Wooden Cutting Board

While wooden cutting boards are great for many foods, there are some things you should avoid cutting on them. Raw meat, poultry, and fish can harbor bacteria, which can seep into the wood and contaminate it. It’s best to use a separate cutting board for these foods to prevent cross-contamination.

Vegetables, fruits, bread, and cheese are all great options for a wooden cutting board. They won’t damage the surface of the board and can be easily cleaned and sanitized.

By understanding how to properly care for and use a wooden cutting board, you can enjoy its benefits for years to come.

What to Cut on Wooden Cutting Boards

When it comes to wooden cutting boards, there are certain foods that are better suited for them than others. Here are some suggestions for what to cut on your wooden cutting board:

Fresh Produce

Wooden cutting boards are great for cutting fresh produce. The soft surface of the wood is gentle on your knives and won’t dull them as quickly as harder surfaces like glass or metal. Plus, wood has natural antimicrobial properties that can help keep your produce fresher for longer.

Bread and Baked Goods

If you’re a fan of baking, you’ll love using a wooden cutting board to slice your bread and other baked goods. The soft surface of the wood won’t crush or flatten your baked goods like harder surfaces might, and it will help keep your bread from sticking to your knife.

Cheese

Wooden cutting boards are also great for cutting cheese. The natural texture of the wood can help grip the cheese, making it easier to cut. Plus, the porous surface of the wood can help absorb any excess moisture from the cheese, which can help prevent it from becoming slimy or moldy.

When it comes to what not to cut on your wooden cutting board, it’s best to avoid cutting raw meat, poultry, or fish. These foods can harbor harmful bacteria that can be difficult to clean from the porous surface of a wooden cutting board. Instead, use a separate cutting board designated specifically for raw meat, poultry, and fish.

What Not to Cut on Wooden Cutting Boards

When it comes to using wooden cutting boards, it’s important to know what foods to avoid cutting on them to prevent cross-contamination and potential foodborne illnesses. Here are some foods you should not cut on wooden cutting boards:

Raw Meat

It is not recommended to cut raw meat on wooden cutting boards. The reason being is that wood is porous and can absorb bacteria from the meat, which can lead to cross-contamination and the spread of harmful bacteria. Instead, use a plastic or glass cutting board specifically designated for raw meat.

Fish

Similar to raw meat, it is not recommended to cut fish on wooden cutting boards. Fish can also contain harmful bacteria that can be absorbed by the wood. Additionally, the strong odor of fish can be difficult to remove from wooden cutting boards. To avoid this, use a separate cutting board for fish.

Poultry

Poultry, such as chicken and turkey, should also not be cut on wooden cutting boards. Like raw meat and fish, poultry can contain harmful bacteria that can be absorbed by the wood. It’s best to use a plastic or glass cutting board designated specifically for poultry.

In general, it’s important to properly clean and maintain wooden cutting boards to prevent the growth of harmful bacteria. Avoid using harsh chemicals and opt for food-safe mineral oil to re-coat the board. Additionally, be sure to replace wooden cutting boards when they become excessively worn or develop deep grooves, as they can harbor bacteria and become difficult to clean.

Proper Care and Maintenance

To ensure that your wooden cutting board lasts for years, it’s crucial to take proper care of it. This section will cover the essential steps to clean, oil, and store your wooden cutting board.

Cleaning

Cleaning your wooden cutting board after each use is essential to prevent bacteria growth and keep it in good condition. Here are the steps to follow:

  1. Rinse the board under hot water and use a sponge or brush to scrub away any food residue.
  2. Apply a mild dish soap to the board and scrub it again.
  3. Rinse the board thoroughly under hot water and dry it with a clean towel.
  4. If your board has any stains or odors, you can use a mixture of baking soda and water or white vinegar and salt to clean it.

Avoid soaking your wooden cutting board in water or putting it in the dishwasher, as this can cause it to warp or crack.

Oiling

Oiling your wooden cutting board regularly will help keep it from drying out and cracking. Here are the steps to follow:

  1. Apply a food-grade mineral oil to the board and rub it in with a clean cloth.
  2. Let the oil soak into the wood for a few hours or overnight.
  3. Wipe off any excess oil with a clean cloth.
  4. Repeat this process every few weeks or when the board starts to look dry.

You can also use board cream, which is a combination of mineral oil and beeswax, to condition your board and give it a protective coating.

Storage

Proper storage is crucial to prevent your wooden cutting board from warping or cracking. Here are some tips:

  1. Store your board in a dry, cool place away from direct sunlight and heat sources.
  2. Avoid stacking heavy items on top of your board, as this can cause it to warp.
  3. If you need to store your board vertically, make sure it has enough support to prevent it from bending.

By following these simple care and maintenance tips, you can ensure that your wooden cutting board lasts for years and stays in excellent condition.

How to Resurface a Wooden Cutting Board: Easy Steps to Bring Your Board Back to Life

If you’re an avid cook, you know the importance of having a good cutting board. Over time, wooden cutting boards can become scratched, stained, and even warped. But before you toss it out and buy a new one, consider resurfacing it instead. Not only is it a more sustainable option, but it can also save you money in the long run.

Resurfacing a wooden cutting board involves sanding down the surface to remove any scratches or stains, and then applying a food-safe finish to protect the wood. It’s a simple process that can be done at home with just a few tools and materials. In this article, we’ll walk you through the steps to resurface your wooden cutting board and make it look like new again.

Understanding the Importance of Resurfacing

If you have a wooden cutting board, you need to resurface it from time to time to keep it in good condition. Here are a few reasons why resurfacing is important:

Hygiene

When you use a cutting board, tiny grooves and scratches can develop on the surface. These grooves can trap food particles and bacteria, making it difficult to clean the board properly. By resurfacing the board, you can remove these grooves and create a smooth surface that is easier to clean.

Longevity

Resurfacing your cutting board can help extend its lifespan. Over time, the surface of a cutting board can become rough and damaged, making it more difficult to use. By resurfacing the board, you can remove any damage and create a smooth surface that will be easier on your knives.

Performance

A smooth cutting surface can make a big difference in how your knives perform. If your cutting board is rough or damaged, it can cause your knives to dull more quickly. By resurfacing the board, you can create a smooth surface that will help your knives stay sharp for longer.

In summary, resurfacing your wooden cutting board is important for hygiene, longevity, and performance. By taking the time to resurface your board, you can keep it in good condition and make it easier to use.

Identifying When Resurfacing is Needed

Wooden cutting boards are a staple in many kitchens, but over time they can become worn, scratched, and stained. While some minor scratches and stains can be sanded out and cleaned, there comes a point when resurfacing is needed to restore the board’s smooth surface. Here are some signs that it’s time to resurface your wooden cutting board:

Deep Scratches

If your cutting board has deep scratches that cannot be sanded out with fine-grit sandpaper, it’s time to resurface. Deep scratches can harbor bacteria and make it difficult to clean the board thoroughly. Plus, they can make it harder to cut food evenly and safely.

Stains that Won’t Come Out

Wooden cutting boards can develop stains over time, especially if they are not cleaned properly. While some stains can be removed with a mixture of salt and lemon juice or baking soda and water, there are some stains that won’t come out no matter what you try. If your cutting board has stubborn stains that won’t budge, it’s time to resurface.

Warping or Cracking

Wooden cutting boards can warp or crack over time, especially if they are not properly cared for. If your cutting board is warped or has cracks that cannot be repaired, it’s time to resurface or replace it. A warped or cracked cutting board can be dangerous to use and can also harbor bacteria.

In summary, if your wooden cutting board has deep scratches, stubborn stains, or is warped or cracked, it’s time to consider resurfacing it. Resurfacing can help restore the board’s smooth surface and make it safe to use again.

Materials Needed for Resurfacing

Resurfacing a wooden cutting board is a simple process that requires a few basic materials. Here are the items you will need:

Sandpaper

Sandpaper is an essential tool for resurfacing a wooden cutting board. You will need sandpaper with different grits to achieve the desired smoothness. Start with a coarse grit, such as 80 or 120, and work your way up to a finer grit, such as 220.

Cutting Board Oil

Cutting board oil is a food-safe oil that is used to protect and seal the cutting board after resurfacing. Mineral oil is a popular choice for cutting board oil. It is affordable, readily available, and easy to apply.

Beeswax

Beeswax is a natural wax that is used to condition and protect the cutting board. It helps to create a barrier against moisture and bacteria. Beeswax is usually melted with other oils to create a wood butter that is used to seal and shine the cutting board.

Orbital Sander

An orbital sander is an optional tool that can be used to speed up the sanding process. It is a handheld tool that uses sandpaper to sand the surface of the cutting board.

Lint-Free Cloth

A lint-free cloth is used to apply the cutting board oil and wood butter to the cutting board. It is important to use a lint-free cloth to avoid leaving fibers on the cutting board.

Face Mask

A face mask is recommended when sanding the cutting board to avoid inhaling dust particles. Dust particles can cause respiratory problems and should be avoided.

Tack Cloth

A tack cloth is a sticky cloth that is used to remove dust and debris from the cutting board after sanding. It is important to remove all dust particles before applying the cutting board oil and wood butter.

With these materials, you can easily resurface your wooden cutting board and keep it in top condition for years to come.

Step-by-Step Guide to Resurfacing

If you’ve got an old wooden cutting board that’s seen better days, don’t throw it away just yet. With a little elbow grease, you can resurface it and give it a new lease on life. Here’s how to do it:

Cleaning the Board

The first step in resurfacing your wooden cutting board is to clean it thoroughly. Use a mixture of warm water and dish soap to scrub the surface of the board, making sure to get into all the nooks and crannies. Rinse the board with clean water and dry it with a clean towel.

Sanding Process

Once your board is clean and dry, it’s time to start sanding. Start with a coarse-grit sandpaper (around 80 grit) and sand the surface of the board in the direction of the grain. Be sure to sand evenly across the entire surface of the board, paying special attention to any areas that are particularly rough or scratched.

After you’ve sanded the board with the coarse-grit sandpaper, switch to a finer-grit sandpaper (around 120 grit) and repeat the process. Continue sanding with progressively finer-grit sandpapers until the board is smooth and free of scratches.

Oiling the Board

Once you’ve finished sanding, it’s time to oil the board. Apply a generous amount of food-grade mineral oil to the surface of the board, using a clean cloth to spread it evenly across the entire surface. Allow the oil to soak in for several hours, or overnight if possible.

After the oil has had a chance to soak in, wipe off any excess with a clean cloth. Your board is now ready to use!

Resurfacing a wooden cutting board is a great way to extend its life and keep it looking great for years to come. With a little bit of effort, you can restore your old cutting board to its former glory and enjoy using it for many more meals to come.

Post-Resurfacing Care Tips

After resurfacing your wooden cutting board, it’s important to take proper care of it to ensure its longevity. Here are some post-resurfacing care tips to keep your cutting board in top condition.

Cleaning Post-Resurfacing

Cleaning your cutting board after resurfacing is crucial to prevent bacteria from growing on it. Here are some tips to clean your cutting board:

  • Wash your cutting board with warm soapy water after each use.
  • Use a scrub brush to remove any food particles.
  • Rinse thoroughly with hot water and dry it with a clean towel.
  • Sanitize your cutting board by rubbing it with a mixture of 1 tablespoon of bleach and 1 gallon of water. Let it sit for a few minutes before rinsing with hot water and drying.

Storage Tips

Proper storage of your cutting board can prevent it from warping or cracking. Here are some tips to store your cutting board:

  • Store your cutting board in a dry place away from direct sunlight.
  • Do not stack heavy items on top of it.
  • Use a cutting board oil or wax to condition it regularly.
  • If you have multiple cutting boards, label them to avoid confusion and use them for specific purposes.

By following these post-resurfacing care tips, you can extend the life of your wooden cutting board and ensure it stays in great condition for years to come.