Tag Archives: mild dish soap

how-to-clean-wooden-chopsticks-simple-tips-for-spotless-utensils-2

How to Clean Wooden Chopsticks: Simple Tips for Spotless Utensils

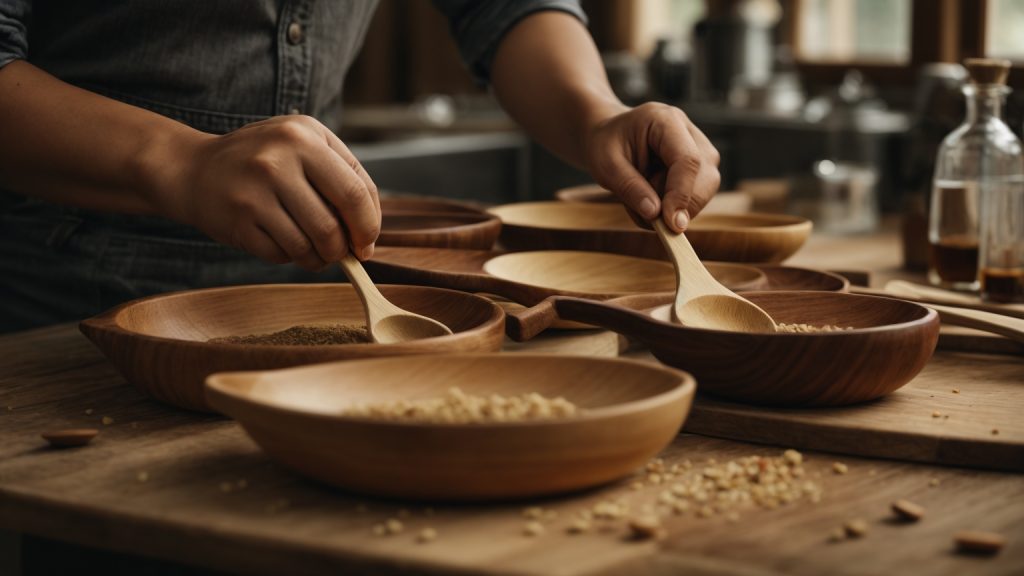
Are you tired of using disposable chopsticks every time you order takeout? Wooden chopsticks are a great alternative, but they require proper cleaning to ensure they are safe to use. In this article, we will guide you through the steps of cleaning wooden chopsticks effectively.

Cleaning wooden chopsticks might seem like a daunting task, but it’s actually quite simple. With just a few basic tools and some easy-to-follow steps, you can keep your chopsticks in top condition for longer. In the following paragraphs, we will provide you with some tips and tricks to make the process as quick and painless as possible. So, if you want to learn how to clean wooden chopsticks like a pro, keep reading!

Understanding the Importance of Cleaning Wooden Chopsticks
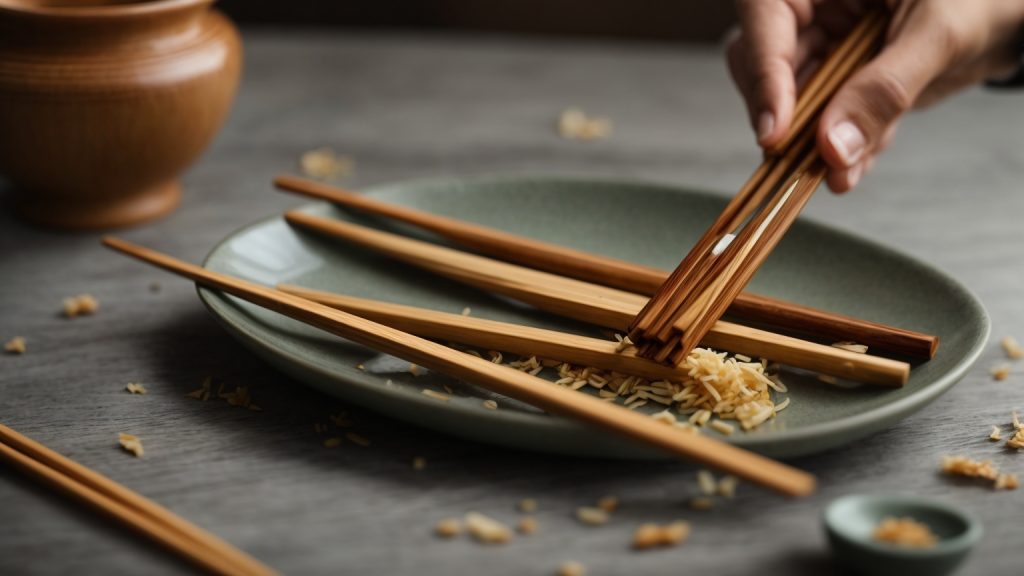
how-to-clean-wooden-chopsticks-simple-tips-for-spotless-utensils-2

If you’re a fan of Asian cuisine, you’re likely familiar with the use of chopsticks. Wooden chopsticks are a popular choice, but it’s essential to keep them clean. Here’s why:

Prevent the Spread of Germs

When you use chopsticks, they come into contact with your mouth and the food you’re eating. This means that bacteria can build up on the surface of the chopsticks. If you don’t clean them properly, you could be spreading germs and bacteria every time you use them. Cleaning your chopsticks after each use helps prevent the spread of germs and keeps them hygienic for future use.

Ensure Longevity

Wooden chopsticks are a sustainable alternative to disposable chopsticks, but they do require proper care to ensure longevity. Regular cleaning helps prevent damage to the wood and ensures that they last longer. If you neglect to clean your chopsticks, they may become stained, warped, or even moldy.

Maintain the Flavor of Your Food

Dirty chopsticks can affect the taste of your food. Leftover food particles on the chopsticks can mix with your next meal, altering the flavor. Keeping your chopsticks clean ensures that you can enjoy the full flavor of your food without any unwanted additions.

In summary, cleaning your wooden chopsticks is essential for maintaining hygiene, ensuring longevity, and preserving the flavor of your food.

Materials Needed for Cleaning Wooden Chopsticks

Cleaning wooden chopsticks is an easy process that requires a few basic materials. These materials are gentle and will not cause any damage to the chopsticks, helping to keep them in top condition for longer. Here are the materials you will need:

Soft Cloth

A soft cloth is essential for cleaning wooden chopsticks. It is gentle and will not scratch or damage the wood. You can use a microfiber cloth or any other soft cloth that you have at home.

Warm Water

Warm water is necessary for cleaning wooden chopsticks. It helps to loosen any food particles or dirt that may be stuck on the chopsticks. You can use tap water or boiled water that has been cooled down.

Mild Dish Soap

Mild dish soap is useful for cleaning wooden chopsticks. It helps to remove any grease or oil that may be on the chopsticks. You can use any mild dish soap that you have at home.

Soft-Bristled Brush

A soft-bristled brush is optional but can be helpful for cleaning wooden chopsticks. It can help to remove any stubborn food particles or dirt that may be stuck on the chopsticks. You can use a toothbrush or any other soft-bristled brush that you have at home.

Using these materials, you can effectively clean your wooden chopsticks and keep them in top condition for longer.

Step-by-Step Guide on How to Clean Wooden Chopsticks

Cleaning wooden chopsticks can be a bit tricky, but with the right tools and techniques, you can keep them clean and hygienic. Here is a step-by-step guide on how to clean wooden chopsticks:

Preparing the Chopsticks

Before cleaning your wooden chopsticks, it is important to prepare them properly. Here are the steps to follow:

  1. Remove any food particles: Rinse the chopsticks under warm water to remove any food particles or debris.
  2. Soak the chopsticks: Fill a sink or bowl with warm water and add a few drops of mild dish soap. Soak the chopsticks in the soapy water for a few minutes to loosen any dirt or stains.
  3. Use a soft-bristled brush: Use a soft-bristled brush to gently scrub the chopsticks, paying special attention to any stained or dirty areas. Avoid using abrasive sponges or scouring pads, as these can damage the wood.

Cleaning the Chopsticks

Once you have prepared the chopsticks, it is time to clean them. Here are the steps to follow:

  1. Wash the chopsticks: Rinse the chopsticks under running water to remove any soap residue.
  2. Use a clean cloth: Use a clean, soft cloth to dry the chopsticks. Avoid using paper towels, as they can leave behind fibers that can get stuck to the wood.
  3. Apply oil: If your wooden chopsticks are looking dull or dry, you can apply a small amount of oil to them. Use a clean cloth to apply a thin layer of food-grade oil to the chopsticks, and then wipe off any excess.

Rinsing and Drying

After cleaning your wooden chopsticks, it is important to rinse and dry them properly. Here are the steps to follow:

  1. Rinse the chopsticks: Rinse the chopsticks under running water to remove any remaining oil or residue.
  2. Dry the chopsticks: Use a clean, soft cloth to dry the chopsticks thoroughly. Make sure to remove any excess moisture to prevent mold or mildew growth.
  3. Store the chopsticks: Once the chopsticks are completely dry, store them in a clean, dry place. Avoid storing them in a damp or humid environment, as this can cause them to warp or crack.

By following these simple steps, you can keep your wooden chopsticks clean and hygienic, ensuring that they last for years to come.

Tips to Maintain Wooden Chopsticks

tips-to-maintain-wooden-chopsticks

If you want to keep your wooden chopsticks in top condition, there are a few things you can do to maintain them properly. Here are some tips to help you take care of your wooden chopsticks and extend their lifespan.

Proper Storage

Storing your wooden chopsticks properly is essential to maintain their quality. Here are some tips to keep in mind:

  • Store your chopsticks in a dry place to prevent mold growth.
  • Keep them away from direct sunlight to avoid discoloration.
  • Avoid storing them in airtight containers to prevent moisture buildup.

Regular Cleaning

Cleaning your wooden chopsticks regularly is important to prevent bacteria growth and maintain their quality. Here are some tips to clean your chopsticks properly:

  • Rinse them under lukewarm water to remove food particles and dirt.
  • Use a soft-bristled brush to gently scrub away any residue.
  • Avoid using harsh detergents or abrasive sponges, as these can damage the wood.
  • Dry them immediately after cleaning to prevent moisture buildup.

Avoiding Dishwasher

Wooden chopsticks should never be washed in a dishwasher. The high temperature and strong detergents can damage the wood and cause them to warp or crack. Instead, follow the steps above to clean your chopsticks by hand.

By following these tips, you can maintain the quality of your wooden chopsticks and enjoy using them for years to come.

Common Mistakes to Avoid While Cleaning Wooden Chopsticks

Cleaning wooden chopsticks may seem like a simple task, but there are a few common mistakes that people make that can damage the chopsticks or make them unsafe to use. Here are some mistakes to avoid when cleaning your wooden chopsticks:

Mistake #1: Soaking Wooden Chopsticks for Too Long

Soaking wooden chopsticks in water for an extended period can cause them to warp or crack. It is recommended to only soak them for a few minutes before cleaning them with a soft-bristled brush.

Mistake #2: Using Harsh Detergents or Abrasive Materials

Using harsh detergents or abrasive materials such as steel wool or scouring pads can scratch or damage the surface of the chopsticks. It is best to use a mild dish soap and a soft-bristled brush to clean them.

Mistake #3: Not Drying the Chopsticks Completely

Leaving your wooden chopsticks wet can cause them to develop mold or bacteria, making them unsafe to use. After cleaning them, be sure to pat them dry with a soft cloth and allow them to air dry completely before storing them.

Mistake #4: Not Storing the Chopsticks Properly

Storing your wooden chopsticks in a damp or humid environment can cause them to absorb moisture and warp. It is best to store them in a dry, cool place, such as a utensil holder or a drawer.

By avoiding these common mistakes, you can ensure that your wooden chopsticks remain clean, safe, and in good condition for many uses to come.

Benefits of Using and Cleaning Wooden Chopsticks

Using and cleaning wooden chopsticks can offer several benefits that you may not have considered before. Here are some of the benefits of using and cleaning wooden chopsticks:

Eco-friendly

One of the most significant benefits of using wooden chopsticks is that they are eco-friendly. Unlike disposable chopsticks, wooden chopsticks are reusable and can last for years with proper care. By using wooden chopsticks, you can reduce the amount of waste generated by disposable chopsticks, which can be harmful to the environment.

Hygienic

Wooden chopsticks are easy to clean and sanitize, which makes them more hygienic compared to other materials. Proper cleaning and maintenance can help remove any bacteria or dirt that may be present on the surface of the chopsticks, ensuring that they are safe to use for your next meal.

Versatile

Wooden chopsticks are versatile and can be used for a variety of dishes, including noodles, sushi, and stir-fry. They are also suitable for use with different types of cuisines, such as Japanese, Chinese, and Korean.

Comfortable to Use

Wooden chopsticks are lightweight and comfortable to hold, making them an excellent choice for people of all ages. Unlike metal chopsticks, wooden chopsticks do not conduct heat, which means that you can use them to eat hot dishes without burning your fingers.

Affordable

Wooden chopsticks are affordable and widely available, making them an excellent choice for people on a budget. They are also easy to find at most grocery stores or online retailers, which means that you can easily replace them if needed.

By using and cleaning wooden chopsticks, you can enjoy these benefits and more. With proper care and maintenance, your wooden chopsticks can last for years, making them a sustainable and cost-effective choice for your dining needs.
how-to-oil-wooden-spoons-for-long-lasting-use-2

How to Oil Wooden Spoons for Long-lasting Use

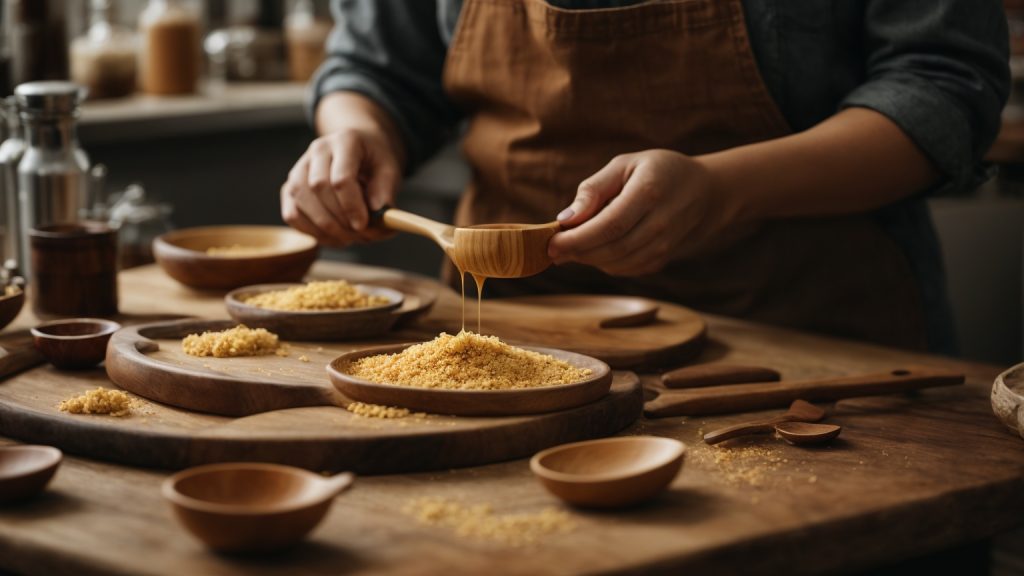
If you’re someone who loves to cook, you probably have a collection of wooden spoons and cutting boards in your kitchen. Wooden spoons are a versatile tool that can be used for stirring, mixing, and even serving. However, over time, wooden spoons can become dry and brittle, making them more susceptible to cracking and splintering. That’s where oiling comes in – it’s a simple process that can help keep your wooden spoons in great condition for years to come.

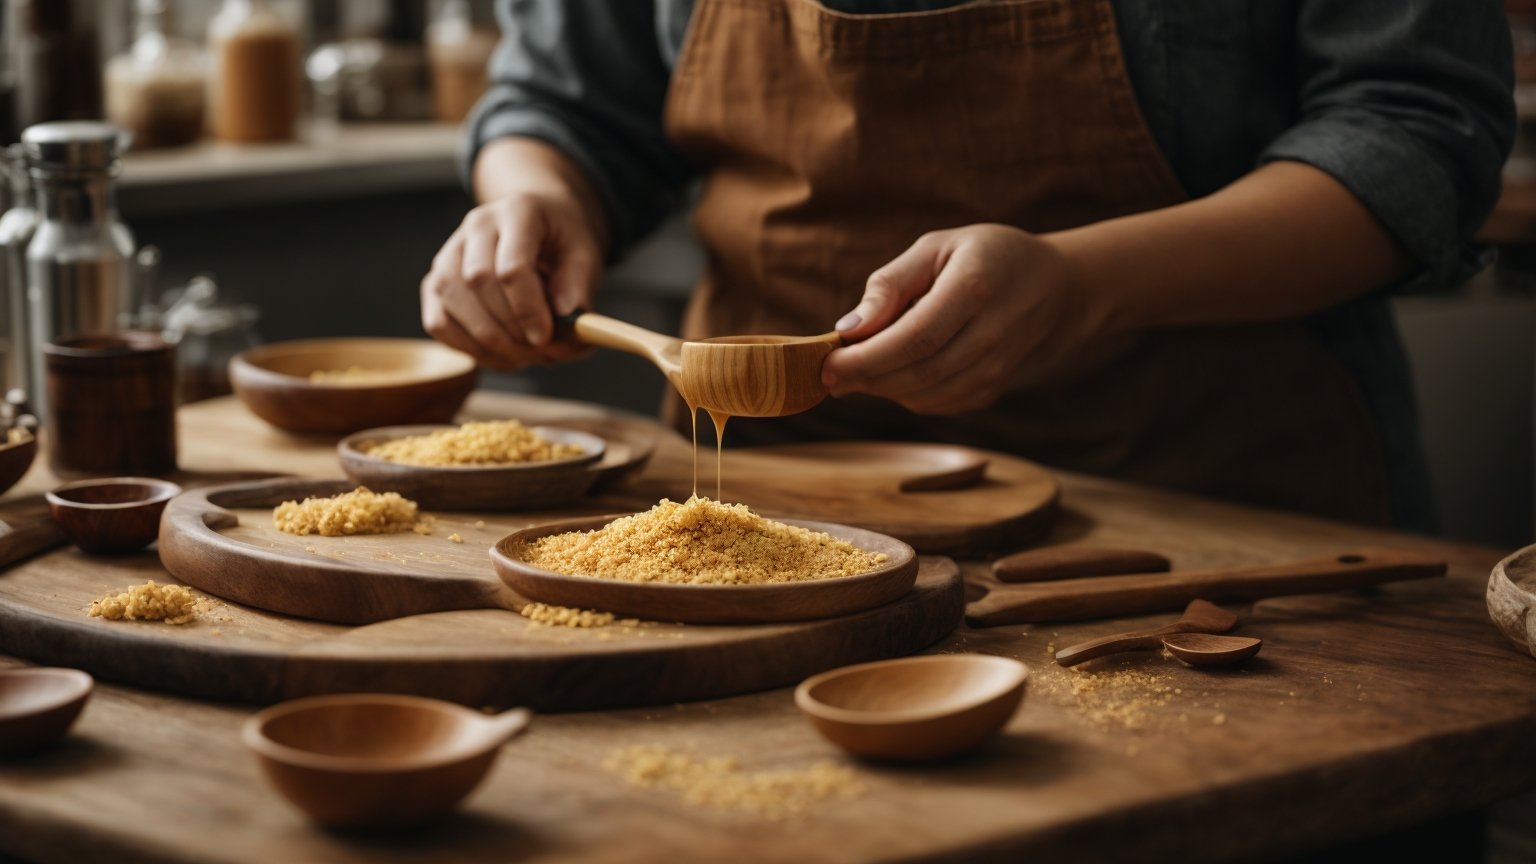
To oil your wooden spoons, you’ll need to choose an oil that’s safe for food use. Mineral oil is a popular choice, as it’s odorless, tasteless, and won’t go rancid. You can also use walnut oil, tung oil, or linseed oil – just be sure to read the label to make sure it’s safe for food use. Once you’ve chosen your oil, you’ll want to apply it generously to your wooden spoons, making sure to cover all surfaces. Let the oil soak in for at least 30 minutes, or overnight if possible, before wiping off any excess with a clean cloth.

By oiling your wooden spoons regularly, you’ll help keep them from drying out and cracking, which can extend their lifespan and make them a joy to use for years to come. With just a little bit of effort and the right oil, you can keep your wooden spoons in great condition and enjoy using them in your kitchen for many meals to come.

Understanding Wooden Spoons

how-to-oil-wooden-spoons-for-long-lasting-use-2

Wooden spoons are a staple in any kitchen. They are versatile, durable, and gentle on cookware. However, they require proper care and maintenance to ensure their longevity. In this section, we will discuss the benefits of using wooden spoons, the different types of wood used to make them, and how to properly care for them.

Benefits of Using Wooden Spoons

There are several benefits to using wooden spoons. They are:

  • Gentle on cookware: Unlike metal utensils, wooden spoons do not scratch or damage non-stick cookware.
  • Versatile: Wooden spoons can be used for stirring, mixing, scraping, and even serving.
  • Durable: Wooden spoons can last for years with proper care and maintenance.
  • Natural and eco-friendly: Wooden spoons are made from renewable resources and are biodegradable.

Types of Wood Used to Make Wooden Spoons

Different types of wood are used to make wooden spoons. The most common types are:

  • Maple: Maple wood is hard and durable, making it ideal for kitchen utensils. It has a light color and a tight grain pattern.
  • Cherry: Cherry wood is also hard and durable. It has a reddish-brown color and a distinctive grain pattern.
  • Olive: Olive wood is dense and heavy, making it perfect for cooking utensils. It has a unique grain pattern and a warm color.

Caring for Wooden Spoons

Proper care and maintenance are essential to keep your wooden spoons in good condition. Here are some tips:

  • Wash your wooden spoons by hand with warm, soapy water. Avoid soaking them in water as it can cause the wood to warp or crack.
  • Dry them thoroughly after washing. You can air dry them or use a towel to dry them off.
  • Oil your wooden spoons regularly to prevent them from drying out and cracking. Use food-grade mineral oil or walnut oil to oil your spoons.
  • Store your wooden spoons in a dry place away from heat and moisture. A utensil holder or a drawer organizer is ideal for storing them.

By following these tips, you can keep your wooden spoons in good condition for years to come.

Why Oiling is Important

If you use wooden spoons regularly, it’s important to keep them in good condition. Oiling your wooden spoons can help extend their lifespan and keep them looking beautiful. Here are a few reasons why oiling is important:

Prevents Drying and Cracking

Wooden spoons can dry out over time, especially if they’re exposed to heat or moisture. When wood dries out, it can become brittle and prone to cracking. Oiling your spoons helps to keep them hydrated, preventing them from drying out and cracking.

Protects Against Stains and Odors

Wooden spoons can absorb stains and odors from the foods you’re cooking. Oiling your spoons can help to create a barrier that protects against these stains and odors. This can help to keep your spoons looking and smelling great for longer.

Enhances the Wood’s Natural Beauty

Oiling your wooden spoons can bring out the natural beauty of the wood. It can help to highlight the grain and color of the wood, giving your spoons a unique and attractive appearance.

Improves Grip and Comfort

Oiling your wooden spoons can also improve their grip and comfort. The oil can help to smooth out any rough spots on the spoon, making it more comfortable to use. Additionally, the oil can help to create a non-slip surface, making it easier to grip the spoon while you’re cooking.

Overall, oiling your wooden spoons is an easy and effective way to keep them in great condition. By preventing drying and cracking, protecting against stains and odors, enhancing the wood’s natural beauty, and improving grip and comfort, oiling can help to extend the lifespan of your spoons and keep them looking and feeling great for years to come.

Choosing the Right Oil

choosing-the-right-oil

When it comes to oiling wooden spoons, there are a few options to consider. Here are three popular choices:

Food Grade Mineral Oil

Food grade mineral oil is a popular choice for oiling wooden spoons and cutting boards. It is a colorless, odorless, and tasteless oil that is safe for food contact. Mineral oil is also affordable and easy to find in most stores.

To use mineral oil, simply apply a small amount to the wood surface and rub it in with a clean cloth. Let it sit for a few hours or overnight, then wipe away any excess oil with a dry cloth. Repeat this process every few months to keep your wooden spoons in good condition.

Beeswax

Beeswax is a natural wax that can be used to protect and seal wooden spoons. It creates a barrier that prevents moisture from penetrating the wood and helps to prevent cracking. Beeswax also gives wooden spoons a warm, natural finish.

To use beeswax, melt a small amount in a double boiler or microwave. Apply the melted wax to the wood surface using a clean cloth or brush. Let it sit for a few minutes, then buff the surface with a dry cloth to remove any excess wax. Repeat this process every few months to maintain the protective barrier.

Coconut Oil

Coconut oil is a popular alternative to mineral oil for those who prefer a natural option. It is a solid oil at room temperature, but melts easily when warmed up. Coconut oil is also known for its antibacterial properties, which can help to keep wooden spoons clean and hygienic.

To use coconut oil, warm up a small amount until it becomes liquid. Apply the oil to the wood surface using a clean cloth, and rub it in well. Let it sit for a few hours or overnight, then wipe away any excess oil with a dry cloth. Repeat this process every few months to keep your wooden spoons in good condition.

Remember, whichever oil you choose, be sure to use a food-grade option that is safe for food contact. And always follow the manufacturer’s instructions for best results.

Oiling Process

Wooden spoons are a great addition to any kitchen, but they require proper care to maintain their quality and longevity. One of the most important steps in caring for your wooden spoons is oiling them regularly. Here is a step-by-step guide on how to oil your wooden spoons properly.

Cleaning the Spoons

Before you start oiling your wooden spoons, you need to make sure they are clean. Wash them with warm soapy water and rinse thoroughly. You can also use a mild abrasive like baking soda to remove any stains or discoloration. Once the spoons are clean, dry them with a towel and allow them to air dry completely.

Applying the Oil

Now it’s time to apply the oil. There are many different types of oils you can use, but we recommend using food-grade mineral oil or walnut oil. These oils are safe for use with food and will not turn rancid over time. Pour a small amount of oil onto a clean cloth and rub it into the wood, making sure to cover all surfaces. You can also use a brush to apply the oil if you prefer. Be sure to apply the oil generously, but not so much that it pools on the surface.

Drying and Curing

After you have applied the oil, let the spoons sit for at least 30 minutes to allow the oil to penetrate the wood. You can also let the spoons sit overnight for best results. Once the oil has had time to soak in, wipe off any excess with a clean cloth. Then, place the spoons in a well-ventilated area to dry and cure for at least 24 hours. This will help the oil to fully cure and harden, creating a protective barrier on the surface of the wood.

By following these simple steps, you can keep your wooden spoons in great condition for years to come. Remember to oil them regularly to prevent drying and cracking, and to keep them looking their best.

Maintaining Oiled Spoons

After oiling your wooden spoons, it is important to maintain them properly to ensure their longevity. Here are some tips on how to maintain your oiled spoons:

Regular Oiling

To keep your wooden spoons in good condition, it is recommended to oil them regularly. This will help prevent the wood from drying out, which can cause cracking and splintering. You can use food-grade mineral oil or coconut oil to oil your spoons.

To oil your spoons, simply apply a small amount of oil to a soft cloth or paper towel and rub it onto the surface of the spoon. Make sure to cover all crevices and the handle. Leave the oil on the spoon for a few hours or overnight to allow it to soak into the wood.

Avoiding Dishwasher

It is important to avoid washing your wooden spoons in the dishwasher. The high heat and harsh detergents can damage the wood and cause it to dry out. Instead, wash your spoons by hand using warm water and mild dish soap.

After washing, dry your spoons thoroughly with a clean towel and let them air dry completely before storing them. Do not store your spoons in a damp or humid environment, as this can cause the wood to warp or crack.

By following these simple tips, you can maintain the beauty and functionality of your oiled wooden spoons for years to come.

clean-your-wooden-front-door

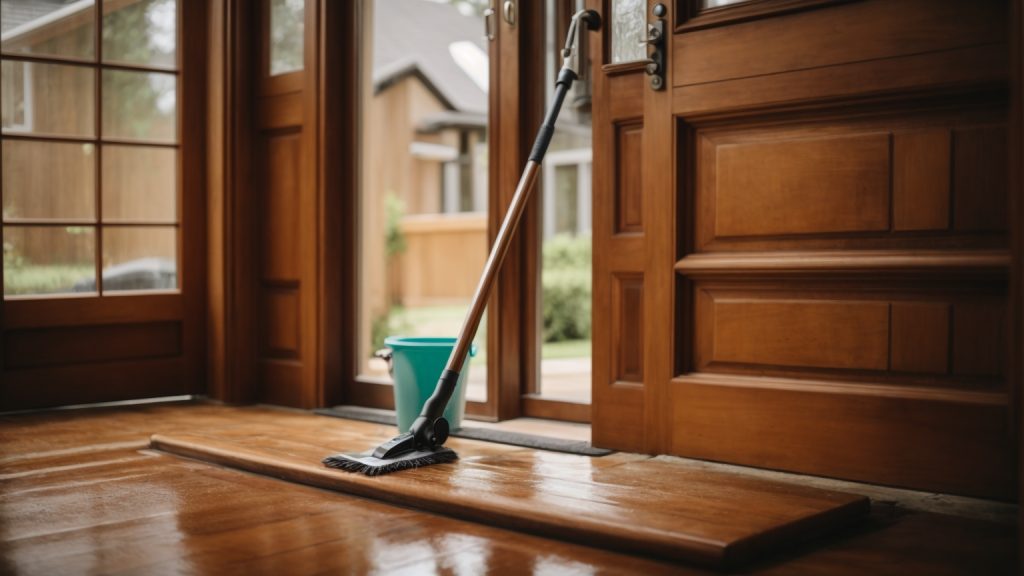
How to Clean Your Wooden Front Door: A Quick Guide

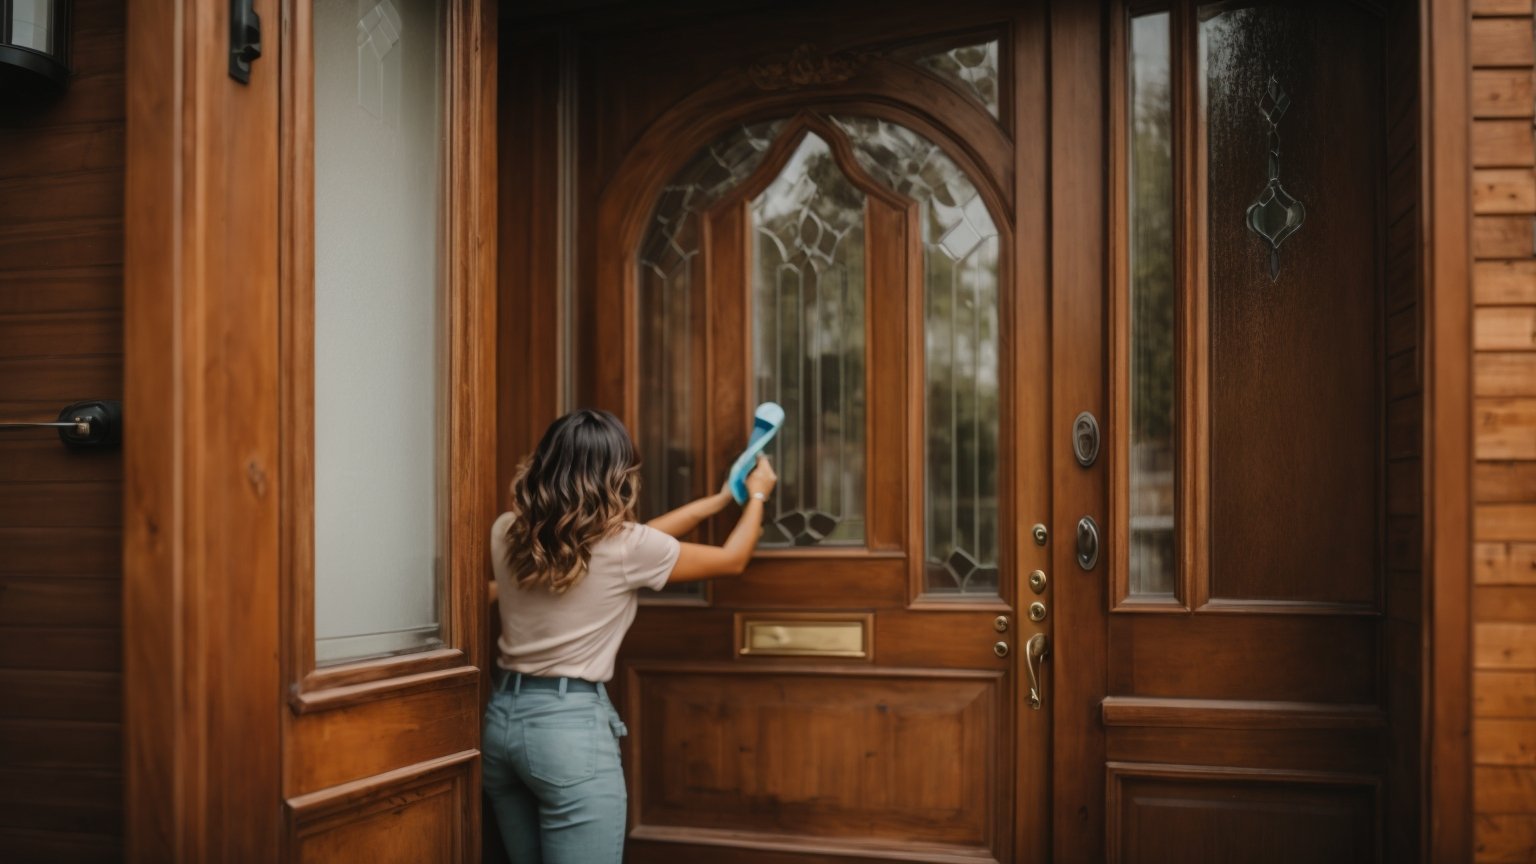
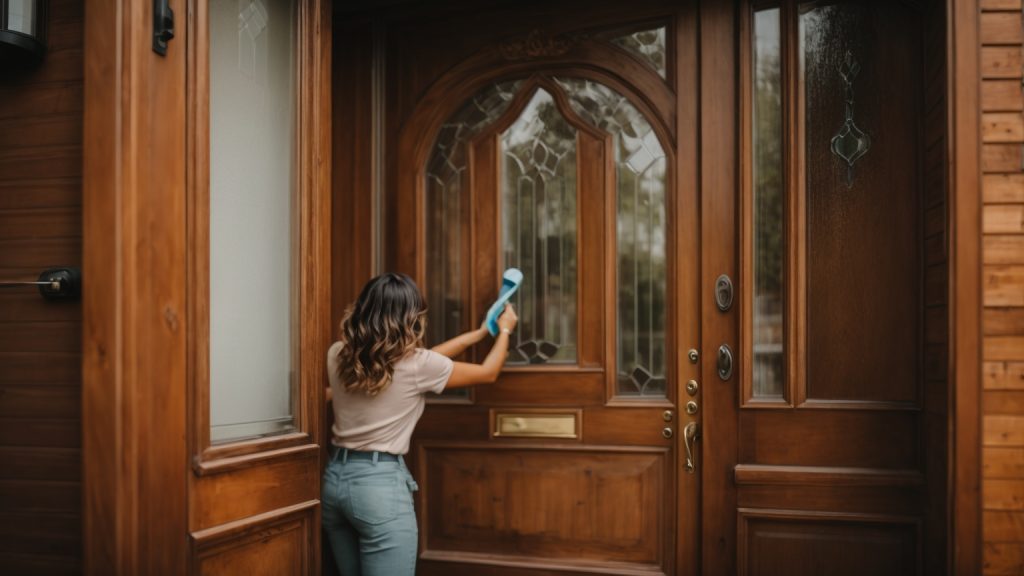
If you have a wooden front door, you know how beautiful they can look. However, over time, they can become dirty and stained, and it can be challenging to know how to clean them without damaging the wood. In this article, we will provide you with some tips on how to clean your wooden front door effectively.

One of the most important things to keep in mind when cleaning a wooden front door is to avoid using harsh chemicals or abrasive materials. Instead, opt for a mild dish soap mixed with hot water and a non-abrasive sponge or brush. Be sure to rinse the door thoroughly with hot water and dry it with a clean, dry cloth to avoid water damage. If there are stubborn stains, you can try using a soft-bristle scrub brush, but be careful not to damage the surface of the wood.

Another essential aspect to consider when cleaning a wooden front door is to work from the top downwards. This will help prevent dirt and debris from getting trapped in crevices or ledges. Don’t forget to clean around the edges of the door and the door frame, as these areas can also accumulate dirt and grime. By following these tips, you can keep your wooden front door looking beautiful for years to come.

Understanding the Importance of Cleaning Your Wooden Front Door

clean-your-wooden-front-door

Your front door is the first thing that guests see when they visit your home. It’s also one of the first things that you see when you come home after a long day. A clean and well-maintained front door can make a big difference in the overall appearance of your home. That’s why it’s important to take the time to clean your wooden front door regularly.

Wooden front doors are a popular choice for homeowners because they are durable and add a touch of elegance to any home. However, if not properly maintained, wooden doors can become damaged over time. Dirt, dust, and debris can accumulate on the door’s surface, causing it to look dull and worn. Additionally, exposure to sunlight and moisture can cause the wood to warp, crack, or fade.

Regular cleaning and maintenance can help prevent these issues and extend the life of your wooden front door. Here are some reasons why cleaning your wooden front door is important:

1. Improves Curb Appeal

A clean and well-maintained front door can instantly improve the curb appeal of your home. It creates a welcoming atmosphere for guests and adds value to your property. A dirty and worn-out door, on the other hand, can make your home look neglected and uninviting.

2. Protects the Wood

Wooden front doors are exposed to the elements, which can cause damage over time. Dirt, dust, and debris can scratch the surface of the wood, while moisture can cause it to warp or rot. Regular cleaning and maintenance can help protect the wood from these elements and keep it looking its best.

3. Saves Money

Replacing a wooden front door can be expensive. Regular cleaning and maintenance can help prevent damage and extend the life of your door, saving you money in the long run. It’s a small investment that can pay off big in the future.

In conclusion, cleaning your wooden front door is an important part of home maintenance. It improves curb appeal, protects the wood, and saves you money in the long run. With a little bit of effort, you can keep your wooden front door looking beautiful for years to come.

Materials and Tools Needed

Cleaning your wooden front door is a simple task that requires a few basic materials and tools. Here are the things you need to get started:

Choosing the Right Cleaning Solutions

When it comes to cleaning your wooden front door, it’s important to choose the right cleaning solutions. Avoid using harsh chemicals or abrasive cleaners that can damage the wood. Instead, opt for mild, non-abrasive solutions that are safe for use on wood surfaces. Here are some options to consider:

  • Mild dish soap mixed with warm water
  • White vinegar mixed with water
  • Commercial wood cleaners

Before using any cleaning solution, test it on a small, inconspicuous area of your door to make sure it doesn’t cause any damage.

Essential Cleaning Tools

In addition to the right cleaning solutions, you’ll also need a few essential cleaning tools to get the job done right. Here are the tools you’ll need:

  • Soft-bristled brush or sponge
  • Microfiber cloth or lint-free cloth
  • Bucket of warm water
  • Vacuum cleaner with brush attachment
  • Duster or feather duster

Using a soft-bristled brush or sponge will help prevent scratches or damage to the wood surface. A microfiber or lint-free cloth is ideal for wiping down the door after cleaning. A bucket of warm water is necessary for diluting your cleaning solution and rinsing the door after cleaning.

Before cleaning your wooden front door, use a vacuum cleaner with a brush attachment to remove any loose dirt, dust, or cobwebs. A duster or feather duster can also be used to remove any debris from hard-to-reach areas.

With the right materials and tools, cleaning your wooden front door is a breeze.

Preparation Before Cleaning

Before you start cleaning your wooden front door, it is essential to prepare the door properly. This will ensure that you don’t damage the wood or any other features on the door during the cleaning process. Here are a few steps you should take before you start cleaning:

Removing Dust and Debris

The first step is to remove any dust and debris from the surface of the door. You can use a soft-bristled brush or a vacuum cleaner with a soft brush attachment to remove the dust and cobwebs from the door. Be sure to pay attention to the corners and crevices of the door, where dust and cobwebs tend to accumulate.

Taping Off Areas

If there are any areas on the door that you don’t want to get wet or that are particularly sensitive, you should tape them off before you start cleaning. You can use painter’s tape or masking tape to cover any areas that you want to protect. This might include glass panels, hardware, or decorative features on the door.

Once you have removed the dust and debris and taped off any areas that need protection, you are ready to start cleaning your wooden front door. By taking these steps, you can ensure that you don’t accidentally damage your door while trying to clean it.

Step-by-Step Cleaning Guide

step-by-step-cleaning-guide

Cleaning your wooden front door is an essential task to keep it looking great and maintaining its longevity. Here is a step-by-step guide to help you clean your wooden door effectively.

Applying the Cleaning Solution

First, prepare a cleaning solution by mixing warm water and a mild dish soap in a bucket. You can also add a quarter cup of baking soda for extra cleaning power. Dip a soft sponge or cloth into the solution and wring it out until it’s damp but not dripping.

Scrubbing the Door

Start scrubbing the door in the direction of the wood grain using the damp sponge or cloth. Use less pressure on painted wood doors but put some muscle into it for stained or varnished front doors. Pay extra attention to areas with built-up dirt or stains. For tough stains, you can use mineral spirits, but be sure to test it on a small, inconspicuous area first.

Rinsing and Drying

After scrubbing the door, rinse it with clean water using a bucket or a hose. Be careful not to get water on any hardware or glass. Once you’ve rinsed the door thoroughly, dry it with a clean, dry cloth or towel. Make sure to dry any water that may have collected in the corners or edges of the door.

By following these simple steps, you can keep your wooden front door looking clean and beautiful for years to come.

Maintenance Tips

Keeping your wooden front door clean and well-maintained is essential to ensure its longevity and beauty. Regular cleaning and applying protective sealant are two key maintenance tips that can help you achieve this goal.

Regular Cleaning

Dust and dirt can accumulate on your wooden front door over time, making it look dull and unappealing. To prevent this, it is important to clean your door regularly. Here are some steps you can follow:

  1. Start by dusting off your door using a soft-bristled brush or a microfiber cloth. This will help remove any loose dirt and cobwebs.
  2. Next, mix a mild soap with warm water and use a non-abrasive brush to scrub the surface of your door. Be sure to rinse away all the soapy residue with clean water.
  3. Don’t forget to clean around the edges of your door and the door frame. You can use a toothbrush or a small brush to clean these areas.
  4. If your door has glass panels, use a glass cleaner and a soft cloth to clean them.
  5. Finally, dry your door with a clean, dry cloth to prevent water spots.

Applying Protective Sealant

In addition to regular cleaning, applying a protective sealant can help protect your wooden front door from the elements and keep it looking great for years to come. Here are some steps you can follow:

  1. Start by sanding your door lightly to remove any rough spots or imperfections.
  2. Next, apply a wood conditioner to your door to help prepare it for the sealant.
  3. Once the wood conditioner has dried, apply a coat of sealant using a brush or a roller. Be sure to follow the manufacturer’s instructions and apply the sealant evenly.
  4. Allow the sealant to dry completely before applying a second coat. Depending on the type of sealant you are using, you may need to apply multiple coats.
  5. Once the final coat of sealant has dried, your door will be protected from the elements and will look great for years to come.

By following these maintenance tips, you can keep your wooden front door looking beautiful and ensure its longevity. Remember to clean your door regularly and apply a protective sealant to keep it in top condition.

Troubleshooting Common Issues

If you encounter some tough stains or scratches on your wooden front door, don’t worry. Here are some troubleshooting tips to help you deal with common issues.

Removing Tough Stains

If you have tough stains on your wooden front door, such as ink or grease, you can try one of the following methods:

  • Use a mixture of baking soda and water to create a paste. Apply the paste to the stain and let it sit for a few minutes. Then, wipe the paste off with a damp cloth.
  • Apply a small amount of toothpaste to the stain and rub it in with a soft cloth. Then, wipe it off with a damp cloth.
  • Use a mixture of vinegar and water to create a cleaning solution. Apply the solution to the stain and let it sit for a few minutes. Then, wipe it off with a damp cloth.

Dealing with Scratches

If you have scratches on your wooden front door, you can try one of the following methods:

  • Use a wood filler to fill in the scratch. Apply the wood filler with a putty knife and let it dry. Then, sand the area with fine-grit sandpaper until it is smooth.
  • Apply a small amount of olive oil or vegetable oil to the scratch and rub it in with a soft cloth. This will help to hide the scratch.
  • Use a wood stain marker to color in the scratch. Choose a color that matches the color of your wooden front door.

Remember, prevention is the best way to avoid tough stains and scratches on your wooden front door. Regular cleaning and maintenance can help keep your door looking great for years to come.

Safety Precautions

Cleaning your wooden front door is a simple task, but it is important to take some safety precautions to avoid any accidents or damages. Here are some tips to keep in mind before you start cleaning your wooden front door:

  • Wear protective gloves: Some cleaning solutions may contain harsh chemicals that can irritate your skin. Wearing protective gloves can prevent any skin irritation or allergies.
  • Use a sturdy ladder: If your front door is high, you may need to use a ladder to reach it. Make sure your ladder is sturdy and secure before climbing it.
  • Avoid using abrasive materials: Using abrasive materials like steel wool or rough brushes can scratch the surface of your wooden front door. Instead, use soft cloths or sponges to clean it.
  • Test the cleaning solution: Before applying any cleaning solution to your wooden front door, test it on a small, inconspicuous area first to make sure it does not damage the surface.
  • Protect the surrounding area: Cover the surrounding area with a drop cloth or plastic sheet to prevent any cleaning solution from getting on your floors or furniture.

By following these safety precautions, you can ensure that your cleaning process goes smoothly and safely.

cleaning-process

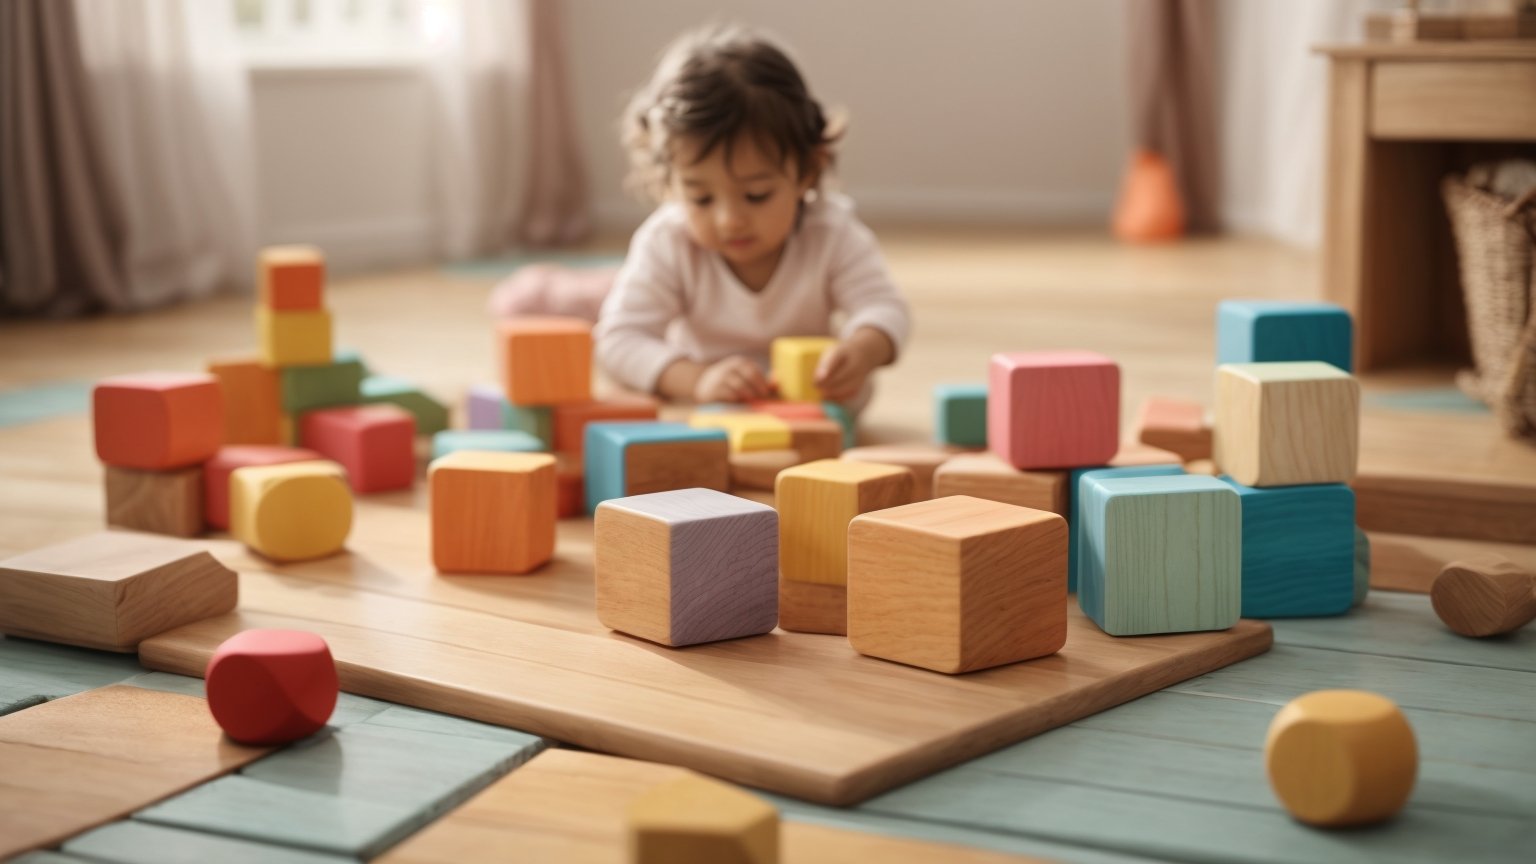
How to Clean Wooden Blocks: Tips and Tricks for Keeping Your Child's Toys Safe and Sanitized

Cleaning wooden blocks may seem like a daunting task, but it’s actually quite simple. Whether you’re a parent wanting to clean your child’s toys or a collector looking to restore old blocks, there are a few easy steps to follow. By properly cleaning your wooden blocks, you can ensure that they last for years to come.

First, it’s important to gather the necessary supplies. You will need a soft cloth, mild soap, and water. For tougher stains, vinegar and baking soda can be used. It’s important to note that only unpainted blocks should be sanded, as painted blocks can be damaged. Once you have your supplies, you’re ready to start cleaning your wooden blocks.

To clean your wooden blocks, simply dampen the cloth with water and mild soap and wipe down each block. For tougher stains, mix equal parts vinegar and water and use the solution to scrub the blocks with a sponge. If the stain still won’t come out, try lightly sanding the block with fine sandpaper. Once you’re done cleaning, be sure to let the blocks air dry completely before storing them away.

Understanding the Importance of Cleaning Wooden Blocks

how-to-clean-wooden-blocks-tips-and-tricks-for-keeping-your-childs-toys-safe-and-sanitized-2

Cleaning your child’s wooden blocks is essential for their health and safety. Wooden blocks are a classic toy that has been around for centuries. They are durable and can last for years, but they can also harbor harmful bacteria if not cleaned regularly. Here are some reasons why cleaning wooden blocks is important:

Preventing the Spread of Germs

Children are notorious for putting things in their mouths, and wooden blocks are no exception. If the blocks are not cleaned regularly, they can harbor harmful bacteria that can make your child sick. By cleaning the blocks regularly, you can prevent the spread of germs and keep your child healthy.

Maintaining the Quality of the Blocks

Wooden blocks can become dirty and stained over time, which can affect their quality. By cleaning the blocks regularly, you can maintain their quality and ensure that they last for years to come. Regular cleaning can also prevent the wood from drying out and cracking.

Promoting a Safe Play Environment

Cleaning your child’s toys is an important part of creating a safe play environment. By keeping the blocks clean, you can reduce the risk of accidents and injuries. Dirty blocks can become slippery and difficult to handle, which can increase the risk of falls and other accidents.

In summary, cleaning your child’s wooden blocks is essential for their health and safety. By preventing the spread of germs, maintaining the quality of the blocks, and promoting a safe play environment, you can ensure that your child’s wooden blocks are a fun and safe toy to play with.

Materials Required for Cleaning

Cleaning wooden blocks is a simple process that requires only a few materials. Here is a list of the materials you will need:

  • Warm water
  • Eco-friendly dish soap
  • White vinegar
  • Spray bottle
  • Soft-bristled brush
  • Microfiber cloth

Warm water mixed with eco-friendly dish soap is an effective and safe cleaning solution for wooden blocks. You can mix one part soap with four parts water and place it in a spray bottle for easy application. Alternatively, you can use a natural disinfectant solution made from white vinegar and water in a ratio of one part vinegar to two parts water.

A soft-bristled brush is useful for removing dirt and grime from the blocks’ crevices and corners. A microfiber cloth can be used to wipe the blocks clean after washing. It is essential to avoid using abrasive materials like steel wool or harsh chemicals that can damage the wood’s surface.

In addition to the above materials, you will need a designated cleaning area covered with a drop cloth or old towel to catch any drips or spills. It is also essential to have a drying rack or a clean towel to dry the blocks after washing them.

By using these simple materials, you can effectively clean your wooden blocks and keep them looking their best for years to come.

Pre-Cleaning Steps

Before you start cleaning your wooden blocks, there are a few pre-cleaning steps you should take to ensure the best results.

Inspecting the Blocks

The first step is to inspect your wooden blocks. Check for any visible signs of damage or wear and tear. Look for cracks, splits, or splinters in the wood. If you find any damaged blocks, set them aside for repair or replacement.

Sorting the Blocks

Once you’ve inspected your blocks, the next step is to sort them. Group the blocks by size, shape, and color. This will make it easier to clean them efficiently and thoroughly.

Here are some tips for sorting your blocks:

  • Sort the blocks into piles based on their size.
  • Group the blocks by shape (cubes, rectangles, triangles, etc.).
  • Separate the blocks by color (natural wood, painted, stained, etc.).

By sorting your blocks, you’ll be able to clean them more effectively and efficiently. It will also make it easier to put them back together once they’re clean.

Taking these pre-cleaning steps will ensure that your wooden blocks are ready for cleaning. By inspecting and sorting your blocks, you’ll be able to clean them more effectively and efficiently.

Cleaning Process

cleaning-process

Cleaning your wooden blocks is an important step to keep them in good condition and ensure they last for years to come. Here is a step-by-step guide on how to clean your wooden blocks:

Preparing the Cleaning Solution

First, you need to prepare the cleaning solution. Mix one part white vinegar with one part water in a bowl. If the blocks are heavily soiled, add a small amount of mild dish soap to the solution.

Applying the Solution

Dip a sponge or soft cloth into the cleaning solution and wring it out. Then, gently wipe down each block with the damp sponge or cloth. Make sure to cover all sides of the block, including any crevices or corners.

Scrubbing the Blocks

For stubborn stains or marks on the blocks, use a soft-bristled brush to scrub the affected area. You can also lightly sand the blocks with fine sandpaper to remove any stains or discoloration, but only do this for unpainted blocks.

Rinsing and Drying

Once you have finished cleaning the blocks, rinse them thoroughly with clean water to remove any remaining cleaning solution. Then, dry the blocks with a clean towel, and let them air dry completely before storing them away.

By following these simple steps, you can keep your wooden blocks clean and in good shape for years to come.

Post-Cleaning Care

After cleaning your wooden blocks, it’s important to take proper care of them to ensure they last a long time. Here are some tips for post-cleaning care:

Proper Storage

Storing your wooden blocks properly is crucial to maintaining their quality. Here are some things to keep in mind:

  • Keep your blocks in a dry, cool place. Moisture can cause the wood to warp or crack.
  • Store your blocks in a container or on a shelf. This will help protect them from dust and dirt.
  • Don’t stack your blocks too high. This can cause them to become misshapen or damaged.

Regular Maintenance

Regular maintenance can help keep your wooden blocks looking and feeling great. Here are some things you can do:

  • Oil your blocks with mineral oil or beeswax every few months. This will help keep the wood from drying out and cracking.
  • Inspect your blocks regularly for any signs of damage or wear. If you notice any issues, address them as soon as possible to prevent further damage.
  • Keep your blocks clean by wiping them down with a damp cloth after each use. This will help prevent dirt and grime from building up on the surface.

By following these tips, you can help ensure that your wooden blocks stay in great condition for years to come.

Tips and Tricks for Effective Cleaning

Cleaning wooden blocks can be a simple and enjoyable task, but it’s important to do it right to ensure the longevity and safety of your toys. Here are some tips and tricks for effective cleaning:

  • Use warm water and a mild dish soap or a natural disinfectant solution of white vinegar and water. Avoid using harsh chemicals or abrasive cleaners that can damage the wood or paint.
  • Dip a clean cloth into the soapy water and wring it out well before wiping the blocks. You can also use a soft-bristled brush or a toothbrush to clean hard-to-reach areas.
  • Avoid immersing, soaking, or putting your wooden blocks in the dishwasher, as this can cause warping, cracking, or discoloration.
  • Dry the blocks thoroughly with a clean towel or let them air dry before storing them. Avoid using a hair dryer or placing them in direct sunlight, as this can cause the wood to dry out and crack.
  • If your wooden blocks have stains or marks that won’t come off with soap and water, you can try rubbing them gently with a cloth dipped in olive oil or mineral oil. This can help restore the natural shine and color of the wood.
  • To prevent mold or mildew from forming on your wooden blocks, store them in a dry and well-ventilated area. Avoid storing them in damp or humid places like basements or bathrooms.
  • If you have vintage or antique wooden blocks, be extra careful when cleaning them, as they may be more fragile or delicate than newer blocks. You may want to consult a professional restoration expert or do some research on the best cleaning methods for your specific type of blocks.

By following these tips and tricks, you can keep your wooden blocks clean, safe, and beautiful for years to come.

Safety Measures While Cleaning

Cleaning wooden blocks is a great way to keep them looking their best, but it’s important to take some safety measures to ensure that you don’t damage the blocks or injure yourself in the process. Here are some tips to help you clean your wooden blocks safely:

  • Wear gloves: Wooden blocks can be rough and splintery, so it’s a good idea to wear gloves while cleaning them to protect your hands.
  • Use a soft brush: A soft-bristled brush, such as a toothbrush or a paintbrush, is ideal for cleaning wooden blocks. Avoid using stiff brushes or abrasive materials that could scratch or damage the blocks.
  • Avoid water damage: Wooden blocks can warp or crack if they get too wet, so it’s important to avoid using too much water while cleaning them. Use a damp cloth or a spray bottle to lightly mist the blocks, rather than soaking them in water.
  • Test cleaning products: Before using any cleaning products on your wooden blocks, test them on a small, inconspicuous area first to make sure that they don’t cause any damage or discoloration.
  • Keep blocks away from heat sources: Wooden blocks are flammable, so it’s important to keep them away from heat sources while cleaning them. Avoid using hot water or heat guns to dry the blocks, and don’t leave them near heaters or open flames.

By following these safety measures, you can ensure that your wooden blocks stay in great condition for years to come, while also protecting yourself from injury and damage.

How to Clean a Wooden Charcuterie Board: Tips and Tricks

Keeping your wooden charcuterie board clean is essential for maintaining its longevity and ensuring your food stays safe to eat. While wooden boards are beautiful and functional, they require a bit more care than other materials. In this article, we’ll go over the best practices for cleaning your wooden charcuterie board to keep it in top condition.

First things first, it’s important to avoid soaking your wooden board in water or putting it in the dishwasher. This can cause the wood to warp or crack, which can ruin the board. Instead, use a sponge or cloth with warm water and soap to clean the board thoroughly. Scrubbing the board well and being generous with the amount of water is more important than using soap in flushing any food and bacteria off the board. After washing, air dry the board immediately on a raised rack or standing on a towel to allow airflow on both sides.

Next, it’s important to oil your wooden board regularly to prevent it from drying out and cracking. Using a soft, lint-free cloth, apply a small amount of food-grade mineral oil to the surface of the board and buff it in until the wood is no longer absorbing the product. Wipe off any excess oil and let the board sit for a few hours before using it again. By following these simple steps, you can keep your wooden charcuterie board in great condition for years to come.

Understanding the Nature of Your Wooden Charcuterie Board

If you’re the proud owner of a wooden charcuterie board, you know how important it is to keep it clean and well-maintained. But before you start cleaning your board, it’s important to understand the nature of the wood and how it reacts to different cleaning methods.

Types of Wood

Charcuterie boards are often made from hardwoods like maple, oak, and walnut. These woods are durable and can withstand the repeated use and cleaning that charcuterie boards require. However, not all woods are created equal, and some may be more prone to warping or cracking than others.

Porosity

Wood is a porous material, which means it can absorb moisture and bacteria. This is why it’s important to properly clean and sanitize your charcuterie board after each use. However, some woods are more porous than others, which can make them more susceptible to absorbing moisture and bacteria.

Cutting vs. Serving

It’s important to note that there is a difference between a cutting board and a serving board. Cutting boards are designed to withstand the repeated use of knives, while serving boards are meant to showcase food and be used for serving only. If you plan to use your charcuterie board for cutting, make sure it’s thick enough to withstand the pressure of a knife.

Cleaning and Maintenance

When it comes to cleaning and maintaining your wooden charcuterie board, there are a few things to keep in mind. First, never soak your board in water or put it in the dishwasher. This can cause the wood to warp or crack. Instead, use a damp sponge or cloth to clean the surface of the board.

It’s also important to regularly sanitize your board to prevent the growth of bacteria. You can do this by using a mixture of coarse salt and lemon juice, or by using a food-safe disinfectant spray.

By understanding the nature of your wooden charcuterie board, you can ensure that it stays in good condition for years to come.

Pre-Cleaning Preparations

Before you start cleaning your wooden charcuterie board, it’s important to gather all the essential cleaning materials and prepare your cleaning area. This will ensure that you have everything you need and that the cleaning process goes smoothly.

Gathering Essential Cleaning Materials

To properly clean your wooden charcuterie board, you will need the following materials:

  • Warm water
  • Mild dish soap
  • Sponge or cloth
  • Distilled white vinegar or 3% hydrogen peroxide
  • Food-grade mineral oil
  • Lint-free cloth
  • Optional: Food-grade wax finish, such as butcher block wax or Clapham’s Salad Bowl Finish

Make sure to use food-grade materials that are safe for use with your charcuterie board. Avoid using harsh chemicals or abrasive materials that can damage the wood.

Preparing Your Cleaning Area

Before you start cleaning your wooden charcuterie board, you should prepare your cleaning area. Here are a few steps you can take to prepare:

  1. Clear the area: Remove any items from the area around your charcuterie board to prevent them from getting in the way or getting dirty.

  2. Lay down a towel: Place a clean towel or cloth on your work surface to protect it from water and cleaning solutions.

  3. Set up your materials: Arrange your cleaning materials within easy reach. This will make the cleaning process more efficient and prevent you from having to search for materials mid-way through.

By taking these steps to prepare your cleaning area, you can ensure that you have a clean and organized space to work in. This will make the cleaning process easier and more effective.

The Cleaning Process

When it comes to cleaning your wooden charcuterie board, it’s important to take the right steps to ensure that it stays in good condition and free from bacteria. Here’s a step-by-step guide on how to clean your board properly.

Wiping Down the Board

The first step in cleaning your wooden charcuterie board is to wipe it down with a damp cloth or sponge. This will remove any loose debris and crumbs from the surface of the board. It’s important to use a damp cloth rather than a wet one, as excess water can cause the wood to warp and crack.

Applying the Cleaning Solution

Once you have wiped down the board, it’s time to apply the cleaning solution. There are a few different options for cleaning solutions, but one of the most effective is a mixture of warm water and mild dish soap. You can also use a solution of equal parts white vinegar and water, or a mixture of baking soda and water.

To apply the cleaning solution, dip a clean sponge or cloth into the solution and wring it out so that it’s damp but not dripping. Then, use the sponge or cloth to gently scrub the surface of the board, working in the direction of the grain. Be sure to get into all the corners and crevices of the board.

Scrubbing the Board

After you have applied the cleaning solution, it’s time to scrub the board. Using a soft-bristled brush or a scrubbing pad, gently scrub the surface of the board in circular motions. Be careful not to scrub too hard, as this can damage the wood.

Once you have scrubbed the entire surface of the board, rinse it thoroughly with warm water to remove any remaining cleaning solution. Then, use a clean towel to dry the board completely. It’s important to let the board air dry completely before using it again, as excess moisture can cause the wood to warp and crack.

By following these simple steps, you can keep your wooden charcuterie board clean and free from bacteria, ensuring that it lasts for years to come.

Drying the Board Properly

After washing your wooden charcuterie board, it’s important to dry it properly to prevent any warping or cracking. Here are some tips for drying your board:

  1. Air dry: The best way to dry your board is to let it air dry completely. Place it on a raised rack or stand it on a towel to allow airflow on both sides. This will ensure that both sides of the board dry evenly.

  2. Towel dry: If you’re in a hurry, you can towel dry your board. Use a clean, dry towel to wipe away any excess water. Make sure to dry both sides of the board thoroughly.

  3. Avoid heat: Do not place your board near a heat source or in direct sunlight to dry. This can cause the board to warp or crack.

  4. Don’t stack: Do not stack your boards while they are still wet. This can trap moisture between the boards and cause them to warp or stick together.

  5. Oil the board: Once your board is completely dry, you can apply a thin layer of food-grade mineral oil to protect and condition the wood. Use a soft cloth to apply the oil in the direction of the grain, and let it soak in for a few hours before wiping away any excess oil.

By following these simple steps, you can ensure that your wooden charcuterie board stays in good condition for years to come.

Maintenance Tips for Your Wooden Charcuterie Board

If you want your wooden charcuterie board to last for years, it’s essential to take good care of it. Here are some maintenance tips to help you keep your board in excellent condition.

Regular Cleaning

To prevent bacteria growth, you should clean your wooden charcuterie board after each use. Here’s how to do it:

  1. Rinse the board with hot water and use a sponge or cloth to remove any food debris.
  2. Use a mild dish soap and warm water to clean the board thoroughly.
  3. Rinse the board with hot water and dry it with a clean towel.
  4. Let the board air dry completely before storing it.

Proper Storage

Proper storage is crucial to keep your wooden charcuterie board in good condition. Here are some tips:

  1. Store your board in a dry, cool place away from direct sunlight.
  2. Never stack your board on top of other boards or objects.
  3. Store your board flat or on its side to prevent warping.

When to Oil Your Board

Oiling your wooden charcuterie board is essential to keep it from drying out and cracking. Here’s how to do it:

  1. Apply a food-grade mineral oil to your board using a clean cloth or paper towel.
  2. Rub the oil into the board, making sure to cover the entire surface.
  3. Let the oil soak into the board for at least 30 minutes.
  4. Wipe off any excess oil with a clean cloth or paper towel.

You should oil your board once a month or as needed, depending on how often you use it.

By following these maintenance tips, you can keep your wooden charcuterie board in excellent condition and enjoy it for years to come.

Why Are Wooden Spoons Good for Cooking?

Are you tired of using metal or plastic spoons that scratch your pots and pans? Have you ever wondered why wooden spoons are a popular choice for cooking? Wooden spoons have been used for centuries in kitchens around the world, and for good reason.

Firstly, wooden spoons are gentle on your cookware. Unlike metal or plastic utensils, wooden spoons won’t scratch or damage the surface of your pots and pans. This makes them an ideal choice for non-stick cookware, as they won’t scrape off the non-stick coating. In addition, wooden spoons are heat-resistant and won’t conduct heat like metal spoons, so you won’t burn your hands while cooking.

Moreover, wooden spoons are a great tool for cooking because they won’t react with acidic or alkaline foods. Unlike metal spoons, wooden spoons won’t cause a chemical reaction that alters the taste or color of your food. Wooden spoons are also porous, which means they can absorb some of the flavors and aromas of the food you’re cooking. This can add a subtle depth of flavor to your dishes over time.

Overall, wooden spoons are a versatile and practical tool for any kitchen. They’re gentle on your cookware, heat-resistant, and won’t react with your food. So next time you’re cooking, consider reaching for a wooden spoon instead of your usual metal or plastic utensil.

The Charm of Wooden Spoons

Wooden spoons are not just practical kitchen tools, but they also have a certain charm that is hard to resist. Here are a few reasons why wooden spoons are so appealing:

Natural Beauty

One of the most obvious reasons why wooden spoons are so charming is their natural beauty. Each spoon is unique, with its own grain pattern and color variations. The warm tones of the wood add a touch of warmth and rustic charm to any kitchen.

Comfortable to Use

Another reason why wooden spoons are so popular is that they are comfortable to use. The smooth surface of the wood feels comfortable in your hand, and the gentle curves of the spoon make it easy to stir and mix ingredients.

Versatile

Wooden spoons are also incredibly versatile. They can be used for everything from stirring soups and sauces to mixing batter and dough. They are gentle enough to use with delicate ingredients, such as eggs and cream, and sturdy enough to handle heavier mixtures.

Safe for Non-Stick Cookware

Unlike metal utensils, wooden spoons are safe to use with non-stick cookware. They won’t scratch the surface of the pan, which can cause the non-stick coating to wear off over time. Wooden spoons are also less likely to conduct heat, which means that the handle won’t get hot and burn your hand.

Durable

Finally, wooden spoons are incredibly durable. With proper care, they can last for years, making them a great investment for any kitchen. Wooden spoons should be hand-washed and dried immediately to prevent them from cracking or warping.

In summary, wooden spoons are not only practical kitchen tools, but they also have a certain charm that makes them a favorite among home cooks and professional chefs alike. Their natural beauty, comfort, versatility, safety, and durability make them a must-have in any kitchen.

Benefits of Using Wooden Spoons

When it comes to cooking utensils, wooden spoons have been a popular choice for centuries. Not only are they aesthetically pleasing, but they also offer a number of benefits that make them a great addition to any kitchen. Here are some of the key benefits of using wooden spoons:

Gentle on Cookware

One of the biggest advantages of using wooden spoons is that they are gentle on your cookware. Unlike metal utensils, wooden spoons won’t scratch or damage the surface of your pots and pans. This is particularly important if you have non-stick cookware, which can be easily damaged by metal utensils. Using wooden spoons will help to extend the life of your cookware and keep it in good condition for longer.

Heat Resistance

Another benefit of using wooden spoons is that they are heat resistant. This means that you can use them to stir hot foods without worrying about the handle getting too hot to hold. Wooden spoons are also less likely to conduct heat than metal utensils, which can become very hot when exposed to high temperatures. This makes wooden spoons a safer and more comfortable option for cooking.

Non-Reactive Nature

Wooden spoons are also non-reactive, which means that they won’t react with acidic ingredients like metal utensils can. This is particularly important when cooking with ingredients like tomatoes or citrus fruits, which can cause a metallic taste in your food if they come into contact with metal utensils. Using wooden spoons will help to ensure that your food tastes the way it should, without any unwanted metallic flavors.

Overall, wooden spoons are a great choice for anyone who loves to cook. They are gentle on your cookware, heat resistant, and non-reactive, making them a versatile and practical addition to any kitchen.

Historical Significance of Wooden Spoons

Wooden spoons have been used for centuries and have a rich history. According to Charles Panati’s book, “Extraordinary Origins of Everyday Things,” wooden spoons have been found alongside gold and silver versions in the tombs of ancient Egyptians, indicating that they were highly valued. The Iron Age Celts of Britain also used wooden spoons, and they were easy to carve, making them inexpensive and common throughout history.

In Medieval Europe, wooden spoons began to be replaced with more durable metal variants in the 15th century, although they were only available to those with deep pockets. Spoons were used not only as a means of eating but also as a mark of wealth and power.

Wooden spoons have also played an essential role in American history. During the American Revolution, colonists boycotted British goods, including metal utensils, and turned to wooden spoons as a symbol of their patriotism. Wooden spoons were also used as a tool for stirring and mixing in the kitchen, and their durability and affordability made them a popular choice for many households.

Today, wooden spoons continue to be a staple in the kitchen, and their historical significance has made them a beloved kitchen utensil. They are simple to carve, highly practical, and have a unique charm that cannot be replicated by other materials. Whether you are a professional chef or a home cook, wooden spoons are an essential tool in any kitchen.

Caring for Your Wooden Spoons

Wooden spoons are a great addition to any kitchen, but they do require some special care to keep them in good condition. In this section, we’ll go over some tips for cleaning and maintaining your wooden spoons.

Cleaning

Cleaning your wooden spoons is important to keep them sanitary and in good condition. Here are some tips for cleaning your wooden spoons:

  • Hand wash your wooden spoons with hot water and mild dish soap. Avoid putting them in the dishwasher, as the high heat and harsh detergents can damage the wood.
  • If your wooden spoons have stubborn stains or odors, you can scrub them with a paste made from baking soda and water or with the cut side of a halved lemon.
  • Rinse your wooden spoons thoroughly and towel dry them immediately after washing to prevent water from seeping into the wood and causing damage.
  • Avoid soaking your wooden spoons in water for extended periods of time, as this can cause the wood to warp or crack.

Maintenance

Proper maintenance can help extend the life of your wooden spoons. Here are some tips for maintaining your wooden spoons:

  • Sand any rough spots or splinters with a fine-grit sandpaper to prevent them from catching on food or causing injury.
  • Apply a food-safe oil or wax to your wooden spoons periodically to help protect the wood and keep it from drying out. Beeswax, mineral oil, and coconut oil are all good options.
  • Store your wooden spoons in a dry, well-ventilated area to prevent mold and mildew growth. Avoid storing them in a drawer or container where they can become damp or crowded.
  • Inspect your wooden spoons regularly for signs of damage or wear, such as cracks, splits, or warping. If a spoon is damaged beyond repair, it’s best to replace it.

By following these tips for cleaning and maintaining your wooden spoons, you can ensure that they remain a valuable and useful tool in your kitchen for years to come.

Choosing the Right Wooden Spoon

When it comes to choosing the right wooden spoon, there are a few factors to consider. Here are some things to keep in mind when selecting the perfect wooden spoon for your kitchen.

Material

The type of wood used to make a wooden spoon can affect its durability, weight, and appearance. Some common types of wood used for wooden spoons include:

  • Beechwood: This is a popular choice for wooden spoons because it is durable and has a smooth texture.
  • Olive wood: This type of wood is known for its beautiful grain patterns and unique appearance.
  • Bamboo: While technically a grass, bamboo is often used to make wooden spoons because it is lightweight and eco-friendly.

When choosing a wooden spoon, consider the type of wood used and how it will fit your needs.

Size and Shape

Wooden spoons come in a variety of sizes and shapes, each with its own benefits. Here are a few things to keep in mind:

  • Length: Longer spoons are great for stirring deep pots, while shorter spoons are better for smaller pots and pans.
  • Bowl shape: Some spoons have a deep, rounded bowl that is great for scooping and stirring, while others have a flatter bowl that is better for sautéing and flipping.
  • Handle shape: Look for a handle that is comfortable to hold and provides a good grip.

Consider the size and shape of the spoon you need for the task at hand.

Comfort

Using a comfortable wooden spoon can make cooking a more enjoyable experience. Here are a few things to keep in mind:

  • Weight: A heavy spoon can be tiring to use, while a lightweight spoon may not feel substantial enough.
  • Texture: Look for a spoon with a smooth texture that feels good in your hand.
  • Ergonomics: Some spoons have ergonomic handles that are designed to reduce hand fatigue.

Consider the comfort of the spoon you choose, as it can affect your cooking experience.

By considering the material, size and shape, and comfort of a wooden spoon, you can choose the perfect one for your kitchen needs.

How to Clean Wooden Kitchen Cabinets: Easy Tips and Tricks

Keeping your kitchen cabinets clean and well-maintained is essential to ensure they last a long time. Wooden cabinets are particularly susceptible to damage if they are not cleaned regularly. However, with the right tools and techniques, cleaning your wooden kitchen cabinets can be a breeze.

One of the most important things to keep in mind when cleaning wooden kitchen cabinets is to avoid using harsh chemicals. These can damage the wood and cause it to deteriorate over time. Instead, opt for natural cleaning solutions such as vinegar and warm water, or a mild dish soap solution. Regular dusting and wiping down with a soft cloth can also go a long way in preventing build-up and damage.

In this article, we will provide you with tips and tricks on how to clean your wooden kitchen cabinets effectively and safely. Whether you have just installed new cabinets or are looking to give your old ones a thorough cleaning, we’ve got you covered. So, let’s get started!

Understanding Wood Types

When it comes to cleaning wooden kitchen cabinets, it’s important to understand the type of wood you’re dealing with. Different types of wood require different cleaning methods to prevent damage. Here are the three main types of wood used for kitchen cabinets:

Hardwood

Hardwood is a popular choice for kitchen cabinets because of its durability and natural beauty. Some common types of hardwood used for cabinets include oak, maple, cherry, and hickory. Hardwood is generally more expensive than softwood, but it’s also more resistant to scratches and dents.

Softwood

Softwood is another option for kitchen cabinets, but it’s less common than hardwood. Pine and cedar are two types of softwood that are sometimes used for cabinets. Softwood is generally less expensive than hardwood, but it’s also more prone to scratches and dents. Softwood cabinets require more care and maintenance than hardwood cabinets.

Engineered Wood

Engineered wood is a popular choice for kitchen cabinets because it’s more affordable than solid wood. Engineered wood is made by combining wood fibers, resin, and other materials to create a strong and durable material. Some common types of engineered wood used for cabinets include plywood, particleboard, and MDF (medium-density fiberboard).

When cleaning engineered wood cabinets, it’s important to be gentle to avoid damaging the surface. Engineered wood is more prone to water damage than solid wood, so it’s important to avoid using too much water when cleaning.

By understanding the type of wood your kitchen cabinets are made of, you can choose the right cleaning method to keep them looking their best.

Materials Needed for Cleaning

Cleaning your wooden kitchen cabinets is easy, and you only need a few materials to get started. Here are the things you’ll need:

1. Cleaning Solution

There are several cleaning solutions you can use to clean your wooden kitchen cabinets. You can use a mixture of white vinegar and water, a mild dish soap and water solution, or a commercial wood cleaner. Make sure to test the cleaning solution on a small, inconspicuous area of your cabinet before using it on the entire surface.

2. Microfiber Cloths

Microfiber cloths are great for cleaning wooden kitchen cabinets because they are soft and gentle on the wood. They are also effective at removing dirt and grime without scratching the surface of the wood.

3. Spray Bottle

A spray bottle is useful for applying the cleaning solution to your cabinets. It allows you to control the amount of cleaning solution you use and helps to prevent over-saturation of the wood.

4. Vacuum with Crevice Tool

Before cleaning your cabinets, it’s a good idea to vacuum them first. Use a crevice tool to get into the corners and crevices of your cabinets to remove any loose dirt and debris.

5. Goo Gone (Optional)

If you have stubborn grease or grime on your wooden kitchen cabinets, you may want to use a commercial cleaner like Goo Gone. This product is effective at removing tough stains and buildup, but make sure to wear rubber gloves when using it.

Overall, cleaning your wooden kitchen cabinets is a simple task that can be accomplished with just a few materials. By using the right cleaning solution and tools, you can keep your cabinets looking clean and beautiful for years to come.

Preparation Steps

Before you start cleaning your wooden kitchen cabinets, you need to prepare them for the cleaning process. This will ensure that you get the best results and avoid any damage to the wood. Here are some preparation steps to follow:

Clearing the Cabinets

The first step is to clear out the cabinets. Remove all the items from the cabinets and place them on the countertop. This will give you more space to work and ensure that you don’t accidentally damage any items while cleaning the cabinets.

Inspecting for Damages

Inspect the cabinets for any damages. Look for cracks, chips, or scratches in the wood. If you find any damages, you should take care of them before you start cleaning the cabinets. If the damages are minor, you can use wood filler to repair them. For more significant damages, you may need to replace the cabinet or hire a professional to repair it.

Once you have cleared the cabinets and inspected them for damages, you are ready to start cleaning. Remember to always follow the manufacturer’s instructions and avoid using harsh chemicals that can damage the wood. With a little bit of effort, you can keep your wooden kitchen cabinets looking beautiful for years to come.

Cleaning Process

Cleaning your wooden kitchen cabinets can be a daunting task, but with the right tools and technique, it can be done in no time. Here’s a step-by-step guide on how to clean your wooden kitchen cabinets.

Dusting Off

Before cleaning your cabinets, make sure to dust off any loose dirt or debris. You can use a microfiber cloth or a soft-bristled brush to remove any loose particles. Be sure to get into all the nooks and crannies, including the corners and edges of the cabinets.

Applying Cleaner

Once you’ve dusted off your cabinets, it’s time to apply your cleaner. You can use a commercial cleaner or make your own by mixing equal parts of white vinegar and water. If your cabinets are particularly dirty, you can add a few drops of dish soap to the mixture.

Apply the cleaner to a soft cloth and gently rub it onto the surface of your cabinets. Avoid using too much water, as this can cause damage to the wood. Be sure to test the cleaner on a small, inconspicuous area first to ensure that it won’t damage your cabinets.

Wiping and Drying

After applying the cleaner, use a clean cloth to wipe off any excess solution. Be sure to wipe in the direction of the wood grain to avoid leaving streaks or scratches. Once you’ve wiped down all of your cabinets, use a dry cloth to remove any remaining moisture.

If your cabinets are particularly dirty or have a buildup of grease, you may need to repeat the cleaning process a few times. It’s important to be patient and take your time to ensure that your cabinets are thoroughly cleaned.

By following these simple steps, you can keep your wooden kitchen cabinets looking clean and beautiful for years to come.

Maintaining Cleanliness

Keeping your wooden kitchen cabinets clean is essential to maintaining their appearance and longevity. Routine dusting and regular deep cleaning are two important steps in ensuring that your cabinets stay in top condition.

Routine Dusting

Dusting your cabinets regularly will help prevent the buildup of dirt and grime. Use a microfiber cloth or a soft-bristled brush to gently wipe down the surfaces of your cabinets. Avoid using abrasive materials that can scratch the wood. You can also use a vacuum cleaner with a crevice tool attachment to remove dust from hard-to-reach areas.

Regular Deep Cleaning

While routine dusting is important, it’s also essential to do a deep cleaning of your cabinets on a regular basis. Here are some steps you can follow to deep clean your wooden kitchen cabinets:

  1. Remove all items from your cabinets and shelves.

  2. Mix a 50/50 solution of vinegar and warm water in a spray bottle.

  3. Spray the solution onto a microfiber cloth or soft rag until it’s damp but not soaking wet.

  4. Wipe down the surfaces of your cabinets, working in small sections.

  5. Use a toothbrush or soft-bristled brush to gently clean any crevices or corners.

  6. Rinse the cloth or rag frequently to avoid spreading dirt and grime.

  7. After cleaning, use a clean, damp cloth to remove any remaining vinegar solution.

  8. Dry the cabinets thoroughly with a clean, dry cloth.

Remember to avoid using harsh chemicals or abrasive materials on your wooden kitchen cabinets, as these can damage the wood. Additionally, be sure to test any cleaning solution on a small, inconspicuous area before applying it to your entire cabinet. By following these steps, you can keep your wooden kitchen cabinets looking clean and beautiful for years to come.

Dealing with Common Issues

Wooden kitchen cabinets are a beautiful addition to any kitchen, but they can be a bit tricky to clean. Here are some tips on how to deal with common issues that you might encounter when cleaning your wooden kitchen cabinets.

Sticky Residue

If you notice that there is sticky residue on your wooden kitchen cabinets, you can use a mixture of warm water and mild dish soap to clean it off. Simply dip a soft cloth into the mixture and gently scrub the affected area. Be sure to rinse the area with clean water and dry it with a clean cloth.

If the sticky residue is particularly stubborn, you can try using a mixture of equal parts water and vinegar. Apply the mixture to the affected area and let it sit for a few minutes before wiping it away with a clean cloth.

Stains

Stains on wooden kitchen cabinets can be unsightly, but they can usually be removed with a bit of elbow grease. For light stains, you can use a mixture of warm water and mild dish soap to clean the affected area. For tougher stains, you can try using a mixture of equal parts baking soda and water. Apply the mixture to the affected area and let it sit for a few minutes before wiping it away with a clean cloth.

If the stain is particularly stubborn, you can try using a mixture of equal parts water and vinegar. Apply the mixture to the affected area and let it sit for a few minutes before wiping it away with a clean cloth.

Scratches

Scratches on wooden kitchen cabinets can be frustrating, but they can usually be disguised with a bit of furniture polish. Simply apply a small amount of furniture polish to a soft cloth and gently rub it into the scratch. Be sure to wipe away any excess polish with a clean cloth.

For deeper scratches, you can try using a wood filler. Apply the wood filler to the affected area and let it dry completely before sanding it down with a fine-grit sandpaper. Once the area is smooth, you can apply a coat of furniture polish to help disguise the scratch.

By following these tips, you can keep your wooden kitchen cabinets looking beautiful for years to come.

Choosing the Right Cleaning Products

When it comes to cleaning your wooden kitchen cabinets, you want to make sure that you are using the right products that are safe and effective. There are two main types of cleaning products that you can choose from: natural cleaners and commercial cleaners.

Natural Cleaners

If you prefer to use natural cleaners, there are several options that you can try. Here are a few:

  • Vinegar and water: Mix equal parts of vinegar and water in a spray bottle and use it to clean your cabinets. Vinegar is a natural disinfectant and can help remove dirt and grime.

  • Baking soda and water: Mix baking soda and water to make a paste and use it to scrub your cabinets. Baking soda is a natural abrasive and can help remove tough stains.

  • Lemon juice and olive oil: Mix lemon juice and olive oil in a spray bottle and use it to clean and polish your cabinets. Lemon juice is a natural cleaner and can help remove stains, while olive oil can help moisturize and protect the wood.

Commercial Cleaners

If you prefer to use commercial cleaners, there are several options that you can choose from. Here are a few:

  • Multi-purpose cleaners: Look for cleaners that are specifically designed for wood cabinets. These cleaners are usually safe and effective for cleaning and polishing your cabinets.

  • Cabinet cleaners: There are several brands of cabinet cleaners that are specifically designed for cleaning wood cabinets. These cleaners are usually more expensive than multi-purpose cleaners but can be more effective.

  • Furniture polish: Look for furniture polish that is specifically designed for wood cabinets. These polishes can help protect and moisturize the wood while also providing a shine.

When choosing a cleaning product, make sure to read the label and follow the instructions carefully. Avoid using harsh chemicals or abrasive cleaners that can damage the wood. With the right cleaning products, you can keep your wooden kitchen cabinets looking clean and beautiful for years to come.

How to Clean Wooden Furniture: Tips and Tricks for a Shiny Finish

Cleaning wooden furniture can be a daunting task, especially if you’re not sure where to start. But with the right tools and techniques, you can keep your wooden furniture looking beautiful for years to come. In this article, we’ll provide you with some helpful tips and tricks for cleaning and maintaining your wooden furniture.

First and foremost, it’s important to avoid using harsh chemicals or abrasive materials when cleaning your wooden furniture. These can scratch or damage the surface of the wood, leaving it looking dull and worn. Instead, opt for gentle cleaning solutions like a mixture of mild dish soap and warm water, or a vinegar and water solution. These will help to remove dirt and grime without harming the wood.

Another key tip for cleaning wooden furniture is to be gentle and patient. Don’t scrub too hard or use too much pressure when cleaning, as this can damage the wood. Instead, use a soft cloth or sponge and work in small, circular motions. And remember to always dry your furniture thoroughly after cleaning to prevent water damage. With these tips in mind, you’ll be well on your way to keeping your wooden furniture looking its best.

Understanding Wood Types

When it comes to cleaning wood furniture, it’s important to understand the type of wood you’re dealing with. Different types of wood require different cleaning methods and products. Here are the three main types of wood:

Hardwood

Hardwood is a type of wood that comes from deciduous trees, such as oak, maple, and cherry. Hardwood is known for its durability and strength, making it a popular choice for furniture. However, hardwood can be more expensive than other types of wood.

When cleaning hardwood furniture, it’s important to use a gentle cleaner and avoid using too much water. Hardwood furniture can be sensitive to moisture, which can cause warping and damage. Use a soft cloth and a mild cleaner to gently wipe down the surface of the furniture.

Softwood

Softwood comes from coniferous trees, such as pine and cedar. Softwood is less expensive than hardwood and is often used for furniture that is painted or stained. Softwood is also more prone to scratches and dents than hardwood.

When cleaning softwood furniture, it’s important to avoid using harsh chemicals or abrasive cleaners. Use a soft cloth and a mild cleaner to gently wipe down the surface of the furniture. Be sure to dry the furniture thoroughly to prevent water damage.

Veneer

Veneer is a thin layer of wood that is applied to a less expensive material, such as particle board or MDF. Veneer is often used to create the look of hardwood furniture at a lower cost. However, veneer furniture can be more delicate than solid wood furniture.

When cleaning veneer furniture, it’s important to use a gentle cleaner and avoid using too much water. Veneer is sensitive to moisture, which can cause the veneer to peel or warp. Use a soft cloth and a mild cleaner to gently wipe down the surface of the furniture. Avoid using abrasive cleaners or scrubbing too hard, as this can damage the veneer.

Materials Needed for Cleaning

When it comes to cleaning wooden furniture, it’s important to have the right materials on hand. Here are some of the items you’ll need to get started:

Dish Soap

Dish soap is a great all-purpose cleaner that can be used on wooden furniture. It’s gentle enough not to damage the surface, but strong enough to remove dirt and grime. To use dish soap, mix a few drops with warm water and apply it to a clean, damp cloth. Wipe the furniture down, making sure to get into all the nooks and crannies. Rinse the cloth and repeat as needed.

Vinegar

Vinegar is a natural cleaning agent that can be used on wooden furniture. It’s especially useful for removing water stains and other tough stains. To use vinegar, mix equal parts water and vinegar in a spray bottle. Spray the solution onto the furniture and wipe it down with a clean cloth. Be sure to rinse the cloth frequently to avoid spreading the vinegar around.

Mineral Spirits

Mineral spirits are a solvent that can be used to clean wooden furniture. They’re especially useful for removing wax buildup and other stubborn stains. To use mineral spirits, apply a small amount to a clean, dry cloth and rub it onto the furniture in a circular motion. Be sure to wear gloves and work in a well-ventilated area.

Wood Polish

Wood polish is a great way to protect and restore the shine of wooden furniture. There are many different types of wood polish available, so be sure to choose one that’s appropriate for your furniture. To use wood polish, apply a small amount to a clean, dry cloth and rub it onto the furniture in a circular motion. Be sure to follow the manufacturer’s instructions for best results.

By having these materials on hand, you’ll be able to keep your wooden furniture looking clean and beautiful for years to come.

Basic Cleaning Process

Cleaning your wooden furniture regularly can help maintain its beauty and extend its lifespan. Here are the basic steps to follow when cleaning your wooden furniture:

Dusting the Furniture

Before you start cleaning your furniture, you need to remove any dust and debris that may have accumulated on it. Dusting is an important step because it helps prevent scratches and other damage to the wood. Here’s how to do it:

  • Use a soft, dry cloth or a feather duster to remove any loose dust and debris from the surface of the furniture.
  • Make sure to dust all the nooks and crannies, including the corners and crevices.
  • Avoid using a rough or abrasive cloth, as this can scratch the surface of the wood.

Applying the Cleaning Solution

Once you have removed the dust and debris, it’s time to apply the cleaning solution. There are many different types of cleaning solutions available, but a simple mixture of water and mild dish soap is often the most effective. Here’s how to apply the cleaning solution:

  • Mix a small amount of mild dish soap with warm water in a bucket.
  • Dip a soft cloth into the cleaning solution and wring it out until it’s just damp.
  • Test the cleaning solution on a small, inconspicuous area of the furniture to make sure it doesn’t damage the wood.
  • If the test area looks good, use the damp cloth to clean the rest of the furniture.

Wiping Down the Furniture

After you have applied the cleaning solution, it’s time to wipe down the furniture with a clean, dry cloth. Here’s how to do it:

  • Use a clean, dry cloth to wipe down the furniture, removing any excess cleaning solution.
  • Make sure to wipe in the direction of the grain to avoid damaging the wood.
  • If the furniture feels damp, let it air dry for a few minutes before using it.

By following these simple steps, you can keep your wooden furniture looking beautiful for years to come.

Dealing with Stains and Spots

Wooden furniture is beautiful and timeless, but it is also susceptible to stains and spots. In this section, we will discuss how to deal with different types of stains and spots that can affect your wooden furniture.

Water Stains

Water stains are a common problem with wooden furniture. They occur when water is left on the surface of the wood for too long. To remove water stains, follow these steps:

  1. Mix equal parts of baking soda and water to make a paste.
  2. Apply the paste to the water stain and rub gently with a soft cloth.
  3. Wipe the area clean with a damp cloth and dry it with a dry cloth.

Ink Stains

Ink stains can be tough to remove from wooden furniture. To remove ink stains, follow these steps:

  1. Mix equal parts of vinegar and water.
  2. Dip a cotton ball into the mixture and apply it to the ink stain.
  3. Rub gently until the stain disappears.
  4. Wipe the area clean with a damp cloth and dry it with a dry cloth.

Food Stains

Food stains are another common problem with wooden furniture. To remove food stains, follow these steps:

  1. Mix equal parts of vinegar and olive oil.
  2. Dip a soft cloth into the mixture and apply it to the food stain.
  3. Rub gently until the stain disappears.
  4. Wipe the area clean with a damp cloth and dry it with a dry cloth.

Remember to always test any cleaning solution on an inconspicuous area of the furniture before using it on a larger area. Also, avoid using harsh chemicals or abrasive materials on wooden furniture as they can damage the surface. With a little care and attention, your wooden furniture can stay beautiful for years to come.

Polishing Your Furniture

Keeping your wooden furniture clean is important, but polishing it will help to maintain its natural beauty and extend its lifespan. Here are some tips on how to polish your wooden furniture:

Choosing the Right Polish

Before you start polishing your furniture, it’s important to choose the right polish for your specific type of wood. There are many different types of wood polishes available on the market, so it’s important to choose one that is appropriate for your furniture.

One popular type of polish is beeswax, which is a natural and eco-friendly option. Beeswax is great for protecting and nourishing your wooden furniture, as it helps to prevent the wood from drying out and cracking. Another popular option is a silicone-based polish, which creates a protective layer over your furniture and gives it a shiny finish.

Applying the Polish

Once you’ve chosen the right polish for your furniture, it’s time to apply it. Here’s how:

  1. Start by dusting your furniture with a dry, soft cloth to remove any dirt or debris.

  2. Apply a small amount of polish to a clean, soft cloth. Be sure to follow the manufacturer’s instructions for how much to use.

  3. Rub the cloth onto the furniture in a circular motion, working in small sections at a time.

  4. Once you’ve applied the polish, let it sit for a few minutes to allow it to penetrate the wood.

  5. Use a clean, dry cloth to buff the furniture, removing any excess polish and creating a shiny finish.

Remember to always test the polish on a small, inconspicuous area of your furniture before applying it to the entire piece. This will help you to ensure that the polish is compatible with your furniture and that it won’t cause any damage.

By following these simple tips, you can keep your wooden furniture looking beautiful for years to come.

Maintaining Your Wooden Furniture

To keep your wooden furniture looking great for years to come, it’s important to maintain it properly. Here are a few tips to keep your wooden furniture in top condition.

Regular Dusting

Dusting your wooden furniture regularly is the most important thing you can do to keep it looking great. Dust can scratch the surface of your furniture, so it’s important to remove it regularly. You can use a soft cloth or a feather duster to remove dust from your furniture. Avoid using a dry cloth, as this can scratch the surface of your furniture.

Avoiding Sunlight and Heat

Sunlight and heat can cause your wooden furniture to fade and dry out. It’s important to keep your furniture away from direct sunlight and heat sources like radiators and fireplaces. If you must place your furniture in a sunny spot, consider using curtains or blinds to block out the sun.

Using Coasters

Using coasters is important to prevent water rings and other damage to your wooden furniture. Always use coasters under glasses, mugs, and other items that can leave moisture on your furniture. If you do spill something on your furniture, clean it up immediately with a soft cloth.

By following these simple tips, you can keep your wooden furniture looking great for years to come. Regular dusting, avoiding sunlight and heat, and using coasters will help protect your furniture and keep it looking its best.

How to Sanitize Wooden Spoons: A Quick and Easy Guide

If you’re an avid cook, you likely have a collection of wooden spoons in your kitchen. Wooden spoons are a popular choice for cooking because they don’t scratch non-stick surfaces, they’re gentle on delicate foods, and they’re durable. However, wooden spoons can also be a breeding ground for bacteria if not properly sanitized.

Sanitizing wooden spoons is an essential part of keeping your kitchen clean and safe. You want to make sure that any bacteria or germs that may be on your wooden spoons are eliminated to prevent cross-contamination. There are several methods for sanitizing wooden spoons, including washing with soap and water, treating with oil, and soaking in a vinegar or hydrogen peroxide solution. In this article, we’ll explore these methods in more detail and provide step-by-step instructions for each.

Understanding the Importance of Sanitizing Wooden Spoons

Wooden spoons are a staple in most kitchens. They are great for stirring, mixing, and serving food. However, they can also be a breeding ground for bacteria if not properly sanitized. Therefore, it’s essential to understand the importance of sanitizing wooden spoons.

When you use wooden spoons, they come into contact with food and can absorb bacteria, which can lead to foodborne illnesses. Sanitizing your wooden spoons helps to kill any bacteria that may be present on the surface. This is especially important when you’re cooking with raw meat, poultry, or fish.

Another reason why sanitizing your wooden spoons is crucial is that they are porous. This means that they can absorb moisture, which can lead to the growth of mold and mildew. Sanitizing your wooden spoons helps to remove any moisture and prevent the growth of mold and mildew.

It’s also important to note that wooden spoons cannot be sanitized in the same way as metal or plastic utensils. They cannot be placed in the dishwasher or boiled in water. Instead, you need to take extra care when sanitizing wooden spoons.

Overall, sanitizing your wooden spoons is vital to ensure that they remain safe to use and free from harmful bacteria. By following the proper sanitization methods, you can help to extend the lifespan of your wooden spoons and keep them in excellent condition.

Identifying the Type of Wooden Spoon

Wooden spoons are a popular choice for cooking and serving food. They are durable, lightweight, and gentle on cookware. However, not all wooden spoons are created equal. Some types of wood are more suitable for kitchen use than others. Here are some tips for identifying the type of wooden spoon you have:

Look for the Wood Type

The type of wood used to make the spoon can affect its durability and safety for cooking. Some common woods used for wooden spoons include:

  • Maple: a hard, durable wood that resists staining and warping
  • Cherry: a strong, dense wood that is resistant to bacteria
  • Beech: a versatile wood that is lightweight and easy to work with
  • Olive: a dense, heavy wood with a distinctive grain pattern

Check for Any Coatings or Treatments

Some wooden spoons are treated with coatings or finishes to protect the wood and make it easier to clean. However, these coatings can also be harmful if they contain toxic chemicals. Look for any signs of coatings or treatments on your spoon, such as:

  • Glossy or shiny finish
  • Uneven coloring or staining
  • Rough or textured surface

Consider the Age and Condition of the Spoon

Older wooden spoons may be more prone to cracking, splitting, or warping. If your spoon is showing signs of wear and tear, it may be time to replace it. Look for any of the following signs of damage:

  • Cracks or splits in the wood
  • Warping or bending
  • Discoloration or mold growth

By identifying the type of wooden spoon you have, you can ensure that it is safe and suitable for cooking. Remember to always hand wash your wooden spoons with mild soap and warm water, and avoid soaking them for long periods of time. With proper care and maintenance, your wooden spoons can last for years to come.

Gathering Necessary Materials

Before you begin sanitizing your wooden spoons, you’ll need to gather some necessary materials. Here are the things you’ll need:

Choosing the Right Sanitizing Agents

When it comes to sanitizing wooden spoons, there are several options to choose from. Here are some popular sanitizing agents:

  • Vinegar: Vinegar is a natural disinfectant that can kill germs and bacteria. It’s also safe to use on wooden utensils.
  • Bleach: Bleach is a powerful disinfectant that can kill germs and bacteria. However, it’s important to use it carefully, as it can be harmful if not diluted properly.
  • Hydrogen peroxide: Hydrogen peroxide is a mild disinfectant that can kill germs and bacteria. It’s also safe to use on wooden utensils.
  • Lemon juice: Lemon juice is a natural disinfectant that can kill germs and bacteria. It’s also safe to use on wooden utensils.

When choosing a sanitizing agent, it’s important to consider the type of wood your utensils are made of. Some types of wood may be more sensitive to certain sanitizing agents than others. It’s always a good idea to do a spot test on a small area of your utensils before applying any sanitizing agents.

Equipment Needed

To sanitize your wooden spoons, you’ll need the following equipment:

  • Dish soap: You’ll need dish soap to clean your wooden spoons before sanitizing them.
  • Warm water: Warm water will help to loosen any dirt or debris on your wooden spoons.
  • Sanitizing agent: Choose one of the sanitizing agents listed above.
  • Container: You’ll need a container large enough to submerge your wooden spoons in the sanitizing solution.
  • Paper towels: You’ll need paper towels to dry your wooden spoons after sanitizing them.

By gathering these necessary materials, you’ll be ready to start sanitizing your wooden spoons and keeping them clean and safe for cooking.

Step by Step Guide to Sanitize Wooden Spoons

If you’re using wooden spoons for cooking, it’s important to sanitize them regularly to prevent the growth of bacteria. Follow these simple steps to keep your wooden spoons clean and safe to use.

Preparation

Before you start sanitizing your wooden spoons, make sure you have the necessary supplies. You will need:

  • Mild dish soap
  • Warm water
  • White vinegar or hydrogen peroxide
  • Non-abrasive sponge
  • Clean, dry towel

Cleaning

Begin by washing your wooden spoons with mild dish soap and warm water. Make sure to scrub the spoons thoroughly to remove any food residue. Avoid using abrasive pads or brushes as they can damage the wood.

After washing, rinse the spoons with warm water and dry them with a clean towel. Make sure to remove all excess water from the spoons.

Sanitizing

To sanitize your wooden spoons, you can use either white vinegar or hydrogen peroxide. Fill a container with equal parts water and vinegar or hydrogen peroxide.

Place the wooden spoons in the container and let them soak for at least 15 minutes. This will kill any bacteria that may be present on the spoons.

After soaking, rinse the spoons with warm water and dry them with a clean towel.

Drying

After sanitizing your wooden spoons, it’s important to let them dry completely before using them again. Place the spoons on a clean, dry towel and let them air dry for several hours.

Avoid using heat to dry the spoons as it can cause them to warp or crack.

By following these simple steps, you can keep your wooden spoons clean and safe to use for all your cooking needs.

Maintaining Cleanliness

Keeping your wooden spoons clean is essential to ensure safe and healthy cooking. Here are some tips on how to maintain cleanliness:

Regular Cleaning Routines

It’s important to wash your wooden spoons after each use. Here’s how:

  1. Rinse the spoon under warm water immediately after use.
  2. Use mild dish soap and a soft dish cloth to clean the spoon thoroughly.
  3. Rinse the spoon again under warm water and dry it with a clean towel.
  4. Let the spoon air dry completely before storing it.

Avoid soaking your wooden spoons in water or putting them in the dishwasher. These practices can cause the wood to split or crack.

If your wooden spoons have stubborn stains or odors, you can try the following:

  • Mix equal parts of baking soda and water to make a paste. Apply the paste to the spoon and let it sit for a few minutes before rinsing it off.
  • Rub the spoon with a lemon wedge and let it sit for a few minutes before rinsing it off.

Proper Storage

Proper storage is key to maintaining the cleanliness of your wooden spoons. Here are some tips:

  1. Store your wooden spoons in a dry and cool place.
  2. Avoid storing your wooden spoons in airtight containers or plastic bags, as this can cause moisture buildup and promote bacterial growth.
  3. Consider using a utensil holder or a crock to store your wooden spoons upright. This will allow air to circulate around the spoons and prevent them from touching each other.

By following these simple tips, you can keep your wooden spoons clean and safe to use for years to come.

Common Mistakes to Avoid

When it comes to sanitizing wooden spoons, there are a few common mistakes that you should avoid. By avoiding these mistakes, you can keep your wooden spoons clean and safe to use for years to come.

Avoiding Harsh Chemicals

One of the most common mistakes people make when sanitizing wooden spoons is using harsh chemicals. While it may be tempting to use bleach or other strong disinfectants, these chemicals can damage the wood and leave behind toxic residues that can be harmful to your health.

Instead, opt for natural cleaning solutions like vinegar and baking soda. These gentle yet effective cleaners can help remove bacteria and other harmful contaminants from your wooden spoons without damaging the wood.

Preventing Over Soaking

Another common mistake people make when sanitizing wooden spoons is over-soaking them. While it’s important to clean your wooden spoons thoroughly, soaking them for too long can cause the wood to swell and crack.

To avoid over-soaking your wooden spoons, simply wash them with warm water and mild dish soap. Use a soft cloth or sponge to gently scrub away any food particles or stains, and rinse the spoons thoroughly with clean water.

By avoiding these common mistakes, you can keep your wooden spoons clean, safe, and in great condition for years to come.

How to Make a Wooden Rolling Tray: A Step-by-Step Guide for Beginners

If you enjoy rolling your own cigarettes or joints, having a rolling tray can make the process much easier and more enjoyable. A wooden rolling tray is a stylish and practical addition to any smoker’s collection, and making one yourself can be a fun and rewarding DIY project. With a few basic tools and some simple materials, you can create a customized rolling tray that meets your specific needs and preferences.

To begin making your wooden rolling tray, you’ll need to gather some supplies. This will include wood, sandpaper, wood glue, a saw, and a drill. You’ll also need to decide on the size and shape of your tray, as well as any additional features you want to include. Once you have your supplies and a plan in place, you can start cutting and sanding your wood to create the basic shape of your tray. From there, you can add any compartments, slots, or other features you desire, and finish your tray with a coat of stain or paint for a polished look.

Understanding the Purpose of a Wooden Rolling Tray

If you’re an avid smoker, you know how important it is to have a rolling tray. A rolling tray is a flat surface that provides a clean and organized area for rolling your herbs. It helps you keep your smoking accessories in one place and prevents you from losing anything. A wooden rolling tray is a great investment if you want something that is both functional and stylish.

When it comes to smoking, having a designated area for rolling your herbs is essential. Not only does it keep your herbs organized, but it also prevents them from spilling onto the floor or table. A wooden rolling tray is perfect for this purpose because it provides a stable surface that won’t slide around. It’s also easy to clean and maintain, making it a great investment.

In addition to being functional, a wooden rolling tray can also be stylish. It can complement your smoking accessories and add a touch of elegance to your smoking area. You can choose from a variety of wooden rolling trays that come in different sizes and designs. Some even have compartments for storing your smoking accessories.

Overall, a wooden rolling tray is a must-have for any smoker. It provides a clean and organized area for rolling your herbs and helps you keep your smoking accessories in one place. It’s also a stylish addition to your smoking area that can complement your smoking accessories. Consider investing in a wooden rolling tray if you want to enhance your smoking experience.

Materials Needed

If you want to make a wooden rolling tray, you’ll need a few things. Here are the materials you’ll need to gather:

Types of Wood

The type of wood you choose for your rolling tray is up to you. However, some popular options include:

Each type of wood has its own unique characteristics and appearance. Maple is a light-colored wood with a tight, even grain. Cherry has a reddish-brown color and a distinctive grain pattern. Walnut is a dark, rich wood with a straight grain. Oak is a strong, durable wood with a coarse texture.

Required Tools

To make a wooden rolling tray, you’ll need a few essential tools, including:

  • Saw
  • Drill
  • Screws
  • Measuring tape
  • Pencil
  • Sandpaper (100 grit, 150 grit, and 220 grit)
  • Wood stain or paint in the color of your choice
  • Clear coat or varnish

With these tools, you’ll be able to cut your wood to size, drill holes for screws, sand the surface to a smooth finish, and apply a protective coating to the wood. Be sure to have all of these tools on hand before you begin your project.

Designing Your Wooden Rolling Tray

When it comes to designing your wooden rolling tray, there are a few things to consider. Size and shape are important, as well as any additional features or compartments you may want to include.

Size and Shape

The size and shape of your wooden rolling tray will depend on your personal preferences and needs. Consider how much space you need to roll your materials and how portable you want your tray to be. A larger tray may be more comfortable to use, but a smaller one may be easier to transport.

Additionally, think about the shape of your tray. A rectangular shape is traditional, but a circular or oval tray may be more unique and visually appealing. Keep in mind that the shape of your tray may also affect its functionality and how easy it is to use.

Features and Compartments

When designing your wooden rolling tray, think about any additional features or compartments you may want to include. For example, you may want to add a slot for holding your rolling papers or a separate compartment for storing your materials.

You could also consider adding a groove around the edge of the tray to catch any loose materials and prevent them from spilling over. Another option is to include a built-in ashtray or lighter holder for added convenience.

Overall, the design of your wooden rolling tray is up to you. Consider your personal preferences and needs, and don’t be afraid to get creative with your design. With a little bit of planning and creativity, you can create a functional and stylish rolling tray that fits your unique needs.

Wood Preparation

Before you start making your wooden rolling tray, it’s important to properly prepare the wood. This will ensure that your rolling tray is sturdy and long-lasting. In this section, we’ll cover two important sub-sections: Cutting the Wood and Sanding the Wood.

Cutting the Wood

The first step in preparing your wood is to cut it to the appropriate size. You can use a table saw, circular saw, or hand saw to make your cuts. It’s important to measure and mark your wood accurately before making any cuts to avoid mistakes.

When cutting your wood, be sure to wear appropriate safety gear, such as safety glasses and gloves. Always cut away from your body and keep your hands and fingers away from the blade.

Sanding the Wood

After cutting your wood to size, the next step is to sand it. Sanding will help smooth out any rough edges and prepare the wood for staining or painting.

Start with a coarse grit sandpaper and gradually work your way up to a finer grit. Be sure to sand in the direction of the wood grain to avoid damaging the wood.

Once you’ve finished sanding, wipe down the wood with a damp cloth to remove any sawdust or debris. Your wood is now ready for staining or painting.

Remember, proper wood preparation is essential for creating a high-quality rolling tray. Take your time and follow these steps carefully for the best results.

Assembling the Tray

Gluing the Pieces

Now that you have all the pieces cut, it’s time to assemble the tray. Start by applying a thin layer of wood glue to the edges of the bottom piece. Then, place the two side pieces on top of the bottom piece, making sure they are flush with the edges. Apply clamps to hold the pieces together while the glue dries.

Next, apply glue to the edges of the two end pieces and attach them to the sides of the tray. Use clamps to hold everything in place while the glue dries. Once the glue has dried, remove the clamps and sand any rough edges.

Securing the Tray

To secure the tray, you can use either screws or nails. If you choose to use screws, pre-drill holes in the bottom of the tray and the sides before attaching them. This will prevent the wood from splitting. Then, use screws to attach the sides to the bottom of the tray.

If you choose to use nails, use a nail gun or hammer to attach the sides to the bottom of the tray. Be sure to use enough nails to hold the pieces securely together.

Once the tray is assembled and secured, you can sand any rough edges and apply a finish if desired. A clear coat of polyurethane will protect the wood and give it a nice shine.

Congratulations, you have now assembled your very own wooden rolling tray!

Finishing Touches

Once you have assembled your wooden rolling tray, it is time to add the finishing touches to make it truly unique and personalized. This section will cover two sub-sections: Applying the Finish and Adding Personal Touches.

Applying the Finish

The finish you choose for your rolling tray can make a big difference in its appearance and durability. Here are some popular options:

  • Stain: A wood stain can add color to your tray while still allowing the natural wood grain to show through. Apply the stain with a brush or cloth, following the manufacturer’s instructions.
  • Paint: If you prefer a solid color, paint is a good option. Use a brush or spray paint for an even finish.
  • Clear Coat: A clear coat can protect the wood and give it a glossy or matte finish. Apply with a brush or spray can.

Before applying any finish, make sure the wood is clean and dry. Sand it lightly with fine-grit sandpaper to smooth out any rough spots. Apply the finish in a well-ventilated area and follow the manufacturer’s instructions for drying and curing time.

Adding Personal Touches

Now that your rolling tray has a beautiful finish, it’s time to add some personal touches. Here are some ideas:

  • Custom Engraving: If you have access to a laser engraver, you can add a custom design or message to your tray.
  • Stickers or Decals: You can find stickers or decals with your favorite designs or quotes and apply them to your tray.
  • Painted Designs: Use paint or markers to add your own designs or patterns to the tray.
  • Accessories: Add a small container for your rolling papers or a holder for your lighter to make your tray even more functional.

Remember to keep your personal touches in line with your own style and preferences. Your rolling tray should reflect your personality and add to your smoking experience.

Maintenance and Care

Cleaning the Tray

To keep your wooden rolling tray in good condition, it is important to clean it regularly. Here are some tips to help you clean your tray:

  • Use a soft, damp cloth to wipe down the surface of the tray. Avoid using abrasive cleaners or scrubbers that can scratch the wood.
  • If your tray has stubborn stains or buildup, you can use a mixture of warm water and mild dish soap to clean it. Be sure to rinse the tray thoroughly with water and dry it completely with a clean cloth.
  • Avoid soaking your wooden rolling tray in water or exposing it to excessive moisture, as this can cause the wood to warp or crack.
  • To remove any odors from your tray, you can wipe it down with a mixture of water and vinegar or lemon juice. Be sure to rinse the tray thoroughly with water and dry it completely.

Prolonging the Tray’s Life

With proper care and maintenance, your wooden rolling tray can last for many years. Here are some tips to help prolong the life of your tray:

  • Avoid exposing your tray to direct sunlight or extreme temperatures, as this can cause the wood to fade or crack.
  • Keep your tray away from sources of moisture, such as sinks or humidifiers.
  • Use a protective coating, such as beeswax or mineral oil, to help seal and protect the wood. Apply the coating with a soft cloth and allow it to soak in for several hours before wiping away any excess.
  • Store your tray in a dry, cool place when not in use to prevent it from becoming warped or damaged.
  • Avoid placing heavy objects on top of your tray, as this can cause it to crack or break.