Tag Archives: reddish-brown color

how-to-finish-a-wooden-countertop-a-beginners-guide-2

How to Finish a Wooden Countertop: A Beginner's Guide

If you’re looking to add some warmth and character to your kitchen, a wooden countertop can be a great choice. However, to keep it looking beautiful and functional, you need to properly finish it. In this article, we’ll guide you through the steps to finish a wooden countertop, so you can enjoy it for years to come.

First, it’s important to gather the necessary materials. You’ll need fine-grit sandpaper, staining pads or rags, wood stain, protective gloves, safety glasses, a paintbrush or foam brush, polyurethane, clean, lint-free cloths, and a tack cloth. Once you have all of your materials, you can begin the process of finishing your wooden countertop.

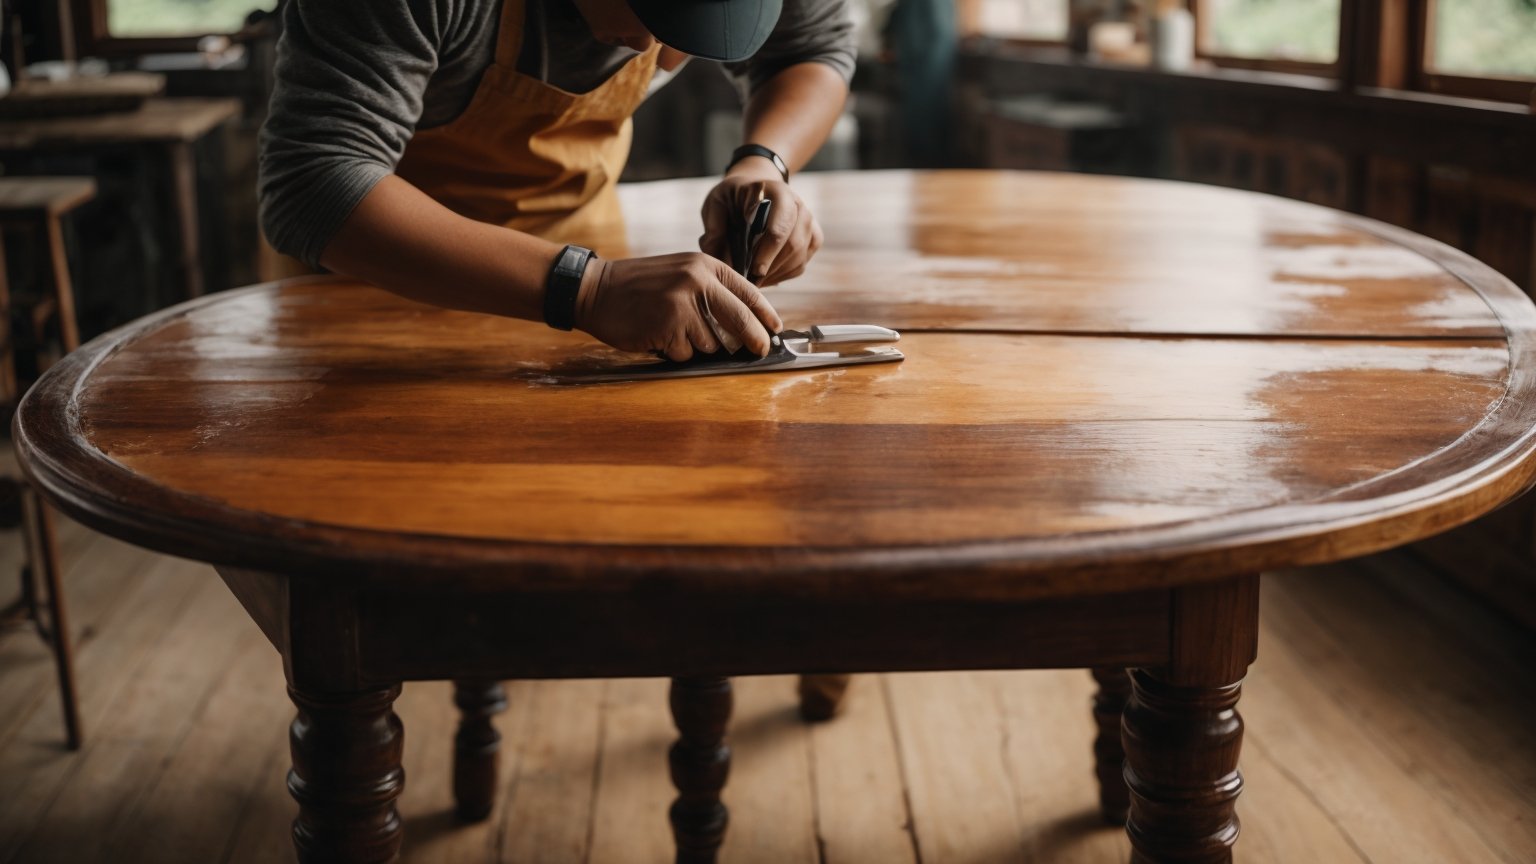
The first step is to sand the countertop with the fine-grit sandpaper until it’s smooth to the touch. Then, use the tack cloth to remove any dust or debris. Next, apply the wood stain with the staining pads or rags, following the manufacturer’s instructions. Once the stain has dried, apply a coat of polyurethane with the paintbrush or foam brush, and let it dry completely. Repeat this process until you’ve achieved the desired level of protection and sheen. With these steps, you can finish your wooden countertop and enjoy its natural beauty.

Understanding Wood Types for Countertops

how-to-finish-a-wooden-countertop-a-beginners-guide-2

When it comes to choosing the right wood for your countertop, it’s important to consider both aesthetics and functionality. Different types of wood have varying levels of hardness, durability, and resistance to moisture and stains. Here are some common wood types used for countertops:

1. Maple

Maple is a popular choice for countertops due to its durability and resistance to wear and tear. It has a light, uniform color and a fine, even grain pattern. Maple is also relatively affordable compared to other hardwoods.

2. Cherry

Cherry is a beautiful, warm-toned wood with a rich, reddish-brown color that darkens over time. It has a fine, straight grain pattern and is known for its durability and resistance to moisture. Cherry is a more expensive option than maple, but it adds a luxurious feel to any kitchen.

3. Walnut

Walnut is a darker wood with a rich, chocolate brown color and a swirling grain pattern. It is a softer wood than maple or cherry, but it is still durable and resistant to moisture. Walnut is a more expensive option, but it adds a unique and sophisticated look to any kitchen.

4. Oak

Oak is a classic choice for countertops with its distinctive grain pattern and warm, golden color. It is a hard, durable wood that is resistant to moisture and stains. Oak is a more affordable option than some other hardwoods, but it still adds a timeless look to any kitchen.

5. Teak

Teak is a tropical hardwood with a warm, golden color and a distinctive grain pattern. It is extremely durable and resistant to moisture, making it a popular choice for outdoor kitchens. Teak is one of the most expensive wood options, but it adds a luxurious feel to any kitchen.

When choosing a wood for your countertop, consider the level of maintenance required to keep it in good condition. Some woods may require more frequent oiling or sealing to prevent damage from moisture and stains. Ultimately, the right wood for your countertop will depend on your personal preferences and the specific needs of your kitchen.

Choosing the Right Wood

When it comes to choosing the right wood for your countertop, there are several factors to consider. Here are some things to keep in mind:

Durability

First and foremost, you want a wood that is durable enough to withstand daily use. Hardwoods like oak, maple, and cherry are popular choices for this reason. They are strong and can handle the wear and tear of a busy kitchen.

Appearance

Of course, you also want your countertop to look good. Different woods have different colors, grains, and textures, so choose one that complements your kitchen’s style. For example, if you have a modern kitchen with stainless steel appliances, you might opt for a sleek, pale wood like birch or ash.

Cost

Wood countertops can be expensive, so you’ll want to consider the cost of the wood you choose. Some woods, like teak or mahogany, can be quite pricey, while others, like pine or poplar, are more affordable.

Sustainability

Finally, it’s important to consider the environmental impact of the wood you choose. Look for woods that are sustainably sourced and certified by organizations like the Forest Stewardship Council (FSC). These woods are harvested in a way that protects the environment and ensures that forests will be around for future generations.

By considering these factors, you can choose a wood that not only looks great but also meets your practical needs and values.

Preparation of the Wood Surface

Before you start finishing your wooden countertop, it is essential to prepare the wood surface properly. Proper preparation will ensure that the finish adheres well to the wood surface and gives you a smooth, even finish. Here are some steps to follow:

Sanding the Wood Surface

The first step in preparing the wood surface is sanding. Sanding the wood surface will remove any roughness, scratches, or stains and create a smooth surface for the finish. Here are some tips for sanding your wooden countertop:

  • Start with a coarse-grit sandpaper, such as 80 grit, and work your way up to a finer-grit sandpaper, such as 220 grit.
  • Sand in the direction of the wood grain to avoid creating scratches.
  • Use a sanding block or an orbital sander to ensure even sanding.

After sanding, use a tack cloth to remove any dust or debris from the surface.

Applying Wood Stain

If you want to stain your wooden countertop, you should do it after sanding and before applying the finish. Here are some tips for applying wood stain:

  • Wear protective gloves and safety glasses.
  • Use a staining pad or a rag to apply the stain evenly.
  • Apply the stain in the direction of the wood grain.
  • Wipe off any excess stain with a clean, lint-free cloth.

Allow the stain to dry completely before applying the finish.

Applying the Finish

The final step in preparing the wood surface is applying the finish. Here are some tips for applying the finish:

  • Choose the right finish for your wooden countertop. Polyurethane is a popular choice for countertops because it is durable and water-resistant.
  • Apply the finish in thin, even coats using a brush or a foam brush.
  • Allow each coat to dry completely before applying the next coat.
  • Sand lightly between coats with a fine-grit sandpaper, such as 220 grit.
  • Apply at least two coats of finish for best results.

By properly preparing the wood surface, you will ensure that your wooden countertop looks beautiful and lasts for years to come.

Cutting and Shaping the Countertop

cutting-and-shaping-the-countertop

Before you start finishing your wooden countertop, you need to cut and shape it according to your desired size and design. Here are some tips to help you with this process:

1. Measure and Mark

First, measure the area where you want to install the countertop. Use a measuring tape to get accurate measurements. Then, mark the measurements on the wooden board where you want to cut. Use a straight edge to ensure that your marks are straight and even.

2. Cut the Countertop

Next, use a circular saw or a jigsaw to cut the countertop along the marked lines. Make sure to wear safety goggles and gloves to protect yourself from flying debris. If you are using a jigsaw, start by drilling a hole in the wood along the cut line. Then, insert the jigsaw blade into the hole and start cutting.

3. Sand the Edges

After cutting the countertop, use a belt sander or an orbital sander to smooth out the edges. Start with a coarse grit sandpaper and gradually move to a finer grit. Sand in the direction of the wood grain to avoid damaging the wood.

4. Shape the Countertop

If you want to shape the countertop, use a router to create the desired edges and curves. You can also use a chisel to create decorative details. Make sure to sand the shaped areas to smooth out any rough edges.

5. Clean the Countertop

Finally, clean the countertop with a tack cloth to remove any sawdust or debris. This will ensure that the wood is clean and ready for the finishing process.

By following these steps, you can cut and shape your wooden countertop to your desired size and design.

Sanding the Wood

When it comes to finishing a wooden countertop, sanding is a crucial step that can make or break the final result. Here are some tips to help you sand your wooden countertop like a pro:

  1. Start with coarse sandpaper: Begin by using a coarse sandpaper, such as 60 or 80 grit, to remove any roughness or imperfections on the surface of the wood. Use a belt sander or orbit sander to make the job easier and faster.
  2. Switch to finer grits: Once you have removed the roughness, switch to finer grits, such as 120, 220, or 320 grit, to create a smooth surface. Be sure to sand evenly and consistently, and avoid applying too much pressure that can cause unevenness or scratches.
  3. Sand with the grain: Always sand with the grain of the wood, not against it, to avoid creating scratches or marks that can be difficult to remove. Use a light touch and let the sandpaper do the work.
  4. Vacuum and wipe the surface: After sanding, vacuum the surface to remove any dust or debris, and then wipe it with a clean rag dipped in mineral spirits to remove any remaining residue. Let the surface dry completely before applying any finish.

Remember, sanding is a crucial step in finishing a wooden countertop, but it can also be time-consuming and messy. Take your time, use the right sandpaper, and follow these tips to achieve a smooth and beautiful finish that will last for years to come.

Applying a Wood Conditioner

When it comes to finishing a wooden countertop, applying a wood conditioner is an important step to ensure a smooth and even stain application. A wood conditioner is a type of pre-stain treatment that helps to prepare the wood surface for staining. It helps to prevent blotchiness and uneven absorption of the stain.

To apply a wood conditioner, you will need to follow these simple steps:

  1. Sand the surface of the wood with low-grit sandpaper to ensure solid absorption of the wood conditioner. Sanding the wood by hand should be more than sufficient for proper absorption. You should also ensure there’s no other residue on the surface of the wood.
  2. Liberally apply the wood conditioner with a brush, roller, or cloth. Make sure to apply the conditioner in the direction of the grain.
  3. Let the conditioner sit on the wood surface for the recommended time specified by the manufacturer. Typically, this is between 5-15 minutes.
  4. After the recommended time has passed, wipe off any remaining wood conditioner with a clean cloth. Make sure to remove all excess conditioner from the surface of the wood.
  5. Wait for the wood to dry completely before applying the stain. It’s important to apply the stain within two hours of applying the wood conditioner to ensure optimal results.

By applying a wood conditioner before staining your wooden countertop, you can ensure that the stain will be absorbed evenly and prevent blotchiness. It’s an easy step that can make a big difference in the final appearance of your countertop.

Staining the Wood

Staining the wood is a crucial step in finishing a wooden countertop. It adds color and depth to the wood, enhancing its natural beauty. Here are some tips on how to stain a wooden countertop:

Step 1: Sand the Wood

Before you start staining, make sure the wood is sanded properly. Sanding removes any rough patches or imperfections, allowing the stain to penetrate the wood evenly. Start with a coarse-grit sandpaper and gradually work your way up to a finer grit. Once you’ve sanded the wood, wipe it down with a tack cloth to remove any dust or debris.

Step 2: Choose the Right Stain

Choosing the right stain is important to achieve the desired color and finish. There are two types of stain: oil-based and water-based. Oil-based stains penetrate deeper into the wood, resulting in a richer color. Water-based stains dry faster and are easier to clean up. Consider the type of wood you’re working with and the look you’re trying to achieve when choosing a stain.

Step 3: Apply the Stain

Apply the stain using a staining pad or rag, working with the grain of the wood. Start with a small section and work your way across the entire countertop. Make sure to apply the stain evenly and wipe off any excess with a clean cloth. Allow the stain to dry completely before moving on to the next step.

Step 4: Seal the Wood

Once the stain has dried, it’s time to seal the wood. This protects the wood from moisture and wear and tear. There are several types of sealers to choose from, including polyurethane, varnish, and shellac. Apply the sealer using a brush or roller, working with the grain of the wood. Allow the sealer to dry completely before using the countertop.

Staining a wooden countertop is a great way to add character and warmth to your kitchen. With the right tools and techniques, you can achieve a beautiful finish that will last for years to come.

Sealing the Countertop

After sanding and staining your wooden countertop, the next step is to seal it. Sealing the countertop will protect it from moisture, stains, and scratches, and it will also enhance the natural beauty of the wood. In this section, we will discuss how to choose the right sealer and how to apply it.

Choosing the Right Sealer

When it comes to choosing a sealer for your wooden countertop, there are several options available. Here are some of the most popular ones:

  • Polyurethane: Polyurethane is a popular choice for sealing wooden countertops because it provides a durable and long-lasting finish. It comes in both oil-based and water-based formulas, and it can be applied with a brush, roller, or sprayer. However, polyurethane can give the wood a plastic-like appearance, which may not be desirable for some homeowners.
  • Tung oil: Tung oil is a natural oil that penetrates the wood and provides a protective finish. It is easy to apply, dries quickly, and gives the wood a warm, natural look. However, tung oil is not as durable as polyurethane, and it may need to be reapplied every few years.
  • Danish oil: Danish oil is a blend of natural oils and varnish that provides a protective finish and enhances the natural beauty of the wood. It is easy to apply, dries quickly, and gives the wood a warm, natural look. However, like tung oil, Danish oil is not as durable as polyurethane, and it may need to be reapplied every few years.

When choosing a sealer for your wooden countertop, consider the level of durability you need, the desired appearance, and the ease of application.

Applying the Sealer

Before applying the sealer, make sure the countertop is clean and free of dust. You can use a tack cloth or a vacuum to remove any dust or debris.

To apply the sealer, follow these steps:

  1. Prepare the sealer: If you are using a polyurethane sealer, make sure to stir it well before use. If you are using an oil-based sealer, you may need to thin it with mineral spirits. Read the manufacturer’s instructions carefully before use.
  2. Apply the sealer: Using a brush, roller, or sprayer, apply a thin, even coat of the sealer to the countertop. Make sure to work in the direction of the grain. Avoid over-applying the sealer, as this can lead to drips and bubbles.
  3. Let the sealer dry: Allow the sealer to dry according to the manufacturer’s instructions. This may take several hours or overnight.
  4. Sand the countertop: Once the sealer is dry, lightly sand the countertop with a fine-grit sandpaper. This will help the next coat of sealer adhere better.
  5. Apply additional coats: Apply additional coats of sealer as needed, following the same process as above. Most sealers require at least two coats for adequate protection.

By following these steps, you can seal your wooden countertop and protect it for years to come.

Maintaining Your Wooden Countertop

Wooden countertops are a beautiful addition to any kitchen, but they require a bit of maintenance to keep them looking their best. Here are some tips to help you maintain your wooden countertop:

Regular Cleaning

The most important thing you can do to maintain your wooden countertop is to clean it regularly. You should wipe down the surface with a damp cloth after each use, and then dry it with a clean towel. Avoid using harsh chemicals or abrasive sponges, as these can damage the wood.

Periodic Re-Sealing

To keep your wooden countertop looking its best, you should re-seal it periodically. This will help to protect the wood from moisture and stains. The frequency with which you need to re-seal your countertop will depend on the type of wood and the amount of use it gets. As a general rule, you should re-seal your countertop every six months to a year.

To re-seal your countertop, follow these steps:

  1. Sand the surface of the countertop with fine-grit sandpaper.
  2. Wipe the surface clean with a tack cloth.
  3. Apply a thin coat of wood sealer with a staining pad or foam brush.
  4. Wait for the sealer to dry, then sand the surface lightly with 220-grit sandpaper.
  5. Wipe the surface clean with a tack cloth.
  6. Apply a second coat of sealer.

Avoiding Damage

Wooden countertops are susceptible to damage from heat, moisture, and sharp objects. To avoid damage, follow these tips:

  • Use trivets or hot pads to protect the surface from hot pots and pans.
  • Wipe up spills immediately to prevent moisture from penetrating the wood.
  • Avoid cutting directly on the countertop. Use a cutting board instead.
  • Do not place heavy objects on the countertop, as this can cause it to warp or crack.

By following these tips, you can keep your wooden countertop looking beautiful for years to come.


how-to-build-wooden-shutters-a-beginners-guide-2

How to Build Wooden Shutters: A Beginner's Guide

Are you looking for a way to add some charm to your home’s exterior? Wooden shutters can be a great addition to any home, providing both aesthetic appeal and functionality. With a little bit of effort and some basic woodworking skills, you can build your own custom shutters that perfectly fit your windows and match your home’s style.

Before you get started, it’s important to consider the purpose of your shutters. Are you looking to add some privacy to your home? Do you want to protect your windows during storms? Or are you simply looking to enhance your home’s curb appeal? Understanding your goals will help you choose the right materials and design for your shutters. Once you have a plan in place, building your own wooden shutters can be a fun and rewarding project.

Understanding the Basics of Wooden Shutters

how-to-build-wooden-shutters-a-beginners-guide-2

If you’re looking for a way to add some charm and character to your home’s exterior, wooden shutters are a great option. They’re not only functional but also aesthetically pleasing. Before you start building your own wooden shutters, it’s important to understand some basic concepts.

Types of Wooden Shutters

There are several types of wooden shutters, including:

  • Louvered shutters: These have angled slats that allow air and light to pass through.
  • Raised panel shutters: These have a solid panel that’s raised above the frame.
  • Board and batten shutters: These are made of vertical boards held together by horizontal battens.

Materials

The most common materials for wooden shutters are cedar and redwood. These woods are durable and naturally resistant to rot and insects. Other types of wood, such as pine or fir, can also be used but may not last as long.

Sizing

To determine the size of your shutters, measure the height and width of your windows. The shutters should be slightly larger than the window opening to ensure proper coverage. Keep in mind that shutters that are too small will look out of proportion, while shutters that are too large may overpower the window.

Hardware

Shutters are typically mounted to the house using hinges. You’ll need to choose the appropriate size and style of hinge based on the weight of your shutters. You may also want to consider adding decorative hardware, such as shutter dogs or holdbacks, to add some extra flair.

By understanding these basic concepts, you’ll be well on your way to building your own wooden shutters.

Choosing the Right Wood

When it comes to building wooden shutters, choosing the right wood is crucial. The type of wood you choose will affect the durability, appearance, and overall quality of your shutters. Here are some factors to consider when selecting the right wood for your shutters:

Durability

Wooden shutters are exposed to the elements, so it’s important to choose a wood that can withstand moisture, sunlight, and temperature changes. Cedar and redwood are popular choices because they are naturally resistant to decay and insect damage. Pine is also a good option for indoor and outdoor shutters since it’s durable and easily workable.

Appearance

The type of wood you choose will also affect the appearance of your shutters. Cedar has a warm, reddish-brown color and a distinctive grain pattern that can add character to your shutters. Redwood is also known for its natural beauty, with a rich, reddish hue that can complement a variety of home styles. If you prefer a more rustic look, elm wood shutters can give you a natural, weathered appearance.

Workability

Some woods are easier to work with than others, which can affect the installation process and the final look of your shutters. Pine is a soft wood that is easy to cut, sand, and finish, making it a popular choice for DIY shutter builders. Cedar and redwood are also workable, but they are harder and denser than pine, which can make them more difficult to shape and sand.

Cost

The cost of the wood will also be a factor in your decision. Cedar and redwood are more expensive than pine, but they are also more durable and have a more attractive appearance. If you’re on a budget, pine can be a good option since it’s affordable and readily available.

Overall, choosing the right wood for your shutters will depend on your personal preferences, budget, and the specific needs of your project. Consider the factors above and do your research to find the best wood for your shutters.

Gathering Your Tools

Before you start building your wooden shutters, it’s important to gather all the necessary tools. Here are the tools you will need to build your shutters:

Measuring Tools

To ensure that your shutters fit perfectly, you’ll need to use measuring tools. Here are the measuring tools you’ll need:

  • Tape measure
  • Speed square
  • Pencil

The tape measure will help you measure the dimensions of your windows, while the speed square will help you ensure that your cuts are straight and accurate. Don’t forget to use a pencil to mark your measurements.

Cutting Tools

Once you’ve measured your windows, it’s time to start cutting your wood. Here are the cutting tools you’ll need:

  • Circular saw
  • Jigsaw
  • Miter saw
  • Table saw

The circular saw is great for making long cuts, while the jigsaw is better for curved cuts. The miter saw and table saw will help you make precise cuts at different angles.

Finishing Tools

After you’ve cut your wood, you’ll need to finish your shutters. Here are the finishing tools you’ll need:

  • Sandpaper
  • Paint or stain
  • Paintbrush or roller
  • Screwdriver

Sandpaper will help you smooth out any rough edges, while paint or stain will help protect your wood from the elements. A paintbrush or roller will help you apply the paint or stain evenly. Finally, a screwdriver will help you attach your shutters to your windows.

By gathering these tools before you start building your shutters, you’ll be well-prepared to create a beautiful and functional addition to your home’s exterior.

Creating Your Design

Before you start building your wooden shutters, you need to create a design that fits your windows and complements your home’s exterior. Here are some steps to help you create your design:

Step 1: Measure Your Windows

Measure the height and width of your windows to determine the size of your shutters. Make sure to measure each window individually, as they may not all be the same size.

Step 2: Choose Your Louver Size and Type

Decide on the size and type of louvers you want for your shutters. Louvers are the horizontal slats that allow you to adjust the amount of light and air that enters your home. Rockler Woodworking and Hardware offers a free design wizard that can help you choose the right louvers for your shutters.

Step 3: Choose Your Material

Choose the type of wood you want to use for your shutters. Cedar, redwood, and cypress are popular choices because they are durable and weather-resistant.

Step 4: Decide on the Style

Decide on the style of your shutters. Board and batten shutters are a classic style that features vertical boards and horizontal battens. Plantation shutters have wider louvers and a more modern look.

Step 5: Create Your Design

Sketch out your design on paper or use a design software program to create a digital design. Make sure to include all the necessary measurements and details, such as the size and placement of the louvers and the number of boards and battens.

By following these steps, you can create a custom design that fits your windows and enhances the look of your home.

Measuring and Cutting the Wood

measuring-and-cutting-the-wood

Before you start building your wooden shutters, you need to measure and cut the wood to the appropriate size. Here are the steps to follow:

  1. Measure the Window: Measure the height and width of the window where you plan to install the shutters. Make sure to measure both the inside and outside of the window frame. This will ensure that the shutters fit properly and look balanced.
  2. Choose the Wood: Choose the type of wood you want to use for your shutters. Cedar, redwood, and cypress are popular choices because they are durable and weather-resistant. You can also use pine or poplar if you plan to paint the shutters.
  3. Cut the Wood: Use a saw to cut the wood to the appropriate size. The width of each board should be between 4 and 6 inches, depending on the size of your window. The length of each board should be equal to the height of the window.
  4. Sand the Edges: Use sandpaper to smooth the edges of each board. This will prevent splinters and make the shutters look more polished.
  5. Drill Holes: Use a drill to make holes for the hinges and screws. Make sure the holes are evenly spaced and aligned with the hinges.
  6. Paint or Stain: If you plan to paint or stain the shutters, do it before you install them. This will make it easier to cover all the surfaces and edges.

By following these steps, you can measure and cut the wood for your wooden shutters with ease.

Assembling the Shutter

Now that you have cut all the pieces of your wooden shutter, it is time to assemble them. Follow these steps to assemble your shutter:

  1. Lay out the vertical boards: Place the two outer vertical boards on a flat surface, facing up. Then, place the remaining vertical boards between them, evenly spaced.
  2. Attach the horizontal boards: Place the top and bottom horizontal boards on top of the vertical boards, lining them up with the edges. Then, attach them using wood glue and screws. Make sure to pre-drill the holes to avoid splitting the wood.
  3. Add the middle horizontal board: Measure and mark the center of the shutter. Then, attach the middle horizontal board using wood glue and screws.
  4. Sand and finish: Once the shutter is assembled, sand it down to remove any rough edges or splinters. Then, apply a finish of your choice, such as paint or stain, to protect the wood from the elements.
  5. Install the shutter: Finally, it’s time to install the shutter. Hold the shutter up to the window and mark the location of the hinges. Attach the hinges to the shutter and then to the window frame. Make sure to use screws that are long enough to secure the hinges to the frame.

By following these steps, you can assemble a beautiful and functional wooden shutter for your home. Remember to take your time and be careful when handling the wood and tools. Good luck!

Finishing the Shutter

Once you have built your wooden shutters, it’s time to finish them. This step is crucial to ensure the longevity of your shutters and to give them a polished look. In this section, we’ll cover the two main steps for finishing your shutters: sanding and painting or staining.

Sanding

Before painting or staining your shutters, you need to sand them down. This will remove any rough spots or splinters and create a smooth surface for the paint or stain to adhere to. Start with a coarse grit sandpaper, such as 80-grit, and work your way up to a finer grit, such as 220-grit. Sand in the direction of the wood grain to avoid scratches.

Once you’re done sanding, wipe down the shutters with a damp cloth to remove any dust or debris. Let them dry completely before moving on to the next step.

Painting or Staining

Now that your shutters are sanded and clean, it’s time to apply your finish. You have two options: painting or staining.

Painting

If you choose to paint your shutters, start by applying a primer to help the paint adhere better. Once the primer is dry, apply your paint in thin, even coats. Use a brush or a roller, depending on the size of your shutters. Allow each coat to dry completely before applying the next one.

Staining

If you prefer the natural look of wood, you can choose to stain your shutters. Start by applying a wood conditioner to help the stain absorb evenly. Once the conditioner is dry, apply your stain with a brush or a rag, following the direction of the wood grain. Wipe off any excess stain with a clean rag. Allow the stain to dry completely before applying a sealer to protect the wood.

No matter which finish you choose, be sure to follow the manufacturer’s instructions and apply multiple coats if necessary. This will ensure your shutters are protected from the elements and look great for years to come.

Installing the Shutter

Once you have built your wooden shutters, it’s time to install them. Here are the steps to follow:

  1. Hold the shutter up to the window and mark the placement of the hinges on both the shutter and the window frame. Use a level to ensure the shutter is straight.
  2. Pre-drill holes for the screws in both the shutter and the window frame where you marked the hinge placement.
  3. Attach the hinges to the shutter using screws, making sure they are flush with the wood.
  4. Hold the shutter up to the window again and attach the hinges to the window frame using screws. Make sure the shutter swings open and closed smoothly.
  5. Install any additional hardware, such as a latch or pull, according to the manufacturer’s instructions.

It’s important to note that shutters are typically mounted purely for aesthetics and do not actually open and close. However, if you have functional shutters, make sure they cover the entire window when closed to function properly.

With these simple steps, you can install your wooden shutters and add a touch of charm to your home’s exterior.

refinish-a-wooden-table

How to Refinish a Wooden Table: A Beginner's Guide

Refinishing a wooden table can breathe new life into an old piece of furniture. Whether you have a family heirloom or a thrift store find, refinishing a table can be a fun and rewarding DIY project. With a little bit of elbow grease and some basic supplies, you can transform a dull or damaged table into a beautiful centerpiece for your home.

Before you get started, it’s important to understand the level of detail and effort required for your specific table. Super ornamental furniture may require more attention to detail, while a simple table may be easier to refinish. The first step in refinishing a table is to clean it thoroughly to remove any dirt or grime that may inhibit the refinishing process. Depending on the condition of your table, you may also need to strip the old finish or sand down any imperfections. With a little bit of patience and some helpful tips, you can successfully refinish a wooden table and enjoy it for years to come.

Understanding the Type of Wood

refinish-a-wooden-table

When it comes to refinishing a wooden table, the first step is to understand the type of wood you’re working with. Different types of wood require different approaches to refinishing, so it’s important to identify the type of wood before you begin.

Identifying Hardwood and Softwood

The first step in identifying the type of wood is to determine whether it is hardwood or softwood. Hardwood comes from deciduous trees, while softwood comes from coniferous trees. Hardwood is denser and more durable than softwood, making it a popular choice for furniture.

To determine whether your table is made of hardwood or softwood, you can look at the grain of the wood. Hardwood has a more complex grain pattern than softwood, which tends to have a straight grain. You can also try scratching the surface of the wood with your fingernail. Hardwood is harder than softwood, so it will be more difficult to scratch.

Distinguishing Wood Species

Once you’ve determined whether your table is made of hardwood or softwood, the next step is to identify the specific wood species. Different wood species have different characteristics, such as color, grain pattern, and hardness.

One way to identify the wood species is to look for identifying marks, such as knots or distinctive grain patterns. You can also try comparing the wood to a wood identification guide or consulting with a professional.

Some common wood species used for furniture include oak, maple, cherry, and mahogany. Each of these species has its own unique characteristics and requires a different approach to refinishing. For example, oak has a distinctive grain pattern and can be difficult to stain evenly, while cherry has a reddish-brown color that can darken over time.

By understanding the type of wood and wood species of your table, you can choose the right approach to refinishing and ensure that your table looks beautiful for years to come.

Safety Precautions

When refinishing a wooden table, it is important to take certain safety precautions to protect yourself from harmful chemicals and dust. Here are some safety tips to follow:

Proper Ventilation

When working with chemicals, it is important to have proper ventilation to avoid inhaling harmful fumes. Work in a well-ventilated area, such as a covered porch or garage, or use a fan to circulate air. Make sure all windows and doors are open to allow fresh air to flow through the room.

Safety Equipment

It is important to wear the appropriate safety equipment when refinishing a wooden table. Here are some items you should have on hand:

  • N95 respirator: Wear a respirator to protect yourself from inhaling harmful dust and fumes.
  • Waterproof gloves: Wear gloves to protect your hands from chemicals and stains.
  • Safety goggles: Wear goggles to protect your eyes from dust and debris.
  • Dust mask: Wear a dust mask to protect your lungs from dust particles.

In addition to these items, it is also important to wear appropriate clothing, such as long sleeves and pants, to protect your skin from chemicals and stains.

By following these safety precautions, you can ensure that your refinishing project is completed safely and without any harm to yourself.

Gathering Necessary Tools

To refinish a wooden table, you will need to gather some necessary tools. Here are the three main categories of tools you will need:

Stripping Tools

To remove the old finish from your table, you will need some stripping tools. Here are some common options:

  • Chemical Stripper: This is a liquid that dissolves the old finish. You apply it with a brush, wait for it to soften the finish, and then scrape it off.
  • Heat Gun: This is a tool that uses hot air to soften the finish, making it easier to scrape off.
  • Sandpaper: If you don’t want to use chemicals or heat, you can use sandpaper to sand off the old finish.

Sanding Tools

After you have removed the old finish, you will need to sand the table to prepare it for the new finish. Here are some tools you will need:

  • Sandpaper: You will need sandpaper of varying grits to sand the table. Start with a coarse grit and work your way up to a finer grit.
  • Sanding Block: This will help you sand the table evenly.
  • Power Sander: If you have a large table or want to save time, you can use a power sander to sand the table.

Finishing Tools

After you have sanded the table, you will need to apply the new finish. Here are some tools you will need:

  • Stain: If you want to change the color of your table, you will need to apply a stain.
  • Polyurethane: This is a clear coat that will protect the table and give it a shiny finish.
  • Brushes: You will need brushes to apply the stain and polyurethane.
  • Rags: You will need rags to wipe off excess stain and polyurethane.

By gathering these necessary tools, you will be well on your way to refinishing your wooden table.

Removing the Old Finish

removing-the-old-finish

Before you can refinish your wooden table, you need to remove the old finish. This can be a messy and time-consuming process, but with the right tools and techniques, you can do it yourself.

Applying the Stripper

The first step in removing the old finish is to apply a chemical stripper. This will dissolve the old finish so that it can be easily removed. Here’s how to do it:

  1. Choose a well-ventilated area to work in. Chemical strippers can be harmful if inhaled, so it’s important to work in a space with good airflow.
  2. Apply the stripper to the table using a brush or spray bottle. Be sure to follow the manufacturer’s instructions for application and safety precautions.
  3. Wait for the stripper to work. This can take anywhere from a few minutes to several hours, depending on the type of stripper and the thickness of the old finish.
  4. Test a small area to see if the finish is ready to be removed. Use a scraper or steel wool to remove the finish. If it comes off easily, the rest of the finish is ready to be removed. If not, wait a little longer and test again.

Removing the Stripper

Once the old finish has been dissolved by the stripper, it’s time to remove it. Here’s how to do it:

  1. Use a scraper or steel wool to remove the old finish. Work in the direction of the grain to avoid damaging the wood.
  2. Wipe away the old finish with a rag or paper towel.
  3. Repeat the process until all of the old finish has been removed.
  4. Use a fine-grit sandpaper to smooth out any rough spots or remaining finish. Be sure to sand in the direction of the grain.
  5. Clean the table thoroughly with a mild soap and water solution to remove any leftover stripper and debris.

Removing the old finish is an important step in refinishing your wooden table. Take your time and be patient, and you’ll be rewarded with a beautiful new finish that will make your table look like new again.

Sanding the Table

Once you have stripped the old finish and repaired any damages, it’s time to sand the table to prepare it for the new finish. Sanding is a crucial step in the refinishing process that helps to remove any remaining finish, smooth out the surface, and open up the wood’s pores to accept the new stain or finish. In this section, we will discuss how to sand a wooden table, including choosing the right grit and sanding techniques.

Choosing the Right Grit

Choosing the right sandpaper grit is essential to achieving a smooth and even finish. The grit number refers to the size of the abrasive particles on the sandpaper. The lower the number, the coarser the sandpaper, and the higher the number, the finer the sandpaper. Here are some guidelines for choosing the right grit:

  • Coarse grit (60-80): Use coarse grit sandpaper to remove any remaining finish, scratches, or dents on the table’s surface.
  • Medium grit (100-150): Use medium grit sandpaper to smooth out any rough spots left by the coarse grit sandpaper.
  • Fine grit (220-240): Use fine grit sandpaper to create a smooth and even surface that is ready for staining or finishing.

Sanding Techniques

Here are some tips for sanding a wooden table:

  • Sand in the direction of the wood grain to avoid creating scratches or marks on the surface.
  • Start with the coarsest-grit sandpaper and work your way up to the finest-grit sandpaper.
  • Use a sanding block or an orbital sander to ensure even sanding and to prevent over-sanding in certain areas.
  • Be careful when sanding edges and corners to avoid rounding them off.
  • Wipe the table down with a tack cloth after sanding to remove any dust or debris.

By following these tips, you can achieve a smooth and even surface that is ready for staining or finishing. Sanding is a crucial step in the refinishing process that requires patience and attention to detail, but the results are worth the effort.

Applying the New Finish

Refinishing a wooden table can give it a new lease on life. Once you have sanded and removed the old finish, it’s time to apply a new one. Here are some tips to help you choose and apply the new finish.

Choosing the Finish

There are many different types of finishes available, each with its own advantages and disadvantages. Some popular options include:

  • Polyurethane: This is a durable and water-resistant finish that is easy to apply. It comes in both oil-based and water-based formulations.
  • Varnish: Varnish is a traditional finish that provides a hard, protective coating. It is available in both glossy and matte finishes.
  • Lacquer: Lacquer is a fast-drying finish that provides a hard, durable coating. It is available in both spray and brush-on formulations.
  • Oil: Oil finishes penetrate the wood and provide a natural look. They are easy to apply but may require more maintenance than other finishes.

Consider the look you want to achieve and the level of durability you need when choosing a finish.

Applying the Finish

Before applying the finish, make sure the surface is clean and free of dust. Use a tack cloth or a damp cloth to remove any debris.

When applying the finish, follow these steps:

  1. Apply a thin coat of finish with a brush or a cloth. Work in the direction of the grain.
  2. Wait for the finish to dry according to the manufacturer’s instructions.
  3. Sand the surface lightly with fine-grit sandpaper.
  4. Apply another coat of finish and repeat the process until you achieve the desired level of coverage.

Be sure to work in a well-ventilated area and follow all safety instructions on the product label. With a little patience and care, you can apply a new finish that will protect and enhance the beauty of your wooden table.

Maintaining Your Refinished Table

Congratulations! You’ve successfully refinished your wooden table and it looks amazing. Now, it’s important to maintain your hard work to keep your table looking beautiful for years to come. Here are some tips to help you maintain your newly refinished table.

Regular Cleaning

To keep your table looking great, it’s important to clean it regularly. Here are some tips to help you keep your table clean:

  • Dust your table regularly with a soft cloth or a feather duster.
  • Use a damp cloth to clean up spills and stains as soon as possible.
  • Avoid using harsh chemicals or abrasive cleaners on your table.
  • If you need to use a cleaner, choose a mild soap and water solution.

Preventing Damage

To prevent damage to your table, it’s important to take some precautions. Here are some tips to help you prevent damage:

  • Use coasters and placemats to protect your table from scratches, stains, and water rings.
  • Avoid placing hot items directly on your table. Always use a trivet or a hot pad.
  • Keep your table out of direct sunlight to prevent fading and warping.
  • Avoid placing heavy objects on your table, as this can cause damage to the finish.

By following these simple tips, you can keep your newly refinished table looking beautiful for years to come.

How to Make a Wooden Reclining Chair: A Step-by-Step Guide

Are you looking for a comfortable and stylish reclining chair for your home, but don’t want to break the bank by buying one? Why not make one yourself? Building a wooden reclining chair is a fun and rewarding project that can be completed by anyone with basic woodworking skills and tools. In this article, we will show you how to make your own wooden reclining chair step-by-step, so you can relax in style and comfort without spending a fortune.

Before you get started, it’s important to choose the right materials and tools for the job. Pine wood is a popular choice for building a reclining chair due to its durability and affordability. You will also need a table saw, miter saw, drill press, clamps, and a router to complete this project. If you don’t have these tools, consider borrowing or renting them to save money. Once you have your materials and tools ready, it’s time to get started on building your own wooden reclining chair.

Understanding Reclining Chairs

If you’re looking for a comfortable and relaxing chair to add to your home, a reclining chair might be just what you need. In this section, we’ll take a closer look at reclining chairs, their history, and the different types available.

History of Reclining Chairs

Reclining chairs have been around for centuries, with evidence of them dating back to ancient Egypt and Greece. However, it wasn’t until the 19th century that the modern reclining chair was developed. In 1850, French inventor Francois-Rene Caillette created the first mechanical reclining chair, which allowed the user to adjust the angle of the chair back and footrest using a lever.

Since then, reclining chairs have become a popular choice for people looking for a comfortable and relaxing seating option. Today, you can find reclining chairs in a variety of styles and materials, from leather to fabric and everything in between.

Types of Reclining Chairs

There are several different types of reclining chairs available, each with its own unique features and benefits. Here are a few of the most common types:

  • Manual Recliners: These recliners are operated by a lever or handle, which allows you to adjust the angle of the chair back and footrest manually.

  • Power Recliners: Power recliners are operated using an electric motor, which allows you to adjust the angle of the chair back and footrest with the push of a button.

  • Rocker Recliners: Rocker recliners combine the relaxing motion of a rocking chair with the comfort of a recliner, allowing you to rock back and forth while reclining.

  • Massage Recliners: Massage recliners feature built-in massage functions, which can help relieve stress and tension in your muscles.

  • Lift Recliners: Lift recliners are designed to help people with mobility issues stand up and sit down more easily. They feature a motorized lifting mechanism that raises the chair up and tilts it forward, making it easier to get in and out of the chair.

No matter what type of reclining chair you choose, make sure to look for one that is comfortable, durable, and fits your personal style and needs.

Materials Needed

Before you start building your wooden reclining chair, you need to make sure you have all the necessary materials. Here’s a list of what you’ll need:

Wood

You will need to choose a type of wood that is strong and durable. Some good options include oak, maple, and cherry wood. You will need the following sizes of wood:

  • Four pieces of wood for the legs, each measuring 2″ x 2″ x 24″
  • Two pieces of wood for the backrest, each measuring 1″ x 4″ x 36″
  • Two pieces of wood for the seat, each measuring 1″ x 4″ x 24″
  • Two pieces of wood for the armrests, each measuring 1″ x 4″ x 18″
  • Two pieces of wood for the footrest, each measuring 1″ x 4″ x 24″

Hardware

You will also need the following hardware:

  • Screws: 1 1/4″ wood screws, 2″ wood screws, and 3″ wood screws
  • Wood glue
  • Sandpaper
  • Stain or paint
  • Polyurethane

Tools

To build your wooden reclining chair, you will need the following tools:

  • Saw
  • Drill
  • Screwdriver
  • Clamps
  • Measuring tape
  • Pencil

Make sure you have all of these materials and tools before you start building your wooden reclining chair. With all of these items on hand, you’ll be well-prepared to tackle this DIY project.

Choosing the Right Wood

When it comes to making a wooden reclining chair, choosing the right wood is crucial. You want to pick a wood that is not only strong and durable, but also aesthetically pleasing. In this section, we will explore the different types of wood you can use for your reclining chair and what to consider when making your selection.

Hardwood vs Softwood

The first thing to consider when choosing the right wood for your reclining chair is whether you want to use hardwood or softwood. Hardwood comes from deciduous trees such as oak, maple, and cherry, while softwood comes from evergreen trees such as pine, spruce, and cedar.

Hardwood is generally more durable and resistant to wear and tear, making it a popular choice for furniture. Softwood, on the other hand, is more affordable and easier to work with, but may not be as long-lasting as hardwood.

Best Types of Wood for Furniture

When it comes to making furniture, some types of wood are better than others. Here are some of the best types of wood for making a wooden reclining chair:

  • Oak: Oak is a popular choice for furniture due to its durability and strength. It is also resistant to moisture and decay, making it a great choice for outdoor furniture.

  • Maple: Maple is a hard and dense wood that is known for its beautiful grain patterns. It is also resistant to wear and tear, making it a great choice for furniture that will see a lot of use.

  • Cherry: Cherry is a beautiful wood that is known for its rich, reddish-brown color. It is also durable and resistant to wear and tear, making it a great choice for furniture.

  • Pine: Pine is a softwood that is affordable and easy to work with. It is also lightweight, making it a great choice for furniture that needs to be moved around.

When selecting the right wood for your reclining chair, keep in mind that different types of wood have different strengths and weaknesses. Consider your budget, the look you want to achieve, and the durability you need, and choose a wood that fits your needs.

Designing Your Reclining Chair

Designing your own reclining chair can be a fun and rewarding experience. Before you start building, it’s important to decide on the dimensions and create a blueprint.

Deciding on Dimensions

The first step in designing your reclining chair is to decide on the dimensions. Consider the following factors:

  • Your height and weight
  • The size of the room where the chair will be placed
  • The amount of space you want to dedicate to the chair
  • The desired angle of recline

Measure yourself and the space where the chair will be placed to determine the appropriate size. Keep in mind that the chair should fit comfortably in the room without taking up too much space. Additionally, the angle of recline should be comfortable for you.

Creating a Blueprint

Once you have decided on the dimensions, it’s time to create a blueprint. A blueprint is a detailed plan that outlines the design and construction of your reclining chair. It should include the following information:

  • A detailed drawing of the chair
  • The dimensions of each component of the chair
  • The materials needed to build the chair
  • The tools needed to build the chair

When creating your blueprint, consider the following:

  • The type of wood you want to use
  • The finish you want to apply to the wood
  • The type of hardware you want to use (such as screws, bolts, and nuts)
  • The type of cushioning you want to use (such as foam or batting)

Make sure to include all of these details in your blueprint to ensure that you have everything you need to build your reclining chair.

In conclusion, designing your own reclining chair requires careful consideration of the dimensions and the creation of a detailed blueprint. By taking the time to plan and design your chair, you can ensure that it will be a comfortable and functional addition to your home.

Preparation Steps

Before you start building your wooden reclining chair, you need to take some preparation steps to ensure that you have everything you need and that you stay safe during the process.

Safety Measures

Safety should always be your top priority when working with power tools and sharp objects. Here are some safety measures you should take before starting your project:

  • Wear protective gear such as safety goggles, earplugs, and work gloves.
  • Make sure your work area is well-lit and well-ventilated.
  • Keep your tools and work area clean and organized to avoid accidents.
  • Read the instructions and safety guidelines for all tools and materials you will be using.
  • Use clamps to secure your workpiece and keep your hands away from the cutting area.
  • Do not wear loose clothing or jewelry that could get caught in the tools.

Gathering Tools

To build your wooden reclining chair, you will need the following tools:

Tools Purpose
Table saw To cut the wood pieces to size
Miter saw To make angled cuts
Drill press To make holes for screws and bolts
Router To shape and smooth the wood
Clamps To hold the wood pieces in place
Workbench To provide a stable surface for your work

Make sure you have all the necessary tools before you start your project. If you don’t own all the tools, consider borrowing or renting them from a hardware store. Once you have all your tools, you can start building your wooden reclining chair.

Building the Chair Frame

To start building your wooden reclining chair, you will need to create the frame. This is the foundation of the chair and will support the weight of the person sitting in it. Here are the steps to build the frame:

  1. Cut the wood to size: You will need to cut the wood to the appropriate size for the chair frame. Use a saw to cut the pieces of wood to the correct length and width. You can use a table saw or circular saw for this task.

  2. Sand the edges: After cutting the wood, use sandpaper to smooth out the edges. This will prevent any rough spots from causing discomfort when sitting in the chair.

  3. Assemble the frame: Use wood glue and screws to assemble the frame. Start by attaching the legs to the seat base. Then, attach the backrest to the seat base. Make sure everything is level and square before tightening the screws.

  4. Add the armrests: Once the basic frame is assembled, you can add the armrests. Cut the armrests to size and attach them to the sides of the backrest and seat base. Use wood glue and screws to secure them in place.

  5. Install the reclining mechanism: Finally, you can install the reclining mechanism. This will allow the chair to recline back and provide a comfortable seating position. Follow the manufacturer’s instructions to install the mechanism correctly.

Building the frame is a crucial step in creating a sturdy and comfortable wooden reclining chair. Take your time and make sure everything is level and square before proceeding to the next step. With the frame complete, you can move on to adding the seat and back cushions for added comfort.

Creating the Reclining Mechanism

Now that you have the basic structure of your wooden recliner chair, it’s time to create the reclining mechanism. This is an essential part of the chair that allows you to adjust the angle of the seat and backrest for maximum comfort.

Materials Needed

Here are the materials you’ll need to create the reclining mechanism:

  • Metal brackets
  • Bolts and nuts
  • Wooden dowels
  • Drill
  • Saw

Step-by-Step Process

Follow these steps to create the reclining mechanism:

  1. First, you need to create the pivot point for the reclining mechanism. This can be done by drilling a hole in the back legs of the chair and inserting a wooden dowel. Make sure the dowel is inserted all the way through the leg and is secured with glue.

  2. Next, attach the metal brackets to the backrest of the chair. These brackets will allow the backrest to pivot on the wooden dowel. Make sure the brackets are securely attached with bolts and nuts.

  3. Now, attach the metal brackets to the seat of the chair. These brackets will allow the seat to pivot on the wooden dowel. Make sure the brackets are securely attached with bolts and nuts.

  4. Finally, test the reclining mechanism by adjusting the angle of the backrest and seat. Make sure the mechanism is smooth and easy to adjust.

Congratulations! You have successfully created the reclining mechanism for your wooden recliner chair.

Assembling the Chair

Congratulations! You have now completed all the necessary steps to build your wooden reclining chair. It’s now time to assemble all the parts and enjoy your new creation. Here are the steps to follow:

  1. Start by placing the backrest against the seat. Align the holes on the backrest with the holes on the seat.

  2. Insert the bolts into the holes and tighten them with a wrench. Make sure the bolts are tight enough to hold the backrest securely in place.

  3. Attach the armrests to the sides of the chair. Align the holes on the armrests with the holes on the seat and backrest.

  4. Insert the bolts into the holes and tighten them with a wrench. Make sure the armrests are securely attached to the chair.

  5. Next, attach the footrest to the front of the chair. Align the holes on the footrest with the holes on the seat.

  6. Insert the bolts into the holes and tighten them with a wrench. Make sure the footrest is securely attached to the chair.

  7. Finally, attach the support bar to the back of the chair. Align the holes on the support bar with the holes on the backrest.

  8. Insert the bolts into the holes and tighten them with a wrench. Make sure the support bar is securely attached to the chair.

  9. Congratulations! You have now successfully assembled your wooden reclining chair. Sit back, relax, and enjoy the fruits of your labor.

Remember, safety is always a top priority when assembling furniture. Make sure to follow all instructions carefully and use the appropriate tools for the job. If you have any questions or concerns, don’t hesitate to seek help from a professional.

Finishing Touches

Once you have completed building your wooden reclining chair, it’s time to add the finishing touches. This will not only enhance the overall appearance of the chair but also protect it from wear and tear.

Sanding the Chair

Before applying any finish, it’s important to sand the chair to smooth out any rough edges and ensure that the surface is even. Start with a coarse sandpaper and gradually move to a finer grit until you achieve the desired level of smoothness. Be sure to sand in the direction of the wood grain to avoid any scratches.

Applying Finish

There are several options when it comes to finishing your wooden reclining chair, including varnish, lacquer, and oil. Each has its own advantages and disadvantages, so it’s important to choose the right one for your chair.

Varnish is a durable finish that provides a glossy shine. It’s easy to apply and dries quickly, but it can be difficult to repair if it gets damaged. Lacquer is also a durable finish that provides a high gloss shine, but it dries quickly and can be difficult to apply evenly. Oil finishes, such as tung oil or linseed oil, provide a more natural look and feel to the wood. They are easy to apply and can be reapplied as needed, but they may not provide as much protection as varnish or lacquer.

Whichever finish you choose, be sure to apply it in a well-ventilated area and follow the manufacturer’s instructions carefully. Apply the finish evenly with a brush or cloth, and allow it to dry completely before applying a second coat. Once the finish is dry, you can add any final touches, such as cushions or upholstery, to complete your wooden reclining chair.

How to Make a Wooden Bucket: A Beginner's Guide

If you’re looking to add a rustic touch to your home decor, consider making a wooden bucket. Not only is it a functional item, but it also makes for a charming decorative piece. With just a few materials and some basic woodworking skills, you can create a beautiful wooden bucket that will add character to any space.

To start, you’ll need to gather your materials. You can either purchase pre-fabricated slats from a construction supply store or cut a larger chunk of wood into individual pieces. Each slat must have a thickness of 3/4 in (1.9 cm) and a width of 2 1/2 in (6.4 cm). You’ll also need a wooden handle, metal bands, and wood glue. With these materials in hand, you’re ready to begin the process of building your wooden bucket.

Whether you’re an experienced woodworker or a beginner, making a wooden bucket is a fun and rewarding project that anyone can tackle. By following these simple steps, you’ll be able to create a beautiful and functional piece that will add warmth and character to your home. So, roll up your sleeves and let’s get started on this DIY adventure!

Understanding the Basics of Woodworking

Woodworking is a fun and rewarding hobby that can also be used to create functional and decorative items. Before you start making a wooden bucket, it’s important to understand the basics of woodworking. This section will cover some safety measures, essential tools, and types of wood that you should know before starting your project.

Safety Measures

Woodworking can be dangerous if proper safety measures are not taken. Here are some safety tips to keep in mind:

  • Always wear safety glasses or goggles to protect your eyes from flying wood chips or dust.
  • Use ear protection to prevent hearing damage from loud power tools.
  • Wear a dust mask or respirator to protect your lungs from sawdust and other airborne particles.
  • Keep your work area clean and free of clutter to prevent tripping hazards.
  • Never wear loose clothing or jewelry that could get caught in power tools.
  • Always read and follow the manufacturer’s instructions for all tools and equipment.

Essential Tools

To make a wooden bucket, you will need some essential tools. Here are some of the most important tools to have:

Tool Description
Circular Saw Used for cutting straight lines
Jigsaw Used for cutting curved lines
Drill Used for making holes
Hammer Used for driving nails
Chisels Used for carving and shaping wood
Sandpaper Used for smoothing rough edges

Types of Wood

Choosing the right type of wood is important for your project. Some woods are better suited for certain projects than others. Here are some common types of wood used in woodworking:

  • Pine: A softwood that is easy to work with and relatively inexpensive.
  • Oak: A hardwood that is strong and durable, but also more expensive.
  • Maple: A hardwood that is hard and dense, making it ideal for furniture and flooring.
  • Cherry: A hardwood that is known for its beautiful grain patterns and reddish-brown color.

In conclusion, understanding the basics of woodworking is important before starting any project. Always take safety measures seriously, have the essential tools, and choose the right type of wood for your project.

Designing Your Wooden Bucket

When making a wooden bucket, it is important to consider its design. The shape, size, and handle are all important factors that will affect the look and functionality of your finished product.

Choosing the Shape

The shape of your wooden bucket will depend on its intended use and personal preference. Some common shapes include round, oval, and square. Round buckets are great for carrying liquids, while square buckets are ideal for storing items. Oval buckets offer a unique shape that can be both functional and decorative.

Determining the Size

The size of your wooden bucket will also depend on its intended use. Consider what you will be carrying or storing in the bucket and how much space you will need. Keep in mind that a larger bucket will be heavier and harder to carry, while a smaller bucket may not be as versatile.

To help determine the size of your bucket, consider making a list of the items you plan to store or carry in it. You can also use a measuring tape to get an idea of the dimensions you will need.

Planning the Handle

The handle of your wooden bucket is an important feature that will affect its functionality and appearance. There are several types of handles to choose from, including:

  • Metal handles: These are durable and strong, but may not match the aesthetic of a wooden bucket.
  • Wooden handles: These are a great choice for a rustic look, but may not be as sturdy as metal handles.
  • Rope handles: These are a unique option that can add a nautical or beachy feel to your bucket.

When planning the handle, consider how it will be attached to the bucket. You may need to drill holes or use metal brackets to secure the handle in place.

By taking the time to design your wooden bucket, you can create a functional and beautiful piece that will last for years to come.

Preparing the Wood Pieces

Before you can start assembling your wooden bucket, you need to prepare the wood pieces. This involves cutting the wood to the right size and sanding it to ensure a smooth finish. Here’s how to do it:

Cutting the Wood

To make your wooden bucket, you will need to cut several slats from a larger piece of wood. You can either purchase pre-fabricated slats from a construction supply store or cut the slats yourself using a circular saw. If you decide to cut the slats yourself, make sure that each slat has a thickness of 3/4 inch (1.9 cm) and a width of 2 1/2 inches (6.4 cm).

Once you have cut the slats, you will need to create templates for the top and bottom of the bucket. These templates will ensure that the slats are cut to the correct shape. You can make the templates out of cardboard or plywood.

Sanding the Wood

After you have cut the slats and created the templates, it’s time to sand the wood. Sanding the wood will smooth out any rough edges and ensure that the pieces fit together properly. Here’s how to do it:

  1. Start by using a coarse-grit sandpaper (around 80 grit) to remove any rough spots or splinters on the wood.
  2. Next, switch to a finer-grit sandpaper (around 120 grit) and sand the wood again. This will help to smooth out any remaining rough spots and prepare the wood for finishing.
  3. Finally, use a very fine-grit sandpaper (around 220 grit) to give the wood a smooth, polished finish.

Make sure to sand both sides of each slat and the templates. Once you have finished sanding, wipe the wood pieces down with a damp cloth to remove any dust or debris.

Assembling the Wooden Bucket

Assembling the wooden bucket is the final step in creating your own homemade bucket. The process involves attaching the sides, securing the bottom, and attaching the handle.

Attaching the Sides

To attach the sides of your wooden bucket, follow these steps:

  1. Lay out the slats in a circular pattern, with the narrow ends pointing downwards.
  2. Hold the slats together tightly and wrap a metal band around the top of the slats, leaving a small gap between the band and the top of the slats.
  3. Hammer the band in place, making sure it is tight and secure.
  4. Repeat this process with another metal band around the bottom of the slats.

Securing the Bottom

Securing the bottom of your wooden bucket is an important step to ensure that it is sturdy and can hold items without breaking. Follow these steps:

  1. Cut a circular piece of wood to fit the bottom of your bucket.
  2. Lay the circular piece of wood on top of the slats at the bottom of the bucket.
  3. Use a hammer and nails to attach the circular piece of wood to the slats.
  4. Make sure the bottom is securely attached and does not wobble or move.

Attaching the Handle

Attaching the handle to your wooden bucket is the final step in the assembly process. Follow these steps:

  1. Cut a piece of wood to the desired length for your handle.
  2. Drill two holes in the sides of the bucket, near the top, where you want to attach the handle.
  3. Insert the ends of the handle into the holes and secure them with nails or screws.
  4. Make sure the handle is securely attached and can support the weight of the bucket when it is full.

Congratulations! You have now assembled your own homemade wooden bucket.

Finishing Touches

Once you have completed the construction of your wooden bucket, it’s time to add the finishing touches. This will not only enhance the overall look of your bucket but also help to protect it from wear and tear.

Applying Wood Finish

One of the most important finishing touches is applying a wood finish. This will help to protect the wood from moisture, UV rays, and other environmental factors. There are several types of wood finishes available, including oil-based, water-based, and wax-based finishes.

Before applying any finish, make sure to sand the surface of the bucket to remove any rough spots or imperfections. Then, apply the finish using a brush or a cloth, following the manufacturer’s instructions. Be sure to apply the finish evenly and allow it to dry completely before applying a second coat.

Adding Decorative Elements

If you want to add some decorative elements to your wooden bucket, there are many options available. You can choose to paint the bucket with a design or add stenciled patterns. You can also add metal bands or handles to give the bucket a rustic look.

Another option is to carve designs or patterns into the wood using a woodburning tool. This can be a great way to personalize your bucket and make it truly unique.

No matter what decorative elements you choose to add, make sure to apply a clear coat of finish over the top to protect them from wear and tear.

By following these simple finishing touches, you can create a beautiful and functional wooden bucket that will last for years to come.

Maintenance Tips for Your Wooden Bucket

Wooden buckets are not only functional but also add rustic charm to any home or garden. However, like any other wooden item, they require proper maintenance to ensure their longevity. Here are some tips to keep your wooden bucket in top condition.

Cleaning

To keep your wooden bucket clean and free of bacteria, it is important to wash it regularly. Here’s how:

  1. Fill the bucket with warm water and add a few drops of dish soap.
  2. Use a soft-bristled brush to scrub the inside and outside of the bucket.
  3. Rinse the bucket thoroughly with clean water.
  4. Dry the bucket with a clean towel or let it air dry.

Avoid using harsh chemicals or abrasive cleaners as they can damage the wood and affect the bucket’s integrity.

Regular Check-ups

Inspect your wooden bucket regularly to catch any issues early on. Here are some things to look out for:

  1. Cracks or splits in the wood: These can lead to leaks and weaken the bucket’s structure. If you notice any cracks or splits, repair them immediately with wood glue or epoxy.
  2. Loose or missing staves: Staves are the wooden slats that make up the bucket’s sides. If any staves become loose or fall out, replace them promptly to prevent further damage.
  3. Warping or bending: Wooden buckets can warp or bend over time due to moisture or temperature changes. If you notice any warping or bending, try to straighten the bucket out or replace it if necessary.

By following these simple maintenance tips, you can ensure that your wooden bucket remains functional and beautiful for years to come.

How to Make a Wooden Circle: A Beginner's Guide

Are you looking to make a perfect wooden circle for your next DIY project? Cutting a circle out of wood can be a daunting task, but with the right tools and techniques, it can be a breeze. Whether you want to make a round sign or a tabletop, there are several methods you can use to create a precise circle.

One of the easiest ways to make a wooden circle is by using a jigsaw. With a jigsaw, you can cut circles of various sizes and thicknesses. Another option is to use a router with a circle-cutting jig. This method allows you to create circles with a smooth edge and precise diameter. If you want to make a large circle, you can use a circular saw with a homemade circle-cutting jig. This method requires a bit more skill and precision, but it can be done with practice.

Understanding Wood Types

When making a wooden circle, it is important to choose the right type of wood for your project. Different types of wood have different properties that can affect the appearance, strength, and durability of your circle. Here are some common types of wood used for making circles:

Hardwoods

Hardwoods are dense and durable, making them a popular choice for furniture and other high-quality woodworking projects. Some common hardwoods used for making circles include:

  • Oak: A strong and durable wood that is resistant to moisture and rot.
  • Maple: A dense and heavy wood that is known for its beautiful grain patterns.
  • Cherry: A medium-hard wood that is prized for its warm, reddish-brown color.

Softwoods

Softwoods are lightweight and easy to work with, making them a popular choice for beginners and for projects that require a lot of cutting and shaping. Some common softwoods used for making circles include:

  • Pine: A soft and lightweight wood that is easy to work with and has a pale, yellowish color.
  • Cedar: A lightweight and durable wood that is known for its natural resistance to rot and insects.
  • Spruce: A soft and lightweight wood that is commonly used for making musical instruments.

Plywood

Plywood is a versatile and affordable material that is made by layering thin sheets of wood together. It is often used for making circles because it is easy to cut and shape, and it is available in a variety of thicknesses and grades. Some common types of plywood used for making circles include:

  • Baltic birch: A high-quality plywood that is known for its strength and durability.
  • Lauan: A lightweight and affordable plywood that is commonly used for making circles and other woodworking projects.
  • MDF: A type of engineered wood that is made by compressing wood fibers together. It is often used for making circles because it is easy to shape and has a smooth surface.

When choosing a type of wood for your circle, consider factors such as the appearance, strength, and durability of the wood, as well as your budget and the tools and techniques you will be using to shape and finish the circle. With the right wood and some basic woodworking skills, you can create a beautiful and functional wooden circle that will last for years to come.

Choosing the Right Tools

When it comes to making a wooden circle, having the right tools is essential. Here are some tips on selecting the right tools for the job.

Selecting a Saw

One of the most popular tools for cutting circles is a saw. Here are some types of saws you can use:

  • Jigsaw: A versatile and easy-to-use tool, a jigsaw is perfect for cutting curves and shapes in wood. With the right blade and proper technique, you can cut clean circles using a jigsaw.
  • Table saw: A table saw is a great option for cutting larger circles. You can use a circle-cutting jig to make precise cuts.
  • Band saw: A band saw is another great option for cutting circles. You can use a circle-cutting jig or a compass to make precise cuts.

When selecting a saw, consider the size of the circle you want to cut and the type of wood you will be cutting. Make sure to use the appropriate blade for the type of wood you are working with.

Choosing a Router

Another tool you can use to cut circles is a router. Here are some tips on selecting the right router:

  • Fixed-base router: A fixed-base router is a good choice for beginners. It is easy to use and provides precise cuts.
  • Plunge router: A plunge router is a more advanced option. It allows you to make cuts in the middle of a piece of wood, rather than just the edge.
  • Trim router: A trim router is a smaller, more compact option. It is great for making small cuts and working with smaller pieces of wood.

When selecting a router, consider the size of the circle you want to cut and the type of wood you will be cutting. Make sure to use the appropriate bit for the type of cut you want to make.

By selecting the right tools for the job, you can ensure that you make clean, precise cuts and create beautiful wooden circles.

Creating a Template

If you want to make a wooden circle, creating a template is the first step. A template is a guide that helps you cut wood into a specific shape. It is a simple tool that can be made from a variety of materials, including paper, card, or thin wood.

Materials

To create a template, you will need:

  • A piece of paper or card
  • A compass or a round object to trace around
  • A pencil
  • Scissors
  • Glue or tape

Steps

  1. Start by drawing a circle on your paper or card using the compass or round object. The size of the circle should be the same size as the wooden circle you want to make.

  2. Cut out the circle using scissors.

  3. To make the template more durable, you can glue or tape it onto a piece of thin wood. This will make it easier to trace around when cutting the wooden circle.

  4. If you need to make multiple circles of the same size, you can use the template to trace around the circle onto another piece of paper or card. Cut out the circle and glue or tape it onto another piece of thin wood.

Creating a template is a simple but important step in making a wooden circle. It will help you to achieve a precise and accurate cut every time. With a template, you can make multiple circles of the same size quickly and easily.

Cutting the Circle

Now that you have your wooden board and a circle template, it’s time to cut the circle. There are several ways to cut a circle, and the best method depends on the size of the circle you need and the tools you have available. Here are some common methods:

Method 1: Hole Saw

A hole saw is a circular saw that attaches to a drill. It’s the easiest way to cut small circles from 0.5 to 6 inches in diameter. Here’s how to use a hole saw:

  1. Attach the hole saw to your drill.
  2. Mark the center of the circle on your wooden board.
  3. Drill a small pilot hole at the center mark.
  4. Place the hole saw over the pilot hole and start drilling.
  5. Apply steady pressure and keep the drill perpendicular to the board.
  6. Once the hole saw has cut through the board, remove it and the wooden circle.

Method 2: Jigsaw

A jigsaw is a handheld saw that can cut curves and circles. It’s best for cutting larger circles from 6 to 24 inches in diameter. Here’s how to use a jigsaw:

  1. Clamp your wooden board securely to a workbench or table.
  2. Mark the center of the circle on your wooden board.
  3. Drill a small pilot hole at the center mark.
  4. Insert the jigsaw blade into the pilot hole and turn on the saw.
  5. Follow the circle template with the jigsaw, cutting the circle slowly and steadily.
  6. Once you’ve cut the circle, sand the edges smooth.

Method 3: Router

A router is a power tool that can cut circles and other shapes. It’s best for cutting precise circles and curves. Here’s how to use a router:

  1. Clamp your wooden board securely to a workbench or table.
  2. Attach a circle-cutting jig to your router.
  3. Adjust the jig to the size of the circle you need.
  4. Set the router bit to the correct depth.
  5. Turn on the router and cut the circle slowly and steadily.
  6. Once you’ve cut the circle, sand the edges smooth.

No matter which method you choose, make sure to wear eye and ear protection, and follow all safety precautions for your tools. With a little practice, you’ll be cutting perfect circles in no time!

Sanding and Finishing

After cutting the wooden circle, it’s time to sand and finish it to give it a smooth and polished look. In this section, we will discuss the two important sub-sections of sanding and finishing.

Sanding the Edges

Before sanding the edges, make sure to use a sandpaper with a grit of 120 or higher. This will help to remove any roughness and splinters from the edges. You can use a sanding block to make sure that the edges are even and smooth.

Start by sanding the edges with the sandpaper at a 45-degree angle. Move the sandpaper in a circular motion, making sure to cover the entire edge. Repeat this process with a finer grit sandpaper until the edges are smooth and even.

After sanding, use a soft cloth to wipe away any dust or debris from the surface of the circle.

Applying Wood Finish

Applying a wood finish to your wooden circle will not only protect it from damage but also enhance its natural beauty. There are various types of wood finishes available, such as oil-based, water-based, and wax-based finishes.

Before applying any finish, make sure to sand the surface of the circle with a fine grit sandpaper to remove any roughness or unevenness. Then, wipe the surface with a clean cloth to remove any dust or debris.

To apply the finish, use a brush or a cloth and apply it evenly on the surface of the circle. Make sure to follow the manufacturer’s instructions for the specific type of finish you are using.

After applying the first coat, let it dry completely before applying a second coat. Repeat this process until you achieve the desired look and protection for your wooden circle.

Remember, sanding and finishing your wooden circle is an important step in the woodworking process. It not only enhances the look of your project but also protects it from damage. Follow these simple steps to achieve a smooth and polished finish for your wooden circle.

Safety Measures

When working with wood, safety should always be your top priority. Here are some important safety measures to keep in mind when making a wooden circle:

Wear Protective Gear

Always wear appropriate safety equipment when working with wood. This includes safety glasses to protect your eyes from flying debris, earplugs or earmuffs to protect your hearing, and a dust mask to prevent inhalation of sawdust.

Keep Your Work Area Clean and Organized

A clean and organized work area can help prevent accidents. Make sure your workspace is well-lit and free of clutter. Keep your tools and materials organized so that you can easily find what you need without having to search through piles of wood and other debris.

Use the Right Tools for the Job

Using the wrong tool for the job can be dangerous and can also damage your materials. Make sure you are using the appropriate tools for the task at hand. For example, use a jigsaw or scroll saw to cut out your circle, rather than a circular saw.

Take Your Time

Rushing through a project can lead to mistakes and accidents. Take your time and work carefully, especially when using power tools. Remember, it’s better to take a little longer and get the job done right than to rush and end up with a sloppy or dangerous result.

Keep a First Aid Kit on Hand

Accidents can happen even when you take all the necessary precautions. Always keep a first aid kit nearby in case of cuts, scrapes, or other injuries. Make sure it is well-stocked with bandages, antiseptic, and other essentials.

How to Make a Wooden Letter Opener: A Beginner's Guide

Are you looking for a simple yet beautiful gift idea that you can make using woodworking skills? Consider making a wooden letter opener. A letter opener is a useful tool that can be used to open mail without tearing or damaging the contents inside. Making a wooden letter opener is a great project for any woodworker, whether you are a beginner or an experienced craftsman.

In this article, we will show you how to make a wooden letter opener using basic woodworking tools and techniques. You will learn how to select the right type of wood for your project, how to shape and sand the wood to create a comfortable grip, and how to sharpen the blade to ensure a clean cut every time. Whether you are making a letter opener for yourself or as a gift for someone else, this project is sure to be a hit. So, grab your tools and let’s get started!

Understanding the Materials

When it comes to making a wooden letter opener, the materials you use are just as important as the tools you use. In this section, we will discuss the types of wood you can use and the essential tools you will need to complete the project.

Types of Wood

Choosing the right type of wood is crucial to the success of your project. You want a wood that is dense, straight-grained, and has closed pores. Here are some of the best types of wood for making a wooden letter opener:

  • Maple – Maple is a hard, dense wood that is easy to work with and has a beautiful grain pattern.
  • Cherry – Cherry is a medium-hard wood that is known for its rich, reddish-brown color and smooth grain.
  • Walnut – Walnut is a hard, durable wood that is dark in color and has a beautiful grain pattern.
  • Mahogany – Mahogany is a hard, dense wood that is known for its reddish-brown color and beautiful grain pattern.

Essential Tools

Now that you have chosen your wood, it’s time to gather your tools. Here are the essential tools you will need to make a wooden letter opener:

  • Saw – You will need a saw to cut your wood to the desired length.
  • Chisel – A chisel is used to shape the handle of your letter opener.
  • Sandpaper – Sandpaper is used to smooth out any rough edges and to give your letter opener a polished look.
  • Wood glue – Wood glue is used to attach the blade to the handle.
  • Clamps – Clamps are used to hold the blade and handle together while the glue dries.
  • Blade – You will need a metal blade to attach to the handle of your letter opener.

With these materials and tools, you will be able to make a beautiful and functional wooden letter opener.

Safety Precautions

When working with wood, it’s important to take safety precautions to avoid injury. Here are a few things to keep in mind when making a wooden letter opener:

  • Wear protective gear: Always wear safety glasses to protect your eyes from flying wood chips and sawdust. Additionally, it’s a good idea to wear a dust mask to prevent inhaling sawdust.

  • Use sharp tools: Dull tools can cause accidents, so make sure your knives and saws are sharp before starting your project.

  • Keep your work area clean: A cluttered work area can be dangerous, so make sure to keep your workspace clean and organized.

  • Use a vice: When carving or sawing, use a vice to secure the wood in place. This will prevent the wood from slipping and causing an accident.

  • Work slowly and carefully: Take your time when carving or sawing, and always be aware of where your hands are in relation to the tools.

By following these safety precautions, you can ensure that your woodworking project is both fun and safe.

Designing Your Letter Opener

Designing your wooden letter opener is a fun and creative process. You can make it as simple or as complex as you want, depending on your skill level and personal preferences.

First, consider the size and shape of your letter opener. You can make it long and slender, or short and stubby. Think about how you will hold it and how it will fit in your hand. You may want to make a few sketches to help you visualize your design.

Next, choose the type of wood you want to use. Dense, straight-grained woods with closed pores are the best choice for this project. Woods like oak and ash are poor choices because their open pores show up on the blade edge and weaken it. You can also consider using exotic woods for a unique and beautiful look.

Once you have your wood selected, think about the finish you want to apply. You can leave the wood natural for a rustic look, or apply a clear coat to bring out the wood’s natural beauty. You can also stain the wood to match your personal style or the decor of your workspace.

Finally, consider any additional embellishments you want to add to your letter opener. You can carve designs or patterns into the wood, or add decorative elements like beads or metal accents. Just remember to keep the design simple and functional, as the primary purpose of a letter opener is to open letters efficiently.

With these design considerations in mind, you can create a beautiful and functional wooden letter opener that is uniquely yours.

Cutting the Wood

To start making your wooden letter opener, you’ll need to cut the wood to size. You can use any type of wood you like, but hardwoods such as maple or oak are good choices as they are durable and can be easily shaped.

Tools Needed

To cut the wood, you’ll need a few tools:

  • A saw: A hand saw or a jigsaw will work well for this task.
  • Sandpaper: You’ll need sandpaper to smooth out any rough edges after cutting.
  • A ruler or tape measure: You’ll need this to measure the length of the wood.

Steps to Follow

Here are the steps to follow to cut the wood for your letter opener:

  1. Measure and mark the length of the wood using a ruler or tape measure.
  2. Use a saw to cut the wood to the desired length. Take your time and make sure the cut is straight.
  3. Sand the cut edges of the wood to smooth out any rough spots.

Once you have cut the wood to size, you can move on to shaping it into a letter opener.

Sanding and Smoothing

Now that you have shaped your wooden letter opener, it’s time to sand and smooth it. Sanding is an essential step in woodworking that helps to remove any rough edges or splinters from the wood. It also helps to achieve a smooth and polished finish.

To begin, you will need a sandpaper with a grit of 220 or higher. You can use a sanding block or a piece of wood to wrap the sandpaper around it. Start sanding the edges and corners of the letter opener, moving the sandpaper in a circular motion. Be careful not to sand too hard, as this can damage the wood.

Next, move on to the flat surfaces of the letter opener. Sand in the direction of the grain, using long strokes. Make sure to sand evenly, so that the surface is smooth and even. You can use a finer grit sandpaper to achieve a smoother finish.

After sanding, wipe the letter opener with a clean cloth to remove any dust or debris. Then, apply a wood finish or polish to protect the wood and give it a shiny appearance. You can use a wax, oil, or varnish, depending on your preference.

In conclusion, sanding and smoothing your wooden letter opener is an important step in achieving a polished and professional-looking product. Take your time and be patient, and you will be rewarded with a beautiful and functional letter opener that you can be proud of.

Applying Finish

Now that you have completed carving and sanding your wooden letter opener, it’s time to apply a finish that will protect the wood and give it a beautiful, polished look.

Before applying any finish, make sure the wood is clean and free of dust and debris. You can use a tack cloth or a soft-bristled brush to remove any particles that might have settled on the surface.

There are several types of finishes you can use for your letter opener, including:

  • Oil finishes: These finishes penetrate the wood and enhance its natural beauty. They are easy to apply and provide a durable, water-resistant finish. Some popular oil finishes include linseed oil, tung oil, and Danish oil.

  • Wax finishes: These finishes provide a soft, smooth feel to the wood and are great for enhancing its natural color. They are easy to apply and provide a low sheen finish. Some popular wax finishes include beeswax and carnuba wax.

  • Varnish finishes: These finishes provide a hard, durable finish that is resistant to scratches and stains. They are great for high-use items like a letter opener. Some popular varnish finishes include polyurethane and spar varnish.

When applying your chosen finish, be sure to follow the manufacturer’s instructions carefully. Here are some general tips to keep in mind:

  • Apply the finish in a well-ventilated area, and wear protective gloves and a mask to avoid inhaling any fumes.

  • Apply a thin, even coat of finish using a brush or a cloth. Avoid applying too much finish, as this can cause drips and uneven spots.

  • Allow the finish to dry completely before applying a second coat. This can take anywhere from a few hours to a day or more, depending on the type of finish you are using.

  • Sand lightly between coats with a fine-grit sandpaper to remove any rough spots or bubbles.

  • Apply as many coats as necessary to achieve the desired level of protection and sheen.

By following these tips, you can apply a beautiful finish to your wooden letter opener that will protect it for years to come.

Adding Personal Touches

Making your own wooden letter opener is a great way to add a personal touch to your desk or workspace. There are a few ways to customize your letter opener to make it unique and special.

Engraving

One way to add a personal touch to your wooden letter opener is to engrave it. You can use a wood burning tool or a laser engraver to add text or designs to your letter opener. This is a great way to add a name, initials, or a special message to your letter opener.

If you are using a wood burning tool, make sure to practice on a scrap piece of wood first to get a feel for the tool. You can use stencils or freehand your design onto the wood. Once you are happy with your design, carefully burn it into the wood.

If you are using a laser engraver, you can create your design on a computer and upload it to the engraver. The laser will etch your design onto the wood. This method is more precise than using a wood burning tool, but it may not be as hands-on.

Painting

Another way to add a personal touch to your wooden letter opener is to paint it. You can use acrylic paint or wood stain to add color to your letter opener. This is a great way to match your letter opener to your workspace or to add a pop of color.

Before painting your letter opener, make sure to sand it down and wipe it clean. This will help the paint adhere to the wood. You can use painter’s tape to create clean lines and prevent the paint from bleeding onto other parts of the letter opener.

Once you have painted your letter opener, let it dry completely before using it. You can also add a coat of clear varnish to protect the paint and give your letter opener a glossy finish.

By adding a personal touch to your wooden letter opener, you can create a unique and special tool for your desk or workspace. Whether you choose to engrave it or paint it, your letter opener will be a reflection of your personal style and creativity.

How to Make a Wooden Rolling Tray: A Step-by-Step Guide for Beginners

If you enjoy rolling your own cigarettes or joints, having a rolling tray can make the process much easier and more enjoyable. A wooden rolling tray is a stylish and practical addition to any smoker’s collection, and making one yourself can be a fun and rewarding DIY project. With a few basic tools and some simple materials, you can create a customized rolling tray that meets your specific needs and preferences.

To begin making your wooden rolling tray, you’ll need to gather some supplies. This will include wood, sandpaper, wood glue, a saw, and a drill. You’ll also need to decide on the size and shape of your tray, as well as any additional features you want to include. Once you have your supplies and a plan in place, you can start cutting and sanding your wood to create the basic shape of your tray. From there, you can add any compartments, slots, or other features you desire, and finish your tray with a coat of stain or paint for a polished look.

Understanding the Purpose of a Wooden Rolling Tray

If you’re an avid smoker, you know how important it is to have a rolling tray. A rolling tray is a flat surface that provides a clean and organized area for rolling your herbs. It helps you keep your smoking accessories in one place and prevents you from losing anything. A wooden rolling tray is a great investment if you want something that is both functional and stylish.

When it comes to smoking, having a designated area for rolling your herbs is essential. Not only does it keep your herbs organized, but it also prevents them from spilling onto the floor or table. A wooden rolling tray is perfect for this purpose because it provides a stable surface that won’t slide around. It’s also easy to clean and maintain, making it a great investment.

In addition to being functional, a wooden rolling tray can also be stylish. It can complement your smoking accessories and add a touch of elegance to your smoking area. You can choose from a variety of wooden rolling trays that come in different sizes and designs. Some even have compartments for storing your smoking accessories.

Overall, a wooden rolling tray is a must-have for any smoker. It provides a clean and organized area for rolling your herbs and helps you keep your smoking accessories in one place. It’s also a stylish addition to your smoking area that can complement your smoking accessories. Consider investing in a wooden rolling tray if you want to enhance your smoking experience.

Materials Needed

If you want to make a wooden rolling tray, you’ll need a few things. Here are the materials you’ll need to gather:

Types of Wood

The type of wood you choose for your rolling tray is up to you. However, some popular options include:

Each type of wood has its own unique characteristics and appearance. Maple is a light-colored wood with a tight, even grain. Cherry has a reddish-brown color and a distinctive grain pattern. Walnut is a dark, rich wood with a straight grain. Oak is a strong, durable wood with a coarse texture.

Required Tools

To make a wooden rolling tray, you’ll need a few essential tools, including:

  • Saw
  • Drill
  • Screws
  • Measuring tape
  • Pencil
  • Sandpaper (100 grit, 150 grit, and 220 grit)
  • Wood stain or paint in the color of your choice
  • Clear coat or varnish

With these tools, you’ll be able to cut your wood to size, drill holes for screws, sand the surface to a smooth finish, and apply a protective coating to the wood. Be sure to have all of these tools on hand before you begin your project.

Designing Your Wooden Rolling Tray

When it comes to designing your wooden rolling tray, there are a few things to consider. Size and shape are important, as well as any additional features or compartments you may want to include.

Size and Shape

The size and shape of your wooden rolling tray will depend on your personal preferences and needs. Consider how much space you need to roll your materials and how portable you want your tray to be. A larger tray may be more comfortable to use, but a smaller one may be easier to transport.

Additionally, think about the shape of your tray. A rectangular shape is traditional, but a circular or oval tray may be more unique and visually appealing. Keep in mind that the shape of your tray may also affect its functionality and how easy it is to use.

Features and Compartments

When designing your wooden rolling tray, think about any additional features or compartments you may want to include. For example, you may want to add a slot for holding your rolling papers or a separate compartment for storing your materials.

You could also consider adding a groove around the edge of the tray to catch any loose materials and prevent them from spilling over. Another option is to include a built-in ashtray or lighter holder for added convenience.

Overall, the design of your wooden rolling tray is up to you. Consider your personal preferences and needs, and don’t be afraid to get creative with your design. With a little bit of planning and creativity, you can create a functional and stylish rolling tray that fits your unique needs.

Wood Preparation

Before you start making your wooden rolling tray, it’s important to properly prepare the wood. This will ensure that your rolling tray is sturdy and long-lasting. In this section, we’ll cover two important sub-sections: Cutting the Wood and Sanding the Wood.

Cutting the Wood

The first step in preparing your wood is to cut it to the appropriate size. You can use a table saw, circular saw, or hand saw to make your cuts. It’s important to measure and mark your wood accurately before making any cuts to avoid mistakes.

When cutting your wood, be sure to wear appropriate safety gear, such as safety glasses and gloves. Always cut away from your body and keep your hands and fingers away from the blade.

Sanding the Wood

After cutting your wood to size, the next step is to sand it. Sanding will help smooth out any rough edges and prepare the wood for staining or painting.

Start with a coarse grit sandpaper and gradually work your way up to a finer grit. Be sure to sand in the direction of the wood grain to avoid damaging the wood.

Once you’ve finished sanding, wipe down the wood with a damp cloth to remove any sawdust or debris. Your wood is now ready for staining or painting.

Remember, proper wood preparation is essential for creating a high-quality rolling tray. Take your time and follow these steps carefully for the best results.

Assembling the Tray

Gluing the Pieces

Now that you have all the pieces cut, it’s time to assemble the tray. Start by applying a thin layer of wood glue to the edges of the bottom piece. Then, place the two side pieces on top of the bottom piece, making sure they are flush with the edges. Apply clamps to hold the pieces together while the glue dries.

Next, apply glue to the edges of the two end pieces and attach them to the sides of the tray. Use clamps to hold everything in place while the glue dries. Once the glue has dried, remove the clamps and sand any rough edges.

Securing the Tray

To secure the tray, you can use either screws or nails. If you choose to use screws, pre-drill holes in the bottom of the tray and the sides before attaching them. This will prevent the wood from splitting. Then, use screws to attach the sides to the bottom of the tray.

If you choose to use nails, use a nail gun or hammer to attach the sides to the bottom of the tray. Be sure to use enough nails to hold the pieces securely together.

Once the tray is assembled and secured, you can sand any rough edges and apply a finish if desired. A clear coat of polyurethane will protect the wood and give it a nice shine.

Congratulations, you have now assembled your very own wooden rolling tray!

Finishing Touches

Once you have assembled your wooden rolling tray, it is time to add the finishing touches to make it truly unique and personalized. This section will cover two sub-sections: Applying the Finish and Adding Personal Touches.

Applying the Finish

The finish you choose for your rolling tray can make a big difference in its appearance and durability. Here are some popular options:

  • Stain: A wood stain can add color to your tray while still allowing the natural wood grain to show through. Apply the stain with a brush or cloth, following the manufacturer’s instructions.
  • Paint: If you prefer a solid color, paint is a good option. Use a brush or spray paint for an even finish.
  • Clear Coat: A clear coat can protect the wood and give it a glossy or matte finish. Apply with a brush or spray can.

Before applying any finish, make sure the wood is clean and dry. Sand it lightly with fine-grit sandpaper to smooth out any rough spots. Apply the finish in a well-ventilated area and follow the manufacturer’s instructions for drying and curing time.

Adding Personal Touches

Now that your rolling tray has a beautiful finish, it’s time to add some personal touches. Here are some ideas:

  • Custom Engraving: If you have access to a laser engraver, you can add a custom design or message to your tray.
  • Stickers or Decals: You can find stickers or decals with your favorite designs or quotes and apply them to your tray.
  • Painted Designs: Use paint or markers to add your own designs or patterns to the tray.
  • Accessories: Add a small container for your rolling papers or a holder for your lighter to make your tray even more functional.

Remember to keep your personal touches in line with your own style and preferences. Your rolling tray should reflect your personality and add to your smoking experience.

Maintenance and Care

Cleaning the Tray

To keep your wooden rolling tray in good condition, it is important to clean it regularly. Here are some tips to help you clean your tray:

  • Use a soft, damp cloth to wipe down the surface of the tray. Avoid using abrasive cleaners or scrubbers that can scratch the wood.
  • If your tray has stubborn stains or buildup, you can use a mixture of warm water and mild dish soap to clean it. Be sure to rinse the tray thoroughly with water and dry it completely with a clean cloth.
  • Avoid soaking your wooden rolling tray in water or exposing it to excessive moisture, as this can cause the wood to warp or crack.
  • To remove any odors from your tray, you can wipe it down with a mixture of water and vinegar or lemon juice. Be sure to rinse the tray thoroughly with water and dry it completely.

Prolonging the Tray’s Life

With proper care and maintenance, your wooden rolling tray can last for many years. Here are some tips to help prolong the life of your tray:

  • Avoid exposing your tray to direct sunlight or extreme temperatures, as this can cause the wood to fade or crack.
  • Keep your tray away from sources of moisture, such as sinks or humidifiers.
  • Use a protective coating, such as beeswax or mineral oil, to help seal and protect the wood. Apply the coating with a soft cloth and allow it to soak in for several hours before wiping away any excess.
  • Store your tray in a dry, cool place when not in use to prevent it from becoming warped or damaged.
  • Avoid placing heavy objects on top of your tray, as this can cause it to crack or break.

How to Make a Wooden Mantel Shelf: A Simple Guide

Looking to add some character to your living space? A wooden mantel shelf is a great way to do just that. Whether you’re looking to create a rustic or modern look, a wooden mantel shelf is a versatile addition to any home.

Creating your own wooden mantel shelf may seem like a daunting task, but with the right tools and materials, it can be a fun and rewarding DIY project. In this article, we’ll take you through the steps to create a wooden mantel shelf from scratch. From choosing the right wood to finishing touches, we’ll cover everything you need to know to create a beautiful and functional mantel shelf.

Before we get started, it’s important to note that safety should always come first when working with power tools and wood. Be sure to wear protective gear, such as goggles and gloves, and follow all safety guidelines for your tools. Now, let’s get started on creating your own wooden mantel shelf!

Understanding the Basics of Woodworking

Woodworking is a fun and rewarding hobby that can also be practical. With the right tools and techniques, you can create beautiful and functional pieces of furniture and decor for your home. If you’re new to woodworking, it’s important to start with the basics. Here are a few things to keep in mind as you begin:

Choosing the Right Wood

The type of wood you choose for your project will depend on a few factors, including your budget, the look you’re going for, and the project itself. Here are a few popular types of wood and their characteristics:

Wood Type Characteristics
Pine Softwood, affordable, easy to work with
Oak Hardwood, durable, attractive grain pattern
Cherry Hardwood, reddish-brown color, smooth texture
Maple Hardwood, light color, fine grain

When selecting wood for your project, be sure to choose pieces that are straight and free of knots or other defects. This will make it easier to work with and will result in a more polished finished product.

Safety Measures

Woodworking can be dangerous if proper safety measures are not taken. Here are a few things to keep in mind:

  • Always wear eye and ear protection when working with power tools.
  • Keep your work area clean and free of clutter.
  • Use sharp tools to avoid slips and accidents.
  • Never work with power tools while under the influence of drugs or alcohol.

By following these basic safety guidelines, you can enjoy woodworking without putting yourself or others at risk.

Gathering Necessary Tools

To build a wooden mantel shelf, you will need some basic tools. Here is a list of tools you’ll need:

Measuring Tools

You’ll need a measuring tape to measure the length and width of the mantel shelf. A level will help you ensure that the shelf is straight and even.

Cutting Tools

A saw is essential for cutting the wood to the desired length and shape. A circular saw or a miter saw is ideal for this job.

Joining Tools

To join the pieces of wood together, you can use wood glue and clamps. A brad nailer and brad nails can also be used to secure the pieces of wood together.

Sanding Tools

After cutting and joining the pieces of wood, you’ll need to sand the surface to make it smooth. A palm sander is ideal for this job.

Finishing Tools

To finish the mantel shelf, you’ll need a stain or paint of your choice. A rag and wood conditioner can be used to prepare the wood for staining. A paste finishing wax can also be used to give the shelf a polished look.

Other Tools

Other tools that may come in handy include a stud finder, drill, and wood screws. These tools will help you secure the mantel shelf to the wall.

Once you have all the necessary tools, you can start building your wooden mantel shelf. With a little patience and effort, you can create a beautiful mantel shelf that will add character and warmth to your home.

Designing Your Wooden Mantel Shelf

When designing your wooden mantel shelf, there are a few things to consider. You want to create a piece that not only adds beauty to your fireplace but also functionality. Here are some tips to help you design the perfect wooden mantel shelf for your home.

1. Choose the Right Wood

The type of wood you choose for your mantel shelf will affect both its appearance and durability. Some popular wood options include oak, maple, cherry, and walnut. Each type of wood has its unique characteristics, such as color, grain pattern, and hardness. Consider the style of your home and the look you want to achieve when selecting the wood for your mantel shelf.

2. Determine the Size

The size of your mantel shelf will depend on the size of your fireplace and the room it’s in. You want to make sure the mantel shelf is proportional to the fireplace and doesn’t overwhelm the room. Measure the width and height of your fireplace and use those measurements to determine the appropriate size for your mantel shelf.

3. Add Decorative Elements

A wooden mantel shelf can be more than just a functional piece. You can add decorative elements to make it a focal point in the room. Consider adding corbels, brackets, or trim to enhance the look of your mantel shelf. You can also add a stain or paint to match your home’s decor.

4. Consider the Functionality

Your mantel shelf should not only look great but also serve a purpose. Consider adding shelves or cubbies to store books, pictures, or other decorative items. You can also add hooks to hang stockings or other items during the holiday season.

Designing a wooden mantel shelf can be a fun and rewarding project. Keep these tips in mind when creating your design to ensure you end up with a beautiful and functional piece that adds value to your home.

Cutting and Shaping the Wood

Now that you have gathered all the necessary materials, it’s time to start cutting and shaping the wood for your mantel shelf. Here are some steps to follow:

  1. Measure and mark the wood: Measure the wood according to the dimensions you want for your mantel shelf. Use a pencil to mark the wood where you will be making cuts.

  2. Cut the wood: Use a saw to cut the wood along the marked lines. Be sure to cut carefully and accurately to avoid any mistakes.

  3. Sand the wood: Use sandpaper to smooth out any rough edges or surfaces on the wood. This will help make the wood look more polished and professional.

  4. Shape the wood: If you want to add any decorative elements to your mantel shelf, now is the time to do so. Use a router or other shaping tool to create the desired design on the wood.

  5. Finish the wood: Apply a wood stain or paint to the wood to give it the desired finish. Be sure to let the finish dry completely before installing the mantel shelf.

Remember to take your time when cutting and shaping the wood. It’s better to work slowly and carefully to avoid any mistakes or accidents. With these steps, you’ll be well on your way to creating a beautiful and functional mantel shelf for your fireplace.

Assembling the Wooden Mantel Shelf

Now that you have all the necessary materials and have made all the required cuts, it’s time to assemble your wooden mantel shelf. Follow these steps to ensure a smooth and successful assembly process:

  1. Start by attaching the mounting bracket to the back of your mantel shelf. If you’re using a French cleat, attach one half of the cleat to the back of the shelf, making sure it’s level and centered.

  2. Next, mark the location where you want the mantel shelf to be installed on the wall. Use a level to ensure that the markings are straight and level. It’s important to take your time with this step to ensure that the mantel shelf is properly aligned and looks great once installed.

  3. Now it’s time to attach the other half of the French cleat or the mounting bracket to the wall. Use a drill to attach the bracket securely to the wall, making sure that it’s level and centered.

  4. Once the mounting bracket is securely attached to the wall, it’s time to hang the mantel shelf. If you’re using a French cleat, simply slide the shelf onto the other half of the cleat that’s attached to the wall. If you’re using a mounting bracket, carefully lift the shelf and slide it onto the bracket.

  5. Finally, use a level to ensure that the mantel shelf is straight and level. Make any necessary adjustments to ensure that it’s properly aligned.

Congratulations! You’ve successfully assembled your wooden mantel shelf. It’s now ready to be decorated and used to enhance the look of your fireplace.

Sanding and Finishing the Shelf

Once you have assembled your wooden mantel shelf, it is time to sand and finish it. Sanding the shelf is important to ensure that it is smooth and free of rough patches or splinters. Finishing the shelf is important to protect the wood from moisture and wear and tear. Here are the steps to sand and finish your wooden mantel shelf:

Sanding the Shelf

  1. Start by sanding the shelf with medium-grit sandpaper to remove any rough patches or splinters. Then, sand the shelf with fine-grit sandpaper to make it smooth.

  2. Use a sanding block or a power sander to make the job easier and more efficient.

  3. Pay special attention to the places where you applied putty. Sand those areas until you can feel little difference between the wood and the putty.

  4. After sanding, wipe the shelf with a damp cloth to remove any dust or debris.

Finishing the Shelf

  1. Apply a wood conditioner to the shelf to help it absorb the stain evenly.

  2. Apply the stain with a brush or a cloth. Be sure to follow the manufacturer’s instructions and apply the stain evenly.

  3. After applying the stain, wipe the shelf with a lint-free cloth to remove any excess stain.

  4. Allow the stain to dry completely before applying a topcoat.

  5. Apply a topcoat to protect the wood from moisture and wear and tear. You can choose a clear coat or a colored coat depending on your preference.

  6. Allow the topcoat to dry completely before installing the shelf.

By following these steps, you can sand and finish your wooden mantel shelf to make it smooth and protected from wear and tear.

Installing the Wooden Mantel Shelf

Now that you have built your wooden mantel shelf, it’s time to install it. Follow these steps to ensure a secure and level installation.

Step 1: Choose the Location

Choose the location where you want to install your mantel shelf. Make sure the location is free from any obstructions and is centered above the fireplace. Use a level to ensure that the location is straight.

Step 2: Mark the Wall

Mark the wall where you want to install the mantel shelf. Use a pencil to mark the location where the shelf will be installed. Make sure the marks are level and straight.

Step 3: Install the Mounting Bracket

Install the mounting bracket on the wall. Use a drill to make holes in the wall where you marked the location. Insert the screws through the mounting bracket and into the wall. Make sure the mounting bracket is level and secure.

Step 4: Attach the Mantel Shelf

Attach the mantel shelf to the mounting bracket. Slide the mantel shelf onto the mounting bracket and secure it with screws. Make sure the mantel shelf is level and secure.

Step 5: Finishing Touches

Now that your mantel shelf is installed, it’s time to add the finishing touches. Sand any rough edges and apply a coat of paint or stain to match your decor. Add any decorative items or pictures to your mantel shelf to complete the look.

Following these steps will ensure a secure and level installation for your wooden mantel shelf. Enjoy your new mantel shelf and the warmth it brings to your home.

How to Build a Wooden Handrail for Outdoor Steps: A Step-by-Step Guide

If you have outdoor steps that need a handrail, you may be wondering how to go about making one yourself. Building a wooden handrail for your outdoor steps is a great DIY project that can provide safety and style to your home. With a few basic tools and some lumber, you can create a handrail that will last for years to come.

Before you begin building your handrail, it’s important to check with your local building codes to ensure that you are meeting any requirements for handrail height, spacing, and materials. Once you have determined the specifications for your handrail, you can begin gathering your materials. The most common materials for outdoor handrails are pressure-treated lumber and metal balusters, but you can also use other materials like cedar or wrought iron to create a unique look.

Once you have your materials, you can begin building your handrail. The process will involve cutting and assembling the pieces of lumber, attaching the balusters, and securing the handrail to the steps. With some patience and attention to detail, you can create a handrail that will not only provide safety but also enhance the look of your outdoor space.

Understanding the Basics of Handrails

If you have outdoor steps, it’s important to have a handrail for safety purposes. A handrail is a simple wooden structure that runs along the length of the stairs. It provides support and stability to people as they climb up or down the stairs. In this section, we will discuss the basics of handrails and how to make one for your outdoor steps.

Handrail Height and Length

Before you begin building your handrail, it’s important to know the height and length of the handrail. The height of the handrail should be between 34 and 38 inches from the top of the stair tread to the top of the handrail. The length of the handrail should extend the full length of the stairs and extend at least 12 inches beyond the top and bottom steps.

Handrail Materials

The most common material used for handrails is wood. Cedar, redwood, and pressure-treated pine are popular choices for outdoor use because they are resistant to rot and decay. Other materials such as metal or vinyl can also be used for handrails, but they may require more maintenance.

Handrail Design

There are many different designs for handrails, but the most common design is a simple straight railing. The railing should be at least 1.5 inches in diameter to provide a comfortable grip. It’s important to make sure that the handrail is securely attached to the stairs to prevent any accidents.

Building Codes

Before building your handrail, it’s important to check your local building codes to ensure that your handrail meets the required standards. Building codes may vary depending on your location, so it’s important to do your research before beginning any construction.

In summary, a handrail is an important safety feature for outdoor steps. It should be between 34 and 38 inches in height, extend the full length of the stairs, and be securely attached to the stairs. Wood is the most common material used for handrails, and there are many different designs to choose from. Always check your local building codes before beginning any construction.

Choosing the Right Wood

When it comes to choosing the right wood for your outdoor handrail, there are several factors to consider. You want a wood that is durable, weather-resistant, and able to withstand the elements. Here are some popular options:

Cedar

Cedar is a popular choice for outdoor handrails because it is naturally resistant to rot and insects. It has a warm, reddish-brown color and a pleasant aroma. Cedar is also lightweight and easy to work with, making it a great choice for DIY projects.

Redwood

Redwood is another popular choice for outdoor handrails. It has a beautiful, rich color and is naturally resistant to decay and insects. Redwood is also easy to work with and holds up well in wet conditions.

Pressure-Treated Pine

Pressure-treated pine is a budget-friendly option that is treated with chemicals to resist rot and insects. It can be stained or painted to match your outdoor decor. However, it is important to note that the chemicals used in pressure treatment can be harmful to humans and pets, so it is important to wear gloves and a mask when working with it.

Ipe

Ipe is a hardwood that is known for its durability and resistance to rot, insects, and weather. It has a rich, dark color and a beautiful grain pattern. However, it is also one of the most expensive options.

No matter which type of wood you choose, make sure it is properly sealed and maintained to ensure its longevity. Consider the climate and weather conditions in your area when making your decision.

Materials and Tools Needed

When it comes to building a wooden handrail for your outdoor steps, you will need to gather a few materials and tools to get the job done. In this section, we will go over the different materials and tools needed to build a sturdy and reliable handrail for your outdoor steps.

Wood Selection

The first thing you will need to do is select the right type of wood for your handrail. You want to choose a wood that is strong, durable, and able to withstand the elements. Some of the best wood options for outdoor handrails include cedar, redwood, and pressure-treated pine. These woods are all resistant to rot and decay, making them ideal for outdoor use.

Handrail Hardware

In addition to the wood, you will also need to gather some handrail hardware. This includes brackets, screws, and bolts to secure the handrail to the posts. You will also need to purchase a post cap to protect the top of the posts from water damage.

Woodworking Tools

To build your handrail, you will need a few basic woodworking tools. These include a circular saw, a jigsaw, a drill, and a level. You will also need a measuring tape, a pencil, and a square to ensure that your cuts are accurate and your handrail is level.

In summary, to build a wooden handrail for your outdoor steps, you will need to select the right type of wood, gather the necessary hardware, and have the right woodworking tools on hand. With these materials and tools, you will be able to build a sturdy and reliable handrail that will provide safety and support for years to come.

Measuring and Planning

Before you start building your wooden handrail for outdoor steps, you need to measure and plan accordingly. This will ensure that your handrail fits properly and provides the necessary support when climbing or descending stairs.

Step Measurement

The first step is to measure the height and width of your steps. Measure the height from the bottom of the step to the top, and the width from side to side. Make sure to measure each step individually, as they may vary in size.

Once you have your measurements, you can determine the number of posts and rails you will need. As a general rule, you should have a post for every four to six feet of railing, and a rail for every two to three feet of railing.

Handrail Design

The next step is to design your handrail. You can choose from a variety of designs, including straight, curved, or angled. You can also choose from a variety of materials, including wood, metal, or vinyl.

When designing your handrail, it’s important to consider the style of your home and the surrounding landscape. You want your handrail to blend in with the overall aesthetic of your property.

Once you have your design in mind, you can start selecting your materials. Make sure to choose high-quality materials that are durable and weather-resistant. Pressure-treated lumber is a popular choice for outdoor handrails.

In summary, measuring and planning is an essential step in building a wooden handrail for outdoor steps. Make sure to measure your steps carefully and design your handrail to fit your specific needs. With the right materials and design, you can create a beautiful and functional handrail that provides the necessary support and adds value to your home.

Cutting the Wood

Now that you have measured and marked the spots for your handrail, it’s time to start cutting the wood. Here’s how you can do it:

  1. Use a chop saw or a miter saw to cut the pressure-treated lumber into the desired lengths for the rails and posts. Remember to wear protective gear while using the saw.

  2. Use a spade drill bit to drill holes into the posts where the rails will be attached. Make sure to align the holes on both sides of the post.

  3. Use a masonry bit to drill holes into the concrete or brick where the post holders will be installed.

  4. If you need to cut the railings at an angle to fit the slope of the stairs, use a miter saw to make the cuts.

  5. Sand the edges of the wood to smooth out any rough spots or splinters.

  6. Apply a wood stain or sealant to protect the wood from weather damage.

Remember to double-check your measurements and make sure all the pieces fit together before securing them in place. With these steps, you’ll be well on your way to creating a sturdy and attractive handrail for your outdoor steps.

Assembling the Handrail

Now that you have installed the posts for your outdoor handrail, it’s time to assemble the handrail itself. Here’s how you can do it:

Step 1: Measure and Cut Rails and Posts

Measure the distance between the posts to determine the length of the rails. Cut the rails to the appropriate length using a saw. Make sure the rails are level and straight.

Step 2: Place the Post Holders

Place the post holders on the rails. The holders should be placed at regular intervals, depending on the length of the rails. Use a measuring tape to ensure that the holders are evenly spaced.

Step 3: Install the Posts

Insert the posts into the post holders. Make sure that the posts are securely in place. Use a level to ensure that the posts are straight and level.

Step 4: Attach the Handrail

Attach the handrail to the posts using screws. Make sure that the screws are long enough to go through the handrail and into the posts. Use a drill to make pilot holes for the screws.

Step 5: Seal the Handrail

Seal the handrail with a weather-resistant sealant. This will protect the wood from the elements and prevent it from rotting or warping. Apply the sealant with a brush or roller, following the manufacturer’s instructions.

And that’s it! Your outdoor handrail is now complete and ready to use. Remember to check the handrail regularly for any signs of wear or damage, and make repairs as necessary.

Installing the Handrail

Now that you have built your wooden handrail, it’s time to install it on your outdoor steps. Follow these steps to ensure a safe and secure installation:

  1. Measure and mark the placement of the handrail on your steps. Use a level to ensure that the handrail is straight and even.

  2. Pre-drill holes into the handrail and the steps. This will prevent the wood from splitting when you attach the handrail to the steps.

  3. Attach the handrail to the steps using screws and brackets. Make sure the screws are long enough to go through the handrail and into the steps securely.

  4. Test the handrail to make sure it is sturdy and can support weight. If it wobbles or feels loose, reinforce the installation with additional screws or brackets.

  5. Finish the handrail with a weather-resistant sealant or paint to protect it from the elements.

Remember, installing a handrail is an important safety feature for your outdoor steps. It provides stability and support, especially for those with mobility issues or disabilities. Take the time to install it properly to ensure the safety of yourself and your guests.

Finishing Touches

Once you have constructed your wooden handrail for your outdoor steps, it’s time to add the finishing touches to make it look great and protect it from the elements.

Sanding the Handrail

Before applying any finish, it’s important to sand the handrail to ensure a smooth surface. Start with a coarse grit sandpaper and work your way up to a finer grit. Be sure to sand with the grain of the wood to avoid scratches. After sanding, wipe the handrail with a damp cloth to remove any dust.

Applying Wood Stain

Applying wood stain to your handrail will not only give it a beautiful color but also protect it from UV rays and water damage. Choose a stain that is specifically designed for outdoor use and matches the color of your deck or steps. Apply the stain with a brush or rag, following the manufacturer’s instructions. Be sure to apply the stain evenly and wipe off any excess.

Sealing the Wood

After the stain has dried, it’s important to seal the wood to protect it from moisture. Choose a clear, waterproof sealer that is designed for outdoor use. Apply the sealer with a brush or roller, following the manufacturer’s instructions. Be sure to apply an even coat and let it dry completely before using the handrail.

By following these simple steps, you can add the finishing touches to your wooden handrail and ensure that it looks great and lasts for years to come.

Maintenance Tips

Once you have installed your wooden handrail for outdoor steps, it is important to maintain it properly to ensure it lasts for years to come. Here are a few tips to help you keep your handrail in good condition:

Regular Cleaning

Dirt, dust, and other debris can accumulate on your handrail over time, making it look dirty and unappealing. To keep it looking its best, you should clean it regularly. You can use a mixture of water and vinegar or a cleaning solution to wipe down the handrail. Be sure to dry it thoroughly afterward to prevent water damage.

Preventing Stains

Stains can be a common problem with wooden handrails, especially if they are not sealed properly. To prevent stains, you can apply a sealant to the handrail. This will help to protect it from moisture and other elements that can cause damage.

Preventing Drying Out

Wooden handrails can dry out over time, which can cause them to crack and split. To prevent this from happening, you should apply a coat of oil or wax to the handrail every few months. This will help to keep it moisturized and prevent it from drying out.

Regular Maintenance

Regular maintenance is key to keeping your wooden handrail in good condition. This includes checking for any signs of damage, such as cracks or splits, and repairing them as necessary. You should also inspect the handrail for any loose screws or other hardware and tighten them as needed.

By following these simple maintenance tips, you can keep your wooden handrail for outdoor steps looking its best and ensure that it lasts for years to come.