Tag Archives: require proper maintenance

What Can I Use to Clean Wooden Floors? Tips and Tricks for a Spotless Finish

What Can I Use to Clean Wooden Floors? Tips and Tricks for a Spotless Finish

Are you tired of seeing your wooden floors looking dull and dirty? Do you want to know what you can use to clean them effectively and efficiently? Look no further! In this article, we will provide you with some tips and tricks on how to clean your wooden floors and keep them looking their best.

Cleaning wooden floors may seem like a daunting task, but it doesn’t have to be. The key is to use the right products and techniques that won’t damage the wood. There are several options available, from commercial wood-cleaning products to DIY solutions. We will explore the pros and cons of each so that you can make an informed decision on what to use for your specific needs.

It’s important to note that not all wooden floors are the same, and what works for one may not work for another. Factors such as the type of wood, finish, and age of the floor can all play a role in determining the best cleaning method. So, let’s dive in and discover what you can use to clean your wooden floors and achieve that beautiful, shiny finish you desire.

Understanding Your Wooden Floors
clean-wooden-floors

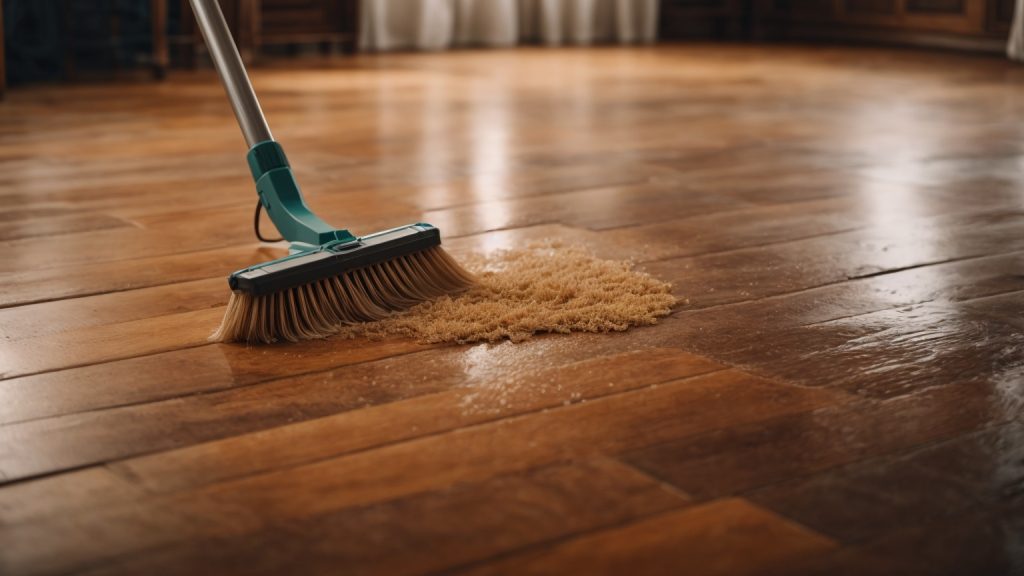
Wooden floors are a beautiful addition to any home, but they also require proper maintenance to keep them looking their best. Before you start cleaning your wooden floors, it’s important to understand the type of wood and finish used. Here are some things to keep in mind:

Types of Wood

Different types of wood have different properties that affect their durability and how they should be cleaned. Here are some common types of wood used for flooring:

  • Oak: durable and resistant to wear and tear
  • Maple: hard and dense, with a uniform texture
  • Pine: soft and prone to scratches and dents
  • Cherry: soft and prone to scratches, but develops a rich patina over time

Types of Finish

The finish on your wooden floors affects how you should clean them. Here are some common types of finishes:

  • Polyurethane: a clear, protective layer that is easy to clean
  • Wax: a traditional finish that requires regular maintenance
  • Oil: penetrates the wood to protect it from within, but requires regular maintenance
  • Varnish: a hard, durable finish that is resistant to scratches and stains

Cleaning Tips

Once you understand the type of wood and finish on your floors, you can start cleaning them properly. Here are some tips to keep in mind:

  • Sweep or vacuum your floors regularly to prevent dirt and dust from scratching the surface.
  • Use a damp mop to clean your floors, but avoid using too much water, as it can damage the wood.
  • Avoid using harsh chemicals or vinegar, as they can strip the finish and damage the wood.
  • Use a cleaner specifically designed for your type of finish, and follow the instructions carefully.
  • Wipe up spills immediately to prevent them from seeping into the wood and causing damage.

By understanding your wooden floors and taking proper care of them, you can enjoy their beauty for years to come.

Choosing the Right Cleaning Products

When it comes to cleaning wooden floors, it’s important to choose the right products to avoid damaging the wood. There are two main categories of cleaning products: natural products and commercial cleaners.

Natural Products

If you prefer to use natural products to clean your wooden floors, there are several options available:

  • Vinegar and water: Mix equal parts of white vinegar and water in a spray bottle and use it to clean your floors. Vinegar is a natural disinfectant and can help remove dirt and grime from your floors.
  • Olive oil and vinegar: Mix 1/4 cup of olive oil with 1/4 cup of white vinegar in a spray bottle and use it to clean your floors. The olive oil will help moisturize the wood and restore its shine.
  • Lemon juice and water: Mix equal parts of lemon juice and water in a spray bottle and use it to clean your floors. Lemon juice is a natural cleaner and can help remove stains and odors from your floors.

Commercial Cleaners

If you prefer to use commercial cleaners to clean your wooden floors, there are several options available:

  • Bona Hardwood Floor Cleaner: This is a popular commercial cleaner that is safe for use on hardwood floors. It is non-toxic and does not leave any residue on your floors.
  • Murphy Oil Soap: This is another popular commercial cleaner that is safe for use on hardwood floors. It is made from natural ingredients and can help remove dirt and grime from your floors.
  • Method Wood Floor Cleaner: This is a natural cleaner that is safe for use on hardwood floors. It is made from plant-based ingredients and does not contain any harsh chemicals.

When choosing a commercial cleaner, make sure to read the label carefully to ensure that it is safe for use on hardwood floors. Avoid using cleaners that contain harsh chemicals or abrasives, as these can damage the wood.

Cleaning Techniques
cleaning-techniques

When it comes to cleaning your wooden floors, there are two main techniques you can use: dry cleaning and wet cleaning. Each method has its advantages and disadvantages, so it’s important to choose the right one for your specific needs.

Dry Cleaning

Dry cleaning is a great technique for removing loose dirt, dust, and debris from your wooden floors. Here are a few methods you can use:

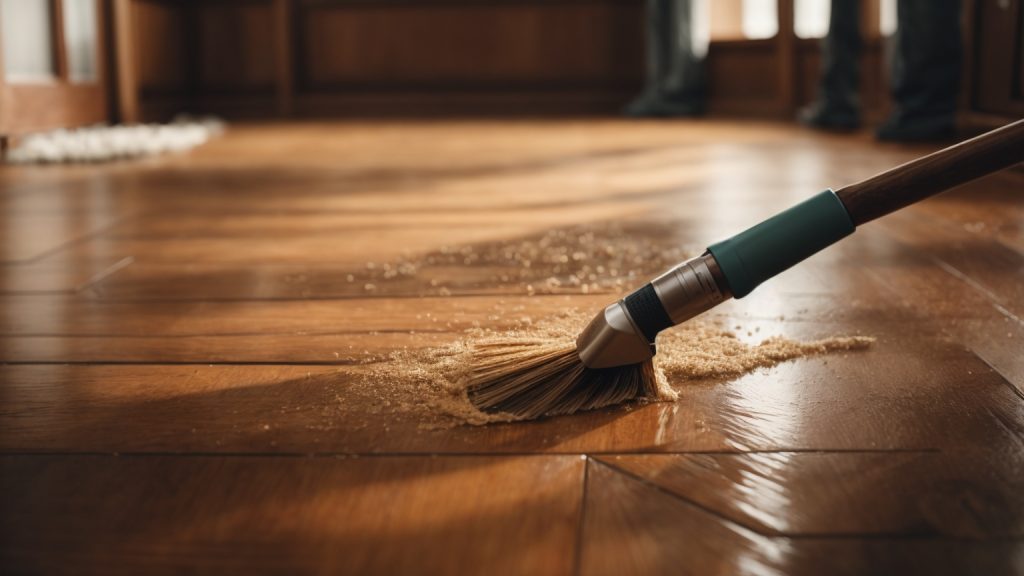
  • Sweeping: Use a soft-bristled broom to sweep your floors regularly. This will help prevent dirt and debris from accumulating and scratching the surface of your floors.
  • Vacuuming: Use a vacuum cleaner with a soft-brush attachment to remove dirt and debris from your floors. Be sure to avoid using a vacuum with a beater bar, as this can scratch the surface of your floors.
  • Dry Mopping: Use a microfiber mop or a dry mop to pick up dirt and debris from your floors. Be sure to avoid using a wet mop, as this can damage your floors.

Wet Cleaning

Wet cleaning is a great technique for removing stains and spills from your wooden floors. Here are a few methods you can use:

  • Damp Mopping: Use a damp mop with a mild cleaning solution to clean your floors. Be sure to wring out the mop thoroughly before using it, as excess water can damage your floors.
  • Vinegar Solution: Mix equal parts water and vinegar to create a natural cleaning solution for your floors. Apply the solution to your floors with a damp mop, and then rinse with clean water.
  • Commercial Cleaners: There are many commercial cleaners available that are specifically designed for cleaning wooden floors. Be sure to follow the manufacturer’s instructions carefully when using these products.

Remember to always test any cleaning solution on a small, inconspicuous area of your floor before using it on the entire surface. This will help prevent any damage or discoloration to your floors.

Preventive Measures

Taking preventive measures is the best way to ensure that your wooden floors remain clean and shiny. Here are some tips for maintaining your floors:

Regular Dusting

Dust and dirt can easily scratch and dull the surface of your wooden floors, so it’s important to dust them regularly. You can use a soft-bristled broom or a microfiber dust mop to remove dirt and debris. Make sure to avoid using a vacuum with a beater bar, as it can cause scratches. If you prefer to use a vacuum, make sure to use a bare-floor setting.

Avoiding Water Damage

Water can cause serious damage to wooden floors, so it’s important to avoid any spills or excess moisture. Make sure to wipe up spills immediately using a dry cloth. Avoid using wet mops or steam cleaners, as they can cause warping and damage to the wood. If you need to clean your floors with water, make sure to use a damp mop and dry the floors thoroughly afterwards.

Using Floor Mats

Floor mats can help prevent dirt and debris from being tracked onto your wooden floors. Place mats at all entryways and high-traffic areas to help trap dirt and moisture. Make sure to clean the mats regularly to prevent any buildup of dirt and debris.

By following these preventive measures, you can help keep your wooden floors looking clean and shiny for years to come.

Restoring and Maintaining Shine

If your wooden floors have lost their shine, don’t worry! There are several ways to restore and maintain their shine.

Polishing

Polishing is a quick and easy way to restore the shine of your wooden floors. You can use a floor polish or wax to bring back the shine. Here are the steps to polish your wooden floors:

  1. Clean the floor thoroughly with a hardwood floor cleaner and let it dry completely.
  2. Apply the polish or wax on a small section of the floor with a clean cloth or mop.
  3. Rub the polish or wax into the floor in a circular motion.
  4. Repeat the process on the rest of the floor.

Note that you should avoid using too much polish or wax as it can leave a residue on the floor.

Recoating

Recoating is another way to restore the shine of your wooden floors. It involves applying a new coat of finish to the floor. Here are the steps to recoat your wooden floors:

  1. Clean the floor thoroughly with a hardwood floor cleaner and let it dry completely.
  2. Lightly sand the floor with a fine-grit sandpaper to remove any scratches or imperfections.
  3. Apply a new coat of finish with a clean mop or applicator.
  4. Let the finish dry completely before walking on the floor.

Note that you should choose a finish that is compatible with the existing finish on your floor. Also, make sure to follow the manufacturer’s instructions when applying the finish.

By following these tips, you can restore and maintain the shine of your wooden floors.
How to Fix Scratches on Wooden Door: Easy DIY Solutions

How to Fix Scratches on Wooden Door: Easy DIY Solutions

If you have a wooden door, chances are you’ve had to deal with scratches at some point. Whether it’s from your pet’s claws or just general wear and tear, scratches can be unsightly and make your door look old and worn out. Fortunately, fixing scratches on a wooden door is a relatively easy DIY project that you can do yourself with a few simple tools and materials.

One of the easiest ways to fix scratches on a wooden door is to use a wood filler. Wood fillers come in various colors to match the shade of your door, and they can be used to fill in deep scratches and gouges. Once the filler is dry, you can sand it down and paint or stain it to match the rest of your door. Another quick fix for light scratches is to rub a walnut over the scratch, which can help fill in the scratch and mask its appearance.

Before you start fixing scratches on your wooden door, it’s important to clean the area thoroughly. Use a damp cloth to wipe away any dirt or debris, and let the area dry completely before you start working on it. Additionally, make sure you have all the necessary tools and materials on hand, including sandpaper, wood filler, and paint or stain. With a little bit of time and effort, you can restore your wooden door to its former glory and make it look as good as new.

Identifying the Type of Scratch

fix-scratches-on-wooden-door

Before you start fixing scratches on your wooden door, you need to identify the type of scratch you are dealing with. This is important because different types of scratches require different methods of repair.

Minor Scratches

Minor scratches are superficial and only affect the surface of the wood. They are usually caused by light abrasions or contact with sharp objects. You can identify minor scratches by their shallow depth and light color. They are often barely visible, but can still be felt when you run your finger over them.

To fix minor scratches, you can use a wood touch-up marker or crayon that matches the color of your door. Simply apply the marker or crayon to the scratch and wipe away any excess with a clean cloth. If the scratch is still visible, you can lightly sand it down with fine-grit sandpaper and then apply the touch-up marker or crayon again.

Deep Scratches

Deep scratches are more serious and penetrate deeper into the wood. They are often caused by heavy impacts or contact with sharp objects. You can identify deep scratches by their dark color and visible depth. They are often rough to the touch and can even expose the raw wood underneath.

To fix deep scratches, you will need to use a wood filler. First, clean the scratch with a damp cloth and let it dry completely. Then, apply the wood filler to the scratch, making sure to fill it completely. Smooth out the surface of the filler with a putty knife and let it dry according to the manufacturer’s instructions. Once the filler is dry, sand it down with fine-grit sandpaper until it is smooth and level with the surface of the door. Finally, apply a matching stain or paint to the area to blend it in with the rest of the door.

By identifying the type of scratch on your wooden door, you can choose the appropriate method of repair and achieve the best possible results.

Gathering Necessary Materials

Before you start fixing scratches on your wooden door, you need to gather some necessary materials. Here are the materials that you will need:

For Minor Scratches

For minor scratches, you will need:

Materials Description
Soft cloth To clean the surface of the door
Walnut To rub on the scratch
Wood filler To fill in the scratch
Sandpaper To sand down the filled area
Paint or stain To match the color of the door

For Deep Scratches

For deep scratches, you will need:

Materials Description
Soft cloth To clean the surface of the door
Wax wood filler stick To fill in the scratch
Sandpaper To sand down the filled area
Paint or stain To match the color of the door

It is important to note that the color of the paint or stain should match the color of the door. If you are unsure about the color, you can take a small piece of the door to a hardware store to match the color.

Make sure to wear gloves and eye protection when using wood filler and sandpaper. Also, work in a well-ventilated area to avoid inhaling any harmful fumes.

Now that you have gathered all the necessary materials, you are ready to start fixing the scratches on your wooden door.

Fixing Minor Scratches

If your wooden door has minor scratches, you can easily fix them yourself with a few simple steps. Here’s what you need to do:

Cleaning the Area

First, clean the scratched area with a soft cloth and a mild cleaner. This will remove any dirt or debris from the surface and ensure that the filler adheres properly.

Applying the Filler

Next, apply a wood filler to the scratched area. You can use a wax wood filler stick or a putty-like wood filler. Choose a color that matches the color of your wooden door. Apply the filler using a putty knife or your finger, making sure to fill the scratch completely.

Sanding and Finishing

After the filler has dried, sand the area with fine-grain sandpaper in the direction of the wood grain. This will smooth out the surface and blend the filler with the surrounding wood. Finish by applying a clear coat of polyurethane or wood finish to protect the repaired area and give it a uniform appearance.

With these simple steps, you can fix minor scratches on your wooden door and restore its beauty.

Fixing Deep Scratches

fixing-deep-scratches

If your wooden door has deep scratches, don’t worry. You can fix them with a few simple steps. Here’s how:

Preparing the Area

Before you start fixing the scratches, you need to prepare the area. Start by cleaning the door with a damp cloth to remove any dirt or debris. Then, use a sandpaper to sand down the area around the scratches. This will create a smooth surface for the wood filler to adhere to.

Applying Wood Filler

Next, apply wood filler to the scratches. You can use a wax wood filler stick or a wood filler paste. If you’re using a wax wood filler stick, rub it over the scratches until they are completely filled in. If you’re using a wood filler paste, apply it to the scratches with a putty knife and smooth it out. Make sure to choose a wood filler that matches the color of your door.

Sanding and Repainting

Once the wood filler has dried, sand it down with a sandpaper until it’s flush with the surface of the door. Then, repaint the area with a matching paint or stain. If you’re painting the door, use a brush or roller to apply the paint in thin, even coats. Let each coat dry completely before applying the next one.

By following these simple steps, you can fix deep scratches on your wooden door and make it look as good as new.

Maintaining Your Wooden Door

Wooden doors are a beautiful addition to any home, but they require proper maintenance to keep them looking their best. Here are some tips on how to maintain your wooden door to prevent scratches and other damage.

Regular Cleaning

Regular cleaning is essential to keep your wooden door looking its best. Dust and dirt can accumulate on the surface of the door, which can scratch the wood over time. To clean your wooden door, simply use a soft cloth or a feather duster to remove any dirt or dust. If the door is particularly dirty, you can use a mild soap and water solution to clean it. Be sure to dry the door thoroughly after cleaning to prevent water damage.

Using Protective Coatings

Using protective coatings is another way to maintain your wooden door and prevent scratches. Applying a clear coat of varnish or polyurethane can protect the wood from scratches and other damage. These coatings also help to seal the wood, preventing moisture from penetrating the surface and causing damage. Be sure to follow the manufacturer’s instructions when applying these coatings, and allow them to dry completely before using the door.

Avoiding Damage

Preventing scratches and other damage is the best way to maintain your wooden door. Avoid slamming the door, as this can cause dents and scratches. Also, be careful when moving furniture or other objects near the door, as these can also cause damage. If you have pets, be sure to keep their nails trimmed to prevent scratches on the door. Finally, avoid exposing your wooden door to direct sunlight, as this can cause the wood to fade and dry out over time.

By following these simple tips, you can maintain your wooden door and prevent scratches and other damage. Regular cleaning, using protective coatings, and avoiding damage are all essential to keep your wooden door looking its best for years to come.

How to Repair a Wooden Fence Gate: A Simple Guide

Repairing a wooden fence gate can seem like a daunting task, but with the right tools and techniques, it can be a simple and straightforward process. A damaged fence gate not only looks unsightly, but it can also compromise the security of your property. Whether it’s a sagging gate or a broken latch, repairing a wooden fence gate can save you time and money compared to replacing it entirely.

One of the most common issues with wooden fence gates is sagging. This can be caused by a variety of factors, including the weight of the gate, poor installation, or wear and tear over time. To fix a sagging gate, you will need to identify the cause of the problem and make the necessary adjustments. This may involve replacing hinges, reinforcing the gate with additional support, or adjusting the gate’s position on the post. By addressing the issue promptly, you can prevent further damage and ensure that your gate is secure and functional.

Understanding the Damage

When repairing a wooden fence gate, it is important to first understand the damage that needs to be addressed. Here are some key things to look for:

Identifying Wood Rot

Wood rot is a common problem with wooden fence gates, especially if they have been exposed to moisture for an extended period of time. To identify wood rot, look for areas of the gate that are soft or spongy to the touch. You may also notice discoloration or a musty odor. If you suspect wood rot, it is important to address it as soon as possible to prevent further damage.

Checking for Loose Nails or Screws

Over time, nails and screws can become loose or even fall out completely, causing the gate to sag or become misaligned. To check for loose nails or screws, inspect the gate carefully and look for any areas where the wood appears to be pulling away from the nails or screws. Tighten any loose hardware as needed, or replace missing hardware altogether.

Inspecting Hinge Issues

The hinges on a wooden fence gate can also be a source of problems. Look for signs of wear and tear on the hinges, such as rust or corrosion. Make sure the hinges are securely attached to the gate and the fence post, and that they are properly aligned. If the hinges are damaged or worn, they may need to be replaced.

By taking the time to carefully inspect your wooden fence gate, you can identify any damage or issues that need to be addressed before beginning the repair process. This will help ensure that your repair is effective and long-lasting.

Gathering Repair Materials

When it comes to repairing a wooden fence gate, you’ll need to gather some materials before you begin. In this section, we’ll go over what you need to get started.

Choosing the Right Wood

The first step in repairing your fence gate is to choose the right wood for the job. You’ll want to select a wood that is strong and durable enough to withstand the elements and the wear and tear of regular use. Cedar and redwood are both good options because they are naturally resistant to rot and decay.

Selecting Proper Tools

In addition to the right wood, you’ll need to gather some tools to help you with the repair. Here are some of the tools you’ll need:

  • Hammer
  • Nails or screws
  • Screwdriver
  • Drill
  • Circular saw
  • Level
  • Tape measure
  • Pencil
  • Safety glasses

Make sure to select the right size and type of nails or screws for your project. You’ll also want to choose the right saw blade for your circular saw to ensure a clean and precise cut.

Once you have all of your materials and tools gathered, you’re ready to begin repairing your wooden fence gate.

Repairing the Wood

If your wooden fence gate is in need of repair, one of the most common issues is damaged wood. Here’s how to repair it:

Removing Damaged Wood

To remove damaged wood, you’ll need a few tools: a circular saw, a hammer, a chisel, and a pry bar. Follow these steps:

  1. Use the circular saw to cut through the damaged wood, making sure to stop at the undamaged wood.
  2. Use the hammer and chisel to remove any remaining wood.
  3. Use the pry bar to remove any nails or screws.

Replacing with New Wood

Once you’ve removed the damaged wood, it’s time to replace it with new wood. Here’s how:

  1. Measure the size of the area you need to replace and cut a piece of new wood to fit.
  2. Sand the edges of the new wood to ensure a smooth fit.
  3. Apply wood glue to the edges of the new wood and the undamaged wood.
  4. Place the new wood in the opening and press firmly.
  5. Use clamps to hold the new wood in place while the glue dries.
  6. Once the glue is dry, use screws or nails to secure the new wood in place.

Remember to stain or paint the new wood to match the rest of the fence. With these simple steps, you can repair the wood on your fence gate and have it looking like new again.

Fixing Loose Nails and Screws

If you have a wooden fence gate, it’s likely that you’ll run into problems with loose nails and screws at some point. Fortunately, these issues are usually easy to fix. In this section, we’ll cover two common methods for fixing loose nails and screws: tightening and replacing.

Tightening Loose Screws

If you notice that some of the screws in your fence gate have worked themselves loose over time, you can usually tighten them up with a screwdriver. Here’s how:

  1. Identify the loose screws. You may need to push or pull on the gate to find them.
  2. Use a screwdriver to tighten each loose screw. Turn the screwdriver clockwise to tighten the screw.
  3. Test the gate to make sure it opens and closes smoothly. If it still feels loose, try tightening the screws a bit more.

Replacing Old Nails

If your fence gate is held together with nails instead of screws, you may need to replace some of them over time. Here’s how:

  1. Identify any nails that are loose or have worked their way out of the wood.
  2. Use a hammer and nail punch to remove the old nails. Place the punch on the head of the nail and tap it gently with the hammer until the nail comes out.
  3. Choose a new nail that is the same size as the old one. If the old nail was rusty or corroded, choose a new one that is made of galvanized or stainless steel.
  4. Insert the new nail into the same hole where the old nail was removed. Use the hammer and nail punch to drive the nail in until it is flush with the surface of the wood.
  5. Test the gate to make sure it opens and closes smoothly. If it still feels loose, try adding another nail or two to reinforce the joint.

By following these simple steps, you can fix most problems with loose nails and screws in your wooden fence gate. If you’re still having trouble, you may want to consider consulting a professional fence repair service for additional assistance.

Addressing Hinge Problems

When it comes to repairing a wooden fence gate, one of the most common issues you may encounter is hinge problems. Fortunately, there are a few simple steps you can take to address these issues and get your gate functioning properly again.

Tightening Loose Hinges

If your gate is sagging or doesn’t close properly, loose hinges may be the culprit. Here’s how to tighten them up:

  1. First, check to see if the screws holding the hinges in place are loose. If they are, use a screwdriver to tighten them up.

  2. If the screws are stripped or damaged, remove them and replace them with new ones.

  3. If the screw holes are stripped or damaged, fill them with wood filler and allow it to dry completely before re-drilling the holes and installing new screws.

  4. Finally, check to make sure the gate is level and adjust the hinges as needed to ensure proper alignment.

Replacing Damaged Hinges

If your hinges are damaged beyond repair, you’ll need to replace them. Here’s how:

  1. Remove the old hinges by unscrewing them from the gate and fence post.

  2. Measure the distance between the screw holes on the old hinges to ensure proper alignment with the new hinges.

  3. Install the new hinges using screws that are long enough to securely attach them to the gate and fence post.

  4. Check to make sure the gate is level and adjust the hinges as needed to ensure proper alignment.

By following these simple steps, you can address hinge problems with your wooden fence gate and get it functioning properly again.

Maintaining Your Wooden Fence Gate

Wooden fence gates are a great addition to any property, but they require proper maintenance to keep them functioning properly and looking their best. Here are some tips for maintaining your wooden fence gate.

Regular Inspection

Inspect your wooden fence gate at least once a year to ensure that it is in good condition. Look for any signs of damage such as cracks, splits, or warping. Check the hinges and latch to make sure they are secure and functioning properly. If you notice any issues, address them promptly to prevent further damage.

Proper Cleaning

Cleaning your wooden fence gate regularly can help prevent damage and prolong its lifespan. Use a soft-bristled brush and mild soap to gently scrub away dirt and debris. Rinse thoroughly with water and allow it to dry completely before applying any protective coatings.

Applying Protective Coating

To protect your wooden fence gate from the elements, it is important to apply a protective coating. Choose a high-quality wood sealer or stain to help prevent water damage, rot, and insect infestations. Apply the coating according to the manufacturer’s instructions and reapply as needed.

By following these simple maintenance tips, you can keep your wooden fence gate looking great and functioning properly for years to come.

How to Make a Wooden Bucket: A Beginner's Guide

If you’re looking to add a rustic touch to your home decor, consider making a wooden bucket. Not only is it a functional item, but it also makes for a charming decorative piece. With just a few materials and some basic woodworking skills, you can create a beautiful wooden bucket that will add character to any space.

To start, you’ll need to gather your materials. You can either purchase pre-fabricated slats from a construction supply store or cut a larger chunk of wood into individual pieces. Each slat must have a thickness of 3/4 in (1.9 cm) and a width of 2 1/2 in (6.4 cm). You’ll also need a wooden handle, metal bands, and wood glue. With these materials in hand, you’re ready to begin the process of building your wooden bucket.

Whether you’re an experienced woodworker or a beginner, making a wooden bucket is a fun and rewarding project that anyone can tackle. By following these simple steps, you’ll be able to create a beautiful and functional piece that will add warmth and character to your home. So, roll up your sleeves and let’s get started on this DIY adventure!

Understanding the Basics of Woodworking

Woodworking is a fun and rewarding hobby that can also be used to create functional and decorative items. Before you start making a wooden bucket, it’s important to understand the basics of woodworking. This section will cover some safety measures, essential tools, and types of wood that you should know before starting your project.

Safety Measures

Woodworking can be dangerous if proper safety measures are not taken. Here are some safety tips to keep in mind:

  • Always wear safety glasses or goggles to protect your eyes from flying wood chips or dust.
  • Use ear protection to prevent hearing damage from loud power tools.
  • Wear a dust mask or respirator to protect your lungs from sawdust and other airborne particles.
  • Keep your work area clean and free of clutter to prevent tripping hazards.
  • Never wear loose clothing or jewelry that could get caught in power tools.
  • Always read and follow the manufacturer’s instructions for all tools and equipment.

Essential Tools

To make a wooden bucket, you will need some essential tools. Here are some of the most important tools to have:

Tool Description
Circular Saw Used for cutting straight lines
Jigsaw Used for cutting curved lines
Drill Used for making holes
Hammer Used for driving nails
Chisels Used for carving and shaping wood
Sandpaper Used for smoothing rough edges

Types of Wood

Choosing the right type of wood is important for your project. Some woods are better suited for certain projects than others. Here are some common types of wood used in woodworking:

  • Pine: A softwood that is easy to work with and relatively inexpensive.
  • Oak: A hardwood that is strong and durable, but also more expensive.
  • Maple: A hardwood that is hard and dense, making it ideal for furniture and flooring.
  • Cherry: A hardwood that is known for its beautiful grain patterns and reddish-brown color.

In conclusion, understanding the basics of woodworking is important before starting any project. Always take safety measures seriously, have the essential tools, and choose the right type of wood for your project.

Designing Your Wooden Bucket

When making a wooden bucket, it is important to consider its design. The shape, size, and handle are all important factors that will affect the look and functionality of your finished product.

Choosing the Shape

The shape of your wooden bucket will depend on its intended use and personal preference. Some common shapes include round, oval, and square. Round buckets are great for carrying liquids, while square buckets are ideal for storing items. Oval buckets offer a unique shape that can be both functional and decorative.

Determining the Size

The size of your wooden bucket will also depend on its intended use. Consider what you will be carrying or storing in the bucket and how much space you will need. Keep in mind that a larger bucket will be heavier and harder to carry, while a smaller bucket may not be as versatile.

To help determine the size of your bucket, consider making a list of the items you plan to store or carry in it. You can also use a measuring tape to get an idea of the dimensions you will need.

Planning the Handle

The handle of your wooden bucket is an important feature that will affect its functionality and appearance. There are several types of handles to choose from, including:

  • Metal handles: These are durable and strong, but may not match the aesthetic of a wooden bucket.
  • Wooden handles: These are a great choice for a rustic look, but may not be as sturdy as metal handles.
  • Rope handles: These are a unique option that can add a nautical or beachy feel to your bucket.

When planning the handle, consider how it will be attached to the bucket. You may need to drill holes or use metal brackets to secure the handle in place.

By taking the time to design your wooden bucket, you can create a functional and beautiful piece that will last for years to come.

Preparing the Wood Pieces

Before you can start assembling your wooden bucket, you need to prepare the wood pieces. This involves cutting the wood to the right size and sanding it to ensure a smooth finish. Here’s how to do it:

Cutting the Wood

To make your wooden bucket, you will need to cut several slats from a larger piece of wood. You can either purchase pre-fabricated slats from a construction supply store or cut the slats yourself using a circular saw. If you decide to cut the slats yourself, make sure that each slat has a thickness of 3/4 inch (1.9 cm) and a width of 2 1/2 inches (6.4 cm).

Once you have cut the slats, you will need to create templates for the top and bottom of the bucket. These templates will ensure that the slats are cut to the correct shape. You can make the templates out of cardboard or plywood.

Sanding the Wood

After you have cut the slats and created the templates, it’s time to sand the wood. Sanding the wood will smooth out any rough edges and ensure that the pieces fit together properly. Here’s how to do it:

  1. Start by using a coarse-grit sandpaper (around 80 grit) to remove any rough spots or splinters on the wood.
  2. Next, switch to a finer-grit sandpaper (around 120 grit) and sand the wood again. This will help to smooth out any remaining rough spots and prepare the wood for finishing.
  3. Finally, use a very fine-grit sandpaper (around 220 grit) to give the wood a smooth, polished finish.

Make sure to sand both sides of each slat and the templates. Once you have finished sanding, wipe the wood pieces down with a damp cloth to remove any dust or debris.

Assembling the Wooden Bucket

Assembling the wooden bucket is the final step in creating your own homemade bucket. The process involves attaching the sides, securing the bottom, and attaching the handle.

Attaching the Sides

To attach the sides of your wooden bucket, follow these steps:

  1. Lay out the slats in a circular pattern, with the narrow ends pointing downwards.
  2. Hold the slats together tightly and wrap a metal band around the top of the slats, leaving a small gap between the band and the top of the slats.
  3. Hammer the band in place, making sure it is tight and secure.
  4. Repeat this process with another metal band around the bottom of the slats.

Securing the Bottom

Securing the bottom of your wooden bucket is an important step to ensure that it is sturdy and can hold items without breaking. Follow these steps:

  1. Cut a circular piece of wood to fit the bottom of your bucket.
  2. Lay the circular piece of wood on top of the slats at the bottom of the bucket.
  3. Use a hammer and nails to attach the circular piece of wood to the slats.
  4. Make sure the bottom is securely attached and does not wobble or move.

Attaching the Handle

Attaching the handle to your wooden bucket is the final step in the assembly process. Follow these steps:

  1. Cut a piece of wood to the desired length for your handle.
  2. Drill two holes in the sides of the bucket, near the top, where you want to attach the handle.
  3. Insert the ends of the handle into the holes and secure them with nails or screws.
  4. Make sure the handle is securely attached and can support the weight of the bucket when it is full.

Congratulations! You have now assembled your own homemade wooden bucket.

Finishing Touches

Once you have completed the construction of your wooden bucket, it’s time to add the finishing touches. This will not only enhance the overall look of your bucket but also help to protect it from wear and tear.

Applying Wood Finish

One of the most important finishing touches is applying a wood finish. This will help to protect the wood from moisture, UV rays, and other environmental factors. There are several types of wood finishes available, including oil-based, water-based, and wax-based finishes.

Before applying any finish, make sure to sand the surface of the bucket to remove any rough spots or imperfections. Then, apply the finish using a brush or a cloth, following the manufacturer’s instructions. Be sure to apply the finish evenly and allow it to dry completely before applying a second coat.

Adding Decorative Elements

If you want to add some decorative elements to your wooden bucket, there are many options available. You can choose to paint the bucket with a design or add stenciled patterns. You can also add metal bands or handles to give the bucket a rustic look.

Another option is to carve designs or patterns into the wood using a woodburning tool. This can be a great way to personalize your bucket and make it truly unique.

No matter what decorative elements you choose to add, make sure to apply a clear coat of finish over the top to protect them from wear and tear.

By following these simple finishing touches, you can create a beautiful and functional wooden bucket that will last for years to come.

Maintenance Tips for Your Wooden Bucket

Wooden buckets are not only functional but also add rustic charm to any home or garden. However, like any other wooden item, they require proper maintenance to ensure their longevity. Here are some tips to keep your wooden bucket in top condition.

Cleaning

To keep your wooden bucket clean and free of bacteria, it is important to wash it regularly. Here’s how:

  1. Fill the bucket with warm water and add a few drops of dish soap.
  2. Use a soft-bristled brush to scrub the inside and outside of the bucket.
  3. Rinse the bucket thoroughly with clean water.
  4. Dry the bucket with a clean towel or let it air dry.

Avoid using harsh chemicals or abrasive cleaners as they can damage the wood and affect the bucket’s integrity.

Regular Check-ups

Inspect your wooden bucket regularly to catch any issues early on. Here are some things to look out for:

  1. Cracks or splits in the wood: These can lead to leaks and weaken the bucket’s structure. If you notice any cracks or splits, repair them immediately with wood glue or epoxy.
  2. Loose or missing staves: Staves are the wooden slats that make up the bucket’s sides. If any staves become loose or fall out, replace them promptly to prevent further damage.
  3. Warping or bending: Wooden buckets can warp or bend over time due to moisture or temperature changes. If you notice any warping or bending, try to straighten the bucket out or replace it if necessary.

By following these simple maintenance tips, you can ensure that your wooden bucket remains functional and beautiful for years to come.