Tag Archives: filler adheres properly

fix-scratches-on-wooden-door

How to Fix Scratches on Wooden Door: Easy DIY Solutions

If you have a wooden door, chances are you’ve had to deal with scratches at some point. Whether it’s from your pet’s claws or just general wear and tear, scratches can be unsightly and make your door look old and worn out. Fortunately, fixing scratches on a wooden door is a relatively easy DIY project that you can do yourself with a few simple tools and materials.

One of the easiest ways to fix scratches on a wooden door is to use a wood filler. Wood fillers come in various colors to match the shade of your door, and they can be used to fill in deep scratches and gouges. Once the filler is dry, you can sand it down and paint or stain it to match the rest of your door. Another quick fix for light scratches is to rub a walnut over the scratch, which can help fill in the scratch and mask its appearance.

Before you start fixing scratches on your wooden door, it’s important to clean the area thoroughly. Use a damp cloth to wipe away any dirt or debris, and let the area dry completely before you start working on it. Additionally, make sure you have all the necessary tools and materials on hand, including sandpaper, wood filler, and paint or stain. With a little bit of time and effort, you can restore your wooden door to its former glory and make it look as good as new.

Identifying the Type of Scratch

fix-scratches-on-wooden-door

Before you start fixing scratches on your wooden door, you need to identify the type of scratch you are dealing with. This is important because different types of scratches require different methods of repair.

Minor Scratches

Minor scratches are superficial and only affect the surface of the wood. They are usually caused by light abrasions or contact with sharp objects. You can identify minor scratches by their shallow depth and light color. They are often barely visible, but can still be felt when you run your finger over them.

To fix minor scratches, you can use a wood touch-up marker or crayon that matches the color of your door. Simply apply the marker or crayon to the scratch and wipe away any excess with a clean cloth. If the scratch is still visible, you can lightly sand it down with fine-grit sandpaper and then apply the touch-up marker or crayon again.

Deep Scratches

Deep scratches are more serious and penetrate deeper into the wood. They are often caused by heavy impacts or contact with sharp objects. You can identify deep scratches by their dark color and visible depth. They are often rough to the touch and can even expose the raw wood underneath.

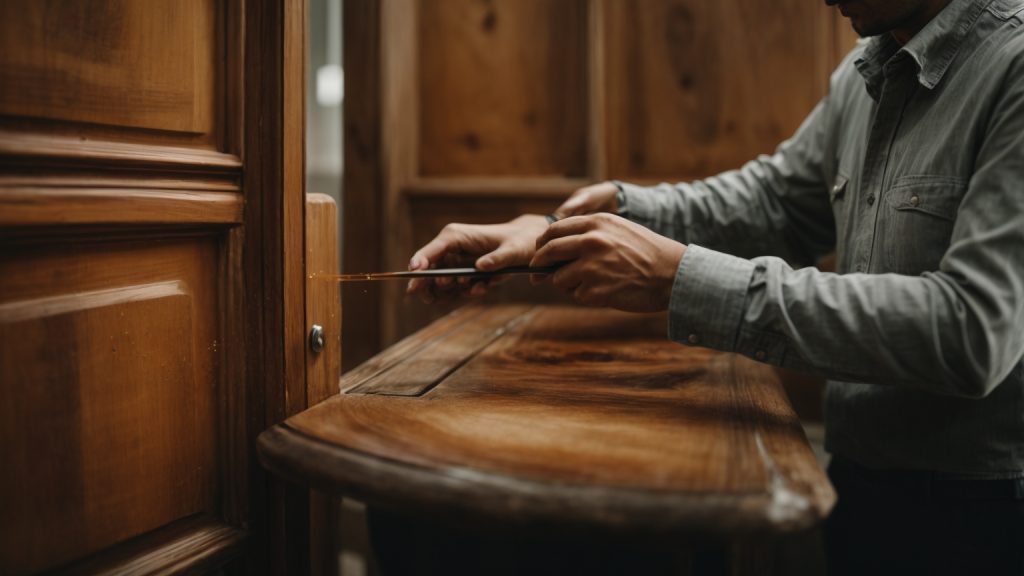
To fix deep scratches, you will need to use a wood filler. First, clean the scratch with a damp cloth and let it dry completely. Then, apply the wood filler to the scratch, making sure to fill it completely. Smooth out the surface of the filler with a putty knife and let it dry according to the manufacturer’s instructions. Once the filler is dry, sand it down with fine-grit sandpaper until it is smooth and level with the surface of the door. Finally, apply a matching stain or paint to the area to blend it in with the rest of the door.

By identifying the type of scratch on your wooden door, you can choose the appropriate method of repair and achieve the best possible results.

Gathering Necessary Materials

Before you start fixing scratches on your wooden door, you need to gather some necessary materials. Here are the materials that you will need:

For Minor Scratches

For minor scratches, you will need:

Materials Description
Soft cloth To clean the surface of the door
Walnut To rub on the scratch
Wood filler To fill in the scratch
Sandpaper To sand down the filled area
Paint or stain To match the color of the door

For Deep Scratches

For deep scratches, you will need:

Materials Description
Soft cloth To clean the surface of the door
Wax wood filler stick To fill in the scratch
Sandpaper To sand down the filled area
Paint or stain To match the color of the door

It is important to note that the color of the paint or stain should match the color of the door. If you are unsure about the color, you can take a small piece of the door to a hardware store to match the color.

Make sure to wear gloves and eye protection when using wood filler and sandpaper. Also, work in a well-ventilated area to avoid inhaling any harmful fumes.

Now that you have gathered all the necessary materials, you are ready to start fixing the scratches on your wooden door.

Fixing Minor Scratches

If your wooden door has minor scratches, you can easily fix them yourself with a few simple steps. Here’s what you need to do:

Cleaning the Area

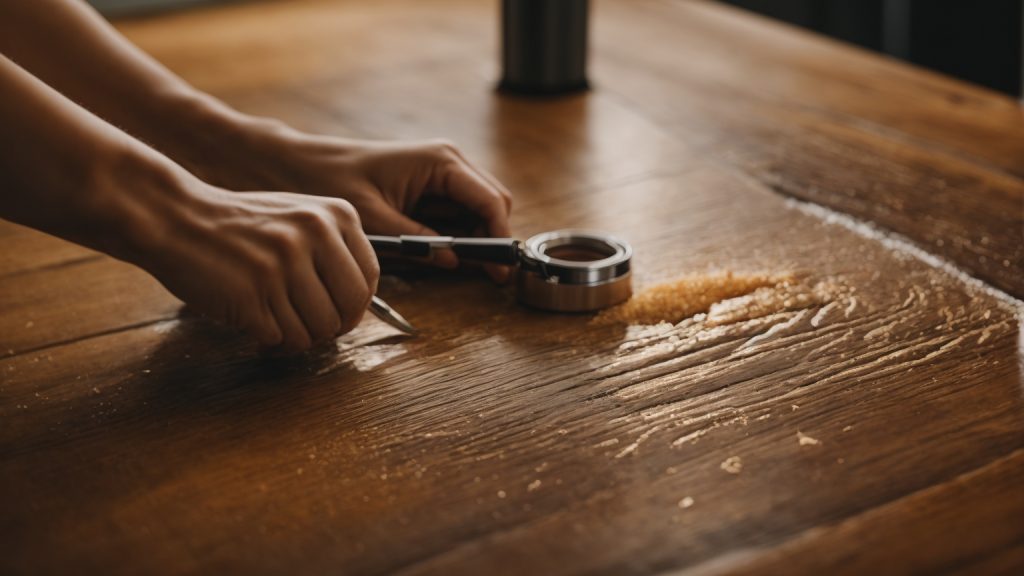
First, clean the scratched area with a soft cloth and a mild cleaner. This will remove any dirt or debris from the surface and ensure that the filler adheres properly.

Applying the Filler

Next, apply a wood filler to the scratched area. You can use a wax wood filler stick or a putty-like wood filler. Choose a color that matches the color of your wooden door. Apply the filler using a putty knife or your finger, making sure to fill the scratch completely.

Sanding and Finishing

After the filler has dried, sand the area with fine-grain sandpaper in the direction of the wood grain. This will smooth out the surface and blend the filler with the surrounding wood. Finish by applying a clear coat of polyurethane or wood finish to protect the repaired area and give it a uniform appearance.

With these simple steps, you can fix minor scratches on your wooden door and restore its beauty.

Fixing Deep Scratches

fixing-deep-scratches

If your wooden door has deep scratches, don’t worry. You can fix them with a few simple steps. Here’s how:

Preparing the Area

Before you start fixing the scratches, you need to prepare the area. Start by cleaning the door with a damp cloth to remove any dirt or debris. Then, use a sandpaper to sand down the area around the scratches. This will create a smooth surface for the wood filler to adhere to.

Applying Wood Filler

Next, apply wood filler to the scratches. You can use a wax wood filler stick or a wood filler paste. If you’re using a wax wood filler stick, rub it over the scratches until they are completely filled in. If you’re using a wood filler paste, apply it to the scratches with a putty knife and smooth it out. Make sure to choose a wood filler that matches the color of your door.

Sanding and Repainting

Once the wood filler has dried, sand it down with a sandpaper until it’s flush with the surface of the door. Then, repaint the area with a matching paint or stain. If you’re painting the door, use a brush or roller to apply the paint in thin, even coats. Let each coat dry completely before applying the next one.

By following these simple steps, you can fix deep scratches on your wooden door and make it look as good as new.

Maintaining Your Wooden Door

Wooden doors are a beautiful addition to any home, but they require proper maintenance to keep them looking their best. Here are some tips on how to maintain your wooden door to prevent scratches and other damage.

Regular Cleaning

Regular cleaning is essential to keep your wooden door looking its best. Dust and dirt can accumulate on the surface of the door, which can scratch the wood over time. To clean your wooden door, simply use a soft cloth or a feather duster to remove any dirt or dust. If the door is particularly dirty, you can use a mild soap and water solution to clean it. Be sure to dry the door thoroughly after cleaning to prevent water damage.

Using Protective Coatings

Using protective coatings is another way to maintain your wooden door and prevent scratches. Applying a clear coat of varnish or polyurethane can protect the wood from scratches and other damage. These coatings also help to seal the wood, preventing moisture from penetrating the surface and causing damage. Be sure to follow the manufacturer’s instructions when applying these coatings, and allow them to dry completely before using the door.

Avoiding Damage

Preventing scratches and other damage is the best way to maintain your wooden door. Avoid slamming the door, as this can cause dents and scratches. Also, be careful when moving furniture or other objects near the door, as these can also cause damage. If you have pets, be sure to keep their nails trimmed to prevent scratches on the door. Finally, avoid exposing your wooden door to direct sunlight, as this can cause the wood to fade and dry out over time.

By following these simple tips, you can maintain your wooden door and prevent scratches and other damage. Regular cleaning, using protective coatings, and avoiding damage are all essential to keep your wooden door looking its best for years to come.

How to Fill Holes in Wood and Redrill: A Beginner's Guide

If you’re a DIY enthusiast, you probably know how frustrating it can be to have a hole in your wooden furniture or wall. It can ruin the entire look of your project, and you might think that you’ll have to start all over again. But don’t worry, filling holes in wood and redrilling is a simple process that can save you both time and money. In this article, we’ll explore the different methods you can use to fill holes in wood and redrill, so you can get back to your project in no time.

One of the most common methods to fill holes in wood and redrill is by using wood filler. Wood filler is a putty-like substance that you can use to fill in any gaps or holes in your woodwork. It’s easy to apply and can be sanded down once it dries to create a smooth surface for redrilling. However, not all wood fillers are created equal, and some might not be suitable for your specific project. We’ll cover the different types of wood fillers and how to choose the right one for your needs.

Another method for filling holes in wood and redrilling is by using wood plugs. Wood plugs are small wooden pieces that you can insert into a hole to cover it up. They can be sanded down and painted to match the surrounding wood, creating a seamless look. However, using wood plugs requires a bit more precision and skill than using wood filler. We’ll go over the steps you need to take to use wood plugs effectively and get the best results.

Understanding Wood Holes

If you’re a DIY enthusiast or a woodworker, you’ve probably encountered the need to fill holes in wood. Holes in wood can result from various reasons, including drilling, screwing, or nailing. Depending on the size of the hole and the type of wood, filling the hole may be necessary to restore the wood’s integrity.

Before you start filling holes in wood, it’s essential to understand the type of hole you’re dealing with. The nature of the hole will determine the type of filler you’ll use and the method you’ll employ to fill it. Here are some common types of holes in wood:

Screw Holes

Screw holes are the most common type of holes in wood. They occur when screws are driven into the wood. Over time, the wood around the screw hole may become weak, causing the screw to loosen or fall out. To prevent this, you’ll need to fill the hole with a suitable filler.

Nail Holes

Nail holes are similar to screw holes, but they’re smaller and have a different shape. They’re usually round or oval and occur when nails are driven into the wood. Like screw holes, nail holes can weaken the wood around them, making it necessary to fill them.

Knot Holes

Knot holes are voids in the wood caused by the removal of a knot. They’re usually irregular in shape and can be quite large. Knot holes can be filled with a suitable filler to restore the wood’s structural integrity.

Gouges and Scratches

Gouges and scratches are not technically holes, but they can still weaken the wood and affect its appearance. They’re usually caused by accidental impacts or improper use of tools. Gouges and scratches can be filled with a suitable filler to restore the wood’s appearance and integrity.

In summary, filling holes in wood is an essential skill for any DIY enthusiast or woodworker. Understanding the type of hole you’re dealing with is the first step in selecting the right filler and method for filling it. With the right tools and techniques, you can restore the wood’s structural integrity and appearance.

Choosing the Right Tools

choosing-the-right-tools

When it comes to filling holes in wood and redrilling, having the right tools is essential. Here are some tools you may need:

Scraper

A scraper is a simple tool that can be used to remove chips, splinters, or paint residue around the hole. This will make it easier to fill the hole and ensure that the filler adheres properly.

Drill Bit

If the hole is not clean or wide enough, you can use a drill bit to make it cleaner and wider. This will make it easier to fill the hole and ensure that the filler adheres properly.

Sandpaper

After filling the hole, you will need to smooth the edges using sandpaper. This will make the surface even and ensure that the filler blends in with the surrounding wood.

Wood Filler

Wood filler is a popular choice for filling holes in wood. It is easy to use and can be found at most hardware stores. There are many different types of wood filler, so be sure to choose one that is appropriate for your project.

Wood Glue

If the hole is small, you can use wood glue to fill it. Simply apply the glue to the hole and let it dry. Once it is dry, you can redrill the hole.

Wooden Dowels and Plugs

If the hole is too large for wood filler or glue, you can use wooden dowels or plugs. Simply cut the dowel or plug to the appropriate size, apply some glue, and insert it into the hole. Once it is dry, you can redrill the hole.

By choosing the right tools, you can ensure that your project is a success. Remember to always follow the manufacturer’s instructions and take your time to ensure that the filler is applied properly.

Preparing the Wood Surface

Before you fill a hole in wood and redrill, you need to prepare the wood surface. This section will cover the two sub-sections: Cleaning the Area and Marking the Spot.

Cleaning the Area

The first step in preparing the wood surface is to clean the area around the hole. You want to remove any debris, sawdust, or paint residue from the area. This will ensure that the wood filler adheres properly to the wood.

To clean the area, you can use a scraper to remove any chips or splinters around the hole. You can also use sandpaper to smooth the edges of the hole. If the hole is too small to use a scraper, you can use a toothbrush or a soft-bristled brush to remove any debris.

Marking the Spot

Once you have cleaned the area, you need to mark the spot where you want to redrill. This is important because you don’t want to redrill in the same spot where you filled the hole. Redrilling in the same spot can cause the wood to split or weaken.

To mark the spot, you can use a pencil or a marker to make a small dot on the wood surface. Make sure the dot is visible and easy to see. You can also use a piece of masking tape to mark the spot.

In conclusion, preparing the wood surface is an important step in filling a hole in wood and redrilling. Cleaning the area and marking the spot will ensure that the wood filler adheres properly to the wood and that you redrill in the right spot.

Filling the Holes

filling-the-holes

When it comes to filling holes in wood, there are a few different methods to choose from. One of the most common methods is to use wood filler, which is a putty-like substance that can be used to fill in holes and gaps in wood surfaces. Here are the steps to follow when filling holes with wood filler:

Selecting Wood Filler

The first step is to select the right type of wood filler for your project. There are many different types of wood filler available, including water-based, solvent-based, and epoxy-based fillers. Each type has its own advantages and disadvantages, so it’s important to choose the right one for your specific needs. Some factors to consider when selecting wood filler include the size and depth of the hole, the type of wood you are working with, and the final finish you are hoping to achieve.

Applying Wood Filler

Once you have selected the right wood filler, it’s time to apply it to the hole. Start by cleaning the area around the hole with a scraper or sandpaper to remove any debris or loose wood fibers. Then, using a putty knife or spatula, apply the wood filler to the hole in thin layers, making sure to press it firmly into the hole and smooth it out as you go. Be sure to fill the hole completely, but avoid overfilling it, as this can make it difficult to sand down later.

Sanding the Surface

After the wood filler has dried completely, it’s time to sand the surface smooth. Use sandpaper or a sanding block to sand the surface of the wood filler until it is flush with the surrounding wood. Start with a coarse grit sandpaper and gradually work your way up to finer grits until the surface is smooth and even. Be sure to sand the surface lightly to avoid damaging the surrounding wood or creating any new scratches or marks.

By following these steps, you can easily fill holes in wood surfaces and prepare them for redrilling. Whether you are working on a small DIY project or a larger renovation, using wood filler is a simple and effective way to achieve a professional-looking finish.

Redrilling Process

After filling the hole in wood, you need to redrill the hole to make it ready for screwing. Here are the steps to follow when redrilling:

Marking the New Spot

Before redrilling, you need to mark the new spot where you want the screw to go. You can use a pencil or a marker to make a small dot on the wood where you want the screw to be. Make sure to measure the distance between the old hole and the new spot to ensure that the screw will be in the right place.

Using a Drill Guide

To ensure that the new hole is straight and in the right place, you can use a drill guide. A drill guide is a tool that attaches to the drill and helps guide the drill bit to the right spot. You can purchase a drill guide at any hardware store or online.

Drilling the Hole

After marking the new spot and attaching the drill guide, it’s time to drill the new hole. Make sure to use the right size drill bit for the screw you will be using. Start drilling slowly and gradually increase the speed until the bit goes through the wood. Be careful not to drill too deep or too far to the side. Once the hole is drilled, remove the drill guide and clean up any wood shavings or debris.

That’s it! You have successfully filled the hole in wood and redrilled it. Now you can screw in your hardware with confidence, knowing that it will be secure and stable.

Finishing Touches

finishing-touches

Once you have filled the hole in your wood and redrilled it, you will want to make sure the surface looks as good as new. Here are some tips for finishing touches that will help your wood look polished and professional.

Smoothing the Surface

After filling the hole, you may notice that the surface is not completely smooth. To fix this, use sandpaper to smooth out the surface until it is flush with the surrounding wood. Start with a coarse grit sandpaper and work your way up to a finer grit until the surface is completely smooth. Be sure to sand in the direction of the wood grain to avoid damaging the surface.

Applying Wood Finish

To make the filled hole blend in with the surrounding wood, you can apply a wood finish. There are many different types of wood finishes available, including stains, varnishes, and oils. Choose a finish that matches the color and sheen of the surrounding wood.

Before applying the finish, make sure the surface is clean and free of dust. Apply the finish using a brush or cloth, following the manufacturer’s instructions. Allow the finish to dry completely before sanding lightly with a fine grit sandpaper and applying a second coat, if necessary.

Remember, the key to a professional-looking finish is patience and attention to detail. Take your time and follow the instructions carefully to achieve the best results.

Frequently Asked Questions

What are some techniques for filling holes in wood and redrilling?

There are several techniques for filling holes in wood and redrilling. Two-part epoxy products, wooden dowels and plugs, sawdust and glue, and wood fillers are some of the most commonly used techniques. You can also use vinegar and baking soda or a wax candle to fill the holes. Once you have filled the hole, you can redrill it using a drill bit of the appropriate size.

Can you recommend a good wood filler for redrilling?

There are many good wood fillers available in the market, but it is important to choose one that is strong and durable enough to hold screws and nails. Some of the best wood fillers for redrilling are Elmer’s Carpenter’s Wood Filler, Minwax High-Performance Wood Filler, and Abatron WoodEpox.

How do you fill in drill holes in wood?

To fill in drill holes in wood, you can use wood fillers, wooden dowels or plugs, or sawdust and glue. First, clean out the hole and make sure it is dry. Then, apply the filler or glue and let it dry completely. Once it is dry, sand the surface smooth and redrill the hole if necessary.

What is the best way to fill large holes in a wood deck?

The best way to fill large holes in a wood deck is to use a two-part epoxy product. First, clean out the hole and make sure it is dry. Then, mix the two parts of the epoxy together and apply it to the hole. Smooth it out and let it dry completely. Once it is dry, sand the surface smooth and apply a coat of paint or stain if necessary.

How can you fix a hole in a wooden wall?

To fix a hole in a wooden wall, you can use wood filler or a wooden dowel. First, clean out the hole and make sure it is dry. Then, apply the filler or glue and let it dry completely. Once it is dry, sand the surface smooth and paint or stain the area to match the surrounding wood.

What are some tips for filling knot holes in wood?

When filling knot holes in wood, it is important to use a filler that matches the color and grain of the surrounding wood. You can use wood filler or sawdust and glue to fill the hole. Apply the filler or glue, let it dry, and then sand the surface smooth. If necessary, apply a coat of paint or stain to match the surrounding wood.