Tag Archives: wooden door wooden doors

fix-scratches-on-wooden-door

How to Fix Scratches on Wooden Door: Easy DIY Solutions

If you have a wooden door, chances are you’ve had to deal with scratches at some point. Whether it’s from your pet’s claws or just general wear and tear, scratches can be unsightly and make your door look old and worn out. Fortunately, fixing scratches on a wooden door is a relatively easy DIY project that you can do yourself with a few simple tools and materials.

One of the easiest ways to fix scratches on a wooden door is to use a wood filler. Wood fillers come in various colors to match the shade of your door, and they can be used to fill in deep scratches and gouges. Once the filler is dry, you can sand it down and paint or stain it to match the rest of your door. Another quick fix for light scratches is to rub a walnut over the scratch, which can help fill in the scratch and mask its appearance.

Before you start fixing scratches on your wooden door, it’s important to clean the area thoroughly. Use a damp cloth to wipe away any dirt or debris, and let the area dry completely before you start working on it. Additionally, make sure you have all the necessary tools and materials on hand, including sandpaper, wood filler, and paint or stain. With a little bit of time and effort, you can restore your wooden door to its former glory and make it look as good as new.

Identifying the Type of Scratch

fix-scratches-on-wooden-door

Before you start fixing scratches on your wooden door, you need to identify the type of scratch you are dealing with. This is important because different types of scratches require different methods of repair.

Minor Scratches

Minor scratches are superficial and only affect the surface of the wood. They are usually caused by light abrasions or contact with sharp objects. You can identify minor scratches by their shallow depth and light color. They are often barely visible, but can still be felt when you run your finger over them.

To fix minor scratches, you can use a wood touch-up marker or crayon that matches the color of your door. Simply apply the marker or crayon to the scratch and wipe away any excess with a clean cloth. If the scratch is still visible, you can lightly sand it down with fine-grit sandpaper and then apply the touch-up marker or crayon again.

Deep Scratches

Deep scratches are more serious and penetrate deeper into the wood. They are often caused by heavy impacts or contact with sharp objects. You can identify deep scratches by their dark color and visible depth. They are often rough to the touch and can even expose the raw wood underneath.

To fix deep scratches, you will need to use a wood filler. First, clean the scratch with a damp cloth and let it dry completely. Then, apply the wood filler to the scratch, making sure to fill it completely. Smooth out the surface of the filler with a putty knife and let it dry according to the manufacturer’s instructions. Once the filler is dry, sand it down with fine-grit sandpaper until it is smooth and level with the surface of the door. Finally, apply a matching stain or paint to the area to blend it in with the rest of the door.

By identifying the type of scratch on your wooden door, you can choose the appropriate method of repair and achieve the best possible results.

Gathering Necessary Materials

Before you start fixing scratches on your wooden door, you need to gather some necessary materials. Here are the materials that you will need:

For Minor Scratches

For minor scratches, you will need:

Materials Description
Soft cloth To clean the surface of the door
Walnut To rub on the scratch
Wood filler To fill in the scratch
Sandpaper To sand down the filled area
Paint or stain To match the color of the door

For Deep Scratches

For deep scratches, you will need:

Materials Description
Soft cloth To clean the surface of the door
Wax wood filler stick To fill in the scratch
Sandpaper To sand down the filled area
Paint or stain To match the color of the door

It is important to note that the color of the paint or stain should match the color of the door. If you are unsure about the color, you can take a small piece of the door to a hardware store to match the color.

Make sure to wear gloves and eye protection when using wood filler and sandpaper. Also, work in a well-ventilated area to avoid inhaling any harmful fumes.

Now that you have gathered all the necessary materials, you are ready to start fixing the scratches on your wooden door.

Fixing Minor Scratches

If your wooden door has minor scratches, you can easily fix them yourself with a few simple steps. Here’s what you need to do:

Cleaning the Area

First, clean the scratched area with a soft cloth and a mild cleaner. This will remove any dirt or debris from the surface and ensure that the filler adheres properly.

Applying the Filler

Next, apply a wood filler to the scratched area. You can use a wax wood filler stick or a putty-like wood filler. Choose a color that matches the color of your wooden door. Apply the filler using a putty knife or your finger, making sure to fill the scratch completely.

Sanding and Finishing

After the filler has dried, sand the area with fine-grain sandpaper in the direction of the wood grain. This will smooth out the surface and blend the filler with the surrounding wood. Finish by applying a clear coat of polyurethane or wood finish to protect the repaired area and give it a uniform appearance.

With these simple steps, you can fix minor scratches on your wooden door and restore its beauty.

Fixing Deep Scratches
fixing-deep-scratches

If your wooden door has deep scratches, don’t worry. You can fix them with a few simple steps. Here’s how:

Preparing the Area

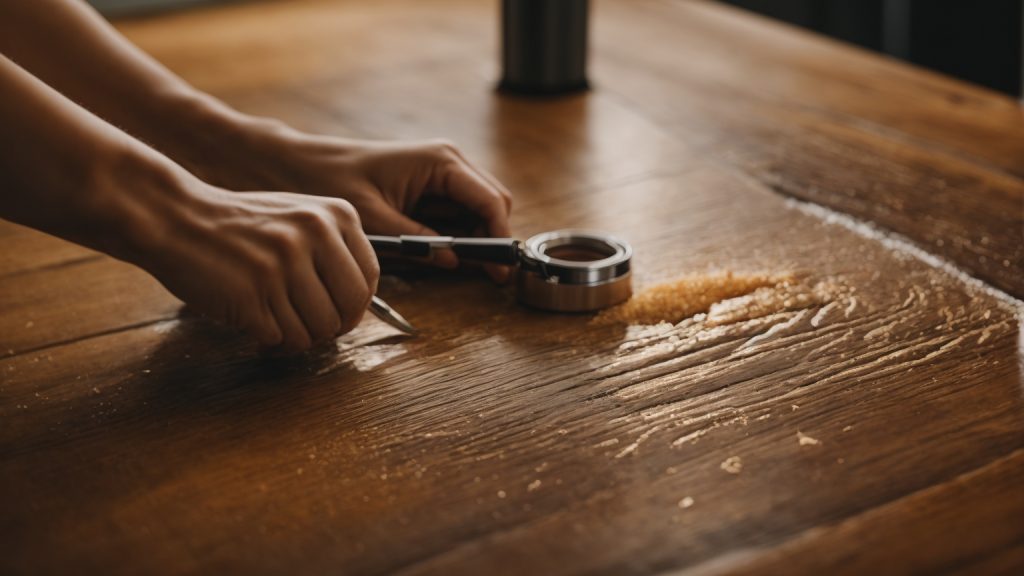
Before you start fixing the scratches, you need to prepare the area. Start by cleaning the door with a damp cloth to remove any dirt or debris. Then, use a sandpaper to sand down the area around the scratches. This will create a smooth surface for the wood filler to adhere to.

Applying Wood Filler

Next, apply wood filler to the scratches. You can use a wax wood filler stick or a wood filler paste. If you’re using a wax wood filler stick, rub it over the scratches until they are completely filled in. If you’re using a wood filler paste, apply it to the scratches with a putty knife and smooth it out. Make sure to choose a wood filler that matches the color of your door.

Sanding and Repainting

Once the wood filler has dried, sand it down with a sandpaper until it’s flush with the surface of the door. Then, repaint the area with a matching paint or stain. If you’re painting the door, use a brush or roller to apply the paint in thin, even coats. Let each coat dry completely before applying the next one.

By following these simple steps, you can fix deep scratches on your wooden door and make it look as good as new.

Maintaining Your Wooden Door

Wooden doors are a beautiful addition to any home, but they require proper maintenance to keep them looking their best. Here are some tips on how to maintain your wooden door to prevent scratches and other damage.

Regular Cleaning

Regular cleaning is essential to keep your wooden door looking its best. Dust and dirt can accumulate on the surface of the door, which can scratch the wood over time. To clean your wooden door, simply use a soft cloth or a feather duster to remove any dirt or dust. If the door is particularly dirty, you can use a mild soap and water solution to clean it. Be sure to dry the door thoroughly after cleaning to prevent water damage.

Using Protective Coatings

Using protective coatings is another way to maintain your wooden door and prevent scratches. Applying a clear coat of varnish or polyurethane can protect the wood from scratches and other damage. These coatings also help to seal the wood, preventing moisture from penetrating the surface and causing damage. Be sure to follow the manufacturer’s instructions when applying these coatings, and allow them to dry completely before using the door.

Avoiding Damage

Preventing scratches and other damage is the best way to maintain your wooden door. Avoid slamming the door, as this can cause dents and scratches. Also, be careful when moving furniture or other objects near the door, as these can also cause damage. If you have pets, be sure to keep their nails trimmed to prevent scratches on the door. Finally, avoid exposing your wooden door to direct sunlight, as this can cause the wood to fade and dry out over time.

By following these simple tips, you can maintain your wooden door and prevent scratches and other damage. Regular cleaning, using protective coatings, and avoiding damage are all essential to keep your wooden door looking its best for years to come.
How to Easily Open a Stuck Wooden Door: Tips and Tricks

Is your wooden door sticking and refusing to open? A stuck door can be frustrating and inconvenient, especially if you’re in a hurry or have guests waiting outside. Fortunately, there are several simple techniques you can try to open a stuck wooden door without causing any damage.

Before you start trying to force the door open, it’s important to identify the cause of the problem. A door can become stuck for a variety of reasons, such as humidity, changes in temperature, or worn-out hinges. Once you understand the cause of the problem, you can choose the best method to fix it. In this article, we will explore some effective techniques to open a stuck wooden door, including using lubricants, sandpaper, and basic tools. With a little patience and effort, you can get your door open and back to functioning properly in no time.

Understanding the Problem

When a wooden door gets stuck, it can be frustrating and inconvenient. However, with a few simple tools and techniques, you can easily fix the problem and get your door functioning properly again. Before attempting to fix a stuck door, it is important to understand the problem and its cause. In this section, we will discuss how to identify the type of door and determine the cause of the jam.

Identifying the Type of Door

There are several types of wooden doors, each with its own unique characteristics. The most common types of wooden doors include solid wood doors, hollow core doors, and panel doors. Solid wood doors are made entirely of wood and are the heaviest and most durable type of wooden door. Hollow core doors are made with a wood frame and a cardboard or veneer center, making them lightweight and less durable. Panel doors are made up of several panels and are the most decorative type of wooden door.

Determining the Cause of the Jam

There are several reasons why a wooden door may become stuck. One common cause is humidity. When the air is humid, wooden doors can absorb moisture and expand, causing them to rub against the door frame. Another common cause of a stuck door is a loose hinge or latch. If the hinges or latch are loose, the door may not be able to close properly, causing it to become stuck.

To determine the cause of the jam, start by examining the door and frame for any visible damage or obstructions. Look for scratches in the paint, grime buildup, or any other noticeable damage. If the door appears to be in good condition, check the hinges and latch for any signs of wear or looseness. If the problem persists, you may need to use some basic techniques to fix the problem, such as using a lubricant or sandpaper to smooth out any rough spots.

Gathering Necessary Tools

Before you start fixing your stuck wooden door, you need to gather some necessary tools. Here are some tools you might need:

1. Screwdriver

A screwdriver is essential for removing screws from the hinges and other parts of the door. It is important to have a screwdriver that fits the screws on your door properly to avoid damaging them.

2. Hammer

A hammer is useful for tapping the door gently to loosen it from the frame. You can also use it to remove nails or screws from the door.

3. Lubricant

A lubricant such as WD-40 can help to loosen the door and make it easier to open. You can apply the lubricant to the hinges and other parts of the door that may be causing the problem.

4. Shims

Shims are thin pieces of wood or plastic that you can use to adjust the position of the door. They can be used to fill gaps between the door and the frame to prevent it from sticking.

5. Electric Planer

An electric planer is a power tool that can be used to shave off small amounts of wood from the door. This can be useful if the door is rubbing against the frame.

6. Sandpaper

Sandpaper can be used to smooth rough edges on the door or frame. It can also be used to remove paint or other coatings that may be causing the door to stick.

By gathering these tools, you will be prepared to tackle the problem of a stuck wooden door. Remember to use caution when working with power tools and to follow all safety instructions.

Simple Techniques to Open a Stuck Wooden Door

If you find yourself struggling to open a stuck wooden door, don’t worry. There are some simple techniques you can try to get your door swinging freely again. Here are a few methods you can use:

Using a Credit Card

Believe it or not, a credit card can be a useful tool when trying to open a stuck wooden door. First, wedge the card between the door and the frame at the level of the latch. Then, wiggle the card up and down while simultaneously pushing on the door. This technique can help to dislodge the latch and allow the door to open.

Applying Force

If the credit card method doesn’t work, you can try using force to open the door. Take a sturdy object, like a hammer or a rubber mallet, and tap the door near the handle. This can help to loosen the door and make it easier to open. If that doesn’t work, you can try pushing or pulling on the door with all your might. Be careful not to hurt yourself or damage the door or frame.

Adjusting the Hinges

If the door is still stuck, the problem may be with the hinges. Check to see if the screws are loose or if the hinges are bent. Tightening loose screws or replacing them with longer ones can help to secure the hinges and make the door easier to open. If the hinges are bent, you may need to replace them entirely.

Remember, opening a stuck wooden door can be frustrating, but with a little patience and persistence, you can get the job done. Try these simple techniques, and you’ll have your door swinging freely in no time.

Advanced Techniques to Open a Stuck Wooden Door

If you have tried the basic techniques to open a stuck wooden door and they did not work, you may need to use more advanced techniques. Here are some techniques you can try:

Using a Screwdriver

If your door is stuck because the latch is not retracting, you can try using a screwdriver to manually retract the latch. To do this, remove the doorknob and the latch plate. Insert the screwdriver into the hole where the doorknob was and push it in the direction of the latch. This should retract the latch and allow you to open the door.

Applying a Lubricant

If your door is stuck because it is rubbing against the frame, you can try applying a lubricant to the areas where the door is rubbing. You can use a lubricant such as WD-40 or silicone spray. Apply the lubricant to the areas where the door is rubbing and then try to open the door. If the door still does not open, you may need to sand the door (see next section).

Sanding the Door

If your door is stuck because it is rubbing against the frame, you can try sanding the door. To do this, remove the door from the hinges and lay it flat on a work surface. Use sandpaper to sand the areas where the door is rubbing against the frame. Sand the areas evenly until the door fits properly in the frame. Once you have sanded the door, rehang it and try to open it.

Remember, if you are not comfortable trying these techniques, you can always call a professional for help. With these advanced techniques, you should be able to open a stuck wooden door and get back to your day.

When to Call a Professional

Opening a stuck wooden door can be a frustrating experience, but before you attempt any DIY fixes, it’s important to assess whether the problem is something you can handle yourself or if you need to call in a professional. Here are a few situations where it’s best to leave the job to an expert:

The Door is Damaged

If your door is visibly damaged, such as having cracks, splits, or holes, it’s best to call a professional. Attempting to fix the door yourself can cause further damage and end up costing you more money in the long run. A professional can assess the damage and recommend the best course of action, whether it’s repairing the door or replacing it altogether.

You’re Not Comfortable with DIY Fixes

If you’re not comfortable with DIY fixes, it’s best to call a professional. Attempting to fix a stuck door when you’re not confident in your abilities can lead to further damage and potentially harm yourself. A professional can safely and effectively open the door without causing any damage.

The Door is an Antique or Has Historical Value

If your door is an antique or has historical value, it’s best to call a professional. Attempting to fix the door yourself can damage its historical integrity and potentially decrease its value. A professional can open the door without causing any damage and ensure its historical value is preserved.

In general, if you’re unsure whether you can handle fixing a stuck wooden door yourself, it’s always best to call a professional. They have the experience and knowledge to safely and effectively open the door without causing any damage.

Maintaining Your Wooden Door

Wooden doors are a beautiful addition to any home, but they require some maintenance to keep them looking and functioning their best. Here are some tips to help you maintain your wooden door:

Keep it Clean

Dirt and grime can build up on your wooden door over time, making it more difficult to open and close. To keep your door clean, wipe it down with a damp cloth regularly. Avoid using harsh chemicals or abrasive sponges that could damage the wood.

Seal the Wood

Wooden doors can absorb moisture, which can cause them to warp or rot over time. To prevent this, it’s important to seal the wood with a protective finish. There are many different types of finishes available, including varnish, paint, and stain. Choose the one that best suits your needs and apply it according to the manufacturer’s instructions.

Lubricate the Hinges

Hinges can become stiff or squeaky over time, making it difficult to open and close the door. To keep your hinges working smoothly, lubricate them with a silicone-based lubricant. Apply a small amount to each hinge and move the door back and forth to distribute the lubricant.

Check for Damage

Regularly inspect your wooden door for any signs of damage, such as cracks, chips, or scratches. If you notice any damage, repair it as soon as possible to prevent further damage. Small chips or scratches can be filled in with wood filler, while larger damage may require the assistance of a professional.

By following these simple tips, you can keep your wooden door looking and functioning its best for years to come.