Tag Archives: easy diy project

preparing-your-wooden-floors

How to Paint Wooden Floors: A Beginner's Guide

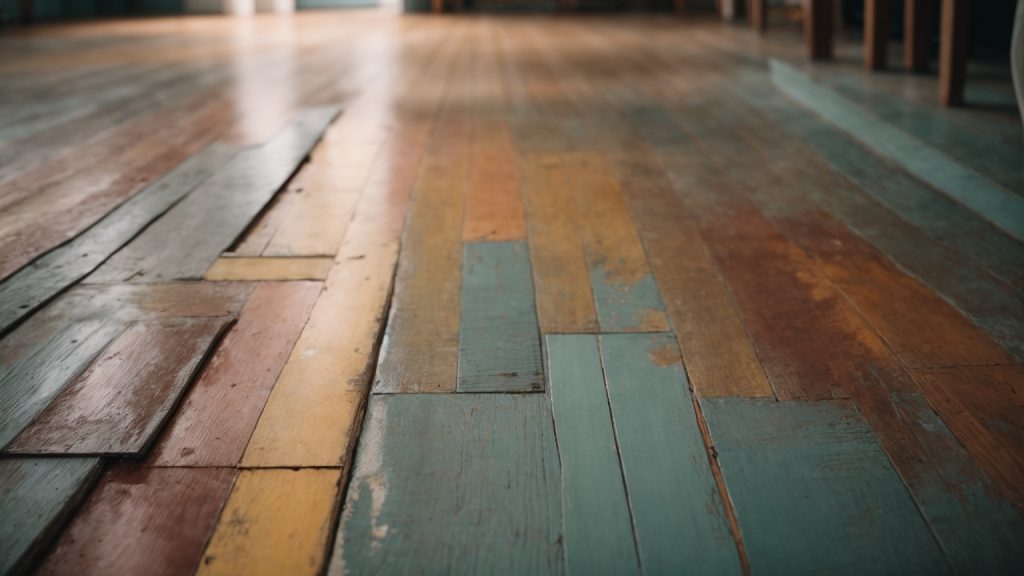
Are you tired of your old, worn-out wooden floors? Painting them can be a great way to give them a fresh new look without the expense of replacing them. Painting wooden floors is a relatively easy DIY project that can be done in a weekend. In this article, we will provide you with some tips on how to paint your wooden floors and achieve a professional-looking finish.

Before you start painting, it is important to prepare your floors properly. This involves cleaning, sanding, and priming the surface to ensure that the paint adheres properly and lasts for a long time. We will walk you through the steps of preparing your floors and choosing the right paint color and finish. We will also provide you with some ideas on how to create interesting patterns and designs on your floors using stencils or painter’s tape. With the right tools and techniques, you can transform your wooden floors into a beautiful and stylish feature of your home.

Understanding the Basics of Painting Wooden Floors

paint-wooden-floors

If you’re thinking of painting your wooden floors, it’s important to understand the basics before you start. Painting your floors can give your home a fresh new look, but it’s not a project to take lightly. Here are some things to keep in mind:

Choose the Right Paint

Not all paints are created equal, and this is especially true when it comes to painting floors. You’ll want to choose a paint that’s specifically designed for floors, as these paints are formulated to be more durable and resistant to wear and tear. Look for paints labeled as “porch and floor” or “deck and floor” paints. These paints are usually oil-based or water-based enamels and are available in a range of colors.
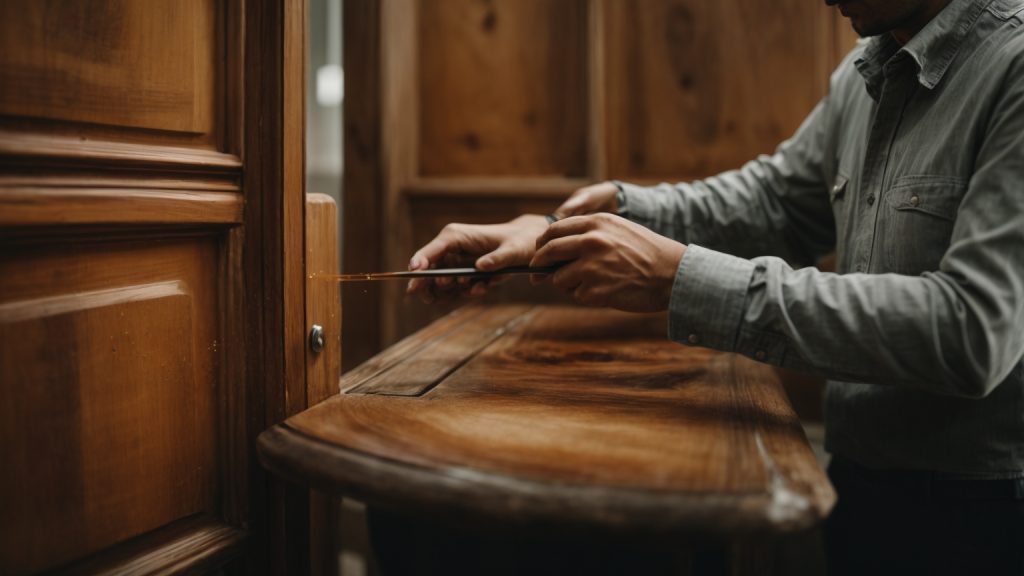
Prepare the Surface

Proper surface preparation is key to a successful floor painting project. Start by thoroughly cleaning the floors to remove any dirt, dust, or debris. Sand the floors lightly to create a rough surface that will help the paint adhere. Fill any cracks or holes with wood filler, and sand again once the filler is dry. Finally, vacuum and wipe down the floors to remove any remaining dust.

Use the Right Tools

To get the best results, it’s important to use the right tools. You’ll need a high-quality brush or roller designed for use with floor paints. A brush will give you a smoother finish, but a roller is faster. You may also want to use a paint sprayer if you have a large area to cover. Be sure to choose the right size brush or roller for your project, and use a high-quality paint tray to hold your paint.

Apply the Paint

When you’re ready to paint, start by cutting in around the edges of the room with a brush. Then, use a roller or sprayer to apply the paint in even, thin coats. Be sure to follow the manufacturer’s instructions for drying time and recoat time. It’s better to apply several thin coats of paint than one thick coat, as this will help prevent drips and ensure a smooth finish.

Allow for Drying Time

Once you’ve finished painting, it’s important to allow plenty of time for the paint to dry before you start using the floors again. This can take anywhere from a few hours to a few days, depending on the type of paint you used and the humidity in your area. Be sure to follow the manufacturer’s instructions for drying time, and avoid walking on the floors or placing furniture on them until the paint is fully cured.

By following these basic tips, you can achieve beautiful, long-lasting results when painting your wooden floors.

Choosing the Right Paint and Tools

When it comes to painting wooden floors, choosing the right paint and tools is crucial to achieving a beautiful and long-lasting finish. In this section, we will go over the key factors to consider when selecting your paint and tools.

Selecting the Paint

When it comes to selecting the paint for your wooden floors, there are a few things to keep in mind. First, you’ll want to choose a paint that is specifically designed for floors. These paints are formulated to be durable and resistant to wear and tear, which is essential for high-traffic areas like floors.

Second, consider the color and finish of the paint. While white is a popular choice for painted wooden floors, you can choose any color you like. Just be sure to test a small area first to make sure you like the color and that it complements the rest of your decor. As for the finish, a glossy or semi-glossy finish is recommended for floors as it is easier to clean and more durable than a matte finish.

Lastly, make sure the paint is compatible with the type of wood you are painting. Some paints may not adhere well to certain types of wood, so be sure to check the label or consult with a professional if you are unsure.

Picking the Right Brushes and Rollers

The tools you use to apply the paint are just as important as the paint itself. When it comes to brushes and rollers, there are a few things to consider.

For brushes, choose a high-quality brush with synthetic bristles. These brushes will provide a smooth and even finish and are easier to clean than natural bristle brushes. Look for a brush with a comfortable grip and a size that is appropriate for the size of your floor.

For rollers, choose a high-quality roller with a medium nap. This will allow the paint to be applied evenly and will prevent drips and streaks. Look for a roller with a sturdy frame and a comfortable grip.

In addition to brushes and rollers, you may also need other tools such as sandpaper, painter’s tape, and a paint tray. Be sure to have all the necessary tools on hand before you begin painting.

By selecting the right paint and tools, you can ensure a successful and long-lasting paint job on your wooden floors.

Preparing Your Wooden Floors

preparing-your-wooden-floors

Before you start painting your wooden floors, you need to prepare them properly. This step is crucial to ensure that the paint adheres well and lasts for a long time. Follow these sub-sections to prepare your floors:

Cleaning the Floor

The first step is to clean your wooden floors thoroughly. You should remove any dirt, dust, or debris that may be present on the surface. Here are some tips to clean your floors:

  • Sweep the floor with a broom to remove loose dirt and debris.
  • Use a vacuum cleaner to remove dust and small particles from the floor.
  • Clean the floor with a damp mop and a mild detergent. Avoid using harsh chemicals that can damage the wood.

Make sure the floor is completely dry before you move on to the next step.
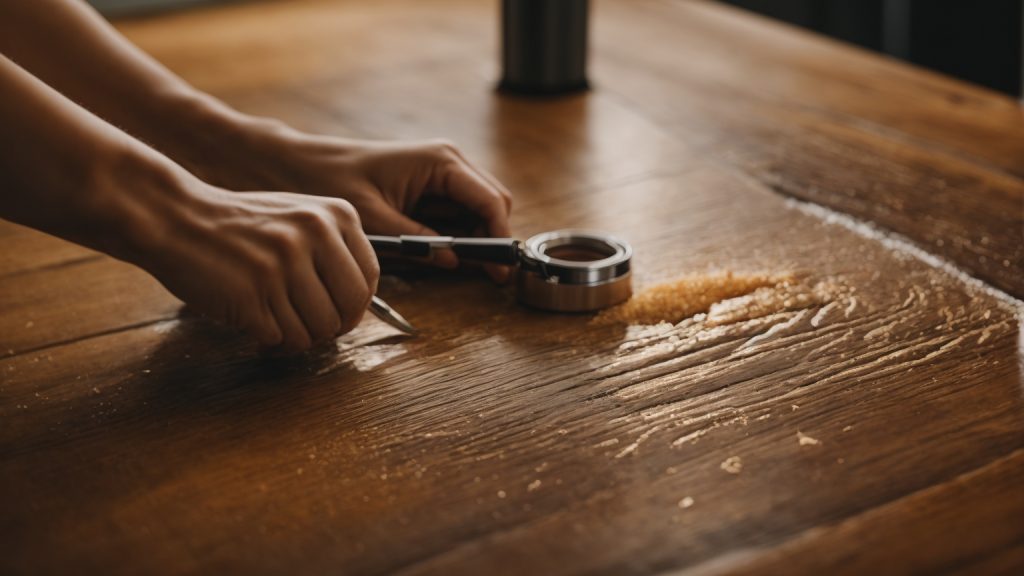
Sanding the Surface

The next step is to sand the surface of your wooden floors. Sanding helps to remove any rough spots, scratches, or stains on the surface. It also helps to create a smooth surface for the paint to adhere to. Here are some tips to sand your floors:

  • Use a floor sander to sand the surface of the floor. Make sure you follow the manufacturer’s instructions carefully.
  • Sand the floor in the direction of the grain to avoid damaging the wood.
  • Start with a coarse sandpaper and gradually move to a finer grit to create a smooth surface.
  • After sanding, use a vacuum cleaner to remove any dust or debris from the floor.

By following these steps, you can prepare your wooden floors for painting. Remember to take your time and be patient during this process. Proper preparation will ensure that your paint job looks great and lasts for a long time.

Applying Primer to the Floor

Before you start painting your wooden floors, you need to prepare the surface by applying a primer. Priming the floor will help the paint adhere better and last longer. Here are the steps to follow when applying primer to your wooden floors:

  1. Choose the Right Primer: Make sure to choose a primer that is suitable for your paint type. If you are using oil-based paint, use an oil-based primer. If you are using water-based paint, use a water-based primer.
  2. Prepare the Surface: Sand the floorboards with 150-grit sandpaper to remove any rough spots or imperfections. Then, clean the floor thoroughly with a powdered detergent cleaner to remove all dust and deposits. Rinse the floor with clean water and allow it to dry completely. This may take a couple of days.
  3. Apply the Primer: Apply the primer to the floor using a paint roller or brush. Start at the farthest corner of the room and work your way towards the door. Make sure to apply the primer in thin, even coats. Allow the primer to dry completely before applying the paint. It is recommended to let the primer dry overnight.
  4. Sand the Floor: Once the primer is dry, lightly sand the floor with 220-grit sandpaper to remove any rough spots or imperfections. Wipe the floor with a cloth or rag dampened with mineral spirits to remove any dust or debris.
  5. Apply a Second Coat of Primer (Optional): If you notice any areas where the primer did not cover well, you can apply a second coat of primer. Allow the primer to dry completely before applying the paint.

By following these steps, you will ensure that your wooden floors are properly primed and ready for painting.

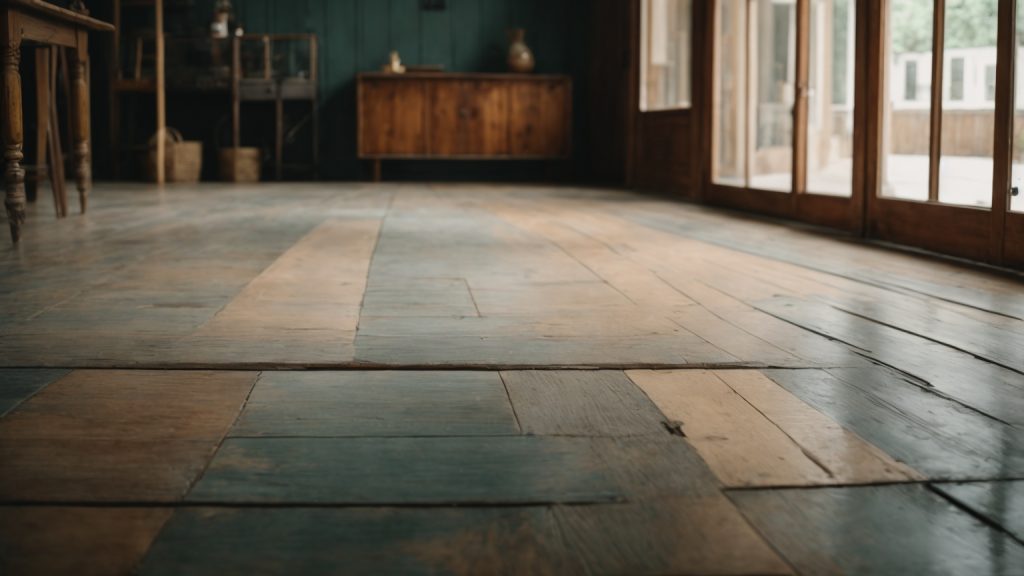
Painting Your Wooden Floors

If you’re looking to give your wooden floors a fresh new look, painting them can be a great option. Here are some tips on how to paint your wooden floors.

Applying the First Coat

Before you begin painting, make sure your floors are clean and free of any debris. You can sweep or vacuum them to remove any dust or dirt. Once they’re clean, you can apply the first coat of paint.

When it comes to choosing paint, make sure you choose a paint that is specifically designed for floors. This type of paint is more durable and will hold up better over time. You can choose any color you like, but be sure to test a small area first to make sure you like the color and finish.

When applying the first coat of paint, use a roller or brush and work in small sections. Start at one end of the room and work your way across, making sure to overlap each section slightly to avoid leaving any gaps. Allow the first coat to dry completely before adding additional coats.

Adding Additional Coats

Once the first coat is dry, you can add additional coats of paint. Depending on the color and finish you’ve chosen, you may need to apply two or three coats to achieve the desired look.

When applying additional coats, be sure to use a light touch and work in small sections. You don’t want to apply too much paint at once, as this can lead to drips and uneven coverage. Allow each coat to dry completely before adding the next one.

When you’re finished painting, allow the floors to dry completely before walking on them or placing any furniture back in the room. This will ensure that the paint has had time to fully cure and will help prevent any damage or scuffs.

Maintaining Your Painted Floors

Once you’ve painted your wooden floors, it’s important to maintain them properly to ensure they look great for years to come. Here are some tips to help you keep your painted floors in top condition.

Regular Cleaning

Regular cleaning is essential to maintain the appearance of your painted floors. Here are some tips for cleaning your painted floors:

  • Sweep or vacuum your floors regularly to remove dust and dirt.
  • Damp mop your floors with a mild detergent to remove any dirt or grime that has accumulated.
  • Avoid using harsh chemicals or abrasive cleaners, as they can damage the paint on your floors.
  • Wipe up spills immediately to avoid staining or damaging the paint on your floors.

Dealing with Scratches and Scuffs

Even with regular cleaning, your painted floors may still get scratched or scuffed over time. Here are some tips for dealing with scratches and scuffs:

  • Use a touch-up kit to repair small scratches and scuffs. These kits usually contain paint and a small brush, and can be used to touch up small areas of damage.
  • For larger scratches or scuffs, you may need to repaint the affected area. Sand the damaged area lightly to remove any loose paint, and then apply a new coat of paint.
  • To prevent scratches and scuffs, place felt pads on the bottom of furniture legs and avoid wearing shoes with hard soles on your floors.

By following these tips, you can keep your painted floors looking great for years to come.

fix-scratches-on-wooden-door

How to Fix Scratches on Wooden Door: Easy DIY Solutions

If you have a wooden door, chances are you’ve had to deal with scratches at some point. Whether it’s from your pet’s claws or just general wear and tear, scratches can be unsightly and make your door look old and worn out. Fortunately, fixing scratches on a wooden door is a relatively easy DIY project that you can do yourself with a few simple tools and materials.

One of the easiest ways to fix scratches on a wooden door is to use a wood filler. Wood fillers come in various colors to match the shade of your door, and they can be used to fill in deep scratches and gouges. Once the filler is dry, you can sand it down and paint or stain it to match the rest of your door. Another quick fix for light scratches is to rub a walnut over the scratch, which can help fill in the scratch and mask its appearance.

Before you start fixing scratches on your wooden door, it’s important to clean the area thoroughly. Use a damp cloth to wipe away any dirt or debris, and let the area dry completely before you start working on it. Additionally, make sure you have all the necessary tools and materials on hand, including sandpaper, wood filler, and paint or stain. With a little bit of time and effort, you can restore your wooden door to its former glory and make it look as good as new.

Identifying the Type of Scratch

fix-scratches-on-wooden-door

Before you start fixing scratches on your wooden door, you need to identify the type of scratch you are dealing with. This is important because different types of scratches require different methods of repair.

Minor Scratches

Minor scratches are superficial and only affect the surface of the wood. They are usually caused by light abrasions or contact with sharp objects. You can identify minor scratches by their shallow depth and light color. They are often barely visible, but can still be felt when you run your finger over them.

To fix minor scratches, you can use a wood touch-up marker or crayon that matches the color of your door. Simply apply the marker or crayon to the scratch and wipe away any excess with a clean cloth. If the scratch is still visible, you can lightly sand it down with fine-grit sandpaper and then apply the touch-up marker or crayon again.

Deep Scratches

Deep scratches are more serious and penetrate deeper into the wood. They are often caused by heavy impacts or contact with sharp objects. You can identify deep scratches by their dark color and visible depth. They are often rough to the touch and can even expose the raw wood underneath.

To fix deep scratches, you will need to use a wood filler. First, clean the scratch with a damp cloth and let it dry completely. Then, apply the wood filler to the scratch, making sure to fill it completely. Smooth out the surface of the filler with a putty knife and let it dry according to the manufacturer’s instructions. Once the filler is dry, sand it down with fine-grit sandpaper until it is smooth and level with the surface of the door. Finally, apply a matching stain or paint to the area to blend it in with the rest of the door.

By identifying the type of scratch on your wooden door, you can choose the appropriate method of repair and achieve the best possible results.

Gathering Necessary Materials

Before you start fixing scratches on your wooden door, you need to gather some necessary materials. Here are the materials that you will need:

For Minor Scratches

For minor scratches, you will need:

Materials Description
Soft cloth To clean the surface of the door
Walnut To rub on the scratch
Wood filler To fill in the scratch
Sandpaper To sand down the filled area
Paint or stain To match the color of the door

For Deep Scratches

For deep scratches, you will need:

Materials Description
Soft cloth To clean the surface of the door
Wax wood filler stick To fill in the scratch
Sandpaper To sand down the filled area
Paint or stain To match the color of the door

It is important to note that the color of the paint or stain should match the color of the door. If you are unsure about the color, you can take a small piece of the door to a hardware store to match the color.

Make sure to wear gloves and eye protection when using wood filler and sandpaper. Also, work in a well-ventilated area to avoid inhaling any harmful fumes.

Now that you have gathered all the necessary materials, you are ready to start fixing the scratches on your wooden door.

Fixing Minor Scratches

If your wooden door has minor scratches, you can easily fix them yourself with a few simple steps. Here’s what you need to do:

Cleaning the Area

First, clean the scratched area with a soft cloth and a mild cleaner. This will remove any dirt or debris from the surface and ensure that the filler adheres properly.

Applying the Filler

Next, apply a wood filler to the scratched area. You can use a wax wood filler stick or a putty-like wood filler. Choose a color that matches the color of your wooden door. Apply the filler using a putty knife or your finger, making sure to fill the scratch completely.

Sanding and Finishing

After the filler has dried, sand the area with fine-grain sandpaper in the direction of the wood grain. This will smooth out the surface and blend the filler with the surrounding wood. Finish by applying a clear coat of polyurethane or wood finish to protect the repaired area and give it a uniform appearance.

With these simple steps, you can fix minor scratches on your wooden door and restore its beauty.

Fixing Deep Scratches

fixing-deep-scratches

If your wooden door has deep scratches, don’t worry. You can fix them with a few simple steps. Here’s how:

Preparing the Area

Before you start fixing the scratches, you need to prepare the area. Start by cleaning the door with a damp cloth to remove any dirt or debris. Then, use a sandpaper to sand down the area around the scratches. This will create a smooth surface for the wood filler to adhere to.

Applying Wood Filler

Next, apply wood filler to the scratches. You can use a wax wood filler stick or a wood filler paste. If you’re using a wax wood filler stick, rub it over the scratches until they are completely filled in. If you’re using a wood filler paste, apply it to the scratches with a putty knife and smooth it out. Make sure to choose a wood filler that matches the color of your door.

Sanding and Repainting

Once the wood filler has dried, sand it down with a sandpaper until it’s flush with the surface of the door. Then, repaint the area with a matching paint or stain. If you’re painting the door, use a brush or roller to apply the paint in thin, even coats. Let each coat dry completely before applying the next one.

By following these simple steps, you can fix deep scratches on your wooden door and make it look as good as new.

Maintaining Your Wooden Door

Wooden doors are a beautiful addition to any home, but they require proper maintenance to keep them looking their best. Here are some tips on how to maintain your wooden door to prevent scratches and other damage.

Regular Cleaning

Regular cleaning is essential to keep your wooden door looking its best. Dust and dirt can accumulate on the surface of the door, which can scratch the wood over time. To clean your wooden door, simply use a soft cloth or a feather duster to remove any dirt or dust. If the door is particularly dirty, you can use a mild soap and water solution to clean it. Be sure to dry the door thoroughly after cleaning to prevent water damage.

Using Protective Coatings

Using protective coatings is another way to maintain your wooden door and prevent scratches. Applying a clear coat of varnish or polyurethane can protect the wood from scratches and other damage. These coatings also help to seal the wood, preventing moisture from penetrating the surface and causing damage. Be sure to follow the manufacturer’s instructions when applying these coatings, and allow them to dry completely before using the door.

Avoiding Damage

Preventing scratches and other damage is the best way to maintain your wooden door. Avoid slamming the door, as this can cause dents and scratches. Also, be careful when moving furniture or other objects near the door, as these can also cause damage. If you have pets, be sure to keep their nails trimmed to prevent scratches on the door. Finally, avoid exposing your wooden door to direct sunlight, as this can cause the wood to fade and dry out over time.

By following these simple tips, you can maintain your wooden door and prevent scratches and other damage. Regular cleaning, using protective coatings, and avoiding damage are all essential to keep your wooden door looking its best for years to come.

How to Repaint a Wooden Bench: A Beginner's Guide

Repainting a wooden bench can be a fun and rewarding DIY project that can breathe new life into an old piece of furniture. Whether you want to update the look of your outdoor bench or restore an old piece to its former glory, repainting can be a cost-effective way to achieve your desired results.

Before you get started, it’s important to gather the necessary tools and materials, including sandpaper, primer, paint, and a paintbrush or roller. You’ll also want to make sure you have a drop cloth or newspaper to protect your work area from any spills or splatters. If your bench has any existing paint or finish, you’ll need to remove it before applying a new coat of paint.

In this article, we’ll provide step-by-step guidelines on how to repaint a wooden bench, including tips on sanding, priming, and painting. By following these easy guidelines, you can transform your old bench into a beautiful and functional piece of furniture that you’ll be proud to display in your home or garden. So grab your paintbrush and let’s get started!

Understanding the Basics of Repainting

When it comes to repainting a wooden bench, there are some basic things you should understand before you get started. This section will cover the types of paint you can use and some safety precautions you should take.

Types of Paint for Wood

There are several types of paint you can use when repainting a wooden bench. Here are some common options:

  • Latex paint: This is a water-based paint that is easy to use and dries quickly. It is a good choice for indoor benches or outdoor benches that are not exposed to harsh weather conditions.
  • Oil-based paint: This type of paint is more durable than latex paint and provides a smoother finish. It is a good choice for outdoor benches that are exposed to harsh weather conditions.
  • Spray paint: This type of paint is easy to use and can provide a smooth finish. However, it may not be as durable as other types of paint.

Before you choose a type of paint, consider the location of your bench and the weather conditions it will be exposed to. You should also consider the color you want and whether you want a glossy or matte finish.

Safety Precautions

When repainting a wooden bench, it is important to take some safety precautions to protect yourself and others. Here are some things to keep in mind:

  • Wear protective gear: You should wear gloves, eye protection, and a mask to protect yourself from fumes and dust.
  • Work in a well-ventilated area: Make sure you are working in an area with good ventilation to avoid inhaling fumes.
  • Follow the manufacturer’s instructions: Be sure to read and follow the instructions on the paint can to ensure that you are using the paint correctly.
  • Dispose of paint and materials properly: After you are finished painting, dispose of any leftover paint and materials according to your local regulations.

By understanding the basics of repainting and taking the necessary safety precautions, you can successfully repaint your wooden bench and give it a fresh new look.

Materials and Tools Needed

Repainting a wooden bench can be a fun and easy DIY project that can give new life to an old piece of furniture. Before you get started, make sure you have all the necessary materials and tools on hand. Here is a list of what you will need:

Materials

  • Sandpaper (for sanding down the wood)
  • Protective gloves and eyewear
  • Primer and paint
  • Painter’s tape (to cover areas that you do not wish to paint)
  • Dropcloth (to protect the surrounding areas from paint splatters)

Tools

  • Paintbrush or roller (for applying the primer and paint)
  • Screwdriver (to remove any hardware on the bench)
  • Palm sander (optional, but helpful for sanding larger areas)
  • Tack cloth (to remove any dust or debris after sanding)
  • Spray bottle filled with water (to wet the wood before sanding, if necessary)

When selecting your primer and paint, make sure to choose products that are suitable for outdoor use and can withstand the elements. Look for products that are specifically designed for wood surfaces and provide good coverage and durability.

Additionally, it’s important to wear protective gloves and eyewear while working with paint and sandpaper to avoid any injuries or irritation. And don’t forget to cover the surrounding areas with a dropcloth to protect them from any paint splatters.

Overall, having the right materials and tools on hand can make all the difference in achieving a successful repainting project.

Preparing the Wooden Bench

Before you start repainting your wooden bench, it’s essential to prepare it properly to ensure the new paint adheres well and looks great. Here are two crucial steps to follow when preparing your wooden bench for repainting.

Cleaning the Bench

The first step in preparing your wooden bench for repainting is to clean it thoroughly. Dirt, grime, and other debris can interfere with the paint’s adherence, so it’s crucial to get the surface as clean as possible.

To clean your bench, follow these steps:

  1. Use a stiff-bristled brush to remove loose dirt and debris from the bench’s surface.
  2. Fill a bucket with warm water and add a small amount of dish soap or wood cleaner.
  3. Dip a clean cloth into the soapy water and use it to scrub the bench’s surface thoroughly.
  4. Rinse the bench with clean water until all soap residue is removed.
  5. Allow the bench to dry completely before moving on to the next step.

Sanding the Surface

Once the bench is clean and dry, the next step is to sand the surface. Sanding helps remove any bumps or uneven surfaces, making the surface smoother and easier to paint. It also helps the new paint adhere better to the wood.

To sand your bench, follow these steps:

  1. Use a light grit sandpaper to sand the entire surface of the bench. Be sure to sand in the direction of the wood grain.
  2. Sand until the surface is smooth and all rough spots and imperfections are removed.
  3. Use a damp cloth to wipe away any dust or debris from sanding.
  4. Allow the bench to dry completely before moving on to the next step.

By following these two crucial steps, you’ll ensure that your wooden bench is well-prepared for repainting. A clean and well-sanded surface will help the new paint adhere better and look great for years to come.

Applying the Primer

Now that you have sanded and cleaned your wooden bench, it’s time to apply the primer. The primer will help the paint adhere to the wood and prevent any stains or discoloration from showing through the final coat of paint. Here are the steps to apply the primer:

  1. Choose the right primer: Make sure to choose a primer that is suitable for outdoor wooden surfaces. Look for a primer that is specifically formulated for wood and is compatible with the type of paint you plan to use.

  2. Apply the primer: Use a paintbrush or a roller to apply the primer evenly over the entire surface of the bench. Make sure to cover all the nooks and crannies and apply a thin, even coat. If you notice any drips or uneven areas, smooth them out with a paintbrush before the primer dries.

  3. Let the primer dry: Allow the primer to dry completely before applying the final coat of paint. This may take anywhere from a few hours to overnight, depending on the type of primer you are using and the weather conditions.

  4. Sand the primer: Once the primer is dry, lightly sand the entire surface of the bench with fine-grit sandpaper. This will help smooth out any rough spots or brush marks and ensure that the final coat of paint goes on smoothly.

  5. Clean the bench: Finally, use a clean, damp cloth to wipe down the entire surface of the bench and remove any dust or debris before applying the final coat of paint.

By following these steps, you can ensure that your wooden bench is properly primed and ready for the final coat of paint.

Painting the Bench

Once you have sanded and primed your wooden bench, it’s time to paint it. Here are some tips to help you get the best results possible.

Choosing the Color

Before you start painting, consider what color you want your bench to be. You can choose a color that matches your outdoor decor or go for something bold and eye-catching. If you’re not sure what color to choose, take a look at some color swatches or paint samples to get an idea of what will work best.

Applying the Paint

When it comes to applying the paint, there are a few things to keep in mind. First, make sure you have the right type of paint for your bench. For outdoor furniture, it’s best to use a paint that is weather-resistant and can withstand the elements. You can choose between oil-based, water-based, or spray paint.

Once you have your paint, apply it in thin, even coats. Use a paintbrush or roller to apply the paint, depending on the size of your bench. Make sure to cover all areas of the bench, including any hard-to-reach spots.

If you’re using a spray paint, make sure to do it in a well-ventilated area and wear a mask to avoid inhaling fumes. Apply the spray paint in thin, even coats, and let each coat dry before applying the next.

After you’ve applied the first coat of paint, let it dry completely before applying the second coat. Depending on the color and type of paint you’re using, you may need to apply more than two coats to get the desired finish.

With these tips, you can paint your wooden bench with ease and achieve a beautiful, long-lasting finish.

Finishing Touches

After you’ve painted your wooden bench, it’s time to add the finishing touches to ensure a long-lasting and beautiful finish. Here are some essential steps to follow:

Sealing the Paint

To protect your newly painted bench from the elements and everyday wear and tear, it’s crucial to apply a sealant. A clear polyurethane or varnish will not only add a protective layer but also give your bench a glossy finish.

Before applying the sealant, make sure the paint is completely dry. Use a clean brush to apply a thin layer of sealant, following the grain of the wood. Allow the first coat to dry completely before applying a second coat.

Drying and Curing Time

It’s important to let your bench dry and cure properly to avoid damaging the paint job. While the paint may feel dry to the touch after a few hours, it’s recommended to wait at least 24 hours before using the bench.

During the first week, avoid placing any heavy objects or sitting on the bench for extended periods. This will allow the paint to fully cure and harden, ensuring a durable finish.

By following these simple finishing touches, your painted wooden bench will look great for years to come.

How to Fix Chipped Paint on Wooden Door: A Quick and Easy Guide

If you have an old wooden door, you may have noticed some chipped paint spots that can be an eyesore. Fortunately, fixing chipped paint on a wooden door is a relatively easy DIY project that you can do with a few simple tools and materials.

One of the first things you’ll need to do is prepare the surface by cleaning it thoroughly and removing any loose paint chips. Then, you’ll need to fill in the chipped areas with a wood filler or putty, making sure to overfill the area slightly to allow for sanding. Once the filler has dried, you can sand it down to a smooth surface and repaint the area to match the rest of the door.

It’s important to take your time and follow the steps carefully to ensure a professional-looking finish. With a little patience and effort, you can fix chipped paint spots on your wooden door and restore its beauty and charm.

Understanding the Problem

If you have a wooden door with chipped paint, it can be an eyesore and can make your door look old and worn out. However, fixing chipped paint on a wooden door is not as difficult as it may seem. In this section, we will help you understand the problem and assess the damage.

Identifying the Chipped Paint

Before you start fixing the chipped paint on your wooden door, you need to identify the areas that need repair. Chipped paint can be caused by a variety of reasons such as accidental hits, scratches, or normal wear and tear. The chipped paint may be visible in small spots or large areas, and it may be on the surface or deeper into the wood.

To identify the chipped paint, you can visually inspect the door for any spots that look different from the rest of the surface. You can also run your hand over the surface of the door to feel for any rough spots or depressions. If the chipped paint is in a small spot, you can use your fingernail to gently scrape away the loose paint.

Assessing the Damage

After identifying the chipped paint, you need to assess the damage to determine the best way to fix it. The damage may be superficial, where only the paint has chipped off, or it may be deeper, where the wood is exposed.

If the damage is superficial, you can simply fill the depression with wood putty or latex filler and sand it down to match the rest of the surface. However, if the damage is deeper and the wood is exposed, you may need to use wood filler or replace the damaged section of the door.

It is important to assess the damage before starting any repairs to ensure that you use the right materials and techniques for the job. If you are unsure about the extent of the damage or the best way to fix it, you can consult a professional or do more research before starting the repair process.

Gathering Necessary Materials

Before you start repairing the chipped paint on your wooden door, you need to gather all the necessary materials. This will ensure that you have everything you need to complete the job without having to stop in the middle of the process. Here are the materials you will need:

Choosing the Right Tools

  • Putty knife: You will need a putty knife to apply wood putty or latex filler to the chipped area.
  • Sandpaper: You will need sandpaper to smooth out the repaired area and prepare it for painting.
  • Paintbrush: You will need a paintbrush to apply the paint to the repaired area.
  • Paint scraper: You will need a paint scraper to remove any loose paint chips from the chipped area.

Selecting the Correct Paint

  • Paint: You will need the correct paint to match the color of your wooden door. If you do not have the original paint, take a small piece of the chipped paint to a paint store and have them match the color.
  • Primer: You will need a primer to prepare the repaired area for painting. Make sure to choose a primer that is compatible with the type of paint you will be using.
  • Painter’s tape: You will need painter’s tape to protect the surrounding area from paint splatters.

By gathering all of these materials before you start the repair process, you will be able to complete the job efficiently and effectively. Now that you have all the necessary materials, it’s time to move on to the next step.

Preparation Steps

Before you begin repairing chipped paint on your wooden door, there are a few preparation steps that you need to take. These steps will ensure that the repair is successful and long-lasting.

Cleaning the Surface

The first step is to clean the surface of the chipped paint. Use a soft cloth or sponge and a mild detergent to remove any dirt, dust, or grime that may have accumulated on the surface. Make sure to rinse the surface thoroughly with clean water and allow it to dry completely before proceeding to the next step.

Sanding the Area

The second step is to sand the area around the chipped paint. Use a fine-grit sandpaper to smooth out any rough edges or bumps around the chipped area. Sand the area until it is smooth and level with the surrounding surface. Be careful not to sand too much or you may damage the wood underneath the paint.

Once you have completed these preparation steps, you are ready to begin repairing the chipped paint on your wooden door. With the right tools and techniques, you can make your door look as good as new.

Applying the Fix

Once you have prepared the surface and filled in the chip, it’s time to apply the fix. This involves priming the surface and painting over the chip. Here’s how to do it:

Priming the Surface

Before you paint, it’s important to prime the surface to ensure that the paint adheres properly and doesn’t peel off later on. Here’s how to prime the surface:

  1. Use a high-quality primer that is suitable for the type of paint you will be using.
  2. Apply a thin, even coat of primer to the chipped area using a paintbrush or roller.
  3. Allow the primer to dry completely before moving on to the next step.

Painting Over the Chip

Once the primer has dried, it’s time to paint over the chip. Here’s how to do it:

  1. Use a high-quality paint that matches the color of the surrounding area.
  2. Apply a thin, even coat of paint to the chipped area using a paintbrush or roller.
  3. Allow the paint to dry completely before applying a second coat, if necessary.
  4. If you need to apply a second coat, make sure the first coat is completely dry before applying the second coat.
  5. After the final coat of paint has dried, inspect the area to ensure that the chip has been completely covered.

That’s it! By following these simple steps, you can fix chipped paint on your wooden door and make it look as good as new.

Post Application Care

After you have fixed the chipped paint on your wooden door, it is important to take care of it properly to ensure that it lasts as long as possible. Here are some tips for post-application care:

Drying and Curing

Before you start using your door again, you need to make sure that the paint has fully dried and cured. This can take anywhere from a few hours to a few days, depending on the type of paint you used and the weather conditions. Check the manufacturer’s instructions for specific drying times.

During the drying and curing process, it’s important to keep the door away from any sources of moisture or heat. This can cause the paint to dry unevenly or peel off. Make sure the door is in a well-ventilated area and avoid touching it until it’s fully dry.

Maintenance Tips

To keep your door looking great, there are a few maintenance tips you should follow:

  • Clean the door regularly with a soft cloth and mild soap and water. Avoid using abrasive cleaners or scrub brushes, as these can damage the paint.
  • Avoid slamming the door or hitting it with hard objects, as this can cause new chips or dents to form.
  • If you notice any new chips or scratches, touch them up with a small amount of paint as soon as possible. This will prevent them from getting worse over time.
  • Consider adding a coat of wax or sealant to the door to protect the paint from UV rays and other environmental factors. Check with the paint manufacturer to see if they recommend any specific products.

By following these post-application care tips, you can ensure that your door looks great for years to come.