Tag Archives: high-quality brush

preparing-your-wooden-floors

How to Paint Wooden Floors: A Beginner's Guide

Are you tired of your old, worn-out wooden floors? Painting them can be a great way to give them a fresh new look without the expense of replacing them. Painting wooden floors is a relatively easy DIY project that can be done in a weekend. In this article, we will provide you with some tips on how to paint your wooden floors and achieve a professional-looking finish.

Before you start painting, it is important to prepare your floors properly. This involves cleaning, sanding, and priming the surface to ensure that the paint adheres properly and lasts for a long time. We will walk you through the steps of preparing your floors and choosing the right paint color and finish. We will also provide you with some ideas on how to create interesting patterns and designs on your floors using stencils or painter’s tape. With the right tools and techniques, you can transform your wooden floors into a beautiful and stylish feature of your home.

Understanding the Basics of Painting Wooden Floors
paint-wooden-floors

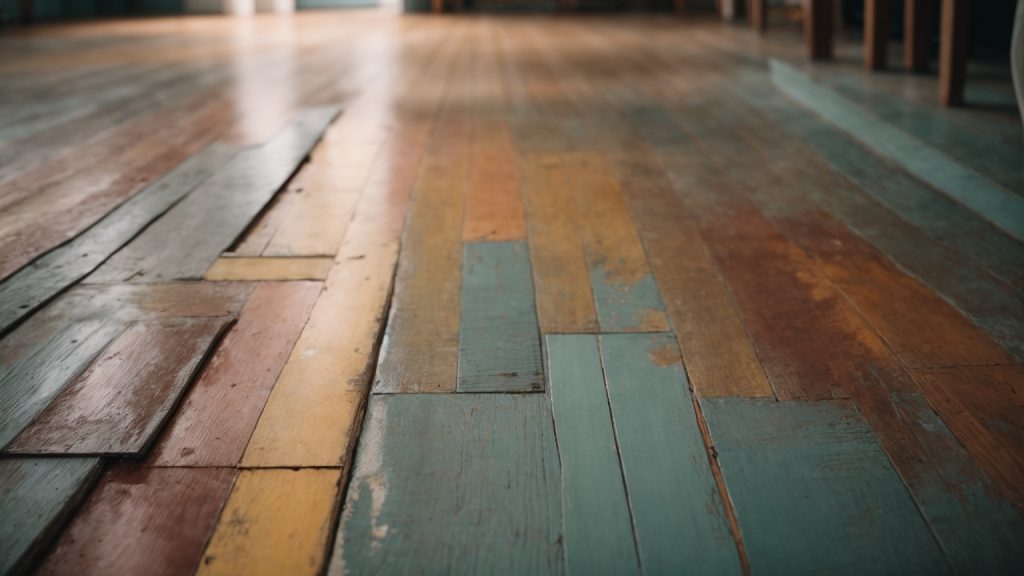
If you’re thinking of painting your wooden floors, it’s important to understand the basics before you start. Painting your floors can give your home a fresh new look, but it’s not a project to take lightly. Here are some things to keep in mind:

Choose the Right Paint

Not all paints are created equal, and this is especially true when it comes to painting floors. You’ll want to choose a paint that’s specifically designed for floors, as these paints are formulated to be more durable and resistant to wear and tear. Look for paints labeled as “porch and floor” or “deck and floor” paints. These paints are usually oil-based or water-based enamels and are available in a range of colors.

Prepare the Surface

Proper surface preparation is key to a successful floor painting project. Start by thoroughly cleaning the floors to remove any dirt, dust, or debris. Sand the floors lightly to create a rough surface that will help the paint adhere. Fill any cracks or holes with wood filler, and sand again once the filler is dry. Finally, vacuum and wipe down the floors to remove any remaining dust.

Use the Right Tools

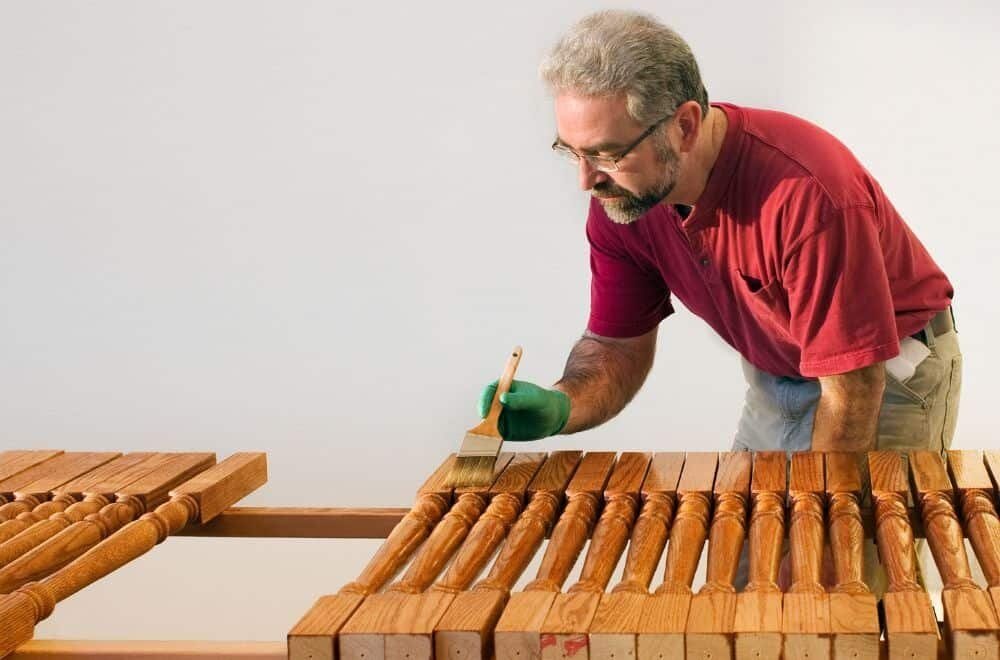
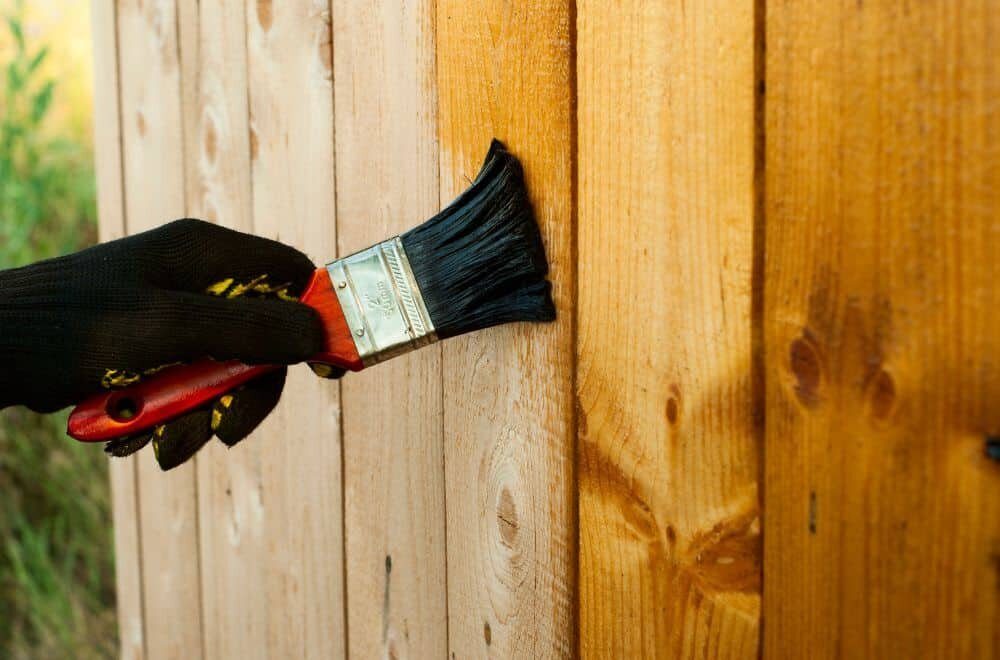
To get the best results, it’s important to use the right tools. You’ll need a high-quality brush or roller designed for use with floor paints. A brush will give you a smoother finish, but a roller is faster. You may also want to use a paint sprayer if you have a large area to cover. Be sure to choose the right size brush or roller for your project, and use a high-quality paint tray to hold your paint.

Apply the Paint

When you’re ready to paint, start by cutting in around the edges of the room with a brush. Then, use a roller or sprayer to apply the paint in even, thin coats. Be sure to follow the manufacturer’s instructions for drying time and recoat time. It’s better to apply several thin coats of paint than one thick coat, as this will help prevent drips and ensure a smooth finish.

Allow for Drying Time

Once you’ve finished painting, it’s important to allow plenty of time for the paint to dry before you start using the floors again. This can take anywhere from a few hours to a few days, depending on the type of paint you used and the humidity in your area. Be sure to follow the manufacturer’s instructions for drying time, and avoid walking on the floors or placing furniture on them until the paint is fully cured.

By following these basic tips, you can achieve beautiful, long-lasting results when painting your wooden floors.

Choosing the Right Paint and Tools

When it comes to painting wooden floors, choosing the right paint and tools is crucial to achieving a beautiful and long-lasting finish. In this section, we will go over the key factors to consider when selecting your paint and tools.

Selecting the Paint

When it comes to selecting the paint for your wooden floors, there are a few things to keep in mind. First, you’ll want to choose a paint that is specifically designed for floors. These paints are formulated to be durable and resistant to wear and tear, which is essential for high-traffic areas like floors.

Second, consider the color and finish of the paint. While white is a popular choice for painted wooden floors, you can choose any color you like. Just be sure to test a small area first to make sure you like the color and that it complements the rest of your decor. As for the finish, a glossy or semi-glossy finish is recommended for floors as it is easier to clean and more durable than a matte finish.

Lastly, make sure the paint is compatible with the type of wood you are painting. Some paints may not adhere well to certain types of wood, so be sure to check the label or consult with a professional if you are unsure.

Picking the Right Brushes and Rollers

The tools you use to apply the paint are just as important as the paint itself. When it comes to brushes and rollers, there are a few things to consider.

For brushes, choose a high-quality brush with synthetic bristles. These brushes will provide a smooth and even finish and are easier to clean than natural bristle brushes. Look for a brush with a comfortable grip and a size that is appropriate for the size of your floor.

For rollers, choose a high-quality roller with a medium nap. This will allow the paint to be applied evenly and will prevent drips and streaks. Look for a roller with a sturdy frame and a comfortable grip.

In addition to brushes and rollers, you may also need other tools such as sandpaper, painter’s tape, and a paint tray. Be sure to have all the necessary tools on hand before you begin painting.

By selecting the right paint and tools, you can ensure a successful and long-lasting paint job on your wooden floors.

Preparing Your Wooden Floors
preparing-your-wooden-floors

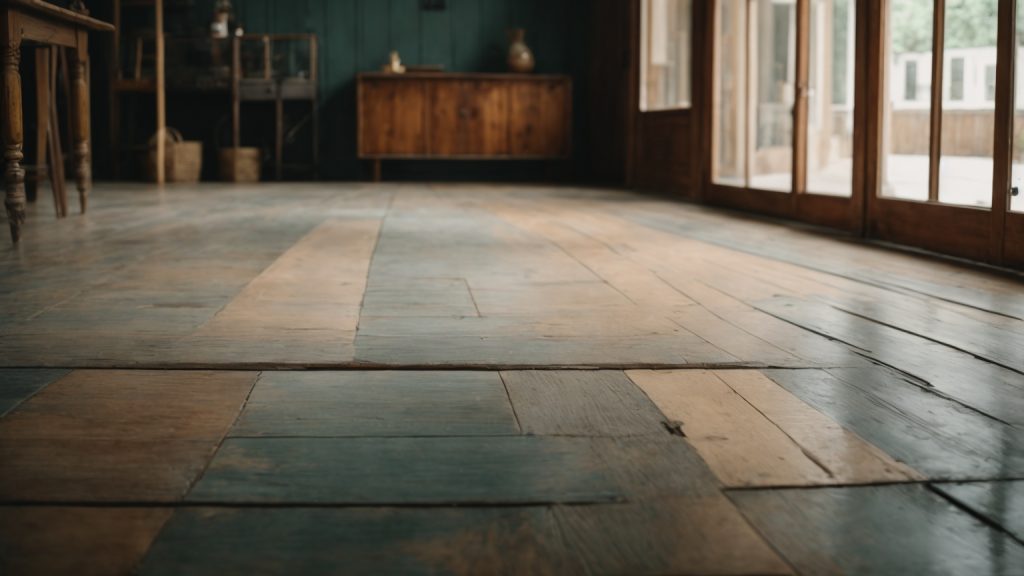
Before you start painting your wooden floors, you need to prepare them properly. This step is crucial to ensure that the paint adheres well and lasts for a long time. Follow these sub-sections to prepare your floors:

Cleaning the Floor

The first step is to clean your wooden floors thoroughly. You should remove any dirt, dust, or debris that may be present on the surface. Here are some tips to clean your floors:

  • Sweep the floor with a broom to remove loose dirt and debris.
  • Use a vacuum cleaner to remove dust and small particles from the floor.
  • Clean the floor with a damp mop and a mild detergent. Avoid using harsh chemicals that can damage the wood.

Make sure the floor is completely dry before you move on to the next step.

Sanding the Surface

The next step is to sand the surface of your wooden floors. Sanding helps to remove any rough spots, scratches, or stains on the surface. It also helps to create a smooth surface for the paint to adhere to. Here are some tips to sand your floors:

  • Use a floor sander to sand the surface of the floor. Make sure you follow the manufacturer’s instructions carefully.
  • Sand the floor in the direction of the grain to avoid damaging the wood.
  • Start with a coarse sandpaper and gradually move to a finer grit to create a smooth surface.
  • After sanding, use a vacuum cleaner to remove any dust or debris from the floor.

By following these steps, you can prepare your wooden floors for painting. Remember to take your time and be patient during this process. Proper preparation will ensure that your paint job looks great and lasts for a long time.

Applying Primer to the Floor

Before you start painting your wooden floors, you need to prepare the surface by applying a primer. Priming the floor will help the paint adhere better and last longer. Here are the steps to follow when applying primer to your wooden floors:

  1. Choose the Right Primer: Make sure to choose a primer that is suitable for your paint type. If you are using oil-based paint, use an oil-based primer. If you are using water-based paint, use a water-based primer.
  2. Prepare the Surface: Sand the floorboards with 150-grit sandpaper to remove any rough spots or imperfections. Then, clean the floor thoroughly with a powdered detergent cleaner to remove all dust and deposits. Rinse the floor with clean water and allow it to dry completely. This may take a couple of days.
  3. Apply the Primer: Apply the primer to the floor using a paint roller or brush. Start at the farthest corner of the room and work your way towards the door. Make sure to apply the primer in thin, even coats. Allow the primer to dry completely before applying the paint. It is recommended to let the primer dry overnight.
  4. Sand the Floor: Once the primer is dry, lightly sand the floor with 220-grit sandpaper to remove any rough spots or imperfections. Wipe the floor with a cloth or rag dampened with mineral spirits to remove any dust or debris.
  5. Apply a Second Coat of Primer (Optional): If you notice any areas where the primer did not cover well, you can apply a second coat of primer. Allow the primer to dry completely before applying the paint.

By following these steps, you will ensure that your wooden floors are properly primed and ready for painting.

Painting Your Wooden Floors

If you’re looking to give your wooden floors a fresh new look, painting them can be a great option. Here are some tips on how to paint your wooden floors.

Applying the First Coat

Before you begin painting, make sure your floors are clean and free of any debris. You can sweep or vacuum them to remove any dust or dirt. Once they’re clean, you can apply the first coat of paint.

When it comes to choosing paint, make sure you choose a paint that is specifically designed for floors. This type of paint is more durable and will hold up better over time. You can choose any color you like, but be sure to test a small area first to make sure you like the color and finish.

When applying the first coat of paint, use a roller or brush and work in small sections. Start at one end of the room and work your way across, making sure to overlap each section slightly to avoid leaving any gaps. Allow the first coat to dry completely before adding additional coats.

Adding Additional Coats

Once the first coat is dry, you can add additional coats of paint. Depending on the color and finish you’ve chosen, you may need to apply two or three coats to achieve the desired look.

When applying additional coats, be sure to use a light touch and work in small sections. You don’t want to apply too much paint at once, as this can lead to drips and uneven coverage. Allow each coat to dry completely before adding the next one.

When you’re finished painting, allow the floors to dry completely before walking on them or placing any furniture back in the room. This will ensure that the paint has had time to fully cure and will help prevent any damage or scuffs.

Maintaining Your Painted Floors

Once you’ve painted your wooden floors, it’s important to maintain them properly to ensure they look great for years to come. Here are some tips to help you keep your painted floors in top condition.

Regular Cleaning

Regular cleaning is essential to maintain the appearance of your painted floors. Here are some tips for cleaning your painted floors:

  • Sweep or vacuum your floors regularly to remove dust and dirt.
  • Damp mop your floors with a mild detergent to remove any dirt or grime that has accumulated.
  • Avoid using harsh chemicals or abrasive cleaners, as they can damage the paint on your floors.
  • Wipe up spills immediately to avoid staining or damaging the paint on your floors.

Dealing with Scratches and Scuffs

Even with regular cleaning, your painted floors may still get scratched or scuffed over time. Here are some tips for dealing with scratches and scuffs:

  • Use a touch-up kit to repair small scratches and scuffs. These kits usually contain paint and a small brush, and can be used to touch up small areas of damage.
  • For larger scratches or scuffs, you may need to repaint the affected area. Sand the damaged area lightly to remove any loose paint, and then apply a new coat of paint.
  • To prevent scratches and scuffs, place felt pads on the bottom of furniture legs and avoid wearing shoes with hard soles on your floors.

By following these tips, you can keep your painted floors looking great for years to come.
paint-your-wooden-coffee-table

How to Paint Your Wooden Coffee Table: A Beginner's Guide

Are you tired of your old and worn-out wooden coffee table? Painting it can be a great way to give it a fresh new look without having to spend a lot of money on a new one. However, painting a wooden coffee table can seem like a daunting task, especially if you’ve never done it before. But don’t worry, with a little bit of knowledge and some patience, you can transform your coffee table into a beautiful piece of furniture that will enhance the look of your living room.

The first step in painting your wooden coffee table is to choose the right paint and supplies. You’ll need a primer, paint, paintbrushes, sandpaper, and a clean cloth. Once you have all your supplies, the next step is to clean your coffee table thoroughly. This will ensure that the primer and paint adhere properly to the surface. After cleaning, you’ll need to sand the table to remove any bumps or rough spots. Once you’ve sanded the table, you’ll need to clean it again to remove any dust or debris.

Understanding the Type of Wood

paint-your-wooden-coffee-table

Before you start painting your wooden coffee table, it’s important to understand the type of wood you’re dealing with. Different types of wood require different preparation and painting techniques to ensure the best results.

Identifying Hardwood and Softwood

The first step in understanding your wood is to identify whether it is hardwood or softwood. Hardwood comes from deciduous trees, such as oak, maple, and cherry, while softwood comes from coniferous trees, such as pine, spruce, and cedar. Hardwood is generally denser and more durable than softwood, but it can also be more difficult to work with.

To identify your wood, look at the grain pattern and color. Hardwood tends to have a more complex grain pattern, while softwood has a simpler, more uniform pattern. Hardwood also tends to be darker in color than softwood.

Checking for Wood Treatments

It’s also important to check whether your wood has been treated with any chemicals or finishes. If your wood has been previously painted or stained, it may have a layer of varnish or polyurethane that needs to be removed before you can paint it.

To check for wood treatments, look for any discoloration or staining on the surface of the wood. You can also try sanding a small area to see if the wood is absorbing the sandpaper or if the surface is too hard and glossy.

If you suspect that your wood has been treated, it’s best to consult a professional or do some research to determine the best way to prepare it for painting. Using the wrong technique could result in a poor finish or damage to the wood.

Choosing the Right Paint

When it comes to painting a wooden coffee table, choosing the right paint is crucial for a successful outcome. You want to choose a paint that will not only look great but also last for a long time. Here are some things to consider when choosing the right paint for your coffee table.

Oil-Based vs Water-Based Paint

One of the first things you need to decide is whether to use oil-based or water-based paint. Both types of paint have their pros and cons.

Oil-based paint is known for its durability and ability to provide a smooth, even finish. It is also resistant to stains and scratches. However, it can take a long time to dry and requires the use of solvents for cleanup.

Water-based paint, on the other hand, dries faster and is easier to clean up. It is also less likely to yellow over time. However, it may not be as durable as oil-based paint and may require multiple coats for a smooth finish.

Choosing the Right Color

Choosing the right color is also important when painting a coffee table. You want to choose a color that will complement the rest of your decor and add visual interest to the room.

Consider the color of your walls, curtains, and other furniture when choosing a color for your coffee table. If you have neutral-colored walls and furniture, you can add a pop of color with your coffee table. If you have bold-colored walls or furniture, you may want to choose a more neutral color for your coffee table.

In addition to color, consider the finish of the paint. A high-gloss finish will provide a shiny, reflective surface, while a matte finish will provide a more subdued look.

Overall, choosing the right paint for your coffee table requires careful consideration of factors such as durability, drying time, and color. By taking the time to choose the right paint, you can ensure that your coffee table looks great and lasts for years to come.

Preparation Before Painting

Before you start painting your wooden coffee table, it is important to properly prepare the surface. This will help ensure that the paint adheres well and lasts longer. Here are two key steps you should take to prepare your coffee table for painting:

Cleaning the Coffee Table

The first step in preparing your coffee table for painting is to clean it thoroughly. Use a bucket of soapy water and a sponge to remove dirt, dust, and oils that may be on the surface. Make sure to clean all surfaces of the table, including the legs and underside.

After cleaning, rinse the table with clean water and let it dry completely. You can use a clean cloth to wipe away any excess water. It is important to make sure the table is completely dry before moving on to the next step.

Sanding the Surface

The next step in preparing your coffee table for painting is to sand the surface. Sanding helps to create a smooth surface for the paint to adhere to. It also helps to remove any existing finish or paint that may be on the table.

Start by using a medium-grit sandpaper (around 120 grit) to sand the entire surface of the table. Make sure to sand in the direction of the wood grain. After sanding, use a damp cloth to wipe away any dust or debris.

Next, use a fine-grit sandpaper (around 220 grit) to sand the surface again. This will help create an even smoother surface for the paint to adhere to. After sanding, use a clean cloth to wipe away any dust or debris.

By properly cleaning and sanding your coffee table, you will be able to create a surface that is ready for painting. This will help ensure that your paint job looks great and lasts for a long time.

Priming the Coffee Table

priming-the-coffee-table

Before you start painting your wooden coffee table, it is essential to prime it. Priming helps the paint adhere better to the surface and provides a smooth and even finish. Here are the steps to prime your coffee table:

  1. Clean the coffee table: Use a damp cloth to wipe down the coffee table and remove any dust or debris. Allow it to dry completely before moving to the next step.
  2. Sand the coffee table: Use sandpaper to rough up the surface of the coffee table. This will help the primer adhere better to the wood. Be sure to wipe away any dust with a damp cloth.
  3. Apply the primer: Using a brush or roller, apply a thin coat of primer to the coffee table. Be sure to cover all surfaces evenly. Allow the primer to dry completely before applying the paint.

When selecting a primer, choose one that is specifically designed for wood surfaces. This will ensure that the primer bonds well with the wood and provides a good base for the paint. If your coffee table has any stains or discolorations, consider using a stain-blocking primer to prevent them from bleeding through the paint.

Remember, the key to a successful paint job is proper preparation. Taking the time to prime your coffee table will ensure that your paint job looks professional and lasts for years to come.

Painting Techniques

When it comes to painting a wooden coffee table, there are several techniques you can use to achieve a professional-looking finish. In this section, we’ll discuss three popular methods: using a brush, using a roller, and spray painting.

Using a Brush

Using a brush is a classic method for painting wooden furniture. It allows for precise application and can be useful for getting into tight corners and edges. Here’s how to do it:

  1. Choose a high-quality brush that’s appropriate for the type of paint you’re using. A natural bristle brush is best for oil-based paints, while a synthetic brush is better for water-based paints.
  2. Start by applying a coat of primer to the entire surface of the coffee table. Use long, even strokes and work in the direction of the wood grain.
  3. Once the primer is dry, apply the first coat of paint in the same manner. Be sure to work in small sections and avoid overloading the brush with paint.
  4. Allow the first coat to dry completely before applying a second coat. Repeat this process until you achieve the desired level of coverage.

Using a Roller

Using a roller can be a faster method for painting larger surfaces. It can also create a smoother finish than using a brush. Here’s how to do it:

  1. Choose a roller that’s appropriate for the type of paint you’re using. A foam roller is best for water-based paints, while a mohair roller is better for oil-based paints.
  2. Start by applying a coat of primer to the entire surface of the coffee table. Use long, even strokes and work in the direction of the wood grain.
  3. Once the primer is dry, apply the first coat of paint using the roller. Be sure to work in small sections and avoid overloading the roller with paint.
  4. Allow the first coat to dry completely before applying a second coat. Repeat this process until you achieve the desired level of coverage.

Spray Painting

Spray painting can be a quick and easy method for painting a coffee table. It can also create a smooth, even finish. However, it requires more preparation and can be more difficult to control than using a brush or roller. Here’s how to do it:

  1. Choose a high-quality spray paint that’s appropriate for the type of wood you’re painting. Be sure to choose a well-ventilated area to work in and wear protective gear, such as a mask and goggles.
  2. Start by preparing the coffee table by cleaning it thoroughly and sanding it lightly to create a rough surface for the paint to adhere to.
  3. Apply a coat of primer to the entire surface of the coffee table using the spray paint. Be sure to work in a well-ventilated area and follow the manufacturer’s instructions for application.
  4. Once the primer is dry, apply the first coat of paint using the spray paint. Be sure to work in small sections and avoid overloading the surface with paint.
  5. Allow the first coat to dry completely before applying a second coat. Repeat this process until you achieve the desired level of coverage.

Adding Finishing Touches

After painting your wooden coffee table, it’s important to add some finishing touches that will protect the paint and enhance the overall look of your furniture. Here are some tips to help you achieve a professional finish.

Applying a Sealant

A sealant is a protective coating that will help prevent scratches, stains, and other types of damage to your coffee table. It also makes the surface easier to clean and maintain. To apply a sealant, follow these steps:

  1. Choose a sealant that is compatible with your paint and the type of wood your coffee table is made of.
  2. Use a brush or roller to apply a thin, even coat of sealant to the surface of your coffee table. Be sure to cover the entire surface, including the edges and corners.
  3. Let the sealant dry completely before applying a second coat. Check the manufacturer’s instructions for the recommended drying time.
  4. Apply a second coat of sealant, if necessary, to achieve the desired level of protection.

Polishing the Coffee Table

Polishing your coffee table will give it a smooth, shiny finish that will enhance the beauty of the wood and the paint. Here’s how to do it:

  1. Use a soft cloth to remove any dust or debris from the surface of your coffee table.
  2. Apply a small amount of furniture polish to another clean, soft cloth.
  3. Rub the polish onto the surface of your coffee table in a circular motion. Be sure to cover the entire surface, including the edges and corners.
  4. Let the polish dry for a few minutes, then buff the surface with another clean, soft cloth until it shines.

Remember to reapply the sealant and polish as needed to keep your coffee table looking its best. With these finishing touches, your painted wooden coffee table will be a beautiful and functional addition to your home decor.

Maintaining Your Painted Coffee Table

Once you have painted your wooden coffee table, you’ll want to keep it looking fresh and new for as long as possible. Here are some tips to help you maintain your painted coffee table:

Regular Cleaning

To keep your painted coffee table looking its best, you should clean it regularly. Here are some tips for cleaning your coffee table:

  • Use a soft cloth or sponge to wipe down the surface of the table.
  • Avoid using abrasive cleaners or scrubbers, as they can scratch the paint.
  • If there are any spills or stains on the table, clean them up as soon as possible to prevent them from setting in.
  • If you need to use a cleaner, choose a mild, non-abrasive cleaner that is safe for painted surfaces.

Touching Up Paint

Over time, your painted coffee table may start to show signs of wear and tear. To keep it looking its best, you may need to touch up the paint from time to time. Here are some tips for touching up the paint on your coffee table:

  • Start by cleaning the surface of the table with a soft cloth or sponge.
  • If the paint has chipped or peeled, use sandpaper to smooth out the area.
  • Apply a small amount of paint to the area using a small brush or sponge.
  • Allow the paint to dry completely before using the table again.

By following these tips, you can keep your painted coffee table looking great for years to come.

How to Paint a Wooden Dining Table: A Beginner's Guide

Painting your wooden dining table can be a fun and creative way to add new life to your dining room. Whether you want to change the color, update the style, or simply refresh the finish, painting your table is a great DIY project that can be done in a weekend. With the right tools, materials, and techniques, you can transform your old, tired table into a beautiful, custom piece that reflects your personal style.

Before you start painting, it’s important to prepare your table properly. This includes cleaning the surface, sanding it down, and priming it to ensure that the paint adheres properly and lasts for a long time. You’ll also need to choose the right type of paint for your table, depending on the material and finish you want to achieve. Whether you prefer a glossy or matte finish, there are plenty of options available that will suit your needs.

Once you’ve prepared your table and chosen your paint, it’s time to get creative! You can use stencils, masking tape, or freehand techniques to create unique designs and patterns on your table. You can also experiment with different colors and textures to achieve the look you want. With a little bit of patience and creativity, you can transform your wooden dining table into a beautiful, one-of-a-kind piece that you’ll be proud to show off to your friends and family.

Understanding the Basics of Painting

When it comes to painting a wooden dining table, it is important to understand the basics of painting. This will help you achieve the desired result and ensure that your table looks good and lasts long. Here are some things you need to know:

Types of Paint

There are different types of paint that you can use to paint your wooden dining table. Some of the most common types include oil-based paint, latex paint, and chalk paint. Oil-based paint is known for its durability and is ideal for high traffic areas. Latex paint is water-based and dries quickly, making it a popular choice for DIY projects. Chalk paint is perfect for achieving a vintage or shabby chic look.

Choosing the Right Brush

Choosing the right brush is important when painting your wooden dining table. A high-quality brush will help you achieve a smooth and even finish. When choosing a brush, consider the type of paint you are using. For oil-based paint, use a natural-bristle brush. For latex paint, use a synthetic-bristle brush. A foam brush is ideal for chalk paint.

When painting your table, start with the edges and work your way towards the center. Use long, smooth strokes and avoid overloading the brush with paint. Apply a thin coat of paint and allow it to dry completely before applying another coat.

By understanding the basics of painting, you can achieve a beautiful and long-lasting finish on your wooden dining table. Choose the right paint and brush, and take your time with the application process for best results.

Preparing Your Wooden Dining Table

Before you start painting your wooden dining table, it’s important to prepare it properly. This will ensure that the paint adheres well and the finish is smooth and long-lasting. In this section, we’ll go over the two main steps of preparing your wooden dining table: cleaning and sanding.

Cleaning the Table

The first step to preparing your wooden dining table is to clean it thoroughly. This will remove any dirt, grime, or grease that might be on the surface, which can affect how well the paint adheres. Here’s how to clean your wooden dining table:

  1. Remove any loose dirt or debris with a soft-bristled brush or a vacuum cleaner.
  2. Mix a solution of warm water and mild soap in a bucket.
  3. Dip a sponge or cloth in the solution and wring it out well.
  4. Wipe down the entire surface of the table, making sure to get into any crevices or corners.
  5. Rinse the sponge or cloth in clean water and wipe down the table again to remove any soap residue.
  6. Dry the table thoroughly with a clean, dry cloth.

Sanding the Surface

Once your wooden dining table is clean and dry, you’ll need to sand the surface to create a smooth, even surface for the paint to adhere to. Here’s how to sand your wooden dining table:

  1. Choose the right sandpaper. For most wooden dining tables, a medium-grit sandpaper (around 120 grit) is a good choice. If your table has a rougher surface, you may need to start with a coarser grit and work your way up to a finer grit.
  2. Sand the surface of the table in the direction of the grain. This will help to prevent any scratches or marks on the surface.
  3. Sand the entire surface of the table, including any legs or other details.
  4. After sanding, wipe down the table with a tack cloth to remove any dust or debris.
  5. If there are any areas that are still rough or uneven, you may need to sand them again with a finer grit sandpaper.

By following these two steps, you’ll be well on your way to preparing your wooden dining table for painting. With a clean and smooth surface, your paint will adhere better and your finished product will look great.

Applying Primer

Before painting your wooden dining table, you need to apply a primer to ensure the paint adheres properly and lasts longer. Here are some steps to follow when applying primer:

  1. Choose the right primer: There are different types of primers available in the market, such as oil-based and water-based. Make sure to choose the one that is suitable for your table and the paint you will be using.

  2. Prepare the surface: Sand the table surface using sandpaper to remove any rough patches or old paint. Clean the surface with a damp cloth to remove any dust or debris.

  3. Apply the primer: Using a paint roller, apply the primer evenly on the table surface. Make sure to cover all areas, including the corners and edges. Let the primer dry completely before applying the paint.

  4. Sand the primer: After the primer has dried, lightly sand the surface with fine-grit sandpaper. This will help the paint adhere better and create a smoother finish.

  5. Clean the surface: Use a damp cloth to remove any dust or debris from the sanded surface. Your table is now ready for painting.

By following these steps, you can ensure that your wooden dining table is properly primed and ready for painting.

Painting Techniques

Painting a wooden dining table requires some patience and attention to detail to achieve a smooth and even finish. There are three main techniques to consider: brushing, rolling, and spraying. Each technique has its own advantages and disadvantages, so it’s important to choose the one that works best for your project.

Brushing

Brushing is a traditional painting technique that provides excellent control and precision. It’s ideal for painting small areas, corners, and edges. To brush your wooden dining table, follow these steps:

  1. Choose a high-quality brush that’s appropriate for your paint type and the size of your project.
  2. Dip the brush into the paint and tap off any excess.
  3. Apply the paint with long, even strokes, working in the direction of the wood grain.
  4. Use a smaller brush for hard-to-reach areas like corners and edges.
  5. Allow the paint to dry completely before applying a second coat.

Rolling

Rolling is a faster painting technique that’s great for larger areas. It’s easy to use and provides a smooth, even finish. To roll your wooden dining table, follow these steps:

  1. Choose a high-quality roller that’s appropriate for your paint type and the size of your project.
  2. Pour the paint into a roller tray and dip the roller into the paint.
  3. Roll the paint onto the table in long, even strokes, working in the direction of the wood grain.
  4. Use a smaller roller or brush for hard-to-reach areas like corners and edges.
  5. Allow the paint to dry completely before applying a second coat.

Spraying

Spraying is a modern painting technique that provides a professional-looking finish. It’s ideal for painting large areas and intricate designs. To spray your wooden dining table, follow these steps:

  1. Choose a high-quality paint sprayer that’s appropriate for your paint type and the size of your project.
  2. Fill the sprayer with paint and adjust the settings according to the manufacturer’s instructions.
  3. Spray the paint onto the table in long, even strokes, working in the direction of the wood grain.
  4. Use a smaller sprayer or brush for hard-to-reach areas like corners and edges.
  5. Allow the paint to dry completely before applying a second coat.

Remember to always wear protective gear, such as gloves and a mask, when painting. Take your time and follow these techniques to achieve a beautiful and long-lasting finish on your wooden dining table.

Drying and Curing

Once you have finished painting your wooden dining table, the final step is to let it dry and cure properly. This is an important step that you should not skip, as it can affect the longevity and durability of your paint job.

Drying Time

The drying time for your paint will depend on several factors, including the type of paint you used, the temperature and humidity of the room, and the thickness of your paint layers. In general, most paints will dry to the touch within a few hours, but you should wait at least 24 hours before using your table.

To avoid any accidental damage to your newly painted surface, it’s best to keep your table in a well-ventilated area and away from any direct sunlight or heat sources. You should also avoid placing any objects on the table until it has fully dried.

Curing Time

While your paint may be dry to the touch after 24 hours, it will take much longer to fully cure. Curing is the process by which the paint hardens and becomes more durable, and it can take anywhere from a few days to a few weeks depending on the type of paint you used.

During the curing process, you should avoid placing any heavy objects on your table or using it for any activities that may scratch or damage the surface. You should also avoid cleaning or wiping down the table until it has fully cured.

Tips for Faster Drying and Curing

If you’re in a hurry to use your table, there are a few things you can do to speed up the drying and curing process:

  • Increase the temperature and humidity in the room by using a fan or humidifier
  • Use a paint with a faster drying and curing time
  • Apply thinner layers of paint
  • Use a spray paint instead of a brush for a smoother and faster application

However, keep in mind that rushing the drying and curing process can result in a less durable and long-lasting paint job. So, it’s best to be patient and let your table dry and cure properly for the best results.

Maintaining Your Painted Table

Now that you have successfully painted your wooden dining table, it is important to maintain it properly to ensure it lasts for years to come. Here are a few tips to help you keep your painted table looking fresh and new:

1. Clean Regularly

To keep your painted table looking its best, it is important to clean it regularly. Use a soft, damp cloth to wipe down the surface after each use, and avoid using harsh chemicals or abrasive cleaners that can damage the paint. If you need to remove tough stains or grime, use a mild detergent and warm water.

2. Avoid Heat and Moisture

Exposure to heat and moisture can cause your painted table to warp, crack, or fade over time. To prevent this, keep your table away from direct sunlight and sources of heat, such as radiators or fireplaces. Additionally, avoid placing hot or wet items directly on the surface of the table, as this can cause damage to the paint.

3. Touch Up as Needed

Over time, your painted table may develop small chips or scratches in the paint. To keep it looking its best, touch up these areas as needed with a small brush and matching paint. Be sure to allow the paint to dry completely before using the table again.

4. Store Properly

If you need to store your painted table for an extended period of time, be sure to do so properly. Clean the surface thoroughly and cover it with a protective cloth or sheet to prevent dust and debris from accumulating. Store the table in a cool, dry place away from direct sunlight and sources of heat.

By following these simple tips, you can keep your painted table looking beautiful and new for years to come.

How to Build a Wooden Sailboat: A Beginner's Guide

Are you interested in building your own sailboat? If so, building a wooden sailboat can be a rewarding and fulfilling experience. Not only will you have a unique vessel to call your own, but you’ll also learn valuable woodworking skills along the way.

To get started, you’ll need to gather the necessary materials and tools. This may include oak plywood, epoxy resin and hardener, thickener, brad nails, masking tape, a pull-saw, and a table saw. Once you have everything you need, you can begin the process of building your sailboat. From creating a jig and frame assembly to making the mast, there are many steps involved in building a wooden sailboat. But with patience and attention to detail, you can create a beautiful and functional vessel that will bring you joy for years to come.

Understanding the Basics of a Wooden Sailboat

If you are interested in building a wooden sailboat, it’s important to understand the basics of how a sailboat is constructed. In this section, we’ll cover the parts of a wooden sailboat and the different types of wooden sailboats.

Parts of a Wooden Sailboat

A wooden sailboat is made up of several parts, each with its own unique function. Here are some of the most important parts:

  • Hull: The hull is the main body of the boat. It is the part of the boat that sits in the water and provides buoyancy.
  • Keel: The keel is a long, narrow fin that extends down from the bottom of the hull. It helps to keep the boat from capsizing by providing stability.
  • Rudder: The rudder is a flat piece of wood or metal that is attached to the back of the boat. It helps to steer the boat.
  • Mast: The mast is a tall, vertical pole that supports the sails.
  • Sails: The sails are large pieces of fabric that are attached to the mast and other parts of the boat. They catch the wind and propel the boat forward.
  • Boom: The boom is a horizontal pole that is attached to the bottom of the mast. It helps to control the shape of the sail.

Types of Wooden Sailboats

There are many different types of wooden sailboats, each with its own unique characteristics. Here are some of the most common types:

  • Dinghy: A dinghy is a small sailboat that is typically used for recreational sailing or racing.
  • Sloop: A sloop is a sailboat with a single mast and a fore-and-aft rig.
  • Ketch: A ketch is a sailboat with two masts, with the main mast taller than the mizzen mast.
  • Yawl: A yawl is a sailboat with two masts, with the mizzen mast located aft of the rudder post.

When choosing a type of wooden sailboat to build, it’s important to consider your needs and experience level. A dinghy is a good choice for beginners, while a ketch or yawl may be more suitable for experienced sailors.

By understanding the basics of a wooden sailboat and the different types available, you can make an informed decision about which type of boat to build.

Choosing the Right Materials

When building a wooden sailboat, choosing the right materials is crucial to ensure the boat’s durability and performance. In this section, we will discuss the two most important materials you’ll need to choose: wood and sails/rigging materials.

Selecting the Right Wood

Choosing the right type of wood for your sailboat is critical. You want a wood that is strong, lightweight, and resistant to rot and decay. Some of the most popular types of wood used in sailboat building include:

  • Cedar: Lightweight and easy to work with, cedar is an excellent choice for planking and decking.
  • Mahogany: Strong and durable, mahogany is often used for building frames and keels.
  • Oak: A dense and hard wood, oak is commonly used for building frames and planking.

When selecting your wood, make sure it is free of knots, cracks, and other defects that could weaken the boat’s structure. You should also consider the wood’s grain pattern, as this can affect the boat’s strength and appearance.

Choosing Sails and Rigging Materials

The type of sails and rigging materials you choose will depend on the type of sailboat you’re building and your sailing needs. Some of the most common materials used in sail and rigging construction include:

  • Dacron: A strong and durable synthetic material, dacron is commonly used for sailcloth.
  • Nylon: Lightweight and flexible, nylon is often used for spinnaker sails.
  • Stainless Steel: Strong and corrosion-resistant, stainless steel is commonly used for rigging hardware.

When selecting your sails and rigging materials, consider the conditions you’ll be sailing in and the type of sailing you’ll be doing. For example, if you’ll be racing, you may want to choose lightweight sails and rigging materials that will help you achieve maximum speed. On the other hand, if you’ll be cruising, you may want to choose more durable materials that can withstand rougher conditions.

By choosing the right materials for your wooden sailboat, you can ensure that your boat is strong, durable, and performs well on the water.

Designing Your Sailboat

Before you start building your wooden sailboat, you need to design it. This will involve creating a blueprint and determining the size and shape of your boat.

Creating a Blueprint

Creating a blueprint is an essential step in designing your sailboat. It will help you visualize your boat and ensure that you have all the necessary components in place. You can create a blueprint using software such as AutoCAD or SketchUp, or you can draw it by hand.

When creating your blueprint, consider the following:

  • The length, width, and height of your boat
  • The position of the mast and sails
  • The location of the rudder and keel
  • The number of cabins and their layout
  • The placement of any storage compartments or equipment

Determining the Size and Shape

The size and shape of your sailboat will depend on several factors, including your budget, the type of sailing you plan to do, and the number of people who will be on board.

Consider the following when determining the size and shape of your sailboat:

  • The type of sailing you plan to do (coastal cruising, racing, etc.)
  • The number of people who will be on board
  • The amount of storage space you will need
  • The amount of deck space you will need
  • Your budget

Once you have determined the size and shape of your sailboat, you can start gathering materials and building your boat.

Building the Hull

When building a wooden sailboat, the hull is the most important part of the boat. It is the main structure that holds everything together and keeps the boat afloat. Building the hull requires cutting and assembling the wooden frame.

Cutting the Wood

To begin building the hull, you will need to cut the wood into the appropriate sizes and shapes. The wood should be cut according to the plans or blueprints that you have created. You can use a saw or a jigsaw to make the cuts.

It is important to use high-quality wood that is free of knots or other defects. The wood should be strong enough to withstand the pressure and weight of the water. Common types of wood used for building a wooden sailboat include cedar, oak, and mahogany.

Assembling the Frame

Once you have cut the wood, you can begin assembling the frame of the hull. The frame is made up of vertical pieces of wood called frames, which hold the shape of the boat. The frames are attached to the keel, which is the main structure that runs down the center of the boat.

To assemble the frame, you will need to use a sawhorse or other support to hold the lumber in place. You can then use screws or bolts to attach the frames to the keel. It is important to ensure that the frames are level and straight.

After the frames are attached to the keel, you can add the planks to the hull. The planks are attached to the frames and keel using screws or nails. It is important to ensure that the planks are properly aligned and spaced.

Once the planks are attached, you can sand and finish the hull to give it a smooth and polished look. This will also help to protect the wood from the elements.

Building the hull of a wooden sailboat requires patience and attention to detail. With the right tools and materials, you can create a strong and beautiful hull that will last for years to come.

Installing the Deck and Cabin

Installing the deck and cabin of your wooden sailboat is a crucial step in the construction process. It not only adds to the aesthetics of your boat but also provides structural support. Here are some tips to help you through the process.

Deck Installation

The deck of your wooden sailboat should be installed after the hull has been completed and before the cabin is built. It is important to ensure that the deck is watertight to prevent any leaks. Here are the steps to follow when installing the deck:

  1. Cut the deck to fit the hull and sand the edges to ensure a tight fit.
  2. Apply a layer of epoxy to the hull and deck joint to seal it.
  3. Secure the deck to the hull using screws or bolts.
  4. Apply a layer of fiberglass cloth and epoxy to the deck to make it watertight.
  5. Sand the surface of the deck to prepare it for painting or varnishing.

Cabin Installation

The cabin of your wooden sailboat provides shelter and storage space. It is important to ensure that it is properly installed to prevent any leaks. Here are the steps to follow when installing the cabin:

  1. Build the cabin on a flat surface using marine-grade plywood.
  2. Cut the cabin to fit the deck and hull and sand the edges to ensure a tight fit.
  3. Apply a layer of epoxy to the cabin and deck joint to seal it.
  4. Secure the cabin to the deck using screws or bolts.
  5. Apply a layer of fiberglass cloth and epoxy to the cabin to make it watertight.
  6. Install any windows, hatches, or doors in the cabin.
  7. Sand the surface of the cabin to prepare it for painting or varnishing.

By following these steps, you can ensure that your wooden sailboat’s deck and cabin are properly installed and watertight. This will not only make your boat look great but also ensure that you have a safe and enjoyable sailing experience.

Setting Up the Mast and Sails

Now that you have built your wooden sailboat, it is time to set up the mast and sails. This process may seem daunting, but with a little patience and attention to detail, you can have your boat ready to sail in no time.

Step 1: Install the Mast

The first step is to install the mast. Depending on the design of your boat, the mast may be a single piece or assembled from multiple sections. Make sure the mast is secured properly and is straight. Use a level to ensure the mast is vertical in both directions.

Step 2: Prepare the Sails

Next, prepare the sails. Make sure the sails are clean and free of any debris or damage. Attach the sail to the mast using the halyard, which is a rope used to raise and lower the sail. Make sure the sail is hoisted all the way to the top of the mast.

Step 3: Attach the Boom

Attach the boom to the mast and secure it with a boom vang, which is a rope used to control the angle of the boom. The boom is the horizontal spar that holds the bottom edge of the sail.

Step 4: Set the Sail

Once the boom is attached, set the sail. Adjust the angle of the boom and the sail to catch the wind and start moving. You can use the main sheet to control the angle of the sail and the boat’s speed.

Step 5: Trim the Sail

Finally, trim the sail to optimize its performance. This involves adjusting the sail’s shape and position to maximize its power and minimize drag. Use the sail controls, such as the cunningham and outhaul, to adjust the sail’s shape. Use the main sheet to control the sail’s position relative to the wind.

Congratulations! You have successfully set up the mast and sails of your wooden sailboat. Now it’s time to hit the water and enjoy the thrill of sailing.

Applying Finishing Touches

When it comes to building a wooden sailboat, applying the finishing touches is a crucial step that can make all the difference in the final product. Here are some tips and tricks to help you get the perfect finish.

Sanding and Finishing

Before you can apply any finish, you need to make sure the surface is smooth and free of imperfections. This means sanding the wood with progressively finer grits of sandpaper until you achieve the desired smoothness. Once you’ve finished sanding, you can apply a wood conditioner to help the wood absorb the finish more evenly.

When it comes to choosing a finish, you have several options. Some popular choices include varnish, paint, and oil. Varnish is a popular choice for wooden boats because it provides a durable, glossy finish that can withstand the harsh marine environment. Paint is another option, but it requires more maintenance than varnish and may not provide as much protection against the elements. Oil is a good choice if you want a more natural look, but it may not provide as much protection as varnish or paint.

Painting and Varnishing

If you decide to go with paint or varnish, there are a few things to keep in mind. First, make sure you apply the finish in a well-ventilated area to avoid inhaling fumes. Second, make sure you apply thin, even coats and allow each coat to dry completely before applying the next. This will help prevent drips and ensure a smooth finish.

When it comes to varnishing, it’s important to use a high-quality brush and work quickly to avoid brush marks. You may also want to consider using a foam brush for hard-to-reach areas. Once you’ve applied the final coat of varnish, you can buff the surface with a soft cloth to achieve a high-gloss finish.

Painting requires a different approach. You’ll need to choose the right type of paint for your boat and make sure you apply it evenly. If you’re painting a large area, you may want to consider using a paint sprayer to achieve a smooth, even finish. Once the paint has dried, you can apply a clear coat to protect the paint and give it a glossy finish.

In conclusion, applying the finishing touches to your wooden sailboat is an important step that requires careful attention to detail. By following these tips and using the right tools and materials, you can achieve a beautiful, long-lasting finish that will protect your boat and make it stand out on the water.

Safety Measures

When building a wooden sailboat, safety should always be your top priority. Here are some safety measures you should take to ensure a safe and successful build.

Installing Safety Equipment

Before you start building, make sure you have all the necessary safety equipment installed in your workshop. This includes fire extinguishers, smoke detectors, and first aid kits. You should also have a clear and unobstructed path to the exit in case of an emergency.

When working with power tools, always wear eye and ear protection, as well as a dust mask to protect your lungs. If you are using chemicals, make sure you are working in a well-ventilated area and wear gloves and a respirator if necessary.

Conducting a Safety Check

Before you start working on your sailboat, conduct a safety check to make sure everything is in order. Check that all tools and equipment are in good working order and that there are no loose or damaged parts. Make sure your work area is clean and free of clutter, and that all cords and cables are properly secured.

When working with wood, be aware of any knots or cracks in the wood that could weaken the structure of your sailboat. Use only high-quality marine-grade wood and be sure to follow the plans carefully to ensure a strong and safe boat.

By following these safety measures, you can ensure that your wooden sailboat build is a safe and enjoyable experience.

Maintaining Your Wooden Sailboat

Congratulations on building your own wooden sailboat! Now that you have a beautiful vessel, it’s important to keep it well-maintained to ensure its longevity and safety on the water.

Regular Maintenance

Regular maintenance is essential to keep your wooden sailboat in top condition. Here are some tips to keep in mind:

  • Clean your boat regularly with a mild soap and water to prevent dirt and grime buildup.
  • Check for any signs of damage, such as cracks, rot, or loose fittings, and address them promptly.
  • Apply a fresh coat of varnish or paint every few years to protect the wood from the elements.
  • Keep your boat covered when not in use to protect it from the sun and rain.

Seasonal Maintenance

In addition to regular maintenance, there are also some seasonal tasks that you should perform to keep your wooden sailboat in top condition:

  • At the beginning of the season, inspect the hull for any damage or wear and make any necessary repairs.
  • Check the rigging and sails to make sure they are in good condition and make any necessary repairs or replacements.
  • Before storing your boat for the winter, make sure to properly winterize it to protect it from the cold and moisture.

Additional Tips

Here are some additional tips to keep in mind when maintaining your wooden sailboat:

  • Use high-quality marine-grade products when cleaning and maintaining your boat.
  • Avoid using harsh chemicals or abrasive materials that can damage the wood.
  • Regularly check the bilge for any water buildup and pump it out as needed.
  • Keep your boat well-ventilated to prevent moisture buildup and mold growth.

By following these tips, you can keep your wooden sailboat in top condition and enjoy many years of safe and fun sailing.

How to Build a Wooden Boat: McIntosh's Guide

Are you interested in building your own wooden boat? If so, you’re in luck! Building a wooden boat can be a rewarding experience that allows you to connect with nature and the water. One of the most popular resources for building a wooden boat is the book “How to Build a Wooden Boat” by David C. McIntosh.

This book is an excellent resource for anyone looking to build a wooden boat. It contains detailed instructions on how to construct a carvel-planked cruising boat from a set of plans and a stack of lumber. McIntosh’s writing is clear and concise, making it easy for even beginners to follow along. The book also includes illustrations by Samuel F. Manning that help to bring the process to life.

Whether you’re an experienced boat builder or a novice, “How to Build a Wooden Boat” has something to offer. McIntosh covers everything from the planking process to fitting the deck, framing, and building the house. With this book as your guide, you’ll be well on your way to building your own beautiful wooden boat.

Understanding the Basics of a Wooden Boat

If you are planning to build a wooden boat, it is important to understand the basics of boat building. A wooden boat is made up of several components that work together to create a functional and beautiful vessel. In this section, we will cover the basics of a wooden boat, including the different parts of a boat and the materials used in boat building.

Parts of a Wooden Boat

A wooden boat is made up of several parts, including the hull, deck, keel, stem, and stern. The hull is the main body of the boat, which is responsible for keeping the boat afloat. The deck is the top of the boat, which provides a platform for passengers and crew. The keel is the centerline of the boat, which helps to stabilize the boat in the water. The stem is the front of the boat, which helps to cut through the water, while the stern is the back of the boat, which provides steering and propulsion.

Materials Used in Boat Building

Wood is the most common material used in boat building, due to its strength, durability, and natural beauty. Different types of wood are used for different parts of the boat, depending on their strength and flexibility. For example, oak is often used for the keel and frames, while cedar is used for the planking and deck. Other materials used in boat building include epoxy, fiberglass, and stainless steel, which are used for waterproofing, reinforcing, and fastening the different parts of the boat.

Building Techniques

There are several techniques used in boat building, including traditional wooden boat building and modern boat building techniques. Traditional boat building involves using hand tools to shape and fit the different parts of the boat, while modern boat building involves using power tools and computer-aided design to create precise and efficient boat designs. Regardless of the technique used, boat building requires patience, attention to detail, and a love for the craft.

In conclusion, building a wooden boat requires an understanding of the basics of boat building, including the different parts of a boat, the materials used in boat building, and the building techniques used to create a functional and beautiful vessel. With the right tools, materials, and techniques, anyone can build a wooden boat that will provide years of enjoyment on the water.

Materials Needed for Building a Wooden Boat

Building a wooden boat requires a variety of materials and tools to ensure that the finished product is sturdy and reliable. Here are some of the essential materials and tools you will need to build a wooden boat.

Wood Types

The type of wood you choose will depend on the type of boat you want to build and your budget. Here are some common types of wood used in boat building:

  • Mahogany: This wood is commonly used for building high-end boats because of its durability and attractive appearance.
  • Cedar: Cedar is a lightweight wood that is easy to work with and is often used for building kayaks and canoes.
  • Pine: Pine is an affordable option for boat building and is commonly used for building small boats and dinghies.
  • Oak: Oak is a strong and durable wood that is often used for building larger boats and yachts.

Essential Tools

To build a wooden boat, you will need a variety of tools to cut, shape, and assemble the wood. Here are some essential tools you will need:

  • Circular saw: A circular saw is used for cutting large pieces of wood to the desired size.
  • Jigsaw: A jigsaw is used for cutting curved shapes in the wood.
  • Hand plane: A hand plane is used for smoothing the surface of the wood.
  • Drill: A drill is used for drilling holes in the wood for screws and other hardware.
  • Clamps: Clamps are used for holding the wood together while the glue dries.

Boat Hardware and Accessories

In addition to the wood and tools, you will also need hardware and accessories to complete your wooden boat. Here are some essential items you will need:

  • Screws and nails: These are used to attach the wood together.
  • Marine-grade epoxy: Epoxy is used for gluing the wood together and sealing the boat.
  • Varnish or paint: Varnish or paint is used to protect the wood from water damage and give the boat a finished look.
  • Rope and rigging: These are used to control the sails and other parts of the boat.
  • Navigation lights: These are required by law for boats that are operated at night.

By gathering all of the necessary materials and tools, you can begin the process of building your own wooden boat. With patience and attention to detail, you can create a beautiful and functional boat that will provide years of enjoyment on the water.

Designing Your Wooden Boat

When it comes to building a wooden boat, the design phase is crucial. It’s important to choose a boat design that suits your needs and preferences, and then create a blueprint that will guide you through the building process.

Choosing a Boat Design

There are many different types of wooden boats to choose from, each with its own unique set of characteristics and features. Some of the most popular types of wooden boats include:

  • Canoes
  • Kayaks
  • Rowboats
  • Sailboats
  • Powerboats

When choosing a boat design, consider your intended use for the boat. Will you be using it for fishing, cruising, or racing? Do you plan to use it on calm lakes or rough open waters? Your answers to these questions will help you narrow down your options and choose a boat design that is suitable for your needs.

Creating a Blueprint

Once you have chosen a boat design, it’s time to create a blueprint. A blueprint is a detailed plan that will guide you through the building process. It should include all the necessary measurements, materials, and instructions for building your boat.

When creating your blueprint, be sure to include the following information:

  • Hull shape and dimensions
  • Deck layout and dimensions
  • Bulkhead and frame locations
  • Engine and propulsion system specifications (if applicable)
  • Materials list, including quantities and sizes

It’s important to be as detailed as possible when creating your blueprint. This will help ensure that your boat turns out exactly as you envision it.

In conclusion, designing your wooden boat is an important step in the building process. By choosing a boat design that suits your needs and preferences, and creating a detailed blueprint, you can ensure that your boat turns out exactly as you envision it.

Building the Boat Frame

Building a wooden boat requires a solid frame to be constructed first. This frame will serve as the backbone of the boat, providing the necessary structure and support for the rest of the boat to be built around. In this section, we will cover the two main steps in building the boat frame: cutting the wood and assembling the frame.

Cutting the Wood

Before you can start assembling the frame, you need to cut the wood to the proper dimensions. The type of wood you use will depend on your personal preference and the type of boat you are building. Some common types of wood used in boat building include oak, cedar, and mahogany.

To ensure that your boat frame is strong and sturdy, it is important to use high-quality wood that is free of knots and other defects. Once you have selected your wood, you will need to cut it to the proper dimensions using a saw. You can use a hand saw or a power saw, depending on your preference and skill level.

Assembling the Frame

Once you have cut your wood to the proper dimensions, you can begin assembling the boat frame. This process involves fitting the various pieces of wood together to create the frame of the boat.

One common method for assembling the boat frame is to use a jig. A jig is a special tool that helps you align the pieces of wood and hold them in place while you attach them together. You can purchase a jig or make one yourself using scrap wood.

To assemble the frame, you will need to use a combination of screws, nails, and glue. It is important to use the proper type of fastener for each joint to ensure that the frame is strong and secure.

Overall, building the boat frame is an essential step in the boat building process. By following the steps outlined in this section, you can create a strong and sturdy frame that will serve as the foundation for your boat.

Planking the Boat

Choosing the Planking Method

When it comes to planking your wooden boat, there are two main methods: carvel planking and clinker planking. Carvel planking involves attaching planks edge-to-edge with caulking in between, while clinker planking involves overlapping planks and fastening them with rivets or screws.

Carvel planking is more commonly used for larger boats and offers a smoother finish, while clinker planking is often used for smaller boats and provides a more traditional look. When choosing your planking method, consider the size of your boat, your skill level, and the look you want to achieve.

Attaching the Planks

Once you have chosen your planking method, it’s time to attach the planks to your boat. Begin by cutting your planks to size and shaping them to fit the curves of your boat.

Next, attach the planks to the boat using screws or rivets. Make sure to pre-drill your holes and countersink them to avoid splitting the wood. Use a caulking compound to fill any gaps between the planks and create a watertight seal.

Finally, sand down the planks to create a smooth surface and apply a protective finish to protect the wood from the elements. With careful attention to detail and a bit of patience, you can create a beautiful wooden boat that will last for years to come.

Finishing Touches

After completing the main construction of your wooden boat, it’s time to add the finishing touches that will make it look beautiful and protect it from the elements. Here are some tips for sanding, smoothing, painting, and varnishing your boat to perfection.

Sanding and Smoothing

Before you start painting or varnishing, you need to make sure that the surface of your boat is smooth and free of imperfections. Start by sanding the entire surface with coarse sandpaper to remove any rough spots or bumps. Then, switch to finer sandpaper to smooth out the surface.

To make sure that the surface is completely smooth, run your hand over it to feel for any rough spots. If you find any, sand them down until the surface is completely smooth. Be sure to wear a mask and goggles while sanding to protect yourself from dust and debris.

Painting and Varnishing

Once the surface is smooth, it’s time to add some color and protection to your boat. Start by applying a coat of primer to the entire surface. This will help the paint or varnish adhere to the wood and provide a smooth, even finish.

After the primer has dried, apply your chosen paint or varnish. Use a high-quality brush or roller to apply the paint or varnish in thin, even coats. Be sure to follow the manufacturer’s instructions for drying times and recoating.

If you’re using varnish, you may need to apply several coats to achieve the desired level of protection and shine. Sand lightly between coats to ensure a smooth finish. Once you’re satisfied with the finish, your wooden boat is ready to take to the water!

Remember, the finishing touches are what will make your boat stand out and protect it from the elements. Take your time and use high-quality materials to ensure a beautiful and long-lasting finish.

Maintenance Tips for Your Wooden Boat

Maintaining a wooden boat is essential to ensure its longevity and keep it looking great. Here are some tips to help you maintain your wooden boat:

1. Keep Your Boat Clean

Cleaning your boat regularly is crucial to prevent dirt, grime, and salt buildup. Use a mild detergent and a soft bristle brush to clean the boat’s deck, hull, and other surfaces. Rinse thoroughly with fresh water and dry the boat with a soft cloth.

2. Protect Your Boat from the Sun

The sun’s UV rays can cause damage to your boat’s wooden surfaces, leading to cracking and fading. Use a marine-grade varnish or paint with UV protection to protect the wood from the sun’s harmful rays.

3. Check for Cracks and Rot

Inspect your boat regularly for any signs of cracks, rot, or other damage. Look for any areas where water may be seeping in and causing damage. Address any issues promptly to prevent further damage.

4. Use Quality Boat Care Products

Invest in quality boat care products to keep your wooden boat looking great. Use a wood cleaner and brightener to remove stains and restore the wood’s natural color. Apply a high-quality marine-grade varnish or paint to protect the wood from the elements.

5. Store Your Boat Properly

Proper storage is essential to keep your wooden boat in good condition. Store your boat in a dry, well-ventilated area away from direct sunlight and extreme temperatures. Cover the boat with a breathable cover to protect it from dust and debris.

By following these maintenance tips, you can keep your wooden boat looking great and ensure its longevity.

How to Repaint a Wooden Porch: A Friendly Guide

Repainting your wooden porch is a great way to give it a fresh new look and protect it from the elements. Whether you’re looking to update your porch’s style or simply maintain its structural integrity, repainting is an easy and affordable solution. In this article, we’ll take you through the step-by-step process of repainting a wooden porch, from preparing the surface to choosing the right paint and tools.

The first step in repainting your wooden porch is to prepare the surface. This involves cleaning the porch thoroughly, removing any old paint or stain, sanding down rough spots, and filling in any cracks or holes. Once the surface is clean and smooth, you’ll need to choose the right paint or stain for your porch. Consider factors like the climate in your area, the amount of foot traffic your porch gets, and the overall style of your home when selecting a paint or stain color.

Once you have your supplies and have prepared the surface, it’s time to get started. Repainting a wooden porch can be a time-consuming process, but the end result is well worth it. With the right tools and techniques, you can transform your porch into a beautiful and functional space that you’ll enjoy for years to come. So grab your paintbrush and let’s get started!

Understanding the Basics of Repainting

When it comes to repainting a wooden porch, there are a few basics you should understand before getting started. In this section, we’ll cover why repainting your porch is important and how to choose the right paint.

Why Repaint a Wooden Porch?

Over time, wooden porches can become weathered and worn, which can lead to damage and deterioration. Repainting your porch can help protect it from the elements and extend its lifespan. Additionally, a fresh coat of paint can give your porch a new look and improve its curb appeal.

Choosing the Right Paint

Choosing the right paint is an important step in repainting your porch. You’ll want to select a paint that is specifically designed for exterior use and can withstand the elements. Look for a paint that is water-resistant and has UV protection to prevent fading.

When it comes to color, consider the style of your home and the surrounding landscape. A neutral color can complement a variety of styles, while a bold color can make a statement. Keep in mind that darker colors may absorb more heat and can be more prone to fading.

In addition to selecting the right paint, you’ll also need to choose the right tools. A high-quality brush and roller can help ensure a smooth, even application. You may also want to consider using a primer to help the paint adhere to the surface and improve its durability.

Overall, repainting your wooden porch is a simple and effective way to protect and enhance your home’s exterior. With the right paint and tools, you can achieve a beautiful and long-lasting finish.

Preparation for Repainting

Before repainting your wooden porch, it is important to properly prepare the surface to ensure a smooth and long-lasting finish. This section will cover the two main steps of porch preparation: inspecting the porch and cleaning and sanding the surface.

Inspecting the Porch

The first step in preparing your porch for repainting is to inspect it thoroughly. Look for any signs of damage, such as cracks, rot, or loose boards. If you find any of these issues, they will need to be repaired before you can begin painting.

Inspect the porch for any nails or screws that are sticking up or are loose. These can be dangerous and should be hammered back in or replaced. Check the porch for any signs of mold or mildew. If you find any, use a mold and mildew cleaner to remove it before painting.

Cleaning and Sanding the Surface

Once you have inspected the porch and made any necessary repairs, it is time to clean and sand the surface. This step is crucial to ensure that the paint adheres properly and lasts a long time.

Start by sweeping the porch to remove any loose debris. Then, use a power washer or a hose with a high-pressure nozzle to thoroughly clean the surface. Allow the porch to dry completely before moving on to the next step.

Next, use a paint scraper to remove any loose or peeling paint. Sand the surface using a fine-grit sandpaper to smooth out any rough spots or imperfections. Be sure to wear a mask and safety goggles while sanding to protect yourself from dust and debris.

After sanding, wipe the porch down with a damp cloth to remove any dust or debris. Then, apply a wood primer to the surface. This will help the paint adhere better and last longer.

By properly inspecting, cleaning, and sanding your porch, you will ensure a smooth and long-lasting finish when repainting.

Painting Process

Once you have prepped your wooden porch, it’s time to start painting. Follow these steps to ensure a smooth and long-lasting finish.

Priming the Surface

Before painting, it’s important to prime the surface. This will help the paint adhere better and last longer. Choose a primer that is suitable for outdoor use and matches the type of paint you will be using.

To prime the surface, follow these steps:

  1. Apply the primer evenly using a brush or roller. Make sure to cover the entire surface.
  2. Let the primer dry completely according to the manufacturer’s instructions.
  3. Inspect the surface for any areas that may need additional priming and apply as necessary.

Applying the First Coat

Once the primer has dried, it’s time to apply the first coat of paint. Use a high-quality paint that is suitable for outdoor use and matches the color you desire.

To apply the first coat, follow these steps:

  1. Apply the paint evenly using a brush or roller. Make sure to cover the entire surface.
  2. Let the first coat dry completely according to the manufacturer’s instructions.
  3. Inspect the surface for any areas that may need additional painting and apply as necessary.

Adding Additional Coats

Depending on the type of paint you are using and the desired finish, you may need to apply additional coats. Follow the manufacturer’s instructions for the recommended number of coats.

To add additional coats, follow these steps:

  1. Apply the paint evenly using a brush or roller. Make sure to cover the entire surface.
  2. Let each coat dry completely according to the manufacturer’s instructions.
  3. Inspect the surface for any areas that may need additional painting and apply as necessary.

Remember to use caution when walking on a freshly painted surface and to allow ample time for drying between coats. With proper preparation and painting techniques, your wooden porch will look great for years to come.

Maintenance Tips

Keeping your wooden porch looking great requires some regular maintenance. Here are some tips to help you keep your porch in top condition.

Regular Cleaning

Cleaning your porch regularly is essential to keep it looking good and prevent damage. Dirt, dust, and debris can build up on your porch and cause it to look dull and dirty. To clean your porch, sweep away any loose debris with a broom or brush. Then, use a pressure washer or hose to wash away any remaining dirt and grime. You can also use a mild detergent to help remove stubborn stains.

Touch-up Painting

Over time, the paint on your porch may start to chip or fade. To keep your porch looking great, it’s important to touch up any areas that need it. Before you begin, make sure the surface is clean and dry. Then, lightly sand the area to remove any loose paint. Apply a coat of primer if necessary, and then paint over the area with a matching color. Be sure to use a high-quality paint that is designed for outdoor use.

Sealing for Protection

Sealing your porch can help protect it from the elements and prevent damage. A good sealant will help prevent water from penetrating the wood, which can cause rot and other damage. Before you seal your porch, make sure it is clean and dry. Apply the sealant with a brush or roller, making sure to cover all surfaces evenly. Be sure to follow the manufacturer’s instructions for best results.

By following these maintenance tips, you can keep your wooden porch looking great for years to come.

understanding-polyurethane-finishes

Matte Polyurethane: The Solution to Shiny Wood Finishes

Are you tired of the traditional glossy finish on your woodwork? Do you wish to have a more subtle, matte look? Fortunately, there are options available for producing a matte polyurethane finish on your woodwork.

Matte polyurethane is a type of finish that does not reflect light, giving it a dull, low-sheen appearance. It is a popular choice for those who want to achieve a more natural, rustic or vintage look on their woodwork. While traditional polyurethane finishes can leave a shiny, plastic-like appearance, matte polyurethane can provide a more subtle, understated look.

If you’re wondering whether matte polyurethane is available, the answer is yes. There are several brands that produce matte polyurethane finishes, such as Rust-Oleum and Minwax. However, it’s important to note that applying a matte polyurethane finish requires a different technique than traditional finishes.

Understanding Polyurethane Finishes

understanding-polyurethane-finishes

What is Polyurethane?

Polyurethane is a type of coating that is commonly used to protect wood surfaces. It is a synthetic material that is created by combining a polyol and a diisocyanate. Once applied to a surface, it forms a hard, durable layer that helps to protect the wood from scratches, dents, and other types of damage.

Polyurethane is available in different types of finishes, including matte, glossy, and semi-glossy. The finish that you choose will depend on your personal preference and the type of look that you are trying to achieve.

Matte vs Glossy Finish

When it comes to polyurethane finishes, there are two main types: matte and glossy. Matte finishes are less reflective and have a dull, low-sheen appearance. Glossy finishes, on the other hand, are highly reflective and have a shiny, polished appearance.

The type of finish that you choose will depend on the look that you are trying to achieve. If you want a more natural look for your wood surface, then a matte finish may be the best option. Matte finishes are also a good choice if you want to minimize the appearance of scratches and other types of damage.

If you want a more polished look for your wood surface, then a glossy finish may be the best option. Glossy finishes are highly reflective and can help to make your wood surface look more vibrant and eye-catching.

Overall, the choice between a matte or glossy finish will depend on your personal preference and the type of look that you are trying to achieve. Both types of finishes offer their own unique benefits, and it is up to you to decide which one is right for your project.

Production of Matte Polyurethane

If you’re looking to achieve a more subtle, less glossy finish on your woodwork, matte polyurethane might be the solution for you. Here’s what you need to know about its production.

Manufacturing Process

Matte polyurethane is produced through a similar process to regular polyurethane. The main difference is the addition of flatting agents, which are clear powders that reduce the glossiness of the finish.

The manufacturing process typically involves the following steps:

  1. Mixing the key ingredients (discussed in the next section) together in a reactor vessel.
  2. Adding flatting agents to the mixture.
  3. Heating the mixture to initiate the reaction that forms the polyurethane.
  4. Applying the resulting mixture to the wood surface.

The exact process can vary depending on the specific manufacturer and product.

Key Ingredients

The key ingredients in matte polyurethane are polyols and isocyanates. Polyols are typically derived from petroleum, while isocyanates are derived from diisocyanates such as toluene diisocyanate (TDI) or methylene diphenyl diisocyanate (MDI).

Other ingredients may also be added to the mixture, such as catalysts to speed up the reaction, surfactants to improve the mixture’s flow, and UV stabilizers to protect against fading.

Overall, matte polyurethane can be a great option for those looking for a more subdued finish on their woodwork. Just be sure to follow the manufacturer’s instructions carefully to achieve the best results.

Application on Wood

application-on-wood-1

When it comes to applying polyurethane on wood, there are some preparation steps and application techniques that can help you achieve a matte finish. Here are some tips to help you get started:

Preparation Steps

Before you apply polyurethane on wood, you need to prepare the surface properly. Here are some preparation steps to follow:

  • Sand the surface: Start by sanding the wood surface with fine-grit sandpaper to remove any rough spots or imperfections. Wipe the surface clean with a tack cloth to remove any dust or debris.
  • Apply a wood conditioner: If you’re working with softwood or porous wood, apply a wood conditioner to the surface. This will help the wood absorb the polyurethane evenly and prevent blotching.
  • Choose a matte polyurethane: Look for a matte or flat polyurethane finish to achieve a non-shiny look. You can also mix a matte additive with a regular polyurethane to create a custom finish.

Application Techniques

Once you’ve prepared the wood surface, it’s time to apply the polyurethane. Here are some application techniques to follow:

  • Apply the polyurethane in thin coats: Use a high-quality brush or a foam applicator to apply the polyurethane in thin, even coats. Avoid applying too much polyurethane at once, as this can lead to drips and bubbles.
  • Sand between coats: Allow each coat to dry completely before sanding the surface lightly with fine-grit sandpaper. This will help the next coat adhere better and make the surface smoother.
  • Apply multiple coats: Apply at least two or three coats of polyurethane to achieve a durable and long-lasting finish. Allow each coat to dry completely before applying the next one.

By following these preparation steps and application techniques, you can achieve a matte polyurethane finish on your wood surface. Remember to work in a well-ventilated area and wear protective gear, such as gloves and a mask, when working with polyurethane.

Benefits of Matte Finish

When it comes to finishing wood, there are a variety of options available. One of the most popular options is matte finish. Matte finish has a number of benefits that make it a great choice for many projects. In this section, we’ll discuss the aesthetic appeal of matte finish, as well as its durability and maintenance.

Aesthetic Appeal

One of the main benefits of matte finish is its aesthetic appeal. Unlike glossy finishes, matte finishes do not reflect light, which gives them a more subdued and natural look. This can be particularly appealing for certain types of wood, such as rustic or reclaimed wood, which may not look as good with a shiny finish.

Matte finishes can also be a good choice if you want to create a more relaxed or casual atmosphere in a room. For example, if you’re finishing a dining room table, you may want to choose a matte finish to create a more intimate and cozy atmosphere.

Durability and Maintenance

Another benefit of matte finish is its durability. Matte finishes are often made with polyurethane, which is a very strong and durable material. This means that matte finishes can provide excellent protection for your wood, and can help prevent scratches, dings, and other types of damage.

Additionally, matte finishes are often easier to maintain than glossy finishes. Because they do not reflect light, they are less likely to show smudges, fingerprints, and other types of marks. This means that you can often get away with cleaning your matte-finished wood less frequently than you would with a glossy finish.

Overall, if you’re looking for a finish that is both aesthetically pleasing and durable, matte finish is a great choice. With its natural look and strong protective properties, it’s no wonder that so many people choose matte finish for their wood projects.

Choosing the Right Finish

choosing-the-right-finish

When it comes to choosing the right finish for your wood project, there are a few things to consider. A matte finish can be a great option if you want to reduce the shine and glare of your wood finish. In this section, we will discuss some of the considerations and popular brands of matte polyurethane finishes.

Considerations

Before choosing a matte polyurethane finish, you should consider the following factors:

  • Durability: Will the finish hold up to wear and tear over time?
  • Application: Is the finish easy to apply? Does it require special tools or equipment?
  • Appearance: Does the finish provide the desired level of shine or matte finish?
  • Cost: How much does the finish cost? Is it worth the investment?

Popular Brands

There are several popular brands of matte polyurethane finishes that you can choose from. Here are a few options to consider:

  • Varathane: Varathane offers a matte finish in both water-borne and standard oil-based formulas. Their finishes are known for their durability and ease of application.
  • Zar: Zar also offers a matte urethane finish that is easy to apply and provides a durable, long-lasting finish.
  • Minwax: Minwax offers a matte finish in their Fast-Drying Polyurethane line. Their finish is known for its fast drying time and durability.
  • General Finishes: General Finishes offers a matte finish in their High-Performance Water-Based Topcoat line. Their finish is water-resistant and provides a durable, long-lasting finish.

When choosing a matte polyurethane finish, it’s important to find a brand that meets your specific needs and preferences. Consider the factors listed above and do your research to find the best option for your project.

Frequently Asked Questions

How can I dull a glossy wood finish without sanding?

If you want to dull a glossy wood finish without sanding, you can use a deglosser or a liquid sander. These products are designed to remove the glossy surface of the finish, allowing you to apply a new coat of polyurethane with a matte finish.

What are some ways to make a shiny wood finish look matte?

There are several ways to make a shiny wood finish look matte. One option is to use a rubbing compound to dull the finish. Another option is to apply a coat of wax or oil to the surface of the finish. You can also use a matte topcoat to cover the shiny finish.

Why does my polyurethane finish look shiny instead of matte?

If your polyurethane finish looks shiny instead of matte, it may be because you used a glossy or semi-glossy polyurethane. To achieve a matte finish, you need to use a polyurethane with a matte sheen.

Is there a type of polyurethane that has a matte finish?

Yes, there are types of polyurethane that have a matte finish. Matte polyurethane leaves the least shiny coating and conveys the look of natural, unfinished wood. It is a good option if you want to achieve a matte finish on your wood surface.

What are some techniques to make a polyurethane finish less shiny?

To make a polyurethane finish less shiny, you can use a rubbing compound or apply a coat of wax or oil to the surface of the finish. You can also use a matte topcoat to cover the shiny finish.

Are there any polyurethane finishes that do not have a shiny appearance?

Yes, there are several types of polyurethane finishes that do not have a shiny appearance. Matte, satin, and semi-gloss polyurethane finishes all have a lower level of sheen and reflectivity than high-gloss polyurethane finishes.