Monthly Archives: August 2023

will-home-depot-cut-wood-for-you-768x512-jpg

Will Home Depot Cut Wood? – Everything You Need to Know

Are you planning a DIY project that requires woodcutting? If so, you might be wondering if Home Depot offers woodcutting services. The answer is yes, Home Depot does cut wood for its customers. However, there are some restrictions and fees that you should be aware of before heading to the store.

Home Depot has a wood-cutting area where they serve customers by cutting their wood to the size they need. Any of the wood that you purchase in-store will be cut for free in this area. However, they will not allow you to bring in your own wood from somewhere else. Additionally, Home Depot’s wood cutting services vary from place to place, and many are switching to a fee-based model.

Understanding Home Depot’s Wood Cutting Services

If you are planning a DIY project that requires wood cutting, you might be wondering if Home Depot offers wood cutting services. The good news is that Home Depot does offer wood cutting services, but there are some limitations and restrictions you should be aware of.

What They Offer

Home Depot has a wood-cutting area where they will cut your wood to size for you for transportation. If you have purchased your wood in the store, Home Depot will typically cut your wood for free if it is just a few cuts. However, the number of free cuts they will make depends on the location. If you want to be absolutely sure of your Home Depot’s wood cutting policy, call your local store before heading over.

The basic wood cutting service offered by Home Depot is suitable for performing straight cuts. If you need more complex cuts, such as angled cuts or project cuts, you may need to pay a fee for the service. Home Depot also offers a rough millwork service, which is suitable for performing more complex cuts.

Limitations and Restrictions

While Home Depot does offer wood cutting services, there are some limitations and restrictions you should be aware of. First, you must purchase the wood in-store. Home Depot will not allow you to bring in your own wood from somewhere else.

Second, there is a limit on how many cuts they will make for free. The exact number of free cuts depends on the location, so it’s best to call your local store to find out. Home Depot will not make cuts under 12″, and they do not provide precision or project cuts.

Third, Home Depot’s wood cutting service is not suitable for cutting pressure-treated wood or any other type of wood that contains hazardous materials. If you need to cut pressure-treated wood or any other type of wood that contains hazardous materials, you will need to cut it yourself or hire a professional.

In conclusion, Home Depot does offer wood cutting services, but there are some limitations and restrictions you should be aware of. If you need more complex cuts or need to cut pressure-treated wood or any other type of wood that contains hazardous materials, you should consider hiring a professional.

Why Choose Home Depot for Wood Cutting

will-home-depot-cut-wood-for-you-768x512-jpgwhy-choose-home-depot-for-wood-cutting

If you are looking for a place to get your wood cut to the size you need, Home Depot is a great option. Here are some reasons why:

Convenience

Home Depot has a wood-cutting area in every store where they can cut your wood to the size you need. This is a convenient option for those who do not have the tools or space to do it themselves. Additionally, you can purchase the wood you need at the same location, saving you time and effort.

Expertise

Home Depot employs trained professionals who have the expertise to cut your wood accurately and efficiently. They have the proper tools and equipment to ensure that your cuts are precise and meet your needs. This expertise can save you time and money in the long run by avoiding mistakes and wasted materials.

Variety of Wood Options

Home Depot offers a wide variety of wood options to choose from, including pine, oak, maple, and more. They also have different sizes and thicknesses available, so you can find the right wood for your project. This variety of options means that you can get all of your wood needs met in one place.

Overall, Home Depot is a great choice for wood cutting because of their convenience, expertise, and variety of wood options. If you need your wood cut to size, consider visiting your local Home Depot for their wood-cutting services.

How to Avail Home Depot’s Wood Cutting Service

If you need wood cut to a specific size for your DIY project, Home Depot offers a wood-cutting service that can help you out. Here’s how you can avail of this service:

Step by Step Process

  1. First, select the type of wood you need from Home Depot’s selection.
  2. Take the wood to the wood-cutting area in the store.
  3. Inform the staff of the dimensions you need for the wood.
  4. The staff will then cut the wood to your specifications using their saws and equipment.
  5. Once the wood has been cut, you can take it home or continue shopping for other items you need.

Things to Keep in Mind

  • Home Depot’s wood-cutting service is only available for wood purchased in-store. They will not cut wood that you bring from outside the store.
  • The accuracy of the cuts is not guaranteed, so be sure to double-check the dimensions before leaving the store.
  • Home Depot’s wood-cutting service is free, but there may be a limit to the number of cuts they can make for you.
  • The wait time for wood-cutting service may vary depending on the store’s workload and the number of customers ahead of you in line.

By following these simple steps and keeping these things in mind, you can easily avail of Home Depot’s wood-cutting service and get the wood you need for your DIY project.

Comparing Home Depot to Other Wood Cutting Services

comparing-home-depot-to-other-wood-cutting-services

When it comes to wood cutting services, Home Depot is not the only option available. Other stores and services offer similar services, and it is worth comparing them to see which one is the best fit for your needs.

One of the most significant advantages of Home Depot’s wood cutting service is that it is free for the first few cuts. This is a great option if you only need a few cuts and do not want to pay for an entire sheet of wood or board. However, if you need more precise cuts, you may need to pay extra for the service.

Another option for wood cutting services is Lowe’s. Like Home Depot, Lowe’s offers free cuts for the first few pieces of wood. However, Lowe’s also offers a precision cutting service that is more accurate than Home Depot’s basic cutting service. If you need precise cuts, Lowe’s may be a better option for you.

If you need more specialized wood cutting services, there are also independent wood shops that offer custom cutting services. These shops may be more expensive than Home Depot or Lowe’s, but they can provide more specialized services, such as custom angles or shapes.

Overall, Home Depot’s wood cutting service is a great option for basic cuts and is free for the first few cuts. However, if you need more precise cuts, you may need to pay extra or consider other options such as Lowe’s or independent wood shops.

Safety Measures When Getting Wood Cut at Home Depot

When getting wood cut at Home Depot, it is important to keep safety in mind. Here are some safety measures to consider:

  • Wear protective gear: Home Depot provides safety goggles and earplugs for customers to use while getting their wood cut. Make sure to use them to protect your eyes and ears from sawdust and loud noise.
  • Follow instructions: Listen carefully to the instructions given by the Home Depot employee operating the saw. Make sure to follow their instructions and stay clear of the saw blade.
  • Keep a safe distance: Stand back from the saw while it is in use. Do not approach the saw until it has stopped moving.
  • Do not force the wood: If the wood is not cutting smoothly, do not force it through the saw. This can cause the saw to kick back and potentially injure you.
  • Watch your fingers: Keep your fingers away from the saw blade at all times. Do not attempt to adjust the wood while it is being cut.
  • Do not leave children unattended: If you have children with you, make sure to keep them at a safe distance from the saw and supervise them at all times.

By following these safety measures, you can ensure a safe and successful wood cutting experience at Home Depot.

Frequently Asked Questions

What is the cost of having wood cut at Home Depot?

If you purchase your wood from Home Depot, they will typically cut it for free. However, if you bring in your own wood, there may be a charge. The cost will depend on the number of cuts you need and the size of the wood. It’s best to check with your local Home Depot for their specific pricing.

Can I request Home Depot to cut wood for me?

Yes, you can request Home Depot to cut wood for you. They have a wood-cutting area where they serve customers by cutting their wood to the size they need. However, they will only cut wood that you have purchased from their store.

Does Home Depot offer wood cutting services for non-purchased wood?

No, Home Depot only offers wood cutting services for wood that has been purchased from their store. If you bring in your own wood, they will not cut it for you.

Will Home Depot cut plywood for customers?

Yes, Home Depot will cut plywood for customers. However, the saws in their wood cutting stations are not meant for fine woodworking. The blades are often dull because of the frequency with which they use the saws in-store. Remember that you will likely have to sand down splintered edges if you get your plywood cut in-store.

Where can I get wood cut at an angle?

Home Depot will not cut angled cuts for you. If you need angled cuts, you may need to use a miter saw or circular saw to make the cuts yourself.

Does Lowes charge for wood cutting services?

Like Home Depot, Lowes also offers free wood cutting services for wood purchased from their store. However, if you bring in your own wood, there may be a charge. The cost will depend on the number of cuts you need and the size of the wood. It’s best to check with your local Lowes for their specific pricing.

precautionary-measures

How to Safely Remove Nail Polish from a Wooden Table

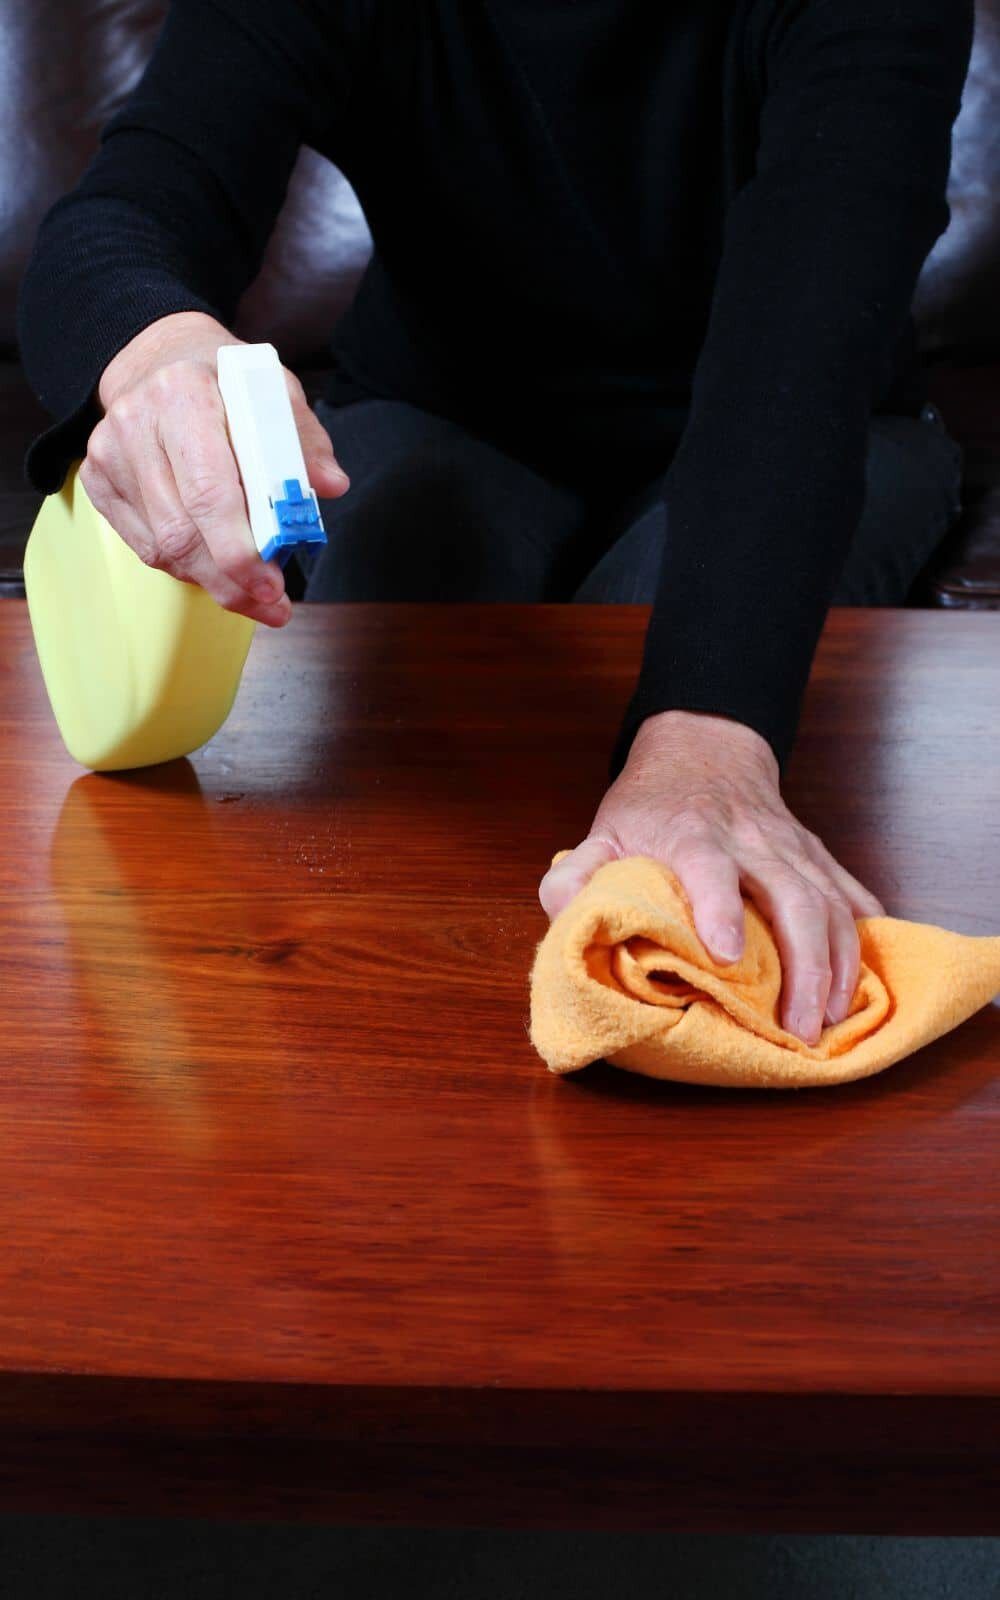
Are you struggling to remove nail polish stains from your wooden table? Don’t worry, you’re not alone! Nail polish stains can be tough to remove, especially from porous surfaces like wood. But with the right techniques and products, you can get your table looking as good as new.

First, it’s important to act fast and remove as much of the nail polish as possible before it sets in. You can use a plastic knife or your fingers to scrape off any excess polish, being careful not to scratch the surface of the wood. If the polish is still wet, you can use a cloth dampened with warm water to blot the stain and remove as much as possible.

Next, you can try using rubbing alcohol to break down the remaining nail polish. Simply dampen a white cloth or cotton swab with rubbing alcohol and gently rub the stain in a circular motion. Be sure to test the alcohol on a small, inconspicuous area of the table first to ensure it doesn’t damage the finish. With a little patience and elbow grease, you can remove even the most stubborn nail polish stains from your wooden table.

Understanding the Problem

understanding-the-problem

When you accidentally spill nail polish on your wooden table, it can be frustrating and worrisome. However, with the right knowledge and tools, you can remove the stain and restore your table to its original condition. In this section, we will explore the nature of nail polish and the characteristics of wooden tables to better understand the problem and how to solve it.

Nature of Nail Polish

Nail polish is a type of lacquer that is designed to adhere to nails and provide a glossy finish. It is made up of various chemicals, including solvents, resins, and pigments. When nail polish comes into contact with a wooden table, it can seep into the pores and create a stain that is difficult to remove.

One of the main solvents in nail polish is acetone, which is a powerful chemical that can dissolve many types of materials. However, acetone can also damage the finish on a wooden table and cause it to become discolored or warped. Therefore, it is important to use the right techniques and products when removing nail polish from a wooden table.

Wooden Table Characteristics

Wooden tables come in many different types of wood, finishes, and styles. Some tables have a natural finish that is designed to showcase the beauty of the wood, while others have a painted or stained finish that provides a different look. Additionally, some tables are more porous than others, which can affect how deeply the nail polish penetrates.

When removing nail polish from a wooden table, it is important to consider the type of wood and finish. Some finishes are more sensitive to solvents than others, and some types of wood are more prone to staining. By understanding the characteristics of your wooden table, you can choose the right products and techniques to remove the nail polish without causing damage.

In the next section, we will explore some of the best methods for removing nail polish from a wooden table.

Precautionary Measures

precautionary-measures

When it comes to removing nail polish from a wooden table, there are a few precautionary measures you should take to ensure that you don’t cause any damage to the wood. Here are some tips to keep in mind:

1. Act quickly

The longer you wait to remove the nail polish, the harder it will be to get it off the wood. As soon as you notice the stain, you should take action to remove it. The longer you wait, the more the nail polish will dry and set into the wood, making it much harder to remove.

2. Test a small area first

Before you start removing the nail polish from the entire surface of the wood, you should test a small, inconspicuous area first. This will help you determine if the nail polish remover you plan to use will cause any damage to the wood.

3. Use the right nail polish remover

It’s important to use the right type of nail polish remover when removing nail polish from a wooden table. Avoid using acetone or any other harsh chemicals that can damage the wood. Instead, opt for a non-acetone nail polish remover or a mixture of warm water and dish soap.

4. Be gentle

When removing the nail polish, be gentle with the wood. Avoid scrubbing too hard or using abrasive materials that can scratch the surface of the wood. Instead, use a soft cloth or cotton swab to gently remove the stain.

5. Clean the area thoroughly

Once you’ve removed the nail polish, make sure to clean the area thoroughly to remove any residue. Use a clean, damp cloth to wipe down the surface of the wood, and then dry it with a soft towel.

By following these precautionary measures, you can safely and effectively remove nail polish from a wooden table without causing any damage to the wood. Remember to act quickly, test a small area first, use the right nail polish remover, be gentle with the wood, and clean the area thoroughly.

Materials Needed

Removing nail polish from a wooden table can be a tricky task, but with the right materials, you can make it a lot easier. Here are some materials you’ll need to get started:

  • Nail polish remover: You can use either acetone or non-acetone nail polish remover, but be careful not to use too much as it can damage the wood.
  • Cotton balls or swabs: These will be used to apply the nail polish remover to the wood.
  • Warm water: You’ll need this to help loosen the nail polish from the wood.
  • Dish soap: This will be used to clean the wood after you’ve removed the nail polish.
  • Soft cloth: You’ll need a soft cloth to wipe away the nail polish and clean the wood.
  • Plastic wrap: This will help to keep the nail polish remover from evaporating too quickly.

Before you begin, make sure you have all of these materials on hand. You don’t want to start the process and then realize you’re missing something important. With these materials, you’ll be able to remove the nail polish from your wooden table quickly and effectively.

Step by Step Guide

step-by-step-guide

Removing nail polish from a wooden table can seem like a daunting task, but with the right tools and techniques, it can be done quickly and effectively. Follow these simple steps to remove nail polish from your wooden table:

Testing the Cleaning Solution

Before applying any cleaning solution to your wooden table, it is important to test it on a small, inconspicuous area to ensure that it does not damage the wood. To do this, apply a small amount of the cleaning solution to a cloth and rub it gently on a small area of the table. If there is no discoloration or damage to the wood, the solution is safe to use.

Applying the Cleaning Solution

Once you have tested the cleaning solution, apply it to the nail polish stain on your wooden table. There are several cleaning solutions you can use, such as rubbing alcohol, acetone, or hairspray. Apply a small amount of the cleaning solution to a cloth and rub it gently on the nail polish stain.

Wiping Off the Nail Polish

After applying the cleaning solution, use a clean cloth to wipe off the nail polish from your wooden table. Be sure to use a gentle, circular motion to avoid scratching the wood. If the nail polish does not come off easily, you can use a plastic knife to scrape it off.

Polishing the Table

Once you have removed the nail polish from your wooden table, it is important to polish the table to restore its shine. Apply a small amount of furniture polish to a cloth and rub it gently on the table. Be sure to follow the manufacturer’s instructions for the furniture polish you are using.

By following these simple steps, you can easily remove nail polish from your wooden table without damaging the wood. Remember to test any cleaning solution on a small area of the table before applying it to the nail polish stain.

Preventing Future Accidents

preventing-future-accidents

Now that you have successfully removed the nail polish from your wooden table, you may be wondering how to prevent future accidents. Here are some tips to help you keep your table looking its best:

  • Use a protective cover: Consider using a tablecloth or placemats to protect your table from spills and stains. This is especially important if you frequently use your table for crafts or other messy activities.
  • Avoid nail polish near your table: Try to avoid painting your nails near your table. If you must apply nail polish near your table, be sure to use a drop cloth or other protective covering to prevent spills.
  • Clean up spills immediately: If you do spill nail polish on your table, clean it up as soon as possible. The longer the nail polish sits on the wood, the harder it will be to remove.
  • Use gentle cleaners: When cleaning your table, avoid harsh chemicals that can damage the wood. Instead, use a gentle cleaner designed for use on wood surfaces.
  • Reapply sealant: If your table has a sealant, consider reapplying it every few years to help protect the wood from spills and stains.

By following these tips, you can help prevent future accidents and keep your wooden table looking beautiful for years to come.

Frequently Asked Questions

How can I remove nail polish from a wooden table without using rubbing alcohol?

If you don’t have rubbing alcohol on hand, there are other household items you can use to remove nail polish from a wooden table. One option is to use vinegar. Soak a cotton ball or cloth in vinegar and gently rub the nail polish stain until it lifts. Another option is to use baking soda. Mix baking soda with a small amount of water to make a paste, then apply it to the stain and gently rub until the nail polish comes off.

How do I remove nail polish remover stains from a painted wood table?

If you accidentally spill nail polish remover on a painted wood table, act quickly to prevent the stain from setting in. Use a damp cloth to blot up as much of the nail polish remover as possible, then mix a solution of mild dish soap and warm water. Dip a clean cloth in the solution and gently rub the stained area until the stain lifts.

What is the best way to remove nail polish from furniture?

The best way to remove nail polish from furniture depends on the type of furniture and the finish. For unfinished wood, use a solution of warm water and dish soap to gently rub the stain until it lifts. For finished wood, use a commercial wood cleaner or furniture polish to remove the stain. If the stain is stubborn, you can also try using rubbing alcohol or acetone, but be careful not to damage the finish.

How can I safely remove nail polish from painted wood surfaces?

Removing nail polish from painted wood surfaces can be tricky, as you don’t want to damage the paint. One option is to use a small amount of nail polish remover on a cotton ball or cloth and gently rub the stained area until the nail polish lifts. Another option is to mix a solution of warm water and mild dish soap, and use a clean cloth to gently rub the stain until it lifts.

What are some effective ways to remove nail polish from wood cabinets?

If you accidentally spill nail polish on your wood cabinets, act quickly to prevent the stain from setting in. Use a damp cloth to blot up as much of the nail polish as possible, then mix a solution of warm water and mild dish soap. Dip a clean cloth in the solution and gently rub the stained area until the stain lifts. If the stain is stubborn, you can also try using rubbing alcohol or acetone, but be careful not to damage the finish.

Can mayonnaise remove nail polish remover stains from wood surfaces?

While some people swear by using mayonnaise to remove nail polish remover stains from wood surfaces, there is no scientific evidence to support this claim. It’s best to stick to tried-and-true methods like using rubbing alcohol or a solution of warm water and mild dish soap to remove stains from wood surfaces.

types-of-wood-filler

How Long Does Wood Filler Need to Dry Before Sanding? Quick Guide

When working on a woodworking project, you may find yourself needing to fill in gaps or cracks in the wood. This is where wood filler comes in handy. However, once you have applied the wood filler, you need to wait for it to dry before you can sand it down and continue working on your project. So, how long does a wood filler need to dry before sanding?

The drying time of wood filler can vary depending on the type of filler you are using and the conditions in which it is applied. Water-based wood fillers typically take around 30 minutes to an hour to dry, while oil-based fillers can take up to six to seven hours. However, if you are working in a space with high humidity or extreme temperatures, the drying process may take longer. Additionally, the thickness of the application can also affect the drying time.

Understanding Wood Filler

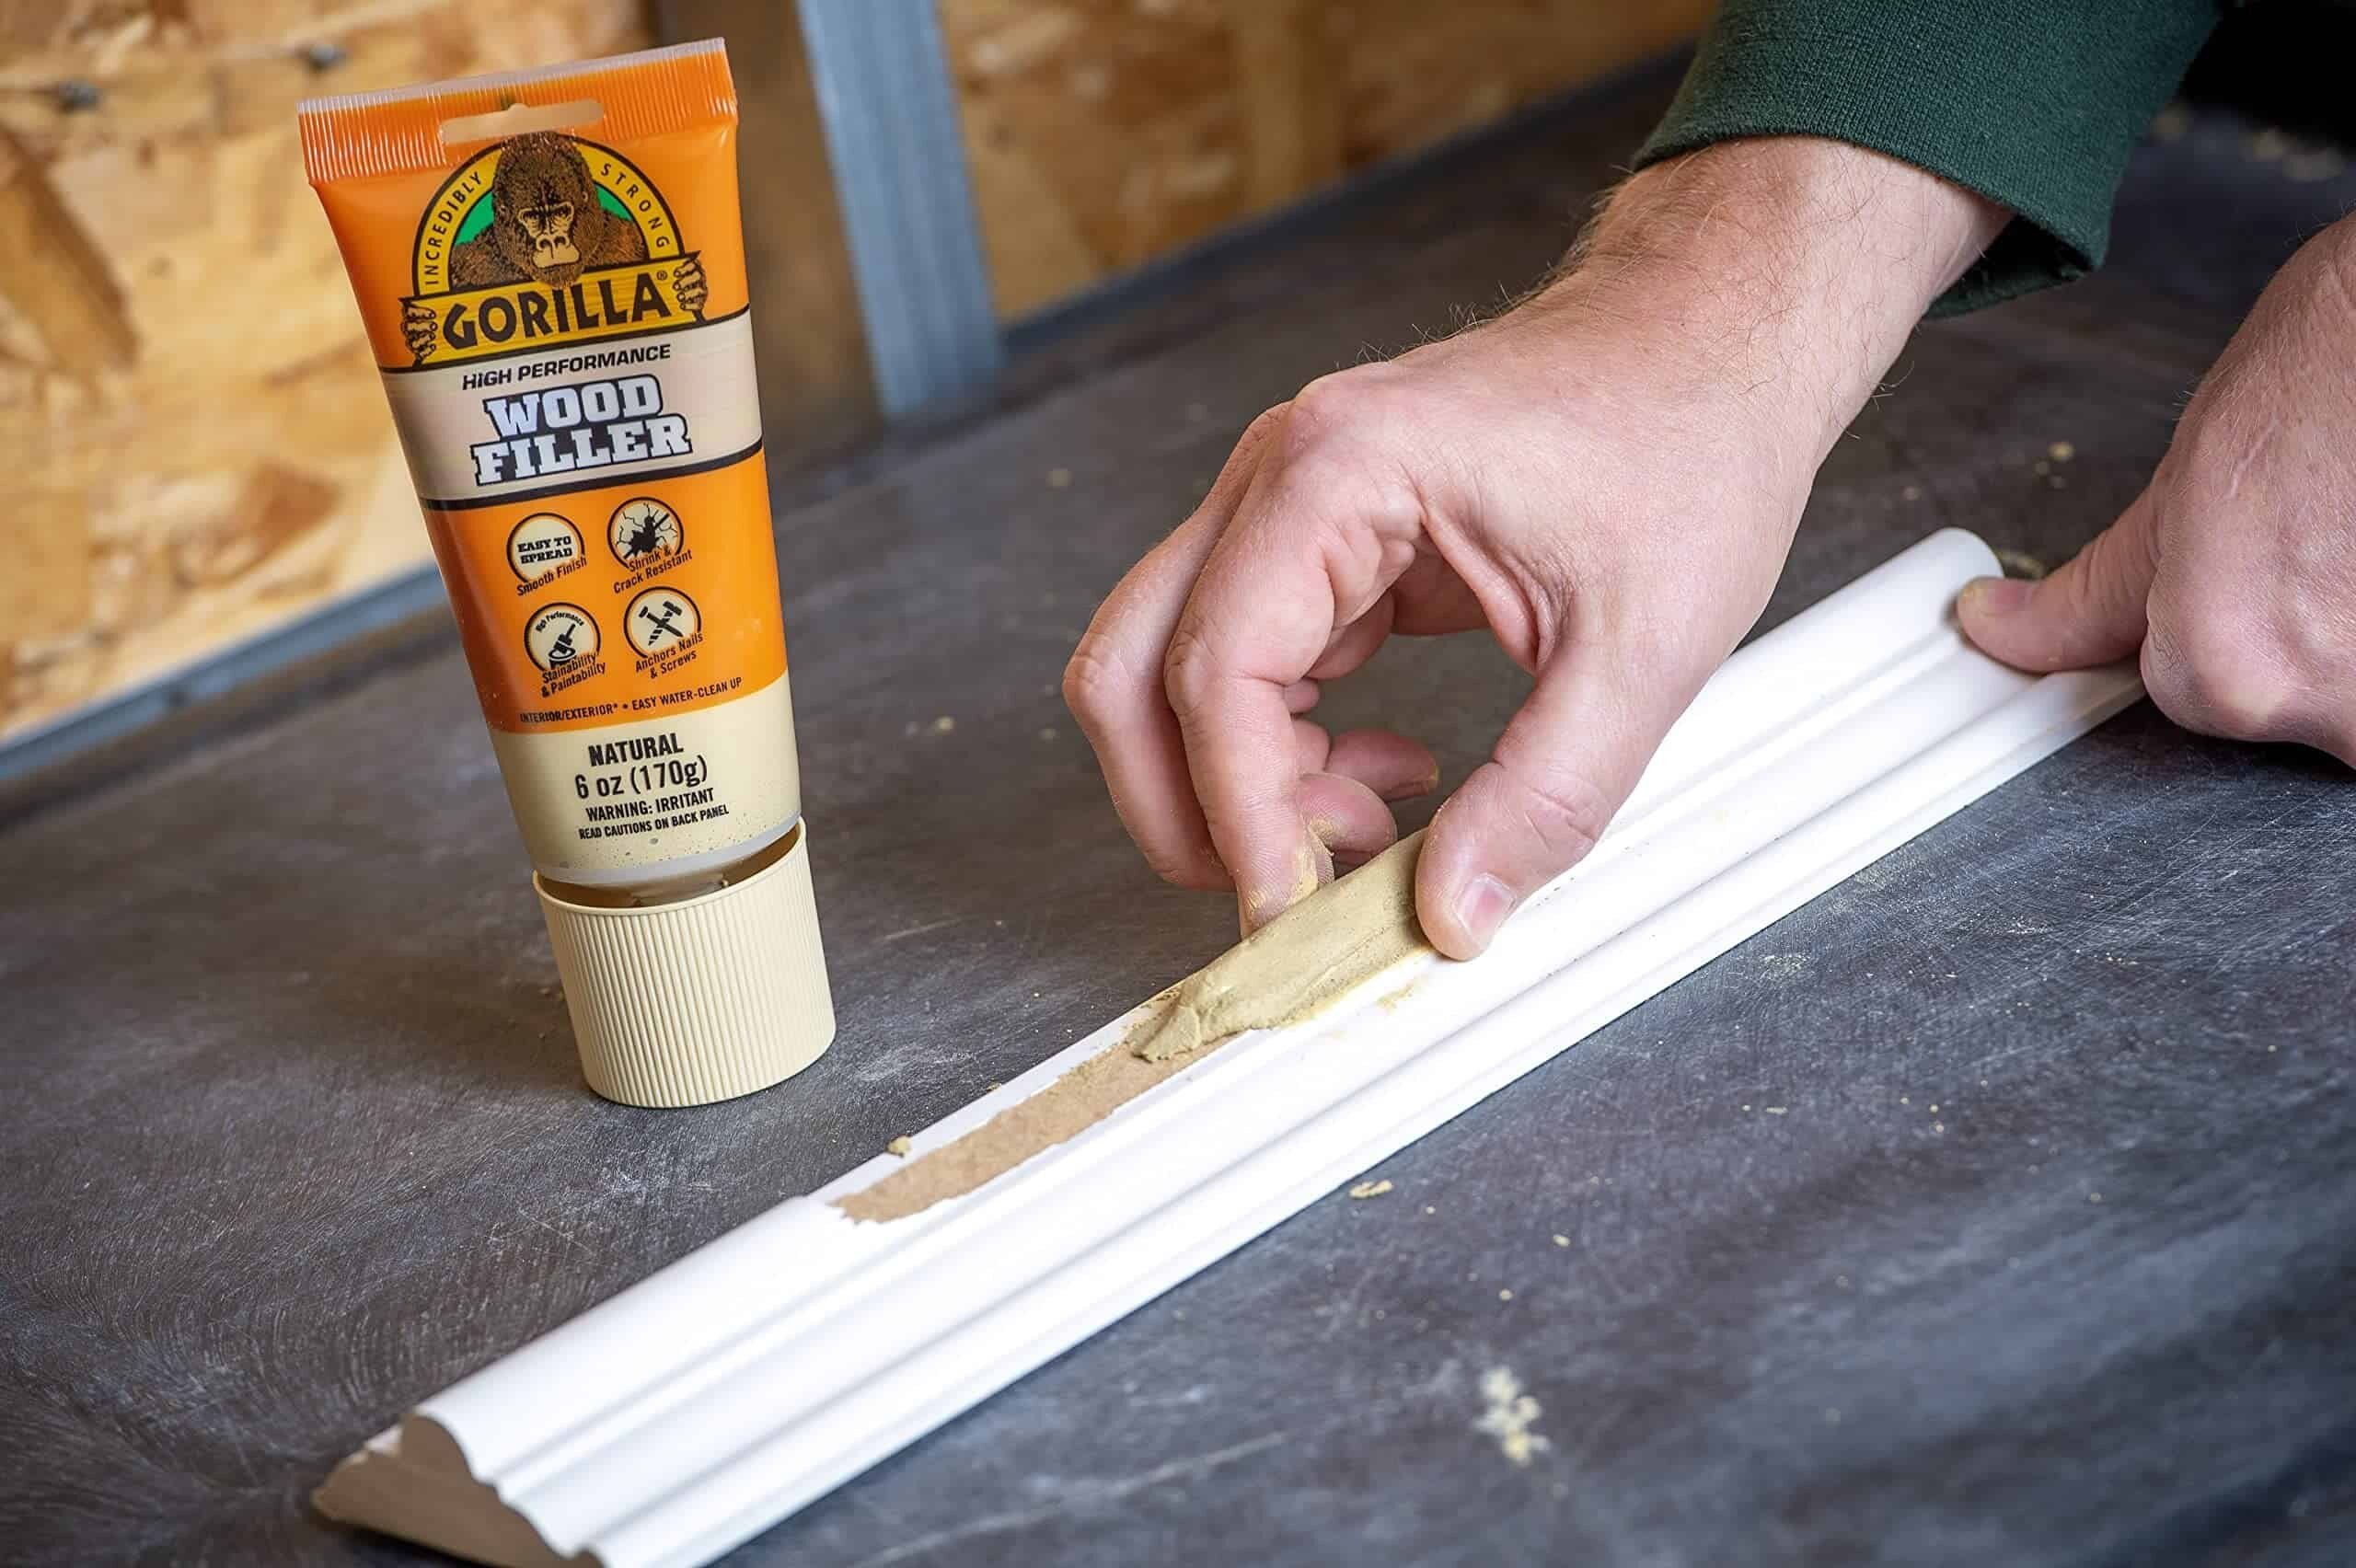
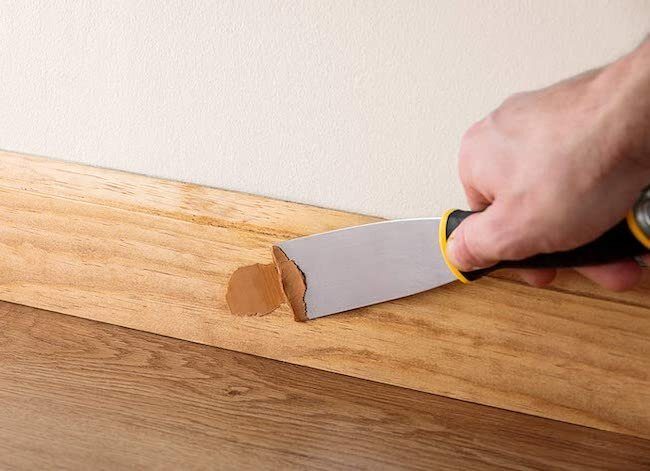
If you’re looking to repair small gaps, cracks, or holes in wood, wood filler can be a great solution. It’s a putty-like material that can be applied to the surface of the wood to fill in any imperfections. However, before you can start sanding, you need to make sure that the wood filler is completely dry.

Wood filler comes in two main types: water-based and oil-based. Water-based wood fillers typically dry faster, while oil-based wood fillers take longer to dry. The drying time can also be affected by other factors such as the temperature, humidity, and thickness of the application.

It’s important to note that wood filler is not a permanent solution. It’s a temporary fix that can help improve the appearance of the wood. If you’re looking for a more permanent solution, you may need to replace the damaged wood entirely.

When using wood filler, it’s important to follow the manufacturer’s instructions carefully. Make sure that the surface of the wood is clean and dry before applying the filler. Apply the filler in thin layers, allowing each layer to dry completely before applying the next.

Once the wood filler is dry, you can start sanding. Sanding helps to smooth out the surface of the wood and remove any excess filler. Start with a coarse-grit sandpaper and gradually work your way up to a finer-grit sandpaper. Be careful not to sand too much, as this can damage the wood.

In summary, wood filler can be a great solution for repairing small imperfections in wood. Understanding the type of wood filler you’re using and the drying time can help you achieve the best results. Remember to follow the manufacturer’s instructions carefully and take your time when sanding to achieve a smooth and flawless finish.

Types of Wood Filler

types-of-wood-filler

When it comes to wood fillers, there are several types available in the market. Each type has its own unique characteristics and is suitable for different applications. In this section, we will discuss the three most common types of wood fillers.

Water-Based Wood Filler

Water-based wood fillers are a popular choice among woodworkers because they are easy to use and clean up. They are also non-toxic and have a low odor, making them ideal for indoor use. These fillers are made from a mixture of water, cellulose fibers, and binding agents.

One of the main advantages of water-based wood fillers is that they dry quickly, usually within an hour. However, they are not as strong as solvent-based or epoxy wood fillers and may not be suitable for larger repairs or heavy-duty applications.

Solvent-Based Wood Filler

Solvent-based wood fillers are made from a mixture of solvents, resins, and wood fibers. They are stronger and more durable than water-based fillers and can be used for heavier repairs. However, they have a strong odor and are not as environmentally friendly as water-based fillers.

One of the advantages of solvent-based wood fillers is that they can be sanded and stained to match the surrounding wood. They also dry quickly, usually within a few hours. However, they can be difficult to clean up and may require the use of solvents.

Epoxy Wood Filler

Epoxy wood fillers are a two-part system that consists of a resin and a hardener. When mixed together, they create a strong, durable filler that can be used for large repairs and heavy-duty applications. They are also waterproof and resistant to rot and decay.

One of the advantages of epoxy wood fillers is that they can be sanded, stained, and painted to match the surrounding wood. They also dry quickly, usually within a few hours. However, they can be more difficult to work with than other types of wood fillers and require careful mixing and application.

Understanding Drying Time

understanding-drying-time

When it comes to using wood filler, drying time is an important factor to consider. The length of time it takes for wood filler to dry can vary depending on a variety of factors, including the type of filler, the humidity and temperature of the room, and the thickness of the application.

Water-based wood filler typically takes around 30 minutes to an hour to dry, while oil-based wood filler can take six to seven hours to dry. However, it’s important to note that if the wood filler is applied in a space with high humidity, the drying process can take longer. Direct sunlight, temperature, and weather can also elongate the drying process.

The amount of wood filler applied can also affect drying time. Small amounts of filler in shallow applications take around 2 hours to dry, while thicker applications can take longer. Additionally, the brand of filler and the amount of hardener used in a 2-part filler can also impact drying time.

To ensure that your wood filler dries properly, it’s important to follow the manufacturer’s instructions carefully. This may include allowing the filler to dry for a specific amount of time before sanding or applying a sealant. Sanding too soon can result in the filler not adhering properly, while waiting too long can make it more difficult to sand.

In summary, understanding the drying time of wood filler is crucial to achieving a smooth and flawless finish. Take into consideration the type of filler, the humidity and temperature of the room, and the thickness of the application to determine the appropriate drying time. Always follow the manufacturer’s instructions carefully to ensure the best results.

Factors Affecting Drying Time

When it comes to wood fillers, the drying time can vary depending on several factors. In this section, we’ll take a closer look at some of the factors that can affect the drying time of wood fillers.

Type of Wood Filler

Different types of wood fillers have different drying times. For example, water-based fillers tend to dry faster than oil-based fillers. Two-part fillers also tend to dry faster than one-part fillers. It’s important to follow the manufacturer’s instructions regarding drying time for the specific type of wood filler you are using.

Application Thickness

The thickness of the wood filler application can also affect the drying time. Thicker applications will take longer to dry than thinner applications. It’s important to apply the wood filler in thin layers and allow each layer to dry completely before applying the next layer. This will help ensure that the wood filler dries evenly and thoroughly.

Ambient Conditions

The ambient conditions of the room where the wood filler is drying can also affect the drying time. Humidity and temperature can both play a role in how long it takes for the wood filler to dry. In general, higher humidity and lower temperatures will result in longer drying times. It’s important to keep the room well-ventilated and at a moderate temperature to help ensure that the wood filler dries properly.

In summary, the type of wood filler, application thickness, and ambient conditions can all affect the drying time of wood fillers. It’s important to follow the manufacturer’s instructions and take these factors into consideration to ensure that the wood filler dries properly and is ready for sanding.

How to Determine if Wood Filler is Dry

When working with wood filler, it’s important to know when it’s dry before sanding or painting. Here are a few ways to determine if your wood filler is dry:

1. Touch Test

The most straightforward way to check if your wood filler is dry is to touch it. If it feels hard and doesn’t leave any residue on your finger, it’s likely dry. However, if it feels tacky or soft, it needs more time to dry.

2. Color Test

Another way to check if your wood filler is dry is to look at its color. If the filler is white or grey when wet, it will turn a darker shade when dry. Once the color has changed, you can assume that the filler is dry.

3. Time Test

The amount of time it takes for wood filler to dry varies depending on the type of filler and the conditions in which it’s applied. As a general rule, shallow repairs involving wood filler will only take 15 minutes to two hours to dry. Deeper fills can take as long as six hours before they are fully affixed to the wood. However, it’s always best to check the manufacturer’s guidelines for specific drying times.

4. Smell Test

Some wood fillers emit a strong odor when they’re wet, but the smell will dissipate as they dry. If you still smell the filler after a few hours, it’s likely not dry yet.

Remember, it’s always better to wait a little longer than to sand or paint too soon and ruin your project.

Preparation for Sanding

Before sanding your wood filler, there are a few things you need to keep in mind to ensure a smooth and flawless finish. In this section, we’ll discuss the safety measures you need to take and the tools required for sanding.

Safety Measures

Sanding wood can produce a lot of dust, which can be harmful if inhaled. To protect yourself, make sure to wear a dust mask and safety goggles while sanding. Additionally, it’s a good idea to work in a well-ventilated area to minimize dust buildup.

Tools Required

To sand your wood filler, you’ll need a few tools. Here are the essential tools you’ll need:

  • Sandpaper: Choose sandpaper with a grit that matches the level of roughness of your wood filler. For example, if you used a coarse filler, start with a coarse grit sandpaper, and work your way up to a finer grit.
  • Sanding block: A sanding block helps you apply even pressure while sanding, which helps prevent uneven sanding.
  • Oscillating sander: An oscillating sander is a power tool that helps you sand large areas quickly and efficiently. If you don’t have access to an oscillating sander, you can sand by hand using a sanding block.

Once you have these tools, you’re ready to start sanding your wood filler. Remember to take your time and sand slowly to avoid over-sanding and damaging your wood.

The Sanding Process

Sanding is an essential step in achieving a smooth and polished finish for your woodwork project. Once the wood filler has dried, you can begin sanding. Here are the steps to follow:

Step by Step Sanding

  1. Start with a coarse-grit sandpaper, such as 80 grit, to remove any excess wood filler and level out the surface. Sand in the direction of the grain to avoid damaging the wood.
  2. Move on to a finer-grit sandpaper, such as 120 grit, to smooth out the surface. Sand in the direction of the grain until the surface is even and smooth.
  3. Finish with an even finer-grit sandpaper, such as 220 grit, to create a polished finish. Sand lightly in the direction of the grain to avoid scratches.

Tips for Effective Sanding

  • Use a sanding block to keep the sandpaper flat and even, preventing uneven sanding and scratches.
  • Change the sandpaper frequently to avoid clogging and ensure effective sanding.
  • Wear a dust mask and eye protection to avoid inhaling wood dust and protect your eyes from flying debris.
  • Sand in a well-ventilated area to avoid inhaling harmful fumes from the wood filler and sandpaper.
  • Take breaks to rest your hands and avoid overexertion, which can lead to hand fatigue and injuries.

Following these steps and tips will ensure that your woodwork project has a smooth and polished finish.

Frequently Asked Questions

How long does it take for wood filler to dry before sanding?

The drying time for wood filler before sanding depends on the type of filler used. Water-based fillers usually take 2 to 4 hours to dry, while oil-based fillers take 6 to 8 hours. It’s important to read the manufacturer’s instructions to determine the exact drying time for your specific filler.

What is the drying time for sandable wood filler?

Sandable wood filler dries in about 2 to 4 hours, but it’s best to wait at least 24 hours before sanding. This will ensure that the filler is completely dry and will prevent it from cracking or shrinking when sanded.

Can wood fillers be sanded?

Yes, wood fillers can be sanded once they are completely dry. Use a fine-grit sandpaper to sand the filler until it’s smooth and level with the surrounding wood.

How long does it take for DAP Plastic Wood Filler to dry?

DAP Plastic Wood Filler dries in about 2 to 6 hours depending on the size of the repair, depth of the fill, and temperature and humidity conditions. It’s best to wait at least 24 hours before sanding or painting.

What is the best wood filler for large holes?

For large holes, it’s best to use an epoxy wood filler. Epoxy fillers are strong, durable, and can be sanded and painted over once dry. Some popular brands include Abatron WoodEpox and J-B Weld Wood Restore.

How do I use wood filler before painting?

To use wood filler before painting, first clean and dry the area to be repaired. Apply the filler using a putty knife, making sure to fill the entire area. Let the filler dry completely, then sand it smooth with a fine-grit sandpaper. Finally, prime and paint the repaired area to match the surrounding wood.

what-are-chep-pallets-and-how-do-they-differ-from-regular-wooden-pallets

what-are-chep-pallets-and-how-do-they-differ-from-regular-wooden-pallets

If you’re in the shipping or logistics industry, you’ve likely heard of CHEP pallets. But what makes them different from regular wooden pallets? While both serve the same basic purpose of transporting goods, there are a few key differences between the two that can impact your supply chain.

First and foremost, CHEP pallets are not your typical wooden pallets. They are standardized, reusable pallets that are designed to be used over and over again. This means that they are inspected, repaired, and maintained to a high standard, ensuring that they are safe and reliable for transporting your goods. In contrast, regular wooden pallets are often one-time use and can vary in quality depending on where they were sourced from.

Another key difference between CHEP pallets and regular wooden pallets is their size. CHEP pallets are typically standardized to match the pallet size of the country or economic market being served, such as 48×40 inches in the Americas. This means that they are designed to fit seamlessly into your supply chain, making it easier to transport and store your goods. In contrast, regular wooden pallets can vary in size and shape, which can make it more difficult to stack and transport them efficiently.

Understanding Pallets

Pallets are an essential part of the transportation and logistics industry. They are flat structures that allow goods to be stacked and transported easily. Pallets can be made of different materials such as wood, plastic, or metal. In this section, we will focus on the difference between CHEP pallets and regular wooden pallets.

Regular Wooden Pallets

Regular wooden pallets, also known as “white wood” pallets, are the most common type of pallets used in the industry. They are made of wood and are usually painted or treated to prevent rot and decay. Regular wooden pallets come in different sizes and designs, but the most common size is 48×40 inches in the Americas.

One of the main advantages of regular wooden pallets is that they are cheap and readily available. However, they have some disadvantages too. For example, they are not very durable and can break easily, leading to damage to the goods being transported. They can also be difficult to track and manage due to the lack of a standardized system.

CHEP Pallets

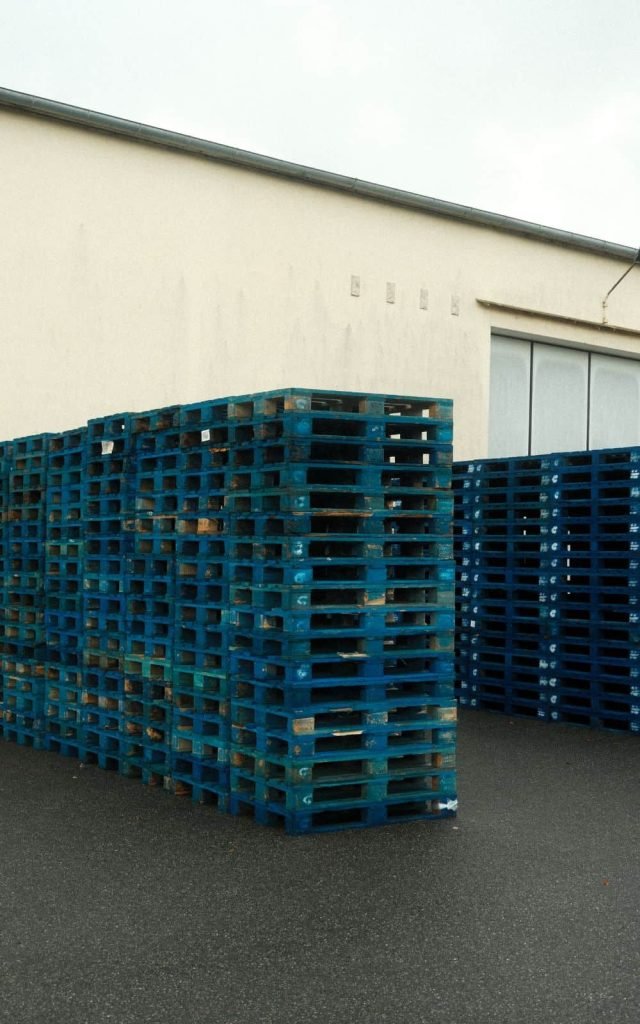
CHEP pallets are a type of rental pallet that is used by many companies in the transportation and logistics industry. They are made of durable materials such as plastic or composite wood and are designed to be reused multiple times. CHEP pallets are usually blue in color, which makes them easy to identify.

One of the main advantages of CHEP pallets is that they are more durable than regular wooden pallets. They are also standardized, which means that they can be easily tracked and managed throughout the supply chain. This makes them ideal for companies that need to transport goods over long distances or across borders.

However, CHEP pallets are more expensive than regular wooden pallets, which can be a disadvantage for some companies. They also require a deposit, which can be a barrier to entry for smaller companies.

In conclusion, both regular wooden pallets and CHEP pallets have their advantages and disadvantages. It is important to choose the right type of pallet for your specific needs based on factors such as cost, durability, and tracking capabilities.

What are CHEP Pallets

what-are-chep-pallets

If you’re in the supply chain or logistics industry, you might have heard of CHEP pallets. CHEP is a global leader in pallet and container pooling services. They provide a sustainable, cost-effective, and efficient way to move products through the supply chain. Here’s what you need to know about CHEP pallets.

History of CHEP Pallets

CHEP was founded in Australia in 1945. In 1958, Brambles Limited, a company experienced in the materials handling industry, purchased CHEP. Over the years, CHEP has grown into a global company with operations in approximately 60 countries. CHEP pallets are easily recognizable by their blue color, which is used as a color coding aid and a marketing advantage.

Features of CHEP Pallets

CHEP pallets have several features that make them stand out from regular wooden pallets. Here are a few of them:

  • Scalable: CHEP pallets can be scaled as per your business needs. You only pay for what you use, which means lower upfront costs.
  • Sustainable: CHEP pallets help reduce your environmental impact and meet sustainability goals. They have a Zero Waste World commitment, which means they aim to eliminate waste from their operations.
  • Standardized: CHEP pallets are standardized, which means they are consistent in size, shape, and quality. This makes them ideal for automated systems, reducing the risk of product damage and downtime.
  • Hygienic: CHEP pallets are cleaned and sanitized after each use, which reduces the risk of contamination and improves food safety.
  • Durable: CHEP pallets are made from high-quality materials and are designed to last longer than regular wooden pallets. This means fewer replacements and less downtime.

In conclusion, CHEP pallets are a sustainable, cost-effective, and efficient way to move products through the supply chain. They have several features that make them stand out from regular wooden pallets, such as scalability, sustainability, standardization, hygiene, and durability.

What are Regular Wooden Pallets

If you’re in the shipping and logistics industry, you’re likely familiar with wooden pallets. They’re a staple in the industry and have been used for decades to transport goods. In this section, we’ll take a closer look at what regular wooden pallets are, their history, and features.

History of Wooden Pallets

Wooden pallets have been around for over a century. They were first used in the early 20th century to transport goods in train cars. The first wooden pallets were made from hardwood and were designed to be lifted by forklifts. The use of wooden pallets became more widespread during World War II when they were used to transport goods to troops overseas.

Since then, wooden pallets have become a standard in the shipping and logistics industry. They’re used to transport everything from food to electronics and are an essential part of the supply chain.

Features of Wooden Pallets

Wooden pallets are typically made from hardwood or softwood and come in a variety of sizes. The most common size for wooden pallets is 48 x 40 inches, but they can be found in other sizes as well.

One of the benefits of wooden pallets is that they’re relatively inexpensive compared to other types of pallets. They’re also easy to repair and can be reused multiple times. Wooden pallets can be stacked, making them ideal for warehouses and other storage facilities.

However, wooden pallets do have some drawbacks. They can be heavy, making them difficult to move around. They’re also susceptible to moisture and can warp or rot over time. Additionally, wooden pallets can be a fire hazard if not stored properly.

Overall, wooden pallets are a reliable and cost-effective option for transporting goods. However, they do have some limitations that should be considered when choosing a pallet for your supply chain.

Comparing CHEP Pallets and Regular Wooden Pallets

comparing-chep-pallets-and-regular-wooden-pallets

When it comes to pallets, there are many options available in the market. Two of the most popular types are CHEP pallets and regular wooden pallets. In this section, we will compare these two types of pallets based on their material, durability, cost, and availability.

Material

CHEP pallets are made of high-quality, sustainable materials such as recycled wood and plastic. They are designed to be reusable and recyclable, which makes them an eco-friendly option for businesses. On the other hand, regular wooden pallets are made of natural wood, which is a renewable resource, but they are not as sustainable as CHEP pallets.

Durability

CHEP pallets are designed to be durable and long-lasting. They are made to withstand the rigors of transportation and storage, and they are less likely to break or splinter than regular wooden pallets. Regular wooden pallets, on the other hand, can be prone to damage, especially if they are not well-maintained.

Cost

When it comes to cost, CHEP pallets are typically more expensive than regular wooden pallets. However, this cost is offset by the fact that CHEP pallets are reusable and recyclable, which means that businesses can save money in the long run by using them. Regular wooden pallets, on the other hand, are cheaper upfront, but they are not as sustainable or long-lasting as CHEP pallets.

Availability

CHEP pallets are widely available in many countries, and they can be rented or purchased from CHEP directly. Regular wooden pallets, on the other hand, can be more difficult to source, especially if you need a specific size or type of pallet. Additionally, regular wooden pallets can be subject to regulations and restrictions, especially when it comes to international shipping.

In summary, both CHEP pallets and regular wooden pallets have their pros and cons. While CHEP pallets are more sustainable and durable, they are also more expensive. Regular wooden pallets are cheaper upfront, but they are not as eco-friendly or long-lasting as CHEP pallets. Ultimately, the choice between these two types of pallets will depend on your business needs and priorities.

Benefits of Using CHEP Pallets over Regular Wooden Pallets

When it comes to transporting goods, pallets are an essential component of the supply chain. While regular wooden pallets have been the traditional choice, CHEP pallets offer several benefits that make them a superior option.

Here are some of the benefits of using CHEP pallets over regular wooden pallets:

1. Consistency in Quality

One of the most significant advantages of CHEP pallets is their consistent quality. CHEP pallets are made from high-quality materials and are designed to meet strict standards, ensuring that they are sturdy and reliable. In contrast, regular wooden pallets can vary in quality, which can lead to issues with stability and safety.

2. Cost Savings

Using CHEP pallets can save you money in the long run. Since CHEP pallets are designed to be reused, you don’t need to constantly buy new pallets. This reduces your overall pallet costs and eliminates the need for pallet disposal. Additionally, CHEP pallets can be rented, so you only pay for what you use.

3. Sustainability

CHEP pallets are an environmentally friendly option. Since they are designed to be reused, they reduce the need for new pallets to be produced, which helps to reduce waste. Additionally, CHEP pallets are made from sustainable materials, so they have a lower environmental impact than regular wooden pallets.

4. Improved Supply Chain Efficiency

Using CHEP pallets can improve the efficiency of your supply chain. Since CHEP pallets are designed to be compatible with automated systems, they can be easily moved and tracked. This helps to reduce the time and effort required to move goods, which can improve overall supply chain performance.

In summary, using CHEP pallets over regular wooden pallets offers several benefits, including consistent quality, cost savings, sustainability, and improved supply chain efficiency.

Drawbacks of Using CHEP Pallets over Regular Wooden Pallets

drawbacks-of-using-chep-pallets-over-regular-wooden-pallets

While CHEP pallets have several advantages over regular wooden pallets, they also have some drawbacks that you should be aware of before deciding which type of pallet to use.

Higher Cost

One of the main drawbacks of using CHEP pallets is their higher cost compared to regular wooden pallets. Since CHEP pallets are designed for reuse, they are made with higher-quality materials and are subject to more stringent quality standards. This results in a higher cost per pallet, which can add up quickly if you have a large volume of shipments.

Limited Customization

Another drawback of using CHEP pallets is their limited customization options. CHEP pallets are available in a limited range of sizes and configurations, which may not be suitable for all types of shipments. If you require a pallet with specific dimensions or features, you may need to use a regular wooden pallet instead.

Complex Logistics

Using CHEP pallets can also add complexity to your logistics operations. Since CHEP pallets are part of a rental pool, you need to ensure that you have enough pallets on hand to meet your shipping needs. You also need to coordinate with CHEP to arrange for pickup and delivery of the pallets, which can be time-consuming and require additional resources.

Environmental Concerns

Finally, while CHEP pallets are designed for reuse and recycling, they still have a negative impact on the environment. CHEP pallets are made from wood, which is a non-renewable resource, and their production and transportation contribute to greenhouse gas emissions. If you are concerned about the environmental impact of your shipping operations, using regular wooden pallets may be a better option.

Frequently Asked Questions

What distinguishes CHEP pallets from regular wooden pallets?

CHEP pallets are made from high-quality wood and are designed to be more durable and long-lasting than regular wooden pallets. They are also standardized in size and shape, which makes them easier to handle and transport. Additionally, CHEP pallets are owned and managed by CHEP, which means that they are always in good condition and can be easily tracked and traced throughout the supply chain.

What are the benefits of using CHEP pallets over regular wooden pallets?

Using CHEP pallets can provide several benefits, including lower upfront costs, reduced environmental impact, and improved supply chain efficiency. CHEP pallets are also designed to be more durable and long-lasting than regular wooden pallets, which can help reduce the need for frequent replacements. Additionally, CHEP pallets are standardized in size and shape, which makes them easier to handle and transport.

How do CHEP pallet dimensions compare to those of regular wooden pallets?

CHEP pallets are available in a range of sizes and dimensions, depending on the country or economic market being served. In the Americas, the primary pallet size is 48×40 inches, while in the UK, the standard CHEP pallet size is 1200×1000 mm. In continental Europe, the standard size is 1200×800 mm. These dimensions are similar to those of regular wooden pallets, which are typically available in standard sizes based on the country or region.

Where can I find CHEP pallets for rent near me?

You can find CHEP pallets for rent at various locations throughout the United States and around the world. The best way to find rental locations near you is to visit the CHEP website and use the location finder tool. Simply enter your zip code or city and state, and the tool will provide a list of rental locations in your area.

What is the weight of a blue CHEP pallet?

The weight of a blue CHEP pallet can vary depending on the size and type of pallet. However, most CHEP pallets are designed to be lightweight and easy to handle, with an average weight of around 40 to 50 pounds.

Who is the owner of CHEP pallets?

CHEP pallets are owned and managed by CHEP, a global provider of supply chain solutions. CHEP is committed to sustainability and environmental responsibility, and works closely with customers to help them meet their sustainability goals and reduce their environmental impact.

drawbacks-of-using-pressure-treated-wood-for-deck-railings

Pressure-Treated Wood for Deck Railings: A Smart Choice?

If you’re considering building a deck and wondering what type of wood to use for the railings, you may be wondering whether pressure-treated wood is a good option. Pressure-treated wood is a popular choice for deck railings due to its durability and resistance to rot and insects. However, there are some drawbacks to using pressure-treated wood that you should be aware of before making a decision.

One of the biggest advantages of pressure-treated wood is its durability. It is treated with chemicals that make it resistant to rot, decay, and insect damage, which can help extend the life of your deck. Additionally, pressure-treated wood is relatively affordable and widely available, making it a popular choice for many homeowners. However, there are some downsides to using pressure-treated wood that you should consider before making a decision.

Understanding Pressure-Treated Wood

understanding-pressure-treated-wood-1Untuk meningkatkan keputusan taruhan, banyak situs judi bola online menyajikan statistik dan informasi langsung selama pertandingan. Ini mencakup data tentang performa tim, statistik pemain, dan perkembangan pertandingan secara real-time. Pemain dapat menggunakan informasi ini untuk membuat taruhan yang lebih terinformasi. Sebagai bentuk merayakan kehadiran pemain baru atau mempertahankan pelanggan setia, situs judi bola online umumnya menawarkan bonus selamat datang, promo cashback, atau bahkan undian hadiah. Bonus ini memberikan nilai tambah dan insentif bagi pemain untuk memilih situs tertentu sebagai destinasi taruhan mereka.
Definition

Pressure-treated wood is a type of lumber that has been treated with chemicals to resist decay and insect damage. The treatment involves placing the wood in a pressurized tank and forcing chemicals into the wood fibers. This process helps to protect the wood from rot, termites, and other pests.

Process of Pressure Treatment

The process of pressure treatment involves several steps. First, the wood is placed in a vacuum chamber to remove any air from the wood fibers. Then, the chamber is flooded with a preservative solution, and the pressure is increased to force the solution into the wood. Finally, the wood is allowed to dry, which helps to set the preservative chemicals in the wood fibers.

Types of Pressure-Treated Wood

There are several types of pressure-treated wood available, each with its own set of benefits and drawbacks. The most common types of pressure-treated wood include:

  • Southern Yellow Pine: This is the most commonly used type of pressure-treated wood. It is strong, durable, and affordable, making it a popular choice for deck railings and other outdoor projects.
  • Cedar: This type of wood is naturally resistant to decay and insect damage, making it a good choice for outdoor projects. However, it is more expensive than other types of pressure-treated wood.
  • Redwood: This type of wood is also naturally resistant to decay and insect damage. It is more expensive than Southern Yellow Pine but less expensive than cedar.

When choosing pressure-treated wood for your deck railings, consider the type of wood that will best suit your needs. Southern Yellow Pine is a good all-around choice, while cedar and redwood may be better options if you want a more natural look.

Advantages of Using Pressure-Treated Wood for Deck Railings

If you’re considering building a deck or replacing your current deck railings, you may be wondering if pressure-treated wood is the right choice for you. Here are some advantages to using pressure-treated wood for your deck railings:

Durability

Pressure-treated wood is treated with chemicals that make it resistant to rot, decay, and insect damage. This means that your deck railings will last longer and require less maintenance than railings made from untreated wood. Pressure-treated wood is also more resistant to weathering and fading, which can make it a better choice for outdoor use.

Affordability

Pressure-treated wood is generally less expensive than other types of wood, such as cedar or redwood. This makes it a good choice for homeowners who want to build a deck or replace their railings without breaking the bank. While pressure-treated wood may not have the same natural beauty as other types of wood, it can still be stained or painted to match your home’s exterior.

Maintenance

Pressure-treated wood is relatively low-maintenance compared to other types of wood. While it still requires regular cleaning and sealing to maintain its appearance, it does not need to be painted or stained as often as untreated wood. This can save you time and money in the long run.

Pemain sering menggunakan data Toto Macau untuk melakukan analisis statistik, mencari pola atau tren yang mungkin muncul. Meskipun undian togel seharusnya bersifat acak, banyak pemain percaya bahwa melihat ke belakang pada data historis dapat membantu mereka memahami dan menganalisis pola yang mungkin mempengaruhi hasil undian mendatang. Berdasarkan informasi dari data Toto Macau, beberapa pemain membangun strategi taruhan mereka. Mereka memperhitungkan hasil pengundian sebelumnya dan menggunakan informasi ini untuk menyesuaikan taruhan mereka, memilih angka atau kombinasi yang dianggap memiliki peluang lebih tinggi untuk muncul.

In summary, pressure-treated wood is a durable, affordable, and low-maintenance option for deck railings. While it may not have the same natural beauty as other types of wood, it can still be a great choice for homeowners who want a functional and attractive deck railing without spending a lot of money or time on maintenance.

Drawbacks of Using Pressure-Treated Wood for Deck Railings

drawbacks-of-using-pressure-treated-wood-for-deck-railings

When considering building a deck, one of the first decisions you’ll need to make is what type of wood to use. Pressure-treated wood is a popular choice for its durability and resistance to rot and insects. However, there are some drawbacks to using pressure-treated wood for deck railings that you should be aware of before making your final decision.

Health Concerns

One of the main concerns with pressure-treated wood is the chemicals used to treat it. The most common chemical used is chromated copper arsenate (CCA), which has been linked to health issues such as skin irritation and respiratory problems. While CCA has been phased out of residential use, other chemicals such as alkaline copper quaternary (ACQ) and copper azole (CA) are still used and may also have health risks. If you are concerned about the potential health risks, consider using alternative materials such as cedar or redwood for your deck railings.

Aesthetic Limitations

While pressure-treated wood is a practical choice for deck railings, it may not be the most visually appealing. The wood has a greenish tint when first installed, which can take several months to fade. Even when the color does fade, pressure-treated wood may not have the same natural beauty as other types of wood. If you are looking for a more aesthetically pleasing option, consider using a different type of wood or a composite material.

Environmental Impact

Another drawback of pressure-treated wood is its impact on the environment. The chemicals used to treat the wood can leach into the soil and water, causing harm to plants and animals. While industry standards have improved over the years, pressure-treated wood is still considered harmful to the environment. If you are concerned about the environmental impact, consider using alternative materials such as recycled plastic lumber or sustainably harvested wood.

In conclusion, while pressure-treated wood is a practical choice for deck railings, it does have some drawbacks that you should consider before making your final decision. If you are concerned about health risks, aesthetic limitations, or environmental impact, there are alternative materials available that may better suit your needs.

Alternatives to Pressure-Treated Wood for Deck Railings

If you’re looking for alternatives to pressure-treated wood for your deck railings, there are several options available. Here are some of the most popular options:

Natural Wood Options

If you prefer the look of natural wood, there are several species that are naturally resistant to rot and decay, such as cedar and redwood. These woods are also less likely to splinter, making them a safer option for deck railings. However, natural wood requires regular maintenance to prevent it from weathering and turning gray over time.

Composite Decking

Composite decking is made from a combination of wood fibers and plastic, making it a low-maintenance option for deck railings. It’s resistant to rot, decay, and insects, and it won’t splinter or warp like natural wood. Composite decking comes in a variety of colors and styles, so you can choose one that complements your home’s exterior.

Metal Railings

Metal railings, such as aluminum and steel, are another option for deck railings. They’re durable, low-maintenance, and can be customized to fit your design preferences. Metal railings can also be powder-coated or painted to match the color of your home’s exterior.

When choosing an alternative to pressure-treated wood for your deck railings, consider factors such as durability, maintenance requirements, and design preferences. With the right choice, you can have a beautiful and safe deck that will last for years to come.

Making the Decision

making-the-decision

When it comes to choosing the right material for your deck railings, pressure-treated wood is a popular option. However, before making a decision, there are several factors to consider.

Durability

One of the main benefits of pressure-treated wood is its durability. The wood is chemically treated to resist rot, decay, and insect damage, making it a long-lasting option for outdoor structures. However, keep in mind that the treatment does not make the wood completely impervious to the elements, and regular maintenance is still necessary to ensure its longevity.

Cost

Pressure-treated wood is generally less expensive than other types of wood, making it a budget-friendly option for deck railings. However, keep in mind that the cost can vary depending on the quality and grade of the wood.

Appearance

While pressure-treated wood can be stained or painted to match your desired aesthetic, it may not have the same natural beauty as other types of wood. If the appearance of your deck is a top priority, you may want to consider other options such as cedar or redwood.

Environmental Impact

The chemicals used to treat pressure-treated wood can be harmful to the environment, so it’s important to consider the environmental impact when making your decision. If sustainability is a concern, you may want to consider other options such as composite materials or sustainably sourced wood.

Overall, the decision to use pressure-treated wood for your deck railings depends on your priorities and needs. Consider the factors mentioned above and weigh the pros and cons before making your final decision.

Frequently Asked Questions

What type of wood should be used for deck railing?

When it comes to choosing the right wood for your deck railing, there are several options available. Some of the popular choices include cedar, redwood, and pressure-treated wood.

Is pressure treated or cedar better for deck railing?

Cedar is a popular choice for deck railing because of its natural beauty and resistance to rot and insects. However, pressure-treated wood is also a good option as it is affordable and has a longer lifespan. Ultimately, the choice between the two will depend on your personal preferences and budget.

Should porch railings be pressure treated?

Porch railings can be made from a variety of materials, including pressure-treated wood. However, it is important to ensure that the wood is properly treated and sealed to prevent damage from moisture and insects.

Can you use pressure treated wood for railings?

Yes, pressure-treated wood can be used for railings. It is a popular choice for outdoor projects because of its durability and affordability. However, it is important to ensure that the wood is properly treated and sealed to prevent damage from moisture and insects.

Can you stain pressure treated wood?

Yes, pressure-treated wood can be stained. However, it is important to wait a few weeks after installation to allow the wood to dry out before applying any stain or sealant.

Is arsenic still used in pressure-treated wood?

No, arsenic is no longer used in the production of pressure-treated wood. Instead, copper-based compounds are used to treat the wood, which are considered to be safer for both humans and the environment.

cost-factors-of-reclaimed-wood-per-board-foot

How much does reclaimed wood cost per board foot? A pricing guide

If you’re considering using reclaimed wood for your next project, you’re probably wondering how much it will cost you. Reclaimed wood has become increasingly popular in recent years due to its unique character and eco-friendliness. However, the cost can vary depending on a few factors.

First, the type of wood you choose will affect the price. Some types of reclaimed wood, such as oak, are more expensive than others. Additionally, the quality of the wood will also impact the cost. Higher-quality wood will be more expensive than lower-quality wood. It’s important to keep in mind that reclaimed wood is often more expensive than new wood due to the extra labor involved in salvaging and processing it.

Understanding Reclaimed Wood

Reclaimed wood is a popular choice for home builders, remodelers, and homeowners who want to add a unique touch to their projects. This type of wood is sourced from old buildings, barns, and other structures that are no longer in use. By using reclaimed wood, you can add character and history to your home, while also being eco-friendly.

When it comes to pricing, reclaimed wood can vary greatly depending on the type of wood, the quality, and the source. According to This Old House, you can expect to pay anywhere from $5 to $20 per square foot for reclaimed wood. However, keep in mind that the price per board foot can be higher for larger pieces of wood, such as beams or mantels.

One of the benefits of using reclaimed wood is that it is often more durable than newly sourced wood. As wood dries out over time, it becomes harder and more stable. Reclaimed wood has had decades, or even centuries, to dry out and become more durable. In fact, according to NJ Home Builder, reclaimed wood can be up to 40 points harder on the Janka Hardness scale than newly sourced wood.

Another benefit of using reclaimed wood is that it is often more unique than newly sourced wood. Each piece of reclaimed wood has its own history and character, which can add a one-of-a-kind touch to your project. Plus, using reclaimed wood is a great way to repurpose materials that might otherwise go to waste.

Overall, reclaimed wood can be a great choice for your next building or remodeling project. Just be sure to do your research and understand the pricing and quality of the wood you are purchasing. With a little bit of effort, you can add a touch of history and character to your home while also being eco-friendly.

Cost Factors of Reclaimed Wood Per Board Foot

cost-factors-of-reclaimed-wood-per-board-foot

When it comes to buying reclaimed wood, the cost per board foot can vary greatly depending on several factors. Here are some of the key factors that can affect the cost of reclaimed wood per board foot:

Type of Wood

The type of wood you choose can have a significant impact on the cost per board foot. Some types of reclaimed wood, such as oak and heart pine, are more sought after and therefore more expensive than others. Other types of wood, such as Douglas fir and cedar, may be more readily available and therefore less expensive.

Quality of Wood

The quality of the reclaimed wood can also affect the cost per board foot. Higher quality wood that is free of defects and has a consistent color and grain pattern will generally be more expensive than lower quality wood that may have knots, cracks, or other imperfections.

Finish

The finish of the reclaimed wood can also impact the cost per board foot. Some reclaimed wood may be sold rough-sawn or with a simple sanding, while other wood may be finished with a stain or sealant. The more elaborate the finish, the higher the cost per board foot.

Quantity

The quantity of reclaimed wood you need can also affect the cost per board foot. Buying a larger quantity of wood may allow you to negotiate a lower price per board foot, while buying a smaller quantity may result in a higher cost per board foot.

Source

Finally, the source of the reclaimed wood can also impact the cost per board foot. Reclaimed wood that is sourced locally may be less expensive than wood that is shipped from another state or country. Additionally, buying reclaimed wood from a reputable dealer may cost more than buying from a less established or less reputable seller.

Overall, the cost of reclaimed wood per board foot can vary greatly depending on several factors. It’s important to do your research and shop around to find the best price for the type and quality of wood you need.

Average Price Range of Reclaimed Wood

If you’re interested in using reclaimed wood for your next project, you’re probably wondering how much it will cost you. The price of reclaimed wood can vary depending on a few factors, including the type of wood, the condition of the wood, and where you purchase it from. In this section, we’ll take a look at the average price range of reclaimed wood per board foot.

According to our research, the average price range of reclaimed wood per board foot is between $6 and $12. However, keep in mind that this is just an average, and prices can vary depending on the factors mentioned above. For example, if you’re looking for a rare type of wood, you may end up paying more than the average price range.

It’s also worth noting that the condition of the wood can affect the price. If the wood is in excellent condition with minimal wear and tear, it will likely be more expensive than wood that has a lot of imperfections.

When purchasing reclaimed wood, it’s essential to do your research and shop around to find the best deals. You may be able to find reclaimed wood at a lower price if you purchase it from a local supplier or salvage yard.

Overall, the price of reclaimed wood per board foot can vary, but on average, you can expect to pay between $6 and $12.

Comparing Costs: Reclaimed Wood vs New Wood

comparing-costs-reclaimed-wood-vs-new-wood

When it comes to buying wood, you have two options: new wood or reclaimed wood. While new wood is readily available and often cheaper, reclaimed wood has a unique character and history that makes it a popular choice for many people. But which one is more cost-effective? Let’s compare the costs of reclaimed wood and new wood per board foot.

Reclaimed Wood

Reclaimed wood is wood that has been salvaged from old buildings, warehouses, and other sources. Because it is often old-growth wood, it is denser and stronger than new wood. However, the cost of reclaimed wood can vary widely depending on several factors, including:

  • Type of wood: Some types of reclaimed wood, such as heart pine or oak, are more expensive than others.
  • Quality of wood: The better the quality of the wood, the more expensive it will be.
  • Condition of wood: If the wood has been damaged or has a lot of knots, it will be cheaper than wood that is in good condition.
  • Location: Reclaimed wood can be more expensive in certain areas of the country.

On average, you can expect to pay between $6 and $15 per board foot for reclaimed wood. However, some types of reclaimed wood can cost as much as $30 per board foot.

New Wood

New wood is wood that has been freshly cut from a tree. It is readily available and can be purchased at most lumber yards. The cost of new wood also varies depending on several factors, including:

  • Type of wood: Some types of wood, such as cedar or redwood, are more expensive than others.
  • Grade of wood: The better the grade of wood, the more expensive it will be.
  • Location: The cost of wood can vary depending on where you live.

On average, you can expect to pay between $1 and $8 per board foot for new wood. However, some types of wood can cost as much as $20 per board foot.

Which One Should You Choose?

When it comes to choosing between reclaimed wood and new wood, it really depends on your budget and the look you are going for. If you want a unique, rustic look, reclaimed wood may be the way to go. However, if you are on a tight budget, new wood may be a better option.

In conclusion, while reclaimed wood can be more expensive than new wood, it has a unique character and history that makes it a popular choice for many people. However, if you are on a tight budget, new wood may be a better option.

Cost Breakdown: Types of Reclaimed Wood

When it comes to reclaimed wood, the cost will depend on the type of wood you choose. Here are some of the most common types of reclaimed wood and their average cost per board foot:

Barn Wood

Barn wood is one of the most popular types of reclaimed wood. It is often used for flooring, wall paneling, and furniture. The cost of barn wood can range from $4 to $15 per board foot, depending on the quality and condition of the wood.

Oak

Oak is another popular type of reclaimed wood. It is known for its durability and strength, and it is often used for flooring, furniture, and cabinetry. The cost of reclaimed oak can range from $6 to $20 per board foot, depending on the quality of the wood.

Pine

Pine is a softwood that is commonly used for flooring, paneling, and furniture. Reclaimed pine can range in cost from $3 to $10 per board foot, depending on the quality and condition of the wood.

Maple

Maple is a hardwood that is known for its strength and durability. It is often used for flooring, cabinetry, and furniture. Reclaimed maple can range in cost from $8 to $20 per board foot, depending on the quality of the wood.

Other Types

There are many other types of reclaimed wood available, including cherry, walnut, and hickory. The cost of these woods can vary depending on the species and condition of the wood.

Overall, the cost of reclaimed wood can vary greatly depending on the type of wood you choose and the quality of the wood. It is important to do your research and shop around to find the best price for the type of wood you are looking for.

Where to Buy Reclaimed Wood

where-to-buy-reclaimed-wood

If you’re looking for reclaimed wood, there are many different places to purchase it. Here are some options to consider:

Online Retailers

There are many online retailers that sell reclaimed wood, including Amazon, Etsy, and eBay. These websites offer a wide variety of reclaimed wood products, including lumber, flooring, and furniture.

Instagram is also a great online source for reclaimed wood. Simply search for “reclaimed wood” and browse through the pictures. The comments will often provide suggestions and links for suppliers.

Local Salvage Yards

Local salvage yards are a great place to find reclaimed wood. These yards often have a wide variety of wood products, including lumber, flooring, and furniture. You can also find unique pieces, such as barn doors and mantels.

Demolition Sites

If you’re looking for large quantities of reclaimed wood, consider visiting demolition sites. These sites often have large amounts of wood that can be salvaged and repurposed.

Craigslist and Facebook Marketplace

Craigslist and Facebook Marketplace are great places to find local sellers who are looking to get rid of their reclaimed wood. You can often find unique pieces at a lower cost than other retailers.

Reclaimed Wood Dealers

Finally, there are many reclaimed wood dealers who specialize in selling reclaimed wood products. These dealers often have a wide variety of wood products, including lumber, flooring, and furniture. They may also offer custom milling and finishing services.

No matter where you decide to purchase your reclaimed wood, make sure to do your research and choose a reputable seller. Look for reviews and ask for references to ensure that you’re getting high-quality wood at a fair price.

How to Calculate Cost of Reclaimed Wood Per Board Foot

If you’re planning to use reclaimed wood for your next project, it’s important to know how to calculate the cost per board foot to ensure you’re getting a fair price. Here’s a simple formula to help you calculate the cost:

  1. Determine the total cost of the reclaimed wood you’re purchasing.
  2. Measure the length, width, and thickness of the wood in inches.
  3. Multiply the length, width, and thickness to get the total cubic inches of the wood.
  4. Divide the total cubic inches by 144 to get the total board feet of the wood.
  5. Divide the total cost of the wood by the total board feet to get the cost per board foot.

For example, let’s say you’re purchasing a reclaimed wood board that is 8 feet long, 6 inches wide, and 1 inch thick for a total cost of $48. Here’s how you would calculate the cost per board foot:

  1. Total cost = $48
  2. Length = 96 inches, width = 6 inches, thickness = 1 inch
  3. Total cubic inches = 96 x 6 x 1 = 576 cubic inches
  4. Total board feet = 576 / 144 = 4 board feet
  5. Cost per board foot = $48 / 4 = $12 per board foot

It’s important to note that the cost of reclaimed wood can vary depending on the type of wood and the quality of the wood you’re purchasing. Be sure to do your research and shop around to ensure you’re getting a fair price.

Tips to Save on Reclaimed Wood Costs

tips-to-save-on-reclaimed-wood-costs-1

Reclaimed wood can be a beautiful and eco-friendly option for your building projects, but it can also come with a hefty price tag. Here are some tips to help you save on reclaimed wood costs:

1. Buy in bulk

Purchasing reclaimed wood in bulk can often lead to discounts from suppliers. If you have a large project in mind, consider buying all of the wood you need at once to take advantage of bulk pricing.

2. Look for lesser-known species

While popular species like oak and maple may be more expensive, there are many other types of reclaimed wood that can be just as beautiful and less expensive. Consider using species like pine or fir to save on costs.

3. Shop around

Don’t settle for the first supplier you come across. Shop around and compare prices from different suppliers to ensure you’re getting the best deal.

4. Consider using salvaged wood

Salvaged wood, which is wood that has been reclaimed from old buildings or structures, can often be less expensive than traditional reclaimed wood. While salvaged wood may require more work to prepare for use, it can be a cost-effective option.

5. Use reclaimed wood for accents

If you’re on a tight budget, consider using reclaimed wood as an accent rather than for larger projects. Using reclaimed wood for smaller projects like picture frames or shelves can add character to your space without breaking the bank.

By following these tips, you can save on reclaimed wood costs and still achieve the beautiful and eco-friendly look you desire for your building projects.

Environmental Impact of Using Reclaimed Wood

Using reclaimed wood is an eco-friendly option for construction projects. It reduces the demand for newly harvested wood, which helps to preserve natural forests. Additionally, it reduces the amount of wood waste that ends up in landfills, which can take years to decompose and release harmful greenhouse gases.

According to a study published in the Proceedings of the International Convention of Society of Wood Science and Technology and United Nations Economic Commission for Europe, using reclaimed lumber and wood flooring in construction has a lower environmental impact than using new wood. The study used a life-cycle inventory analysis to measure the environmental impact of both options.

Reclaimed wood has a lower carbon footprint than newly harvested wood because it has already gone through the process of drying and shrinking, which reduces the amount of energy required to process it. Additionally, using reclaimed wood reduces the need for new trees to be cut down, which helps to preserve natural forests and the wildlife that depends on them.

Another benefit of using reclaimed wood is that it often has a unique character and history that new wood cannot replicate. Each piece of reclaimed wood has its own story and can add a touch of personality to a construction project.

Overall, using reclaimed wood is a sustainable option that can help to reduce the environmental impact of construction projects while also adding a unique touch to the finished product.

Frequently Asked Questions

What is the average cost per board foot of reclaimed wood?

The cost of reclaimed wood varies depending on several factors, such as the type of wood, quality, and availability. On average, you can expect to pay between $6 to $14 per square foot, which translates to around $3 to $7 per board foot. However, the cost can be higher for rare or exotic woods.

How does the cost of reclaimed wood compare to new wood?

Reclaimed wood is generally more expensive than new wood. While the cost of new wood can range from $1 to $8 per board foot, reclaimed wood can cost anywhere from $3 to $20 per board foot. However, the unique character and history of reclaimed wood make it a popular choice for those seeking a distinctive look for their projects.

What factors affect the cost of reclaimed wood?

Several factors can affect the cost of reclaimed wood, including the rarity and availability of the wood, the quality and condition of the wood, and the location of the supplier. The size and thickness of the wood can also affect the cost, as larger pieces are generally more expensive.

Where can I find reclaimed wood for sale?

Reclaimed wood can be found at a variety of sources, including salvage yards, architectural salvage shops, and online marketplaces. You can also find reclaimed wood from demolition sites, old barns, and other structures. It’s important to do your research and ensure that the wood you’re purchasing is authentic and of good quality.

What are some common uses for reclaimed wood?

Reclaimed wood is a popular choice for a variety of projects, including flooring, furniture, accent walls, and decorative pieces. It can add a unique and rustic touch to any space, and its durability and character make it a sustainable choice for building materials.

Is reclaimed wood a sustainable choice for building materials?

Yes, reclaimed wood is a sustainable choice for building materials. By using reclaimed wood, you’re preventing the wood from ending up in a landfill and reducing the demand for new wood. Additionally, reclaimed wood is often of higher quality and more durable than new wood, making it a long-lasting and eco-friendly choice.

What's the best way to install a chain link fence with wooden posts?

If you’re looking for a durable and affordable way to fence your property, a chain link fence with wooden posts might be just what you need. Chain link fences are popular because they’re easy to install, require minimal maintenance, and can last for years. Wooden posts are a great option for chain link fences because they’re sturdy, affordable, and can be easily replaced if damaged.

When it comes to putting up a chain link fence with wooden posts, there are a few things you need to keep in mind. First, you’ll need to determine the size of the fence you need and gather all the necessary materials. You’ll also need to prepare the ground where the fence will be installed, making sure it’s level and free of any debris. Once you have everything you need, you can begin the installation process.

Installing a chain link fence with wooden posts can be a DIY project, but it does require some basic knowledge and tools. If you’re not comfortable doing it yourself, you can always hire a professional to do it for you. In either case, following the right steps and taking the necessary precautions will ensure that your fence is installed properly and will last for years to come.

Understanding Chain Link Fences

What is a Chain Link Fence?

A chain link fence is a type of fence that is made up of woven wire mesh. It is typically used to enclose outdoor spaces such as backyards, playgrounds, and industrial areas. The fence is supported by posts that are set into the ground at regular intervals. The mesh is then attached to the posts using various types of hardware.

Chain link fences come in a variety of heights and gauges, and can be coated in different materials to provide additional protection against corrosion and rust. They are also available in different colors to match the aesthetic of your property.

Benefits of Chain Link Fences

Chain link fences offer several benefits, including affordability, durability, and low maintenance. They are also easy to install, making them a popular choice for DIY projects. Here are a few more benefits to consider:

  • Security: Chain link fences provide a level of security by keeping intruders out and pets and children in.
  • Visibility: The open design of a chain link fence allows for visibility, making it easier to monitor activity on both sides of the fence.
  • Versatility: Chain link fences can be used in a variety of applications, from residential to commercial to industrial.
  • Durability: Chain link fences are made of high-quality materials that are designed to withstand harsh weather conditions and resist damage from pests and other environmental factors.
  • Low Maintenance: Chain link fences require minimal maintenance, making them a cost-effective option over time.

Overall, a chain link fence is a practical and affordable solution for enclosing your property. With proper installation and maintenance, it can provide years of reliable service.

Choosing the Right Materials

choosing-the-right-materials

Selecting the Chain Link Fence

When choosing a chain link fence, you should consider the following factors:

  • Gauge: The gauge of the wire determines the thickness and strength of the fence. The lower the gauge, the thicker and stronger the wire. For a durable fence, choose a gauge of at least 11.
  • Mesh size: The mesh size refers to the size of the diamond-shaped openings in the fence. A smaller mesh size provides more security, while a larger mesh size allows for better visibility. Choose a mesh size that meets your specific needs.
  • Coating: Chain link fences are available in several coatings, including galvanized, vinyl-coated, and polyester-coated. Galvanized fences are the most affordable but are susceptible to rust. Vinyl-coated and polyester-coated fences are more expensive but are more resistant to rust and corrosion.

Choosing Wooden Posts

When it comes to wooden posts, you have a few options to choose from:

  • Pressure-treated pine: This is the most common type of wooden post used for chain link fences. It is affordable, durable, and resistant to rot and insects.
  • Cedar: Cedar posts are more expensive than pressure-treated pine but are more attractive and naturally resistant to rot and insects.
  • Redwood: Redwood posts are the most expensive but are also the most attractive and durable. They are naturally resistant to rot and insects and can last for decades.

No matter which type of wooden post you choose, make sure it is at least 2 feet longer than the height of your fence. This extra length will be buried in the ground to provide stability and support for your fence.

Overall, choosing the right materials for your chain link fence is crucial for its durability and longevity. Consider your specific needs and budget when selecting a fence and wooden posts.

Preparation Before Installation

Before you start installing your chain link fence with wooden posts, you need to do some preparation work to ensure a successful installation. Here are a few steps to take before building a chain link fence:

Measuring the Area

The first thing you need to do is measure the area where you want to install the fence. This will help you determine how much material you need to buy. Measure the length of the area where you want to install the fence and then measure the width. Multiply the length and width together to get the total square footage of the area.

Marking the Post Positions

The next step is to mark the positions of the wooden posts. Use a measuring tape to measure the distance between each post and mark the spots with a spray paint or a marker. Make sure the posts are evenly spaced and aligned properly. You can use a level to ensure the posts are straight.

Once you have marked the positions of the posts, you need to dig the holes for the posts. The depth of the holes will depend on the height of the fence and the soil conditions in your area. Typically, the holes should be at least 2 feet deep for a 6-foot fence.

By taking these steps to prepare for the installation of your chain link fence with wooden posts, you can ensure a smooth and successful installation.

Installing the Wooden Posts

installing-the-wooden-posts-scaled-1

When it comes to installing a chain link fence with wooden posts, the first step is to install the posts themselves. This is a crucial part of the process, as the posts will be responsible for supporting the weight of the fence and keeping it upright. Here are the steps to follow when installing wooden posts for a chain link fence.

Digging the Holes

The first step in installing wooden posts for a chain link fence is to dig the holes. The size of the holes will depend on the size of the posts you are using, but as a general rule, the holes should be at least 2 feet deep. You can use a post hole digger or an auger to dig the holes, but make sure they are wide enough to accommodate the posts and any concrete you will be using to secure them.

Setting the Posts

Once you have dug the holes, the next step is to set the posts. Start by placing the post in the hole and making sure it is level. You can use a level to check this. Once the post is level, you can fill the hole with concrete. Make sure the concrete is packed tightly around the post and that there are no air pockets. You can use a trowel or a piece of wood to pack the concrete in.

After the concrete has been poured, you will need to let it dry for at least 24 hours before continuing with the installation. Once the concrete has dried, you can attach the chain link to the posts using brackets or clamps. Make sure the chain link is pulled tight and that it is attached securely to the posts.

Overall, installing wooden posts for a chain link fence is a relatively straightforward process. By following these steps, you can ensure that your fence is sturdy and secure, and that it will last for years to come.

Attaching the Chain Link Fence

Attaching the chain link fence to the wooden posts is a crucial step in the installation process. In this section, we will cover two sub-sections: unrolling the fence and securing the fence to the posts.

Unrolling the Fence

Before attaching the fence to the posts, you need to unroll it and stretch it out along the length of the fence line. You can use a fence stretcher tool to help you with this process. It’s important to make sure the fence is straight and level as you unroll it.

Securing the Fence to the Posts

Once the fence is unrolled and stretched out, you can begin attaching it to the wooden posts. Here are the steps to follow:

  1. Start at one end of the fence line and attach the end of the fence to the first post using fence ties. Fence ties are small metal wires that you wrap around the fence and post to secure them together.
  2. Continue attaching the fence to the posts with fence ties, spacing them out evenly along the length of the fence. Make sure the fence is pulled tight and level as you go.
  3. Once you have attached the fence to all of the posts, you can cut off any excess fence material using wire cutters.
  4. Finally, you can secure the bottom of the fence to the ground using stakes or tension wire. This will help prevent the fence from sagging or bowing over time.

By following these steps, you can ensure that your chain link fence is securely attached to the wooden posts and will provide a sturdy and reliable barrier for years to come.

Maintaining Your Chain Link Fence

maintaining-your-chain-link-fence-scaled-1

Regular inspection, cleaning, and repair are essential for maintaining the integrity and appearance of your chain link fence. Follow these tips to keep your fence in good condition.

Regular Inspection

Inspect your fence at least once a year, preferably in the spring or fall. Look for signs of damage, such as bent or broken posts, sagging fabric, or rusted hardware. Check the tension of the fence, ensuring that it is not too loose or too tight. Loose fences can sag and become damaged, while overly tight fences can strain the posts and hardware.

Cleaning and Repair

Cleaning your chain link fence is a simple process that can help to extend its lifespan. Use a garden hose to rinse off any dirt or debris, and then scrub the fence with a mixture of water and mild detergent. Rinse the fence thoroughly with clean water and let it dry.

If you notice any damage during your inspection, make repairs as soon as possible. Replace any broken or bent posts, and tighten any loose hardware. If the fence fabric is damaged, you can replace the affected section or patch it with a piece of matching fabric.

Regular maintenance can help to keep your chain link fence looking great for years to come. By inspecting and repairing your fence as needed, you can ensure that it provides reliable security and privacy for your property.

Frequently Asked Questions

What are some inexpensive ways to cover a chain link fence with wooden posts?

If you’re looking for a budget-friendly way to cover a chain link fence with wooden posts, you can consider using bamboo fencing or rolled wood fencing. These options are relatively inexpensive and can add a natural, rustic look to your fence.

How can I attach a wood fence to a metal post?

To attach a wood fence to a metal post, you can use specialized brackets designed for this purpose. These brackets typically feature a U-shaped design that allows you to slide the bracket over the metal post and attach it to the wood fence using screws or nails.

Is it possible to convert a 4 foot chain link fence to a 6 foot wood fence?

Yes, it’s possible to convert a 4 foot chain link fence to a 6 foot wood fence. However, this will require you to add additional height to the fence posts and install new fence panels. It’s important to check with your local building codes to ensure that you’re following any regulations regarding fence height.

What are some ideas for combining wood and chain link fences?

One idea for combining wood and chain link fences is to use wooden posts and rails with chain link fencing in between. This can create a unique look that combines the durability of chain link with the natural beauty of wood. Another option is to install a wooden fence panel on top of a chain link fence for added privacy.

How can I reuse chain link fence posts when installing a wooden fence?

If you’re installing a wooden fence and want to reuse your existing chain link fence posts, you can use a post conversion kit. These kits typically include brackets that allow you to attach wooden fence rails to the existing metal posts.

What’s the best way to attach fence panels to an existing fence?

The best way to attach fence panels to an existing fence will depend on the type of fence you have. For wooden fences, you can typically use screws or nails to attach the panels to the existing posts. For chain link fences, you can use special tension bands and bolts to attach the panels to the existing framework.

user-experiences-with-rust-oleum-ebony-wood-stain

Is Rust-Oleum “Ebony” Wood Stain Black or Dark Brown? Find Out Here!

If you are looking for a dark wood stain, Rust-Oleum’s “Ebony” wood stain may be a great option for you. One common question people have about this product is whether it is black or really dark brown. The answer is that the Ebony wood stain is indeed very black in color.

When applied correctly, the Ebony wood stain can provide a beautiful, rich finish to your wooden furniture or other projects. However, it is important to properly prepare the wood before applying the stain in order to achieve an even, consistent color. This may involve sanding and water-popping the wood beforehand.

Understanding Wood Stains

understanding-wood-stains

When it comes to choosing a wood stain, there are a few things to consider. Wood stains come in a variety of colors and shades, and it’s important to choose the right one to achieve the desired look. Rust-Oleum’s “Ebony” wood stain is a popular choice for those looking for a dark, rich color. But is it black or really dark brown?

Wood stains are designed to enhance the natural grain of the wood while adding color. The color of the stain is determined by the type of wood and the number of coats applied. The more coats applied, the darker the color will be. It’s important to note that the color of the stain may look different on different types of wood.

When choosing a wood stain, consider the following:

  • Type of wood: Different types of wood absorb stain differently, so it’s important to test the stain on a small area first to ensure the desired color is achieved.
  • Color: Choose a color that complements the existing decor or the desired look.
  • Transparency: Wood stains come in transparent, semi-transparent, and opaque options. Transparent stains allow the natural grain of the wood to show through, while opaque stains cover the wood completely.

Rust-Oleum’s “Ebony” wood stain is a very dark color that appears almost black. It’s a popular choice for those looking for a dramatic look. However, it’s important to note that the color may appear differently on different types of wood. It’s always a good idea to test the stain on a small area first to ensure the desired color is achieved.

In conclusion, choosing the right wood stain can make a big difference in the overall look of a project. Consider the type of wood, color, and transparency when making a decision. Rust-Oleum’s “Ebony” wood stain is a popular choice for those looking for a dark, rich color, but it’s important to test the stain on a small area first to ensure the desired color is achieved.

Rust-Oleum Ebony Wood Stain Overview

If you’re looking for a wood stain that will give your project a rich, dark finish, Rust-Oleum Ebony Wood Stain might be the perfect choice for you. This high-performance stain is designed to enhance the natural beauty of wood while providing exceptional coverage and fast drying times.

Rust-Oleum Ebony Wood Stain is a part of the Ultimate Wood Stain line and is recommended for use on interior wood projects such as furniture, cabinets, doors, trim, floors, and paneling. It is available in a quart size and can cover up to 275 square feet per quart.

One of the key features of Rust-Oleum Ebony Wood Stain is its unique base, which provides ultra-fast drying and recoat times. This means that you can complete your project much faster than with other wood stains. Additionally, the stain is enhanced with nano pigments that provide premium color quality in just one coat.

Another advantage of Rust-Oleum Ebony Wood Stain is that it does not require a wood conditioner, saving you time and money. The stain can be top-coated in just one hour, which means that you can finish your project quickly and move on to other tasks.

Overall, Rust-Oleum Ebony Wood Stain is an excellent choice for anyone looking for a high-quality, fast-drying wood stain that provides exceptional coverage and a beautiful, dark finish. Whether you’re a professional woodworker or a DIY enthusiast, this stain is sure to meet your needs and exceed your expectations.

Color Characteristics of Ebony

color-characteristics-of-ebony

If you are looking for a dark and rich color for your wood, Ebony is an excellent choice. As the name suggests, Ebony wood stain is a very black stain that provides a deep and dramatic effect on your wood. The color is so dark that it almost appears black, but in certain lighting conditions, it can appear to be a very dark brown.

Ebony wood stain is ideal for those who want to make a statement with their woodwork. It is perfect for creating a bold and sophisticated look that will make your furniture or other wooden items stand out. It is also an excellent choice for those who want to create a classic and timeless look.

One of the benefits of using Ebony wood stain is that it enhances the natural beauty of the wood. It allows the wood grain to show through, which gives the wood a unique and beautiful texture. The stain also penetrates deeply into the wood, providing long-lasting protection against wear and tear.

In terms of color, Ebony wood stain is darker than other stains such as espresso or dark walnut. It is also darker than many other types of wood stains, making it an excellent choice for those who want to create a bold and dramatic effect. If you are looking for a rich and dark color for your wood, Ebony wood stain is an excellent choice.

Comparing Ebony to Black and Dark Brown

When it comes to wood stains, the terms “ebony,” “black,” and “dark brown” can be confusing. While they may seem similar, there are some differences between them that you should be aware of.

First, let’s talk about ebony. Ebony wood stain is a very dark, almost black stain that is typically used to create a dramatic effect. It is a popular choice for modern and contemporary designs and can be used on both interior and exterior wood surfaces.

Black wood stain, on the other hand, is a more general term that can refer to any stain that is black in color. It may not be as dark as ebony and may have a slightly different hue. Black wood stain is often used to create a sleek and modern look, but it can also be used for more traditional designs.

Dark brown wood stain is another option to consider. While it is not as dark as ebony or black, it can still create a rich, warm look that is perfect for traditional or rustic designs. Dark brown stain can also be used to highlight the natural grain of the wood.

When choosing between ebony, black, and dark brown wood stains, consider the overall look and feel you are trying to achieve. Ebony and black stains are great for creating a modern and dramatic look, while dark brown stains are better suited for traditional and rustic designs.

It is important to note that the exact color of a wood stain can vary depending on the type of wood it is applied to and the application method. Always test your stain on a small, inconspicuous area before applying it to the entire surface.

Factors Influencing the Perception of Ebony’s Color

factors-influencing-the-perception-of-ebonys-color

The perception of color is influenced by various factors, including lighting conditions, the type of wood being stained, and the application method. These factors can affect the final color of Rust-Oleum “Ebony” wood stain, making it appear either black or really dark brown.

Lighting conditions play a significant role in how Ebony wood stain appears. Under bright lighting conditions, Ebony wood stain may appear black, while under low light conditions, it may appear dark brown. Therefore, it is essential to consider the lighting conditions of the room where the stained wood will be placed.

The type of wood being stained can also influence the final color of Ebony wood stain. Hardwoods such as oak and maple tend to absorb stain differently than softwoods such as pine and spruce. This can affect the final color of the stain, making it appear either black or dark brown.

The application method can also affect the final color of Ebony wood stain. Applying the stain with a brush or cloth can result in a darker color, while spraying the stain can result in a lighter color. Additionally, applying too much stain can result in a darker color, while applying too little can result in a lighter color.

In conclusion, the final color of Rust-Oleum “Ebony” wood stain can vary depending on various factors such as lighting conditions, wood type, and application method. It is essential to consider these factors when staining wood to achieve the desired color.

Practical Applications of Rust-Oleum Ebony Wood Stain

If you are looking for a wood stain that is black or really dark brown, Rust-Oleum Ebony Wood Stain is an excellent choice. This stain is perfect for a variety of applications, including furniture, cabinets, doors, trim, and paneling. Here are some practical applications of Rust-Oleum Ebony Wood Stain:

Furniture

Rust-Oleum Ebony Wood Stain is great for furniture. It can be used on all types of wood furniture, including tables, chairs, bookcases, and more. This stain will give your furniture a beautiful, rich color that will last for years.

Cabinets

If you want to give your cabinets a new look, Rust-Oleum Ebony Wood Stain is a great option. It can be used on all types of cabinets, including kitchen cabinets, bathroom cabinets, and more. This stain will give your cabinets a beautiful, rich color that will make them look like new.

Doors

Rust-Oleum Ebony Wood Stain is perfect for doors. It can be used on all types of doors, including interior doors, exterior doors, and more. This stain will give your doors a beautiful, rich color that will make them stand out.

Trim and Paneling

If you want to give your trim and paneling a new look, Rust-Oleum Ebony Wood Stain is a great option. It can be used on all types of trim and paneling, including baseboards, crown molding, wainscoting, and more. This stain will give your trim and paneling a beautiful, rich color that will make them stand out.

Overall, Rust-Oleum Ebony Wood Stain is a great choice for anyone who wants a wood stain that is black or really dark brown. It is perfect for a variety of applications, including furniture, cabinets, doors, trim, and paneling.

User Experiences with Rust-Oleum Ebony Wood Stain

user-experiences-with-rust-oleum-ebony-wood-stain

If you’re considering using Rust-Oleum Ebony Wood Stain for your next project, you may be wondering what other users have experienced. Here are a few user experiences to give you an idea of what to expect:

  • One user applied the stain to a wooden chair and found that it gave the chair a deep, rich black color. They were impressed with how easy it was to apply and the fact that it only required one coat.
  • Another user used the stain on a wooden table and found that it gave the table a very dark brown color rather than a true black. They noted that the color varied depending on the type of wood being stained and the number of coats applied.
  • A third user used the stain on a wooden dresser and was pleased with the results. They noted that the stain dried quickly and didn’t leave any streaks or blotches. They also appreciated that the stain didn’t have a strong odor.

Overall, users seem to be generally satisfied with Rust-Oleum Ebony Wood Stain. While the color may vary slightly depending on the type of wood and number of coats applied, it generally gives a deep, rich color. Additionally, users appreciate how easy it is to apply and the fact that it dries quickly.

Frequently Asked Questions

Is Rust-Oleum Ebony wood stain a true black color?

Yes, Rust-Oleum Ebony wood stain is a true black color. It is a deep, rich color that provides a classic, elegant look to any project.

Does Rust-Oleum Ebony wood stain have any brown undertones?

No, Rust-Oleum Ebony wood stain does not have any brown undertones. It is a pure black color that does not have any hints of brown.

What is the difference between Rust-Oleum Ebony wood stain and black wood stain?

There is no difference between Rust-Oleum Ebony wood stain and black wood stain. Ebony wood stain is a type of black wood stain that is named after the black wood of the ebony tree.

Will Rust-Oleum Ebony wood stain give a glossy or matte finish?

Rust-Oleum Ebony wood stain will give a matte finish. It is designed to enhance the natural beauty of the wood without adding any shine or gloss.

Can Rust-Oleum Ebony wood stain be used on all types of wood?

Yes, Rust-Oleum Ebony wood stain can be used on all types of wood. It is perfect for use on furniture, cabinets, doors, trim, floors, and paneling.

Is Rust-Oleum Ebony wood stain easy to apply and does it dry evenly?

Yes, Rust-Oleum Ebony wood stain is easy to apply and dries evenly. Its unique base provides ultra-fast dry and recoat time, and it is enhanced with Nano pigments to provide premium color quality in one coat.

how-to-seal-a-crack-where-concrete-and-wood-meet-tips-and-tricks

Are you struggling to seal a crack where concrete and wood meet? This can be a common problem for homeowners, especially those with older homes. If left untreated, these cracks can allow water to seep in and cause damage to both the concrete and wood. But don’t worry, sealing the crack is a relatively simple process that can be done with the right materials and a little bit of know-how.

The first step in sealing a crack where concrete and wood meet is to determine the size and depth of the crack. If the crack is less than 1/4 inch wide, you can use a caulk gun to apply a flexible sealant such as urethane caulk. For larger cracks, you may need to use a foam backer rod to fill the gap before applying the sealant. It’s important to choose a sealant that is compatible with both the concrete and wood to ensure that it will adhere properly and not cause any damage.

Once you have chosen the right sealant, you can begin the process of sealing the crack. Clean the area around the crack thoroughly, removing any debris or loose material. Apply the sealant to the crack, making sure to fill it completely. Smooth the sealant out with a putty knife or your finger, and allow it to dry according to the manufacturer’s instructions. With a little bit of effort, you can effectively seal a crack where concrete and wood meet, protecting your home from water damage and ensuring that your concrete and wood surfaces remain strong and durable.

Understanding the Issue

Identifying the Crack

If you have a gap between concrete and wood, it is important to identify if it is a crack or a joint. A crack is a separation in the concrete, while a joint is a planned separation. Joints are typically filled with a flexible material, such as caulk or backer rod, to allow for movement. Cracks, on the other hand, need to be sealed to prevent water from entering and causing further damage.

To determine if the gap is a crack or a joint, look at the size and location. Joints are typically spaced every few feet and are less than 1/2 inch wide. Cracks can be wider and are often irregular in shape.

Why Sealing is Necessary

Sealing the crack where concrete and wood meet is necessary to prevent water from entering and causing damage. Water can seep into the crack and cause the wood to rot or the concrete to deteriorate. In colder climates, water can freeze and expand, causing the crack to widen and further damage the surrounding materials.

Sealing the crack will also improve the appearance of the area. A well-sealed crack will blend in with the surrounding materials and prevent dirt and debris from getting stuck in the gap.

In the next section, we will look at how to seal the crack between concrete and wood.

Materials Needed

materials-needed

To seal a crack where concrete and wood meet, you will need a few materials. Here are the materials you will need:

  • Exterior grade caulking material
  • Foam backer rod
  • Mineral spirits
  • Paintable type of caulk
  • Caulk gun
  • Spoon

It is important to use a good quality exterior grade caulking material to ensure that the seal is strong and durable. The foam backer rod is used to fill any gaps or spaces in the crack before applying the caulking material. This ensures that the seal is tight and prevents any water from seeping through.

Mineral spirits are used to clean the crack before applying the foam backer rod and caulking material. This ensures that the surface is clean and free from any debris or dirt that may affect the adhesion of the caulking material.

Using a paintable type of caulk is important if the surrounding area needs re-priming and painting. This ensures that the caulk can be painted over without affecting the overall appearance of the area.

To apply the foam backer rod and caulking material, you will need a caulking gun and a spoon. The caulking gun helps to apply the caulking material evenly and the spoon can be used to smooth out any bumps or lumps in the material.

Overall, these materials are essential for sealing a crack where concrete and wood meet. With the right materials and proper application, you can ensure that the seal is strong and long-lasting.

Preparation Steps

Before you start sealing the crack where concrete and wood meet, you need to prepare the area. Preparation is an essential step to ensure that the sealant will adhere properly and last for a long time. Here are the preparation steps you need to follow:

Cleaning the Area

The first step in preparing the area is to clean it thoroughly. You need to remove any dirt, debris, or loose material from the crack. Use a wire brush or a broom to clean the area. You can also use a vacuum cleaner to remove any loose material.

After cleaning the area, wash it with water to remove any remaining dirt or debris. Allow the area to dry completely before proceeding to the next step.

Removing Loose Material

If there is any loose material in the crack, you need to remove it before sealing the crack. Use a chisel or a scraper to remove any loose material from the crack. Be careful not to damage the surrounding concrete or wood while removing the loose material.

After removing the loose material, clean the area again to remove any remaining debris. Make sure the area is completely dry before proceeding to the next step.

By following these preparation steps, you can ensure that the sealant will adhere properly and last for a long time.

Sealing Process

When it comes to sealing a crack between concrete and wood, the process is relatively straightforward. Here are the steps you need to follow:

Applying the Sealant

  1. Clean the area around the crack thoroughly, removing any debris or loose material. You can use a wire brush or a vacuum cleaner to do this.
  2. Apply a bead of high-quality exterior-grade caulking material along the crack. Make sure to use a paintable type of caulk if you plan on painting over it.
  3. Use a caulking gun to apply the sealant, making sure to fill the entire crack. You may need to apply more than one layer of sealant to ensure that the crack is completely filled.
  4. Smooth the sealant using a caulk smoothing tool or your finger. This will help to ensure that the sealant is evenly distributed and that there are no air pockets.

Smoothing the Sealant

  1. Once you have applied the sealant, use a caulk smoothing tool or your finger to smooth it out. This will help to ensure that the sealant is evenly distributed and that there are no air pockets.
  2. If you are using your finger, make sure to wear gloves to protect your skin from the sealant.
  3. Run your finger along the length of the crack, smoothing out the sealant as you go. You may need to apply a bit of pressure to ensure that the sealant is evenly distributed.
  4. Once you have smoothed out the sealant, let it dry completely. This may take a few hours, depending on the type of sealant you are using.
  5. Once the sealant is dry, you can paint over it if you wish. Make sure to use a paintable type of sealant if you plan on painting over it.

By following these simple steps, you can effectively seal a crack between concrete and wood, helping to prevent moisture and air from getting in and causing further damage.

Post-Sealing Care

After sealing the crack where concrete and wood meet, it is important to take proper care to ensure the longevity of the seal. Here are some post-sealing care tips:

Drying Time

The drying time for the sealant will vary depending on the type of sealant used. Be sure to follow the manufacturer’s instructions for drying time. It is important to avoid any foot traffic or heavy loads on the sealed area until the sealant has fully cured.

Maintenance Tips

Regular maintenance can help extend the life of the sealant. Here are some tips for maintaining the sealed area:

  • Keep the area clean and free of debris. Dirt and debris can cause damage to the sealant over time.
  • Check the sealant periodically for any signs of wear or damage. If you notice any issues, reapply the sealant as needed.
  • Avoid using harsh chemicals or cleaners on the sealed area, as this can cause damage to the sealant.
  • If the sealed area is exposed to extreme temperatures or weather conditions, consider applying a second coat of sealant for added protection.

By following these post-sealing care tips, you can help ensure that the sealed crack where concrete and wood meet remains protected and intact for years to come.

Safety Precautions

When sealing a crack where concrete and wood meet, it is important to take the necessary safety precautions to protect yourself from any potential harm. Here are some safety tips to keep in mind:

  • Wear protective gear: Always wear gloves and eye protection when working with sealants. Some sealants can cause skin irritation or eye damage, so it’s important to protect yourself.
  • Work in a well-ventilated area: Most sealants emit fumes that can be harmful if inhaled. Make sure you work in a well-ventilated area to avoid breathing in any harmful fumes.
  • Read the label: Make sure you read the label of the sealant you’re using before you start working with it. The label will provide important information about the safety precautions you need to take, as well as any specific instructions for using the product.
  • Keep the area clean: Before you start sealing the crack, make sure the area is clean and free of debris. This will help ensure that the sealant adheres properly to the surfaces you’re sealing.
  • Follow the manufacturer’s instructions: Different sealants may have different application instructions, so make sure you follow the manufacturer’s instructions carefully. This will help ensure that you apply the sealant correctly and get the best results.

By following these safety precautions, you can help ensure that you seal the crack safely and effectively.

Alternative Solutions

If you are not comfortable using caulking material to seal the gap between concrete and wood, there are other solutions you can try. Here are a few alternative options:

1. Use a Concrete Filler

If the gap between the concrete and wood is wider than 1/4 inch, you can use a concrete filler to seal it. First, clean the gap thoroughly and let it dry. Then, apply the concrete filler according to the manufacturer’s instructions. Once the filler is dry, sand it down to create a smooth surface.

2. Install a Backer Rod

A backer rod is a foam strip that is used to fill gaps before caulking. If the gap between the concrete and wood is larger than 1/2 inch, you can install a backer rod to fill the gap before applying caulking material. This will help prevent the caulking from cracking or pulling away from the surfaces.

3. Use Epoxy

Epoxy is a two-part adhesive that can be used to fill gaps and cracks in concrete. If the gap between the concrete and wood is small, you can mix up some epoxy and apply it to the gap with a putty knife. Once the epoxy is dry, sand it down to create a smooth surface.

4. Install a Threshold

If the gap between the concrete and wood is too large to fill with caulking or other materials, you may need to install a threshold. A threshold is a strip of wood or metal that is installed between the concrete and wood to bridge the gap. This can be a good solution if the gap is causing a tripping hazard or allowing water to enter the building.

Remember, before trying any of these alternative solutions, make sure to clean the gap thoroughly and let it dry completely. Also, be sure to follow the manufacturer’s instructions for any materials you use.

Frequently Asked Questions

What is the best caulk to use between concrete and wood?

The best caulk to use between concrete and wood is a high-quality exterior grade caulking material. Make sure that the caulk is paintable, as some of the siding may need re-priming and painting. Urethane caulk is also an excellent sealer for concrete expansion joints.

How do you seal a crack between concrete and a house?

To seal a crack between concrete and a house, clean the area of all debris and let it dry completely. Apply a bead of high-quality exterior grade caulking material to the gap. Make sure the caulk is paintable if any of the siding needs re-priming and painting.

What is the barrier between concrete and wood framing?

The barrier between concrete and wood framing is called a sill plate. It is a wooden board that is placed over the foundation wall to provide a surface for attaching the wood framing of the house.

How do you fill a 2 inch gap in concrete?

To fill a 2 inch gap in concrete, you can use a compressible foam backer rod to fill the gap halfway. Then apply a high-quality concrete crack sealer to fill the remaining gap.

What are some outdoor waterproof caulking options for concrete?

Some outdoor waterproof caulking options for concrete include silicone caulk, polyurethane caulk, and butyl rubber caulk. These caulks are designed to withstand outdoor weather conditions and provide a waterproof seal.

What is the best concrete crack sealer for waterproofing?

The best concrete crack sealer for waterproofing is a polyurethane-based sealant. It is flexible, durable, and can withstand extreme weather conditions. Polyurethane sealants are also resistant to chemicals and abrasion, making them ideal for outdoor use.

rubbing-alcohol-for-cleaning-finished-wood-surfaces-does-it-work

Rubbing alcohol is a popular cleaning agent that many people swear by for tackling tough stains and grime. However, when it comes to cleaning finished wood surfaces, you may be wondering if rubbing alcohol is safe and effective. After all, you don’t want to risk damaging your beautiful wood furniture or floors.

The good news is that rubbing alcohol can be a safe and effective cleaner for finished wood surfaces, as long as it is used properly. Rubbing alcohol, also known as isopropyl alcohol, is a colorless liquid that is made by combining water and propylene or ethylene. It is commonly sold at most big box stores, grocery stores, and hardware stores in concentrations ranging from 60% to 90% isopropyl alcohol and distilled water solution.

Understanding Finished Wood Surfaces

understanding-finished-wood-surfaces

When it comes to cleaning finished wood surfaces, it’s important to understand what type of finish you are dealing with. Different finishes will react differently to cleaning agents, including rubbing alcohol. Here are some common types of finishes and how they may react to rubbing alcohol:

  • Varnish: Varnish is a popular finish for wood surfaces, but it can be sensitive to rubbing alcohol. The alcohol can dissolve the varnish, leaving the wood unprotected and vulnerable to damage.
  • Shellac: Shellac is another popular finish, but it is even more sensitive to rubbing alcohol than varnish. The alcohol can dissolve shellac almost instantly, leaving behind a sticky residue that is difficult to remove.
  • Lacquer: Lacquer is a durable finish, but it can still be sensitive to rubbing alcohol. The alcohol can cause the lacquer to soften and become sticky, which can make it difficult to clean.
  • Polyurethane: Polyurethane is a tough, durable finish that is resistant to most cleaning agents, including rubbing alcohol. However, prolonged exposure to alcohol can cause the finish to soften and become damaged.

If you are unsure what type of finish your wood surface has, it’s best to err on the side of caution and avoid using rubbing alcohol altogether. Instead, try using a mild soap and water solution or a specialized wood cleaner that is designed for your specific type of finish.

Remember, prevention is always better than cure. To avoid damaging your finished wood surfaces, take care to clean up spills and stains as soon as possible, and avoid using harsh cleaning agents or abrasive materials that can scratch or damage the finish.

What is Rubbing Alcohol?

Rubbing alcohol, also known as isopropyl alcohol, is a colorless liquid that is commonly used for cleaning and disinfecting surfaces. It is made by combining water and propylene or ethylene, and it contains approximately 70% alcohol.

Rubbing alcohol is a versatile cleaning agent that can be used for a variety of purposes, including removing stains and grime from surfaces. However, it is important to note that rubbing alcohol can be harmful to certain surfaces, particularly finished wood surfaces.

When using rubbing alcohol on finished wood surfaces, it is important to exercise caution. Rubbing alcohol can dissolve or liquefy finishes and varnishes, causing significant damage to the surface. As such, it is not recommended to use rubbing alcohol on painted, shellac, lacquered, or varnished surfaces.

Despite its potential for damage, rubbing alcohol can be an effective cleaning agent for certain types of finished wood surfaces. For example, it can be used to remove ink stains or other stubborn marks from unfinished wood surfaces.

Overall, rubbing alcohol can be a useful tool for cleaning and disinfecting surfaces, but it is important to use it with caution and to avoid using it on surfaces that may be damaged by the alcohol.

The Cleaning Properties of Rubbing Alcohol

the-cleaning-properties-of-rubbing-alcohol

Rubbing alcohol, also known as isopropyl alcohol, is a versatile cleaning solution that can be used on various surfaces, including finished wood. It is a popular choice for cleaning and disinfecting because it is effective against a wide range of microorganisms, including bacteria, viruses, and fungi.

When it comes to cleaning finished wood surfaces, rubbing alcohol can be an effective solution. It can help remove dirt, grime, and stains without damaging the finish. However, it is important to use it correctly to avoid any potential damage.

Here are some tips on how to use rubbing alcohol for cleaning finished wood surfaces:

  • Dilute the rubbing alcohol: Pure rubbing alcohol can be too strong and can damage the finish of the wood. Dilute it with water to create a solution that is safe for use on finished wood. A ratio of 1:1 (equal parts rubbing alcohol and water) is a good starting point.
  • Test on a small, inconspicuous area: Before using rubbing alcohol on a larger area, test it on a small, hidden spot to make sure it does not damage the finish.
  • Apply the solution with a soft cloth: Dip a soft cloth in the rubbing alcohol solution and wring it out to remove excess liquid. Gently wipe the surface of the wood, being careful not to scrub too hard.
  • Dry the surface: After cleaning, use a clean, dry cloth to wipe the surface of the wood and remove any excess moisture.

Rubbing alcohol can be a useful tool for cleaning finished wood surfaces, but it is important to use it correctly to avoid any potential damage. With the right technique, you can effectively remove dirt and stains without harming the finish of your wood furniture or flooring.

Rubbing Alcohol and Finished Wood Surfaces

When it comes to cleaning finished wood surfaces, rubbing alcohol can be a useful tool. However, it’s important to understand the potential effects it can have on your furniture. In this section, we’ll explore the chemical reaction that occurs when rubbing alcohol comes into contact with finished wood surfaces, as well as the effects it can have on the finish and wood grain.

Chemical Reaction

Rubbing alcohol, also known as isopropyl alcohol, is a solvent that can dissolve certain types of finishes, such as shellac and lacquer. When rubbing alcohol comes into contact with these finishes, it can cause them to liquefy and become sticky. This can make the finish more susceptible to damage from other cleaning products or even from something as simple as water.

Effect on Finish

If you’re cleaning a finished wood surface with rubbing alcohol, it’s important to be careful about how much you use and how you apply it. Using too much rubbing alcohol or rubbing too hard can cause the finish to become damaged or even dissolve completely. To avoid this, it’s best to use a soft cloth or sponge and to apply the rubbing alcohol in a gentle, circular motion.

Effect on Wood Grain

In addition to potentially damaging the finish, rubbing alcohol can also affect the wood grain itself. If you’re cleaning a piece of wood furniture with rubbing alcohol, it’s important to be aware that the alcohol can strip away some of the natural oils in the wood. This can cause the wood to become dry and brittle over time, which can lead to cracking or other damage.

To minimize the risk of damage to your finished wood surfaces, it’s best to use rubbing alcohol sparingly and to avoid using it on surfaces that are particularly delicate or prone to damage. If you’re unsure about whether or not rubbing alcohol is safe to use on a particular surface, it’s always a good idea to test a small, inconspicuous area first to see how it reacts.

Alternatives to Rubbing Alcohol for Cleaning Finished Wood Surfaces

alternatives-to-rubbing-alcohol-for-cleaning-finished-wood-surfaces

If you’re looking for alternatives to rubbing alcohol for cleaning finished wood surfaces, there are a few options available. Here are some of the most effective alternatives:

Commercial Wood Cleaners

There are a variety of commercial wood cleaners available that are specifically designed for cleaning finished wood surfaces. These cleaners come in a variety of forms, including sprays, wipes, and concentrated solutions that you can dilute with water.

When choosing a commercial wood cleaner, it’s important to look for one that is specifically designed for finished wood surfaces. Some wood cleaners are designed for use on unfinished or raw wood, and may not be effective on finished surfaces.

Homemade Natural Cleaners

If you prefer to use natural cleaning solutions, there are several options that are effective for cleaning finished wood surfaces. Here are a few homemade natural cleaners that you can try:

  • White Vinegar: Mix equal parts white vinegar and water in a spray bottle. Spray the solution onto the wood surface and wipe it clean with a soft cloth.
  • Olive Oil and Lemon Juice: Mix 1/4 cup olive oil and 1/4 cup lemon juice in a spray bottle. Spray the solution onto the wood surface and wipe it clean with a soft cloth.
  • Baking Soda and Water: Mix 1/4 cup baking soda and enough water to make a paste. Apply the paste to the wood surface and scrub it gently with a soft brush. Wipe the surface clean with a damp cloth.

When using homemade natural cleaners, it’s important to test the solution on a small, inconspicuous area of the wood surface first to ensure that it doesn’t cause any damage or discoloration.

Overall, there are several effective alternatives to rubbing alcohol for cleaning finished wood surfaces. Whether you choose a commercial wood cleaner or a homemade natural solution, be sure to follow the manufacturer’s instructions or recipe carefully to ensure the best results.

Precautions When Using Rubbing Alcohol on Finished Wood Surfaces

When using rubbing alcohol to clean finished wood surfaces, there are a few precautions you should take to avoid damaging the wood. Here are some important tips to keep in mind:

Test Patch

Before applying rubbing alcohol to a large area, it’s important to test it on a small, inconspicuous spot first. This will help you determine if the alcohol will cause any damage or discoloration to the wood. Apply a small amount of rubbing alcohol to a cotton swab or cloth and rub it gently on the test area. If there is no damage or discoloration, you can proceed with cleaning the rest of the surface.

Proper Application

When applying rubbing alcohol to a finished wood surface, it’s important to use a soft, lint-free cloth. Avoid using abrasive materials like steel wool or rough sponges, as these can scratch the surface of the wood. Apply the rubbing alcohol to the cloth, rather than directly to the wood, and use a gentle, circular motion to clean the surface.

Ventilation

Rubbing alcohol can produce fumes that can be harmful if inhaled in large quantities. To avoid breathing in these fumes, it’s important to work in a well-ventilated area. Open windows and doors to allow fresh air to circulate, and consider wearing a mask or respirator if you will be working with rubbing alcohol for an extended period of time.

By following these precautions, you can safely and effectively use rubbing alcohol to clean finished wood surfaces. Remember to always test a small area first, use a soft cloth, and work in a well-ventilated area to protect both yourself and your wood surfaces.

Regular Maintenance of Finished Wood Surfaces

If you have finished wood surfaces in your home, you know that they require regular maintenance to keep them looking their best. One of the most common questions people have is whether rubbing alcohol is an effective cleaner for finished wood surfaces.

The answer is that it depends on the type of finish you have. Most finishes will degrade or dissolve with alcohol, but some are more resistant than others and can tolerate a little bit of alcohol to clean off dirt or some adhesive. It is best to test a small, inconspicuous area before using rubbing alcohol on a larger area.

Assuming your finish can tolerate rubbing alcohol, here are some tips for regular maintenance of finished wood surfaces:

  • Dust regularly: Use a soft cloth or microfiber duster to remove dust from your finished wood surfaces. Dust can scratch the surface if left to accumulate.
  • Clean up spills immediately: If you spill something on your finished wood surface, clean it up immediately with a soft cloth or paper towel. Liquids can seep into the finish and cause damage if left to sit for too long.
  • Use a mild cleaner: If you need to use a cleaner on your finished wood surface, use a mild cleaner that is specifically formulated for wood surfaces. Avoid using harsh chemicals or abrasive cleaners that can scratch or damage the finish.
  • Avoid excessive moisture: Finished wood surfaces should be kept dry. Avoid using excessive amounts of water or leaving wet items on the surface, as this can cause the finish to warp or discolor.
  • Use rubbing alcohol sparingly: If you choose to use rubbing alcohol to clean your finished wood surface, use it sparingly and only on areas that need extra cleaning. Always test a small area first to make sure the finish can tolerate it.

By following these tips for regular maintenance of your finished wood surfaces, you can keep them looking beautiful for years to come.

Frequently Asked Questions

What is the best way to clean finished wood surfaces?

The best way to clean finished wood surfaces is to use a soft cloth or sponge with a mild soap and water solution. Avoid using abrasive cleaners or harsh chemicals that can damage the wood or the finish. Always test any cleaning solution on a small, inconspicuous area of the wood before applying it to the entire surface.

Can rubbing alcohol be used to clean furniture?

Rubbing alcohol can be used to clean furniture, but it is not recommended for use on finished wood surfaces. Rubbing alcohol can dissolve or damage the finish, leaving the wood looking dull or discolored. It is best to avoid using rubbing alcohol on finished wood surfaces.

How do you disinfect finished wood?

To disinfect finished wood, use a solution of equal parts water and white vinegar. Apply the solution to the wood surface using a soft cloth or sponge, and let it sit for a few minutes. Then, wipe the surface clean with a damp cloth and dry it thoroughly.

Is rubbing alcohol safe for use on finished wood?

Rubbing alcohol is generally not safe for use on finished wood surfaces. It can damage or dissolve the finish, leaving the wood looking dull or discolored. It is best to avoid using rubbing alcohol on finished wood surfaces.

What are the effects of rubbing alcohol on polyurethane finishes?

Rubbing alcohol can damage polyurethane finishes, leaving the wood looking dull or discolored. It is best to avoid using rubbing alcohol on polyurethane finishes.

Can rubbing alcohol remove shellac from wood surfaces?

Rubbing alcohol can remove shellac from wood surfaces, but it is not recommended. Shellac is a delicate finish, and rubbing alcohol can dissolve or damage it, leaving the wood looking dull or discolored. It is best to avoid using rubbing alcohol on shellac finishes.