Tag Archives: wood absorb stain differently

user-experiences-with-rust-oleum-ebony-wood-stain

Is Rust-Oleum “Ebony” Wood Stain Black or Dark Brown? Find Out Here!

If you are looking for a dark wood stain, Rust-Oleum’s “Ebony” wood stain may be a great option for you. One common question people have about this product is whether it is black or really dark brown. The answer is that the Ebony wood stain is indeed very black in color.

When applied correctly, the Ebony wood stain can provide a beautiful, rich finish to your wooden furniture or other projects. However, it is important to properly prepare the wood before applying the stain in order to achieve an even, consistent color. This may involve sanding and water-popping the wood beforehand.

Understanding Wood Stains
understanding-wood-stains

When it comes to choosing a wood stain, there are a few things to consider. Wood stains come in a variety of colors and shades, and it’s important to choose the right one to achieve the desired look. Rust-Oleum’s “Ebony” wood stain is a popular choice for those looking for a dark, rich color. But is it black or really dark brown?

Wood stains are designed to enhance the natural grain of the wood while adding color. The color of the stain is determined by the type of wood and the number of coats applied. The more coats applied, the darker the color will be. It’s important to note that the color of the stain may look different on different types of wood.

When choosing a wood stain, consider the following:

  • Type of wood: Different types of wood absorb stain differently, so it’s important to test the stain on a small area first to ensure the desired color is achieved.
  • Color: Choose a color that complements the existing decor or the desired look.
  • Transparency: Wood stains come in transparent, semi-transparent, and opaque options. Transparent stains allow the natural grain of the wood to show through, while opaque stains cover the wood completely.

Rust-Oleum’s “Ebony” wood stain is a very dark color that appears almost black. It’s a popular choice for those looking for a dramatic look. However, it’s important to note that the color may appear differently on different types of wood. It’s always a good idea to test the stain on a small area first to ensure the desired color is achieved.

In conclusion, choosing the right wood stain can make a big difference in the overall look of a project. Consider the type of wood, color, and transparency when making a decision. Rust-Oleum’s “Ebony” wood stain is a popular choice for those looking for a dark, rich color, but it’s important to test the stain on a small area first to ensure the desired color is achieved.

Rust-Oleum Ebony Wood Stain Overview

If you’re looking for a wood stain that will give your project a rich, dark finish, Rust-Oleum Ebony Wood Stain might be the perfect choice for you. This high-performance stain is designed to enhance the natural beauty of wood while providing exceptional coverage and fast drying times.

Rust-Oleum Ebony Wood Stain is a part of the Ultimate Wood Stain line and is recommended for use on interior wood projects such as furniture, cabinets, doors, trim, floors, and paneling. It is available in a quart size and can cover up to 275 square feet per quart.

One of the key features of Rust-Oleum Ebony Wood Stain is its unique base, which provides ultra-fast drying and recoat times. This means that you can complete your project much faster than with other wood stains. Additionally, the stain is enhanced with nano pigments that provide premium color quality in just one coat.

Another advantage of Rust-Oleum Ebony Wood Stain is that it does not require a wood conditioner, saving you time and money. The stain can be top-coated in just one hour, which means that you can finish your project quickly and move on to other tasks.

Overall, Rust-Oleum Ebony Wood Stain is an excellent choice for anyone looking for a high-quality, fast-drying wood stain that provides exceptional coverage and a beautiful, dark finish. Whether you’re a professional woodworker or a DIY enthusiast, this stain is sure to meet your needs and exceed your expectations.

Color Characteristics of Ebony
color-characteristics-of-ebony

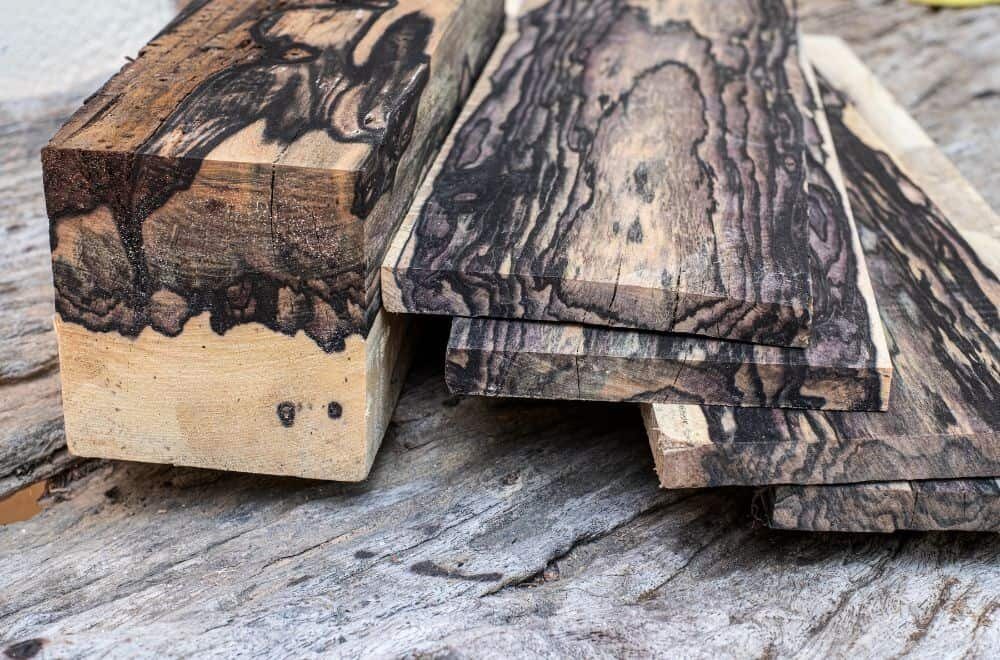
If you are looking for a dark and rich color for your wood, Ebony is an excellent choice. As the name suggests, Ebony wood stain is a very black stain that provides a deep and dramatic effect on your wood. The color is so dark that it almost appears black, but in certain lighting conditions, it can appear to be a very dark brown.

Ebony wood stain is ideal for those who want to make a statement with their woodwork. It is perfect for creating a bold and sophisticated look that will make your furniture or other wooden items stand out. It is also an excellent choice for those who want to create a classic and timeless look.

One of the benefits of using Ebony wood stain is that it enhances the natural beauty of the wood. It allows the wood grain to show through, which gives the wood a unique and beautiful texture. The stain also penetrates deeply into the wood, providing long-lasting protection against wear and tear.

In terms of color, Ebony wood stain is darker than other stains such as espresso or dark walnut. It is also darker than many other types of wood stains, making it an excellent choice for those who want to create a bold and dramatic effect. If you are looking for a rich and dark color for your wood, Ebony wood stain is an excellent choice.

Comparing Ebony to Black and Dark Brown

When it comes to wood stains, the terms “ebony,” “black,” and “dark brown” can be confusing. While they may seem similar, there are some differences between them that you should be aware of.

First, let’s talk about ebony. Ebony wood stain is a very dark, almost black stain that is typically used to create a dramatic effect. It is a popular choice for modern and contemporary designs and can be used on both interior and exterior wood surfaces.

Black wood stain, on the other hand, is a more general term that can refer to any stain that is black in color. It may not be as dark as ebony and may have a slightly different hue. Black wood stain is often used to create a sleek and modern look, but it can also be used for more traditional designs.

Dark brown wood stain is another option to consider. While it is not as dark as ebony or black, it can still create a rich, warm look that is perfect for traditional or rustic designs. Dark brown stain can also be used to highlight the natural grain of the wood.

When choosing between ebony, black, and dark brown wood stains, consider the overall look and feel you are trying to achieve. Ebony and black stains are great for creating a modern and dramatic look, while dark brown stains are better suited for traditional and rustic designs.

It is important to note that the exact color of a wood stain can vary depending on the type of wood it is applied to and the application method. Always test your stain on a small, inconspicuous area before applying it to the entire surface.

Factors Influencing the Perception of Ebony’s Color
factors-influencing-the-perception-of-ebonys-color

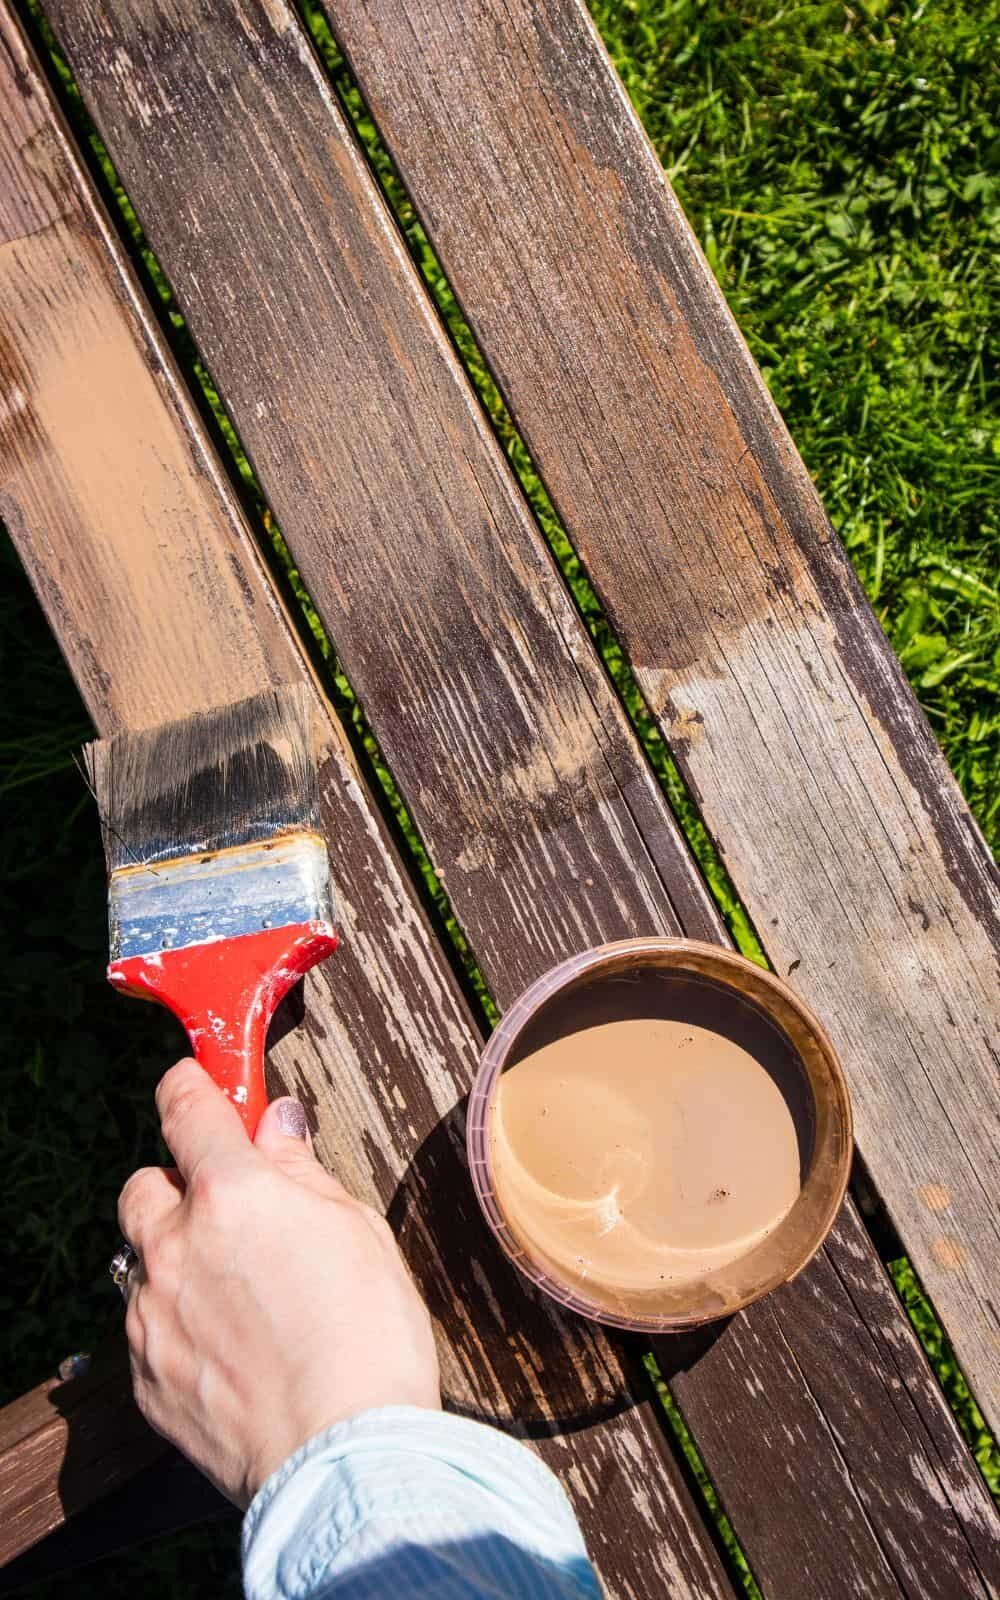
The perception of color is influenced by various factors, including lighting conditions, the type of wood being stained, and the application method. These factors can affect the final color of Rust-Oleum “Ebony” wood stain, making it appear either black or really dark brown.

Lighting conditions play a significant role in how Ebony wood stain appears. Under bright lighting conditions, Ebony wood stain may appear black, while under low light conditions, it may appear dark brown. Therefore, it is essential to consider the lighting conditions of the room where the stained wood will be placed.

The type of wood being stained can also influence the final color of Ebony wood stain. Hardwoods such as oak and maple tend to absorb stain differently than softwoods such as pine and spruce. This can affect the final color of the stain, making it appear either black or dark brown.

The application method can also affect the final color of Ebony wood stain. Applying the stain with a brush or cloth can result in a darker color, while spraying the stain can result in a lighter color. Additionally, applying too much stain can result in a darker color, while applying too little can result in a lighter color.

In conclusion, the final color of Rust-Oleum “Ebony” wood stain can vary depending on various factors such as lighting conditions, wood type, and application method. It is essential to consider these factors when staining wood to achieve the desired color.

Practical Applications of Rust-Oleum Ebony Wood Stain

If you are looking for a wood stain that is black or really dark brown, Rust-Oleum Ebony Wood Stain is an excellent choice. This stain is perfect for a variety of applications, including furniture, cabinets, doors, trim, and paneling. Here are some practical applications of Rust-Oleum Ebony Wood Stain:

Furniture

Rust-Oleum Ebony Wood Stain is great for furniture. It can be used on all types of wood furniture, including tables, chairs, bookcases, and more. This stain will give your furniture a beautiful, rich color that will last for years.

Cabinets

If you want to give your cabinets a new look, Rust-Oleum Ebony Wood Stain is a great option. It can be used on all types of cabinets, including kitchen cabinets, bathroom cabinets, and more. This stain will give your cabinets a beautiful, rich color that will make them look like new.

Doors

Rust-Oleum Ebony Wood Stain is perfect for doors. It can be used on all types of doors, including interior doors, exterior doors, and more. This stain will give your doors a beautiful, rich color that will make them stand out.

Trim and Paneling

If you want to give your trim and paneling a new look, Rust-Oleum Ebony Wood Stain is a great option. It can be used on all types of trim and paneling, including baseboards, crown molding, wainscoting, and more. This stain will give your trim and paneling a beautiful, rich color that will make them stand out.

Overall, Rust-Oleum Ebony Wood Stain is a great choice for anyone who wants a wood stain that is black or really dark brown. It is perfect for a variety of applications, including furniture, cabinets, doors, trim, and paneling.

User Experiences with Rust-Oleum Ebony Wood Stain

user-experiences-with-rust-oleum-ebony-wood-stain

If you’re considering using Rust-Oleum Ebony Wood Stain for your next project, you may be wondering what other users have experienced. Here are a few user experiences to give you an idea of what to expect:

  • One user applied the stain to a wooden chair and found that it gave the chair a deep, rich black color. They were impressed with how easy it was to apply and the fact that it only required one coat.
  • Another user used the stain on a wooden table and found that it gave the table a very dark brown color rather than a true black. They noted that the color varied depending on the type of wood being stained and the number of coats applied.
  • A third user used the stain on a wooden dresser and was pleased with the results. They noted that the stain dried quickly and didn’t leave any streaks or blotches. They also appreciated that the stain didn’t have a strong odor.

Overall, users seem to be generally satisfied with Rust-Oleum Ebony Wood Stain. While the color may vary slightly depending on the type of wood and number of coats applied, it generally gives a deep, rich color. Additionally, users appreciate how easy it is to apply and the fact that it dries quickly.

Frequently Asked Questions

Is Rust-Oleum Ebony wood stain a true black color?

Yes, Rust-Oleum Ebony wood stain is a true black color. It is a deep, rich color that provides a classic, elegant look to any project.

Does Rust-Oleum Ebony wood stain have any brown undertones?

No, Rust-Oleum Ebony wood stain does not have any brown undertones. It is a pure black color that does not have any hints of brown.

What is the difference between Rust-Oleum Ebony wood stain and black wood stain?

There is no difference between Rust-Oleum Ebony wood stain and black wood stain. Ebony wood stain is a type of black wood stain that is named after the black wood of the ebony tree.

Will Rust-Oleum Ebony wood stain give a glossy or matte finish?

Rust-Oleum Ebony wood stain will give a matte finish. It is designed to enhance the natural beauty of the wood without adding any shine or gloss.

Can Rust-Oleum Ebony wood stain be used on all types of wood?

Yes, Rust-Oleum Ebony wood stain can be used on all types of wood. It is perfect for use on furniture, cabinets, doors, trim, floors, and paneling.

Is Rust-Oleum Ebony wood stain easy to apply and does it dry evenly?

Yes, Rust-Oleum Ebony wood stain is easy to apply and dries evenly. Its unique base provides ultra-fast dry and recoat time, and it is enhanced with Nano pigments to provide premium color quality in one coat.
understanding-wood-staining

Staining Wood: Can You Apply Danish Oil Afterwards?

Are you considering staining your wood and then applying Danish oil after? This is a common question among woodworkers who want to achieve a specific look for their projects. While some people swear by this technique, others are hesitant to try it out. In this article, we will explore whether it is okay to stain wood and then apply Danish oil after, and what you need to know before attempting this technique.

According to woodworking experts, it is possible to apply Danish oil over a stained wood surface. However, there are some important factors to consider before you start. First, you need to ensure that the stain is completely dry before applying the Danish oil. This is because the oil can prevent the stain from drying properly, resulting in a sticky and uneven finish. Additionally, you need to make sure that the stain and the oil are compatible with each other. Some types of stains may not work well with Danish oil, so it’s important to test the combination on a small area first.

Overall, staining wood and then applying Danish oil after can be a great way to enhance the appearance of your project. However, it’s important to follow the right steps and use the right products to achieve the desired results. In the following sections, we will explore the benefits and drawbacks of this technique, as well as some tips for getting the best possible finish.

Understanding Wood Staining

understanding-wood-staining

What is Wood Staining?

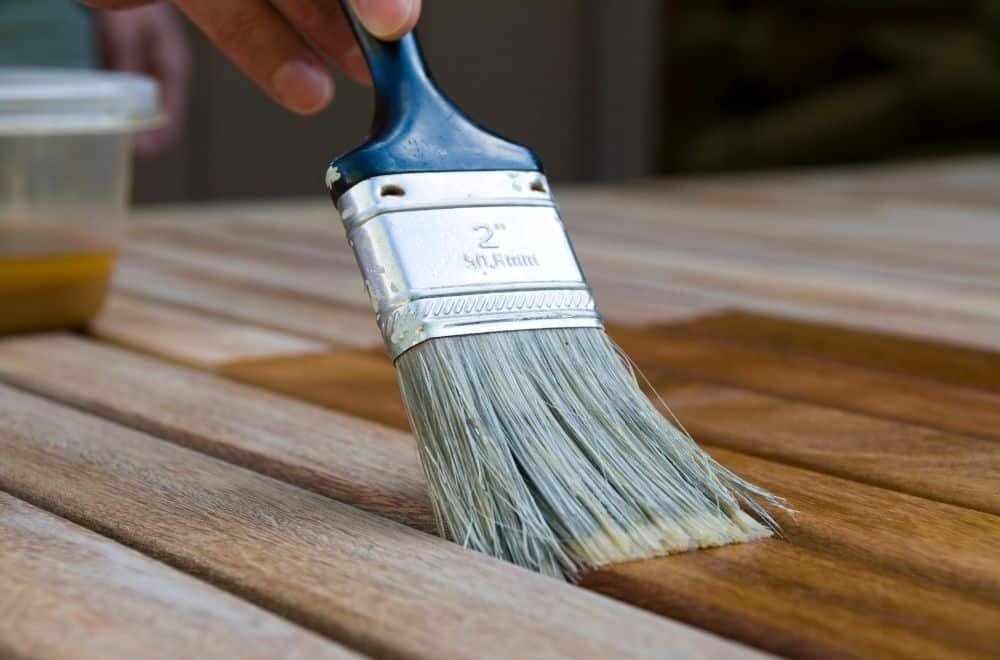
Wood staining is a process of adding color to the wood. It is done by applying a pigmented solution to the surface of the wood. The pigments in the solution penetrate the wood and give it a colored appearance. Wood stains come in a variety of colors and shades, and they can be used to enhance the natural beauty of the wood or to give it a completely different look.

Benefits of Wood Staining

There are many benefits to staining wood. Here are a few:

  • Enhances natural beauty: Staining wood can help bring out the natural beauty of the wood grain and texture.
  • Color customization: Wood stains come in a variety of colors and shades, allowing you to customize the look of your project.
  • Protects against UV rays: Some wood stains contain UV protection, which can help prevent the wood from fading or becoming discolored over time.
  • Protects against moisture: Some wood stains contain water-resistant properties, which can help protect the wood from moisture damage.

Overall, wood staining is a great way to add color and protection to your wood projects. However, it’s important to note that not all stains are created equal, and some may not be compatible with certain finishes, such as Danish oil. Always read the label and do a test on a small, inconspicuous area before applying any stain or finish to your project.

Applying Danish Oil

applying-danish-oil

If you’ve decided to apply Danish oil over your stained wood, you’ll be pleased to know that it’s a relatively straightforward process. Here’s what you need to know:

What is Danish Oil?

Danish oil is a type of wood finishing oil that is made up of a blend of oils and varnish. It’s a popular choice for finishing wood because it provides a durable, water-resistant finish while also enhancing the natural beauty of the wood.

Benefits of Danish Oil

Applying Danish oil to your stained wood can offer several benefits. Here are a few:

  • Enhances the natural beauty of the wood: Danish oil can bring out the natural grain and color of the wood, giving it a rich, warm glow.
  • Provides a durable finish: Danish oil creates a hard, water-resistant finish that can protect your wood from scratches, stains, and other damage.
  • Easy to apply: Danish oil is easy to apply with a brush or rag, and it dries quickly, so you can apply multiple coats in a short amount of time.

When applying Danish oil over stained wood, it’s important to make sure that the stain is completely dry before you start. This will help ensure that the oil adheres properly and doesn’t create any unwanted effects.

To apply Danish oil, simply brush or wipe it onto the wood in a thin, even layer. Let it sit for a few minutes, then wipe off any excess with a clean cloth. Repeat this process until you’ve achieved the desired level of sheen and protection.

Overall, applying Danish oil over stained wood can be a great way to enhance the natural beauty of your wood while also providing a durable, water-resistant finish. With a little bit of patience and attention to detail, you can achieve a beautiful result that will last for years to come.

The Process of Staining and Applying Danish Oil

the-process-of-staining-and-applying-danish-oil

If you are wondering whether it is okay to apply Danish oil over stain, the answer is yes. However, it is important to understand the process of staining and applying Danish oil to achieve the best results. Here is a breakdown of the process:

Preparation for Staining

Before you start staining, it is important to prepare the wood surface properly. This involves sanding the wood to remove any rough spots or imperfections. You can use a sandpaper with a grit of 120 to 150 for this purpose. After sanding, wipe the wood surface with a clean cloth to remove any dust or debris.

Steps to Stain Wood

Once the wood is properly prepared, you can start staining. Here are the steps to follow:

  1. Apply the stain to the wood surface using a brush or a cloth. Make sure to apply the stain evenly and in the direction of the wood grain.
  2. Let the stain sit on the wood for a few minutes. The longer you let it sit, the darker the color will be.
  3. Wipe off any excess stain with a clean cloth. Make sure to wipe in the direction of the wood grain.
  4. Let the stain dry completely before applying Danish oil.

Applying Danish Oil After Staining

Once the stain is dry, you can apply Danish oil to the wood surface. Here are the steps to follow:

  1. Shake the Danish oil container well before use.
  2. Apply a thin coat of Danish oil to the wood surface using a brush or a cloth. Make sure to apply the oil evenly and in the direction of the wood grain.
  3. Let the Danish oil sit on the wood for a few minutes.
  4. Wipe off any excess oil with a clean cloth. Make sure to wipe in the direction of the wood grain.
  5. Let the Danish oil dry completely before applying a second coat if desired.

It is important to note that Danish oil is a blend of oil and varnish, which can enhance the appearance of the stain and add a rich, low-luster sheen. However, ensuring the stain is completely dry before applying Danish oil is crucial to avoid any issues with the finish.

Considerations Before Staining and Applying Danish Oil

considerations-before-staining-and-applying-danish-oil

When it comes to staining and applying Danish oil to wood, there are a few considerations you should keep in mind to ensure a successful and safe project. In this section, we’ll cover some important factors to consider before starting your project.

Choosing the Right Stain

Choosing the right stain is crucial to achieving the desired color and finish for your project. Here are some things to keep in mind when selecting a stain:

  • Type of wood: Different types of wood absorb stain differently, so it’s important to choose a stain that works well with the type of wood you’re using.
  • Color: Stains come in a variety of colors and shades, so choose one that complements your project and achieves the desired look.
  • Transparency: Stains can be transparent, semi-transparent, or opaque. Transparent stains allow the natural wood grain to show through, while opaque stains cover the wood completely.

Choosing the Right Danish Oil

Danish oil is a popular finish for wood projects because it provides protection while enhancing the natural beauty of the wood. Here are some things to consider when choosing a Danish oil:

  • Type of wood: Like with stains, different types of wood absorb Danish oil differently, so choose an oil that works well with the type of wood you’re using.
  • Satin or gloss finish: Danish oil comes in a variety of finishes, from satin to gloss. Choose the finish that best suits your project.
  • Drying time: Danish oil takes longer to dry than other finishes, so be sure to plan accordingly.

Safety Precautions

Staining and applying Danish oil can be hazardous if proper safety precautions are not taken. Here are some safety tips to keep in mind:

  • Wear protective gloves and eyewear when handling stains and oils.
  • Work in a well-ventilated area to avoid inhaling fumes.
  • Dispose of rags and other materials soaked in stain or oil properly, as they can spontaneously combust.

By considering these factors before staining and applying Danish oil to your wood project, you can ensure a beautiful and safe finished product.

Frequently Asked Questions

Can I apply Danish oil over water based stain?

Yes, you can apply Danish oil over water-based stain, but it’s important to make sure the stain is completely dry before applying the oil. Water-based stains can take longer to dry than oil-based stains, so it’s important to be patient and wait until the stain is completely dry before applying the oil.

How to apply Danish Oil?

To apply Danish oil, you can use a brush, cloth, or foam applicator. Apply a thin, even coat of oil to the wood, working with the grain. Let the oil soak into the wood for about 15 minutes, then wipe off any excess with a clean cloth. Repeat the process until you achieve the desired level of sheen.

Can you use Danish oil after staining?

Yes, you can use Danish oil after staining. In fact, Danish oil can enhance the appearance of the stain, adding a rich, low-luster sheen. However, it’s important to make sure the stain is completely dry before applying the oil.

Should I stain wood before oiling?

Yes, you should stain wood before oiling. Staining the wood first will help to bring out the natural beauty of the wood and provide a consistent color. Applying oil over the stain will help to protect the wood and enhance its natural beauty.

Danish oil over polyurethane?

It is not recommended to apply Danish oil over polyurethane. Polyurethane creates a hard, protective layer on top of the wood, which can prevent the oil from penetrating the wood. If you want to use Danish oil, it’s best to apply it to bare wood or wood that has been stained but not finished with polyurethane.

Tinted Danish Oil?

Yes, you can use tinted Danish oil to add color to your wood. Tinted Danish oil is available in a variety of colors and can be used to enhance the natural beauty of the wood or to add a pop of color. Just like regular Danish oil, it’s important to make sure the wood is clean and dry before applying the tinted oil.

Mari bergabung di Slot88 resmi permainan paling fun di slot! Temukan keseruan dan peluang emas meraih kemenangan serta hadiah menarik di setiap putaran. Jangan lewatkan momen istimewa ini, segera kunjungi link Slot88 resmi dan mulailah petualanganmu! Ayo bergabung sekarang dan tunjukkan keberuntunganmu!

why-consider-staining-over-polyurethane

Wood Stain Over Polyurethane: Is It Possible?

Are you wondering if you can put wood stain over polyurethane? If you have a wood surface that has been coated with polyurethane and you want to change its color, you may be wondering if it’s possible to apply a wood stain over the existing finish. The answer is not straightforward, but it is possible in some cases.

Regular wood stain is a penetrating finish, meaning it needs to penetrate the wood pores to stick. However, since polyurethane forms a moisture-resistant barrier over the surface, the wood stain can’t penetrate it and won’t stick. But, there are some topical stains, such as gel stains, that can stick to polyurethane. In this article, we will explore the options available to you if you want to put wood stain over polyurethane and the benefits of doing so.

Understanding Polyurethane and Wood Stain

When it comes to finishing woodwork, polyurethane and wood stain are two of the most commonly used products. Polyurethane is a clear, protective coating that is applied over wood to protect it from damage and wear. On the other hand, wood stain is a colored liquid that is applied to wood to enhance its natural beauty and add color.

Polyurethane is available in two types: water-based and oil-based. Water-based polyurethane dries faster and has a lower VOC (volatile organic compound) content, making it a more environmentally friendly option. Oil-based polyurethane, on the other hand, takes longer to dry but provides a more durable finish.

Wood stain is also available in two types: oil-based and water-based. Oil-based stains penetrate deeper into the wood grain, providing a richer color and a more natural look. Water-based stains, on the other hand, dry faster and have a lower VOC content.

One common question people have is whether they can put wood stain over polyurethane. The answer is no, regular wood stain won’t stick to polyurethane because it forms a moisture-resistant barrier over the surface. However, topical stains, such as gel stains, can stick to polyurethane because they don’t need to penetrate the wood pores to stick.

If you want to apply wood stain over polyurethane, you’ll need to remove the polyurethane first by sanding or stripping it off. Once the polyurethane is removed, you can apply the wood stain and then apply a new coat of polyurethane over it to protect it.

It’s important to note that when mixing wood stain with polyurethane, you should use the same bases, such as an oil-based stain with only oil-based poly and vice versa. This ensures that the two products will bond properly and provide the best results.

Why Consider Staining Over Polyurethane

why-consider-staining-over-polyurethane

If you have a wood project that has already been coated with polyurethane, you may be wondering if you can add more color to it. The answer is yes, you can stain over polyurethane. Here are a few reasons why you might consider staining over polyurethane:

To Add Color

Polyurethane is a clear coating that protects the wood but doesn’t add any color. If you want to add some color to your wood project, staining over polyurethane is a great option. You can choose from a variety of colors and shades to achieve the desired look.

To Enhance Durability

Staining over polyurethane can actually enhance the durability of the finish. By adding an additional layer of stain, you are also adding an additional layer of protection to the wood. This can help prevent scratches, dents, and other types of damage.

To Refresh the Look

Over time, polyurethane can become dull and worn-looking. Staining over polyurethane can help refresh the look of the wood and make it look new again. It’s a great way to give an old piece of furniture or a wood floor a fresh new look.

To Correct Mistakes

If you’ve already applied polyurethane to your wood project and made a mistake, such as a drip or a spot that didn’t get coated properly, you can fix it by staining over the polyurethane. The stain will help cover up the mistake and make it less noticeable.

Overall, staining over polyurethane is a great option if you want to add color, enhance durability, refresh the look, or correct mistakes. Just make sure to prepare the surface properly and choose the right type of stain for your project.

Preparation Before Staining Over Polyurethane

Before you start staining over polyurethane, it is crucial to prepare the surface properly. This will ensure that the stain adheres well and gives you the desired finish. Here are two important steps you should follow:

Cleaning the Surface

Before you start staining, ensure that the surface is clean and free of any dust, dirt, or debris. Use a soft cloth or a vacuum cleaner to remove any loose particles from the surface. For any stubborn stains, you can use a mild detergent and water solution. Ensure that you wipe off any excess soap with a clean, damp cloth.

Sanding the Surface

Sanding the surface is an essential step before staining. It helps to remove any existing polyurethane and gives the stain a better surface to adhere to. Use a fine-grit sandpaper to sand the surface gently. Ensure that you sand in the direction of the wood grain. Once you have sanded the surface, wipe off any dust with a soft cloth.

In summary, cleaning and sanding the surface are crucial steps in preparing to stain over polyurethane. By following these steps, you can ensure that the stain adheres well and gives you the desired finish.

Choosing the Right Wood Stain

choosing-the-right-wood-stain

When it comes to choosing the right wood stain, there are a few things you should consider. First, you need to decide what type of finish you want. Do you want a clear finish, or do you want a colored finish? If you want a colored finish, what color do you want? Once you have decided on the type of finish you want, you need to choose the right product.

There are two main types of wood stain: oil-based and water-based. Oil-based stains are the traditional choice and are known for their durability and rich color. They are also easier to apply and penetrate the wood more deeply. Water-based stains, on the other hand, are a newer option and are known for their low VOCs and easy cleanup. They also dry faster than oil-based stains.

Another factor to consider is the opacity of the stain. Some stains are more opaque than others, meaning they will hide the natural grain of the wood more. If you want to highlight the natural grain of the wood, you should choose a more transparent stain. If you want a more solid color, you should choose a more opaque stain.

Lastly, consider the type of wood you are staining. Different types of wood absorb stain differently, so you should choose a stain that is specifically designed for the type of wood you are working with. For example, if you are staining pine, you may want to choose a stain that is designed for softwoods.

Overall, choosing the right wood stain is an important part of the staining process. By considering the type of finish, the type of stain, the opacity, and the type of wood, you can ensure that you choose the right product for your project.

Application Process

Applying the Stain

If you want to apply wood stain over polyurethane, you need to follow a few steps to ensure that the stain adheres properly. First, you need to clean the surface of the wood thoroughly to remove any dirt, grime, or wax. You can use a scouring pad dipped in a 5-50 solution of denatured alcohol and water to scrub the surface. After cleaning, let the surface dry for at least two hours.

Next, you need to sand the surface of the wood lightly by hand with 400-grit sandpaper. This step is necessary to remove any glossiness and provide a rough surface for the stain to adhere to. After sanding, wipe the surface with a clean cloth to remove any dust or debris.

Now, it’s time to apply the stain. You can use a brush, foam applicator, or cloth to apply the stain. Make sure to apply the stain in the direction of the wood grain. Apply the stain evenly and wipe off any excess with a clean cloth. If you want a darker color, you can apply a second coat of stain after the first coat has dried.

Drying and Curing Time

After applying the stain, you need to let it dry completely before applying polyurethane. The drying time can vary depending on the type of stain you use, but it usually takes around 24 hours. Make sure to check the manufacturer’s instructions for specific drying times.

Once the stain has dried completely, you can apply polyurethane. Apply the first coat of polyurethane thinly and evenly with a brush or roller, and let it dry for at least six hours. After the first coat has dried, sand the surface lightly with 220-grit sandpaper to remove any bumps or imperfections. Then, apply the second coat of polyurethane and let it dry for another six hours.

In conclusion, applying wood stain over polyurethane requires proper preparation and application techniques. By following the steps outlined above, you can achieve a beautiful and long-lasting finish on your wood projects.

Potential Challenges and How to Overcome Them

potential-challenges-and-how-to-overcome-them

When staining over polyurethane, you may encounter some challenges that can affect the final outcome of your project. Here are some of the potential challenges and how to overcome them:

Uneven Stain Application

One of the challenges you may face when staining over polyurethane is uneven stain application. This can happen when the polyurethane surface is not properly prepared before applying the stain. To avoid this, follow these steps:

  • Sand the polyurethane surface lightly with fine-grit sandpaper to create a rough surface that the stain can adhere to.
  • Clean the surface thoroughly with denatured alcohol and a clean cloth to remove any dirt or debris.
  • Apply a pre-stain conditioner to the surface to help the stain absorb evenly.

Stain Not Adhering Properly

Another challenge you may face is the stain not adhering properly to the polyurethane surface. This can happen when the polyurethane is too smooth or when the stain is not applied properly. To overcome this challenge, follow these steps:

  • Sand the polyurethane surface with coarse-grit sandpaper to create a rough surface that the stain can adhere to.
  • Apply a gel stain, which is thicker and easier to control than traditional liquid stains.
  • Apply the stain in thin, even coats with a brush or rag, making sure to wipe off any excess stain.
  • Allow the stain to dry completely before applying a protective topcoat.

By following these steps, you can overcome the potential challenges of staining over polyurethane and achieve a beautiful, even finish.

Maintenance of Stained Wood Over Polyurethane

maintenance-of-stained-wood-over-polyurethane

If you have a stained wood surface that has been coated with polyurethane, it is essential to maintain it properly to keep it looking its best. Here are some tips to help you maintain your stained wood over polyurethane:

Regular Cleaning

Regular cleaning is essential to keep your stained wood over polyurethane looking its best. You can use a soft cloth or a vacuum cleaner with a soft brush attachment to remove dust and debris from the surface. Avoid using harsh chemicals or abrasive cleaners that can damage the polyurethane coating.

Avoid Excessive Moisture

Excessive moisture can damage the polyurethane coating and cause it to peel or crack. Avoid placing wet items directly on the surface and wipe up spills immediately to prevent them from penetrating the polyurethane coating.

Avoid Direct Sunlight

Direct sunlight can cause the stained wood over polyurethane to fade and lose its color over time. To prevent this, avoid placing the surface in direct sunlight for extended periods. You can also use window treatments or UV-blocking films to protect the surface from sunlight.

Touch-Up as Needed

If the polyurethane coating becomes damaged or begins to peel, you can touch it up with a polyurethane coating designed for stained wood surfaces. Follow the manufacturer’s instructions carefully to ensure a smooth and even application.

Refinish When Necessary

If the stained wood over polyurethane becomes severely damaged or begins to show signs of wear, it may be time to refinish the surface. Refinishing involves removing the old polyurethane coating and applying a new one. This process should be done by a professional to ensure a smooth and even finish.

By following these tips, you can keep your stained wood over polyurethane looking beautiful for years to come.

Frequently Asked Questions

Can I apply gel stain over polyurethane?

Yes, you can apply gel stain over polyurethane. However, before doing so, you need to ensure that the polyurethane is clean and free from any dirt or debris. You can use denatured alcohol or a degreaser to clean the surface. After cleaning, sand the polyurethane lightly with sandpaper to create a rough surface that the gel stain can adhere to. Once the surface is ready, you can apply the gel stain and wipe off the excess.

Is it possible to stain over water-based polyurethane?

Yes, it is possible to stain over water-based polyurethane. However, you need to ensure that the surface is clean and free from any contaminants. You can use a degreaser or denatured alcohol to clean the surface. After cleaning, sand the surface lightly with sandpaper to create a rough surface that the stain can adhere to. Once the surface is ready, you can apply the stain and wipe off the excess.

Can you put gel wood stain over polyurethane?

Yes, you can put gel wood stain over polyurethane. However, you need to ensure that the polyurethane is clean and free from any dirt or debris. You can use denatured alcohol or a degreaser to clean the surface. After cleaning, sand the polyurethane lightly with sandpaper to create a rough surface that the gel stain can adhere to. Once the surface is ready, you can apply the gel stain and wipe off the excess.

Can you apply PolyShades over polyurethane?

Yes, you can apply PolyShades over polyurethane. However, you need to ensure that the surface is clean and free from any contaminants. You can use a degreaser or denatured alcohol to clean the surface. After cleaning, sand the surface lightly with sandpaper to create a rough surface that the PolyShades can adhere to. Once the surface is ready, you can apply the PolyShades and wipe off the excess.

What type of stain can go over polyurethane?

You can use any type of stain over polyurethane as long as the surface is clean and free from any contaminants. However, it is recommended to use gel stain as it adheres well to polyurethane and provides a uniform finish.

Can I stain over varnished wood without sanding?

No, you cannot stain over varnished wood without sanding. Sanding is necessary to create a rough surface that the stain can adhere to. If you apply stain over varnished wood without sanding, it will not adhere properly and will result in an uneven finish.