Tag Archives: wear protective gloves

wooden-doors-and-fire

How Many Fire Arrows Do You Need to Destroy a Wooden Door?

Are you trying to raid a wooden base in Rust but don’t know how many fire arrows it takes to destroy a wooden door? Look no further! In this article, we will answer the burning question of how many fire arrows you need to bring down a wooden door in Rust.

Generally, it takes between two and four fire arrows to destroy a wooden door. Fire arrows are special arrows that are lit on fire before being shot at a target. Once the target is hit, the fire arrows ignite the target and burn it away. This method is often used to break down wooden doors or walls. However, it’s important to note that the number of fire arrows needed can vary depending on the type of door and its condition.

To make two fire arrows in Rust, you will need 20 wood, 2 cloth, and 10 low-grade fuel. This means that you will need 500 wood, 50 cloth, and 250 low-grade fuel to bring down a wooden door using fire arrows. Keep in mind that this is just an estimate and the actual number of fire arrows needed may be higher or lower depending on various factors. With this information, you can plan your raid more efficiently and effectively.

Understanding Fire Arrows

how-many-fire-arrows-do-you-need-to-destroy-a-wooden-door-2

What Are Fire Arrows?

Fire arrows are special arrows that have been used for centuries as a weapon in warfare. They are arrows that have been dipped in a flammable substance, such as oil or pitch, and then set on fire before being shot at a target. The fire on the arrow ignites the target and causes damage. Fire arrows are often used to break down wooden doors or walls.

In modern times, fire arrows are still used in certain contexts, such as in hunting or in survival situations. They can be a useful tool for starting fires, as the flaming arrow can be used to ignite dry kindling or other combustible materials.

History of Fire Arrows

The use of fire arrows dates back to ancient China, where they were used as a weapon during battles. The Chinese would attach a small container of gunpowder to the end of the arrow, which would explode upon impact and cause damage to the target.

Fire arrows were also used in Europe during the Middle Ages, where they were used to attack enemy fortifications. The arrows would be launched from a longbow or crossbow, and the flaming tips would ignite the wooden structures.

Today, fire arrows are still used in some cultures for ceremonial purposes, such as in traditional archery competitions in Japan. They are also used in movies and TV shows as a dramatic and visually striking weapon.

Overall, fire arrows are a fascinating historical weapon that have been used for centuries. While they may not be as commonly used today, they still hold a place in history and continue to be a useful tool in certain contexts.

Wooden Doors and Fire

wooden-doors-and-fire

Properties of Wooden Doors

Wooden doors are one of the most common types of doors in Rust. They are easy to make and can be used to secure your base. However, they are not very strong and can be easily destroyed with the right tools. Wooden doors have 200 hitpoints and can be destroyed with explosives, melee weapons, or ranged weapons.

Effect of Fire on Wood

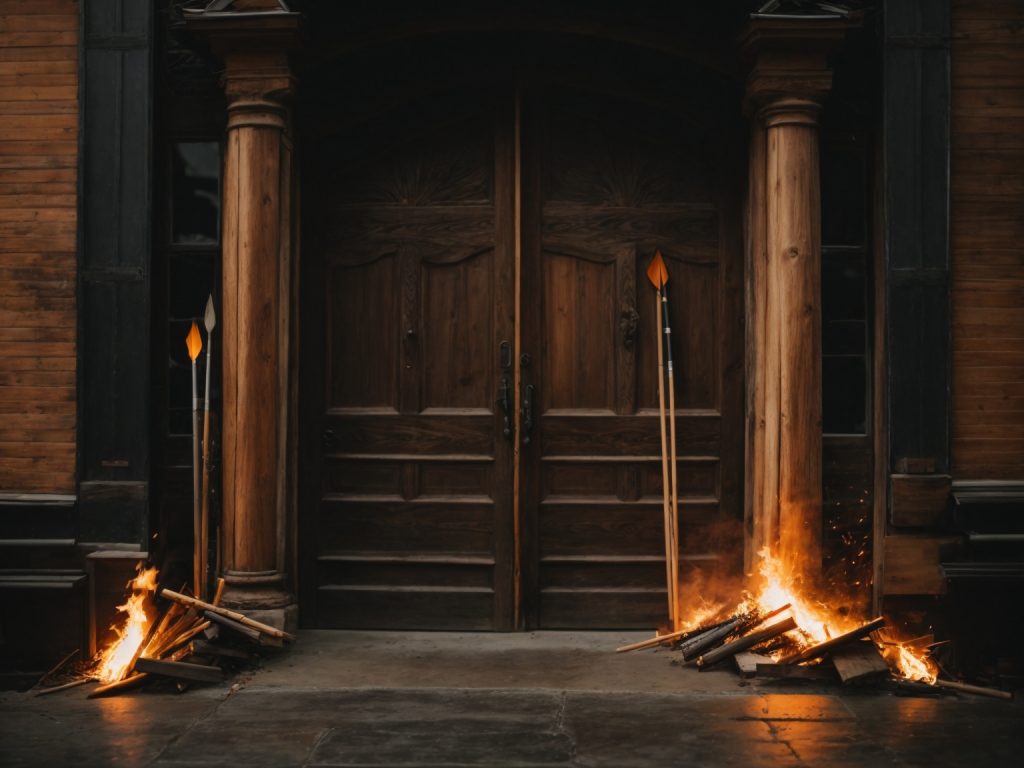
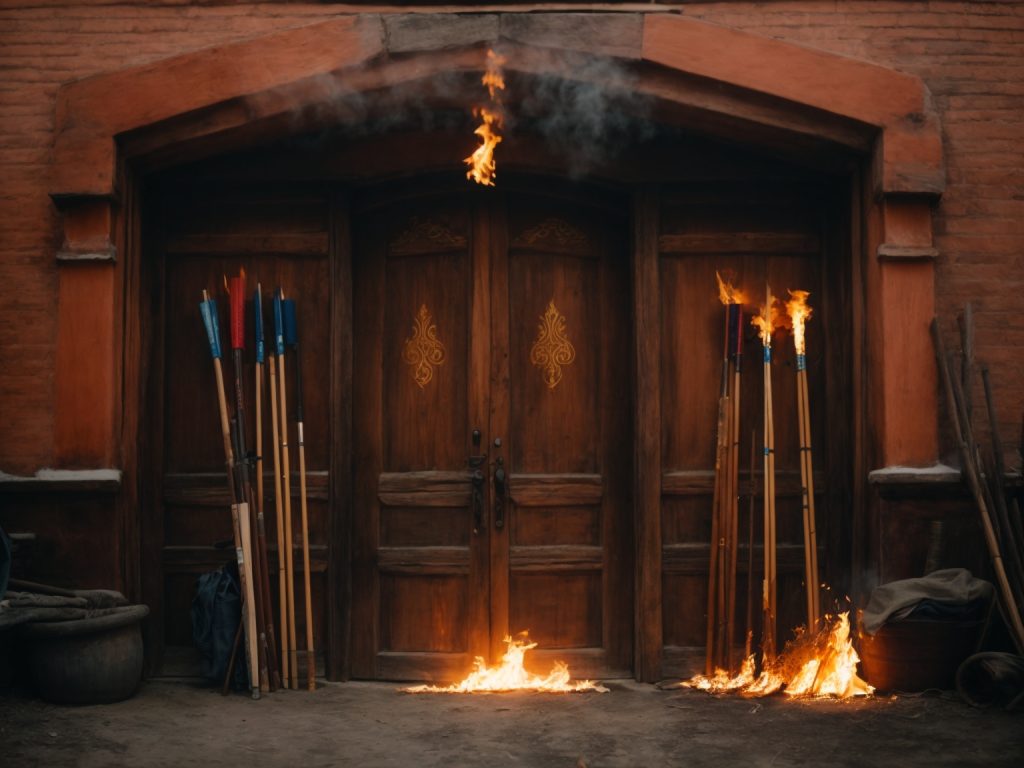
Fire arrows can be used to burn wooden doors. The number of fire arrows needed to destroy a wooden door depends on the size of the door and how dry the wood is. According to Rust Labs, it takes 50 fire arrows (250 low grade fuel) to destroy a wooden door. However, this number may vary depending on the size of the door and how dry the wood is.

The general rule of thumb is that you’ll need about one fire arrow for every two pieces of wood. So, if you’re looking at burning through a door made of four pieces of wood, then you’ll need at least eight fire arrows. However, this is just an estimate, and the actual number of fire arrows needed may vary.

Therefore, anywhere between three and six fire arrows could be necessary in order to set light on such an object as a wooden door. This means that it should still be attainable within two volleys without missing too many shots depending on how skilled the archer is.

In conclusion, wooden doors can be easily destroyed with the right tools, including fire arrows. The number of fire arrows needed to destroy a wooden door depends on the size of the door and how dry the wood is. It’s important to keep this in mind when raiding other bases or defending your own.

Fire Arrows Versus Wooden Doors

Impact of Fire Arrows

Fire arrows are a popular choice for raiding wooden bases because they are cheap and easy to craft. However, they are not always effective against wooden doors. Fire arrows deal damage over time, so they are not the best option if you want to breach a base quickly. They are also less effective against doors that have been treated with fire retardant.

Number of Arrows Needed

The number of fire arrows needed to burn through a wooden door depends on several factors, including the type of door and its condition. According to Rust Labs, a standard wooden door has 200 hitpoints and can withstand up to 50 fire arrows. However, this number can vary depending on the door’s condition and the type of fire arrows used.

If you are raiding a base with a wooden door, you should expect to use at least 10 to 15 fire arrows to burn through it. The more arrows you use, the faster the door will burn through. However, keep in mind that fire arrows can be difficult to aim, so you may need to use more arrows if you miss your shots.

It is also worth noting that fire arrows are not the only option for breaching wooden doors. Explosives, such as timed explosive charges, can also be effective against wooden doors. However, they are more expensive and can be more difficult to obtain than fire arrows.

In summary, fire arrows can be an effective tool for raiding wooden bases, but they are not always the best option for breaching wooden doors. The number of arrows needed to burn through a door can vary, so it is important to be prepared and bring enough arrows to ensure success.

Safety Precautions

When using fire arrows to raid a wooden door, it is important to take certain safety precautions to prevent any accidents or injuries. Here are some tips to keep in mind:

Handling Fire Arrows

First and foremost, always handle fire arrows with care. These arrows are designed to ignite upon impact, so be sure to keep them away from any flammable materials or surfaces. When loading your bow with fire arrows, make sure to keep the arrowhead pointed away from your body and any nearby objects. Additionally, be sure to wear protective gloves when handling fire arrows, as the arrowhead can become very hot after being lit.

Protecting Wooden Doors

When raiding a wooden door with fire arrows, it is important to take steps to protect the door from catching fire too quickly. One way to do this is to use water buckets or other fire extinguishing tools to put out any flames that may start to spread. Another option is to use explosive charges or other raiding methods to weaken the door before using fire arrows. This can help to ensure that the door will catch fire more easily and quickly, without risking the spread of flames to other parts of your base.

Remember, safety should always be your top priority when using fire arrows to raid wooden doors. By taking the necessary precautions and using common sense, you can help to ensure a successful raid without any accidents or injuries.

Experimenting with Fire Arrows

Setting up the Experiment

To determine how many fire arrows are needed to burn through a wooden door, you will need to set up an experiment. First, you will need to gather the necessary materials, including a wooden door, fire arrows, and a bow.

Once you have your materials, place the wooden door in a safe and open area where you can shoot at it without causing damage to surrounding structures. Then, shoot the wooden door with one fire arrow and observe the damage. Repeat this step with two, three, and four fire arrows, taking note of the damage each time.

Results and Observations

After conducting the experiment, you should have a good understanding of how many fire arrows are needed to burn through a wooden door. Based on our research and the information provided by the search results, it seems that anywhere between three and ten fire arrows could be necessary to burn through a wooden door, depending on the door’s size and the archer’s skill level.

It’s important to note that using fire arrows to raid a base can be expensive and time-consuming, especially if you miss your shots. Additionally, wooden doors are the weakest type of door, so it’s recommended to upgrade to metal doors as soon as possible for better protection against raiders.

In conclusion, experimenting with fire arrows can give you a good idea of how many you need to burn through a wooden door. However, it’s important to consider the cost and time involved in using fire arrows, as well as the vulnerability of wooden doors compared to other door types.

how-to-make-a-wooden-spear

How to Make a Wooden Spear: A Beginner's Guide

Are you interested in learning how to make a wooden spear? Spears have been used for hunting and fishing for thousands of years, and making your own can be a rewarding and useful skill to have. With just a few basic tools and materials, you can create a simple spear that will be effective for catching fish or small game.

To start, you will need to gather some materials. You can use a straight branch or pole as the shaft of your spear, and a sharp piece of flint or obsidian as the spearhead. If you don’t have access to these materials, you can also use a knife or other sharp tool to carve the spearhead from a piece of wood. Once you have your materials, you can begin the process of crafting your spear.

While making a wooden spear may seem daunting at first, it is actually a relatively simple process. With a little patience and practice, you can create a functional and effective tool that will serve you well in the wilderness. So why not give it a try and see what you can create?

Understanding the Basics of a Wooden Spear

how-to-make-a-wooden-spear

If you’re looking to make a wooden spear, it’s important to understand the basics of the tool before you start. A wooden spear consists of a long shaft with a pointed tip, and it has been used for hunting and fishing for thousands of years. Here are some key points to keep in mind:

Materials

The most important part of making a wooden spear is choosing the right materials. You’ll need a strong and straight piece of wood for the shaft, and a hard and durable material for the tip. Some common materials for the tip include bone, flint, or metal.

Design

The design of your spear will depend on what you plan to use it for. If you’re using it for hunting, you’ll want a longer and heavier spear with a sharp tip. If you’re using it for fishing, you’ll want a shorter and lighter spear with a barbed tip. Make sure to plan out your design before you start cutting and shaping the wood.

Tools

To make a wooden spear, you’ll need some basic tools such as a saw, a knife, and sandpaper. You may also need some specialized tools such as a drill or chisel, depending on the design of your spear.

Safety

It’s important to be safe when making a wooden spear. Make sure to wear protective gear such as gloves and eye goggles, and be careful when using sharp tools. Always cut away from your body and keep your fingers clear of the blade.

Choosing the Right Wood

When it comes to making a wooden spear, choosing the right wood is crucial. You want a wood that is strong, durable, and flexible enough to withstand the force of throwing or thrusting. Here are some of the most popular woods used for making wooden spears:

Ash Wood

Ash wood is one of the best woods for making a wooden spear. It is strong, flexible, and lightweight, making it easy to handle and maneuver. It is also readily available, making it a popular choice for many people.

Hickory Wood

Hickory wood is another great option for making a wooden spear. It is strong and durable, making it ideal for thrusting and throwing. It is also resistant to bending, which is important when using a spear.

Oak Wood

Oak wood is a popular choice for making a wooden spear because it is strong and durable. It is also readily available in many parts of the world, making it a convenient choice for many people.

Other Woods

While ash, hickory, and oak are the most popular woods for making a wooden spear, there are other woods that can be used as well. Some examples include maple, birch, and cherry wood.

When choosing a wood for your spear, it is important to consider the length and thickness of the wood, as well as its flexibility and strength. You want a wood that is straight, sturdy, and free of knots or other defects. With the right wood and some basic tools, you can craft a sharp and effective wooden spear that will serve you well in a variety of situations.

Shaping the Spear

Once you have selected the appropriate wood for your spear, it’s time to shape it. Shaping the spear involves trimming the wood to the desired length and carving the point.

Trimming the Wood

The first step in shaping your wooden spear is to trim it to the desired length. Use a hand saw to cut the wood to the desired length. Make sure to measure the length of the spear before cutting it to avoid any mistakes.

Carving the Point

After trimming the wood, it’s time to carve the point. This is the most crucial part of making a wooden spear, as the point determines the effectiveness of the weapon. Use a carving knife to shape the point of the spear. Start by making a small notch at the tip of the spear. Then, carve the wood around the notch to create the point.

Make sure to carve the point evenly on all sides to ensure that it is symmetrical. The point should be sharp enough to penetrate the target, but not too sharp that it becomes brittle and breaks easily.

Tips for Shaping the Spear

Here are some tips to keep in mind when shaping your wooden spear:

  • Use a sharp carving knife to make precise cuts and avoid any accidents.
  • Sand the spear after carving to smooth out any rough edges and give it a polished look.
  • Use a wood chisel to remove any excess wood and create precise cuts.
  • Make sure to wear protective gloves and goggles to avoid any injuries.
  • Take your time when shaping the spear to ensure that it is done correctly.

By following these tips, you can create a well-crafted wooden spear that is both functional and aesthetically pleasing.

Hardening the Spear

Once you have crafted your wooden spear, you need to harden it to make it more durable and effective. There are two main methods for hardening a wooden spear: using fire and using oil.

Using Fire

Fire-hardening your spear involves exposing it to heat to make it stronger and more resistant to breaking. Here’s how to do it:

  1. Start a small fire and let it burn down until you have a bed of hot coals.
  2. Hold the spear over the coals, rotating it slowly to expose all sides to the heat.
  3. Continue to heat the spear until the wood begins to darken and char slightly.
  4. Remove the spear from the heat and allow it to cool.

Fire-hardening your spear will make it stronger and more resistant to breaking, but it may also make it more brittle. Be careful not to overheat the spear, as this can cause it to crack or break.

Using Oil

Oil-hardening your spear involves soaking it in oil to make it more resistant to moisture and decay. Here’s how to do it:

  1. Choose an oil that is suitable for wood, such as linseed oil or tung oil.
  2. Pour the oil into a container that is large enough to hold the spear.
  3. Submerge the spear in the oil and let it soak for at least 24 hours.
  4. Remove the spear from the oil and wipe off any excess with a clean cloth.
  5. Allow the spear to dry completely before using it.

Oil-hardening your spear will make it more resistant to moisture and decay, but it may also make it heavier and less balanced. Use a light touch when applying the oil to avoid oversaturating the wood.

By hardening your wooden spear using either fire or oil, you can make it stronger, more durable, and more effective for hunting or survival situations.

Adding Features

adding-features

Attaching a Stone Tip

If you want to make your wooden spear even more deadly, you can attach a stone tip to the end. This will make it much sharper and more effective for hunting or self-defense. Here are the steps to attach a stone tip to your spear:

  1. Find a suitable stone – Look for a stone that is roughly the same size and shape as the tip of your spear. It should be hard and durable, and ideally, it should be sharp or pointed already.
  2. Prepare the stone – Use a hammer or another hard object to shape the stone into the desired shape. You may need to chip away at it to make it sharper or more pointed.
  3. Attach the stone to the spear – Use a strong adhesive or cordage to attach the stone to the end of the spear. Make sure it is securely fastened and won’t come loose during use.

Adding a Grip

Adding a grip to your spear can make it more comfortable to hold and easier to use. It can also provide additional traction and help prevent your hand from slipping during use. Here are some ways to add a grip to your spear:

  1. Use cordage – Wrap a length of cordage around the handle of your spear, starting at the base and working your way up. Tie it off securely at the top and trim any excess.
  2. Carve a grip – Use a knife or other sharp tool to carve a grip into the handle of your spear. You can make it as simple or as intricate as you like, but make sure it provides a comfortable and secure grip.
  3. Use tape – Wrap a length of tape around the handle of your spear, starting at the base and working your way up. Make sure it is securely fastened and won’t come loose during use.

Adding features to your wooden spear can make it more effective and easier to use. Whether you attach a stone tip or add a grip, these modifications can help you get the most out of your spear and improve your chances of success in the wild.

Safety Precautions While Making a Wooden Spear

When making a wooden spear, it’s important to take safety precautions to avoid any accidents or injuries. Here are a few safety tips to keep in mind:

1. Wear Protective Gear

Wear protective gear such as gloves and eye protection to prevent any injuries while handling sharp tools. Splinters and wood chips can also fly off during the process, so it’s important to protect your eyes.

2. Use Sharp Tools

Using dull tools can increase the risk of accidents. Make sure your tools are sharp and in good condition before using them.

3. Work in a Safe Area

Work in a safe and well-ventilated area. Avoid working near flammable materials or in an area with poor lighting.

4. Keep First Aid Kit Nearby

Keep a first aid kit nearby in case of any accidents or injuries. Make sure you know how to use it properly.

5. Follow Tool Safety Guidelines

Follow tool safety guidelines and manufacturer instructions when using power tools. Make sure to use them properly and safely.

By following these safety precautions, you can ensure a safe and enjoyable experience while making a wooden spear.

Maintaining Your Wooden Spear

Once you have crafted your wooden spear, you will want to ensure that it remains in good condition for future use. Here are some tips to help you maintain your wooden spear:

Keep it Dry

Water can damage your wooden spear, so it is important to keep it dry. After use, wipe it down with a dry cloth or towel. If your spear gets wet, allow it to dry completely before storing it.

Store it Properly

When not in use, store your wooden spear in a dry place, away from direct sunlight. You can hang it on a wall or store it horizontally on a shelf. Avoid storing it in a damp or humid area, as this can cause the wood to warp or rot.

Oil the Wood

To keep the wood from drying out and cracking, you can apply a coat of oil to your wooden spear. Use a natural oil, such as linseed or tung oil, and apply it with a cloth. Allow the oil to soak in for a few minutes, then wipe away any excess.

Sharpen the Point

Over time, the point of your wooden spear may become dull. To sharpen it, use a sharpening stone or a file. Hold the spear firmly and run the stone or file along the edge of the point, using a circular motion. Be careful not to remove too much wood, as this can weaken the spear.

Check for Damage

Before each use, inspect your wooden spear for any signs of damage. Look for cracks, splits, or other damage that could weaken the spear. If you notice any damage, do not use the spear until it has been repaired or replaced.

By following these simple tips, you can help ensure that your wooden spear remains in good condition for years to come.

How to Repair Wooden Fence Rails: A Simple Guide

If you have a wooden fence, it’s likely that at some point you will need to repair it. One of the most common issues with wooden fences is the rails. Over time, they can become damaged, rotten, or warped, which can affect the stability of the fence. Repairing wooden fence rails may seem like a daunting task, but with the right tools and knowledge, it can be a simple and straightforward process.

Before you begin repairing your wooden fence rails, it’s important to assess the damage. Look for any cracks, splits, or rotting sections. Depending on the severity of the damage, you may need to replace the entire rail or just a portion of it. Once you have determined the extent of the damage, you can gather the necessary tools and materials to begin the repair process. In the following sections, we will provide step-by-step instructions on how to repair wooden fence rails, including how to replace a rotten post, fix a slumpy gate, and seal the fence while fixing it.

Understanding Your Wooden Fence Rails

When it comes to repairing wooden fence rails, it’s important to understand the different types of rails and the common issues that can arise. In this section, we’ll go over the basics of wooden fence rails so you can better understand how to repair them.

Types of Wooden Fence Rails

There are several types of wooden fence rails, each with their own unique characteristics. Here are some of the most common types:

  • Round Rails: These rails are typically used in post and rail fences and are rounded on both ends.
  • Post and Rail: This type of fence consists of vertical posts and horizontal rails. The rails can be either round or rectangular.
  • Split Rail: Split rail fences are made up of vertical posts and horizontal rails that are split in half. This type of fence is often used for decorative purposes.
  • Picket Fence Rails: Picket fences are made up of vertical pickets that are attached to horizontal rails. The rails can be either round or rectangular.

Common Issues with Wooden Fence Rails

Wooden fence rails are susceptible to a variety of issues, including rotting, warping, and cracking. Here are some of the most common issues and how to address them:

  • Rotting: Over time, wooden fence rails can begin to rot, especially if they are exposed to moisture. If the rot is minor, you may be able to repair the rail using a wood filler or putty. However, if the rot is extensive, you may need to replace the entire rail.
  • Warping: Wooden fence rails can warp due to changes in temperature and humidity. If the warping is minor, you may be able to straighten the rail using clamps or a board. If the warping is severe, you may need to replace the rail.
  • Cracking: Cracks can occur in wooden fence rails due to age or exposure to the elements. If the crack is minor, you may be able to repair it using wood glue or filler. However, if the crack is severe, you may need to replace the entire rail.

By understanding the different types of wooden fence rails and the common issues that can arise, you’ll be better equipped to repair your fence and keep it in good condition.

Gathering Repair Tools and Materials

Before you start repairing your wooden fence rails, you need to gather all the necessary tools and materials. Here are the essential tools and required materials you will need:

Essential Tools

  • Protective gloves and eyewear
  • Saw (hand saw or circular saw)
  • Hammer
  • Screwdriver
  • Level
  • Measuring tape
  • Drill with drill bits
  • Nails and screws
  • Wood glue
  • Clamps
  • Paintbrush or roller (optional)

Required Materials

  • Replacement fence rails
  • Replacement fence posts (if needed)
  • Concrete mix (if needed)
  • Gravel (if needed)
  • Wood preservative
  • Wood filler
  • Sandpaper
  • Paint or stain (optional)

Make sure you have all the necessary tools and materials before starting the repair process. It’s important to wear protective gloves and eyewear to avoid any injuries. A saw is needed to cut out the damaged area of the fence rail. A hammer and screwdriver are needed to remove any nails or screws. A level and measuring tape are needed to ensure the fence rails are level and the correct length.

A drill with drill bits is needed to make new holes for screws or nails. Nails and screws are needed to attach the new fence rails to the fence posts. Wood glue is needed to reinforce any weak areas. Clamps are needed to hold the fence rails in place while the glue dries. A paintbrush or roller is optional if you want to paint or stain the fence after the repair.

You will also need replacement fence rails and posts if they are damaged beyond repair. Concrete mix and gravel may be needed if the fence posts need to be reset. Wood preservative is needed to protect the fence from rot and insects. Wood filler and sandpaper are needed to fill any gaps or holes in the fence. Lastly, paint or stain is optional if you want to give your fence a fresh look.

Now that you have all the necessary tools and materials, you are ready to start repairing your wooden fence rails.

Inspecting the Fence for Damage

Before you start repairing your wooden fence rails, it’s important to inspect the fence for any damage. A thorough inspection will help you identify the extent of the damage and determine the best course of action for repairing it. Here are a few things you should look for when inspecting your fence:

  • Check for loose or broken rails: Walk along the length of the fence and check each rail to see if it’s loose or broken. If you find a loose rail, you may be able to tighten it by tightening the screws or nails that hold it in place. If the rail is broken, you’ll need to replace it.

  • Look for rotten wood: Rotten wood is a common problem with wooden fences, especially if they’re not properly maintained. Look for signs of rotting wood, such as soft spots or discoloration. If you find any rotten wood, you’ll need to replace it.

  • Inspect the posts: The posts are the backbone of your fence, so it’s important to make sure they’re in good condition. Check each post for signs of rot or damage. If you find any issues, you may need to replace the post or reinforce it with additional support.

  • Check the gate: If your fence has a gate, make sure it’s functioning properly. Check the hinges and latch to make sure they’re secure and working as they should. If you find any issues, you may need to replace the hinges or latch.

By taking the time to inspect your fence for damage, you can ensure that you’re addressing all of the issues that need to be fixed. This will help you avoid any future problems with your fence and ensure that it lasts for years to come.

Removing Damaged Rails

If you have a wooden fence with damaged rails, you’ll need to remove them before you can replace them. Here are the steps to follow:

  1. Put on protective gloves and eyewear before starting the repair work.

  2. Identify the damaged rails. If only one section of the rail is damaged, you can remove just that section. If the entire rail is damaged, you’ll need to remove the whole rail.

  3. Use a saw to cut out the damaged section of the rail. If you’re removing the entire rail, cut it into manageable pieces that you can easily handle.

  4. Remove the nails or screws that are holding the rail in place. Use a hammer or screwdriver to remove the nails or screws carefully. Save any nails or screws that are still in good condition for reuse.

  5. If the rail is attached to a post, remove any brackets or hardware that are holding the rail in place.

  6. If the rail is attached to a post and you need to remove the post, use a post hole digger to dig around the post. If the post is set in concrete, break up the concrete with a sledgehammer before removing the post.

  7. Once the rail and any associated hardware have been removed, clean up the area around the fence. Remove any debris or nails that may have fallen on the ground.

Removing damaged rails is an important step in repairing a wooden fence. By following these steps, you can safely remove the damaged rails and prepare the fence for replacement.

Preparing the New Rail

Now that you have removed the damaged section of the rail, it’s time to prepare the new rail. Here are the steps you need to follow:

  1. Measure the length of the rail: Use a measuring tape to measure the length of the new rail you need. Make sure to measure it accurately to avoid any mistakes.

  2. Cut the rail: Use a saw to cut the new rail to the appropriate length. Make sure to cut it straight, so it fits properly.

  3. Sand the edges: Use sandpaper to smooth the edges of the new rail. This will prevent any splinters from forming and make it easier to handle.

  4. Apply wood preservative: Apply a generous coat of wood preservative to the new rail. This will protect it from rot and other damage.

  5. Paint or stain the rail: If you want to match the color of the new rail with the rest of the fence, you can paint or stain it. Make sure to let it dry completely before installing it.

By following these steps, you will have a new rail that is ready to be installed.

Installing the New Rail

Now that you have removed the damaged rail, it’s time to install the new one. Here are the steps to follow:

  1. Measure the length of the new rail and cut it to size using a saw. Make sure that it fits snugly between the posts.

  2. Place the new rail in position and secure it to the posts using screws or nails. Use a level to ensure that the rail is straight.

  3. If you are using screws, pre-drill the holes to prevent splitting. Use rust-resistant screws to prevent corrosion.

  4. If you are using nails, use galvanized nails to prevent rust. Hammer the nails in at an angle to prevent them from pulling out.

  5. If the rail is longer than one section, you may need to join it to the existing rail. Use a scarf joint or a lap joint to join the rails together.

  6. Once the new rail is securely in place, apply wood preservative to protect it from rot and decay.

  7. Finally, check the fence for any other damage or wear and tear. Repair any other issues before they become bigger problems.

By following these steps, you can install a new rail and extend the life of your wooden fence.

Securing the Rail

Once you have repaired or replaced the damaged section of the rail, it’s time to secure it back in place. Here are some steps you can follow to ensure that the rail is securely fixed to the posts:

  • Use galvanized screws or nails: Galvanized screws or nails are resistant to rust and corrosion, making them ideal for outdoor use. Make sure to use screws or nails that are long enough to penetrate both the rail and the post.

  • Pre-drill the holes: To prevent splitting the wood, it’s a good idea to pre-drill the holes before inserting the screws or nails. Use a drill bit that is slightly smaller than the diameter of the screws or nails.

  • Use a level: Before securing the rail, make sure it is level. If it’s not level, adjust it until it is. A level rail will not only look better, but it will also be more secure.

  • Add additional support: If the rail is particularly long or heavy, you may want to add additional support. You can do this by attaching a diagonal brace between the rail and the post. This will help distribute the weight of the rail more evenly and prevent it from sagging over time.

  • Apply wood glue: For added strength, you can apply wood glue to the joint between the rail and the post before securing it with screws or nails. This will help create a stronger bond between the two pieces of wood.

By following these steps, you can ensure that your repaired or replaced rail is securely fixed in place and will provide years of reliable service.

Maintaining Your Wooden Fence Rails

To ensure your wooden fence rails last as long as possible, it is important to maintain them regularly. Here are some tips on how to maintain your wooden fence rails.

Regular Inspection

Inspect your fence rails regularly to catch any damage early on. Check for cracks, splits, or rotting wood. If you notice any damage, repair it as soon as possible to prevent it from getting worse.

Cleaning and Sealing

Cleaning your fence rails is an important part of maintenance. Use a pressure washer or a garden hose to remove dirt, grime, and debris. Once the fence is clean, let it dry completely. Then, apply a sealant to protect the wood from moisture and UV rays. A sealant will also help prevent rotting and warping.

Preventing Future Damage

To prevent future damage, there are a few things you can do. First, trim any trees or bushes that are growing too close to your fence. This will prevent them from rubbing against the fence and causing damage. Second, avoid placing anything heavy against the fence. This could cause it to warp or bend over time. Finally, be sure to maintain a clear space between your fence and the ground. This will prevent moisture from seeping into the wood and causing rot.

By following these tips, you can help ensure your wooden fence rails last for years to come. Regular maintenance is key to preventing damage and keeping your fence looking great.

How to Make a Wooden Letter Opener: A Beginner's Guide

Are you looking for a simple yet beautiful gift idea that you can make using woodworking skills? Consider making a wooden letter opener. A letter opener is a useful tool that can be used to open mail without tearing or damaging the contents inside. Making a wooden letter opener is a great project for any woodworker, whether you are a beginner or an experienced craftsman.

In this article, we will show you how to make a wooden letter opener using basic woodworking tools and techniques. You will learn how to select the right type of wood for your project, how to shape and sand the wood to create a comfortable grip, and how to sharpen the blade to ensure a clean cut every time. Whether you are making a letter opener for yourself or as a gift for someone else, this project is sure to be a hit. So, grab your tools and let’s get started!

Understanding the Materials

When it comes to making a wooden letter opener, the materials you use are just as important as the tools you use. In this section, we will discuss the types of wood you can use and the essential tools you will need to complete the project.

Types of Wood

Choosing the right type of wood is crucial to the success of your project. You want a wood that is dense, straight-grained, and has closed pores. Here are some of the best types of wood for making a wooden letter opener:

  • Maple – Maple is a hard, dense wood that is easy to work with and has a beautiful grain pattern.
  • Cherry – Cherry is a medium-hard wood that is known for its rich, reddish-brown color and smooth grain.
  • Walnut – Walnut is a hard, durable wood that is dark in color and has a beautiful grain pattern.
  • Mahogany – Mahogany is a hard, dense wood that is known for its reddish-brown color and beautiful grain pattern.

Essential Tools

Now that you have chosen your wood, it’s time to gather your tools. Here are the essential tools you will need to make a wooden letter opener:

  • Saw – You will need a saw to cut your wood to the desired length.
  • Chisel – A chisel is used to shape the handle of your letter opener.
  • Sandpaper – Sandpaper is used to smooth out any rough edges and to give your letter opener a polished look.
  • Wood glue – Wood glue is used to attach the blade to the handle.
  • Clamps – Clamps are used to hold the blade and handle together while the glue dries.
  • Blade – You will need a metal blade to attach to the handle of your letter opener.

With these materials and tools, you will be able to make a beautiful and functional wooden letter opener.

Safety Precautions

When working with wood, it’s important to take safety precautions to avoid injury. Here are a few things to keep in mind when making a wooden letter opener:

  • Wear protective gear: Always wear safety glasses to protect your eyes from flying wood chips and sawdust. Additionally, it’s a good idea to wear a dust mask to prevent inhaling sawdust.

  • Use sharp tools: Dull tools can cause accidents, so make sure your knives and saws are sharp before starting your project.

  • Keep your work area clean: A cluttered work area can be dangerous, so make sure to keep your workspace clean and organized.

  • Use a vice: When carving or sawing, use a vice to secure the wood in place. This will prevent the wood from slipping and causing an accident.

  • Work slowly and carefully: Take your time when carving or sawing, and always be aware of where your hands are in relation to the tools.

By following these safety precautions, you can ensure that your woodworking project is both fun and safe.

Designing Your Letter Opener

Designing your wooden letter opener is a fun and creative process. You can make it as simple or as complex as you want, depending on your skill level and personal preferences.

First, consider the size and shape of your letter opener. You can make it long and slender, or short and stubby. Think about how you will hold it and how it will fit in your hand. You may want to make a few sketches to help you visualize your design.

Next, choose the type of wood you want to use. Dense, straight-grained woods with closed pores are the best choice for this project. Woods like oak and ash are poor choices because their open pores show up on the blade edge and weaken it. You can also consider using exotic woods for a unique and beautiful look.

Once you have your wood selected, think about the finish you want to apply. You can leave the wood natural for a rustic look, or apply a clear coat to bring out the wood’s natural beauty. You can also stain the wood to match your personal style or the decor of your workspace.

Finally, consider any additional embellishments you want to add to your letter opener. You can carve designs or patterns into the wood, or add decorative elements like beads or metal accents. Just remember to keep the design simple and functional, as the primary purpose of a letter opener is to open letters efficiently.

With these design considerations in mind, you can create a beautiful and functional wooden letter opener that is uniquely yours.

Cutting the Wood

To start making your wooden letter opener, you’ll need to cut the wood to size. You can use any type of wood you like, but hardwoods such as maple or oak are good choices as they are durable and can be easily shaped.

Tools Needed

To cut the wood, you’ll need a few tools:

  • A saw: A hand saw or a jigsaw will work well for this task.
  • Sandpaper: You’ll need sandpaper to smooth out any rough edges after cutting.
  • A ruler or tape measure: You’ll need this to measure the length of the wood.

Steps to Follow

Here are the steps to follow to cut the wood for your letter opener:

  1. Measure and mark the length of the wood using a ruler or tape measure.
  2. Use a saw to cut the wood to the desired length. Take your time and make sure the cut is straight.
  3. Sand the cut edges of the wood to smooth out any rough spots.

Once you have cut the wood to size, you can move on to shaping it into a letter opener.

Sanding and Smoothing

Now that you have shaped your wooden letter opener, it’s time to sand and smooth it. Sanding is an essential step in woodworking that helps to remove any rough edges or splinters from the wood. It also helps to achieve a smooth and polished finish.

To begin, you will need a sandpaper with a grit of 220 or higher. You can use a sanding block or a piece of wood to wrap the sandpaper around it. Start sanding the edges and corners of the letter opener, moving the sandpaper in a circular motion. Be careful not to sand too hard, as this can damage the wood.

Next, move on to the flat surfaces of the letter opener. Sand in the direction of the grain, using long strokes. Make sure to sand evenly, so that the surface is smooth and even. You can use a finer grit sandpaper to achieve a smoother finish.

After sanding, wipe the letter opener with a clean cloth to remove any dust or debris. Then, apply a wood finish or polish to protect the wood and give it a shiny appearance. You can use a wax, oil, or varnish, depending on your preference.

In conclusion, sanding and smoothing your wooden letter opener is an important step in achieving a polished and professional-looking product. Take your time and be patient, and you will be rewarded with a beautiful and functional letter opener that you can be proud of.

Applying Finish

Now that you have completed carving and sanding your wooden letter opener, it’s time to apply a finish that will protect the wood and give it a beautiful, polished look.

Before applying any finish, make sure the wood is clean and free of dust and debris. You can use a tack cloth or a soft-bristled brush to remove any particles that might have settled on the surface.

There are several types of finishes you can use for your letter opener, including:

  • Oil finishes: These finishes penetrate the wood and enhance its natural beauty. They are easy to apply and provide a durable, water-resistant finish. Some popular oil finishes include linseed oil, tung oil, and Danish oil.

  • Wax finishes: These finishes provide a soft, smooth feel to the wood and are great for enhancing its natural color. They are easy to apply and provide a low sheen finish. Some popular wax finishes include beeswax and carnuba wax.

  • Varnish finishes: These finishes provide a hard, durable finish that is resistant to scratches and stains. They are great for high-use items like a letter opener. Some popular varnish finishes include polyurethane and spar varnish.

When applying your chosen finish, be sure to follow the manufacturer’s instructions carefully. Here are some general tips to keep in mind:

  • Apply the finish in a well-ventilated area, and wear protective gloves and a mask to avoid inhaling any fumes.

  • Apply a thin, even coat of finish using a brush or a cloth. Avoid applying too much finish, as this can cause drips and uneven spots.

  • Allow the finish to dry completely before applying a second coat. This can take anywhere from a few hours to a day or more, depending on the type of finish you are using.

  • Sand lightly between coats with a fine-grit sandpaper to remove any rough spots or bubbles.

  • Apply as many coats as necessary to achieve the desired level of protection and sheen.

By following these tips, you can apply a beautiful finish to your wooden letter opener that will protect it for years to come.

Adding Personal Touches

Making your own wooden letter opener is a great way to add a personal touch to your desk or workspace. There are a few ways to customize your letter opener to make it unique and special.

Engraving

One way to add a personal touch to your wooden letter opener is to engrave it. You can use a wood burning tool or a laser engraver to add text or designs to your letter opener. This is a great way to add a name, initials, or a special message to your letter opener.

If you are using a wood burning tool, make sure to practice on a scrap piece of wood first to get a feel for the tool. You can use stencils or freehand your design onto the wood. Once you are happy with your design, carefully burn it into the wood.

If you are using a laser engraver, you can create your design on a computer and upload it to the engraver. The laser will etch your design onto the wood. This method is more precise than using a wood burning tool, but it may not be as hands-on.

Painting

Another way to add a personal touch to your wooden letter opener is to paint it. You can use acrylic paint or wood stain to add color to your letter opener. This is a great way to match your letter opener to your workspace or to add a pop of color.

Before painting your letter opener, make sure to sand it down and wipe it clean. This will help the paint adhere to the wood. You can use painter’s tape to create clean lines and prevent the paint from bleeding onto other parts of the letter opener.

Once you have painted your letter opener, let it dry completely before using it. You can also add a coat of clear varnish to protect the paint and give your letter opener a glossy finish.

By adding a personal touch to your wooden letter opener, you can create a unique and special tool for your desk or workspace. Whether you choose to engrave it or paint it, your letter opener will be a reflection of your personal style and creativity.

understanding-wood-staining

Staining Wood: Can You Apply Danish Oil Afterwards?

Are you considering staining your wood and then applying Danish oil after? This is a common question among woodworkers who want to achieve a specific look for their projects. While some people swear by this technique, others are hesitant to try it out. In this article, we will explore whether it is okay to stain wood and then apply Danish oil after, and what you need to know before attempting this technique.

According to woodworking experts, it is possible to apply Danish oil over a stained wood surface. However, there are some important factors to consider before you start. First, you need to ensure that the stain is completely dry before applying the Danish oil. This is because the oil can prevent the stain from drying properly, resulting in a sticky and uneven finish. Additionally, you need to make sure that the stain and the oil are compatible with each other. Some types of stains may not work well with Danish oil, so it’s important to test the combination on a small area first.

Overall, staining wood and then applying Danish oil after can be a great way to enhance the appearance of your project. However, it’s important to follow the right steps and use the right products to achieve the desired results. In the following sections, we will explore the benefits and drawbacks of this technique, as well as some tips for getting the best possible finish.

Understanding Wood Staining

understanding-wood-staining

What is Wood Staining?

Wood staining is a process of adding color to the wood. It is done by applying a pigmented solution to the surface of the wood. The pigments in the solution penetrate the wood and give it a colored appearance. Wood stains come in a variety of colors and shades, and they can be used to enhance the natural beauty of the wood or to give it a completely different look.

Benefits of Wood Staining

There are many benefits to staining wood. Here are a few:

  • Enhances natural beauty: Staining wood can help bring out the natural beauty of the wood grain and texture.
  • Color customization: Wood stains come in a variety of colors and shades, allowing you to customize the look of your project.
  • Protects against UV rays: Some wood stains contain UV protection, which can help prevent the wood from fading or becoming discolored over time.
  • Protects against moisture: Some wood stains contain water-resistant properties, which can help protect the wood from moisture damage.

Overall, wood staining is a great way to add color and protection to your wood projects. However, it’s important to note that not all stains are created equal, and some may not be compatible with certain finishes, such as Danish oil. Always read the label and do a test on a small, inconspicuous area before applying any stain or finish to your project.

Applying Danish Oil

applying-danish-oil

If you’ve decided to apply Danish oil over your stained wood, you’ll be pleased to know that it’s a relatively straightforward process. Here’s what you need to know:

What is Danish Oil?

Danish oil is a type of wood finishing oil that is made up of a blend of oils and varnish. It’s a popular choice for finishing wood because it provides a durable, water-resistant finish while also enhancing the natural beauty of the wood.

Benefits of Danish Oil

Applying Danish oil to your stained wood can offer several benefits. Here are a few:

  • Enhances the natural beauty of the wood: Danish oil can bring out the natural grain and color of the wood, giving it a rich, warm glow.
  • Provides a durable finish: Danish oil creates a hard, water-resistant finish that can protect your wood from scratches, stains, and other damage.
  • Easy to apply: Danish oil is easy to apply with a brush or rag, and it dries quickly, so you can apply multiple coats in a short amount of time.

When applying Danish oil over stained wood, it’s important to make sure that the stain is completely dry before you start. This will help ensure that the oil adheres properly and doesn’t create any unwanted effects.

To apply Danish oil, simply brush or wipe it onto the wood in a thin, even layer. Let it sit for a few minutes, then wipe off any excess with a clean cloth. Repeat this process until you’ve achieved the desired level of sheen and protection.

Overall, applying Danish oil over stained wood can be a great way to enhance the natural beauty of your wood while also providing a durable, water-resistant finish. With a little bit of patience and attention to detail, you can achieve a beautiful result that will last for years to come.

The Process of Staining and Applying Danish Oil

the-process-of-staining-and-applying-danish-oil

If you are wondering whether it is okay to apply Danish oil over stain, the answer is yes. However, it is important to understand the process of staining and applying Danish oil to achieve the best results. Here is a breakdown of the process:

Preparation for Staining

Before you start staining, it is important to prepare the wood surface properly. This involves sanding the wood to remove any rough spots or imperfections. You can use a sandpaper with a grit of 120 to 150 for this purpose. After sanding, wipe the wood surface with a clean cloth to remove any dust or debris.

Steps to Stain Wood

Once the wood is properly prepared, you can start staining. Here are the steps to follow:

  1. Apply the stain to the wood surface using a brush or a cloth. Make sure to apply the stain evenly and in the direction of the wood grain.
  2. Let the stain sit on the wood for a few minutes. The longer you let it sit, the darker the color will be.
  3. Wipe off any excess stain with a clean cloth. Make sure to wipe in the direction of the wood grain.
  4. Let the stain dry completely before applying Danish oil.

Applying Danish Oil After Staining

Once the stain is dry, you can apply Danish oil to the wood surface. Here are the steps to follow:

  1. Shake the Danish oil container well before use.
  2. Apply a thin coat of Danish oil to the wood surface using a brush or a cloth. Make sure to apply the oil evenly and in the direction of the wood grain.
  3. Let the Danish oil sit on the wood for a few minutes.
  4. Wipe off any excess oil with a clean cloth. Make sure to wipe in the direction of the wood grain.
  5. Let the Danish oil dry completely before applying a second coat if desired.

It is important to note that Danish oil is a blend of oil and varnish, which can enhance the appearance of the stain and add a rich, low-luster sheen. However, ensuring the stain is completely dry before applying Danish oil is crucial to avoid any issues with the finish.

Considerations Before Staining and Applying Danish Oil

considerations-before-staining-and-applying-danish-oil

When it comes to staining and applying Danish oil to wood, there are a few considerations you should keep in mind to ensure a successful and safe project. In this section, we’ll cover some important factors to consider before starting your project.

Choosing the Right Stain

Choosing the right stain is crucial to achieving the desired color and finish for your project. Here are some things to keep in mind when selecting a stain:

  • Type of wood: Different types of wood absorb stain differently, so it’s important to choose a stain that works well with the type of wood you’re using.
  • Color: Stains come in a variety of colors and shades, so choose one that complements your project and achieves the desired look.
  • Transparency: Stains can be transparent, semi-transparent, or opaque. Transparent stains allow the natural wood grain to show through, while opaque stains cover the wood completely.

Choosing the Right Danish Oil

Danish oil is a popular finish for wood projects because it provides protection while enhancing the natural beauty of the wood. Here are some things to consider when choosing a Danish oil:

  • Type of wood: Like with stains, different types of wood absorb Danish oil differently, so choose an oil that works well with the type of wood you’re using.
  • Satin or gloss finish: Danish oil comes in a variety of finishes, from satin to gloss. Choose the finish that best suits your project.
  • Drying time: Danish oil takes longer to dry than other finishes, so be sure to plan accordingly.

Safety Precautions

Staining and applying Danish oil can be hazardous if proper safety precautions are not taken. Here are some safety tips to keep in mind:

  • Wear protective gloves and eyewear when handling stains and oils.
  • Work in a well-ventilated area to avoid inhaling fumes.
  • Dispose of rags and other materials soaked in stain or oil properly, as they can spontaneously combust.

By considering these factors before staining and applying Danish oil to your wood project, you can ensure a beautiful and safe finished product.

Frequently Asked Questions

Can I apply Danish oil over water based stain?

Yes, you can apply Danish oil over water-based stain, but it’s important to make sure the stain is completely dry before applying the oil. Water-based stains can take longer to dry than oil-based stains, so it’s important to be patient and wait until the stain is completely dry before applying the oil.

How to apply Danish Oil?

To apply Danish oil, you can use a brush, cloth, or foam applicator. Apply a thin, even coat of oil to the wood, working with the grain. Let the oil soak into the wood for about 15 minutes, then wipe off any excess with a clean cloth. Repeat the process until you achieve the desired level of sheen.

Can you use Danish oil after staining?

Yes, you can use Danish oil after staining. In fact, Danish oil can enhance the appearance of the stain, adding a rich, low-luster sheen. However, it’s important to make sure the stain is completely dry before applying the oil.

Should I stain wood before oiling?

Yes, you should stain wood before oiling. Staining the wood first will help to bring out the natural beauty of the wood and provide a consistent color. Applying oil over the stain will help to protect the wood and enhance its natural beauty.

Danish oil over polyurethane?

It is not recommended to apply Danish oil over polyurethane. Polyurethane creates a hard, protective layer on top of the wood, which can prevent the oil from penetrating the wood. If you want to use Danish oil, it’s best to apply it to bare wood or wood that has been stained but not finished with polyurethane.

Tinted Danish Oil?

Yes, you can use tinted Danish oil to add color to your wood. Tinted Danish oil is available in a variety of colors and can be used to enhance the natural beauty of the wood or to add a pop of color. Just like regular Danish oil, it’s important to make sure the wood is clean and dry before applying the tinted oil.

Mari bergabung di Slot88 resmi permainan paling fun di slot! Temukan keseruan dan peluang emas meraih kemenangan serta hadiah menarik di setiap putaran. Jangan lewatkan momen istimewa ini, segera kunjungi link Slot88 resmi dan mulailah petualanganmu! Ayo bergabung sekarang dan tunjukkan keberuntunganmu!