
Are you interested in learning how to make a wooden spear? Spears have been used for hunting and fishing for thousands of years, and making your own can be a rewarding and useful skill to have. With just a few basic tools and materials, you can create a simple spear that will be effective for catching fish or small game.
To start, you will need to gather some materials. You can use a straight branch or pole as the shaft of your spear, and a sharp piece of flint or obsidian as the spearhead. If you don’t have access to these materials, you can also use a knife or other sharp tool to carve the spearhead from a piece of wood. Once you have your materials, you can begin the process of crafting your spear.
While making a wooden spear may seem daunting at first, it is actually a relatively simple process. With a little patience and practice, you can create a functional and effective tool that will serve you well in the wilderness. So why not give it a try and see what you can create?
Understanding the Basics of a Wooden Spear
If you’re looking to make a wooden spear, it’s important to understand the basics of the tool before you start. A wooden spear consists of a long shaft with a pointed tip, and it has been used for hunting and fishing for thousands of years. Here are some key points to keep in mind:
Materials
The most important part of making a wooden spear is choosing the right materials. You’ll need a strong and straight piece of wood for the shaft, and a hard and durable material for the tip. Some common materials for the tip include bone, flint, or metal.
Design
The design of your spear will depend on what you plan to use it for. If you’re using it for hunting, you’ll want a longer and heavier spear with a sharp tip. If you’re using it for fishing, you’ll want a shorter and lighter spear with a barbed tip. Make sure to plan out your design before you start cutting and shaping the wood.
Tools
To make a wooden spear, you’ll need some basic tools such as a saw, a knife, and sandpaper. You may also need some specialized tools such as a drill or chisel, depending on the design of your spear.
Safety
It’s important to be safe when making a wooden spear. Make sure to wear protective gear such as gloves and eye goggles, and be careful when using sharp tools. Always cut away from your body and keep your fingers clear of the blade.
Choosing the Right Wood
When it comes to making a wooden spear, choosing the right wood is crucial. You want a wood that is strong, durable, and flexible enough to withstand the force of throwing or thrusting. Here are some of the most popular woods used for making wooden spears:
Ash Wood
Ash wood is one of the best woods for making a wooden spear. It is strong, flexible, and lightweight, making it easy to handle and maneuver. It is also readily available, making it a popular choice for many people.
Hickory Wood
Hickory wood is another great option for making a wooden spear. It is strong and durable, making it ideal for thrusting and throwing. It is also resistant to bending, which is important when using a spear.
Oak Wood
Oak wood is a popular choice for making a wooden spear because it is strong and durable. It is also readily available in many parts of the world, making it a convenient choice for many people.
Other Woods
While ash, hickory, and oak are the most popular woods for making a wooden spear, there are other woods that can be used as well. Some examples include maple, birch, and cherry wood.
When choosing a wood for your spear, it is important to consider the length and thickness of the wood, as well as its flexibility and strength. You want a wood that is straight, sturdy, and free of knots or other defects. With the right wood and some basic tools, you can craft a sharp and effective wooden spear that will serve you well in a variety of situations.
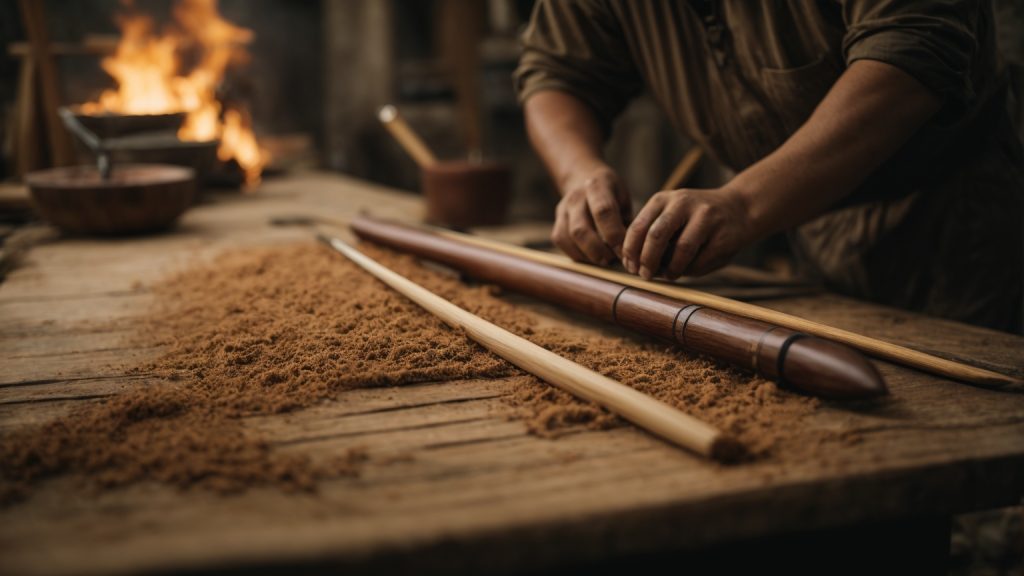
Shaping the Spear
Once you have selected the appropriate wood for your spear, it’s time to shape it. Shaping the spear involves trimming the wood to the desired length and carving the point.
Trimming the Wood
The first step in shaping your wooden spear is to trim it to the desired length. Use a hand saw to cut the wood to the desired length. Make sure to measure the length of the spear before cutting it to avoid any mistakes.
Carving the Point
After trimming the wood, it’s time to carve the point. This is the most crucial part of making a wooden spear, as the point determines the effectiveness of the weapon. Use a carving knife to shape the point of the spear. Start by making a small notch at the tip of the spear. Then, carve the wood around the notch to create the point.
Make sure to carve the point evenly on all sides to ensure that it is symmetrical. The point should be sharp enough to penetrate the target, but not too sharp that it becomes brittle and breaks easily.
Tips for Shaping the Spear
Here are some tips to keep in mind when shaping your wooden spear:
- Use a sharp carving knife to make precise cuts and avoid any accidents.
- Sand the spear after carving to smooth out any rough edges and give it a polished look.
- Use a wood chisel to remove any excess wood and create precise cuts.
- Make sure to wear protective gloves and goggles to avoid any injuries.
- Take your time when shaping the spear to ensure that it is done correctly.
By following these tips, you can create a well-crafted wooden spear that is both functional and aesthetically pleasing.
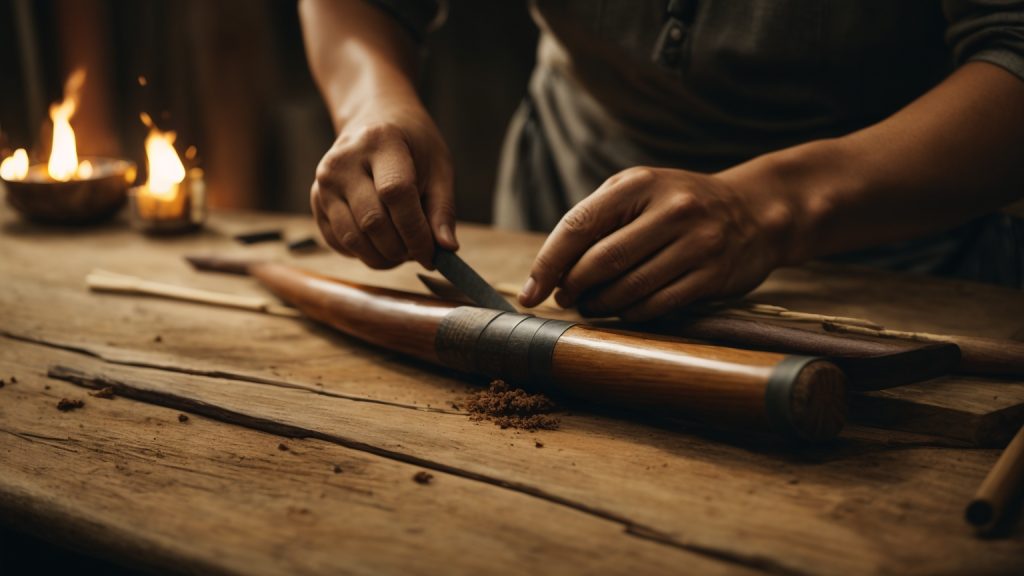
Hardening the Spear
Once you have crafted your wooden spear, you need to harden it to make it more durable and effective. There are two main methods for hardening a wooden spear: using fire and using oil.
Using Fire
Fire-hardening your spear involves exposing it to heat to make it stronger and more resistant to breaking. Here’s how to do it:
- Start a small fire and let it burn down until you have a bed of hot coals.
- Hold the spear over the coals, rotating it slowly to expose all sides to the heat.
- Continue to heat the spear until the wood begins to darken and char slightly.
- Remove the spear from the heat and allow it to cool.
Fire-hardening your spear will make it stronger and more resistant to breaking, but it may also make it more brittle. Be careful not to overheat the spear, as this can cause it to crack or break.
Using Oil
Oil-hardening your spear involves soaking it in oil to make it more resistant to moisture and decay. Here’s how to do it:
- Choose an oil that is suitable for wood, such as linseed oil or tung oil.
- Pour the oil into a container that is large enough to hold the spear.
- Submerge the spear in the oil and let it soak for at least 24 hours.
- Remove the spear from the oil and wipe off any excess with a clean cloth.
- Allow the spear to dry completely before using it.
Oil-hardening your spear will make it more resistant to moisture and decay, but it may also make it heavier and less balanced. Use a light touch when applying the oil to avoid oversaturating the wood.
By hardening your wooden spear using either fire or oil, you can make it stronger, more durable, and more effective for hunting or survival situations.
Adding Features
Attaching a Stone Tip
If you want to make your wooden spear even more deadly, you can attach a stone tip to the end. This will make it much sharper and more effective for hunting or self-defense. Here are the steps to attach a stone tip to your spear:
- Find a suitable stone – Look for a stone that is roughly the same size and shape as the tip of your spear. It should be hard and durable, and ideally, it should be sharp or pointed already.
- Prepare the stone – Use a hammer or another hard object to shape the stone into the desired shape. You may need to chip away at it to make it sharper or more pointed.
- Attach the stone to the spear – Use a strong adhesive or cordage to attach the stone to the end of the spear. Make sure it is securely fastened and won’t come loose during use.
Adding a Grip
Adding a grip to your spear can make it more comfortable to hold and easier to use. It can also provide additional traction and help prevent your hand from slipping during use. Here are some ways to add a grip to your spear:
- Use cordage – Wrap a length of cordage around the handle of your spear, starting at the base and working your way up. Tie it off securely at the top and trim any excess.
- Carve a grip – Use a knife or other sharp tool to carve a grip into the handle of your spear. You can make it as simple or as intricate as you like, but make sure it provides a comfortable and secure grip.
- Use tape – Wrap a length of tape around the handle of your spear, starting at the base and working your way up. Make sure it is securely fastened and won’t come loose during use.
Adding features to your wooden spear can make it more effective and easier to use. Whether you attach a stone tip or add a grip, these modifications can help you get the most out of your spear and improve your chances of success in the wild.
Safety Precautions While Making a Wooden Spear
When making a wooden spear, it’s important to take safety precautions to avoid any accidents or injuries. Here are a few safety tips to keep in mind:
1. Wear Protective Gear
Wear protective gear such as gloves and eye protection to prevent any injuries while handling sharp tools. Splinters and wood chips can also fly off during the process, so it’s important to protect your eyes.
2. Use Sharp Tools
Using dull tools can increase the risk of accidents. Make sure your tools are sharp and in good condition before using them.
3. Work in a Safe Area
Work in a safe and well-ventilated area. Avoid working near flammable materials or in an area with poor lighting.
4. Keep First Aid Kit Nearby
Keep a first aid kit nearby in case of any accidents or injuries. Make sure you know how to use it properly.
5. Follow Tool Safety Guidelines
Follow tool safety guidelines and manufacturer instructions when using power tools. Make sure to use them properly and safely.
By following these safety precautions, you can ensure a safe and enjoyable experience while making a wooden spear.
Maintaining Your Wooden Spear
Once you have crafted your wooden spear, you will want to ensure that it remains in good condition for future use. Here are some tips to help you maintain your wooden spear:
Keep it Dry
Water can damage your wooden spear, so it is important to keep it dry. After use, wipe it down with a dry cloth or towel. If your spear gets wet, allow it to dry completely before storing it.
Store it Properly
When not in use, store your wooden spear in a dry place, away from direct sunlight. You can hang it on a wall or store it horizontally on a shelf. Avoid storing it in a damp or humid area, as this can cause the wood to warp or rot.
Oil the Wood
To keep the wood from drying out and cracking, you can apply a coat of oil to your wooden spear. Use a natural oil, such as linseed or tung oil, and apply it with a cloth. Allow the oil to soak in for a few minutes, then wipe away any excess.
Sharpen the Point
Over time, the point of your wooden spear may become dull. To sharpen it, use a sharpening stone or a file. Hold the spear firmly and run the stone or file along the edge of the point, using a circular motion. Be careful not to remove too much wood, as this can weaken the spear.
Check for Damage
Before each use, inspect your wooden spear for any signs of damage. Look for cracks, splits, or other damage that could weaken the spear. If you notice any damage, do not use the spear until it has been repaired or replaced.
By following these simple tips, you can help ensure that your wooden spear remains in good condition for years to come.