Tag Archives: wear protective gear

How to Build a Wooden Box Frame: A Beginner's Guide

How to Build a Wooden Box Frame: A Beginner's Guide

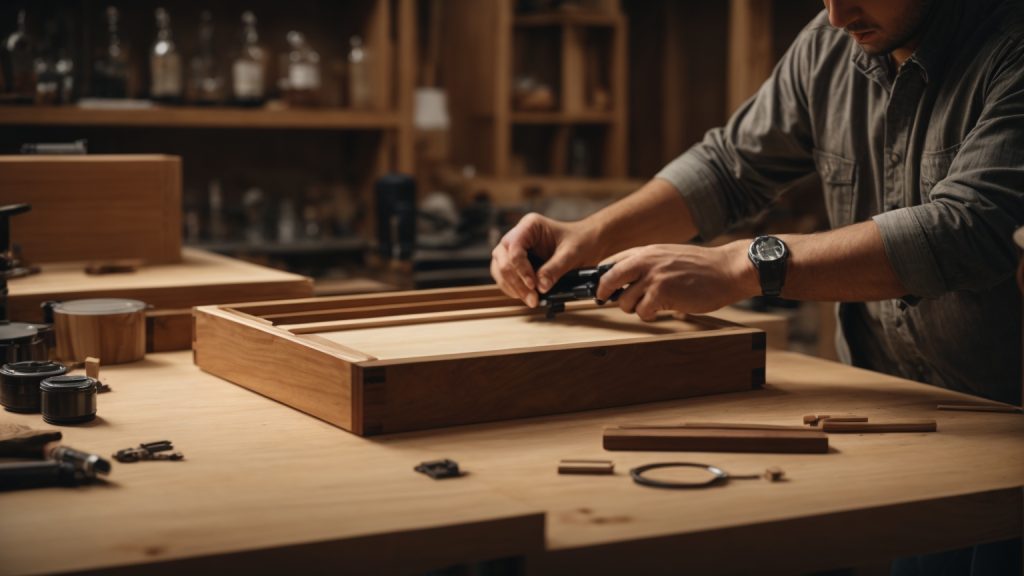
Are you looking for a simple and practical way to build a wooden box frame? Whether you need a storage solution or a decorative item, building a wooden box frame is a great DIY project that can be completed with basic tools and materials. In this article, we will provide you with step-by-step instructions on how to build a wooden box frame using lumber, screws, and nails.

First, you will need to gather the necessary tools and materials, such as a saw, a drill, screws, nails, and lumber. Then, you will need to measure and cut the lumber to the correct size and shape, and assemble the pieces using screws and nails. We will guide you through each step of the process, including how to create a sturdy frame and how to finish the box with paint or stain.

Whether you are a beginner or an experienced DIY enthusiast, building a wooden box frame can be a fun and rewarding project that allows you to create a custom piece that fits your needs and style. So, let’s get started and learn how to build a wooden box frame that will last for years to come.

Understanding Wooden Box Frames

If you’re looking for a simple and elegant way to showcase your artwork, photographs, or other prized possessions, a wooden box frame might be just what you need. These frames are easy to make, customizable, and can be built to fit any size or shape of item you want to display.

A wooden box frame is essentially a wooden frame with a box-like shape that can hold items inside it. The frame is made up of multiple layers of lumber glued together using special types of adhesive, making it sturdy and easy to assemble.

When building a wooden box frame, you’ll need to choose the right type of wood. Hardwoods like oak, maple, and cherry are popular choices because they’re strong and durable, but softwoods like pine and spruce can also be used if you’re on a budget.

One of the advantages of building a wooden box frame is that you can customize it to your specific needs. You can choose the dimensions of the frame, the thickness of the wood, and the finish you want to apply. You can also add decorative elements like moldings or carvings to give your frame a unique look.

Overall, building a wooden box frame is a fun and rewarding project that can be completed in just a few hours. With a little bit of patience and the right tools and materials, you can create a beautiful frame that will showcase your favorite items for years to come.

Choosing the Right Materials

When it comes to building a wooden box frame, choosing the right materials is crucial. Here are some things to consider when selecting materials for your project.

Types of Wood

Pine, oak, or cedar are all good choices for a box frame. Pine is a popular choice because it is affordable and easy to work with. Oak is a bit more expensive but is known for its durability and strength. Cedar is a great choice if you want a wood that is resistant to rot and insects.

When selecting your wood, make sure it is straight and free of knots. It should also be dry and have a moisture content of around 12%.

Selecting Nails and Screws

Make sure your nails and screws are large enough that they won’t pull out of the wood too easily. For a box frame, nails are usually the best choice. They are easy to use and provide a strong hold.

If you choose to use screws, make sure they are long enough to go through both pieces of wood and have a wide enough diameter to provide a secure hold.

Choosing the Right Tools

A hammer and nails are the most basic tools you’ll need for building a box frame. Make sure you use a hammer with an anti-vibration handle to prevent fatigue while driving in the nails.

An electric saw is ideal for making precise cuts with minimal effort. If you don’t have an electric saw, a hand saw will work, but it will take more time and effort to make accurate cuts.

In addition to these tools, you may also need a drill, sandpaper, and wood glue depending on the design of your box frame.

Designing the Box Frame
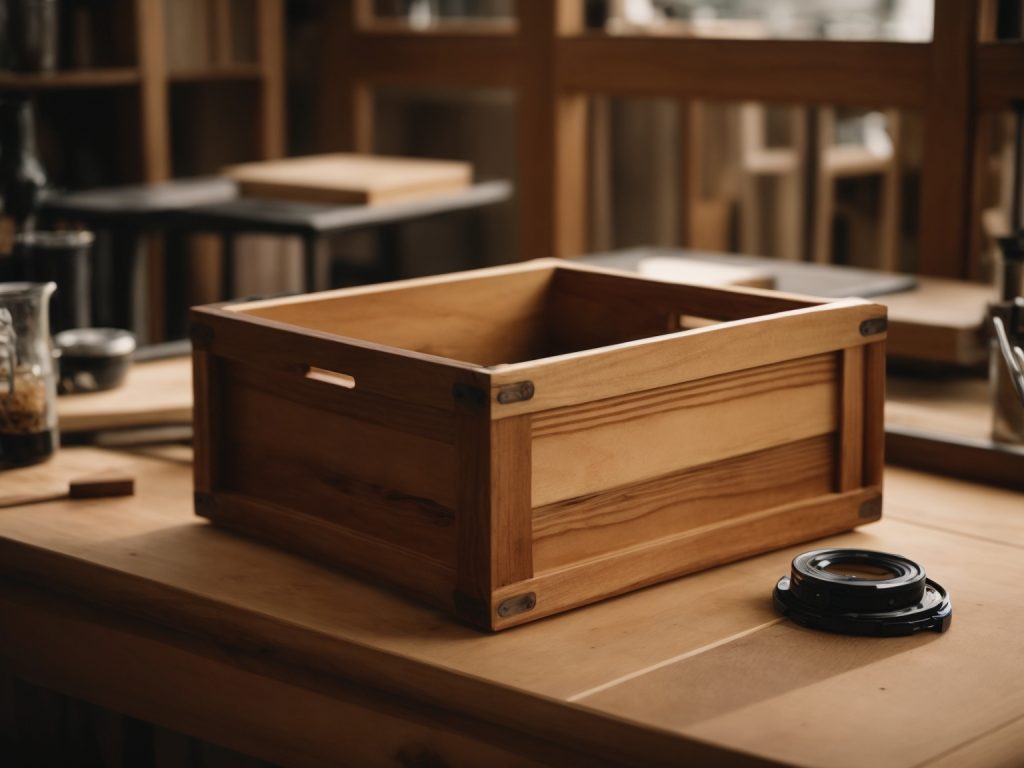
how-to-build-a-wooden-box-frame-a-beginners-guide-2

Before you start building your wooden box frame, you need to design it. This will ensure that your box frame meets your requirements and looks the way you want it to. Here are two important steps to follow when designing your box frame:

Determining the Dimensions

The first step in designing your box frame is to determine its dimensions. You need to decide how big you want your box frame to be. Consider what you will be storing in it and how much space you have available.

To determine the dimensions of your box frame, measure the length, width, and height of the items you will be storing in it. Add a few inches to each measurement to ensure that your box frame will be big enough to hold everything.

Sketching the Design

Once you have determined the dimensions of your box frame, it’s time to sketch your design. This will help you visualize what your box frame will look like and make any necessary adjustments before you start building.

You don’t need to be an artist to sketch your design. Simply draw a rough outline of your box frame and label the dimensions. You can also add any additional features you want, such as handles or a lid.

Here are some things to keep in mind when sketching your design:

  • Make sure your box frame is symmetrical and balanced.
  • Consider the type of wood you will be using and how it will look with your design.
  • Think about any additional features you want to add, such as hinges or locks.

By following these steps, you can design a wooden box frame that meets your needs and looks great.

Preparing the Wood

Before you can begin constructing your wooden box frame, you need to prepare the wood. This involves cutting the wood to the desired size and sanding it to create a smooth surface. Here are the steps you should follow:

Cutting the Wood

The first step in preparing the wood is to cut it to the desired size. You can use a saw or a miter saw to cut the wood. Make sure to measure the wood carefully and mark the cut lines before you start cutting. Here are some tips to keep in mind:

  • Use a saw with a fine-toothed blade to ensure a clean cut.
  • Use a miter saw to make precise cuts at specific angles.
  • Wear safety goggles and gloves to protect yourself from flying wood chips.

Sanding the Wood

Once you have cut the wood to the desired size, the next step is to sand it. Sanding the wood will help create a smooth surface and remove any rough edges. Here are some tips to keep in mind:

  • Use a sandpaper with a low grit to remove any rough spots or imperfections.
  • Use a sandpaper with a high grit to create a smooth surface.
  • Sand in the direction of the grain to avoid creating scratches on the wood.
  • Use a sanding block to ensure an even sanding surface.

By following these steps, you can prepare the wood for your wooden box frame. With the wood cut to size and sanded, you are now ready to start constructing your box frame.

Assembling the Box Frame
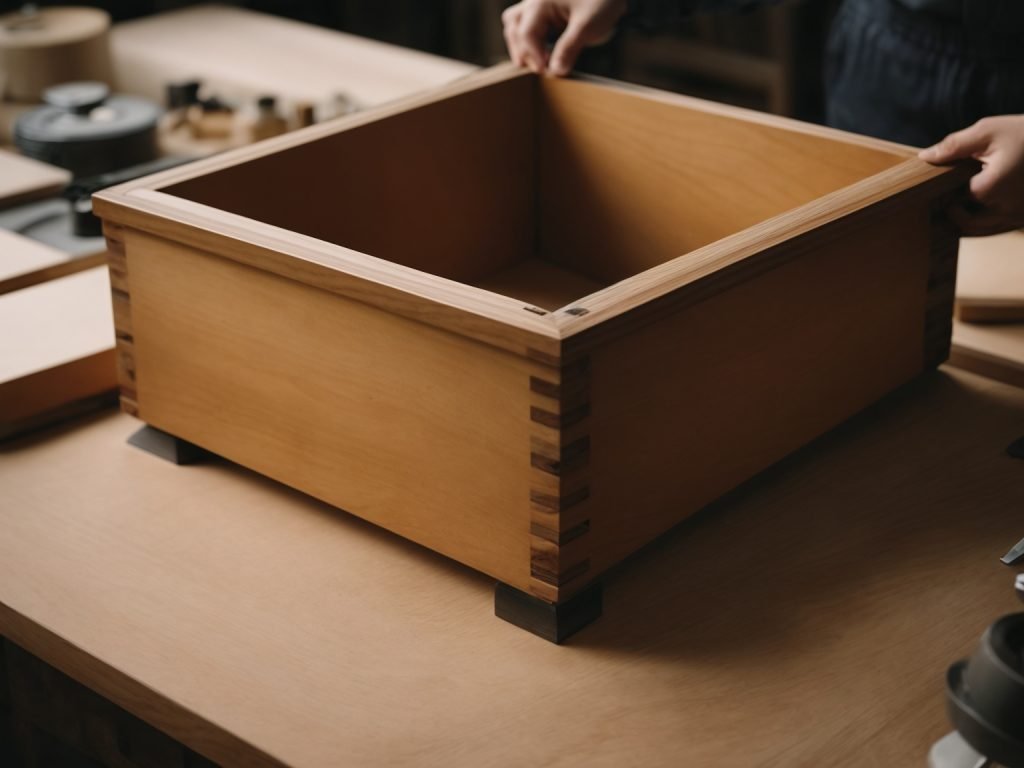
assembling-the-box-frame

Once you have cut all the lumber pieces to the correct size and shape, it’s time to start assembling your wooden box frame. This section will guide you through the process of joining the pieces and securing the frame.

Joining the Pieces

To join the pieces of lumber together, you can use screws, nails, or wood glue. However, using all three will provide the most secure and stable frame. Here are the steps to follow:

  1. Apply a small amount of wood glue to the end of one of the side pieces.
  2. Place the glued end of the side piece flush against the end of one of the end pieces.
  3. Use a drill to make pilot holes through the side piece and into the end piece.
  4. Insert screws into the pilot holes to secure the pieces together.
  5. Repeat the process for the other side piece and the other end piece.

Securing the Frame

Once you have joined all the pieces together to form the frame, you need to secure it to ensure it remains stable. Here’s what you need to do:

  1. Place the frame on a flat surface.
  2. Use a square to ensure that the corners are 90 degrees.
  3. Drill pilot holes through the corners of the frame.
  4. Insert screws into the pilot holes to secure the corners.
  5. Check that the frame is level and adjust as necessary.

Congratulations! You have successfully assembled your wooden box frame. The next step is to finish it by sanding, staining, or painting it to your desired finish.

Finishing Touches

Once you have constructed your wooden box frame, it is time to add the finishing touches to make it look polished and professional. Here are a few things you can do to give your box frame a final touch of elegance.

Applying Paint or Stain

One of the easiest ways to give your wooden box frame a finished look is to apply paint or stain. You can choose a color that complements the decor of the room where the box frame will be displayed. Before applying paint or stain, make sure to sand the wood surface to ensure that it is smooth and free of any imperfections. Use a paintbrush or a cloth to apply the paint or stain evenly, and let it dry completely before handling the box frame.

Adding Protective Coating

If you want to protect your wooden box frame from scratches, dents, and other types of damage, you can add a protective coating. There are many types of protective coatings available, such as polyurethane, lacquer, and varnish. When applying a protective coating, make sure to read the instructions carefully to ensure that you are using it correctly. It is also important to apply the coating in a well-ventilated area and to wear protective gear, such as gloves and a mask.

By following these simple finishing touches, you can take your wooden box frame from a basic DIY project to a beautiful and functional piece of decor.
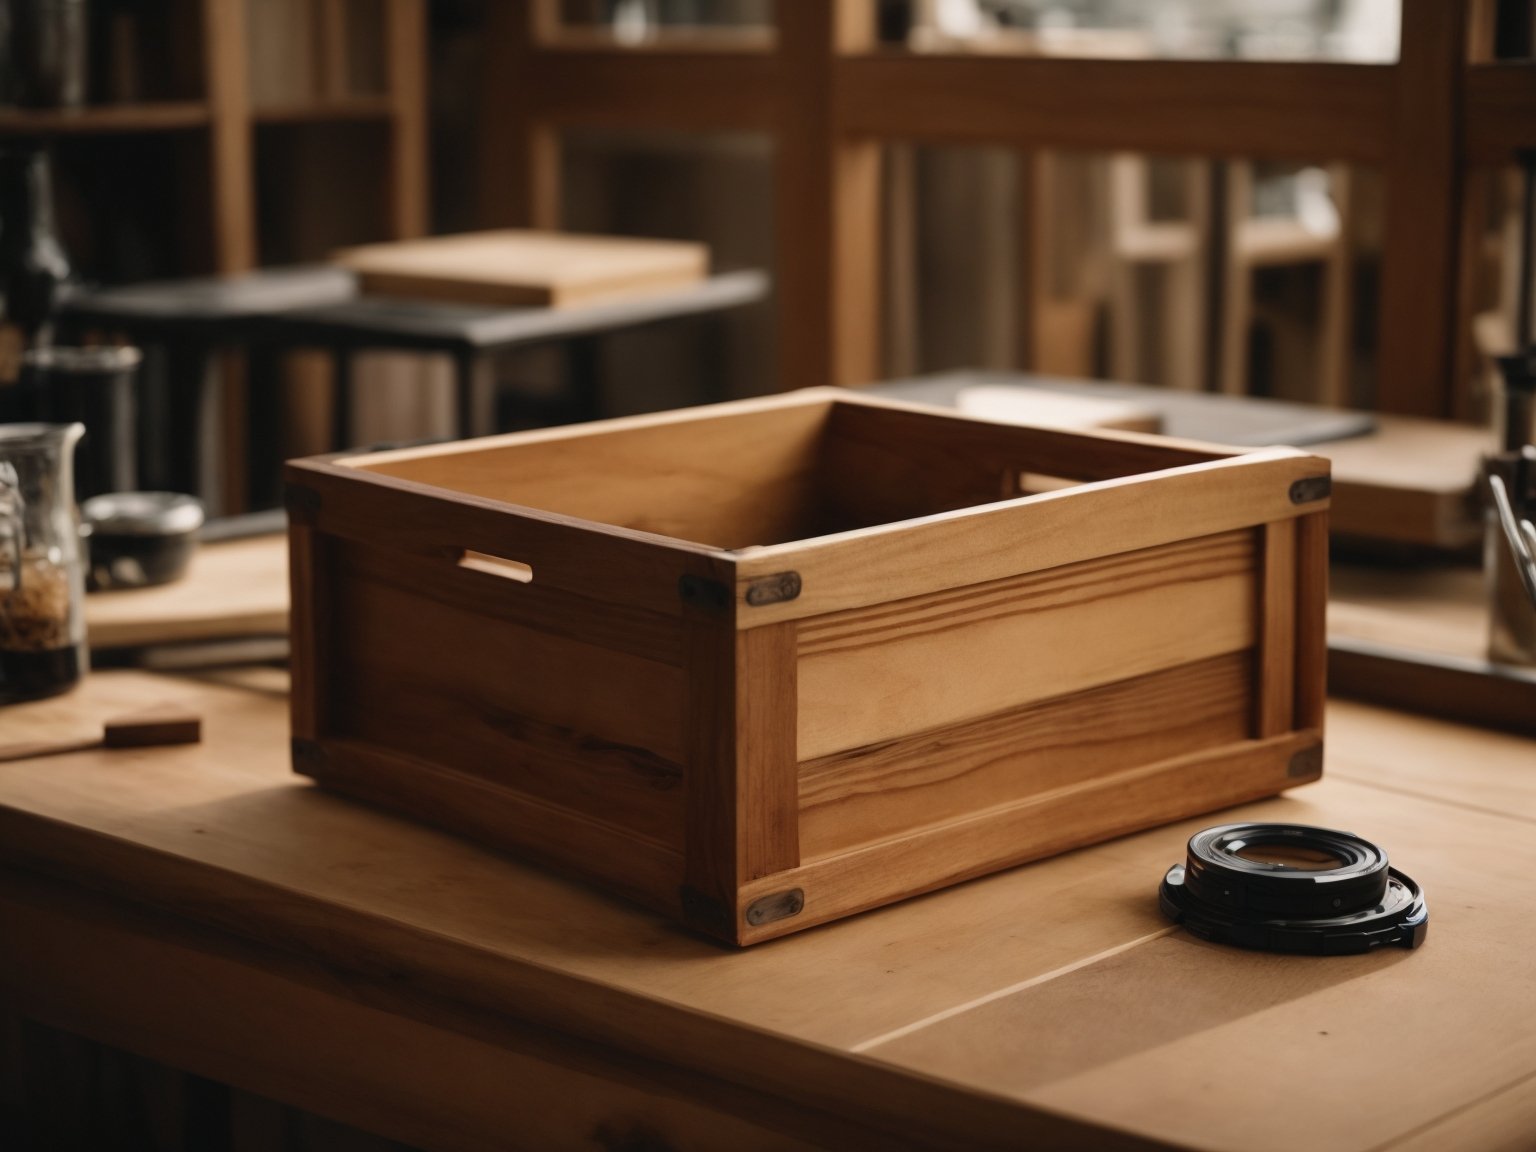
How to Craft a Wooden Pickaxe: A Beginner's Guide

How to Craft a Wooden Pickaxe: A Beginner's Guide

Are you new to Minecraft and wondering how to craft a wooden pickaxe? Look no further, as we have got you covered! A wooden pickaxe is a basic tool that is essential for mining stone and other materials. In this article, we will guide you through the simple steps to craft a wooden pickaxe in Minecraft.

To craft a wooden pickaxe, you will need two sticks and three wooden planks of any type. You can use oak, spruce, birch, jungle, acacia, dark oak, mangrove, bamboo, crimson, warped, or cherry planks. Once you have gathered these materials, open your crafting table and place the three wooden planks horizontally on the top row, and the two sticks in the middle row. This will create a crafting pattern for the wooden pickaxe.

Crafting a wooden pickaxe is a crucial step in Minecraft, as it allows you to mine basic stone blocks and collect resources. It is also a great way to get started with crafting tools and exploring the game. So, grab your materials and get ready to craft your very own wooden pickaxe in Minecraft!

Understanding the Basics of Crafting

how-to-craft-a-wooden-pickaxe

Crafting is an essential aspect of Minecraft that allows you to create various tools, weapons, and items that will help you survive and thrive in the game world. In this section, we will cover the basics of crafting, including the materials needed and the essentials of using a crafting table.

Materials Needed

Before you can start crafting, you need to gather the necessary materials. The materials you need will depend on what you want to craft. For example, to craft a wooden pickaxe, you will need three wooden planks, two sticks, and one piece of string. To craft a stone pickaxe, you will need three cobblestones and two sticks.

Here is a table that shows the materials needed to craft some of the basic tools in Minecraft:

Tool Materials Needed
Wooden Pickaxe 3 Wooden Planks, 2 Sticks, 1 String
Stone Pickaxe 3 Cobblestones, 2 Sticks
Iron Pickaxe 3 Iron Ingots, 2 Sticks
Diamond Pickaxe 3 Diamonds, 2 Sticks

Crafting Table Essentials

To craft items in Minecraft, you need to use a crafting table. A crafting table is a block that allows you to access a 3×3 crafting grid, which is where you will place the materials needed to craft an item.

To use a crafting table, you need to right-click on it to open the crafting interface. Once the interface is open, you can place the materials in the correct pattern to craft the item you want. For example, to craft a wooden pickaxe, you would place two sticks in the middle column and one wooden plank in each of the top and bottom rows.

It’s important to note that the crafting table is an essential tool in Minecraft, and you will need to use it frequently to craft items that will help you survive and progress in the game. So, make sure you always have access to a crafting table when you need it.

In summary, crafting is a vital aspect of Minecraft, and understanding the basics of crafting is crucial to your success in the game. By gathering the necessary materials and using a crafting table, you can create a variety of tools, weapons, and items that will help you survive and thrive in the game world.

Step by Step Guide to Crafting a Wooden Pickaxe

Crafting a wooden pickaxe is one of the first things you should do when starting a new game in Minecraft. This tool is essential for mining blocks and collecting resources. Here is a step-by-step guide to crafting a wooden pickaxe.

Arranging the Sticks

The first step in crafting a wooden pickaxe is to arrange the sticks in the crafting table. Follow these steps:

  1. Open your crafting table.
  2. Place two sticks in a vertical line in the left column of the crafting grid.
  3. Leave the middle and right columns of the grid empty.

Placing the Wooden Planks

Once you have arranged the sticks in the crafting table, it’s time to place the wooden planks. Follow these steps:

  1. Place three wooden planks horizontally across the top row of the crafting grid.
  2. Leave the middle and bottom rows of the grid empty.
  3. The wooden planks can be any type of wood, so use whatever you have available.

After you have arranged the sticks and placed the wooden planks, the wooden pickaxe will appear in the result box of the crafting table. Simply click on the pickaxe to add it to your inventory.

Crafting a wooden pickaxe is an easy process that only requires a few basic materials. With this tool in hand, you’ll be able to mine blocks and collect resources to help you progress through the game.

Safety Precautions While Crafting

Crafting a wooden pickaxe in Minecraft is a fun and exciting process, but it’s important to take some safety precautions to ensure that you don’t accidentally hurt yourself or damage your surroundings. Here are some tips to keep in mind while crafting:

  1. Choose a Safe Location: Before you start crafting, make sure you’re in a safe location. Avoid crafting near lava, water, or any other hazardous materials. It’s also a good idea to craft in a well-lit area to avoid any accidents.
  2. Wear Protective Gear: While crafting, it’s a good idea to wear protective gear such as gloves and safety glasses. This will protect your hands and eyes from any sharp or flying objects.
  3. Keep Your Work Area Clean: Make sure your work area is clean and free of any clutter. This will prevent you from accidentally knocking over any tools or materials.
  4. Use the Right Tools: Always use the right tools for the job. Using the wrong tool can not only damage your materials but can also be dangerous.
  5. Take Breaks: Crafting can be tiring, so make sure you take breaks when needed. This will prevent you from getting fatigued and making mistakes.

By following these safety precautions, you can ensure that your crafting experience is safe and enjoyable. So, put on your safety gear, choose a safe location, and start crafting your wooden pickaxe!

Maintaining Your Wooden Pickaxe

maintaining-your-wooden-pickaxe

After crafting your wooden pickaxe, it’s important to maintain it to ensure that it lasts as long as possible. Here are some tips on how to maintain your wooden pickaxe:

Keep it Away from Water

Wooden pickaxes are susceptible to water damage, so it’s important to keep them away from water. If your pickaxe gets wet, it will become damaged and may break more easily.

Repair it with Wooden Planks

If your wooden pickaxe becomes damaged, you can repair it by using wooden planks. Simply place the damaged pickaxe and a wooden plank in a crafting table to repair it. This will restore its durability and make it last longer.

Use it on Appropriate Blocks

Using your wooden pickaxe on inappropriate blocks, such as stone or ores, will cause it to lose durability more quickly. To make your wooden pickaxe last longer, use it only on appropriate blocks, such as dirt, sand, and gravel.

Store it Properly

When you’re not using your wooden pickaxe, it’s important to store it properly. Keep it in a chest or on a tool rack to prevent it from getting damaged or lost.

By following these tips, you can keep your wooden pickaxe in good condition and make it last as long as possible.

Advanced Crafting Tips

Now that you know how to craft a wooden pickaxe, let’s take a look at some advanced crafting tips to help you improve your skills and make the most out of your resources.

Crafting Table Efficiency

Crafting tables are essential for crafting various items in Minecraft. However, did you know that you can use them more efficiently? Here are some tips:

  • You can craft multiple items at once by placing the required materials in the crafting table. For example, you can craft four wooden planks at once by placing a block of wood in each slot of the crafting table.
  • You can also use the crafting table to store items temporarily. Simply leave the items in the crafting table and they will remain there until you take them out.

Tool Durability

Tools in Minecraft have a durability rating that decreases as you use them. When the durability reaches zero, the tool will break and you will need to craft a new one. Here are some tips to help you maximize the durability of your tools:

  • Avoid using your tools to break blocks that they are not designed for. For example, don’t use a pickaxe to break leaves or dirt.
  • Repair your tools using an anvil. This will restore their durability and allow you to use them for longer.

Resource Gathering

Gathering resources is a key part of Minecraft. Here are some tips to help you gather resources more efficiently:

  • Use a pickaxe to mine stone, iron, gold, and diamond ore. Each type of ore requires a different pickaxe to mine.
  • Use a shovel to dig dirt, sand, and gravel.
  • Use an axe to chop down trees and gather wood.

By following these advanced crafting tips, you will be able to craft more efficiently, maximize the durability of your tools, and gather resources more efficiently.

How to Paint a Wooden Table: A Beginner's Guide

How to Paint a Wooden Table: A Beginner's Guide

If you’re looking to give your wooden table a fresh new look, painting it can be a great option. Not only is it an affordable way to update your furniture, but it can also be a fun DIY project. However, if you’ve never painted a table before, it can be a little intimidating. Don’t worry, we’re here to help! In this article, we’ll walk you through the steps on how to paint a wooden table.

Before you get started, it’s important to pick the right products. Long-lasting results go hand-in-hand with the right prep, products, and patience. In this article, we’ll cover different methods for painting a wooden table, including using a roller and paintbrush, spray painting, and spray cans. We’ll also discuss what type of paint you should use for furniture painting and how to prepare the surface of your wooden table for painting. With these tips, you’ll be able to give your wooden table a perfect finish.

Understanding the Basics of Painting

how-to-paint-a-wooden-table

If you have an old wooden table that needs a fresh look, painting it is an excellent way to give it a new lease of life. But before you start, it’s essential to understand the basics of painting to achieve a professional-looking finish.

Types of Paint for Wood

When it comes to painting wood, there are two main types of paint: oil-based and water-based. Oil-based paints are more durable and provide better protection against scratches and stains. However, they take longer to dry and require solvents for cleanup, which can be toxic and harmful to the environment.

Water-based paints, on the other hand, are easier to clean up and dry faster. They are also less toxic and more environmentally friendly than oil-based paints. However, they may not be as durable as oil-based paints, and they may require more coats to achieve full coverage.

When choosing a paint for your wooden table, consider the level of durability you need and the amount of time you have for drying. Also, make sure to choose a color that complements your room’s decor.

Tools Needed for Painting

Before you start painting, you’ll need to gather some essential tools. Here are the tools you’ll need:

  • Sandpaper: You’ll need sandpaper to smooth out any rough spots on the table’s surface and to create a surface that the paint can adhere to.
  • Primer: A primer helps the paint adhere to the surface and provides a smooth base for the paint to go on.
  • Paintbrushes: You’ll need a variety of paintbrushes, including a larger brush for the main areas and smaller brushes for the corners and edges.
  • Paint: Choose a high-quality paint that is specifically designed for wooden surfaces.
  • Drop cloth: A drop cloth will protect your floor or work surface from drips and spills.
  • Painter’s tape: Use painter’s tape to mask off any areas that you don’t want to paint.

By having the right tools and understanding the basics of painting, you can transform your old wooden table into a beautiful and functional piece of furniture that will last for years to come.

Preparing the Wooden Table

Before you start painting your wooden table, it’s important to prepare the surface properly. This will ensure that the paint adheres well and that the finish is smooth and even. In this section, we’ll go over the two main steps involved in preparing your table: cleaning and sanding.

Cleaning the Table

The first step in preparing your wooden table for painting is to clean it thoroughly. This will remove any dirt, dust, or grime that may be on the surface, which can interfere with the paint’s ability to adhere properly. Here are a few tips to help you clean your table effectively:

  • Use a soft cloth or sponge to wipe down the surface of the table.
  • If there are any stubborn stains or marks, use a mild detergent mixed with warm water to clean them off.
  • Be sure to rinse the table thoroughly with clean water to remove any soap residue.
  • Allow the table to dry completely before moving on to the next step.

Sanding the Surface

The next step in preparing your wooden table for painting is to sand the surface. Sanding will help to smooth out any rough spots or imperfections in the wood, and it will also help the paint to adhere better. Here’s how to sand your table:

  1. Choose the right sandpaper: For most tables, a medium-grit sandpaper (such as 120-grit) is a good choice. If your table is in particularly rough shape, you may need to start with a coarser grit and work your way up to a finer grit.
  2. Sand the surface: Use the sandpaper to sand the entire surface of the table, working in the direction of the wood grain. Be sure to sand evenly and thoroughly, paying extra attention to any rough spots or areas that need extra attention.
  3. Clean up: Once you’re done sanding, use a soft cloth or vacuum to clean up any dust or debris. Be sure to remove all of the dust, as it can interfere with the paint’s ability to adhere properly.

By following these steps, you’ll be able to prepare your wooden table properly for painting. With a clean, smooth surface, your table will be ready for the next step: priming.

Priming the Table

Before you start painting your wooden table, you need to prime it. Priming helps the paint adhere better to the surface and gives it a smoother finish. Here are some steps to follow when priming your table:

  1. Choose the right primer: Select a primer that is suitable for wooden surfaces. Look for a primer that is compatible with the type of paint you plan to use. You can choose between oil-based or water-based primers.
  2. Sand the table: Sand the table to remove any old paint, dirt, or imperfections. Use a sandpaper with a grit of 120-150. Make sure to sand along the grain of the wood.
  3. Clean the table: Use a damp cloth to wipe away any dust or debris from the sanding. Make sure the table is completely dry before proceeding.
  4. Apply the primer: Apply the primer evenly using a paintbrush or a roller. Make sure to cover the entire surface of the table. You may need to apply more than one coat of primer depending on the condition of the table.
  5. Let the primer dry: Wait for the primer to dry completely before painting. This may take a few hours or overnight, depending on the type of primer you used.
  6. Sand the table again: Once the primer is dry, sand the table again with a fine-grit sandpaper (220 grit). This will help to smooth out any rough spots or bumps.
  7. Clean the table: Wipe the table with a clean, dry cloth to remove any dust or debris from sanding.

By following these steps, you will have a well-primed table ready for painting. Remember to choose a well-ventilated area to work in and to wear protective gear such as gloves and a mask.

Applying the Paint

applying-the-paint

Once you have prepared your wooden table for painting, it’s time to apply the paint. In this section, we will cover the two main sub-sections of applying the paint: choosing the right color and painting techniques.

Choosing the Right Color

When choosing the color for your wooden table, it’s important to consider the overall style and color scheme of the room it will be in. You want to choose a color that complements the rest of the room and creates a cohesive look. Here are some tips to help you choose the right color:

  • Look at the color wheel: Choose colors that are opposite each other on the color wheel for a complementary look. If you want a more monochromatic look, choose colors that are next to each other on the color wheel.
  • Consider the room’s lighting: If the room is dark, choose a lighter color to brighten it up. If the room is already bright, you can choose a darker color to create a cozy atmosphere.
  • Think about the table’s use: If the table will be used for meals, choose a color that won’t show stains easily. If the table is more decorative, you can choose a bolder color.

Painting Techniques

Now that you have chosen the right color, it’s time to apply the paint. Here are some painting techniques to help you achieve a smooth and even finish:

  • Use a paintbrush: Use a high-quality paintbrush to apply the paint. Start at the top of the table and work your way down, using long strokes in the direction of the wood grain.
  • Roll the paint: If you want to save time, you can use a paint roller to apply the paint to larger areas of the table. Use a small paintbrush to get into any hard-to-reach areas.
  • Apply multiple coats: Depending on the color and type of paint you are using, you may need to apply multiple coats to achieve the desired finish. Allow each coat to dry completely before applying the next.

Remember to follow the manufacturer’s instructions for the paint you are using. With the right color and painting techniques, you can transform your wooden table into a beautiful and functional piece of furniture.

Drying and Finishing

After you have painted your wooden table, the next step is to let it dry properly. This is an important step as it ensures that the paint adheres well to the wood and doesn’t peel off easily. Here are some tips to help you ensure that your table dries properly.

Proper Drying Time

Different types of paint require different amounts of time to dry. Most paints will dry to the touch within a few hours, but it’s important to let the paint cure fully before using the table. The curing time can range from a few days to a few weeks, depending on the type of paint used.

To ensure that your table dries properly, it’s important to place it in a well-ventilated area, away from direct sunlight and heat sources. This will help the paint dry evenly and prevent it from cracking or peeling.

Applying Sealant

Once the paint has dried, you may want to apply a sealant to protect the table from scratches and other damage. There are several types of sealants available, including polyurethane, lacquer, and wax.

Polyurethane is a popular choice as it provides a durable, long-lasting finish. It’s available in both water-based and oil-based formulas and can be applied with a brush or sprayer. Lacquer is another option that provides a high-gloss finish, but it’s more difficult to apply than polyurethane.

Wax is a natural option that provides a soft, matte finish. It’s easy to apply and can be buffed to a shine with a soft cloth. However, it’s not as durable as polyurethane or lacquer and may need to be reapplied more frequently.

Before applying any sealant, it’s important to sand the table to ensure that the surface is smooth and free of any imperfections. Then, apply the sealant according to the manufacturer’s instructions and allow it to dry completely before using the table.

Maintenance Tips

Now that you’ve successfully painted your wooden table, it’s important to maintain it properly to ensure the longevity of your hard work. Here are some maintenance tips to keep your table looking great for years to come:

  • Use coasters and placemats: To prevent scratches and water damage, always use coasters and placemats when placing glasses, plates, or any other items on your table.
  • Avoid harsh chemicals: Harsh chemicals such as bleach or ammonia can damage the paint and finish of your table. Instead, use a mild cleaner and a soft cloth to clean your table.
  • Clean spills immediately: Accidents happen, but it’s important to clean up spills as soon as possible to prevent damage to the paint and wood. Use a damp cloth to gently clean up spills and dry the area thoroughly.
  • Avoid direct sunlight: Direct sunlight can cause the paint to fade and the wood to dry out, leading to cracks and damage. If possible, place your table away from direct sunlight or use curtains or blinds to block the sun.
  • Regularly dust your table: Dust can accumulate on your table and scratch the paint. Use a soft, dry cloth to regularly dust your table and keep it looking clean and beautiful.

By following these simple maintenance tips, you can keep your painted wooden table looking great for years to come.

How Many Satchels Do You Need for a Wooden Door?

How Many Satchels Do You Need for a Wooden Door?

When it comes to securing your wooden door, one of the most common questions homeowners ask is how many satchels they need. The answer to this question depends on a range of factors, including the size and weight of your door, as well as the type of hinges and hardware you have installed. In this article, we’ll provide you with a comprehensive guide on how many satchels you need to secure your wooden door.

Generally, it’s recommended to use two to three satchels to secure a standard-sized wooden door. However, if you have a larger or heavier door, you may need four or more satchels to ensure proper security. It’s also important to consider the type of hinges and hardware you have installed, as these may require additional satchels for optimal security. By following these guidelines, you can ensure that your wooden door is properly secured and protected against potential intruders.

Understanding Satchels

how-many-satchels-do-you-need-for-a-wooden-door-2

What is a Satchel?

A satchel is a small bag that is used to carry items. In the context of securing a wooden door, satchels are used as an explosive device to break down the door. Satchels are commonly used in games like Rust and Terraria to raid other players’ bases. In real life, satchels are used by law enforcement and military personnel to breach doors and walls.

Satchels are made of various materials, including leather and synthetic materials. They come in different sizes and shapes, depending on their intended use. Satchels used for breaching doors are typically small and compact, making them easy to carry and handle.

Different Types of Satchels

There are different types of satchels, each with its own unique characteristics and uses. The most common types of satchels used for breaching doors are:

  • Explosive Satchels: These satchels are filled with explosives that are detonated to break down the door. They are powerful and effective, but also dangerous and should only be used by trained professionals.
  • Thermal Satchels: These satchels use heat to break down the door. They are less powerful than explosive satchels but are safer to use and can be used in confined spaces.
  • Mechanical Satchels: These satchels use a mechanical force to break down the door. They are less powerful than explosive and thermal satchels but are also safer to use and can be used in confined spaces.

It is important to choose the right type of satchel for the job to ensure maximum effectiveness and safety. Consulting with a professional is recommended before using satchels for breaching doors.

That’s all you need to know about satchels for securing a wooden door.

Wooden Doors Basics

When it comes to securing your home, your wooden door is the first line of defense. But how many satchels do you need to secure it? Before we get into that, let’s go over some basics of wooden doors.

Types of Wooden Doors

There are many types of wooden doors, each with its own unique features and characteristics. Here are a few common types:

  • Solid wood doors: Made entirely of wood, these doors are durable and offer good sound insulation.
  • Hollow core doors: These doors have a honeycomb-like structure inside, making them lightweight and affordable.
  • Paneled doors: These doors have decorative panels on the front, adding a touch of style to your home.
  • French doors: These doors have glass panels and are often used as patio doors.

Wooden Door Dimensions

Wooden doors come in a variety of sizes, but most standard doors are 80 inches tall and 36 inches wide. However, it’s important to measure your door to ensure you get the right size satchels.

When measuring your door, be sure to measure the height, width, and thickness. The thickness of your door can affect the number of satchels you need. A thicker door may require more satchels for proper installation.

In summary, understanding the basics of wooden doors is important before determining how many satchels you need to secure them. Knowing the type and dimensions of your door will help you make an informed decision.

Determining Satchels for a Wooden Door

determining-satchels-for-a-wooden-door

When it comes to securing a wooden door, it is important to determine the correct number of satchels needed for proper installation. This section will guide you through the process of determining the number of satchels required for your wooden door.

Importance of Accurate Measurements

Before purchasing satchels, it is important to take accurate measurements of your wooden door. This will ensure that you purchase the correct number of satchels required for proper installation. Here are some steps to follow when measuring your wooden door:

  1. Measure the height and width of your wooden door using a tape measure.
  2. Measure the thickness of your wooden door using a caliper or ruler.
  3. Determine the weight of your wooden door using a scale.

Calculating Number of Satchels

Once you have accurate measurements of your wooden door, you can calculate the number of satchels required for proper installation. Here are some factors to consider when calculating the number of satchels needed:

  1. Door size: The size of your wooden door will determine the number of satchels required for proper installation. Generally, a single satchel is used for a door up to 81 inches tall and a double satchel is used for taller doors.
  2. Door weight: The weight of your wooden door will also determine the number of satchels required for proper installation. Generally, two or three satchels are enough to secure a standard-sized wood door, but four or more may be required for larger or heavier doors.
  3. Door hardware: Speciality door hinges and hardware may require additional satchels to ensure proper installation. Be sure to consult a professional before purchasing satchels for your wooden door.

By taking accurate measurements and considering the factors listed above, you can determine the correct number of satchels required for proper installation of your wooden door.

Factors Influencing the Number of Satchels

When determining the number of satchels needed to breach a wooden door, several factors come into play. These factors include the weight of the wooden door, the size of the satchel, and the material of the satchel.

Weight of the Wooden Door

The weight of the wooden door is a critical factor when determining the number of satchels needed to breach it. Generally, the heavier the door, the more satchels you will need to use. A heavier wooden door is usually thicker and made of denser wood, which makes it harder to penetrate. In contrast, a lighter wooden door is usually thinner and made of less dense wood, which makes it easier to breach.

Size of the Satchel

The size of the satchel is another crucial factor that influences the number of satchels needed to breach a wooden door. A smaller satchel will require you to use more of them to breach the door, while a larger satchel will require fewer. It’s essential to use the right size of the satchel to ensure that you don’t waste resources or fail to breach the door.

Material of the Satchel

The material of the satchel is the final factor that influences the number of satchels needed to breach a wooden door. The material of the satchel determines its durability and strength, which affects its ability to penetrate the wooden door. A stronger and more durable satchel will require fewer of them to breach the door, while a weaker and less durable satchel will require more.

In conclusion, the number of satchels needed to breach a wooden door depends on several factors, including the weight of the wooden door, the size of the satchel, and the material of the satchel. It’s essential to consider these factors carefully to ensure that you use the right number of satchels and breach the wooden door successfully.

Practical Tips for Using Satchels with Wooden Doors

When using satchels to open a wooden door, there are a few practical tips that can help ensure a safe and successful operation. In this section, we will discuss some of these tips, including safety precautions and maintenance tips.

Safety Precautions

Before you begin using satchels to open a wooden door, it’s important to take certain safety precautions to avoid injury or damage to the door. Here are some tips to keep in mind:

  • Always wear protective gear, such as gloves and safety goggles, when handling satchels.
  • Make sure the area around the door is clear of any flammable materials or debris that could be ignited by the explosion.
  • Keep a safe distance from the door when the satchel is detonated to avoid injury from flying debris.
  • Never attempt to use satchels on a door that is already damaged or weakened, as this could cause the door to collapse and cause injury.

By following these safety precautions, you can help ensure a safe and successful operation when using satchels to open a wooden door.

Maintenance Tips

To ensure that your satchels are effective and reliable when used with a wooden door, it’s important to take proper care of them. Here are some maintenance tips to keep in mind:

  • Store satchels in a cool, dry place to prevent moisture and heat damage.
  • Check the expiration date on your satchels to ensure they are still effective.
  • Inspect your satchels for any signs of damage or wear before using them.
  • Follow the manufacturer’s instructions for storage and use of satchels to ensure maximum effectiveness.

By following these maintenance tips, you can help ensure that your satchels are effective and reliable when used with a wooden door.

How to Make Wooden Pallets: A Beginner's Guide

How to Make Wooden Pallets: A Beginner's Guide

If you’re looking to build your own furniture or create a unique DIY project, wooden pallets can be a great material to work with. Not only are they affordable and easy to find, but they can also be customized to fit your specific needs and style. In this article, we’ll walk you through the process of making your own wooden pallets, so you can start creating your own one-of-a-kind pieces.

Before we get started, it’s important to note that there are two types of pallets: chemically treated and heat treated. Chemically treated pallets are often used for shipping and can contain harmful chemicals, so it’s best to avoid using them for DIY projects. Heat treated pallets, on the other hand, are treated with heat to kill any pests and are safe to use for furniture and other projects. It’s important to look for the “HT” stamp on the pallet to ensure it’s safe to use. Once you have your heat treated pallets, you’re ready to start building!

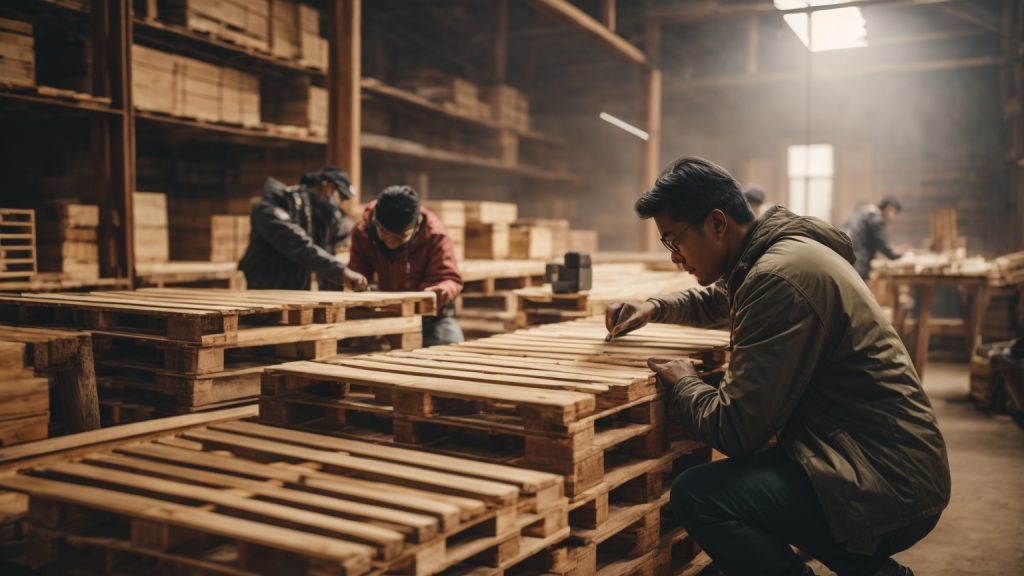
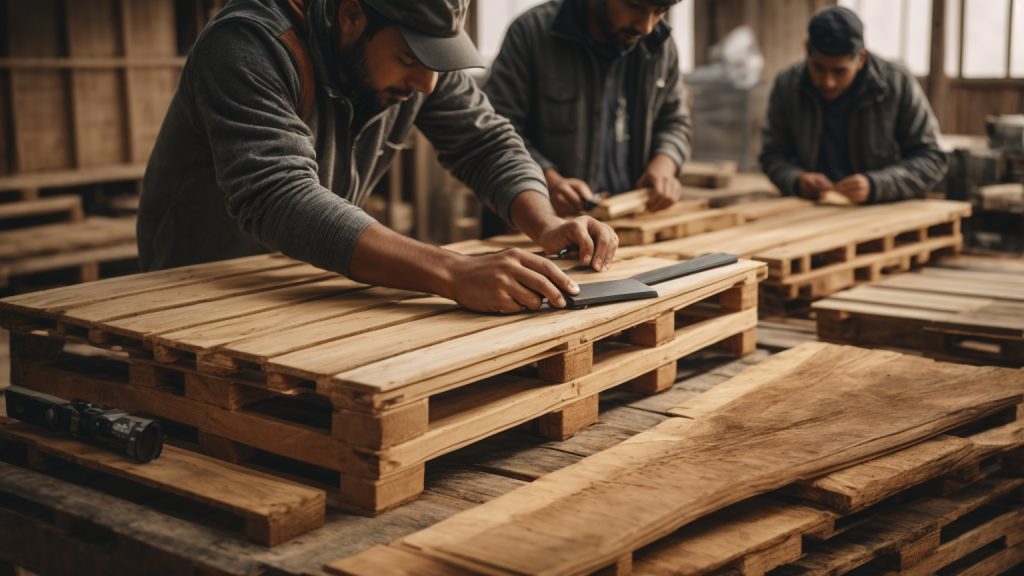
Understanding the Basics of Pallet Making

how-to-make-wooden-pallets

If you are interested in making wooden pallets, it is important to understand the basics of pallet making. Pallets are typically made from a combination of softwood and hardwood, with oak and pine being popular choices. Here are some key factors to consider when making wooden pallets:

Wood Selection

When selecting wood for your pallets, you should consider factors such as strength, availability, and cost. Most pallets are made from softwood and hardwood, with the choice of wood depending on the intended use of the pallet. Oak is a strong and widely available hardwood, while pine is a popular and relatively affordable softwood.

Size and Trim

The size of your pallet will depend on its intended use. Pallets are typically either 48×40 inches or 42×42 inches, but custom sizes can be made as well. Once you have determined the size of your pallet, you will need to trim the wood to the appropriate length.

Deck Boards and Stringers

The deck boards and stringers are the main components of a pallet. Deck boards are the top and bottom boards that support the load, while stringers are the boards that run perpendicular to the deck boards and provide support. The size and spacing of the deck boards and stringers will depend on the intended use of the pallet.

Notches and Fasteners

Notches can be cut into the stringers to allow forklifts or pallet jacks to easily lift and move the pallet. Fasteners such as nails or screws are used to hold the pallet together. It is important to use the appropriate fasteners and to ensure that they are properly secured to prevent the pallet from breaking apart during use.

By understanding the basics of pallet making, you can create strong and durable pallets that are suitable for a variety of applications.

Materials Required

If you’re planning to make wooden pallets, you will need a few essential materials. In this section, we will discuss the types of wood and other materials required to make wooden pallets.

Types of Wood

The type of wood you choose for your pallets will depend on your budget, the purpose of the pallets, and the availability of the wood. Here are a few common types of wood used in making pallets:

  • Softwood: Softwood is the most common type of wood used in making pallets. It is affordable and readily available. Pine is a popular softwood used in making pallets.
  • Hardwood: Hardwood is more durable than softwood but is also more expensive. Oak is a popular hardwood used in making pallets.
  • Mixed Wood: Most pallets are made of a mixture of softwood and hardwood. This is because pallet manufacturers cannot always specify the type of wood used in making the pallets.

Other Essential Materials

Apart from the wood, you will also need a few other essential materials to make wooden pallets. Here are a few of them:

  • Nails: You will need nails to hold the pallet together. Make sure to use nails that are long enough to go through the wood and hold it securely.
  • Saw: You will need a saw to cut the wood to the desired size and shape.
  • Hammer: You will need a hammer to drive the nails into the wood.
  • Measuring Tape: You will need a measuring tape to measure the wood accurately.
  • Pencil: You will need a pencil to mark the wood before cutting it.
  • Safety Equipment: You will need safety equipment such as gloves and safety glasses to protect yourself while working with the wood.

By having all the necessary materials on hand, you can make your own wooden pallets and save money in the process.

Choosing the Right Wood

When it comes to making wooden pallets, choosing the right type of wood is crucial. The right wood will ensure that your pallets are durable, sturdy, and able to withstand the weight of the products they are carrying. Here are some factors to consider when choosing the right wood for your pallets:

Hardwood vs. Softwood

Most pallet manufacturers prefer to use hardwood for making pallets. This is because hardwood is denser and more durable than softwood, which makes it better suited for heavy-duty applications. However, softwood can also be used for making pallets, especially if the pallets are intended for lighter loads.

Location and Availability

The type of wood you choose for your pallets will also depend on your location and the availability of different types of wood in your area. For example, if you live in an area with a lot of pine trees, it may be more cost-effective to use pine wood for your pallets instead of importing hardwood from another region.

Intended Use

The intended use of your pallets is another important factor to consider when choosing the right wood. If your pallets will be used for outdoor storage or transportation, you may want to choose a type of wood that is more resistant to moisture and rot, such as cedar or redwood. On the other hand, if your pallets will be used for indoor storage or transportation, you may not need to worry as much about moisture resistance.

Other Considerations

In addition to the factors mentioned above, there are a few other things to consider when choosing the right wood for your pallets:

  • Size: Make sure the wood you choose is the right size for your pallets.
  • Strength: Choose wood that is strong enough to support the weight of your products.
  • Sustainability: Consider using wood that is sustainably sourced to reduce your environmental impact.

By considering these factors when choosing the right wood for your pallets, you can ensure that your pallets are strong, durable, and able to meet your specific needs.

Pallet Designing

When it comes to designing pallets, there are two main options: standard sizes and custom designs.

Standard Pallet Sizes

Standard pallet sizes are widely used in the industry and can be easily sourced from manufacturers. The most common sizes are:

Size Dimensions (inches)
48×40 48 x 40 x 6
42×42 42 x 42 x 6
48×48 48 x 48 x 6

These sizes are popular because they are compatible with most pallet jacks and forklifts. They are also easy to stack and transport.

Custom Pallet Designs

Custom pallet designs are an option for those who need a specific size or shape that is not available in standard sizes. When designing a custom pallet, there are several factors to consider:

  • Load capacity: Determine the weight and size of the items that will be placed on the pallet to ensure it can handle the load.
  • Material: Choose the appropriate type of wood or other material based on the intended use of the pallet.
  • Durability: Consider the expected lifespan of the pallet and choose materials and design elements that will ensure longevity.
  • Compatibility: Ensure the pallet is compatible with the machinery that will be used to move and transport it.

Custom pallets can be designed in a variety of shapes and sizes, including circular, triangular, and hexagonal. They can also be designed with additional features such as notches, grooves, and handles for easier handling.

Overall, whether you choose a standard size or a custom design, it’s important to consider the specific needs of your business and the intended use of the pallet. With the right design, pallets can be a valuable asset for your operations.

Cutting the Wood

Now that you have chosen your wood, it’s time to cut it into the proper-sized deck boards and stringers for your pallet. Here are the steps to follow:

  1. Trim the cants: Pallet cants from local sawmills are trimmed to the proper length before being ripped into boards. The length of the cants will depend on the size of the pallet you want to make.
  2. Rip into boards: Once the cants are trimmed, they are then ripped into boards of the proper width. The width will depend on the type of pallet you want to make.
  3. Sawn into deck boards and stringers: After the boards are ripped, they are sawn into deck boards and stringers that will fit the type of pallet being used.
  4. Cut notches into stringers: The next step is to cut notches into stringers. This allows for 4-way entry using forklifts, or 2-way entry using pallet jacks.

When cutting the wood, it’s important to take safety precautions. Always wear protective gear, such as safety glasses and gloves, and ensure that the saw blade is sharp and in good condition. It’s also important to make sure the wood is securely held in place while cutting to avoid accidents.

By following these steps, you can cut the wood for your pallet with ease and precision.

Assembling the Pallet

assembling-the-pallet

Now that you have all the necessary materials, it’s time to assemble your wooden pallet. Here are the steps you need to follow:

  1. Lay out the bottom deck of the forklift by placing two 5-1/2 by 40 by 5/8 inch crosspiece boards on the ground. Mount one flush with each end of the two outside stringers. Nail the third stringer parallel to the others in the middle. Use nine nails per 5-1/2 inch crosspiece, three at each joining.
  2. Once the bottom deck is complete, lay the top deck on top of it and secure it with nails or screws. Make sure to align the boards of the top deck with those of the bottom deck.
  3. Next, attach the blocks to each corner of the pallet. These blocks will help distribute the weight of the load and prevent the pallet from collapsing.
  4. Finally, attach the optional stringers to the bottom of the pallet. These stringers will provide additional support and stability to the pallet.

Remember to use the appropriate safety gear, such as gloves and safety glasses, when assembling your pallet. Also, make sure to inspect your pallet for any defects or damage before using it. With these simple steps, you can create a sturdy and reliable wooden pallet that will serve your needs for years to come.

Finishing the Pallet

Once you have assembled your wooden pallet, it’s time to give it a finishing touch. Finishing a pallet is important not only for aesthetic reasons but also to protect the wood from weathering and deterioration. In this section, we will cover two important steps in finishing your pallet: sanding and sealing.

Sanding

Sanding is crucial to give your pallet a smooth and polished surface. Sanding will also help to remove any rough edges and splinters, making your pallet safe to handle. Here are some tips for sanding your pallet:

  • Use a coarse-grit sandpaper (60-80 grit) to start sanding the surface of the pallet.
  • Sand in the direction of the wood grain to avoid damaging the wood fibers.
  • Once you have sanded the surface, use a finer grit sandpaper (120-150 grit) to smooth out the surface further.
  • Sand the edges of the pallet to remove any rough edges and splinters.
  • Use a tack cloth to remove any dust or debris left from sanding.

Sealing

Sealing your pallet is important to protect the wood from moisture and weathering. There are several options for sealing your pallet, including staining, painting, or using a clear sealant. Here are some tips for sealing your pallet:

  • If you want to stain your pallet, choose a stain that is suitable for outdoor use and matches the color of your other outdoor furniture.
  • If you want to paint your pallet, choose a paint that is suitable for outdoor use and matches the color of your other outdoor furniture.
  • If you want to use a clear sealant, choose a sealant that is suitable for outdoor use and provides UV protection.
  • Apply the sealant evenly with a brush or roller, making sure to cover all surfaces of the pallet.
  • Allow the sealant to dry completely before using the pallet.

By following these tips for sanding and sealing your pallet, you can ensure that your pallet will look great and last for years to come.

Safety Precautions

When working with wooden pallets, it is important to take proper safety precautions to avoid injury. Here are some tips to keep in mind:

Wear Protective Gear

Wearing protective gear is crucial when working with wooden pallets. Safety equipment such as puncture-proof gloves, safety shoes, and clothing that covers your legs and arms will help protect you from slivers and other injuries.

Check the Condition of the Pallet

Before using a wooden pallet, make sure it is in good condition. Check for any broken or loose boards, protruding nails, or other damage that could cause injury. Do not use a damaged or underrated pallet.

Be Careful When Handling Pallets

When handling pallets, be sure to lift with your legs and not your back. Do not try to lift a pallet that is too heavy for you to handle safely. Use a pallet jack or forklift if necessary.

Avoid Hazardous Pallets

Some pallets are used to transport hazardous materials or may harbor bacteria. Avoid using these pallets for indoor projects, and be sure to take appropriate precautions when handling them.

Use Tools Safely

When cutting or sawing wooden pallets, be sure to use the appropriate tools and follow all safety guidelines. Wear eye protection and keep your hands and fingers away from the blade.

By following these safety precautions, you can work with wooden pallets safely and avoid injury.

Maintaining Your Wooden Pallets

Keeping your wooden pallets in good condition is important to ensure they last longer and can be reused. Here are some tips for maintaining your wooden pallets:

1. Store Pallets Properly

Storing your pallets correctly is essential to prevent damage and extend their lifespan. Keep them in a dry, cool place away from direct sunlight and moisture. You can stack them on top of each other, but make sure to place a layer of cardboard or other protective material between them to avoid scratches and damage.

2. Inspect Regularly

Inspect your pallets regularly to identify any damage or issues that need to be addressed. Check for cracks, splinters, loose boards, or any signs of rot or decay. If you notice any damage, remove the pallet from circulation and repair or replace it as needed.

3. Clean Pallets

Cleaning your pallets is essential to maintain their quality and hygiene. Use a soft-bristled brush or a pressure washer to remove any dirt, debris, or stains. Avoid using harsh chemicals or bleach as they can damage the wood and reduce its lifespan.

4. Treat Pallets

Treating your pallets can help protect them from moisture, insects, and other environmental factors that can cause damage. You can use a variety of treatments such as paint, stain, or sealant to protect the wood. Make sure to choose a treatment that is safe for the intended use of the pallet.

5. Handle with Care

When handling your pallets, make sure to do so with care to avoid damage. Use a forklift or pallet jack to move them around and avoid dragging them on the ground. Also, avoid overloading them beyond their weight capacity as it can cause damage and increase the risk of accidents.

By following these simple tips, you can maintain your wooden pallets and ensure they last longer and can be reused.

How to Build a Wooden Cabinet: A Beginner's Guide

How to Build a Wooden Cabinet: A Beginner's Guide

Are you looking to build a wooden cabinet but don’t know where to start? Building a cabinet can seem like a daunting task, but with the right tools and guidance, it can be a rewarding and satisfying project. In this article, we will guide you through the process of building a wooden cabinet, step by step.

Before you begin building your cabinet, you will need to gather the necessary materials and tools. This will include wood boards, screws, nails, wood glue, a saw, a drill, and sandpaper. You will also need to measure the space where you plan to install the cabinet to ensure that it fits properly. Once you have everything you need, you can begin building your cabinet.

The first step in building a wooden cabinet is to create a plan or blueprint. This will help you visualize the design of your cabinet and ensure that you have all the necessary materials. Next, you will need to cut the wood boards to the appropriate size and shape. You can then assemble the cabinet using screws, nails, and wood glue. Once the cabinet is assembled, you can sand and finish it to give it a polished look.

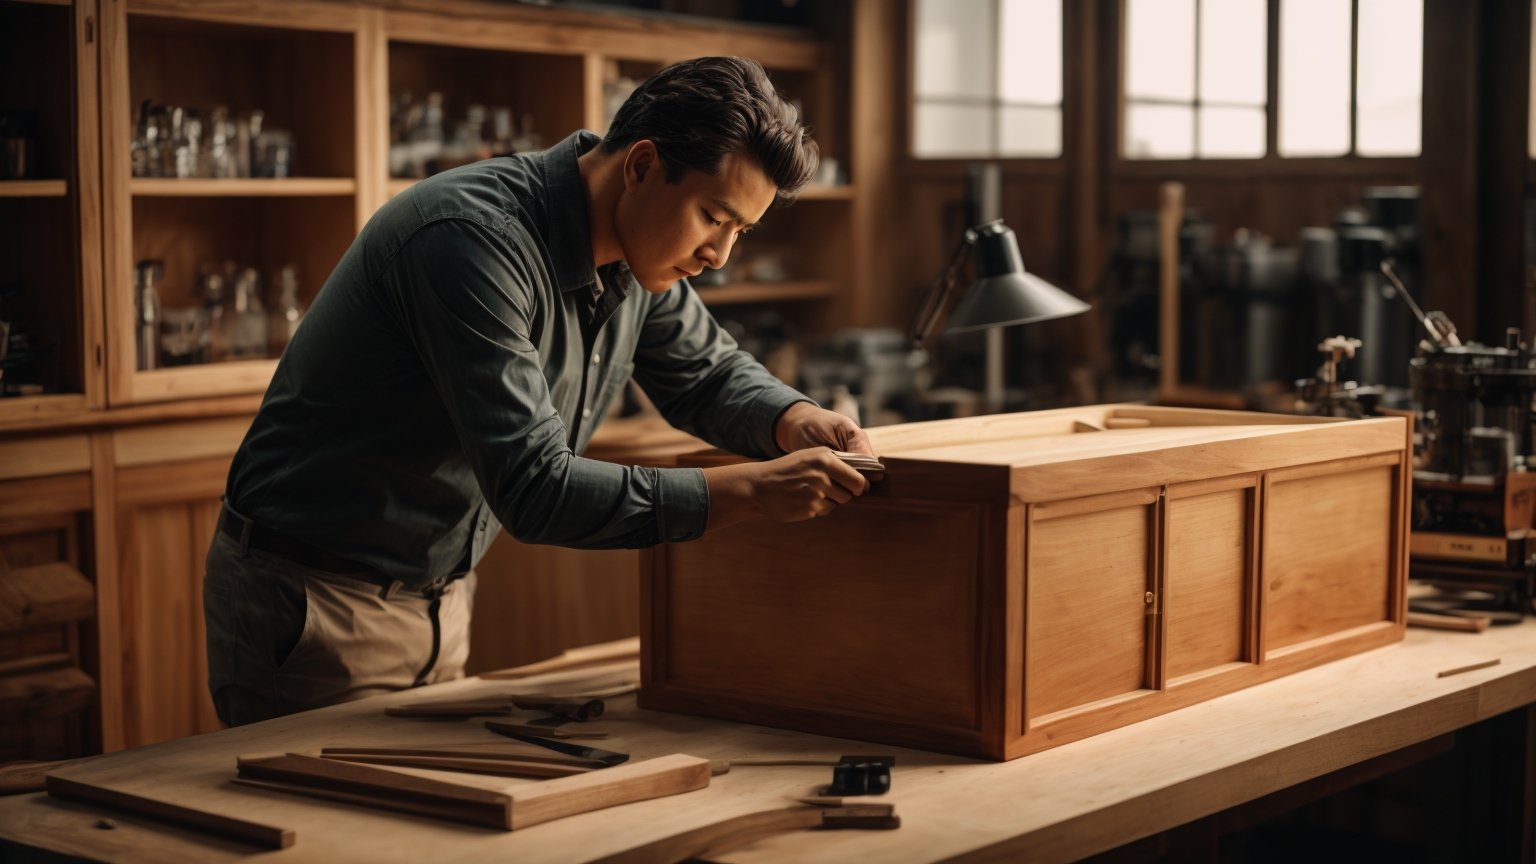
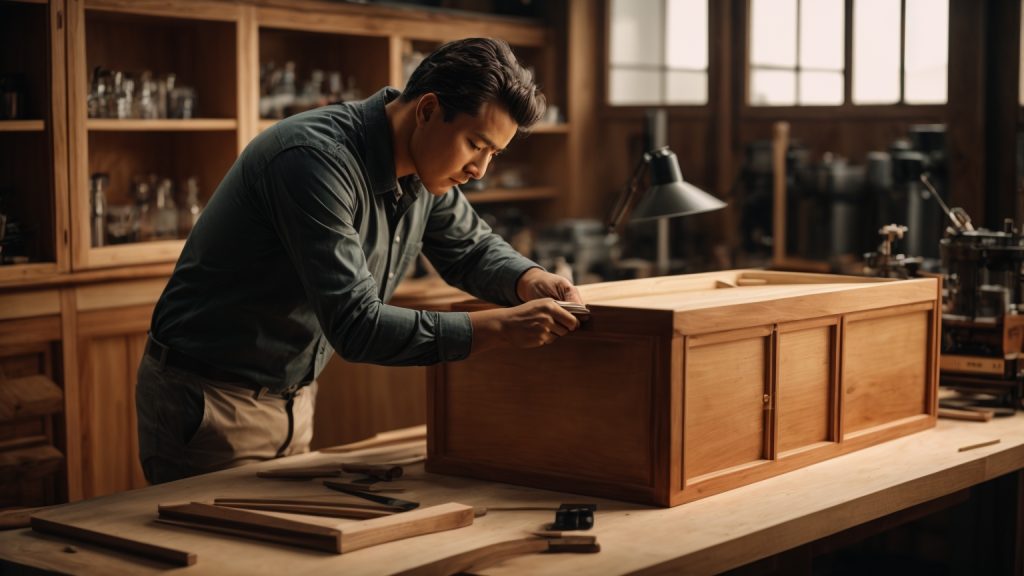
Understanding the Basics

build-a-wooden-cabinet

If you’re new to woodworking, building a cabinet can seem like a daunting task. However, with the right tools and materials, it can be a rewarding project that adds both functionality and aesthetic appeal to your living space. In this section, we’ll cover the basics of building a wooden cabinet.

Types of Wood

When it comes to choosing the right wood for your cabinet, there are several options available. Here are some of the most common types of wood used in cabinet-making:

  • Plywood: A popular choice for its affordability and durability, plywood is made by layering thin sheets of wood together. It comes in various grades and thicknesses, so be sure to choose the right one for your project.
  • Solid Wood: This type of wood is more expensive than plywood but is known for its natural beauty and durability. Popular types of solid wood for cabinets include oak, maple, and cherry.
  • MDF: Medium-density fiberboard is a man-made material that is made by breaking down wood fibers and combining them with resin. It’s a popular choice for painted cabinets due to its smooth surface.

Required Tools

Before you start building your cabinet, you’ll need to gather the necessary tools. Here are some of the most important tools you’ll need:

  • Table Saw: This tool is essential for cutting large sheets of plywood or solid wood into the right size and shape.
  • Circular Saw: A circular saw is useful for making straight cuts on smaller pieces of wood.
  • Jigsaw: A jigsaw is a handheld saw that can be used for cutting curves and intricate shapes.
  • Drill: You’ll need a drill to make holes for screws and other fasteners.
  • Sander: A sander is used to smooth out rough edges and surfaces before applying finish.
  • Clamps: Clamps are used to hold pieces of wood together while glue dries or while you’re making cuts.

By understanding the basics of wood selection and required tools, you’ll be well on your way to building a wooden cabinet that you can be proud of.

Planning Your Cabinet

Before you start building your wooden cabinet, it’s essential to plan it out properly. This will ensure that you have all the necessary materials and tools, and that your cabinet will fit perfectly in the space you have designated for it. Here are some steps to follow when planning your cabinet.

Determining the Size

The first step in planning your cabinet is to determine its size. Measure the space where you want to install the cabinet, and write down the height, width, and depth of the area. Consider what you will be storing in the cabinet and how much space you will need. Keep in mind that it’s better to have a cabinet that’s slightly too big than one that’s too small.

Once you have the measurements, you can decide on the size of your cabinet. You can use a table saw to cut the wood to the exact size you need. Alternatively, you can purchase pre-cut wood pieces from a hardware store.

Choosing the Design

The next step is to choose the design of your cabinet. There are many different styles and designs to choose from, so take some time to research and find one that suits your needs and preferences. Some popular options include:

  • Wall-mounted cabinets
  • Base cabinets
  • Corner cabinets
  • Pantry cabinets
  • Open shelving cabinets

Consider the style of your room and the overall aesthetic you want to achieve. You can also choose to add decorative elements such as trim or molding to your cabinet to give it a more finished look.

Once you have determined the size and design of your cabinet, you can start gathering the necessary materials and tools. With proper planning, you can build a beautiful and functional wooden cabinet that will last for years to come.

Preparing the Materials

Before you start building your wooden cabinet, it’s important to prepare all of the necessary materials. This includes measuring and cutting the wood, as well as sanding it down to a smooth finish.

Cutting the Wood

The first step in preparing your materials is to measure and cut the wood. This will ensure that all of your pieces fit together properly and that your cabinet is the correct size. You will need a tape measure, a saw, and the wood that you will be using for your cabinet.

To begin, measure the height, width, and depth of the space where you will be placing your cabinet. Then, use these measurements to determine the size of each piece of wood that you will need. Mark the measurements on the wood and use the saw to cut each piece to the correct size.

Make sure to double-check your measurements before cutting to avoid any mistakes. It’s also a good idea to label each piece of wood as you cut it to keep track of which piece goes where.

Sanding the Wood

Once you have cut all of your pieces of wood, it’s time to sand them down to a smooth finish. Sanding will help to remove any rough edges or splinters and will ensure that your cabinet looks clean and professional.

You will need sandpaper and a sanding block or an electric sander. Start with a coarse grit sandpaper and work your way up to a finer grit for a smoother finish.

Hold the sandpaper or sander firmly and move it in a back-and-forth motion along the surface of the wood. Be sure to sand evenly and not to apply too much pressure, as this can damage the wood.

Once you have sanded all of your pieces, wipe them down with a damp cloth to remove any dust or debris. Your wood is now ready to be assembled into your cabinet.

By taking the time to properly prepare your materials, you will ensure that your cabinet is sturdy, well-fitted, and looks great.

Assembling the Cabinet

assembling-the-cabinet

Now that you have all the necessary components ready, it’s time to assemble your wooden cabinet. This section will guide you through the process of building the frame, adding shelves, and attaching the doors.

Building the Frame

Start by laying out the cabinet’s sides, top, bottom, and back on a flat surface. Use clamps to hold the pieces together while you drill pilot holes and then use screws to attach them. Make sure the corners are square by using a carpenter’s square.

Next, attach the face frame to the cabinet’s front. The face frame is the part of the cabinet that the doors will attach to. Use glue and clamps to hold the face frame in place while you drill pilot holes and then use screws to attach it to the cabinet.

Adding the Shelves

Measure and cut the shelves to fit inside the cabinet. Use a table saw or circular saw to make straight cuts. Drill pilot holes into the sides of the cabinet and then attach the shelves using screws. Make sure the shelves are level by using a level.

Attaching the Doors

Measure and cut the doors to fit the face frame. Use a router to create a groove on the inside of the door where the hinges will be attached. Install the hinges on the door and then attach the door to the face frame. Adjust the hinges so that the door hangs straight and opens and closes smoothly.

Finally, install any knobs or pulls on the doors. Make sure they are level and centered.

Congratulations! You have successfully assembled your wooden cabinet.

Finishing Touches

Once you have built your wooden cabinet, it’s time to add the finishing touches to make it look great. Here are some tips on how to finish your cabinet:

Painting or Staining

Painting or staining your cabinet is an important step in the finishing process. You can choose to paint or stain your cabinet depending on the look you want to achieve. If you want a more natural look, staining is the way to go. If you want a more colorful look, painting is the way to go.

Before you start painting or staining, you need to prepare the wood. Sand the wood with a fine-grit sandpaper to remove any rough spots. Then, wipe the wood with a damp cloth to remove any dust. Apply a wood conditioner to the wood to help the stain or paint adhere better.

When painting, apply a primer first to help the paint adhere better. Then, apply the paint in thin, even coats. Let each coat dry before applying the next coat. When staining, apply the stain with a brush or cloth, following the grain of the wood. Let the stain dry for at least 24 hours before applying a clear coat.

Adding Hardware

Adding hardware to your cabinet is another important step in the finishing process. Hardware includes knobs, handles, hinges, and locks. Choose hardware that complements the style of your cabinet.

When installing hardware, mark the location of the hardware on the cabinet with a pencil. Then, drill pilot holes for the screws. Install the hardware with screws, making sure they are tight.

Adding hardware can be a simple way to update the look of your cabinet. You can choose from a variety of styles and finishes to find the perfect hardware for your cabinet.

By following these tips, you can give your wooden cabinet a professional-looking finish that will make it stand out in your home.

Safety Precautions

When building a wooden cabinet, safety should be your top priority. Woodworking can be dangerous, and it is important to take the necessary precautions to prevent accidents. Here are some safety tips to keep in mind:

Wear Protective Gear

Always wear protective gear when working with power tools or sharp objects. This includes safety glasses, earplugs, gloves, and a dust mask. Safety glasses will protect your eyes from flying debris, earplugs will protect your hearing from loud noises, gloves will protect your hands from cuts and scrapes, and a dust mask will protect your lungs from sawdust and other airborne particles.

Keep Your Workspace Clean and Organized

A cluttered workspace can lead to accidents. Keep your workspace clean and organized to prevent tripping hazards and to ensure that you have enough space to work safely. Make sure that all tools are stored in their proper place when not in use.

Use Tools Safely

Always use tools according to their intended purpose and manufacturer’s instructions. Make sure that blades are sharp and in good condition, and that all guards and safety features are in place and working properly. Never remove guards or safety features from tools.

Take Breaks

Working for long periods of time without a break can lead to fatigue and increased risk of accidents. Take frequent breaks to rest and stretch your muscles. This will help you stay alert and focused while working.

Have a First Aid Kit on Hand

Accidents can happen even when you take all the necessary precautions. Keep a first aid kit on hand in case of minor injuries. The kit should include items such as bandages, antiseptic, and tweezers.

By following these safety precautions, you can help ensure that your woodworking project is completed safely and without incident.

Maintaining Your Wooden Cabinet

Now that you have built your wooden cabinet, it is important to maintain it properly to ensure its longevity and keep it looking its best. Here are some tips to help you maintain your wooden cabinet:

Regular Cleaning

Regular cleaning is essential to keep your wooden cabinet looking its best. Use a soft, damp cloth to wipe down the cabinet and remove any dust or dirt. Avoid using harsh chemicals or abrasive cleaners, as these can damage the wood.

Avoid Excessive Moisture

Excessive moisture can cause the wood to warp or crack, so it is important to avoid getting your wooden cabinet too wet. If you need to clean a spill or stain, use a damp cloth and dry the area immediately afterward.

Polish the Wood

Polishing your wooden cabinet can help protect the wood and keep it looking shiny and new. Choose a high-quality polish that does not contain silicone or wax, and follow the manufacturer’s directions for application.

Check for Damage

Regularly inspect your wooden cabinet for any signs of damage, such as cracks or scratches. If you notice any damage, address it promptly to prevent it from getting worse.

Avoid Direct Sunlight

Direct sunlight can cause the wood to fade or discolor, so it is important to avoid placing your wooden cabinet in direct sunlight. If you cannot avoid placing it in a sunny location, consider using curtains or blinds to block the sunlight.

By following these tips, you can keep your wooden cabinet looking beautiful for years to come.

How to Make a Wooden Desk: A Beginner's Guide to Crafting Your Own Workspace

How to Make a Wooden Desk: A Beginner's Guide to Crafting Your Own Workspace

Looking to build your own wooden desk? Whether you’re a seasoned woodworker or a beginner, building your own desk can be a fun and rewarding project. Not only will you end up with a custom piece of furniture that perfectly fits your needs and style, but you’ll also have the satisfaction of knowing that you built it yourself.

Before you get started, you’ll need to decide on the type of desk you want to build. Do you want a simple, minimalist desk that can be built in a weekend, or are you looking for a more elaborate design that will require more time and skill? You’ll also need to consider the size and shape of your desk, as well as the type of wood you want to use. Once you’ve made these decisions, you’ll be ready to start gathering your materials and tools and getting to work on your new desk.

Understanding the Basics of Woodworking

make-a-wooden-desk

Woodworking is a rewarding and fulfilling hobby that allows you to create beautiful and functional pieces of furniture. However, before you start building your own wooden desk, there are a few basics you need to understand.

Types of Wood

There are many different types of wood available, each with its own unique characteristics. Some popular types of wood used in woodworking include:

  • Pine: A softwood that is easy to work with and relatively inexpensive.
  • Oak: A hardwood that is strong and durable, but can be difficult to work with due to its density.
  • Cherry: A hardwood that is known for its beautiful grain patterns and rich color.
  • Maple: A hardwood that is strong and durable, but can be difficult to work with due to its hardness.

When choosing wood for your desk, consider factors such as strength, durability, and appearance.

Safety Measures

Woodworking can be dangerous if proper safety measures are not taken. Always wear protective gear, such as safety glasses and earplugs, when working with power tools. Additionally, make sure to follow all safety instructions for each tool you use. Never rush or take shortcuts when working with wood.

Essential Tools

To build a wooden desk, you will need a few essential tools, including:

  • Saw: A saw is used to cut the wood to the desired size and shape.
  • Drill: A drill is used to make holes in the wood for screws and other fasteners.
  • Hammer: A hammer is used to drive nails and other fasteners into the wood.
  • Sandpaper: Sandpaper is used to smooth the wood and remove any rough edges.

Other useful tools include a measuring tape, square, and clamps.

By understanding the basics of woodworking, you will be well on your way to building your own beautiful and functional wooden desk. Remember to always prioritize safety and take your time to ensure a high-quality finished product.

Designing Your Wooden Desk

designing-your-wooden-desk

When it comes to designing your own wooden desk, there are a few key things to consider. By taking the time to think through these factors, you can create a desk that is both functional and visually appealing. Here are some sub-sections to help guide you through the design process:

Deciding the Size

The first step in designing your wooden desk is to decide on the size. Consider the space where the desk will be placed and how much room you need to work. You’ll want to make sure that your desk is large enough to accommodate all of your tools and equipment, but not so large that it takes up too much space in the room.

To help you determine the right size for your desk, take measurements of the area where it will be placed. Consider the height of the desk as well, and make sure that it is comfortable for you to work at for extended periods of time.

Choosing the Style

The style of your wooden desk is another important factor to consider. Do you want a modern, minimalist desk, or something more traditional? Think about the overall aesthetic of the room where the desk will be placed, and try to choose a style that complements it.

You’ll also want to consider the type of wood you’ll use for your desk. Different woods have different grains and colors, so choose one that matches your personal style and the look you’re going for.

Creating the Blueprint

Once you have an idea of the size and style of your desk, it’s time to create a blueprint. This will help you visualize the final product and ensure that everything fits together properly.

You can create a blueprint using software like SketchUp, or you can draw it by hand. Make sure to include all of the necessary measurements and details, including the size of the desk, the placement of drawers and shelves, and any other features you want to include.

By taking the time to design your wooden desk properly, you can create a beautiful and functional piece of furniture that will last for years to come.

Preparing the Wood

Before you start building your wooden desk, you need to prepare the wood. This involves selecting the right type of wood, cutting it to size, and sanding it to create a smooth surface.

Selecting the Wood

When selecting wood for your desk, you want to choose a type of wood that is sturdy and durable. Some popular options include oak, maple, and pine. You should also consider the color and grain pattern of the wood to ensure it matches your desired aesthetic.

Once you have selected the wood, you need to measure and cut it to the appropriate size.

Cutting the Wood

To cut the wood, you will need a saw. A miter saw or handsaw will work for this task. Make sure to measure the wood carefully before cutting to ensure accuracy.

If you are not comfortable using a saw, you can have the wood cut to size at a hardware store or lumber yard.

Sanding the Wood

Once the wood is cut to size, you need to sand it to create a smooth surface. Start with a coarse-grit sandpaper, such as 120-grit, and work your way up to a finer grit, such as 180-grit.

Make sure to sand with the grain of the wood to avoid creating scratches or marks. You can use a sanding block or an orbital sander to make the process easier.

After sanding, wipe the wood with a clean cloth to remove any dust or debris. Your wood is now ready to be assembled into a desk.

Assembling the Desk

Once you have all the pieces of your wooden desk cut and sanded, it’s time to put them together. This section will guide you through the process of assembling your desk. We will cover two sub-sections: Joining the Pieces and Securing the Structure.

Joining the Pieces

The first step in assembling your desk is to join the pieces together. You will need to use wood glue and clamps to ensure a strong bond between the pieces. Follow these steps to join the pieces:

  1. Apply wood glue to the edges of the pieces that will be joined together.
  2. Press the pieces together and use clamps to hold them in place.
  3. Wipe away any excess glue with a damp cloth.
  4. Allow the glue to dry completely before removing the clamps.

Securing the Structure

Once the pieces are joined together, you will need to secure the structure of the desk. This will ensure that your desk is sturdy and can hold the weight of your computer, books, and other items. Follow these steps to secure the structure:

  1. Attach the legs to the underside of the desk using wood screws.
  2. Install the cross supports between the legs to add stability to the desk.
  3. Attach the top of the desk to the frame using wood screws.
  4. Sand any rough edges or surfaces to ensure a smooth finish.

Congratulations! You have successfully assembled your wooden desk.

Finishing Touches

Applying the Finish

Now that you have assembled your wooden desk, it’s time to apply the finish. This will not only protect the wood but also enhance its beauty. There are various finishes you can choose from, such as stains, oils, and varnishes. Here are some tips to help you apply the finish:

  • Sand the surface of the desk with fine-grit sandpaper to remove any imperfections and ensure a smooth finish.
  • Apply the finish in thin coats using a brush or a cloth. It’s important to follow the manufacturer’s instructions and allow each coat to dry completely before applying the next one.
  • If you’re using a stain, make sure to wipe off any excess with a clean cloth after a few minutes. This will prevent the stain from becoming too dark or blotchy.
  • For a glossy finish, you can use a varnish or a polyurethane. Apply several coats, sanding lightly between each coat to remove any bumps or bubbles.

Adding Accessories

To make your wooden desk more functional and comfortable, you can add some accessories. Here are some ideas:

  • Desk lamp: A desk lamp will provide you with the right amount of light and reduce eye strain.
  • Desk organizer: Keep your desk clutter-free with a desk organizer. You can store pens, papers, and other office supplies in it.
  • Chair: Choose a comfortable chair that provides good support for your back. You’ll be spending a lot of time sitting at your desk, so it’s important to have a chair that is both comfortable and ergonomic.
  • Monitor stand: If you use a computer, a monitor stand will elevate your screen to eye level, reducing neck and eye strain.
  • Keyboard tray: A keyboard tray will help you maintain a good posture and prevent wrist strain.

With these finishing touches, your wooden desk will be ready for you to use and enjoy.

How to Make a Wooden Spear: A Beginner's Guide

How to Make a Wooden Spear: A Beginner's Guide

Are you interested in learning how to make a wooden spear? Spears have been used for hunting and fishing for thousands of years, and making your own can be a rewarding and useful skill to have. With just a few basic tools and materials, you can create a simple spear that will be effective for catching fish or small game.

To start, you will need to gather some materials. You can use a straight branch or pole as the shaft of your spear, and a sharp piece of flint or obsidian as the spearhead. If you don’t have access to these materials, you can also use a knife or other sharp tool to carve the spearhead from a piece of wood. Once you have your materials, you can begin the process of crafting your spear.

While making a wooden spear may seem daunting at first, it is actually a relatively simple process. With a little patience and practice, you can create a functional and effective tool that will serve you well in the wilderness. So why not give it a try and see what you can create?

Understanding the Basics of a Wooden Spear

how-to-make-a-wooden-spear

If you’re looking to make a wooden spear, it’s important to understand the basics of the tool before you start. A wooden spear consists of a long shaft with a pointed tip, and it has been used for hunting and fishing for thousands of years. Here are some key points to keep in mind:

Materials

The most important part of making a wooden spear is choosing the right materials. You’ll need a strong and straight piece of wood for the shaft, and a hard and durable material for the tip. Some common materials for the tip include bone, flint, or metal.

Design

The design of your spear will depend on what you plan to use it for. If you’re using it for hunting, you’ll want a longer and heavier spear with a sharp tip. If you’re using it for fishing, you’ll want a shorter and lighter spear with a barbed tip. Make sure to plan out your design before you start cutting and shaping the wood.

Tools

To make a wooden spear, you’ll need some basic tools such as a saw, a knife, and sandpaper. You may also need some specialized tools such as a drill or chisel, depending on the design of your spear.

Safety

It’s important to be safe when making a wooden spear. Make sure to wear protective gear such as gloves and eye goggles, and be careful when using sharp tools. Always cut away from your body and keep your fingers clear of the blade.

Choosing the Right Wood

When it comes to making a wooden spear, choosing the right wood is crucial. You want a wood that is strong, durable, and flexible enough to withstand the force of throwing or thrusting. Here are some of the most popular woods used for making wooden spears:

Ash Wood

Ash wood is one of the best woods for making a wooden spear. It is strong, flexible, and lightweight, making it easy to handle and maneuver. It is also readily available, making it a popular choice for many people.

Hickory Wood

Hickory wood is another great option for making a wooden spear. It is strong and durable, making it ideal for thrusting and throwing. It is also resistant to bending, which is important when using a spear.

Oak Wood

Oak wood is a popular choice for making a wooden spear because it is strong and durable. It is also readily available in many parts of the world, making it a convenient choice for many people.

Other Woods

While ash, hickory, and oak are the most popular woods for making a wooden spear, there are other woods that can be used as well. Some examples include maple, birch, and cherry wood.

When choosing a wood for your spear, it is important to consider the length and thickness of the wood, as well as its flexibility and strength. You want a wood that is straight, sturdy, and free of knots or other defects. With the right wood and some basic tools, you can craft a sharp and effective wooden spear that will serve you well in a variety of situations.

Shaping the Spear

Once you have selected the appropriate wood for your spear, it’s time to shape it. Shaping the spear involves trimming the wood to the desired length and carving the point.

Trimming the Wood

The first step in shaping your wooden spear is to trim it to the desired length. Use a hand saw to cut the wood to the desired length. Make sure to measure the length of the spear before cutting it to avoid any mistakes.

Carving the Point

After trimming the wood, it’s time to carve the point. This is the most crucial part of making a wooden spear, as the point determines the effectiveness of the weapon. Use a carving knife to shape the point of the spear. Start by making a small notch at the tip of the spear. Then, carve the wood around the notch to create the point.

Make sure to carve the point evenly on all sides to ensure that it is symmetrical. The point should be sharp enough to penetrate the target, but not too sharp that it becomes brittle and breaks easily.

Tips for Shaping the Spear

Here are some tips to keep in mind when shaping your wooden spear:

  • Use a sharp carving knife to make precise cuts and avoid any accidents.
  • Sand the spear after carving to smooth out any rough edges and give it a polished look.
  • Use a wood chisel to remove any excess wood and create precise cuts.
  • Make sure to wear protective gloves and goggles to avoid any injuries.
  • Take your time when shaping the spear to ensure that it is done correctly.

By following these tips, you can create a well-crafted wooden spear that is both functional and aesthetically pleasing.

Hardening the Spear

Once you have crafted your wooden spear, you need to harden it to make it more durable and effective. There are two main methods for hardening a wooden spear: using fire and using oil.

Using Fire

Fire-hardening your spear involves exposing it to heat to make it stronger and more resistant to breaking. Here’s how to do it:

  1. Start a small fire and let it burn down until you have a bed of hot coals.
  2. Hold the spear over the coals, rotating it slowly to expose all sides to the heat.
  3. Continue to heat the spear until the wood begins to darken and char slightly.
  4. Remove the spear from the heat and allow it to cool.

Fire-hardening your spear will make it stronger and more resistant to breaking, but it may also make it more brittle. Be careful not to overheat the spear, as this can cause it to crack or break.

Using Oil

Oil-hardening your spear involves soaking it in oil to make it more resistant to moisture and decay. Here’s how to do it:

  1. Choose an oil that is suitable for wood, such as linseed oil or tung oil.
  2. Pour the oil into a container that is large enough to hold the spear.
  3. Submerge the spear in the oil and let it soak for at least 24 hours.
  4. Remove the spear from the oil and wipe off any excess with a clean cloth.
  5. Allow the spear to dry completely before using it.

Oil-hardening your spear will make it more resistant to moisture and decay, but it may also make it heavier and less balanced. Use a light touch when applying the oil to avoid oversaturating the wood.

By hardening your wooden spear using either fire or oil, you can make it stronger, more durable, and more effective for hunting or survival situations.

Adding Features

adding-features

Attaching a Stone Tip

If you want to make your wooden spear even more deadly, you can attach a stone tip to the end. This will make it much sharper and more effective for hunting or self-defense. Here are the steps to attach a stone tip to your spear:

  1. Find a suitable stone – Look for a stone that is roughly the same size and shape as the tip of your spear. It should be hard and durable, and ideally, it should be sharp or pointed already.
  2. Prepare the stone – Use a hammer or another hard object to shape the stone into the desired shape. You may need to chip away at it to make it sharper or more pointed.
  3. Attach the stone to the spear – Use a strong adhesive or cordage to attach the stone to the end of the spear. Make sure it is securely fastened and won’t come loose during use.

Adding a Grip

Adding a grip to your spear can make it more comfortable to hold and easier to use. It can also provide additional traction and help prevent your hand from slipping during use. Here are some ways to add a grip to your spear:

  1. Use cordage – Wrap a length of cordage around the handle of your spear, starting at the base and working your way up. Tie it off securely at the top and trim any excess.
  2. Carve a grip – Use a knife or other sharp tool to carve a grip into the handle of your spear. You can make it as simple or as intricate as you like, but make sure it provides a comfortable and secure grip.
  3. Use tape – Wrap a length of tape around the handle of your spear, starting at the base and working your way up. Make sure it is securely fastened and won’t come loose during use.

Adding features to your wooden spear can make it more effective and easier to use. Whether you attach a stone tip or add a grip, these modifications can help you get the most out of your spear and improve your chances of success in the wild.

Safety Precautions While Making a Wooden Spear

When making a wooden spear, it’s important to take safety precautions to avoid any accidents or injuries. Here are a few safety tips to keep in mind:

1. Wear Protective Gear

Wear protective gear such as gloves and eye protection to prevent any injuries while handling sharp tools. Splinters and wood chips can also fly off during the process, so it’s important to protect your eyes.

2. Use Sharp Tools

Using dull tools can increase the risk of accidents. Make sure your tools are sharp and in good condition before using them.

3. Work in a Safe Area

Work in a safe and well-ventilated area. Avoid working near flammable materials or in an area with poor lighting.

4. Keep First Aid Kit Nearby

Keep a first aid kit nearby in case of any accidents or injuries. Make sure you know how to use it properly.

5. Follow Tool Safety Guidelines

Follow tool safety guidelines and manufacturer instructions when using power tools. Make sure to use them properly and safely.

By following these safety precautions, you can ensure a safe and enjoyable experience while making a wooden spear.

Maintaining Your Wooden Spear

Once you have crafted your wooden spear, you will want to ensure that it remains in good condition for future use. Here are some tips to help you maintain your wooden spear:

Keep it Dry

Water can damage your wooden spear, so it is important to keep it dry. After use, wipe it down with a dry cloth or towel. If your spear gets wet, allow it to dry completely before storing it.

Store it Properly

When not in use, store your wooden spear in a dry place, away from direct sunlight. You can hang it on a wall or store it horizontally on a shelf. Avoid storing it in a damp or humid area, as this can cause the wood to warp or rot.

Oil the Wood

To keep the wood from drying out and cracking, you can apply a coat of oil to your wooden spear. Use a natural oil, such as linseed or tung oil, and apply it with a cloth. Allow the oil to soak in for a few minutes, then wipe away any excess.

Sharpen the Point

Over time, the point of your wooden spear may become dull. To sharpen it, use a sharpening stone or a file. Hold the spear firmly and run the stone or file along the edge of the point, using a circular motion. Be careful not to remove too much wood, as this can weaken the spear.

Check for Damage

Before each use, inspect your wooden spear for any signs of damage. Look for cracks, splits, or other damage that could weaken the spear. If you notice any damage, do not use the spear until it has been repaired or replaced.

By following these simple tips, you can help ensure that your wooden spear remains in good condition for years to come.

How to Shorten Wooden Blinds: Quick and Easy Steps

How to Shorten Wooden Blinds: Quick and Easy Steps

Do you have wooden blinds that are too long for your window? Shortening them is a simple process that you can do yourself with just a few tools and some basic knowledge. In this article, we will provide step-by-step instructions on how to shorten your wooden blinds to fit your window perfectly.

Before you begin, it’s important to know that there are two types of wooden blinds: those with a cord and those with a wand. The process for shortening each type is slightly different, so make sure you know which type you have before you start. Once you have determined the type of blinds you have, you can follow the appropriate steps to shorten them. With a little patience and attention to detail, you can have your wooden blinds fitting perfectly in no time.

Understanding Wooden Blinds

shorten-wooden-blinds

Wooden blinds are a popular window treatment that can add warmth and style to any room. They are made of horizontal slats that can be adjusted to control the amount of light that enters the room. Wooden blinds are available in a variety of colors and finishes to match any decor.

When it comes to sizing, wooden blinds are typically made to fit standard window sizes. However, if your window is an odd size or shape, you may need to have your blinds custom made. It’s important to measure your window carefully to ensure that your blinds fit properly.

Wooden blinds are also available in different slat widths, ranging from 1 inch to 2 1/2 inches. The wider the slats, the more light they will let in when they are open. However, wider slats may also make the blinds heavier and harder to lift.

One thing to keep in mind when choosing wooden blinds is that they can be prone to warping in humid environments. If you live in a humid climate or plan to use your blinds in a bathroom or kitchen, you may want to consider faux wood blinds instead.

Overall, wooden blinds are a classic and versatile window treatment that can add beauty and functionality to any room in your home. With proper care and maintenance, they can last for many years to come.

Tools Needed for Shortening Wooden Blinds

When it comes to shortening wooden blinds, you will need a few tools to get the job done. Here are the essential tools you will need:

Measuring Tape

Before you start shortening your wooden blinds, you need to measure the length of the blinds and determine how much you need to shorten them. A measuring tape is an essential tool that will help you get accurate measurements.

Pencil

You will need a pencil to mark the spot where you need to cut the wooden blinds. Make sure the pencil is sharp so that you can make precise marks on the blinds.

Scissors

You will need a pair of scissors to cut the ladder strings of the wooden blinds. Make sure the scissors are sharp enough to cut through the strings easily.

Screwdriver

You will need a screwdriver to remove the end caps of the wooden blinds. This will allow you to remove the ladder strings and cut the blinds to the desired length.

With these tools in hand, you will be able to shorten your wooden blinds with ease. Just make sure to follow the instructions carefully and take your time to ensure that you get the job done right.

How to Measure Wooden Blinds for Shortening

If you have wooden blinds that are too long for your window, you can easily shorten them to fit. Before you begin, you’ll need to measure your blinds to determine how much to shorten them. Here’s how to do it:

  1. Measure the width of your window opening. This will give you the width measurement for your blinds. If you already have blinds installed, you can skip this step.
  2. Measure the length of your blinds. Use a measuring tape to measure the length of your blinds from the top of the headrail to the bottom of the slats.
  3. Determine how much you need to shorten your blinds. Subtract the desired length of your blinds from the current length. This will give you the amount you need to shorten your blinds.
  4. Decide where you want to make the cut. You can cut the slats themselves or the lift cords that hold the slats in place. If you cut the lift cords, be sure to tie a knot in the end to prevent the cords from slipping through the holes in the slats.
  5. Mark the spot where you want to make the cut. Use a pencil or a piece of tape to mark the spot where you want to cut your blinds.
  6. Double-check your measurements before making any cuts. Measure twice, cut once!

By following these simple steps, you can easily measure your wooden blinds for shortening. Once you’ve determined how much to shorten your blinds, you can move on to the next step of actually shortening them.

Marking the Desired Length

marking-the-desired-length

Shortening wooden blinds can be a simple and cost-effective way to update the look of your windows without having to replace the entire set of blinds. To begin, you’ll need to determine the desired length of your blinds.

  1. Measure the height of your window frame from the top to the bottom. This will give you an idea of how much length you need to remove from your blinds.
  2. Decide on the new length of your blinds. Keep in mind that you’ll need to mark the slat at or just below where the blind will stop, so make sure to account for the length of the bottom rail and any excess slats that may need to be removed.
  3. Mark the slat at the desired length. You can use a pencil or a piece of tape to mark the slat. Make sure the mark is clear and visible.
  4. Note which are the ladder strings and which are the lift strings. This will help you when it comes time to trim the strings.
  5. If you have multiple blinds, make sure to mark each one individually. This will help ensure that all of your blinds are the same length.

By following these steps, you can easily mark the desired length of your wooden blinds and prepare them for the next step in the shortening process.

Removing the Excess Slats

Shortening wooden blinds is a simple process that can be done at home with a few basic tools. One of the first steps to shortening your wooden blinds is to remove the excess slats. This is an important step because it will help you achieve the correct length for your blinds.

To remove the excess slats, you will need to follow these steps:

  1. First, lower your blinds all the way down so that you can easily access the bottom rail.
  2. Next, remove the end caps from the bottom rail, if they are already installed. This will allow you to slide out the slats in the bottom rail, exposing the inside of the rail.
  3. Select the slat that is even with or slightly below the window sill. This will be the new bottom slat.
  4. Remove the excess slats by cutting them with a pair of scissors or a saw. Be sure to cut the excess slats close to the bottom of the bottom rail.
  5. Once you have removed the excess slats, slide the bottom rail back into place and reattach the end caps.

By following these steps, you can easily remove the excess slats from your wooden blinds and achieve the correct length for your windows. Remember to measure twice and cut once to ensure that you shorten your blinds to the correct length.

Reassembling the Blinds

Now that you have shortened your wooden blinds, it’s time to reassemble them. Here are some steps to follow:

  1. First, make sure that all the slats are facing in the same direction. You can easily do this by laying them flat on a table or any other flat surface.
  2. Next, insert the lift cords back into the holes in the bottom rail. Make sure that they are properly aligned and that all the cords are in their respective holes.
  3. After that, insert the tilt rod back into the tilter mechanism. Make sure that it is properly aligned and that it moves smoothly.
  4. Now, reattach the end caps to the headrail. You can do this by sliding them into place and then tightening the screws with a screwdriver.
  5. Finally, reattach the valance clips to the headrail. Make sure that they are properly aligned and that they hold the valance securely in place.

Congratulations, you have successfully shortened and reassembled your wooden blinds! Now you can enjoy your new custom-fit window coverings.

Final Adjustments

Once you have shortened your wooden blinds to the desired length, you will need to make some final adjustments to ensure they are working properly. Here are some steps you can take to make sure your newly shortened blinds are functioning correctly:

  • Check the slats: After shortening your blinds, the slats may be uneven. To fix this, gently adjust the slats with your hands until they are even and level with each other.
  • Test the cords: Pull on the cords to make sure they are working properly. If the cords are too loose or too tight, adjust them as needed. Be careful not to overtighten the cords, as this can cause the blinds to become misaligned.
  • Reattach the bottom rail plugs: Once you have adjusted the cords, reattach the bottom rail plugs. Make sure they are securely in place.
  • Test the blinds: Test the blinds by raising and lowering them a few times. Make sure they are moving smoothly and evenly. If the blinds are still not working properly, you may need to make further adjustments.

By following these steps, you can ensure that your newly shortened wooden blinds are functioning properly and will provide you with years of use.

Safety Precautions While Shortening Wooden Blinds

Before you start shortening your wooden blinds, it is essential to take some safety precautions to prevent any injuries or damage to your property. Here are some safety tips to keep in mind:

1. Use Protective Gear

When shortening wooden blinds, you may need to use sharp tools such as scissors or pliers. To avoid injury, it is crucial to wear protective gear such as gloves and eye protection. Gloves will protect your hands from cuts, while eye protection will prevent any debris from getting into your eyes.

2. Keep Children and Pets Away

Shortening wooden blinds can be a hazardous task, and it is not recommended to let children or pets near the area. The tools used to shorten the blinds can be dangerous, and children or pets could accidentally hurt themselves.

3. Work in a Well-Lit Area

It is essential to work in a well-lit area when shortening wooden blinds. This will help you see what you are doing and prevent any accidents. If you are working in a dimly lit area, use a flashlight or work lamp to illuminate the workspace.

4. Follow the Manufacturer’s Instructions

Before shortening your wooden blinds, it is essential to read the manufacturer’s instructions carefully. This will help you understand the process and avoid any mistakes that could damage the blinds. If you are unsure about any step, contact the manufacturer for clarification.

By following these safety precautions, you can ensure that your wooden blinds are shortened correctly without any accidents. Remember, safety should always come first, and it is better to be safe than sorry.

How to Build a Wooden Picture Frame in 5 Easy Steps

How to Build a Wooden Picture Frame in 5 Easy Steps

If you’re looking to add a personal touch to your home decor, building your own wooden picture frames can be a great place to start. Not only do they add a rustic feel to your space, but they also allow you to showcase your favorite photos in a unique way. With a few basic tools and some simple steps, you can create custom frames that perfectly match your style.

Before you begin, it’s important to choose the right type of wood for your project. Softwoods like pine and cedar are easy to work with and can be found at most home improvement stores. Hardwoods like oak and cherry are more durable and offer a more polished look, but they can be more expensive. Once you’ve selected your wood, you’ll need to measure and cut it to the desired size. From there, you’ll use basic tools like a saw and sander to shape the wood and create the frame. Whether you’re a seasoned woodworker or a beginner, building a wooden picture frame is a fun and rewarding project that anyone can tackle.

Understanding the Basics

build-a-wooden-picture-frame

Building a wooden picture frame is a great way to showcase your favorite photos or artwork. With a few basic tools and some lumber, you can create a custom frame that perfectly fits your style and décor. In this section, we’ll cover the basics of building a wooden picture frame, including the types of wood to use and the tools you’ll need.

Types of Wood

When it comes to building a picture frame, you’ll want to choose a wood that is both attractive and durable. Some popular options include:

  • Oak: A strong and durable wood that is perfect for larger frames.
  • Maple: A light-colored wood that is easy to stain or paint.
  • Cherry: A beautiful and richly colored wood that is perfect for smaller frames.
  • Walnut: A dark and luxurious wood that is great for more formal or elegant frames.

When selecting your wood, be sure to choose boards that are straight and free of knots or other defects. You’ll also want to consider the grain pattern of the wood, as this can affect the overall look of your frame.

Choosing the Right Tools

To build a wooden picture frame, you’ll need a few basic tools, including:

  • Table saw: This will be used to rip your lumber to the correct size.
  • Miter saw: This will be used to cut your frame pieces to the correct length.
  • Router: This will be used to create a groove for your glass and backing.
  • Clamps: These will be used to hold your frame pieces together while the glue dries.
  • Sandpaper: This will be used to smooth out any rough edges or surfaces.

You may also want to invest in a few additional tools, such as a nail gun or a biscuit joiner, depending on the complexity of your frame design.

With these basics in mind, you’re ready to start building your own wooden picture frame.

Designing Your Picture Frame

When it comes to building a wooden picture frame, the design is just as important as the construction. A well-designed frame can enhance the beauty of your artwork and add a personal touch to your space. Here are some tips on how to design your picture frame.

Determining the Size

The first step in designing your picture frame is to determine the size of your artwork. Measure the width and height of your artwork and add an inch to each measurement to allow for the frame to overlap the artwork. This will be the size of your frame. Keep in mind that larger frames will require thicker and sturdier wood to support the weight of the artwork.

Choosing the Style

Once you have determined the size of your frame, you can choose the style that best suits your artwork and personal taste. Here are some popular styles to consider:

  • Traditional: A classic style with simple, clean lines and minimal ornamentation.
  • Ornate: A decorative style with intricate details and embellishments.
  • Rustic: A natural, earthy style with rough-hewn wood and a distressed finish.
  • Modern: A sleek, minimalist style with clean lines and a smooth finish.

Consider the style of your artwork and the decor of your space when choosing the style of your frame. A traditional frame may be best suited for a classic painting, while a rustic frame may complement a landscape photograph. A modern frame may work well with a contemporary abstract piece.

In summary, designing your picture frame involves determining the size of your artwork and choosing a style that complements both your artwork and your space. Keep these tips in mind when designing your frame to create a beautiful and personalized finished product.

Preparing the Wood

Before you start building your wooden picture frame, it is essential to prepare the wood properly. This process involves cutting and sanding the wood to achieve a smooth and even surface.

Cutting the Wood

The first step in preparing the wood is to cut it to the required size. You can use a table saw or a miter saw to cut the wood. It is essential to measure the wood accurately before cutting it to avoid any mistakes.

When cutting the wood, it is crucial to use the right blade for the job. A crosscut blade is ideal for cutting across the grain, while a rip blade is suitable for cutting along the grain. Using the wrong blade can result in a rough and uneven cut.

Sanding the Wood

After cutting the wood, the next step is to sand it to achieve a smooth and even surface. Sanding helps to remove any rough edges and splinters, making the wood easier to work with.

Start by using a coarse-grit sandpaper to remove any rough spots or imperfections on the wood. Then, switch to a finer-grit sandpaper to achieve a smooth surface. It is essential to sand the wood evenly to avoid any unevenness in the final product.

When sanding the wood, it is crucial to wear protective gear such as gloves, goggles, and a dust mask. Sanding produces a lot of dust, which can be harmful to your health if inhaled.

In conclusion, preparing the wood is an essential step in building a wooden picture frame. By cutting and sanding the wood properly, you can achieve a smooth and even surface, making it easier to work with.

Assembling the Frame

assembling-the-frame

Once you have all the pieces cut to size, it’s time to assemble your wooden picture frame. This section will cover the two main steps of joining the pieces and securing the corners.

Joining the Pieces

To join the pieces of your wooden picture frame, you will need wood glue and plastic pegs. Follow these steps:

  1. Apply a drop of wood glue to four of the eight miter faces.
  2. Spread the glue thinly over the miter face.
  3. Join the pieces together, making sure the corners are flush.
  4. Insert the plastic pegs into the pre-drilled holes in the back of the frame.

Securing the Corners

To secure the corners of your wooden picture frame, you have a few options:

  • Use a band clamp to hold the corners together while the glue dries.
  • Use corner clamps to hold the corners together while the glue dries.
  • Use a brad nailer to secure the corners.

If you choose to use a brad nailer, be sure to countersink the nails and fill the holes with wood filler before sanding and finishing your frame.

Once your frame is assembled and the glue is dry, you can sand it smooth and apply your finish of choice. Congratulations, you’ve built your own wooden picture frame!

Finishing Touches

Once you’ve assembled your wooden picture frame, it’s time to add the finishing touches that will make it look polished and professional. This section will cover two important steps: applying the finish and adding the glass and picture.

Applying the Finish

The finish you choose for your picture frame will depend on your personal preference and the look you’re going for. Some common options include stain, paint, or a clear coat to showcase the natural beauty of the wood.

Before applying any finish, make sure the frame is clean and free of dust and debris. Sand the frame lightly to smooth out any rough spots or imperfections. Then, apply the finish according to the manufacturer’s instructions. You may need to apply multiple coats, allowing each coat to dry completely before applying the next.

Adding the Glass and Picture

Once the finish has dried, it’s time to add the glass and picture to your frame. Start by cleaning the glass to remove any fingerprints or smudges. Then, carefully place the glass into the frame, making sure it fits snugly.

Next, add the picture. If you’re using a mat, make sure the picture is centered and straight within the mat. Then, carefully place the mat and picture into the frame, making sure everything is lined up correctly.

Finally, add any hardware you need to hang the frame. This may include picture hangers, wire, or hooks. Make sure the hardware is securely attached to the frame, and test the frame to make sure it hangs straight.

With these finishing touches, your wooden picture frame is complete and ready to display your favorite photo or artwork.