Tag Archives: home improvement stores

how-to-make-a-wooden-flag

How to Make a Wooden Flag: Step-by-Step Guide for Beginners

Do you want to show your love for your country and your woodworking skills at the same time? Making a wooden flag is a great way to do both. With just a few tools and materials, you can create a beautiful wooden flag that you can display in your home or office.

There are many different ways to make a wooden flag, from simple designs to more complex ones. You can use a variety of woods, stains, and finishes to create a unique look that reflects your personal style. Whether you are a beginner or an experienced woodworker, making a wooden flag is a fun and rewarding project that you can enjoy for years to come.

In this article, we will show you how to make a wooden flag step-by-step. We will cover everything from choosing the right wood to cutting and assembling the pieces. Whether you want to make a rustic American flag or a sleek modern design, we have the tips and techniques you need to create a beautiful wooden flag that you can be proud of.

Understanding the Basics of Woodworking

how-to-make-a-wooden-flag

Woodworking is a rewarding and enjoyable hobby that can produce beautiful and functional pieces. If you’re interested in making a wooden flag, it’s important to understand the basics of woodworking before you start. This section will cover the basics of choosing the right wood, the required tools and accessories, and safety measures to keep in mind.

Choosing the Right Wood

When making a wooden flag, it’s important to choose the right type of wood. Cedar is a popular choice because it’s durable, lightweight, and has a natural resistance to decay. Pine and reclaimed wood are other options to consider. Make sure the wood you choose is about 3/4″ thick and has a smooth surface.

Required Tools and Accessories

To make a wooden flag, you’ll need a few basic tools and accessories. These include:

  • Saw (hand saw, jig saw, circular saw, or miter saw)
  • Palm sander (or sandpaper and sanding block)
  • Hammer or drill
  • Wood glue (optional)

Having the right tools and accessories can make the woodworking process much easier and more enjoyable.

Safety Measures

Woodworking can be dangerous if proper safety measures aren’t taken. Here are a few safety tips to keep in mind:

  • Wear safety goggles to protect your eyes from sawdust and debris.
  • Use a dust mask to avoid inhaling sawdust.
  • Always use sharp tools to prevent accidents.
  • Keep your work area clean and organized to avoid tripping hazards.
  • Use clamps to hold your workpiece in place while you’re cutting or sanding.

By following these safety measures, you can enjoy woodworking safely and without incident.

Designing Your Wooden Flag

designing-your-wooden-flag

When making a wooden flag, designing the flag is an essential step that determines the final look of your project. Here are some sub-sections that will guide you on how to design your wooden flag.

Sketching the Design

Before starting the project, you need to sketch the design of your flag on paper. This step helps you to visualize how the final product will look like and make necessary adjustments before starting. You can sketch the flag using a pencil and paper or use a computer program to design it.

When sketching, consider the number of stripes you want, the size of the union, and the placement of the stars. You can also decide to add other features such as text or symbols. Remember, the design should be simple and easy to replicate.

Determining the Size

The size of your wooden flag depends on the location where you plan to hang it. If you plan to hang it indoors, you can make it smaller than an outdoor flag. If you plan to hang it outdoors, you need to consider the distance from which it will be viewed.

A standard size for an outdoor flag is 3 feet by 5 feet. However, you can make it larger or smaller depending on your preference. When determining the size, consider the size of the wooden boards you plan to use and the number of stripes you want.

In conclusion, designing your wooden flag is an important step in creating a beautiful and unique flag. By sketching the design and determining the size, you can create a flag that meets your specific needs and preferences.

Cutting and Shaping the Wood

Before you can assemble your wooden American flag, you’ll need to cut and shape the wood. Here’s what you need to know:

Making the Stripes

To make the stripes, you’ll need seven 1 1/2″ x 3/4″ pine boards, each 8 feet long. You can find these at Menards, Lowes, or other home improvement stores. Cut each board down to 37 inches in length. Sand the edges of each board to smooth out any rough spots.

Creating the Union

For the union, you’ll need a piece of pine cut to size. You can use the same type of pine as the stripes, or you can use a different type of wood for contrast. Cut the union to 19 1/2 inches wide by 13 inches tall. Sand the edges to smooth them out.

Once you have all of your pieces cut, it’s time to shape them. You can use a jigsaw or a circular saw to create the shape of the flag. Here’s how:

  1. Lay out your stripes in the correct order, with the union in the top left corner.
  2. Use a pencil to sketch out the shape of the flag on the top board.
  3. Use a jigsaw or circular saw to carefully cut along the pencil lines.
  4. Sand the edges of the flag to smooth out any rough spots.

Congratulations! You’ve now cut and shaped the wood for your wooden American flag. It’s time to move on to the next step: painting.

Assembling the Wooden Flag

Once you have completed the cutting and sanding of the wooden pieces, it is time to assemble the flag. This section will guide you through the process of attaching the stripes and fixing the union.

Attaching the Stripes

To attach the stripes, you will need wood glue and clamps. Apply a thin layer of wood glue to the back of each stripe and carefully place it onto the backing board. Use clamps to hold the stripe in place while the glue dries. Repeat this process for all the stripes, making sure to leave space between each stripe for the union.

Fixing the Union

The union is the blue field with the stars on the flag. To fix the union, you will need to cut a piece of wood to size and sand it smooth. Once you have the wood ready, you can start marking out the position of the stars. Use a stencil or a star-shaped cookie cutter to trace the stars onto the wood.

Once you have marked out the stars, you can start drilling holes for them. Use a drill bit that is slightly larger than the diameter of the dowels you will use for the stars. Drill the holes to a depth that is slightly shorter than the length of the dowels.

Next, apply a thin layer of wood glue to the back of the union and carefully place it onto the backing board, making sure to align it with the stripes. Insert the dowels into the holes you drilled earlier and tap them in gently with a mallet. Allow the glue to dry completely before moving on to the next step.

Congratulations, you have now assembled your wooden American flag!

Finishing Touches

Once you have constructed your wooden flag, it is time to add the finishing touches. This section will guide you through the process of sanding, painting, and applying a sealant to your flag.

Sanding the Wood

Before you start painting, you need to sand your flag to ensure that the surface is smooth and free of any rough spots or splinters. Start with a coarse grit sandpaper and work your way up to a finer grit until the wood is smooth to the touch. Be sure to wipe away any dust or debris before moving on to the next step.

Painting Your Flag

Now it’s time to add some color to your flag. You can use any combination of colors you like, but for a traditional American flag, you will need red, white, and blue paint. You can use spray paint or brush-on paint, but be sure to use a paint that is suitable for wood surfaces.

Start by painting the blue rectangle in the top left corner of your flag. Once the blue paint has dried, use painter’s tape to mask off the areas of the flag that will be painted red. Apply the red paint and allow it to dry completely. Finally, remove the painter’s tape and mask off the areas that will be painted white. Apply the white paint and allow it to dry completely.

Applying the Sealant

The final step in finishing your wooden flag is to apply a sealant to protect it from the elements. There are many types of sealants available, but for this project, we recommend using a clear polyurethane spray. Apply the spray in a well-ventilated area and follow the manufacturer’s instructions for best results.

Once the sealant has dried, your wooden flag is complete. Hang it on a wall or display it proudly in your home. Congratulations on a job well done!

assembling-the-frame

How to Build a Wooden Picture Frame in 5 Easy Steps

If you’re looking to add a personal touch to your home decor, building your own wooden picture frames can be a great place to start. Not only do they add a rustic feel to your space, but they also allow you to showcase your favorite photos in a unique way. With a few basic tools and some simple steps, you can create custom frames that perfectly match your style.

Before you begin, it’s important to choose the right type of wood for your project. Softwoods like pine and cedar are easy to work with and can be found at most home improvement stores. Hardwoods like oak and cherry are more durable and offer a more polished look, but they can be more expensive. Once you’ve selected your wood, you’ll need to measure and cut it to the desired size. From there, you’ll use basic tools like a saw and sander to shape the wood and create the frame. Whether you’re a seasoned woodworker or a beginner, building a wooden picture frame is a fun and rewarding project that anyone can tackle.

Understanding the Basics

build-a-wooden-picture-frame

Building a wooden picture frame is a great way to showcase your favorite photos or artwork. With a few basic tools and some lumber, you can create a custom frame that perfectly fits your style and décor. In this section, we’ll cover the basics of building a wooden picture frame, including the types of wood to use and the tools you’ll need.

Types of Wood

When it comes to building a picture frame, you’ll want to choose a wood that is both attractive and durable. Some popular options include:

  • Oak: A strong and durable wood that is perfect for larger frames.
  • Maple: A light-colored wood that is easy to stain or paint.
  • Cherry: A beautiful and richly colored wood that is perfect for smaller frames.
  • Walnut: A dark and luxurious wood that is great for more formal or elegant frames.

When selecting your wood, be sure to choose boards that are straight and free of knots or other defects. You’ll also want to consider the grain pattern of the wood, as this can affect the overall look of your frame.

Choosing the Right Tools

To build a wooden picture frame, you’ll need a few basic tools, including:

  • Table saw: This will be used to rip your lumber to the correct size.
  • Miter saw: This will be used to cut your frame pieces to the correct length.
  • Router: This will be used to create a groove for your glass and backing.
  • Clamps: These will be used to hold your frame pieces together while the glue dries.
  • Sandpaper: This will be used to smooth out any rough edges or surfaces.

You may also want to invest in a few additional tools, such as a nail gun or a biscuit joiner, depending on the complexity of your frame design.

With these basics in mind, you’re ready to start building your own wooden picture frame.

Designing Your Picture Frame

When it comes to building a wooden picture frame, the design is just as important as the construction. A well-designed frame can enhance the beauty of your artwork and add a personal touch to your space. Here are some tips on how to design your picture frame.

Determining the Size

The first step in designing your picture frame is to determine the size of your artwork. Measure the width and height of your artwork and add an inch to each measurement to allow for the frame to overlap the artwork. This will be the size of your frame. Keep in mind that larger frames will require thicker and sturdier wood to support the weight of the artwork.

Choosing the Style

Once you have determined the size of your frame, you can choose the style that best suits your artwork and personal taste. Here are some popular styles to consider:

  • Traditional: A classic style with simple, clean lines and minimal ornamentation.
  • Ornate: A decorative style with intricate details and embellishments.
  • Rustic: A natural, earthy style with rough-hewn wood and a distressed finish.
  • Modern: A sleek, minimalist style with clean lines and a smooth finish.

Consider the style of your artwork and the decor of your space when choosing the style of your frame. A traditional frame may be best suited for a classic painting, while a rustic frame may complement a landscape photograph. A modern frame may work well with a contemporary abstract piece.

In summary, designing your picture frame involves determining the size of your artwork and choosing a style that complements both your artwork and your space. Keep these tips in mind when designing your frame to create a beautiful and personalized finished product.

Preparing the Wood

Before you start building your wooden picture frame, it is essential to prepare the wood properly. This process involves cutting and sanding the wood to achieve a smooth and even surface.

Cutting the Wood

The first step in preparing the wood is to cut it to the required size. You can use a table saw or a miter saw to cut the wood. It is essential to measure the wood accurately before cutting it to avoid any mistakes.

When cutting the wood, it is crucial to use the right blade for the job. A crosscut blade is ideal for cutting across the grain, while a rip blade is suitable for cutting along the grain. Using the wrong blade can result in a rough and uneven cut.

Sanding the Wood

After cutting the wood, the next step is to sand it to achieve a smooth and even surface. Sanding helps to remove any rough edges and splinters, making the wood easier to work with.

Start by using a coarse-grit sandpaper to remove any rough spots or imperfections on the wood. Then, switch to a finer-grit sandpaper to achieve a smooth surface. It is essential to sand the wood evenly to avoid any unevenness in the final product.

When sanding the wood, it is crucial to wear protective gear such as gloves, goggles, and a dust mask. Sanding produces a lot of dust, which can be harmful to your health if inhaled.

In conclusion, preparing the wood is an essential step in building a wooden picture frame. By cutting and sanding the wood properly, you can achieve a smooth and even surface, making it easier to work with.

Assembling the Frame

assembling-the-frame

Once you have all the pieces cut to size, it’s time to assemble your wooden picture frame. This section will cover the two main steps of joining the pieces and securing the corners.

Joining the Pieces

To join the pieces of your wooden picture frame, you will need wood glue and plastic pegs. Follow these steps:

  1. Apply a drop of wood glue to four of the eight miter faces.
  2. Spread the glue thinly over the miter face.
  3. Join the pieces together, making sure the corners are flush.
  4. Insert the plastic pegs into the pre-drilled holes in the back of the frame.

Securing the Corners

To secure the corners of your wooden picture frame, you have a few options:

  • Use a band clamp to hold the corners together while the glue dries.
  • Use corner clamps to hold the corners together while the glue dries.
  • Use a brad nailer to secure the corners.

If you choose to use a brad nailer, be sure to countersink the nails and fill the holes with wood filler before sanding and finishing your frame.

Once your frame is assembled and the glue is dry, you can sand it smooth and apply your finish of choice. Congratulations, you’ve built your own wooden picture frame!

Finishing Touches

Once you’ve assembled your wooden picture frame, it’s time to add the finishing touches that will make it look polished and professional. This section will cover two important steps: applying the finish and adding the glass and picture.

Applying the Finish

The finish you choose for your picture frame will depend on your personal preference and the look you’re going for. Some common options include stain, paint, or a clear coat to showcase the natural beauty of the wood.

Before applying any finish, make sure the frame is clean and free of dust and debris. Sand the frame lightly to smooth out any rough spots or imperfections. Then, apply the finish according to the manufacturer’s instructions. You may need to apply multiple coats, allowing each coat to dry completely before applying the next.

Adding the Glass and Picture

Once the finish has dried, it’s time to add the glass and picture to your frame. Start by cleaning the glass to remove any fingerprints or smudges. Then, carefully place the glass into the frame, making sure it fits snugly.

Next, add the picture. If you’re using a mat, make sure the picture is centered and straight within the mat. Then, carefully place the mat and picture into the frame, making sure everything is lined up correctly.

Finally, add any hardware you need to hang the frame. This may include picture hangers, wire, or hooks. Make sure the hardware is securely attached to the frame, and test the frame to make sure it hangs straight.

With these finishing touches, your wooden picture frame is complete and ready to display your favorite photo or artwork.

Where to Buy Wooden Dowels: A Guide for Crafters and DIY Enthusiasts

Looking to buy wooden dowels for your next project? Whether you’re a DIY enthusiast or a professional woodworker, finding the right wooden dowels can be a challenge. Fortunately, there are many options available both online and in-store to suit your needs.

One popular option for purchasing wooden dowels is home improvement stores such as Lowes and Home Depot. These stores offer a wide variety of dowels in different sizes, materials, and finishes. You can browse their selection in-store or online and even have them delivered to your doorstep.

Another great option is woodworking supply stores like Woodcraft. They offer a large selection of wooden dowels, including fluted and grooved options, as well as dowel pins. You can also find specialty dowels, such as those made from exotic woods, for unique projects. With so many options available, you’re sure to find the perfect wooden dowels for your next project.

Understanding Wooden Dowels

If you are new to woodworking, you may be wondering what wooden dowels are and how they are used. Simply put, a wooden dowel is a cylindrical rod made of wood that is used to join two pieces of wood together. They are available in a variety of sizes and lengths, making them a versatile option for many different projects.

One of the most common uses for wooden dowels is to create concealed joints. By drilling a hole into one piece of wood and inserting a dowel, you can then connect it to another piece of wood. This creates a strong joint that is hidden from view, resulting in a clean and finished look.

When selecting wooden dowels, there are a few factors to consider. First, you will want to choose the appropriate diameter for your project. Dowels typically range in diameter from 1/8″ to 1″, with larger sizes available for specialty projects. You will also want to consider the length of the dowel, as this will determine how deep you need to drill your holes.

It is important to note that not all wooden dowels are created equal. Some dowels may be made from lower quality wood, which can result in weaker joints. Make sure to choose dowels made from high-quality wood, such as poplar or oak, to ensure a strong and reliable joint.

Overall, wooden dowels are a simple and effective way to join two pieces of wood together. By understanding the basics of wooden dowels, you can confidently choose the right size and type for your project and create strong and beautiful joints.

Local Store Options

If you need wooden dowels, you don’t have to look far. You can find them at your local home improvement store or craft store. Here are some options to consider:

Home Improvement Stores

Home improvement stores are a great place to find wooden dowels. They usually have a variety of sizes and types, and you can often buy them in bulk. Here are some popular home improvement stores where you can find wooden dowels:

Store Selection
Lowe’s Poplar and oak dowels in various sizes
Home Depot Raw wood round dowels in various sizes
Menards Pine dowels in various sizes

Craft Stores

Craft stores are another option for finding wooden dowels. They usually have a smaller selection than home improvement stores, but they may have more specialty dowels, such as square or fluted dowels. Here are some popular craft stores where you can find wooden dowels:

  • Michaels
  • Jo-Ann Fabric and Craft Stores
  • Hobby Lobby

When shopping for wooden dowels at a craft store, be sure to check the woodworking section as well as the general craft section. Some stores may have dowels in both areas.

No matter where you decide to buy your wooden dowels, be sure to check the quality of the wood. Look for dowels that are straight and smooth, with no cracks or knots. With a little bit of shopping around, you can find the perfect wooden dowels for your project.

Online Marketplaces

If you’re looking to buy wooden dowels, online marketplaces are a great place to start. Here are three popular options:

Amazon

Amazon is one of the largest online marketplaces in the world, and it’s a great place to find wooden dowels. You can find a wide variety of sizes and types, and many sellers offer free shipping. Plus, with Amazon Prime, you can get free two-day shipping on many items.

When shopping on Amazon, be sure to read reviews from other customers to ensure you’re getting a quality product. You can also use filters to narrow down your search by size, material, and more.

Etsy

Etsy is a popular marketplace for handmade and vintage items, and it’s a great place to find unique wooden dowels. Many sellers on Etsy specialize in woodworking and offer a wide variety of sizes and types of dowels.

When shopping on Etsy, be sure to read the seller’s reviews and policies before making a purchase. You can also message the seller directly if you have any questions or specific requests.

eBay

eBay is another popular online marketplace where you can find wooden dowels. Many sellers on eBay offer bulk quantities at discounted prices, which can be great if you need a large quantity of dowels.

When shopping on eBay, be sure to check the seller’s feedback rating and read reviews from other customers to ensure you’re getting a quality product. You can also use filters to narrow down your search by size, type, and more.

Overall, online marketplaces are a convenient and affordable way to buy wooden dowels. Just be sure to do your research and read reviews before making a purchase to ensure you’re getting a quality product.

Specialty Woodworking Stores

If you’re looking for a wider selection of wooden dowels and woodworking supplies, specialty woodworking stores might be the way to go. These stores cater specifically to woodworkers and often carry a larger variety of products than your typical hardware store.

One popular specialty woodworking store is Woodcraft. They have a wide selection of wooden dowels in different sizes and types of wood, including maple and walnut. They also offer dowel pins, which can be useful for joining pieces of wood together.

Rockler is another specialty woodworking store that carries wooden dowels. They offer dowels in a variety of sizes and wood types, including birch, oak, and cherry. Additionally, they have a selection of pre-cut dowel rods for specific projects.

If you’re looking for a more personalized experience, consider visiting a local woodworking store. These stores often have knowledgeable staff who can help you find the right wooden dowels for your project. Plus, you’ll be supporting a local business.

Overall, specialty woodworking stores can be a great option for those looking for a wider selection of wooden dowels and woodworking supplies. Just be sure to compare prices and quality before making a purchase.

Factors to Consider When Buying

When purchasing wooden dowels, there are several factors to consider to ensure that you get the right product for your needs. Here are some of the most important factors to keep in mind:

Size and Shape

One of the first things to consider is the size and shape of the dowel. Dowels come in a range of sizes, from thin and delicate to thick and sturdy. The diameter of the dowel is an important consideration, as it will determine how much weight the dowel can support. Additionally, the shape of the dowel can vary, with some dowels being round and others being square or hexagonal. Consider the specific needs of your project when selecting the size and shape of your dowel.

Type of Wood

The type of wood used to make the dowel is another important factor to consider. Different types of wood have different strengths and characteristics, so it’s important to choose a wood that is appropriate for your project. Some common types of wood used for dowels include poplar, oak, maple, and cherry. Consider the color, grain, and other characteristics of the wood when making your selection.

Price

Finally, price is another important consideration when purchasing wooden dowels. Prices can vary depending on the size, shape, and type of wood used to make the dowel. While it may be tempting to opt for the cheapest option available, it’s important to remember that quality is important. A higher-quality dowel may be more expensive, but it will likely be stronger and more durable, making it a better value in the long run.

When purchasing wooden dowels, be sure to consider the size and shape, type of wood, and price to ensure that you get the right product for your needs.

DIY Wooden Dowels

Making your own wooden dowels can be a fun and rewarding DIY project. Plus, it can save you money compared to buying pre-made dowels. Here are some tips and steps to help you make your own wooden dowels.

Materials Needed

  • Hardwood block (such as maple)
  • Saw
  • Drill
  • Dowel plate or dowel jig
  • Sandpaper

Steps

  1. Cut the hardwood block into a square shape that is slightly larger than the desired diameter of your dowel.
  2. Use a saw to cut the block into a cylinder shape, making sure to keep the diameter consistent.
  3. Sand the cylinder until it is smooth and the desired diameter is achieved.
  4. Use a drill to create a hole in the center of the cylinder.
  5. Insert the cylinder into the dowel plate or jig.
  6. Use a hammer or mallet to pound the cylinder through the plate or jig, creating a perfectly round dowel.
  7. Sand the dowel until it is smooth.

Tips

  • Make sure to use a hardwood block for your dowel, as softwoods may not hold up well.
  • Use a saw with a fine-toothed blade to ensure a smooth cut.
  • When drilling the hole in the center of the cylinder, make sure to keep the drill bit centered to avoid creating an off-center dowel.
  • Use a dowel plate or jig to ensure a perfectly round dowel.
  • Sand the dowel thoroughly to remove any rough spots or splinters.

By following these steps and tips, you can easily make your own wooden dowels for your next woodworking project. It may take a bit of practice to get the hang of it, but once you do, you’ll be able to create custom-sized dowels for any project.

Understanding 2×4 Studs

What Kind of Wood is a 2×4 Stud? A Quick Guide to Identifying the Most Commonly Used Lumber for Framing.

If you’re new to woodworking or DIY projects, you might be wondering what type of wood is used for a 2×4 stud. The most common type of wood for 2×4 studs is pine, but they can also be made from other types of lumber, such as spruce or fir. Knowing the different types of wood can be helpful when selecting materials for your project.

Pine is a softwood that is easy to work with and is readily available at most home improvement stores. It’s also one of the most affordable woods, making it a popular choice for beginners. Spruce and fir are also softwoods that are commonly used for 2×4 studs. These woods are often chosen for their strength and durability, and they are also easy to work with.

Understanding 2×4 Studs

Understanding 2×4 Studs

If you are planning a construction project, you may have come across the term “2×4 studs.” A 2×4 stud is a piece of wood that is commonly used to build walls, frames, and other structures. But what type of wood is a 2×4 stud made of?

The most common type of wood used for 2×4 studs is pine. However, they can also be made from other types of lumber, such as spruce or fir. It is important to note that 2×4 studs made from different types of wood may have different properties, such as strength and durability.

When selecting materials for your project, it is important to consider the properties of the wood you are using. Softwoods like pine, spruce, and fir are commonly used for 2×4 studs because they are lightweight, easy to work with, and relatively inexpensive. Hardwoods, on the other hand, are denser and more difficult to work with, making them better suited for applications like flooring, decking, and furniture making.

It is also important to consider the dimensions of 2×4 studs. Despite their name, 2×4 studs are not actually 2 inches by 4 inches. Rather, they measure 1.5 inches by 3.5 inches. This is because the wood is planed and smoothed down to these dimensions for consistency and ease of use.

In summary, 2×4 studs are commonly made from softwoods like pine, spruce, and fir. They are lightweight, easy to work with, and relatively inexpensive. When selecting materials for your project, it is important to consider the properties of the wood you are using and to be aware of the actual dimensions of 2×4 studs.

Types of Wood for 2×4 Studs

When it comes to choosing the right type of wood for your 2×4 studs, there are a few options to consider. The most common types of wood used for 2×4 studs are pine, spruce, and fir. Each type of wood has its own unique characteristics and advantages.

Pine

Pine is the most commonly used wood for 2×4 studs. It is readily available and affordable, making it a popular choice for builders and DIY enthusiasts alike. Pine is a softwood, which means it is easy to work with and can be cut and shaped with basic tools. It is also lightweight, which makes it easy to transport and handle.

Spruce

Spruce is another popular choice for 2×4 studs. It is a softwood, like pine, but it is slightly stronger and more durable. Spruce is also known for its straight grain, which makes it easy to work with and gives it a uniform appearance. It is a good choice for projects that require a strong, stable wood.

Fir

Fir is a dense, strong wood that is often used for structural applications. It is a softwood, but it is harder and more durable than pine or spruce. Fir is also resistant to rot and decay, which makes it a good choice for outdoor projects. It is slightly more expensive than pine or spruce, but it is worth the investment for its strength and durability.

When choosing the right type of wood for your 2×4 studs, it is important to consider your specific needs and budget. Pine is a good choice for basic projects, while spruce and fir are better suited for projects that require a stronger, more durable wood. Whatever type of wood you choose, be sure to consult with a professional if you are unsure about which type is best for your specific needs.

Factors Affecting Wood Choice

When choosing the type of wood for your 2×4 studs, there are several factors to consider. These factors include climate, construction type, and budget.

Climate

The climate of the area where the wood will be used is an important factor to consider when selecting the type of wood for your 2×4 studs. Different types of wood have different levels of resistance to moisture, rot, and insects. If you live in an area with high humidity or frequent rainfall, you may want to consider using a type of wood that is more resistant to moisture, such as treated lumber. On the other hand, if you live in a dry climate, you may be able to use a less expensive type of wood that is not as resistant to moisture.

Construction Type

The type of construction you are working on is another important factor to consider when selecting the type of wood for your 2×4 studs. If you are building a structure that will be exposed to the elements, such as a deck or outdoor shed, you will need to use a type of wood that is more resistant to moisture and rot. If you are building an interior wall or a non-load-bearing structure, you may be able to use a less expensive type of wood.

Budget

Budget is always a consideration when choosing the type of wood for your 2×4 studs. Some types of wood are more expensive than others. If you are working on a tight budget, you may want to consider using a less expensive type of wood, such as pine. However, keep in mind that less expensive types of wood may not be as durable or resistant to moisture and insects as more expensive types of wood.

In conclusion, when selecting the type of wood for your 2×4 studs, it is important to consider the climate, construction type, and budget. By taking these factors into account, you can choose the right type of wood for your specific needs.

Benefits of Different Wood Types

When it comes to choosing the right wood for your 2×4 stud, you have several options to consider. Each type of wood has its own unique benefits, so it’s important to choose the one that best fits your needs. Here are some of the benefits of different wood types for 2×4 studs:

Durability

One of the most important factors to consider when choosing a wood type for your 2×4 stud is durability. You want a wood that is strong enough to support the weight of your structure and withstand the test of time. Here are some of the most durable wood types for 2×4 studs:

  • Douglas Fir: Douglas fir is a popular choice for 2×4 studs because it is strong, durable, and relatively affordable.
  • Hemlock: Hemlock is another strong and durable wood that is commonly used for 2×4 studs. It is also resistant to rot and decay.
  • Southern Yellow Pine: Southern yellow pine is a dense and strong wood that is ideal for 2×4 studs. It is also resistant to rot and decay.

Cost-Effectiveness

Another important factor to consider when choosing a wood type for your 2×4 stud is cost-effectiveness. You want a wood that is affordable without sacrificing quality. Here are some of the most cost-effective wood types for 2×4 studs:

  • Spruce: Spruce is a lightweight and affordable wood that is commonly used for 2×4 studs. It is also easy to work with.
  • Pine: Pine is another affordable wood that is commonly used for 2×4 studs. It is also easy to work with and has a natural resistance to decay.
  • Cedar: Cedar is a slightly more expensive wood than spruce or pine, but it is also more durable and resistant to rot and decay.

Availability

Finally, you want to choose a wood type for your 2×4 stud that is readily available in your area. Here are some of the most widely available wood types for 2×4 studs:

  • Spruce: Spruce is one of the most widely available wood types for 2×4 studs. It is commonly found in North America and Europe.
  • Pine: Pine is another widely available wood type for 2×4 studs. It is commonly found in North America and Europe.
  • Douglas Fir: Douglas fir is also widely available in North America and Europe and is commonly used for 2×4 studs.

In conclusion, when choosing the right wood type for your 2×4 stud, it’s important to consider factors such as durability, cost-effectiveness, and availability. By choosing the right wood type for your needs, you can ensure that your structure is strong, durable, and built to last.

Environmental Impact of Wood Choices

When choosing the type of wood for your construction project, it’s important to consider the environmental impact of your choice. Here are some factors to consider:

Sustainability

One important aspect of environmental impact is sustainability. This refers to whether the wood is being harvested in a way that allows the forest to regenerate and continue to provide wood in the future. Look for wood that has been certified by organizations like the Forest Stewardship Council (FSC) or the Sustainable Forestry Initiative (SFI).

Carbon Footprint

Another aspect to consider is the carbon footprint of the wood. Wood is a renewable resource, but harvesting, transporting, and processing it can still have a significant impact on the environment. Look for wood that has been harvested and processed locally to minimize transportation emissions.

End-of-Life Disposal

Finally, consider what will happen to the wood at the end of its life. Will it be recycled, reused, or sent to a landfill? Look for wood that can be easily recycled or reused, or that will break down naturally if it does end up in a landfill.

By considering these factors, you can choose a wood that has a minimal environmental impact and is sustainable for future generations.

Frequently Asked Questions

What are the dimensions of a 2×4 stud?

A 2×4 stud typically has actual dimensions of 1.5 inches by 3.5 inches. The length can vary depending on the intended use.

What is the longest length of a 2×4?

The longest length of a 2×4 stud is typically 16 feet. However, some lumber yards may carry longer lengths.

What type of wood is typically used for framing with 2x4s?

The most common type of wood used for framing with 2x4s is pine. However, other types of lumber such as spruce or fir can also be used.

What is the price range for a 2×4 at Lowe’s?

The price range for a 2×4 at Lowe’s can vary depending on the type of wood and length. On average, a 2×4 can cost between $2 and $5.

What are the different types of 2×4 wood?

There are several different types of 2×4 wood, including pine, spruce, fir, hemlock, and cedar. Each type of wood has its own unique characteristics and may be better suited for certain projects.

Is pine the most common type of wood used for 2x4s?

Yes, pine is the most common type of wood used for 2x4s. This is because it is readily available, affordable, and easy to work with. However, other types of wood can also be used depending on the project requirements.

hardwood

What are Some Examples of Cheap Types of Wood? – Affordable Options for Your Next Project

Are you looking for affordable wood options for your next DIY project? You’re not alone. Many people want to create beautiful pieces without breaking the bank. Fortunately, there are several types of wood that are both cheap and versatile. In this article, we’ll explore some examples of cheap types of wood and what they are commonly used for.

Dari sekian banyak jenis taruhan judi online, memilih slot sebagai fokus permainan taruhan Anda adalah hal paling cerdik di tahun 2024 ini. Bukan karena berdasarkan kepada hiburannya saja, melainkan juga keuntungan yang bisa didapatkan. IDN Slot 88 adalah salah satu permainan judi yang menjanjikan keuntungan besar, karena ada jackpot progresif dan RTP tinggi yang menjadi ciri khasnya.

One of the most popular types of cheap wood is pine. Pine wood is sourced from various pine species that grow natively around the world. It is one of the best wood options when high strength and low cost are needed. Pine wood is easy to work with and can be used for a variety of projects, including furniture, flooring, and construction.

Another option is American white oak or maple. These homegrown species perform well for many projects, including DIY furniture. For general projects, 3 Common is a good choice because it’s strong and affordable. If you’re looking for something a little bit nicer, 2 Common can be substituted for 1 without too much sacrifice in terms of strength. Stay tuned to learn more about other examples of cheap types of wood and their uses.

Secara keseluruhan, situs toto togel online membuka pintu bagi para pecinta taruhan untuk menikmati pengalaman taruhan yang menyenangkan, seru, dan terpercaya. Dengan berbagai pasaran, informasi terpercaya, fitur menarik, dan keamanan yang dijamin, situs-situs ini menjelma menjadi destinasi utama bagi mereka yang ingin menjelajahi dunia taruhan togel secara online.

Understanding Wood Types

understanding-wood-typesWhen it comes to woodworking, choosing the right type of wood is essential. There are many different types of wood available, each with its own unique properties and characteristics. Some woods are more expensive than others, while some are more durable or easier to work with.
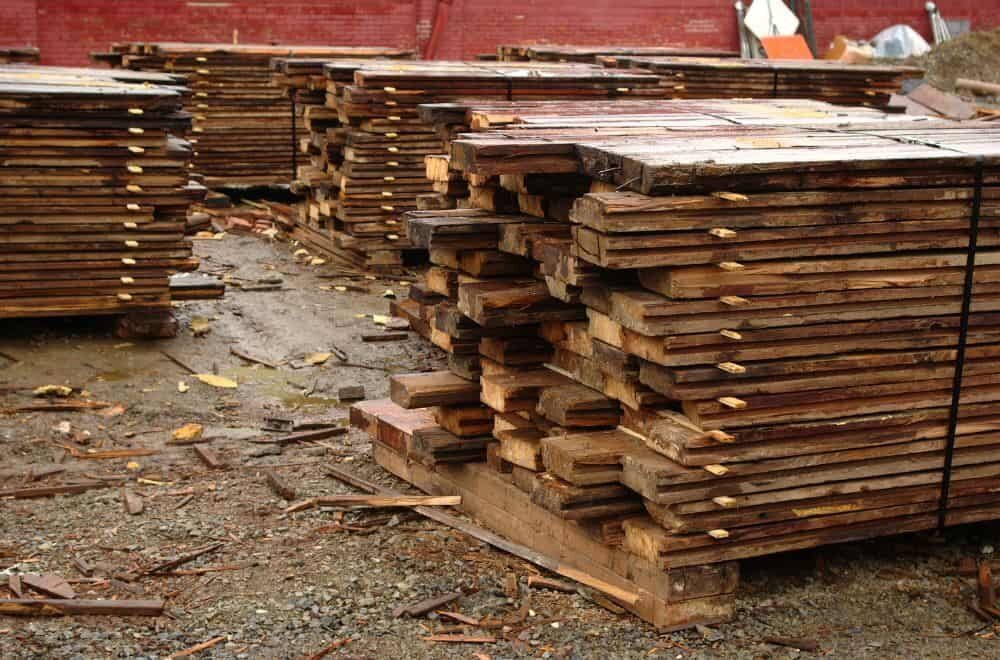
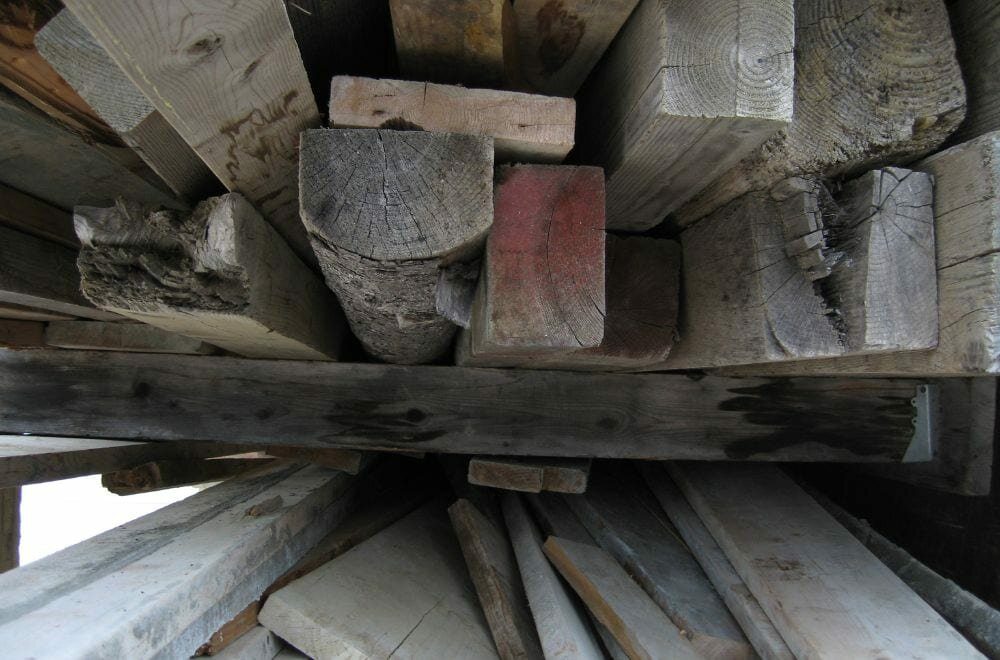
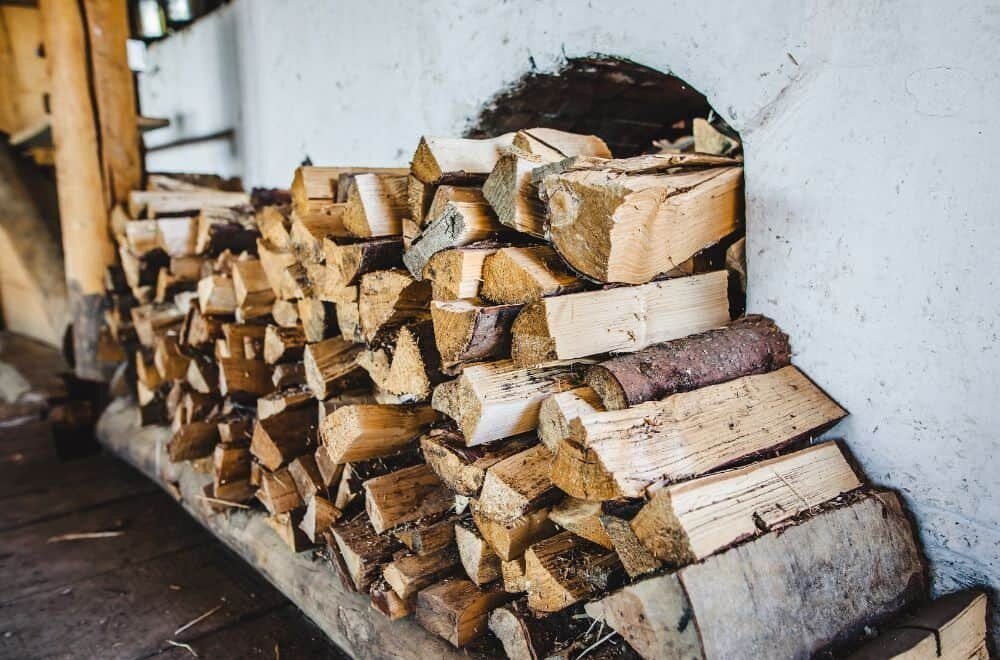
Here are a few things to keep in mind when selecting a type of wood for your project:

Hardwood vs. Softwood

One of the first things to consider is whether you need hardwood or softwood. Hardwood comes from deciduous trees, while softwood comes from evergreen trees. Hardwood is generally denser and stronger than softwood, but it is also more expensive. Softwood is usually less expensive and easier to work with, but it may not be as durable.

Grain Patterns

Another important consideration when choosing wood is the grain pattern. The grain pattern refers to the way the wood fibers are oriented. Some woods have a straight grain pattern, while others have a more complex pattern. The grain pattern can affect the strength and appearance of the wood.

Color and Texture

The color and texture of the wood can also be important factors to consider. Some woods are naturally light in color, while others are darker. Some woods have a smooth, even texture, while others have a more rustic, rough texture. The color and texture of the wood can affect the overall look and feel of your project.

Cost

Lastly, cost is always a consideration when choosing wood. Some types of wood are more expensive than others, so it’s important to consider your budget when selecting a type of wood for your project. Keep in mind that the cost of the wood may also be affected by its availability and how difficult it is to work with.

By considering these factors, you can choose the right type of wood for your project and ensure that it will be both beautiful and functional.

Softwood

If you’re looking for cheap wood options, softwood is a great choice. Softwoods come from coniferous trees and are generally less expensive than hardwoods. Here are a few examples of softwoods that won’t break the bank:

Pine

Pine is a popular choice for furniture, flooring, and construction. It’s easy to work with and relatively inexpensive. Pine is also lightweight, making it a good option for projects that require a lighter touch. Keep in mind that pine can be prone to dents and scratches, so it may not be the best choice for high-traffic areas.

Cedar

Cedar is another softwood that’s often used for outdoor projects like decks and fences. It’s naturally resistant to rot and insects, making it a good choice for outdoor applications. Cedar also has a pleasant scent, which can help repel insects. Keep in mind that cedar can be more expensive than other softwoods, so it may not be the best choice if you’re on a tight budget.

Fir

Fir is a versatile softwood that’s often used for framing and construction. It’s relatively inexpensive and easy to work with, making it a good choice for DIY projects. Fir is also strong and durable, making it a good option for structural applications. Keep in mind that fir can be prone to warping and splitting, so it may not be the best choice for projects that require a lot of precision.

Overall, softwoods are a great choice if you’re looking for inexpensive wood options. Pine, cedar, and fir are just a few examples of softwoods that can be used for a variety of projects. When choosing a softwood, consider the project you’re working on and the specific qualities you need in your wood.

Hardwood

hardwood

When it comes to cheap hardwood, there are a few options that you can consider. In this section, we will discuss two of them: Poplar and Beech.

Poplar

Poplar is a hardwood that is often overlooked because it is not as hard as some of the other hardwoods. However, it is a great option if you are looking for a cheap wood that is easy to work with. Poplar has a straight grain and a uniform texture, which makes it easy to cut and sand. It is also lightweight, which makes it a good option for projects that require a lighter wood.

One of the downsides of poplar is that it is not as strong as some of the other hardwoods. This means that it may not be the best option for projects that require a lot of weight-bearing. However, if you are looking for a cheap wood that is easy to work with and is suitable for lighter projects, poplar is a great option.

Beech

Beech is another hardwood that is often overlooked because it is not as hard as some of the other hardwoods. However, it is a great option if you are looking for a cheap wood that is easy to work with. Beech has a straight grain and a fine, even texture, which makes it easy to cut and sand. It is also a very stable wood, which means that it is less likely to warp or twist.

One of the downsides of beech is that it can be difficult to stain. If you are planning on staining your project, you may want to consider a different wood. However, if you are looking for a cheap wood that is easy to work with and is suitable for projects that do not require staining, beech is a great option.

In conclusion, if you are looking for a cheap hardwood, poplar and beech are two great options to consider. They are both easy to work with and are suitable for a variety of projects. However, it is important to keep in mind that they may not be the best option for projects that require a lot of weight-bearing or staining.

Manufactured Wood

If you’re looking for a cheap type of wood, you might want to consider manufactured wood. Manufactured wood is made by combining wood fibers and resins, which are then pressed into boards. This process creates a strong and durable material that can be used for a variety of projects.

Plywood

Plywood is a type of manufactured wood that is made by gluing together several layers of thin wood veneers. This creates a strong and stable material that is perfect for a variety of projects. Plywood is often used for furniture, cabinets, and flooring.

One of the great things about plywood is that it comes in a variety of grades and thicknesses. This means that you can choose the perfect type of plywood for your project, depending on your needs and budget.

MDF

MDF, or medium-density fiberboard, is another type of manufactured wood that is made by combining wood fibers and resins. MDF is a great option if you’re looking for a cheap and versatile material that can be used for a variety of projects.

MDF is often used for furniture, cabinets, and shelving. It’s also a popular choice for molding and trim work. One of the great things about MDF is that it’s easy to work with and can be cut, drilled, and shaped just like solid wood.

When choosing MDF, it’s important to consider the thickness and density of the material. Thicker and denser MDF will be stronger and more durable, but it will also be more expensive. Thinner and less dense MDF will be cheaper, but it may not be as strong or durable.

Reclaimed Wood

reclaimed-wood

If you are looking for a cheap and eco-friendly option for your woodworking projects, reclaimed wood may be the way to go. Reclaimed wood is wood that has been salvaged from old buildings, barns, or other structures that are no longer in use. Instead of being discarded, this wood is repurposed and given a new life.

One of the benefits of using reclaimed wood is that it is often available in larger sizes than new lumber. This is because the old-growth trees that were used in construction projects in the past were much larger than the trees that are harvested today. Reclaimed wood can also have unique character and a weathered look that is difficult to replicate with new wood.

When it comes to the types of wood that can be reclaimed, the possibilities are endless. Some of the most common species of reclaimed wood include Douglas fir, redwood, pine, and oak. However, any wood species can be reclaimed and repurposed for use in building structures, floors, paneling, siding, and even furniture.

The cost of reclaimed wood can vary depending on the type of wood and its intended use. In most cases, reclaimed wood can range from $10 to $40 per square foot. While this may be more expensive than new lumber, the environmental benefits and unique character of reclaimed wood make it a worthwhile investment for many woodworkers.

Overall, reclaimed wood is a great option for those looking for a cheap and eco-friendly alternative to new lumber. With its unique character and larger sizes, it can add a touch of history and charm to any woodworking project.

Factors Affecting Wood Prices

When it comes to buying wood, the price is one of the most important factors to consider. The cost of wood can vary significantly depending on a number of factors. Here are some of the most important factors that can affect wood prices:

Type of Wood

The type of wood you choose can have a significant impact on the cost. Some types of hardwoods like mahogany and teak tend to be more expensive than other softwoods like pine or spruce. Factors affecting the price include how rare they are, where they were sourced from (e.g., imported), and their quality.

Grade of Wood

The grade of wood you choose can also affect the price. Wood is graded based on its appearance, strength, and other factors. Higher grade wood is generally more expensive than lower grade wood. If you’re using the wood for a project where appearance is important, you may want to consider spending more for a higher grade.

Season and Availability

Season and availability can also affect wood prices. For example, in the winter, when construction slows down, the demand for wood may decrease, which can lead to lower prices. On the other hand, during the summer, when construction is in full swing, prices may be higher due to increased demand.

Location

The location of the wood can also affect the price. If you’re buying wood from a local supplier, you may be able to save money on shipping costs. However, if you’re buying wood from a supplier that’s located far away, you may have to pay more for shipping, which can increase the overall cost.

Market Conditions

Finally, market conditions can also affect wood prices. For example, if there’s a shortage of wood due to a natural disaster or other event, prices may increase. On the other hand, if there’s an oversupply of wood, prices may decrease. It’s important to keep an eye on market conditions if you want to get the best price for your wood.

Where to Buy Cheap Wood

where-to-buy-cheap-wood

If you’re looking to save money on your woodworking projects, buying cheap wood is a great way to do it. Here are some places where you can find affordable lumber:

Home Improvement Stores

Home improvement stores like Home Depot and Lowe’s are great places to find cheap wood. They often have a wide selection of lumber, including pine, poplar, and other inexpensive woods. You can also find sales and discounts on wood at these stores, so be sure to check regularly.

Lumberyards

Lumberyards are another great place to find affordable wood. They often have a wider selection than home improvement stores and may have better prices, especially if you’re buying in bulk. You can also ask the salespeople at the lumberyard for advice on the best types of wood for your project.

Online Retailers

Online retailers like Amazon and Etsy can be great places to find cheap wood, especially if you’re looking for specialty woods that may be harder to find locally. Be sure to read reviews and check the seller’s ratings before making a purchase, and factor in shipping costs when comparing prices.

Salvage Yards

If you’re willing to do a little digging, salvage yards can be a great source of cheap wood. Look for old barns, fences, and other structures that are being torn down, and ask the owner if you can salvage any usable wood. You may need to do some cleaning and sanding, but the savings can be worth it.

Local Sawmills

If you live in a rural area, local sawmills can be a great source of cheap wood. They may have a limited selection, but the prices are often lower than what you’ll find at a home improvement store or lumberyard. You can also ask the sawmill owner for advice on the best types of wood for your project.

Remember, when buying cheap wood, it’s important to check for quality. Look for wood that is straight, free of knots and cracks, and has a consistent color and texture. With a little research and some smart shopping, you can find affordable wood that will work great for your woodworking projects.

Frequently Asked Questions

Where can I find affordable wood boards?

You can find affordable wood boards at your local lumberyard or home improvement store. You can also check online retailers for competitive prices.

What are some inexpensive options for wood sheets?

Plywood and particle board are two inexpensive options for wood sheets. They are both made from wood particles and fibers, making them strong and affordable.

What are some types of pine wood that are affordable?

Pine is a popular option for affordable wood. Some types of pine wood that are affordable include Eastern White Pine, Southern Yellow Pine, and Ponderosa Pine.

What are some examples of strong and affordable wood?

American White Oak and Maple are both strong and affordable options for wood. 3 Common is also a good choice for general projects because it is both strong and affordable.

What is the most affordable natural wood to buy?

Pine is the most affordable natural wood to buy. It is widely available and comes in many different grades, making it a versatile and cost-effective option.

What are some cheaper alternatives to oak for furniture?

If you’re looking for a cheaper alternative to oak for furniture, consider using Birch or Poplar. Both woods have a similar look and feel to oak but are more affordable.

dimensions-of-a-cord

How many pieces of wood in a cord? Understanding cord measurements for firewood

When it comes to buying firewood, understanding the measurement of a cord is crucial. A cord is a standard unit of measurement for firewood, but it can be confusing to determine how much wood you’re actually getting. One common question people have is how many pieces of wood are in a cord.

The number of pieces of wood in a cord can vary depending on the type of wood and how it is split. A full cord of wood typically contains 600-800 pieces of split firewood, while a face cord (or rick) contains 200-275 pieces. It’s important to note that a cord is measured by the total volume of wood, so the number of pieces will change depending on the size of the logs and how they are stacked.

Understanding a Cord of Wood

If you’re a homeowner with a fireplace or wood stove, you’ve probably heard the term “cord of wood” before. But what exactly is a cord of wood, and how much firewood does it actually contain? In this section, we’ll break down the basics of a cord of wood, including how it’s measured and what you can expect in terms of quantity.

What is a Cord of Wood?

A cord of wood is a unit of measurement used to describe a quantity of firewood. Specifically, it refers to a stack of wood that measures 4 feet high, 4 feet wide, and 8 feet long. This stack contains a total of 128 cubic feet of wood, which is equivalent to approximately 3.62 cubic meters.

How Many Pieces of Wood are in a Cord?

The number of pieces of wood in a cord can vary depending on a few factors, including the size and shape of the wood, as well as how it’s split. As a general rule of thumb, a cord of wood typically contains between 400 and 700 pieces of firewood. However, this number can fluctuate based on the type of wood being used, as well as how it’s stacked and stored.

Other Units of Measure for Firewood

While a cord of wood is the most common unit of measurement for firewood, there are a few other terms you might hear when buying or selling firewood. These include:

  • Face cord: A face cord is a stack of wood that measures 4 feet high, 8 feet long, and as wide as the length of the logs being used. This stack contains approximately one-third of the wood found in a full cord.
  • Rick: A rick is another term for a face cord. However, the term “rick” can also refer to a smaller stack of wood that’s not quite a face cord in size.
  • Bundled firewood: Bundled firewood is typically sold in pre-packaged bundles that contain a specific number of pieces of wood. These bundles can vary in size, but typically contain between 6 and 12 pieces of wood.

Overall, understanding the basics of a cord of wood can help you make informed decisions when buying firewood for your home. Whether you’re looking for a full cord, a face cord, or a bundle of firewood, knowing how much wood you’re getting and how it’s measured can help ensure that you get the best value for your money.

Dimensions of a Cord

dimensions-of-a-cord

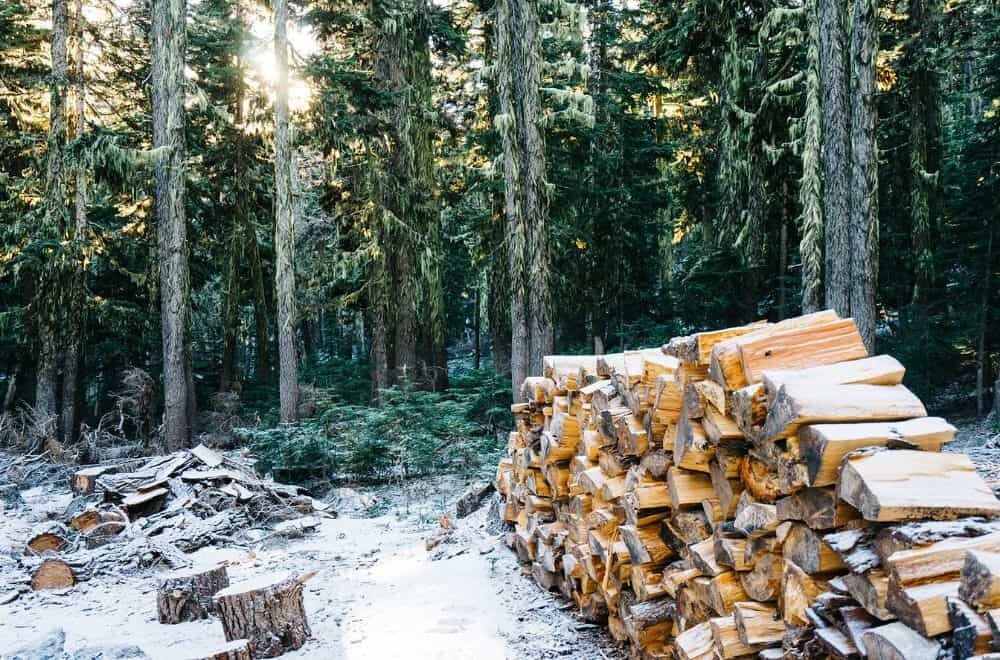
When it comes to firewood, a cord is the standard unit of measurement. A cord is defined as a stack of wood that measures 4 feet wide, 4 feet tall, and 8 feet long. This means that a cord of wood has a total volume of 128 cubic feet.

It’s important to note that there are different types of cords, such as full cords and face cords. While they have the same height and length measurements as a standard cord, they differ in depth. A face cord, for example, is only 16 inches deep, while a full cord is 4 feet deep.

To help you visualize the dimensions of a cord, here’s a breakdown:

Dimension Measurement
Width 4 feet
Height 4 feet
Depth 8 feet (for a full cord) or 16 inches (for a face cord)

It’s also worth noting that while a cord is the standard unit of measurement for firewood, there are other measurements that are sometimes used, such as a rick or a truckload. However, these measurements are not standardized and can vary depending on the supplier.

In summary, a cord of wood is a stack of wood that measures 4 feet wide, 4 feet tall, and 8 feet long, with a total volume of 128 cubic feet. Different types of cords, such as face cords and full cords, differ in depth.

Types of Wood in a Cord

types-of-wood-in-a-cord

When purchasing firewood, it’s important to know what type of wood you are getting. Different types of wood have different burning characteristics, such as heat output and burn time. Here are the two main types of wood you’ll find in a cord:

Hardwood

Hardwood is denser and heavier than softwood and tends to burn longer and hotter. It’s a good choice for heating your home because it produces a lot of heat and burns slowly. Hardwood also produces less smoke and creosote than softwood, which is better for your chimney and the environment. Some common types of hardwood you might find in a cord include oak, maple, hickory, and birch.

Softwood

Softwood is lighter and less dense than hardwood and tends to burn faster and cooler. It’s a good choice for starting fires because it ignites easily and produces a lot of flames. Softwood also tends to be less expensive than hardwood. However, it produces more smoke and creosote than hardwood, which can be a problem for your chimney and the environment. Some common types of softwood you might find in a cord include pine, spruce, and fir.

When choosing between hardwood and softwood, it’s important to consider your specific needs and preferences. If you’re looking for a long-lasting fire with high heat output, hardwood is the way to go. If you’re looking for a quick and easy fire to start, softwood might be the better choice.

Estimating the Number of Pieces in a Cord

estimating-the-number-of-pieces-in-a-cord

When it comes to buying firewood, it’s important to know how much you’re getting for your money. One common way to measure firewood is by the cord, but how many pieces of wood are actually in a cord?

The exact number of pieces in a cord can vary depending on the size and shape of the wood, but there are some general estimates that can be helpful. According to our search results, a full cord of wood typically contains 600-800 pieces of split firewood, while a face cord (or rick) contains 200-275 pieces.

It’s important to note that these estimates are based on split wood, which is easier to dry and burn. If the wood is not split, the number of pieces in a cord will be significantly less.

If you’re buying firewood, you can ask the seller how many pieces are in a cord to get a better idea of what you’re getting. However, keep in mind that the number of pieces can vary depending on the type of wood and how it’s split.

Here are some other factors that can affect the number of pieces in a cord:

  • Wood species: Some types of wood, like oak, are denser than others and will have fewer pieces in a cord.
  • Length of logs: Longer logs will have fewer pieces in a cord than shorter logs.
  • Diameter of logs: Thicker logs will have fewer pieces in a cord than thinner logs.
  • How the wood is stacked: If the wood is stacked tightly, there will be more pieces in a cord than if it’s stacked loosely.

In conclusion, while there is no exact answer to how many pieces of wood are in a cord, there are some general estimates that can be helpful. By understanding the factors that can affect the number of pieces, you can make a more informed decision when buying firewood.

Factors Affecting the Number of Pieces

factors-affecting-the-number-of-pieces

The number of pieces of wood in a cord can vary depending on several factors. Here are some of the main factors that can affect the total number of pieces in a cord:

1. Log Size and Shape

The size and shape of the logs used to make up a cord of wood can have a significant impact on the total number of pieces. If the logs are cut into smaller pieces, there will be more pieces in the cord. Conversely, if the logs are cut into larger pieces, there will be fewer pieces in the cord.

2. Moisture Content

The moisture content of the wood can also affect the total number of pieces in a cord. As wood dries, it typically shrinks in volume. This means that a cord of dried wood can contain more pieces than a cord of green wood, as the dried pieces take up less space.

3. Cutting Method

The method used to cut the wood can also affect the total number of pieces in a cord. For example, if the wood is split by hand, there may be more irregularly shaped pieces, which can result in a higher total number of pieces. On the other hand, if the wood is cut using a machine, the pieces may be more uniform in size and shape, resulting in a lower total number of pieces.

4. Wood Species

Different wood species can also have different densities, which can affect the total number of pieces in a cord. For example, a cord of oak, which is a dense hardwood, may contain fewer pieces than a cord of pine, which is a less dense softwood.

Overall, the total number of pieces in a cord of wood can vary depending on a range of factors. It’s important to keep these factors in mind when purchasing firewood to ensure that you’re getting the right amount for your needs.

Practical Applications of a Cord of Wood

practical-applications-of-a-cord-of-wood

A cord of wood is a significant amount of firewood that can serve a variety of practical purposes. Here are some common applications of a cord of wood:

Heating Your Home

One of the primary uses of a cord of wood is for heating your home. Depending on the size and insulation of your home, a cord of wood can last anywhere from a few weeks to a few months. It’s important to note that the number of pieces of wood in a cord can vary depending on the size and shape of the wood, but a full cord typically contains 600-800 pieces of split firewood.

Cooking and Grilling

If you enjoy cooking with wood, a cord of wood can provide you with plenty of fuel for your outdoor grill or indoor wood-fired oven. Different types of wood can impart different flavors to your food, so it’s worth experimenting with different types of wood to find what tastes best to you.

Campfires and Bonfires

A cord of wood can also be used for recreational purposes, such as building campfires or bonfires. This is a great way to spend time with friends and family while enjoying the warmth and ambiance of a crackling fire.

Woodworking and Crafting

If you’re a woodworker or crafter, a cord of wood can provide you with a ready supply of raw materials. You can use the wood to make furniture, carvings, toys, and other items.

Reselling

Finally, if you have access to a large supply of firewood, you may be able to sell it for a profit. It’s important to check local regulations and obtain any necessary permits before selling firewood.

Overall, a cord of wood can be a versatile and valuable resource for a variety of practical applications.

Frequently Asked Questions

What are the dimensions of a cord of wood in feet?

A cord of wood is a stack of wood that measures 4 feet wide, 4 feet tall, and 8 feet long. The volume of a cord is 128 cubic feet.

How much firewood is in a full cord?

A full cord of wood typically contains 600-800 pieces of split firewood. However, the number of pieces will change depending on the type of wood and how it is split.

What is the difference between a face cord and a full cord of wood?

A face cord, also known as a rick, is one-third of a full cord of wood. It is a stack of wood that measures 4 feet high, 8 feet long, and the depth of the firewood pieces. The number of pieces within a cord can vary depending on the size and shape of the wood, ranging from around 200 to over 400 pieces.

How do I measure a cord of wood?

To measure a cord of wood, stack the firewood in a line or row, making sure the pieces are tightly packed together. Then, measure the length, width, and height of the stack in feet and multiply the three numbers together to get the volume in cubic feet. If the stack measures 4 feet by 4 feet by 8 feet, it is a full cord of wood.

How long will one cord of wood last?

The length of time a cord of wood will last depends on many factors, including the type of wood, the efficiency of your stove or fireplace, and how often you use it. On average, one cord of wood can last anywhere from a few weeks to a few months.

Where can I find cord of firewood for sale near me?

You can find cord of firewood for sale at local nurseries, home improvement stores, and online retailers. Be sure to check the regulations on the sale of firewood in your state or country to ensure you are getting a fair deal.