Tag Archives: popular options include

refinish-a-wooden-table

How to Refinish a Wooden Table: A Beginner's Guide

Refinishing a wooden table can breathe new life into an old piece of furniture. Whether you have a family heirloom or a thrift store find, refinishing a table can be a fun and rewarding DIY project. With a little bit of elbow grease and some basic supplies, you can transform a dull or damaged table into a beautiful centerpiece for your home.

Before you get started, it’s important to understand the level of detail and effort required for your specific table. Super ornamental furniture may require more attention to detail, while a simple table may be easier to refinish. The first step in refinishing a table is to clean it thoroughly to remove any dirt or grime that may inhibit the refinishing process. Depending on the condition of your table, you may also need to strip the old finish or sand down any imperfections. With a little bit of patience and some helpful tips, you can successfully refinish a wooden table and enjoy it for years to come.

Understanding the Type of Wood
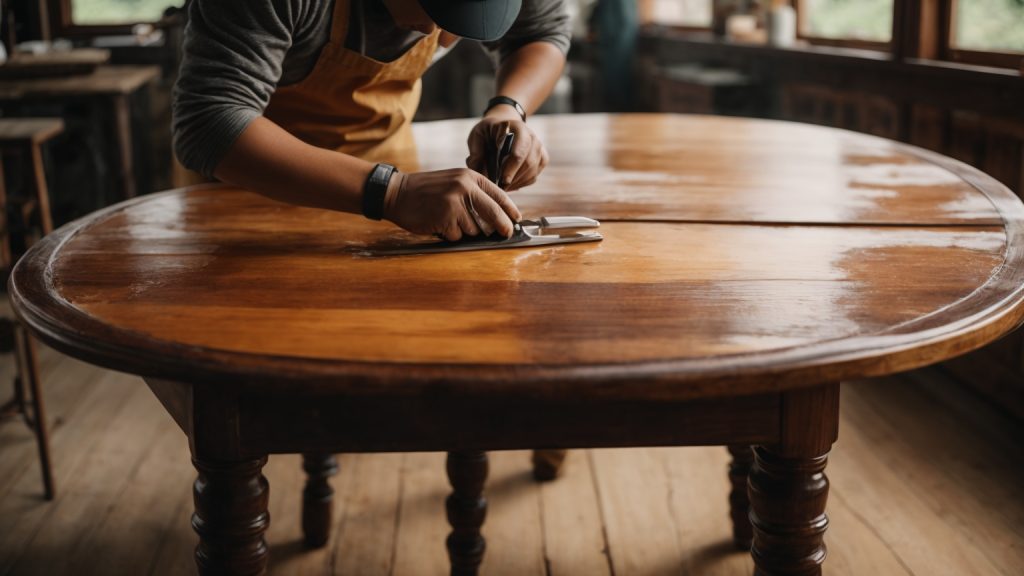
refinish-a-wooden-table

When it comes to refinishing a wooden table, the first step is to understand the type of wood you’re working with. Different types of wood require different approaches to refinishing, so it’s important to identify the type of wood before you begin.

Identifying Hardwood and Softwood

The first step in identifying the type of wood is to determine whether it is hardwood or softwood. Hardwood comes from deciduous trees, while softwood comes from coniferous trees. Hardwood is denser and more durable than softwood, making it a popular choice for furniture.

To determine whether your table is made of hardwood or softwood, you can look at the grain of the wood. Hardwood has a more complex grain pattern than softwood, which tends to have a straight grain. You can also try scratching the surface of the wood with your fingernail. Hardwood is harder than softwood, so it will be more difficult to scratch.

Distinguishing Wood Species

Once you’ve determined whether your table is made of hardwood or softwood, the next step is to identify the specific wood species. Different wood species have different characteristics, such as color, grain pattern, and hardness.

One way to identify the wood species is to look for identifying marks, such as knots or distinctive grain patterns. You can also try comparing the wood to a wood identification guide or consulting with a professional.

Some common wood species used for furniture include oak, maple, cherry, and mahogany. Each of these species has its own unique characteristics and requires a different approach to refinishing. For example, oak has a distinctive grain pattern and can be difficult to stain evenly, while cherry has a reddish-brown color that can darken over time.

By understanding the type of wood and wood species of your table, you can choose the right approach to refinishing and ensure that your table looks beautiful for years to come.

Safety Precautions

When refinishing a wooden table, it is important to take certain safety precautions to protect yourself from harmful chemicals and dust. Here are some safety tips to follow:

Proper Ventilation

When working with chemicals, it is important to have proper ventilation to avoid inhaling harmful fumes. Work in a well-ventilated area, such as a covered porch or garage, or use a fan to circulate air. Make sure all windows and doors are open to allow fresh air to flow through the room.

Safety Equipment

It is important to wear the appropriate safety equipment when refinishing a wooden table. Here are some items you should have on hand:

  • N95 respirator: Wear a respirator to protect yourself from inhaling harmful dust and fumes.
  • Waterproof gloves: Wear gloves to protect your hands from chemicals and stains.
  • Safety goggles: Wear goggles to protect your eyes from dust and debris.
  • Dust mask: Wear a dust mask to protect your lungs from dust particles.

In addition to these items, it is also important to wear appropriate clothing, such as long sleeves and pants, to protect your skin from chemicals and stains.

By following these safety precautions, you can ensure that your refinishing project is completed safely and without any harm to yourself.

Gathering Necessary Tools

To refinish a wooden table, you will need to gather some necessary tools. Here are the three main categories of tools you will need:

Stripping Tools

To remove the old finish from your table, you will need some stripping tools. Here are some common options:

  • Chemical Stripper: This is a liquid that dissolves the old finish. You apply it with a brush, wait for it to soften the finish, and then scrape it off.
  • Heat Gun: This is a tool that uses hot air to soften the finish, making it easier to scrape off.
  • Sandpaper: If you don’t want to use chemicals or heat, you can use sandpaper to sand off the old finish.

Sanding Tools

After you have removed the old finish, you will need to sand the table to prepare it for the new finish. Here are some tools you will need:

  • Sandpaper: You will need sandpaper of varying grits to sand the table. Start with a coarse grit and work your way up to a finer grit.
  • Sanding Block: This will help you sand the table evenly.
  • Power Sander: If you have a large table or want to save time, you can use a power sander to sand the table.

Finishing Tools

After you have sanded the table, you will need to apply the new finish. Here are some tools you will need:

  • Stain: If you want to change the color of your table, you will need to apply a stain.
  • Polyurethane: This is a clear coat that will protect the table and give it a shiny finish.
  • Brushes: You will need brushes to apply the stain and polyurethane.
  • Rags: You will need rags to wipe off excess stain and polyurethane.

By gathering these necessary tools, you will be well on your way to refinishing your wooden table.

Removing the Old Finish

removing-the-old-finish

Before you can refinish your wooden table, you need to remove the old finish. This can be a messy and time-consuming process, but with the right tools and techniques, you can do it yourself.

Applying the Stripper

The first step in removing the old finish is to apply a chemical stripper. This will dissolve the old finish so that it can be easily removed. Here’s how to do it:

  1. Choose a well-ventilated area to work in. Chemical strippers can be harmful if inhaled, so it’s important to work in a space with good airflow.
  2. Apply the stripper to the table using a brush or spray bottle. Be sure to follow the manufacturer’s instructions for application and safety precautions.
  3. Wait for the stripper to work. This can take anywhere from a few minutes to several hours, depending on the type of stripper and the thickness of the old finish.
  4. Test a small area to see if the finish is ready to be removed. Use a scraper or steel wool to remove the finish. If it comes off easily, the rest of the finish is ready to be removed. If not, wait a little longer and test again.

Removing the Stripper

Once the old finish has been dissolved by the stripper, it’s time to remove it. Here’s how to do it:

  1. Use a scraper or steel wool to remove the old finish. Work in the direction of the grain to avoid damaging the wood.
  2. Wipe away the old finish with a rag or paper towel.
  3. Repeat the process until all of the old finish has been removed.
  4. Use a fine-grit sandpaper to smooth out any rough spots or remaining finish. Be sure to sand in the direction of the grain.
  5. Clean the table thoroughly with a mild soap and water solution to remove any leftover stripper and debris.

Removing the old finish is an important step in refinishing your wooden table. Take your time and be patient, and you’ll be rewarded with a beautiful new finish that will make your table look like new again.

Sanding the Table

Once you have stripped the old finish and repaired any damages, it’s time to sand the table to prepare it for the new finish. Sanding is a crucial step in the refinishing process that helps to remove any remaining finish, smooth out the surface, and open up the wood’s pores to accept the new stain or finish. In this section, we will discuss how to sand a wooden table, including choosing the right grit and sanding techniques.

Choosing the Right Grit

Choosing the right sandpaper grit is essential to achieving a smooth and even finish. The grit number refers to the size of the abrasive particles on the sandpaper. The lower the number, the coarser the sandpaper, and the higher the number, the finer the sandpaper. Here are some guidelines for choosing the right grit:

  • Coarse grit (60-80): Use coarse grit sandpaper to remove any remaining finish, scratches, or dents on the table’s surface.
  • Medium grit (100-150): Use medium grit sandpaper to smooth out any rough spots left by the coarse grit sandpaper.
  • Fine grit (220-240): Use fine grit sandpaper to create a smooth and even surface that is ready for staining or finishing.

Sanding Techniques

Here are some tips for sanding a wooden table:

  • Sand in the direction of the wood grain to avoid creating scratches or marks on the surface.
  • Start with the coarsest-grit sandpaper and work your way up to the finest-grit sandpaper.
  • Use a sanding block or an orbital sander to ensure even sanding and to prevent over-sanding in certain areas.
  • Be careful when sanding edges and corners to avoid rounding them off.
  • Wipe the table down with a tack cloth after sanding to remove any dust or debris.

By following these tips, you can achieve a smooth and even surface that is ready for staining or finishing. Sanding is a crucial step in the refinishing process that requires patience and attention to detail, but the results are worth the effort.

Applying the New Finish

Refinishing a wooden table can give it a new lease on life. Once you have sanded and removed the old finish, it’s time to apply a new one. Here are some tips to help you choose and apply the new finish.

Choosing the Finish

There are many different types of finishes available, each with its own advantages and disadvantages. Some popular options include:

  • Polyurethane: This is a durable and water-resistant finish that is easy to apply. It comes in both oil-based and water-based formulations.
  • Varnish: Varnish is a traditional finish that provides a hard, protective coating. It is available in both glossy and matte finishes.
  • Lacquer: Lacquer is a fast-drying finish that provides a hard, durable coating. It is available in both spray and brush-on formulations.
  • Oil: Oil finishes penetrate the wood and provide a natural look. They are easy to apply but may require more maintenance than other finishes.

Consider the look you want to achieve and the level of durability you need when choosing a finish.

Applying the Finish

Before applying the finish, make sure the surface is clean and free of dust. Use a tack cloth or a damp cloth to remove any debris.

When applying the finish, follow these steps:

  1. Apply a thin coat of finish with a brush or a cloth. Work in the direction of the grain.
  2. Wait for the finish to dry according to the manufacturer’s instructions.
  3. Sand the surface lightly with fine-grit sandpaper.
  4. Apply another coat of finish and repeat the process until you achieve the desired level of coverage.

Be sure to work in a well-ventilated area and follow all safety instructions on the product label. With a little patience and care, you can apply a new finish that will protect and enhance the beauty of your wooden table.

Maintaining Your Refinished Table

Congratulations! You’ve successfully refinished your wooden table and it looks amazing. Now, it’s important to maintain your hard work to keep your table looking beautiful for years to come. Here are some tips to help you maintain your newly refinished table.

Regular Cleaning

To keep your table looking great, it’s important to clean it regularly. Here are some tips to help you keep your table clean:

  • Dust your table regularly with a soft cloth or a feather duster.
  • Use a damp cloth to clean up spills and stains as soon as possible.
  • Avoid using harsh chemicals or abrasive cleaners on your table.
  • If you need to use a cleaner, choose a mild soap and water solution.

Preventing Damage

To prevent damage to your table, it’s important to take some precautions. Here are some tips to help you prevent damage:

  • Use coasters and placemats to protect your table from scratches, stains, and water rings.
  • Avoid placing hot items directly on your table. Always use a trivet or a hot pad.
  • Keep your table out of direct sunlight to prevent fading and warping.
  • Avoid placing heavy objects on your table, as this can cause damage to the finish.

By following these simple tips, you can keep your newly refinished table looking beautiful for years to come.
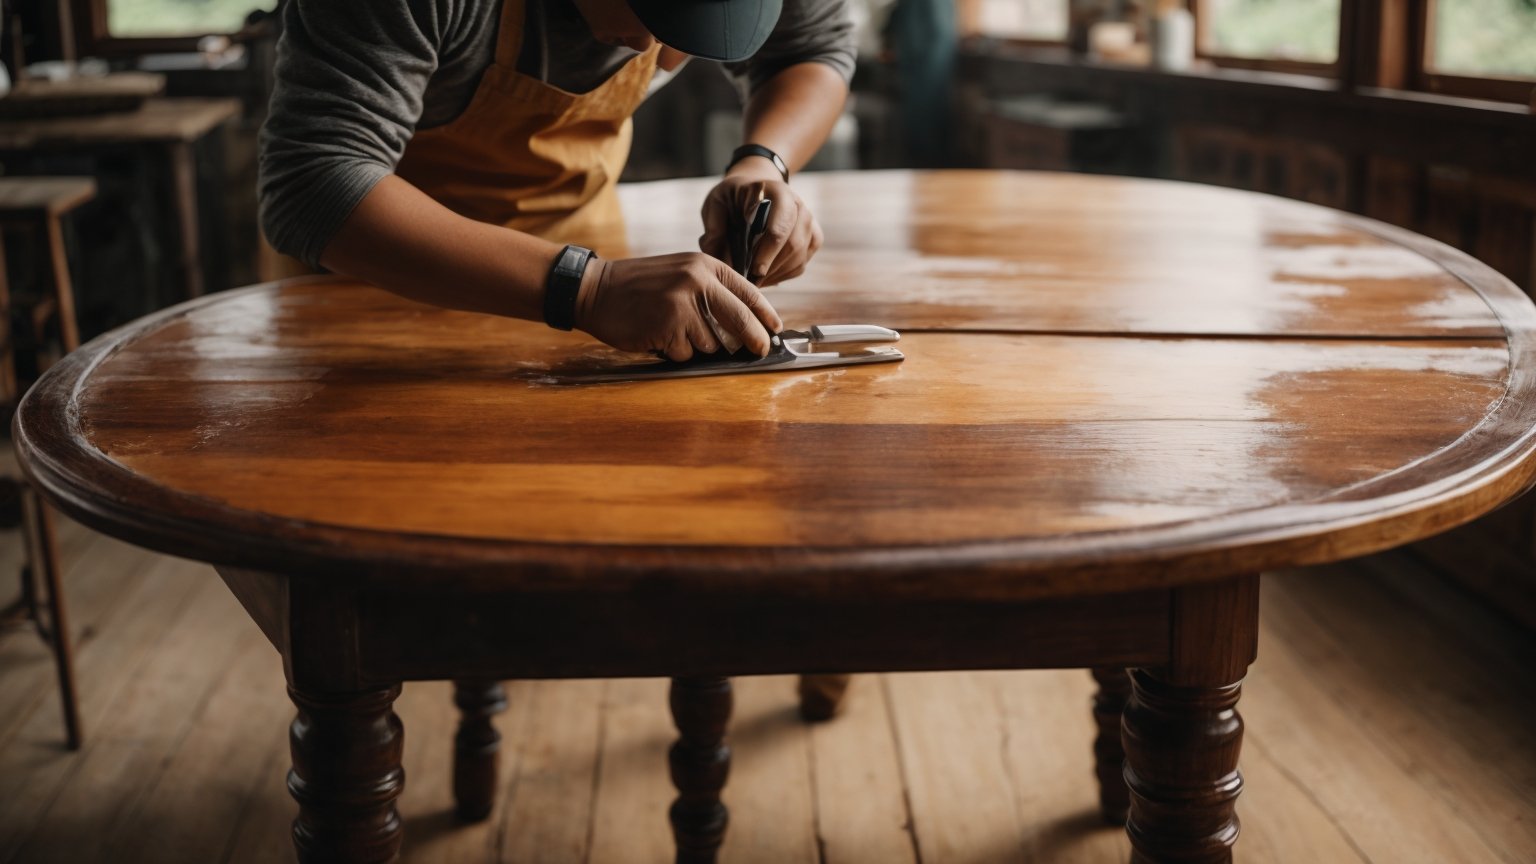
assembling-the-frame

How to Build a Wooden Picture Frame in 5 Easy Steps

If you’re looking to add a personal touch to your home decor, building your own wooden picture frames can be a great place to start. Not only do they add a rustic feel to your space, but they also allow you to showcase your favorite photos in a unique way. With a few basic tools and some simple steps, you can create custom frames that perfectly match your style.

Before you begin, it’s important to choose the right type of wood for your project. Softwoods like pine and cedar are easy to work with and can be found at most home improvement stores. Hardwoods like oak and cherry are more durable and offer a more polished look, but they can be more expensive. Once you’ve selected your wood, you’ll need to measure and cut it to the desired size. From there, you’ll use basic tools like a saw and sander to shape the wood and create the frame. Whether you’re a seasoned woodworker or a beginner, building a wooden picture frame is a fun and rewarding project that anyone can tackle.

Understanding the Basics

build-a-wooden-picture-frame

Building a wooden picture frame is a great way to showcase your favorite photos or artwork. With a few basic tools and some lumber, you can create a custom frame that perfectly fits your style and décor. In this section, we’ll cover the basics of building a wooden picture frame, including the types of wood to use and the tools you’ll need.

Types of Wood

When it comes to building a picture frame, you’ll want to choose a wood that is both attractive and durable. Some popular options include:

  • Oak: A strong and durable wood that is perfect for larger frames.
  • Maple: A light-colored wood that is easy to stain or paint.
  • Cherry: A beautiful and richly colored wood that is perfect for smaller frames.
  • Walnut: A dark and luxurious wood that is great for more formal or elegant frames.

When selecting your wood, be sure to choose boards that are straight and free of knots or other defects. You’ll also want to consider the grain pattern of the wood, as this can affect the overall look of your frame.

Choosing the Right Tools

To build a wooden picture frame, you’ll need a few basic tools, including:

  • Table saw: This will be used to rip your lumber to the correct size.
  • Miter saw: This will be used to cut your frame pieces to the correct length.
  • Router: This will be used to create a groove for your glass and backing.
  • Clamps: These will be used to hold your frame pieces together while the glue dries.
  • Sandpaper: This will be used to smooth out any rough edges or surfaces.

You may also want to invest in a few additional tools, such as a nail gun or a biscuit joiner, depending on the complexity of your frame design.

With these basics in mind, you’re ready to start building your own wooden picture frame.

Designing Your Picture Frame

When it comes to building a wooden picture frame, the design is just as important as the construction. A well-designed frame can enhance the beauty of your artwork and add a personal touch to your space. Here are some tips on how to design your picture frame.

Determining the Size

The first step in designing your picture frame is to determine the size of your artwork. Measure the width and height of your artwork and add an inch to each measurement to allow for the frame to overlap the artwork. This will be the size of your frame. Keep in mind that larger frames will require thicker and sturdier wood to support the weight of the artwork.

Choosing the Style

Once you have determined the size of your frame, you can choose the style that best suits your artwork and personal taste. Here are some popular styles to consider:

  • Traditional: A classic style with simple, clean lines and minimal ornamentation.
  • Ornate: A decorative style with intricate details and embellishments.
  • Rustic: A natural, earthy style with rough-hewn wood and a distressed finish.
  • Modern: A sleek, minimalist style with clean lines and a smooth finish.

Consider the style of your artwork and the decor of your space when choosing the style of your frame. A traditional frame may be best suited for a classic painting, while a rustic frame may complement a landscape photograph. A modern frame may work well with a contemporary abstract piece.

In summary, designing your picture frame involves determining the size of your artwork and choosing a style that complements both your artwork and your space. Keep these tips in mind when designing your frame to create a beautiful and personalized finished product.

Preparing the Wood

Before you start building your wooden picture frame, it is essential to prepare the wood properly. This process involves cutting and sanding the wood to achieve a smooth and even surface.

Cutting the Wood

The first step in preparing the wood is to cut it to the required size. You can use a table saw or a miter saw to cut the wood. It is essential to measure the wood accurately before cutting it to avoid any mistakes.

When cutting the wood, it is crucial to use the right blade for the job. A crosscut blade is ideal for cutting across the grain, while a rip blade is suitable for cutting along the grain. Using the wrong blade can result in a rough and uneven cut.

Sanding the Wood

After cutting the wood, the next step is to sand it to achieve a smooth and even surface. Sanding helps to remove any rough edges and splinters, making the wood easier to work with.

Start by using a coarse-grit sandpaper to remove any rough spots or imperfections on the wood. Then, switch to a finer-grit sandpaper to achieve a smooth surface. It is essential to sand the wood evenly to avoid any unevenness in the final product.

When sanding the wood, it is crucial to wear protective gear such as gloves, goggles, and a dust mask. Sanding produces a lot of dust, which can be harmful to your health if inhaled.

In conclusion, preparing the wood is an essential step in building a wooden picture frame. By cutting and sanding the wood properly, you can achieve a smooth and even surface, making it easier to work with.

Assembling the Frame

assembling-the-frame

Once you have all the pieces cut to size, it’s time to assemble your wooden picture frame. This section will cover the two main steps of joining the pieces and securing the corners.

Joining the Pieces

To join the pieces of your wooden picture frame, you will need wood glue and plastic pegs. Follow these steps:

  1. Apply a drop of wood glue to four of the eight miter faces.
  2. Spread the glue thinly over the miter face.
  3. Join the pieces together, making sure the corners are flush.
  4. Insert the plastic pegs into the pre-drilled holes in the back of the frame.

Securing the Corners

To secure the corners of your wooden picture frame, you have a few options:

  • Use a band clamp to hold the corners together while the glue dries.
  • Use corner clamps to hold the corners together while the glue dries.
  • Use a brad nailer to secure the corners.

If you choose to use a brad nailer, be sure to countersink the nails and fill the holes with wood filler before sanding and finishing your frame.

Once your frame is assembled and the glue is dry, you can sand it smooth and apply your finish of choice. Congratulations, you’ve built your own wooden picture frame!

Finishing Touches

Once you’ve assembled your wooden picture frame, it’s time to add the finishing touches that will make it look polished and professional. This section will cover two important steps: applying the finish and adding the glass and picture.

Applying the Finish

The finish you choose for your picture frame will depend on your personal preference and the look you’re going for. Some common options include stain, paint, or a clear coat to showcase the natural beauty of the wood.

Before applying any finish, make sure the frame is clean and free of dust and debris. Sand the frame lightly to smooth out any rough spots or imperfections. Then, apply the finish according to the manufacturer’s instructions. You may need to apply multiple coats, allowing each coat to dry completely before applying the next.

Adding the Glass and Picture

Once the finish has dried, it’s time to add the glass and picture to your frame. Start by cleaning the glass to remove any fingerprints or smudges. Then, carefully place the glass into the frame, making sure it fits snugly.

Next, add the picture. If you’re using a mat, make sure the picture is centered and straight within the mat. Then, carefully place the mat and picture into the frame, making sure everything is lined up correctly.

Finally, add any hardware you need to hang the frame. This may include picture hangers, wire, or hooks. Make sure the hardware is securely attached to the frame, and test the frame to make sure it hangs straight.

With these finishing touches, your wooden picture frame is complete and ready to display your favorite photo or artwork.

How to Make an Inexpensive Wooden Dummy for Martial Arts Training

Looking to improve your martial arts skills but don’t want to break the bank? One way to do so is by making your own wooden dummy. Wooden dummies, also known as Wing Chun dummies, are used in martial arts training to improve technique, timing, and precision. While they can be expensive to purchase, making your own can be a cost-effective solution.

To make an inexpensive wooden dummy, you’ll need some basic woodworking skills and tools. There are several different designs and materials you can use, but many DIY enthusiasts opt for a flat board design using plywood and PVC pipe. This design is easy to make and can be customized to fit your specific needs.

In this article, we’ll provide step-by-step instructions for making your own wooden dummy, including a list of necessary materials and tools. Whether you’re a seasoned martial artist or a beginner looking to improve your skills, making your own wooden dummy is a fun and rewarding project that can help you achieve your goals without breaking the bank.

Why Choose a Wooden Dummy

If you’re looking to improve your martial arts skills, a wooden dummy can be an invaluable tool. Here are a few reasons why you might want to consider building one for yourself.

Cost-Effective

One of the biggest advantages of building a wooden dummy is that it can be a cost-effective solution for your training needs. Compared to other training equipment, such as punching bags or grappling dummies, wooden dummies can be relatively cheap to build. With some basic woodworking skills and a few materials, you can create a wooden dummy that will last for years.

Easy to Build

Another advantage of building a wooden dummy is that it’s relatively easy to do. While you will need some basic woodworking skills, you don’t need to be an expert to create a functional wooden dummy. There are plenty of plans and tutorials available online that can guide you through the process step-by-step. Plus, because you’re building the dummy yourself, you can customize it to fit your specific training needs.

Overall, if you’re looking for a cost-effective and easy-to-build solution for your martial arts training, a wooden dummy is definitely worth considering. With a little bit of effort and some basic woodworking skills, you can create a training tool that will help you improve your skills and reach your goals.

Materials Needed

If you’re looking to build an inexpensive wooden dummy, you’ll need a few key materials. Here’s a breakdown of what you’ll need:

Type of Wood

The type of wood you choose will depend on your budget and personal preferences. Some popular options include:

  • Pine: A softwood that is affordable and easy to work with.
  • Poplar: A hardwood that is slightly more expensive than pine but is more durable and resistant to wear and tear.
  • Oak: A hardwood that is the most expensive option but is extremely durable and long-lasting.

Regardless of the type of wood you choose, make sure it is straight and free of knots and cracks.

Tools Required

To build a wooden dummy, you’ll need a few basic tools:

  • Saw: You’ll need a saw to cut the wood to size.
  • Drill: A drill will be necessary to make holes for the arms and legs.
  • Chisel: A chisel will be used to carve out the arms and legs.
  • Sandpaper: You’ll need sandpaper to smooth out any rough edges.
  • Measuring tape: To ensure accurate measurements.

In addition to these basic tools, you may also want to consider using clamps to hold the wood in place while you work, as well as a square to ensure your cuts are straight and precise.

With these materials and tools, you’ll be well on your way to building your own wooden dummy.

Designing Your Dummy

When designing your wooden dummy, there are two main things to consider: dimensions and style.

Dimensions

The dimensions of your wooden dummy will depend on your height and reach. Generally, the dummy should be about the same height as you and the arms should be at the same level as your chest. The following table provides some general guidelines for dimensions based on height:

Height Dummy Height Arm Length
5’0″ – 5’6″ 60″ 12″
5’7″ – 6’0″ 64″ 13″
6’1″ – 6’6″ 68″ 14″

Of course, these are just general guidelines and you may need to adjust the dimensions to fit your specific body type.

Style

There are many different styles of wooden dummies, but the most common is the Wing Chun dummy. This style features three arms and a leg for practicing kicks, as well as a central post for practicing strikes. However, you can also design your dummy to fit your specific needs.

When designing the style of your dummy, consider the following:

  • How many arms and legs do you want?
  • What angles should the arms and legs be at?
  • How thick should the arms and legs be?

Ultimately, the style of your dummy will depend on your specific training needs and preferences.

By considering both the dimensions and style of your wooden dummy, you can create a training tool that is tailored to your individual needs.

Building Steps

Building an inexpensive wooden dummy is a great way to practice your Wing Chun skills without breaking the bank. Here are the steps you need to follow to build your own dummy:

Cutting the Wood

The first step is to cut the wood into the right sizes. You will need two 6-foot long 4x4s, one 3-foot long 2×4, and one 2-foot long 2×4. Cut one of the 6-foot 4x4s into four 18-inch pieces, and cut the other 6-foot 4×4 into two 24-inch pieces and two 30-inch pieces. Cut the 3-foot 2×4 into two 18-inch pieces, and cut the 2-foot 2×4 into two 12-inch pieces.

Assembling the Parts

Once you have all the pieces cut, it’s time to assemble them. Start by attaching the two 24-inch pieces to one of the 30-inch pieces to form a T-shape. Then, attach the two 18-inch pieces to the other end of the 30-inch piece to form a cross-shape. Next, attach the four 18-inch pieces to the cross-shaped frame, two on each side, to form the arms and legs of the dummy.

Attach the two 12-inch pieces to the bottom of the dummy to form the feet. Then, attach the two 18-inch pieces to the top of the dummy to form the arms. Finally, attach the two 18-inch pieces to the sides of the dummy to form the body.

Finishing Touches

Once the dummy is assembled, it’s time to add some finishing touches. Sand all the rough edges and corners to make sure the dummy is smooth and safe to use. You can also add padding to the arms and legs to make them more comfortable to hit.

You can also add some weight to the bottom of the dummy to make it more stable. You can use sandbags or concrete blocks for this. Finally, you can paint the dummy to give it a more finished look.

That’s it! Follow these steps, and you’ll have your very own inexpensive wooden dummy to practice your Wing Chun skills on.

Maintaining Your Dummy

Maintaining your wooden dummy is crucial to ensure it lasts a long time and continues to be a valuable training tool. In this section, we will discuss how to clean your dummy and how to repair and replace parts that may become damaged over time.

Cleaning

Cleaning your wooden dummy is a simple process that should be done regularly to keep it in good condition. Here are the steps to follow:

  1. Use a soft cloth or brush to remove any dust or debris from the surface of the dummy.
  2. Mix a solution of mild soap and warm water in a bucket.
  3. Dip a clean cloth into the solution and wring out any excess water.
  4. Wipe down the surface of the dummy with the damp cloth, making sure to get into all the crevices and corners.
  5. Use a dry cloth to remove any excess water and allow the dummy to air dry completely before using it again.

Repair and Replacement

Even with proper maintenance, parts of your wooden dummy may become damaged over time. Here are some common issues and how to address them:

Loose Arms or Legs

If the arms or legs of your dummy become loose, you can fix them by tightening the screws that hold them in place. Use a screwdriver to tighten the screws until they are snug.

Cracks or Splits

If you notice any cracks or splits in the wood, you should address them immediately to prevent further damage. Use a wood filler to fill in the crack or split and sand it down until it is smooth. You can also apply a wood sealer to protect the repaired area.

Broken Arms or Legs

If an arm or leg of your dummy becomes broken, you may need to replace it. You can purchase replacement arms and legs online or from a martial arts supply store. Remove the damaged arm or leg and replace it with the new one, making sure to tighten the screws securely.

By following these simple steps, you can keep your wooden dummy in great condition and continue to use it as a valuable training tool.

How to Build a Wooden Rocking Chair: A Step-by-Step Guide

Are you looking to add a touch of comfort to your home with a beautiful wooden rocking chair? Building your own rocking chair can be a rewarding and fulfilling project that will provide you with a unique piece of furniture that you can cherish for years to come. Whether you’re an experienced woodworker or a beginner, building a wooden rocking chair is a project that can be accomplished with some patience and attention to detail.

To get started, you’ll need to gather the necessary materials and tools, including wood, screws, a saw, a drill, and sandpaper. There are many different styles and designs of rocking chairs to choose from, so you’ll want to decide on the one that best fits your needs and preferences. You can find plans and instructions online, or you can create your own design if you have some woodworking experience. Once you have your materials and plans in hand, it’s time to get started on your project.

Understanding the Basics

Before you start building a wooden rocking chair, it’s important to understand some basics. This section will cover the types of wood you can use and the tools you will need to get the job done.

Types of Wood

When choosing the type of wood for your rocking chair, consider both the look and durability. Some popular options include:

  • Cherry: A beautiful, reddish-brown wood that is both durable and easy to work with.
  • Maple: A strong, dense wood with a fine grain that is often used for furniture.
  • Oak: A classic, sturdy wood that is resistant to wear and tear.
  • Walnut: A dark, rich wood that is strong and durable.

You can also use other types of wood, but make sure they are strong enough to support the weight of a person and have a tight, even grain.

Tools Needed

To build a wooden rocking chair, you will need some basic tools:

  • Saw: A hand saw or power saw will be necessary to cut the wood to the right size.
  • Drill: You will need a drill to make holes for screws and other fasteners.
  • Screwdriver: A screwdriver will be necessary to tighten screws and other fasteners.
  • Sandpaper: You will need sandpaper to smooth out rough edges and surfaces.
  • Clamps: Clamps will be necessary to hold the wood in place while you work on it.
  • Measuring tape: You will need a measuring tape to ensure that all the pieces are cut to the right size.

Other tools you may need include a chisel, a hammer, and a router. Make sure you have all the necessary tools before you begin.

Now that you understand the basics of building a wooden rocking chair, it’s time to move on to the next step.

Designing Your Rocking Chair

When it comes to building a wooden rocking chair, the design process is crucial. You want to create a chair that is not only comfortable but also aesthetically pleasing and functional. In this section, we will cover the two main aspects of designing your rocking chair: choosing a design and creating a blueprint.

Choosing a Design

Before you start building your rocking chair, you need to choose a design that suits your needs and preferences. There are many different designs to choose from, ranging from traditional to modern styles. Here are some factors to consider when choosing a design:

  • Comfort: The most important factor to consider is comfort. You want to choose a design that will provide adequate support and comfort for your body.
  • Style: Consider the style of your rocking chair and how it will fit in with the rest of your furniture. If you have a traditional home, you may want to choose a classic design. If you have a modern home, you may want to choose a more contemporary design.
  • Materials: Think about the type of wood you want to use for your rocking chair. Different woods have different properties, and some are better suited for certain designs than others.
  • Size: Consider the size of your rocking chair and how it will fit in your space. You want to choose a design that is proportional to the room it will be in.

Creating a Blueprint

Once you have chosen a design for your rocking chair, the next step is to create a blueprint. A blueprint is a detailed plan that outlines the dimensions and specifications of your chair. Here are the steps to creating a blueprint:

  1. Measure and sketch: Measure the dimensions of your chair and sketch a rough outline of your design.
  2. Refine your sketch: Refine your sketch, adding more details and making adjustments to the dimensions as necessary.
  3. Add measurements: Add measurements to your sketch, including the height, width, and depth of each component.
  4. Create a parts list: Create a list of all the parts you will need to build your chair, including the type and quantity of wood, screws, and other materials.
  5. Review and revise: Review your blueprint and make any necessary revisions before you start building.

By following these steps, you can create a detailed blueprint that will guide you through the building process and ensure that your rocking chair turns out just the way you want it.

Preparing the Wood

Before you start building your wooden rocking chair, it’s important to prepare the wood properly. This will ensure that your chair is sturdy and long-lasting. In this section, we’ll cover the two main steps to prepare the wood: selecting the wood and cutting the wood.

Selecting the Wood

The first step in preparing the wood is to select the right type of wood. You want to choose a wood that is strong and durable, but also has a nice grain and texture. Some popular choices for a rocking chair include cherry, oak, and maple.

When selecting your wood, make sure that it is free of knots and cracks. These imperfections can weaken the wood and make it more prone to breaking. You should also choose wood that is straight and has a consistent thickness. This will make it easier to work with when cutting and shaping.

Cutting the Wood

Once you have selected your wood, the next step is to cut it to the right size and shape. You will need to cut several pieces of wood for your rocking chair, including the seat, back, legs, and rockers.

To cut the wood, you will need a saw and a measuring tape. Make sure to measure each piece of wood carefully to ensure that it is the right size. You can use a table saw or a circular saw to make the cuts, but make sure to use a guide to keep your cuts straight and even.

After you have cut your wood to the right size, you can start shaping it. You can use a variety of tools to shape the wood, including a router, chisels, and sandpaper. Make sure to take your time and work carefully to create smooth, even curves and angles.

By following these steps to prepare your wood, you can ensure that your wooden rocking chair is strong, durable, and beautiful. With a little patience and attention to detail, you can create a chair that you will enjoy for years to come.

Building the Chair

Assembling the Pieces

Now that you have cut and shaped all the wooden pieces for your rocking chair, it’s time to start assembling them together. Here are the steps you need to follow:

  1. Begin by attaching the front legs to the seat. Place the seat upside down on a flat surface and align the legs so they are perpendicular to the seat. Use wood glue and screws to secure them in place.

  2. Next, attach the back legs to the seat. Again, use wood glue and screws to secure them in place.

  3. Now it’s time to attach the backrest to the back legs. Align the backrest with the back legs and use wood glue and screws to secure it in place.

  4. Finally, attach the armrests to the front legs. Align them with the legs and use wood glue and screws to secure them in place.

Sanding and Finishing

Once you have assembled the chair, it’s important to sand it down and apply a finish to protect the wood and give it a polished look. Here’s what you need to do:

  1. Start by sanding the entire chair with coarse-grit sandpaper to remove any rough spots or imperfections. Then switch to a finer-grit sandpaper to smooth out the surface.

  2. Once you have finished sanding, wipe down the chair with a damp cloth to remove any dust or debris.

  3. Apply a wood stain or paint to the chair, following the manufacturer’s instructions. Be sure to apply an even coat and let it dry completely before applying a second coat.

  4. Finally, apply a clear coat of polyurethane or another protective finish to the chair to seal the wood and give it a glossy finish.

By following these steps, you can build a beautiful and sturdy wooden rocking chair that will last for years to come.

Safety Measures

When it comes to building a wooden rocking chair, safety should always be your top priority. Here are some safety measures you should take to ensure that you can build your chair without any accidents.

Wear Protective Gear

Before you begin building your rocking chair, make sure to wear protective gear. This includes safety glasses, gloves, and a dust mask. These items will protect you from flying wood chips, sawdust, and other debris that can cause serious injury.

Use Proper Tools

Using the right tools for the job is essential to building a safe and sturdy rocking chair. Make sure your tools are in good condition and that you know how to use them properly. If you’re not sure how to use a tool, ask someone with experience or do some research before you begin.

Follow Instructions Carefully

Make sure to read and follow the instructions carefully. This will help you avoid mistakes that can cause injury. If you’re not sure about something, don’t hesitate to ask for help.

Secure Your Workpiece

Make sure your workpiece is securely clamped or held in place before you begin cutting or drilling. This will prevent the wood from moving or shifting, which can cause the saw or drill to kick back and cause injury.

Take Breaks

Building a wooden rocking chair can be a time-consuming process. It’s important to take breaks and rest your eyes, hands, and back to prevent injury from repetitive motion.

By following these safety measures, you can build a wooden rocking chair without any accidents. Remember to always prioritize safety and take the necessary precautions to protect yourself while building.

Maintaining Your Rocking Chair

Congratulations on building your own wooden rocking chair! Now that you have this beautiful piece of furniture, it’s important to take care of it so it can last for years to come. Here are some tips for maintaining your rocking chair:

Cleaning

Regular cleaning is essential for keeping your rocking chair looking its best. Use a soft cloth or brush to remove any dust or debris from the surface of the chair. You can also use a damp cloth to wipe down the chair, but be sure to dry it thoroughly afterwards to prevent any water damage.

Oiling

Wooden furniture needs to be oiled periodically to keep it from drying out and cracking. Apply a thin layer of oil to your rocking chair using a soft cloth, and then wipe away any excess. Be sure to use an oil that is appropriate for your type of wood.

Tightening Screws and Bolts

Over time, the screws and bolts in your rocking chair may become loose. Periodically check to make sure that they are all tight and secure. If you notice any that are loose, tighten them with a screwdriver or wrench.

Avoiding Sunlight and Moisture

Direct sunlight and moisture can damage the finish and wood of your rocking chair. Try to keep your chair out of direct sunlight, and avoid placing it in areas where it may be exposed to moisture, such as near windows or in a damp basement.

By following these simple maintenance tips, you can keep your rocking chair looking beautiful and functioning properly for years to come.

How to Build a Wooden Door for Your Shed

To add a touch of personality and functionality to your shed, why not build a wooden door? Not only will it give your shed a rustic look, but it will also provide added security and insulation. With a few tools and materials, you can easily create a custom wooden door that fits your shed’s dimensions.

Before you get started, measure the size of your doorframe and gather the necessary materials. You’ll need wood paneling or plywood to create the door itself, as well as a wooden frame to reinforce it. Once you have your materials, it’s time to get to work! Follow these steps to create a stylish and sturdy door for your shed.

Understanding the Basics

When it comes to building a wooden door for your shed, it’s important to understand the basics. This includes the types of wood that are commonly used, as well as how to choose the right wood for your project. In this section, we’ll cover these topics in more detail.

Types of Wood

There are many types of wood that can be used to build a shed door. Some of the most popular options include:

  • Cedar: Cedar is a popular choice for shed doors because it is naturally resistant to rot and decay. It also has a beautiful natural color and grain pattern.

  • Pine: Pine is a softwood that is easy to work with and relatively inexpensive. However, it is not as durable as some other types of wood and may require regular maintenance to prevent rot and decay.

  • Redwood: Redwood is a beautiful and durable wood that is resistant to rot and decay. However, it can be more expensive than other types of wood.

  • Oak: Oak is a hardwood that is strong and durable. It is also resistant to rot and decay. However, it can be more difficult to work with than some other types of wood.

Choosing the Right Wood

When choosing the right wood for your shed door, there are a few things to consider. These include:

  • Durability: You want a wood that is strong and durable, so it can withstand the elements and last for years to come.

  • Resistance to rot and decay: Since your shed door will be exposed to the elements, it’s important to choose a wood that is naturally resistant to rot and decay.

  • Aesthetics: You want your shed door to look good, so consider the natural color and grain pattern of the wood.

  • Cost: Finally, consider the cost of the wood. Some types of wood can be more expensive than others, so choose a wood that fits your budget.

By understanding the basics of wood selection, you can choose the right wood for your shed door and ensure that it looks great and lasts for years to come.

Tools Needed

To make a wooden door for your shed, you will need some tools. Here are the basic tools you will need:

  • Measuring tape
  • Circular saw or table saw
  • Jigsaw
  • Power drill
  • Screwdriver
  • Wood glue
  • Clamps
  • Sandpaper
  • Paint or stain (optional)

Before you start building your shed door, make sure you have all the necessary tools and materials. Having everything you need in one place will make the process much smoother and more efficient.

Using a measuring tape, measure the size of your shed door frame. This will help you determine the size of your door and how much wood you will need. Once you have your measurements, use a circular saw or table saw to cut the wood to size.

Next, use a jigsaw to cut out any decorative or functional features you want on your door, such as windows or handles. Then, use a power drill to attach the pieces of wood together, making sure to use wood glue and clamps to hold everything in place while it dries.

Once your door is assembled, use sandpaper to smooth out any rough edges and prepare the surface for painting or staining. Finally, add any finishing touches, such as hardware or a coat of paint, to complete your shed door.

Preparing the Wood

Before you start building your shed door, it’s important to properly prepare the wood to ensure a sturdy and long-lasting finished product. This section will cover the necessary steps to measure, cut, sand, and finish your wooden door.

Measuring and Cutting

The first step in preparing the wood for your shed door is to measure and cut the pieces to the correct size. You will need to measure the opening of your shed and add an inch to both the width and height to allow for a proper fit. Once you have your measurements, use a saw to cut the wood to the correct size.

It’s important to use a straight edge when cutting the wood to ensure a clean and even cut. You may also want to label each piece of wood to keep track of which piece goes where in the door.

Sanding and Finishing

After cutting the wood, the next step is to sand it down to remove any rough edges or splinters. Start with a coarse grit sandpaper and work your way up to a finer grit for a smooth finish. Be sure to sand both sides of the wood as well as the edges.

Once the wood is sanded, you can apply a finish to protect it from the elements. A clear sealant or paint can be used to give the wood a polished look and protect it from moisture and UV damage.

Before applying the finish, be sure to wipe down the wood with a damp cloth to remove any sawdust or debris. Apply the finish evenly with a brush or roller, and allow it to dry completely before handling the wood.

By properly preparing your wood, you can ensure that your shed door will be sturdy, durable, and look great for years to come.

Assembling the Door

When it comes to assembling your wooden shed door, there are two main steps you need to follow: framing the door and attaching the panels. With the right tools and materials, this process can be relatively straightforward and easy to accomplish.

Framing the Door

The first step in assembling your wooden shed door is to frame it. This involves cutting the lumber to the correct size and shape, and then assembling it into a sturdy frame that will support the weight of the door panels.

To frame your door, you will need the following materials:

  • 2×4 lumber
  • Measuring tape
  • Circular saw
  • Drill
  • Screws

Start by measuring the opening of your shed and cutting the 2×4 lumber to the appropriate length. You will need two pieces for the top and bottom of the frame, and two more for the sides.

Once you have cut your lumber to size, assemble the pieces using screws and a drill. Make sure the corners are square and the frame is sturdy and level.

Attaching the Panels

Once you have framed your door, the next step is to attach the panels. This involves cutting the plywood or other material to size and then securing it to the frame.

To attach the panels, you will need the following materials:

  • Plywood or other panel material
  • Measuring tape
  • Circular saw
  • Drill
  • Screws

Start by measuring the size of each panel and cutting the plywood to the appropriate size. Then, attach the panels to the frame using screws and a drill. Make sure the panels are flush with the frame and secure.

Once you have attached all of the panels, your shed door should be sturdy and ready to use. With a little bit of effort and the right tools, you can easily assemble a wooden shed door that will provide years of reliable use.

Installing the Door

Once you have built your wooden shed door, it’s time to install it. This section will walk you through the steps of installing your shed door.

Installing Hinges

The first step in installing your shed door is to attach the hinges to the door frame. You will need to have at least two hinges for your door, but depending on the size and weight of your door, you may need more.

To attach the hinges, follow these steps:

  1. Measure and mark the placement of the hinges on the door frame. Make sure they are evenly spaced and level.
  2. Pre-drill pilot holes for the screws.
  3. Attach the hinges to the door frame using screws. Make sure they are tightened securely.

Hanging the Door

Once the hinges are attached to the door frame, it’s time to hang the door. Follow these steps:

  1. Hold the door up to the door frame, aligning the hinges with the hinge plates on the frame.
  2. Insert the hinge pins into the hinge plates.
  3. Test the door to make sure it opens and closes smoothly. If it doesn’t, adjust the hinges as needed.
  4. Install a latch or lock on the door to keep it closed.

Congratulations, you have successfully installed your shed door!

Maintaining Your Wooden Door

Wooden shed doors are sturdy and durable, but they do require some maintenance to keep them in good condition. Regular cleaning, sealing, and painting can help extend the life of your door and keep it looking great.

Regular Cleaning

To keep your wooden door looking its best, you should clean it regularly. Use a mild detergent and warm water to wash the door, and rinse it with a hose. Avoid using harsh chemicals or abrasive cleaners, as they can damage the wood.

If your door has any mildew or mold, you can use a solution of bleach and water to clean it. Mix one part bleach with three parts water, and apply the solution to the door with a brush. Rinse the door thoroughly with a hose, and let it dry completely before sealing or painting.

Sealing and Painting

Sealing your wooden door is important to protect it from moisture and weather damage. You should seal your door every few years, or whenever the finish begins to wear off. Use a high-quality wood sealer, and apply it according to the manufacturer’s instructions.

Painting your wooden door can also help protect it from the elements. Choose a high-quality exterior paint, and apply it in thin, even coats. Be sure to paint all sides of the door, including the edges and the top and bottom.

If your door has any cracks or gaps, you should fill them with wood filler before sealing or painting. Sand the surface of the door smooth before applying the sealer or paint.

By following these simple maintenance steps, you can keep your wooden shed door looking great for years to come.

How to Make Wooden Beads Without a Lathe: Easy DIY Guide

Are you interested in creating your own wooden beads but don’t have access to a lathe? Don’t worry, you can still make beautiful beads with just a few tools and some patience. In this article, we will guide you through the process of making wooden beads without a lathe.

One of the easiest ways to make wooden beads without a lathe is by using a Dremel drill. With the right attachments and techniques, you can create beads of any size and shape. Another method is by using a hand drill and sandpaper. This technique requires more effort and time, but it can produce beautiful results. We will cover both methods in detail, so you can choose the one that works best for you.

Whether you want to create unique jewelry pieces or decorate your home, making wooden beads is a fun and rewarding activity. With a little bit of practice, you can master the techniques and create beads that are as beautiful as they are functional. So, let’s get started and learn how to make wooden beads without a lathe!

Understanding the Basics of Wooden Beads

If you’re looking to create your own wooden beads without a lathe, it’s important to understand the basics of wooden beads. Wooden beads are commonly used in jewelry making, home decor, and other craft projects. They come in various shapes and sizes, and can be made from a variety of woods.

Types of Wood

Different types of wood can be used to make wooden beads. Some popular choices include:

  • Pine: A softwood that is easy to work with and has a light, natural color.
  • Oak: A hardwood that is durable and has a distinctive grain pattern.
  • Maple: A hardwood that is dense and has a smooth, uniform texture.
  • Cherry: A hardwood that has a reddish-brown color and a fine grain.

Shapes and Sizes

Wooden beads can be made in a variety of shapes and sizes. Some common shapes include:

  • Round: The most common shape for wooden beads, available in various sizes.
  • Oval: A more unique shape that can add interest to your projects.
  • Cube: A square-shaped bead that can add a modern touch to your designs.
  • Tube: A cylindrical bead that can be used as a spacer or focal bead.

Sizes of wooden beads can range from tiny seed beads to larger statement beads. It’s important to choose the right size for your project to ensure that it looks balanced and visually appealing.

Finishing Techniques

Once you’ve created your wooden beads, you may want to apply a finish to them. Some popular finishing techniques include:

  • Sanding: Sanding the beads with a fine-grit sandpaper can create a smooth surface and remove any rough spots.
  • Staining: Staining the beads can add color and depth to the wood grain.
  • Sealing: Sealing the beads with a clear coat can protect them from moisture and wear.

By understanding the basics of wooden beads, you can create your own unique beads to use in your craft projects. With a little practice and experimentation, you can create beads that are both beautiful and functional.

Choosing the Right Wood

When it comes to making wooden beads without a lathe, choosing the right wood is crucial. You want a wood that is easy to work with and won’t split or crack during the drilling process. Here are some tips to help you choose the right wood for your project:

Softwoods vs. Hardwoods

Softwoods are generally easier to work with than hardwoods because they are less dense and have a lower risk of splitting. Some good softwoods for making wooden beads include pine, cedar, and spruce. Hardwoods, on the other hand, are denser and can be more difficult to work with. However, they also tend to be more durable and have a nicer finish. Some good hardwoods for making wooden beads include oak, maple, and cherry.

Grain Direction

When choosing your wood, pay attention to the direction of the grain. You want to choose a piece of wood with a straight grain that runs parallel to the length of the bead. This will help prevent the wood from splitting or cracking during the drilling process.

Knots and Imperfections

Avoid using wood with knots or other imperfections. These can cause the wood to split or crack during drilling. Look for a piece of wood that is free of knots and other defects.

Moisture Content

Finally, make sure your wood is dry before you begin. Moisture in the wood can cause it to warp or split during the drilling process. You can test the moisture content of your wood by weighing it before and after drying it in an oven at 200 degrees Fahrenheit for several hours. If the weight changes by more than a few percent, the wood is still too moist to use.

By following these tips, you can choose the right wood for your wooden bead project and avoid any issues during the drilling process.

Tools and Materials Needed

To make wooden beads without a lathe, you will need a few tools and materials. Here are the essential items you will need:

Hand Drill

A hand drill is the most important tool you will need to make wooden beads. You can use either a cordless or corded drill. A cordless drill will give you more freedom of movement, but a corded drill will provide you with more power. Make sure to have a variety of drill bits in different sizes to create holes of different diameters in the wooden beads.

Sandpaper

Sandpaper is essential to smooth the surface of the wooden beads. You will need sandpaper in various grits, from coarse to fine. Coarse grit sandpaper will remove rough spots and smooth out the shape of the bead, while fine grit sandpaper will give the bead a polished finish.

Saw

You will need a saw to cut the wooden dowel into smaller pieces that you can work with. A hand saw or a miter saw will work well for this purpose. Make sure to choose a saw that is appropriate for the size of the wooden dowel you are working with.

In addition to these tools, you will also need wooden dowels, a ruler, a pencil, and a clamp to secure the wooden dowel in place while you work on it. Once you have gathered all the necessary tools and materials, you are ready to start making your own wooden beads without a lathe.

Preparing the Wood

Making wooden beads without a lathe is a fun and easy craft that anyone can do. The first step is to prepare the wood that you will be using. Here are some tips to get you started:

Choose the Right Wood

The type of wood you choose will affect the final look and durability of your beads. Some good options include:

  • Softwoods like pine or cedar
  • Hardwoods like oak or maple
  • Fruitwoods like apple or cherry

Avoid using wood that is too hard or too soft, as it will be difficult to work with or may not hold up well over time.

Cut the Wood into Strips

Once you have chosen your wood, the next step is to cut it into strips. You can use a saw or a sharp knife to do this. Make sure that the strips are uniform in size and thickness, as this will make it easier to shape them into beads.

Sand the Strips

After cutting the strips, sand them down to remove any rough edges or splinters. You can use sandpaper or a sanding block to do this. Start with a coarse grit and gradually work your way up to a finer grit for a smooth finish.

Mark the Center of Each Strip

To make your beads symmetrical, you will need to mark the center of each strip. You can do this by measuring the width of the strip and dividing it in half. Use a pencil or a small notch to mark the center.

Drill a Hole in Each Strip

Finally, use a drill to make a hole in the center of each strip. The size of the hole will depend on the size of the bead you want to make. Use a drill bit that is slightly smaller than the diameter of the bead you want to create.

By following these steps, you will be well on your way to making beautiful wooden beads without a lathe.

Creating the Bead

If you don’t have access to a lathe, you can still make your own wooden beads using a few simple tools. In this section, we’ll go over the steps to create a basic wooden bead using a drill.

Cutting the Wood

To start, you’ll need a piece of wood that’s roughly the size and shape you want your bead to be. You can use a saw to cut the wood into a rough cylinder shape, or you can use a knife or chisel to carve it into the desired shape.

Once you have your rough shape, use sandpaper to smooth out any rough edges or bumps. You want the surface of the wood to be as smooth as possible before you begin drilling.

Drilling the Hole

Next, you’ll need to drill a hole through the center of the bead. This is where you’ll be able to string the bead onto a necklace or bracelet.

To drill the hole, you’ll need a drill and a drill bit that’s the same size as the string or cord you’ll be using. Clamp the wood onto a work surface to keep it steady, and use the drill to make a hole straight through the center of the bead.

Be sure to drill slowly and carefully to avoid cracking or splitting the wood. Once you’ve drilled the hole, use sandpaper to smooth out any rough edges around the hole.

And that’s it! With a little bit of patience and some basic tools, you can create your own wooden beads without a lathe.

Finishing the Beads

Once you have drilled your wooden beads, it’s time to finish them. This step is essential to protect the wood and give it a polished look. Here are the two main steps to finish your wooden beads:

Sanding the Beads

Before you apply any finish, you need to sand the beads to remove any rough edges and make the surface smooth. Here’s how to sand your wooden beads:

  1. Start with a coarse grit sandpaper (around 100 grit) and sand the bead until all the rough edges are gone.
  2. Move on to a finer grit sandpaper (around 220 grit) and sand the bead again to make the surface even smoother.
  3. Finally, use a very fine grit sandpaper (around 400 grit) to give the bead a polished finish.

Make sure to sand the entire surface of the bead, including the hole where the string will go through. You can use a small piece of sandpaper to sand the inside of the hole.

Applying Finish

After you have sanded the beads, it’s time to apply the finish. There are many different types of finishes you can use, but some popular options include:

  • Beeswax: This is a natural and non-toxic option that will give your wooden beads a soft, matte finish.
  • Shellac: This is a quick-drying and easy-to-apply finish that will give your wooden beads a glossy look.
  • Polyurethane: This is a durable and water-resistant finish that will protect your wooden beads from wear and tear.

Here’s how to apply the finish to your wooden beads:

  1. Apply a small amount of the finish to a clean cloth.
  2. Rub the finish onto the surface of the bead, making sure to cover the entire surface.
  3. Allow the finish to dry completely before handling the bead.

You may need to apply multiple coats of the finish to get the desired look. Make sure to follow the manufacturer’s instructions for the specific finish you are using.

In conclusion, finishing your wooden beads is an important step to protect and enhance the wood. By sanding the beads and applying a finish, you can create beautiful and long-lasting wooden beads without the need for a lathe.

Safety Tips

When working with wood, it is important to take certain safety precautions to avoid injury. Here are some safety tips to keep in mind when making wooden beads without a lathe:

  • Wear protective gear: Always wear eye protection and a dust mask when working with wood. Sawdust can irritate your eyes and lungs, so it’s important to protect yourself.
  • Use sharp tools: Dull tools can slip and cause injury. Make sure your tools are sharp and in good condition before using them.
  • Secure your workpiece: Use clamps or a vise to secure your workpiece to a stable surface. This will prevent it from moving around while you work on it.
  • Take breaks: Working for long periods of time can lead to fatigue and increase the risk of injury. Take frequent breaks to rest and stretch your muscles.
  • Follow instructions: When using power tools, always follow the manufacturer’s instructions and safety guidelines. Improper use can lead to serious injury.
  • Keep your workspace clean: A cluttered workspace can be hazardous. Keep your work area clean and organized to avoid tripping or falling.

By following these safety tips, you can reduce the risk of injury and enjoy the process of making wooden beads without a lathe.

Frequently Asked Questions

Here are some common questions that people have when it comes to making wooden beads without a lathe:

Q: Can I use any type of wood to make beads?

A: Yes, you can use any type of wood that you like. However, some types of wood may be easier to work with than others. Soft woods like pine and cedar are easier to carve and drill than harder woods like oak or maple. You may also want to consider the color and grain of the wood when choosing what type to use.

Q: Do I need any special tools to make wooden beads?

A: No, you don’t need any special tools. All you need is a drill, sandpaper, and a saw to cut the wood into small pieces. If you want to add designs or patterns to your beads, you can use a wood burning tool or paint.

Q: What size should I make my beads?

A: The size of your beads is up to you. However, most wooden beads range in size from 4mm to 20mm in diameter. If you are making jewelry, you may want to consider the size of the beads in relation to the size of the holes in your findings.

Q: How do I drill the holes in the beads?

A: To drill the holes in your beads, you will need a drill and a small drill bit. You can use a hand drill or a power drill, whichever you feel more comfortable with. Be sure to clamp the wood securely before drilling to prevent it from moving around. Start with a small drill bit and work your way up to a larger size if needed.

Q: How do I finish my wooden beads?

A: You can finish your wooden beads with sandpaper to smooth out any rough edges or surfaces. You can also add a coat of varnish or sealant to protect the wood and give it a polished look. If you want to add color to your beads, you can use wood stain or paint.

hybrid-clubs-vs-3-wood

What Hybrid Replaces a 3 Wood? A Friendly Guide to Choosing the Right Club

Are you in search of a club to replace your 3 wood? Look no further than a hybrid club. Hybrid clubs have become increasingly popular in recent years due to their versatility and ability to replace multiple clubs in a golfer’s bag. But what hybrid replaces a 3 wood?

A 3 wood is typically used for longer shots off the fairway and tee, but a hybrid club can provide similar distance and accuracy while also being easier to hit. The loft of a 3 wood is typically between 14 and 16 degrees, while a hybrid club can range from 16 to 22 degrees. The higher loft of a hybrid club allows for a higher launch angle and more spin, making it easier to get the ball in the air and land it softly on the green.

When selecting a hybrid to replace your 3 wood, it is important to consider the loft, shaft length, and average distance of each club. The right hybrid can help fill the gap between your fairway woods and irons, providing you with a more consistent and reliable club for those longer shots. So, what hybrid replaces a 3 wood? Let’s take a closer look at some options and factors to consider.

Understanding Hybrid Clubs

The Basics

Hybrid clubs, also known as utility clubs, are a combination of fairway woods and irons. They are designed to provide golfers with a more forgiving option than long irons, while still maintaining the distance of a fairway wood. Hybrid clubs typically have a smaller clubhead than fairway woods, but larger than irons. They also have a lower center of gravity, which helps to launch the ball higher and with more accuracy.

Hybrids are available in a variety of lofts and can replace any club in your bag, from a 1 iron to a pitching wedge. They are especially useful for players who struggle with long irons or fairway woods. By using a hybrid, you can hit the ball higher and with more accuracy, making it easier to hit greens in regulation.

Benefits of Hybrid Clubs

One of the main benefits of using a hybrid club is the increased forgiveness it provides. Hybrids have a larger sweet spot than long irons, making it easier to hit good shots, even on mishits. They also have a lower center of gravity, which helps to launch the ball higher and with more accuracy.

Another benefit of using a hybrid is the versatility it provides. Hybrids can be used from a variety of lies, including fairway, rough, and even bunkers. They are also useful for getting out of trouble, such as when you need to hit a low shot under a tree branch.

Overall, hybrid clubs are a great addition to any golfer’s bag. They provide increased forgiveness and versatility, making it easier to hit good shots from a variety of lies. If you struggle with long irons or fairway woods, consider adding a hybrid to your bag to improve your game.

Hybrid Clubs Vs 3 Wood

hybrid-clubs-vs-3-wood

When it comes to deciding between a hybrid club and a 3 wood, there are a few key factors to consider. Here are some things to keep in mind:

Distance Comparison

One of the main differences between a hybrid club and a 3 wood is the distance they can achieve. In general, a 3 wood will travel further than a hybrid club. This is because a 3 wood has a longer shaft and a lower loft angle, which allows for a greater amount of clubhead speed and distance.

However, it’s important to keep in mind that distance isn’t the only factor to consider. A hybrid club may not travel as far as a 3 wood, but it can still provide plenty of distance while also offering greater accuracy and control.

Ease of Use

Another factor to consider is ease of use. While a 3 wood can be a powerful club in the right hands, it can also be difficult to hit consistently. This is because it requires a high level of skill and technique to get the most out of it.

On the other hand, a hybrid club is generally easier to hit than a 3 wood. This is because it has a shorter shaft and a higher loft angle, which makes it easier to get the ball in the air and keep it on target.

Versatility

Finally, it’s worth considering the versatility of each type of club. A 3 wood is generally used for long shots off the tee or from the fairway, while a hybrid club can be used for a wider range of shots.

For example, a hybrid club can be used for long approach shots, shots from the rough, and even chip shots around the green. This versatility can make a hybrid club a valuable addition to your bag, especially if you’re looking for a club that can help you in a variety of situations.

Overall, the decision between a hybrid club and a 3 wood will depend on your individual needs and preferences. Consider factors like distance, ease of use, and versatility when making your decision, and don’t be afraid to experiment with different clubs to find the ones that work best for you.

Popular Hybrid Replacements for 3 Wood

popular-hybrid-replacements-for-3-wood

If you’re looking for a replacement for your 3 wood, a hybrid club might be just what you need. Here are a few popular options to consider:

Callaway Big Bertha

The Callaway Big Bertha hybrid is a great option for those looking to replace their 3 wood. It features a larger head and a low center of gravity, which makes it easier to launch the ball high and far. The club also has a high MOI (moment of inertia), which means it’s more forgiving on off-center hits.

TaylorMade M6

The TaylorMade M6 hybrid is another solid choice for those in search of a 3 wood replacement. It has a sleek, aerodynamic design that promotes faster swing speeds and longer shots. The M6 also has a low CG (center of gravity) and a high MOI, making it easy to hit and forgiving on mishits.

Cobra King F9

The Cobra King F9 hybrid is a versatile club that can replace both your 3 wood and your long irons. It has a lightweight carbon fiber crown and a low CG, which helps you launch the ball high and far. The F9 also has adjustable loft and lie settings, so you can fine-tune it to your swing and the course conditions.

No matter which hybrid you choose, make sure to get fitted for the right shaft and loft to maximize your performance. Happy golfing!

Factors to Consider When Replacing a 3 Wood with a Hybrid

factors-to-consider-when-replacing-a-3-wood-with-a-hybrid

When it comes to replacing a 3 wood with a hybrid, there are several factors that you need to consider to ensure that you make the right choice. Here are some of the key factors that you should keep in mind:

Skill Level

Your skill level is an important factor to consider when choosing a hybrid to replace your 3 wood. If you are a beginner or a high handicapper, you may want to choose a hybrid with a higher loft and a larger clubhead. These features can make it easier to hit the ball higher and straighter, which can be beneficial for golfers who struggle with consistency.

On the other hand, if you are a more experienced golfer with a lower handicap, you may prefer a hybrid with a lower loft and a smaller clubhead. This type of hybrid can provide more distance and control, which can be useful for golfers who are looking to shape their shots and hit the ball with more precision.

Course Conditions

The course conditions that you typically play on can also influence your choice of hybrid. If you play on courses with tight fairways and thick rough, a hybrid with a higher loft and a larger clubhead can be advantageous. This type of hybrid can help you get out of trouble and advance the ball towards the green more easily.

On the other hand, if you play on courses with wide fairways and little rough, a hybrid with a lower loft and a smaller clubhead may be more suitable. This type of hybrid can provide more distance and accuracy, which can be beneficial for golfers who are looking to hit longer shots and attack the green more aggressively.

Personal Preference

Finally, your personal preference is an important factor to consider when choosing a hybrid to replace your 3 wood. Some golfers prefer hybrids with a more wood-like feel and appearance, while others prefer hybrids that look and feel more like irons.

You should also consider the shaft flex, weight, and length of the hybrid, as well as any other features that are important to you. Ultimately, the best hybrid for you is the one that feels comfortable in your hands and inspires confidence in your swing.

Frequently Asked Questions

What is the difference between a 2 hybrid and a 3 wood?

A 2 hybrid is a club that is designed to replace a 2 iron, while a 3 wood is a club that is designed for longer shots off the tee or from the fairway. The main difference between the two is the loft angle. A 2 hybrid typically has a loft angle of around 16-19 degrees, while a 3 wood has a loft angle of around 15-18 degrees.

Can a 2 hybrid replace a 3 wood?

While a 2 hybrid can be a good replacement for a 3 wood, it may not be able to hit the ball as far as a 3 wood can. The loft angle of a 2 hybrid is lower than that of a 3 wood, which means that it may not be able to generate as much distance. However, a 2 hybrid can be more versatile and easier to hit than a 3 wood, making it a good option for players who struggle with fairway woods.

What is the best 2 hybrid golf club?

There are many good 2 hybrid golf clubs on the market, and the best one for you will depend on your individual needs and preferences. Some popular options include the TaylorMade SIM Max Rescue, Callaway MAVRIK Max Hybrid, and Titleist TS2 Hybrid. It’s important to try out different clubs and find one that feels comfortable and suits your swing style.

Is there a hybrid that hits as far as a 3 wood?

While hybrids can be versatile and easier to hit than fairway woods, they may not be able to hit the ball as far as a 3 wood can. The loft angle of a hybrid is typically lower than that of a fairway wood, which means that it may not be able to generate as much distance. However, some hybrids are designed to be more distance-oriented and may be able to hit the ball as far as a 3 wood.

Can you replace fairway woods with hybrids?

Yes, you can replace fairway woods with hybrids. Hybrids are designed to be more versatile and easier to hit than fairway woods, making them a good option for players who struggle with fairway woods. However, it’s important to keep in mind that hybrids may not be able to hit the ball as far as fairway woods can, so you may need to adjust your club selection accordingly.

Where is the best place to buy golf clubs?

There are many places to buy golf clubs, including golf stores, sporting goods stores, and online retailers. It’s important to do your research and find a reputable seller that offers a wide selection of clubs at competitive prices. Some popular options include Golf Galaxy, Dick’s Sporting Goods, and Amazon.