
Refinishing a wooden table can breathe new life into an old piece of furniture. Whether you have a family heirloom or a thrift store find, refinishing a table can be a fun and rewarding DIY project. With a little bit of elbow grease and some basic supplies, you can transform a dull or damaged table into a beautiful centerpiece for your home.
Before you get started, it’s important to understand the level of detail and effort required for your specific table. Super ornamental furniture may require more attention to detail, while a simple table may be easier to refinish. The first step in refinishing a table is to clean it thoroughly to remove any dirt or grime that may inhibit the refinishing process. Depending on the condition of your table, you may also need to strip the old finish or sand down any imperfections. With a little bit of patience and some helpful tips, you can successfully refinish a wooden table and enjoy it for years to come.
Understanding the Type of Wood
When it comes to refinishing a wooden table, the first step is to understand the type of wood you’re working with. Different types of wood require different approaches to refinishing, so it’s important to identify the type of wood before you begin.
Identifying Hardwood and Softwood
The first step in identifying the type of wood is to determine whether it is hardwood or softwood. Hardwood comes from deciduous trees, while softwood comes from coniferous trees. Hardwood is denser and more durable than softwood, making it a popular choice for furniture.
To determine whether your table is made of hardwood or softwood, you can look at the grain of the wood. Hardwood has a more complex grain pattern than softwood, which tends to have a straight grain. You can also try scratching the surface of the wood with your fingernail. Hardwood is harder than softwood, so it will be more difficult to scratch.
Distinguishing Wood Species
Once you’ve determined whether your table is made of hardwood or softwood, the next step is to identify the specific wood species. Different wood species have different characteristics, such as color, grain pattern, and hardness.
One way to identify the wood species is to look for identifying marks, such as knots or distinctive grain patterns. You can also try comparing the wood to a wood identification guide or consulting with a professional.
Some common wood species used for furniture include oak, maple, cherry, and mahogany. Each of these species has its own unique characteristics and requires a different approach to refinishing. For example, oak has a distinctive grain pattern and can be difficult to stain evenly, while cherry has a reddish-brown color that can darken over time.
By understanding the type of wood and wood species of your table, you can choose the right approach to refinishing and ensure that your table looks beautiful for years to come.
Safety Precautions
When refinishing a wooden table, it is important to take certain safety precautions to protect yourself from harmful chemicals and dust. Here are some safety tips to follow:
Proper Ventilation
When working with chemicals, it is important to have proper ventilation to avoid inhaling harmful fumes. Work in a well-ventilated area, such as a covered porch or garage, or use a fan to circulate air. Make sure all windows and doors are open to allow fresh air to flow through the room.
Safety Equipment
It is important to wear the appropriate safety equipment when refinishing a wooden table. Here are some items you should have on hand:
- N95 respirator: Wear a respirator to protect yourself from inhaling harmful dust and fumes.
- Waterproof gloves: Wear gloves to protect your hands from chemicals and stains.
- Safety goggles: Wear goggles to protect your eyes from dust and debris.
- Dust mask: Wear a dust mask to protect your lungs from dust particles.
In addition to these items, it is also important to wear appropriate clothing, such as long sleeves and pants, to protect your skin from chemicals and stains.
By following these safety precautions, you can ensure that your refinishing project is completed safely and without any harm to yourself.
Gathering Necessary Tools
To refinish a wooden table, you will need to gather some necessary tools. Here are the three main categories of tools you will need:
Stripping Tools
To remove the old finish from your table, you will need some stripping tools. Here are some common options:
- Chemical Stripper: This is a liquid that dissolves the old finish. You apply it with a brush, wait for it to soften the finish, and then scrape it off.
- Heat Gun: This is a tool that uses hot air to soften the finish, making it easier to scrape off.
- Sandpaper: If you don’t want to use chemicals or heat, you can use sandpaper to sand off the old finish.
Sanding Tools
After you have removed the old finish, you will need to sand the table to prepare it for the new finish. Here are some tools you will need:
- Sandpaper: You will need sandpaper of varying grits to sand the table. Start with a coarse grit and work your way up to a finer grit.
- Sanding Block: This will help you sand the table evenly.
- Power Sander: If you have a large table or want to save time, you can use a power sander to sand the table.
Finishing Tools
After you have sanded the table, you will need to apply the new finish. Here are some tools you will need:
- Stain: If you want to change the color of your table, you will need to apply a stain.
- Polyurethane: This is a clear coat that will protect the table and give it a shiny finish.
- Brushes: You will need brushes to apply the stain and polyurethane.
- Rags: You will need rags to wipe off excess stain and polyurethane.
By gathering these necessary tools, you will be well on your way to refinishing your wooden table.
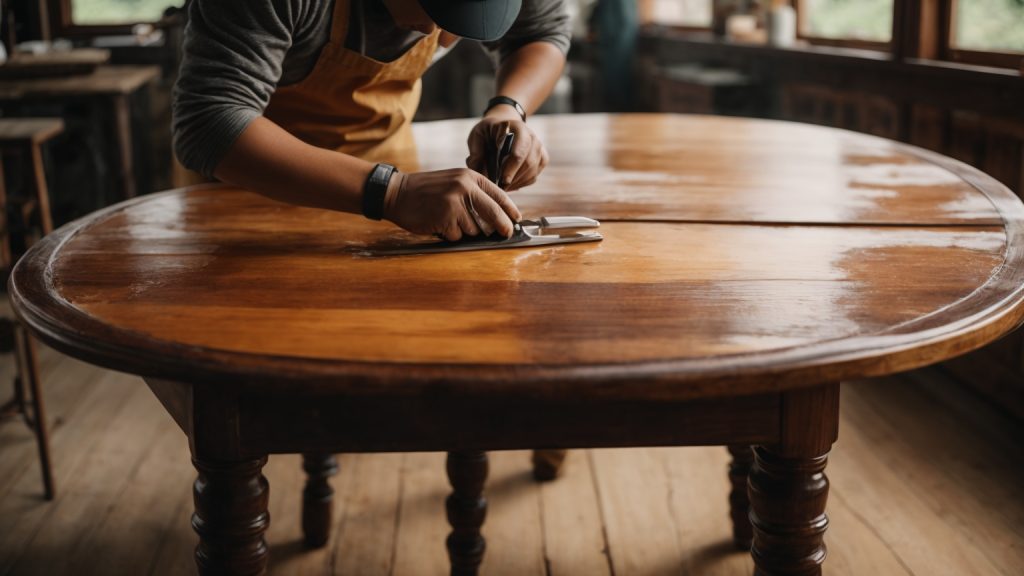
Removing the Old Finish
Before you can refinish your wooden table, you need to remove the old finish. This can be a messy and time-consuming process, but with the right tools and techniques, you can do it yourself.
Applying the Stripper
The first step in removing the old finish is to apply a chemical stripper. This will dissolve the old finish so that it can be easily removed. Here’s how to do it:
- Choose a well-ventilated area to work in. Chemical strippers can be harmful if inhaled, so it’s important to work in a space with good airflow.
- Apply the stripper to the table using a brush or spray bottle. Be sure to follow the manufacturer’s instructions for application and safety precautions.
- Wait for the stripper to work. This can take anywhere from a few minutes to several hours, depending on the type of stripper and the thickness of the old finish.
- Test a small area to see if the finish is ready to be removed. Use a scraper or steel wool to remove the finish. If it comes off easily, the rest of the finish is ready to be removed. If not, wait a little longer and test again.
Removing the Stripper
Once the old finish has been dissolved by the stripper, it’s time to remove it. Here’s how to do it:
- Use a scraper or steel wool to remove the old finish. Work in the direction of the grain to avoid damaging the wood.
- Wipe away the old finish with a rag or paper towel.
- Repeat the process until all of the old finish has been removed.
- Use a fine-grit sandpaper to smooth out any rough spots or remaining finish. Be sure to sand in the direction of the grain.
- Clean the table thoroughly with a mild soap and water solution to remove any leftover stripper and debris.
Removing the old finish is an important step in refinishing your wooden table. Take your time and be patient, and you’ll be rewarded with a beautiful new finish that will make your table look like new again.
Sanding the Table
Once you have stripped the old finish and repaired any damages, it’s time to sand the table to prepare it for the new finish. Sanding is a crucial step in the refinishing process that helps to remove any remaining finish, smooth out the surface, and open up the wood’s pores to accept the new stain or finish. In this section, we will discuss how to sand a wooden table, including choosing the right grit and sanding techniques.
Choosing the Right Grit
Choosing the right sandpaper grit is essential to achieving a smooth and even finish. The grit number refers to the size of the abrasive particles on the sandpaper. The lower the number, the coarser the sandpaper, and the higher the number, the finer the sandpaper. Here are some guidelines for choosing the right grit:
- Coarse grit (60-80): Use coarse grit sandpaper to remove any remaining finish, scratches, or dents on the table’s surface.
- Medium grit (100-150): Use medium grit sandpaper to smooth out any rough spots left by the coarse grit sandpaper.
- Fine grit (220-240): Use fine grit sandpaper to create a smooth and even surface that is ready for staining or finishing.
Sanding Techniques
Here are some tips for sanding a wooden table:
- Sand in the direction of the wood grain to avoid creating scratches or marks on the surface.
- Start with the coarsest-grit sandpaper and work your way up to the finest-grit sandpaper.
- Use a sanding block or an orbital sander to ensure even sanding and to prevent over-sanding in certain areas.
- Be careful when sanding edges and corners to avoid rounding them off.
- Wipe the table down with a tack cloth after sanding to remove any dust or debris.
By following these tips, you can achieve a smooth and even surface that is ready for staining or finishing. Sanding is a crucial step in the refinishing process that requires patience and attention to detail, but the results are worth the effort.
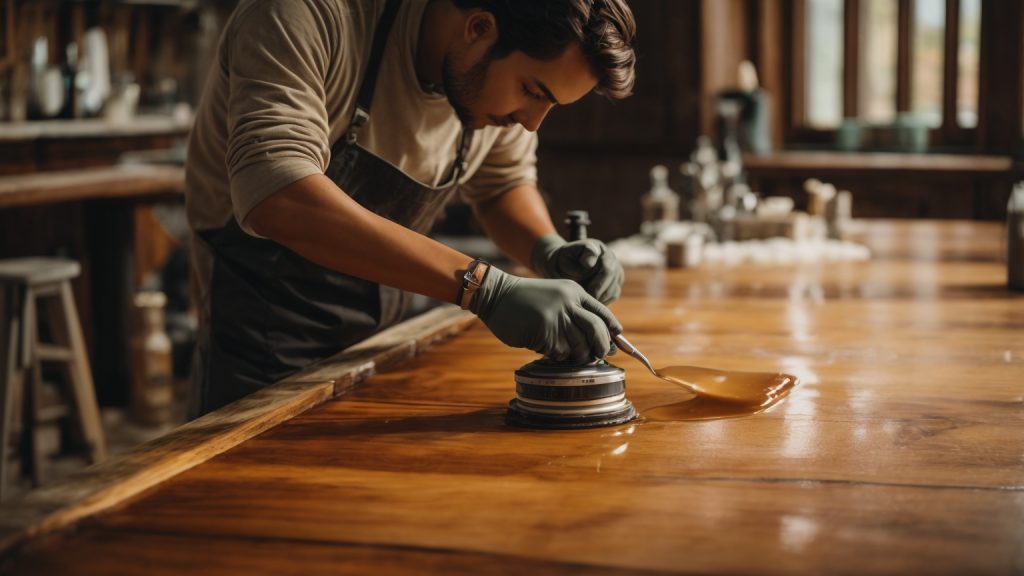
Applying the New Finish
Refinishing a wooden table can give it a new lease on life. Once you have sanded and removed the old finish, it’s time to apply a new one. Here are some tips to help you choose and apply the new finish.
Choosing the Finish
There are many different types of finishes available, each with its own advantages and disadvantages. Some popular options include:
- Polyurethane: This is a durable and water-resistant finish that is easy to apply. It comes in both oil-based and water-based formulations.
- Varnish: Varnish is a traditional finish that provides a hard, protective coating. It is available in both glossy and matte finishes.
- Lacquer: Lacquer is a fast-drying finish that provides a hard, durable coating. It is available in both spray and brush-on formulations.
- Oil: Oil finishes penetrate the wood and provide a natural look. They are easy to apply but may require more maintenance than other finishes.
Consider the look you want to achieve and the level of durability you need when choosing a finish.
Applying the Finish
Before applying the finish, make sure the surface is clean and free of dust. Use a tack cloth or a damp cloth to remove any debris.
When applying the finish, follow these steps:
- Apply a thin coat of finish with a brush or a cloth. Work in the direction of the grain.
- Wait for the finish to dry according to the manufacturer’s instructions.
- Sand the surface lightly with fine-grit sandpaper.
- Apply another coat of finish and repeat the process until you achieve the desired level of coverage.
Be sure to work in a well-ventilated area and follow all safety instructions on the product label. With a little patience and care, you can apply a new finish that will protect and enhance the beauty of your wooden table.
Maintaining Your Refinished Table
Congratulations! You’ve successfully refinished your wooden table and it looks amazing. Now, it’s important to maintain your hard work to keep your table looking beautiful for years to come. Here are some tips to help you maintain your newly refinished table.
Regular Cleaning
To keep your table looking great, it’s important to clean it regularly. Here are some tips to help you keep your table clean:
- Dust your table regularly with a soft cloth or a feather duster.
- Use a damp cloth to clean up spills and stains as soon as possible.
- Avoid using harsh chemicals or abrasive cleaners on your table.
- If you need to use a cleaner, choose a mild soap and water solution.
Preventing Damage
To prevent damage to your table, it’s important to take some precautions. Here are some tips to help you prevent damage:
- Use coasters and placemats to protect your table from scratches, stains, and water rings.
- Avoid placing hot items directly on your table. Always use a trivet or a hot pad.
- Keep your table out of direct sunlight to prevent fading and warping.
- Avoid placing heavy objects on your table, as this can cause damage to the finish.
By following these simple tips, you can keep your newly refinished table looking beautiful for years to come.