Tag Archives: avoid placing heavy objects

refinish-a-wooden-table

How to Refinish a Wooden Table: A Beginner's Guide

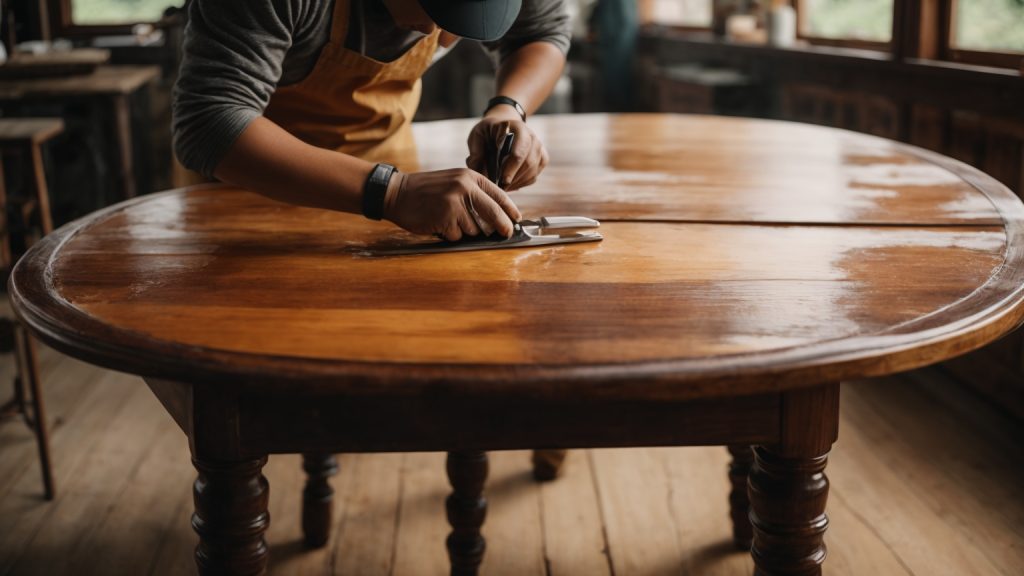
Refinishing a wooden table can breathe new life into an old piece of furniture. Whether you have a family heirloom or a thrift store find, refinishing a table can be a fun and rewarding DIY project. With a little bit of elbow grease and some basic supplies, you can transform a dull or damaged table into a beautiful centerpiece for your home.

Before you get started, it’s important to understand the level of detail and effort required for your specific table. Super ornamental furniture may require more attention to detail, while a simple table may be easier to refinish. The first step in refinishing a table is to clean it thoroughly to remove any dirt or grime that may inhibit the refinishing process. Depending on the condition of your table, you may also need to strip the old finish or sand down any imperfections. With a little bit of patience and some helpful tips, you can successfully refinish a wooden table and enjoy it for years to come.

Understanding the Type of Wood
refinish-a-wooden-table

When it comes to refinishing a wooden table, the first step is to understand the type of wood you’re working with. Different types of wood require different approaches to refinishing, so it’s important to identify the type of wood before you begin.

Identifying Hardwood and Softwood

The first step in identifying the type of wood is to determine whether it is hardwood or softwood. Hardwood comes from deciduous trees, while softwood comes from coniferous trees. Hardwood is denser and more durable than softwood, making it a popular choice for furniture.

To determine whether your table is made of hardwood or softwood, you can look at the grain of the wood. Hardwood has a more complex grain pattern than softwood, which tends to have a straight grain. You can also try scratching the surface of the wood with your fingernail. Hardwood is harder than softwood, so it will be more difficult to scratch.

Distinguishing Wood Species

Once you’ve determined whether your table is made of hardwood or softwood, the next step is to identify the specific wood species. Different wood species have different characteristics, such as color, grain pattern, and hardness.

One way to identify the wood species is to look for identifying marks, such as knots or distinctive grain patterns. You can also try comparing the wood to a wood identification guide or consulting with a professional.

Some common wood species used for furniture include oak, maple, cherry, and mahogany. Each of these species has its own unique characteristics and requires a different approach to refinishing. For example, oak has a distinctive grain pattern and can be difficult to stain evenly, while cherry has a reddish-brown color that can darken over time.

By understanding the type of wood and wood species of your table, you can choose the right approach to refinishing and ensure that your table looks beautiful for years to come.

Safety Precautions

When refinishing a wooden table, it is important to take certain safety precautions to protect yourself from harmful chemicals and dust. Here are some safety tips to follow:

Proper Ventilation

When working with chemicals, it is important to have proper ventilation to avoid inhaling harmful fumes. Work in a well-ventilated area, such as a covered porch or garage, or use a fan to circulate air. Make sure all windows and doors are open to allow fresh air to flow through the room.

Safety Equipment

It is important to wear the appropriate safety equipment when refinishing a wooden table. Here are some items you should have on hand:

  • N95 respirator: Wear a respirator to protect yourself from inhaling harmful dust and fumes.
  • Waterproof gloves: Wear gloves to protect your hands from chemicals and stains.
  • Safety goggles: Wear goggles to protect your eyes from dust and debris.
  • Dust mask: Wear a dust mask to protect your lungs from dust particles.

In addition to these items, it is also important to wear appropriate clothing, such as long sleeves and pants, to protect your skin from chemicals and stains.

By following these safety precautions, you can ensure that your refinishing project is completed safely and without any harm to yourself.

Gathering Necessary Tools

To refinish a wooden table, you will need to gather some necessary tools. Here are the three main categories of tools you will need:

Stripping Tools

To remove the old finish from your table, you will need some stripping tools. Here are some common options:

  • Chemical Stripper: This is a liquid that dissolves the old finish. You apply it with a brush, wait for it to soften the finish, and then scrape it off.
  • Heat Gun: This is a tool that uses hot air to soften the finish, making it easier to scrape off.
  • Sandpaper: If you don’t want to use chemicals or heat, you can use sandpaper to sand off the old finish.

Sanding Tools

After you have removed the old finish, you will need to sand the table to prepare it for the new finish. Here are some tools you will need:

  • Sandpaper: You will need sandpaper of varying grits to sand the table. Start with a coarse grit and work your way up to a finer grit.
  • Sanding Block: This will help you sand the table evenly.
  • Power Sander: If you have a large table or want to save time, you can use a power sander to sand the table.

Finishing Tools

After you have sanded the table, you will need to apply the new finish. Here are some tools you will need:

  • Stain: If you want to change the color of your table, you will need to apply a stain.
  • Polyurethane: This is a clear coat that will protect the table and give it a shiny finish.
  • Brushes: You will need brushes to apply the stain and polyurethane.
  • Rags: You will need rags to wipe off excess stain and polyurethane.

By gathering these necessary tools, you will be well on your way to refinishing your wooden table.

Removing the Old Finish
removing-the-old-finish

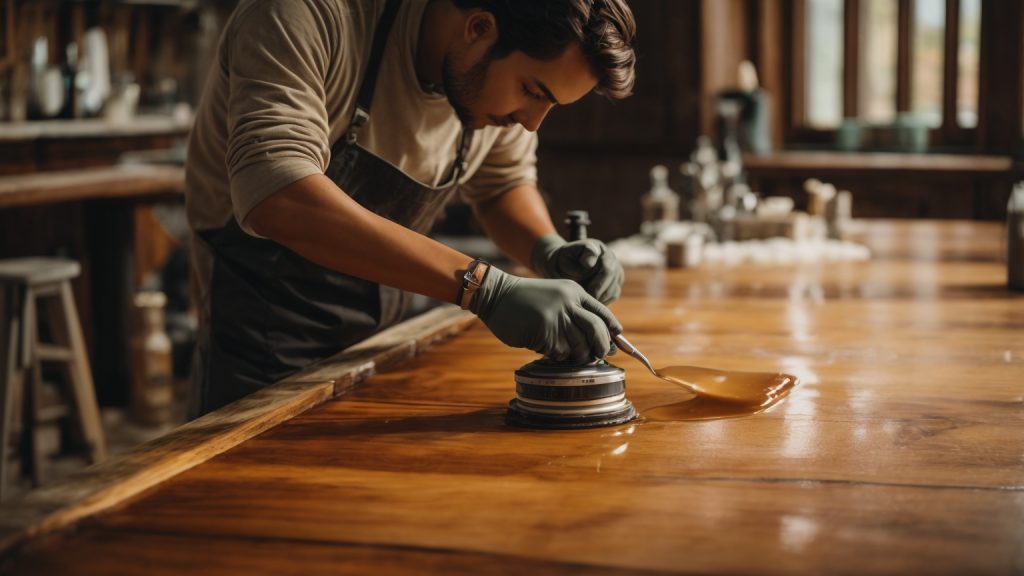
Before you can refinish your wooden table, you need to remove the old finish. This can be a messy and time-consuming process, but with the right tools and techniques, you can do it yourself.

Applying the Stripper

The first step in removing the old finish is to apply a chemical stripper. This will dissolve the old finish so that it can be easily removed. Here’s how to do it:

  1. Choose a well-ventilated area to work in. Chemical strippers can be harmful if inhaled, so it’s important to work in a space with good airflow.
  2. Apply the stripper to the table using a brush or spray bottle. Be sure to follow the manufacturer’s instructions for application and safety precautions.
  3. Wait for the stripper to work. This can take anywhere from a few minutes to several hours, depending on the type of stripper and the thickness of the old finish.
  4. Test a small area to see if the finish is ready to be removed. Use a scraper or steel wool to remove the finish. If it comes off easily, the rest of the finish is ready to be removed. If not, wait a little longer and test again.

Removing the Stripper

Once the old finish has been dissolved by the stripper, it’s time to remove it. Here’s how to do it:

  1. Use a scraper or steel wool to remove the old finish. Work in the direction of the grain to avoid damaging the wood.
  2. Wipe away the old finish with a rag or paper towel.
  3. Repeat the process until all of the old finish has been removed.
  4. Use a fine-grit sandpaper to smooth out any rough spots or remaining finish. Be sure to sand in the direction of the grain.
  5. Clean the table thoroughly with a mild soap and water solution to remove any leftover stripper and debris.

Removing the old finish is an important step in refinishing your wooden table. Take your time and be patient, and you’ll be rewarded with a beautiful new finish that will make your table look like new again.

Sanding the Table

Once you have stripped the old finish and repaired any damages, it’s time to sand the table to prepare it for the new finish. Sanding is a crucial step in the refinishing process that helps to remove any remaining finish, smooth out the surface, and open up the wood’s pores to accept the new stain or finish. In this section, we will discuss how to sand a wooden table, including choosing the right grit and sanding techniques.

Choosing the Right Grit

Choosing the right sandpaper grit is essential to achieving a smooth and even finish. The grit number refers to the size of the abrasive particles on the sandpaper. The lower the number, the coarser the sandpaper, and the higher the number, the finer the sandpaper. Here are some guidelines for choosing the right grit:

  • Coarse grit (60-80): Use coarse grit sandpaper to remove any remaining finish, scratches, or dents on the table’s surface.
  • Medium grit (100-150): Use medium grit sandpaper to smooth out any rough spots left by the coarse grit sandpaper.
  • Fine grit (220-240): Use fine grit sandpaper to create a smooth and even surface that is ready for staining or finishing.

Sanding Techniques

Here are some tips for sanding a wooden table:

  • Sand in the direction of the wood grain to avoid creating scratches or marks on the surface.
  • Start with the coarsest-grit sandpaper and work your way up to the finest-grit sandpaper.
  • Use a sanding block or an orbital sander to ensure even sanding and to prevent over-sanding in certain areas.
  • Be careful when sanding edges and corners to avoid rounding them off.
  • Wipe the table down with a tack cloth after sanding to remove any dust or debris.

By following these tips, you can achieve a smooth and even surface that is ready for staining or finishing. Sanding is a crucial step in the refinishing process that requires patience and attention to detail, but the results are worth the effort.

Applying the New Finish

Refinishing a wooden table can give it a new lease on life. Once you have sanded and removed the old finish, it’s time to apply a new one. Here are some tips to help you choose and apply the new finish.

Choosing the Finish

There are many different types of finishes available, each with its own advantages and disadvantages. Some popular options include:

  • Polyurethane: This is a durable and water-resistant finish that is easy to apply. It comes in both oil-based and water-based formulations.
  • Varnish: Varnish is a traditional finish that provides a hard, protective coating. It is available in both glossy and matte finishes.
  • Lacquer: Lacquer is a fast-drying finish that provides a hard, durable coating. It is available in both spray and brush-on formulations.
  • Oil: Oil finishes penetrate the wood and provide a natural look. They are easy to apply but may require more maintenance than other finishes.

Consider the look you want to achieve and the level of durability you need when choosing a finish.

Applying the Finish

Before applying the finish, make sure the surface is clean and free of dust. Use a tack cloth or a damp cloth to remove any debris.

When applying the finish, follow these steps:

  1. Apply a thin coat of finish with a brush or a cloth. Work in the direction of the grain.
  2. Wait for the finish to dry according to the manufacturer’s instructions.
  3. Sand the surface lightly with fine-grit sandpaper.
  4. Apply another coat of finish and repeat the process until you achieve the desired level of coverage.

Be sure to work in a well-ventilated area and follow all safety instructions on the product label. With a little patience and care, you can apply a new finish that will protect and enhance the beauty of your wooden table.

Maintaining Your Refinished Table

Congratulations! You’ve successfully refinished your wooden table and it looks amazing. Now, it’s important to maintain your hard work to keep your table looking beautiful for years to come. Here are some tips to help you maintain your newly refinished table.

Regular Cleaning

To keep your table looking great, it’s important to clean it regularly. Here are some tips to help you keep your table clean:

  • Dust your table regularly with a soft cloth or a feather duster.
  • Use a damp cloth to clean up spills and stains as soon as possible.
  • Avoid using harsh chemicals or abrasive cleaners on your table.
  • If you need to use a cleaner, choose a mild soap and water solution.

Preventing Damage

To prevent damage to your table, it’s important to take some precautions. Here are some tips to help you prevent damage:

  • Use coasters and placemats to protect your table from scratches, stains, and water rings.
  • Avoid placing hot items directly on your table. Always use a trivet or a hot pad.
  • Keep your table out of direct sunlight to prevent fading and warping.
  • Avoid placing heavy objects on your table, as this can cause damage to the finish.

By following these simple tips, you can keep your newly refinished table looking beautiful for years to come.
wooden-deck

How Long Does a Wooden Deck Last: A Comprehensive Guide

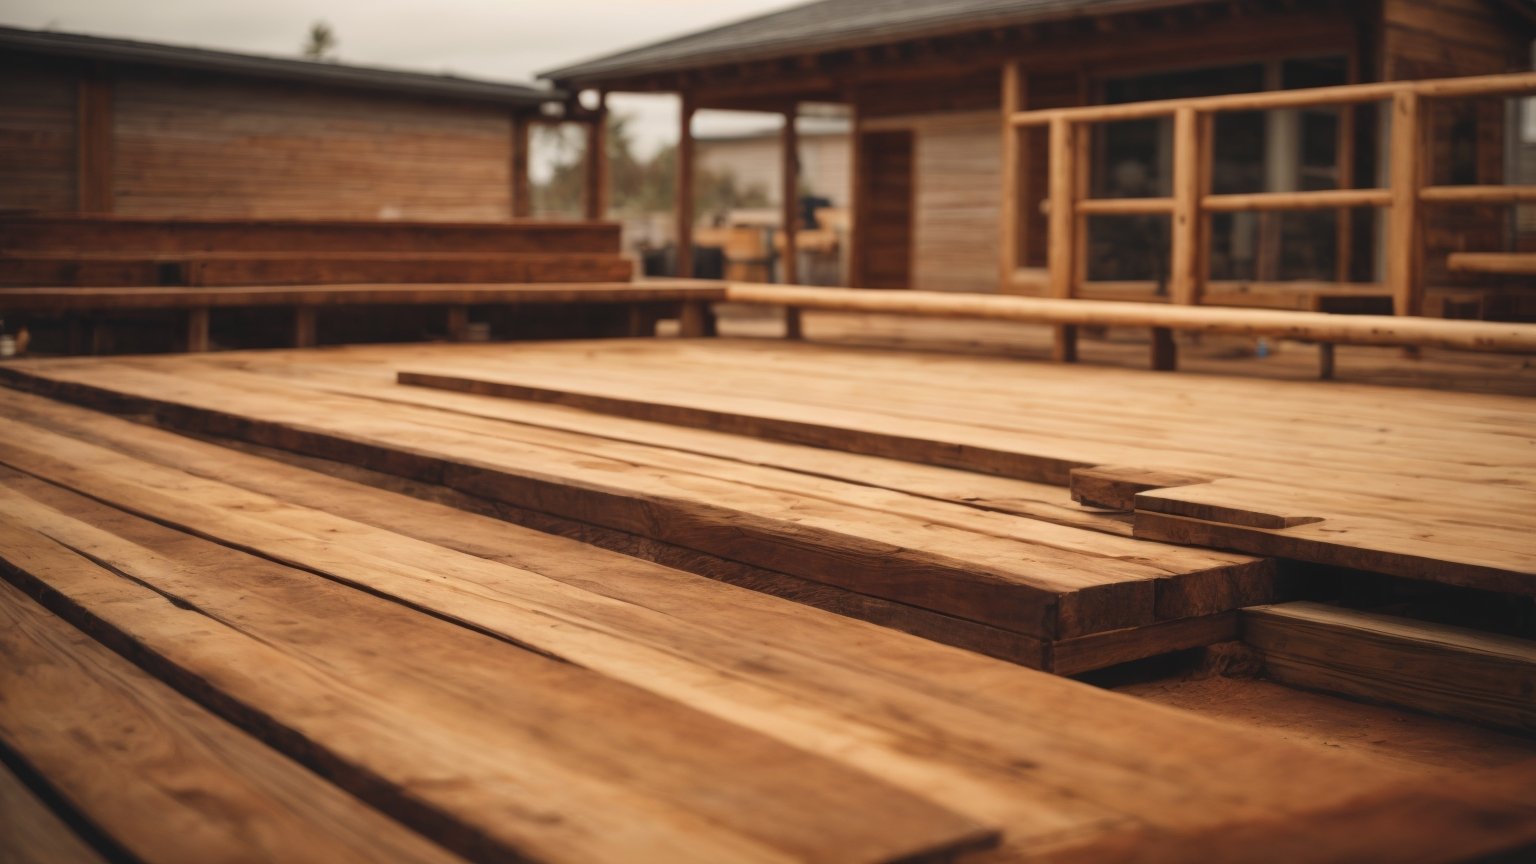
If you’re a homeowner with a wooden deck, you may be wondering how long it will last before needing to be replaced. The answer to this question can vary depending on a number of factors, including the type of wood used, how well the deck is maintained, and the climate in which you live.

According to industry experts, a traditional wooden deck can last anywhere from 10 to 15 years with proper care and maintenance. However, if you opt for a composite deck made from materials like plastic and wood fibers, you can expect it to last up to 30 years or more. Capped polymer decks, which are made from a superior material composition, can potentially last for 50 years or more.

It’s important to note that the lifespan of your wooden deck will also depend on how well you take care of it. Regular cleaning, staining, and sealing can help to extend the life of your deck and prevent damage from moisture, insects, and UV rays. With proper maintenance, your wooden deck can provide years of enjoyment and add value to your home.

Life Span of a Wooden Deck

wooden-deck

When it comes to building a deck in your backyard, you want to make sure it lasts as long as possible. The life span of a wooden deck will depend on several factors, including the type of wood, the quality of the installation, and how well you maintain it over time.

According to The International Association of Certified Home Inspectors, a traditional wood deck can last for 10-15 years, while a composite deck can last around 15 to 30 years. However, with proper maintenance, a wood deck can last anywhere from 10 to 30 years.

One of the biggest factors that can affect the life span of your wooden deck is the type of wood you choose. Different woods have different levels of durability and resistance to weather and insects. For example, cedar and redwood are known for their natural resistance to decay and insects, making them a popular choice for decks. Pressure-treated lumber is also a popular choice, as it is treated with chemicals to resist decay and insects.

Another factor to consider is the quality of the installation. A well-built deck that is properly supported and secured will last longer than a poorly built deck. It’s important to hire a professional contractor who has experience building decks and will use quality materials and construction techniques.

Finally, proper maintenance is crucial to extending the life span of your wooden deck. This includes regular cleaning, staining, and sealing to protect the wood from moisture, UV rays, and other environmental factors. You should also inspect your deck regularly for any signs of damage, such as rotting or splitting boards, and make repairs as needed.

Overall, the life span of a wooden deck will depend on several factors, but with proper care and maintenance, you can enjoy your deck for many years to come.

Factors Influencing Deck Durability

When it comes to the lifespan of your wooden deck, several factors come into play. Here are some of the most important factors that can influence the durability of your deck:

Quality of Wood

The quality of the wood used to build your deck is one of the most critical factors that can affect its lifespan. Some wood species are naturally more resistant to rot and decay than others. For instance, cedar and redwood are known for their natural resistance to rot and insects, while pine and spruce are less durable and require more maintenance.

Another crucial factor that can influence the quality of your deck is the grade of the wood used. Higher-grade wood has fewer knots and defects, making it more durable and long-lasting than lower-grade wood.

Climate and Weather Conditions

The climate and weather conditions in your area can also have a significant impact on the lifespan of your deck. If you live in an area with high humidity or frequent rainfall, your deck is more likely to experience moisture damage, which can lead to rot, decay, and warping.

Similarly, if you live in an area with extreme temperatures, such as hot summers and cold winters, your deck may be more prone to cracking, splitting, and fading.

Maintenance and Care

Proper maintenance and care are crucial for extending the lifespan of your deck. Regular cleaning, sealing, and staining can help protect your deck from weathering and moisture damage. It’s also essential to inspect your deck regularly for signs of wear and tear, such as splintering, cracking, or loose boards.

In addition to regular maintenance, you should also take steps to prevent damage to your deck. For instance, avoid placing heavy objects on your deck, such as grills or furniture, as this can cause dents and scratches. You should also avoid using harsh chemicals or pressure washers to clean your deck, as this can damage the wood.

Overall, the lifespan of your wooden deck depends on several factors, including the quality of wood, climate and weather conditions, and maintenance and care. By choosing high-quality wood, maintaining your deck regularly, and taking steps to prevent damage, you can extend the lifespan of your deck and enjoy it for years to come.

Types of Wood and Their Longevity

types-of-wood-and-their-longevity

When it comes to building a wooden deck, the type of wood you choose can have a big impact on its longevity. Here are some of the most common types of wood used for decks and how long you can expect them to last with proper maintenance:

Pressure-Treated Wood

Pressure-treated wood is a popular choice for deck building because it is affordable and resistant to rot and insects. However, it does require regular maintenance to prevent warping and cracking. With proper care, a pressure-treated wood deck can last up to 20 years.

Cedar Wood

Cedar wood is a beautiful and durable option for deck building. It is naturally resistant to rot and insects, and it has a warm, reddish-brown color that many people find appealing. With regular maintenance, a cedar wood deck can last up to 25 years.

Redwood

Redwood is another popular option for deck building because it is naturally resistant to rot and insects. It has a rich, reddish color that can add warmth and character to any outdoor space. With proper care, a redwood deck can last up to 30 years.

It’s important to note that these are just general guidelines, and the lifespan of your deck will depend on many factors, including the quality of the wood, the climate in your area, and how well you maintain it. Regular cleaning, sealing, and staining can help extend the life of your deck and keep it looking beautiful for years to come.
Warning Signs of Deck Aging

If you have a wooden deck, it’s essential to keep an eye on its condition. Even with proper maintenance, decks will show signs of aging over time. Here are some warning signs to look out for:

Wood Rot

One of the most common problems with wooden decks is wood rot. This occurs when moisture gets trapped in the wood, causing it to decay. Signs of wood rot include soft and spongy areas, discoloration, and a musty odor. If you notice any of these signs, it’s crucial to address the issue as soon as possible. Rot can spread quickly and compromise the structural integrity of your deck.

Loose Boards

Another warning sign of an aging deck is loose boards. Over time, the fasteners that hold the boards in place can become loose, causing the boards to shift and move. If left unchecked, this can lead to tripping hazards and even collapse. Check your deck regularly for loose boards and tighten any loose fasteners.

Fading and Discoloration

Wooden decks are exposed to the elements year-round, which can cause fading and discoloration. UV rays from the sun can cause the wood to fade, while moisture can cause it to turn gray or black. While this is a cosmetic issue, it can also be a sign of deeper problems. Fading and discoloration can be an indication that your deck is not properly sealed, which can lead to rot and decay.

In conclusion, keeping an eye on your wooden deck’s condition is crucial to ensure its longevity and safety. If you notice any of these warning signs, it’s essential to address them promptly to prevent further damage.

How to Extend the Life of Your Deck

If you want to get the most out of your wooden deck, it’s important to take care of it properly. With proper maintenance, your deck can last for many years. Here are some tips to help you extend the life of your deck.

Regular Cleaning

Regular cleaning is essential for keeping your deck in good condition. Dirt, leaves, and other debris can accumulate on your deck over time, which can lead to mold and mildew growth. To prevent this, you should sweep your deck regularly and remove any debris that you find.

In addition to sweeping, you should also give your deck a thorough cleaning at least once a year. You can use a pressure washer or a deck cleaner to remove dirt and stains. Be sure to follow the manufacturer’s instructions when using a deck cleaner, and rinse your deck thoroughly after cleaning.

Sealing and Staining

Sealing and staining your deck can help to protect it from the elements. Sealing your deck will help to prevent moisture from penetrating the wood, which can lead to rot and decay. Staining your deck will help to protect it from UV rays and other environmental factors.

You should plan to seal or stain your deck every two to three years. Before you do this, you should clean your deck thoroughly and allow it to dry completely. Then, you can apply the sealer or stain according to the manufacturer’s instructions.

Annual Inspections

It’s important to inspect your deck regularly to make sure that it’s in good condition. You should inspect your deck at least once a year, and look for signs of damage such as loose boards, cracks, and rot.

If you find any damage, you should repair it as soon as possible. This will help to prevent the damage from getting worse and potentially compromising the structural integrity of your deck.

By following these tips, you can extend the life of your wooden deck and keep it looking great for many years to come.

How to Paint a Wooden Kitchen Table: A Beginner's Guide

Are you tired of your old, worn-out kitchen table? Do you want to give it a fresh new look without having to buy a new one? Painting your wooden kitchen table is an easy and affordable way to transform it into a beautiful centerpiece for your kitchen.

Before you begin, it’s important to gather all the necessary materials. You’ll need a tarp or plastic floor lining to protect your floors, PPE as recommended by the manufacturer of your selected products (such as gloves and a dust mask), furniture cleaning materials, sandpaper in varying grit levels, an electric belt sander, lint-free rags, paintbrushes, and primer. Once you have everything you need, you can start preparing your table for painting.

The first step is to clean your table thoroughly. Remove any dirt, grime, or grease using furniture cleaning materials. Once your table is clean, use sandpaper to rough up the surface and create a better bond for the primer. Then, use an electric belt sander to smooth out any rough spots and create an even surface. After you’ve finished sanding, wipe down the table with a lint-free rag to remove any dust or debris. With these steps complete, you’re ready to start painting your wooden kitchen table.

Choosing the Right Materials

When it comes to painting a wooden kitchen table, selecting the right materials is crucial. Here are some things to consider:

Selecting Paint

Choose a paint that is durable and easy to clean, as the table will likely see a lot of use. Acrylic latex paint is a popular choice, as it is water-based and easy to apply. Oil-based paint is another option, but it requires more time to dry and requires solvents for cleanup.

Consider the color of the paint as well. A lighter color may show stains more easily, while a darker color can hide them. You can also consider using a primer to help the paint adhere better and last longer.

Choosing Brushes

The type of brush you use can affect the outcome of your project. A high-quality brush will apply the paint more evenly and smoothly. A synthetic brush is a good choice for water-based paints, while a natural bristle brush is better suited for oil-based paints.

Consider the size of the brush as well. A larger brush will cover more surface area, but a smaller brush is better for detail work.

Safety Equipment Needed

Painting a kitchen table can be messy, so it’s important to take safety precautions. Here are some things you may need:

  • Gloves to protect your hands from the paint
  • Safety glasses to protect your eyes from splatters
  • A dust mask to protect your lungs from paint fumes
  • A drop cloth or newspaper to protect the floor from drips and spills

Make sure to follow all safety instructions on the paint can and any other materials you use.

Preparing the Kitchen Table

Before you start painting your wooden kitchen table, it’s essential to prepare the surface to ensure the best results. This section will guide you through the steps of cleaning and sanding your table.

Cleaning the Table

The first step in preparing your kitchen table for painting is to clean it thoroughly. Here are the steps to follow:

  1. Remove any dirt, dust, or debris from the surface of the table using a soft cloth or brush.
  2. Use a mild detergent solution to wipe down the table, paying special attention to any stains or spots.
  3. Rinse the table with clean water and dry it with a clean cloth.

Make sure that the table is completely dry before moving on to the next step.

Sanding the Surface

Sanding the surface of your kitchen table is crucial to ensure that the paint adheres properly and creates a smooth finish. Here are the steps to follow:

  1. Use a medium-grit sandpaper (around 120 grit) to sand the surface of the table, focusing on any rough spots or imperfections.
  2. After sanding, wipe down the table with a clean cloth to remove any dust or debris.
  3. Next, use a fine-grit sandpaper (around 220 grit) to sand the surface of the table again. This will create a smooth surface for the paint to adhere to.
  4. After sanding, wipe down the table with a clean cloth to remove any dust or debris.

If your table has any intricate details or hard-to-reach areas, you may want to use a sanding sponge or sanding block to ensure that you can reach all areas.

By following these steps, you will have a clean and smooth surface that is ready for painting.

Priming the Table

Before you start painting your wooden kitchen table, you need to prime it. Priming the table will help the paint adhere to the surface better and create a smoother finish. Here are the steps to prime your table:

  1. Clean the table: Use a damp cloth to wipe down the table and remove any dirt or debris. Let the table dry completely before moving on to the next step.

  2. Sand the table: Use sandpaper to rough up the surface of the table. This will help the primer adhere better. Use a fine-grit sandpaper (such as 120-grit) to avoid scratching the surface of the table.

  3. Clean the table again: Use a damp cloth to wipe down the table and remove any dust from sanding. Let the table dry completely before moving on to the next step.

  4. Apply the primer: Use a paintbrush or roller to apply a thin, even coat of primer to the table. Make sure to cover the entire surface of the table. Let the primer dry completely before moving on to the next step.

  5. Sand the table again: Use a fine-grit sandpaper (such as 220-grit) to lightly sand the surface of the table. This will help smooth out any rough spots or brush marks from the primer.

  6. Clean the table again: Use a damp cloth to wipe down the table and remove any dust from sanding. Let the table dry completely before moving on to the next step.

  7. Optional: Apply a second coat of primer: If you notice any bare spots or uneven areas, you can apply a second coat of primer. Let the primer dry completely before moving on to the next step.

Priming your wooden kitchen table may take some time, but it’s an essential step in achieving a professional-looking finish. Make sure to follow these steps carefully and take your time to ensure that the surface of your table is properly prepared for painting.

Painting the Table

Now that you have prepped your wooden kitchen table, it’s time to start painting. Follow these steps to ensure a smooth and even finish.

Applying the First Coat

Using a medium-sized paintbrush, apply the first coat of paint to the table. Start at the edges and work your way inward, making sure to cover the entire surface evenly. Be careful not to apply too much paint at once, as this can cause drips and unevenness.

Once you have finished applying the first coat, let it dry completely before moving on to the next step. This can take anywhere from a few hours to overnight, depending on the type of paint you are using.

Sanding Between Coats

Before applying subsequent coats of paint, lightly sand the surface of the table with fine-grit sandpaper. This will help to smooth out any imperfections and create a better surface for the next coat of paint to adhere to.

After sanding, wipe down the table with a damp cloth to remove any dust or debris. Let the surface dry completely before applying the next coat of paint.

Applying Subsequent Coats

Repeat the process of applying paint, letting it dry, and sanding between coats until you achieve the desired level of coverage. Depending on the type of paint you are using, you may need to apply several coats to achieve the desired finish.

Be sure to let each coat of paint dry completely before applying the next. This will help to prevent drips and ensure a smooth and even finish.

Remember to follow the manufacturer’s instructions for drying times and application techniques. With a little patience and attention to detail, you can transform your wooden kitchen table into a beautiful and durable piece of furniture.

Finishing Touches

Once you have painted your wooden kitchen table, it is important to apply a sealant to protect the surface from scratches, stains, and general wear and tear. Here are some tips for applying sealant to your newly painted table:

Applying Sealant

  • Choose the right type of sealant: There are several types of sealants available, including polyurethane, varnish, and wax. Polyurethane is the most durable and long-lasting option, while wax provides a more natural look. Choose the one that best suits your needs and preferences.
  • Use a high-quality brush: A good brush will help you apply the sealant evenly and smoothly. Look for a brush with soft bristles and a comfortable grip.
  • Apply thin coats: It is better to apply several thin coats of sealant than one thick coat. This will ensure that the sealant dries evenly and does not drip or bubble. Wait for each coat to dry completely before applying the next one.
  • Sand between coats: Use a fine-grit sandpaper to lightly sand the surface between coats of sealant. This will help the next coat adhere better and create a smoother finish.
  • Apply the final coat: Once you have applied the desired number of coats, let the final coat dry completely before using your table.

Drying and Curing Time

After you have applied the sealant, it is important to allow the table to dry and cure properly before using it. Here are some general guidelines for drying and curing time:

  • Drying time: The drying time for sealant varies depending on the type and brand you use. Check the label for specific instructions. In general, you should wait at least 24 hours before using the table.
  • Curing time: Curing time refers to the time it takes for the sealant to fully harden and reach maximum durability. This can take anywhere from a few days to a few weeks, depending on the type of sealant and the conditions in your home. Avoid placing heavy objects on the table or using it excessively during this time.

By following these tips, you can ensure that your newly painted wooden kitchen table looks great and lasts for years to come.

How to Make Wooden Steps for a Caravan: A Simple Guide

If you own a caravan, you know how important it is to have sturdy and reliable steps to enter and exit your vehicle. While there are pre-built options available on the market, building your own wooden steps can be a fun and rewarding project. With the right tools and materials, you can create steps that are customized to fit your specific caravan and style preferences.

Before you begin building your wooden steps, it’s important to consider the size and height of your caravan. Measure the distance from the ground to the entrance of your caravan to determine how many steps you will need and what the height of each step should be. Additionally, consider the width of your entrance and the space available for your steps. Once you have these measurements, you can begin gathering your materials and planning your design. With a little bit of effort, you can have beautiful and functional wooden steps that will make entering and exiting your caravan a breeze.

Understanding the Basics of Caravan Steps

If you own a caravan, then you know that one of the essential things to consider is the steps. Building a set of wooden steps for your caravan is a great way to add convenience and safety to your mobile home. Here are some basics you need to understand before you start building your caravan steps.

Step Dimensions

The first thing to consider when building caravan steps is the dimensions. The size of the steps will depend on the height of your caravan’s entrance. You will need to measure the height of your caravan from the ground to the entrance. Then, you can calculate the number of steps you need and the dimensions of each step.

Materials

The materials you use for your caravan steps will depend on your preference and budget. However, pressure-treated wood is a popular choice for caravan steps because it is durable and resistant to rot and decay. You can also use decking boards or plywood for the steps.

Tools

To build your caravan steps, you will need some tools, including a saw, drill, screwdriver, and measuring tape. You may also need a hammer, nails, and screws.

Building Process

The building process of caravan steps is relatively simple. You will need to measure the area where you want to install the steps and cut the wood to the right size. Then, you can assemble the steps using screws or nails. Finally, you can attach the steps to your caravan.

In summary, building wooden steps for your caravan is a great way to add convenience and safety to your mobile home. By understanding the basics of caravan steps, you can build a set of steps that will last for years and make your caravan more comfortable to use.

Choosing the Right Wood

When it comes to building wooden steps for your caravan, choosing the right type of wood is crucial. You want a wood that is durable, strong, and can withstand the outdoor elements. Here are some of the best types of wood for building caravan steps:

Pressure-Treated Wood

Pressure-treated wood is a popular choice for building caravan steps because it is resistant to rot and decay. This type of wood is treated with chemicals that make it more durable and long-lasting. It is also affordable and widely available.

Cedar Wood

Cedar wood is another great option for building caravan steps. It is naturally resistant to rot and decay, and it has a beautiful natural color that can add to the aesthetic of your caravan. Cedar wood is also lightweight, making it easy to work with.

Redwood

Redwood is a strong and durable wood that is resistant to rot and decay. It is also naturally resistant to insects, making it a great choice for outdoor use. Redwood has a beautiful natural color that can add to the look of your caravan.

Oak

Oak is a strong and durable wood that is commonly used for outdoor projects. It is resistant to rot and decay and can withstand harsh weather conditions. Oak is also a beautiful wood with a natural grain pattern that can add to the aesthetic of your caravan.

When choosing the right wood for your caravan steps, it is important to consider the climate in which you will be using them. If you live in a wet or humid climate, you may want to choose a wood that is more resistant to rot and decay. If you live in a dry climate, you may want to choose a wood that is more resistant to cracking and splitting. By choosing the right wood, you can ensure that your caravan steps will last for years to come.

Tools Required

Making wooden steps for your caravan is a great DIY project that can be easily completed with the right tools. Here are the essential tools you will need to get started:

1. Measuring Tape

Before you start building your wooden steps, you need to measure the height of your caravan entrance. This will help you determine the number of steps you need to build and the height of each step.

2. Circular Saw

A circular saw is an essential tool for cutting the wooden boards to the correct size. It is important to make precise cuts to ensure that the steps are level and safe to use.

3. Jigsaw

A jigsaw is useful for cutting out any curved or angled shapes that may be required for your steps.

4. Drill

A drill is essential for creating pilot holes and screwing the wooden boards together. It is also useful for attaching the steps to the caravan.

5. Screwdriver

A screwdriver is necessary for tightening screws and attaching the wooden boards together securely.

6. Sandpaper

After cutting and drilling the wooden boards, it is important to smooth out any rough edges with sandpaper. This will ensure that the steps are safe to use and do not cause any splinters.

7. Safety Equipment

When using power tools, it is important to wear safety equipment such as safety glasses and gloves to protect yourself from any potential accidents.

Safety Precautions

When building wooden steps for your caravan, safety should be a top priority. Here are some safety precautions to keep in mind:

1. Use Appropriate Materials

Make sure to use materials that are sturdy and can support the weight of individuals using the steps. Avoid using weak or brittle wood that can easily break or splinter.

2. Use Proper Tools

Using the right tools for the job can help prevent accidents and ensure that the steps are built correctly. Make sure to use tools that are appropriate for the type of wood you are using and follow all safety instructions.

3. Measure Twice, Cut Once

Take accurate measurements and double-check them before cutting any wood. This can help prevent mistakes and ensure that the steps fit properly.

4. Secure the Steps

Make sure the steps are securely attached to the caravan and won’t shift or move while in use. Use screws or bolts to secure the steps to the caravan and make sure they are tightly fastened.

5. Add Non-Slip Surface

Adding a non-slip surface to the steps can help prevent slips and falls. This can be achieved by adding grip tape or a non-slip coating to the steps.

6. Regular Maintenance

Regularly inspect the steps and make any necessary repairs or adjustments. Over time, the steps may become loose or damaged, so it’s important to keep them in good condition.

By following these safety precautions, you can ensure that your wooden steps are safe and secure for use with your caravan.

Step-by-Step Guide to Making Wooden Steps

Making your own wooden steps for your caravan is a great way to add a personal touch to your home on wheels. With just a few tools and materials, you can create a sturdy and stylish set of steps that will last for years to come. Here’s how to do it:

Measuring and Cutting the Wood

The first step in making your wooden steps is to measure and cut the wood to the right size. You will need two long pieces of wood for the sides of the steps, and several shorter pieces for the steps themselves.

To measure the wood, start by measuring the height from the ground to the bottom of your caravan door. This will give you the overall height of your steps. Next, measure the width of your caravan door to determine how wide your steps should be.

Once you have your measurements, use a circular saw or handsaw to cut the wood to the right size. Be sure to wear safety goggles and follow all safety precautions when using power tools.

Assembling the Steps

Once you have your wood cut to the right size, it’s time to assemble the steps. Start by attaching the shorter pieces of wood to the longer side pieces using wood screws. Be sure to pre-drill the holes to prevent the wood from splitting.

Once all of the steps are attached, you can add additional support by attaching diagonal braces between the steps and the side pieces. This will help to make your steps more sturdy and stable.

Finishing the Steps

With the steps assembled, it’s time to add the finishing touches. Sand the wood to remove any rough edges or splinters, and apply a coat of wood stain or paint to protect the wood from the elements.

To add extra grip, you can also attach non-slip treads or strips to the steps. These can be found at most hardware stores and will help to prevent slips and falls.

And there you have it – a simple and easy way to make your own wooden steps for your caravan. With a little bit of time and effort, you can create a set of steps that will make your caravan feel like home.

Maintaining Your Wooden Steps

Congratulations, you have built your own wooden steps for your caravan! Now that you have them, you want to make sure they last as long as possible. Here are some tips to help maintain your wooden steps:

1. Keep them clean

Dirt and debris can accumulate on your wooden steps, which can cause them to deteriorate over time. To keep them clean, sweep them regularly or use a leaf blower to remove any debris. You can also use a mild soap and water to clean them, but make sure to rinse them thoroughly and let them dry completely before using them again.

2. Protect them from the elements

Wooden steps can be damaged by exposure to the elements, especially moisture. To protect them, consider applying a water-resistant sealant or paint. This will help prevent water from penetrating the wood and causing it to rot. Make sure to apply the sealant or paint according to the manufacturer’s instructions.

3. Check for damage regularly

Regularly inspect your wooden steps for any signs of damage, such as cracks or splits in the wood. If you notice any damage, repair it as soon as possible to prevent it from getting worse. You can use wood filler or epoxy to repair minor damage, but for more serious damage, it may be best to replace the affected part of the step.

4. Avoid placing heavy objects on them

Wooden steps are designed to support the weight of people, but placing heavy objects on them can cause them to weaken or break. Avoid placing heavy objects on your wooden steps, and if you need to move heavy objects up or down the steps, consider using a dolly or hand truck.

By following these tips, you can help ensure that your wooden steps last as long as possible and continue to provide safe and reliable access to your caravan.

Troubleshooting Common Issues

Even with proper planning and execution, it is possible to encounter some issues when building wooden steps for your caravan. Here are some common problems and how to troubleshoot them:

Uneven Steps

If you notice that your steps are uneven, it may be due to the ground being uneven. To fix this, you can try adjusting the height of the legs on the bottom of the steps. Alternatively, you can add a shim to the bottom of the shorter leg to even it out.

Steps That Are Too Steep

If your steps are too steep, it can be difficult to climb up and down them. To fix this, you can try adjusting the height of the legs on the bottom of the steps. Alternatively, you can add an additional step to reduce the height of each individual step.

Steps That Are Too Slippery

Slippery steps can be dangerous, especially when wet. To fix this, you can add non-slip strips to the surface of each step. Another option is to apply a non-slip coating to the steps.

Steps That Are Too Wobbly

Wobbly steps can be unstable and unsafe. To fix this, you can try adjusting the height of the legs on the bottom of the steps. Alternatively, you can add cross braces between the legs to provide additional stability.

Steps That Are Too Heavy

If your steps are too heavy, it can be difficult to move them around. To fix this, you can try using lighter materials or reducing the size of the steps. Another option is to add wheels to the bottom of the steps to make them easier to move.

How to Decorate a Wooden Box: Easy DIY Ideas and Tips

Are you looking for a fun and creative way to decorate a wooden box? Whether you want to personalize a gift or add a unique touch to your home decor, decorating a wooden box is a great way to showcase your creativity. With a little bit of inspiration and some basic materials, you can transform an unfinished wooden box into a beautiful work of art.

One of the easiest ways to decorate a wooden box is by painting it. You can use acrylic paint, spray paint, or even chalk paint to create a variety of designs and patterns. If you’re not comfortable with free-hand painting, you can use stencils or masking tape to create crisp lines and shapes. You can also add texture and dimension to your box by using sponges, brushes, or even your fingers to create different effects.

Another popular way to decorate a wooden box is by decoupaging it. This technique involves gluing paper or fabric onto the surface of the box and then sealing it with a protective coating. You can use patterned paper, magazine clippings, or even family photos to create a unique and personalized design. Decoupaging is a great way to add color and texture to your box, and it’s a fun project to do with kids or friends.

Choosing the Right Wooden Box

When it comes to decorating a wooden box, the first step is to choose the right one. There are many different types of wooden boxes available, each with its own unique characteristics and benefits. Here are some things to consider when choosing the right wooden box for your project:

Size and Shape

The size and shape of the wooden box will have a big impact on how it looks and what you can do with it. Think about the purpose of the box and what you want to use it for. Do you want a small box for storing jewelry or a larger one for holding blankets? Do you want a square box or a round one? Consider the dimensions carefully and make sure the box is the right size and shape for your needs.

Type of Wood

Different types of wood have different colors, textures, and properties. Some woods, like pine, are soft and easy to work with, while others, like oak, are harder and more durable. Consider the type of wood carefully and choose one that will work well for your project. Some common types of wood used for boxes include:

  • Pine
  • Cedar
  • Oak
  • Maple
  • Birch

Style and Design

The style and design of the wooden box will also play a big role in how it looks and what you can do with it. Some boxes have simple, clean lines, while others are more ornate and decorative. Think about the overall look and feel you want to achieve and choose a box that fits that style. You can also consider adding your own decorations, such as paint, stain, or decoupage, to customize the box even further.

By considering these factors when choosing the right wooden box, you can ensure that your project turns out just the way you want it to. Take your time and choose a box that is both functional and beautiful, and you’ll be well on your way to creating a stunning piece of decor.

Materials Needed for Decoration

When it comes to decorating a wooden box, you will need a few materials to get started. Here are some of the essential items you will need to decorate your wooden box:

Paint and Brushes

One of the most popular ways to decorate a wooden box is to use paint and brushes. You can use acrylic paint, which is easy to work with and dries quickly. You will also need brushes in different sizes to create different effects. For example, a small brush is great for adding details, while a large brush is perfect for covering large areas.

Stencils and Decals

If you want to create a more intricate design, you can use stencils and decals. Stencils are pre-cut designs that you can use to paint on your wooden box. You can find stencils in a variety of shapes and sizes. Decals are pre-made designs that you can stick onto your wooden box. They come in a variety of designs, including flowers, animals, and patterns.

Adhesive and Glitter

If you want to add some sparkle to your wooden box, you can use adhesive and glitter. You can use a glue gun to apply adhesive to your wooden box. Then, you can sprinkle glitter over the adhesive to create a glittery effect. You can use different colors of glitter to create a unique design.

In addition to these materials, you may also need sandpaper to smooth out any rough spots on your wooden box. You may also need a sealant to protect your design and make it last longer. With these materials, you will be able to create a beautiful and unique wooden box that you can use to store your treasures or give as a gift.

Preparation of the Wooden Box

Before you start decorating your wooden box, it’s important to properly prepare it to ensure a smooth and successful project. Here are some steps to follow:

1. Sanding

First, you need to sand the wooden box to remove any rough spots or splinters. Use a fine-grit sandpaper to gently sand the surface of the box, making sure to sand in the direction of the grain. Sanding also helps to create a surface that will better absorb paint or stain.

2. Cleaning

After sanding, it’s important to clean the box to remove any dust or debris. You can use a damp cloth or a tack cloth to wipe down the surface of the box. Make sure the box is completely dry before moving on to the next step.

3. Priming (Optional)

If you plan to paint the box, it’s a good idea to use a primer first. Primer helps to create a smooth surface and also helps the paint adhere better. Apply the primer with a brush or a spray can, and let it dry completely before moving on to the next step.

4. Painting or Staining

Now it’s time to add some color to your wooden box! You can use paint or stain to achieve the desired look. Apply the paint or stain with a brush or a cloth, making sure to follow the manufacturer’s instructions. You may need to apply multiple coats to achieve the desired color and finish.

5. Finishing (Optional)

If you want to protect the surface of your wooden box, you can apply a clear coat or a wax finish. This will help to prevent scratches and other damage. Apply the finish with a brush or a cloth, and let it dry completely before using your newly decorated wooden box.

By following these simple steps, you can prepare your wooden box for decoration and ensure a successful project.

Basic Painting Techniques

When it comes to decorating a wooden box, painting is one of the easiest and most versatile techniques you can use. Here are some basic painting techniques you can use to transform your wooden box into a work of art.

Sponge Painting

Sponge painting is a great technique for adding texture and depth to your wooden box. To sponge paint, you will need a sponge, paint, and a palette. Dip the sponge into the paint and dab it onto the palette to remove any excess. Then, gently dab the sponge onto the wooden box. You can use one color or multiple colors to create a unique pattern.

Dry Brushing

Dry brushing is a technique that involves using a dry brush to apply paint to the wooden box. This technique is great for creating a distressed or vintage look. To dry brush, dip the brush into the paint and then wipe off most of the paint onto a paper towel. Then, lightly brush the wooden box with the dry brush. This will create a subtle, textured effect.

Stenciling

Stenciling is a technique that involves using a stencil to apply paint to the wooden box. This technique is great for creating intricate designs or patterns. To stencil, you will need a stencil, paint, and a stencil brush. Place the stencil onto the wooden box and hold it in place with tape. Then, dip the stencil brush into the paint and dab it onto the stencil. Be sure to use a light touch and work slowly to avoid smudging the paint.

By using these basic painting techniques, you can create a unique and personalized wooden box that will make a great addition to any room in your home.

Adding Details and Embellishments

When it comes to decorating wooden boxes, the possibilities are endless. Adding details and embellishments can take your box from plain and simple to eye-catching and unique. Here are a few ideas to get you started:

Glittering

If you want to add some sparkle to your wooden box, glitter is a great option. You can use glitter glue or loose glitter to create a variety of effects. Here’s how:

  1. Apply a layer of glue to the surface of your box using a paintbrush.
  2. Sprinkle loose glitter over the glue, making sure to cover the entire surface.
  3. Shake off any excess glitter and let the glue dry completely.

You can also use stencils to create glitter designs on your box. Simply place the stencil on the box and apply the glitter glue over the stencil. Once the glue dries, carefully remove the stencil to reveal your design.

Decoupage

Decoupage is a technique that involves gluing paper or fabric to a surface and then coating it with a clear sealant. It’s a great way to add a pattern or design to your wooden box. Here’s how:

  1. Cut your paper or fabric into the desired shape and size.
  2. Apply a layer of decoupage glue to the surface of your box using a paintbrush.
  3. Place the paper or fabric onto the glue and smooth out any wrinkles or bubbles.
  4. Apply another layer of glue over the paper or fabric, making sure to cover the entire surface.
  5. Let the glue dry completely, then apply additional layers of glue as needed to create a smooth finish.

Adding Hardware

Adding hardware to your wooden box can give it a more polished and professional look. Here are a few options to consider:

  • Handles: Attach handles to the sides of your box to make it easier to carry.
  • Hinges: Install hinges on the lid of your box to make it easier to open and close.
  • Latches: Add a latch to the front of your box to keep it securely closed.

When choosing hardware, make sure to select pieces that are the right size and style for your box. You can find a variety of hardware options at your local hardware store or online.

Sealing and Finishing the Box

Once you have decorated your wooden box to your liking, it’s time to seal and finish it. This will not only protect your artwork but also enhance the overall look of your box. Here are some tips on how to seal and finish your wooden box:

1. Sanding the Box

Before applying any sealant or finish, make sure to sand the box thoroughly. This will help remove any rough spots or imperfections on the surface. Start with a coarse-grit sandpaper and gradually move to a finer grit until the surface is smooth to the touch.

2. Applying a Sealant

A sealant will help protect the wood from moisture and other environmental factors. There are many types of sealants available, such as polyurethane, shellac, and lacquer. Choose the one that best suits your needs and apply it evenly using a brush or cloth. Allow the sealant to dry completely before moving on to the next step.

3. Adding a Finish

A finish will give your wooden box a polished look and enhance the natural beauty of the wood. There are many types of finishes available, such as wax, oil, and varnish. Choose the one that best suits your needs and apply it evenly using a brush or cloth. Allow the finish to dry completely before using the box.

4. Buffing the Box

Once the finish has dried, you can buff the box to give it a smooth and shiny surface. Use a soft cloth or buffing wheel and gently rub the surface in a circular motion. This will help remove any excess finish or sealant and give your box a professional look.

By following these simple steps, you can seal and finish your wooden box like a pro. With a little bit of patience and care, your box will look beautiful and last for years to come.

Maintenance and Care of Decorated Box

Once you have decorated your wooden box, it is important to take good care of it to ensure that it lasts for a long time. Here are some tips on how to maintain and care for your decorated wooden box:

Keep the Box Clean

Dust and dirt can accumulate on the surface of your decorated box, which can dull its appearance. To keep the box looking its best, wipe it down regularly with a soft, dry cloth. If the box is particularly dirty, you can use a damp cloth to clean it, but make sure to dry it thoroughly afterward.

Avoid Exposure to Direct Sunlight

Direct sunlight can cause the colors on your decorated box to fade over time. To prevent this from happening, avoid placing the box in direct sunlight for extended periods of time. Instead, store it in a cool, dry place away from windows or other sources of direct sunlight.

Handle the Box Carefully

When handling your decorated box, be careful not to scratch or damage the surface. Avoid placing heavy objects on top of the box, and be gentle when opening and closing the lid. If you need to move the box, pick it up from the bottom and support it with your other hand to prevent it from bending or warping.

Apply a Protective Coating

To protect the surface of your decorated box from scratches and other damage, you can apply a protective coating. There are many different types of coatings available, including varnish, lacquer, and wax. Choose the one that is best suited for the type of decoration on your box, and follow the manufacturer’s instructions for application.

By following these simple tips, you can maintain the beauty and integrity of your decorated wooden box for years to come.

How to Assemble a Wooden Bed Frame: A Beginner's Guide

Assembling a wooden bed frame may seem like a daunting task, but with the right tools and instructions, it can be a straightforward process. Whether you’re starting from scratch or upgrading your current bed, building a wooden bed frame is a great way to add a personal touch to your bedroom decor.

Before you get started, it’s important to select the right type of wood for your bed frame. Wood is a natural material that expands and contracts with changes in temperature and humidity. To avoid warping or cracking, choose a high-quality, kiln-dried wood that has been properly stored and acclimated to your home’s environment. Additionally, make sure you have all the necessary tools and hardware, including a drill, screws, and wood glue.

Once you have your materials and tools ready, it’s time to start assembling your bed frame. While the specifics may vary depending on the design of your bed frame, the general process involves attaching the headboard and footboard to the side rails, and then adding slats or a box spring to support the mattress. By following these steps and taking your time, you can create a sturdy and stylish wooden bed frame that will last for years to come.

Understanding Your Wooden Bed Frame

When it comes to assembling a wooden bed frame, the first step is to understand the different parts of the frame and how they fit together. This will make the assembly process much easier and quicker. In this section, we will cover how to identify the different parts of your wooden bed frame and how to read assembly instructions.

Identifying Parts

Before you start assembling your wooden bed frame, it’s important to identify all the parts that came with it. This will help you understand which pieces go where and how they fit together. Here are some common parts that you might find in a wooden bed frame:

  • Headboard: This is the vertical panel at the head of the bed.
  • Footboard: This is the vertical panel at the foot of the bed.
  • Side rails: These are the horizontal pieces that connect the headboard and footboard.
  • Slats: These are the wooden boards that support the mattress.
  • Center support: This is a vertical piece that runs down the center of the bed frame to provide additional support.

Once you have identified all the parts, lay them out on the floor in the order that they will be assembled. This will make it easier to follow the assembly instructions.

Reading Assembly Instructions

Most wooden bed frames come with assembly instructions. These instructions will guide you through the process of assembling your bed frame step-by-step. Here are some tips for reading assembly instructions:

  • Read the instructions carefully before you start assembling your bed frame.
  • Make sure you have all the tools you need before you start.
  • Follow the instructions in the order they are given.
  • If you don’t understand a step, read it again or consult the manufacturer’s website for additional information.
  • If you get stuck, don’t force anything. Take a break and come back to it later.

By following these tips, you can ensure that you assemble your wooden bed frame correctly and safely.

Gathering Necessary Tools

Before starting to assemble your wooden bed frame, it is important to gather all the necessary tools. Here is a list of tools that you will need:

Tools

Tool Description
Screwdriver A screwdriver is needed to tighten screws. A Phillips head screwdriver is usually needed.
Hammer A hammer is needed to tap in wooden dowels and other parts.
Measuring Tape A measuring tape is needed to ensure that the bed frame is assembled to the correct dimensions.
Level A level is needed to ensure that the bed frame is level and not tilted.
Allen Wrench An Allen wrench is needed to tighten bolts and screws that require an Allen head.
Pliers Pliers are needed to hold nuts and bolts in place while tightening them.

Materials

In addition to the tools, you will also need the following materials:

  • Wooden bed frame pieces
  • Screws
  • Bolts
  • Nuts
  • Wooden dowels

It is important to check that all the necessary materials and tools are present before starting the assembly process. This will save time and frustration later on.

Once you have gathered all the necessary tools and materials, you are ready to start assembling your wooden bed frame.

Assembling the Headboard and Footboard

Assembling the headboard and footboard of a wooden bed frame can be a bit tricky, but with the right tools and instructions, you can do it easily. Here are the steps to follow:

  1. First, lay the headboard and footboard flat on the ground or on a work surface. Make sure that the back of the headboard and the front of the footboard are facing up.

  2. Next, attach the side rails to the headboard and footboard. To do this, insert the metal brackets on the end of the side rails into the slots on the headboard and footboard. Then, use the bolts and nuts provided to secure the brackets in place. Make sure that the rails are level and straight.

  3. Once the side rails are attached, you can attach the center support beam. This is important for providing extra stability to the bed frame. Simply slide the beam into the slots on the side rails and secure it in place with the bolts and nuts provided.

  4. Finally, attach the slats to the side rails. Lay the slats across the rails, making sure that they are evenly spaced. Then, use the screws provided to secure the slats in place.

  5. Once you have assembled the headboard and footboard, you can attach them to the side rails. Simply insert the metal brackets on the headboard and footboard into the slots on the side rails and secure them in place with the bolts and nuts provided.

By following these simple steps, you can easily assemble the headboard and footboard of your wooden bed frame. Remember to take your time and double-check your work as you go to ensure that everything is level and secure.

Attaching the Side Rails

Now that the headboard and footboard are connected, it’s time to attach the side rails. This step is crucial as it will ensure that your bed frame is sturdy and secure.

First, you need to determine the location of the side rails. Measure the distance between the headboard and footboard, and cut the side rails to the appropriate length. Make sure that the side rails are flush with the top of the headboard and footboard.

Next, attach the side rails to the headboard and footboard using bed rail brackets. These brackets are specifically designed for this purpose and will ensure a strong and secure connection. Simply line up the brackets with the pre-drilled holes on the headboard and footboard, and screw them in place.

If your bed frame does not come with bed rail brackets, you can use L-brackets instead. Simply attach the L-brackets to the inside of the headboard and footboard, and then attach the side rails to the brackets using screws.

Once the side rails are attached, you can reinforce the connection by adding corner brackets. These brackets will provide additional stability and support to the bed frame. Simply attach the corner brackets to the inside of the headboard and footboard, and then attach the side rails to the brackets using screws.

Finally, check the bed frame for any wobbling or movement. If you notice any issues, tighten the screws and brackets until the bed frame is secure.

Congratulations, you have successfully attached the side rails to your wooden bed frame!

Installing the Slats

Once you have prepared the frame and cut and sanded the slats, it’s time to install the slats onto the bed frame.

  1. Lay the slats across the width of the bed frame, ensuring that they are evenly spaced. You can use a measuring tape to ensure the spacing is consistent.

  2. Make sure that the slats are centered on the frame and that they are flush with the edges of the frame.

  3. Attach the slats to the ledges of the bed frame using screws or bolts. Make sure that the screws or bolts are long enough to securely fasten the slats to the frame.

  4. For added support, you can also attach center support legs to the slats. These legs should be placed evenly spaced along the length of the bed frame.

  5. Once all the slats and support legs are securely attached, test the bed by gently sitting on it or applying some weight to ensure that everything is stable and secure.

It is important to ensure that the slats are securely attached to the bed frame to prevent them from shifting or falling out of place. By following these steps, you can easily install the slats onto your wooden bed frame and have a sturdy and comfortable bed to sleep on.

Securing the Bed Frame

Once you have assembled your wooden bed frame, it is important to make sure that it is secure and stable. Here are some tips to help you secure your bed frame:

1. Use Wood Glue

Wood glue is a great way to reinforce the joints of your bed frame. Apply a small amount of wood glue to each joint and use a clamp to hold the pieces together until the glue dries. This will help prevent the joints from coming loose over time.

2. Add Corner Braces

Corner braces are metal brackets that can be attached to the corners of your bed frame to add extra support. Simply attach the brackets to the inside of the frame using screws, making sure to drill pilot holes first to prevent the wood from splitting.

3. Use Bed Rail Brackets

Bed rail brackets are another option for securing your bed frame. These brackets attach to the headboard and footboard and allow you to easily attach and detach the side rails of your bed frame. This makes it easier to move your bed and also provides extra stability.

4. Check for Loose Screws

It is important to regularly check your bed frame for loose screws and tighten them as needed. Loose screws can cause the frame to become unstable and can even cause damage to the wood over time.

By following these tips, you can ensure that your wooden bed frame is secure and stable, providing you with a comfortable and safe place to sleep.

Adding the Mattress

Now that you have successfully assembled your wooden bed frame, it’s time to add the mattress. Here are some tips to help you do it easily and safely.

Step 1: Measure Your Mattress

Before you start, make sure you have the right size of mattress for your bed frame. Measure the length, width, and height of your mattress to ensure a perfect fit.

Step 2: Get Help

Adding a mattress to a bed frame can be a two-person job, especially if the mattress is heavy or bulky. Ask a friend or family member to help you lift and position the mattress.

Step 3: Center the Mattress

Place the mattress on top of the bed frame and center it. Make sure the mattress is evenly distributed on the frame. This will ensure that the weight is evenly distributed and prevent any sagging or warping of the frame.

Step 4: Secure the Mattress

Most bed frames have slats or a platform to support the mattress. Make sure the mattress is securely in place on the slats or platform. You can also use straps or clips to hold the mattress in place.

Step 5: Add Bedding

Once the mattress is securely in place, it’s time to add bedding. Start with a fitted sheet, followed by a flat sheet, and then a comforter or duvet. Add pillows and any other decorative bedding to complete the look.

By following these simple steps, you can easily add a mattress to your wooden bed frame and enjoy a comfortable and restful night’s sleep.

Safety Precautions During Assembly

Assembling a wooden bed frame can be a fun and rewarding project, but it’s important to take safety precautions to avoid injury. Here are some safety tips to keep in mind during assembly:

Wear Protective Gear

Before you start assembling your bed frame, be sure to wear protective gear such as safety glasses and work gloves. This will help protect your eyes and hands from any potential hazards, such as flying wood chips or sharp edges.

Use the Right Tools

Using the right tools is essential for safe and efficient assembly. Make sure you have all the necessary tools, such as a drill, screwdriver, and hammer, and use them correctly. Using the wrong tool or using a tool improperly can result in injury or damage to the bed frame.

Follow the Instructions

It’s important to carefully read and follow the instructions that come with your bed frame. Skipping steps or improvising can lead to mistakes or unsafe conditions. If you have any questions or concerns about the assembly process, don’t hesitate to contact the manufacturer for guidance.

Work in a Safe Environment

Make sure you have a safe and comfortable environment to work in. This includes having enough space to move around, good lighting, and a stable work surface. Avoid working in areas with clutter or tripping hazards.

Lift with Care

When lifting heavy pieces of the bed frame, be sure to lift with your legs and not your back. Use proper lifting techniques to avoid straining your muscles or injuring your back.

By following these safety precautions, you can ensure a safe and successful assembly of your wooden bed frame.

Troubleshooting Common Assembly Issues

Assembling a wooden bed frame can be a daunting task, especially if you are not familiar with the process. However, even if you have some experience with DIY projects, you may still encounter some issues during the assembly of your wooden bed frame. Here are some common issues that you may encounter and how to troubleshoot them.

Problem: Misaligned Holes

One of the most common issues that people face when assembling a wooden bed frame is misaligned holes. This can happen due to a variety of reasons, such as poor quality control during manufacturing, or the wood may have warped during storage or transportation.

Solution:

If you encounter misaligned holes, the first thing you can try is to use a rubber mallet to gently tap the pieces into place. If this does not work, you can use a drill to create new holes that align with the existing ones. Make sure to drill the holes at the same depth as the original holes to avoid damaging the wood.

Problem: Loose Joints

Another issue that you may face when assembling a wooden bed frame is loose joints. This can happen if the screws are not tightened enough or if the wood has warped or expanded.

Solution:

To fix loose joints, you can try tightening the screws with a screwdriver or a drill. If the wood has expanded, you may need to sand down the affected area to create a better fit. If the wood has warped, you can try using clamps to hold the pieces in place until the glue dries.

Problem: Damaged Parts

Sometimes, you may receive a wooden bed frame with damaged parts, such as broken slats or damaged side rails. This can happen due to poor quality control during manufacturing or during transportation.

Solution:

If you encounter damaged parts, the first thing you should do is contact the manufacturer or retailer to request replacement parts. If this is not possible, you can try repairing the damaged parts with wood glue or wood filler. However, keep in mind that this may affect the structural integrity of the bed frame.

By troubleshooting these common assembly issues, you can ensure that your wooden bed frame is sturdy and secure. Remember to take your time during the assembly process and follow the instructions carefully to avoid these issues in the first place.

Maintaining Your Wooden Bed Frame

Congratulations, you have successfully assembled your wooden bed frame! Now, it’s time to learn how to maintain it properly to ensure it lasts for years to come. Here are some tips to help you keep your bed frame in top condition:

1. Clean Regularly

Dust and dirt can accumulate on your bed frame, so it’s important to clean it regularly. Use a soft cloth or a brush to remove any dust or debris. You can also use a mild soap solution to clean the frame, but make sure to dry it thoroughly afterward.

2. Avoid Direct Sunlight

Direct sunlight can cause the wood to fade and dry out, leading to cracks and splits. To prevent this, avoid placing your bed frame in direct sunlight. If that’s not possible, use curtains or blinds to block out the sun.

3. Check for Loose Screws

Over time, screws can become loose, causing the bed frame to wobble or creak. Check the screws regularly and tighten them as needed. You can also use wood glue to reinforce the joints and prevent them from loosening.

4. Use a Mattress Protector

Using a mattress protector can help prevent spills and stains from damaging your bed frame. It can also protect your mattress from dust mites and allergens.

5. Avoid Excessive Weight

Wooden bed frames are designed to support a certain amount of weight. Avoid placing heavy objects on the frame or jumping on the bed, as this can cause the wood to crack or break.

By following these simple tips, you can keep your wooden bed frame looking and functioning like new for years to come.

How to Make a Wooden Rolling Tray: A Step-by-Step Guide for Beginners

If you enjoy rolling your own cigarettes or joints, having a rolling tray can make the process much easier and more enjoyable. A wooden rolling tray is a stylish and practical addition to any smoker’s collection, and making one yourself can be a fun and rewarding DIY project. With a few basic tools and some simple materials, you can create a customized rolling tray that meets your specific needs and preferences.

To begin making your wooden rolling tray, you’ll need to gather some supplies. This will include wood, sandpaper, wood glue, a saw, and a drill. You’ll also need to decide on the size and shape of your tray, as well as any additional features you want to include. Once you have your supplies and a plan in place, you can start cutting and sanding your wood to create the basic shape of your tray. From there, you can add any compartments, slots, or other features you desire, and finish your tray with a coat of stain or paint for a polished look.

Understanding the Purpose of a Wooden Rolling Tray

If you’re an avid smoker, you know how important it is to have a rolling tray. A rolling tray is a flat surface that provides a clean and organized area for rolling your herbs. It helps you keep your smoking accessories in one place and prevents you from losing anything. A wooden rolling tray is a great investment if you want something that is both functional and stylish.

When it comes to smoking, having a designated area for rolling your herbs is essential. Not only does it keep your herbs organized, but it also prevents them from spilling onto the floor or table. A wooden rolling tray is perfect for this purpose because it provides a stable surface that won’t slide around. It’s also easy to clean and maintain, making it a great investment.

In addition to being functional, a wooden rolling tray can also be stylish. It can complement your smoking accessories and add a touch of elegance to your smoking area. You can choose from a variety of wooden rolling trays that come in different sizes and designs. Some even have compartments for storing your smoking accessories.

Overall, a wooden rolling tray is a must-have for any smoker. It provides a clean and organized area for rolling your herbs and helps you keep your smoking accessories in one place. It’s also a stylish addition to your smoking area that can complement your smoking accessories. Consider investing in a wooden rolling tray if you want to enhance your smoking experience.

Materials Needed

If you want to make a wooden rolling tray, you’ll need a few things. Here are the materials you’ll need to gather:

Types of Wood

The type of wood you choose for your rolling tray is up to you. However, some popular options include:

Each type of wood has its own unique characteristics and appearance. Maple is a light-colored wood with a tight, even grain. Cherry has a reddish-brown color and a distinctive grain pattern. Walnut is a dark, rich wood with a straight grain. Oak is a strong, durable wood with a coarse texture.

Required Tools

To make a wooden rolling tray, you’ll need a few essential tools, including:

  • Saw
  • Drill
  • Screws
  • Measuring tape
  • Pencil
  • Sandpaper (100 grit, 150 grit, and 220 grit)
  • Wood stain or paint in the color of your choice
  • Clear coat or varnish

With these tools, you’ll be able to cut your wood to size, drill holes for screws, sand the surface to a smooth finish, and apply a protective coating to the wood. Be sure to have all of these tools on hand before you begin your project.

Designing Your Wooden Rolling Tray

When it comes to designing your wooden rolling tray, there are a few things to consider. Size and shape are important, as well as any additional features or compartments you may want to include.

Size and Shape

The size and shape of your wooden rolling tray will depend on your personal preferences and needs. Consider how much space you need to roll your materials and how portable you want your tray to be. A larger tray may be more comfortable to use, but a smaller one may be easier to transport.

Additionally, think about the shape of your tray. A rectangular shape is traditional, but a circular or oval tray may be more unique and visually appealing. Keep in mind that the shape of your tray may also affect its functionality and how easy it is to use.

Features and Compartments

When designing your wooden rolling tray, think about any additional features or compartments you may want to include. For example, you may want to add a slot for holding your rolling papers or a separate compartment for storing your materials.

You could also consider adding a groove around the edge of the tray to catch any loose materials and prevent them from spilling over. Another option is to include a built-in ashtray or lighter holder for added convenience.

Overall, the design of your wooden rolling tray is up to you. Consider your personal preferences and needs, and don’t be afraid to get creative with your design. With a little bit of planning and creativity, you can create a functional and stylish rolling tray that fits your unique needs.

Wood Preparation

Before you start making your wooden rolling tray, it’s important to properly prepare the wood. This will ensure that your rolling tray is sturdy and long-lasting. In this section, we’ll cover two important sub-sections: Cutting the Wood and Sanding the Wood.

Cutting the Wood

The first step in preparing your wood is to cut it to the appropriate size. You can use a table saw, circular saw, or hand saw to make your cuts. It’s important to measure and mark your wood accurately before making any cuts to avoid mistakes.

When cutting your wood, be sure to wear appropriate safety gear, such as safety glasses and gloves. Always cut away from your body and keep your hands and fingers away from the blade.

Sanding the Wood

After cutting your wood to size, the next step is to sand it. Sanding will help smooth out any rough edges and prepare the wood for staining or painting.

Start with a coarse grit sandpaper and gradually work your way up to a finer grit. Be sure to sand in the direction of the wood grain to avoid damaging the wood.

Once you’ve finished sanding, wipe down the wood with a damp cloth to remove any sawdust or debris. Your wood is now ready for staining or painting.

Remember, proper wood preparation is essential for creating a high-quality rolling tray. Take your time and follow these steps carefully for the best results.

Assembling the Tray

Gluing the Pieces

Now that you have all the pieces cut, it’s time to assemble the tray. Start by applying a thin layer of wood glue to the edges of the bottom piece. Then, place the two side pieces on top of the bottom piece, making sure they are flush with the edges. Apply clamps to hold the pieces together while the glue dries.

Next, apply glue to the edges of the two end pieces and attach them to the sides of the tray. Use clamps to hold everything in place while the glue dries. Once the glue has dried, remove the clamps and sand any rough edges.

Securing the Tray

To secure the tray, you can use either screws or nails. If you choose to use screws, pre-drill holes in the bottom of the tray and the sides before attaching them. This will prevent the wood from splitting. Then, use screws to attach the sides to the bottom of the tray.

If you choose to use nails, use a nail gun or hammer to attach the sides to the bottom of the tray. Be sure to use enough nails to hold the pieces securely together.

Once the tray is assembled and secured, you can sand any rough edges and apply a finish if desired. A clear coat of polyurethane will protect the wood and give it a nice shine.

Congratulations, you have now assembled your very own wooden rolling tray!

Finishing Touches

Once you have assembled your wooden rolling tray, it is time to add the finishing touches to make it truly unique and personalized. This section will cover two sub-sections: Applying the Finish and Adding Personal Touches.

Applying the Finish

The finish you choose for your rolling tray can make a big difference in its appearance and durability. Here are some popular options:

  • Stain: A wood stain can add color to your tray while still allowing the natural wood grain to show through. Apply the stain with a brush or cloth, following the manufacturer’s instructions.
  • Paint: If you prefer a solid color, paint is a good option. Use a brush or spray paint for an even finish.
  • Clear Coat: A clear coat can protect the wood and give it a glossy or matte finish. Apply with a brush or spray can.

Before applying any finish, make sure the wood is clean and dry. Sand it lightly with fine-grit sandpaper to smooth out any rough spots. Apply the finish in a well-ventilated area and follow the manufacturer’s instructions for drying and curing time.

Adding Personal Touches

Now that your rolling tray has a beautiful finish, it’s time to add some personal touches. Here are some ideas:

  • Custom Engraving: If you have access to a laser engraver, you can add a custom design or message to your tray.
  • Stickers or Decals: You can find stickers or decals with your favorite designs or quotes and apply them to your tray.
  • Painted Designs: Use paint or markers to add your own designs or patterns to the tray.
  • Accessories: Add a small container for your rolling papers or a holder for your lighter to make your tray even more functional.

Remember to keep your personal touches in line with your own style and preferences. Your rolling tray should reflect your personality and add to your smoking experience.

Maintenance and Care

Cleaning the Tray

To keep your wooden rolling tray in good condition, it is important to clean it regularly. Here are some tips to help you clean your tray:

  • Use a soft, damp cloth to wipe down the surface of the tray. Avoid using abrasive cleaners or scrubbers that can scratch the wood.
  • If your tray has stubborn stains or buildup, you can use a mixture of warm water and mild dish soap to clean it. Be sure to rinse the tray thoroughly with water and dry it completely with a clean cloth.
  • Avoid soaking your wooden rolling tray in water or exposing it to excessive moisture, as this can cause the wood to warp or crack.
  • To remove any odors from your tray, you can wipe it down with a mixture of water and vinegar or lemon juice. Be sure to rinse the tray thoroughly with water and dry it completely.

Prolonging the Tray’s Life

With proper care and maintenance, your wooden rolling tray can last for many years. Here are some tips to help prolong the life of your tray:

  • Avoid exposing your tray to direct sunlight or extreme temperatures, as this can cause the wood to fade or crack.
  • Keep your tray away from sources of moisture, such as sinks or humidifiers.
  • Use a protective coating, such as beeswax or mineral oil, to help seal and protect the wood. Apply the coating with a soft cloth and allow it to soak in for several hours before wiping away any excess.
  • Store your tray in a dry, cool place when not in use to prevent it from becoming warped or damaged.
  • Avoid placing heavy objects on top of your tray, as this can cause it to crack or break.
characteristics-of-wood

What is the Best Way to Attach Tile to Wood? Tips and Tricks

Are you planning to attach tile to a wooden surface and wondering what the best way to do it is? If so, you’re not alone. Many people face this challenge, and it can be tricky to find the right solution. Fortunately, there are several methods you can use to attach tile to wood, each with its own advantages and disadvantages.

One of the most popular ways to attach tile to wood is by using construction adhesive. This strong, durable adhesive is ideal for wet areas like bathrooms and kitchens, as it is waterproof and can hold your tiles in place for years. Another option is to use mastic glue, which is cost-effective and can be used to fix tiles into plywood effortlessly. However, mastic glue is not suitable for outdoor tiling as it is susceptible to harsh weather conditions. Additionally, you can use a combination of thinset mortar and construction adhesive for a more secure attachment. Whatever method you choose, it’s essential to make sure that the wood surface is even, flat, and finished before beginning the tiling process.

Understanding Tile and Wood

When it comes to attaching tile to wood, it’s important to understand the properties of both materials. In this section, we’ll take a closer look at the characteristics of tile and wood.

Properties of Tile

properties-of-tile

Tile is a popular flooring material that comes in a variety of materials, including ceramic, porcelain, and natural stone. Here are some of the key properties of tile:

  • Durability: Tile is a highly durable material that can withstand heavy foot traffic and is resistant to scratches, stains, and moisture.
  • Variety: With so many different types of tile available, there’s a style to suit every taste and decor.
  • Maintenance: Tile is relatively easy to clean and maintain, making it a popular choice for kitchens and bathrooms.
  • Installation: Installing tile can be a complex process that requires specialized tools and expertise.

Characteristics of Wood

characteristics-of-wood

Wood is a classic flooring material that adds warmth and character to any space. Here are some of the key characteristics of wood:

  • Natural beauty: Wood has a natural beauty that can’t be replicated by other materials.
  • Versatility: Wood can be stained or painted to match any decor style.
  • Comfort: Wood flooring is comfortable underfoot and provides insulation against cold temperatures.
  • Maintenance: Wood requires regular maintenance, including refinishing and sealing, to keep it looking its best.
  • Susceptibility to moisture: Wood is susceptible to moisture damage and should not be installed in areas with high humidity or moisture levels.

By understanding the properties of tile and wood, you can make an informed decision about which material is best for your flooring needs.

Necessary Tools and Materials

Tile Adhesives

When attaching tile to wood, you’ll need to use a tile adhesive that is specifically designed for this purpose. There are several types of adhesives available, including thinset mortar, mastic, and epoxy. Thinset mortar is the most commonly used adhesive for tile installation, as it provides a strong bond and is resistant to moisture. Mastic is a good choice for smaller tiles and for walls, but it is not recommended for high-moisture areas. Epoxy is the strongest adhesive available, but it is also the most expensive and difficult to work with.

To choose the right adhesive for your project, consider the size and type of tile you’ll be using, as well as the location and level of moisture in the area. Always follow the manufacturer’s instructions for mixing and applying the adhesive.

Equipment Needed

In addition to the tile adhesive, you’ll need a few other tools and materials to attach tile to wood. Here are the essentials:

  • Backer board: This is a cement-based material that is installed over the wood subfloor to provide a stable surface for the tile. It comes in sheets and should be cut to fit the room using a circular saw or jigsaw.
  • Trowel: This is used to spread the adhesive onto the backer board. Choose a trowel with the appropriate size notches for your tile size.
  • Level: A level will help you ensure that the backer board is installed evenly.
  • Tile spacers: These small plastic pieces are used to create even gaps between the tiles.
  • Tile cutter or wet saw: Depending on the type of tile you’re using, you’ll need either a tile cutter or a wet saw to cut the tiles to size.
  • Grout: This is used to fill in the gaps between the tiles. Choose a color that complements your tile and follow the manufacturer’s instructions for mixing and applying the grout.
  • Rubber float: This tool is used to spread the grout over the tiles and into the gaps.
  • Sponge: A damp sponge is used to wipe away excess grout and clean the tiles after grouting.

With these tools and materials on hand, you’ll be ready to tackle your tile installation project with confidence.

Preparation Steps

preparation-steps-3

Before you start attaching tiles to wood, there are some essential preparation steps you need to follow. These steps will ensure that your tiles adhere properly to the surface, and you get the desired results. Here are the two critical preparation steps you should follow:

Preparing the Wood Surface

The first step is to prepare the wood surface where you will attach the tiles. The wood surface needs to be clean, smooth, and free from any dust, dirt, or debris. You can use a vacuum cleaner or a broom to remove any dirt or debris. After cleaning, you need to sand the wood surface to make it smooth. Sanding will also help the adhesive bond better with the wood surface.

Choosing the Right Tile

The second step is to choose the right tile for your project. When choosing tiles, you need to consider the size, shape, and type of tile. The size and shape of the tile should match the surface where you will attach them. The type of tile should also be suitable for the area where you will install it. For example, if you are installing tiles in a bathroom, you should choose tiles that are water-resistant and slip-resistant.

Once you have prepared the wood surface and chosen the right tile, you are ready to attach the tiles to the wood surface. Remember to follow the manufacturer’s instructions when applying the adhesive and grout. With proper preparation and installation, you can achieve a beautiful and long-lasting tile installation on wood.

Attachment Process

When it comes to attaching tile to wood, there are a few key steps you need to follow to ensure a successful installation. In this section, we’ll go over the two main steps of the attachment process: applying the adhesive and setting the tile.

Applying the Adhesive

The first step in attaching tile to wood is to apply the adhesive. There are a few different types of adhesive you can use, but the most common is thinset mortar. Here’s how to apply it:

  1. Mix the mortar according to the manufacturer’s instructions. You’ll want to mix it to a consistency that’s similar to peanut butter.
  2. Using a notched trowel, spread the mortar onto the wood surface in an even layer.
  3. Make sure the mortar is spread evenly and covers the entire surface. You don’t want any areas to be missed.
  4. Once the mortar is applied, wait a few minutes for it to set up. This will help it bond better to the tile.

Setting the Tile

Once the adhesive is applied, it’s time to set the tile. Here’s how to do it:

  1. Start by placing the first tile in the corner of the room. Make sure it’s lined up with your layout lines.
  2. Press the tile down firmly into the adhesive. You’ll want to wiggle it back and forth a bit to ensure it’s fully embedded in the mortar.
  3. Continue placing tiles in a straight line along the first row. Use spacers to ensure even spacing between the tiles.
  4. Once the first row is complete, start on the second row. Stagger the tiles so that the joints don’t line up with the joints in the first row.
  5. Continue setting tiles row by row until the entire surface is covered.

Remember to work in small sections at a time to ensure the adhesive doesn’t dry out before you have a chance to set the tile. And always double-check your layout lines to make sure your tiles are going in straight. With these steps, you’ll be able to attach tile to wood with confidence and create a beautiful, long-lasting installation.

Post-Attachment Care

post-attachment-care-1

After attaching tile to wood, it’s important to take proper care of the surface to ensure it lasts as long as possible. Here are some tips for post-attachment care:

Cleaning the Tile

To keep your tile looking its best, it’s important to clean it regularly. Here are some tips for cleaning tile:

  • Use a soft-bristled brush or sponge to avoid scratching the surface of the tile.
  • Avoid using harsh chemicals or abrasive cleaners, as they can damage the surface of the tile.
  • Use a mild detergent and warm water to clean the tile. Be sure to rinse thoroughly to avoid leaving any residue behind.

Maintaining the Wood

In addition to cleaning the tile, it’s important to take care of the wood surface as well. Here are some tips for maintaining the wood:

  • Keep the wood surface dry to avoid warping or rotting. If the wood does get wet, be sure to dry it thoroughly.
  • Avoid placing heavy objects on the wood surface, as this can cause it to warp or crack.
  • Apply a sealant or protective coating to the wood surface to help protect it from moisture and other damage.

By following these tips for post-attachment care, you can help ensure that your tile and wood surface stay looking great for years to come.

Frequently Asked Questions

What is the recommended adhesive for attaching tile to wood?

The recommended adhesive for attaching tile to wood is a combination of thinset mortar and construction adhesive. This method is the most secure and will ensure that the tile stays in place for a long time. Make sure the wood surface is relatively even, flat, and finished before beginning.

Can ceramic tiles be safely installed on a wooden floor?

Yes, ceramic tiles can be safely installed on a wooden floor. However, it is important to ensure that the wooden floor is stable and free from any movement before installing the tiles. It is also recommended to use a cement backer board to help stabilize the wooden floor and provide a good surface for the tiles to adhere to.

How can I attach wood trim to tile without damaging either surface?

To attach wood trim to tile without damaging either surface, use a construction adhesive that is specifically designed for use with both wood and tile. Apply the adhesive to the back of the wood trim and press it firmly onto the tile surface. Hold it in place until the adhesive dries completely.

Is it possible to put tiles directly onto a wooden surface?

It is possible to put tiles directly onto a wooden surface, but it is not recommended. Wood is a porous material that can expand and contract with changes in temperature and humidity. This movement can cause the tiles to crack or come loose. It is recommended to use a cement backer board to provide a stable surface for the tiles to adhere to.

What is the best way to attach tile to a wooden countertop?

The best way to attach tile to a wooden countertop is to use a combination of thinset mortar and construction adhesive. Apply a layer of thinset mortar to the wooden countertop and then press the tiles firmly into place. Allow the mortar to dry completely before applying a layer of construction adhesive to the back of the tiles. Press the tiles firmly onto the countertop and hold them in place until the adhesive dries completely.

What are some tips for using mastic glue to attach tile to wood?

When using mastic glue to attach tile to wood, it is important to make sure that the wood surface is clean and free from any debris. Apply a thin layer of mastic glue to the back of the tiles and press them firmly into place. Make sure to work quickly, as mastic glue tends to dry quickly. Avoid using mastic glue in areas that are exposed to moisture, as it is not waterproof.