Tag Archives: withstand heavy foot traffic

painting-techniques

How to Paint Wooden Stairs: A Step-by-Step Guide

If you’re looking to give your wooden stairs a fresh new look, painting them is a great option. Not only is it an affordable way to spruce up your home, but it’s also a relatively easy DIY project that can be completed in a weekend. Whether you’re looking to add a pop of color or simply refresh the existing finish, painting your stairs can make a big impact.

Before you get started, it’s important to properly prepare your stairs. This includes thoroughly cleaning and sanding the surface to ensure the paint adheres properly. You’ll also want to choose the right kind of paint for the job. Look for a high-quality floor paint that will withstand heavy foot traffic and provide a durable finish.

Once you’ve prepped your stairs and gathered your supplies, it’s time to start painting. Take your time and work in small sections, using a brush or roller to apply the paint evenly. Depending on the size of your staircase, you may need to apply multiple coats to achieve the desired finish. With a little patience and attention to detail, you can transform your wooden stairs into a beautiful focal point of your home.

Choosing the Right Materials
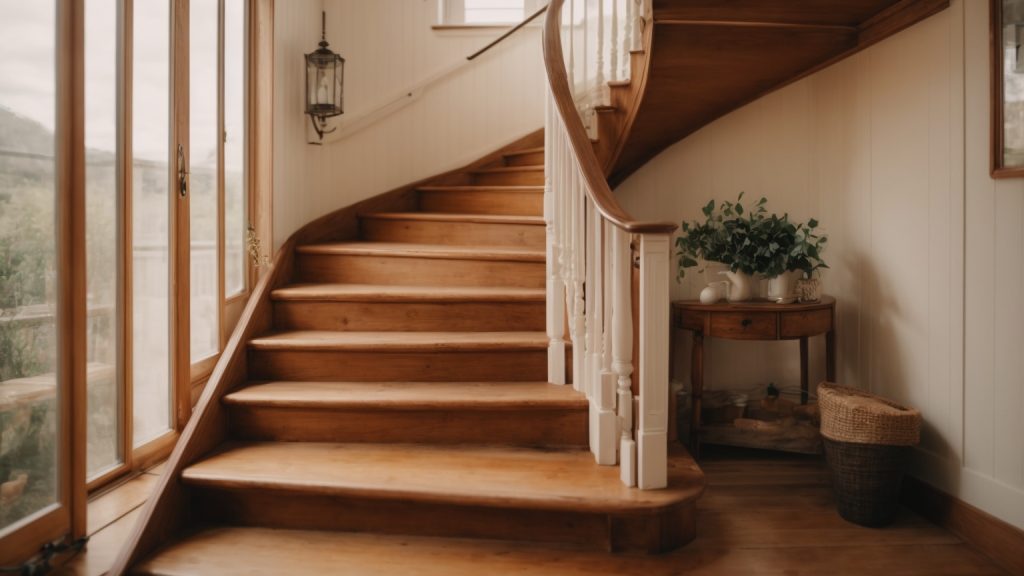
how-to-paint-wooden-stairs-a-step-by-step-guide-2

When it comes to painting wooden stairs, selecting the right materials is key to achieving a professional-looking finish that will last. In this section, we’ll cover the basics of choosing the right paint, brushes, and rollers for your project.

Selecting Paint

Choosing the right paint for your wooden stairs is crucial to ensure a durable and long-lasting finish. You’ll want to look for a paint that is specifically designed for use on floors and stairs, as these paints are formulated to withstand heavy foot traffic and wear and tear.

When selecting a paint, you’ll also want to consider the finish. High-gloss finishes are durable and easy to clean, but can be slippery underfoot. Satin or semi-gloss finishes offer a good balance of durability and slip resistance, while matte finishes are less durable but provide better traction.

Some recommended paints for wooden stairs include:

  • Benjamin Moore Floor & Patio Paint
  • PPG Floor & Porch Paint
  • BEHR Premium Porch and Patio Floor Paint

Choosing Brushes and Rollers

Selecting the right brushes and rollers is just as important as choosing the right paint. For painting stairs, you’ll want to use a combination of brushes and rollers to ensure even coverage and a smooth finish.

For the flat surfaces of the stairs, use a high-quality roller with a short nap. This will help you apply the paint evenly and quickly. For the edges and corners of the stairs, use a small, angled brush to ensure precise application.

When selecting brushes and rollers, look for ones that are specifically designed for use with floor and stair paints. These brushes and rollers will have the right stiffness and thickness to apply the paint evenly and smoothly.

Some recommended brushes and rollers for painting wooden stairs include:

  • Wooster Pro Doo-Z Roller
  • Purdy XL Elite Glide Brush
  • Wooster Shortcut Angle Sash Brush

By selecting the right paint, brushes, and rollers, you can ensure a professional-looking finish that will last for years to come.

Preparing the Wooden Stairs

Before you start painting your wooden stairs, it’s important to prepare the surface properly. This will ensure that the paint adheres well and that the finish is smooth and even.

Cleaning the Stairs

The first step in preparing your wooden stairs is to clean them thoroughly. This will remove any dirt, dust, or grime that may have accumulated on the surface. You can use a vacuum cleaner to remove loose dirt and debris, and then wipe down the stairs with a damp cloth and warm soapy water. Make sure to clean all the nooks and crannies, including the handrails and spindles. Once you have cleaned the stairs, allow them to dry completely before moving on to the next step.

Sanding the Surface

Once the stairs are clean and dry, it’s time to sand the surface. Sanding will help to smooth out any rough patches and create a surface that the paint will adhere to more easily. You can use a sanding block or an orbital sander to sand the stairs. Start with a coarse grit sandpaper and work your way up to a finer grit. Make sure to sand the entire surface of the stairs, including the edges and corners. Once you have finished sanding, wipe down the stairs with a clean, dry cloth to remove any dust or debris.

By properly cleaning and sanding your wooden stairs, you will create a smooth and even surface that is ready for painting. This will ensure that your paint job looks great and lasts for a long time.

Safety Measures

Painting your wooden stairs can be a fun and rewarding project, but it’s important to take safety measures to prevent accidents. Here are some things to keep in mind before you start:

1. Wear Protective Gear:

Before you start painting, make sure you have the right protective gear. Wear a dust mask to avoid inhaling dust particles, safety goggles to protect your eyes from paint splatters, and gloves to protect your hands from chemicals.

2. Prepare the Work Area:

Prepare the work area by removing any obstacles that could cause you to trip or fall. Cover the floor with a drop cloth to protect it from paint drips and spills. Make sure the area is well-ventilated by opening windows or using a fan.

3. Use the Right Tools:

Using the right tools is crucial to ensure your safety while painting stairs. Use a sturdy ladder that can support your weight and reach all areas of the stairs. Use a paintbrush with a comfortable grip to prevent hand fatigue.

4. Follow Proper Painting Techniques:

When painting stairs, it’s important to follow proper painting techniques to prevent accidents. Start at the top of the stairs and work your way down, painting one step at a time. Allow each step to dry completely before moving on to the next one.

5. Clean Up Properly:

After you finish painting, clean up properly to prevent accidents. Dispose of any paint cans, brushes, or rollers in a safe manner. Clean up any spills or drips immediately to prevent slipping.

By following these safety measures, you can ensure a safe and successful painting project.

Applying Primer

Before you start painting your wooden stairs, it’s important to apply a primer. A primer is essential because it helps the paint adhere better to the surface, and it also helps to seal the wood, preventing any stains or tannins from bleeding through the paint. Here’s how to apply primer to your wooden stairs:

Step 1: Clean the Stairs

Before you apply primer, make sure your stairs are clean and free of any dust, dirt, or debris. Use a vacuum cleaner or a soft-bristled brush to remove any loose dirt or debris. Then, wipe the stairs down with a damp cloth to remove any remaining dirt or dust.

Step 2: Sand the Stairs

Next, you’ll need to sand the stairs to create a smooth surface for the primer to adhere to. Use a fine-grit sandpaper (220-grit) and sanding sponge to sand the spindles, handrails, and any other wood surfaces to smooth them before painting. Vacuum up any sanding dust and wipe down your sanded surfaces with a damp cloth.

Step 3: Apply the Primer

Apply the primer using a medium-sized paintbrush or a roller. Make sure to apply the primer evenly and cover all areas of the stairs. If you’re using a sprayer, make sure to cover any nearby surfaces to prevent overspray. Let the primer dry completely before painting.

Step 4: Sand the Primer

Once the primer is dry, use a fine-grit sandpaper (220-grit) to lightly sand the surface. This will help to create a smooth surface for the paint to adhere to.

Step 5: Apply a Second Coat of Primer (Optional)

If necessary, apply a second coat of primer. This will help to ensure that the surface is fully covered and that the paint will adhere properly.

By following these steps, you’ll be able to apply primer to your wooden stairs and prepare them for painting.

Painting Techniques
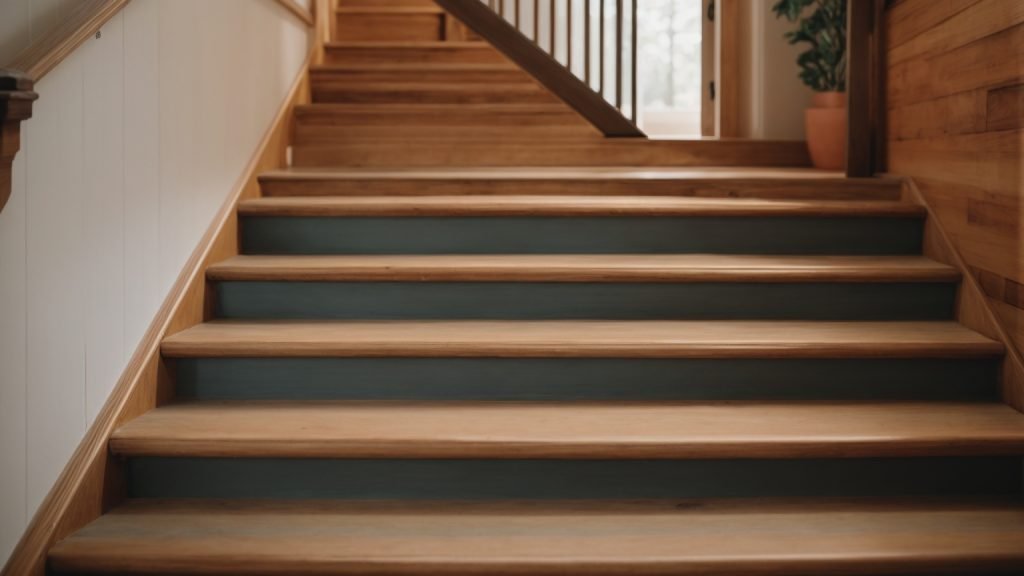
painting-techniques

When painting wooden stairs, it’s important to use the right techniques to ensure a smooth and long-lasting finish. Here are some tips to help you get the best results:

First Coat Application

Before applying the first coat of paint, make sure the stairs are clean and dry. Sand the surface lightly to remove any rough spots or imperfections. Then, apply a coat of primer to help the paint adhere better and provide a more even finish.

When applying the first coat of paint, use a brush or roller to apply the paint in long, even strokes. Start at the top of the stairs and work your way down, making sure to cover all areas evenly. Avoid applying too much paint at once, as this can cause drips and uneven coverage.

Adding Additional Coats

Once the first coat is dry, you can apply additional coats of paint as needed. Depending on the type of paint you’re using, you may need to apply two or more coats to achieve the desired finish.

Before applying each additional coat, lightly sand the surface to remove any bumps or imperfections. Then, apply the paint in the same manner as the first coat, using long, even strokes and avoiding applying too much paint at once.

If you notice any drips or uneven areas, use a brush or roller to smooth them out before the paint dries. Allow each coat to dry completely before applying the next coat.

By following these painting techniques, you can achieve a smooth and durable finish on your wooden stairs.

Drying and Curing

Once you have finished painting your wooden stairs, you will need to allow them to dry and cure properly. This process is essential to ensure that your stairs look their best and that the paint job lasts for a long time.

The drying time for your stairs will depend on a few factors, including the type of paint you used, the temperature and humidity in the room, and the airflow. In general, you should allow the stairs to dry for at least 24 hours before walking on them or putting any furniture back in place.

Curing, on the other hand, takes longer and involves the hardening and strengthening of the paint. This process can take up to a week or more, depending on the type of paint and the conditions in the room. During this time, it is important to avoid heavy traffic on the stairs, and to be careful when moving furniture or other objects.

To ensure that your stairs dry and cure properly, follow these tips:

  • Keep the room well-ventilated by opening windows or using fans to circulate air.
  • Avoid touching or bumping into the stairs during the drying and curing process.
  • Wait at least 24 hours before walking on the stairs or putting any furniture back in place.
  • Wait at least a week before cleaning the stairs or applying any additional coats of paint.

Properly drying and curing your painted wooden stairs is a crucial step in achieving a professional-looking finish that will last for years to come. So be patient, follow these tips, and enjoy your newly painted stairs!

Maintenance Tips

Once you’ve painted your wooden stairs, it’s important to maintain them properly to ensure they look great for years to come. Here are some maintenance tips to keep in mind:

  • Regular Cleaning: Regularly clean your stairs with a soft-bristled brush or a vacuum cleaner to remove any dirt or debris. Avoid using abrasive cleaners or harsh chemicals that can damage the paint or wood.
  • Touch-Ups: Over time, your stairs may develop scratches or chips. To keep them looking their best, touch up any damaged areas with a small brush and matching paint.
  • Protective Coating: Consider applying a protective coating to your stairs to help prevent scratches, scuffs, and other damage. A clear polyurethane or varnish can help protect the paint and wood from wear and tear.
  • Avoid Heavy Traffic: Try to avoid heavy traffic on your stairs, especially if you have pets or children who may scratch or damage the paint. Consider placing rugs or runners on your stairs to help protect them.
  • Inspect Regularly: Regularly inspect your stairs for any signs of damage or wear and tear. Address any issues promptly to prevent them from getting worse.

By following these maintenance tips, you can keep your painted wooden stairs looking great for years to come.
How to Make Wooden Stairs Less Slippery: Tips and Tricks

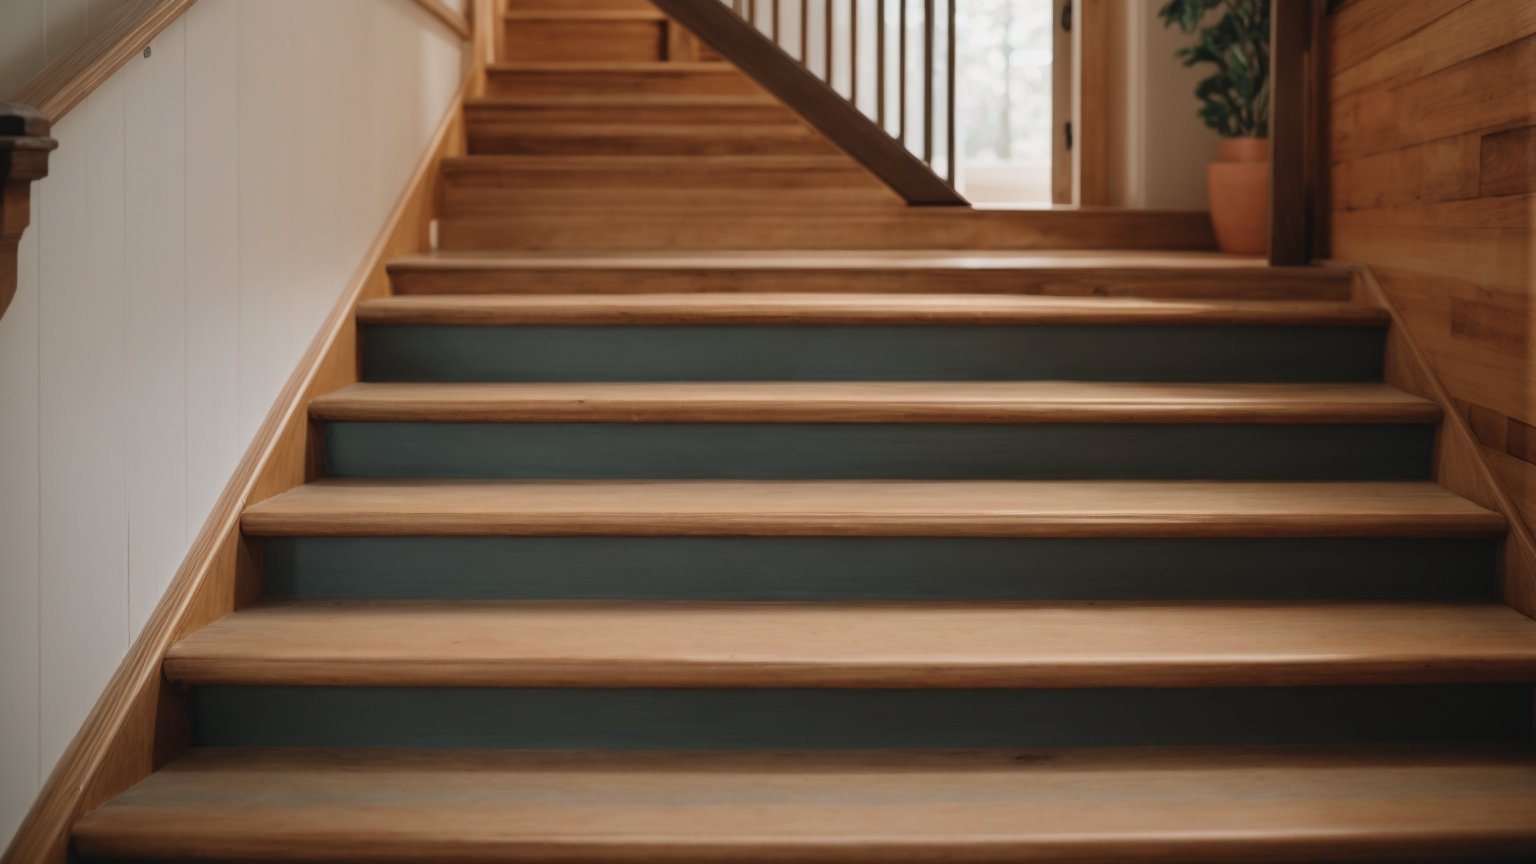
Are you tired of slipping on your wooden stairs? Do you want to make your stairs safer for you and your family? Slippery stairs can be a major hazard, especially for children and elderly people. Fortunately, there are several effective ways to make your wooden stairs less slippery and reduce the risk of falls and injuries.

One simple solution is to add texture to your stairs in the form of a carpet or a stair runner. This will provide more grip and traction when you walk up and down the stairs. However, if you prefer the natural look of your wooden stairs, there are other options available. You can use transparent stair strips, anti-slip finish, spray and paint additives to make the surface of each stair rougher and less slippery.

Understanding the Risks of Slippery Wooden Stairs

Wooden stairs are a popular feature in many homes and businesses because they add aesthetic appeal and warmth. However, one of the downsides of having wooden stairs in or around your property is that when slippery, they can be dangerous to anyone using them. Wood is specifically slippery when wet conditions or mold are present or corrosion has taken place. As a home or business owner, it is your responsibility to ensure the safety of anyone using your stairs.

Slippery wooden stairs can lead to serious injuries such as broken bones, sprains, and head injuries. According to the National Safety Council, falls are the third leading cause of unintentional injury-related deaths in the United States, and the majority of these falls occur on stairs. Slippery wooden stairs can also be a liability issue if someone is injured on your property.

It is important to understand the risks associated with slippery wooden stairs and take the necessary steps to prevent accidents from happening. There are many effective ways to make your wooden stairs less slippery, including adding texture, applying anti-slip finish, and installing carpet or stair treads. By taking these steps, you can ensure the safety of everyone who uses your stairs and prevent accidents from occurring.

Identifying the Type of Wood

Before you begin making your wooden stairs less slippery, it’s important to identify the type of wood you’re working with. This will help you determine the best methods for adding traction without damaging the wood.

Here are some common types of wood used for stairs:

1. Oak

Oak is a popular choice for stairs because of its durability and strength. It has a prominent grain pattern that can be enhanced with stains and finishes.

2. Maple

Maple is another strong and durable option for stairs. It has a smooth, uniform grain pattern that can be stained or painted.

3. Pine

Pine is a softer wood that is often used for stairs in older homes. It has a knotty, rustic look that can be stained or painted.

4. Mahogany

Mahogany is a hardwood that is known for its rich, reddish-brown color and straight grain pattern. It is a popular choice for high-end stairs.

Once you have identified the type of wood, you can choose the best method for adding traction without damaging the wood. Some options include using anti-slip finish, adding carpet or stair runners, or installing individual carpet stair treads on each step. Be sure to test any products or methods on a small, inconspicuous area first to ensure they do not damage the wood.

Choosing the Right Anti-Slip Solution

When it comes to making your wooden stairs less slippery, there are several anti-slip solutions available in the market. Choosing the right one can significantly reduce the risk of slipping and falling. Here are some of the most popular anti-slip solutions:

Anti-Slip Tape

Anti-slip tape is a quick and easy solution to make your wooden stairs less slippery. It is a self-adhesive tape that can be applied directly to the surface of each stair. The tape has a rough surface that provides excellent traction, making it ideal for high-traffic areas. Anti-slip tape is available in different colors and patterns, so you can choose one that matches your decor.

Non-Slip Paint

Non-slip paint is another popular solution for making wooden stairs less slippery. It is a specially formulated paint that contains anti-slip additives, such as sand or grit. The paint creates a rough surface that provides excellent traction, making it ideal for stairs. Non-slip paint is available in a range of colors, so you can choose one that matches your decor.

Stair Treads

Stair treads are another effective solution for making wooden stairs less slippery. They are pre-cut strips of material that can be attached to the surface of each stair. Stair treads are available in a range of materials, including rubber, vinyl, and carpet. They provide excellent traction and are ideal for high-traffic areas.

When choosing the right anti-slip solution for your wooden stairs, consider the following factors:

  • Durability: Choose a solution that can withstand heavy foot traffic and last for a long time.
  • Aesthetics: Choose a solution that matches your decor and enhances the beauty of your wooden stairs.
  • Ease of installation: Choose a solution that is easy to install and does not require professional assistance.

By considering these factors, you can choose the right anti-slip solution for your wooden stairs and significantly reduce the risk of slipping and falling.

Preparation Before Application

Before you start applying any anti-slip solution to your wooden stairs, it’s important to prepare the surface properly. This will ensure that the solution adheres well and lasts longer. Here are two essential steps you should take to prepare the surface of your wooden stairs.

Cleaning the Stairs

The first step is to clean the stairs thoroughly. Remove any dirt, dust, or debris from the surface of the stairs. You can use a broom, vacuum cleaner, or a damp cloth to clean the stairs. Make sure that the stairs are completely dry before moving to the next step.

If there are any stains or stubborn dirt marks on the stairs, you can use a mild detergent to clean them. Mix the detergent with water and apply it to the stains. Let it sit for a few minutes, then scrub the stains with a soft-bristled brush. Rinse the stairs with clean water and let them dry completely.

Sanding the Surface

The second step is to sand the surface of the stairs. Sanding will create a rougher surface that will provide better traction and make the anti-slip solution adhere better. Use a fine-grit sandpaper to sand the surface of the stairs.

Start at the top of the stairs and work your way down. Sand each stair individually, making sure to sand the edges and corners as well. Wipe the stairs with a damp cloth to remove any dust or debris created by sanding.

Note that sanding can be time-consuming, especially if you have a lot of stairs. However, it’s an essential step that will ensure the effectiveness of the anti-slip solution.

Applying the Anti-Slip Solution

Once you have chosen the best anti-slip solution for your wooden stairs, it’s time to apply it. Here are some steps to follow:

  1. Clean the stairs: Before applying any anti-slip solution, make sure your stairs are clean and dry. Remove any dirt, dust, or debris on the surface of each stair. You can use a broom or vacuum cleaner to do this.

  2. Apply the solution: Depending on the type of anti-slip solution you have chosen, you can apply it using a brush, roller, or spray. Follow the instructions on the label carefully. Make sure you apply the solution evenly on each stair.

  3. Let it dry: After applying the solution, let it dry completely before using the stairs. This can take anywhere from a few hours to a full day, depending on the solution.

  4. Reapply as needed: Some anti-slip solutions may need to be reapplied after a certain period of time, especially if the stairs get a lot of foot traffic. Check the label for instructions on when to reapply the solution.

  5. Maintain the stairs: To ensure your anti-slip solution lasts as long as possible, it’s important to maintain your stairs regularly. Clean them regularly and avoid using harsh chemicals that can damage the solution.

Applying an anti-slip solution to your wooden stairs is a simple and effective way to reduce the risk of slipping and falling. By following these steps, you can make your stairs safer and more comfortable to use.

Maintaining Your Non-Slip Stairs

Keeping your stairs slip-resistant is important to ensure safety in your home. Here are some tips on how to maintain your non-slip stairs.

Regular Cleaning

To keep your non-slip stairs in good condition, you should clean them regularly. Dirt and debris can build up on the stair treads, which can reduce the effectiveness of the non-slip treatment. Here are some tips for cleaning your non-slip stairs:

  • Sweep or vacuum the stairs regularly to remove dirt and debris.
  • Use a damp mop to clean the stairs, using a mild detergent if necessary.
  • Avoid using abrasive cleaners or scrubbing pads, as these can damage the non-slip treatment.

Periodic Reapplication

Over time, the non-slip treatment on your stairs may wear off. To maintain the slip-resistant properties of your stairs, you may need to reapply the treatment periodically. Here are some tips for reapplying the non-slip treatment:

  • Follow the manufacturer’s instructions for the specific non-slip treatment you are using.
  • Test a small area first to ensure that the treatment is compatible with your stairs and that it provides the desired level of slip resistance.
  • Apply the treatment evenly and allow it to dry completely before using the stairs.

By following these tips, you can maintain the slip-resistant properties of your non-slip stairs and ensure the safety of your family and guests.

How Much Does It Cost to Build Wooden Steps? A Friendly Guide

If you’re looking to add wooden steps to your home, you may be wondering how much it will cost. The cost of building wooden steps can vary depending on a variety of factors, including the materials used, the size and shape of the steps, and the complexity of the design.

One of the biggest factors that will impact the cost of building wooden steps is the type of wood used. Hardwood stairs can cost anywhere from $75 to $200 per stair, including materials and labor. Thick treads with high-quality wood can cost as much as $160. You may also need to factor in the cost of any structural work that needs to be done, such as reinforcing the stairs or adding a railing.

Other factors that can impact the cost of building wooden steps include the size and shape of the steps, as well as the complexity of the design. For example, if you’re building a set of curved steps, you can expect to pay more than if you’re building a set of straight steps. Additionally, if you’re adding decorative elements like balusters or a handrail, this can add to the cost as well.

Understanding Wooden Steps

When it comes to building wooden steps, there are a few things to consider that can affect the overall cost of the project. In this section, we will cover the types of wood commonly used for wooden steps and the dimensions of the steps themselves.

Types of Wood

The type of wood you choose for your steps can impact both the cost and the durability of the steps. Here are a few common types of wood used for building steps:

  • Pine: Pine is a softwood that is budget-friendly and easy to work with. However, it is not as durable as some other types of wood and may require more maintenance over time.
  • Oak: Oak is a hardwood that is more durable than pine and can withstand heavy foot traffic. It is also more expensive than pine.
  • Cedar: Cedar is a softwood that is naturally resistant to rot and insects. It is also more expensive than pine but may require less maintenance over time.
  • Redwood: Redwood is a hardwood that is naturally resistant to rot and insects. It is also more expensive than pine and cedar but is known for its durability and beauty.

Step Dimensions

The dimensions of your steps can also affect the cost of the project. Here are a few things to consider when it comes to step dimensions:

  • Rise: The rise is the height of each step. The typical rise for a step is between 6 and 8 inches.
  • Run: The run is the depth of each step. The typical run for a step is between 10 and 11 inches.
  • Width: The width of each step can vary depending on the space available and the intended use of the steps. The typical width for a step is between 36 and 48 inches.

Keep in mind that building codes may dictate certain dimensions for steps, so it is important to check with your local building department before beginning your project.

Overall, the cost of building wooden steps can vary depending on the type of wood and the dimensions of the steps. By understanding these factors, you can make an informed decision about the best approach for your project.

Cost Factors

When it comes to building wooden steps, there are several factors that can affect the overall cost of the project. Here are some of the key cost factors to keep in mind:

Material Costs

The type of wood you choose for your steps will have a big impact on the overall cost of the project. Some of the most popular types of wood for steps include pine, oak, and cedar. Pine is the most affordable option, while cedar is the most expensive. Other factors that can affect material costs include the size and shape of the steps, as well as any additional features you want to include, such as handrails or balusters.

Labor Costs

The amount of labor required to build your steps will also affect the overall cost of the project. If you’re planning to build the steps yourself, you’ll save money on labor costs. However, if you hire a contractor to build the steps for you, you can expect to pay anywhere from $600 to $1,000 per step. Other factors that can affect labor costs include the complexity of the project and the experience level of the contractor.

Additional Costs

In addition to material and labor costs, there may be other expenses to consider when building wooden steps. For example, you may need to purchase tools or equipment to complete the project, such as a saw or drill. You may also need to pay for permits or inspections, depending on the regulations in your area. Finally, if you’re planning to add handrails or other features to your steps, you’ll need to factor in the cost of those materials as well.

Overall, the cost of building wooden steps can vary widely depending on a number of factors. By considering the material, labor, and additional costs involved, you can get a better idea of what to expect when planning your project.

DIY vs Professional Installation

When it comes to building wooden steps, you have the option to either do it yourself or hire a professional. Each option has its own benefits and drawbacks, so it’s important to weigh them carefully before making a decision.

DIY Installation

If you have experience with woodworking and feel confident in your skills, then building wooden steps yourself can save you a significant amount of money. However, keep in mind that there are some potential downsides to this approach. For example:

  • It can be time-consuming: Depending on the complexity of the project, building wooden steps can take a significant amount of time. If you’re not used to working on projects like this, it could take even longer.
  • It can be expensive: While building the steps yourself can save you money on labor costs, you’ll still need to purchase all of the necessary materials and tools. This can add up quickly, especially if you don’t already own everything you need.
  • It can be risky: If you make a mistake during the installation process, it could compromise the safety and stability of your steps. This is particularly important if you’re building steps that will be used frequently or by children or elderly individuals.

Professional Installation

Hiring a professional to build your wooden steps can be more expensive, but it also comes with some significant benefits:

  • It’s faster: A professional contractor will have the experience and tools necessary to complete the job quickly and efficiently. This means you won’t have to spend weeks or months working on the project yourself.
  • It’s safer: A professional contractor will have the skills and knowledge necessary to ensure that your steps are safe and stable. This can give you peace of mind, especially if you’re building steps that will be used frequently or by children or elderly individuals.
  • It’s more convenient: When you hire a professional contractor, you won’t have to worry about purchasing all of the necessary materials and tools yourself. The contractor will take care of everything for you.

Of course, there are also some potential downsides to hiring a professional contractor. For example:

  • It can be expensive: Hiring a professional contractor can be significantly more expensive than building the steps yourself. You’ll need to factor in the cost of labor, which can add up quickly.
  • You’ll need to find a reputable contractor: Not all contractors are created equal, so you’ll need to do your research to find a reputable professional who can do the job right. This can take time and effort.

Maintenance and Repair Costs

Wooden steps require regular maintenance to ensure their longevity and prevent costly repairs. Here are some common maintenance tasks and repair costs associated with wooden steps:

  • Regular cleaning: Regular cleaning of your wooden steps is essential to maintain their appearance and prevent dirt and debris buildup. You can use a broom or vacuum to remove loose dirt and debris, followed by a damp mop or cloth to remove any remaining dirt or stains. This simple task can help prevent costly repairs down the line.

  • Staining or sealing: Wooden steps should be sealed or stained every few years to protect them from the elements and prevent rotting. The cost of staining or sealing your steps depends on the size of your steps and the type of stain or sealant used. On average, you can expect to pay between $1.50 and $4.00 per square foot for staining or sealing.

  • Repairing cracks or splits: Over time, wooden steps may develop cracks or splits due to wear and tear or exposure to the elements. Repairing these issues promptly can prevent them from becoming more significant and costly. The cost of repairing cracks or splits in your wooden steps depends on the extent of the damage and the type of wood used. On average, you can expect to pay between $150 and $500 for repairs.

  • Replacing damaged steps: If your wooden steps are beyond repair, you may need to replace them entirely. The cost of replacing your steps depends on the size of your steps and the type of wood used. On average, you can expect to pay between $1,000 and $5,000 for a full replacement.

By performing regular maintenance tasks and addressing repairs promptly, you can help extend the life of your wooden steps and prevent costly repairs down the line.

Cost Saving Tips

If you’re looking to build wooden steps on a budget, here are some cost-saving tips that you might find helpful:

1. Choose a cost-effective wood

The type of wood you choose for your steps can significantly impact the overall cost. Softwoods like pine and cedar are typically less expensive than hardwoods like oak and maple. However, they may not be as durable and may require more maintenance over time. Consider the pros and cons of each type of wood and choose one that fits your budget and needs.

2. Build the steps yourself

Hiring a contractor to build your wooden steps can be expensive, with costs ranging from $600 to $1,000 per step. If you have the necessary skills and tools, building the steps yourself can save you a significant amount of money. You’ll need to factor in the cost of materials and time, but it can be a worthwhile investment.

3. Use pre-cut stringers

Stringers are the structural supports that hold up the steps. Pre-cut stringers can save you time and money compared to cutting them yourself. They are available in a variety of sizes and styles and can be purchased at most home improvement stores.

4. Consider a simpler design

The more intricate the design of your wooden steps, the more expensive it will be to build. Consider a simpler design with fewer steps and less decorative features. This can save you money on both materials and labor costs.

5. Shop around for materials

Don’t settle for the first supplier you find. Shop around for the best prices on wood, hardware, and other materials. You may be able to find discounts or sales that can save you money.

By following these cost-saving tips, you can build wooden steps that fit your budget without sacrificing quality or safety.

How to Make a Wooden Ramp Non Slip: Tips and Tricks

Are you looking for ways to make your wooden ramp non-slip? Wooden ramps can be a great addition to your home or business, but they can also be hazardous if they become slippery. Whether you have an outdoor ramp that is exposed to the elements or an indoor ramp that is prone to moisture, there are several ways to make your wooden ramp safer to use.

One option is to apply a non-slip coating to the surface of the ramp. This can be done using a variety of products, such as grit paint, grip tape, or non-slip additives mixed into paint or stain. Another option is to install deck treads, which are designed to provide traction and prevent slips and falls. Regardless of the method you choose, taking steps to make your wooden ramp non-slip can help ensure the safety of yourself and others who use it.

Understanding the Need for a Non-Slip Wooden Ramp

If you have a wooden ramp, it is important to make sure it is non-slip to prevent accidents and injuries. A non-slip wooden ramp is especially important if you or someone you know uses a wheelchair or mobility device to navigate the ramp. In this section, we will discuss the safety concerns and weather considerations that make a non-slip wooden ramp essential.

Safety Concerns

A wooden ramp can become slippery due to a variety of factors, such as moisture, mold, and mildew growth. This can make it difficult to maintain traction while navigating the ramp, especially for those with mobility issues. A non-slip wooden ramp can prevent slips, trips, and falls, which can result in serious injuries.

Weather Considerations

Weather conditions can also affect the safety of a wooden ramp. During colder months, sleet and snow can accumulate on the ramp, making it even more slippery. This can be especially dangerous for those with mobility issues. A non-slip wooden ramp can ensure safe passage, regardless of the weather conditions.

To make your wooden ramp non-slip, there are several options available, such as adding grit tape or paint, installing deck treads, or using a slip-resistant material on the surface. When choosing a non-slip solution, it is important to consider the durability and effectiveness of the product, as well as the cost and ease of installation.

By taking the necessary precautions to make your wooden ramp non-slip, you can ensure the safety and accessibility of your ramp for yourself and others who may use it.

Materials Needed for a Non-Slip Wooden Ramp

Making a wooden ramp non-slip is crucial to ensure safety for those who use it. Here are the materials you will need to make your wooden ramp non-slip:

Non-Slip Coating

One of the easiest and most cost-effective ways to make a wooden ramp non-slip is to apply a non-slip coating. There are many non-slip coatings available on the market, such as grit tape, grit paint, and non-slip sealant. These coatings can be applied to the surface of the ramp to provide a rough texture that will prevent slips and falls.

Aluminum Treads

Another option to consider is to install aluminum treads on the surface of your wooden ramp. Aluminum treads are durable and weather-resistant, making them an excellent choice for outdoor ramps. They provide a non-slip surface that will not wear down over time, ensuring that your ramp remains safe and secure.

Anti-Slip Mats

Anti-slip mats are another option to consider when making your wooden ramp non-slip. These mats can be placed on the surface of the ramp to provide a non-slip surface. They are easy to install and can be removed for cleaning or replacement.

Nails and Screws

When installing non-slip coatings, aluminum treads, or anti-slip mats, you will need nails or screws to secure them to the surface of your wooden ramp. Make sure to use nails or screws that are appropriate for outdoor use and can withstand exposure to the elements.

Safety Equipment

When working on your wooden ramp, it is essential to prioritize safety. Make sure to wear appropriate safety equipment, such as gloves and safety glasses, to protect yourself from potential hazards.

By using these materials, you can make your wooden ramp non-slip and ensure the safety of those who use it.

Choosing the Right Non-Slip Solution

When it comes to making your wooden ramp non-slip, there are a few options to choose from. Here are some of the most popular non-slip solutions to consider:

Anti-Slip Paints

Anti-slip paints are a great option for those who want to maintain the natural look of their wooden ramp. These paints contain gritty additives that provide traction and prevent slips. They come in a variety of colors and can be applied to both new and old ramps. However, keep in mind that anti-slip paints may require more frequent touch-ups than other non-slip solutions.

Non-Slip Tapes

Non-slip tapes are another option to consider. These tapes are easy to apply and can be cut to fit any size ramp. They come in a variety of colors and textures, so you can choose the one that best matches your ramp. Non-slip tapes are also very durable and can withstand heavy foot traffic. However, keep in mind that they may not be as aesthetically pleasing as other non-slip solutions.

Rubber Matting

Rubber matting is a great non-slip solution for those who want a more permanent option. These mats can be cut to fit any size ramp and provide excellent traction. They are also very durable and can withstand heavy foot traffic. However, keep in mind that they may be more expensive than other non-slip solutions.

No matter which non-slip solution you choose, make sure to follow the manufacturer’s instructions carefully. This will ensure that your wooden ramp is safe and slip-resistant for years to come.

Step-by-Step Guide to Making a Wooden Ramp Non-Slip

If you have a wooden ramp that tends to get slippery when it’s wet, you might be wondering how to make it safer to use. Fortunately, there are several ways to make a wooden ramp non-slip. In this guide, we’ll walk you through the steps to make your wooden ramp safer to use.

Preparation

Before you start making your wooden ramp non-slip, you need to prepare the surface. Here’s what you’ll need to do:

  1. Clean the ramp: Use a broom or brush to sweep off any dirt, debris, or leaves that may have accumulated on the ramp. You can also use a pressure washer to clean the ramp thoroughly.

  2. Sand the ramp: Use a sander or sandpaper to roughen the surface of the ramp. This will help the non-slip material adhere better to the wood.

  3. Choose a non-slip material: There are several non-slip materials to choose from, including grit tape, grit paint, and deck treads. Choose the one that suits your needs and budget.

Application

Once you’ve prepared the surface, it’s time to apply the non-slip material. Here’s how to do it:

  1. Apply the non-slip material: Follow the manufacturer’s instructions to apply the non-slip material to the ramp. Make sure to apply it evenly and cover the entire surface of the ramp.

  2. Use a roller: Use a roller to press the non-slip material firmly onto the ramp. This will help it adhere better to the wood.

  3. Apply a second coat: If necessary, apply a second coat of the non-slip material to ensure maximum traction.

Drying and Curing

After applying the non-slip material, you’ll need to let it dry and cure. Here’s what you need to do:

  1. Let it dry: Let the non-slip material dry for at least 24 hours. This will ensure that it has fully adhered to the wood.

  2. Keep it dry: Make sure to keep the ramp dry during the curing process. Avoid using the ramp until the non-slip material has fully cured.

  3. Test it out: Once the non-slip material has fully cured, test it out to make sure it’s working properly. Walk on the ramp with wet shoes to see if it’s still slippery. If it is, you may need to apply another coat of the non-slip material.

By following these steps, you can make your wooden ramp safer to use. With a non-slip surface, you can use your ramp with confidence, even in wet or slippery conditions.

Maintaining Your Non-Slip Wooden Ramp

Once you have made your wooden ramp non-slip, it is important to maintain it properly to ensure its longevity and effectiveness. Here are some tips for maintaining your non-slip wooden ramp:

Regular Cleaning

Cleaning your ramp regularly is essential to keep it free from dirt, debris, and other substances that could compromise its non-slip properties. You can use a broom, a leaf blower, or a hose to remove any loose dirt or debris from the surface of the ramp.

For more stubborn stains, you can use a mild detergent and a soft-bristled brush to scrub the surface of the ramp. Be sure to rinse the ramp thoroughly with water to remove any soap residue.

Periodic Inspection

Periodic inspection of your ramp is crucial to identify any potential issues before they become major problems. Check the ramp regularly for any signs of wear and tear, such as cracks, splinters, or loose boards.

If you notice any damage, repair it immediately to prevent further deterioration. You can replace any damaged boards or apply a fresh coat of non-slip paint or sealant to the affected area.

Reapplication Tips

Over time, the non-slip properties of your ramp may begin to wear off due to exposure to the elements or regular use. When this happens, you can reapply a non-slip coating to restore the ramp’s effectiveness.

Before applying a new coat of non-slip paint or sealant, be sure to clean the surface of the ramp thoroughly to remove any dirt or debris. Apply the coating evenly and allow it to dry completely before using the ramp again.

By following these simple maintenance tips, you can ensure that your non-slip wooden ramp remains safe and effective for years to come.

How to Lay Laminate Flooring on Wooden Floorboards: A Beginner's Guide

If you’re looking to update the look of your home, installing laminate flooring on top of your wooden floorboards is a great way to do it. Laminate flooring is easy to install, durable, and comes in a wide variety of styles and colors to suit any taste. Plus, it’s a budget-friendly option that can give your home a fresh, modern look without breaking the bank.

Before you begin, it’s important to make sure your wooden floorboards are in good condition. Check for any loose boards or nails that need to be hammered down. If there are any damaged or warped boards, you’ll need to replace them before installing the laminate flooring. Once your floorboards are in good shape, you can start the installation process.

Understanding Laminate Flooring

Laminate flooring is a popular choice for homeowners who want a durable and cost-effective alternative to hardwood floors. It’s made up of several layers of synthetic materials that are fused together to create a strong, resilient surface. Here are some essential things you need to know about laminate flooring before you start installing it on your wooden floorboards.

Advantages of Laminate Flooring

Laminate flooring has several advantages over other types of flooring. Here are some of the most significant benefits:

  • Durability: Laminate flooring is highly durable and can withstand heavy foot traffic, scratches, and stains.

  • Easy to Install: Laminate flooring is easy to install and doesn’t require any special tools or skills.

  • Cost-Effective: Laminate flooring is less expensive than hardwood flooring, making it an affordable option for homeowners on a budget.

  • Low Maintenance: Laminate flooring is easy to clean and maintain, requiring only regular sweeping or vacuuming and occasional mopping.

Types of Laminate Flooring

There are several types of laminate flooring available in the market. Here are some of the most common types:

  • High-Pressure Laminate (HPL): HPL is the most durable type of laminate flooring and is suitable for high-traffic areas like commercial buildings.

  • Direct Pressure Laminate (DPL): DPL is a less expensive type of laminate flooring that is suitable for residential use.

  • Embossed Laminate: Embossed laminate has a textured surface that mimics the look and feel of natural wood.

  • Smooth Laminate: Smooth laminate has a sleek, glossy surface that gives a modern look to your home.

Installation Process

Installing laminate flooring on your wooden floorboards is a straightforward process that you can do yourself. Here are the basic steps involved:

  1. Prepare the Subfloor: Ensure that the subfloor is clean, dry, and level before installing laminate flooring.

  2. Measure and Cut the Laminate Flooring: Measure the length and width of the room and cut the laminate flooring accordingly.

  3. Install the Underlayment: Install a foam underlayment on the subfloor to provide a cushioning effect and reduce noise.

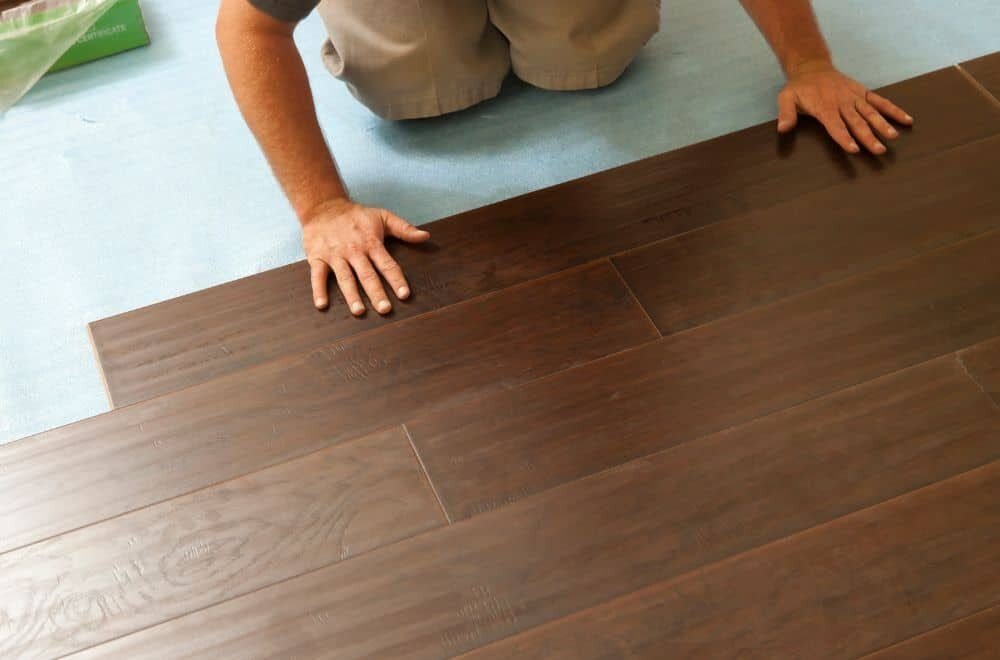
  4. Lay the Laminate Flooring: Start laying the laminate flooring from one corner of the room and work your way across the floor.

  5. Cut the Laminate Flooring to Fit: Use a saw to cut the laminate flooring to fit around corners and edges.

  6. Install the Baseboards: Install the baseboards around the perimeter of the room to cover the gaps between the laminate flooring and the walls.

By following these simple steps, you can install laminate flooring on your wooden floorboards and enjoy the benefits of a beautiful, durable, and cost-effective flooring option.

Preparation of Wooden Floorboards

Before you start laying laminate flooring, you need to prepare the wooden floorboards. Here are the steps you need to follow:

Step 1: Inspect the Floorboards

First, inspect the floorboards to ensure that they are in good condition. Check for any loose or damaged boards, and replace them if necessary. Also, make sure that the floorboards are level and free from any bumps or dips.

Step 2: Clean the Floorboards

Next, clean the floorboards thoroughly. Use a vacuum cleaner or broom to remove any dirt, dust, or debris. Then, wipe the floorboards with a damp cloth to remove any remaining dirt or grime.

Step 3: Sand the Floorboards

If the floorboards are uneven or have rough spots, you may need to sand them down. Use a plane, sander, or sandpaper to smooth out any rough areas. Be sure to wear a dust mask and eye protection when sanding.

Step 4: Fill in Gaps and Cracks

If there are any gaps or cracks in the floorboards, fill them in with wood filler. Apply the filler with a putty knife, and smooth it out so that it is level with the surrounding wood. Allow the filler to dry completely before proceeding.

Step 5: Nail Down Loose Boards

If there are any loose floorboards, nail them down securely using a hammer and nail punch. Be sure to countersink the nails so that they are below the surface of the wood.

By following these steps, you can ensure that your wooden floorboards are properly prepared for the installation of laminate flooring.

Materials and Tools Needed

Before you start laying laminate flooring on wooden floorboards, it is essential to ensure that you have all the necessary tools and materials. Here is a list of everything you will need:

Materials

  • Laminate flooring
  • Underlayment
  • Damp-proof membrane (if required)
  • Waterproof tape (if using damp-proof membrane)
  • Flooring spacers
  • Screws (if required to secure loose boards)

Tools

  • Tape measure
  • Chalk line
  • Circular saw or jigsaw
  • Hammer and nails or nail gun
  • Pry bar
  • Tapping block
  • Pull bar
  • Utility knife
  • Safety glasses
  • Knee pads

Make sure that you have all the materials and tools before starting the installation process. This will save you time and prevent any delays during the installation process. Additionally, it is essential to ensure that the tools are in good condition and functioning correctly.

Laminate flooring is relatively easy to install, but it requires precision and attention to detail. Having the right tools and materials will make the process smoother and more manageable.

Laying the Underlay

Before you start laying the laminate flooring on your wooden floorboards, you need to lay the underlay. The underlay is a thin layer of material that goes between the floorboards and the laminate flooring.

The purpose of the underlay is to provide a smooth surface for the laminate flooring to sit on, to absorb any minor imperfections in the floorboards, and to act as a barrier against moisture. It also helps to reduce noise and provides insulation.

Here are the steps to follow when laying the underlay:

  1. Clear the floorboards of any debris, dust, or dirt. Sweep or vacuum the floor to make sure it is clean and dry.

  2. Roll out the underlay over the floorboards. Make sure the underlay is flush against the wall, with no gaps or overlaps.

  3. Cut the underlay to size using a utility knife. Make sure to leave a small gap (about 1/4 inch) between the underlay and the wall to allow for expansion.

  4. Tape the seams of the underlay using underlay tape. This will help to keep the underlay in place and prevent it from shifting during installation.

  5. Once the underlay is in place, you can start laying the laminate flooring on top of it.

Remember, the quality of the underlay is just as important as the quality of the laminate flooring. Make sure to choose a good quality underlay that is appropriate for your specific flooring needs.

Installing the Laminate Flooring

Now that you have prepped your wooden floorboards, it’s time to start installing the laminate flooring. Here are the steps you need to follow:

  1. Start by measuring the length and width of your room to determine how much flooring you will need. Add about 10% to that number to account for any mistakes or waste.

  2. Lay down a moisture barrier over the wooden floorboards. This will help prevent any moisture from seeping up into the laminate flooring and causing damage. You can use a plastic sheeting or a foam underlayment as a moisture barrier.

  3. Begin by laying the first row of laminate flooring along the longest wall of the room. Make sure to leave a 1/4 inch gap between the flooring and the wall to allow for expansion and contraction.

  4. Use spacers to maintain the gap between the flooring and the wall. You can use scrap wood pieces as spacers.

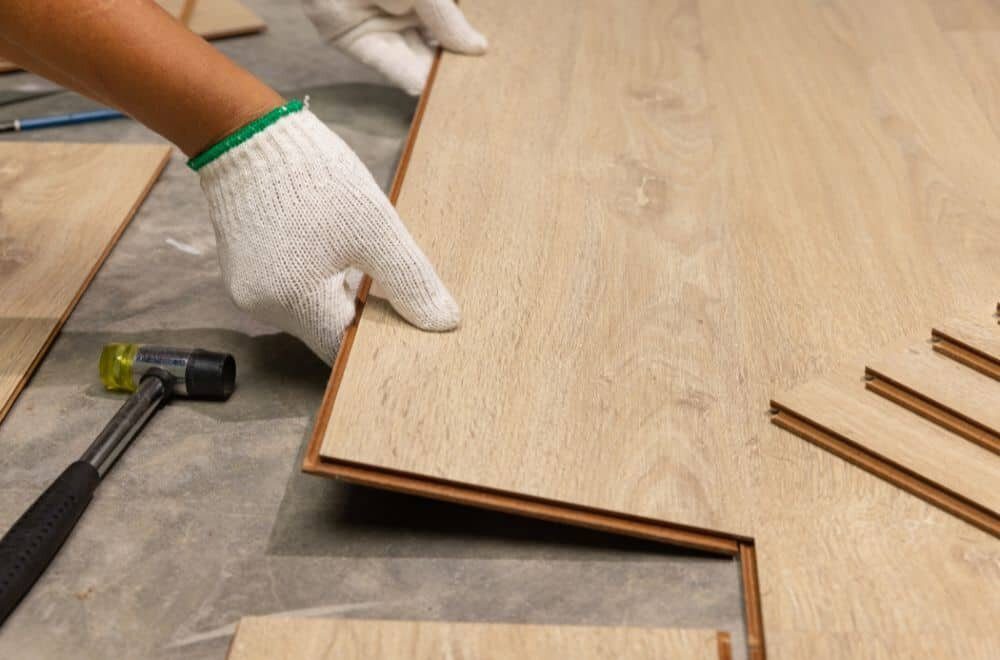
  5. Use a tapping block and a hammer to connect the tongue and groove of the laminate flooring. Make sure to tap gently to avoid damaging the flooring.

  6. Continue laying the rows of laminate flooring, making sure to stagger the joints so that they don’t line up. This will help make the flooring more stable.

  7. Use a saw to cut the laminate flooring to fit around any obstacles, such as doorways or corners.

  8. Once you have laid all of the laminate flooring, install the baseboards or quarter round to cover the gap between the flooring and the wall.

  9. Finally, clean up any debris or sawdust from the installation process.

With these steps, you should be able to successfully install laminate flooring over your wooden floorboards. Remember to take your time and follow the manufacturer’s instructions for the best results.

Cutting and Fitting Laminate Flooring

Once you have prepared the floor and laid the underlay, it’s time to start cutting and fitting your laminate flooring. Here are some tips to help you get started:

1. Measure and Cut Your Planks

Before you start cutting, measure the length of the room and the width of each plank. Cut the planks to the desired length using a saw. Make sure to leave a small gap between the wall and the plank to allow for expansion. You can use a jigsaw or handsaw to cut the planks to fit around any obstacles, such as pipes or door frames.

2. Fit the Planks Together

Once you have cut your planks to size, it’s time to start fitting them together. Start in one corner of the room and work your way across. Fit the tongue of one plank into the groove of the previous plank and press down firmly. Use a tapping block and hammer to gently tap the planks together if necessary. Make sure to stagger the joints of the planks to create a more natural look.

3. Cut Around Obstacles

When you come across obstacles, such as pipes or door frames, you will need to cut the planks to fit around them. Measure the size of the obstacle and transfer the measurements onto the plank. Use a jigsaw or handsaw to cut the plank to fit around the obstacle. Make sure to leave a small gap between the obstacle and the plank to allow for expansion.

4. Fit the Final Row

When you reach the final row, you will need to cut the planks to fit the remaining space. Measure the width of the remaining space and cut the planks to fit. Use a pull bar to fit the final row into place. Make sure to leave a small gap between the final row and the wall to allow for expansion.

By following these tips, you can easily cut and fit your laminate flooring on wooden floorboards. Remember to take your time and measure twice before cutting to ensure a perfect fit.

Finishing Touches

Congratulations! You’ve successfully laid your new laminate flooring on top of your wooden floorboards. Now, it’s time to add some finishing touches to make your new flooring look even better and last longer.

Install Skirting Boards

One of the first things you should do is to install skirting boards around the edges of your new flooring. Skirting boards not only cover up the expansion gap between the flooring and the wall, but they also protect the edges of your new flooring from damage. You can choose from a variety of skirting board designs and materials to match your new flooring.

Install Door Trims

Another finishing touch you can add is to install door trims. Door trims are small strips of wood or metal that cover the gap between the flooring and the door frame. They not only improve the appearance of your new flooring but also protect the edges of your new flooring from damage.

Clean Your New Laminate Flooring

Before you start using your new laminate flooring, make sure it’s clean. Use a soft-bristled broom or vacuum cleaner to remove any dust or debris from the surface of your new flooring. Then, use a damp mop or cloth to clean your new flooring. Avoid using harsh chemicals or abrasive cleaners that can damage the surface of your new flooring.

Use Furniture Pads

To prevent scratches and dents on your new laminate flooring, use furniture pads under the legs of your furniture. Furniture pads are small felt or rubber pads that stick to the bottom of your furniture legs. They not only protect your new flooring but also make it easier to move your furniture around.

Regular Maintenance

Finally, to keep your new laminate flooring looking great, you need to perform regular maintenance. This includes sweeping or vacuuming your new flooring regularly, wiping up spills immediately, and avoiding dragging heavy furniture or sharp objects across your new flooring. With proper care and maintenance, your new laminate flooring will last for many years to come.

Maintenance and Care of Laminate Flooring

Laminate flooring is a popular choice for many homeowners due to its durability, affordability, and easy maintenance. However, to ensure your laminate flooring lasts for many years, it’s essential to take proper care of it. Here are some tips to help you maintain and care for your laminate flooring:

Regular Cleaning

Regular cleaning is the key to keeping your laminate flooring looking its best. Sweep or vacuum the floor regularly to remove dirt, dust, and debris. Use a soft-bristled brush attachment to avoid scratching the surface. If you prefer to use a mop, make sure it’s damp, not wet, as excess water can damage the flooring.

Spill and Stain Removal

Accidents happen, and spills are inevitable. If you spill something on your laminate flooring, clean it up immediately. Use a soft cloth or paper towel to blot up the spill. Avoid using abrasive cleaners, steel wool, or scouring pads, as they can scratch the surface of the flooring.

For stubborn stains, use a mild cleaning solution and a soft-bristled brush to gently scrub the affected area. Rinse the area with clean water and dry it thoroughly.

Preventative Measures

Preventative measures can help prolong the life of your laminate flooring. Place mats or rugs at entrances to catch dirt and debris. Use furniture pads under the legs of your furniture to prevent scratches and dents. Avoid wearing high heels or shoes with cleats on your laminate flooring, as they can cause damage.

Avoid Excess Moisture

Excess moisture can cause damage to your laminate flooring. Avoid using steam cleaners, as they can cause the flooring to warp or buckle. If you need to mop the floor, use a damp mop, not a wet one. Wipe up spills immediately to prevent water from seeping into the flooring.

Conclusion

By following these simple maintenance and care tips, you can keep your laminate flooring looking its best for many years to come. Regular cleaning, spill and stain removal, preventative measures, and avoiding excess moisture will help ensure your flooring stays in top condition.

Common Mistakes to Avoid

Laying laminate flooring over wooden floorboards can be a great way to update your home’s look, but it’s important to avoid common mistakes that can lead to problems down the line. Here are some common mistakes to avoid when laying laminate flooring on wooden floorboards:

Not Preparing the Subfloor

One of the most common mistakes people make when laying laminate flooring is not properly preparing the subfloor. Before you begin installation, make sure the floorboards are level and free of any debris. If there are any high spots, grind them down, and fill in any low spots with leveling compound.

Not Using Spacers

Another mistake to avoid is not using spacers during installation. Spacers are essential for maintaining the correct expansion gap between the flooring and the walls. Without spacers, your flooring could buckle or warp over time.

Starting in the Wrong Place

Starting your laminate flooring in the wrong place can also cause problems. It’s generally recommended to start laying the flooring in the corner of the room farthest from the entrance. This will help ensure a more even look and make it easier to install the flooring around doorways and other obstacles.

Not Allowing for Expansion

Laminate flooring needs room to expand and contract with changes in temperature and humidity. Failing to leave enough space for expansion can cause the flooring to buckle or warp. Make sure to leave at least a quarter-inch gap between the flooring and the walls, and use spacers to maintain this gap during installation.

Laying in the Wrong Environment

Finally, it’s important to consider the environment when laying laminate flooring. Avoid laying laminate in rooms with high moisture, such as bathrooms or laundry rooms. If you do choose to install laminate in these areas, make sure to use a moisture barrier and seal the edges of the flooring to prevent water from seeping underneath.

By avoiding these common mistakes, you can ensure a successful and long-lasting installation of your laminate flooring.

understanding-wood-floor-transitions

How to Transition Between Two Different Wood Floors: A Simple Guide

Are you planning to renovate your home and have different types of wood floors in different rooms? If so, you may be wondering how to transition between two different wood floors. Transitioning between two different floors can be challenging, but it can be done in various ways. In this article, we will discuss some of the most popular ways to transition between two different wood floors.

One of the most commonly used methods to transition between two different wood floors is using T-molding. T-molding fits well if the two floors are the same height. It is a wooden or vinyl trim with a rounded top and a stem piece that fits between the gaps in your floor. Another way to transition is by using transition molding, which comes in various colors and finishes. It can be cut to size and attached using screws and pre-drilled holes or a construction adhesive.

Understanding Wood Floor Transitions

understanding-wood-floor-transitions

When it comes to wood floor transitions, it’s important to ensure that they are not only aesthetically pleasing, but also functional. A smooth transition between two different wood floors can prevent accidents and make your home look more cohesive. In this section, we will explore the different types of wood floors and the importance of smooth transitions.

Types of Wood Floors

Before we dive into the types of wood floor transitions, it’s important to understand the different types of wood floors. There are two main types of wood floors: solid wood and engineered wood.

Solid wood floors are made of a single piece of wood and are typically thicker than engineered wood floors. They are more expensive but can be sanded and refinished multiple times.

Engineered wood floors, on the other hand, are made of layers of wood that are glued together. They are more affordable and can be more stable in areas with high humidity or moisture.

Importance of Smooth Transitions

A smooth transition between two different wood floors is important for several reasons. First, it can prevent accidents. Uneven transitions can create tripping hazards, especially for young children and elderly people.

Second, smooth transitions can make your home look more cohesive. A seamless transition between two different wood floors can create a more polished look and feel.

To achieve a smooth transition, there are several transition options available, including T-molding, reducer strips, and threshold strips. It’s important to choose the right transition option based on the height difference between the two floors and the overall design of your home.

In summary, understanding the types of wood floors and the importance of smooth transitions is crucial when it comes to creating a cohesive and safe home. By choosing the right transition option, you can ensure that your home not only looks great but also functions well.

Preparation Steps

preparation-steps-4

Before you start transitioning between two different wood floors, there are a few preparation steps that you need to take. These steps will help you ensure that the transition is smooth and seamless.

Evaluating Existing Floors

The first step in preparing for a transition between two different wood floors is to evaluate the existing floors. You need to determine the type of wood, the condition of the floors, and the level of the floors. Make sure that the floors are level and free from any damage or defects before you start the transition.

Choosing Transition Materials

Once you have evaluated the existing floors, the next step is to choose the transition materials. There are several transition materials that you can use, including seam binders, T-molding, and transition strips. Choose a material that matches the color and style of your existing floors.

Here are some tips to help you choose the right transition material:

  • Consider the thickness of the wood floors. Choose a transition material that is the same thickness as your existing floors.
  • Choose a material that is easy to install. Some transition materials require special tools or adhesives to install, while others can be installed with basic tools.
  • Consider the durability of the material. Choose a material that is durable and can withstand heavy foot traffic.

By following these preparation steps, you can ensure that your transition between two different wood floors is seamless and visually appealing.

Installation Techniques

installation-techniques

When it comes to transitioning between two different wood floors, there are several installation techniques you can use to achieve a seamless and visually appealing transition. Here are three popular techniques to consider:

Using T-Molding

T-molding is a great option if the two different floors are the same height. This type of molding is typically made of wood or vinyl and has a rounded top with a stem piece that fits between the gaps in your floor. To use T-molding, leave about 1 3⁄4 inches (4.4 cm) of space between the two floors so some of the subfloor is exposed. Then, simply snap the T-molding into place.

Creating a Saddle Transition

A saddle transition is a type of molding that is used when the two different floors are at different heights. This technique involves creating a gradual slope between the two floors using a piece of wood or other material. To create a saddle transition, you’ll need to measure the height difference between the two floors and cut a piece of wood to fit. Then, attach the wood to the lower floor using construction adhesive and screws. Finally, sand and finish the saddle transition to match the surrounding floors.

Installing a Flush Transition

A flush transition is a type of molding that is used when the two different floors are at the same height. This technique involves installing a piece of molding that sits flush with the surrounding floors. To install a flush transition, you’ll need to measure the width of the gap between the two floors and cut a piece of molding to fit. Then, use construction adhesive to attach the molding to the floor. Finally, sand and finish the molding to match the surrounding floors.

No matter which installation technique you choose, it’s important to take your time and ensure that the transition is level and secure. With a little patience and attention to detail, you can create a seamless and beautiful transition between two different wood floors.

Maintenance and Care

maintenance-and-care

When it comes to maintaining and caring for your transition between two different wood floors, there are a few things to keep in mind. By following these tips, you can ensure that your floors remain in good condition for years to come.

Cleaning Tips

Regular cleaning is essential to keep your transition looking its best. Here are some tips to keep in mind:

  • Sweep or vacuum your floors regularly to remove dirt and debris that can scratch the surface.
  • Use a damp mop to clean your floors, but avoid using too much water, as this can cause damage over time.
  • Avoid using harsh chemicals or abrasive cleaners, as these can damage the finish of your floors.

Repair and Replacement

If your transition becomes damaged or worn over time, it may need to be repaired or replaced. Here are some things to keep in mind:

  • If your transition is damaged, it may be possible to repair it rather than replacing it entirely. Consult a professional to determine the best course of action.
  • If your transition needs to be replaced, make sure to choose a high-quality replacement that matches the style and color of your existing floors.
  • Consider hiring a professional to install your new transition, as this can ensure that it is installed correctly and will last for years to come.

By following these tips, you can ensure that your transition between two different wood floors remains in good condition and looks great for years to come.

Frequently Asked Questions

What are some options for transitioning between two different types of wood flooring?

When transitioning between two different types of wood flooring, there are several options available. One option is to use a transition strip, such as a T-molding, to create a smooth transition between the two floors. Another option is to use a contrasting wood or stain to create a deliberate design choice. You can also use a patterned or textured rug to help blend the two floors together.

How can I blend new hardwood floors with old hardwood floors?

Blending new hardwood floors with old hardwood floors can be tricky, but there are a few things you can do to help make the transition smoother. One option is to use a transition strip, such as a T-molding, to create a seamless transition between the two floors. Another option is to use a contrasting wood or stain to create a deliberate design choice. You can also use a patterned or textured rug to help blend the two floors together.

What are some ideas for transitioning between different colored wood floors?

When transitioning between different colored wood floors, there are several ideas you can use to create a cohesive design. One option is to use a transition strip, such as a T-molding, to create a seamless transition between the two floors. Another option is to use a contrasting wood or stain to create a deliberate design choice. You can also use a patterned or textured rug to help blend the two floors together.

What is a T-molding transition and how can I use it for my wood floors?

A T-molding transition is a type of transition strip that is used to create a smooth transition between two different types of flooring. The T-molding is installed by placing the stem piece between the two floors and attaching the rounded top to the stem piece. This creates a clean and seamless transition between the two floors. T-molding transitions can be used for wood floors, as well as other types of hard flooring.

How do I transition between two different types of hard flooring?

Transitioning between two different types of hard flooring can be done using a variety of transition strips. One option is to use a T-molding transition, which is a type of transition strip that is used to create a smooth transition between two different types of flooring. Another option is to use a reducer strip, which is used to transition between two different types of flooring that are at different heights.

What are some wood floor transition strip options for different floor heights?

When transitioning between two different types of flooring that are at different heights, there are several options available. One option is to use a reducer strip, which is used to transition between two different types of flooring that are at different heights. Another option is to use a stair nose transition, which is used to transition between a stairway and a different type of flooring. A T-molding transition can also be used for different floor heights, as long as there is enough space between the two floors to accommodate the transition strip.

characteristics-of-wood

What is the Best Way to Attach Tile to Wood? Tips and Tricks

Are you planning to attach tile to a wooden surface and wondering what the best way to do it is? If so, you’re not alone. Many people face this challenge, and it can be tricky to find the right solution. Fortunately, there are several methods you can use to attach tile to wood, each with its own advantages and disadvantages.

One of the most popular ways to attach tile to wood is by using construction adhesive. This strong, durable adhesive is ideal for wet areas like bathrooms and kitchens, as it is waterproof and can hold your tiles in place for years. Another option is to use mastic glue, which is cost-effective and can be used to fix tiles into plywood effortlessly. However, mastic glue is not suitable for outdoor tiling as it is susceptible to harsh weather conditions. Additionally, you can use a combination of thinset mortar and construction adhesive for a more secure attachment. Whatever method you choose, it’s essential to make sure that the wood surface is even, flat, and finished before beginning the tiling process.

Understanding Tile and Wood

When it comes to attaching tile to wood, it’s important to understand the properties of both materials. In this section, we’ll take a closer look at the characteristics of tile and wood.

Properties of Tile

properties-of-tile

Tile is a popular flooring material that comes in a variety of materials, including ceramic, porcelain, and natural stone. Here are some of the key properties of tile:

  • Durability: Tile is a highly durable material that can withstand heavy foot traffic and is resistant to scratches, stains, and moisture.
  • Variety: With so many different types of tile available, there’s a style to suit every taste and decor.
  • Maintenance: Tile is relatively easy to clean and maintain, making it a popular choice for kitchens and bathrooms.
  • Installation: Installing tile can be a complex process that requires specialized tools and expertise.

Characteristics of Wood

characteristics-of-wood

Wood is a classic flooring material that adds warmth and character to any space. Here are some of the key characteristics of wood:

  • Natural beauty: Wood has a natural beauty that can’t be replicated by other materials.
  • Versatility: Wood can be stained or painted to match any decor style.
  • Comfort: Wood flooring is comfortable underfoot and provides insulation against cold temperatures.
  • Maintenance: Wood requires regular maintenance, including refinishing and sealing, to keep it looking its best.
  • Susceptibility to moisture: Wood is susceptible to moisture damage and should not be installed in areas with high humidity or moisture levels.

By understanding the properties of tile and wood, you can make an informed decision about which material is best for your flooring needs.

Necessary Tools and Materials

Tile Adhesives

When attaching tile to wood, you’ll need to use a tile adhesive that is specifically designed for this purpose. There are several types of adhesives available, including thinset mortar, mastic, and epoxy. Thinset mortar is the most commonly used adhesive for tile installation, as it provides a strong bond and is resistant to moisture. Mastic is a good choice for smaller tiles and for walls, but it is not recommended for high-moisture areas. Epoxy is the strongest adhesive available, but it is also the most expensive and difficult to work with.

To choose the right adhesive for your project, consider the size and type of tile you’ll be using, as well as the location and level of moisture in the area. Always follow the manufacturer’s instructions for mixing and applying the adhesive.

Equipment Needed

In addition to the tile adhesive, you’ll need a few other tools and materials to attach tile to wood. Here are the essentials:

  • Backer board: This is a cement-based material that is installed over the wood subfloor to provide a stable surface for the tile. It comes in sheets and should be cut to fit the room using a circular saw or jigsaw.
  • Trowel: This is used to spread the adhesive onto the backer board. Choose a trowel with the appropriate size notches for your tile size.
  • Level: A level will help you ensure that the backer board is installed evenly.
  • Tile spacers: These small plastic pieces are used to create even gaps between the tiles.
  • Tile cutter or wet saw: Depending on the type of tile you’re using, you’ll need either a tile cutter or a wet saw to cut the tiles to size.
  • Grout: This is used to fill in the gaps between the tiles. Choose a color that complements your tile and follow the manufacturer’s instructions for mixing and applying the grout.
  • Rubber float: This tool is used to spread the grout over the tiles and into the gaps.
  • Sponge: A damp sponge is used to wipe away excess grout and clean the tiles after grouting.

With these tools and materials on hand, you’ll be ready to tackle your tile installation project with confidence.

Preparation Steps

preparation-steps-3

Before you start attaching tiles to wood, there are some essential preparation steps you need to follow. These steps will ensure that your tiles adhere properly to the surface, and you get the desired results. Here are the two critical preparation steps you should follow:

Preparing the Wood Surface

The first step is to prepare the wood surface where you will attach the tiles. The wood surface needs to be clean, smooth, and free from any dust, dirt, or debris. You can use a vacuum cleaner or a broom to remove any dirt or debris. After cleaning, you need to sand the wood surface to make it smooth. Sanding will also help the adhesive bond better with the wood surface.

Choosing the Right Tile

The second step is to choose the right tile for your project. When choosing tiles, you need to consider the size, shape, and type of tile. The size and shape of the tile should match the surface where you will attach them. The type of tile should also be suitable for the area where you will install it. For example, if you are installing tiles in a bathroom, you should choose tiles that are water-resistant and slip-resistant.

Once you have prepared the wood surface and chosen the right tile, you are ready to attach the tiles to the wood surface. Remember to follow the manufacturer’s instructions when applying the adhesive and grout. With proper preparation and installation, you can achieve a beautiful and long-lasting tile installation on wood.

Attachment Process

When it comes to attaching tile to wood, there are a few key steps you need to follow to ensure a successful installation. In this section, we’ll go over the two main steps of the attachment process: applying the adhesive and setting the tile.

Applying the Adhesive

The first step in attaching tile to wood is to apply the adhesive. There are a few different types of adhesive you can use, but the most common is thinset mortar. Here’s how to apply it:

  1. Mix the mortar according to the manufacturer’s instructions. You’ll want to mix it to a consistency that’s similar to peanut butter.
  2. Using a notched trowel, spread the mortar onto the wood surface in an even layer.
  3. Make sure the mortar is spread evenly and covers the entire surface. You don’t want any areas to be missed.
  4. Once the mortar is applied, wait a few minutes for it to set up. This will help it bond better to the tile.

Setting the Tile

Once the adhesive is applied, it’s time to set the tile. Here’s how to do it:

  1. Start by placing the first tile in the corner of the room. Make sure it’s lined up with your layout lines.
  2. Press the tile down firmly into the adhesive. You’ll want to wiggle it back and forth a bit to ensure it’s fully embedded in the mortar.
  3. Continue placing tiles in a straight line along the first row. Use spacers to ensure even spacing between the tiles.
  4. Once the first row is complete, start on the second row. Stagger the tiles so that the joints don’t line up with the joints in the first row.
  5. Continue setting tiles row by row until the entire surface is covered.

Remember to work in small sections at a time to ensure the adhesive doesn’t dry out before you have a chance to set the tile. And always double-check your layout lines to make sure your tiles are going in straight. With these steps, you’ll be able to attach tile to wood with confidence and create a beautiful, long-lasting installation.

Post-Attachment Care

post-attachment-care-1

After attaching tile to wood, it’s important to take proper care of the surface to ensure it lasts as long as possible. Here are some tips for post-attachment care:

Cleaning the Tile

To keep your tile looking its best, it’s important to clean it regularly. Here are some tips for cleaning tile:

  • Use a soft-bristled brush or sponge to avoid scratching the surface of the tile.
  • Avoid using harsh chemicals or abrasive cleaners, as they can damage the surface of the tile.
  • Use a mild detergent and warm water to clean the tile. Be sure to rinse thoroughly to avoid leaving any residue behind.

Maintaining the Wood

In addition to cleaning the tile, it’s important to take care of the wood surface as well. Here are some tips for maintaining the wood:

  • Keep the wood surface dry to avoid warping or rotting. If the wood does get wet, be sure to dry it thoroughly.
  • Avoid placing heavy objects on the wood surface, as this can cause it to warp or crack.
  • Apply a sealant or protective coating to the wood surface to help protect it from moisture and other damage.

By following these tips for post-attachment care, you can help ensure that your tile and wood surface stay looking great for years to come.

Frequently Asked Questions

What is the recommended adhesive for attaching tile to wood?

The recommended adhesive for attaching tile to wood is a combination of thinset mortar and construction adhesive. This method is the most secure and will ensure that the tile stays in place for a long time. Make sure the wood surface is relatively even, flat, and finished before beginning.

Can ceramic tiles be safely installed on a wooden floor?

Yes, ceramic tiles can be safely installed on a wooden floor. However, it is important to ensure that the wooden floor is stable and free from any movement before installing the tiles. It is also recommended to use a cement backer board to help stabilize the wooden floor and provide a good surface for the tiles to adhere to.

How can I attach wood trim to tile without damaging either surface?

To attach wood trim to tile without damaging either surface, use a construction adhesive that is specifically designed for use with both wood and tile. Apply the adhesive to the back of the wood trim and press it firmly onto the tile surface. Hold it in place until the adhesive dries completely.

Is it possible to put tiles directly onto a wooden surface?

It is possible to put tiles directly onto a wooden surface, but it is not recommended. Wood is a porous material that can expand and contract with changes in temperature and humidity. This movement can cause the tiles to crack or come loose. It is recommended to use a cement backer board to provide a stable surface for the tiles to adhere to.

What is the best way to attach tile to a wooden countertop?

The best way to attach tile to a wooden countertop is to use a combination of thinset mortar and construction adhesive. Apply a layer of thinset mortar to the wooden countertop and then press the tiles firmly into place. Allow the mortar to dry completely before applying a layer of construction adhesive to the back of the tiles. Press the tiles firmly onto the countertop and hold them in place until the adhesive dries completely.

What are some tips for using mastic glue to attach tile to wood?

When using mastic glue to attach tile to wood, it is important to make sure that the wood surface is clean and free from any debris. Apply a thin layer of mastic glue to the back of the tiles and press them firmly into place. Make sure to work quickly, as mastic glue tends to dry quickly. Avoid using mastic glue in areas that are exposed to moisture, as it is not waterproof.