Tag Archives: harsh weather conditions

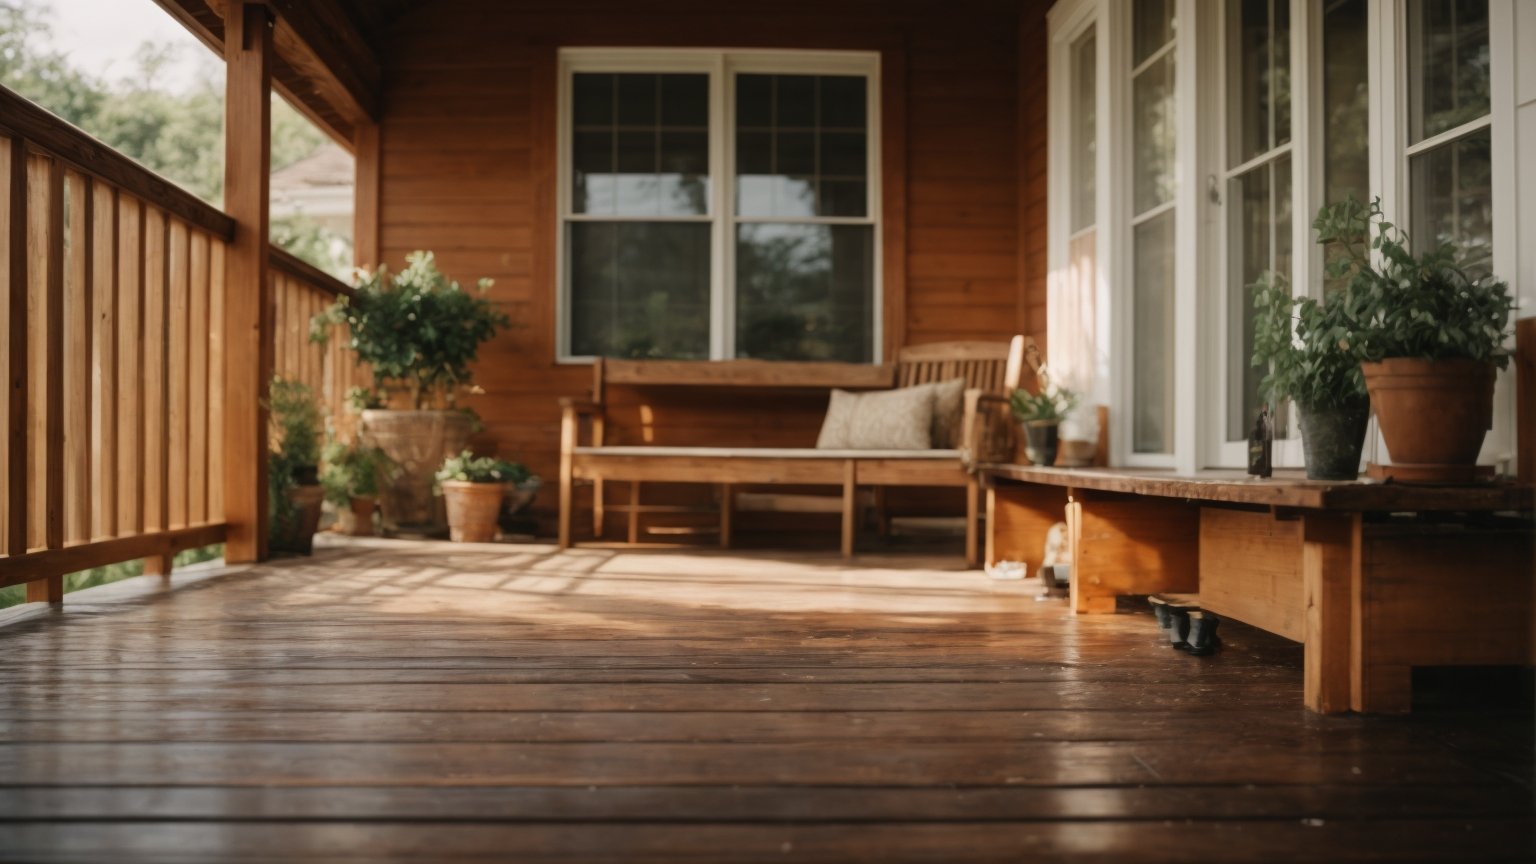
How to Paint Your Wooden Porch: A Beginner's Guide

How to Paint Your Wooden Porch: A Beginner's Guide

Painting a wooden porch is a great way to give your home a fresh and updated look. Whether you’re looking to enhance your curb appeal or just want to protect your porch from the elements, painting is a simple and effective solution. In this article, we’ll guide you through the process of painting your wooden porch step-by-step, so you can achieve a professional-looking finish.

Before you begin painting, it’s important to properly prepare your porch. This includes removing any furniture or decor, sweeping away debris, and cleaning the surface thoroughly. Once your porch is clean and dry, you can begin the painting process. We’ll cover everything from choosing the right paint and tools, to applying the paint and finishing touches. With our help, you’ll be able to paint your wooden porch with ease and confidence.

Choosing the Right Paint
paint-your-wooden-porch

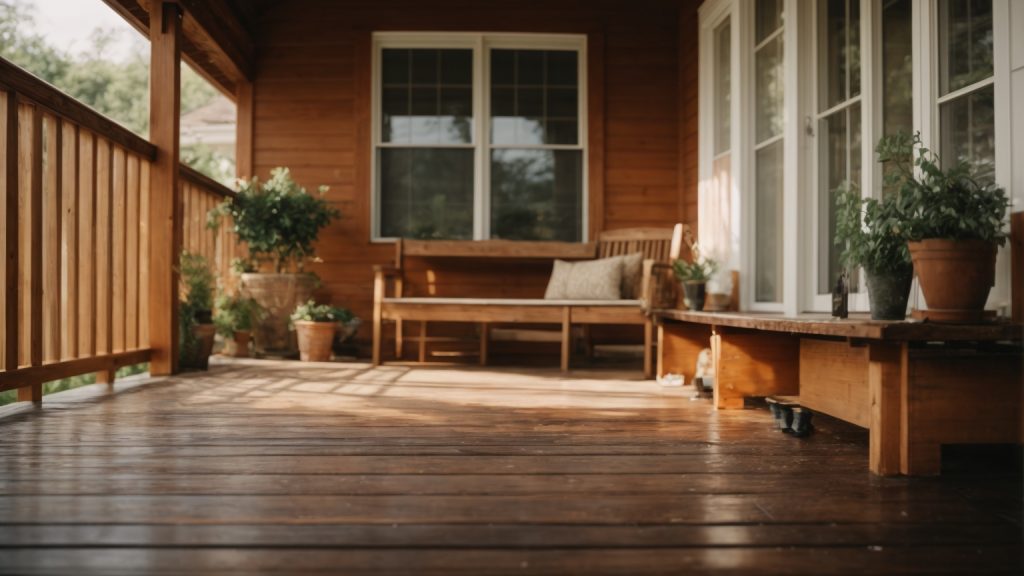
When it comes to painting your wooden porch, choosing the right paint is crucial to ensure a long-lasting finish. Here are some things to consider when selecting the right paint for your porch.

Types of Paint for Wood

There are two main types of paint to consider when painting your wooden porch: oil-based and latex-based.

Oil-based paint is known for its durability and ability to withstand harsh weather conditions. It also has a glossy finish that can enhance the natural beauty of wood. However, it takes longer to dry and requires mineral spirits for cleanup.

Latex-based paint, on the other hand, dries faster and is easier to clean up with soap and water. It also has a low odor and is more environmentally friendly. However, it may not be as durable as oil-based paint and may not adhere as well to bare wood.

Weather Considerations

The weather in your area is an important factor to consider when choosing the right paint for your porch. If you live in an area with harsh weather conditions, such as extreme heat or cold, rain, or snow, you’ll want to choose a paint that can withstand these conditions.

Look for a paint that is labeled as “exterior” and “weather-resistant.” These types of paints are formulated to withstand exposure to the elements and will provide long-lasting protection for your porch.

In addition to choosing the right paint, it’s also important to properly prepare your porch before painting. This includes cleaning the surface, repairing any damage, and priming the wood to ensure proper adhesion of the paint.

By taking the time to choose the right paint for your porch and properly preparing the surface, you can ensure a beautiful and long-lasting finish that will enhance the look of your outdoor space.

Preparing the Wooden Porch

Before you start painting your wooden porch, it’s important to prepare the surface properly. This will ensure that the paint adheres well and lasts longer. Here are some steps to follow:

Cleaning the Surface

The first step in preparing your wooden porch is to clean the surface thoroughly. This will remove any dirt, grime, or mildew that may have accumulated on the surface. Here’s how you can clean the surface:

  • Sweep the porch with a broom to remove loose dirt and debris.
  • Use a pressure washer or a garden hose with a spray nozzle to wash the surface. If there is mildew, you can use a solution of bleach and water to remove it. Be sure to follow the manufacturer’s instructions for the bleach solution.
  • Let the surface dry completely before moving on to the next step.

Sanding the Wood

After cleaning the surface, you need to sand the wood to create a smooth surface for the paint to adhere to. Here’s how you can sand the wood:

  • Use a coarse sandpaper (60-80 grit) to sand the surface. This will remove any rough spots or splinters.
  • Use a medium sandpaper (100-150 grit) to sand the surface again. This will smooth out any rough spots left by the coarse sandpaper.
  • Use a fine sandpaper (220 grit) to sand the surface one final time. This will create a smooth surface for the paint to adhere to.

After sanding the surface, be sure to remove any dust or debris with a damp cloth or a vacuum cleaner. This will ensure that the paint adheres well to the surface.

By following these steps, you can prepare your wooden porch for painting and ensure that the paint lasts longer.

Priming the Porch

Before you start painting your wooden porch, you need to prime it. Priming is an essential step that ensures the paint adheres well to the surface, and it also helps to protect the wood from moisture and other elements. In this section, you will learn how to choose and apply the right primer for your porch.

Choosing a Primer

When it comes to choosing a primer, there are a few things to consider. First, make sure you choose a primer that is specifically designed for exterior use. Exterior primers are formulated to withstand the elements and provide a strong base for the paint. Second, consider the type of paint you will be using. If you are using an oil-based paint, you will need to use an oil-based primer. If you are using a latex-based paint, you can use either a latex-based or an oil-based primer.

Another thing to consider is the condition of your porch. If your porch is new or in good condition, you can use a regular primer. However, if your porch is old or has a lot of cracks and imperfections, you may want to use a filler primer. Filler primers are thicker and can fill in small cracks and imperfections, giving you a smoother surface to paint.

Applying the Primer

Before you apply the primer, make sure your porch is clean and dry. Use a stiff-bristled brush to remove any loose or peeling paint, and then sweep the porch to remove any dust or debris.

To apply the primer, use a paintbrush or roller. If you are using a roller, use a brush to cut in around the edges and corners. Work in small sections to ensure thorough coverage. Apply the primer in thin, even coats, and make sure to follow the manufacturer’s instructions for drying time.

Once the primer is dry, you can start painting your porch. Remember to choose a paint that is specifically designed for exterior use, and follow the manufacturer’s instructions for application and drying time.

By following these steps, you can ensure that your porch is properly primed and ready for painting. A little extra effort in the priming stage can go a long way in ensuring a smooth and long-lasting paint job.

Painting Techniques
wooden-painting-techniques

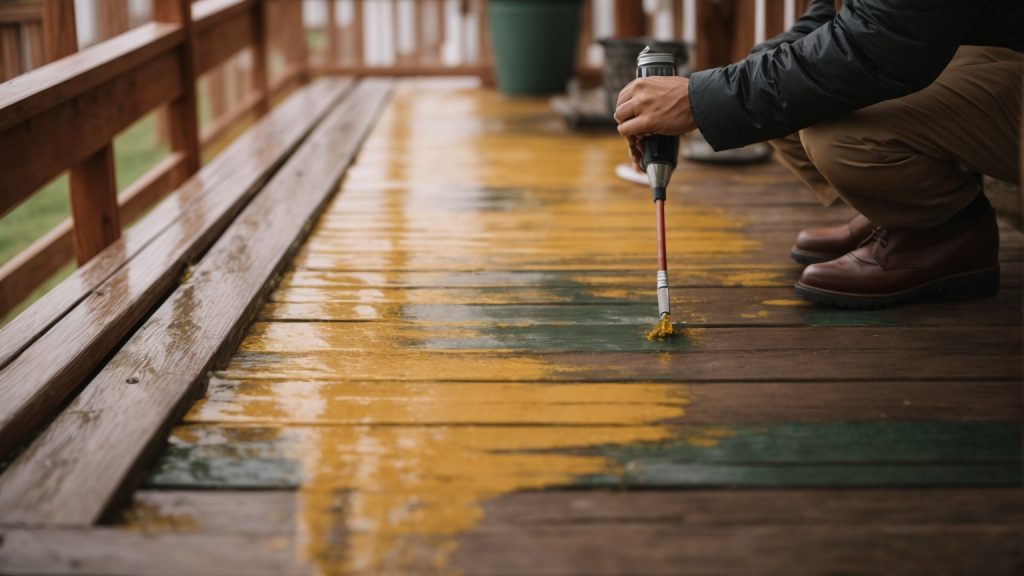
When it comes to painting your wooden porch, there are a few different techniques you can use. Each technique has its own advantages and disadvantages, so it’s important to choose the one that’s right for you.

Using a Brush

Using a brush is a great way to get a precise, detailed finish. It’s also a good option if you’re working in a small area or need to touch up certain spots. To use a brush, simply dip it into the paint and apply it to the wood in smooth, even strokes. Be sure to work in the direction of the wood grain to get the best results.

One downside to using a brush is that it can be time-consuming, especially if you’re painting a large area. It can also be difficult to avoid brush marks, so you may need to do some sanding and touch-ups after the paint has dried.

Using a Roller

Using a roller is a faster way to paint your porch, especially if you’re working in a large area. It’s also a good option if you want a smooth, even finish. To use a roller, simply dip it into the paint and roll it onto the wood in long, even strokes. Be sure to work in sections to avoid overlapping.

One downside to using a roller is that it can be difficult to get into tight corners and edges. You may need to use a brush to touch up these areas after the paint has dried.

Using a Sprayer

Using a sprayer is the fastest way to paint your porch, especially if you’re working in a large area. It’s also a good option if you want a smooth, even finish without any brush marks. To use a sprayer, simply fill it with paint and spray it onto the wood in long, even strokes. Be sure to work in sections to avoid overlapping.

One downside to using a sprayer is that it can be messy and difficult to control. You may also need to use a brush to touch up certain areas after the paint has dried. Additionally, you’ll need to take extra precautions to protect nearby surfaces from overspray.

Maintenance and Care

Taking care of your newly painted wooden porch will help it look great for years to come. Here are some tips for routine cleaning and touch-ups and repairs.

Routine Cleaning

Regular cleaning is important to prevent dirt and grime buildup that can damage your porch’s finish. Here are some tips for keeping your porch clean:

  • Sweep your porch regularly to remove dirt, leaves, and other debris. Use a broom with soft bristles to avoid scratching the surface.
  • Use a mild soap and water solution to clean your porch. Avoid using harsh chemicals or abrasive cleaners that can damage the finish.
  • Rinse with a hose or pressure washer, being careful not to use too much pressure that can damage the wood.
  • Dry your porch thoroughly after cleaning to prevent water damage.

Touch-Ups and Repairs

Even with proper care, your porch may need touch-ups and repairs from time to time. Here are some tips for keeping your porch looking its best:

  • Check your porch regularly for any signs of damage, such as cracks, peeling paint, or rot. Repair any damage as soon as possible to prevent further damage.
  • Sand any rough spots or peeling paint before applying touch-up paint. Use a fine-grit sandpaper and be careful not to sand too much of the surrounding area.
  • Use a high-quality exterior paint that is designed for wooden surfaces. Apply the paint with a brush or roller, following the manufacturer’s instructions.
  • Allow the paint to dry completely before using your porch.

By following these tips, you can keep your wooden porch looking great for years to come.

Safety Precautions

When painting your wooden porch, it’s important to take certain safety precautions to protect yourself and those around you. Here are some safety tips to keep in mind:

Use of Protective Gear

Before you start painting, make sure to wear the appropriate protective gear. This includes gloves, protective eyewear, and a mask to prevent inhaling any paint fumes. In addition, make sure to wear clothing that you don’t mind getting dirty or potentially ruined by paint.

Proper Ventilation

It’s important to ensure that you have proper ventilation when painting your porch. This means opening windows, doors, and using fans to circulate air. If you’re using a paint sprayer, make sure to wear a respirator to prevent inhaling any paint particles.

In addition, keep in mind that some paints and solvents can be flammable, so avoid smoking or using any open flames near the paint. Store all paint and solvents in a cool, dry place away from any heat sources.

By taking these safety precautions, you can ensure that you and your loved ones stay safe while painting your porch.
How to Repaint a Wooden Bench: A Beginner's Guide

Repainting a wooden bench can be a fun and rewarding DIY project that can breathe new life into an old piece of furniture. Whether you want to update the look of your outdoor bench or restore an old piece to its former glory, repainting can be a cost-effective way to achieve your desired results.

Before you get started, it’s important to gather the necessary tools and materials, including sandpaper, primer, paint, and a paintbrush or roller. You’ll also want to make sure you have a drop cloth or newspaper to protect your work area from any spills or splatters. If your bench has any existing paint or finish, you’ll need to remove it before applying a new coat of paint.

In this article, we’ll provide step-by-step guidelines on how to repaint a wooden bench, including tips on sanding, priming, and painting. By following these easy guidelines, you can transform your old bench into a beautiful and functional piece of furniture that you’ll be proud to display in your home or garden. So grab your paintbrush and let’s get started!

Understanding the Basics of Repainting

When it comes to repainting a wooden bench, there are some basic things you should understand before you get started. This section will cover the types of paint you can use and some safety precautions you should take.

Types of Paint for Wood

There are several types of paint you can use when repainting a wooden bench. Here are some common options:

  • Latex paint: This is a water-based paint that is easy to use and dries quickly. It is a good choice for indoor benches or outdoor benches that are not exposed to harsh weather conditions.
  • Oil-based paint: This type of paint is more durable than latex paint and provides a smoother finish. It is a good choice for outdoor benches that are exposed to harsh weather conditions.
  • Spray paint: This type of paint is easy to use and can provide a smooth finish. However, it may not be as durable as other types of paint.

Before you choose a type of paint, consider the location of your bench and the weather conditions it will be exposed to. You should also consider the color you want and whether you want a glossy or matte finish.

Safety Precautions

When repainting a wooden bench, it is important to take some safety precautions to protect yourself and others. Here are some things to keep in mind:

  • Wear protective gear: You should wear gloves, eye protection, and a mask to protect yourself from fumes and dust.
  • Work in a well-ventilated area: Make sure you are working in an area with good ventilation to avoid inhaling fumes.
  • Follow the manufacturer’s instructions: Be sure to read and follow the instructions on the paint can to ensure that you are using the paint correctly.
  • Dispose of paint and materials properly: After you are finished painting, dispose of any leftover paint and materials according to your local regulations.

By understanding the basics of repainting and taking the necessary safety precautions, you can successfully repaint your wooden bench and give it a fresh new look.

Materials and Tools Needed

Repainting a wooden bench can be a fun and easy DIY project that can give new life to an old piece of furniture. Before you get started, make sure you have all the necessary materials and tools on hand. Here is a list of what you will need:

Materials

  • Sandpaper (for sanding down the wood)
  • Protective gloves and eyewear
  • Primer and paint
  • Painter’s tape (to cover areas that you do not wish to paint)
  • Dropcloth (to protect the surrounding areas from paint splatters)

Tools

  • Paintbrush or roller (for applying the primer and paint)
  • Screwdriver (to remove any hardware on the bench)
  • Palm sander (optional, but helpful for sanding larger areas)
  • Tack cloth (to remove any dust or debris after sanding)
  • Spray bottle filled with water (to wet the wood before sanding, if necessary)

When selecting your primer and paint, make sure to choose products that are suitable for outdoor use and can withstand the elements. Look for products that are specifically designed for wood surfaces and provide good coverage and durability.

Additionally, it’s important to wear protective gloves and eyewear while working with paint and sandpaper to avoid any injuries or irritation. And don’t forget to cover the surrounding areas with a dropcloth to protect them from any paint splatters.

Overall, having the right materials and tools on hand can make all the difference in achieving a successful repainting project.

Preparing the Wooden Bench

Before you start repainting your wooden bench, it’s essential to prepare it properly to ensure the new paint adheres well and looks great. Here are two crucial steps to follow when preparing your wooden bench for repainting.

Cleaning the Bench

The first step in preparing your wooden bench for repainting is to clean it thoroughly. Dirt, grime, and other debris can interfere with the paint’s adherence, so it’s crucial to get the surface as clean as possible.

To clean your bench, follow these steps:

  1. Use a stiff-bristled brush to remove loose dirt and debris from the bench’s surface.
  2. Fill a bucket with warm water and add a small amount of dish soap or wood cleaner.
  3. Dip a clean cloth into the soapy water and use it to scrub the bench’s surface thoroughly.
  4. Rinse the bench with clean water until all soap residue is removed.
  5. Allow the bench to dry completely before moving on to the next step.

Sanding the Surface

Once the bench is clean and dry, the next step is to sand the surface. Sanding helps remove any bumps or uneven surfaces, making the surface smoother and easier to paint. It also helps the new paint adhere better to the wood.

To sand your bench, follow these steps:

  1. Use a light grit sandpaper to sand the entire surface of the bench. Be sure to sand in the direction of the wood grain.
  2. Sand until the surface is smooth and all rough spots and imperfections are removed.
  3. Use a damp cloth to wipe away any dust or debris from sanding.
  4. Allow the bench to dry completely before moving on to the next step.

By following these two crucial steps, you’ll ensure that your wooden bench is well-prepared for repainting. A clean and well-sanded surface will help the new paint adhere better and look great for years to come.

Applying the Primer

Now that you have sanded and cleaned your wooden bench, it’s time to apply the primer. The primer will help the paint adhere to the wood and prevent any stains or discoloration from showing through the final coat of paint. Here are the steps to apply the primer:

  1. Choose the right primer: Make sure to choose a primer that is suitable for outdoor wooden surfaces. Look for a primer that is specifically formulated for wood and is compatible with the type of paint you plan to use.

  2. Apply the primer: Use a paintbrush or a roller to apply the primer evenly over the entire surface of the bench. Make sure to cover all the nooks and crannies and apply a thin, even coat. If you notice any drips or uneven areas, smooth them out with a paintbrush before the primer dries.

  3. Let the primer dry: Allow the primer to dry completely before applying the final coat of paint. This may take anywhere from a few hours to overnight, depending on the type of primer you are using and the weather conditions.

  4. Sand the primer: Once the primer is dry, lightly sand the entire surface of the bench with fine-grit sandpaper. This will help smooth out any rough spots or brush marks and ensure that the final coat of paint goes on smoothly.

  5. Clean the bench: Finally, use a clean, damp cloth to wipe down the entire surface of the bench and remove any dust or debris before applying the final coat of paint.

By following these steps, you can ensure that your wooden bench is properly primed and ready for the final coat of paint.

Painting the Bench

Once you have sanded and primed your wooden bench, it’s time to paint it. Here are some tips to help you get the best results possible.

Choosing the Color

Before you start painting, consider what color you want your bench to be. You can choose a color that matches your outdoor decor or go for something bold and eye-catching. If you’re not sure what color to choose, take a look at some color swatches or paint samples to get an idea of what will work best.

Applying the Paint

When it comes to applying the paint, there are a few things to keep in mind. First, make sure you have the right type of paint for your bench. For outdoor furniture, it’s best to use a paint that is weather-resistant and can withstand the elements. You can choose between oil-based, water-based, or spray paint.

Once you have your paint, apply it in thin, even coats. Use a paintbrush or roller to apply the paint, depending on the size of your bench. Make sure to cover all areas of the bench, including any hard-to-reach spots.

If you’re using a spray paint, make sure to do it in a well-ventilated area and wear a mask to avoid inhaling fumes. Apply the spray paint in thin, even coats, and let each coat dry before applying the next.

After you’ve applied the first coat of paint, let it dry completely before applying the second coat. Depending on the color and type of paint you’re using, you may need to apply more than two coats to get the desired finish.

With these tips, you can paint your wooden bench with ease and achieve a beautiful, long-lasting finish.

Finishing Touches

After you’ve painted your wooden bench, it’s time to add the finishing touches to ensure a long-lasting and beautiful finish. Here are some essential steps to follow:

Sealing the Paint

To protect your newly painted bench from the elements and everyday wear and tear, it’s crucial to apply a sealant. A clear polyurethane or varnish will not only add a protective layer but also give your bench a glossy finish.

Before applying the sealant, make sure the paint is completely dry. Use a clean brush to apply a thin layer of sealant, following the grain of the wood. Allow the first coat to dry completely before applying a second coat.

Drying and Curing Time

It’s important to let your bench dry and cure properly to avoid damaging the paint job. While the paint may feel dry to the touch after a few hours, it’s recommended to wait at least 24 hours before using the bench.

During the first week, avoid placing any heavy objects or sitting on the bench for extended periods. This will allow the paint to fully cure and harden, ensuring a durable finish.

By following these simple finishing touches, your painted wooden bench will look great for years to come.

How to Paint a Wooden Bench: Tips and Tricks for a Perfect Finish

Are you looking to add a pop of color to your outdoor space? Painting a wooden bench is a simple and cost-effective way to give your patio or garden a fresh new look. Whether you have an old, weathered bench or a brand new one, painting it can protect the wood from the elements and add some personality to your outdoor decor.

Before you start, it’s important to prepare the bench properly. This includes sanding down the wood to create a smooth surface for the paint to adhere to, and removing any loose paint or debris. You’ll also want to choose the right type of paint for your bench, depending on whether it will be exposed to the elements or not. With a few simple steps and some patience, you can transform your wooden bench into a beautiful and functional piece of outdoor furniture.

Understanding the Importance of Surface Preparation

Before you start painting your wooden bench, it is crucial to prepare the surface properly. Proper surface preparation ensures that the paint adheres well to the surface, resulting in a smooth and long-lasting finish. In this section, we will discuss the importance of surface preparation and the steps involved.

Choosing the Right Sandpaper

The first step in preparing the surface is to sand the bench. Sanding helps to remove any bumps or uneven surfaces, making the surface smoother and easier to paint. It also helps to remove any old paint or varnish, which can interfere with the new paint’s adhesion.

When sanding, it is essential to choose the right sandpaper grit. The grit determines how coarse or fine the sandpaper is. A coarser grit, such as 60 or 80, is suitable for removing old paint or varnish. A finer grit, such as 120 or 150, is suitable for smoothing out the surface.

Cleaning the Bench

After sanding, it is crucial to clean the bench thoroughly. Any dust or debris left on the surface can interfere with the paint’s adhesion. Start by wiping the surface with a dry cloth or brush to remove any loose debris. Then, use a damp cloth to wipe the surface clean. If there are any stubborn stains or dirt, use a mild detergent or cleaner to clean the surface.

Once the surface is clean, allow it to dry completely before painting. It is essential to ensure that the surface is completely dry, as any moisture left on the surface can cause the paint to bubble or peel.

In summary, surface preparation is a crucial step in painting a wooden bench. It ensures that the paint adheres well to the surface, resulting in a smooth and long-lasting finish. Choose the right sandpaper grit and clean the bench thoroughly before painting. With proper surface preparation, your wooden bench will look beautiful and last for years to come.

Selecting the Right Paint

When it comes to painting a wooden bench, selecting the right paint is crucial for a long-lasting finish. In this section, we will discuss the two main types of paint – water-based and oil-based – and how to choose the right color for your bench.

Water vs. Oil Based

Water-based paint is a popular choice for painting wooden benches, as it dries quickly and emits fewer fumes than oil-based paint. It is also easier to clean up with just soap and water. However, it may not be as durable as oil-based paint and may not hold up well against harsh weather conditions.

On the other hand, oil-based paint is more durable and can withstand harsh weather conditions. It also provides a smoother finish than water-based paint. However, it emits strong fumes and takes longer to dry. Cleanup requires solvents such as mineral spirits.

When deciding between water-based and oil-based paint, consider your project’s needs and your personal preferences.

Choosing the Right Color

Choosing the right color for your bench is just as important as selecting the right type of paint. Here are some tips to help you choose the perfect color:

  • Consider the bench’s location. If it will be placed in a sunny area, choose a lighter color to prevent it from fading quickly.
  • Think about the surrounding decor. Choose a color that complements the colors of your outdoor space.
  • Consider the bench’s purpose. If it will be used for a children’s play area, choose a bright and playful color.

Remember to always test the color on a small, inconspicuous area before painting the entire bench to ensure you are happy with the color.

Protecting Your Surroundings

Painting a wooden bench can be a messy job, but it doesn’t have to leave your surroundings covered in paint. Taking a few precautions can help protect your floors, walls, and other items from accidental paint splatters and spills.

Here are some tips to help protect your surroundings while painting a wooden bench:

Cover the Floor

Before you start painting, lay down a drop cloth or old sheet to protect your floor from paint drips and spills. If you don’t have a drop cloth, you can also use old newspapers or cardboard boxes.

Tape Off Surrounding Areas

If your bench is located near walls or other items that you don’t want to get paint on, use painter’s tape to tape off the surrounding areas. This will help prevent accidental paint splatters and make cleanup easier.

Wear Protective Clothing

Wearing old clothes or a painting smock can help protect your clothing from paint splatters. You may also want to wear gloves to protect your hands.

Use a Paint Shield

A paint shield is a tool that can help prevent paint from getting on surrounding areas. It’s a flat piece of metal or plastic that you hold against the surface you’re painting, creating a barrier between the paint and the surrounding area.

Clean Up Spills Immediately

If you do accidentally spill paint, clean it up immediately with a damp cloth or paper towel. The longer you wait, the harder it will be to remove the paint.

By taking these simple precautions, you can protect your surroundings while painting a wooden bench and avoid any unnecessary cleanup.

Applying the Primer

Choosing the Right Primer

Before you start painting your wooden bench, it is important to choose the right primer. The primer is essential for creating a smooth, even surface that the paint can adhere to. Here are some tips for choosing the right primer:

  • Choose a primer that is specifically designed for wood surfaces.
  • If you are painting an outdoor bench, choose a primer that is weather-resistant and can withstand the elements.
  • If you are painting a bench that has been previously painted, choose a primer that is compatible with the type of paint that was previously used.

Applying the Primer Correctly

Once you have chosen the right primer, it is time to apply it to your wooden bench. Here are some tips for applying the primer correctly:

  1. Start by cleaning the bench thoroughly to remove any dirt, dust, or debris. Use a damp cloth or sponge and allow the bench to dry completely before proceeding.

  2. If the bench has any rough spots or imperfections, use sandpaper to smooth them out before applying the primer.

  3. Apply the primer in thin, even coats using a paintbrush or roller. Be sure to follow the manufacturer’s instructions for drying time between coats.

  4. Allow the primer to dry completely before sanding it lightly with fine-grit sandpaper. This will help to create a smooth surface for the paint to adhere to.

  5. If necessary, apply a second coat of primer and repeat the sanding process.

By following these tips for choosing and applying the primer, you can ensure that your wooden bench is properly prepared for painting.

Painting the Bench

Painting a wooden bench can give it a fresh new look and protect it from the elements. Here are some steps to follow when painting your wooden bench.

Applying the First Coat

  1. Start by preparing the bench surface. Sand the bench with a medium grit sandpaper to remove any rough spots and create a smooth surface. Wipe the bench clean with a damp cloth to remove any dust or debris.

  2. Apply a coat of primer to the bench. The primer will help the paint adhere to the wood and provide a smooth surface for the paint to go on. Use a brush or roller to apply the primer evenly across the bench. Let the primer dry completely before moving on to the next step.

  3. Apply the first coat of paint to the bench. Use a brush or roller to apply the paint evenly across the bench. Be sure to work in the direction of the wood grain for a smooth finish. Let the paint dry completely before adding additional coats.

Adding Additional Coats

  1. Once the first coat of paint is completely dry, lightly sand the bench with a fine grit sandpaper. This will help the next coat of paint adhere to the surface and create a smooth finish.

  2. Apply a second coat of paint to the bench. Use the same technique as before, working in the direction of the wood grain for a smooth finish. Let the paint dry completely before adding additional coats.

  3. Depending on the color and quality of the paint, you may need to add additional coats to achieve the desired finish. Be sure to sand the bench lightly between each coat to create a smooth surface.

  4. Once you have achieved the desired finish, let the bench dry completely before using it. This will ensure that the paint has fully cured and will be durable enough to withstand regular use.

Painting a wooden bench can be a fun and rewarding project. By following these steps, you can give your bench a fresh new look and protect it from the elements.

Maintaining Your Painted Bench

After you have successfully painted your wooden bench, it is important to maintain it properly to keep it looking great for years to come. Here are some tips for maintaining your painted bench:

Routine Cleaning

Routine cleaning is essential to keep your painted bench looking fresh and clean. Here are some steps to follow:

  • Start by removing any loose dirt or debris with a soft-bristled brush or a damp cloth.
  • Mix a mild detergent with warm water and use a soft cloth to clean the bench. Avoid using abrasive cleaners or harsh chemicals as they can damage the paint.
  • Rinse the bench thoroughly with clean water and dry it with a soft cloth.

Touching Up Damages

Despite your best efforts, your painted bench may get scratched or damaged over time. Here are some steps to follow to touch up any damages:

  • Start by cleaning the damaged area with a mild detergent and warm water. Dry the area with a soft cloth.
  • Sand the damaged area lightly with fine-grit sandpaper. Be careful not to sand away too much of the paint.
  • Apply a small amount of touch-up paint to the damaged area using a small brush. Allow the paint to dry completely.
  • Sand the area lightly with fine-grit sandpaper to blend the touch-up paint with the surrounding area.
  • Apply a clear coat of polyurethane to protect the touch-up paint and the surrounding area.

By following these simple steps, you can keep your painted bench looking great for years to come.

How to Make Wooden Adirondack Chairs: A Beginner's Guide

Looking to add some comfortable and stylish seating to your outdoor space? Why not try building your own wooden Adirondack chairs? These classic chairs are perfect for relaxing in the sun, enjoying a cold drink, or simply taking in the scenery around you. Plus, building them yourself can be a fun and rewarding DIY project for any skill level.

To get started, you’ll need some basic woodworking tools and materials like wood screws, wood glue, and sandpaper. There are a variety of plans and templates available online to help guide you through the process, or you can even create your own design if you’re feeling adventurous. Whether you prefer a traditional look or want to add your own personal flair, making your own Adirondack chairs is a great way to customize your outdoor space and create a comfortable place to unwind.

Understanding Adirondack Chairs

If you’re looking for a comfortable and stylish outdoor chair, the Adirondack chair is a great choice. With its slanted seat and backrest, wide armrests, and sturdy construction, it’s perfect for relaxing on your patio or in your garden.

Here are a few things to keep in mind when building your own Adirondack chair:

Materials

Adirondack chairs are typically made of wood, although you can also find plastic and metal versions. When choosing wood, look for a durable and weather-resistant species like cedar, teak, or redwood. Avoid softwoods like pine, which can warp and rot over time.

Design

Adirondack chairs have a distinctive design that sets them apart from other outdoor chairs. They feature a slanted seat and backrest, wide armrests, and a low profile that makes them perfect for lounging. Some chairs also have a curved backrest for added comfort.

Assembly

Building an Adirondack chair requires some woodworking skills, but it’s a relatively simple project that can be completed in a few days. You’ll need basic tools like a saw, drill, and sander, as well as some woodworking clamps and glue. Follow a set of plans carefully to ensure that your chair is sturdy and comfortable.

Maintenance

To keep your Adirondack chair looking great, you’ll need to take care of it properly. Regularly clean it with soap and water, and apply a protective finish to prevent weather damage. If you live in a damp or humid climate, you may need to store your chair indoors during the winter months.

Materials Needed

When it comes to building wooden Adirondack chairs, you’ll need a few materials to get started. Here are the two main sub-sections to consider:

Choosing the Wood

The first step is to choose the wood you’ll use for your Adirondack chair. You want to select a durable wood that can withstand outdoor elements. Cedar, cypress, and redwood are popular choices for Adirondack chairs because of their durability and resistance to rot and insect damage. Pine and fir are also options, but they may not last as long as the others.

When selecting your wood, make sure it is straight, free of knots, and has a smooth surface. You’ll also want to choose wood that is the right thickness for your project. Typically, 1-inch thick boards are used for the seat, back, and arms, while 2-inch thick boards are used for the legs.

Gathering Tools and Hardware

In addition to the wood, you’ll need a few tools and pieces of hardware to build your Adirondack chair. Here’s a list of what you’ll need:

  • Saw (circular or jigsaw)
  • Drill
  • Drill bits
  • Screws (1 1/4 inch and 2 inch)
  • Wood glue
  • Clamps
  • Sandpaper (80-grit and 120-grit)
  • Paint or stain (optional)

Make sure you have all of these tools and hardware before you start building your chair. It’s also a good idea to have a workbench or table to work on and a set of safety glasses to protect your eyes while working.

With these materials and tools, you’ll be well on your way to building your own Adirondack chair.

Preparation

Before you start building your Adirondack chair, there are a few things you need to do to ensure that the process goes smoothly. This section will cover the two main aspects of preparation: design and planning, and cutting the wood.

Design and Planning

The first step in building your Adirondack chair is to decide on a design. There are many different styles to choose from, so take some time to research and find one that suits your taste. Once you have a design in mind, it’s a good idea to create a plan or blueprint. This will help you stay organized and ensure that you have all of the necessary materials.

When creating your plan, be sure to include the following:

  • Dimensions: Determine the size of your chair based on your needs and the available space.
  • Materials: Decide on the type of wood you want to use and how much you will need.
  • Tools: Make a list of the tools you will need, such as a saw, drill, and sander.
  • Assembly: Plan out the steps you will need to take to assemble the chair.

Cutting the Wood

Once you have your design and plan in place, it’s time to start cutting the wood. This is a crucial step, as it will determine the overall quality and appearance of your chair.

Before you begin cutting, make sure you have all of the necessary tools and safety equipment, such as gloves and safety goggles. It’s also a good idea to mark your wood pieces to ensure accuracy.

When cutting the wood, be sure to:

  • Measure twice, cut once: Take accurate measurements and double-check them before making any cuts.
  • Use a saw that is appropriate for the job: A jigsaw is ideal for cutting curves, while a circular saw is better for straight cuts.
  • Cut slowly and carefully: Rushing can lead to mistakes and uneven cuts.

By taking the time to properly design and plan your chair, as well as carefully cutting the wood, you will be well on your way to creating a beautiful and functional Adirondack chair.

Building the Chair

Building an Adirondack chair can be a fun and rewarding project that will provide you with a comfortable and stylish outdoor seating option. In this section, we’ll go over the steps involved in building the chair, including assembling the base, creating the seat, and building the backrest.

Assembling the Base

The base of the Adirondack chair consists of two legs and two armrests that are connected by a series of horizontal slats. To assemble the base, follow these steps:

  1. Cut the legs and armrests to the desired length and shape.
  2. Cut the horizontal slats to the appropriate length and shape.
  3. Attach the slats to the legs and armrests using screws or nails.
  4. Use a level to ensure that the base is even and stable.

Creating the Seat

The seat of the Adirondack chair is made up of several slats that are attached to the base. To create the seat, follow these steps:

  1. Cut the seat slats to the appropriate length and shape.
  2. Attach the slats to the base using screws or nails.
  3. Use a level to ensure that the seat is even and stable.
  4. Sand the seat to remove any rough edges or splinters.

Building the Backrest

The backrest of the Adirondack chair is made up of several slats that are angled to provide a comfortable sitting position. To build the backrest, follow these steps:

  1. Cut the backrest slats to the appropriate length and shape.
  2. Angle the top of each slat to provide a comfortable sitting position.
  3. Attach the slats to the seat using screws or nails.
  4. Use a level to ensure that the backrest is even and stable.
  5. Sand the backrest to remove any rough edges or splinters.

By following these steps, you can build your own Adirondack chair that will provide a comfortable and stylish seating option for your outdoor space.

Finishing Touches

After you’ve completed building your Adirondack chair, it’s time to add the finishing touches to make it look great and protect it from the elements. In this section, we’ll cover sanding and smoothing, as well as painting or staining options.

Sanding and Smoothing

Before you apply any finish, it’s important to sand and smooth your chair to ensure a clean and even surface. Start with a coarse sandpaper (around 80 grit) to remove any rough spots or tool marks. Then, gradually work your way up to a finer grit (around 220) to achieve a smooth finish. Be sure to sand in the direction of the wood grain to avoid scratches.

Once you’ve finished sanding, use a damp cloth to wipe down the chair and remove any dust. You may also want to use a tack cloth to pick up any remaining particles.

Painting or Staining

Now that your chair is smooth and clean, you can choose to paint or stain it to achieve your desired look. Here are some options to consider:

  • Paint: If you want a bold, colorful look, paint is a great option. Choose a high-quality outdoor paint and apply it in thin, even coats. Be sure to let each coat dry completely before applying the next.

  • Stain: If you prefer a more natural look, stain is a great choice. Choose a stain that is specifically designed for outdoor use and apply it with a brush or rag. Be sure to follow the manufacturer’s instructions and apply multiple coats as needed.

  • Sealant: No matter which option you choose, it’s important to apply a sealant to protect your chair from the elements. Choose a high-quality outdoor sealant and apply it in thin, even coats. Be sure to let each coat dry completely before applying the next.

With these finishing touches, your Adirondack chair will look great and be ready to withstand the elements for years to come.

Maintenance and Care

Congratulations on making your own Adirondack chairs! Now that you have them, it’s important to take care of them so they can last for years to come. Here are some tips on how to maintain and care for your wooden Adirondack chairs:

Cleaning

To keep your Adirondack chairs looking their best, it’s important to clean them regularly. Use a soft cloth, warm water, and a mild detergent like dish soap. Once you’re done washing it with soap, give it a thorough rinse to prevent any residue from lingering on the wood.

If your chairs are stained or have accumulated dirt or grime, you can use a wood cleaner specifically designed for outdoor furniture. Be sure to follow the manufacturer’s instructions and test the cleaner on a small, inconspicuous area first.

Protecting

Protecting your Adirondack chairs from the elements is key to their longevity. If you live in an area with harsh weather conditions, consider storing your chairs indoors during the off-season. If that’s not an option, invest in some high-quality furniture covers to protect them from rain, snow, and UV rays.

If you prefer the natural look of your wooden Adirondack chairs, you can apply a clear sealant or wood preservative to protect them from moisture and UV rays. Be sure to choose a product that’s specifically designed for outdoor use and follow the manufacturer’s instructions.

Maintenance

Regular maintenance is important to keep your Adirondack chairs in good condition. Here are some tips on how to maintain your chairs:

  • Check for loose screws or bolts and tighten them as needed.
  • Sand down any rough spots or splinters to prevent injury.
  • If your chairs are stained, consider reapplying the stain every 1-7 years depending on the quality of the stain used, the number of coats applied, and the type of application.
  • If your chairs are painted, consider repainting them every 3-5 years to keep them looking fresh.

With proper maintenance and care, your Adirondack chairs can last for many years and provide you with a comfortable and stylish place to relax outdoors.

How to Make Wooden Barn Doors: A Simple Guide

Are you looking to add some rustic charm to your home decor? Wooden barn doors are a great way to achieve that look. Plus, they’re functional too! You can use them to separate living spaces or as a statement piece in any room. In this article, we’ll show you how to make your own wooden barn doors.

First, you’ll need to decide on the type of wood you want to use. Appearance board is a popular choice for its finish, but you can also use reclaimed wood for a more authentic barn door look. Once you have your wood, you’ll need to measure and cut it to size. Make sure to sand the edges and surfaces to avoid splinters.

Next, you’ll need to assemble the door. You can use a simple design with cross braces or create a more intricate pattern. Once the door is assembled, you’ll need to add the hardware. Barn door hardware kits are available in a variety of styles and finishes. Make sure to follow the manufacturer’s instructions for installation. With a little bit of effort, you’ll have a beautiful wooden barn door that adds character and charm to your home.

Understanding Barn Doors

If you’re looking for a unique and attractive way to add functionality to your shed or barn, building a set of Dutch-style barn doors is a great option. However, before you start building, it’s important to understand the history and different types of barn doors available.

History of Barn Doors

Barn doors have been around for centuries and were originally used to protect livestock and farm equipment from harsh weather conditions. They were typically made from wood and were hung on tracks to allow for easy opening and closing.

Over time, barn doors have become a popular design element in homes and businesses. Today, they are often used as room dividers, closet doors, and even as a decorative feature on walls.

Types of Barn Doors

There are several different types of barn doors available, each with its own unique style and functionality. Some of the most popular types include:

  • Dutch Barn Doors: These doors are split horizontally, with the top half able to swing open while the bottom half remains closed. They are a popular choice for barns and sheds, as they allow for easy access while still providing security.

  • Sliding Barn Doors: Sliding barn doors are a great option for rooms with limited space, as they don’t require any clearance for swinging. They are typically hung on tracks and can be made from a variety of materials, including wood, metal, and glass.

  • Hinged Barn Doors: Hinged barn doors are similar to traditional doors, but with a rustic, barn-like appearance. They are often used as interior doors and can be customized to fit any decor style.

When choosing a barn door, it’s important to consider the size and weight of the door, as well as the style and functionality you’re looking for. With the right door, you can add both beauty and functionality to any space.

Materials Needed

Before you start building your wooden barn doors, you need to gather all the necessary materials. Here is a list of the basic materials you will need:

Wood

The type of wood you choose for your barn doors will depend on your personal preference and the style you want to achieve. Here are some popular options:

  • Pine: This is a popular choice for barn doors because it is affordable and easy to work with.
  • Cedar: This wood is naturally resistant to rot and insects, making it a good choice for exterior barn doors.
  • Oak: This hardwood is strong and durable, making it ideal for heavy-duty barn doors.

Hardware

You will also need hardware to hang your barn doors. Here are some common options:

  • Barn door track: This is the most popular option for hanging barn doors. It consists of a track that is mounted to the wall and rollers that attach to the top of the door.
  • Hinges: If you prefer a more traditional look, you can use hinges to hang your barn doors.
  • Handles: You will need handles to open and close your barn doors. There are many styles to choose from, including pulls, knobs, and handles.

Tools

Finally, you will need some tools to build your barn doors. Here are some basic tools you will need:

  • Circular saw or table saw: You will need a saw to cut your wood to the desired size.
  • Drill: You will need a drill to make holes for hardware and to attach the boards together.
  • Screwdriver: You will need a screwdriver to attach the hardware to the door.
  • Tape measure: You will need a tape measure to measure the length and width of your door.
  • Level: You will need a level to ensure that your door is installed straight.

By gathering all of these materials and tools, you will be ready to start building your wooden barn doors.

Choosing the Right Wood

When it comes to building a wooden barn door, choosing the right type of wood is crucial. Not only does the wood need to be strong and durable, but it also needs to look good and fit the aesthetic of your barn. Here are some factors to consider when choosing the right wood for your barn door.

Hardwood vs Softwood

The first decision you need to make is whether to use hardwood or softwood. Hardwoods come from deciduous trees, while softwoods come from coniferous trees. Hardwoods tend to be more durable and resistant to wear and tear, making them a good choice for a barn door that will be used frequently. Softwoods are generally less expensive and easier to work with, but they may not be as durable as hardwoods.

Some popular hardwoods for barn doors include oak, walnut, and mahogany. Softwoods like pine, cedar, and fir are also commonly used for barn doors.

Reclaimed Wood vs New Wood

Another decision to make is whether to use reclaimed wood or new wood. Reclaimed wood is wood that has been salvaged from old buildings, barns, or other structures. It has a unique character and history that can add charm and character to your barn door. However, reclaimed wood can be more expensive and harder to find than new wood.

New wood is a more affordable and readily available option. It can be purchased in a variety of sizes and species, making it easier to find the right wood for your project. However, new wood may not have the same character or history as reclaimed wood.

Ultimately, the choice between hardwood or softwood and reclaimed or new wood will depend on your personal preference, budget, and the look you are trying to achieve. Consider the pros and cons of each option and choose the wood that best fits your needs.

Designing Your Barn Door

When it comes to designing your barn door, there are a few things to consider before you start building. In this section, we’ll cover some important factors to keep in mind to ensure your barn door is not only functional but also aesthetically pleasing.

Choosing a Design

The first step in designing your barn door is choosing a design that fits your style and needs. There are many different designs to choose from, including traditional, modern, rustic, and more. Consider the overall look and feel of your space, as well as the purpose of the door. For example, if you’re using the door for a pantry, you may want a design with a window or cutouts to allow for ventilation.

Once you’ve chosen a design, consider the type of wood you want to use. Popular options include pine, cedar, and oak. Each type of wood has its own unique characteristics, so be sure to choose one that fits your needs and budget.

Taking Measurements

Before you start building your barn door, it’s important to take accurate measurements. Measure the width and height of the door opening, as well as the thickness of the door. Keep in mind that the door should be slightly larger than the opening to ensure a snug fit.

Once you have your measurements, create a rough sketch of your door design. This will help you determine the size and placement of any windows or cutouts, as well as the location of any hardware.

In conclusion, designing your barn door is an important step in the building process. By choosing a design that fits your style and needs and taking accurate measurements, you can ensure that your door is not only functional but also adds to the overall look and feel of your space.

Preparing the Wood

Before you start building your barn door, it’s essential to prepare your wood. This step is crucial because it ensures that your door is sturdy, durable, and looks great. In this section, we’ll cover the two main steps in preparing your wood: cutting and sanding.

Cutting the Wood

The first step in preparing your wood is to cut it to the right size. You’ll need to measure your wood carefully before cutting it to ensure that it fits your door frame perfectly. Here are some tips to help you cut your wood:

  • Use a saw that’s appropriate for the type of wood you’re using. A circular saw is ideal for cutting straight lines, while a jigsaw is better for curved cuts.
  • Measure twice, cut once. Double-check your measurements before making any cuts to avoid mistakes.
  • Use a straight edge to guide your saw for straight cuts.
  • Cut your wood slightly longer than you need it. You can always trim it down later.

Sanding the Wood

Once you’ve cut your wood to the right size, it’s time to sand it. Sanding is essential because it smooths out any rough edges and prepares the surface for painting or staining. Here are some tips to help you sand your wood:

  • Start with a coarse sandpaper to remove any rough spots or splinters.
  • Use a finer sandpaper to smooth out the surface. Repeat this process until the wood is smooth to the touch.
  • Sand in the direction of the grain to avoid damaging the wood.
  • Use a sanding block to ensure that the surface is even.
  • Wipe down the wood with a damp cloth to remove any sawdust.

By following these steps, you’ll be able to prepare your wood for building a beautiful barn door. Remember to take your time and be patient – the better you prepare your wood, the better your door will look and function.

Assembling the Barn Door

Once you have all the necessary materials and tools, it’s time to start assembling your barn door. This section will guide you through the process of joining the boards and installing the hardware.

Joining the Boards

To create a sturdy and durable barn door, you need to join the boards together securely. Here’s how you can do it:

  1. Lay the boards flat on a work surface, making sure they are aligned properly.
  2. Apply wood glue to the edges of the boards that will be joined together.
  3. Use clamps to hold the boards together until the glue dries. Make sure the boards are level and flush with each other.
  4. Once the glue has dried, remove the clamps and sand the edges of the boards to create a smooth surface.

Installing the Hardware

Now that the boards are joined together, it’s time to install the hardware that will allow you to hang the barn door. Here’s what you need to do:

  1. Measure and mark the placement of the hardware on the barn door. Make sure the hardware is evenly spaced and level.
  2. Install the track on the wall above the doorway according to the manufacturer’s instructions.
  3. Attach the hangers to the top of the barn door using screws and a drill. Make sure the hangers are securely attached to the door.
  4. Hang the door on the track and test to make sure it slides smoothly.
  5. Install the door handle and any other hardware according to the manufacturer’s instructions.

By following these steps, you can assemble a beautiful and functional barn door that will add character and charm to your home.

Finishing Touches

Applying a Finish

Once you have constructed your wooden barn door, it is time to add a finish to protect it from the elements. Applying a finish will also enhance the natural beauty of the wood and give it a professional look. Here are some steps you can follow to apply a finish to your barn door:

  1. Sand the door: Start by sanding the door with fine-grit sandpaper to remove any rough spots or imperfections.

  2. Choose a finish: There are many finishes you can use, such as paint, stain, or clear coat. Choose the finish that best suits your needs and preferences.

  3. Apply the finish: Using a brush or roller, apply the finish to the door in thin, even coats. Be sure to follow the manufacturer’s instructions for drying time and reapplication.

  4. Sand between coats: Sand the door lightly between each coat to ensure a smooth finish.

  5. Finish with a topcoat: Once you have applied all the coats of finish, add a topcoat to protect the door from scratches and wear.

Installing the Door

Now that your barn door is finished, it’s time to install it. Here are some steps you can follow to install your wooden barn door:

  1. Measure the opening: Measure the height and width of the opening where you want to install the door.

  2. Cut the track: Cut the track to the same length as the width of the door.

  3. Install the track: Install the track above the opening using screws and anchors.

  4. Attach the hangers: Attach the hangers to the top of the door using screws.

  5. Hang the door: Hang the door on the track by sliding the hangers into the track.

  6. Install the guides: Install the guides at the bottom of the door to keep it from swinging.

  7. Test the door: Test the door to make sure it slides smoothly and closes securely.

By following these steps, you can create a beautiful and functional wooden barn door that will add charm and character to your home.

What is the Best Way to Attach Tile to Wood? Tips and Tricks

What is the Best Way to Attach Tile to Wood? Tips and Tricks

Are you planning to attach tile to a wooden surface and wondering what the best way to do it is? If so, you’re not alone. Many people face this challenge, and it can be tricky to find the right solution. Fortunately, there are several methods you can use to attach tile to wood, each with its own advantages and disadvantages.

One of the most popular ways to attach tile to wood is by using construction adhesive. This strong, durable adhesive is ideal for wet areas like bathrooms and kitchens, as it is waterproof and can hold your tiles in place for years. Another option is to use mastic glue, which is cost-effective and can be used to fix tiles into plywood effortlessly. However, mastic glue is not suitable for outdoor tiling as it is susceptible to harsh weather conditions. Additionally, you can use a combination of thinset mortar and construction adhesive for a more secure attachment. Whatever method you choose, it’s essential to make sure that the wood surface is even, flat, and finished before beginning the tiling process.

Understanding Tile and Wood

When it comes to attaching tile to wood, it’s important to understand the properties of both materials. In this section, we’ll take a closer look at the characteristics of tile and wood.

Properties of Tile

properties-of-tile

Tile is a popular flooring material that comes in a variety of materials, including ceramic, porcelain, and natural stone. Here are some of the key properties of tile:

  • Durability: Tile is a highly durable material that can withstand heavy foot traffic and is resistant to scratches, stains, and moisture.
  • Variety: With so many different types of tile available, there’s a style to suit every taste and decor.
  • Maintenance: Tile is relatively easy to clean and maintain, making it a popular choice for kitchens and bathrooms.
  • Installation: Installing tile can be a complex process that requires specialized tools and expertise.

Characteristics of Wood

characteristics-of-wood

Wood is a classic flooring material that adds warmth and character to any space. Here are some of the key characteristics of wood:

  • Natural beauty: Wood has a natural beauty that can’t be replicated by other materials.
  • Versatility: Wood can be stained or painted to match any decor style.
  • Comfort: Wood flooring is comfortable underfoot and provides insulation against cold temperatures.
  • Maintenance: Wood requires regular maintenance, including refinishing and sealing, to keep it looking its best.
  • Susceptibility to moisture: Wood is susceptible to moisture damage and should not be installed in areas with high humidity or moisture levels.

By understanding the properties of tile and wood, you can make an informed decision about which material is best for your flooring needs.

Necessary Tools and Materials

Tile Adhesives

When attaching tile to wood, you’ll need to use a tile adhesive that is specifically designed for this purpose. There are several types of adhesives available, including thinset mortar, mastic, and epoxy. Thinset mortar is the most commonly used adhesive for tile installation, as it provides a strong bond and is resistant to moisture. Mastic is a good choice for smaller tiles and for walls, but it is not recommended for high-moisture areas. Epoxy is the strongest adhesive available, but it is also the most expensive and difficult to work with.

To choose the right adhesive for your project, consider the size and type of tile you’ll be using, as well as the location and level of moisture in the area. Always follow the manufacturer’s instructions for mixing and applying the adhesive.

Equipment Needed

In addition to the tile adhesive, you’ll need a few other tools and materials to attach tile to wood. Here are the essentials:

  • Backer board: This is a cement-based material that is installed over the wood subfloor to provide a stable surface for the tile. It comes in sheets and should be cut to fit the room using a circular saw or jigsaw.
  • Trowel: This is used to spread the adhesive onto the backer board. Choose a trowel with the appropriate size notches for your tile size.
  • Level: A level will help you ensure that the backer board is installed evenly.
  • Tile spacers: These small plastic pieces are used to create even gaps between the tiles.
  • Tile cutter or wet saw: Depending on the type of tile you’re using, you’ll need either a tile cutter or a wet saw to cut the tiles to size.
  • Grout: This is used to fill in the gaps between the tiles. Choose a color that complements your tile and follow the manufacturer’s instructions for mixing and applying the grout.
  • Rubber float: This tool is used to spread the grout over the tiles and into the gaps.
  • Sponge: A damp sponge is used to wipe away excess grout and clean the tiles after grouting.

With these tools and materials on hand, you’ll be ready to tackle your tile installation project with confidence.

Preparation Steps

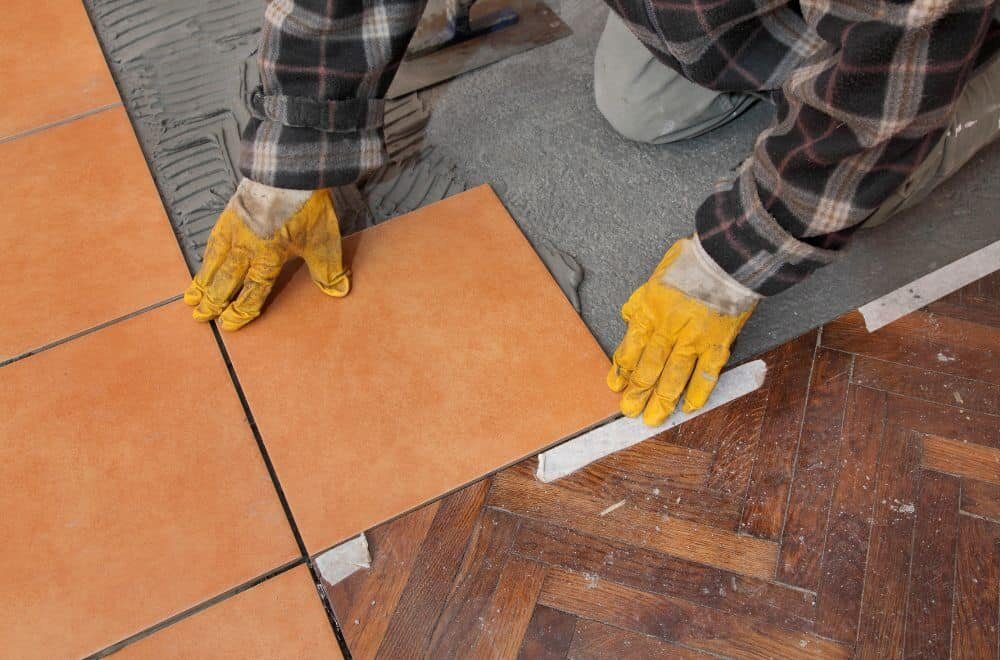
preparation-steps-3

Before you start attaching tiles to wood, there are some essential preparation steps you need to follow. These steps will ensure that your tiles adhere properly to the surface, and you get the desired results. Here are the two critical preparation steps you should follow:

Preparing the Wood Surface

The first step is to prepare the wood surface where you will attach the tiles. The wood surface needs to be clean, smooth, and free from any dust, dirt, or debris. You can use a vacuum cleaner or a broom to remove any dirt or debris. After cleaning, you need to sand the wood surface to make it smooth. Sanding will also help the adhesive bond better with the wood surface.

Choosing the Right Tile

The second step is to choose the right tile for your project. When choosing tiles, you need to consider the size, shape, and type of tile. The size and shape of the tile should match the surface where you will attach them. The type of tile should also be suitable for the area where you will install it. For example, if you are installing tiles in a bathroom, you should choose tiles that are water-resistant and slip-resistant.

Once you have prepared the wood surface and chosen the right tile, you are ready to attach the tiles to the wood surface. Remember to follow the manufacturer’s instructions when applying the adhesive and grout. With proper preparation and installation, you can achieve a beautiful and long-lasting tile installation on wood.

Attachment Process

When it comes to attaching tile to wood, there are a few key steps you need to follow to ensure a successful installation. In this section, we’ll go over the two main steps of the attachment process: applying the adhesive and setting the tile.

Applying the Adhesive

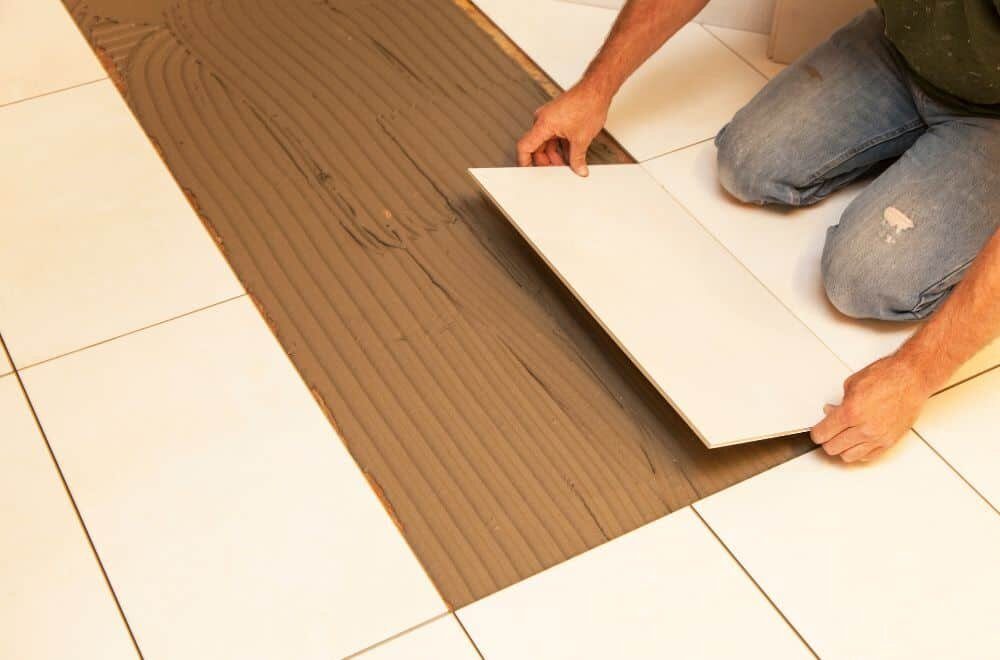
The first step in attaching tile to wood is to apply the adhesive. There are a few different types of adhesive you can use, but the most common is thinset mortar. Here’s how to apply it:

  1. Mix the mortar according to the manufacturer’s instructions. You’ll want to mix it to a consistency that’s similar to peanut butter.
  2. Using a notched trowel, spread the mortar onto the wood surface in an even layer.
  3. Make sure the mortar is spread evenly and covers the entire surface. You don’t want any areas to be missed.
  4. Once the mortar is applied, wait a few minutes for it to set up. This will help it bond better to the tile.

Setting the Tile

Once the adhesive is applied, it’s time to set the tile. Here’s how to do it:

  1. Start by placing the first tile in the corner of the room. Make sure it’s lined up with your layout lines.
  2. Press the tile down firmly into the adhesive. You’ll want to wiggle it back and forth a bit to ensure it’s fully embedded in the mortar.
  3. Continue placing tiles in a straight line along the first row. Use spacers to ensure even spacing between the tiles.
  4. Once the first row is complete, start on the second row. Stagger the tiles so that the joints don’t line up with the joints in the first row.
  5. Continue setting tiles row by row until the entire surface is covered.

Remember to work in small sections at a time to ensure the adhesive doesn’t dry out before you have a chance to set the tile. And always double-check your layout lines to make sure your tiles are going in straight. With these steps, you’ll be able to attach tile to wood with confidence and create a beautiful, long-lasting installation.

Post-Attachment Care

post-attachment-care-1

After attaching tile to wood, it’s important to take proper care of the surface to ensure it lasts as long as possible. Here are some tips for post-attachment care:

Cleaning the Tile

To keep your tile looking its best, it’s important to clean it regularly. Here are some tips for cleaning tile:

  • Use a soft-bristled brush or sponge to avoid scratching the surface of the tile.
  • Avoid using harsh chemicals or abrasive cleaners, as they can damage the surface of the tile.
  • Use a mild detergent and warm water to clean the tile. Be sure to rinse thoroughly to avoid leaving any residue behind.

Maintaining the Wood

In addition to cleaning the tile, it’s important to take care of the wood surface as well. Here are some tips for maintaining the wood:

  • Keep the wood surface dry to avoid warping or rotting. If the wood does get wet, be sure to dry it thoroughly.
  • Avoid placing heavy objects on the wood surface, as this can cause it to warp or crack.
  • Apply a sealant or protective coating to the wood surface to help protect it from moisture and other damage.

By following these tips for post-attachment care, you can help ensure that your tile and wood surface stay looking great for years to come.

Frequently Asked Questions

What is the recommended adhesive for attaching tile to wood?

The recommended adhesive for attaching tile to wood is a combination of thinset mortar and construction adhesive. This method is the most secure and will ensure that the tile stays in place for a long time. Make sure the wood surface is relatively even, flat, and finished before beginning.

Can ceramic tiles be safely installed on a wooden floor?

Yes, ceramic tiles can be safely installed on a wooden floor. However, it is important to ensure that the wooden floor is stable and free from any movement before installing the tiles. It is also recommended to use a cement backer board to help stabilize the wooden floor and provide a good surface for the tiles to adhere to.

How can I attach wood trim to tile without damaging either surface?

To attach wood trim to tile without damaging either surface, use a construction adhesive that is specifically designed for use with both wood and tile. Apply the adhesive to the back of the wood trim and press it firmly onto the tile surface. Hold it in place until the adhesive dries completely.

Is it possible to put tiles directly onto a wooden surface?

It is possible to put tiles directly onto a wooden surface, but it is not recommended. Wood is a porous material that can expand and contract with changes in temperature and humidity. This movement can cause the tiles to crack or come loose. It is recommended to use a cement backer board to provide a stable surface for the tiles to adhere to.

What is the best way to attach tile to a wooden countertop?

The best way to attach tile to a wooden countertop is to use a combination of thinset mortar and construction adhesive. Apply a layer of thinset mortar to the wooden countertop and then press the tiles firmly into place. Allow the mortar to dry completely before applying a layer of construction adhesive to the back of the tiles. Press the tiles firmly onto the countertop and hold them in place until the adhesive dries completely.

What are some tips for using mastic glue to attach tile to wood?

When using mastic glue to attach tile to wood, it is important to make sure that the wood surface is clean and free from any debris. Apply a thin layer of mastic glue to the back of the tiles and press them firmly into place. Make sure to work quickly, as mastic glue tends to dry quickly. Avoid using mastic glue in areas that are exposed to moisture, as it is not waterproof.