Tag Archives: provide long-lasting protection

paint-your-wooden-porch

How to Paint Your Wooden Porch: A Beginner's Guide

Painting a wooden porch is a great way to give your home a fresh and updated look. Whether you’re looking to enhance your curb appeal or just want to protect your porch from the elements, painting is a simple and effective solution. In this article, we’ll guide you through the process of painting your wooden porch step-by-step, so you can achieve a professional-looking finish.

Before you begin painting, it’s important to properly prepare your porch. This includes removing any furniture or decor, sweeping away debris, and cleaning the surface thoroughly. Once your porch is clean and dry, you can begin the painting process. We’ll cover everything from choosing the right paint and tools, to applying the paint and finishing touches. With our help, you’ll be able to paint your wooden porch with ease and confidence.

Choosing the Right Paint
paint-your-wooden-porch

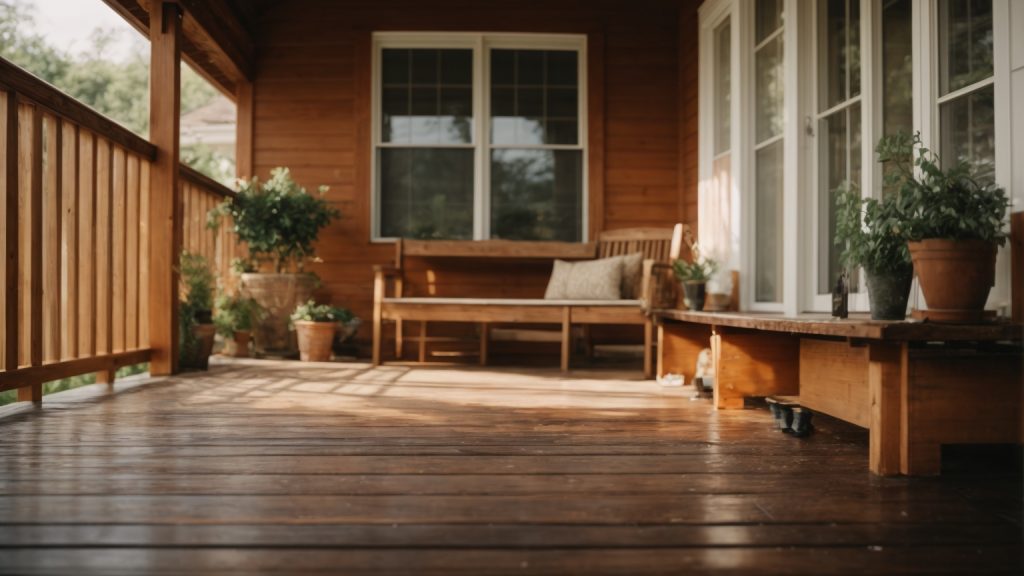
When it comes to painting your wooden porch, choosing the right paint is crucial to ensure a long-lasting finish. Here are some things to consider when selecting the right paint for your porch.

Types of Paint for Wood

There are two main types of paint to consider when painting your wooden porch: oil-based and latex-based.

Oil-based paint is known for its durability and ability to withstand harsh weather conditions. It also has a glossy finish that can enhance the natural beauty of wood. However, it takes longer to dry and requires mineral spirits for cleanup.

Latex-based paint, on the other hand, dries faster and is easier to clean up with soap and water. It also has a low odor and is more environmentally friendly. However, it may not be as durable as oil-based paint and may not adhere as well to bare wood.

Weather Considerations

The weather in your area is an important factor to consider when choosing the right paint for your porch. If you live in an area with harsh weather conditions, such as extreme heat or cold, rain, or snow, you’ll want to choose a paint that can withstand these conditions.

Look for a paint that is labeled as “exterior” and “weather-resistant.” These types of paints are formulated to withstand exposure to the elements and will provide long-lasting protection for your porch.

In addition to choosing the right paint, it’s also important to properly prepare your porch before painting. This includes cleaning the surface, repairing any damage, and priming the wood to ensure proper adhesion of the paint.

By taking the time to choose the right paint for your porch and properly preparing the surface, you can ensure a beautiful and long-lasting finish that will enhance the look of your outdoor space.

Preparing the Wooden Porch

Before you start painting your wooden porch, it’s important to prepare the surface properly. This will ensure that the paint adheres well and lasts longer. Here are some steps to follow:

Cleaning the Surface

The first step in preparing your wooden porch is to clean the surface thoroughly. This will remove any dirt, grime, or mildew that may have accumulated on the surface. Here’s how you can clean the surface:

  • Sweep the porch with a broom to remove loose dirt and debris.
  • Use a pressure washer or a garden hose with a spray nozzle to wash the surface. If there is mildew, you can use a solution of bleach and water to remove it. Be sure to follow the manufacturer’s instructions for the bleach solution.
  • Let the surface dry completely before moving on to the next step.

Sanding the Wood

After cleaning the surface, you need to sand the wood to create a smooth surface for the paint to adhere to. Here’s how you can sand the wood:

  • Use a coarse sandpaper (60-80 grit) to sand the surface. This will remove any rough spots or splinters.
  • Use a medium sandpaper (100-150 grit) to sand the surface again. This will smooth out any rough spots left by the coarse sandpaper.
  • Use a fine sandpaper (220 grit) to sand the surface one final time. This will create a smooth surface for the paint to adhere to.

After sanding the surface, be sure to remove any dust or debris with a damp cloth or a vacuum cleaner. This will ensure that the paint adheres well to the surface.

By following these steps, you can prepare your wooden porch for painting and ensure that the paint lasts longer.

Priming the Porch

Before you start painting your wooden porch, you need to prime it. Priming is an essential step that ensures the paint adheres well to the surface, and it also helps to protect the wood from moisture and other elements. In this section, you will learn how to choose and apply the right primer for your porch.

Choosing a Primer

When it comes to choosing a primer, there are a few things to consider. First, make sure you choose a primer that is specifically designed for exterior use. Exterior primers are formulated to withstand the elements and provide a strong base for the paint. Second, consider the type of paint you will be using. If you are using an oil-based paint, you will need to use an oil-based primer. If you are using a latex-based paint, you can use either a latex-based or an oil-based primer.

Another thing to consider is the condition of your porch. If your porch is new or in good condition, you can use a regular primer. However, if your porch is old or has a lot of cracks and imperfections, you may want to use a filler primer. Filler primers are thicker and can fill in small cracks and imperfections, giving you a smoother surface to paint.

Applying the Primer

Before you apply the primer, make sure your porch is clean and dry. Use a stiff-bristled brush to remove any loose or peeling paint, and then sweep the porch to remove any dust or debris.

To apply the primer, use a paintbrush or roller. If you are using a roller, use a brush to cut in around the edges and corners. Work in small sections to ensure thorough coverage. Apply the primer in thin, even coats, and make sure to follow the manufacturer’s instructions for drying time.

Once the primer is dry, you can start painting your porch. Remember to choose a paint that is specifically designed for exterior use, and follow the manufacturer’s instructions for application and drying time.

By following these steps, you can ensure that your porch is properly primed and ready for painting. A little extra effort in the priming stage can go a long way in ensuring a smooth and long-lasting paint job.

Painting Techniques
wooden-painting-techniques

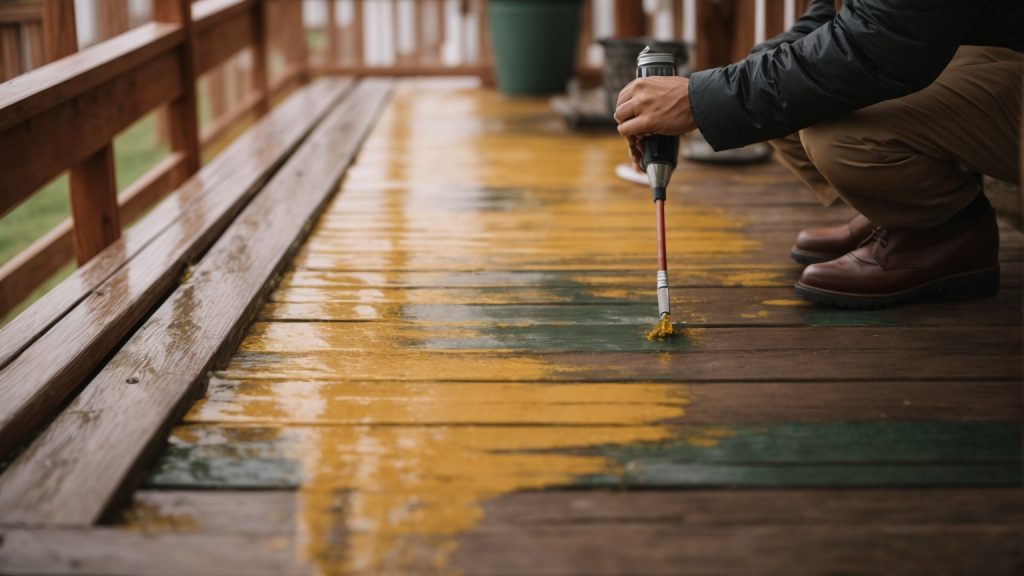
When it comes to painting your wooden porch, there are a few different techniques you can use. Each technique has its own advantages and disadvantages, so it’s important to choose the one that’s right for you.

Using a Brush

Using a brush is a great way to get a precise, detailed finish. It’s also a good option if you’re working in a small area or need to touch up certain spots. To use a brush, simply dip it into the paint and apply it to the wood in smooth, even strokes. Be sure to work in the direction of the wood grain to get the best results.

One downside to using a brush is that it can be time-consuming, especially if you’re painting a large area. It can also be difficult to avoid brush marks, so you may need to do some sanding and touch-ups after the paint has dried.

Using a Roller

Using a roller is a faster way to paint your porch, especially if you’re working in a large area. It’s also a good option if you want a smooth, even finish. To use a roller, simply dip it into the paint and roll it onto the wood in long, even strokes. Be sure to work in sections to avoid overlapping.

One downside to using a roller is that it can be difficult to get into tight corners and edges. You may need to use a brush to touch up these areas after the paint has dried.

Using a Sprayer

Using a sprayer is the fastest way to paint your porch, especially if you’re working in a large area. It’s also a good option if you want a smooth, even finish without any brush marks. To use a sprayer, simply fill it with paint and spray it onto the wood in long, even strokes. Be sure to work in sections to avoid overlapping.

One downside to using a sprayer is that it can be messy and difficult to control. You may also need to use a brush to touch up certain areas after the paint has dried. Additionally, you’ll need to take extra precautions to protect nearby surfaces from overspray.

Maintenance and Care

Taking care of your newly painted wooden porch will help it look great for years to come. Here are some tips for routine cleaning and touch-ups and repairs.

Routine Cleaning

Regular cleaning is important to prevent dirt and grime buildup that can damage your porch’s finish. Here are some tips for keeping your porch clean:

  • Sweep your porch regularly to remove dirt, leaves, and other debris. Use a broom with soft bristles to avoid scratching the surface.
  • Use a mild soap and water solution to clean your porch. Avoid using harsh chemicals or abrasive cleaners that can damage the finish.
  • Rinse with a hose or pressure washer, being careful not to use too much pressure that can damage the wood.
  • Dry your porch thoroughly after cleaning to prevent water damage.

Touch-Ups and Repairs

Even with proper care, your porch may need touch-ups and repairs from time to time. Here are some tips for keeping your porch looking its best:

  • Check your porch regularly for any signs of damage, such as cracks, peeling paint, or rot. Repair any damage as soon as possible to prevent further damage.
  • Sand any rough spots or peeling paint before applying touch-up paint. Use a fine-grit sandpaper and be careful not to sand too much of the surrounding area.
  • Use a high-quality exterior paint that is designed for wooden surfaces. Apply the paint with a brush or roller, following the manufacturer’s instructions.
  • Allow the paint to dry completely before using your porch.

By following these tips, you can keep your wooden porch looking great for years to come.

Safety Precautions

When painting your wooden porch, it’s important to take certain safety precautions to protect yourself and those around you. Here are some safety tips to keep in mind:

Use of Protective Gear

Before you start painting, make sure to wear the appropriate protective gear. This includes gloves, protective eyewear, and a mask to prevent inhaling any paint fumes. In addition, make sure to wear clothing that you don’t mind getting dirty or potentially ruined by paint.

Proper Ventilation

It’s important to ensure that you have proper ventilation when painting your porch. This means opening windows, doors, and using fans to circulate air. If you’re using a paint sprayer, make sure to wear a respirator to prevent inhaling any paint particles.

In addition, keep in mind that some paints and solvents can be flammable, so avoid smoking or using any open flames near the paint. Store all paint and solvents in a cool, dry place away from any heat sources.

By taking these safety precautions, you can ensure that you and your loved ones stay safe while painting your porch.
How to Paint Outdoor Wooden Steps: A Beginner's Guide

Are you looking to spruce up your outdoor space? One way to do so is by painting your wooden steps. Not only does this add a pop of color, but it also helps protect the wood from weather damage. However, painting outdoor wooden steps can be a bit tricky if you don’t know what you’re doing.

First, it’s important to properly prepare the surface before painting. This includes sanding down any rough spots and wiping down the steps to remove any dust or debris. Once the surface is prepped, it’s time to choose the right type of paint. Look for a paint that is specifically designed for exterior use, as it will be able to withstand temperature changes and moisture. And don’t forget to prime the surface before applying the paint to ensure a smooth and even finish.

With the right preparation and materials, painting your outdoor wooden steps can be a fun and easy DIY project. Not only will it add some personality to your outdoor space, but it will also help protect your steps from the elements. Keep reading for more tips and tricks on how to paint your outdoor wooden steps like a pro.

Choosing the Right Paint

When it comes to painting outdoor wooden steps, choosing the right paint is crucial. You want a paint that will not only look great but also provide long-lasting protection against the elements. Here are some factors to consider when choosing the right paint for your outdoor wooden steps.

Weather-Resistant Paints

Outdoor wooden steps are exposed to the elements, including rain, snow, and sunlight. Weather-resistant paints are designed to withstand these conditions and provide long-lasting protection. Look for paints that are labeled as “exterior” or “outdoor” and are formulated to resist fading, cracking, and peeling. Some popular options include water-based acrylic, oil-based alkyd, and deck and porch paint.

Non-Slip Paints

Safety should also be a consideration when choosing a paint for your outdoor wooden steps. Non-slip paints are designed to provide traction and reduce the risk of slips and falls. Look for paints that are labeled as “non-slip” or “anti-slip” and are formulated with additives that create a textured surface. Some popular options include epoxy-based paints and paints with sand or grit additives.

When choosing a paint for your outdoor wooden steps, consider both the weather resistance and safety features of the paint. With the right paint, you can not only improve the appearance of your steps but also ensure their longevity and safety for years to come.

Preparing the Wooden Steps

Before painting your outdoor wooden steps, you need to prepare the surface to ensure that the paint adheres properly and lasts longer. This section will outline the steps you need to take to prepare your wooden steps for painting.

Cleaning the Steps

The first step in preparing your wooden steps for painting is to clean them thoroughly. Here’s how to do it:

  1. Remove any loose dirt and debris from the steps using a stiff-bristled brush or broom.
  2. Mix a solution of warm water and mild detergent in a bucket.
  3. Dip a scrub brush into the solution and scrub the steps, paying particular attention to any areas with stains or discoloration.
  4. Rinse the steps thoroughly with a hose or pressure washer.
  5. Allow the steps to dry completely before proceeding.

If there is any mold on the stairs, mix one quart of bleach with one gallon of water and use the solution to scrub the stairs with a stiff-bristle brush. Rinse with clear water and suction all standing water away with a wet vac. Leave the wood to dry completely.

Sanding the Steps

After cleaning the steps, the next step is to sand them to create a smooth surface for painting. Follow these steps:

  1. Use a coarse grit sandpaper to remove any rough spots or splinters on the steps.
  2. Follow up with a finer grit sandpaper to smooth out the surface.
  3. Wipe down the steps with a clean cloth to remove any dust or debris.

If there are any gaps, holes or cracks, fill them with exterior-grade two-part epoxy wood filler, says Minwax.

By following these steps, you will have prepared your wooden steps for painting and ensured that the paint will adhere properly and last longer.

Applying Primer

When painting outdoor wooden steps, applying primer is a crucial step to ensure a smooth and long-lasting finish. In this section, we will discuss the importance of choosing the right primer and the primer application process.

Choosing the Right Primer

Choosing the right primer is essential to ensure that the paint adheres to the wooden steps and lasts for a long time. Here are some factors to consider when choosing a primer for your outdoor wooden steps:

  • Type of wood: Different types of wood require different types of primer. For example, if you are painting cedar or redwood steps, choose a primer that is specifically designed for these types of wood.

  • Exposure to elements: If your steps are exposed to the elements, choose a primer that is designed for outdoor use. Outdoor primers are formulated to resist moisture, mildew, and UV rays, which can cause the paint to fade or peel.

  • Paint compatibility: Make sure the primer you choose is compatible with the paint you plan to use. Check the paint manufacturer’s instructions to see which primer works best with their paint.

Primer Application Process

Once you have chosen the right primer for your outdoor wooden steps, it’s time to apply it. Here’s a step-by-step guide to the primer application process:

  1. Clean the steps: Before applying primer, make sure the steps are clean and free of dust, dirt, and debris. Use a stiff-bristled brush or a pressure washer to clean the steps thoroughly.

  2. Sand the steps: Sand the surface of the steps to create a slightly rough texture. This will help the primer adhere better to the wood. Use a medium-grit sandpaper to avoid scratching the wood too deeply.

  3. Apply the primer: Apply the primer to the steps using a brush or a roller. Make sure to apply the primer evenly and cover the entire surface of the steps. If you are using a roller, use a long-handled roller to reach the top of the steps.

  4. Let the primer dry: Let the primer dry completely before painting. The drying time will depend on the type of primer you are using and the weather conditions. Check the primer manufacturer’s instructions for drying times.

By following these steps, you can ensure that your outdoor wooden steps are properly primed and ready for painting. Applying primer is an essential step that will help the paint adhere better to the wood and last for a long time.

Painting the Steps

When it comes to painting your outdoor wooden steps, there are a few things to keep in mind to ensure a successful project. In this section, we will cover two sub-sections: Choosing the Right Brush and Paint Application Process.

Choosing the Right Brush

Choosing the right brush is essential to achieving a smooth and even finish. A high-quality brush will make the job easier and save you time in the long run. Here are some things to keep in mind when selecting a brush:

  • Bristle Type: Synthetic bristles work well with latex paints, while natural bristles are better suited for oil-based paints.
  • Size: A 2-3 inch brush is ideal for painting steps.
  • Shape: A flat brush is best for painting flat surfaces, while an angled brush is better for painting edges and corners.

Paint Application Process

Before you begin painting, make sure your steps are clean and dry. Follow these steps for a successful paint application:

  1. Prime the Steps: Apply a primer to the steps to help the paint adhere better and last longer. Use a brush to apply the primer evenly, and allow it to dry completely before painting.

  2. Stir the Paint: Stir the paint thoroughly before using it to ensure an even consistency.

  3. Apply the Paint: Using your chosen brush, apply the paint in long, even strokes. Start at the top of the steps and work your way down. Be sure to cover all areas of the steps, including the edges and corners.

  4. Allow the Paint to Dry: Allow the first coat of paint to dry completely before applying a second coat. Follow the manufacturer’s instructions for drying time.

  5. Apply a Second Coat: Apply a second coat of paint using the same technique as the first coat. This will help ensure a smooth and even finish.

By following these simple steps, you can paint your outdoor wooden steps with ease and achieve a professional-looking finish.

Maintenance Tips

Taking care of your outdoor wooden steps is essential to ensure they last for years to come. Regular maintenance will keep them looking beautiful and prevent damage from occurring. Here are some tips to help you maintain your outdoor wooden steps:

Regular Cleaning

Regular cleaning is crucial to keeping your outdoor wooden steps looking their best. Dirt, debris, and moisture can accumulate on the surface, causing damage over time. To clean your steps, follow these steps:

  • Sweep the steps to remove any loose dirt or debris.
  • Use a garden hose to rinse the steps thoroughly.
  • Mix a solution of mild soap and water.
  • Use a soft-bristled brush to scrub the steps with the soap solution.
  • Rinse the steps thoroughly with clean water.
  • Allow the steps to dry completely before walking on them.

Periodic Repainting

Over time, the paint on your outdoor wooden steps will begin to fade and peel. When this happens, it’s time to repaint them. Here are some tips to help you repaint your outdoor wooden steps:

  • Sand the steps to remove any loose paint or rough spots.
  • Wipe the steps with a clean cloth to remove any dust or debris.
  • Apply a coat of primer to the steps.
  • Allow the primer to dry completely.
  • Apply two coats of paint to the steps, allowing each coat to dry completely before applying the next.

Damage Prevention

Preventing damage to your outdoor wooden steps is essential to ensuring they last for years to come. Here are some tips to help you prevent damage:

  • Keep the steps clean and free of debris.
  • Avoid using harsh chemicals or cleaning products on the steps.
  • Use a non-slip coating on the steps to prevent slips and falls.
  • Repair any damage to the steps as soon as possible to prevent further damage.

By following these maintenance tips, you can keep your outdoor wooden steps looking their best and prevent damage from occurring.

Safety Precautions

When painting outdoor wooden steps, it’s important to take safety precautions to protect yourself and others. Here are some tips to keep in mind:

Using Safety Equipment

Make sure to wear appropriate safety equipment when painting your outdoor wooden steps. This includes:

  • Safety goggles to protect your eyes from paint splatters and fumes
  • A dust mask to protect your lungs from dust and fumes
  • Gloves to protect your hands from paint and chemicals

Wearing safety equipment can help prevent injuries and keep you safe while painting.

Proper Ventilation

It’s important to have proper ventilation when painting outdoor wooden steps. This helps prevent the buildup of fumes and ensures that you have fresh air to breathe. Here are some tips to keep in mind:

  • Open windows and doors to allow fresh air to circulate.
  • Use fans to help circulate air and reduce fumes.
  • Avoid painting on windy days, as this can cause fumes to blow around and potentially harm others.

By following these safety precautions, you can ensure that your painting project is safe and enjoyable.

factors-affecting-drying-time

How Long Does It Take for Wood Stain to Dry on a Deck? A Quick Guide

If you’re planning to stain your deck, you may be wondering how long it takes for the stain to dry. The drying time for wood stain on a deck depends on several factors, including the type of wood, the type of stain, and the weather conditions. In general, you can expect wood stain to take anywhere from 24 to 48 hours to dry on a deck.

One of the most important factors that affects the drying time of wood stain on a deck is the type of wood you’re working with. Hardwood decks tend to dry faster than softwood decks, since hardwood is less porous and absorbs less moisture. Softwood decks, on the other hand, are more porous and tend to take longer to dry. Additionally, the type of stain you use can also affect the drying time. Oil-based stains generally take longer to dry than water-based stains, but they also tend to be more durable.

Understanding Wood Stain

If you’re planning on staining your deck, it’s important to understand what wood stain is and how it works. Wood stain is a type of finish that is applied to wood surfaces to enhance their natural color, protect them from the elements, and improve their durability. Stains are available in a wide range of colors and finishes, from clear to opaque, and can be oil-based or water-based.

When you apply wood stain to a deck, it penetrates the wood fibers and enhances the natural grain pattern. The stain also provides a layer of protection against moisture, UV rays, and other environmental factors that can cause damage to the wood. The type of stain you choose will depend on the look you want to achieve and the level of protection you need.

Oil-based stains are a popular choice for decks because they penetrate deeply into the wood and provide long-lasting protection. They are also easy to apply and can be used on a variety of wood types. However, they do take longer to dry than water-based stains, and they can emit strong odors during the application process.

Water-based stains are another option for deck staining. They dry faster than oil-based stains and emit fewer odors. They are also easier to clean up with soap and water. However, they don’t penetrate the wood as deeply as oil-based stains, which means they may not provide as much protection against the elements.

In general, it’s best to choose a stain that is specifically designed for outdoor use and can withstand the elements. Look for stains that offer UV protection and are resistant to mildew, mold, and other types of damage. It’s also important to follow the manufacturer’s instructions for application and drying times to ensure that your deck looks great and stays protected for years to come.

Factors Affecting Drying Time

factors-affecting-drying-time

When it comes to staining a deck, one of the most important things to consider is how long it will take for the stain to dry. The drying time can vary depending on several factors, including the type of wood stain you use, the weather conditions, and the type of wood you are staining.

Type of Wood Stain

Different types of wood stains have different drying times. For example, water-based wood stains generally dry faster than oil-based stains. Water-based stains can take around 3-4 hours to dry to the touch and up to 24-48 hours to fully cure. Oil-based stains, on the other hand, can take anywhere from 24-48 hours to dry and up to 72 hours to fully cure.

Weather Conditions

The weather conditions can also affect the drying time of your wood stain. High humidity levels can extend the drying time of water-based stains by several hours. Similarly, if the temperature is too cold, the stain may not dry properly. Ideally, the temperature should be between 50-90°F with low humidity levels for optimal drying conditions.

Wood Type

The type of wood you are staining can also affect the drying time of your wood stain. Softwoods such as pine and cedar tend to absorb stain more quickly than hardwoods like oak and maple. This means that softwoods may dry faster, but they may also require more coats of stain to achieve the desired color. Hardwoods, on the other hand, may take longer to dry, but they may require fewer coats of stain.

In summary, the drying time of wood stain on a deck can vary depending on several factors, including the type of wood stain, weather conditions, and wood type. By considering these factors, you can ensure that your deck stain dries properly and looks great for years to come.

General Drying Time for Wood Stain

When it comes to staining a deck, one of the most important things to consider is drying time. You don’t want to apply a second coat of stain too soon, or you risk ruining the finish. On the other hand, you don’t want to wait too long either, as this can cause the wood to become too dry and prevent the stain from soaking in properly.

On average, wood stain takes about 24 to 48 hours to dry completely on a deck. However, the exact drying time can vary depending on several factors, including the type of wood, the type of stain, and the weather conditions.

For example, if you are staining a softwood like pine, it will likely dry faster than a hardwood like oak. Similarly, if you are using an oil-based stain, it will typically take longer to dry than a water-based stain.

In addition to these factors, the temperature and humidity levels can also affect the drying time of wood stain. If it is hot and dry outside, the stain will dry faster, while cooler and more humid conditions will slow down the drying process.

To ensure that your deck stain dries properly, it is important to follow the manufacturer’s instructions carefully. This may include waiting a certain amount of time between coats, as well as avoiding heavy foot traffic or exposure to water until the stain is fully dry. By doing so, you can help ensure that your deck looks beautiful and lasts for years to come.

How to Tell if Your Wood Stain is Dry

how-to-tell-if-your-wood-stain-is-dry

After applying wood stain to your deck, you might be wondering how long it will take to dry. It’s important to let the stain dry completely before walking on it or placing any furniture on it, as it can easily smudge or transfer onto other surfaces. Here are some ways to tell if your wood stain is dry:

1. Check the Touch

One of the easiest ways to tell if your wood stain is dry is to touch it. If it feels dry to the touch, then it’s likely dry. However, be careful not to press too hard or scratch the surface with your fingernail, as this can cause damage.

2. Look for Glossiness

Another way to tell if your wood stain is dry is to look for glossiness. If the stain is still shiny or glossy, then it’s likely still wet. Once it dries, the glossiness will disappear.

3. Smell the Surface

If the wood stain is still wet, it will have a strong odor. Once it dries, the smell will dissipate. You can also try smelling the surface of the wood from a few inches away to see if it still has a strong odor.

4. Perform a Tape Test

Performing a tape test is a good way to check if the wood stain is dry. Simply place a piece of tape onto the surface of the wood and then peel it off. If the tape comes off cleanly without any stain residue, then the stain is dry.

5. Use a Moisture Meter

If you have a moisture meter, you can use it to check the moisture content of the wood. If the moisture content is below 15%, then the wood stain is likely dry. However, keep in mind that moisture meters can be expensive and may not be necessary for most DIY projects.

By following these tips, you can ensure that your wood stain is dry before moving on to the next step of your deck project. Remember to be patient and let the stain dry completely before using the deck.

Tips for Quick Drying

When staining a deck, you want to make sure it dries as quickly as possible so you can enjoy it sooner. Here are some tips to help speed up the drying process:

1. Choose the Right Stain

Water-based stains dry faster than oil-based stains. If you’re in a hurry, opt for a water-based stain. However, keep in mind that oil-based stains tend to last longer and provide better protection for your deck.

2. Check the Weather

The weather can greatly affect how quickly your stain dries. Choose a day with low humidity and moderate temperatures. Avoid staining on a rainy or excessively hot day.

3. Apply Thin Coats

Applying thick coats of stain can prolong the drying time. Instead, apply thin coats and let each coat dry completely before applying the next one.

4. Use a Fan

A fan can help circulate air and speed up the drying process. If you don’t have a fan, simply leave the deck open to the air and avoid covering it with a tarp or other material.

5. Add Heat

Adding heat can help dry the stain faster. You can use a heat gun or a hair dryer on a low setting to gently warm the surface of the deck. Just be careful not to overheat the wood or the stain.

By following these tips, you can help your deck stain dry faster and enjoy your newly stained deck sooner.

Safety Measures During Drying

safety-measures-during-drying

When it comes to wood stain, it’s important to take certain safety measures during the drying process. Here are a few things to keep in mind:

Ventilation

Make sure the area where you’re staining your deck is well-ventilated. This will help prevent the buildup of fumes, which can be harmful if inhaled. Consider opening windows and doors, or using a fan to circulate air.

Protective Gear

Wear protective gear, such as gloves and a mask, to prevent skin and respiratory irritation. Some wood stains contain chemicals that can be harmful if they come into contact with your skin or if you inhale them.

Keep Children and Pets Away

Keep children and pets away from the area where you’re staining your deck. Wood stain can be toxic if ingested, so it’s important to keep it out of reach.

Follow Manufacturer’s Instructions

Always follow the manufacturer’s instructions when it comes to drying times and safety precautions. Different types of wood stains may have different drying times and require different safety measures.

By following these safety measures, you can ensure that the wood stain on your deck dries properly and without any harm to yourself or others.

Frequently Asked Questions

How long does it take for deck stain to dry?

The drying time for deck stain can vary depending on several factors, such as the type of stain, humidity, temperature, and the porosity of the wood. On average, it may take 24 to 48 hours for deck stain to dry to the touch. However, it’s important to note that it may take up to 72 hours for the stain to fully cure.

How long should I wait before walking on a newly stained deck?

It’s best to wait at least 24 hours before walking on a newly stained deck. This will give the stain enough time to dry and cure properly. However, if the weather is humid or if the temperature is below 50°F, it’s best to wait longer to ensure that the stain has fully cured.

What happens if it rains on a freshly stained deck?

If it rains on a freshly stained deck, it can ruin the finish and cause water damage to the wood. It’s best to avoid staining your deck if rain is in the forecast for the next 24 to 48 hours. If it does rain unexpectedly, cover your deck with a tarp or plastic sheeting to protect it from the rain.

How long does it take for Behr solid stain to dry before rain?

Behr solid stain can take anywhere from 24 to 48 hours to dry before it’s safe from rain. However, it’s important to check the manufacturer’s instructions for specific drying times and other recommendations.

How long does Cabot deck stain take to dry?

Cabot deck stain can take anywhere from 24 to 48 hours to dry to the touch. However, it may take up to 72 hours for the stain to fully cure. It’s important to follow the manufacturer’s instructions for specific drying times and other recommendations.

How long should deck stain dry before applying a second coat?

It’s important to wait at least 24 hours before applying a second coat of deck stain. This will give the first coat enough time to dry and cure properly. However, it’s best to check the manufacturer’s instructions for specific recommendations on when to apply a second coat of stain.