Tag Archives: maintenance tips taking care

how-to-build-wooden-steps-a-beginners-guide-2

How to Build Wooden Steps: A Beginner's Guide

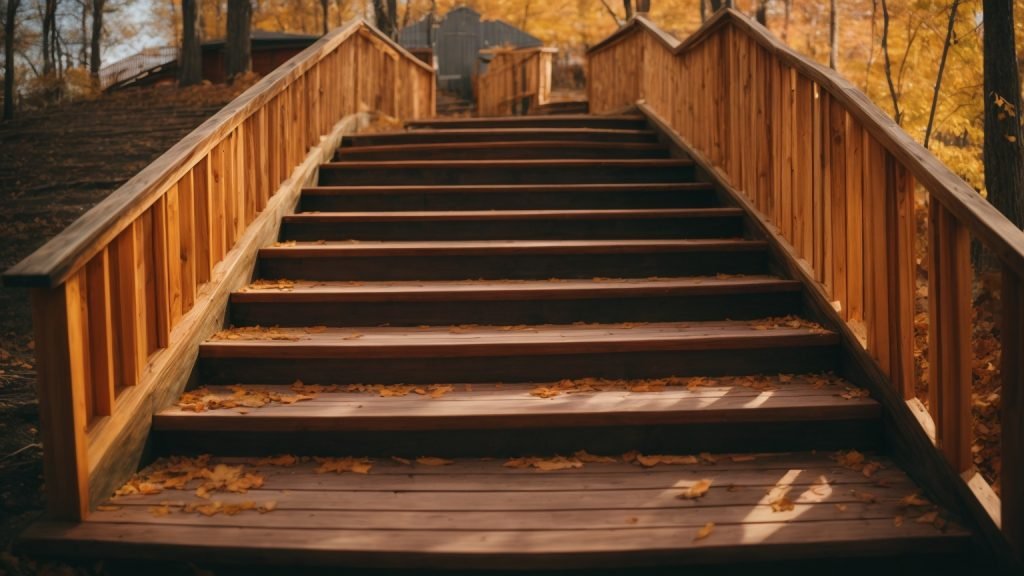
Are you looking to add some charm and functionality to your outdoor space? Building wooden steps can be a great way to enhance the look of your yard and provide easy access to different levels of your property. Whether you’re looking to build steps for a deck, patio, or garden, this article will provide you with the basics of how to build wooden steps.

Before you start building, it’s important to prepare the area where the steps will be located. This means removing any shrubs or plants and ensuring the ground is level. You may need to build up low spots with fill dirt so the area slopes away from your house. Once you’ve prepared the area, you’ll need to determine the height and width of the steps. This will depend on the location and purpose of the steps, as well as the materials you’ll be using.

Understanding the Basics of Wooden Steps

how-to-build-wooden-steps-a-beginners-guide-2

When it comes to building wooden steps, there are a few things you need to keep in mind. In this section, we’ll cover the basics of wooden steps, including the types of wood you can use and the safety measures you need to take.

Types of Wood

When it comes to choosing the right type of wood for your steps, there are a few things you need to consider. First, you want to choose a wood that is strong and durable, as your steps will need to support a lot of weight over time. Some of the most popular types of wood for steps include:

  • Cedar: A popular choice for outdoor steps, cedar is a durable and weather-resistant wood that is also resistant to insects and rot.
  • Redwood: Another popular choice for outdoor steps, redwood is a durable and weather-resistant wood that is also resistant to insects and rot.
  • Pressure-treated pine: A popular choice for indoor and outdoor steps, pressure-treated pine is a durable and affordable wood that is treated to resist insects and rot.

When choosing your wood, make sure to choose a type that is appropriate for your climate and the location of your steps.

Safety Measures

When building wooden steps, safety should always be your top priority. Here are a few safety measures you should take:

  • Use a level: Make sure your steps are level and evenly spaced to prevent tripping hazards.
  • Use non-slip treads: Consider using non-slip treads on your steps to prevent slipping, especially if your steps will be used in wet or icy conditions.
  • Install handrails: Handrails can provide additional support and stability when using your steps, especially for children and elderly individuals.
  • Use appropriate tools and equipment: Make sure you have the right tools and equipment for the job, and use them safely and appropriately.

By following these basic guidelines, you can ensure that your wooden steps are safe and durable for years to come.

Tools and Materials Needed

Building wooden steps can be a fun and rewarding DIY project. Before you get started, it’s important to gather all the necessary tools and materials. Here’s what you’ll need:

Tools

  • Circular saw
  • Jigsaw
  • Power drill
  • Hammer
  • Measuring tape
  • Carpenter’s square
  • Level
  • Safety glasses
  • Work gloves

Materials

  • Pressure-treated lumber (2x12s for stringers, 2x6s for treads, and 4x4s for posts)
  • Gravel or crushed stone
  • Concrete mix
  • Galvanized screws or nails
  • Post spikes or concrete anchors

Make sure to choose high-quality materials that are suitable for outdoor use. Pressure-treated lumber is a popular choice because it is durable and resistant to rot and insect damage. You’ll also need gravel or crushed stone to create a stable base for your steps, as well as concrete mix to anchor the posts.

In terms of tools, a circular saw and jigsaw are essential for cutting the lumber to size. A power drill is necessary for drilling pilot holes and attaching the pieces together with screws or nails. A measuring tape and carpenter’s square will help ensure accurate cuts and angles. Don’t forget to wear safety glasses and work gloves to protect yourself while working with power tools.

By gathering all the necessary tools and materials before you start, you’ll be well-prepared to tackle your wooden step project with confidence.

Designing Your Wooden Steps

When building wooden steps, it’s important to consider both functionality and aesthetics. In this section, we’ll cover the key factors to consider when designing your wooden steps.

Step Measurements

Before you start building your wooden steps, you need to measure the area where they will be installed. Here are the key measurements you’ll need to take:

  • Total Rise: Measure the height from the ground to the top of where the steps will end. This will determine the number of steps you need to build.
  • Total Run: Measure the horizontal distance from the bottom of the steps to the top.
  • Tread Depth: This is the horizontal depth of each step. It should be at least 10 inches for comfort and safety.
  • Riser Height: This is the vertical height of each step. It should be between 6 and 8 inches for safety and ease of use.

Once you have these measurements, you can start designing your steps.

Choosing the Design
choosing-the-design

When it comes to designing your wooden steps, there are a few different options to consider. Here are some popular designs:

  • Straight Steps: These are the most basic design, with steps that go straight up and down. They’re easy to build and work well in most situations.
  • L-Shaped Steps: These steps have a landing or platform halfway up, which makes them easier to climb and can add visual interest to your design.
  • U-Shaped Steps: These steps have two landings or platforms, making them ideal for longer staircases. They can be more difficult to build, but they offer a unique and impressive look.

When choosing your design, consider the overall style of your home and the surrounding landscape. You want your wooden steps to complement your property and enhance its curb appeal.

By taking accurate measurements and choosing a design that fits your needs and style, you can create beautiful and functional wooden steps that will last for years to come.

Building the Steps

When it comes to building wooden steps, there are three main steps you need to follow: cutting the wood, assembling the steps, and securing the steps. Here’s a breakdown of each step:

Cutting the Wood

Before you can start assembling your wooden steps, you’ll need to cut the wood to the right size. To do this, you’ll need a saw, a measuring tape, and a pencil. Here’s what you need to do:

  1. Measure the height and width of the area where you want to install the steps.
  2. Cut two pieces of wood to the width of the area where you want to install the steps.
  3. Cut two more pieces of wood to the height of the area where you want to install the steps.
  4. Cut several smaller pieces of wood to the same width as the two larger pieces. These will be used as the steps themselves.

Assembling the Steps

Once you’ve cut all of the wood to the right size, it’s time to start assembling the steps. Here’s what you need to do:

  1. Lay the two larger pieces of wood on the ground where you want to install the steps. These will be the sides of the steps.
  2. Place the smaller pieces of wood on top of the larger pieces, evenly spaced apart. These will be the steps themselves.
  3. Use a level to make sure each step is level before moving on to the next step.
  4. Once you’ve placed all of the steps, use a drill to attach them to the larger pieces of wood on either side.

Securing the Steps

After you’ve assembled the steps, it’s important to make sure they’re secure. Here’s what you need to do:

  1. Use wood glue to attach each step to the larger pieces of wood on either side.
  2. Once the glue has dried, use screws to attach each step to the larger pieces of wood on either side.
  3. Use a level to make sure the steps are still level after you’ve secured them.

By following these three steps, you’ll be able to build wooden steps that are sturdy, secure, and safe to use.

Finishing Touches

Once you have completed building your wooden steps, it’s time to give them a finishing touch. This will not only make them look more attractive but also protect them from the elements. Here are some steps you can take to finish your wooden steps.

Sanding the Steps

Before applying any finish, it’s important to sand your wooden steps. This will help smooth out any rough spots and ensure that the finish adheres properly. Start by using a coarse grit sandpaper, such as 60-grit, to remove any rough spots or splinters. Then, move on to a finer grit sandpaper, such as 120-grit, to smooth out the surface of the wood.

Make sure to sand in the direction of the grain to avoid damaging the wood. You can use a sanding block or an orbital sander to make the job easier. Once you’re done sanding, wipe down the steps with a damp cloth to remove any dust.

Applying the Finish

There are several types of finishes you can use on your wooden steps, including paint, stain, or varnish. Each has its own advantages and disadvantages, so choose the one that best suits your needs.

If you want to paint your steps, make sure to use a high-quality exterior paint that is designed for wood surfaces. Apply the paint in thin, even coats, and allow each coat to dry completely before applying the next.

If you prefer a natural look, you can use a stain to enhance the natural beauty of the wood. Choose a stain that is designed for exterior use and apply it in thin coats with a brush or rag. Make sure to wipe off any excess stain with a clean cloth.

Finally, if you want to protect your steps from the elements, you can use a varnish or sealer. These products will help prevent water damage and protect the wood from UV rays. Apply the varnish or sealer in thin coats, and allow each coat to dry completely before applying the next.

With these finishing touches, your wooden steps will look great and last for years to come.

Maintenance Tips

Taking care of your wooden steps is essential to ensure their longevity and safety. Here are some maintenance tips to keep them in good condition for years to come.

Regular Cleaning

Regular cleaning of your wooden steps is crucial to maintain their appearance and prevent the buildup of dirt and debris. Here are some steps to follow:

  • Sweep the steps regularly to remove dirt, leaves, and other debris.
  • Use a stiff-bristled brush to scrub the steps with a solution of mild soap and water.
  • Rinse the steps thoroughly with water and allow them to dry completely before use.
  • Avoid using a pressure washer as it can damage the wood.

Wood Treatment

Wooden steps are prone to damage from moisture, sunlight, and insects. To prevent this, it is essential to treat them regularly. Here are some tips to follow:

  • Apply a wood preservative to protect the wood from moisture and insects. Follow the manufacturer’s instructions for application and frequency of treatment.
  • Apply a coat of exterior wood sealer or stain to protect the wood from sunlight and weather damage. Choose a product that is suitable for your climate and follow the manufacturer’s instructions for application and frequency of treatment.
  • Inspect the steps regularly for signs of damage such as cracks, splinters, and rot. Repair any damage promptly to prevent further deterioration.

By following these maintenance tips, you can keep your wooden steps in good condition and ensure their safety for you and your family.


build-a-wooden-picnic-table

How to Build a Wooden Picnic Table: A Beginner's Guide

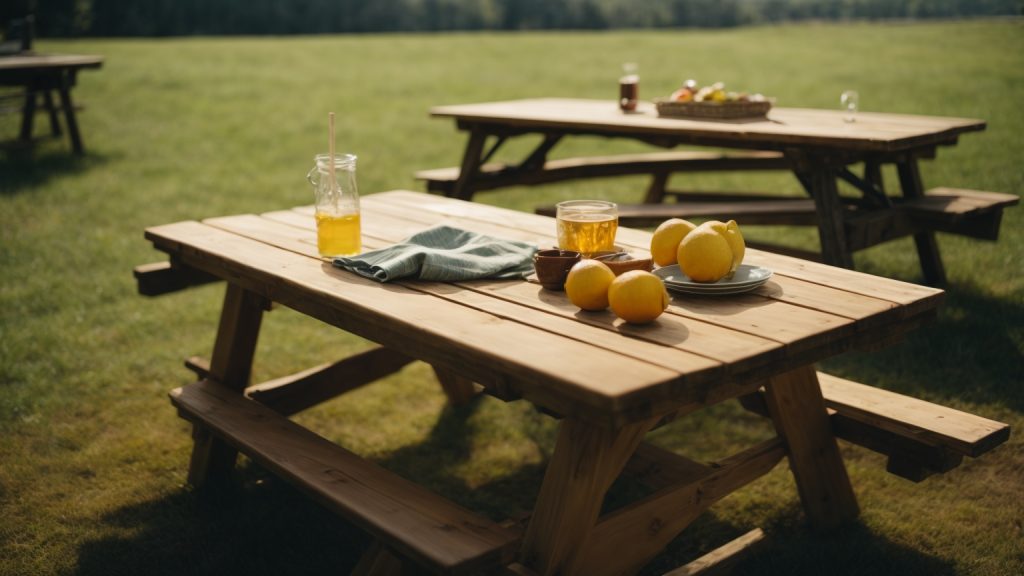
Building a wooden picnic table is a great way to add functionality and charm to your outdoor space. Whether you’re planning a family gathering or simply looking for a spot to enjoy your morning coffee, a sturdy picnic table can provide the perfect setting. With a few basic tools and some quality lumber, you can easily create a beautiful and functional picnic table that will last for years to come.

Before you get started, it’s important to choose the right type of wood for your project. Hardwood or pressure-treated lumber are popular choices, as they can withstand the outdoor elements in your area. Southern yellow pine is another strong and relatively inexpensive option. Additionally, you will need some basic tools such as a saw, drill, and measuring tape. Once you have your materials and tools ready, you can begin building your picnic table.

Understanding the Basics

build-a-wooden-picnic-table

When it comes to building a wooden picnic table, there are a few basics you need to understand before you get started. In this section, we’ll cover the types of wood you should use and the tools you’ll need to build a sturdy and reliable table.

Types of Wood

Choosing the right type of wood is crucial to building a picnic table that will last for years to come. Here are some of the most popular types of wood used for picnic tables:

  • Cedar: Cedar is a popular choice for outdoor furniture because it’s naturally resistant to rot and insects. It’s also lightweight and easy to work with.
  • Pressure-treated pine: Pressure-treated pine is a more affordable option that’s also resistant to rot and insects. However, it can be heavier and harder to work with than cedar.
  • Redwood: Redwood is a beautiful and durable wood that’s naturally resistant to decay and insects. However, it can be expensive and harder to find than other types of wood.

When choosing your wood, make sure to select boards that are straight and free of knots or cracks. You’ll also want to choose boards that are at least 1 inch thick to ensure your table is sturdy enough to hold up to regular use.

Required Tools

To build a wooden picnic table, you’ll need a few basic tools. Here’s a list of the tools you’ll need:

  • Circular saw: You’ll use a circular saw to cut your boards to the right length.
  • Drill: A drill is essential for drilling pilot holes and driving screws.
  • Screwdriver: You’ll need a screwdriver to tighten screws and attach hardware.
  • Clamps: Clamps will help hold your boards in place while you’re assembling your table.
  • Tape measure: You’ll use a tape measure to ensure your boards are cut to the right length.
  • Safety gear: Safety glasses and ear protection are essential when working with power tools.

Make sure to have all of your tools ready before you start building your picnic table. With the right tools and materials, you’ll be able to build a beautiful and functional picnic table that will be the centerpiece of your outdoor gatherings for years to come.

Designing the Picnic Table

When it comes to building a wooden picnic table, the design is an important aspect to consider. In this section, we will discuss the size and dimensions of the table as well as choosing a suitable design.

Size and Dimensions

The size of your picnic table will depend on how many people you plan on seating. A standard picnic table can seat six to eight people comfortably. The dimensions of a typical picnic table are as follows:

  • Tabletop length: 6 feet
  • Tabletop width: 2 feet
  • Bench length: 6 feet
  • Bench width: 1 foot

However, you can adjust the dimensions to fit your specific needs. Keep in mind that the tabletop should be at least 28 inches off the ground, and the benches should be about 18 inches off the ground.

Choosing a Design

There are many different designs to choose from when it comes to building a wooden picnic table. Some popular options include:

  • Traditional A-frame design
  • Cross-legged design
  • Detached benches design

The traditional A-frame design is a classic look that is easy to build. The cross-legged design is a more modern look that provides more legroom. The detached benches design allows for more flexibility and can be moved around to accommodate different seating arrangements.

When choosing a design, consider your skill level and the tools you have available. Some designs may be more complicated than others and require more advanced woodworking skills. Additionally, some designs may require specialized tools that you may not have access to.

Overall, the design of your picnic table should be functional and comfortable for your guests. With the right design and dimensions, you can build a picnic table that will provide years of outdoor enjoyment.

Preparing the Materials

Before you begin building your wooden picnic table, you need to prepare all the necessary materials. Here are the steps you need to follow:

Cutting the Wood

The first step in preparing your materials is to cut the wood to the right size. You will need to cut the following pieces:

  • Four legs, each measuring 28 inches long
  • Two seat supports, each measuring 51 inches long
  • Two tabletop boards, each measuring 72 inches long
  • Five tabletop braces, each measuring 28 inches long

Make sure to measure and mark the wood accurately before cutting it. Use a saw to make the cuts, and be sure to wear safety goggles and gloves to protect yourself.

Sanding and Smoothing

After cutting the wood, you need to sand and smooth the edges to ensure that they are safe and comfortable to use. Here’s how to do it:

  1. Start by using a coarse-grit sandpaper (around 60 grit) to remove any rough spots or splinters on the wood.
  2. Next, use a medium-grit sandpaper (around 120 grit) to smooth out the surface of the wood.
  3. Finally, use a fine-grit sandpaper (around 220 grit) to give the wood a smooth, polished finish.

Be sure to sand all the edges and corners of the wood, as well as the surfaces that will be in contact with your skin. This will help prevent splinters and make the picnic table more comfortable to use.

By following these steps, you can ensure that your wooden picnic table is safe, sturdy, and comfortable to use.

Assembling the Table

assembling-the-table

Now that you have all the pieces cut and sanded, it’s time to put them together. In this section, we’ll go over how to assemble your wooden picnic table. This process can be completed in a few hours with the help of a friend or family member.

Building the Table Top

The first step in assembling your picnic table is to build the table top. Lay out the five 2×6 boards on a flat surface, making sure they are flush with each other. Use clamps to hold them together and drill pilot holes through the boards where they will be attached to the braces.

Next, attach the two braces to the underside of the table top. Make sure they are centered and flush with the edges of the boards. Use wood screws to secure them in place.

Constructing the Seats

Once the table top is assembled, it’s time to build the seats. Lay out the four 2×6 boards for each seat on a flat surface. Use clamps to hold them together and drill pilot holes through the boards where they will be attached to the braces.

Attach the two braces to the underside of each seat board, making sure they are centered and flush with the edges of the boards. Use wood screws to secure them in place.

Attaching the Legs

Now it’s time to attach the legs to the table top and seats. Stand the table top upright and attach the legs to the braces using wood screws. Make sure the legs are flush with the edges of the table top and perpendicular to the ground.

Next, attach the legs to the braces on the seats using wood screws. Make sure the legs are flush with the edges of the seats and perpendicular to the ground.

Finally, flip the table over and check that all the legs are level and secure. If necessary, adjust the legs until the table sits level on the ground.

Congratulations, you have successfully assembled your wooden picnic table!

Finishing Touches

Once you have built your wooden picnic table, it’s time to add the finishing touches. This will not only give your table a polished look but also protect it from the elements. In this section, we will discuss two important finishing touches: applying wood stain and adding a protective coating.

Applying Wood Stain

Wood stain is a great way to enhance the natural beauty of your wooden picnic table while providing it with additional protection. Follow these steps to apply wood stain:

  1. Sand the surface of the table to remove any rough spots or splinters.
  2. Wipe the table with a damp cloth to remove any dust or debris.
  3. Apply the wood stain using a brush, roller or sprayer. Be sure to apply the stain in the direction of the wood grain.
  4. Allow the stain to dry completely before applying a second coat if desired.

Note: Always follow the manufacturer’s instructions when applying wood stain.

Adding Protective Coating

Adding a protective coating to your picnic table will help it withstand the elements and last longer. Here are some options for protective coatings:

  • Polyurethane: This is a popular choice for outdoor furniture. It provides a clear, durable finish that is resistant to water and UV rays.
  • Varnish: Similar to polyurethane, varnish provides a clear, hard finish that protects against water and UV rays.
  • Paint: If you want to add some color to your picnic table, paint is a good option. Make sure to use an outdoor paint that is specifically designed for wood.

Here are the steps to add a protective coating to your picnic table:

  1. Sand the surface of the table to remove any rough spots or splinters.
  2. Wipe the table with a damp cloth to remove any dust or debris.
  3. Apply the protective coating using a brush or roller. Be sure to apply in the direction of the wood grain.
  4. Allow the coating to dry completely before applying a second coat if desired.

Note: Always follow the manufacturer’s instructions when applying a protective coating.

Maintenance Tips

Taking care of your wooden picnic table is crucial to ensure that it lasts for many years of outdoor enjoyment. Here are some maintenance tips to keep your picnic table looking great and in good condition.

Regular Cleaning

Cleaning your picnic table regularly is essential to prevent dirt and grime buildup. Use a mild detergent and warm water to clean the surface of the table. Avoid using harsh chemicals or abrasive cleaners that can damage the wood. Scrub the surface gently with a soft-bristled brush, and rinse thoroughly with water.

After cleaning, let the picnic table dry completely before using it again. You can also apply a wood sealer or protector to help prevent water damage and maintain the natural color of the wood.

Yearly Inspections

Inspect your picnic table at least once a year to check for any signs of damage or wear. Look for cracks, splits, or splinters in the wood, and check the stability of the table legs and supports. Tighten any loose screws or bolts, and replace any damaged or broken parts.

If you notice any signs of rot or decay, it’s essential to address the issue promptly. Remove any damaged wood and replace it with new boards. Applying a wood preservative can also help prevent further decay and extend the life of your picnic table.

By following these maintenance tips, you can keep your wooden picnic table in excellent condition for many years of outdoor fun and relaxation.

make-a-wooden-doll-house

How to Make a Wooden Doll House: A Beginner's Guide

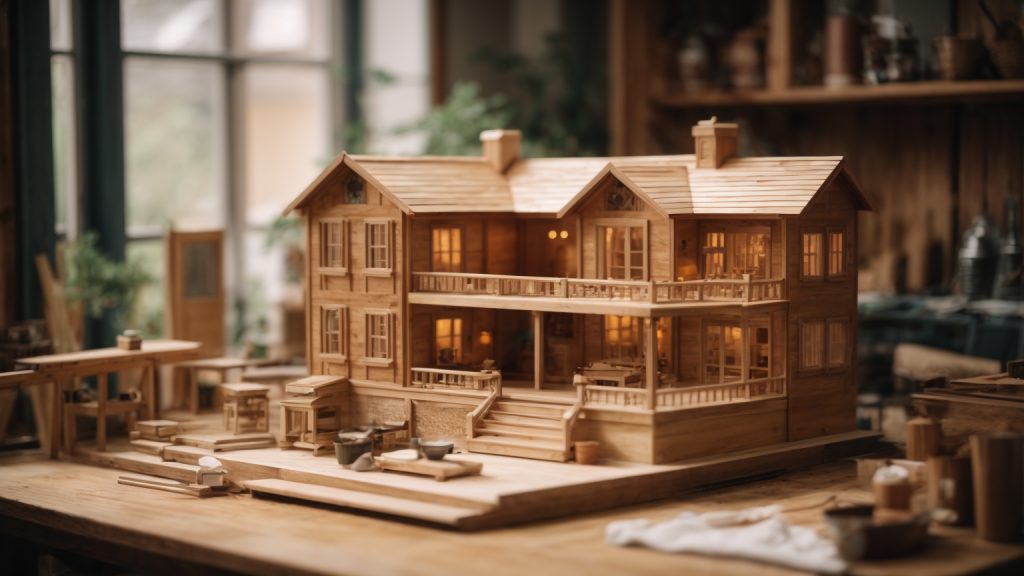
Are you looking for a fun and creative project to do with your kids or just for yourself? Making a wooden dollhouse from scratch is a great way to spend time together and create something beautiful that you can cherish for years to come. With a little bit of planning, patience, and some basic woodworking skills, you can build a dollhouse that is customized to your liking and fits perfectly in your home.

Before you start building your wooden dollhouse, there are a few things you need to consider. First, decide on the size and style of the dollhouse you want to build. You can choose from a variety of designs, such as a Victorian-style mansion or a modern minimalist house. You also need to determine what materials you will need and what tools you will use. Once you have all the necessary supplies, you can get started on your project. In the next section, we will go over some basic steps to help you build your very own wooden dollhouse.

Choosing the Right Wood

When building a wooden dollhouse, choosing the right type of wood is crucial. You want to select a wood that is sturdy, easy to work with, and will hold up over time. In this section, we will discuss how to identify different types of wood and how to select the best wood for dollhouses.

Identifying Different Types of Wood

Wood can be classified into two main categories: hardwood and softwood. Hardwood comes from deciduous trees such as oak, maple, and cherry, while softwood comes from coniferous trees such as pine, cedar, and spruce.

Hardwood is generally more expensive than softwood, but it is also stronger and more durable. Softwood is easier to work with and is often used in construction due to its affordability.

When selecting wood for your dollhouse, it’s important to consider the grain pattern. The grain pattern refers to the direction in which the wood fibers run. Some woods, such as oak, have a prominent grain pattern, while others, such as maple, have a more subtle grain pattern.

Selecting the Best Wood for Doll Houses

When selecting wood for your dollhouse, there are a few factors to consider. First, you want to choose a wood that is easy to work with. Softwoods such as pine and cedar are great options for beginners because they are easy to cut and shape.

Second, you want to choose a wood that is sturdy and will hold up over time. Hardwoods such as oak and maple are great options for dollhouses because they are strong and durable.

Finally, you want to choose a wood that will look great once it is finished. Woods such as cherry and mahogany have a beautiful finish and are perfect for dollhouses that will be on display.

In summary, when choosing wood for your dollhouse, consider the type of wood, the grain pattern, and the ease of use. Softwoods such as pine and cedar are great for beginners, while hardwoods such as oak and maple are strong and durable. Choose a wood that will look great once finished, and your dollhouse will be a beautiful addition to your collection.

Designing Your Doll House

make-a-wooden-doll-house

When it comes to designing your wooden doll house, there are a few things to consider to make sure your final product is everything you want it to be. Here are some tips to get you started:

Sketching Your Design

Before you start building, it’s a good idea to sketch out your design. This will help you visualize the final product and make any necessary adjustments before you start cutting wood. You can use graph paper to create a scale drawing of your design, or simply sketch it out on a piece of paper.

Consider the number of rooms you want, the size of each room, and any special features you want to include, such as a balcony or porch. Think about the style of the house you want to create, whether it’s a cozy cottage or a grand mansion.

Size and Scale Considerations

When designing your doll house, it’s important to consider the size and scale of your dolls. Make sure the rooms are large enough to accommodate your dolls and any furniture you plan to include. You should also consider the overall size of the doll house, as this will affect the amount of materials you will need and the time it will take to build.

Another important consideration is the scale of your doll house. Most doll houses are built to a scale of 1:12, which means that one inch of doll house equals one foot of real life. However, you can choose a different scale if you prefer. Just make sure all the elements of your doll house are in proportion to each other.

By taking the time to carefully design your wooden doll house, you’ll end up with a beautiful and functional toy that your child will love to play with for years to come.

Cutting the Wood

Cutting the wood is an essential part of building a wooden dollhouse. In this section, we will discuss safety measures and how to use a saw when cutting the wood.

Safety Measures

Before you start cutting the wood, it is important to take some safety measures to avoid any accidents. Here are some tips to keep in mind:

  • Wear safety goggles to protect your eyes from sawdust and wood chips.
  • Use a dust mask to avoid inhaling sawdust.
  • Wear earplugs or earmuffs to protect your ears from the noise of the saw.
  • Use a clamp to secure the wood to the workbench to avoid any movement while cutting.
  • Keep your fingers away from the saw blade and use a push stick to guide the wood through the saw.

Using a Saw

There are different types of saws you can use to cut the wood for your dollhouse, such as a jigsaw, miter saw, or circular saw. Here are some tips on how to use a saw:

  • Read the instructions carefully before using the saw and make sure you know how to operate it.
  • Adjust the blade depth according to the thickness of the wood you are cutting.
  • Use a straight edge or a square to guide the saw for straight cuts.
  • For curved cuts, use a jigsaw and follow the lines carefully.
  • Use a miter saw to make angled cuts for corners and roof pieces.
  • Always keep the saw blade clean and sharp for better results.

By following these safety measures and tips on how to use a saw, you can cut the wood for your dollhouse accurately and safely.

Assembling the Doll House

photoreal_process_making_a_wooden_doll_house_1

Before you begin assembling your wooden doll house, make sure you have all the necessary materials and tools. You will need wood glue, nails, a hammer, a saw, and sandpaper. Once you have everything you need, you can begin the assembly process.

Joining the Pieces

The first step in assembling your doll house is to join the pieces together. To do this, you will need to use wood glue and nails. Apply a small amount of glue to the edges of the pieces you are joining together, and then use nails to secure them in place. Make sure the pieces are aligned properly before nailing them together.

It’s important to work slowly and carefully when joining the pieces together. Take your time to ensure that each piece is properly aligned and secured before moving on to the next one.

Securing with Glue

Once you have joined all the pieces together, you can use wood glue to reinforce the joints. Apply a small amount of glue to each joint, and then use a brush or your finger to spread it evenly. Make sure you apply enough glue to fully cover the joint, but not so much that it drips or runs.

After applying the glue, use clamps or weights to hold the pieces in place while the glue dries. This will help ensure that the joints are strong and secure.

Once the glue has dried, use sandpaper to smooth out any rough edges or surfaces. This will give your doll house a polished and professional look.

In conclusion, assembling a wooden doll house requires patience and attention to detail. By following these steps and taking your time, you can create a beautiful and sturdy doll house that will provide hours of enjoyment.

Finishing Touches

Once you have completed building your wooden dollhouse, it’s time to add the finishing touches that will make it look complete and beautiful. This section will cover two important sub-sections: Sanding the Edges and Painting and Decorating.

Sanding the Edges

Before painting and decorating your dollhouse, it’s essential to sand the edges to ensure that they are smooth and free of splinters. You can use a sanding block or sandpaper to sand the edges. Be sure to sand in the direction of the grain to avoid creating scratches on the surface of the wood.

Once you have sanded the edges, you can use a damp cloth to wipe away any dust or debris. Then, let the dollhouse dry completely before moving on to the next step.

Painting and Decorating

Painting and decorating your dollhouse is where you can get creative and add your personal touch. You can use a variety of materials such as paint, wallpaper, fabric, and stickers to decorate your dollhouse.

Before painting, it’s important to prime the surface with a primer to ensure that the paint adheres properly. You can use acrylic or latex paint to paint the dollhouse. Be sure to use a paintbrush that is appropriate for the size of the surface you are painting.

When decorating the dollhouse, you can use wallpaper to add patterns and texture to the walls. You can also use fabric to create curtains and bedding for the dollhouse. Stickers can be used to add small details such as flowers or animals.

It’s important to let each layer of paint or glue dry completely before adding another layer. This will ensure that the final result looks neat and professional.

In conclusion, sanding the edges and painting and decorating the dollhouse are essential steps in completing your wooden dollhouse. With a little bit of creativity and patience, you can create a beautiful and unique dollhouse that you will be proud to display.

Maintenance Tips

Taking care of your wooden dollhouse is essential to ensure it lasts for years to come. Here are some maintenance tips to keep your dollhouse in top condition:

Cleaning Your Wooden Doll House

Cleaning your wooden dollhouse is a crucial part of maintenance. Here are some tips to help you keep your dollhouse clean:

  • Use a soft cloth or brush to remove dust and dirt from the surface of your dollhouse.
  • Avoid using water or any cleaning agents that contain harsh chemicals as they can damage the wood.
  • If you need to clean the inside of your dollhouse, use a small vacuum cleaner or a soft brush to remove dust and dirt.
  • If you notice any stains or marks on your dollhouse, try using a mild soap and water solution to clean them off.

Minor Repairs

Over time, your wooden dollhouse may require minor repairs. Here are some tips to help you fix any minor issues:

  • If you notice any loose parts, use wood glue to reattach them.
  • If any parts of your dollhouse become damaged, use wood filler to fill in any cracks or holes.
  • If you need to repaint your dollhouse, use a primer before applying the paint to ensure it adheres properly to the wood.

By following these maintenance tips, you can ensure that your wooden dollhouse stays in great condition for years to come.

How to Build an Outdoor Wooden Table: A Friendly Guide

Building an outdoor wooden table is a great way to add functionality and style to your outdoor space. Whether you want to entertain guests, enjoy a meal with your family, or simply relax outside, a wooden table can provide the perfect setting. With the right tools and materials, building a wooden table can be a fun and rewarding DIY project.

To get started, you will need to choose the right type of wood for your table. Cedar, redwood, and teak are popular choices for outdoor furniture because they are durable and weather-resistant. You will also need to decide on the size and design of your table. Consider how many people you want to seat and what type of activities you will use the table for. Once you have a plan in place, you can start gathering your materials and tools.

Choosing the Right Wood

When building an outdoor wooden table, choosing the right type of wood is crucial to ensure its longevity and durability. Here are some factors to consider when selecting the right wood for your project.

Hardwood vs Softwood

The first thing to consider is whether to use hardwood or softwood. Hardwood is denser and more durable than softwood, making it a better choice for outdoor furniture. However, hardwood is also more expensive than softwood. Softwood is less dense and less expensive than hardwood, but it is still a good option for outdoor furniture as long as it is properly treated and maintained.

Weather-Resistant Woods

Another important factor to consider is the wood’s ability to withstand weather conditions. Some woods are naturally weather-resistant, while others require treatment to become resistant. Here are some popular weather-resistant woods:

Wood Characteristics
Teak Naturally weather-resistant, durable, expensive
Cedar Naturally weather-resistant, lightweight, affordable
Redwood Naturally weather-resistant, durable, expensive
Pressure-treated pine Requires treatment, affordable, widely available

It is important to note that even weather-resistant woods require regular maintenance to prolong their lifespan. This includes applying sealant or stain to protect the wood from moisture and UV rays.

By considering the type of wood and its weather-resistant properties, you can ensure that your outdoor wooden table will last for years to come.

Tools and Materials Needed

Building an outdoor wooden table requires a few essential tools and materials. Here is a list of what you will need to get started:

Tools

  • Miter saw
  • Drill
  • Kreg Jig
  • Clamps
  • Orbital sander
  • Jigsaw
  • Tape measure
  • Square
  • Pencil
  • Safety glasses
  • Ear protection
  • Dust mask
  • Work gloves

Materials

  • 3 pieces of 1×6 lumber at 8ft long
  • 5 pieces of 1×4 lumber at 8ft long
  • 3 pieces of 1×3 lumber at 8ft long
  • 2 pieces of 4×4 lumber at 8ft long
  • 1/2 inch thick scrap wood at 3ft long
  • 1 1/4 inch Kreg screws (weather-resistant)
  • Waterproof wood glue
  • Exterior wood stain (quart)

Before you start building, make sure you have all the necessary tools and materials. You can find most of these items at your local hardware store or online. It’s important to wear safety gear when using power tools, so don’t forget to grab your safety glasses, ear protection, dust mask, and work gloves before you start.

The lumber sizes listed above are just a guide. You can adjust the size of the table to fit your needs, but make sure to adjust the amount of lumber accordingly. Also, make sure the lumber you choose is suitable for outdoor use. Pressure-treated or cedar lumber is a good choice because it’s resistant to rot and decay.

In addition to the tools and materials listed above, you may also need some additional hardware such as bolts, nuts, and washers. These will depend on the design of your table and how you plan to attach the legs. Make sure to have these on hand before you start building.

Designing Your Table

When it comes to building an outdoor wooden table, the design is an important aspect to consider. You want to make sure that the table fits your needs and style preferences. Here are some things to consider when designing your table.

Size and Proportions

The size of your table will depend on how many people you want to seat and how much space you have available. A good rule of thumb is to have at least 24 inches of table space per person. You should also consider the height of the table, which should be around 30 inches for comfortable seating.

Proportions are also important when designing your table. You want to make sure that the legs are sturdy enough to support the weight of the tabletop. A good ratio to follow is a 1:2 ratio between the legs and the tabletop. For example, if your tabletop is 36 inches wide, your legs should be at least 18 inches apart.

Style and Aesthetics

The style and aesthetics of your table are also important to consider. You want to make sure that the table matches the overall look and feel of your outdoor space. Some popular styles for outdoor wooden tables include farmhouse, rustic, and modern.

When choosing the wood for your table, consider the color and grain pattern. Cedar and redwood are popular choices for outdoor furniture because they are naturally resistant to rot and decay. If you want a darker wood, consider using mahogany or teak.

You can also add design elements to your table, such as a decorative edge or a patterned tabletop. Just make sure that any design elements you choose do not compromise the structural integrity of the table.

In summary, when designing your outdoor wooden table, consider the size and proportions to ensure it is functional and sturdy, and the style and aesthetics to ensure it matches the overall look and feel of your outdoor space.

Preparing the Wood

Before you start building your outdoor wooden table, it’s important to properly prepare the wood. This will help ensure that your table looks great and lasts for years to come. The two main steps in preparing the wood are cutting and sanding.

Cutting

The first step in preparing your wood is cutting it to the right size. Make sure you have all the necessary tools, including a saw, measuring tape, and square. Measure and mark your wood according to your plans, and then carefully cut along your markings. Double-check your measurements and cuts to make sure everything is accurate before moving on to sanding.

Sanding

Once you’ve cut your wood to the right size, it’s time to sand it. Sanding helps smooth out any rough spots or edges, and prepares the wood for staining or painting. Start with a coarse grit sandpaper to remove any rough spots, and then move on to a finer grit sandpaper to smooth everything out. Be sure to sand both the top and bottom of your wood pieces, as well as any edges or corners.

As you sand, be sure to wear a dust mask and safety goggles to protect yourself from sawdust and debris. You may also want to use a sanding block to help keep your sandpaper flat and even. Once you’ve finished sanding, wipe down your wood with a damp cloth to remove any remaining sawdust.

By properly preparing your wood through cutting and sanding, you’ll be well on your way to building a beautiful and durable outdoor wooden table.

Table Assembly

Building the Frame

To build the frame of your outdoor wooden table, you will need to follow the steps below:

  1. Cut four pieces of wood to the desired length for the legs.
  2. Cut four additional pieces of wood to the desired length for the top and bottom rails.
  3. Use wood screws to attach the top and bottom rails to the legs, making sure they are level.
  4. Add diagonal braces between the legs for added stability.

Attaching the Top

Once you have built the frame of your outdoor wooden table, it’s time to attach the top. Follow the steps below to do so:

  1. Cut your desired table top to size and sand the edges smooth.
  2. Place the table top on the frame and make sure it is centered.
  3. Use wood screws to attach the table top to the frame, making sure they are evenly spaced.
  4. If desired, add additional support to the underside of the table top for added stability.

Once you have completed these steps, your outdoor wooden table is ready to be used and enjoyed!

Finishing Touches

After building your outdoor wooden table, it’s time to add the finishing touches. This will not only enhance the appearance of your table but also protect it from weather elements. Here are two important sub-sections to consider:

Applying Sealant

Applying a sealant is crucial to protect your table from moisture and UV rays. There are different types of sealants available in the market, including oil-based, water-based, and polyurethane. Here are some steps to follow when applying a sealant:

  1. Sand the surface of the table to remove any rough spots or splinters.
  2. Clean the surface with a damp cloth and let it dry completely.
  3. Apply the sealant using a brush or roller, following the manufacturer’s instructions.
  4. Let the first coat dry completely before applying a second coat.
  5. Repeat the process until you achieve the desired level of protection.

Adding Decorative Details

Adding decorative details to your outdoor wooden table can make it stand out and add a personal touch. Here are some ideas to consider:

  • Paint the table in your favorite color or add a design using stencils.
  • Add a tablecloth or runner to protect the surface and add a pop of color.
  • Add a centerpiece such as a vase of flowers, candles, or a bowl of fruit.
  • Use decorative plates, glasses, and utensils when dining outdoors.
  • Add cushions or pillows to the chairs for added comfort and style.

Remember to choose materials that are weather-resistant and suitable for outdoor use. With these finishing touches, your outdoor wooden table will be ready for many enjoyable meals and gatherings with family and friends.

Maintenance Tips

Taking care of your outdoor wooden table is essential to ensure it lasts for many years. In this section, we’ll cover some tips on how to maintain your table properly.

Regular Cleaning

Regular cleaning is the key to keeping your outdoor wooden table in good condition. Here are some tips on how to clean your table:

  • Use a soft-bristled brush or a sponge to remove dirt and debris.
  • Mix a mild detergent with water and apply it to the table with a sponge or brush.
  • Scrub the table gently and evenly.
  • Rinse the table with clean water.
  • Allow the table to dry completely.

Annual Check-Up

It’s a good idea to give your outdoor wooden table an annual check-up to ensure it’s still in good condition. Here are some things to look for:

  • Check for any signs of rot or decay.
  • Inspect the table for cracks or splits.
  • Look for any loose or broken parts.
  • Check the table’s finish for any signs of wear.

If you notice any issues, it’s important to address them as soon as possible to prevent further damage to your table. You may need to sand and refinish your table or replace any damaged parts.

By following these maintenance tips, you can keep your outdoor wooden table looking great for many years to come.

How to Paint Outdoor Wooden Steps: A Beginner's Guide

Are you looking to spruce up your outdoor space? One way to do so is by painting your wooden steps. Not only does this add a pop of color, but it also helps protect the wood from weather damage. However, painting outdoor wooden steps can be a bit tricky if you don’t know what you’re doing.

First, it’s important to properly prepare the surface before painting. This includes sanding down any rough spots and wiping down the steps to remove any dust or debris. Once the surface is prepped, it’s time to choose the right type of paint. Look for a paint that is specifically designed for exterior use, as it will be able to withstand temperature changes and moisture. And don’t forget to prime the surface before applying the paint to ensure a smooth and even finish.

With the right preparation and materials, painting your outdoor wooden steps can be a fun and easy DIY project. Not only will it add some personality to your outdoor space, but it will also help protect your steps from the elements. Keep reading for more tips and tricks on how to paint your outdoor wooden steps like a pro.

Choosing the Right Paint

When it comes to painting outdoor wooden steps, choosing the right paint is crucial. You want a paint that will not only look great but also provide long-lasting protection against the elements. Here are some factors to consider when choosing the right paint for your outdoor wooden steps.

Weather-Resistant Paints

Outdoor wooden steps are exposed to the elements, including rain, snow, and sunlight. Weather-resistant paints are designed to withstand these conditions and provide long-lasting protection. Look for paints that are labeled as “exterior” or “outdoor” and are formulated to resist fading, cracking, and peeling. Some popular options include water-based acrylic, oil-based alkyd, and deck and porch paint.

Non-Slip Paints

Safety should also be a consideration when choosing a paint for your outdoor wooden steps. Non-slip paints are designed to provide traction and reduce the risk of slips and falls. Look for paints that are labeled as “non-slip” or “anti-slip” and are formulated with additives that create a textured surface. Some popular options include epoxy-based paints and paints with sand or grit additives.

When choosing a paint for your outdoor wooden steps, consider both the weather resistance and safety features of the paint. With the right paint, you can not only improve the appearance of your steps but also ensure their longevity and safety for years to come.

Preparing the Wooden Steps

Before painting your outdoor wooden steps, you need to prepare the surface to ensure that the paint adheres properly and lasts longer. This section will outline the steps you need to take to prepare your wooden steps for painting.

Cleaning the Steps

The first step in preparing your wooden steps for painting is to clean them thoroughly. Here’s how to do it:

  1. Remove any loose dirt and debris from the steps using a stiff-bristled brush or broom.
  2. Mix a solution of warm water and mild detergent in a bucket.
  3. Dip a scrub brush into the solution and scrub the steps, paying particular attention to any areas with stains or discoloration.
  4. Rinse the steps thoroughly with a hose or pressure washer.
  5. Allow the steps to dry completely before proceeding.

If there is any mold on the stairs, mix one quart of bleach with one gallon of water and use the solution to scrub the stairs with a stiff-bristle brush. Rinse with clear water and suction all standing water away with a wet vac. Leave the wood to dry completely.

Sanding the Steps

After cleaning the steps, the next step is to sand them to create a smooth surface for painting. Follow these steps:

  1. Use a coarse grit sandpaper to remove any rough spots or splinters on the steps.
  2. Follow up with a finer grit sandpaper to smooth out the surface.
  3. Wipe down the steps with a clean cloth to remove any dust or debris.

If there are any gaps, holes or cracks, fill them with exterior-grade two-part epoxy wood filler, says Minwax.

By following these steps, you will have prepared your wooden steps for painting and ensured that the paint will adhere properly and last longer.

Applying Primer

When painting outdoor wooden steps, applying primer is a crucial step to ensure a smooth and long-lasting finish. In this section, we will discuss the importance of choosing the right primer and the primer application process.

Choosing the Right Primer

Choosing the right primer is essential to ensure that the paint adheres to the wooden steps and lasts for a long time. Here are some factors to consider when choosing a primer for your outdoor wooden steps:

  • Type of wood: Different types of wood require different types of primer. For example, if you are painting cedar or redwood steps, choose a primer that is specifically designed for these types of wood.

  • Exposure to elements: If your steps are exposed to the elements, choose a primer that is designed for outdoor use. Outdoor primers are formulated to resist moisture, mildew, and UV rays, which can cause the paint to fade or peel.

  • Paint compatibility: Make sure the primer you choose is compatible with the paint you plan to use. Check the paint manufacturer’s instructions to see which primer works best with their paint.

Primer Application Process

Once you have chosen the right primer for your outdoor wooden steps, it’s time to apply it. Here’s a step-by-step guide to the primer application process:

  1. Clean the steps: Before applying primer, make sure the steps are clean and free of dust, dirt, and debris. Use a stiff-bristled brush or a pressure washer to clean the steps thoroughly.

  2. Sand the steps: Sand the surface of the steps to create a slightly rough texture. This will help the primer adhere better to the wood. Use a medium-grit sandpaper to avoid scratching the wood too deeply.

  3. Apply the primer: Apply the primer to the steps using a brush or a roller. Make sure to apply the primer evenly and cover the entire surface of the steps. If you are using a roller, use a long-handled roller to reach the top of the steps.

  4. Let the primer dry: Let the primer dry completely before painting. The drying time will depend on the type of primer you are using and the weather conditions. Check the primer manufacturer’s instructions for drying times.

By following these steps, you can ensure that your outdoor wooden steps are properly primed and ready for painting. Applying primer is an essential step that will help the paint adhere better to the wood and last for a long time.

Painting the Steps

When it comes to painting your outdoor wooden steps, there are a few things to keep in mind to ensure a successful project. In this section, we will cover two sub-sections: Choosing the Right Brush and Paint Application Process.

Choosing the Right Brush

Choosing the right brush is essential to achieving a smooth and even finish. A high-quality brush will make the job easier and save you time in the long run. Here are some things to keep in mind when selecting a brush:

  • Bristle Type: Synthetic bristles work well with latex paints, while natural bristles are better suited for oil-based paints.
  • Size: A 2-3 inch brush is ideal for painting steps.
  • Shape: A flat brush is best for painting flat surfaces, while an angled brush is better for painting edges and corners.

Paint Application Process

Before you begin painting, make sure your steps are clean and dry. Follow these steps for a successful paint application:

  1. Prime the Steps: Apply a primer to the steps to help the paint adhere better and last longer. Use a brush to apply the primer evenly, and allow it to dry completely before painting.

  2. Stir the Paint: Stir the paint thoroughly before using it to ensure an even consistency.

  3. Apply the Paint: Using your chosen brush, apply the paint in long, even strokes. Start at the top of the steps and work your way down. Be sure to cover all areas of the steps, including the edges and corners.

  4. Allow the Paint to Dry: Allow the first coat of paint to dry completely before applying a second coat. Follow the manufacturer’s instructions for drying time.

  5. Apply a Second Coat: Apply a second coat of paint using the same technique as the first coat. This will help ensure a smooth and even finish.

By following these simple steps, you can paint your outdoor wooden steps with ease and achieve a professional-looking finish.

Maintenance Tips

Taking care of your outdoor wooden steps is essential to ensure they last for years to come. Regular maintenance will keep them looking beautiful and prevent damage from occurring. Here are some tips to help you maintain your outdoor wooden steps:

Regular Cleaning

Regular cleaning is crucial to keeping your outdoor wooden steps looking their best. Dirt, debris, and moisture can accumulate on the surface, causing damage over time. To clean your steps, follow these steps:

  • Sweep the steps to remove any loose dirt or debris.
  • Use a garden hose to rinse the steps thoroughly.
  • Mix a solution of mild soap and water.
  • Use a soft-bristled brush to scrub the steps with the soap solution.
  • Rinse the steps thoroughly with clean water.
  • Allow the steps to dry completely before walking on them.

Periodic Repainting

Over time, the paint on your outdoor wooden steps will begin to fade and peel. When this happens, it’s time to repaint them. Here are some tips to help you repaint your outdoor wooden steps:

  • Sand the steps to remove any loose paint or rough spots.
  • Wipe the steps with a clean cloth to remove any dust or debris.
  • Apply a coat of primer to the steps.
  • Allow the primer to dry completely.
  • Apply two coats of paint to the steps, allowing each coat to dry completely before applying the next.

Damage Prevention

Preventing damage to your outdoor wooden steps is essential to ensuring they last for years to come. Here are some tips to help you prevent damage:

  • Keep the steps clean and free of debris.
  • Avoid using harsh chemicals or cleaning products on the steps.
  • Use a non-slip coating on the steps to prevent slips and falls.
  • Repair any damage to the steps as soon as possible to prevent further damage.

By following these maintenance tips, you can keep your outdoor wooden steps looking their best and prevent damage from occurring.

Safety Precautions

When painting outdoor wooden steps, it’s important to take safety precautions to protect yourself and others. Here are some tips to keep in mind:

Using Safety Equipment

Make sure to wear appropriate safety equipment when painting your outdoor wooden steps. This includes:

  • Safety goggles to protect your eyes from paint splatters and fumes
  • A dust mask to protect your lungs from dust and fumes
  • Gloves to protect your hands from paint and chemicals

Wearing safety equipment can help prevent injuries and keep you safe while painting.

Proper Ventilation

It’s important to have proper ventilation when painting outdoor wooden steps. This helps prevent the buildup of fumes and ensures that you have fresh air to breathe. Here are some tips to keep in mind:

  • Open windows and doors to allow fresh air to circulate.
  • Use fans to help circulate air and reduce fumes.
  • Avoid painting on windy days, as this can cause fumes to blow around and potentially harm others.

By following these safety precautions, you can ensure that your painting project is safe and enjoyable.