Are you looking to add some charm and functionality to your outdoor space? Building wooden steps can be a great way to enhance the look of your yard and provide easy access to different levels of your property. Whether you’re looking to build steps for a deck, patio, or garden, this article will provide you with the basics of how to build wooden steps.
Before you start building, it’s important to prepare the area where the steps will be located. This means removing any shrubs or plants and ensuring the ground is level. You may need to build up low spots with fill dirt so the area slopes away from your house. Once you’ve prepared the area, you’ll need to determine the height and width of the steps. This will depend on the location and purpose of the steps, as well as the materials you’ll be using.
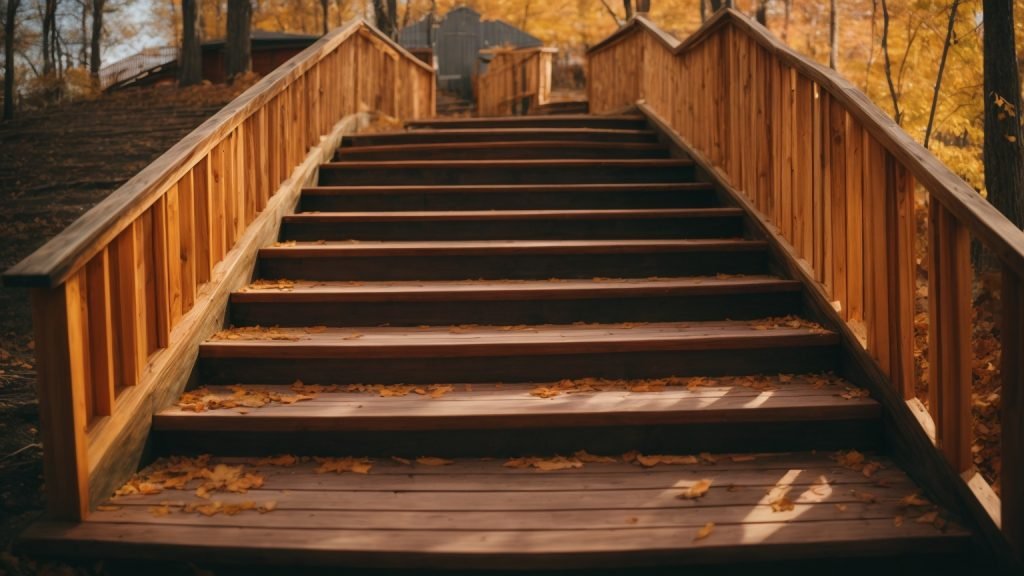
Understanding the Basics of Wooden Steps

When it comes to building wooden steps, there are a few things you need to keep in mind. In this section, we’ll cover the basics of wooden steps, including the types of wood you can use and the safety measures you need to take.
Types of Wood
When it comes to choosing the right type of wood for your steps, there are a few things you need to consider. First, you want to choose a wood that is strong and durable, as your steps will need to support a lot of weight over time. Some of the most popular types of wood for steps include:
- Cedar: A popular choice for outdoor steps, cedar is a durable and weather-resistant wood that is also resistant to insects and rot.
- Redwood: Another popular choice for outdoor steps, redwood is a durable and weather-resistant wood that is also resistant to insects and rot.
- Pressure-treated pine: A popular choice for indoor and outdoor steps, pressure-treated pine is a durable and affordable wood that is treated to resist insects and rot.
When choosing your wood, make sure to choose a type that is appropriate for your climate and the location of your steps.
Safety Measures
When building wooden steps, safety should always be your top priority. Here are a few safety measures you should take:
- Use a level: Make sure your steps are level and evenly spaced to prevent tripping hazards.
- Use non-slip treads: Consider using non-slip treads on your steps to prevent slipping, especially if your steps will be used in wet or icy conditions.
- Install handrails: Handrails can provide additional support and stability when using your steps, especially for children and elderly individuals.
- Use appropriate tools and equipment: Make sure you have the right tools and equipment for the job, and use them safely and appropriately.
By following these basic guidelines, you can ensure that your wooden steps are safe and durable for years to come.
Tools and Materials Needed
Building wooden steps can be a fun and rewarding DIY project. Before you get started, it’s important to gather all the necessary tools and materials. Here’s what you’ll need:
Tools
- Circular saw
- Jigsaw
- Power drill
- Hammer
- Measuring tape
- Carpenter’s square
- Level
- Safety glasses
- Work gloves
Materials
- Pressure-treated lumber (2x12s for stringers, 2x6s for treads, and 4x4s for posts)
- Gravel or crushed stone
- Concrete mix
- Galvanized screws or nails
- Post spikes or concrete anchors
Make sure to choose high-quality materials that are suitable for outdoor use. Pressure-treated lumber is a popular choice because it is durable and resistant to rot and insect damage. You’ll also need gravel or crushed stone to create a stable base for your steps, as well as concrete mix to anchor the posts.
In terms of tools, a circular saw and jigsaw are essential for cutting the lumber to size. A power drill is necessary for drilling pilot holes and attaching the pieces together with screws or nails. A measuring tape and carpenter’s square will help ensure accurate cuts and angles. Don’t forget to wear safety glasses and work gloves to protect yourself while working with power tools.
By gathering all the necessary tools and materials before you start, you’ll be well-prepared to tackle your wooden step project with confidence.
Designing Your Wooden Steps
When building wooden steps, it’s important to consider both functionality and aesthetics. In this section, we’ll cover the key factors to consider when designing your wooden steps.
Step Measurements
Before you start building your wooden steps, you need to measure the area where they will be installed. Here are the key measurements you’ll need to take:
- Total Rise: Measure the height from the ground to the top of where the steps will end. This will determine the number of steps you need to build.
- Total Run: Measure the horizontal distance from the bottom of the steps to the top.
- Tread Depth: This is the horizontal depth of each step. It should be at least 10 inches for comfort and safety.
- Riser Height: This is the vertical height of each step. It should be between 6 and 8 inches for safety and ease of use.
Once you have these measurements, you can start designing your steps.
Choosing the Design
When it comes to designing your wooden steps, there are a few different options to consider. Here are some popular designs:
- Straight Steps: These are the most basic design, with steps that go straight up and down. They’re easy to build and work well in most situations.
- L-Shaped Steps: These steps have a landing or platform halfway up, which makes them easier to climb and can add visual interest to your design.
- U-Shaped Steps: These steps have two landings or platforms, making them ideal for longer staircases. They can be more difficult to build, but they offer a unique and impressive look.
When choosing your design, consider the overall style of your home and the surrounding landscape. You want your wooden steps to complement your property and enhance its curb appeal.
By taking accurate measurements and choosing a design that fits your needs and style, you can create beautiful and functional wooden steps that will last for years to come.
Building the Steps
When it comes to building wooden steps, there are three main steps you need to follow: cutting the wood, assembling the steps, and securing the steps. Here’s a breakdown of each step:
Cutting the Wood
Before you can start assembling your wooden steps, you’ll need to cut the wood to the right size. To do this, you’ll need a saw, a measuring tape, and a pencil. Here’s what you need to do:
- Measure the height and width of the area where you want to install the steps.
- Cut two pieces of wood to the width of the area where you want to install the steps.
- Cut two more pieces of wood to the height of the area where you want to install the steps.
- Cut several smaller pieces of wood to the same width as the two larger pieces. These will be used as the steps themselves.
Assembling the Steps
Once you’ve cut all of the wood to the right size, it’s time to start assembling the steps. Here’s what you need to do:
- Lay the two larger pieces of wood on the ground where you want to install the steps. These will be the sides of the steps.
- Place the smaller pieces of wood on top of the larger pieces, evenly spaced apart. These will be the steps themselves.
- Use a level to make sure each step is level before moving on to the next step.
- Once you’ve placed all of the steps, use a drill to attach them to the larger pieces of wood on either side.
Securing the Steps
After you’ve assembled the steps, it’s important to make sure they’re secure. Here’s what you need to do:
- Use wood glue to attach each step to the larger pieces of wood on either side.
- Once the glue has dried, use screws to attach each step to the larger pieces of wood on either side.
- Use a level to make sure the steps are still level after you’ve secured them.
By following these three steps, you’ll be able to build wooden steps that are sturdy, secure, and safe to use.
Finishing Touches
Once you have completed building your wooden steps, it’s time to give them a finishing touch. This will not only make them look more attractive but also protect them from the elements. Here are some steps you can take to finish your wooden steps.
Sanding the Steps
Before applying any finish, it’s important to sand your wooden steps. This will help smooth out any rough spots and ensure that the finish adheres properly. Start by using a coarse grit sandpaper, such as 60-grit, to remove any rough spots or splinters. Then, move on to a finer grit sandpaper, such as 120-grit, to smooth out the surface of the wood.
Make sure to sand in the direction of the grain to avoid damaging the wood. You can use a sanding block or an orbital sander to make the job easier. Once you’re done sanding, wipe down the steps with a damp cloth to remove any dust.
Applying the Finish
There are several types of finishes you can use on your wooden steps, including paint, stain, or varnish. Each has its own advantages and disadvantages, so choose the one that best suits your needs.
If you want to paint your steps, make sure to use a high-quality exterior paint that is designed for wood surfaces. Apply the paint in thin, even coats, and allow each coat to dry completely before applying the next.
If you prefer a natural look, you can use a stain to enhance the natural beauty of the wood. Choose a stain that is designed for exterior use and apply it in thin coats with a brush or rag. Make sure to wipe off any excess stain with a clean cloth.
Finally, if you want to protect your steps from the elements, you can use a varnish or sealer. These products will help prevent water damage and protect the wood from UV rays. Apply the varnish or sealer in thin coats, and allow each coat to dry completely before applying the next.
With these finishing touches, your wooden steps will look great and last for years to come.
Maintenance Tips
Taking care of your wooden steps is essential to ensure their longevity and safety. Here are some maintenance tips to keep them in good condition for years to come.
Regular Cleaning
Regular cleaning of your wooden steps is crucial to maintain their appearance and prevent the buildup of dirt and debris. Here are some steps to follow:
- Sweep the steps regularly to remove dirt, leaves, and other debris.
- Use a stiff-bristled brush to scrub the steps with a solution of mild soap and water.
- Rinse the steps thoroughly with water and allow them to dry completely before use.
- Avoid using a pressure washer as it can damage the wood.
Wood Treatment
Wooden steps are prone to damage from moisture, sunlight, and insects. To prevent this, it is essential to treat them regularly. Here are some tips to follow:
- Apply a wood preservative to protect the wood from moisture and insects. Follow the manufacturer’s instructions for application and frequency of treatment.
- Apply a coat of exterior wood sealer or stain to protect the wood from sunlight and weather damage. Choose a product that is suitable for your climate and follow the manufacturer’s instructions for application and frequency of treatment.
- Inspect the steps regularly for signs of damage such as cracks, splinters, and rot. Repair any damage promptly to prevent further deterioration.
By following these maintenance tips, you can keep your wooden steps in good condition and ensure their safety for you and your family.