
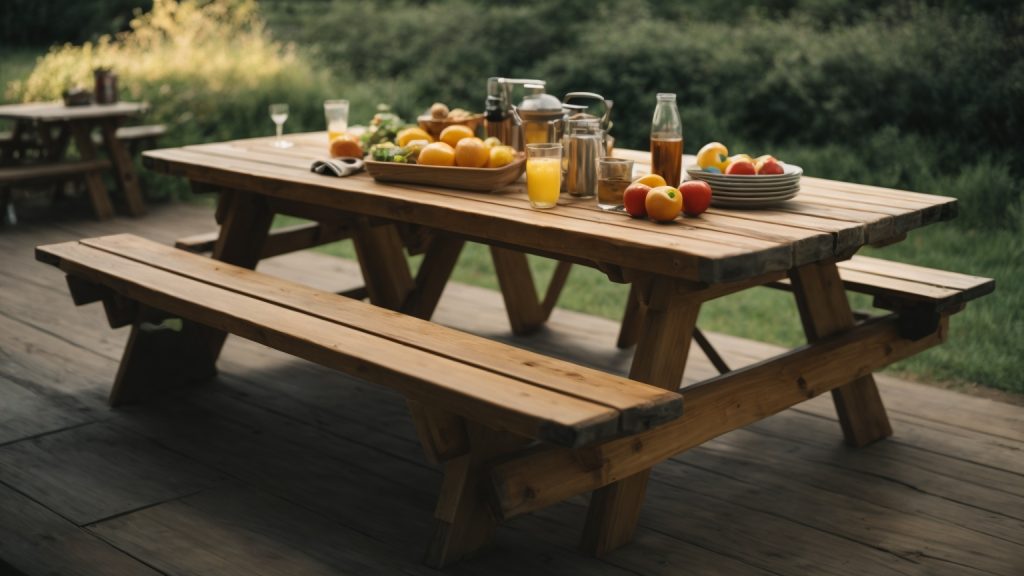
Building a wooden picnic table is a great way to add functionality and charm to your outdoor space. Whether you’re planning a family gathering or simply looking for a spot to enjoy your morning coffee, a sturdy picnic table can provide the perfect setting. With a few basic tools and some quality lumber, you can easily create a beautiful and functional picnic table that will last for years to come.
Before you get started, it’s important to choose the right type of wood for your project. Hardwood or pressure-treated lumber are popular choices, as they can withstand the outdoor elements in your area. Southern yellow pine is another strong and relatively inexpensive option. Additionally, you will need some basic tools such as a saw, drill, and measuring tape. Once you have your materials and tools ready, you can begin building your picnic table.
Understanding the Basics
When it comes to building a wooden picnic table, there are a few basics you need to understand before you get started. In this section, we’ll cover the types of wood you should use and the tools you’ll need to build a sturdy and reliable table.
Types of Wood
Choosing the right type of wood is crucial to building a picnic table that will last for years to come. Here are some of the most popular types of wood used for picnic tables:
- Cedar: Cedar is a popular choice for outdoor furniture because it’s naturally resistant to rot and insects. It’s also lightweight and easy to work with.
- Pressure-treated pine: Pressure-treated pine is a more affordable option that’s also resistant to rot and insects. However, it can be heavier and harder to work with than cedar.
- Redwood: Redwood is a beautiful and durable wood that’s naturally resistant to decay and insects. However, it can be expensive and harder to find than other types of wood.
When choosing your wood, make sure to select boards that are straight and free of knots or cracks. You’ll also want to choose boards that are at least 1 inch thick to ensure your table is sturdy enough to hold up to regular use.
Required Tools
To build a wooden picnic table, you’ll need a few basic tools. Here’s a list of the tools you’ll need:
- Circular saw: You’ll use a circular saw to cut your boards to the right length.
- Drill: A drill is essential for drilling pilot holes and driving screws.
- Screwdriver: You’ll need a screwdriver to tighten screws and attach hardware.
- Clamps: Clamps will help hold your boards in place while you’re assembling your table.
- Tape measure: You’ll use a tape measure to ensure your boards are cut to the right length.
- Safety gear: Safety glasses and ear protection are essential when working with power tools.
Make sure to have all of your tools ready before you start building your picnic table. With the right tools and materials, you’ll be able to build a beautiful and functional picnic table that will be the centerpiece of your outdoor gatherings for years to come.
Designing the Picnic Table
When it comes to building a wooden picnic table, the design is an important aspect to consider. In this section, we will discuss the size and dimensions of the table as well as choosing a suitable design.
Size and Dimensions
The size of your picnic table will depend on how many people you plan on seating. A standard picnic table can seat six to eight people comfortably. The dimensions of a typical picnic table are as follows:
- Tabletop length: 6 feet
- Tabletop width: 2 feet
- Bench length: 6 feet
- Bench width: 1 foot
However, you can adjust the dimensions to fit your specific needs. Keep in mind that the tabletop should be at least 28 inches off the ground, and the benches should be about 18 inches off the ground.
Choosing a Design
There are many different designs to choose from when it comes to building a wooden picnic table. Some popular options include:
- Traditional A-frame design
- Cross-legged design
- Detached benches design
The traditional A-frame design is a classic look that is easy to build. The cross-legged design is a more modern look that provides more legroom. The detached benches design allows for more flexibility and can be moved around to accommodate different seating arrangements.
When choosing a design, consider your skill level and the tools you have available. Some designs may be more complicated than others and require more advanced woodworking skills. Additionally, some designs may require specialized tools that you may not have access to.
Overall, the design of your picnic table should be functional and comfortable for your guests. With the right design and dimensions, you can build a picnic table that will provide years of outdoor enjoyment.
Preparing the Materials
Before you begin building your wooden picnic table, you need to prepare all the necessary materials. Here are the steps you need to follow:
Cutting the Wood
The first step in preparing your materials is to cut the wood to the right size. You will need to cut the following pieces:
- Four legs, each measuring 28 inches long
- Two seat supports, each measuring 51 inches long
- Two tabletop boards, each measuring 72 inches long
- Five tabletop braces, each measuring 28 inches long
Make sure to measure and mark the wood accurately before cutting it. Use a saw to make the cuts, and be sure to wear safety goggles and gloves to protect yourself.
Sanding and Smoothing
After cutting the wood, you need to sand and smooth the edges to ensure that they are safe and comfortable to use. Here’s how to do it:
- Start by using a coarse-grit sandpaper (around 60 grit) to remove any rough spots or splinters on the wood.
- Next, use a medium-grit sandpaper (around 120 grit) to smooth out the surface of the wood.
- Finally, use a fine-grit sandpaper (around 220 grit) to give the wood a smooth, polished finish.
Be sure to sand all the edges and corners of the wood, as well as the surfaces that will be in contact with your skin. This will help prevent splinters and make the picnic table more comfortable to use.
By following these steps, you can ensure that your wooden picnic table is safe, sturdy, and comfortable to use.
Assembling the Table

Now that you have all the pieces cut and sanded, it’s time to put them together. In this section, we’ll go over how to assemble your wooden picnic table. This process can be completed in a few hours with the help of a friend or family member.
Building the Table Top
The first step in assembling your picnic table is to build the table top. Lay out the five 2×6 boards on a flat surface, making sure they are flush with each other. Use clamps to hold them together and drill pilot holes through the boards where they will be attached to the braces.
Next, attach the two braces to the underside of the table top. Make sure they are centered and flush with the edges of the boards. Use wood screws to secure them in place.
Constructing the Seats
Once the table top is assembled, it’s time to build the seats. Lay out the four 2×6 boards for each seat on a flat surface. Use clamps to hold them together and drill pilot holes through the boards where they will be attached to the braces.
Attach the two braces to the underside of each seat board, making sure they are centered and flush with the edges of the boards. Use wood screws to secure them in place.
Attaching the Legs
Now it’s time to attach the legs to the table top and seats. Stand the table top upright and attach the legs to the braces using wood screws. Make sure the legs are flush with the edges of the table top and perpendicular to the ground.
Next, attach the legs to the braces on the seats using wood screws. Make sure the legs are flush with the edges of the seats and perpendicular to the ground.
Finally, flip the table over and check that all the legs are level and secure. If necessary, adjust the legs until the table sits level on the ground.
Congratulations, you have successfully assembled your wooden picnic table!
Finishing Touches
Once you have built your wooden picnic table, it’s time to add the finishing touches. This will not only give your table a polished look but also protect it from the elements. In this section, we will discuss two important finishing touches: applying wood stain and adding a protective coating.
Applying Wood Stain
Wood stain is a great way to enhance the natural beauty of your wooden picnic table while providing it with additional protection. Follow these steps to apply wood stain:
- Sand the surface of the table to remove any rough spots or splinters.
- Wipe the table with a damp cloth to remove any dust or debris.
- Apply the wood stain using a brush, roller or sprayer. Be sure to apply the stain in the direction of the wood grain.
- Allow the stain to dry completely before applying a second coat if desired.
Note: Always follow the manufacturer’s instructions when applying wood stain.
Adding Protective Coating
Adding a protective coating to your picnic table will help it withstand the elements and last longer. Here are some options for protective coatings:
- Polyurethane: This is a popular choice for outdoor furniture. It provides a clear, durable finish that is resistant to water and UV rays.
- Varnish: Similar to polyurethane, varnish provides a clear, hard finish that protects against water and UV rays.
- Paint: If you want to add some color to your picnic table, paint is a good option. Make sure to use an outdoor paint that is specifically designed for wood.
Here are the steps to add a protective coating to your picnic table:
- Sand the surface of the table to remove any rough spots or splinters.
- Wipe the table with a damp cloth to remove any dust or debris.
- Apply the protective coating using a brush or roller. Be sure to apply in the direction of the wood grain.
- Allow the coating to dry completely before applying a second coat if desired.
Note: Always follow the manufacturer’s instructions when applying a protective coating.
Maintenance Tips
Taking care of your wooden picnic table is crucial to ensure that it lasts for many years of outdoor enjoyment. Here are some maintenance tips to keep your picnic table looking great and in good condition.
Regular Cleaning
Cleaning your picnic table regularly is essential to prevent dirt and grime buildup. Use a mild detergent and warm water to clean the surface of the table. Avoid using harsh chemicals or abrasive cleaners that can damage the wood. Scrub the surface gently with a soft-bristled brush, and rinse thoroughly with water.
After cleaning, let the picnic table dry completely before using it again. You can also apply a wood sealer or protector to help prevent water damage and maintain the natural color of the wood.
Yearly Inspections
Inspect your picnic table at least once a year to check for any signs of damage or wear. Look for cracks, splits, or splinters in the wood, and check the stability of the table legs and supports. Tighten any loose screws or bolts, and replace any damaged or broken parts.
If you notice any signs of rot or decay, it’s essential to address the issue promptly. Remove any damaged wood and replace it with new boards. Applying a wood preservative can also help prevent further decay and extend the life of your picnic table.
By following these maintenance tips, you can keep your wooden picnic table in excellent condition for many years of outdoor fun and relaxation.