Tag Archives: factors affecting drying time

factors-affecting-drying-time

How Long Does It Take for Wood Stain to Dry on a Deck? A Quick Guide

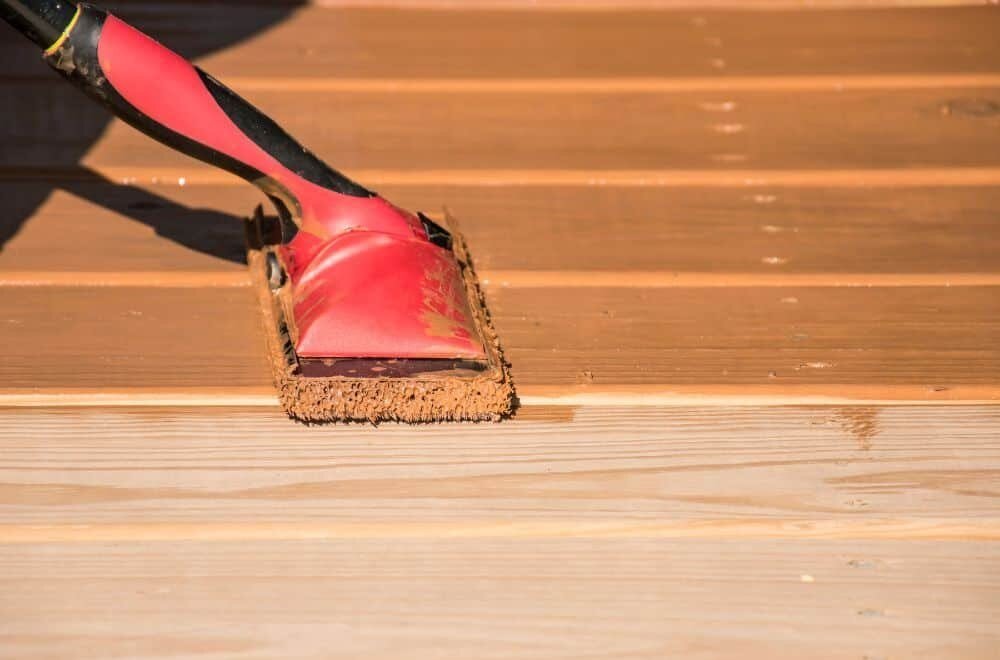
If you’re planning to stain your deck, you may be wondering how long it takes for the stain to dry. The drying time for wood stain on a deck depends on several factors, including the type of wood, the type of stain, and the weather conditions. In general, you can expect wood stain to take anywhere from 24 to 48 hours to dry on a deck.

One of the most important factors that affects the drying time of wood stain on a deck is the type of wood you’re working with. Hardwood decks tend to dry faster than softwood decks, since hardwood is less porous and absorbs less moisture. Softwood decks, on the other hand, are more porous and tend to take longer to dry. Additionally, the type of stain you use can also affect the drying time. Oil-based stains generally take longer to dry than water-based stains, but they also tend to be more durable.

Understanding Wood Stain

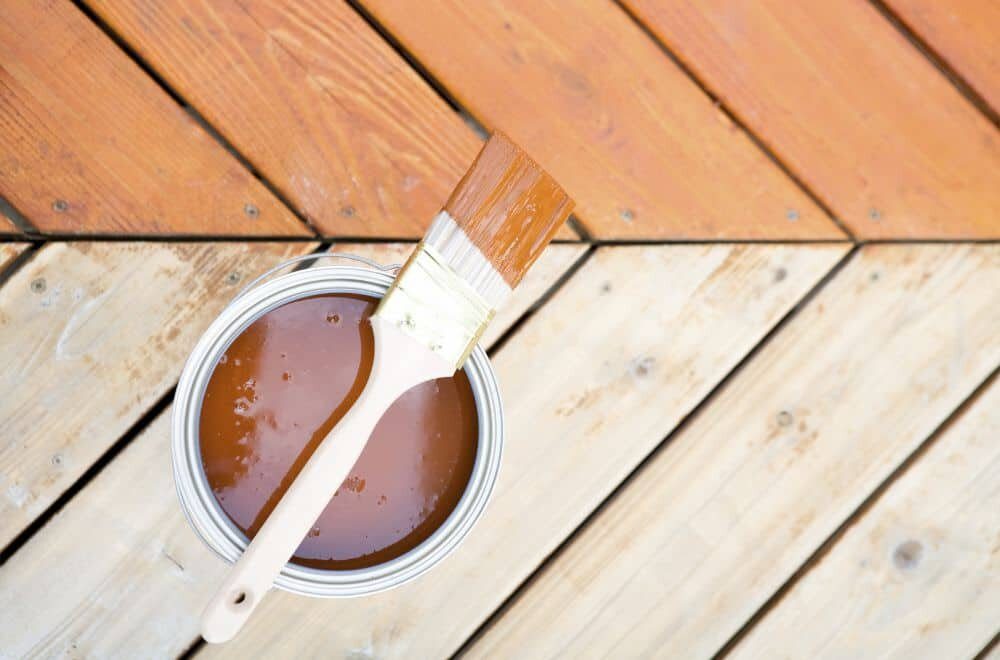
If you’re planning on staining your deck, it’s important to understand what wood stain is and how it works. Wood stain is a type of finish that is applied to wood surfaces to enhance their natural color, protect them from the elements, and improve their durability. Stains are available in a wide range of colors and finishes, from clear to opaque, and can be oil-based or water-based.

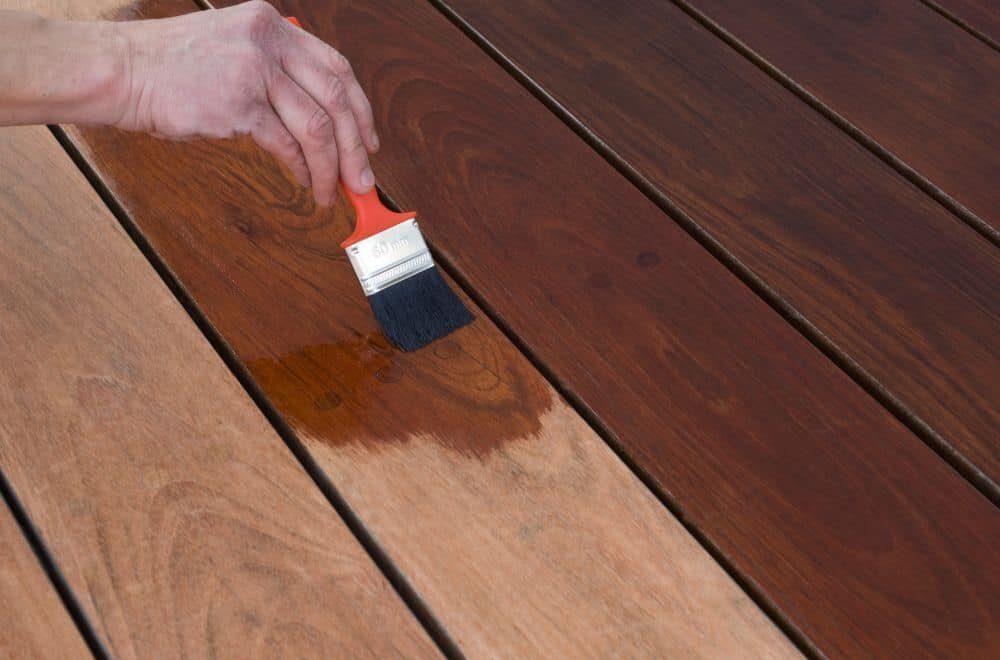
When you apply wood stain to a deck, it penetrates the wood fibers and enhances the natural grain pattern. The stain also provides a layer of protection against moisture, UV rays, and other environmental factors that can cause damage to the wood. The type of stain you choose will depend on the look you want to achieve and the level of protection you need.

Oil-based stains are a popular choice for decks because they penetrate deeply into the wood and provide long-lasting protection. They are also easy to apply and can be used on a variety of wood types. However, they do take longer to dry than water-based stains, and they can emit strong odors during the application process.

Water-based stains are another option for deck staining. They dry faster than oil-based stains and emit fewer odors. They are also easier to clean up with soap and water. However, they don’t penetrate the wood as deeply as oil-based stains, which means they may not provide as much protection against the elements.

In general, it’s best to choose a stain that is specifically designed for outdoor use and can withstand the elements. Look for stains that offer UV protection and are resistant to mildew, mold, and other types of damage. It’s also important to follow the manufacturer’s instructions for application and drying times to ensure that your deck looks great and stays protected for years to come.

Factors Affecting Drying Time

factors-affecting-drying-time

When it comes to staining a deck, one of the most important things to consider is how long it will take for the stain to dry. The drying time can vary depending on several factors, including the type of wood stain you use, the weather conditions, and the type of wood you are staining.

Type of Wood Stain

Different types of wood stains have different drying times. For example, water-based wood stains generally dry faster than oil-based stains. Water-based stains can take around 3-4 hours to dry to the touch and up to 24-48 hours to fully cure. Oil-based stains, on the other hand, can take anywhere from 24-48 hours to dry and up to 72 hours to fully cure.

Weather Conditions

The weather conditions can also affect the drying time of your wood stain. High humidity levels can extend the drying time of water-based stains by several hours. Similarly, if the temperature is too cold, the stain may not dry properly. Ideally, the temperature should be between 50-90°F with low humidity levels for optimal drying conditions.

Wood Type

The type of wood you are staining can also affect the drying time of your wood stain. Softwoods such as pine and cedar tend to absorb stain more quickly than hardwoods like oak and maple. This means that softwoods may dry faster, but they may also require more coats of stain to achieve the desired color. Hardwoods, on the other hand, may take longer to dry, but they may require fewer coats of stain.

In summary, the drying time of wood stain on a deck can vary depending on several factors, including the type of wood stain, weather conditions, and wood type. By considering these factors, you can ensure that your deck stain dries properly and looks great for years to come.

General Drying Time for Wood Stain

When it comes to staining a deck, one of the most important things to consider is drying time. You don’t want to apply a second coat of stain too soon, or you risk ruining the finish. On the other hand, you don’t want to wait too long either, as this can cause the wood to become too dry and prevent the stain from soaking in properly.

On average, wood stain takes about 24 to 48 hours to dry completely on a deck. However, the exact drying time can vary depending on several factors, including the type of wood, the type of stain, and the weather conditions.

For example, if you are staining a softwood like pine, it will likely dry faster than a hardwood like oak. Similarly, if you are using an oil-based stain, it will typically take longer to dry than a water-based stain.

In addition to these factors, the temperature and humidity levels can also affect the drying time of wood stain. If it is hot and dry outside, the stain will dry faster, while cooler and more humid conditions will slow down the drying process.

To ensure that your deck stain dries properly, it is important to follow the manufacturer’s instructions carefully. This may include waiting a certain amount of time between coats, as well as avoiding heavy foot traffic or exposure to water until the stain is fully dry. By doing so, you can help ensure that your deck looks beautiful and lasts for years to come.

How to Tell if Your Wood Stain is Dry

how-to-tell-if-your-wood-stain-is-dry

After applying wood stain to your deck, you might be wondering how long it will take to dry. It’s important to let the stain dry completely before walking on it or placing any furniture on it, as it can easily smudge or transfer onto other surfaces. Here are some ways to tell if your wood stain is dry:

1. Check the Touch

One of the easiest ways to tell if your wood stain is dry is to touch it. If it feels dry to the touch, then it’s likely dry. However, be careful not to press too hard or scratch the surface with your fingernail, as this can cause damage.

2. Look for Glossiness

Another way to tell if your wood stain is dry is to look for glossiness. If the stain is still shiny or glossy, then it’s likely still wet. Once it dries, the glossiness will disappear.

3. Smell the Surface

If the wood stain is still wet, it will have a strong odor. Once it dries, the smell will dissipate. You can also try smelling the surface of the wood from a few inches away to see if it still has a strong odor.

4. Perform a Tape Test

Performing a tape test is a good way to check if the wood stain is dry. Simply place a piece of tape onto the surface of the wood and then peel it off. If the tape comes off cleanly without any stain residue, then the stain is dry.

5. Use a Moisture Meter

If you have a moisture meter, you can use it to check the moisture content of the wood. If the moisture content is below 15%, then the wood stain is likely dry. However, keep in mind that moisture meters can be expensive and may not be necessary for most DIY projects.

By following these tips, you can ensure that your wood stain is dry before moving on to the next step of your deck project. Remember to be patient and let the stain dry completely before using the deck.

Tips for Quick Drying

When staining a deck, you want to make sure it dries as quickly as possible so you can enjoy it sooner. Here are some tips to help speed up the drying process:

1. Choose the Right Stain

Water-based stains dry faster than oil-based stains. If you’re in a hurry, opt for a water-based stain. However, keep in mind that oil-based stains tend to last longer and provide better protection for your deck.

2. Check the Weather

The weather can greatly affect how quickly your stain dries. Choose a day with low humidity and moderate temperatures. Avoid staining on a rainy or excessively hot day.

3. Apply Thin Coats

Applying thick coats of stain can prolong the drying time. Instead, apply thin coats and let each coat dry completely before applying the next one.

4. Use a Fan

A fan can help circulate air and speed up the drying process. If you don’t have a fan, simply leave the deck open to the air and avoid covering it with a tarp or other material.

5. Add Heat

Adding heat can help dry the stain faster. You can use a heat gun or a hair dryer on a low setting to gently warm the surface of the deck. Just be careful not to overheat the wood or the stain.

By following these tips, you can help your deck stain dry faster and enjoy your newly stained deck sooner.

Safety Measures During Drying

safety-measures-during-drying

When it comes to wood stain, it’s important to take certain safety measures during the drying process. Here are a few things to keep in mind:

Ventilation

Make sure the area where you’re staining your deck is well-ventilated. This will help prevent the buildup of fumes, which can be harmful if inhaled. Consider opening windows and doors, or using a fan to circulate air.

Protective Gear

Wear protective gear, such as gloves and a mask, to prevent skin and respiratory irritation. Some wood stains contain chemicals that can be harmful if they come into contact with your skin or if you inhale them.

Keep Children and Pets Away

Keep children and pets away from the area where you’re staining your deck. Wood stain can be toxic if ingested, so it’s important to keep it out of reach.

Follow Manufacturer’s Instructions

Always follow the manufacturer’s instructions when it comes to drying times and safety precautions. Different types of wood stains may have different drying times and require different safety measures.

By following these safety measures, you can ensure that the wood stain on your deck dries properly and without any harm to yourself or others.

Frequently Asked Questions

How long does it take for deck stain to dry?

The drying time for deck stain can vary depending on several factors, such as the type of stain, humidity, temperature, and the porosity of the wood. On average, it may take 24 to 48 hours for deck stain to dry to the touch. However, it’s important to note that it may take up to 72 hours for the stain to fully cure.

How long should I wait before walking on a newly stained deck?

It’s best to wait at least 24 hours before walking on a newly stained deck. This will give the stain enough time to dry and cure properly. However, if the weather is humid or if the temperature is below 50°F, it’s best to wait longer to ensure that the stain has fully cured.

What happens if it rains on a freshly stained deck?

If it rains on a freshly stained deck, it can ruin the finish and cause water damage to the wood. It’s best to avoid staining your deck if rain is in the forecast for the next 24 to 48 hours. If it does rain unexpectedly, cover your deck with a tarp or plastic sheeting to protect it from the rain.

How long does it take for Behr solid stain to dry before rain?

Behr solid stain can take anywhere from 24 to 48 hours to dry before it’s safe from rain. However, it’s important to check the manufacturer’s instructions for specific drying times and other recommendations.

How long does Cabot deck stain take to dry?

Cabot deck stain can take anywhere from 24 to 48 hours to dry to the touch. However, it may take up to 72 hours for the stain to fully cure. It’s important to follow the manufacturer’s instructions for specific drying times and other recommendations.

How long should deck stain dry before applying a second coat?

It’s important to wait at least 24 hours before applying a second coat of deck stain. This will give the first coat enough time to dry and cure properly. However, it’s best to check the manufacturer’s instructions for specific recommendations on when to apply a second coat of stain.

preparation-before-sanding

How Long Should Wood Glue Dry Before Sanding? A Quick Guide

When it comes to woodworking, knowing how long you should let wood glue dry before sanding is crucial to ensuring the strength and durability of your project. While it may be tempting to rush through the process, taking the time to properly let the glue dry can make all the difference in the final result.

Most wood glues only need clamps on them for about 30 minutes to 1 hour. After that point, you can do some light sanding, as long as you do not subject the joints to stress. The glue has not cured fully at that point, so the joint does not have full strength. It will reach full strength in about 24 hours.

However, it’s important to note that different types of wood glue may have different drying times. For example, cyanoacrylate, better known as superglue, can dry enough to fix small repairs in seconds, though full cure might still take anywhere from 8 to 24 hours. It’s always best to consult the manufacturer’s instructions for specific drying times and recommendations.

Understanding Wood Glue

When working on woodworking projects, one of the most important things to consider is the type of glue you use. Wood glue is a popular adhesive that is used to bond wood pieces together. It is a versatile and strong adhesive that can be used for a variety of woodworking projects.

There are different types of wood glue available, and each type has its own unique properties. Some wood glues are fast-drying, while others take longer to dry. Some are water-resistant, while others are waterproof. It is important to choose the right type of wood glue for your project to ensure a strong and lasting bond.

Wood glue is made from a combination of water, resin, and sometimes filler materials. When the glue is applied to wood, the water evaporates, leaving behind a strong bond between the wood pieces. The bond created by wood glue is often stronger than the wood itself, making it an ideal adhesive for woodworking projects.

One of the benefits of wood glue is that it can be sanded and painted once it has dried. This makes it an ideal adhesive for projects that require a smooth finish. However, it is important to allow the glue to dry completely before sanding or painting to avoid damaging the bond.

When using wood glue, it is important to follow the manufacturer’s instructions carefully. This will ensure that you use the glue correctly and achieve the best possible results. Some wood glues require clamping, while others do not. It is important to understand the requirements of the glue you are using to ensure a strong bond.

Overall, wood glue is a versatile and strong adhesive that is ideal for woodworking projects. By understanding the properties of wood glue and choosing the right type for your project, you can achieve a strong and lasting bond between wood pieces.

Ideal Drying Time for Wood Glue

ideal-drying-time-for-wood-glue

When working on a woodworking project, you want to make sure that you are using the right techniques to achieve the best results. One of the most important steps in woodworking is gluing pieces of wood together. However, knowing how long to let the glue dry before sanding can be tricky. In this section, we will discuss the ideal drying time for wood glue.

The general rule of thumb is to let freshly applied wood glue dry for a minimum of 24 hours before unclamping the attached pieces. This is the recommended time for most wood glue brands. Some people in woodworking circles may find this timing overkill, but it is always safer to err on the side of caution. Some wood glue brands have specific recommendations for their products, so it is important to follow the manufacturer’s instructions.

It is important to note that the drying time of wood glue can vary depending on several factors, such as the type of glue, temperature, and humidity. For example, Titebond recommends clamping unstressed joints for between 30-60 minutes and allowing them to cure for 24 hours, while stressed joints should be clamped for 24 hours and allowed an additional 24 hours to cure before stress is applied.

If you are working on a project that requires sanding, it is important to let the wood glue dry completely before sanding. You need to let wood glue dry for at least 1 hour before sanding to avoid shrinkage when curing. The safest time to sand wood glue is after 24 hours of application, as the volume of the adhesive is not going to change.

In summary, the ideal drying time for wood glue is at least 24 hours before unclamping the attached pieces. However, it is important to follow the manufacturer’s instructions and take into consideration the type of glue, temperature, and humidity. Remember to let the wood glue dry completely before sanding to avoid any issues.

Factors Affecting Drying Time

When it comes to wood glue, the drying time can vary depending on several factors. Here are the main factors that can affect how long wood glue should dry before sanding:

Type of Wood Glue

Different types of wood glue have different drying times. For example, polyvinyl acetate (PVA) glue, which is one of the most popular types of wood glue, dries when exposed to air and can take anywhere from 15 minutes to 24 hours to dry completely, depending on the thickness of the glue layer and environmental conditions. On the other hand, epoxy glue can take several hours to several days to dry completely.

Environmental Conditions

The temperature and humidity of the environment can also affect how long wood glue should dry before sanding. In general, the ideal temperature for drying wood glue is between 60°F and 80°F, and the ideal humidity is between 40% and 60%. If the temperature is too low or the humidity is too high, the drying time can be longer than usual. Conversely, if the temperature is too high or the humidity is too low, the drying time can be shorter than usual.

Thickness of the Glue Layer

The thickness of the glue layer can also affect how long wood glue should dry before sanding. In general, the thicker the glue layer, the longer it will take to dry. As a rule of thumb, you should allow one hour of drying time for every 1/16 inch of glue layer thickness. However, this can vary depending on the type of glue and environmental conditions.

In summary, the drying time for wood glue can vary depending on several factors, including the type of glue, environmental conditions, and thickness of the glue layer. It’s important to take these factors into consideration when using wood glue to ensure that it dries completely before sanding.

Preparation Before Sanding

preparation-before-sanding

Before you start sanding your wood glue, there are a few things you should do to prepare. This will ensure that your sanding process goes smoothly and that you achieve the desired results.

Checking Glue Dryness

The first step in preparing to sand your wood glue is to check its dryness. If the glue is not completely dry, sanding it can cause damage to the joint and ruin your project. Most wood glues take around 24 hours to dry completely, but it’s always best to check the manufacturer’s instructions to be sure.

To check the dryness of your glue, gently press your finger onto the glue joint. If it feels tacky or sticky, it’s not dry yet and you should wait a little longer before sanding. If it feels hard and dry, you can proceed with sanding.

Safety Measures

When sanding wood glue, it’s important to take safety measures to protect yourself from inhaling dust and debris. Here are some tips to keep in mind:

  • Wear a dust mask or respirator to protect your lungs from dust particles.
  • Use eye protection to protect your eyes from flying debris.
  • Wear gloves to protect your hands from sharp edges and splinters.
  • Sand in a well-ventilated area to prevent the buildup of dust.

By taking these safety measures, you can ensure that your sanding process is safe and effective.

Sanding Process After Glue Drying

sanding-process-after-glue-drying

After allowing the wood glue to dry for at least 24 hours, it is now safe to sand the surface. Sanding is an essential part of woodworking, and it helps to achieve a smooth, even surface. In this section, we will discuss the sanding process after glue drying.

Choosing Sandpaper Grit

The first step in sanding after glue drying is to choose the right sandpaper grit. The grit you choose will depend on the type of wood and the finish you want to achieve. If you want a smooth finish, start with a low grit sandpaper, such as 80 or 100. If you are sanding a hardwood, you may need to start with a higher grit, such as 120 or 150.

As you progress through the sanding process, move up to a higher grit sandpaper. For example, if you start with 80 grit, move up to 120 grit, then 220 grit, and so on. The higher the grit, the smoother the surface will be.

Sanding Technique

To sand the surface, start with a sanding block or an orbital sander. Hold the sander at a 45-degree angle to the surface and move it in a circular motion. Be sure to apply even pressure to avoid creating uneven spots.

As you sand, periodically check the surface to see if it is smooth and even. If you notice any rough spots, continue sanding until they are gone. Be careful not to sand too much in one area, as this can create a dip in the surface.

Once you have finished sanding with the orbital sander, switch to a sandpaper sheet and sand by hand. This will help you to reach any tight spots that the sander may have missed. Use a light touch and sand in the direction of the grain.

In conclusion, sanding after glue drying is an essential part of woodworking. Choosing the right sandpaper grit and using the correct sanding technique will help you to achieve a smooth, even surface. Remember to take your time and be patient, as rushing the sanding process can result in a less-than-perfect finish.

Frequently Asked Questions

How long does it take for wood glue to dry before sanding?

The drying time for wood glue before sanding depends on several factors such as humidity, temperature, wood type, and the type of glue used. Typically, it takes around 24 hours for most wood glues to dry before sanding. However, some rapid-set epoxy can dry in about 6 hours. It is best to follow the manufacturer’s instructions for the specific glue you are using to ensure optimal results.

What is the recommended dry time for wood filler before sanding?

The recommended dry time for wood filler before sanding can vary depending on the brand and type of filler used. Generally, it is recommended to let the wood filler dry for at least 24 hours before sanding. However, some fillers may require longer drying times. It is best to consult the manufacturer’s instructions for the specific wood filler you are using.

How long does it take for Gorilla Glue to dry before sanding?

Gorilla Glue is a type of polyurethane glue that requires moisture to activate and cure. The drying time for Gorilla Glue can vary depending on the amount of moisture present. Typically, it takes around 24 hours for Gorilla Glue to dry before sanding. However, it is best to follow the manufacturer’s instructions for the specific glue you are using to ensure optimal results.

What is the dry time for Titebond 3 before sanding?

Titebond 3 is a waterproof wood glue that is commonly used in woodworking projects. The drying time for Titebond 3 before sanding is around 24 hours. However, it is best to follow the manufacturer’s instructions for the specific glue you are using to ensure optimal results.

Can dried wood glue be sanded?

Yes, dried wood glue can be sanded. However, it is important to ensure that the glue is completely dry before sanding to avoid compromising the strength and durability of the joint. Partially dried or uncured wood glue can result in a weak joint that may fail over time.

How long should I let wood glue cure before sanding?

It is recommended to let wood glue cure for at least 24 hours before sanding. However, the curing time can vary depending on several factors such as humidity, temperature, and the type of glue used. It is best to follow the manufacturer’s instructions for the specific glue you are using to ensure optimal results.