When it comes to woodworking, knowing how long you should let wood glue dry before sanding is crucial to ensuring the strength and durability of your project. While it may be tempting to rush through the process, taking the time to properly let the glue dry can make all the difference in the final result.
Most wood glues only need clamps on them for about 30 minutes to 1 hour. After that point, you can do some light sanding, as long as you do not subject the joints to stress. The glue has not cured fully at that point, so the joint does not have full strength. It will reach full strength in about 24 hours.
However, it’s important to note that different types of wood glue may have different drying times. For example, cyanoacrylate, better known as superglue, can dry enough to fix small repairs in seconds, though full cure might still take anywhere from 8 to 24 hours. It’s always best to consult the manufacturer’s instructions for specific drying times and recommendations.
Understanding Wood Glue
When working on woodworking projects, one of the most important things to consider is the type of glue you use. Wood glue is a popular adhesive that is used to bond wood pieces together. It is a versatile and strong adhesive that can be used for a variety of woodworking projects.
There are different types of wood glue available, and each type has its own unique properties. Some wood glues are fast-drying, while others take longer to dry. Some are water-resistant, while others are waterproof. It is important to choose the right type of wood glue for your project to ensure a strong and lasting bond.
Wood glue is made from a combination of water, resin, and sometimes filler materials. When the glue is applied to wood, the water evaporates, leaving behind a strong bond between the wood pieces. The bond created by wood glue is often stronger than the wood itself, making it an ideal adhesive for woodworking projects.
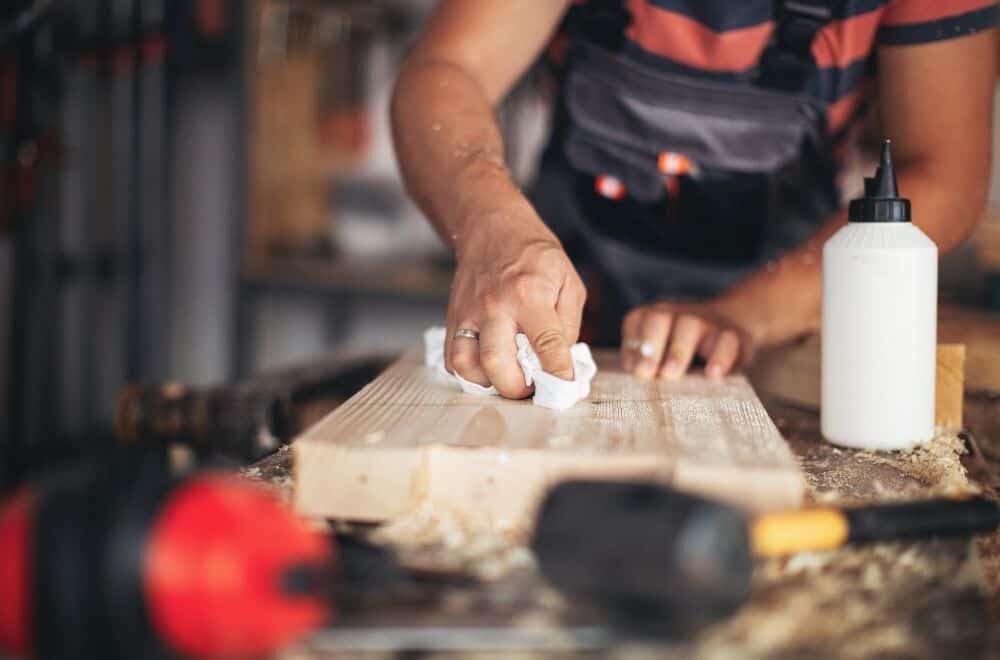
One of the benefits of wood glue is that it can be sanded and painted once it has dried. This makes it an ideal adhesive for projects that require a smooth finish. However, it is important to allow the glue to dry completely before sanding or painting to avoid damaging the bond.
When using wood glue, it is important to follow the manufacturer’s instructions carefully. This will ensure that you use the glue correctly and achieve the best possible results. Some wood glues require clamping, while others do not. It is important to understand the requirements of the glue you are using to ensure a strong bond.
Overall, wood glue is a versatile and strong adhesive that is ideal for woodworking projects. By understanding the properties of wood glue and choosing the right type for your project, you can achieve a strong and lasting bond between wood pieces.
Ideal Drying Time for Wood Glue

When working on a woodworking project, you want to make sure that you are using the right techniques to achieve the best results. One of the most important steps in woodworking is gluing pieces of wood together. However, knowing how long to let the glue dry before sanding can be tricky. In this section, we will discuss the ideal drying time for wood glue.
The general rule of thumb is to let freshly applied wood glue dry for a minimum of 24 hours before unclamping the attached pieces. This is the recommended time for most wood glue brands. Some people in woodworking circles may find this timing overkill, but it is always safer to err on the side of caution. Some wood glue brands have specific recommendations for their products, so it is important to follow the manufacturer’s instructions.
It is important to note that the drying time of wood glue can vary depending on several factors, such as the type of glue, temperature, and humidity. For example, Titebond recommends clamping unstressed joints for between 30-60 minutes and allowing them to cure for 24 hours, while stressed joints should be clamped for 24 hours and allowed an additional 24 hours to cure before stress is applied.
If you are working on a project that requires sanding, it is important to let the wood glue dry completely before sanding. You need to let wood glue dry for at least 1 hour before sanding to avoid shrinkage when curing. The safest time to sand wood glue is after 24 hours of application, as the volume of the adhesive is not going to change.
In summary, the ideal drying time for wood glue is at least 24 hours before unclamping the attached pieces. However, it is important to follow the manufacturer’s instructions and take into consideration the type of glue, temperature, and humidity. Remember to let the wood glue dry completely before sanding to avoid any issues.
Factors Affecting Drying Time
When it comes to wood glue, the drying time can vary depending on several factors. Here are the main factors that can affect how long wood glue should dry before sanding:
Type of Wood Glue
Different types of wood glue have different drying times. For example, polyvinyl acetate (PVA) glue, which is one of the most popular types of wood glue, dries when exposed to air and can take anywhere from 15 minutes to 24 hours to dry completely, depending on the thickness of the glue layer and environmental conditions. On the other hand, epoxy glue can take several hours to several days to dry completely.
Environmental Conditions
The temperature and humidity of the environment can also affect how long wood glue should dry before sanding. In general, the ideal temperature for drying wood glue is between 60°F and 80°F, and the ideal humidity is between 40% and 60%. If the temperature is too low or the humidity is too high, the drying time can be longer than usual. Conversely, if the temperature is too high or the humidity is too low, the drying time can be shorter than usual.
Thickness of the Glue Layer
The thickness of the glue layer can also affect how long wood glue should dry before sanding. In general, the thicker the glue layer, the longer it will take to dry. As a rule of thumb, you should allow one hour of drying time for every 1/16 inch of glue layer thickness. However, this can vary depending on the type of glue and environmental conditions.
In summary, the drying time for wood glue can vary depending on several factors, including the type of glue, environmental conditions, and thickness of the glue layer. It’s important to take these factors into consideration when using wood glue to ensure that it dries completely before sanding.
Preparation Before Sanding
Before you start sanding your wood glue, there are a few things you should do to prepare. This will ensure that your sanding process goes smoothly and that you achieve the desired results.
Checking Glue Dryness
The first step in preparing to sand your wood glue is to check its dryness. If the glue is not completely dry, sanding it can cause damage to the joint and ruin your project. Most wood glues take around 24 hours to dry completely, but it’s always best to check the manufacturer’s instructions to be sure.
To check the dryness of your glue, gently press your finger onto the glue joint. If it feels tacky or sticky, it’s not dry yet and you should wait a little longer before sanding. If it feels hard and dry, you can proceed with sanding.
Safety Measures
When sanding wood glue, it’s important to take safety measures to protect yourself from inhaling dust and debris. Here are some tips to keep in mind:
- Wear a dust mask or respirator to protect your lungs from dust particles.
- Use eye protection to protect your eyes from flying debris.
- Wear gloves to protect your hands from sharp edges and splinters.
- Sand in a well-ventilated area to prevent the buildup of dust.
By taking these safety measures, you can ensure that your sanding process is safe and effective.
Sanding Process After Glue Drying

After allowing the wood glue to dry for at least 24 hours, it is now safe to sand the surface. Sanding is an essential part of woodworking, and it helps to achieve a smooth, even surface. In this section, we will discuss the sanding process after glue drying.
Choosing Sandpaper Grit
The first step in sanding after glue drying is to choose the right sandpaper grit. The grit you choose will depend on the type of wood and the finish you want to achieve. If you want a smooth finish, start with a low grit sandpaper, such as 80 or 100. If you are sanding a hardwood, you may need to start with a higher grit, such as 120 or 150.
As you progress through the sanding process, move up to a higher grit sandpaper. For example, if you start with 80 grit, move up to 120 grit, then 220 grit, and so on. The higher the grit, the smoother the surface will be.
Sanding Technique
To sand the surface, start with a sanding block or an orbital sander. Hold the sander at a 45-degree angle to the surface and move it in a circular motion. Be sure to apply even pressure to avoid creating uneven spots.
As you sand, periodically check the surface to see if it is smooth and even. If you notice any rough spots, continue sanding until they are gone. Be careful not to sand too much in one area, as this can create a dip in the surface.
Once you have finished sanding with the orbital sander, switch to a sandpaper sheet and sand by hand. This will help you to reach any tight spots that the sander may have missed. Use a light touch and sand in the direction of the grain.
In conclusion, sanding after glue drying is an essential part of woodworking. Choosing the right sandpaper grit and using the correct sanding technique will help you to achieve a smooth, even surface. Remember to take your time and be patient, as rushing the sanding process can result in a less-than-perfect finish.
Frequently Asked Questions
How long does it take for wood glue to dry before sanding?
The drying time for wood glue before sanding depends on several factors such as humidity, temperature, wood type, and the type of glue used. Typically, it takes around 24 hours for most wood glues to dry before sanding. However, some rapid-set epoxy can dry in about 6 hours. It is best to follow the manufacturer’s instructions for the specific glue you are using to ensure optimal results.
What is the recommended dry time for wood filler before sanding?
The recommended dry time for wood filler before sanding can vary depending on the brand and type of filler used. Generally, it is recommended to let the wood filler dry for at least 24 hours before sanding. However, some fillers may require longer drying times. It is best to consult the manufacturer’s instructions for the specific wood filler you are using.
How long does it take for Gorilla Glue to dry before sanding?
Gorilla Glue is a type of polyurethane glue that requires moisture to activate and cure. The drying time for Gorilla Glue can vary depending on the amount of moisture present. Typically, it takes around 24 hours for Gorilla Glue to dry before sanding. However, it is best to follow the manufacturer’s instructions for the specific glue you are using to ensure optimal results.
What is the dry time for Titebond 3 before sanding?
Titebond 3 is a waterproof wood glue that is commonly used in woodworking projects. The drying time for Titebond 3 before sanding is around 24 hours. However, it is best to follow the manufacturer’s instructions for the specific glue you are using to ensure optimal results.
Can dried wood glue be sanded?
Yes, dried wood glue can be sanded. However, it is important to ensure that the glue is completely dry before sanding to avoid compromising the strength and durability of the joint. Partially dried or uncured wood glue can result in a weak joint that may fail over time.
How long should I let wood glue cure before sanding?
It is recommended to let wood glue cure for at least 24 hours before sanding. However, the curing time can vary depending on several factors such as humidity, temperature, and the type of glue used. It is best to follow the manufacturer’s instructions for the specific glue you are using to ensure optimal results.