
If you’re looking to add a personal touch to your home decor, building your own wooden picture frames can be a great place to start. Not only do they add a rustic feel to your space, but they also allow you to showcase your favorite photos in a unique way. With a few basic tools and some simple steps, you can create custom frames that perfectly match your style.
Before you begin, it’s important to choose the right type of wood for your project. Softwoods like pine and cedar are easy to work with and can be found at most home improvement stores. Hardwoods like oak and cherry are more durable and offer a more polished look, but they can be more expensive. Once you’ve selected your wood, you’ll need to measure and cut it to the desired size. From there, you’ll use basic tools like a saw and sander to shape the wood and create the frame. Whether you’re a seasoned woodworker or a beginner, building a wooden picture frame is a fun and rewarding project that anyone can tackle.
Understanding the Basics
Building a wooden picture frame is a great way to showcase your favorite photos or artwork. With a few basic tools and some lumber, you can create a custom frame that perfectly fits your style and décor. In this section, we’ll cover the basics of building a wooden picture frame, including the types of wood to use and the tools you’ll need.
Types of Wood
When it comes to building a picture frame, you’ll want to choose a wood that is both attractive and durable. Some popular options include:
- Oak: A strong and durable wood that is perfect for larger frames.
- Maple: A light-colored wood that is easy to stain or paint.
- Cherry: A beautiful and richly colored wood that is perfect for smaller frames.
- Walnut: A dark and luxurious wood that is great for more formal or elegant frames.
When selecting your wood, be sure to choose boards that are straight and free of knots or other defects. You’ll also want to consider the grain pattern of the wood, as this can affect the overall look of your frame.
Choosing the Right Tools
To build a wooden picture frame, you’ll need a few basic tools, including:
- Table saw: This will be used to rip your lumber to the correct size.
- Miter saw: This will be used to cut your frame pieces to the correct length.
- Router: This will be used to create a groove for your glass and backing.
- Clamps: These will be used to hold your frame pieces together while the glue dries.
- Sandpaper: This will be used to smooth out any rough edges or surfaces.
You may also want to invest in a few additional tools, such as a nail gun or a biscuit joiner, depending on the complexity of your frame design.
With these basics in mind, you’re ready to start building your own wooden picture frame.
Designing Your Picture Frame
When it comes to building a wooden picture frame, the design is just as important as the construction. A well-designed frame can enhance the beauty of your artwork and add a personal touch to your space. Here are some tips on how to design your picture frame.
Determining the Size
The first step in designing your picture frame is to determine the size of your artwork. Measure the width and height of your artwork and add an inch to each measurement to allow for the frame to overlap the artwork. This will be the size of your frame. Keep in mind that larger frames will require thicker and sturdier wood to support the weight of the artwork.
Choosing the Style
Once you have determined the size of your frame, you can choose the style that best suits your artwork and personal taste. Here are some popular styles to consider:
- Traditional: A classic style with simple, clean lines and minimal ornamentation.
- Ornate: A decorative style with intricate details and embellishments.
- Rustic: A natural, earthy style with rough-hewn wood and a distressed finish.
- Modern: A sleek, minimalist style with clean lines and a smooth finish.
Consider the style of your artwork and the decor of your space when choosing the style of your frame. A traditional frame may be best suited for a classic painting, while a rustic frame may complement a landscape photograph. A modern frame may work well with a contemporary abstract piece.
In summary, designing your picture frame involves determining the size of your artwork and choosing a style that complements both your artwork and your space. Keep these tips in mind when designing your frame to create a beautiful and personalized finished product.
Preparing the Wood
Before you start building your wooden picture frame, it is essential to prepare the wood properly. This process involves cutting and sanding the wood to achieve a smooth and even surface.
Cutting the Wood
The first step in preparing the wood is to cut it to the required size. You can use a table saw or a miter saw to cut the wood. It is essential to measure the wood accurately before cutting it to avoid any mistakes.
When cutting the wood, it is crucial to use the right blade for the job. A crosscut blade is ideal for cutting across the grain, while a rip blade is suitable for cutting along the grain. Using the wrong blade can result in a rough and uneven cut.
Sanding the Wood
After cutting the wood, the next step is to sand it to achieve a smooth and even surface. Sanding helps to remove any rough edges and splinters, making the wood easier to work with.
Start by using a coarse-grit sandpaper to remove any rough spots or imperfections on the wood. Then, switch to a finer-grit sandpaper to achieve a smooth surface. It is essential to sand the wood evenly to avoid any unevenness in the final product.
When sanding the wood, it is crucial to wear protective gear such as gloves, goggles, and a dust mask. Sanding produces a lot of dust, which can be harmful to your health if inhaled.
In conclusion, preparing the wood is an essential step in building a wooden picture frame. By cutting and sanding the wood properly, you can achieve a smooth and even surface, making it easier to work with.
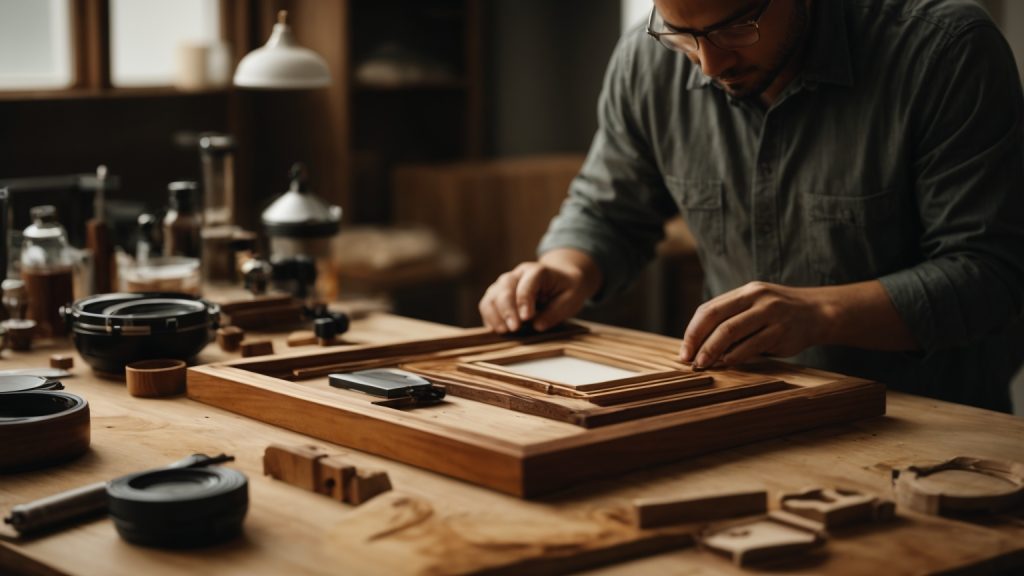
Assembling the Frame
Once you have all the pieces cut to size, it’s time to assemble your wooden picture frame. This section will cover the two main steps of joining the pieces and securing the corners.
Joining the Pieces
To join the pieces of your wooden picture frame, you will need wood glue and plastic pegs. Follow these steps:
- Apply a drop of wood glue to four of the eight miter faces.
- Spread the glue thinly over the miter face.
- Join the pieces together, making sure the corners are flush.
- Insert the plastic pegs into the pre-drilled holes in the back of the frame.
Securing the Corners
To secure the corners of your wooden picture frame, you have a few options:
- Use a band clamp to hold the corners together while the glue dries.
- Use corner clamps to hold the corners together while the glue dries.
- Use a brad nailer to secure the corners.
If you choose to use a brad nailer, be sure to countersink the nails and fill the holes with wood filler before sanding and finishing your frame.
Once your frame is assembled and the glue is dry, you can sand it smooth and apply your finish of choice. Congratulations, you’ve built your own wooden picture frame!
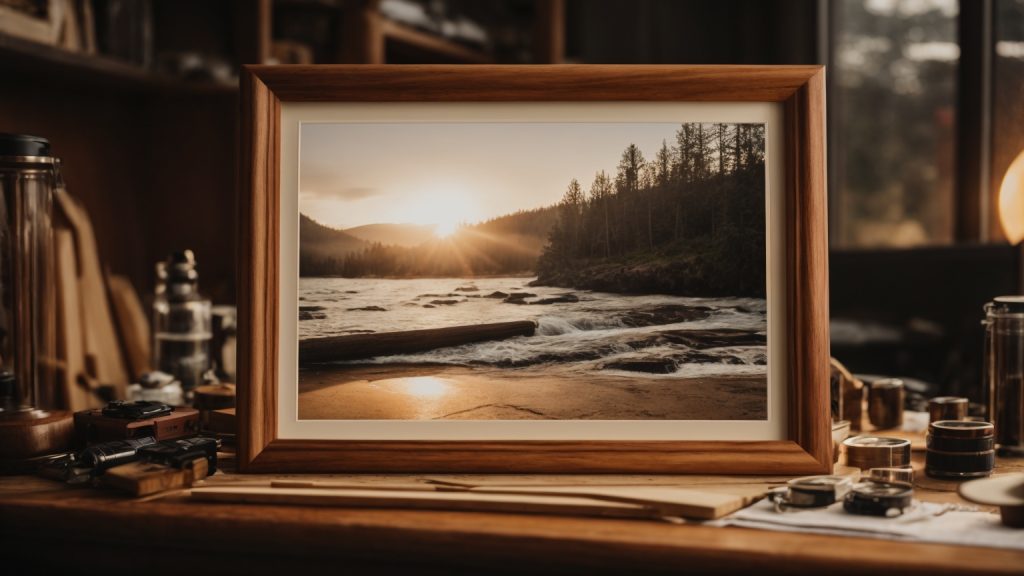
Finishing Touches
Once you’ve assembled your wooden picture frame, it’s time to add the finishing touches that will make it look polished and professional. This section will cover two important steps: applying the finish and adding the glass and picture.
Applying the Finish
The finish you choose for your picture frame will depend on your personal preference and the look you’re going for. Some common options include stain, paint, or a clear coat to showcase the natural beauty of the wood.
Before applying any finish, make sure the frame is clean and free of dust and debris. Sand the frame lightly to smooth out any rough spots or imperfections. Then, apply the finish according to the manufacturer’s instructions. You may need to apply multiple coats, allowing each coat to dry completely before applying the next.
Adding the Glass and Picture
Once the finish has dried, it’s time to add the glass and picture to your frame. Start by cleaning the glass to remove any fingerprints or smudges. Then, carefully place the glass into the frame, making sure it fits snugly.
Next, add the picture. If you’re using a mat, make sure the picture is centered and straight within the mat. Then, carefully place the mat and picture into the frame, making sure everything is lined up correctly.
Finally, add any hardware you need to hang the frame. This may include picture hangers, wire, or hooks. Make sure the hardware is securely attached to the frame, and test the frame to make sure it hangs straight.
With these finishing touches, your wooden picture frame is complete and ready to display your favorite photo or artwork.