Tag Archives: local home improvement store

how-to-easily-get-rid-of-wooden-pallets

How Much Do Wooden Planks Cost? A Friendly Guide to Budgeting for Your Next DIY Project

If you’re planning to start a woodworking project, one of the most significant expenses you’ll encounter is the cost of wooden planks. The cost of wooden planks varies depending on several factors such as the type of wood, size, and quality. Wooden planks are used for a wide range of applications, including building furniture, flooring, and constructing decks and fences.

The cost of wooden planks depends on the type of wood you choose. Softwoods such as pine and spruce are less expensive than hardwoods such as oak and mahogany. The size of the wooden planks also plays a role in the cost. The larger the plank, the more expensive it is likely to be. Additionally, the quality of the wooden planks can also affect the cost. Higher quality planks are typically more expensive than lower quality ones.

When it comes to purchasing wooden planks, it’s essential to consider your budget and the project’s requirements. You can purchase wooden planks at home improvement stores such as Home Depot and Lowe’s, as well as specialty lumber yards. It’s essential to compare prices and quality before making a purchase to ensure you’re getting the best value for your money.

Understanding Wood Plank Costs

how-to-easily-get-rid-of-wooden-pallets

Wood planks are a popular choice for flooring, decking, and many other construction projects. However, the cost of wood planks can vary widely depending on a variety of factors. Here are some things to keep in mind when considering the cost of wood planks:

Type of Wood

Different types of wood have different costs. For example, pine is generally less expensive than oak. Exotic woods like teak and mahogany can be much more expensive. Keep in mind that the cost of the wood itself is just one factor in the total cost of your project.

Grade of Wood

Wood is graded based on its quality. Higher-grade wood is more expensive but also tends to be more durable and attractive. Lower-grade wood may be cheaper but may not last as long or look as nice.

Size of Planks

The size of the planks you choose can also affect the cost. Larger planks are generally more expensive than smaller ones. Keep in mind that larger planks may require more labor to install, which can also add to the total cost of your project.

Installation Costs

The cost of installation can vary depending on the type of wood, the size of the planks, and other factors. Make sure to get an estimate from a qualified professional before starting your project.

Additional Costs

There may be additional costs associated with your project, such as the cost of underlayment, adhesives, and finishing materials. Make sure to factor these costs into your budget.

Overall, the cost of wood planks can vary widely depending on a variety of factors. Keep in mind that the cheapest option may not always be the best choice in the long run. It’s important to consider factors like durability, appearance, and installation costs when choosing the right wood planks for your project.

Factors Influencing Wood Plank Prices

When it comes to purchasing wood planks, there are several factors that can influence the price you pay. Understanding these factors can help you make an informed decision and get the best value for your money. Here are some of the main factors that influence wood plank prices:

Quality of Wood

The quality of the wood you choose can have a significant impact on the price you pay. Higher quality wood is typically more expensive, but it may be worth the investment if you want a durable and long-lasting product. Lower quality wood may be cheaper initially, but it may not hold up as well over time and could end up costing you more in the long run.

Size of Planks

The size of the planks you choose can also impact the price. Larger planks may be more expensive than smaller ones, but they can also cover more area and reduce the amount of labor required for installation. However, smaller planks may be easier to handle and install, which could save you money on installation costs.

Type of Wood

The type of wood you choose can also affect the price. Some types of wood are more expensive than others due to their rarity, durability, or unique characteristics. For example, exotic hardwoods like Brazilian cherry or teak can be much more expensive than domestic hardwoods like oak or maple. Additionally, some types of wood may require special treatment or maintenance, which can add to the overall cost.

When considering the factors that influence wood plank prices, it’s important to weigh the pros and cons of each option and determine what will work best for your budget and needs. By doing your research and understanding the costs associated with different types of wood, you can make an informed decision and get the best value for your money.

Cost of Different Types of Wood Planks

When it comes to wooden planks, the cost can vary greatly depending on the type of wood. Here are the average prices for some of the most popular types of wood planks:

Pine Wood Planks

Pine wood is a popular choice for those on a budget. It is a softwood and is easy to work with, making it a great option for DIY projects. The cost of pine wood planks ranges from $1.50 to $4.50 per square foot, depending on the grade and quality of the wood.

Oak Wood Planks

Oak wood is a hardwood that is known for its durability and strength. It is a popular choice for flooring and furniture. The cost of oak wood planks ranges from $5 to $15 per square foot, depending on the grade and quality of the wood.

Teak Wood Planks

Teak wood is a hardwood that is known for its resistance to rot and decay. It is a popular choice for outdoor furniture and decking. The cost of teak wood planks ranges from $8 to $30 per square foot, depending on the grade and quality of the wood.

When choosing the type of wood for your project, keep in mind that the cost is not the only factor to consider. You should also consider the durability, strength, and appearance of the wood.

Buying Wood Planks in Bulk

If you’re planning a large-scale woodworking project, buying wood planks in bulk can save you a significant amount of money. However, it’s important to do your research and make sure you’re getting a good deal.

One option for buying wood planks in bulk is to check out your local home improvement stores. Stores like Lowe’s and Home Depot often offer bulk pricing on lumber, and you can save even more if you have a store credit card or sign up for their loyalty program.

Another option is to look for online retailers that specialize in lumber and woodworking supplies. Advantage Lumber is one such retailer that offers bulk pricing on a wide variety of wood species, including popular options like cedar, redwood, and pine.

When buying wood planks in bulk, it’s important to consider the quality of the wood. Make sure you’re getting kiln-dried lumber, which will be more stable and less likely to warp or twist over time. You should also check the wood for knots, cracks, and other defects that could weaken the planks.

Finally, don’t forget to factor in the cost of shipping when buying wood planks online. Some retailers offer free shipping on large orders, while others may charge a flat rate or calculate shipping based on the weight of the lumber.

Overall, buying wood planks in bulk can be a great way to save money on your woodworking projects. Just be sure to do your research and choose a reputable retailer that offers high-quality lumber at a fair price.

Cost Comparison: New vs. Reclaimed Wood

find-scrap-wood-at-your-local-hardware-store-do-they-have-scrap-wood-bins

If you’re planning to use wood planks for your next project, you might be wondering whether to go for new or reclaimed wood. Here’s a quick cost comparison to help you decide.

New Wood

New wood is readily available and can be purchased in various sizes and types. The cost of new wood can vary depending on the type of wood, size, and quality. Here are some average costs for new wood planks:

  • Pine: $1.50 to $10 per square foot
  • Oak: $5 to $15 per square foot
  • Cedar: $4 to $12 per square foot
  • Maple: $6 to $14 per square foot
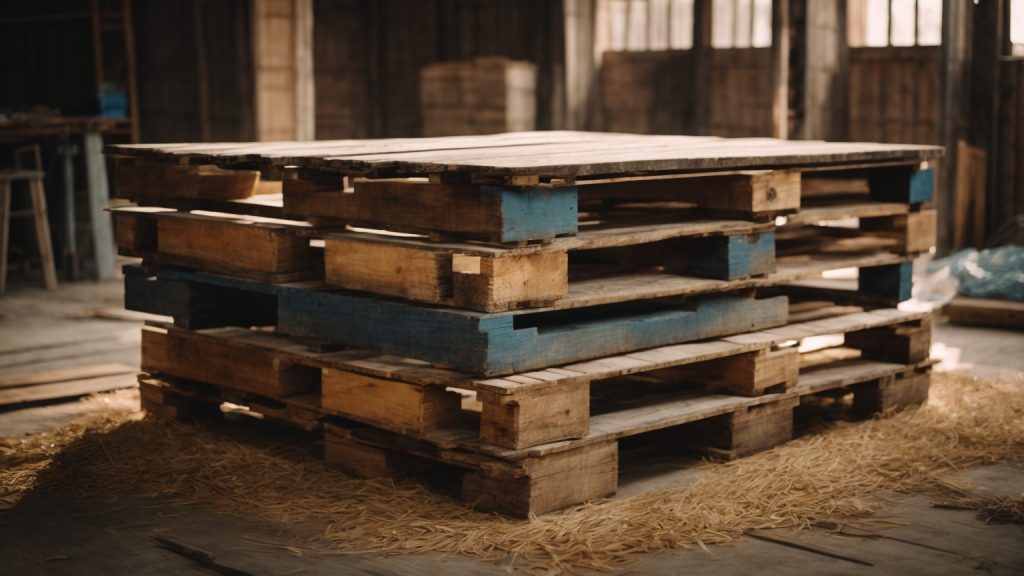
Reclaimed Wood

Reclaimed wood is salvaged from old buildings, barns, and other structures. It’s a sustainable option that adds character and history to your project. However, it can be more expensive than new wood due to the time and effort required to source and prepare it. Here are some average costs for reclaimed wood planks:

  • Pine: $5 to $20 per square foot
  • Oak: $10 to $25 per square foot
  • Cedar: $8 to $20 per square foot
  • Maple: $12 to $30 per square foot

Keep in mind that the cost of reclaimed wood can vary depending on factors such as the age, condition, and rarity of the wood. Additionally, some suppliers may charge extra for cleaning, milling, and finishing the wood.

Overall, the cost of wood planks depends on your budget, project requirements, and personal preference. New wood is a more affordable option, while reclaimed wood is a sustainable and unique choice that adds character to your project.

Where to Buy Wood Planks

If you’re looking to buy wood planks for your next project, there are a few places you can consider. Here are some options:

Home Improvement Stores

Home improvement stores like The Home Depot and Lowe’s offer a wide variety of wood planks in different sizes, types, and finishes. You can find common types of wood like pine, cedar, and spruce, as well as more exotic types like mahogany and teak. These stores also offer the option to cut the wood to your desired size, which can be convenient if you don’t have the tools to do it yourself.

Lumber Yards

Lumber yards are another option for buying wood planks. They typically have a larger selection of wood types and sizes than home improvement stores. You can also find specialty woods like reclaimed barn wood and exotic hardwoods. Lumber yards may also be able to provide custom cuts and milling services.

Online Retailers

If you don’t have any local options or prefer the convenience of shopping from home, there are several online retailers that sell wood planks. Some popular options include Amazon, Etsy, and Wayfair. Keep in mind that shipping costs can be high due to the weight and size of the wood, so factor that into your budget.

Local Sawmills

If you’re looking for a more unique or sustainable option, consider buying wood planks from a local sawmill. These businesses specialize in cutting and milling wood, often from local sources. You can find a variety of wood types and sizes, and may even be able to choose the specific tree the wood came from. Local sawmills also tend to have lower prices than larger retailers.

No matter where you decide to buy your wood planks, make sure to do your research and compare prices and quality. Don’t be afraid to ask questions and seek advice from experts to ensure you’re getting the best value for your money.

Tips to Save on Wood Planks

Wood planks can be a beautiful addition to any home, but they can also be expensive. Here are some tips to help you save money when purchasing wood planks:

  • Buy in bulk: Purchasing wood planks in bulk can save you money. Look for deals on larger quantities.
  • Choose a less expensive wood: Some types of wood are more expensive than others. Consider using a less expensive wood, such as pine, instead of a more expensive wood like oak or mahogany.
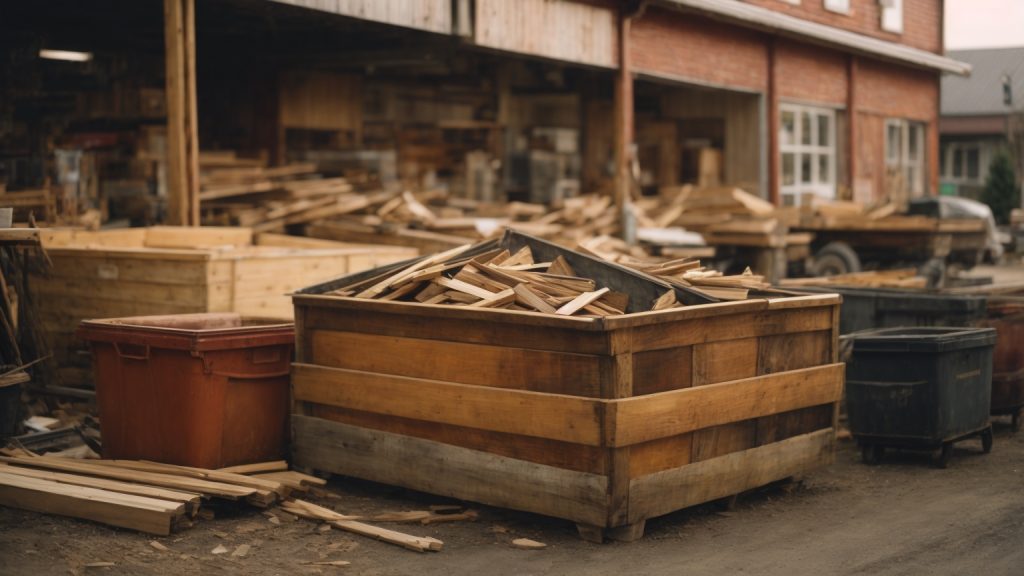
  • Use reclaimed wood: Reclaimed wood is often less expensive than new wood and can add a unique character to your project.
  • Look for discounts: Check with your local home improvement store or lumberyard for discounts on wood planks. You may be able to find end-of-season sales or clearance items.
  • Use thinner planks: Thinner wood planks can be less expensive than thicker ones. Consider using a thinner plank if it will still work for your project.
  • Plan ahead: Knowing exactly how much wood you need before you start your project can help you avoid purchasing more than you need. This can save you money and prevent waste.

By following these tips, you can save money when purchasing wood planks for your next project.

How to Make a Wooden Table: A Beginner's Guide to Crafting Your Own Furniture

Are you looking to add a unique touch to your home decor? Building your own wooden table can be a great DIY project that will not only save you money but also provide you with a sense of accomplishment. Whether you’re a seasoned woodworker or a beginner, making a wooden table is a project that can be completed with a few basic tools and materials.

Before you begin, it’s important to determine the type of table you want to make. There are many different styles and designs to choose from, so take some time to consider your preferences. You can browse furniture catalogs or woodworking magazines for inspiration, or simply search online for pictures of tables to get ideas. Once you have a clear idea of the type of table you want to build, you can start gathering the necessary materials and tools.

Choosing the Right Wood

When it comes to building a wooden table, choosing the right wood is crucial. The type of wood you select will determine the durability, appearance, and overall quality of your table. Here are some factors to consider when choosing the right wood for your project.

Hardwood Vs Softwood

The first decision you need to make is whether to use hardwood or softwood. Hardwoods are generally more durable and denser, making them ideal for furniture projects that require long-term durability, such as dining room tables. Examples of hardwoods include Beech, Hickory, Maple, Oak (including red oak and white oak), Teak, Walnut, and Cherry wood. Softwoods, on the other hand, are generally less dense and less durable, but they can be less expensive and easier to work with. Examples of softwoods include Pine, Cedar, and Fir.

Considering Wood Grain

The wood grain is an important factor to consider when choosing the right wood for your table. The grain refers to the pattern of the wood fibers, and it can affect the appearance and stability of your table. There are two main types of grain: straight grain and cross-grain. Straight grain runs parallel to the length of the board and is generally more stable. Cross-grain runs perpendicular to the length of the board and can be less stable. When choosing your wood, look for boards with straight grain and minimal knots or defects.

Understanding Wood Sizes

Understanding wood sizes is important when selecting the right wood for your table. Wood is usually sold in standard sizes, such as 1×4, 2×6, and 4×4. These sizes refer to the nominal size, which is the size of the board before it is planed and sanded. The actual size of the board will be slightly smaller. For example, a 1×4 board will actually measure 3/4 inch by 3 1/2 inches. When selecting your wood, make sure to choose boards that are straight, flat, and free from cracks or defects. It’s also a good idea to purchase extra wood in case of mistakes or defects.

By considering the type of wood, wood grain, and wood sizes, you can choose the right wood for your table project. With the right wood, you can create a beautiful and durable table that will last for years to come.

Designing Your Table

When it comes to designing your wooden table, there are a few important considerations to keep in mind. In this section, we’ll explore how to determine the dimensions of your table and how to sketch out your design.

Determining Table Dimensions

Before you start building your table, you’ll need to determine the dimensions that will work best for your space and needs. Here are a few factors to consider:

  • Size of the room: Make sure your table fits comfortably in the room without taking up too much space.
  • Number of people: Think about how many people you want to seat at the table. A standard table is about 30 inches high and can seat four to six people.
  • Purpose of the table: Will you be using the table for dining, work, or another purpose? This can affect the size and shape of the table.

Once you’ve determined the dimensions you need, make sure to measure your space carefully to ensure your table will fit.

Sketching the Table Design

Once you’ve determined the dimensions of your table, it’s time to sketch out your design. Here are a few tips to get you started:

  • Decide on a style: Do you want a modern, rustic, or traditional look? Look online or in magazines for inspiration.
  • Choose your materials: Think about what type of wood you want to use and any other materials you may need, such as screws or brackets.
  • Sketch out your design: Use graph paper to sketch out your table design, making sure to include accurate measurements. This will help you visualize your table and make any necessary adjustments before you start building.

Remember, your table design doesn’t have to be perfect. Use your sketches as a starting point and make adjustments as you go. With a little creativity and planning, you can create a beautiful wooden table that fits perfectly in your space.

Gathering Tools and Materials

Before you begin building your wooden table, it’s important to gather all the necessary tools and materials. Here are the essential items you will need:

Essential Woodworking Tools

  1. Circular saw: This tool is perfect for cutting large pieces of wood.

  2. Jigsaw: A jigsaw is great for making curved cuts.

  3. Table saw: A table saw is essential for making precise cuts.

  4. Drill: You’ll need a drill for making holes and attaching screws.

  5. Sander: A sander is necessary for smoothing out rough edges and surfaces.

  6. Clamps: Clamps are useful for holding pieces of wood together while glue dries.

  7. Chisels: Chisels are handy for removing excess wood and creating intricate details.

Safety Equipment

  1. Safety goggles: Protect your eyes from sawdust and flying debris.

  2. Earplugs: Loud power tools can damage your hearing, so make sure to wear earplugs.

  3. Dust mask: Protect your lungs from sawdust by wearing a dust mask.

  4. Work gloves: Keep your hands safe from splinters and cuts with a good pair of work gloves.

Make sure to purchase high-quality wood, such as pine, cherry, poplar, or cedar, from your local home improvement store. You’ll also need wood glue, screws, and sandpaper.

With all the necessary tools and materials gathered, you’re ready to move on to the next step in building your wooden table.

Preparing the Wood

Before you can start building your wooden table, you need to prepare the wood. This involves cutting the wood to the correct size and sanding it to ensure a smooth finish. Here’s how to do it:

Cutting the Wood

The first step in preparing the wood for your table is to cut it to the correct size. You’ll need a saw for this, as well as a measuring tape to ensure accuracy. Here are the steps to follow:

  1. Measure the length and width of the table you want to build.
  2. Mark the measurements on your wood using a pencil and a straight edge.
  3. Use your saw to cut the wood along the marked lines.

It’s important to take your time when cutting the wood to ensure that you get straight, even cuts. If you’re not confident using a saw, consider asking a friend or professional for help.

Sanding the Wood

Once you’ve cut the wood to the correct size, it’s time to sand it. Sanding is important because it helps to smooth out any rough spots or imperfections in the wood. Here’s how to do it:

  1. Start with a coarse sandpaper (around 80 grit) and work your way up to a finer grit (around 220 grit).
  2. Sand the wood in the direction of the grain, using long, even strokes.
  3. Be sure to sand all surfaces of the wood, including the edges and corners.
  4. Use a vacuum or brush to remove any sawdust or debris from the wood.

If you want an even smoother finish, you can use a wood conditioner or sealer after sanding. This will help to protect the wood and give it a nice, polished look.

By following these steps, you’ll be well on your way to preparing the wood for your new wooden table.

Assembling the Table

Now that you have all the pieces cut and sanded, it’s time to assemble your wooden table. This process can be done in a few steps: joining the table top, attaching the legs, and securing the frame.

Joining the Table Top

Start by laying out the table top boards on a flat surface. Arrange them in the order you want them to appear on the finished table. Use wood glue to attach the boards together, applying a generous amount to the edges of each board. Clamp the boards together and let the glue dry overnight.

Once the glue has dried, use a belt sander or hand plane to even out any unevenness in the table top surface. Sand the surface with progressively finer grits of sandpaper until it is smooth and even.

Attaching the Legs

Flip the table top over and attach the legs. Measure and mark the center of each end of the table top. Use a square to draw a line across the width of the table top at each mark. This line will be the center line for the legs.

Attach the legs to the table top using wood screws. Drill pilot holes before screwing in the screws to prevent the wood from splitting. Make sure the legs are flush with the edges of the table top and perpendicular to the center line.

Securing the Frame

Finally, attach the frame to the underside of the table top. The frame will provide additional support and stability to the table. Measure and cut the frame pieces to fit between the legs. Attach the frame to the legs using wood screws and glue.

Once the frame is attached, sand any rough edges or corners. Apply a finish of your choice to protect the wood and give it a polished look.

Congratulations! You have successfully assembled your own wooden table.

Finishing the Table

Once you’ve built your wooden table, it’s time to finish it to protect the wood and give it a beautiful appearance. Here are the steps to finish your table.

Applying Wood Stain

Before applying wood stain, make sure the table is clean and free of any dust or debris. Sand the table surface starting with a coarse grit sandpaper and working your way up to a fine grit sandpaper. This will ensure a smooth surface for the stain to be applied.

Next, apply the wood stain using a brush or cloth. Apply the stain in the direction of the grain and make sure to cover the entire surface evenly. Let the stain sit for the recommended time on the product label before wiping off any excess with a clean cloth.

If you want a darker shade, you can apply a second coat of stain after the first coat has dried. Once you’re satisfied with the color, let the stain dry completely before moving on to the next step.

Sealing with Polyurethane

To seal the wood and protect it from scratches and water damage, apply a coat of polyurethane. You can choose between a matte, satin, or glossy finish depending on your preference.

Before applying the polyurethane, make sure the stain has dried completely. Use a brush or cloth to apply the polyurethane in the direction of the grain. Apply a thin coat and let it dry completely before applying a second coat. Repeat this process until you’ve applied the desired number of coats.

After the final coat has dried, lightly sand the surface with a fine grit sandpaper to remove any imperfections. Wipe the surface with a clean cloth and your wooden table is ready to use!

Remember to always work in a well-ventilated area and wear protective gear such as gloves and a mask when working with wood stain and polyurethane. With these simple steps, you can create a beautiful and durable finish for your wooden table.

How to Build a Wooden Swing Set: A Beginner's Guide

Are you looking to build a wooden swing set for your kids or grandkids? Building a swing set can be a fun and rewarding project for the whole family. Not only will your children have a blast playing on it, but you’ll have the satisfaction of knowing that you built it yourself.

Before you get started, it’s important to have a plan in place. You’ll need to decide on the size and style of your swing set, as well as the materials you’ll use. There are many resources available online, including free plans and tutorials, that can help guide you through the process. Keep in mind that building a swing set will require some basic carpentry skills and tools.

Choosing the Right Wood

When it comes to building a wooden swing set, choosing the right type of wood is crucial. You want to make sure that the wood you use is durable, weather-resistant, and safe for your children to play on. In this section, we’ll go over the different types of wood you can use for your swing set and the treatments that can be applied to make it last longer.

Types of Wood

The most common types of wood used for swing sets are redwood, cedar, and pressure-treated pine. Each type of wood has its own unique properties and benefits.

  • Redwood: Redwood is a popular choice for swing sets because it is naturally resistant to decay and insects. It is also a very strong and durable wood that can withstand harsh weather conditions. However, redwood is one of the more expensive options.

  • Cedar: Cedar is another popular choice for swing sets because it is naturally resistant to decay and insects. It is also a lightweight wood that is easy to work with. Cedar is a good choice if you have concerns about the chemicals used in pressure-treated pine.

  • Pressure-Treated Pine: Pressure-treated pine is the most durable, weather-resistant, and inexpensive of the three. It is treated with chemicals that help protect it from decay and insects. However, there are concerns about the chemicals used in pressure-treated pine, so it may not be the best choice if you have young children.

Wood Treatment

No matter what type of wood you choose, it’s important to treat it to help protect it from the elements and extend its lifespan. There are several treatments that can be applied to wood to make it more durable.

  • Paint: Painting your swing set is a good way to protect it from the elements and give it a fresh look. However, paint can chip and peel over time, so it may need to be reapplied every few years.

  • Stain: Staining your swing set is another good way to protect it from the elements. Stain penetrates the wood and provides a long-lasting finish. It also enhances the natural beauty of the wood.

  • Sealant: A sealant is a clear coating that is applied to the wood to protect it from moisture and UV rays. It does not change the color of the wood, but it does provide a long-lasting finish.

In conclusion, choosing the right type of wood and treating it properly can help ensure that your swing set lasts for many years to come. Consider the pros and cons of each type of wood and treatment option before making your final decision.

Designing the Swing Set

When it comes to building a wooden swing set, designing it is one of the most important steps. In this section, we will discuss the two main sub-sections of designing: choosing a design and creating a blueprint.

Choosing a Design

Before you start building your swing set, you need to decide on a design. There are many different designs to choose from, and you should choose one that fits your needs and budget. Some factors to consider when choosing a design include:

  • Age of children: If you have younger children, you may want a swing set with lower swings and a smaller slide.
  • Available space: Consider the size of your yard and how much space you have for the swing set.
  • Budget: Wooden swing sets can range from a few hundred dollars to several thousand dollars. Determine your budget before you start looking at designs.
  • Features: Some swing sets come with additional features such as monkey bars, rock walls, and tire swings. Consider which features you want and which ones you can do without.

Once you have considered these factors, you can start looking at different designs. You can find designs online, in books, or by visiting local playgrounds.

Creating a Blueprint

Once you have chosen a design, you need to create a blueprint. A blueprint is a detailed plan of your swing set that includes measurements, materials, and instructions. Creating a blueprint will help you stay organized and ensure that you have all the materials you need before you start building.

To create a blueprint, follow these steps:

  1. Measure your yard: Measure the area where you plan to build the swing set. This will help you determine the size of the swing set you can build.

  2. Sketch your design: Draw a rough sketch of your swing set design. Include all the features you want and the size of each feature.

  3. Determine materials: Determine what materials you will need for each part of the swing set. This will include wood, screws, bolts, and other hardware.

  4. Create a materials list: Create a list of all the materials you will need. Include the quantity of each item and the size.

  5. Write instructions: Write detailed instructions for each part of the swing set. Include any tips or tricks that will make the building process easier.

By following these steps, you can create a detailed blueprint that will make building your swing set much easier.

Gathering Materials

Before you start building your wooden swing set, you need to gather all the necessary materials. This includes tools and wood. Here are the things you need to do before you start building.

Required Tools

To build a wooden swing set, you will need the following tools:

  • Saw
  • Drill
  • Hammer
  • Measuring tape
  • Level
  • Socket set
  • Screwdriver
  • Safety glasses
  • Gloves

Purchasing the Wood

When it comes to purchasing wood for your swing set, you have two options. You can either purchase pre-cut wood or cut it yourself. If you choose to cut it yourself, you will need to purchase the following:

  • 4×4 lumber for the legs
  • 4×6 lumber for the top beam
  • 2×4 lumber for the cross beams
  • 1×6 lumber for the swing seats
  • 2×6 lumber for the slide

Make sure to purchase pressure-treated wood to ensure it lasts longer and is resistant to rot and insects. You can purchase wood at your local home improvement store or lumber yard.

Before purchasing, make sure to measure the area where you want to build your swing set to ensure you purchase the correct amount of wood. It’s always better to purchase a little extra just in case.

By gathering all the necessary materials before you start building, you can ensure a smoother and more efficient building process.

Building the Frame

Building the frame is the first step in building a wooden swing set. It is important to ensure that the frame is sturdy and strong enough to support the weight of the swings and the children who will be using them. This section will guide you through the process of building the frame, including cutting the wood and assembling the frame.

Cutting the Wood

Before you start cutting the wood, it is important to have a plan in place. You should have a detailed plan or blueprint of the swing set that you want to build. This will help you determine the amount of wood that you will need and the dimensions of each piece.

Once you have your plan in place, you can start cutting the wood. Use a saw to cut the wood to the appropriate lengths and angles. Make sure that each piece is cut accurately to ensure that the frame will be sturdy and strong.

Assembling the Frame

Once you have cut all of the wood, you can start assembling the frame. Begin by laying out all of the pieces of wood on the ground in the shape of the frame. Use clamps to hold the pieces of wood together while you drill holes and attach them together.

Start by attaching the top beam to the two side beams. Drill holes through the beams and use bolts to attach them together. Repeat this process for the bottom beam.

Next, attach the A-frame braces to the top beam and the side beams. Use bolts to attach the braces to the beams.

Finally, attach the crossbeam to the A-frame braces and the top beam. Drill holes through the beams and use bolts to attach them together.

Once you have assembled the frame, you can add the swings and any other accessories that you want to include. Make sure that everything is secure and sturdy before allowing children to use the swing set.

Adding the Swing

Once you have built the A-frame structure of your swing set, it’s time to add the swing. This is the fun part that your kids have been waiting for! In this section, we will cover how to choose the right swing and how to attach it to your swing set.

Choosing the Swing

When it comes to choosing the swing, there are a few things to consider like the age and weight of your children, the material of the swing, and the type of swing you want. Here are some options to consider:

  • Belt Swing: A belt swing is a classic option that is suitable for all ages. It’s made of sturdy materials and can support a lot of weight.

  • Tire Swing: A tire swing is a fun option that can be made from an old tire. It’s suitable for younger children but can also support older kids.

  • Bucket Swing: A bucket swing is a great option for toddlers and younger children. It has a high back and comes with a safety belt.

  • Rope Swing: A rope swing is a fun and adventurous option that is suitable for older children. It’s made of durable materials and can support a lot of weight.

Choose the swing that best suits your children’s needs and interests.

Attaching the Swing

Once you have chosen the swing, it’s time to attach it to your swing set. Here are the steps to follow:

  1. Measure the height: Measure the height from the ground to the top of the swing beam. This will help you determine the length of the swing chains.

  2. Attach the chains: Attach the chains to the swing hangers using S-hooks. Make sure the chains are the same length.

  3. Attach the swing: Attach the swing to the chains using S-hooks. Make sure the swing is level and centered.

  4. Test the swing: Test the swing by giving it a gentle push. Make sure it is stable and secure.

  5. Adjust the height: Adjust the height of the swing by moving the S-hooks up or down the swing chains. Make sure the swing is at a comfortable height for your children.

With these simple steps, you can add the swing to your swing set and give your children hours of fun and adventure.

Safety Measures

Building a wooden swing set can be a fun project, but it’s important to prioritize safety for your children. Here are some safety measures to keep in mind:

Securing the Structure

When building your wooden swing set, make sure that it is securely anchored to the ground. This will prevent the structure from tipping over during use. You can use concrete footings or ground anchors to secure the posts.

Additionally, make sure that all bolts and screws are tightly secured. Loose hardware can lead to instability and potential accidents. You may also want to consider using lock washers or thread-locking adhesive to prevent bolts from loosening over time.

Checking for Sharp Edges

Before allowing your children to use the swing set, inspect it for any sharp edges or splinters. Sand down any rough areas and cover any exposed hardware with plastic caps to prevent injury.

You should also consider using soft materials, such as rubber mulch or sand, around the base of the swing set to cushion potential falls.

By taking these safety measures, you can ensure that your children can enjoy their wooden swing set without the risk of injury.

Maintenance Tips

To ensure that your wooden swing set lasts for a long time, you need to perform regular maintenance. Here are some tips to help you keep your swing set in good condition.

Regular Inspection

Inspect your swing set regularly to identify any signs of wear and tear. Check the wood for cracks, splinters, and rot. Look for loose screws, bolts, and nuts. Inspect the chains and ropes for fraying or wear. If you find any issues, address them immediately to prevent further damage.

Wood Treatment Reapplication

Staining and sealing the wood is one of the most effective ways to keep your swing set looking and working like new. However, the treatment will wear off over time, especially if your swing set is exposed to the elements. You should reapply the treatment every 2-3 years or as needed.

To reapply the treatment, follow these steps:

  1. Clean the wood with a mild detergent and water.
  2. Let the wood dry completely.
  3. Sand the wood to remove any rough spots or splinters.
  4. Apply the stain or sealant with a brush or sprayer, following the manufacturer’s instructions.
  5. Let the treatment dry completely before using the swing set.

By following these maintenance tips, you can ensure that your wooden swing set remains safe, sturdy, and enjoyable for years to come.

How to Build a Wooden Shoe Rack: A Beginner's Guide

If you’re tired of tripping over shoes cluttering your entryway, it might be time to consider building a wooden shoe rack. Not only will it provide a designated spot for your footwear, but it can also add a touch of organization and style to your home decor. With a few basic tools and materials, building a shoe rack can be a simple and rewarding DIY project.

Before you begin, it’s important to consider the size and style of shoe rack that will best fit your space and needs. Do you want a wall-mounted rack or a freestanding one? How many pairs of shoes do you need it to hold? Once you have a clear idea of what you’re looking for, you can start gathering your materials. Depending on the design you choose, you may need wood planks, screws, nails, wood glue, sandpaper, and a saw. With these materials in hand, you’ll be ready to start building your own custom shoe rack.

Understanding Wooden Shoe Racks

If you’re looking for a shoe storage solution that is both functional and stylish, a wooden shoe rack might be just what you need. Wooden shoe racks are durable, versatile, and can add a touch of warmth and elegance to any room. Here are a few things to keep in mind when building or buying a wooden shoe rack:

Types of Wooden Shoe Racks

There are many different types of wooden shoe racks to choose from, each with its own unique features and benefits. Some of the most common types include:

  • Open shoe racks: These are simple wooden structures that allow you to store your shoes in an open, easily accessible manner. They are ideal for people who want to keep their shoes organized but don’t have a lot of space to work with.

  • Enclosed shoe racks: These are wooden cabinets with doors that can be closed to keep your shoes out of sight. They are ideal for people who want to keep their shoes organized but don’t want them on display.

  • Shoe benches: These are wooden benches with built-in shoe storage compartments. They are ideal for people who want to combine seating and storage in one piece of furniture.

Materials and Construction

When building or buying a wooden shoe rack, it’s important to choose materials that are strong, durable, and able to withstand the weight of your shoes. Some popular materials for wooden shoe racks include:

  • Pine: Pine is a softwood that is easy to work with and relatively inexpensive. It is a popular choice for people who want a simple, functional shoe rack.

  • Oak: Oak is a hardwood that is strong, durable, and able to withstand heavy use. It is a popular choice for people who want a shoe rack that will last for many years.

  • Bamboo: Bamboo is a sustainable and eco-friendly material that is becoming increasingly popular for shoe racks. It is strong, lightweight, and resistant to moisture and pests.

When constructing a wooden shoe rack, it’s important to use sturdy joints and fasteners to ensure that the rack is stable and secure. Some popular construction methods include:

  • Dovetail joints: These are interlocking joints that provide a strong, secure connection between pieces of wood.

  • Mortise and tenon joints: These are joints that involve cutting a hole (mortise) in one piece of wood and inserting a protruding piece (tenon) from another piece of wood into the hole.

  • Screws and dowels: These are fasteners that can be used to connect pieces of wood together. Screws provide a strong, secure connection, while dowels provide a more traditional, decorative look.

Conclusion

A wooden shoe rack can be a great addition to any home, providing a functional and stylish way to keep your shoes organized. By choosing the right materials and construction methods, you can create a shoe rack that will last for many years and add a touch of warmth and elegance to your home.

Materials Needed

When building a wooden shoe rack, you will need to gather some materials before getting started. Here are the things you will need:

Choosing the Right Wood

The first thing you need to consider when building a wooden shoe rack is the type of wood you will use. You want to choose a wood that is strong, durable, and can withstand the weight of your shoes. Some of the best types of wood for this project include pine, cedar, and oak. These woods are affordable, easy to work with, and can be stained or painted to match your decor.

Necessary Tools and Equipment

In addition to the wood, you will also need some tools and equipment to build your shoe rack. Here is a list of the necessary tools and equipment:

Tool Purpose
Circular saw Used to cut the wood to size
Drill Used to make pilot holes and attach the pieces together
Pocket hole jig Used to create pocket holes for screws
Brad nailer Used to attach the wood together
Sandpaper (80-220 grit) Used to smooth out rough edges and surfaces
Wood glue Used to attach the pieces together
Wood filler Used to fill in any gaps or holes
Stain or paint and primer Used to finish the wood and protect it from moisture and wear

Make sure to have all these tools and equipment on hand before starting your shoe rack project. Having everything ready will make the process go smoothly and efficiently.

Designing Your Shoe Rack

When it comes to designing your wooden shoe rack, there are a few things you should consider. This section will discuss the two main aspects of designing your shoe rack: determining size and capacity, and sketching the design.

Determining Size and Capacity

Before you start sketching your shoe rack design, you need to determine the size and capacity of the shoe rack. This will depend on how many shoes you need to store and the available space in your home.

To determine the size and capacity of your shoe rack, start by measuring the space where you plan to put it. Take into account any other furniture or items that will be in the same area. You’ll want to make sure your shoe rack fits comfortably without overcrowding the space.

Next, count how many pairs of shoes you need to store. This will give you an idea of how many shelves or compartments you’ll need. Remember to leave some extra space for future shoe purchases.

Sketching the Design

Once you have determined the size and capacity of your shoe rack, it’s time to start sketching the design. You can use graph paper or a design software program to create a detailed sketch.

When sketching your design, keep in mind the style of your home. You want your shoe rack to fit in with the overall decor. You can choose from a variety of styles, such as rustic, modern, or traditional.

Consider the materials you want to use for your shoe rack. Wood is a popular choice for shoe racks because it is sturdy and can be stained or painted to match your home’s decor.

When sketching your design, make sure to include measurements for each shelf or compartment. This will ensure that your shoe rack has enough space for all of your shoes.

By taking the time to determine the size and capacity of your shoe rack and sketching a detailed design, you can create a functional and stylish addition to your home.

Building the Shoe Rack

Building a wooden shoe rack is an excellent way to organize your shoes and keep them off the floor. This section will guide you through the process of building a shoe rack from scratch.

Cutting the Wood

First, you need to cut the wood into the required pieces. Here are the dimensions for the pieces you’ll need:

Piece Quantity Dimensions
Sides 2 24″ x 10″
Shelves 3 24″ x 10″
Top 1 26″ x 12″
Base 1 26″ x 12″

You can use a circular saw or a table saw to make these cuts. If you don’t have access to either of these tools, you can have the wood cut at your local home improvement store.

Assembling the Pieces

Once you have all the pieces cut, it’s time to assemble the shoe rack. Follow these steps:

  1. Drill pocket holes into the sides of each shelf piece.
  2. Attach the shelves to the sides using pocket hole screws.
  3. Attach the top piece to the sides using pocket hole screws.
  4. Attach the base piece to the sides using pocket hole screws.

Finishing Touches

After the shoe rack is assembled, it’s time to add some finishing touches. Sand the entire shoe rack to smooth out any rough edges. You can also stain or paint the shoe rack to match your decor.

Congratulations! You’ve built a wooden shoe rack that will keep your shoes organized and off the floor.

Safety Tips

When working with power tools and woodworking materials, safety should always be a top priority. Here are some safety tips to keep in mind when building your wooden shoe rack:

Wear Protective Gear

Before you begin construction, make sure you have the appropriate protective gear. This includes safety glasses to protect your eyes from flying debris, earplugs to protect your hearing from loud power tools, and a dust mask to protect your lungs from sawdust and other particles.

Use Tools Properly

Always use tools as they are intended to be used. Follow the manufacturer’s instructions and safety guidelines. When using power tools, make sure the tool is properly grounded and that the blades are sharp and in good condition.

Keep Your Workspace Clean and Organized

A clean and organized workspace can help prevent accidents. Make sure your work area is well-lit, and keep your tools and materials organized and within easy reach. Sweep up sawdust and other debris regularly to prevent slips and falls.

Take Your Time

Rushing through a project can lead to mistakes and accidents. Take your time and work at a comfortable pace. If you feel tired or fatigued, take a break and come back to the project later.

Know Your Limits

If you’re new to woodworking, start with simple projects and work your way up to more complex ones. Don’t attempt a project that is beyond your skill level. If you’re not sure how to use a tool or perform a particular task, seek advice from a more experienced woodworker or consult online resources for guidance.

By following these safety tips, you can help ensure that your woodworking projects are completed safely and without incident.

Maintenance and Care

Once you’ve built your wooden shoe rack, it’s important to take care of it to ensure it lasts for years to come. Here are some tips to keep your shoe rack clean and well-maintained:

Cleaning

Regularly dust your shoe rack with a soft, dry cloth to remove any dirt or debris. For more stubborn stains, use a damp cloth and mild soap to gently clean the affected area. Avoid using harsh chemicals or abrasive cleaners, as these can damage the wood.

Protection

To protect your shoe rack from scratches and other damage, consider adding felt pads to the bottom of the legs. This will also help prevent the rack from sliding around on hardwood floors.

Polishing

If you want to give your shoe rack a shiny finish, you can apply a coat of furniture polish or wax. Be sure to follow the manufacturer’s instructions carefully and test the product on a small, inconspicuous area first.

Storage

When not in use, store your shoes in the shoe rack to prevent them from getting scattered around the house. This will also help keep your shoe rack organized and free from clutter.

By following these simple maintenance and care tips, you can keep your wooden shoe rack looking great for years to come.

Where to Buy Wooden Dowels: A Guide for Crafters and DIY Enthusiasts

Looking to buy wooden dowels for your next project? Whether you’re a DIY enthusiast or a professional woodworker, finding the right wooden dowels can be a challenge. Fortunately, there are many options available both online and in-store to suit your needs.

One popular option for purchasing wooden dowels is home improvement stores such as Lowes and Home Depot. These stores offer a wide variety of dowels in different sizes, materials, and finishes. You can browse their selection in-store or online and even have them delivered to your doorstep.

Another great option is woodworking supply stores like Woodcraft. They offer a large selection of wooden dowels, including fluted and grooved options, as well as dowel pins. You can also find specialty dowels, such as those made from exotic woods, for unique projects. With so many options available, you’re sure to find the perfect wooden dowels for your next project.

Understanding Wooden Dowels

If you are new to woodworking, you may be wondering what wooden dowels are and how they are used. Simply put, a wooden dowel is a cylindrical rod made of wood that is used to join two pieces of wood together. They are available in a variety of sizes and lengths, making them a versatile option for many different projects.

One of the most common uses for wooden dowels is to create concealed joints. By drilling a hole into one piece of wood and inserting a dowel, you can then connect it to another piece of wood. This creates a strong joint that is hidden from view, resulting in a clean and finished look.

When selecting wooden dowels, there are a few factors to consider. First, you will want to choose the appropriate diameter for your project. Dowels typically range in diameter from 1/8″ to 1″, with larger sizes available for specialty projects. You will also want to consider the length of the dowel, as this will determine how deep you need to drill your holes.

It is important to note that not all wooden dowels are created equal. Some dowels may be made from lower quality wood, which can result in weaker joints. Make sure to choose dowels made from high-quality wood, such as poplar or oak, to ensure a strong and reliable joint.

Overall, wooden dowels are a simple and effective way to join two pieces of wood together. By understanding the basics of wooden dowels, you can confidently choose the right size and type for your project and create strong and beautiful joints.

Local Store Options

If you need wooden dowels, you don’t have to look far. You can find them at your local home improvement store or craft store. Here are some options to consider:

Home Improvement Stores

Home improvement stores are a great place to find wooden dowels. They usually have a variety of sizes and types, and you can often buy them in bulk. Here are some popular home improvement stores where you can find wooden dowels:

Store Selection
Lowe’s Poplar and oak dowels in various sizes
Home Depot Raw wood round dowels in various sizes
Menards Pine dowels in various sizes

Craft Stores

Craft stores are another option for finding wooden dowels. They usually have a smaller selection than home improvement stores, but they may have more specialty dowels, such as square or fluted dowels. Here are some popular craft stores where you can find wooden dowels:

  • Michaels
  • Jo-Ann Fabric and Craft Stores
  • Hobby Lobby

When shopping for wooden dowels at a craft store, be sure to check the woodworking section as well as the general craft section. Some stores may have dowels in both areas.

No matter where you decide to buy your wooden dowels, be sure to check the quality of the wood. Look for dowels that are straight and smooth, with no cracks or knots. With a little bit of shopping around, you can find the perfect wooden dowels for your project.

Online Marketplaces

If you’re looking to buy wooden dowels, online marketplaces are a great place to start. Here are three popular options:

Amazon

Amazon is one of the largest online marketplaces in the world, and it’s a great place to find wooden dowels. You can find a wide variety of sizes and types, and many sellers offer free shipping. Plus, with Amazon Prime, you can get free two-day shipping on many items.

When shopping on Amazon, be sure to read reviews from other customers to ensure you’re getting a quality product. You can also use filters to narrow down your search by size, material, and more.

Etsy

Etsy is a popular marketplace for handmade and vintage items, and it’s a great place to find unique wooden dowels. Many sellers on Etsy specialize in woodworking and offer a wide variety of sizes and types of dowels.

When shopping on Etsy, be sure to read the seller’s reviews and policies before making a purchase. You can also message the seller directly if you have any questions or specific requests.

eBay

eBay is another popular online marketplace where you can find wooden dowels. Many sellers on eBay offer bulk quantities at discounted prices, which can be great if you need a large quantity of dowels.

When shopping on eBay, be sure to check the seller’s feedback rating and read reviews from other customers to ensure you’re getting a quality product. You can also use filters to narrow down your search by size, type, and more.

Overall, online marketplaces are a convenient and affordable way to buy wooden dowels. Just be sure to do your research and read reviews before making a purchase to ensure you’re getting a quality product.

Specialty Woodworking Stores

If you’re looking for a wider selection of wooden dowels and woodworking supplies, specialty woodworking stores might be the way to go. These stores cater specifically to woodworkers and often carry a larger variety of products than your typical hardware store.

One popular specialty woodworking store is Woodcraft. They have a wide selection of wooden dowels in different sizes and types of wood, including maple and walnut. They also offer dowel pins, which can be useful for joining pieces of wood together.

Rockler is another specialty woodworking store that carries wooden dowels. They offer dowels in a variety of sizes and wood types, including birch, oak, and cherry. Additionally, they have a selection of pre-cut dowel rods for specific projects.

If you’re looking for a more personalized experience, consider visiting a local woodworking store. These stores often have knowledgeable staff who can help you find the right wooden dowels for your project. Plus, you’ll be supporting a local business.

Overall, specialty woodworking stores can be a great option for those looking for a wider selection of wooden dowels and woodworking supplies. Just be sure to compare prices and quality before making a purchase.

Factors to Consider When Buying

When purchasing wooden dowels, there are several factors to consider to ensure that you get the right product for your needs. Here are some of the most important factors to keep in mind:

Size and Shape

One of the first things to consider is the size and shape of the dowel. Dowels come in a range of sizes, from thin and delicate to thick and sturdy. The diameter of the dowel is an important consideration, as it will determine how much weight the dowel can support. Additionally, the shape of the dowel can vary, with some dowels being round and others being square or hexagonal. Consider the specific needs of your project when selecting the size and shape of your dowel.

Type of Wood

The type of wood used to make the dowel is another important factor to consider. Different types of wood have different strengths and characteristics, so it’s important to choose a wood that is appropriate for your project. Some common types of wood used for dowels include poplar, oak, maple, and cherry. Consider the color, grain, and other characteristics of the wood when making your selection.

Price

Finally, price is another important consideration when purchasing wooden dowels. Prices can vary depending on the size, shape, and type of wood used to make the dowel. While it may be tempting to opt for the cheapest option available, it’s important to remember that quality is important. A higher-quality dowel may be more expensive, but it will likely be stronger and more durable, making it a better value in the long run.

When purchasing wooden dowels, be sure to consider the size and shape, type of wood, and price to ensure that you get the right product for your needs.

DIY Wooden Dowels

Making your own wooden dowels can be a fun and rewarding DIY project. Plus, it can save you money compared to buying pre-made dowels. Here are some tips and steps to help you make your own wooden dowels.

Materials Needed

  • Hardwood block (such as maple)
  • Saw
  • Drill
  • Dowel plate or dowel jig
  • Sandpaper

Steps

  1. Cut the hardwood block into a square shape that is slightly larger than the desired diameter of your dowel.
  2. Use a saw to cut the block into a cylinder shape, making sure to keep the diameter consistent.
  3. Sand the cylinder until it is smooth and the desired diameter is achieved.
  4. Use a drill to create a hole in the center of the cylinder.
  5. Insert the cylinder into the dowel plate or jig.
  6. Use a hammer or mallet to pound the cylinder through the plate or jig, creating a perfectly round dowel.
  7. Sand the dowel until it is smooth.

Tips

  • Make sure to use a hardwood block for your dowel, as softwoods may not hold up well.
  • Use a saw with a fine-toothed blade to ensure a smooth cut.
  • When drilling the hole in the center of the cylinder, make sure to keep the drill bit centered to avoid creating an off-center dowel.
  • Use a dowel plate or jig to ensure a perfectly round dowel.
  • Sand the dowel thoroughly to remove any rough spots or splinters.

By following these steps and tips, you can easily make your own wooden dowels for your next woodworking project. It may take a bit of practice to get the hang of it, but once you do, you’ll be able to create custom-sized dowels for any project.