Tag Archives: basic carpentry skills

wooden-gate-frame

How to Build a Wooden Gate Frame: A Beginner's Guide

If you’re looking to add some privacy to your yard or keep your pets safely contained, building a wooden gate frame is a great DIY project to take on. With the right tools and materials, it’s a project that can be completed in a weekend. In this article, we’ll walk you through the steps to build a sturdy and attractive wooden gate frame that will last for years to come.

First, you’ll need to gather your tools and materials. You’ll need a saw, drill, screws, wood glue, and a level, as well as the wood for your gate frame. You can choose from a variety of wood types, but cedar and redwood are popular choices for their durability and resistance to rot and insects. Once you have your tools and materials, you’re ready to get started on building your gate frame.

Building a wooden gate frame involves several steps, including measuring and cutting your wood, assembling the frame, and attaching hardware like hinges and a latch. With our step-by-step guide, you’ll be able to build a gate frame that fits your space perfectly and functions smoothly. Whether you’re a seasoned DIYer or a beginner, building a wooden gate frame is a satisfying project that will add both function and style to your outdoor space.

Understanding the Basics of a Wooden Gate Frame

how-to-build-a-wooden-gate-frame

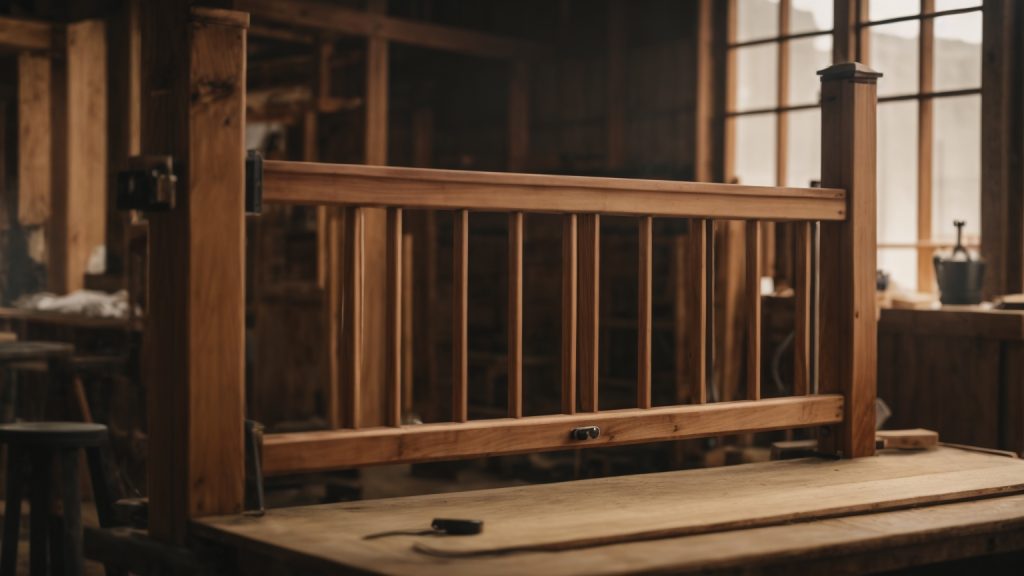
If you’re planning to build a wooden gate, then understanding the basics of a wooden gate frame is essential. A gate frame is the backbone of a gate, and it needs to be sturdy enough to support the weight of the gate and withstand the elements. Here are some important things you need to know about building a wooden gate frame.

Choosing the Right Wood

The type of wood you choose for your gate frame will affect its strength and durability. You should choose a wood that is strong, durable, and resistant to rot and decay. Some of the best types of wood for gate frames include cedar, redwood, and pressure-treated pine. Cedar and redwood are naturally resistant to rot and decay, while pressure-treated pine has been treated with chemicals to make it resistant to rot and decay.

Measuring and Cutting the Wood

Before you start building your gate frame, you need to measure the opening where the gate will go. The gate frame should be slightly smaller than the opening to allow for clearance. Once you have your measurements, you can start cutting the wood. You will need to cut four pieces of wood for the frame: two vertical pieces and two horizontal pieces. The vertical pieces should be the same length as the height of the gate, while the horizontal pieces should be the same length as the width of the gate.

Joining the Wood

To join the wood, you can use a variety of methods, including screws, nails, and dowels. Screws are the best option because they provide a strong and secure connection. You should use at least two screws per joint, and you should pre-drill the holes to prevent the wood from splitting. When joining the wood, make sure that the joints are flush and square.

Adding Bracing

To add extra strength to the gate frame, you can add bracing. Bracing is a diagonal piece of wood that is attached to the gate frame. It helps to prevent the gate from sagging and adds extra support. To add bracing, measure and cut a diagonal piece of wood that runs from the top corner of the gate frame to the bottom corner. Attach the bracing to the gate frame using screws.

By understanding the basics of a wooden gate frame, you can build a gate that is strong, durable, and will last for years to come. Remember to choose the right wood, measure and cut the wood accurately, join the wood securely, and add bracing for extra strength.

Choosing the Right Materials

When building a wooden gate frame, selecting the right materials is crucial to ensure durability and longevity. Here are some factors to consider when choosing your materials:

Selecting the Wood

When selecting the wood for your gate frame, you want to choose a type that is strong and resistant to weathering. Cedar and redwood are popular choices for their natural resistance to decay and insects. However, they can be expensive. Pine and spruce are more affordable options, but they require treatment to withstand the elements.

It’s important to choose wood that is straight and free of knots, as this will ensure a sturdy gate frame. You should also consider the thickness of the wood. Thicker wood will provide more stability, but also add weight to the gate.

Picking the Screws

Choosing the right screws is just as important as selecting the wood. You want to use screws that are strong enough to hold the weight of the gate, but also resistant to rust and corrosion. Stainless steel screws are a great option for their durability and resistance to weathering.

When selecting the size of the screws, you should choose ones that are at least 1 1/2 times the thickness of the wood. For example, if you are using 2x4s for your gate frame, you should use screws that are at least 3 inches long.

By choosing the right materials for your gate frame, you can ensure that your gate will withstand the elements and last for years to come.

Creating the Design

wooden-gate-frame

Before you start building your wooden gate frame, you need to create a design. This will help you determine the amount of materials you need and give you a clear idea of what the finished product will look like. Here are some steps to follow when creating your gate frame design:

  1. Measure the opening: Measure the width and height of the opening where you want to install the gate. This will help you determine the size of the gate frame you need to build.
  2. Determine the style: Decide on the style of gate you want to build. There are many different styles to choose from, including picket, panel, and ranch-style gates. Look online or in home improvement magazines for inspiration.
  3. Choose the wood: Select the type of wood you want to use for your gate frame. Cedar and redwood are popular choices because they are naturally resistant to rot and insects. However, they can be more expensive than other types of wood.
  4. Sketch the design: Draw a sketch of your gate frame design. Include the dimensions, the style, and any decorative elements you want to add. This will help you visualize the finished product and make any necessary adjustments before you start building.
  5. Consider hardware: Think about the hardware you will need to install the gate, such as hinges and latches. Make sure you choose hardware that is strong enough to support the weight of the gate and that matches the style of your gate frame.

By following these steps, you can create a design for your wooden gate frame that meets your needs and fits your style. Once you have a design, you can start gathering the materials and building your gate frame.

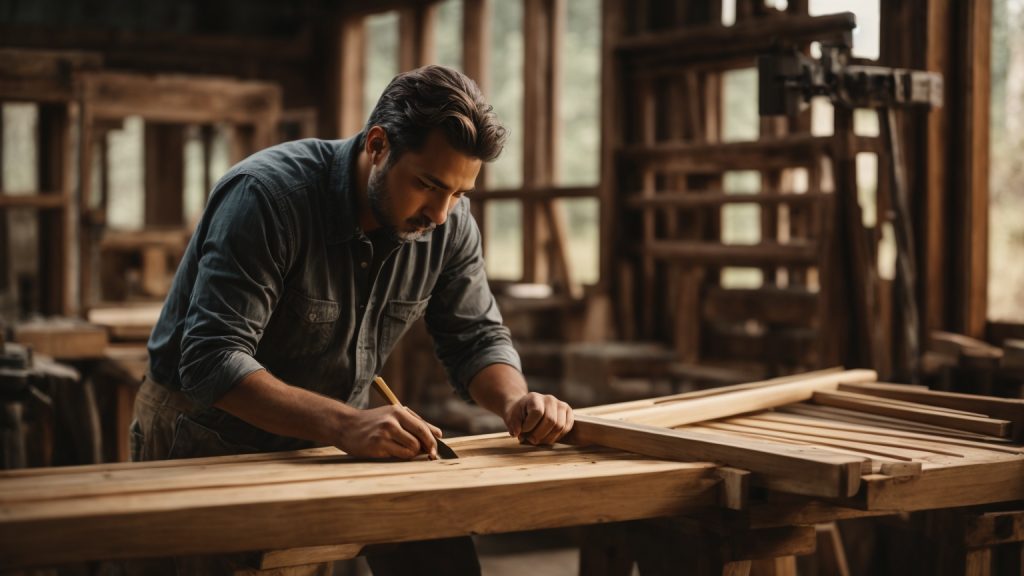
Measuring and Marking the Wood

Before you start building your wooden gate frame, it is important to measure and mark the wood accurately. This will ensure that your gate is the correct size and that all the pieces fit together correctly.

To measure the wood, you will need a tape measure. Measure the height and width of the gate opening, and then add a few inches to each measurement to allow for the gate to swing freely. This will give you the dimensions for the gate frame.

Once you have your measurements, it’s time to mark the wood. Use a pencil to mark the measurements on the wood, making sure that the marks are clear and visible. You can use a straight edge to ensure that your marks are straight and even.

When marking the wood, it’s important to mark the top and bottom of each piece, as well as the ends. This will help you keep track of which piece is which and ensure that everything is lined up correctly.

If you’re using a compound miter saw to cut your wood, you’ll also need to mark the angle of the cuts. Use a protractor to measure the angle, and then mark it on the wood with a pencil.

Overall, measuring and marking the wood accurately is crucial to building a strong and sturdy gate frame. Take your time and double-check your measurements and marks before making any cuts.

Cutting the Wood

Before you start cutting the wood for your gate frame, make sure you have all the necessary tools and materials. You’ll need a saw, measuring tape, pencil, and safety goggles. It’s also important to choose the right type of wood for your gate frame. Cedar and redwood are popular choices because they are durable and resistant to rot and insects.

Once you have your tools and materials ready, it’s time to start cutting the wood. Follow these steps:

  1. Measure the height and width of your gate opening. Use these measurements to determine the length of your gate frame boards. Cut two boards to the height of your gate opening and two boards to the width of your gate opening.
  2. Cut two diagonal braces to fit between the top corner of one vertical board and the bottom corner of the opposite vertical board. These braces will add stability to your gate frame. Cut the braces to length and angle the ends to fit snugly against the vertical boards.
  3. Cut a horizontal crossbar to fit between the two vertical boards. This will provide additional support for your gate. Measure and mark the center of the crossbar and drill a hole through it. This is where you’ll attach the gate latch.
  4. Use a saw to cut any decorative profiles or shapes into the top of the gate frame boards, if desired. Be sure to wear safety goggles and follow all safety precautions when using power tools.
  5. Sand all the edges and corners of the gate frame boards to remove any rough spots or splinters.

With these steps, you should have a sturdy and well-crafted gate frame ready for the next steps in the building process.

Assembling the Frame

Building a wooden gate frame is a simple process that requires some basic carpentry skills and tools. Once you have gathered all the necessary materials, it’s time to assemble the frame. In this section, we will go over the steps to assemble the frame of your wooden gate.

Attaching the Rails

The first step in assembling the frame is to attach the rails to the posts. Rails are the horizontal pieces of wood that run between the posts and provide support for the gate. Here’s how to attach the rails:

  1. Measure the distance between the posts and cut the rails to the appropriate length.
  2. Place the rails on the posts, making sure they are level.
  3. Drill pilot holes through the rails and into the posts.
  4. Secure the rails to the posts using screws.

Fitting the Stiles

Once the rails are attached, it’s time to fit the stiles. Stiles are the vertical pieces of wood that run between the rails and provide the structure for the gate. Here’s how to fit the stiles:

  1. Measure the distance between the rails and cut the stiles to the appropriate length.
  2. Place the stiles between the rails, making sure they are evenly spaced.
  3. Drill pilot holes through the stiles and into the rails.
  4. Secure the stiles to the rails using screws.

It’s important to make sure that the frame is square and level before proceeding to the next step. Use a carpenter’s level to check that the frame is straight and adjust as necessary.

In conclusion, assembling the frame of your wooden gate is a straightforward process that requires some basic carpentry skills and tools. By following these simple steps, you can build a sturdy and reliable gate frame that will last for years to come.

Adding the Finishing Touches

Once you have built your wooden gate frame, it’s time to add the finishing touches. This will not only improve the appearance of your gate but also protect it from the elements and extend its lifespan. Here are some steps to follow:

Sanding the Frame

Before applying any finish, it’s essential to sand the gate frame. Sanding will smooth out any rough edges and ensure that the finish adheres properly. Here’s how to sand your gate frame:

  1. Start with a coarse-grit sandpaper (around 80 grit) and sand the entire frame, including the edges and corners. Use a sanding block or an electric sander for larger surfaces.
  2. Switch to a finer-grit sandpaper (around 120 grit) and sand again, removing any scratches left by the coarse sandpaper.
  3. Finish with an even finer-grit sandpaper (around 220 grit) to achieve a smooth and even surface.

Make sure to remove all dust and debris from the frame before applying the finish.

Applying the Finish

There are several options when it comes to finishing your wooden gate frame. You can use paint, stain, or a clear sealer. Here’s how to apply each of these finishes:

Paint

Paint is a popular choice for wooden gates as it provides a durable and colorful finish. Here’s how to paint your gate frame:

  1. Apply a primer to the entire frame, following the manufacturer’s instructions.
  2. Once the primer has dried, apply a coat of paint using a brush or a roller. Make sure to apply the paint evenly and avoid drips or runs.
  3. Allow the first coat to dry completely, then apply a second coat if necessary.

Stain

Stain is another option for finishing your gate frame. It provides a natural and rustic look while also protecting the wood from moisture and UV rays. Here’s how to stain your gate frame:

  1. Apply the stain using a brush or a rag, following the manufacturer’s instructions. Make sure to apply the stain evenly and avoid drips or runs.
  2. Allow the stain to penetrate the wood for a few minutes, then wipe off any excess with a clean rag.
  3. Allow the stain to dry completely, then apply a second coat if necessary.

Clear Sealer

A clear sealer is a good choice if you want to protect your gate frame without altering its natural color. It provides a transparent and waterproof finish. Here’s how to apply a clear sealer:

  1. Apply the sealer using a brush or a roller, following the manufacturer’s instructions. Make sure to apply the sealer evenly and avoid drips or runs.
  2. Allow the sealer to dry completely, then apply a second coat if necessary.

By following these steps, you can add the finishing touches to your wooden gate frame and ensure that it looks great and lasts for years to come.

Installing the Gate Frame

Now that you have built the gate frame, it’s time to install it. Follow these steps to ensure a secure and sturdy installation:

  1. Determine the placement of your gate. Measure the opening where the gate will be installed and mark the placement of the gate posts.
  2. Dig the post holes. Use a post hole digger to dig holes for the gate posts. The depth of the holes should be at least one-third the height of the gate, plus six inches for a gravel base.
  3. Add a gravel base. Pour six inches of gravel into the bottom of each post hole to help with drainage.
  4. Set the gate posts. Place the gate posts in the holes and use a level to ensure they are plumb. Fill the holes with concrete and allow to dry according to the manufacturer’s instructions.
  5. Attach the hinges. Once the concrete has dried, attach the hinges to the gate frame. Make sure the hinges are level and evenly spaced.
  6. Hang the gate. With the help of a friend, hang the gate on the hinges. Use shims to ensure the gate is level and swings freely.
  7. Install the latch. Install the latch on the gate and the post opposite the hinges. Make sure the latch is aligned properly and securely fastened.

Congratulations! You have successfully installed your wooden gate frame. With proper care and maintenance, your gate will provide years of security and beauty to your property.

Maintenance Tips for Wooden Gate Frame

Once you have built your wooden gate frame, it is important to maintain it properly to ensure its longevity. Here are some tips to help you keep your wooden gate frame in good condition:

1. Regular Cleaning

It is important to regularly clean your wooden gate frame to prevent the accumulation of dirt and debris. Use a soft-bristled brush or a cloth to remove any dirt or debris that may have accumulated on the surface. You can also use a mild detergent and water to clean the surface. After cleaning, rinse the surface thoroughly with water and allow it to dry completely.

2. Apply a Protective Coating

Applying a protective coating to your wooden gate frame can help to protect it from the elements. You can use a clear wood sealer or a stain to protect the surface. Make sure to apply the coating evenly and follow the manufacturer’s instructions carefully.

3. Check for Damage

Regularly check your wooden gate frame for any signs of damage. Look for cracks, splits, or warping, and address any issues as soon as possible. Small cracks or splits can be filled with wood filler, while more significant damage may require the replacement of the affected parts.

4. Lubricate Moving Parts

If your wooden gate frame has any moving parts, such as hinges or latches, it is important to lubricate them regularly. Use a lubricant such as WD-40 to keep the moving parts working smoothly.

5. Protect from Moisture

Moisture can cause wooden gate frames to warp or rot over time. To protect your wooden gate frame from moisture, make sure it is installed with proper drainage and that the ground around it is sloped away from the gate. You can also use a moisture barrier such as a plastic sheet to protect the bottom of the gate from moisture.

By following these maintenance tips, you can keep your wooden gate frame in good condition for years to come.

How to Build Outdoor Wooden Steps on a Slope: A Step-by-Step Guide

If you have a sloped yard, building outdoor wooden steps can be a great way to add both functionality and aesthetic appeal to your property. However, building steps on a slope can be a challenging task that requires some planning and preparation. In this article, we will provide you with some helpful tips and step-by-step instructions on how to build outdoor wooden steps on a slope.

Before you start building, it’s important to assess the slope of your yard and determine the best location for your steps. You’ll also need to gather the necessary tools and materials, including wood posts, deck screws, landscape fabric, and stones. Once you have everything you need, you can begin the process of building your steps.

Building steps on a slope can be a bit more complicated than building them on level ground, but with the right tools and techniques, it’s definitely doable. By following our step-by-step instructions and taking the time to plan and prepare, you can create a beautiful and functional set of outdoor wooden steps that will enhance the look and usability of your yard. So, let’s get started!

Understanding the Slope

Building outdoor wooden steps on a slope can seem daunting, but with the right knowledge and tools, it can be a manageable project. Before you start building, it’s important to understand the slope and how it will affect your project.

Slope Measurement

To measure the slope of your yard, you will need a level, a tape measure, and a string. First, tie the string to two stakes and stretch it across the slope. Use the level to make sure the string is level. Then, measure the distance between the string and the ground at both ends. The difference in height between the two points is the slope.

You can also use a slope calculator to determine the slope of your yard. Simply enter the distance and the change in elevation, and the calculator will give you the slope percentage.

Slope Analysis

Once you have measured the slope, you will need to analyze it to determine the best way to build your steps. A gentle slope of 2-3 degrees can be stepped over without the need for steps. However, a steeper slope will require steps to be built.

When analyzing the slope, consider the following factors:

  • The height of the slope: The higher the slope, the more steps you will need to build.
  • The length of the slope: The longer the slope, the more steps you will need to build.
  • The angle of the slope: A steeper slope will require shorter steps with a steeper rise and a deeper tread.

By taking these factors into account, you can determine the number of steps you will need to build and the dimensions of each step.

Understanding the slope is an essential step in building outdoor wooden steps on a slope. By measuring and analyzing the slope, you can determine the best way to build your steps and ensure a safe and stable structure.

Materials and Tools

Choosing the Right Wood

When building outdoor wooden steps on a slope, it’s important to choose the right type of wood. Cedar, redwood, and pressure-treated pine are all popular choices for outdoor projects. They’re all durable and resistant to rot and decay, making them ideal for outdoor use.

Cedar and redwood are both naturally resistant to insects and decay, but they can be more expensive than pressure-treated pine. Pressure-treated pine is chemically treated to resist rot and decay, but it may not be as attractive as cedar or redwood.

When choosing your wood, keep in mind the color and grain pattern you prefer, as well as the durability and cost.

Essential Tools

To build outdoor wooden steps on a slope, you’ll need a few essential tools. Here’s a list of the most important ones:

  • Measuring tape
  • Circular saw or jigsaw
  • Drill
  • Hammer
  • Level
  • Shovel
  • Tamper
  • Safety glasses and gloves

You may also need additional tools depending on the complexity of your project, such as a miter saw or router. It’s important to have the right tools on hand to ensure that your project is completed safely and efficiently.

Planning the Steps

Before you start building outdoor wooden steps on a slope, it is important to plan the steps properly. This will ensure that the steps are safe, functional, and aesthetically pleasing. In this section, we will discuss the two main aspects of planning outdoor wooden steps on a slope: step design and step placement.

Step Design

When designing the steps, there are several things to consider. Firstly, you need to decide on the size and height of each step. The size of each step should be large enough to comfortably fit your foot, but not so large that it becomes difficult to climb the stairs. The height of each step should be consistent to make it easier to climb the stairs.

Secondly, you need to decide on the type of wood to use for the steps. Cedar, redwood, and pressure-treated pine are popular choices for outdoor wooden steps. Cedar and redwood are more expensive but are more resistant to rot and insects. Pressure-treated pine is cheaper but needs to be maintained regularly to prevent rot and decay.

Thirdly, you need to decide on the style of the steps. Straight steps are the simplest and most common, but curved steps can add an interesting design element to your outdoor space.

Step Placement

When placing the steps, you need to consider the slope of the land. The steps should be placed in a way that is safe and easy to climb. Here are some tips for placing the steps:

  • The steps should be placed at a comfortable angle. A slope of 30-35 degrees is ideal.
  • The steps should be placed in a way that minimizes erosion. This can be done by placing the steps in a zigzag pattern.
  • The steps should be placed in a way that is visually appealing. Consider using landscaping and lighting to enhance the look of the steps.

By considering the design and placement of the steps, you can ensure that your outdoor wooden steps on a slope are safe, functional, and beautiful.

Building the Steps

Building outdoor wooden steps on a slope is a great way to enhance the look of your backyard and provide safe access to different levels of your property. Here’s how you can build outdoor wooden steps on a slope.

Cutting the Wood

The first step in building outdoor wooden steps is to cut the wood to the desired size. You will need to cut the stringers, risers, and treads. The stringers are the long, diagonal pieces that support the steps. The risers are the vertical pieces that fit between the treads, while the treads are the horizontal pieces that you step on.

When cutting the wood, it’s important to measure carefully to ensure that all the pieces are the same size. You can use a circular saw or a handsaw to cut the wood. Make sure to wear safety goggles and gloves when cutting the wood.

Assembling the Steps

Once you have cut all the wood pieces to size, it’s time to assemble the steps. Start by attaching the stringers to the deck or patio using metal brackets. Make sure that the stringers are level and secure.

Next, attach the risers to the stringers using wood screws. Make sure that the risers are evenly spaced and level. Then, attach the treads to the risers using wood screws. Make sure that the treads are evenly spaced and level.

Finally, sand the steps to smooth out any rough edges and apply a coat of wood stain or paint to protect the wood from the elements. You can also add non-slip strips to the treads to make the steps safer to use.

Building outdoor wooden steps on a slope requires some basic carpentry skills, but with a little patience and attention to detail, you can create a beautiful and functional set of steps that will last for years to come.

Securing the Steps

When building outdoor wooden steps on a slope, it is important to ensure that the steps are secure and stable. Here are some steps you can take to make sure your steps are anchored and stable.

Anchoring the Steps

One way to anchor your steps is to use rebar. Rebar is a steel bar that is used to reinforce concrete and masonry structures. To use rebar, drill holes in the bottom of your steps and hammer in the rebar. Make sure the rebar is long enough to go through the steps and into the ground.

Another way to anchor your steps is to use concrete. To use concrete, dig a hole at the bottom of your steps and pour in some concrete. Make sure the concrete is level and let it dry. Once the concrete is dry, you can attach your steps to the concrete with screws.

Checking Stability

To check the stability of your steps, stand on each step and shift your weight back and forth. If the step moves or wobbles, it is not stable and needs to be adjusted. You can adjust the stability of your steps by adding more screws or rebar, or by adjusting the height of the step.

It is also important to check the stability of your steps after heavy rain or snowfall. If the ground around your steps has shifted or eroded, it can affect the stability of your steps. Make sure to check your steps regularly and make any necessary adjustments to ensure they remain stable and secure.

By following these steps, you can ensure that your outdoor wooden steps on a slope are anchored and stable, providing a safe and secure way to navigate your outdoor space.

Finishing Touches

Once you have built your outdoor wooden steps on a slope, you will want to add some finishing touches to make them look great and ensure safety.

Painting and Sealing

Painting your wooden steps can help protect them from the elements and give them a polished look. Before painting, make sure the wood is clean and dry. You can use a pressure washer or a stiff brush to clean the surface. Once the surface is clean, apply a coat of primer to help the paint adhere to the wood. After the primer has dried, apply a coat of paint. You may want to add a second coat for better coverage. Allow the paint to dry completely before using the steps.

Sealing your wooden steps can also help protect them from the elements. A sealer can help prevent water damage and rot. Before sealing, make sure the wood is clean and dry. Apply the sealer according to the manufacturer’s instructions. You may need to apply more than one coat. Allow the sealer to dry completely before using the steps.

Adding Safety Features

Adding safety features to your outdoor wooden steps can help prevent accidents. Here are some options:

  • Install handrails: Handrails can provide support and stability when going up and down the stairs. Make sure the handrails are securely attached to the steps and that they are at a comfortable height.

  • Add non-slip treads: Non-slip treads can help prevent slips and falls. You can purchase treads that can be attached to the steps or you can apply a non-slip coating to the steps.

  • Install lighting: Lighting can help make the steps more visible and prevent accidents. You can install lights on the steps or nearby.

By adding these finishing touches, you can make your outdoor wooden steps on a slope both functional and attractive.

Maintenance Tips

Maintaining your outdoor wooden steps is important to ensure their longevity and safety. Here are some tips to help you keep your steps in good condition.

Regular Inspection

Regularly inspect your steps for any signs of damage or wear and tear. Look for cracks, splinters, loose boards, or any other damage that could cause a safety hazard. If you notice any issues, address them immediately to prevent further damage or injury.

Cleaning

Cleaning your steps regularly will help keep them looking great and prevent the buildup of dirt and debris. Use a broom or leaf blower to remove any loose debris, and then use a garden hose to wash away any remaining dirt. For tougher stains, you can use a scrub brush and a mild detergent.

Repairs

If you notice any damage to your steps, it’s important to address it as soon as possible. Small cracks or loose boards can be fixed with wood filler or by replacing the damaged board. Larger repairs may require the help of a professional.

In addition to regular inspections and repairs, it’s important to take steps to prevent damage to your steps. Avoid using harsh chemicals or power washers, as these can damage the wood. Use mats or rugs to protect the steps from heavy foot traffic, and avoid dragging heavy objects across the surface.

By following these maintenance tips, you can keep your outdoor wooden steps in great condition for years to come.

How to Make a Wooden Gate for Your Deck: A Step-by-Step Guide

Are you looking to add a wooden gate to your deck? A gate can provide both security and style to your outdoor space. With a few tools and some basic carpentry skills, you can easily build a wooden gate for your deck that will last for years to come.

Before you get started, it’s important to measure the opening where you want to install the gate. Be sure to measure the width and height of the opening to ensure a consistent fit. Subtract an inch from the width measurement to allow for the gate latch and hinges. Once you have your measurements, you can purchase the necessary materials and get started on building your gate.

Building a wooden gate for your deck is a great DIY project that can be completed in a weekend. Not only will it add a personal touch to your outdoor space, but it will also provide an added layer of safety and security. Whether you’re a seasoned carpenter or a beginner, building a wooden gate for your deck is a project that anyone can tackle with the right tools and a little bit of patience.

Understanding the Basics of a Wooden Gate

When it comes to building a wooden gate for your deck, it is important to understand the basics of gate building. This will ensure that your gate operates well for years to come. In this section, we will cover the importance of a wooden gate and the types of wood suitable for gates.

Importance of a Wooden Gate

A wooden gate is an important component of any deck. It not only provides access to your deck but also adds to the overall aesthetics of your outdoor space. A well-built wooden gate can also enhance the security of your deck by keeping unwanted visitors out.

When building a wooden gate, it is important to consider the size and weight of the gate. A gate that is too heavy or too large can put unnecessary strain on the hinges and cause the gate to sag over time. It is also important to ensure that the gate is level and plumb to prevent it from dragging on the ground or sticking when opening and closing.

Types of Wood Suitable for Gates

When it comes to choosing the right wood for your gate, there are a few factors to consider. First, the wood should be strong and durable to withstand the elements and the wear and tear of daily use. Second, the wood should be resistant to rot, decay, and insect infestation.

Some of the most popular types of wood for building gates include:

  • Cedar: Cedar is a popular choice for wooden gates due to its natural resistance to rot and decay. It is also lightweight and easy to work with.

  • Redwood: Redwood is another popular choice for wooden gates due to its natural resistance to rot and decay. It is also durable and has a beautiful natural color.

  • Pressure-treated pine: Pressure-treated pine is a cost-effective option for building gates. It is treated with chemicals to resist rot and decay and can be stained or painted to match your deck.

When choosing the right wood for your gate, it is important to consider the climate and weather conditions in your area. Some types of wood may be more suitable for certain climates than others.

Materials Required for a Wooden Gate

If you’re looking to build a wooden gate for your deck, you’ll need to gather the right materials to get the job done. Here’s a list of the essential items you’ll need:

  • Pressure-treated pine or rot-resistant wood of your choice
  • Wood screws
  • Gate hinges
  • Gate latch
  • Metal corner braces
  • Carpenter’s level
  • Power drill
  • Compound miter saw
  • Jigsaw (for cutting a decorative profile)

When it comes to choosing the wood for your gate, pressure-treated pine is the most common material used. However, you can use any rot-resistant wood that you prefer. Cedar and redwood are typical alternatives, while exotic hardwoods are often reserved for the fanciest of decks.

You’ll also need to purchase wood screws to assemble the gate, as well as gate hinges and a gate latch to secure it in place. Metal corner braces will help to reinforce the gate’s structure and prevent it from sagging over time.

To ensure that your gate is level and properly aligned, you’ll need a carpenter’s level, power drill, and compound miter saw. A jigsaw can also be useful for cutting a decorative profile into the gate if desired.

Overall, building a wooden gate for your deck requires a few essential materials and tools, but the end result can be a beautiful and functional addition to your outdoor space.

Tools Required for Building a Wooden Gate

Building a wooden gate for your deck requires a few essential tools to get the job done correctly. Here are the tools you’ll need to have on hand:

1. Measuring Tools

Before you can start building your gate, you’ll need to measure the opening where you plan to install it. Make sure you have a tape measure and a carpenter’s level to ensure that your gate is level and properly aligned.

2. Cutting Tools

You’ll need a saw to cut the wood to the appropriate size for your gate. A compound miter saw is ideal for making precise angled cuts, while a jigsaw can help you create decorative profiles.

3. Fastening Tools

To attach the pieces of your gate together, you’ll need screws and a power drill. Make sure you have a 3/16″ drill bit and a countersink drill bit to create pilot holes for the screws and prevent the wood from splitting.

4. Assembly Tools

Once you’ve cut and fastened the pieces of your gate, you’ll need to assemble them. You’ll need clamps to hold the pieces in place while you attach them, and an impact driver can make the process faster and easier.

5. Gate Hardware

Finally, you’ll need hinges and a latch to attach your gate to the deck and keep it securely closed. Make sure you choose hardware that is appropriate for the size and weight of your gate.

By having these essential tools on hand, you’ll be ready to build a sturdy and attractive wooden gate for your deck.

Preparation Before Building

Before you start building your wooden gate for the deck, it is crucial to prepare properly. This will ensure that your gate is sturdy, secure, and long-lasting. Here are some things to keep in mind during the preparation process.

Measuring the Deck

The first step in building a wooden gate for your deck is to measure the opening where you want to install the gate. Measure the width and height of the opening, taking into account any obstructions such as railings or posts. It is essential to measure across the top, bottom, and middle to ensure that the opening is a consistent width. Also, measure the height of both sides to be sure that the railing is the same height.

Once you have measured the opening, subtract one inch from the measurement to allow for a latch and hinges. This will ensure that your gate fits snugly and opens and closes smoothly.

Choosing the Right Design

When it comes to designing your wooden gate, there are several options to choose from. You can opt for a simple, classic design or something more elaborate. Whatever design you choose, make sure that it complements the style of your deck and home.

Consider the type of wood you want to use for your gate. Cedar and redwood are popular choices because they are durable and resistant to rot and decay. However, they can be expensive. Pine is a more affordable option, but it is not as durable as cedar or redwood.

In addition to the design and wood type, consider the hardware you will use to install the gate. Hinges, latches, and locks are all important components of a secure and functional gate. Choose hardware that is sturdy and able to withstand the elements.

By taking the time to measure your deck and choose the right design and materials, you can ensure that your wooden gate is a functional and stylish addition to your outdoor living space.

Step by Step Guide to Building a Wooden Gate

Building a wooden gate for your deck is a great way to add both functionality and aesthetic appeal to your outdoor space. Follow this step-by-step guide to build your own wooden gate.

Cutting the Wood

Before you begin, gather all the necessary tools and materials, including a saw, drill, screws, and gate hardware. Begin by measuring the opening where you want to install the gate. Cut two pressure-treated 2x4s to the length of the opening to make the top and bottom of the gate frame. Then, cut two more 2x4s to the height of the gate and attach them to the top and bottom pieces using screws.

Next, measure and cut the vertical slats for the gate. Use a compound miter saw to cut the ends of the slats at a 45-degree angle for a decorative touch. Attach the slats to the frame using screws, spacing them evenly apart.

Assembling the Gate

Once all the slats are attached, it’s time to assemble the gate. Lay the gate face down on a flat surface and attach diagonal braces to the back using screws. This will help keep the gate square and prevent it from sagging. Finally, attach the gate hardware, including hinges and a latch, according to the manufacturer’s instructions.

Installing the Gate

With the gate complete, it’s time to install it. Begin by attaching the hinges to the gate frame using screws. Then, attach the hinges to the deck post or adjacent structure. Finally, attach the latch to the gate frame and the adjacent post or structure.

Congratulations! You have successfully built and installed a wooden gate for your deck. Enjoy the added functionality and beauty it brings to your outdoor space.

Maintaining Your Wooden Gate

Keeping your wooden gate in good condition is essential to ensure it lasts for years to come. Regular cleaning and periodic repairs will help maintain the gate’s appearance and functionality.

Regular Cleaning

To keep your wooden gate looking great, you should clean it regularly. Here are some tips to help you keep your gate clean:

  • Use a soft-bristled brush or cloth to remove any dirt or debris from the surface of the gate.
  • Mix a mild detergent with warm water and use it to clean the gate. Do not use harsh chemicals or abrasives as they can damage the wood.
  • Rinse the gate with clean water and let it dry completely before applying any sealant or stain.

Periodic Repairs

Periodic repairs are necessary to keep your wooden gate functioning properly. Here are some common repairs you may need to make:

  • Tighten any loose screws or bolts that hold the gate together.
  • Replace any broken or damaged boards or rails.
  • Sand down any rough spots or splinters to prevent injury.
  • Apply a sealant or stain to protect the wood from moisture and sun damage.

By following these maintenance tips, you can keep your wooden gate looking great and functioning properly for years to come.

Safety Tips When Building a Wooden Gate

When building a wooden gate for your deck, safety should be your top priority. Here are some safety tips to keep in mind:

Use Protective Gear

Wearing protective gear can help prevent accidents and injuries. When working with power tools, make sure to wear eye protection and earplugs. Gloves can also be helpful when handling rough wood.

Follow Instructions

Follow the manufacturer’s instructions when using power tools. Make sure to use the correct blade or bit for the job at hand, and never force a tool to do something it’s not designed for.

Measure Twice, Cut Once

Taking accurate measurements is crucial when building a wooden gate. Double-check your measurements before making any cuts to ensure that your gate fits properly.

Use the Right Materials

Make sure to use the right materials for your gate. Pressure-treated wood is a good choice for outdoor use, as it’s resistant to rot and decay. Avoid using untreated wood, as it can quickly deteriorate when exposed to the elements.

Work in a Safe Area

Make sure to work in a safe area when building your gate. Clear away any debris or obstacles, and make sure that your work area is well-lit. If you’re working on a ladder, make sure that it’s stable and secure.

By following these safety tips, you can help prevent accidents and injuries when building your wooden gate.

How to Build a Wooden Swing Set: A Beginner's Guide

Are you looking to build a wooden swing set for your kids or grandkids? Building a swing set can be a fun and rewarding project for the whole family. Not only will your children have a blast playing on it, but you’ll have the satisfaction of knowing that you built it yourself.

Before you get started, it’s important to have a plan in place. You’ll need to decide on the size and style of your swing set, as well as the materials you’ll use. There are many resources available online, including free plans and tutorials, that can help guide you through the process. Keep in mind that building a swing set will require some basic carpentry skills and tools.

Choosing the Right Wood

When it comes to building a wooden swing set, choosing the right type of wood is crucial. You want to make sure that the wood you use is durable, weather-resistant, and safe for your children to play on. In this section, we’ll go over the different types of wood you can use for your swing set and the treatments that can be applied to make it last longer.

Types of Wood

The most common types of wood used for swing sets are redwood, cedar, and pressure-treated pine. Each type of wood has its own unique properties and benefits.

  • Redwood: Redwood is a popular choice for swing sets because it is naturally resistant to decay and insects. It is also a very strong and durable wood that can withstand harsh weather conditions. However, redwood is one of the more expensive options.

  • Cedar: Cedar is another popular choice for swing sets because it is naturally resistant to decay and insects. It is also a lightweight wood that is easy to work with. Cedar is a good choice if you have concerns about the chemicals used in pressure-treated pine.

  • Pressure-Treated Pine: Pressure-treated pine is the most durable, weather-resistant, and inexpensive of the three. It is treated with chemicals that help protect it from decay and insects. However, there are concerns about the chemicals used in pressure-treated pine, so it may not be the best choice if you have young children.

Wood Treatment

No matter what type of wood you choose, it’s important to treat it to help protect it from the elements and extend its lifespan. There are several treatments that can be applied to wood to make it more durable.

  • Paint: Painting your swing set is a good way to protect it from the elements and give it a fresh look. However, paint can chip and peel over time, so it may need to be reapplied every few years.

  • Stain: Staining your swing set is another good way to protect it from the elements. Stain penetrates the wood and provides a long-lasting finish. It also enhances the natural beauty of the wood.

  • Sealant: A sealant is a clear coating that is applied to the wood to protect it from moisture and UV rays. It does not change the color of the wood, but it does provide a long-lasting finish.

In conclusion, choosing the right type of wood and treating it properly can help ensure that your swing set lasts for many years to come. Consider the pros and cons of each type of wood and treatment option before making your final decision.

Designing the Swing Set

When it comes to building a wooden swing set, designing it is one of the most important steps. In this section, we will discuss the two main sub-sections of designing: choosing a design and creating a blueprint.

Choosing a Design

Before you start building your swing set, you need to decide on a design. There are many different designs to choose from, and you should choose one that fits your needs and budget. Some factors to consider when choosing a design include:

  • Age of children: If you have younger children, you may want a swing set with lower swings and a smaller slide.
  • Available space: Consider the size of your yard and how much space you have for the swing set.
  • Budget: Wooden swing sets can range from a few hundred dollars to several thousand dollars. Determine your budget before you start looking at designs.
  • Features: Some swing sets come with additional features such as monkey bars, rock walls, and tire swings. Consider which features you want and which ones you can do without.

Once you have considered these factors, you can start looking at different designs. You can find designs online, in books, or by visiting local playgrounds.

Creating a Blueprint

Once you have chosen a design, you need to create a blueprint. A blueprint is a detailed plan of your swing set that includes measurements, materials, and instructions. Creating a blueprint will help you stay organized and ensure that you have all the materials you need before you start building.

To create a blueprint, follow these steps:

  1. Measure your yard: Measure the area where you plan to build the swing set. This will help you determine the size of the swing set you can build.

  2. Sketch your design: Draw a rough sketch of your swing set design. Include all the features you want and the size of each feature.

  3. Determine materials: Determine what materials you will need for each part of the swing set. This will include wood, screws, bolts, and other hardware.

  4. Create a materials list: Create a list of all the materials you will need. Include the quantity of each item and the size.

  5. Write instructions: Write detailed instructions for each part of the swing set. Include any tips or tricks that will make the building process easier.

By following these steps, you can create a detailed blueprint that will make building your swing set much easier.

Gathering Materials

Before you start building your wooden swing set, you need to gather all the necessary materials. This includes tools and wood. Here are the things you need to do before you start building.

Required Tools

To build a wooden swing set, you will need the following tools:

  • Saw
  • Drill
  • Hammer
  • Measuring tape
  • Level
  • Socket set
  • Screwdriver
  • Safety glasses
  • Gloves

Purchasing the Wood

When it comes to purchasing wood for your swing set, you have two options. You can either purchase pre-cut wood or cut it yourself. If you choose to cut it yourself, you will need to purchase the following:

  • 4×4 lumber for the legs
  • 4×6 lumber for the top beam
  • 2×4 lumber for the cross beams
  • 1×6 lumber for the swing seats
  • 2×6 lumber for the slide

Make sure to purchase pressure-treated wood to ensure it lasts longer and is resistant to rot and insects. You can purchase wood at your local home improvement store or lumber yard.

Before purchasing, make sure to measure the area where you want to build your swing set to ensure you purchase the correct amount of wood. It’s always better to purchase a little extra just in case.

By gathering all the necessary materials before you start building, you can ensure a smoother and more efficient building process.

Building the Frame

Building the frame is the first step in building a wooden swing set. It is important to ensure that the frame is sturdy and strong enough to support the weight of the swings and the children who will be using them. This section will guide you through the process of building the frame, including cutting the wood and assembling the frame.

Cutting the Wood

Before you start cutting the wood, it is important to have a plan in place. You should have a detailed plan or blueprint of the swing set that you want to build. This will help you determine the amount of wood that you will need and the dimensions of each piece.

Once you have your plan in place, you can start cutting the wood. Use a saw to cut the wood to the appropriate lengths and angles. Make sure that each piece is cut accurately to ensure that the frame will be sturdy and strong.

Assembling the Frame

Once you have cut all of the wood, you can start assembling the frame. Begin by laying out all of the pieces of wood on the ground in the shape of the frame. Use clamps to hold the pieces of wood together while you drill holes and attach them together.

Start by attaching the top beam to the two side beams. Drill holes through the beams and use bolts to attach them together. Repeat this process for the bottom beam.

Next, attach the A-frame braces to the top beam and the side beams. Use bolts to attach the braces to the beams.

Finally, attach the crossbeam to the A-frame braces and the top beam. Drill holes through the beams and use bolts to attach them together.

Once you have assembled the frame, you can add the swings and any other accessories that you want to include. Make sure that everything is secure and sturdy before allowing children to use the swing set.

Adding the Swing

Once you have built the A-frame structure of your swing set, it’s time to add the swing. This is the fun part that your kids have been waiting for! In this section, we will cover how to choose the right swing and how to attach it to your swing set.

Choosing the Swing

When it comes to choosing the swing, there are a few things to consider like the age and weight of your children, the material of the swing, and the type of swing you want. Here are some options to consider:

  • Belt Swing: A belt swing is a classic option that is suitable for all ages. It’s made of sturdy materials and can support a lot of weight.

  • Tire Swing: A tire swing is a fun option that can be made from an old tire. It’s suitable for younger children but can also support older kids.

  • Bucket Swing: A bucket swing is a great option for toddlers and younger children. It has a high back and comes with a safety belt.

  • Rope Swing: A rope swing is a fun and adventurous option that is suitable for older children. It’s made of durable materials and can support a lot of weight.

Choose the swing that best suits your children’s needs and interests.

Attaching the Swing

Once you have chosen the swing, it’s time to attach it to your swing set. Here are the steps to follow:

  1. Measure the height: Measure the height from the ground to the top of the swing beam. This will help you determine the length of the swing chains.

  2. Attach the chains: Attach the chains to the swing hangers using S-hooks. Make sure the chains are the same length.

  3. Attach the swing: Attach the swing to the chains using S-hooks. Make sure the swing is level and centered.

  4. Test the swing: Test the swing by giving it a gentle push. Make sure it is stable and secure.

  5. Adjust the height: Adjust the height of the swing by moving the S-hooks up or down the swing chains. Make sure the swing is at a comfortable height for your children.

With these simple steps, you can add the swing to your swing set and give your children hours of fun and adventure.

Safety Measures

Building a wooden swing set can be a fun project, but it’s important to prioritize safety for your children. Here are some safety measures to keep in mind:

Securing the Structure

When building your wooden swing set, make sure that it is securely anchored to the ground. This will prevent the structure from tipping over during use. You can use concrete footings or ground anchors to secure the posts.

Additionally, make sure that all bolts and screws are tightly secured. Loose hardware can lead to instability and potential accidents. You may also want to consider using lock washers or thread-locking adhesive to prevent bolts from loosening over time.

Checking for Sharp Edges

Before allowing your children to use the swing set, inspect it for any sharp edges or splinters. Sand down any rough areas and cover any exposed hardware with plastic caps to prevent injury.

You should also consider using soft materials, such as rubber mulch or sand, around the base of the swing set to cushion potential falls.

By taking these safety measures, you can ensure that your children can enjoy their wooden swing set without the risk of injury.

Maintenance Tips

To ensure that your wooden swing set lasts for a long time, you need to perform regular maintenance. Here are some tips to help you keep your swing set in good condition.

Regular Inspection

Inspect your swing set regularly to identify any signs of wear and tear. Check the wood for cracks, splinters, and rot. Look for loose screws, bolts, and nuts. Inspect the chains and ropes for fraying or wear. If you find any issues, address them immediately to prevent further damage.

Wood Treatment Reapplication

Staining and sealing the wood is one of the most effective ways to keep your swing set looking and working like new. However, the treatment will wear off over time, especially if your swing set is exposed to the elements. You should reapply the treatment every 2-3 years or as needed.

To reapply the treatment, follow these steps:

  1. Clean the wood with a mild detergent and water.
  2. Let the wood dry completely.
  3. Sand the wood to remove any rough spots or splinters.
  4. Apply the stain or sealant with a brush or sprayer, following the manufacturer’s instructions.
  5. Let the treatment dry completely before using the swing set.

By following these maintenance tips, you can ensure that your wooden swing set remains safe, sturdy, and enjoyable for years to come.

How to Build a Wooden Ramp for a Shed: A Step-by-Step Guide

Building a wooden ramp for your shed can make it easier to move heavy equipment and tools in and out of your storage space. Whether you have a small garden shed or a larger storage shed, a ramp can be a practical addition to your property. With a few tools and some basic carpentry skills, you can build a sturdy ramp that will last for years.

Before you start building your ramp, it’s important to consider the materials you’ll need. Pressure-treated lumber is a popular choice for shed ramps because it is durable and can withstand exposure to the elements. You’ll also need screws, a saw, a drill, and other basic tools. It’s a good idea to sketch out a plan for your ramp and measure the area where you’ll be building it to ensure that it will fit properly. Once you have your materials and plan in place, you can begin building your ramp.

Understanding the Basics of Ramp Construction

When it comes to building a ramp for your shed, there are a few basics you need to understand before you get started. In this section, we’ll cover the importance of ramp angle and choosing the right wood for your project.

Importance of Ramp Angle

The angle of your ramp is crucial for ensuring safe and easy access to your shed. If the ramp is too steep, it can be difficult to climb and potentially dangerous. On the other hand, if the ramp is too shallow, it may take up too much space and not provide enough incline for easy access.

The ideal angle for a ramp is between 15 and 20 degrees. This provides a good balance between ease of use and space efficiency. To determine the length of your ramp, you’ll need to measure the distance from the ground to the entrance of your shed and calculate the angle based on that height.

Choosing the Right Wood

When it comes to building a ramp, choosing the right type of wood is essential. You want a wood that is strong, durable, and resistant to water damage. Here are a few options to consider:

  • Pressure-treated lumber: This is a popular choice for ramps because it is resistant to rot and decay. It is also affordable and easy to work with.
  • Cedar: Cedar is naturally resistant to rot and insect damage, making it a great option for outdoor projects. It is also lightweight and easy to work with.
  • Redwood: Redwood is another durable and rot-resistant option. It is more expensive than other types of wood, but it has a beautiful natural color and texture.

No matter what type of wood you choose, make sure it is treated or coated with a waterproof sealant to protect it from moisture damage.

By understanding the basics of ramp construction, you can ensure that your ramp is safe, sturdy, and built to last. Remember to choose the right angle and wood for your project, and take your time to build it properly.

Gathering Materials

Before you start building your wooden ramp for your shed, you need to gather all the necessary materials. This section will guide you through the process of selecting the right wood and plywood, as well as the necessary tools you will need to complete the project.

Wood and Plywood Selection

When selecting the wood and plywood for your ramp, it is important to choose materials that are strong and durable. Here are some tips to keep in mind when selecting your materials:

  • Use pressure-treated lumber to prevent rot and decay.
  • Choose lumber that is straight and free of knots.
  • Use 2×6 or 2×8 boards for the frame of the ramp.
  • Use 3/4-inch plywood for the ramp surface.

It’s important to note that the length of your ramp will determine the amount of wood and plywood you will need. Be sure to measure the distance from the ground to the floor of your shed to determine the length of your ramp.

Necessary Tools

To build your wooden ramp, you will need a few basic tools. Here’s a list of the tools you will need:

  • Circular saw or handsaw
  • Drill
  • Measuring tape
  • Level
  • Hammer
  • Screws and nails
  • Sawhorses or workbench

Make sure you have all the necessary tools before you start building your ramp. This will ensure that the project goes smoothly and that you don’t have to stop in the middle of the project to go buy more tools.

Now that you know what materials and tools you will need, it’s time to start building your wooden ramp for your shed.

Creating a Ramp Plan

Before you start building your wooden ramp for your shed, you need to create a plan. A ramp plan will help you determine the materials you need and the dimensions of the ramp. Here are the steps to create a ramp plan.

Measuring the Shed Entrance

The first step is to measure the entrance of your shed. You need to measure the width and height of the entrance. Use a measuring tape to get accurate measurements. Write down the measurements on a piece of paper.

Calculating the Ramp Length

The next step is to calculate the ramp length. You need to determine the slope of the ramp. The slope should not be too steep, as it will be difficult to climb up with heavy items. The ADA guidelines recommend a slope of 1:12, which means for every inch of rise, you need 12 inches of ramp length.

To calculate the ramp length, you need to know the height of the shed entrance. Multiply the height by 12 to get the minimum ramp length. For example, if the height of the shed entrance is 18 inches, the minimum ramp length should be 18 x 12 = 216 inches.

However, you also need to consider the available space you have for the ramp. If you don’t have enough space, you may need to make the ramp steeper. Use the following table as a guide for the ramp length based on the slope:

Slope Rise Run (Ramp Length)
1:12 1″ 12″
2:12 2″ 24″
3:12 3″ 36″
4:12 4″ 48″
5:12 5″ 60″
6:12 6″ 72″

Keep in mind that the ramp should also be wide enough to accommodate the items you will be carrying in and out of the shed. A width of 36 inches is recommended.

By following these steps, you can create a ramp plan that will help you build a wooden ramp for your shed that is safe and functional.

Building the Ramp

Building a wooden ramp for your shed is a great way to make it easier to move heavy equipment in and out of the shed. Here are the steps to follow to build a sturdy ramp for your shed.

Cutting the Wood

The first step in building a ramp for your shed is to cut the wood to the correct size. You will need pressure-treated 2x6s for the ramp and pressure-treated 4x4s for the supports. Cut the 2x6s to the length of the ramp and the 4x4s to the correct length to support the ramp.

Assembling the Ramp

Once you have cut the wood to the correct size, it’s time to assemble the ramp. First, attach the 2x6s to the 4x4s using deck screws. Make sure the screws are long enough to go through the 2x6s and into the 4x4s. Space the screws evenly along the length of the ramp.

Next, add additional 2x6s to the ramp to create a sturdy surface. Attach the additional 2x6s to the first set of 2x6s using deck screws. Again, make sure the screws are long enough to go through the 2x6s and into the 4x4s.

Securing the Ramp to the Shed

The final step in building a ramp for your shed is to secure the ramp to the shed. Start by attaching a pressure-treated 2×4 to the shed where the ramp will rest. Use deck screws to attach the 2×4 to the shed.

Next, place the ramp on the supports and position it so that it is level. Attach the ramp to the 2×4 on the shed using deck screws. Make sure the ramp is securely attached to the shed and that it is level.

With these steps, you can build a sturdy wooden ramp for your shed that will make it easier to move heavy equipment in and out.

Safety Measures

When building a wooden ramp for your shed, safety should be your top priority. Here are some important safety measures to consider:

Adding Non-Slip Surface

One of the most important safety features of a ramp is its surface. Without a non-slip surface, the ramp can become dangerously slippery when wet or covered in debris. There are several options for adding a non-slip surface to your ramp:

  • Apply a non-slip coating: There are several types of non-slip coatings available that can be applied to the surface of your ramp. These coatings can provide excellent traction and are often resistant to weather and UV rays.
  • Use non-slip tape: Non-slip tape is an inexpensive and easy way to add traction to your ramp. Simply apply the tape to the surface of the ramp, making sure to cover all areas that will be walked on.
  • Install a non-slip surface: There are several types of non-slip surfaces that can be installed on your ramp, including rubber mats, perforated metal, and textured concrete. These surfaces provide excellent traction and are often very durable.

Ensuring Proper Weight Capacity

Another important safety consideration when building a ramp is ensuring that it can support the weight of the objects and people that will be using it. Here are some tips for ensuring proper weight capacity:

  • Choose the right materials: When building your ramp, make sure to choose materials that are strong enough to support the weight of the heaviest objects that will be using it. This may mean using thicker or stronger lumber, or using metal brackets and supports.
  • Calculate the weight capacity: To ensure that your ramp can support the weight of the objects and people that will be using it, you will need to calculate its weight capacity. This will depend on the size and strength of the materials you use, as well as the angle and length of the ramp.
  • Test the ramp: Once your ramp is built, it is important to test it to ensure that it can support the weight of the objects and people that will be using it. This can be done by placing heavy objects on the ramp and walking on it yourself to ensure that it feels sturdy and secure.

How Much Does It Cost to Build a Wooden Shed: A Comprehensive Guide

Are you looking to build a wooden shed but unsure of the cost? It’s important to have an idea of the expenses before you begin your project. The cost to build a wooden shed can vary greatly depending on several factors such as the size, design, construction material, type of foundation, number of windows, number and type of doors, pitch of roof, and roofing material.

According to national averages, the typical cost to build a wooden shed ranges from $200 to $30,000. However, the average cost is around $3,634 with a typical range between $1,767 and $9,567. The cost per square foot for a basic wooden storage building with one door and one window is between $25 to $65 per square foot, installed. Keep in mind that many factors will affect your final bill, and this is just an estimate.

Understanding the Basics of Building a Wooden Shed

If you’re looking to build a wooden shed, there are a few things you need to consider before getting started. Here are some basics to keep in mind:

Size and Design

The first thing you need to decide is the size and design of your shed. The cost of building a wooden shed can vary greatly depending on these factors. A small 4-foot by 7-foot shed can cost anywhere from $100 to $1,000, while a larger 12-foot by 16-foot shed can cost between $3,000 to $15,000. Keep in mind that custom designs and high-quality materials can increase the cost even further.

Foundation and Flooring

Once you have your design in mind, you need to think about the foundation and flooring. A solid foundation is important to ensure your shed lasts for years to come. Depending on your location and the size of your shed, you may need to obtain a permit before building. It’s also important to consider the type of flooring you want. Concrete, wood, and gravel are all popular options.

Walls and Roofing

The next step is to build the walls and roofing. When it comes to walls, you have the option of using either plywood or tongue-and-groove boards. Plywood is a more affordable option, while tongue-and-groove boards offer a more polished look. As for roofing, asphalt shingles are a popular choice due to their durability and affordability.

Doors and Windows

Finally, you need to think about doors and windows. The number and size of doors and windows you choose will impact the overall cost of your shed. Consider the amount of natural light you want and the level of security you need when choosing these features.

By taking these basics into consideration, you can begin to plan and budget for your wooden shed build.

Cost Factors in Building a Wooden Shed

When planning to build a wooden shed, there are several cost factors to consider. Here are the main factors that can affect the cost of building a wooden shed:

Materials

The type and quality of materials used in building a wooden shed can significantly affect its cost. The cost of materials can vary depending on the type of wood used, the thickness of the wood, and the size of the shed. Cedar and redwood are popular choices for wooden sheds due to their durability and resistance to decay. Pressure-treated lumber is also a good option, especially for the shed’s foundation.

Labor

The cost of labor is another significant factor in building a wooden shed. If you plan to hire a professional contractor, the cost of labor will depend on the contractor’s experience and the complexity of the project. On the other hand, if you plan to build the shed yourself, you can save money on labor costs. However, keep in mind that building a wooden shed requires some level of carpentry skills and experience.

Size of the Shed

The size of the shed is another factor that can affect its cost. The larger the shed, the more materials and labor will be required, which can increase the cost. Additionally, larger sheds may require a building permit, which can add to the overall cost.

Location

The location of the shed can also affect its cost. If the shed is located in an area with high labor costs or where building permits are expensive, the overall cost of the shed will be higher. Additionally, if the shed needs to be built on sloping or uneven ground, additional site preparation may be required, which can increase the cost.

In conclusion, the cost of building a wooden shed can vary depending on several factors, including materials, labor, size, and location. By considering these factors carefully, you can estimate the cost of building your wooden shed and plan your budget accordingly.

Types of Wooden Sheds and Their Costs

When it comes to building a wooden shed, there are various types to choose from depending on your needs. Here are the most common types of wooden sheds and their costs:

Garden Sheds

Garden sheds are the perfect solution for storing your gardening tools, lawnmower, and other outdoor equipment. They come in various sizes and designs and can be customized to fit your specific needs. The cost of a garden shed ranges from $500 to $5,000 depending on the size and complexity of the design.

Storage Sheds

Storage sheds are the most common type of wooden sheds. They are perfect for storing items such as bicycles, outdoor furniture, and other household items. The cost of a storage shed ranges from $1,000 to $10,000 depending on the size and complexity of the design.

Workshop Sheds

Workshop sheds are perfect for those who need a space to work on their DIY projects or hobbies. They come equipped with workbenches, shelves, and other features to make your work easier. The cost of a workshop shed ranges from $2,000 to $15,000 depending on the size and complexity of the design.

When deciding on the type of wooden shed to build, consider your budget, the size of the shed, and the purpose it will serve. Keep in mind that the cost of the shed will vary depending on the materials used, the size, and the complexity of the design.

Potential Additional Costs

When building a wooden shed, it’s important to consider the potential additional costs that may arise during the construction process. Here are some factors to keep in mind that could increase the overall cost of your shed.

Permits and Licenses

Before starting any construction project, it’s essential to check with your local government to see if you need any permits or licenses. Depending on where you live, you may need a building permit, electrical permit, or plumbing permit. These permits can range from $50 to $500, depending on the type and complexity of the project. Failure to obtain the necessary permits can result in fines and even legal action, so it’s important to do your research beforehand.

Insulation

If you plan on using your wooden shed as a workspace or storage for sensitive items, you may want to consider insulation. Insulation can help regulate the temperature inside your shed and protect your belongings from moisture and pests. The cost of insulation can vary depending on the type and thickness of the material used. On average, expect to pay around $1 to $2 per square foot for insulation installation.

Electricity and Plumbing

If you plan on using your wooden shed as a workspace or living space, you may want to consider adding electricity and plumbing. This can include wiring for lights and outlets, as well as running water and drainage for a sink or toilet. The cost of adding electricity and plumbing can vary depending on the complexity of the project and the distance of your shed from your home’s main electrical and plumbing lines. On average, expect to pay around $1,000 to $2,000 for electrical and plumbing installation.

Keep in mind that these additional costs can quickly add up, so it’s important to budget accordingly. However, investing in permits, insulation, and electrical and plumbing can increase the functionality and value of your wooden shed in the long run.

Ways to Save on Shed Construction Costs

When building a wooden shed, there are several ways you can save money without sacrificing quality. Here are some tips to help you reduce your shed construction costs:

DIY Approach

One of the easiest ways to save money on shed construction costs is to build it yourself. If you have basic carpentry skills and some free time, you can save a significant amount of money by doing the work yourself. You can also customize the shed to your specific needs and preferences, which can save you money in the long run.

Buying in Bulk

Another way to save money on shed construction costs is to buy materials in bulk. Many home improvement stores offer discounts for buying materials in large quantities. This can save you money on the cost of lumber, roofing materials, and other supplies.

Off-Season Construction

If you’re flexible on when you build your shed, consider building it during the off-season. Many contractors offer discounts during the winter months when business is slow. You can also save money on materials by purchasing them during the off-season when prices are lower.

By using these tips, you can build a high-quality wooden shed without breaking the bank. Whether you decide to build it yourself, buy materials in bulk, or build during the off-season, you can save money and still get the shed you need.